| 3640 Views | Amin
EMCSoft, a leading technology company specializing in Bitrix24 integration, is committed to providing tailored solutions to meet the needs of businesses of all sizes. In this article, we will discuss how we use robots in Bitrix24 for customer communication.
Automation in Bitrix24 helps businesses streamline their customer communication processes, making them more efficient and timely. By automating repetitive tasks, you can free up valuable time for your team to focus on more important tasks, such as building customer relationships and closing sales. Additionally, automation allows you to track customer engagement, helping you tailor your communication efforts to suit the needs of individual customers.
In this article, we will walk you through some of the powerful features available in Bitrix24 for managing customer communication.
The Power of Automation
Automating customer communications is essential for efficient customer relationship management. With Bitrix24, you can use robots to automate processes, such as sending emails, tracking email opens and link clicks and managing incoming emails.
How Robots Work
You can set up a robot to automatically send an email to a customer when the lead reaches a certain stage. The timing of these actions can be adjusted to suit your business needs, such as sending an email immediately, after a certain amount of time, or at a specific date and time.
1. Email Automation
The first type of robot we use in customer communication is an email robot. This robot can be programmed to send emails to customers based on specific conditions. For instance, you can send an email if a customer is assigned to a particular conference, or if a certain field in their record contains specific information. You can also customize the email subject and body by inserting data fields.
2. Tracking Email Opens
Once you’ve sent an email, it’s important to know if the customer has opened it. Bitrix24 allows you to create stages that track whether an email has been opened. If the customer opens your email, the lead will automatically move to the “opened email” stage. Additionally, you can set up notifications to alert responsible employees when an email is opened, allowing them to follow up with the customer immediately.
3. Tracking Link Clicks
You can also track when a customer clicks on a link in your email. By creating a stage for “customer opened link,” you can monitor customer engagement with your content. If a customer clicks on a link, the lead will move to the designated stage, triggering further actions or notifications.
4. Managing Incoming Emails
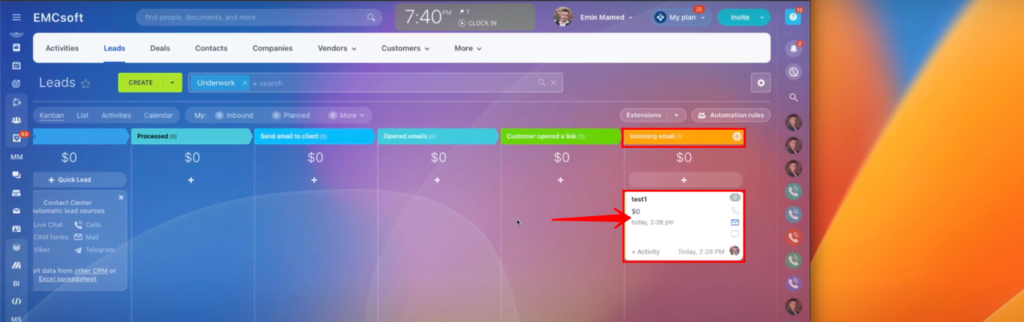
To stay on top of customer communication, you can set up a robot to track incoming emails. When a customer replies to your email, the lead will automatically move to the “incoming email” stage, notifying your team of the response.
5. Email Automation
Bitrix24 allows you to create automation rules for email communication. For example, you can set up an additional stage that triggers an email to be sent to a customer once a specific action is taken. This can be particularly useful for notifying customers of changes in their account status or for following up after a sales interaction.
Moreover, you can set up triggers to move leads to a specific stage once one of your managers sends an email. This ensures that leads are properly categorized based on their communication history, allowing for more targeted follow-up.
6. Notifications to Supervisors
In addition to notifying customers, you can also set up notifications for supervisors. This can be especially useful for keeping supervisors informed about key communications and ensuring that customer interactions are managed effectively.
You can even add calculations to determine how long after an incoming email a response was sent. This data can be used to measure response times and ensure that customer inquiries are being handled promptly.
7. Call Automation
Bitrix24 offers call automation through the Call Center 24 application. With this feature, you can track both outbound and inbound calls, as well as missed calls. By creating custom communication triggers, you can automatically move leads to specific stages based on call interactions.
For instance, if a manager makes an outbound call, the lead can be moved to the “Contacted” stage. Similarly, if a lead receives an inbound call, it can be moved to the “Contact” stage.
Missed calls can also be tracked and leads can be moved to a specific stage, such as “Not Contacted” or “Missed Call.” This helps ensure that missed calls are followed up on and that leads are properly managed.
8. Open Channel Communication
Open channels allow you to track customer messages and employee replies, making it easier to monitor communication history.
When a customer sends an initial message through an open channel, you can set up automation rules to move the lead to a specific stage, such as “Customer Initial Message.” This helps you track leads based on their communication history.
Additionally, you can set up automation rules to track when an employee replies to a customer message. By moving the lead to a specific stage, such as “Reply to Customer,” you can measure the time difference between the initial message and the employee reply.
Detailed instructions on how these robots can be used are described below.
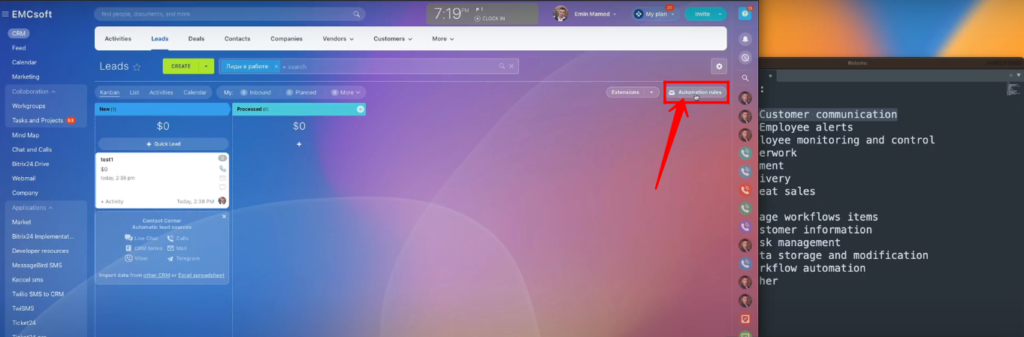
1. Go to “Automation Rules”.
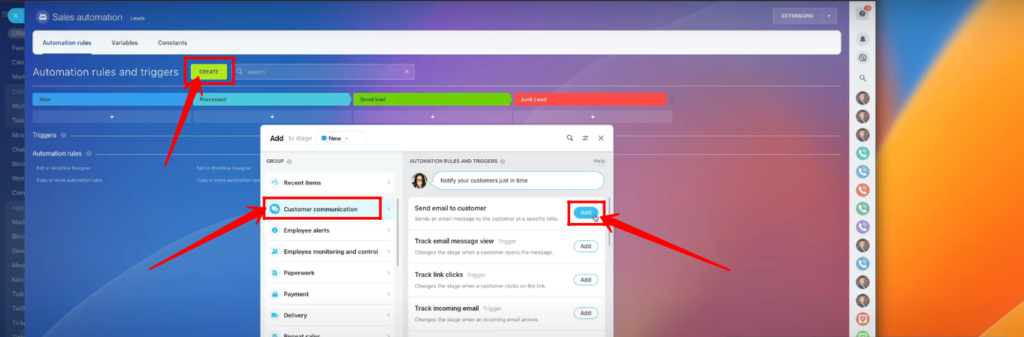
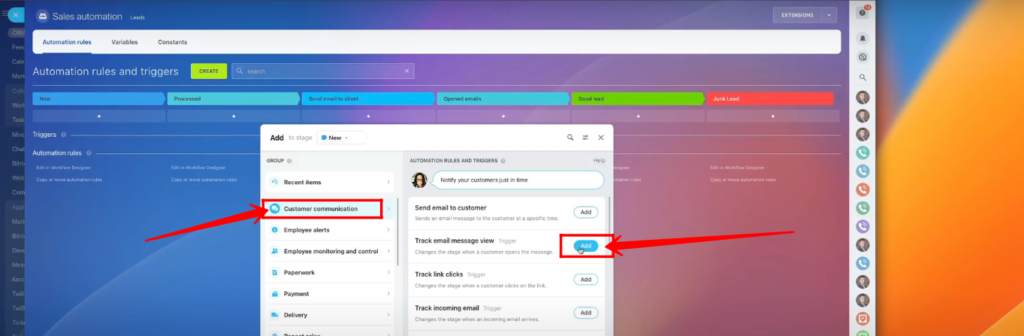
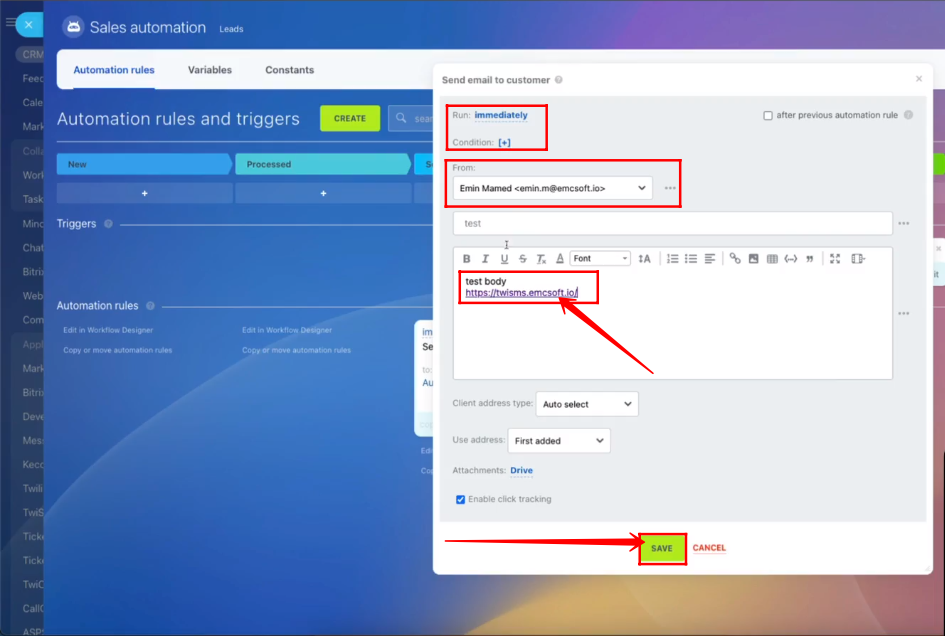
2. Click “Create”, go to “Customer Communication” and add “Send email to Customer”.
3. Apply your conditions, select a sender, type your email and click “Save”.

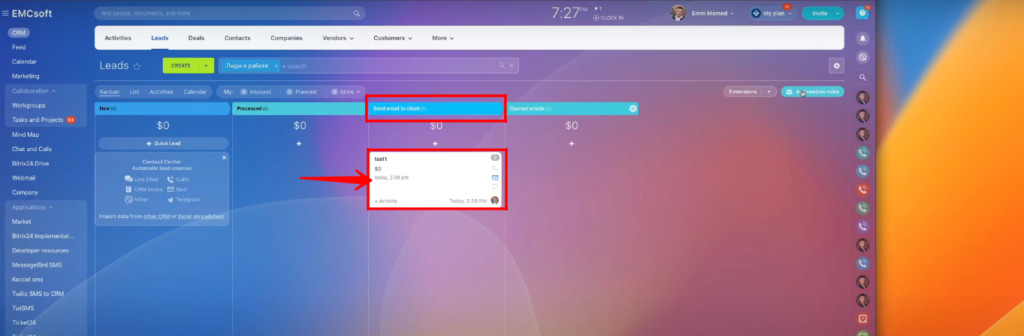
4. When email is delivered to the client, the lead will move to your configured state of sending email to the client.
5. Go to “Customer Communication” and add “Track email message view”.
6. Apply conditions in your automation rule, trigger name, configure responsible person and click “Save”.
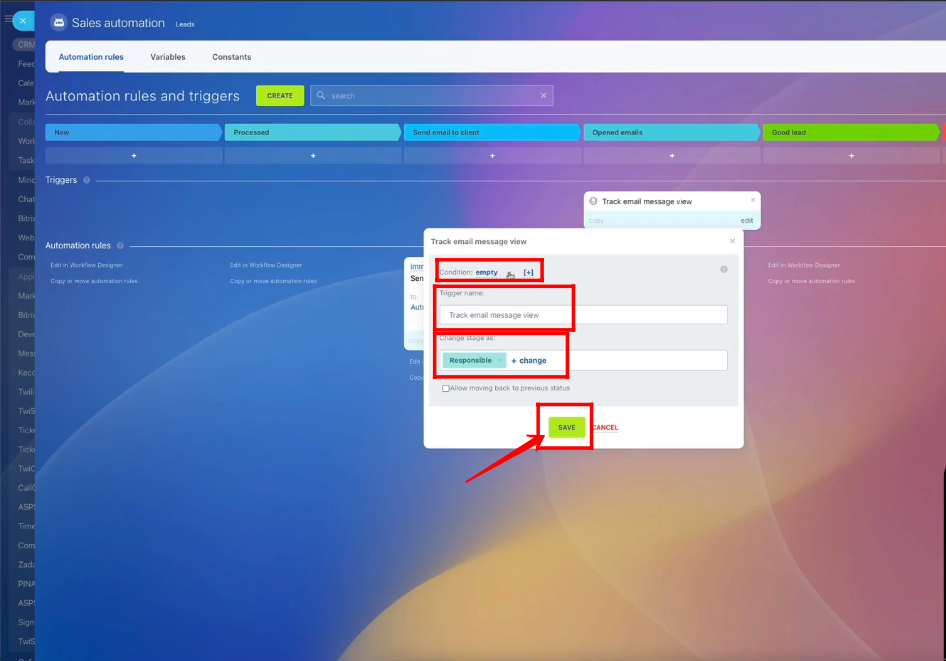
7. If client opens email, then lead will move to the stage of tracking message view and that should be created by you.

8. If you want to get a notification, when client opens email. Go to “Employee Alerts” and add a notification automation rule.
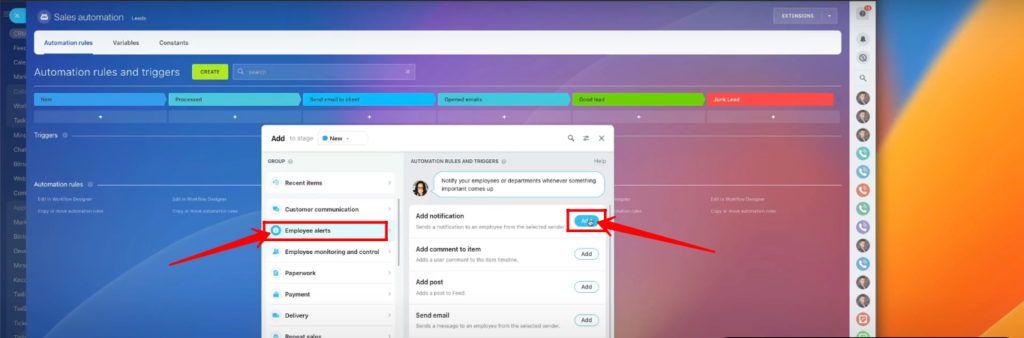
9. Configure all conditions, type a message, fix the sender and the receiver and click “Save”.

10. For testing purposes, manually move your lead to opened email stage to get a notification.

11. Now, you’ve received the notification alert.

12. Go to “Customer Communication” and add “Track Link Clicks”.
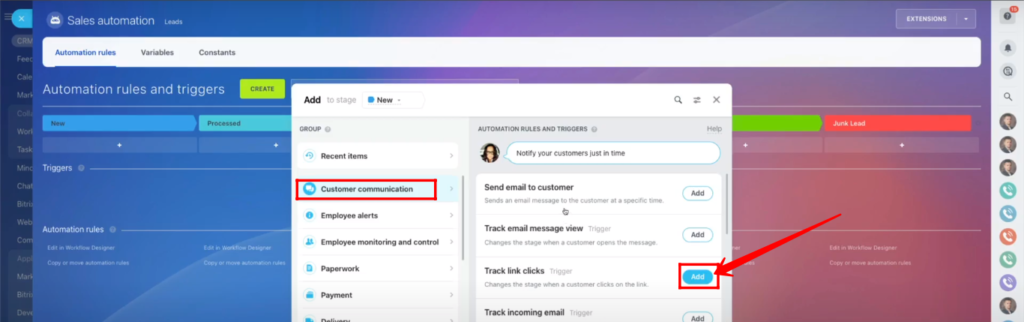
13. Apply conditions to automate the rule add a link that you want to track and click “Save”.
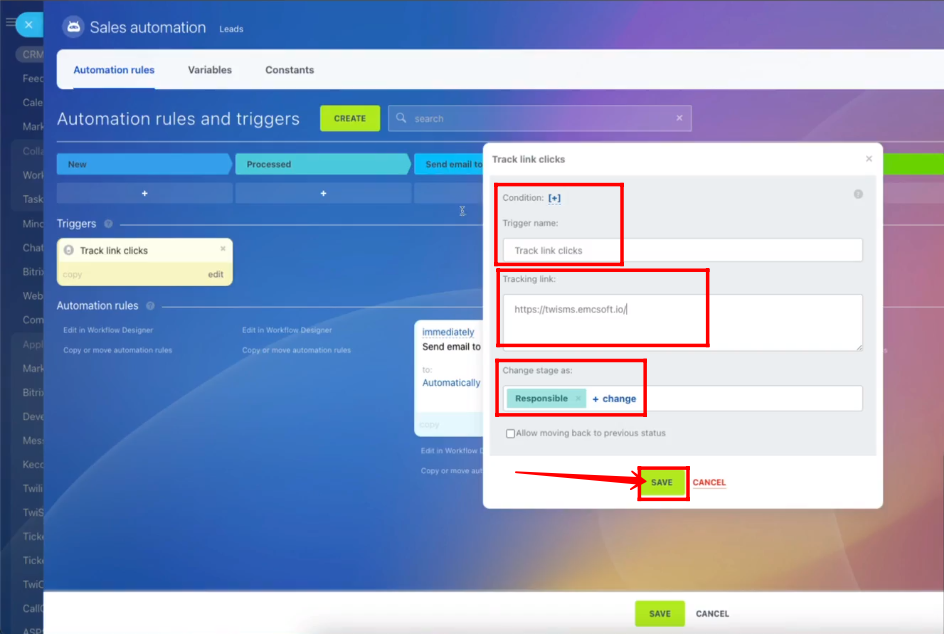
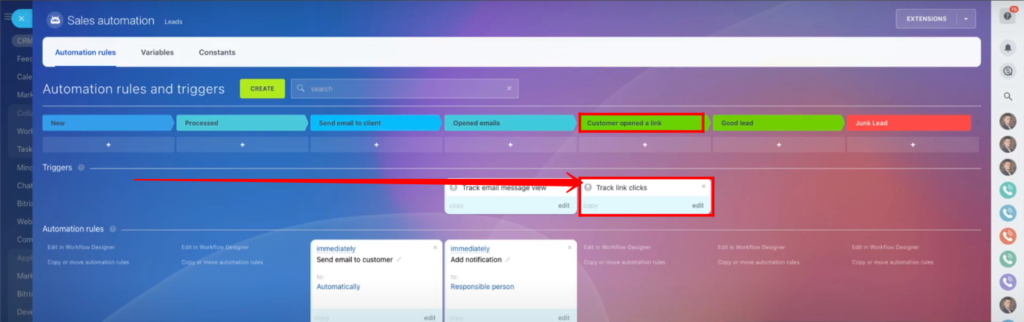
14. Add a new stage “Customer opened the link” and move your newly created automation rule of tracking link click to that stage.
15. You can edit your automation rule after creation.
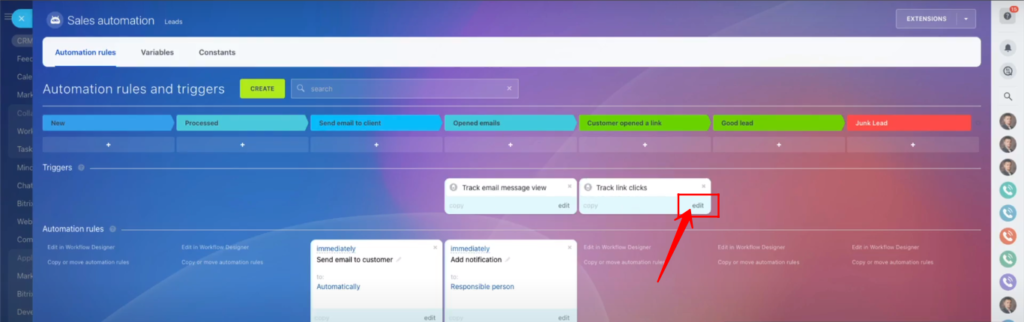
16. Edit conditions or email content and click “Save”.
17. As you can see “Customer Opened Link” stage is empty for now.
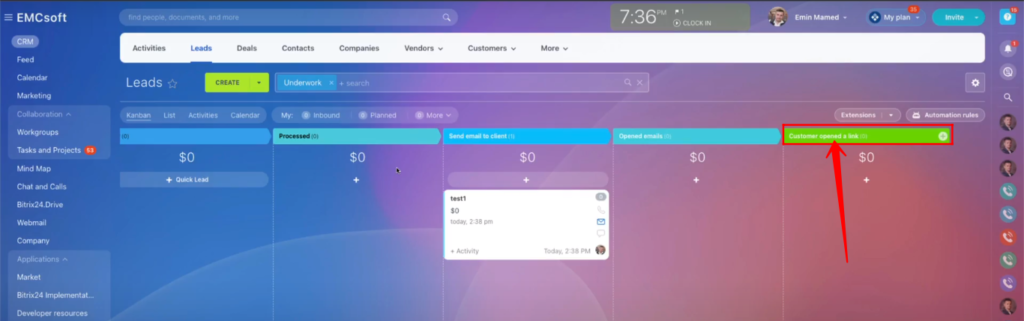
18. When customer clicks the link, that you added in email content and sent that to the customer. Your lead will move to the appropriate stage section.

19. Go to “Customer Communication” and add “Track Incoming Email”.

20. Add a new stage named “Incoming Email”.

21. If a customer replies back to your email.

22. As you get email, your lead will automatically move to the “Incoming Email” stage section.
23. Go to “Customer Communication” and add “Track Email messages to customer”.
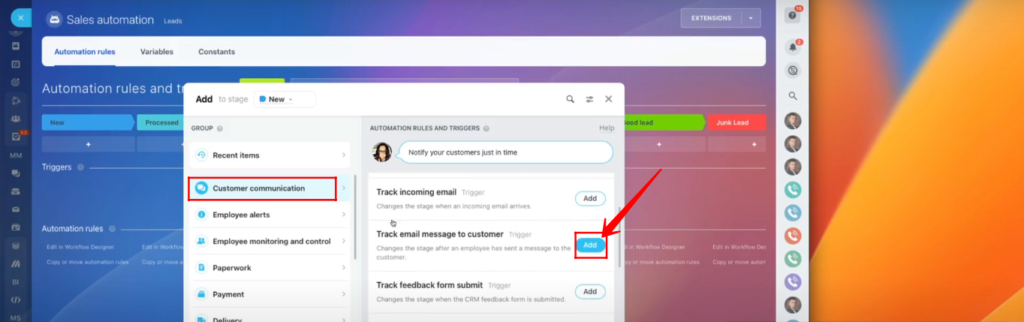
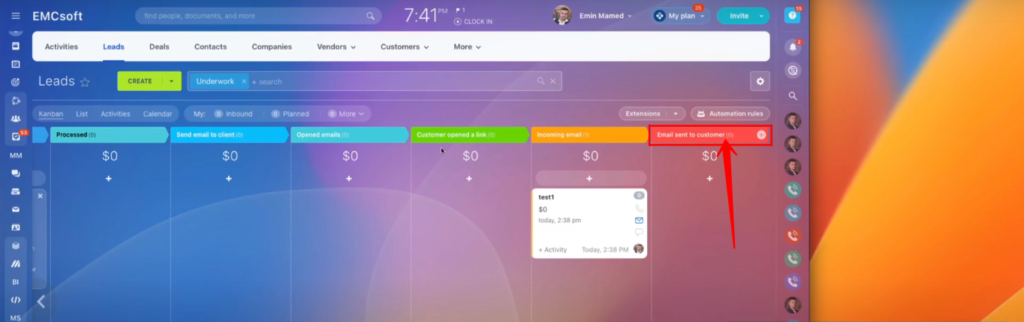
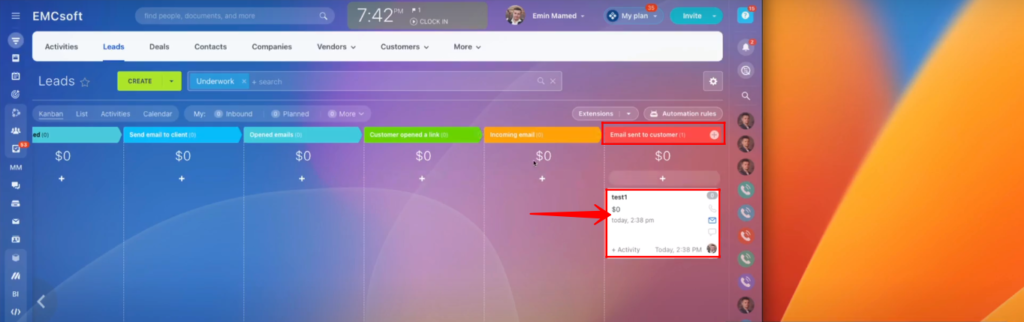
24. Add a stage “Email sent to Customer”.
25. Move that newly created rule to the your “Email sent to customer” stage section.

26. Now send the email to the customer.

27. And your lead will move to the appropriate stage section.
28. If want to get a notification, when an email sent to the customer. Then move your notification automation rule to the “Email sent to customer” stage section.

29. Edit your notification automation rule, if you want. And get a notification on sending email to the customer.

30. Go to “Customer Communication” and add “Track Outbound Call”.

31. Add a new stage named “Outbound Calls”.

32. Move your outbound calls rule to this newly created stage.

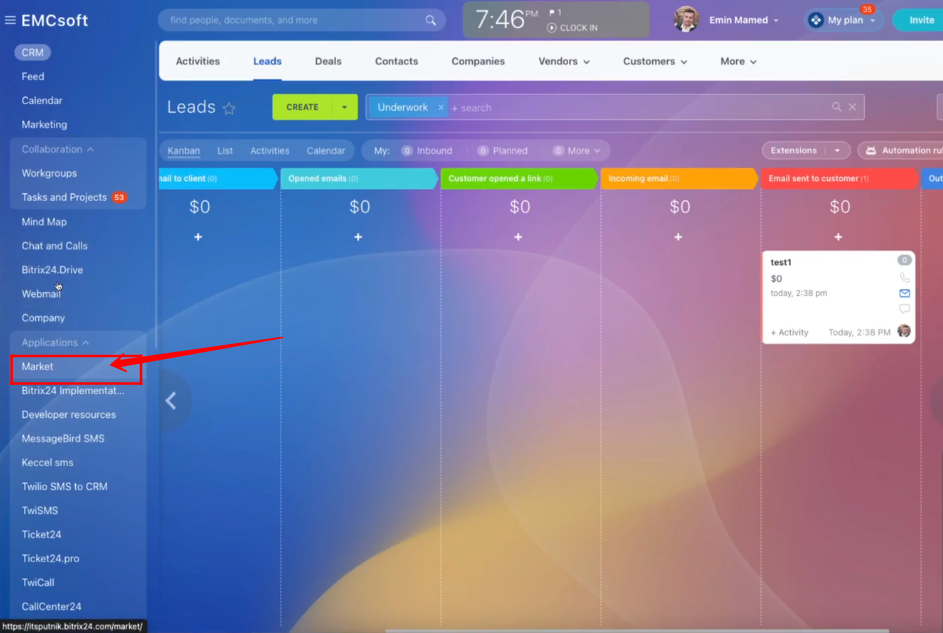
33. For establishing calls go to “Market”.
34. Search for “CallCenter24” and open this application to install.

35. Once you install “CallCenter24” application, create a stage and move your automation rule to that stage section.

36. Create a call by selecting phone number.
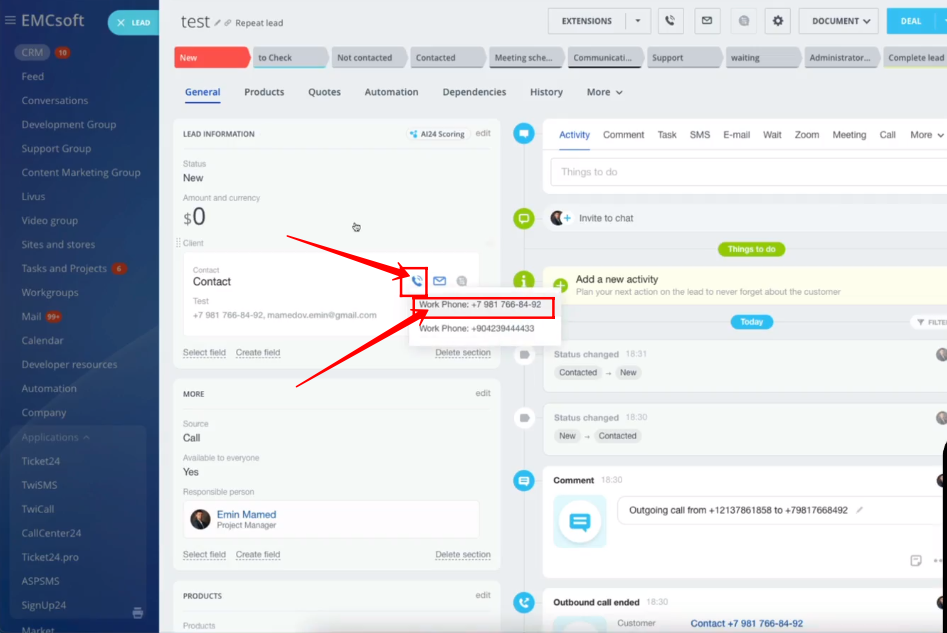
37. Here, you have completely established a phone call.
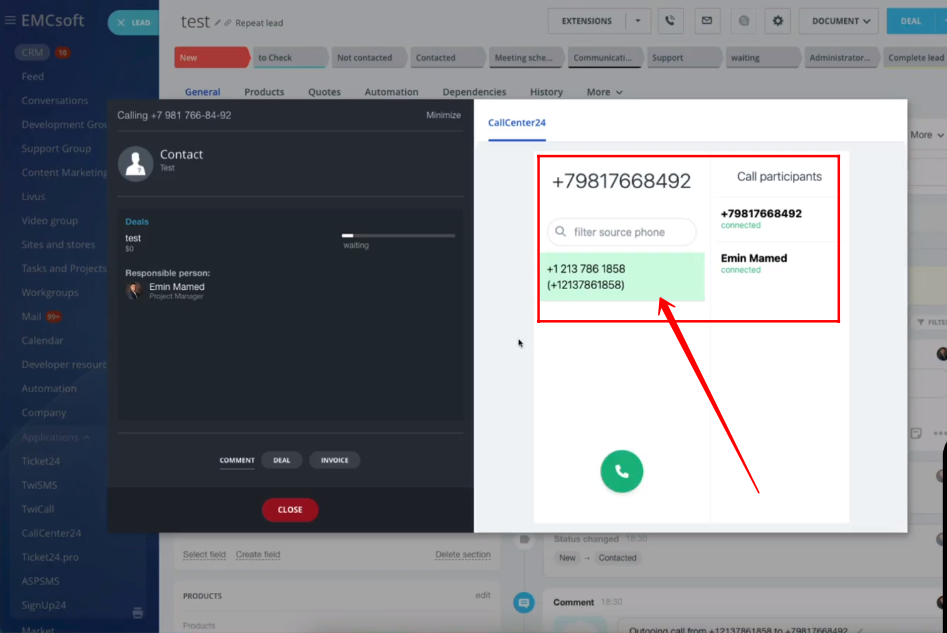
38. And the lead automatically moved to the “Connected” stage section.

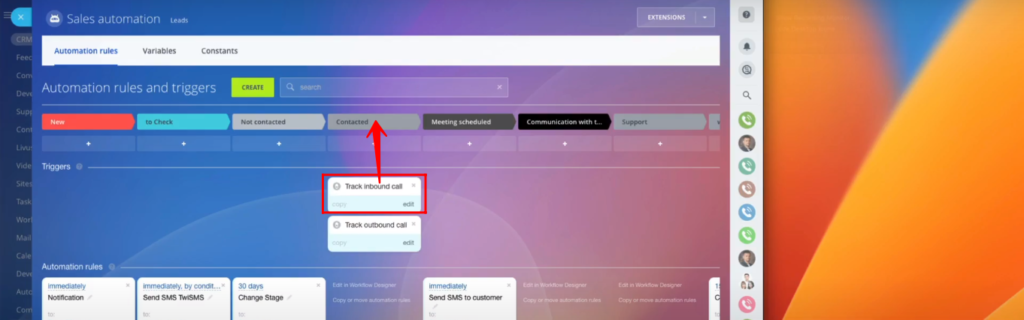
39. Go to “Customer Communication” and add “Track Inbound Call”.

40. Apply the conditions, select a channel and click “Save” to configure the incoming calls tracking automation rule.

41. Move your incoming calls tracking automation rule to the “Connected” stage section.
42. Here, we have attempted an incoming call.

43. And lead move to the “Connected” stage.

44. Go to “Customer Communication” and add “Track missed calls”.

45. Apply conditions to run the automation rule, select a channel and click “Save”.

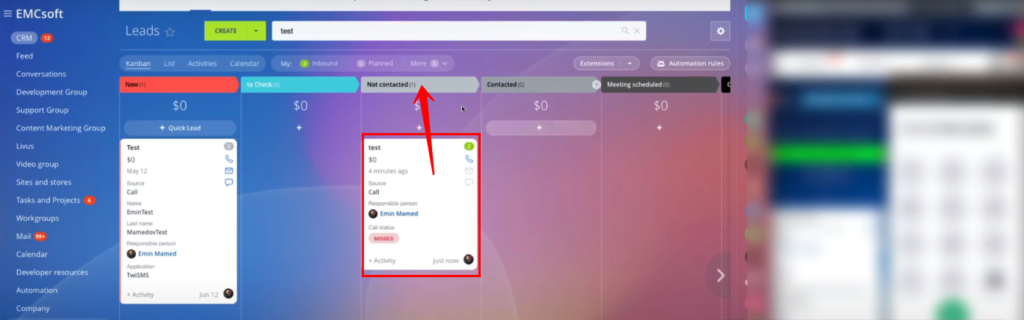
46. Move your automation rule to the stage section of your choice. In this case, stage tab name is “Not Connected”.

47. If you missed a call, then the lead will move to the “Not Connected” stage.
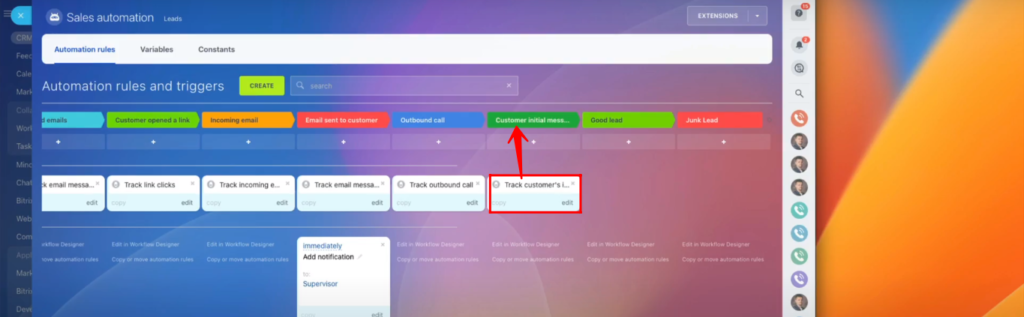
48. Go to “Customer Communication” and add “Track customer’s initial message”.

49. Apply conditions, select a channel and click “Save”.

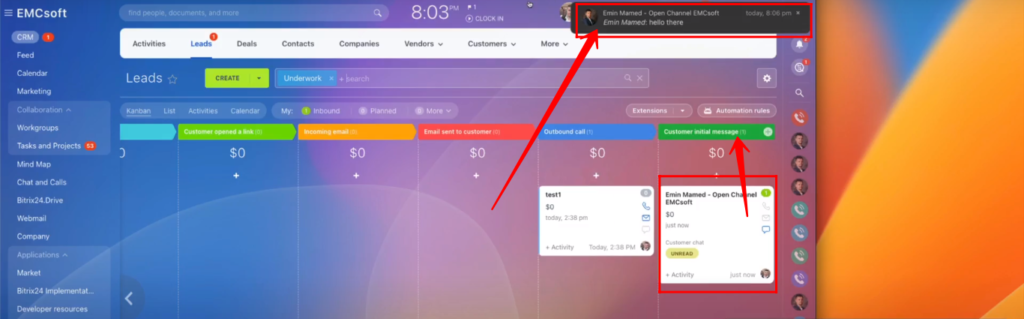
50. Add a new stage “Customer’s Initial Message”.

51. Move your initial message tracking automation rule to the newly created stage section.
52. As you get a message from customer, your lead will move to the “Customer’s initial message” stage section.
53. You can filter out your leads by applying the stage sections names in filter attributes and click “Search”.
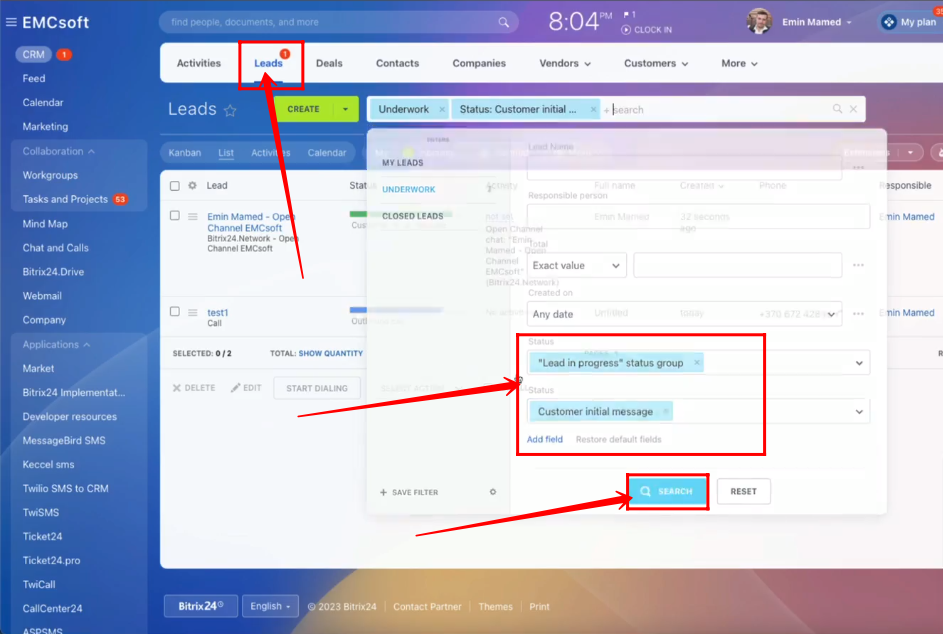
54. Here’s the filtered lead.

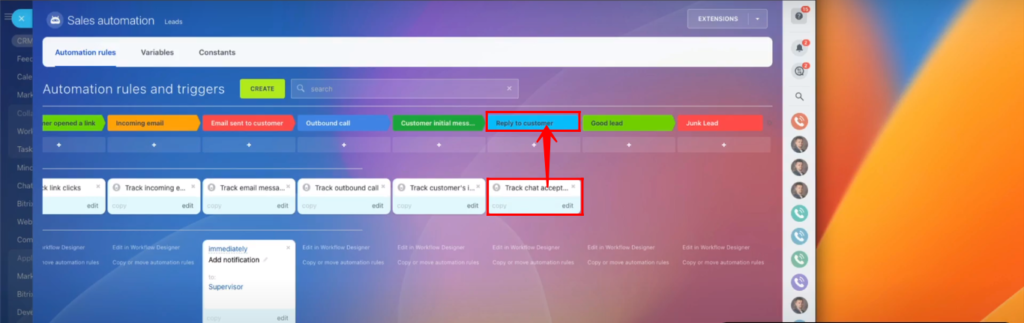
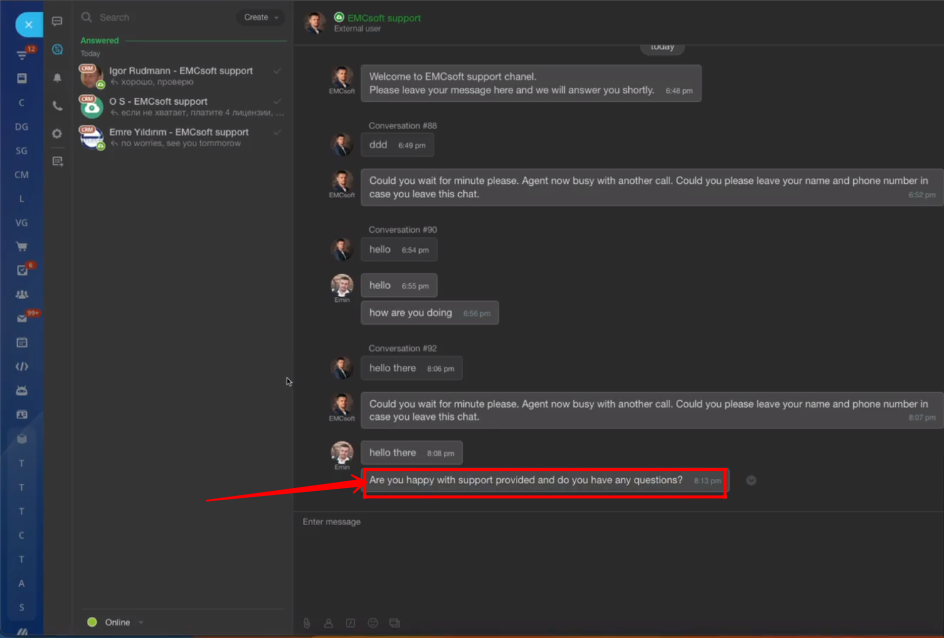
55. Go to “Customer Communication” and add “Track chat accepted event”.

56. Add a stage tab named “Reply to Customer”.

57. Move your newly created automation rule to the “Reply to Customer” stage section.
58. As you reply the customer in chat section.
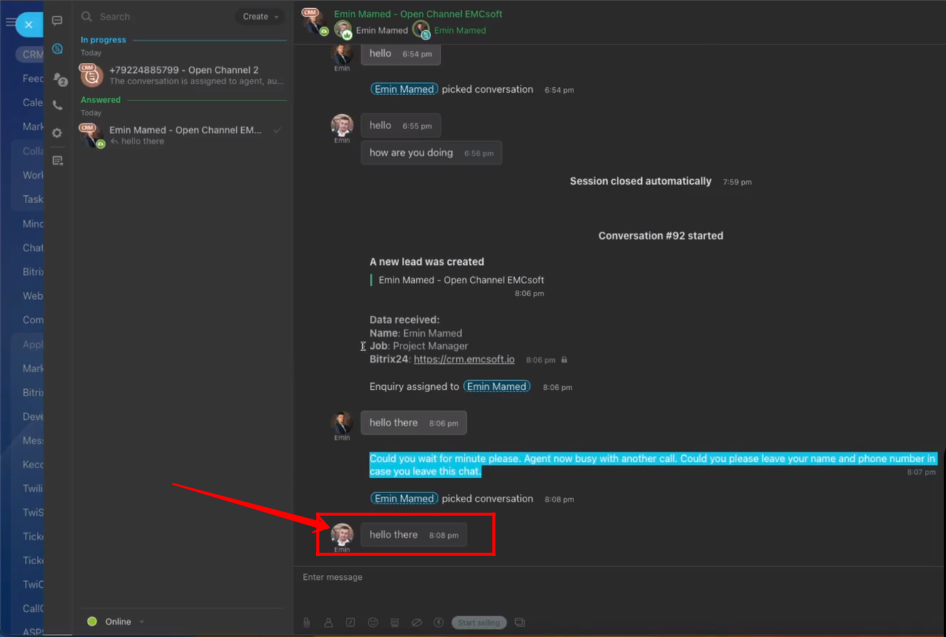
59. The lead will move to the appropriate stage section.

60. Go to “Customer Communication” and add “Send message to the chat”.
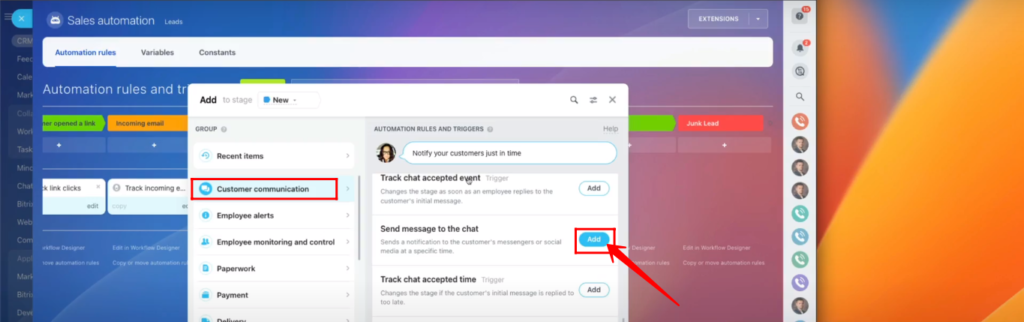
61. Add a stage tab named “Wait for reply from Customer”.

62. Apply conditions, add a message and click “Save”.

63. For testing purposes, move your lead manually to the “Wait for reply from Customer” stage section.
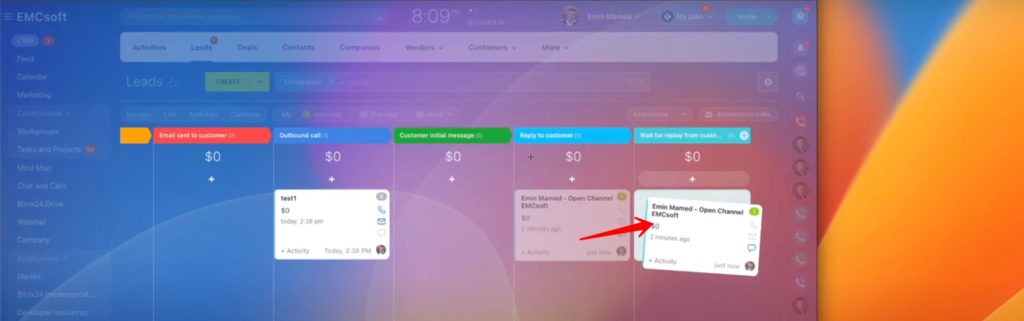
64. Your message will automatically be sent to the customer.
65. Go to “Customer Communication” and add “Track chat accepted time”.
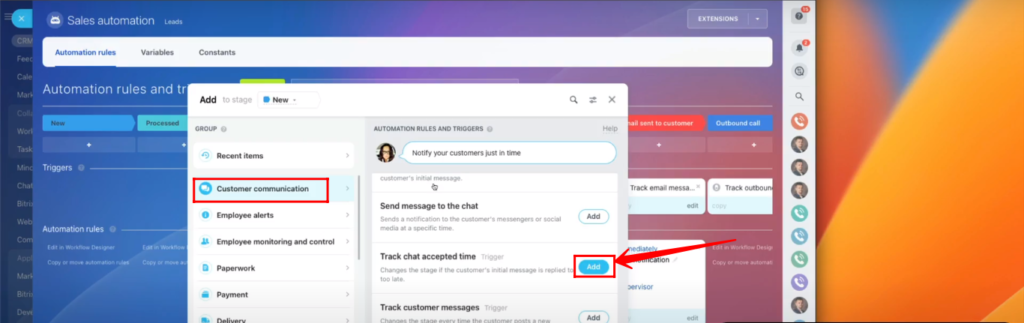
66. Apply conditions, trigger name, time, responsible person and click “Save”.

67. As the customer not replies within the time acception of chat, the lead will move to the appropriate stage section configured by you.

68. Go to “Customer Communication” and add “Send SMS to Customer”.

69. For SMS configuration, go to “Market”.
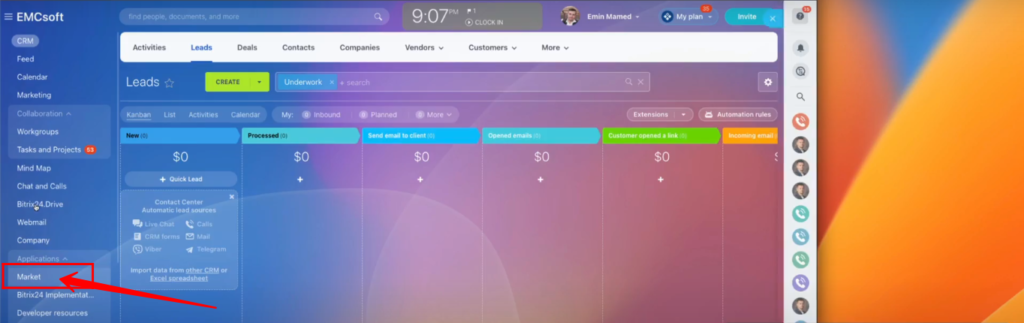
70. Search for “TwiSMS” and open this application to install.

71. Now configure your automation rule, select a provider as “TwiSMS” and click “Save”.

72. Move your automation rule to the stage section of your choice.
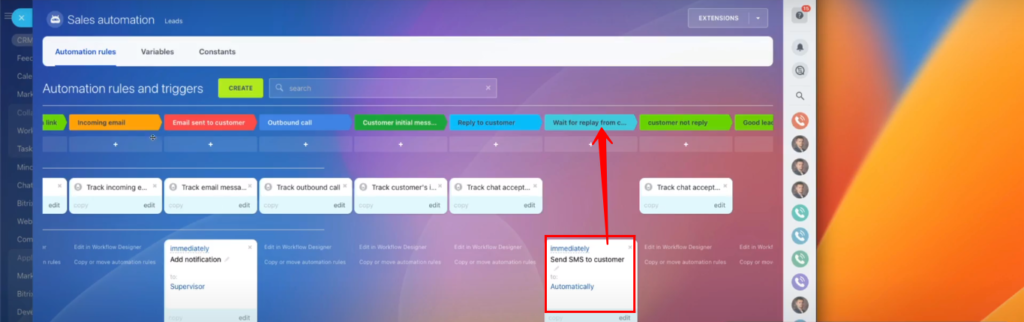
73. If that stage becomes true for the lead then the SMS will automatically be sent to the customer.

“You can also watch this video on Youtube”