| 1447 Views | Amin

Creating Contacts Automatically
A primary focus of this training is on the robot named “Create Contact for Lead”. This tool is a time-saver, especially when dealing with complex or automated lead creation processes. The robot enables the automatic creation of contacts from leads, bypassing the need for manual entry and simplifying the conversion of leads into deals.
Efficient Lead Management
The process of lead management can often be cumbersome, particularly when sorting through large volumes of data, some of which might be irrelevant or spam. By using specific robots in Bitrix24, you can effectively manage leads, swiftly converting valid ones into contacts and deals, thereby saving considerable time and effort.
Customizing Contact Information
Customization is a crucial aspect of contact management. In Bitrix24, you can modify contact information to categorize contacts as clients, partners, or other types. This customization is particularly useful in targeted email marketing, allowing for more precise communication strategies.
Automating Contact Type Assignments
The training further explores the automation of assigning contact types. By moving a lead to a designated stage, the system can automatically categorize the contact type, be it a client, supplier, or partner. This automation significantly reduces manual workload and enhances data accuracy.
Company Data Management
Similar to contact information, managing company data efficiently is vital. The tutorial covers how to modify company information in Bitrix24, ensuring that company-related data remains up-to-date and relevant for business operations.
Spam Management with Automation
Dealing with spam can be a significant challenge in any system. The training introduces a robot designed to add spam contacts to an exception list automatically, reducing the clutter in your Bitrix24 environment and maintaining the integrity of your leads and contact lists.
Detailed instructions on how these robots can be used are described below.
1. Go to “Automation Rules”. Click “Create”. Go to “Customer Information” and add “Create contact for lead” robot.

2. Add a responsible person and click “Save”.
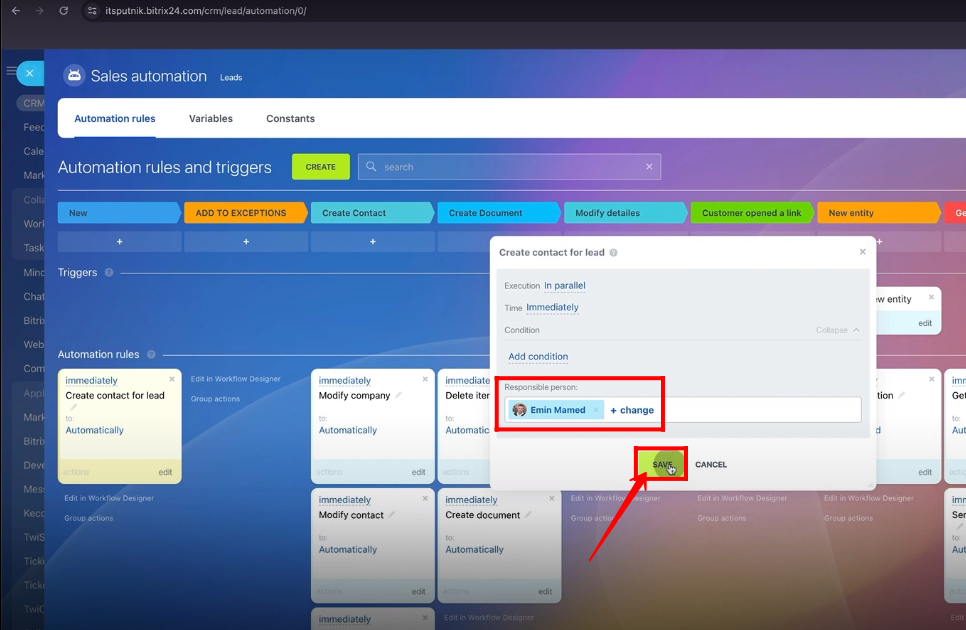
3. Move “Create contact for lead” robot to “Create Contact” stage.

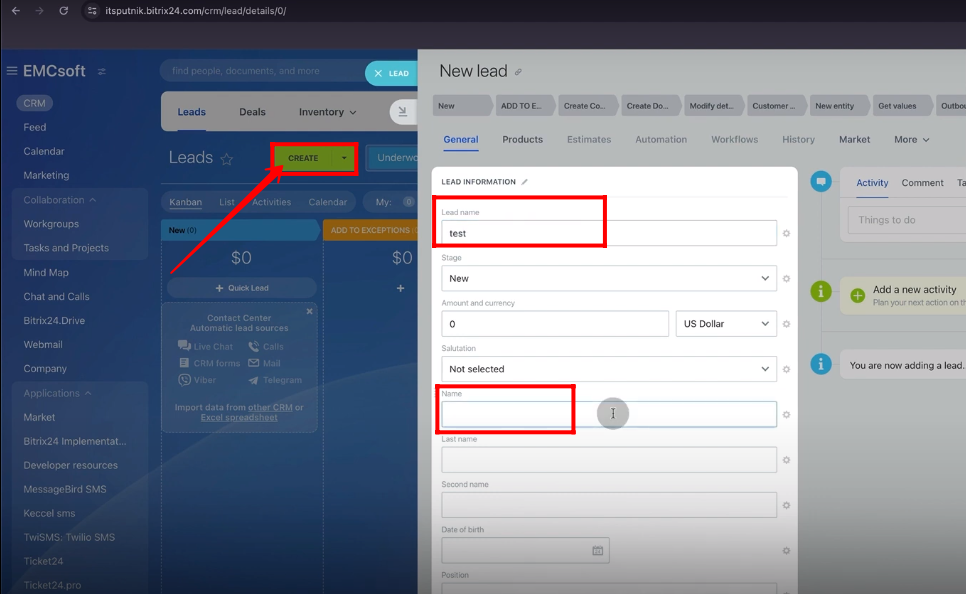
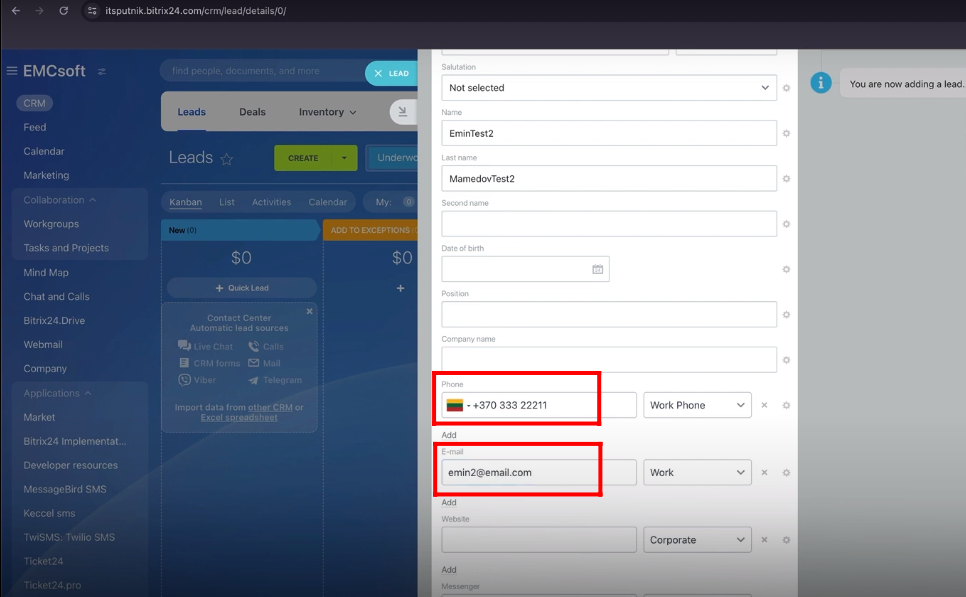
4. Click “Create” in “Leads” tab to create a new lead. Name the lead and assign a contact person.
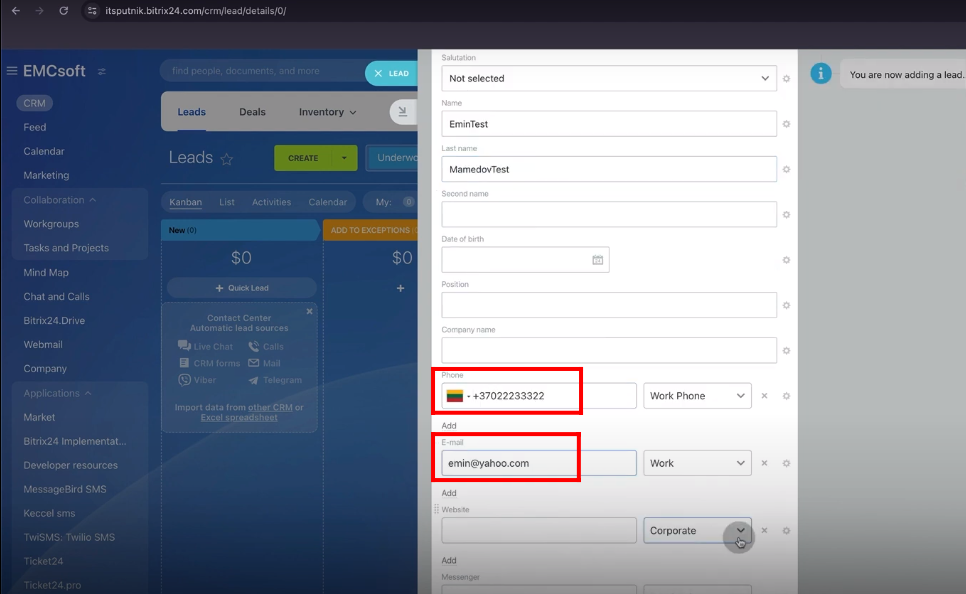
5. Add phone number and email of contact person. Save it.
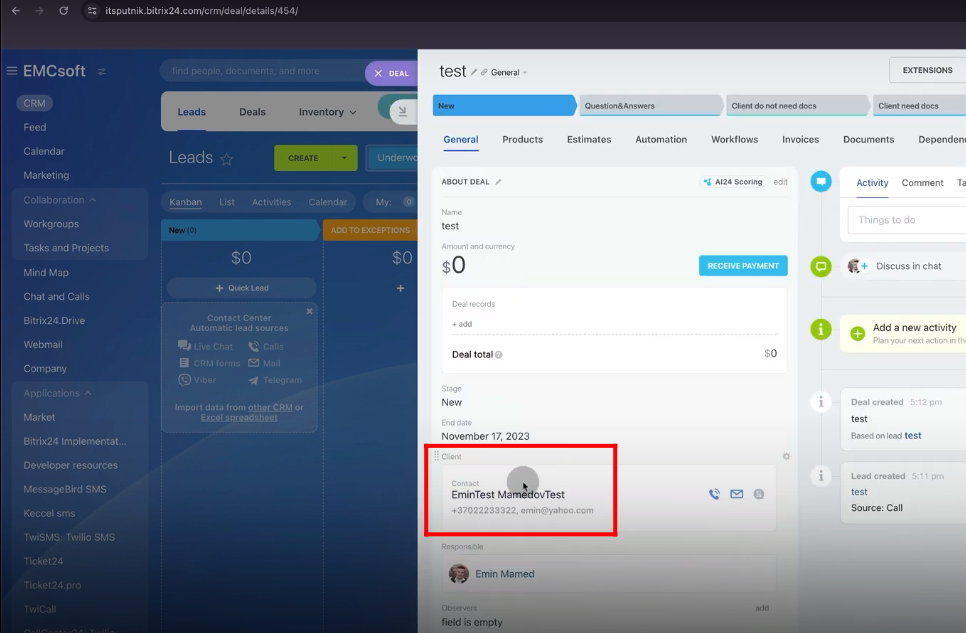
6. In manual process, click “Complete Lead”. Then, click “Generate Deal” and select “Deal+Contact”. Click “Save”.

7. Now, you need to verify that how the contact came here in the lead after completion.
8. Change the stage of the lead from “Completed” to “New”. And again move the lead to “Create Contact” stage. Open the lead.
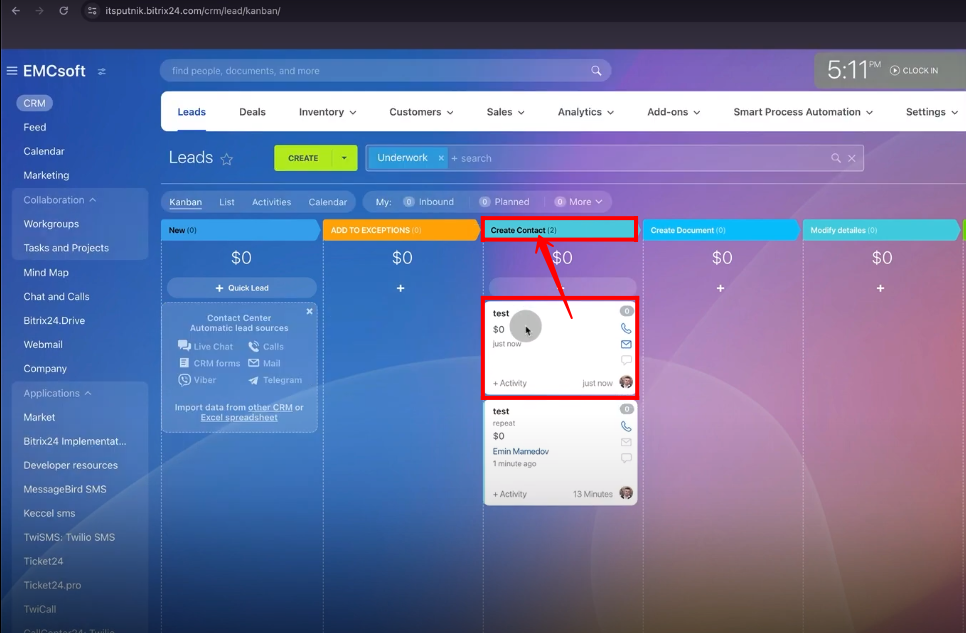
9. You can see, contact has been created within the lead.

10. Click “Complete Lead”. Then click “Generate Lead”.

11. Click “Save”.
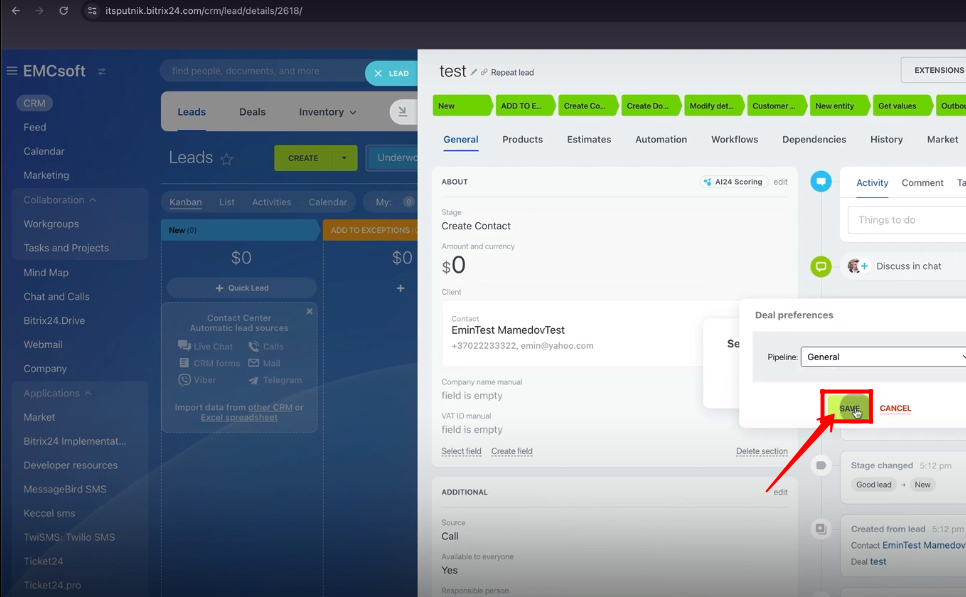
12. And you already got a contact connected to this deal.

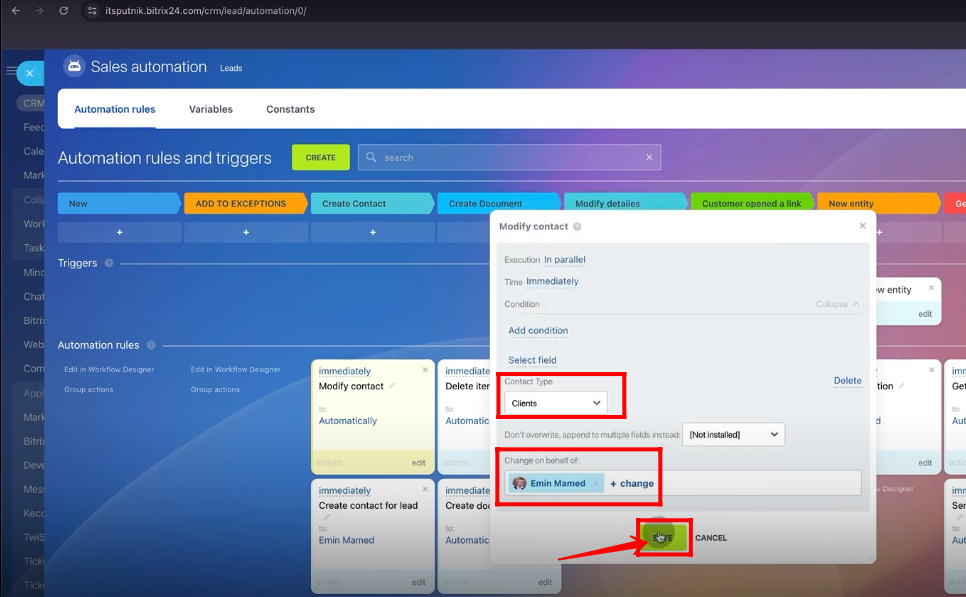
13. Go to “Automation Rules”. Click “Create”. Go to “Contact Information” and add “Modify Contact” robot.

14. Click “Select field” and select “Contact Type” for now.

15. Select “Contact Type” whether it should be “Client”, “Partner” or “Supplier”. Select a person in “Change on behalf of”. Click “Save”.
16. Create a new lead. Name the lead and add contact person.
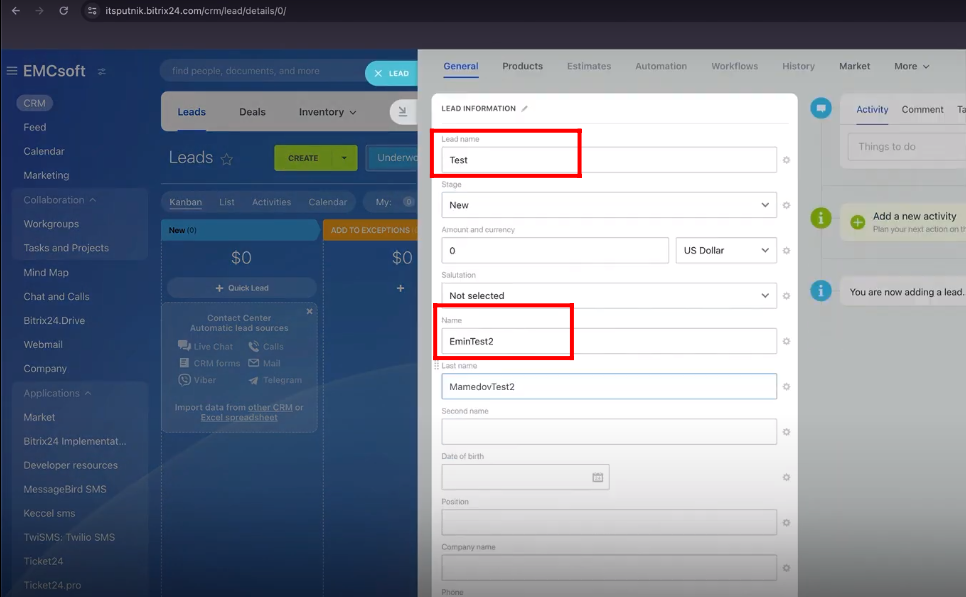
17. Add number and email of contact person.
18. Change the stage of the lead to “Create Contact”.

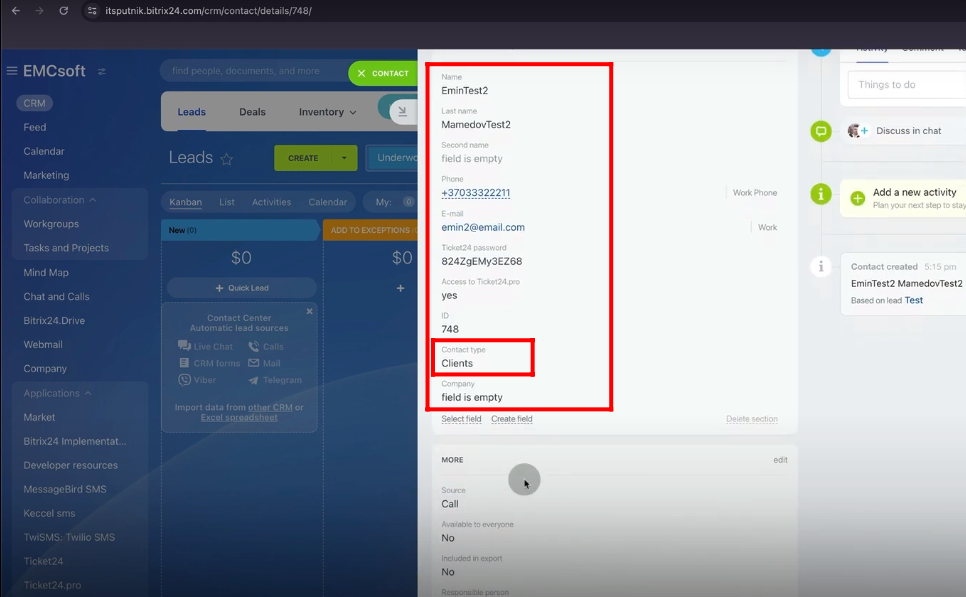
19. The contact person and details automatically has been created within the lead. Open the contact details.

20. You can see, the field “Contact Type” is “Clients” here, that was selected in the robot configuration.
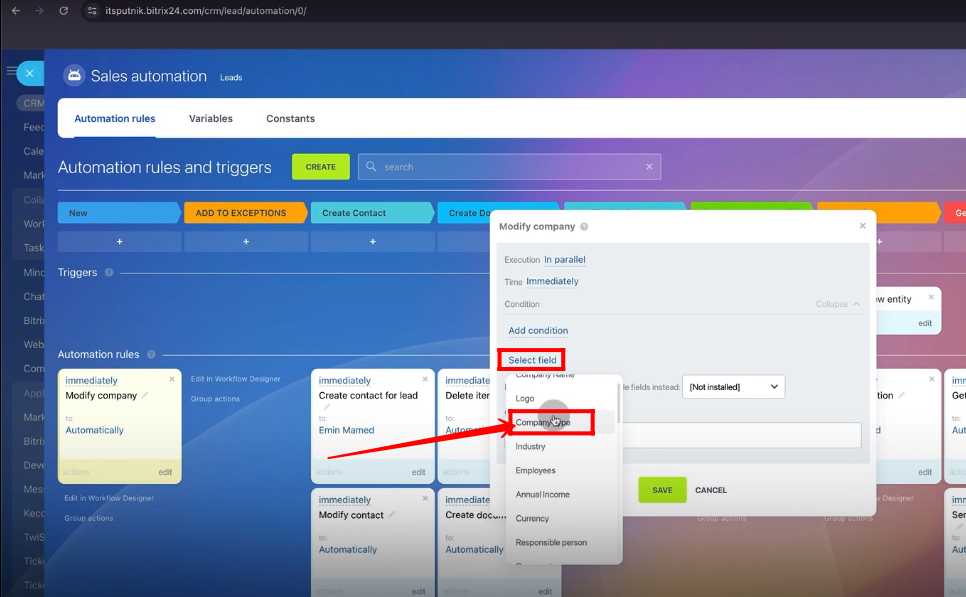
21. Go to “Automation Rules”. Click “Create”. Go to “Customer Information” and add “Modify Company” robot.

22. Click “Select field” and select “Company Type”.
23. Select “Company Type” as “Client” for now. Select a person in “Change on behalf of” and click “Save”.

24. Move the “Modify company” robot to “Create Contact” stage.

25. Move back the lead to “New” stage. Open the lead and click “Edit”.

26. Add a company within the lead and open it.

27. Check the box “Company Type” and click “Select”.

28. For a while, select “Company Type” as “Not Selected”.
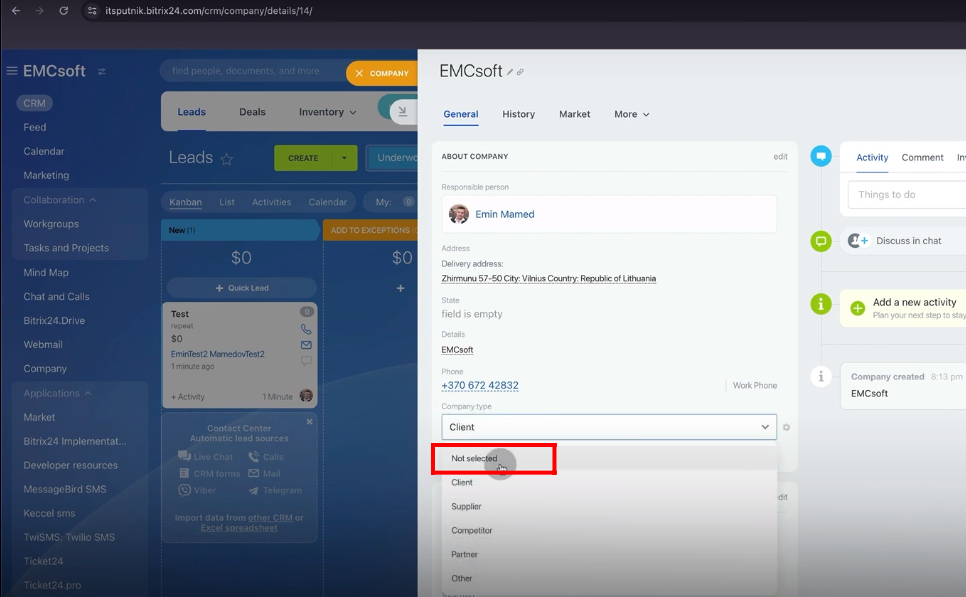
29. Change the stage of the lead to “Create Contact”. And open the company information.

30. You can see, the “Company Type” is “Client” here, that was selected in the robot configuration.

31. Go to “Automation Rules”. Click “Create”. Go to “Customer Information” and add “Add customer to exceptions” robot.

32. Move the “Add customer to exceptions” robot to “Add to Exceptions” stage.
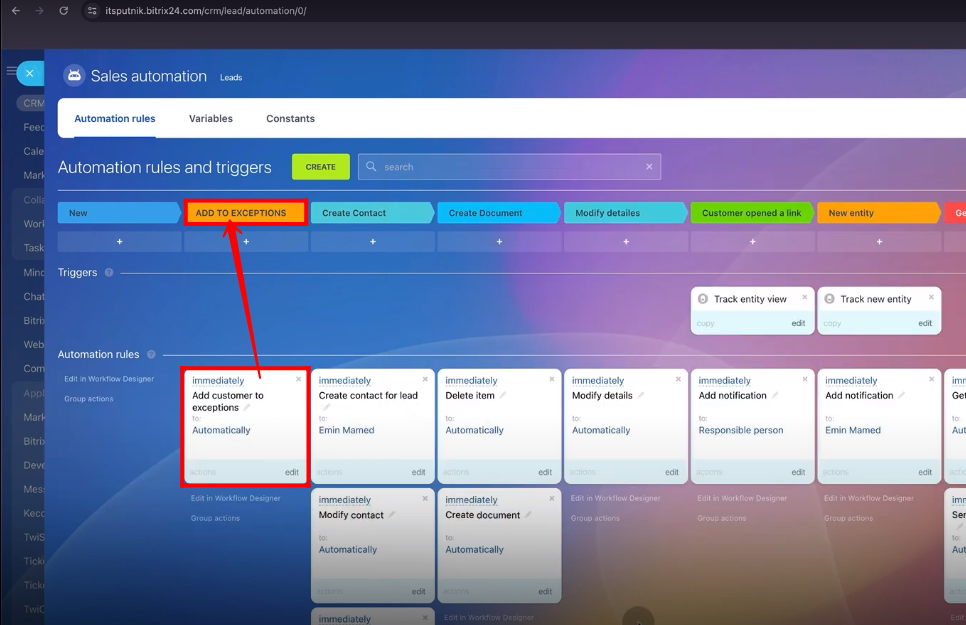
33. Move the lead to “Add to Exceptions” stage. The lead will disappear. You will not receive spam emails in the lead from the email present in the lead.

“You can also watch this video on Youtube”