| 3732 Views | Amin

In today’s fast-paced business environment, efficiency is key to staying competitive. As companies strive to streamline their operations and improve productivity, the adoption of advanced automation tools becomes essential. Bitrix, a leading platform for business management, offers robust features for automating processes through its Smart Process Automation (SPA) capabilities.
Smart Process Automation, or SPA
Empowers businesses to automate repetitive tasks, streamline workflows, and optimize resource utilization. In this comprehensive guide, we’ll explore how Bitrix’s SPA functionality can revolutionize your business operations, drive efficiency, and enhance overall productivity.
Understanding Smart Process Automation in Bitrix24
At its core, SPA in Bitrix enables users to create automated workflows that execute predefined actions based on specified triggers. These triggers can range from data updates to time-based events, empowering organizations to automate complex processes seamlessly.
Key Features and Functionality
Automation Rules: Bitrix allows users to define automation rules to trigger actions based on specific events. From updating records to sending notifications, automation rules streamline repetitive tasks and minimize manual intervention.
Workflow Automation
With Bitrix’s workflow automation capabilities, businesses can design and implement custom workflows tailored to their unique requirements. Whether it’s routing tasks or coordinating approvals, workflow automation ensures smooth, error-free process execution.
Data Integration
Bitrix facilitates seamless integration with other systems and data sources, enabling the exchange of information across platforms. This integration eliminates data silos, enhances data consistency, and enables real-time decision-making.
Customization
Bitrix offers extensive customization options, allowing users to tailor SPA workflows to suit their specific business processes. From defining custom fields to configuring user permissions, businesses can adapt Bitrix to their exact needs.
Detailed instructions on how these robots can be used are described below.
1. Go to “Smart Process Automation”.

2. Click “Create”. Go to “SPA Components”. Type its name as “Test SPA” for testing purposes. Check all the boxes for now.

3. Go to “SPA from layout”. Select “Customer”.

4. Go to “CRM bindings”. Turn on the switch option “Bind to this SPA” and select “Deal”.
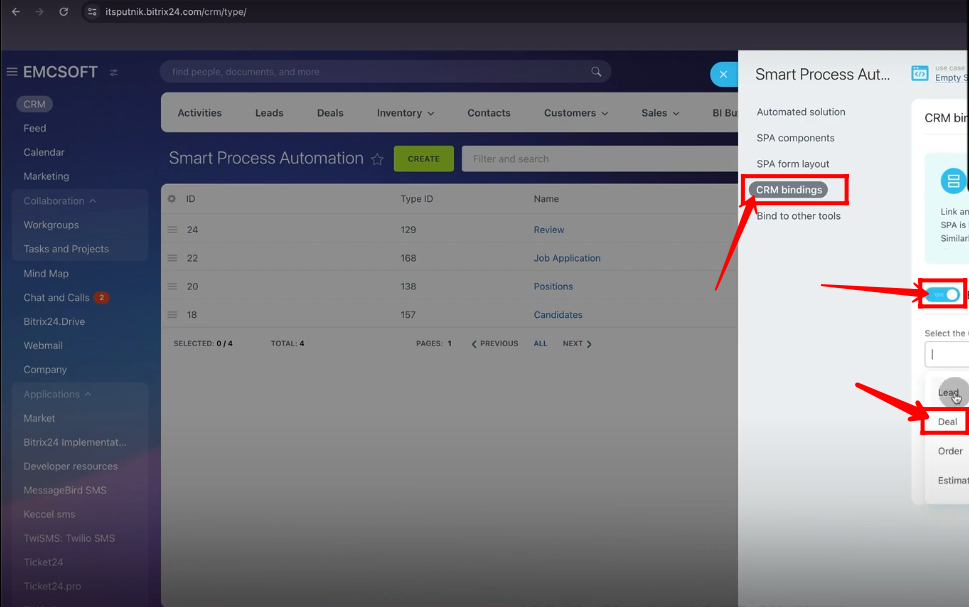
5. Go to “Bind to other tools”. Select “CRM entities”.

6. Open the newly configured smart process automation “Test SPA”.

7. You will see a newly configured “Kanban” with stages.
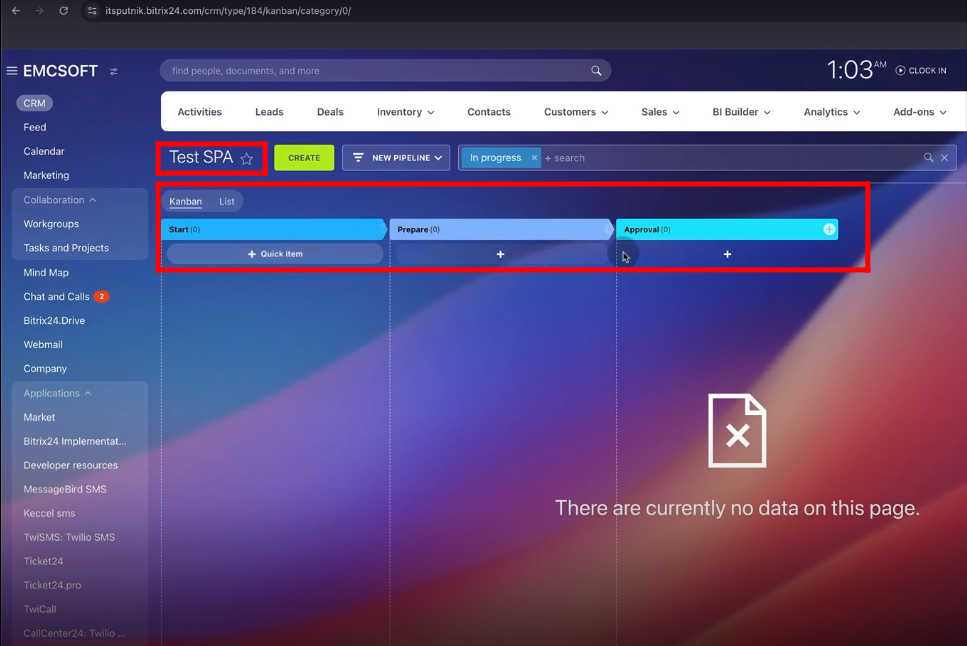
8. Open EMCsoft panel in another tab. Go to “Automation Rules” in “Deals” section. Click “Create”. Go to “Workflow automation” and add “Create SPA” robot.

9. Create a new stage “SPA” in Deals section and move “Create SPA” robot in “SPA” stage. Click “Edit”.

10. Select “Test SPA” in “CRM item type” attribute. Execution must be in “WAIT”.

11. Select dynamic “Name” and “Amount” of deals from three dots options. Select “Created by” and “Responsible person”. Select “Availability to everyone”. Select “Pipeline” as “New pipeline” and “stage” will be “New pipeline/Prepare” for now. Check the box “Link to current item”. Save it.

12. Move your test deal (Company A) to “SPA” stage.

13. Move to your previous tab where “Kanban” was configured and refresh the tab. A new “SPA” will be generated with the title as we configured before.

14. Go to “Settings” and click “configure view form fields”.

15. You can select the attributes that you want to see in the preview of SPA. Click “Save”.

16. All selected attributes will be shown in the SPA preview. Open it.

17. Click “Select field”. Select all the attributes within SPA as per requirement. Click “SELECT”.

18. Click “Create field”. Select type as “String”.

19. Type field name as “Contract name in SPA”.

20. Come back to first tab and go to “Automation Rules” within “Deals” section. Click “Create”. Go to “Workflow automation” and add “Edit SPA item” robot.
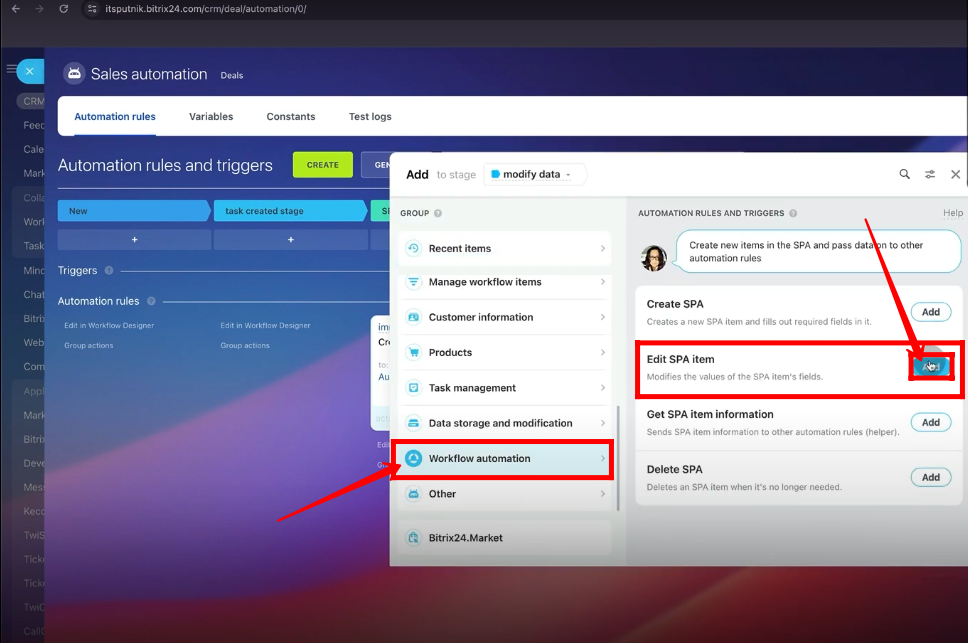
21. Move “Edit SPA item” robot to “modify data” stage and edit it. Select “SPA item type” as “Test SPA”. Select dynamic “Contract name” of the deal within “Contract name in SPA” attribute from three dots option.

22. Move “Company A” deal to “modify data” stage.

23. Go to another tab and open the configure SPA. You can view the contract name of the deal under “Contract name in SPA” field.

24. Now go to “Automation Rules” within the “Deals” section. Click “Create”. Go to “Workflow automation” and add “Get SPA item information” robot.

25. Move “Get SPA item information” robot to “Get data from SPA” stage.

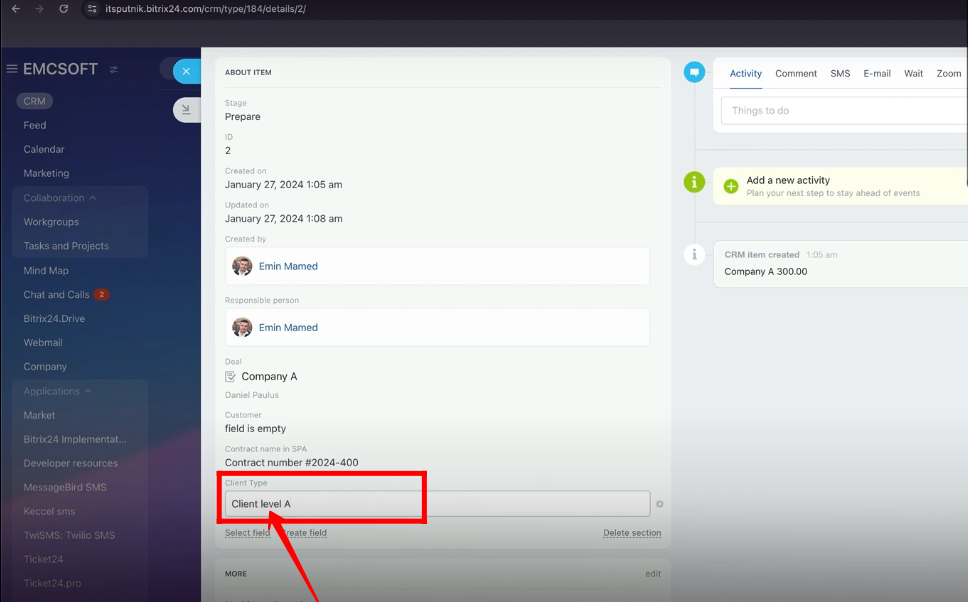
26. Come back to first tab and open SPA. Add a new field named as “Client Type”.
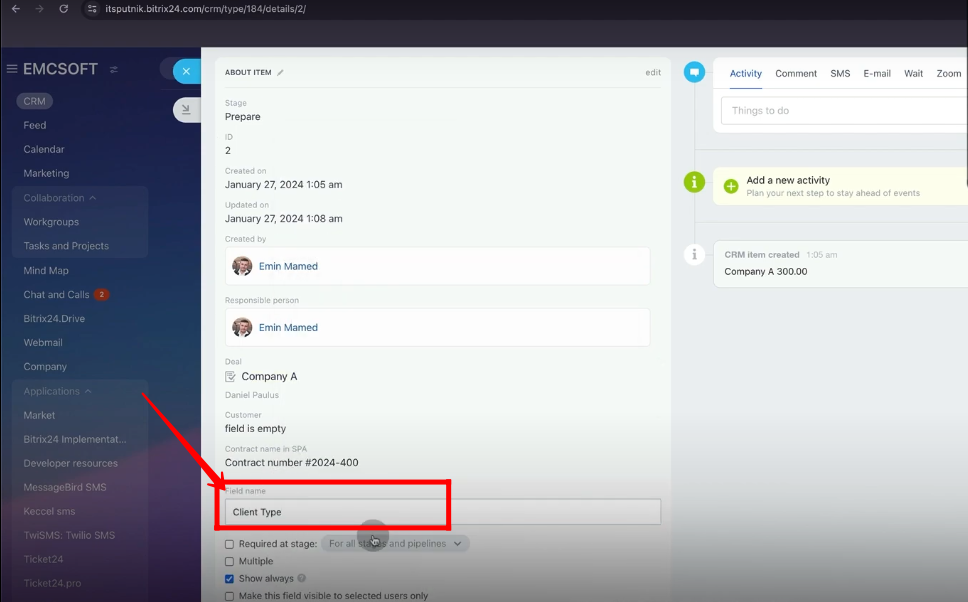
27. The value of “Client type” field will be “Client level A” for now.
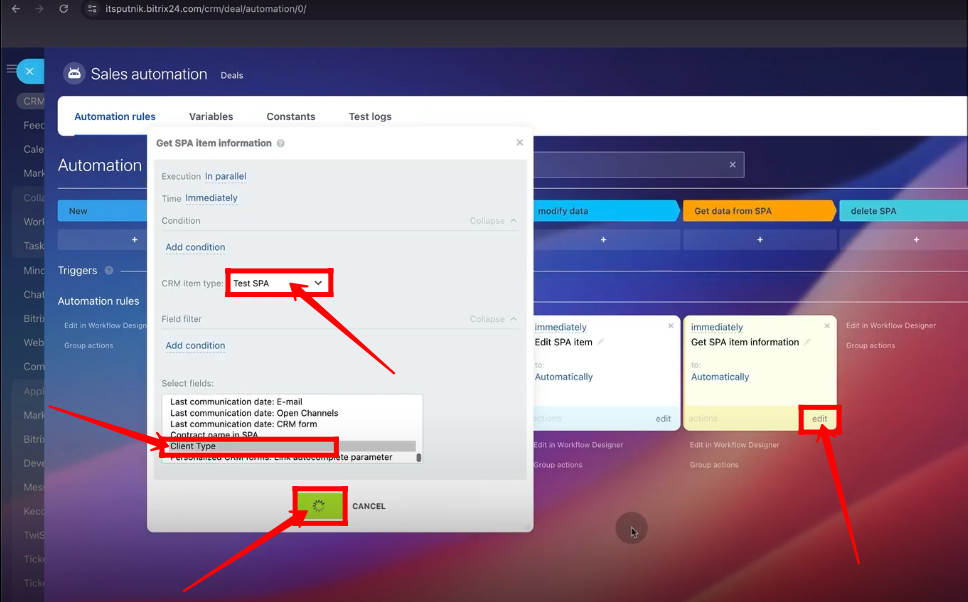
28. Now edit “Get SPA item information” robot. The Execution must be in “WAIT”. Select “CRM item type” as “Test SPA”. Select field as “Client Type”. Click “Save”.
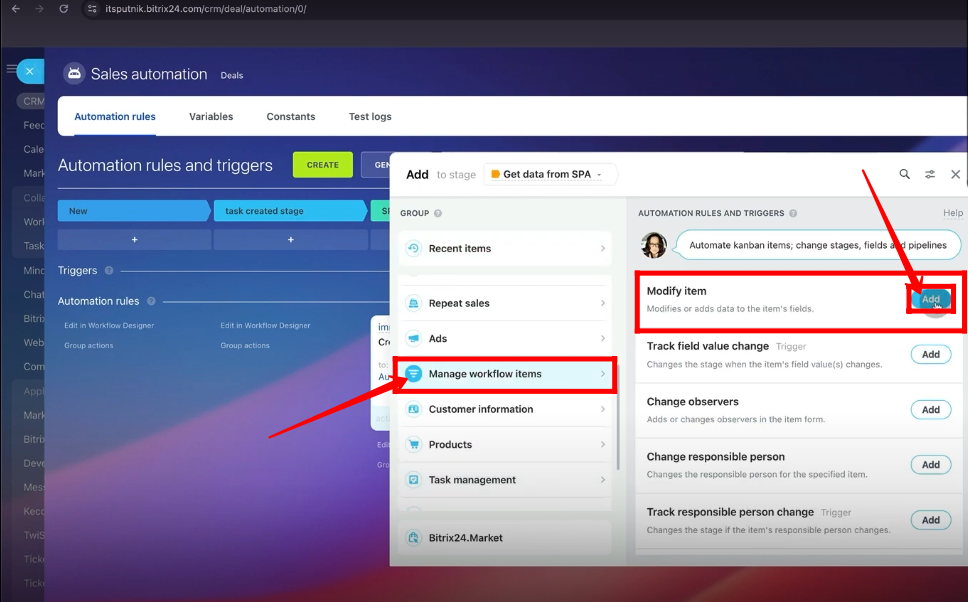
29. Within automation rules, go to “Manage workflow items” and add “Modify item” robot.
30. Select dynamic “Name of the deal” and “Client Type” within “Get SPA item information” rule in “Name” attribute from three dots option.

31. Execution must be in “WAIT”. Apply space between both dynamic values. Select responsible person in “Change on behalf of” attribute. Click “Save”.

32. Move “Company A” deal to “Get data from SPA” stage. Refresh the tab.

33. You can view name of the deal as we configured before.

34. Copy “Get SPA item information” robot and move it to “delete SPA” stage. Edit it.

35. Execution must be in “WAIT”. Select “CRM item type” as “Test SPA”. Select field as “ID” for now. Click “Save”.

36. Within automation rules, go to “Workflow automation” and add “Delete SPA” robot.

37. Execution must be in “WAIT”. Select “CRM item type” as “Test SPA”. Select “ID” within “Get SPA item information” rule from three dots option in “CRM item ID” attribute. Click “Save”.

38. Move deal to “delete SPA” stage.

39. Go to first tab and refresh it. Your configured SPA will be deleted automatically.

“You can also watch this video on Youtube”
