| 1994 Views | Amin

Unlocking the Potential:
Smart Scripts are not just about automation; they’re about tailored solutions. Whether you’re a real estate agency in Dubai or a multinational corporation, Smart Scripts adapt to your unique needs. By streamlining processes and eliminating manual tasks, they empower businesses to focus on growth and innovation.
Customized Solutions for Every Scenario:
One of the standout features of Smart Scripts is their adaptability. Take, for instance, the scenario of a real estate agency in Dubai. With clients from diverse backgrounds and varying documentation requirements, finding the right mortgage provider can be a daunting task. Smart Scripts simplify this process by creating customized workflows for each client, ensuring seamless communication and compliance with regulatory standards.
Efficiency Redefined:
Gone are the days of tedious manual tasks and human error. With Smart Scripts, businesses can automate repetitive tasks, such as sending client emails and managing workflow stages, with precision and efficiency. This not only saves time but also minimizes the risk of errors, ensuring a smooth and seamless operation.
Execution Made Simple:
Implementing Smart Scripts is easier than you think. Our comprehensive guide below walks you through the process, from setting up automation rules to executing scripts and managing workflow items. With step-by-step instructions below and real-world examples, you’ll be harnessing the power of Smart Scripts in no time.
Detailed instructions on how these robots can be used are described below.
1. Go to “Scripts”. Click “Smart Scripts” and then “Scripts”.
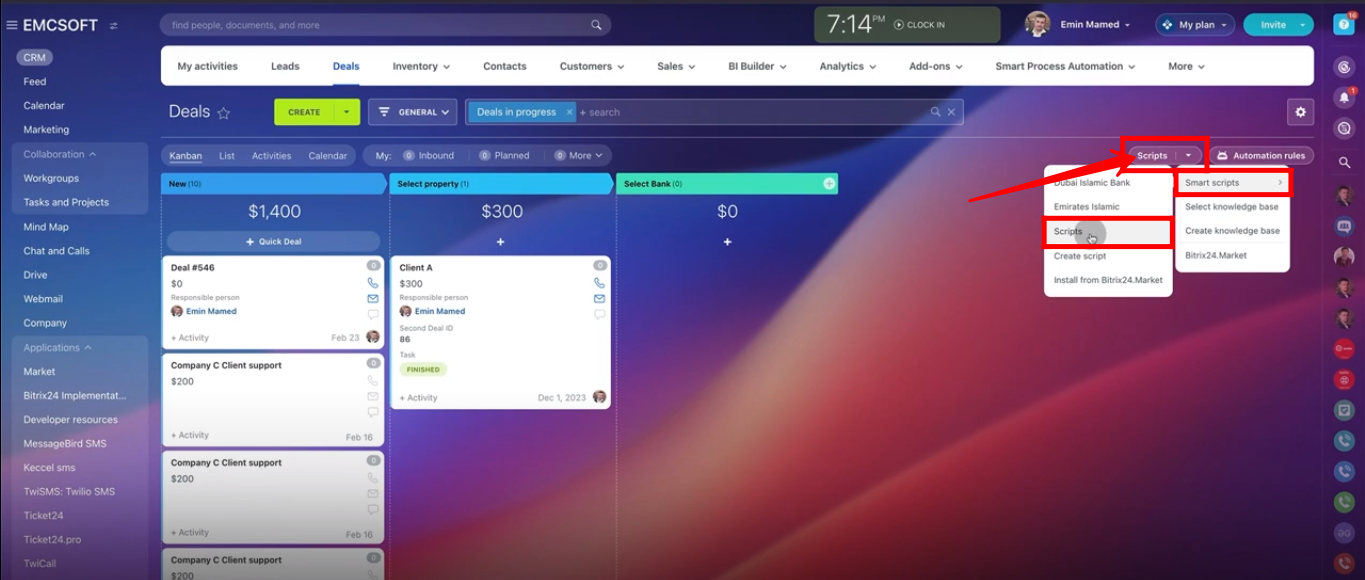
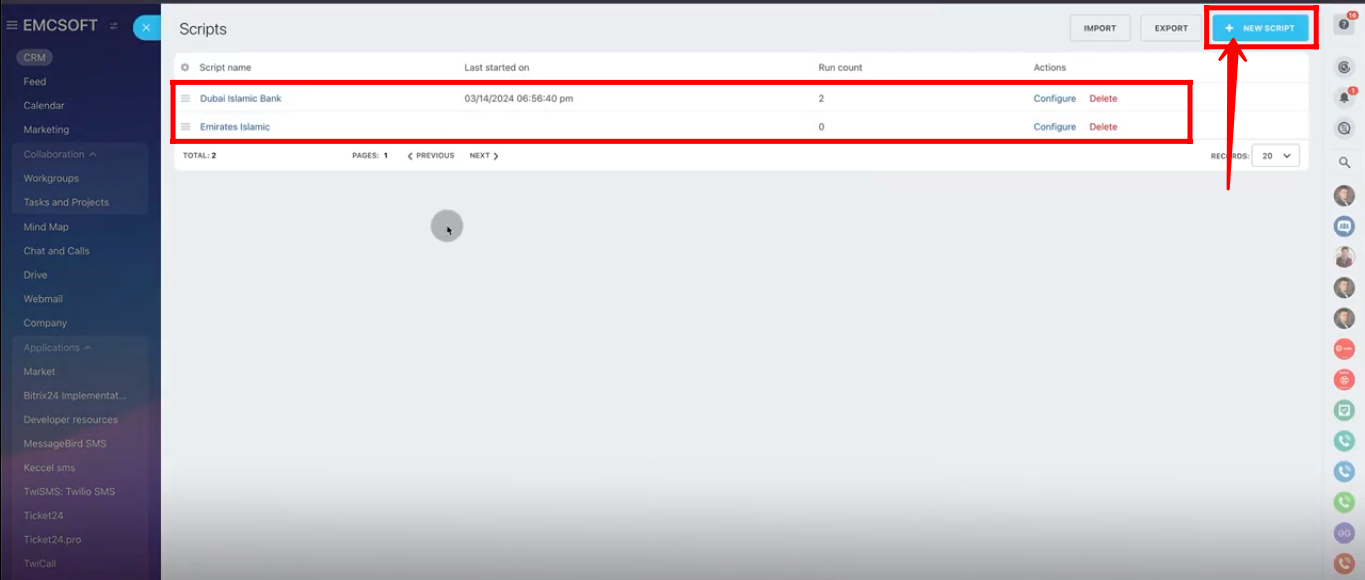
2. You can view the list of previously configured scripts. You can edit these scripts or create a new one for testing purpose for now.
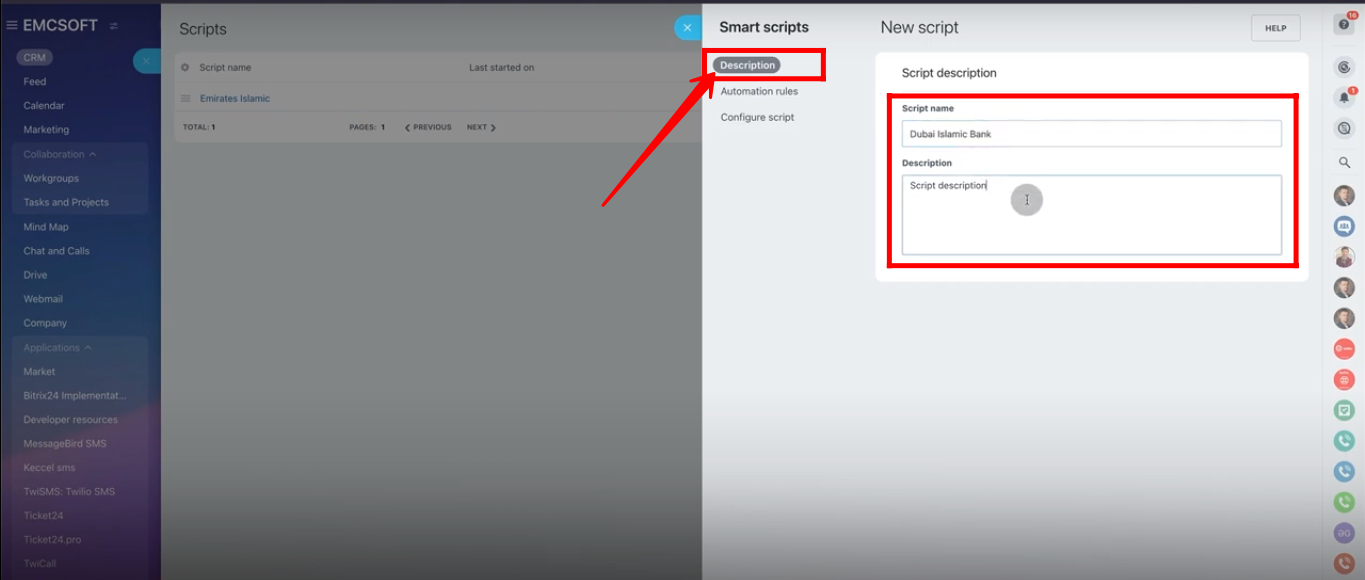
3. In “Description” section of script, type the “Script name” and “description”.
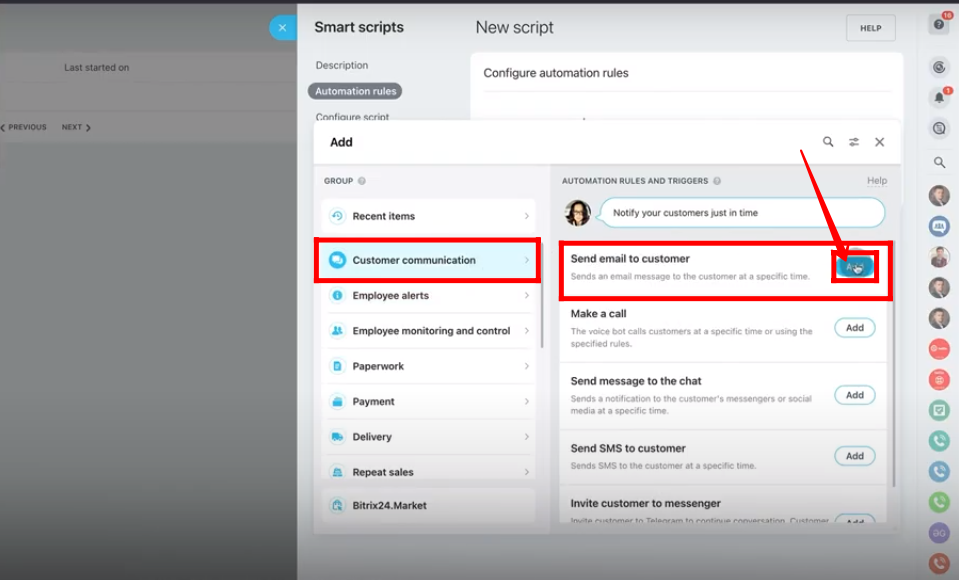
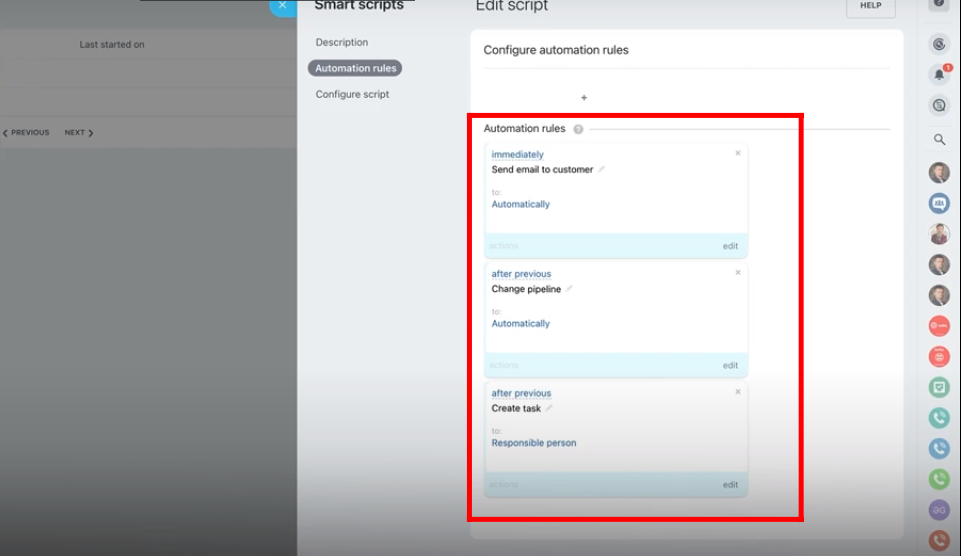
4. Within “Automation rules” section of script, click “+add” button.

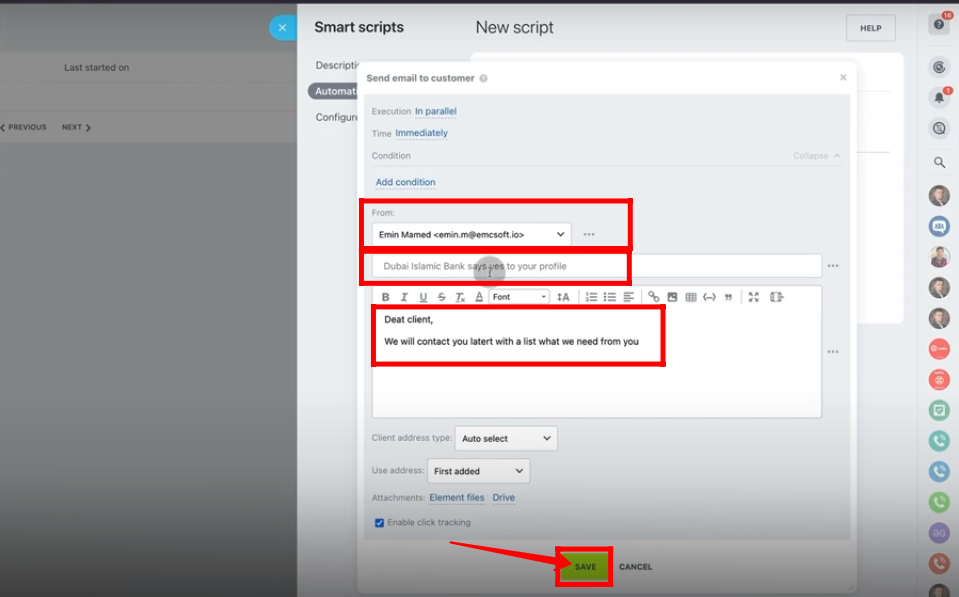
5. Go to “Customer Communication”. Add “Send email to customer” robot.
6. Configure sender of the email. Type title and description of the email. Click “Save”.
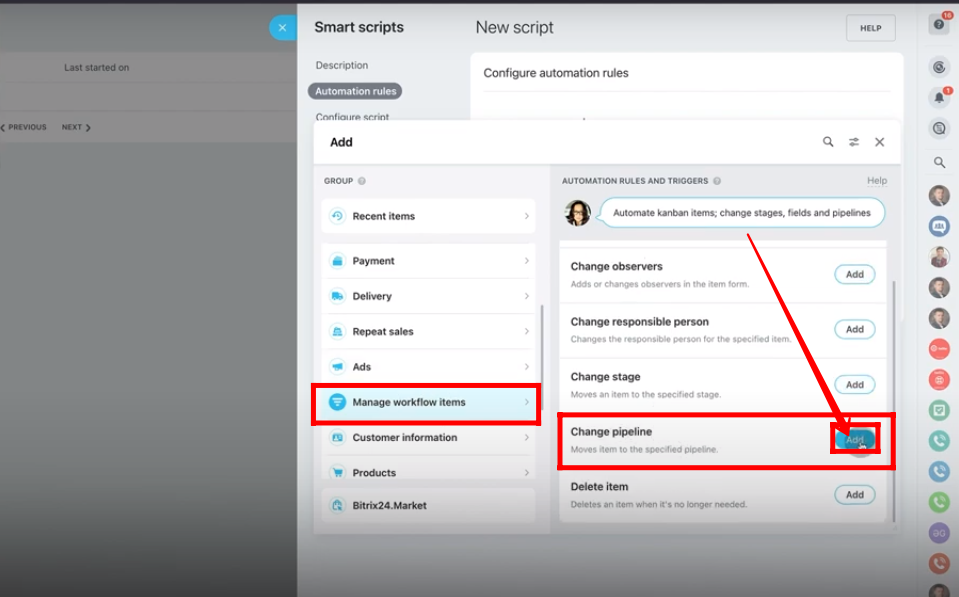
7. Now, go to “Manage Workflow items” and add “Change pipeline” robot.
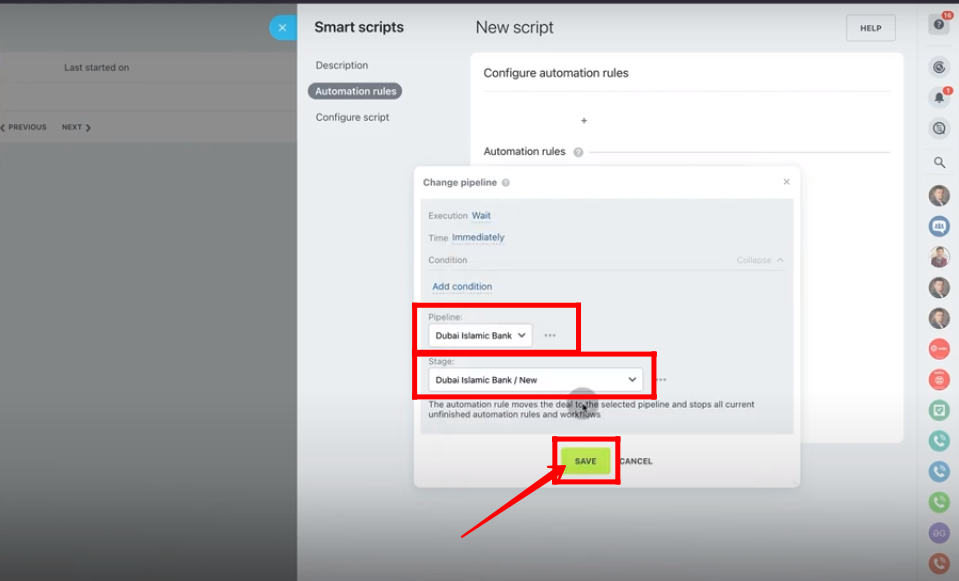
8. Select the pipeline and stage of your choice. Click “Save”.
9. Create a new robot named “Create task”. Type task name and description. Configure the deadline of the task.
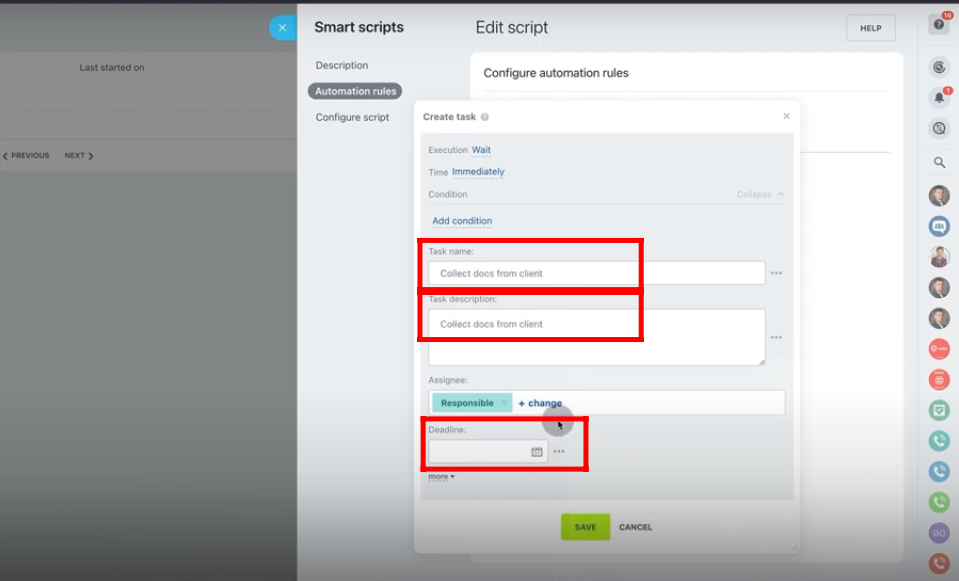
10. Add “observers”. Create a checklist of attributes for which this robot is created. In this case, robot is created to collect documents from client. Save the robot. You can add as many as robots you want.

11. Move the deal to any stage of your choice according to requirement. Go to “Smart Scripts” and select the script(Dubai Islamic Bank) that you configured just now.
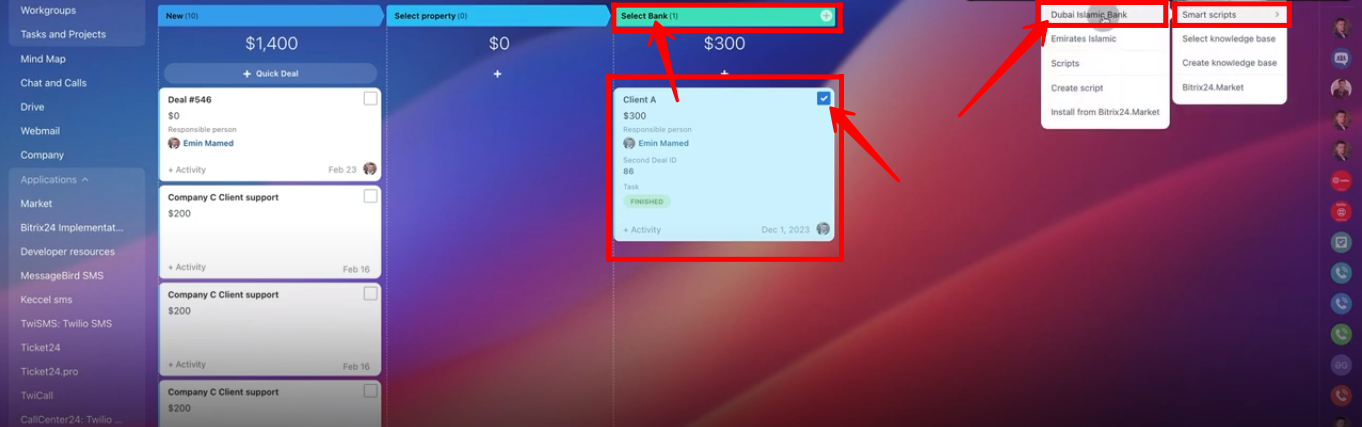
12. Your deal will be shifted to “New” stage in another funnel that you selected in the “Change pipeline” robot. Open it.
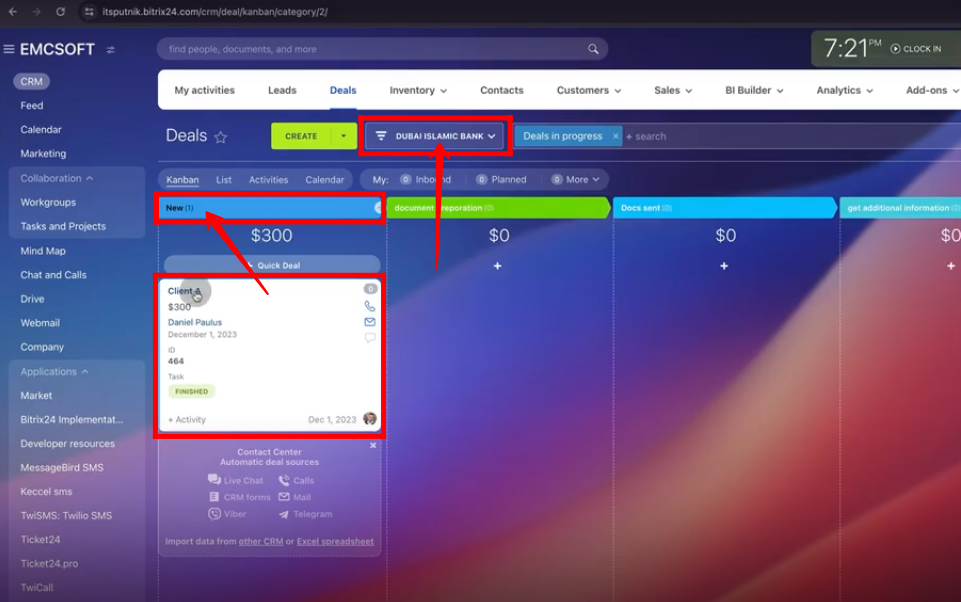
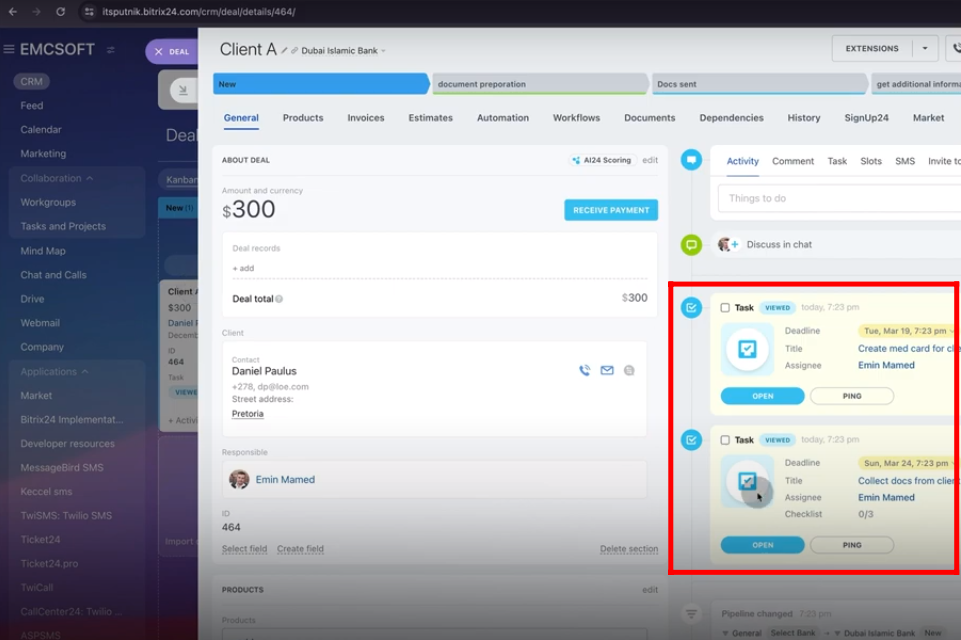
13. You can view the tasks generated that you created within the script.
14. Ensure that the “Execution” of all robots must be “WAIT”. You can change the sequence of robots to be executed. Drag the “Change pipeline” robot after the “Create task” robots.
“You can also watch this video on Youtube”