| 3503 Views | Amin

Users should consider using Power BI together with Bitrix24 for several reasons:
Advanced Data Analysis:
Power BI is a robust business intelligence tool that offers powerful data analysis capabilities. By combining Power BI with Bitrix24, users can gain deeper insights into their data, identify patterns, and make informed decisions based on comprehensive data analysis.
Visual Data Representation:
Power BI excels at visualizing data through interactive charts, graphs, and dashboards. By integrating Power BI with Bitrix24, users can create visually appealing and dynamic visualizations that effectively communicate data trends and patterns to stakeholders.
Real-Time Reporting:
Bitrix24 provides a centralized platform for managing various aspects of a business, including customer relationship management (CRM), project management, and communication. By connecting Power BI to Bitrix24, users can generate real-time reports and dashboards that display up-to-date information from their Bitrix24 system.
Customizable Dashboards:
With Power BI and Bitrix24 integration, users can create personalized dashboards tailored to their specific business needs. They can choose relevant data sources from Bitrix24 and design interactive dashboards that provide a comprehensive overview of key metrics and performance indicators.
Data Consolidation:
Bitrix24 may contain data from various sources, including CRM, project management, and communication tools. Power BI allows users to consolidate data from different Bitrix24 modules and external sources, enabling a holistic view of their business operations and facilitating cross-functional analysis.
Collaboration and Sharing:
Power BI enables users to collaborate on reports and dashboards, allowing multiple stakeholders to work together on data analysis and decision-making. By integrating Power BI with Bitrix24, users can easily share reports and dashboards with team members, fostering collaboration and promoting data-driven discussions.
Mobile Accessibility:
Both Power BI and Bitrix24 offer mobile applications, allowing users to access and interact with their data on the go. The integration of Power BI with Bitrix24 ensures that users can view their customized dashboards and reports seamlessly on mobile devices, enabling real-time insights anytime, anywhere.
By combining the analytical power of Power BI with the comprehensive features of Bitrix24, users can leverage data-driven insights to optimize their business processes, enhance decision-making, and drive overall organizational success.
If you are using a self-hosted Bitrix24 instance and want to connect it directly to a MySQL database in Power BI, you can follow these steps:
Verify MySQL Database Access:
Ensure that you have the necessary credentials (username and password) and the required privileges to access the MySQL database that Bitrix24 uses.
Install MySQL Connector/ODBC:
Download and install the MySQL Connector/ODBC driver on the computer where Power BI is installed. This driver acts as a bridge between Power BI and the MySQL database. Make sure to choose the appropriate version based on your operating system.
Configure ODBC Data Source:
Open the ODBC Data Source Administrator on your computer. In the System DSN tab, click “Add” to create a new data source. Select the MySQL ODBC driver and provide a name for the data source. Configure the necessary connection details such as server address, port, username, password, and the specific database you want to connect to.
Test the Connection:
Click on the “Test” button in the ODBC Data Source Administrator to verify the connection to the MySQL database. If successful, you should see a confirmation message.
Open Power BI:
Launch Power BI Desktop on your computer.
Connect to the MySQL Database:
In Power BI Desktop, click on the “Get Data” button in the Home tab. Search for and select “MySQL database” from the available data source options.
Provide Connection Details:
In the MySQL database connector window, enter the server address, port, and database name. Choose “ODBC” as the connection method and select the data source name (DSN) you created in step 3. If required, enter the username and password for the MySQL database.
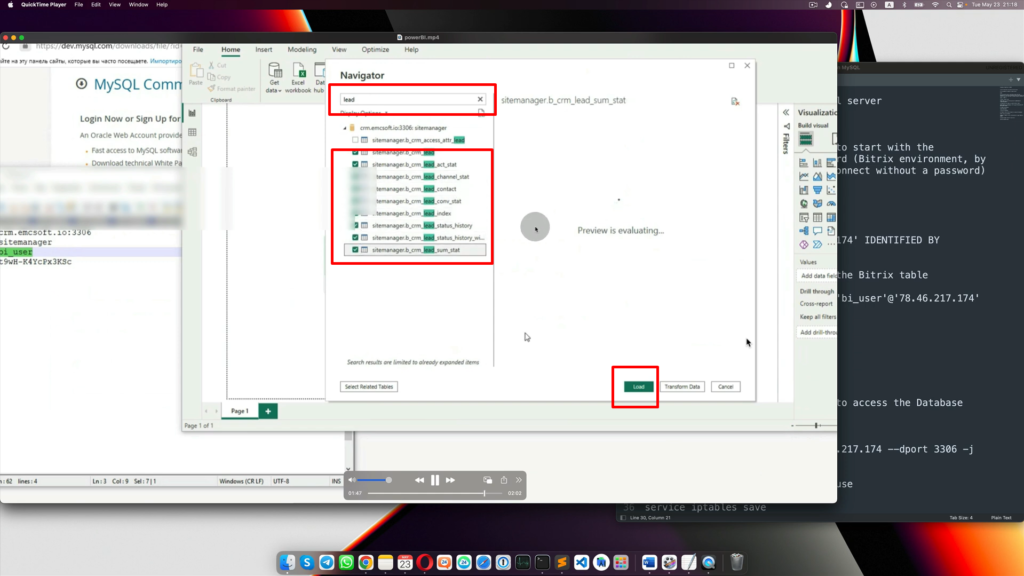
Connect and Import Data:
Click “Connect” to establish the connection to the MySQL database. If the connection is successful, you will be able to select the tables or views you want to import into Power BI. Choose the relevant tables and click “Load” to import the data into Power BI.
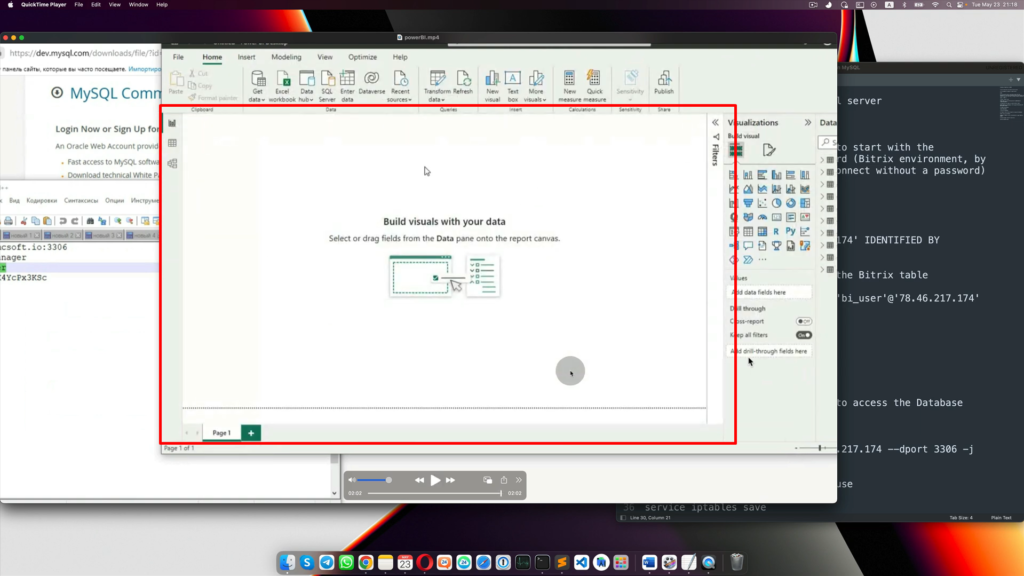
Build Visualizations:
Once the data is imported into Power BI, you can start creating visualizations, reports, and dashboards based on your requirements.
By following these steps, you will be able to connect Power BI directly to your self-hosted Bitrix24 MySQL database. This allows you to leverage the power of Power BI for advanced data analysis and reporting, using the data stored in your Bitrix24 instance.
Below you may find instuction with screenshots how to do that yourself.
1. Create a read user in mySQL database.

2. Instructions are available in the description box in this video.

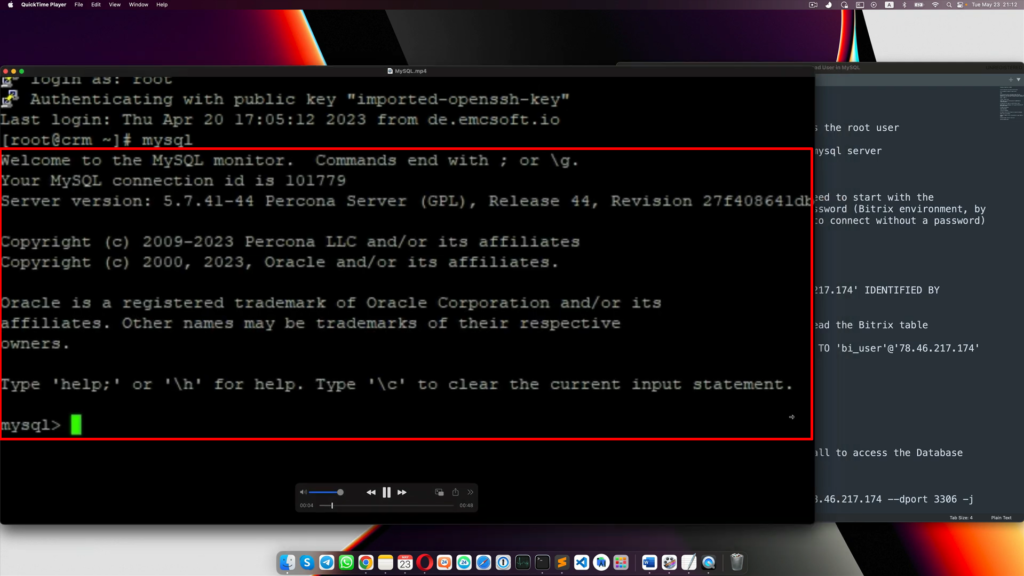
3. Log-in to the server where your Bitrix is located, as a root user, via SSH. And then run MySQL.
4. Create a user then assign the rights to read the Bitrix table. GRANT SELECT on site manager database.
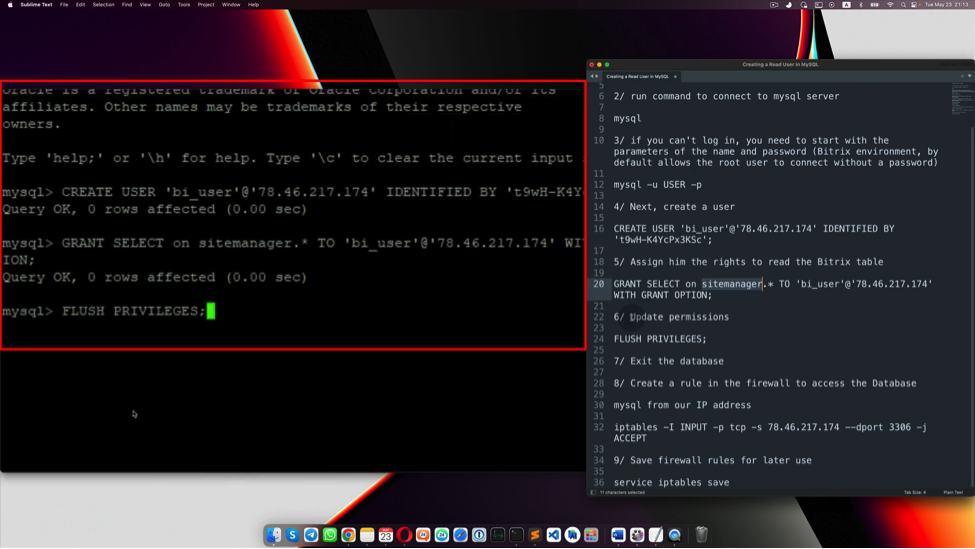
5. Update permissions and exit the database and create a rule in the firewall to access the database. Go to POWER BI.
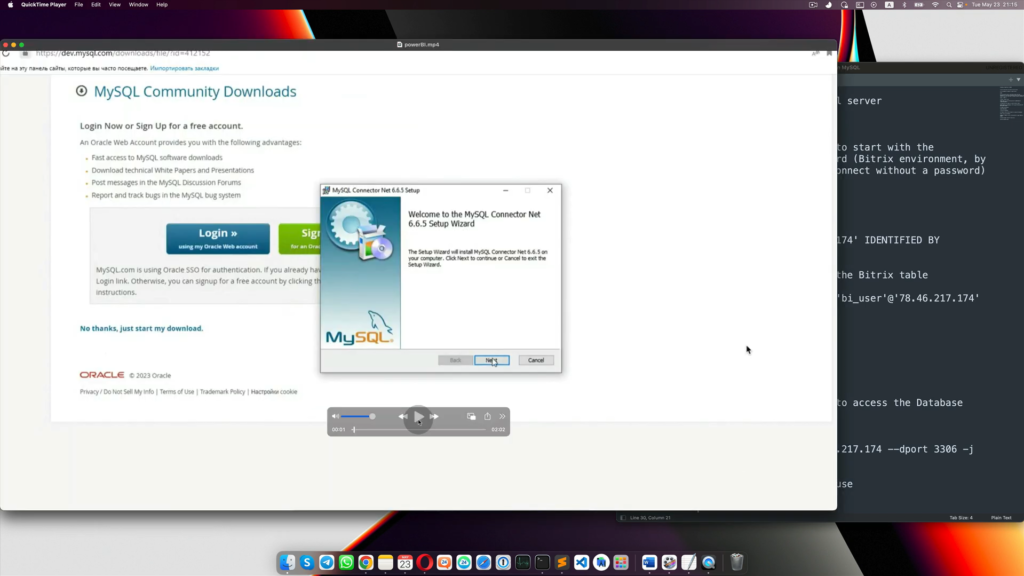
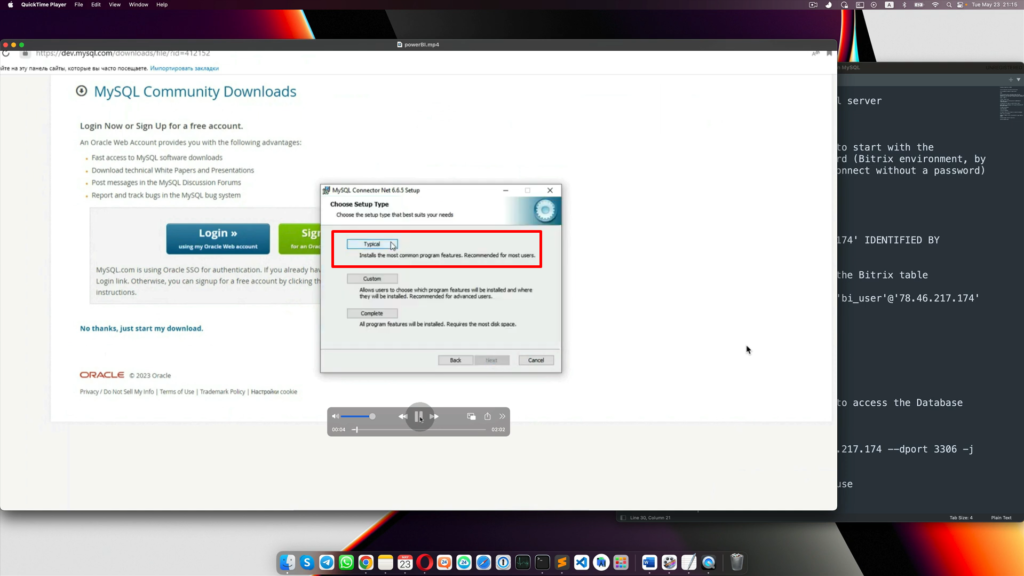
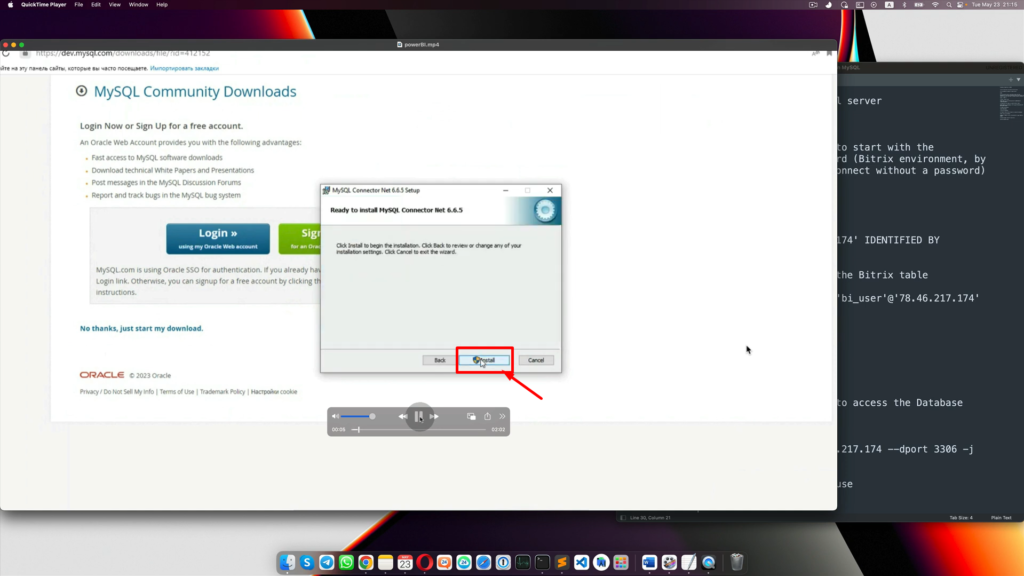
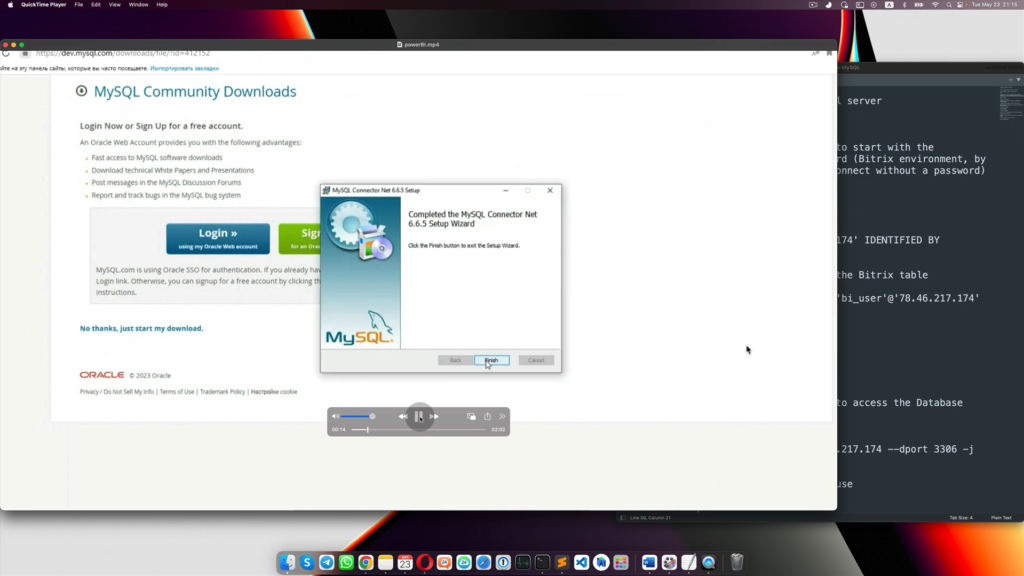
6. Install the plug-in.
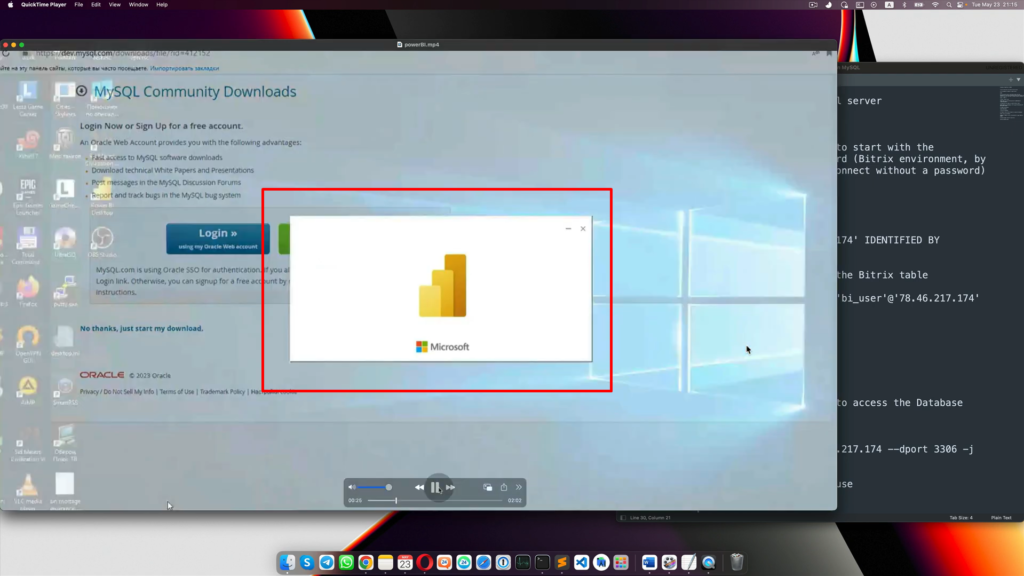
7. Start the Power BI
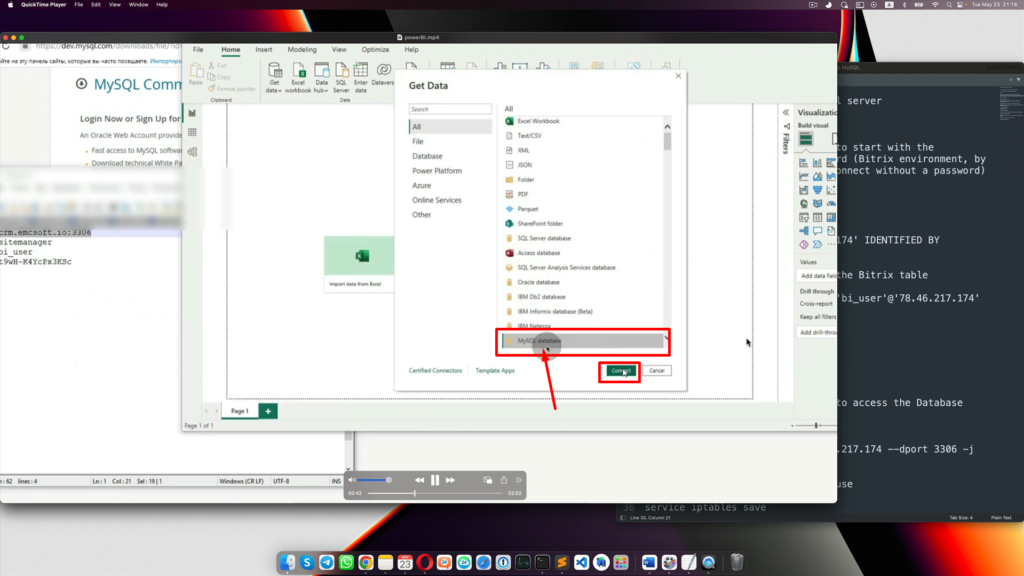
8. Click “Get Data”
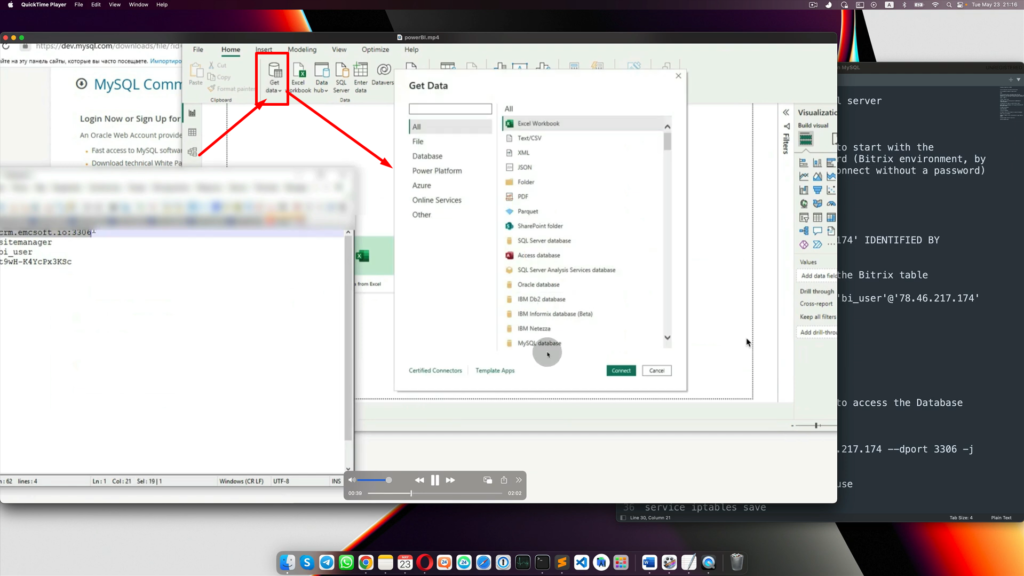
9. And Select “MySQL Database”
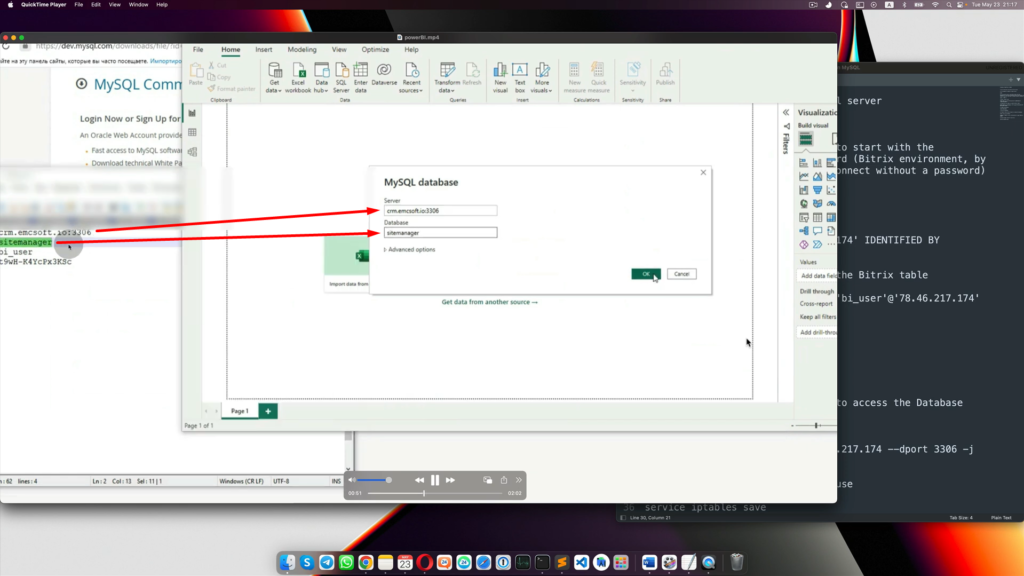
10. Put an address of your portal, then put database, name, username and password for that particular user.

11. Put Server Name and Database.
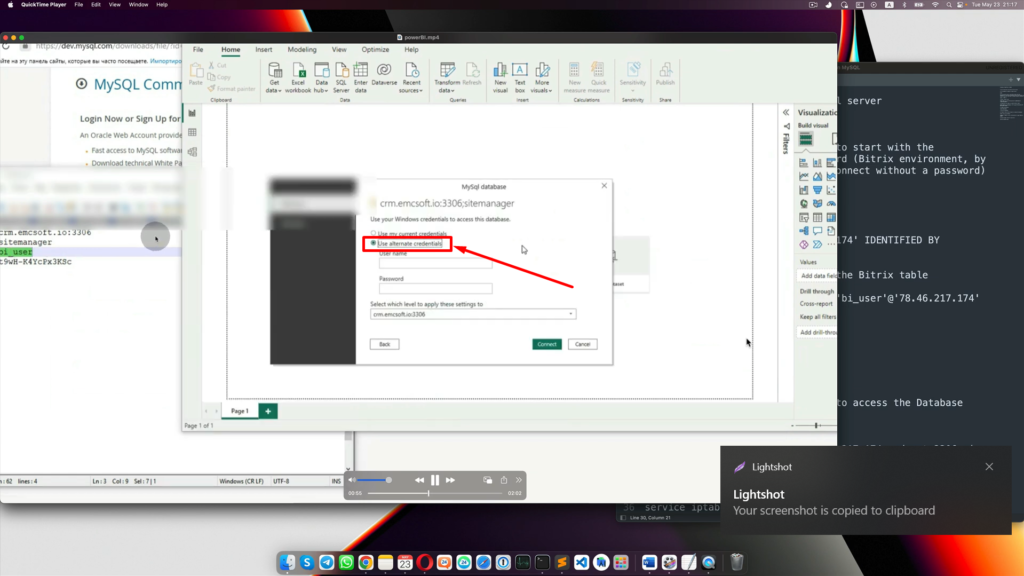
12. Select “Use alternate credentials”.
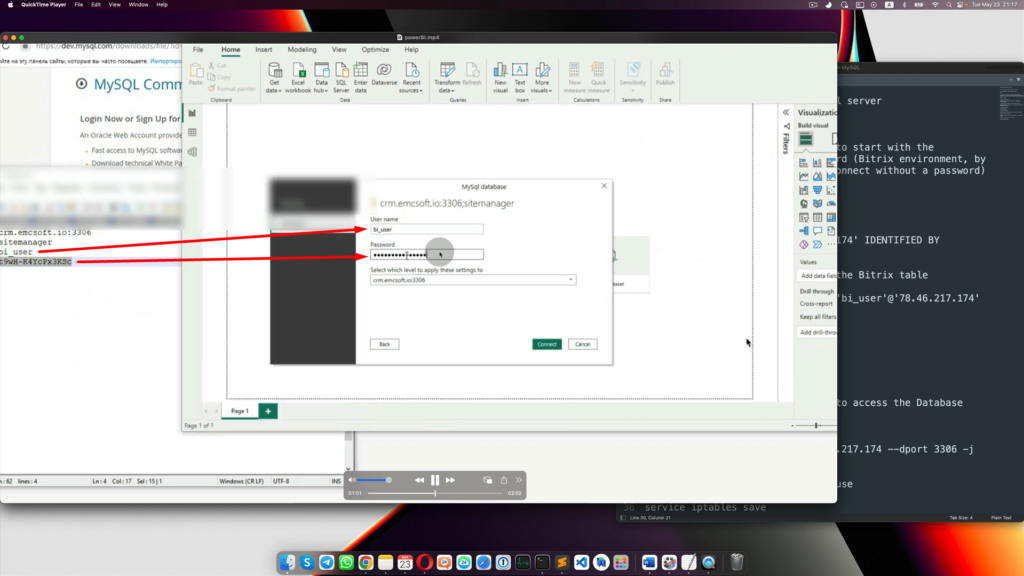
13. Put username and password, then click “Connect”.
14. Select a table with “Lead” and then load them to the POWER BI.
15. Now you can start creating graphs and tables.
“You can also watch this video on Youtube.”