| 2727 Views | Amin

A customer relationship management system like Bitrix24 undoubtedly helps you manage every interaction you have with your customers. In essence, Bitrix24 equips you to deliver the best services without jeopardizing your business’s convenience.
From lead generation to deal closing and sales forecasts, Bitrix24 also helps you streamline your sales funnel for increased revenue and profits. And when it comes to automating your marketing processes, you can leverage Bitrix24 by personalizing your campaigns and marketing strategies on the platform.
In this tutorial, we’ll show you how we developed a process by which you, our client, can automatically select your goods’ prices based on the number of items and their previous prices.
Product price automation on Bitrix24 benefits your business in the following ways:
Consistent Customer Service
We know that inflation and economic factors can sometimes affect your goods’ prices. But your customers cannot enjoy your services if they keep encountering price fluctuations whenever they transact with you. Hence, an automated CRM-price-selection can become handy in ensuring that your transactions are consistent.
Eliminates Manual Entry Stress
Sales would not be exactly convenient for you and your employees if, at every instance, you have to manually enter each item’s price. This development on the Bitrix24 system, done by EMCsoft, helps you automate your sales funnel to make your business processes less stressful.
Increases Productivity
This Bitrix24 development helps to enhance productivity in your business. The time spent entering each price manually can be utilized to improve other aspects of your business for greater productivity.
Eliminates Error
Most certainly, an automatic selection of price eliminates the errors and omissions associated with manual entry.
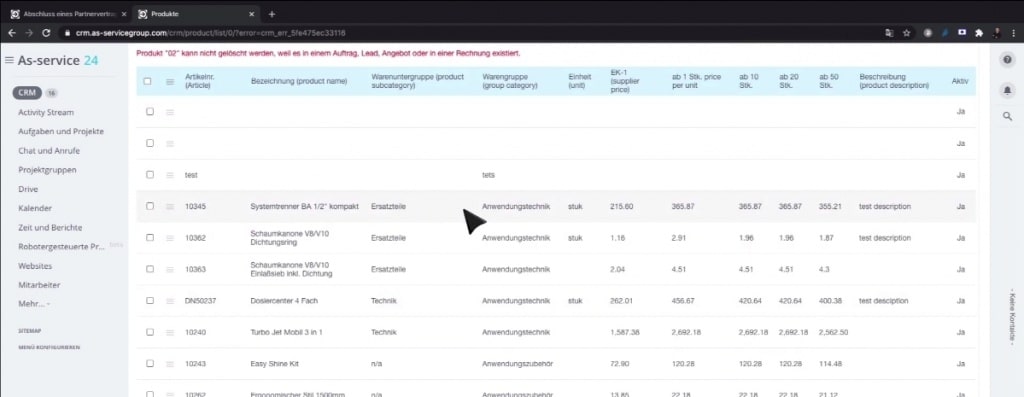
Steps how it works
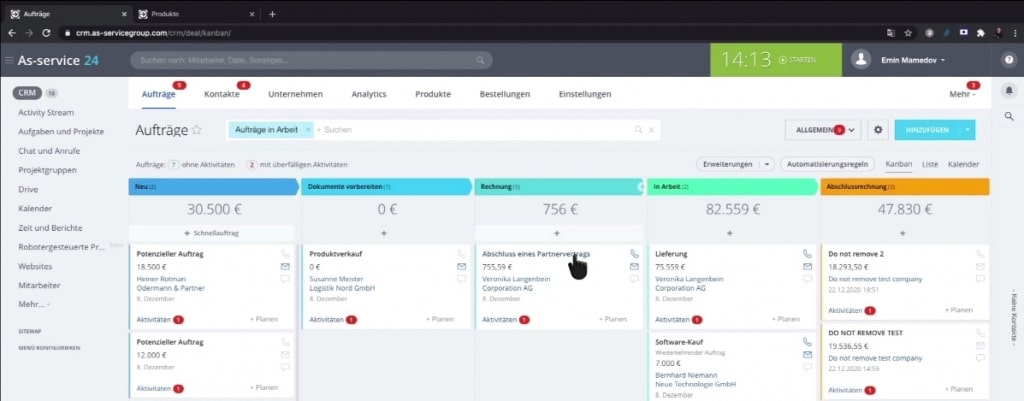
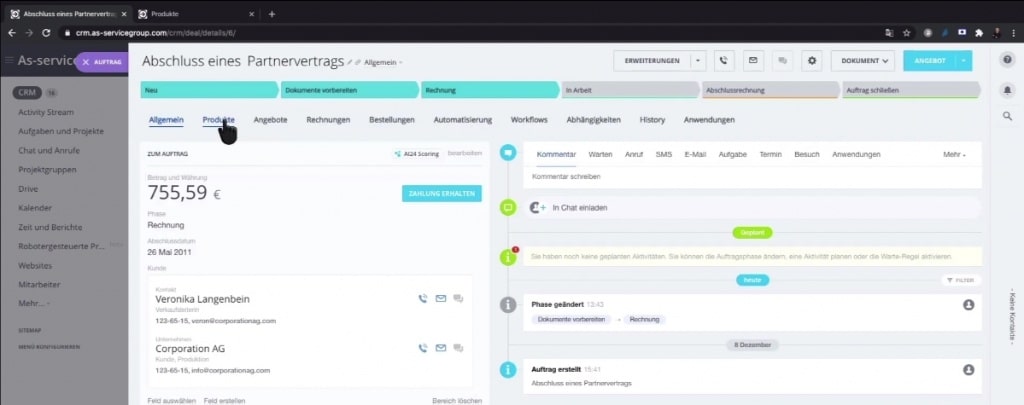
1. First, we navigate to an existing deal on the Bitrix24 interface.
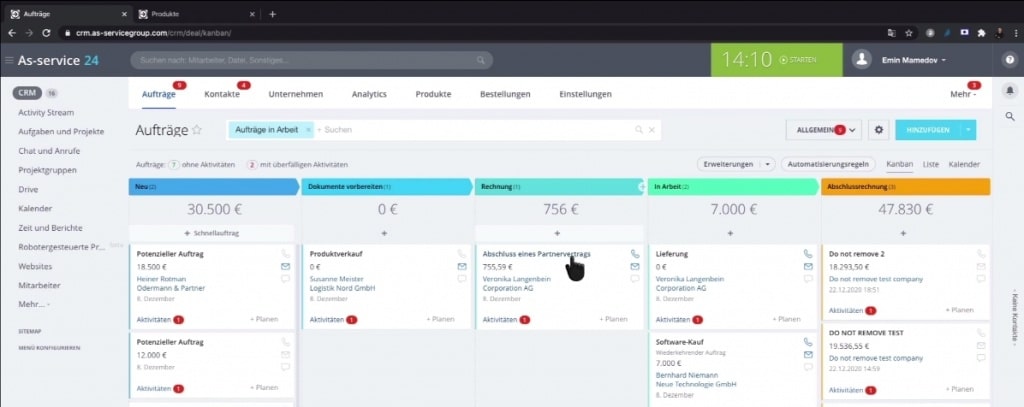
2. Next, we select products for that specific deal.
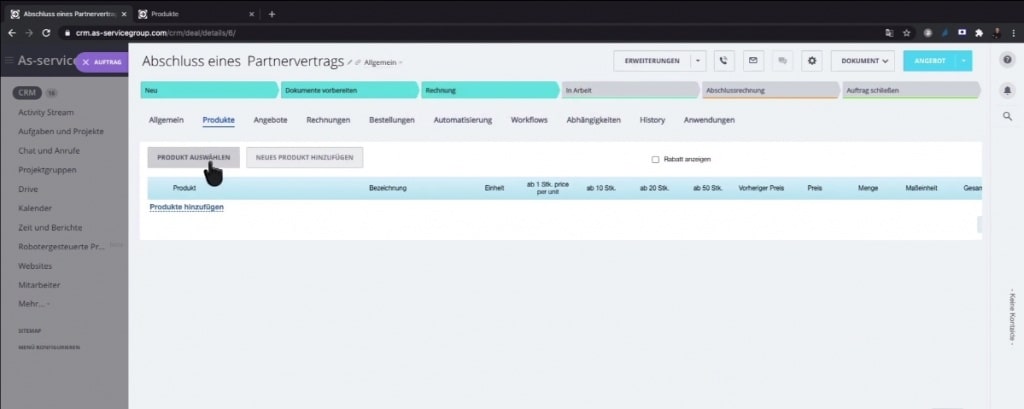
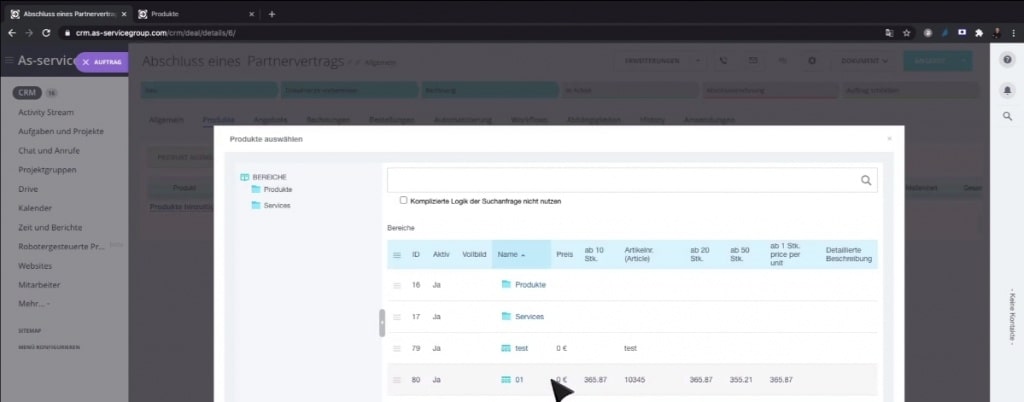
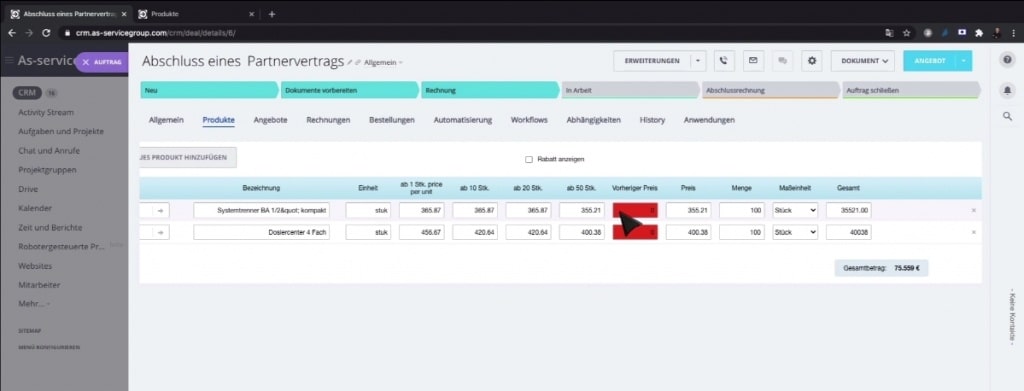
3. You can now see the details and prices of each product. Our clients can change these prices based on the number of items selected.
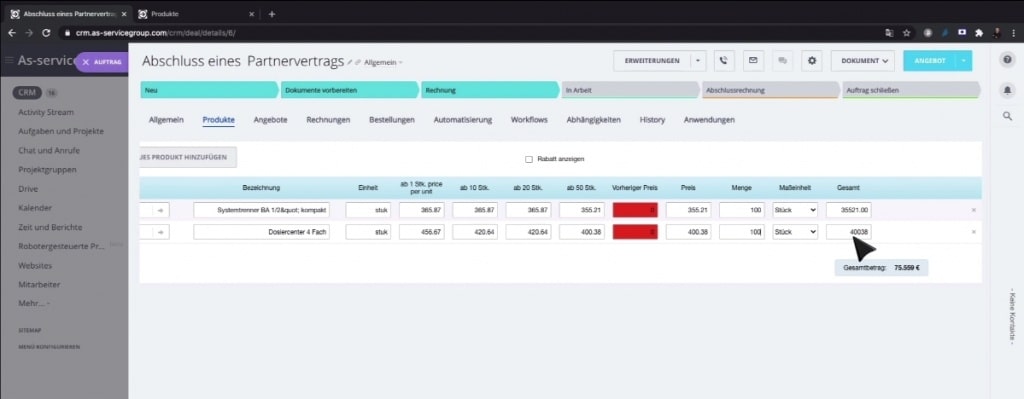
4. For this development, we want our clients to see the previous prices for a particular transaction. These prices should reflect in the columns highlighted in red.
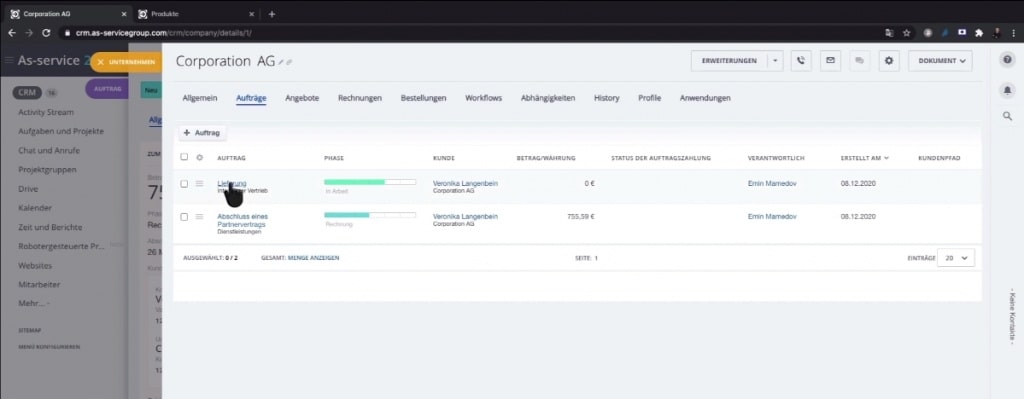
5. We may check how previous price selected to products in Deal. Navigate back to products and then select the assigned company.
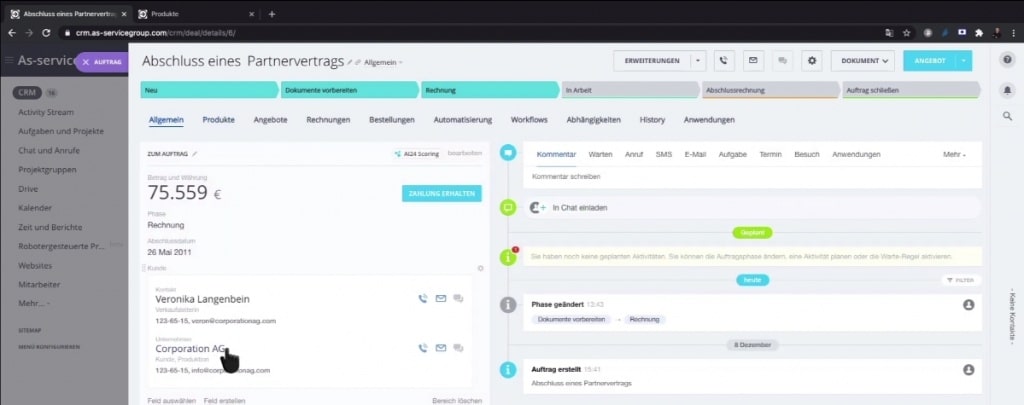
6. Next, we navigate to the ‘deals’ for that company and select the current deal.
7. Under the current deal, we select products and insert items quantities before saving the products. For this tutorial, we have two products and 100 of each.

8. Now, we need to ensure that this client of ours does new transactions with their customers using the same price as their previous deals. So, we go back to our deals page and refresh its content. We open the same ‘deal’ after refreshing the page, and we go back to the company to cross-check the previous input.
9. Afterward, we go back to the ‘Product’ menu of the deal and delete the existing product details.
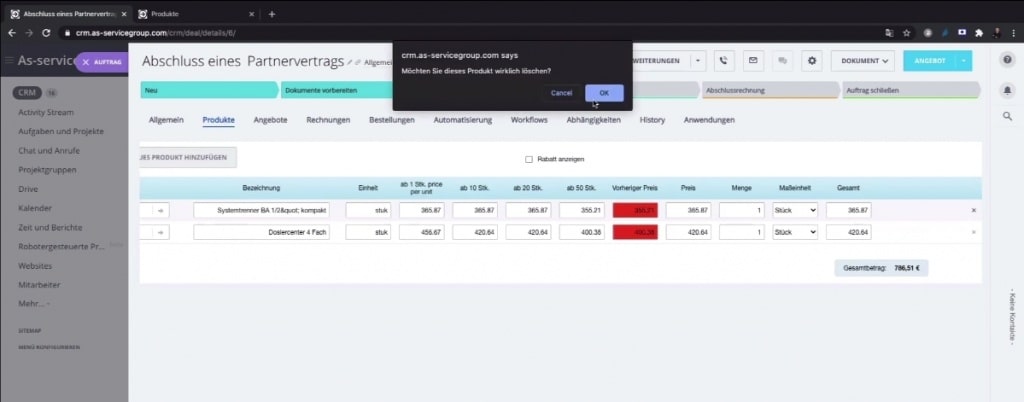
10. Still on the same page, we now ‘select products’ by importing the same products we selected in number 7.
11. We now see that the prices used for the deal in number 7 now appear in the columns highlighted in red. This price is the previous price used by our client for that particular deal.
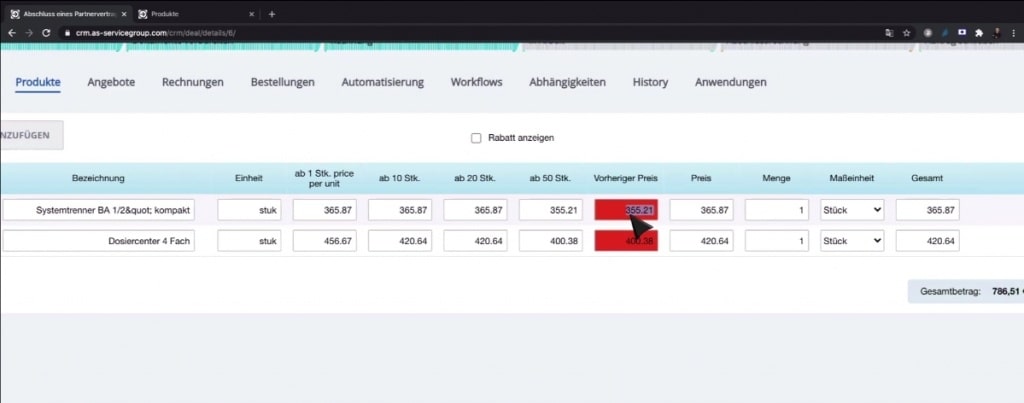
12. Our client can decide to change their current price to the price in the red columns. Doing this will eliminate the highlighting as both current and previous price will be the same.
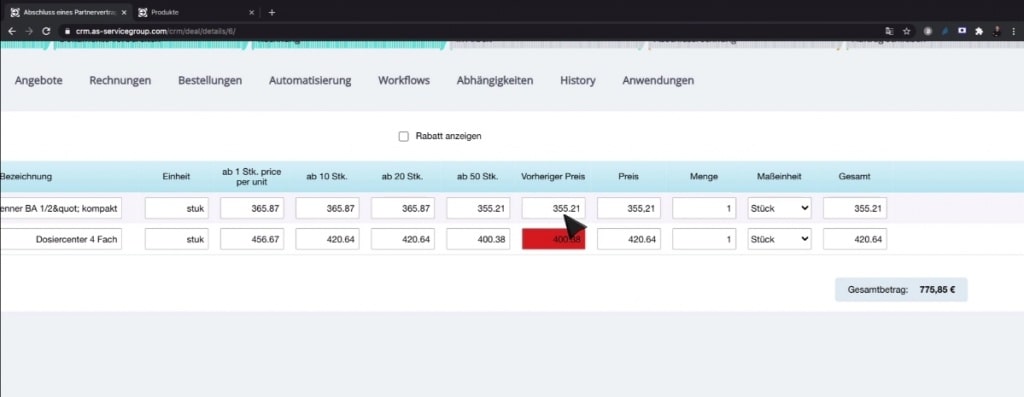
13. Our clients can then decide to sell items based on their numbers that are stored in the product sections.
14. They can also see the previous price of each item and then change prices manually.
You can also watch the video below about that development