| 4582 Views | Amin

Bitrix24 and sales channels
Bitrix24 is a client management solution that provides a platform for businesses to organize and track interactions with potential or existing clients and partners. Its core functionality is dedicated to customer relationship management.
Therefore, Bitrix24 should be configured to reach desired efficiency in marketing and sales. That’s why we are observing various sales channels and its peculiarities within Bitrix24.
We have studied email marketing from various situations. In this article we evaluated efficiency of email campaign on a real example. Also, we learned how to design emails, choose audience segments and analyze statistics. Here we observed how to link business mailbox with Bitrix24 through IMAP to do correspondence from one place with no additional switching.
Bitrix24 on premise and its limitations
There are quite a lot of requests from Bitrix users who face problems with sending emails. Some of them are connected with local server limitations. For example, Yandex and Google have a default sending limit of 500 emails per day. If there are several recipients in the letter, each of them is considered as a separate letter. This daily limit is subject to changes based on their own user integrity calculation algorithms.
In this article we will handle another reason. Self-hosted Bitrix24 users struggle to send any emails after connecting mailboxes with Bitrix24 through IMAP or other services such as Gmail, Outlook, Office 365 and so on. This situation occurs because on premise version doesn’t provide relevant configuration and should be performed using local server.
On the contrary, cloud Bitrix doesn’t have such problems because Bitrix provides external SMPT using its own servers.
By the way, to send emails via SMTP in Bitrix24 self-hosted version, be sure that server supports SSL. The SSL certificate needs to be valid and self-signed certificates are not applicable. In this article we gave a tutorial for SSL certificate installation.
Configuring the ability to send mail
It is obvious that almost any sales manager should be able to both receive and send emails to properly communicate with potential and existing clients. For example, when potential clients answer back to the new email campaign.
Any user can send emails using the SMTP server. There are various ways to do that.
Below we provide ready-to-use instructions using which you will be able to extend self-hosted Bitrix24 configurations by yourself. To perform these operations, you don’t need to have an advanced coding skill.
After configuring the SMTP server, the messages will be sent through the servers of the specified SMTP service. Here it is important to remember the following:
- The SMTP server settings are available to any user;
- SMTP servers often have their own limits and restrict mass mailing, or can even block your account if these limits are exceeded;
- Official Bitrix24 helpdesk recommend not to use # and ^ symbols in passwords, as it may cause problems with outgoing mail when using some SMTP-services.
So, let’s see what exactly should be configured in order to start sending emails in self-hosted Bitrix24.
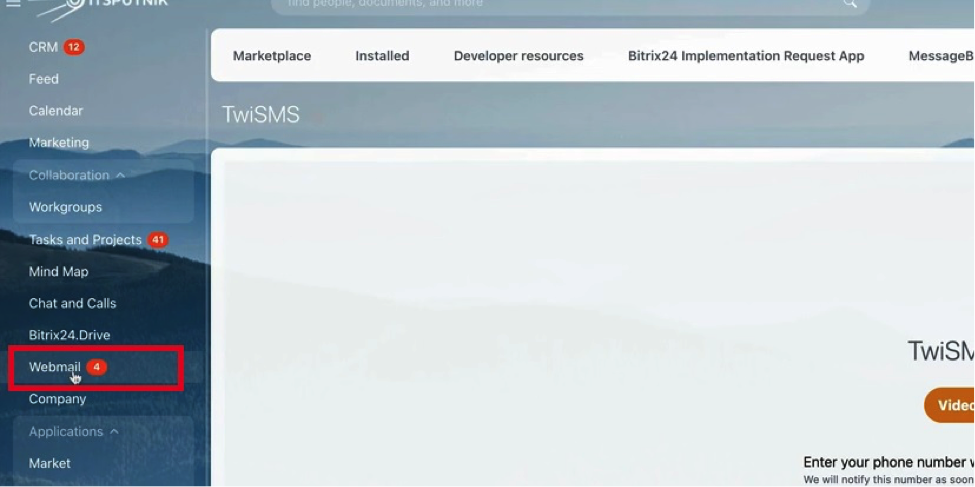
1. When we are configuring mail agents in Bitrix24, we go to Webmail.
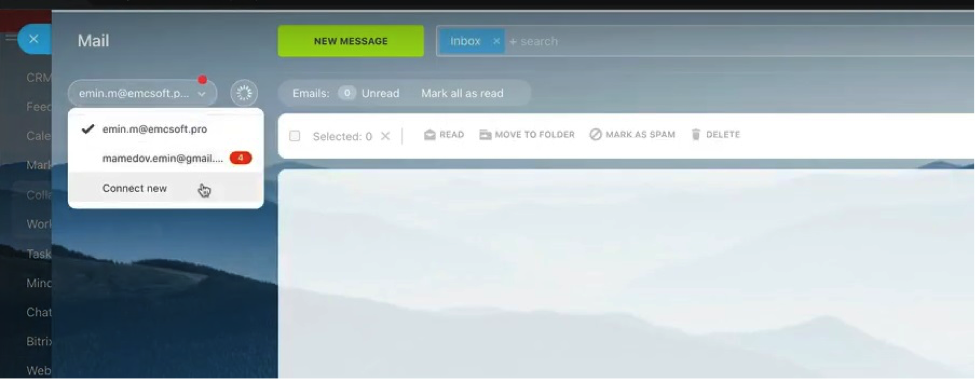
2. There you can click to Connect new mail.
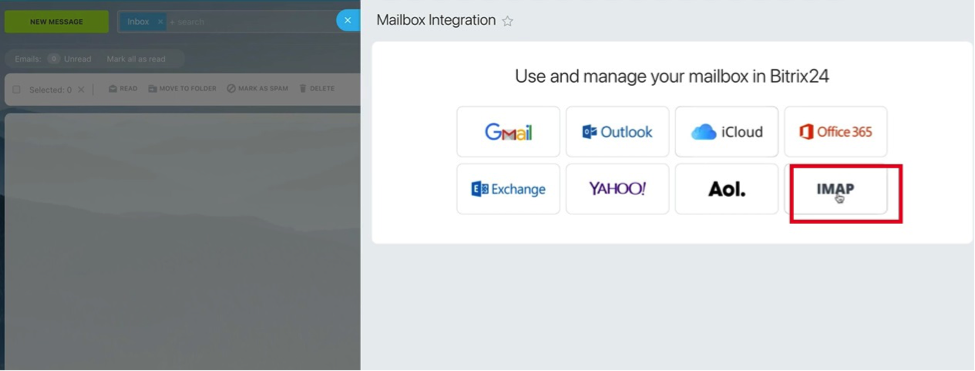
3. There are various mailboxes to integrate with Bitrix24, including Gmail, Outlook, iCloud, Office365 and so on. However, after you choose an option and start using mailbox, sometimes you will find out that there is no ability to send emails.
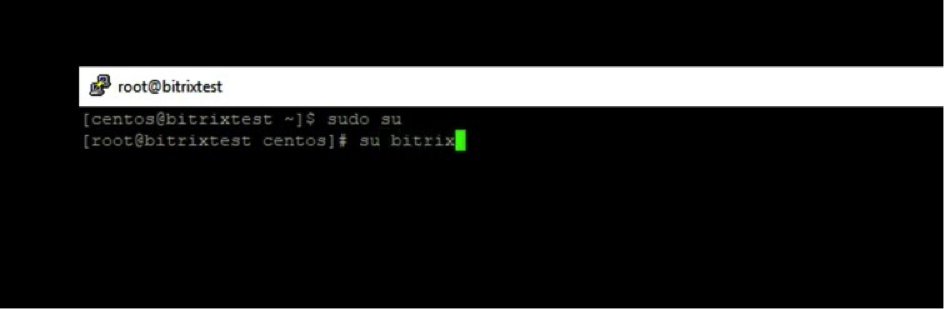
4. So, to do additional configuration, go to your server where you did an installation of self-hosted Bitrix. We are using CentOS platform and our admin will perform operations there.

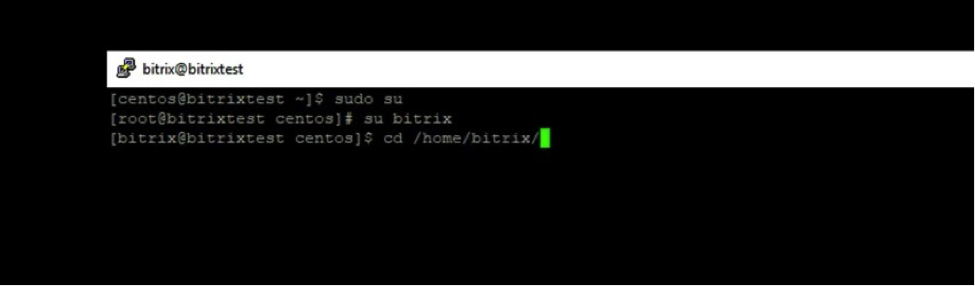
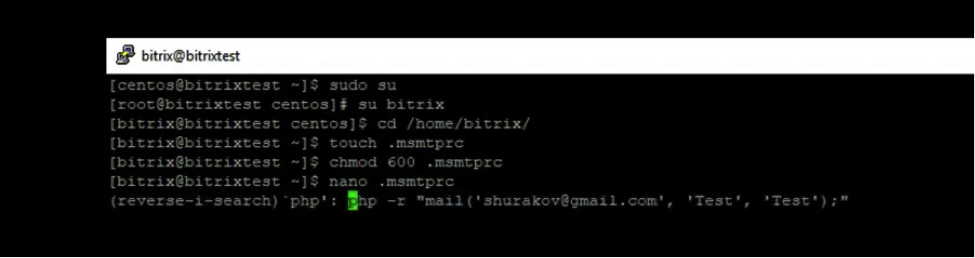
5. Log in as a super user.
6. Then you need to change directory to home/Bitrixcd/home/bitrix
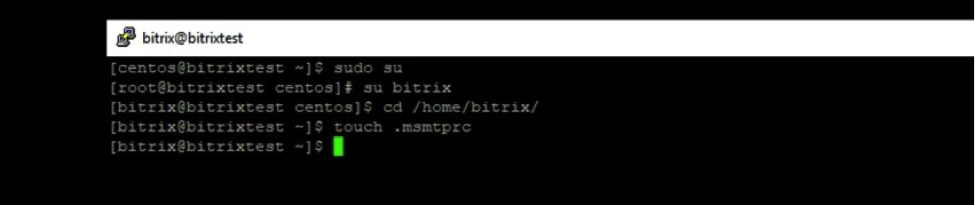
7. Then create a .msmtprc file
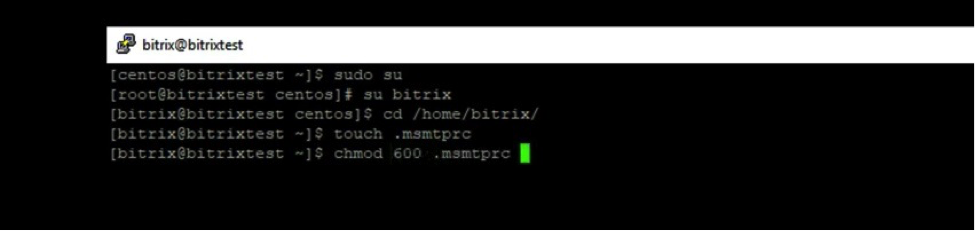
8. Then you need to give full permissions to that file.
9. Then you will need to open that file in text editor.

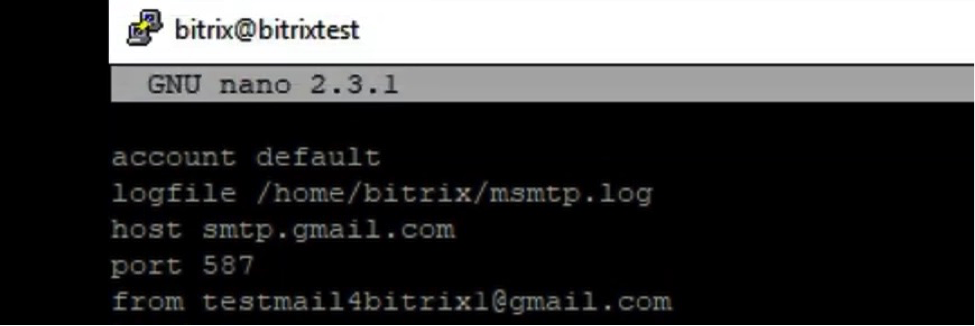
10. Here, you need to enter the following information step-by-step. First of all, determine account as default. Default is used as standard for all websites. After that locate msmtp.log. Using this log you will be able to check and find out why certain email was not sent.
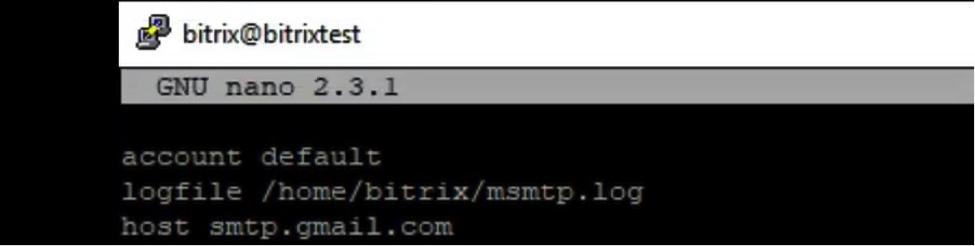
11. Then connect SMPT with mail agent, in our case its Gmail. If you have another mailbox, you need to put relevant host. Specify the port used to connect to the mail server. After that nominate one email address which will be used for all outgoing emails.
12. Then specify the full name of the mailbox from which the sending will be performed and enter the password for the mailbox.
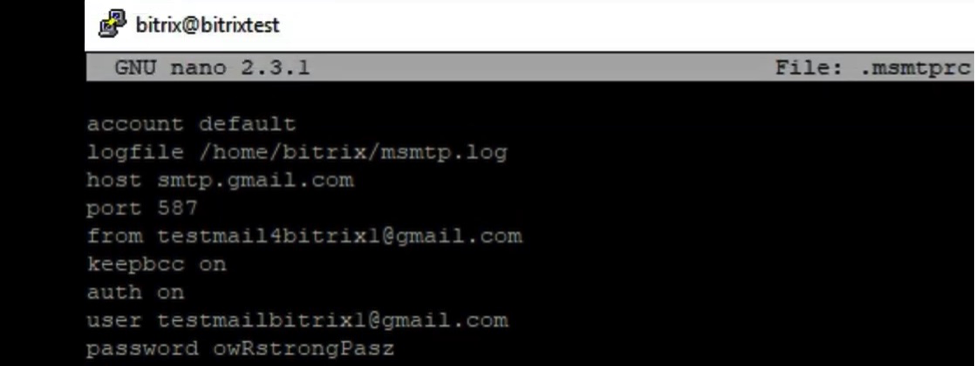
13. Then add the following settings:tls, ontls_starttls, ontls_certcheck, offkeepbcc on

14. That’s it, you did all the settings. Save the file and you can test outgoing emails via PHP as our admin did.
That was a quick and uncomplicated tutorial of how to: Set up outgoing emails for self-hosted Bitrix24.
Thanks to these steps you will be able to send emails right from your Bitrix24. We remind that these steps are required only for self-hosted Bitrix. Cloud version has these settings done already.
If you want to avoid such pitfalls in Bitrix24, you can handle these details to service companies. We in EMCsoft have gained extensive experience in Bitrix24 configuration and integration with various external services.
You can send us inquiries regarding your projects via this contact form.
You can also watch this video on Youtube.