| 4262 Views | Amin

The day-to-day interactions you have with your customers and employees are crucial to the survival of your business. And there is no better way to record these interactions other than adequate documentation.
Creating document files for each transaction (either inquiry or sales) you have with your customers can be a huge task to complete. But when you allow us to integrate your document generator with Bitrix24, work will be a lot easier for you and your employees. Furthermore, you also get to enjoy the following advantages:
You save resources
When we integrate your document generation system with CRM software like Bitrix24, you save many of your company’s resources. First, you won’t have to spend so much time searching for documents on different systems while a customer awaits your service.
Also, you can easily edit and share documents whenever necessary. You’ll save yourself the time and energy required to move documents from your document manager to your employees and customers.
Automated Operations
With a document creator-CRM system, your business interactions will be automated and streamlined. You won’t have to go through the stress of inputting new data whenever you have to raise an invoice or send a memo to your customers or employees.
No Replication of Files
When your files are generated and stored on different platforms, the chances are that you will duplicate a file on more than one platform. But by integrating your document generator with Bitrix24, every customer or sales data logged in from one employee will be automatically available for use on the central server.
Improved Business Efficiency
Similar to integrating Bitrix24 with G-Suite and your business’s inventory management and ticketing systems, creating your documents on Bitrix24 improve your business’s efficiency. First, your interactions with your customers will be more productive and less time-consuming because you’ll have access to all their information from one place. This access can be beneficial for sales and lead improvement.
Faster Creation of Documents
Just as we’d show you in this tutorial, integrating your document management system with Bitrix24 makes document creation easier. The need to manually enter data will be eliminated, as items like company name, address, product, and pricing will already be captured in the Bitrix24 system.
Instructions How to Create Standard Document on Bitrix24
The steps below show how we generate standard documents from Bitrix24:
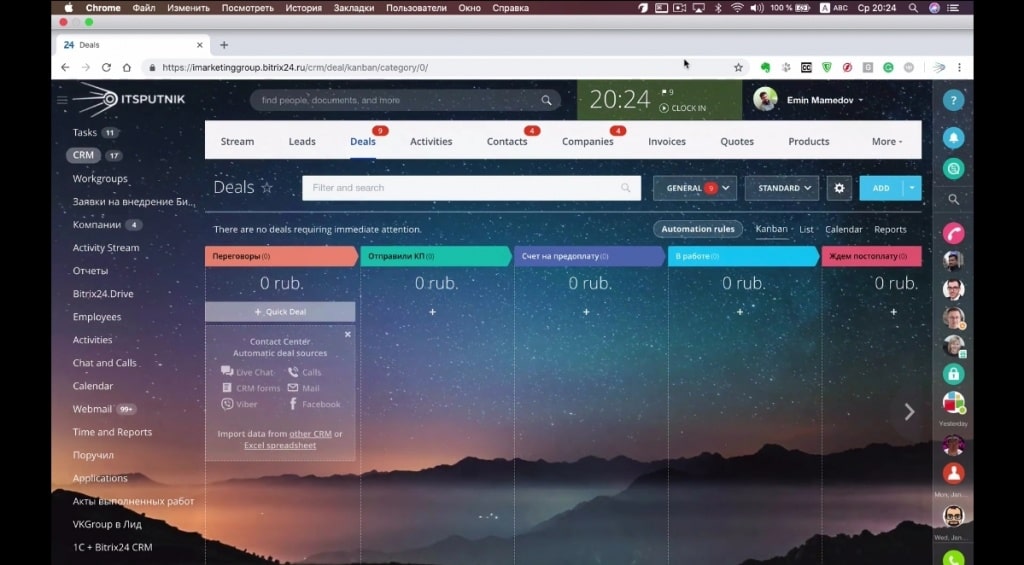
1. First, we navigate to ‘Deals’ on the Bitrix24 Homepage and create a new deal.
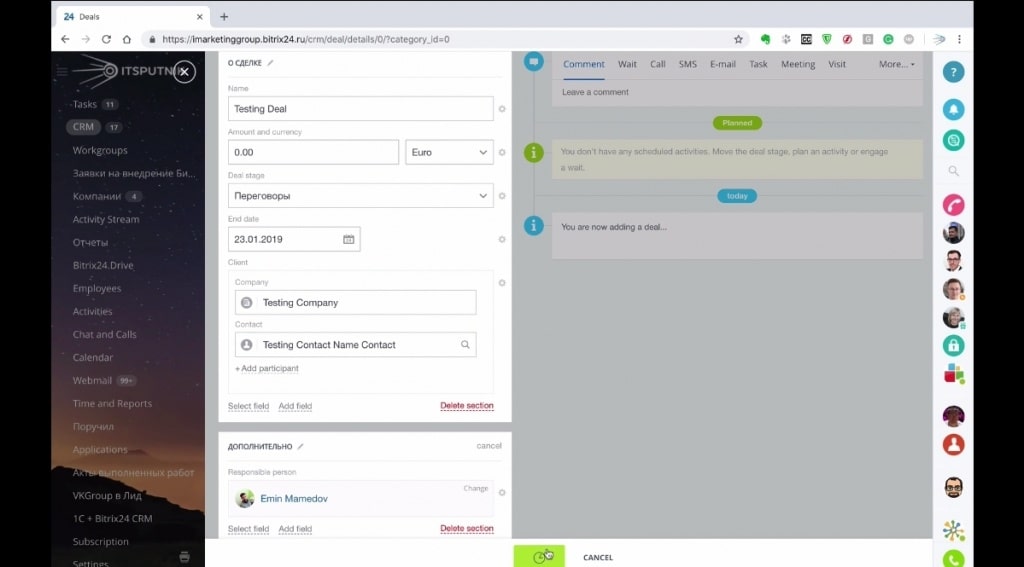
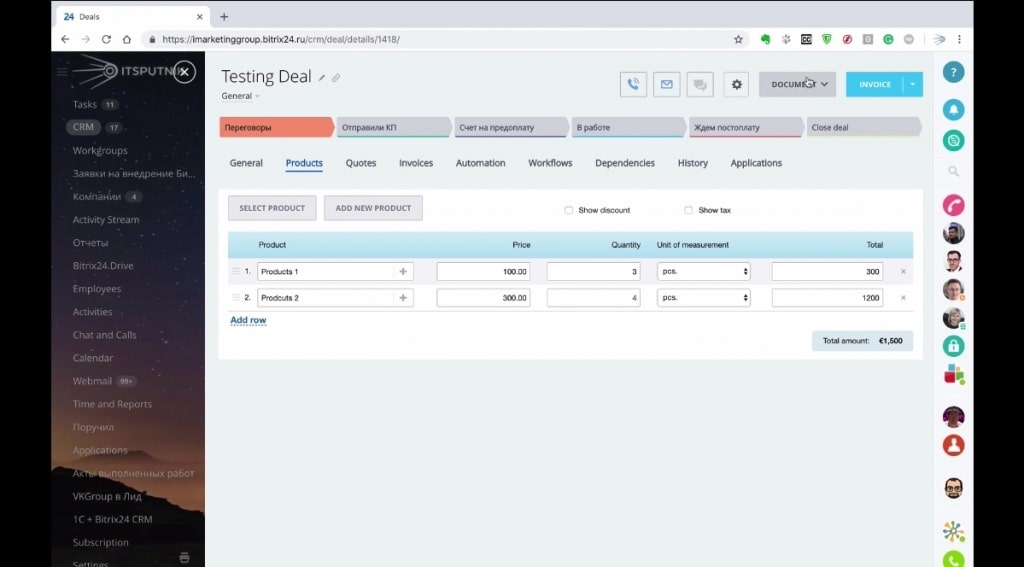
2. For this tutorial, we select the company name as ‘Testing Company’ before completing other necessary information.
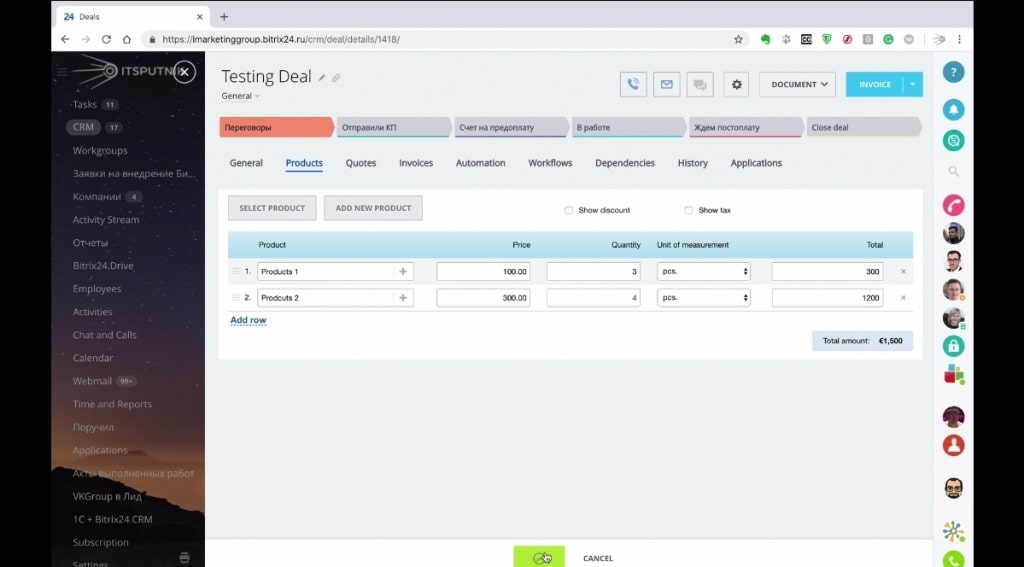
3. Next, we enter the products, their prices, and quantity. The system automatically inputs the sum for each product.
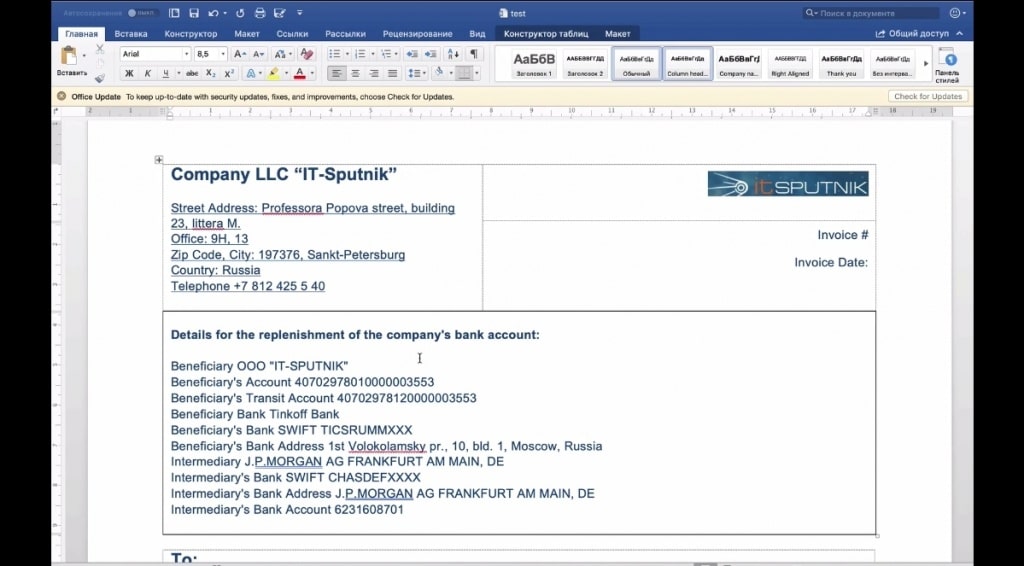
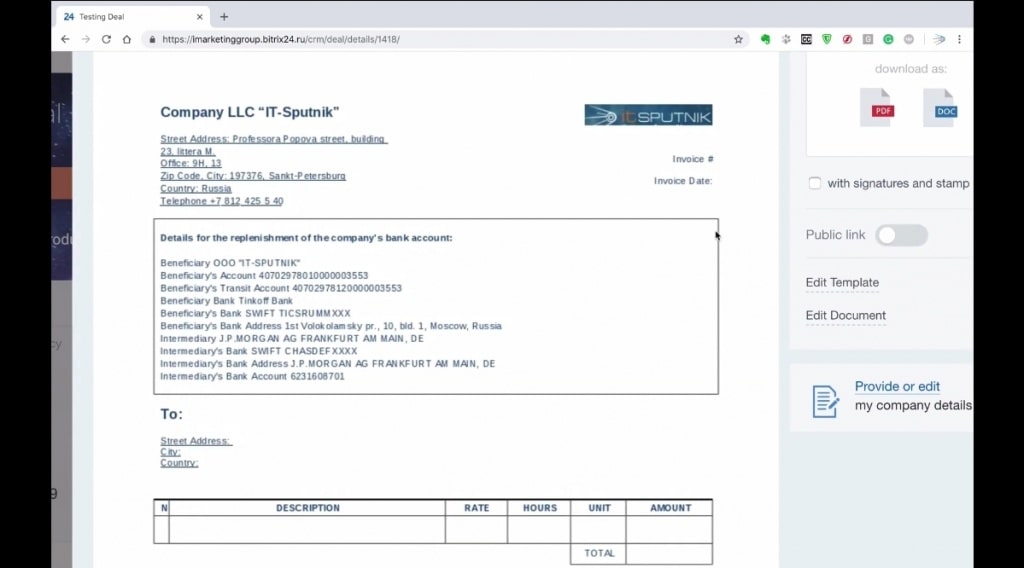
4. To generate an invoice on Bitrix24 that follows the template on our Microsoft Word document management system, we need to download it on Bitrix24.
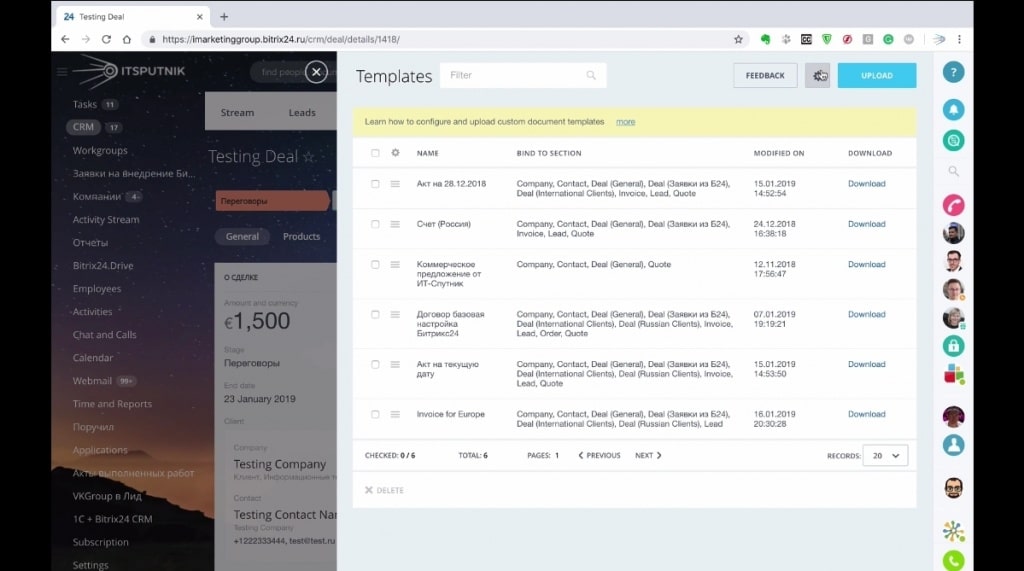
5. On the ‘Products’ page of Bitrix24, we navigate to ‘Document’ on the page’s upper right.
6. From the ‘Document’ dropdown menu, we select ‘Add new template’ and then ‘Upload’ on the ‘Template’ page’s upper right.

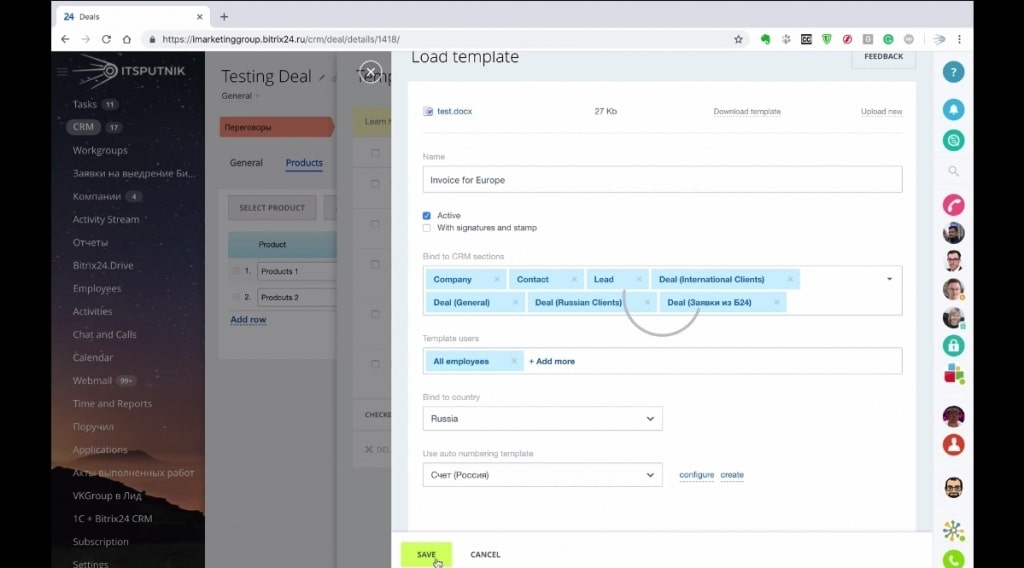
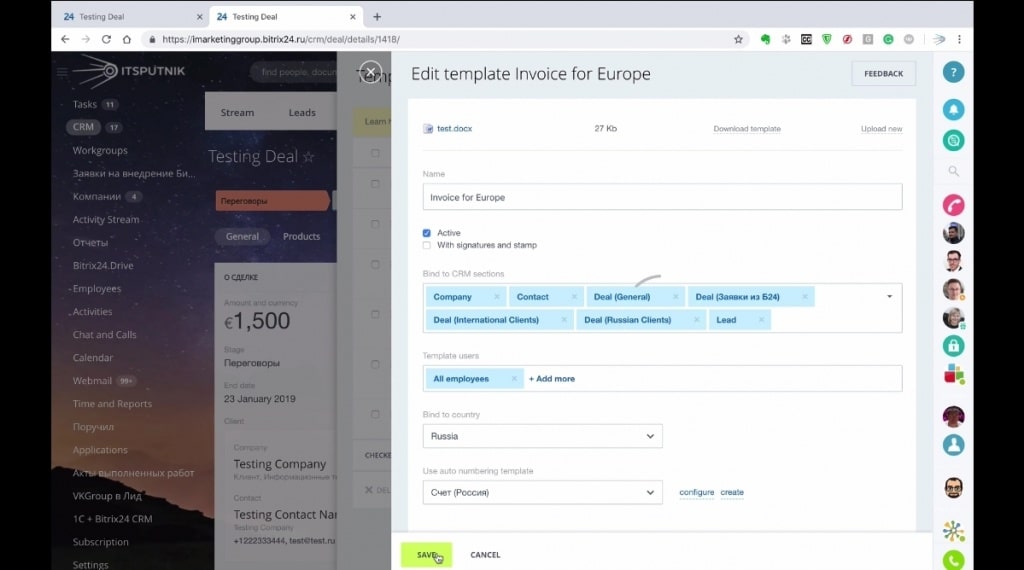
7. We then upload ‘test docx’ from our computer onto the Bitrix24 system.

8. Next, we name the template ‘Invoice for Europe’ for easy navigation. We also unselect ‘signature and stamp’ and then bind the document into ‘Company,’ ‘Contact,’ and all ‘Deal’ sections of Bitrix24 CRM. For Country, we choose Russia and invoice for ‘auto numbering’ before saving the template.
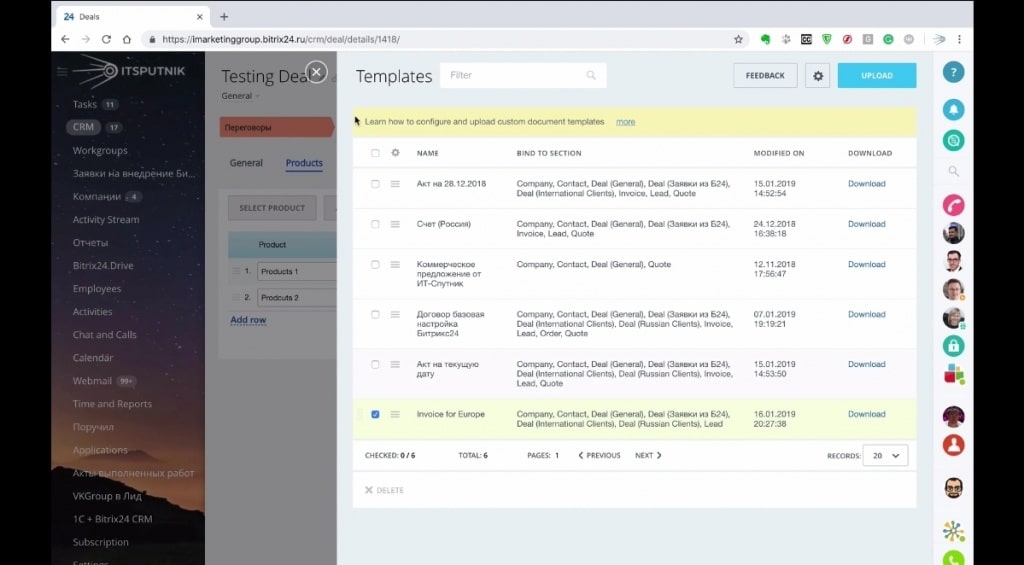
9. The saved template now appears under our ‘Template’ page. Next, we save and refresh the website by clicking on Ctrl R
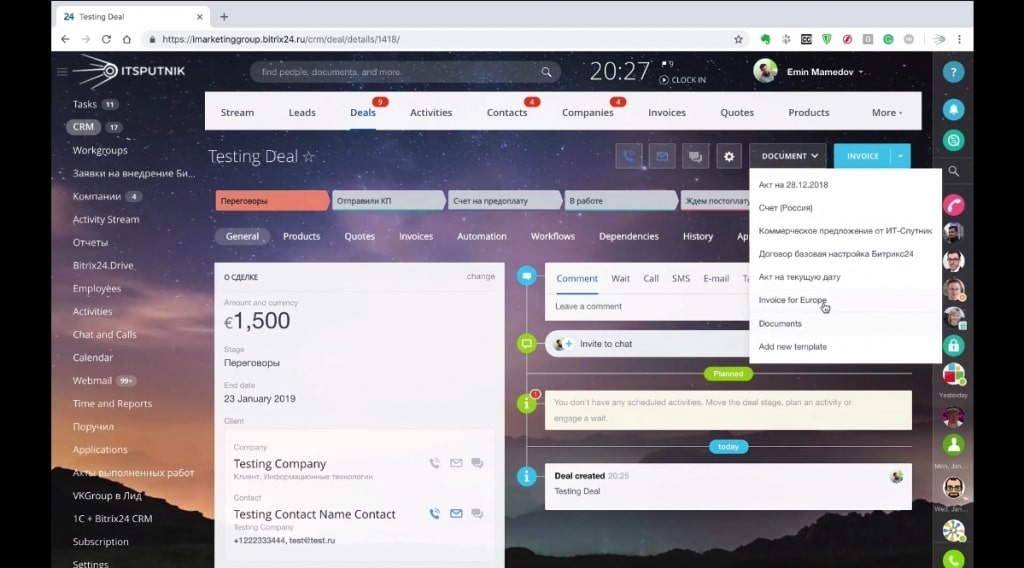
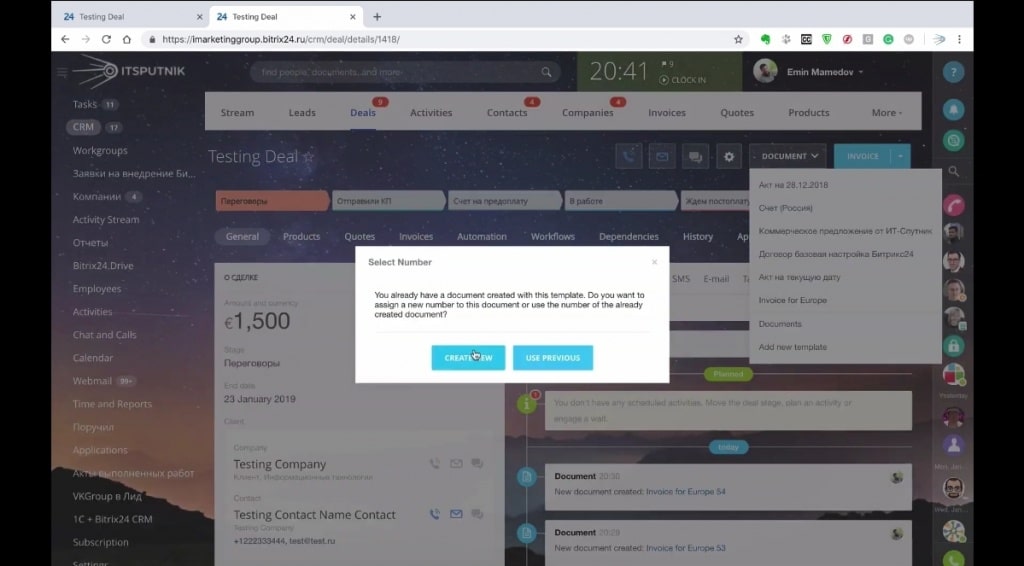
10. After refreshing the web page, we navigate ‘Document’ under ‘Deals,’ and then select ‘Invoice for Europe’ from the dropdown menu.
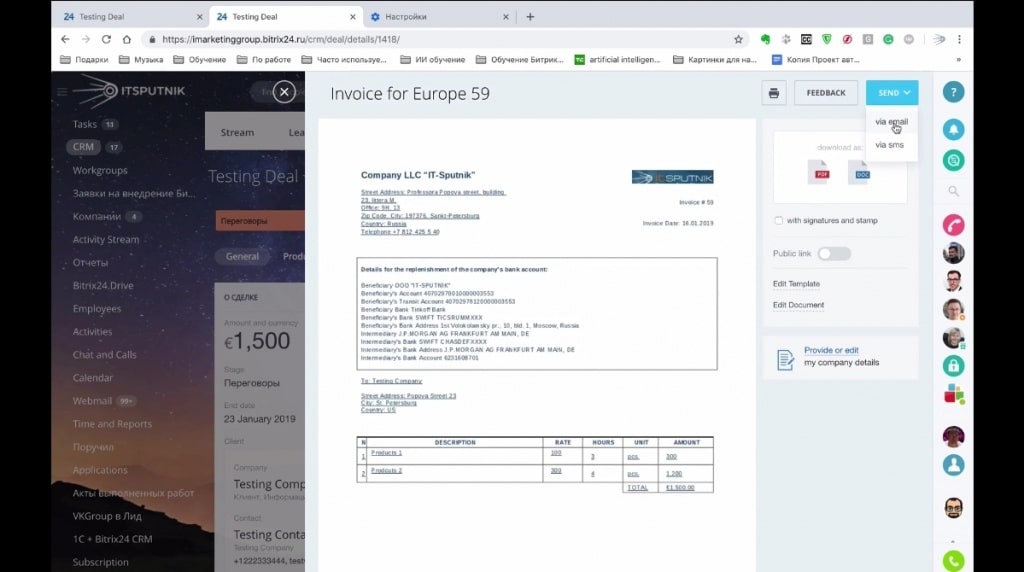
11. We should now see the invoice template as it is on the Microsoft document manager. Now, we need to extract the specific details of the invoice from our CRM system. These details are invoice number, date, recipient contact details, and product information.
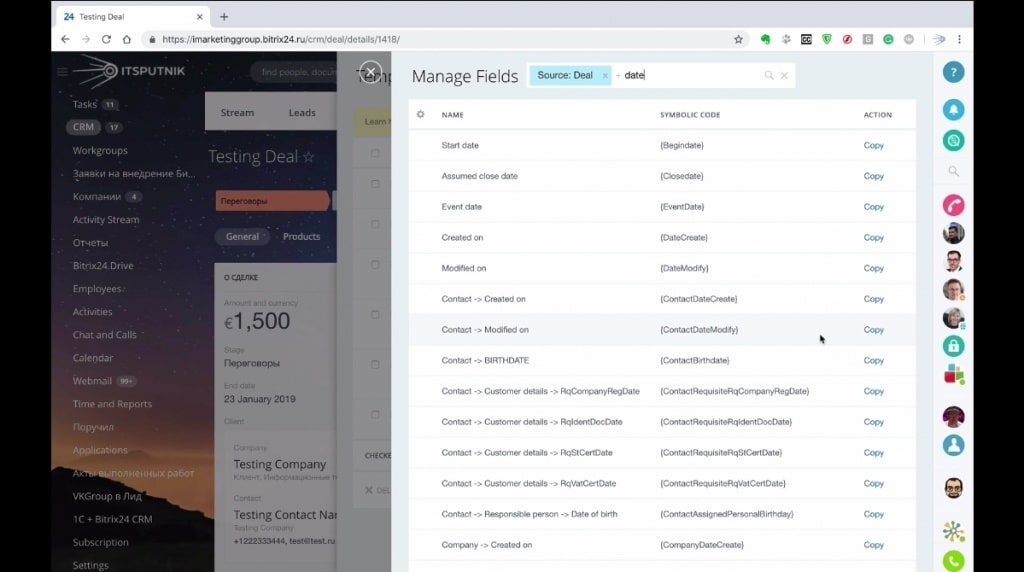
12. For the extraction, we go back to the Bitrix24 ‘Deals’ page, select ‘Document’ and ‘Add new template’ from the dropdown menu. From the ‘Template’ page, we click on the setting icon by the page’s top right. From the dropdown on the settings icon, we select ‘field’ to extract invoice details to publish on the template.
13. For the ‘invoice number,’ we search for ‘number’ from the space above the manage field page. We then copy {DocumentNumber} from the ‘SYMBOLIC CODE’ column and paste it on the template in our Microsoft Word document creator.

14. For date, we search for ‘date,’ then copy and paste {DateCreate} from our Bitrix24 deals to MS Word.
15. Copy
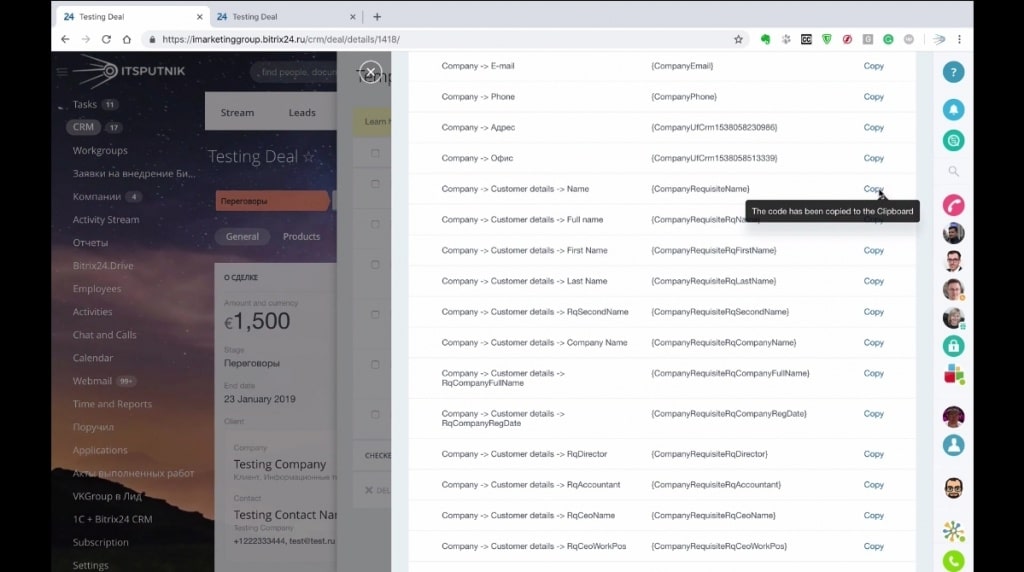
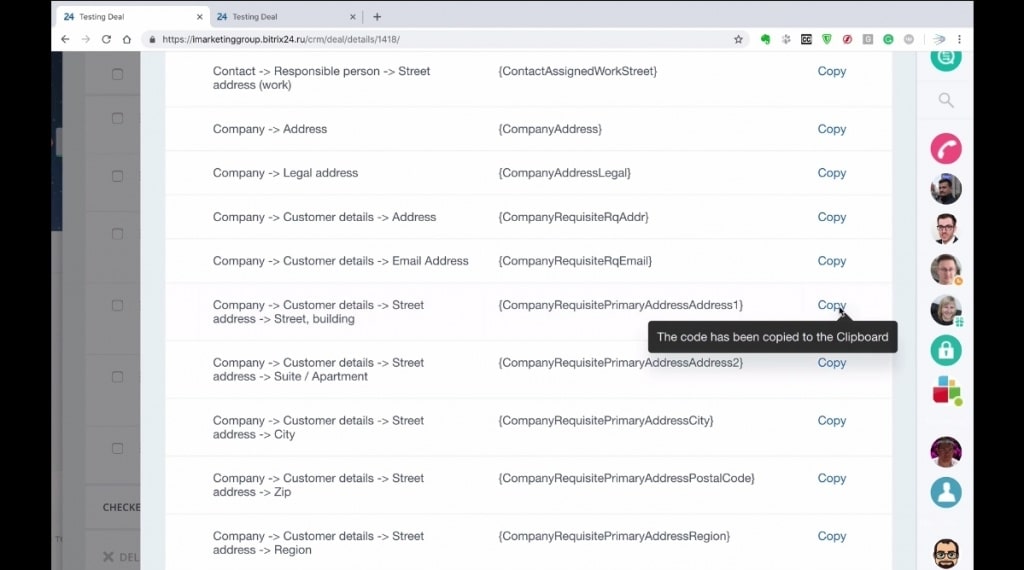
16. For ‘Street Address’, we type ‘Address’, and copy and paste {CompanyRequisitePrimaryAddressAddress1} onto the document editor.
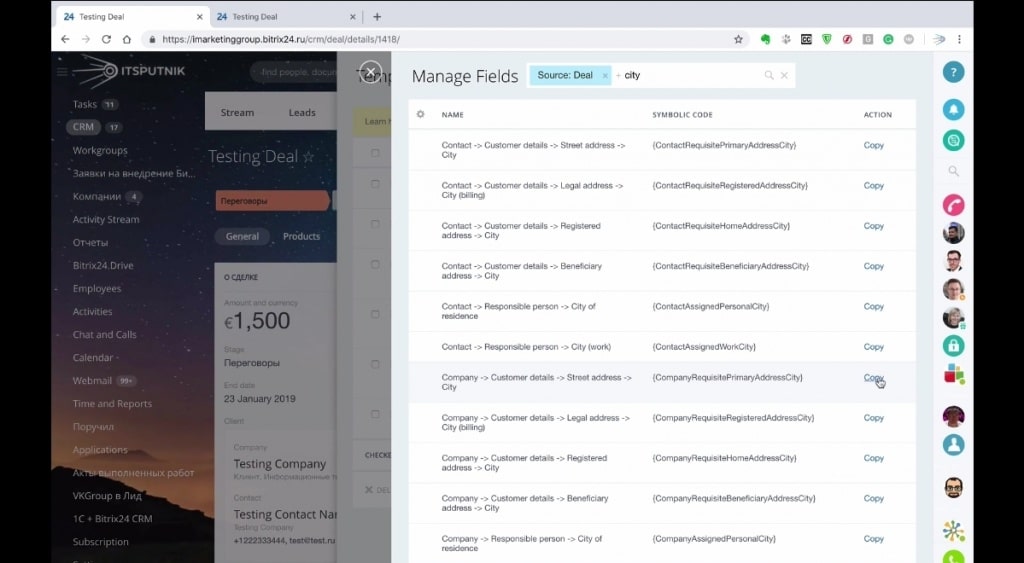
17. For City, we search for ‘City’, and paste {CompanyRequisitePrimaryAddressCity}, on the MS Word editor.
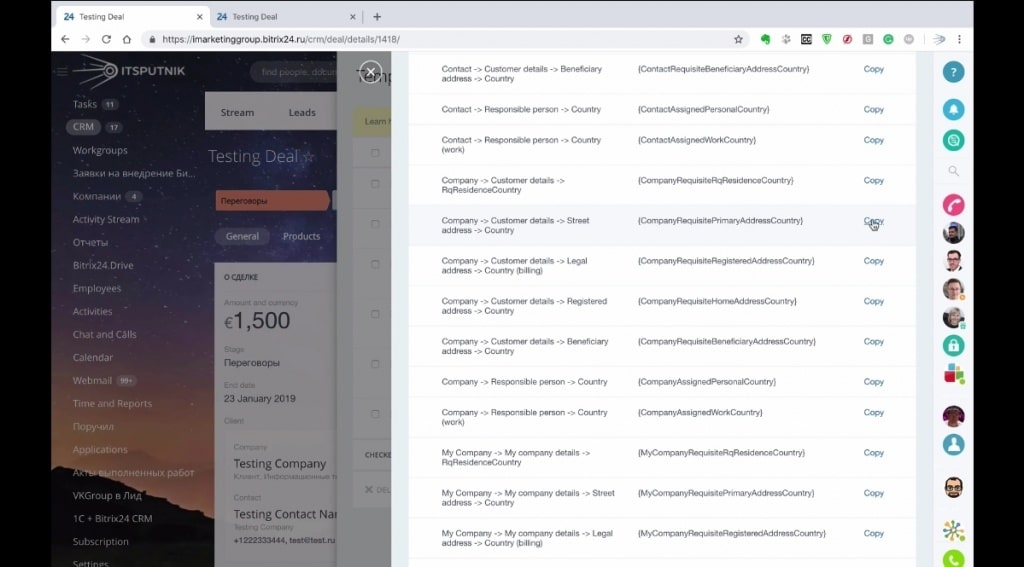
18. For Country, we repeat the same procedure and paste {CompanyRequisitePrimaryAddressCountry} to the template editor.
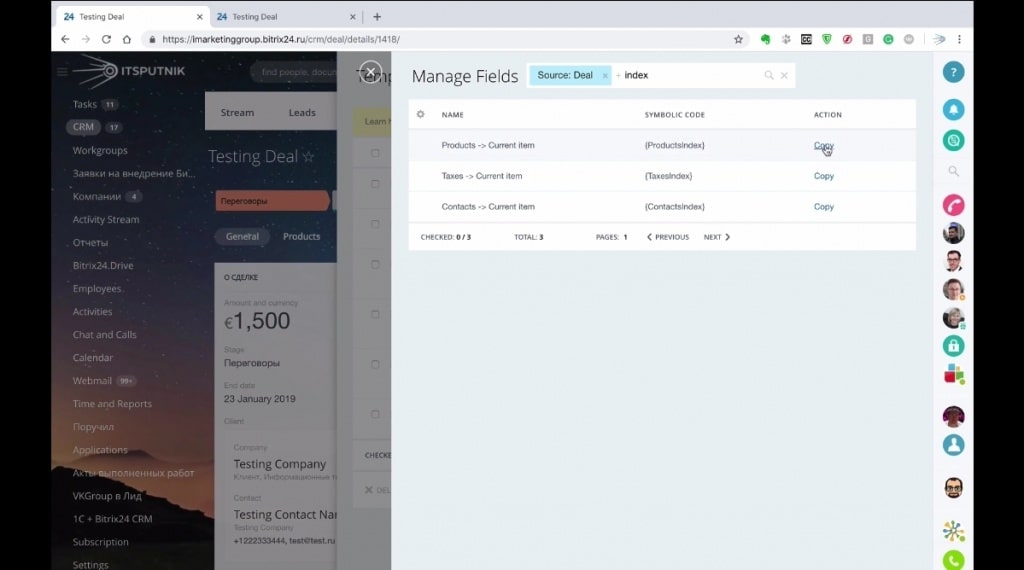
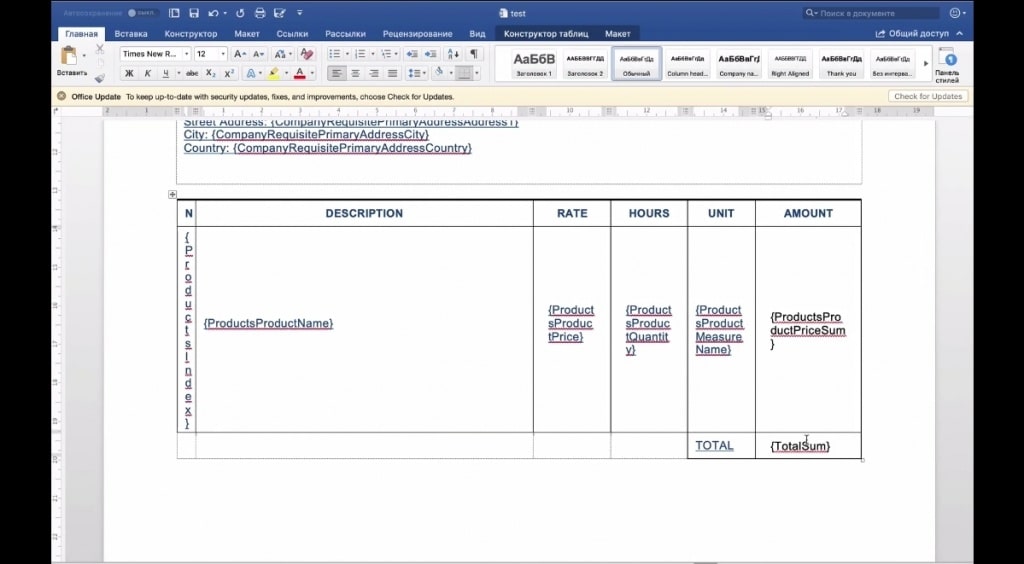
19. For the product section, we begin by searching the ‘Manage fields’ section for ‘Index’; and then pasting {ProductIndex} on the template.
20. For ‘Description’, we search for product and select {ProductsProductName}.
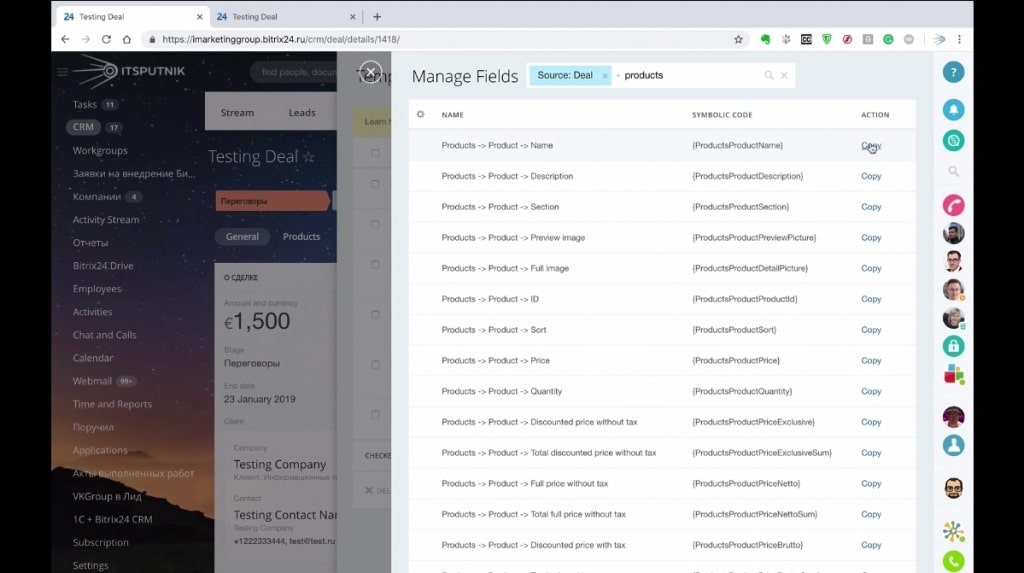
21. For ‘Rate’, we search for ‘Product’, and select {ProductsProductPrice}.
22. For ‘Hours’, we copy and paste {ProductsProductQuantity}.
23. For “Unit ‘, we copy and paste {ProductsProductMeasureName}.
24. For ‘Amount, we search for price and paste {ProductsProductPriceSum}.
25. Finally, for ‘Total’, we copy and paste {TotalSum}.
26. Next, we format the template on the document manager and upload it on Bitrix24.
27. To upload, we navigate back to ‘Template on Bitrix24, and then’ edit ‘Invoice for Europe.
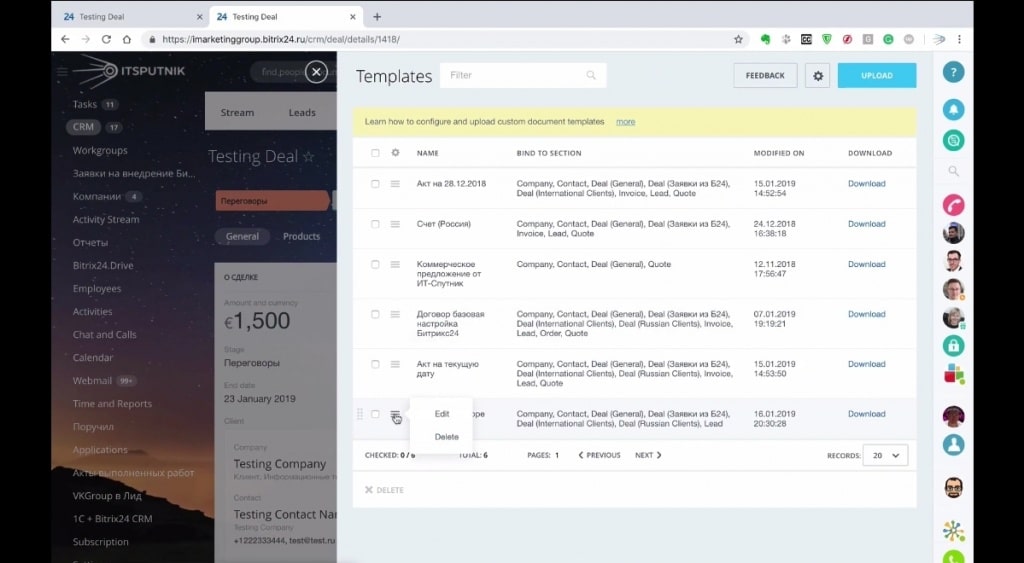
28. On the ‘Edit template’ page, we upload the template from our computer again and then save.
29. Finally, we refresh the BItrix24 webpage. Then, we open ‘Invoice for Europe’ from ‘Documents’ by clicking on ‘Create New’.
30. The full details of the document in the original template will now appear on Bitrix24.
We’re pretty sure that was easy enough! Give us a call if you have any projects you’d have us run for you. You can also watch the video below about how you may create document in Bitrix24.