| 1959 Views | Amin

Getting Started
If you’re new to TwiSMS, it’s important to note that most installation challenges stem from the setup of Twilio itself. We’ll address these issues step by step, starting with your Twilio account.
1. Trial Account Upgrade
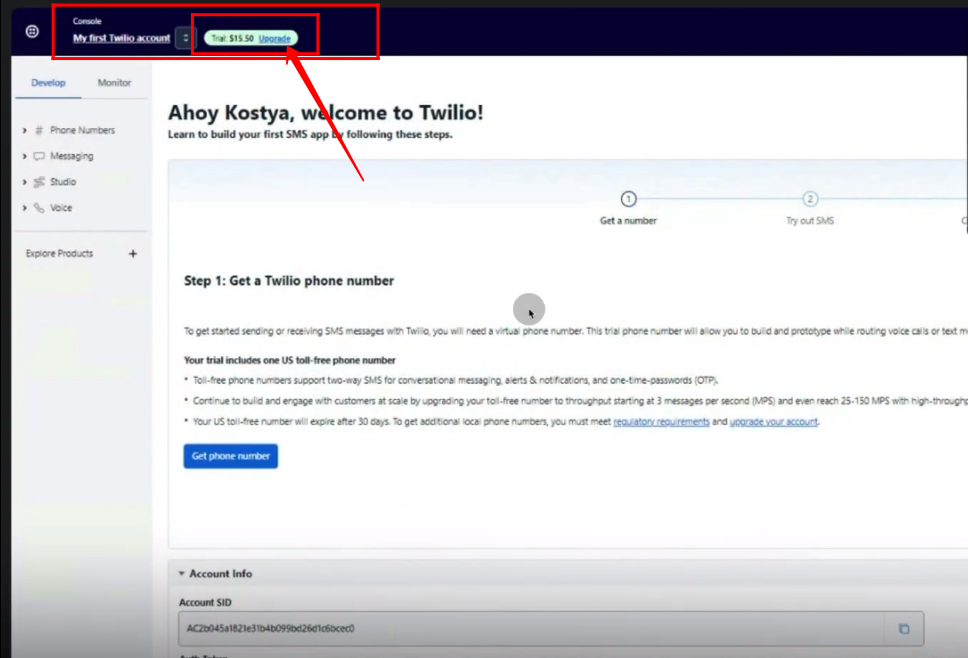
One of the primary roadblocks users encounter is having a trial Twilio account. To check your account status, look for a notification indicating a trial account. If you see this, you’ll need to upgrade. Click on the upgrade option and follow the prompts, including entering your company address and topping up your account with a minimum of $20. This step is essential to unlock full functionality.
2. Setting Up a Trial Company
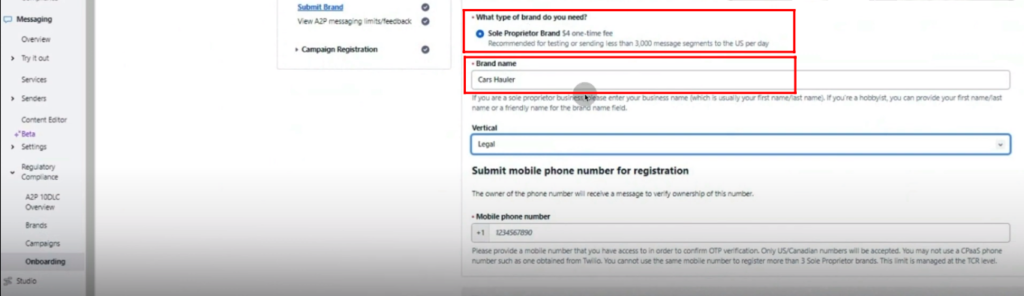
During the registration process, you’ll create a “Sole Proprietor” company, which is not a physical entity but a requirement for Twilio usage.
3. Immediate SMS Sending
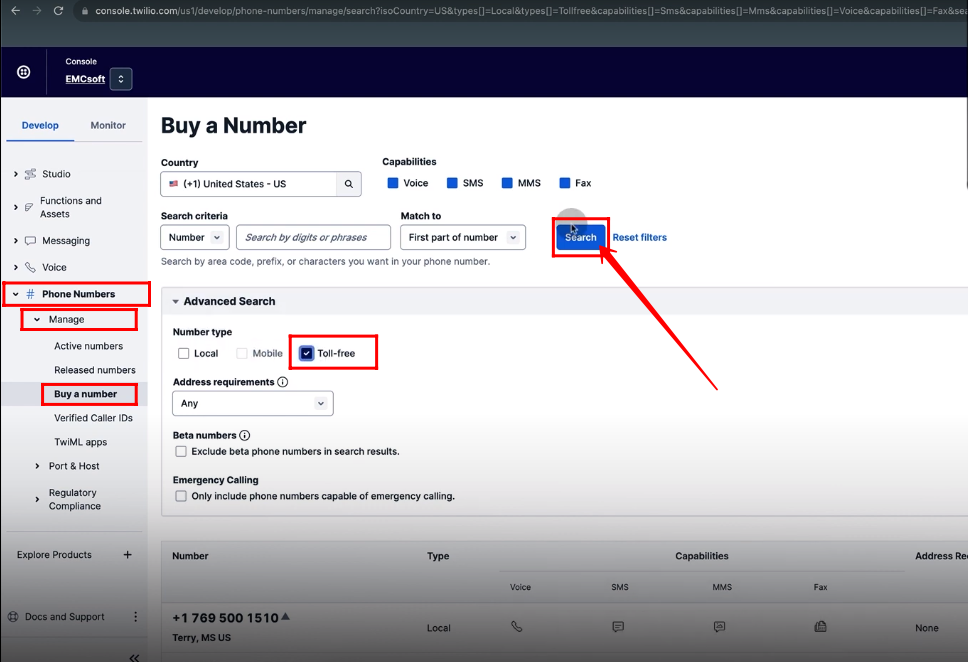
To start sending SMS immediately (before your full registration is complete), navigate to the “Phone Numbers” section. Here, you can purchase real numbers for your city and state. Additionally, consider buying a toll-free number for smoother operations. This allows you to send SMS right away while your full registration proceeds, a process that can take up to four weeks.
Configuring Twilio for Real Numbers
When you’re ready to move beyond trial usage and require multiple phone numbers for SMS, you must register a real company. Here’s how:
4. Registering a Real Company
Click on “Register Brand” in the Twilio dashboard. Initially, you’ll only see the option for a “Sole Proprietor” brand. If you need more than one number for SMS, click “Switch Profile” and then “Create a New Company.” Provide the necessary details, including your EIN (Tax ID number) to register a real company.
5. Company Registration Process
Specify your business type, location, and select the required messaging volume. Then, input your tax ID and complete the rest of the company information. Depending on your choice of a real company type (e.g., low volume standard brand), your brand registration will be processed, typically taking two to three weeks.
6. Registering a Campaign
Once you have your brand registered, you can proceed to register campaigns. You can use multiple numbers for a campaign if needed.
7. Creating a Campaign
During campaign registration, select the brand you wish to use. In the campaign description, provide detailed information about the campaign’s purpose. You can use sample messages or craft your own, ensuring you include any necessary links or phone numbers.
8. Collecting User Phone Numbers
When gathering user phone numbers, ensure you create a user-friendly form with a checkbox for users to acknowledge their consent. This form should be hosted on a page that displays your company’s terms and conditions.
Conclusion
Setting up Twilio for use with our TwiSMS application might seem complex, but it’s a cost-effective and powerful solution for SMS messaging. Remember the key steps: upgrading from a trial account, configuring real numbers for immediate SMS sending, and, if necessary, registering a real company for expanded SMS capabilities.
Our team at EMC Soft is here to support you every step of the way. If you encounter any challenges or have additional questions about Twilio registration, please don’t hesitate to reach out. We’re committed to providing quality products and assisting you in harnessing the full potential of our TwiSMS application.
Thank you for reading, and we look forward to helping you achieve seamless SMS integration!
Detailed instructions are described below.
1. Create a “Twilio” account and upgrade it for configurations interface.
2. If you want to use SMS service immediately and don’t have a registered company on twilio yet. Just buy Toll-free number and use that. Go to “Phone Numbers”, then click “Manage” and “Buy a Number”. Check the box “Toll-free” and click “Search”.
3. Buy any toll-free number for immediate use.

4. Go to “Messaging”, “Regulatory Compliance” and select “Brands”. Click “Register a Brand”.

5. If you want to use only one number for SMS service, just keep “Sole Proprietor Brand” as selected. Write your “Brand Name”.
6. If you want to use multiple numbers for SMS service integration, register a real company by clicking “Switch Customer Profile”.

7. Click on button “Create a New Company”, select your official company profile and click “Continue”.

8. Mark checks, where your business is located and whether you have “TAX ID” or not.
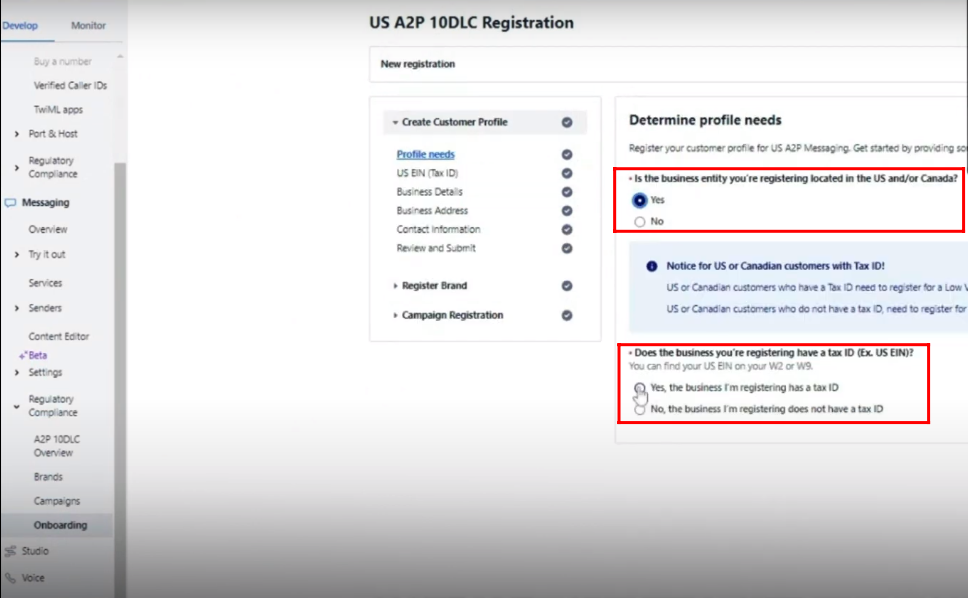
9. You will get your messages plan details and fee information. Mark “Yes” if you want to register a “Primary Customer Profile”.

10. Enter the “US EIN (TAX ID)”, if you have. This Id will be mandatory to initiate “Primary Customer Pofile”. You can skip this step also.

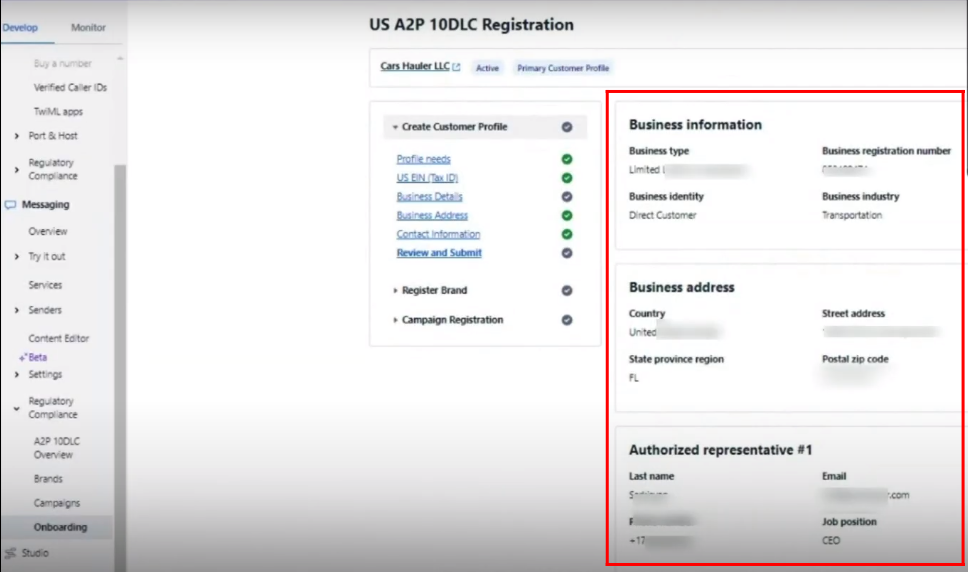
11. Fill in all details related to your business, like “Business Identity”, “Business Type”, “Business Registration ID Type”, “Business Registration Number”, “Business Industry” and “Website Url”.

12. Now, you will get all your business details for review that you filled in.
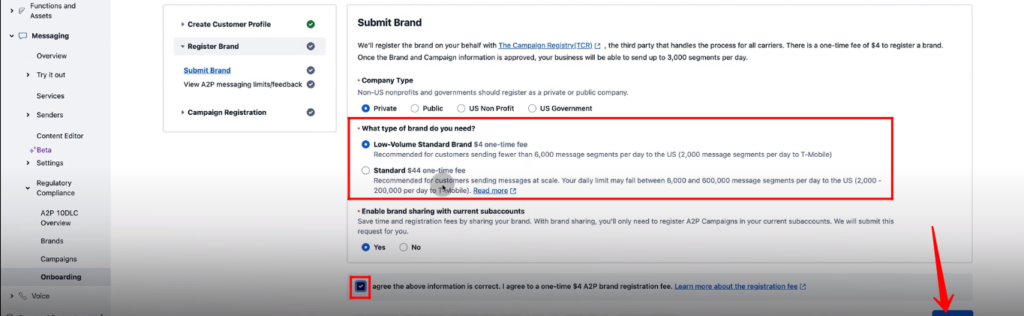
13. Select the brand type plan for your business, accept the agreement and register your brand.
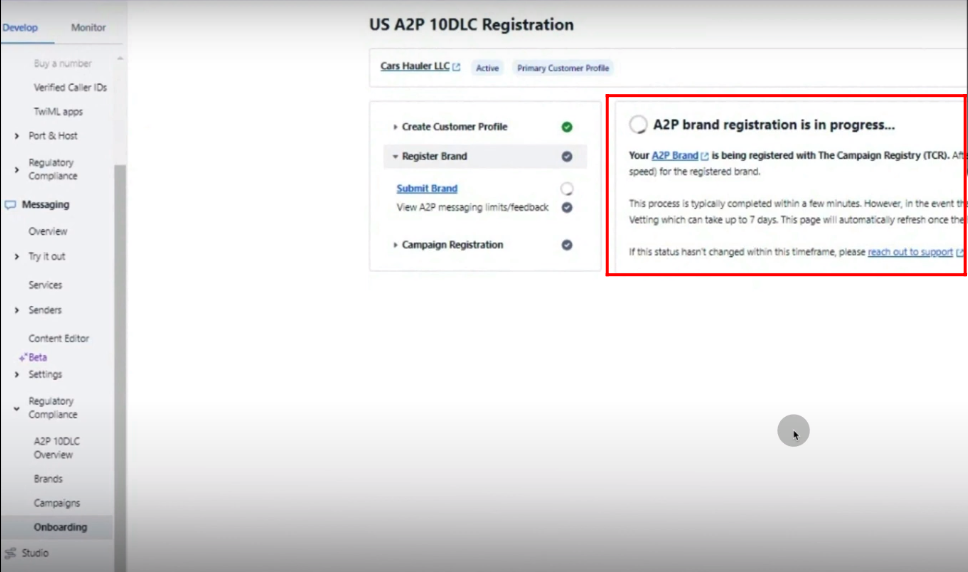
14. Now, your brand information is in progress stage and this process can take 3 to 4 weeks to get approved.
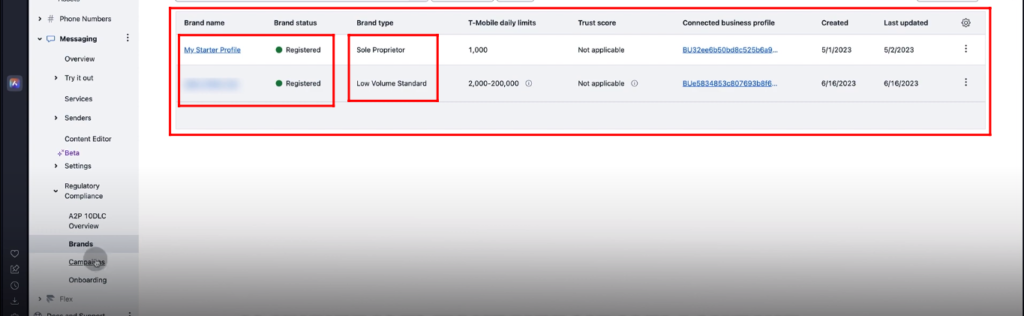
15. At the end, you should have two types of brands registered, “Sole Proprietor” and “Low Volume Standard”.
16. Go to “Messaging”, “Regulatory Compliance” and then “Campaings”. Click “Register new Campaign”.

17. Select the options from menu “A2P Brand” and “Available A2P Compaign use cases” that suits best your brand. Check the mark “Create new Messaging Service”, if you want to configure new service.

18. Write your brand “Campaign Description”.
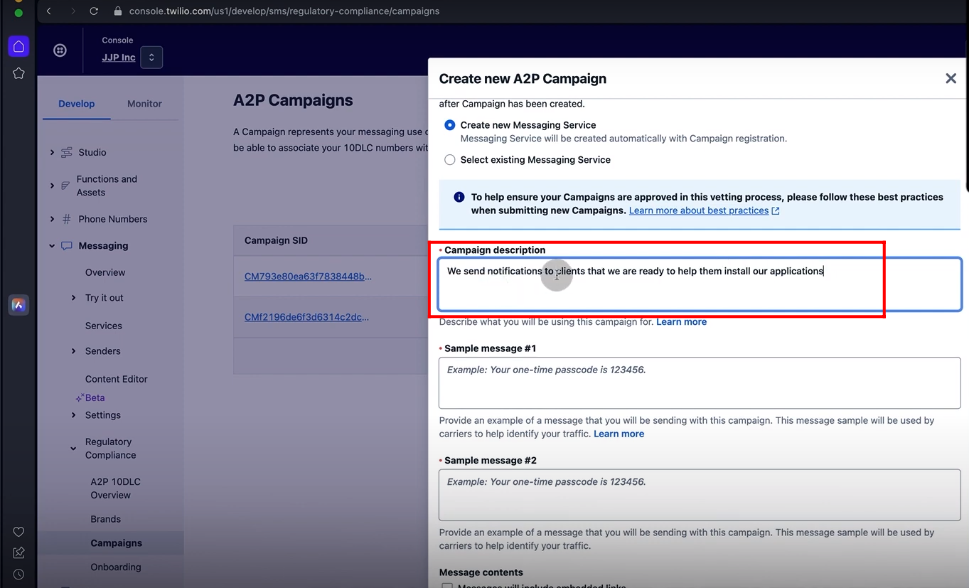
19. Type two messages that you want to send with this campaign.

20. Check mark message contents types, if your messages include “embedded links” or “phone numbers”.

21. Write the end user content that you want to show in messages. It is recommended to use the example format.

22. Use the link to form of your website in the message where you want to get details of customer. Click “Create”.

23. Click “Confirm” to confirm campaign registration.

24. Now you will get the list of your campaigns and the newly configured compaign will be in “In Progress” stage. Compaign Registration will take 2 to 3 weeks to get verified.

25. Open a verified campaign and click a link named “Linked Messaging Service”.

26. Click “Add Senders”, select “Sender Type” and click “Continue” to add new phone numbers in the campaign setup.

27. You will have a list of phone numbers that will be used in the compaign after adding as senders.

“You can also watch this video on Youtube”