| 1648 Views | Amin

Automation rules and triggers in email marketing
Area of automation rules and triggers has a great potential in Bitrix CRM. In this article we will observe an area of email communications. Before we discovered the power of email marketing in customer relationship. As you might remember, email marketing still stays at the top of communication channels in modern global world.
Email tracking app alternative
These triggers work best when you wish to analyze the efficiency of your email campaigns. Imagine you’ve got a base of 50 clients whom you send an email. Using that triggers you will be able to see how many emails were opened / interacted / replied.
You will demonstrably see it thanks to Kanban view. Therefore, it is important to have separate stages for each interaction, e.g.: Email checked, Link clicked, Email reply. Kanban view of Bitrix cards is a powerful tool itself which we observed in this article.
As a result, our leads page in Bitrix will actually replace an email tracking solutions. You will be able to evaluate your email marketing campaigns and perform further steps to handle customers actions in one CRM.
Important note
Important to remember that lead will move to appointed stage from any stage. For example, when your lead is on Finish or Done stage and you send an email to that client, if he or she checks it, the lead will automatically come back to Email checked stage.
You should be careful and keep in mind triggers working mechanism in order to avoid duplicating emails or another mistakes.
So, let’s observe Triggers. How to change the stage of a Lead/Deal when the customer clicks on a certain link.
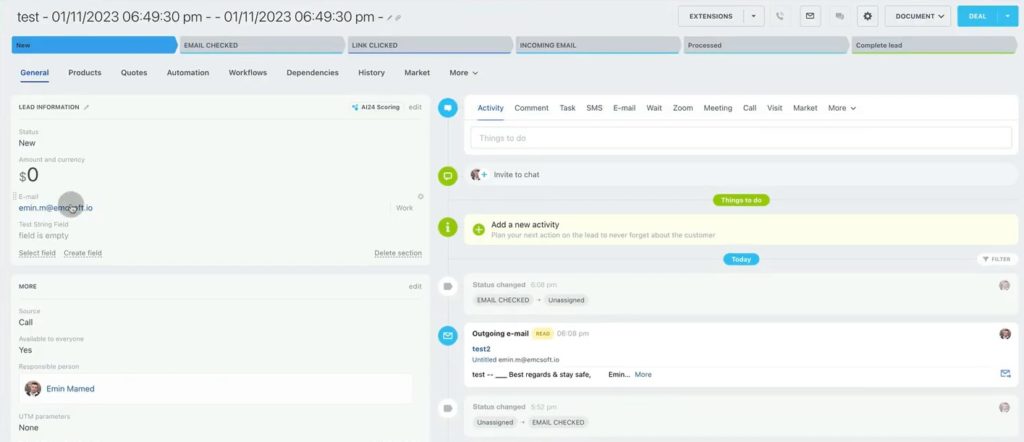
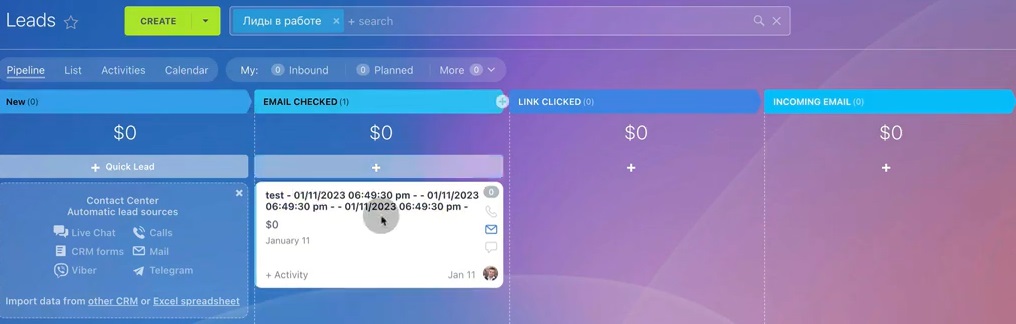
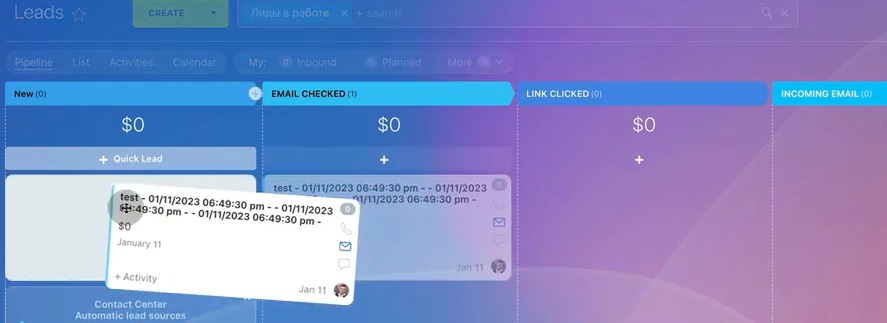
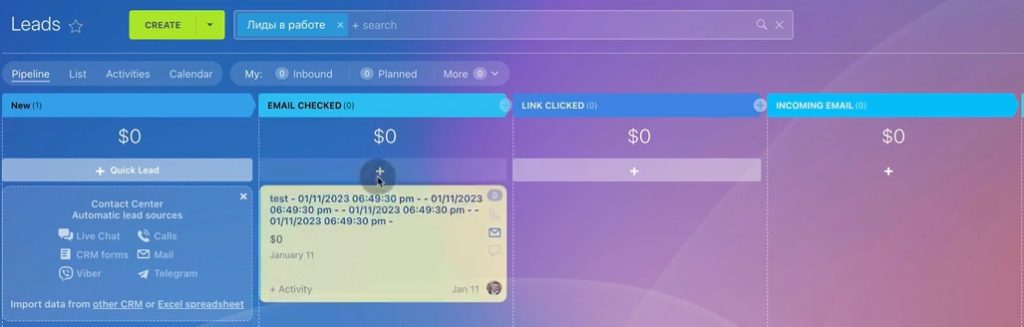
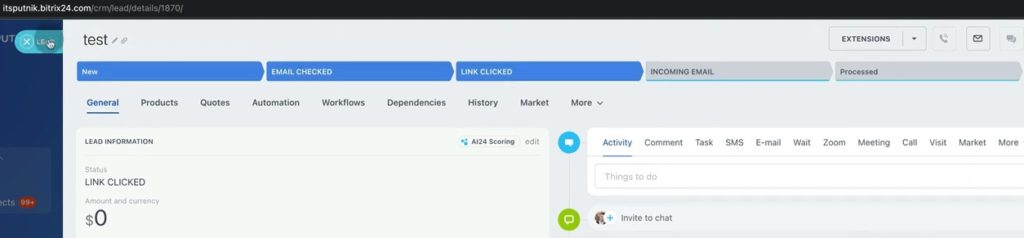
1. This is our sample lead.
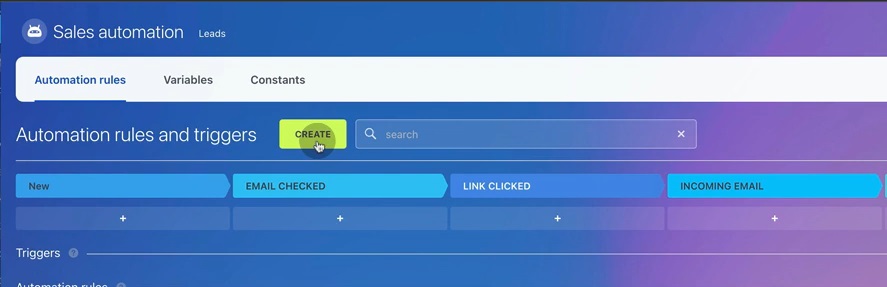
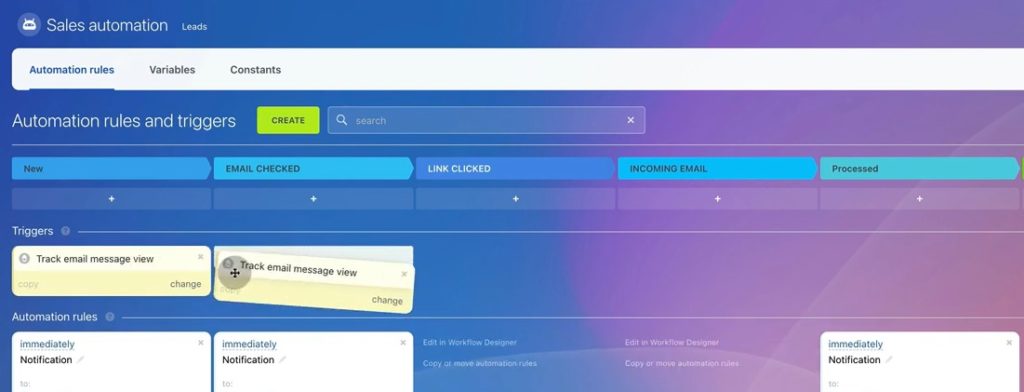
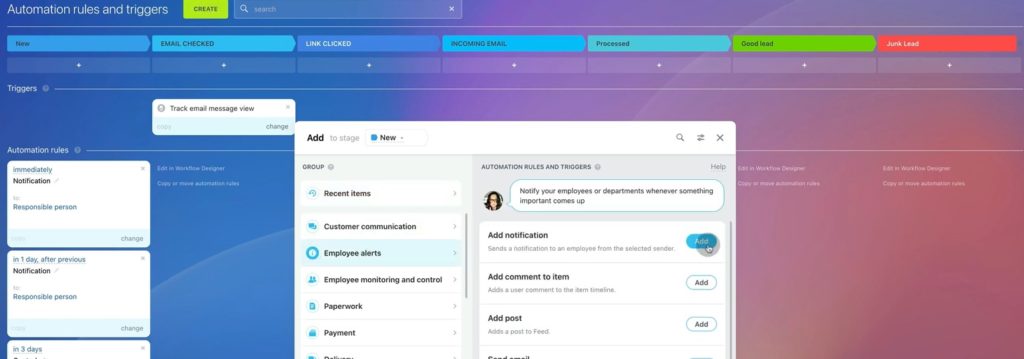
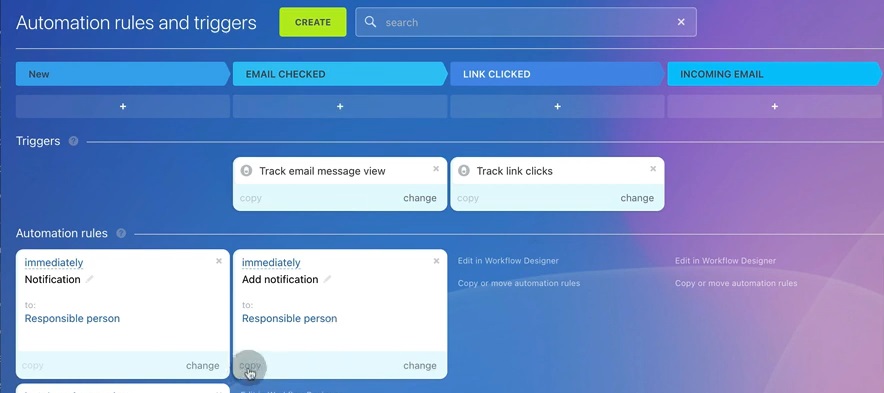
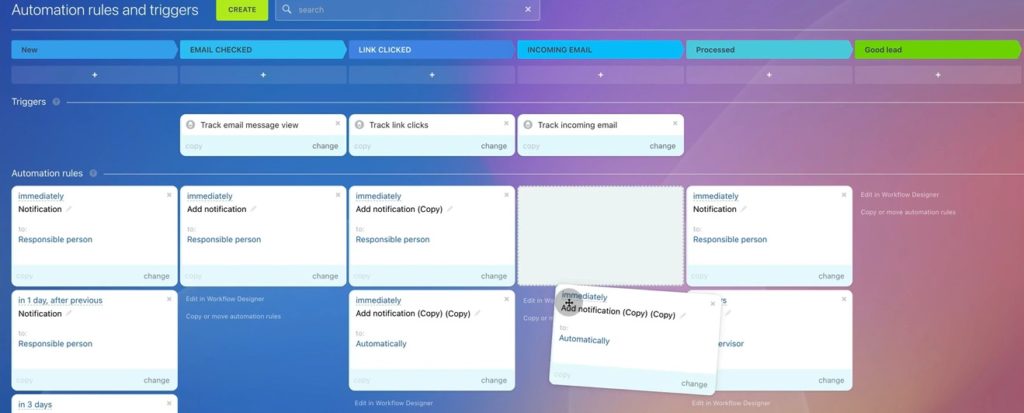
2. To add a trigger, go to Leads and click on Automation rules tab.

3. Create new one.
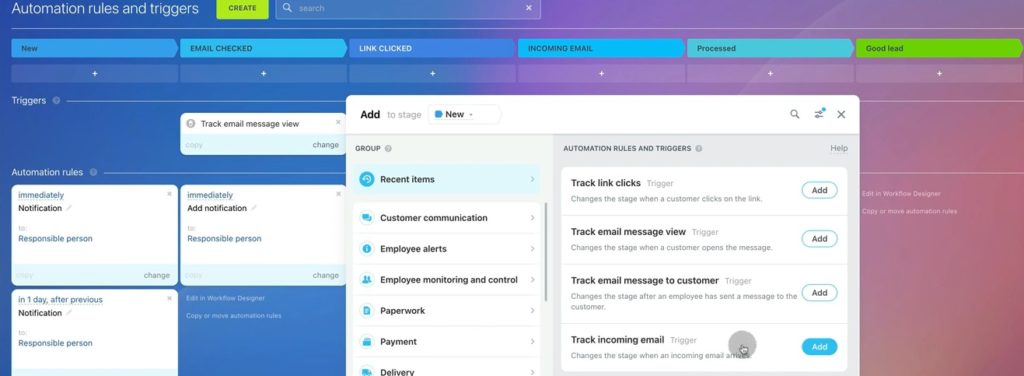
4. Then go to settings – Bitrix Triggers as below.
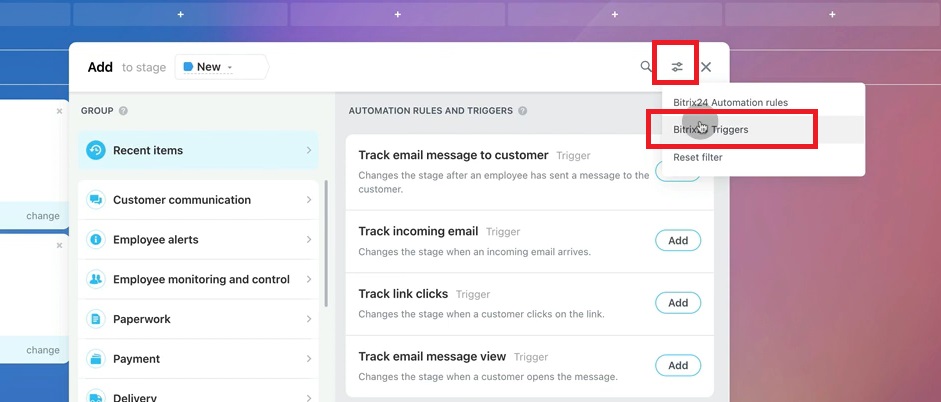
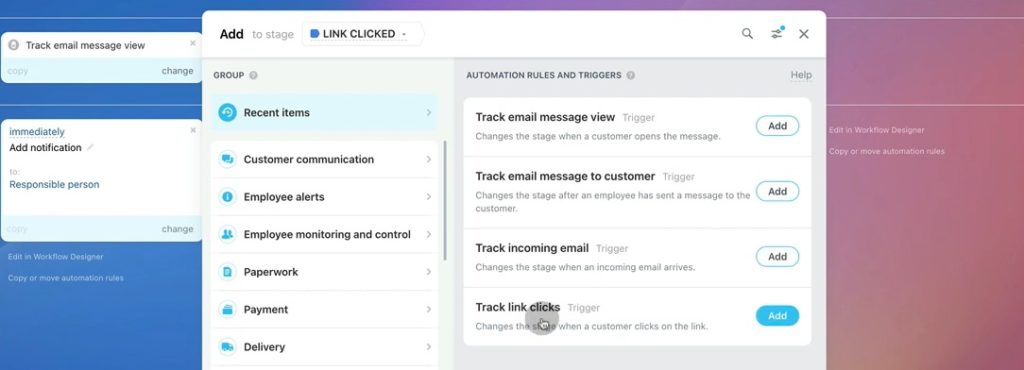
5. Go to Customer communication – Track email message view – Add.
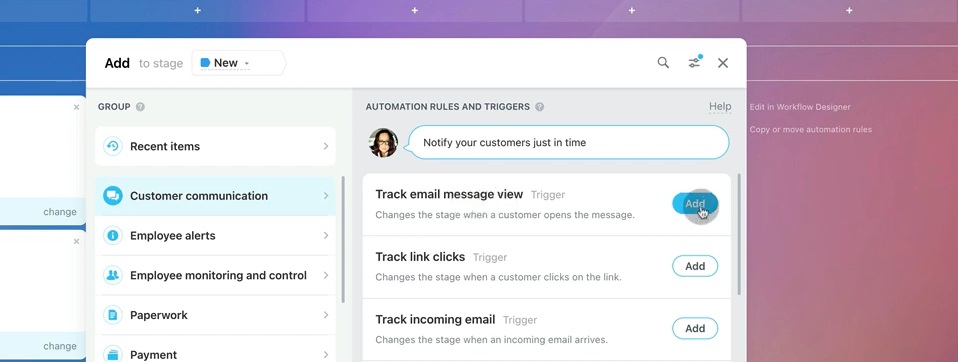
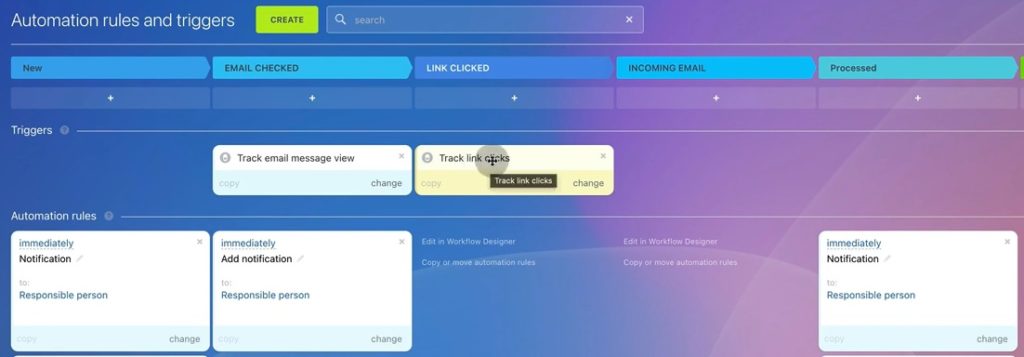
6. A new trigger will emerge. Move it to the stage, where you want your lead be once client checks an e-mail. In our case its “Email checked” stage, but you can name it as you want.
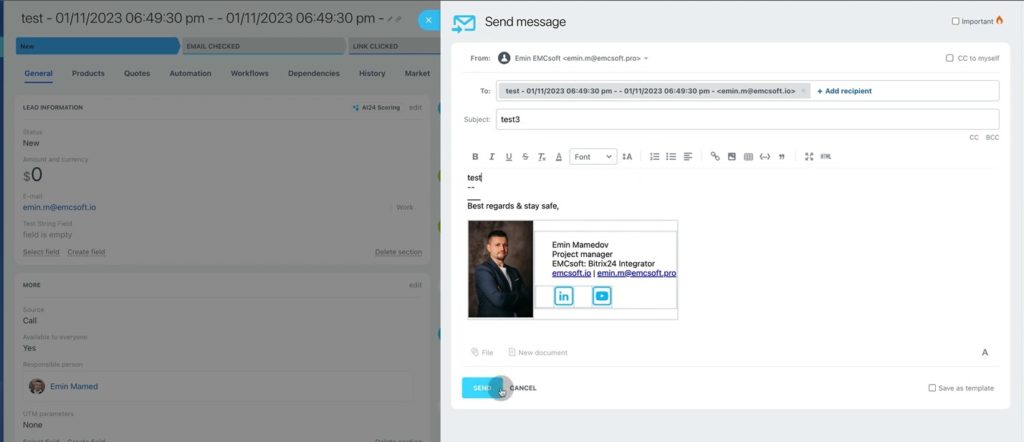
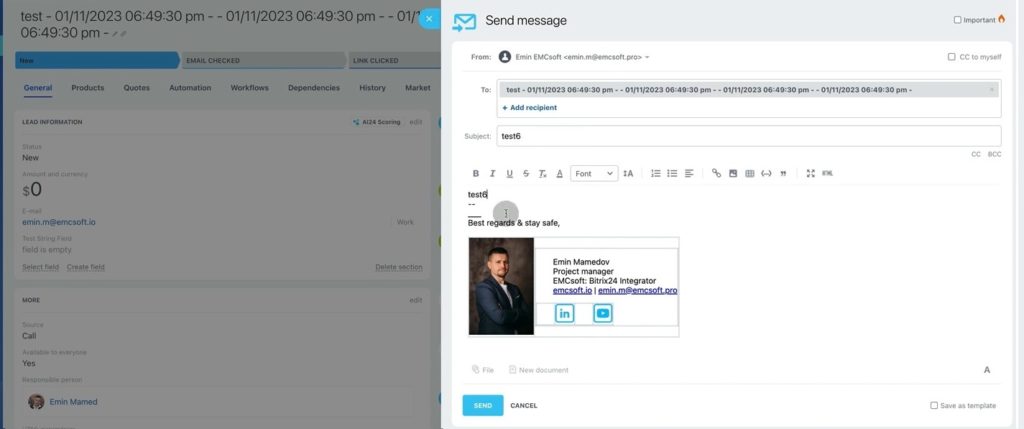
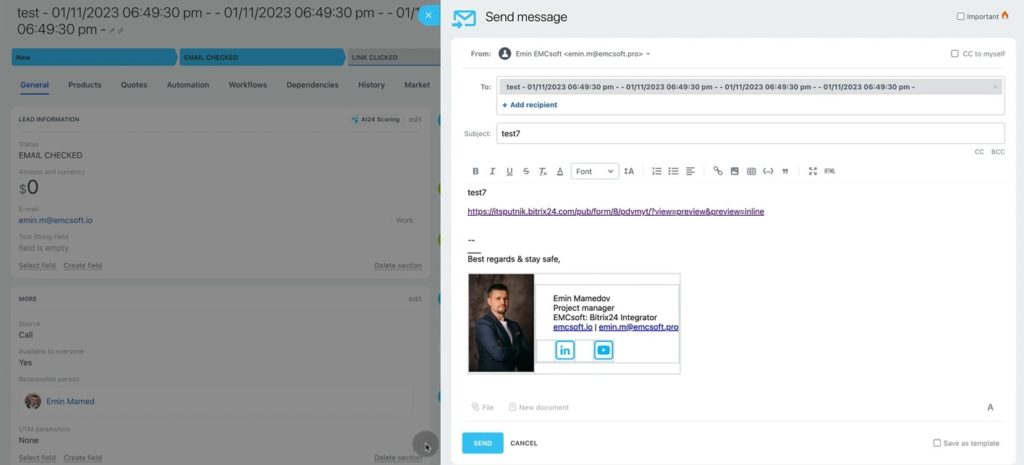
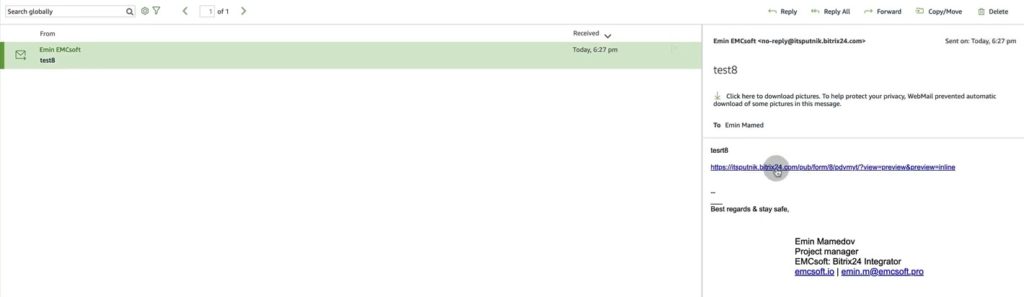
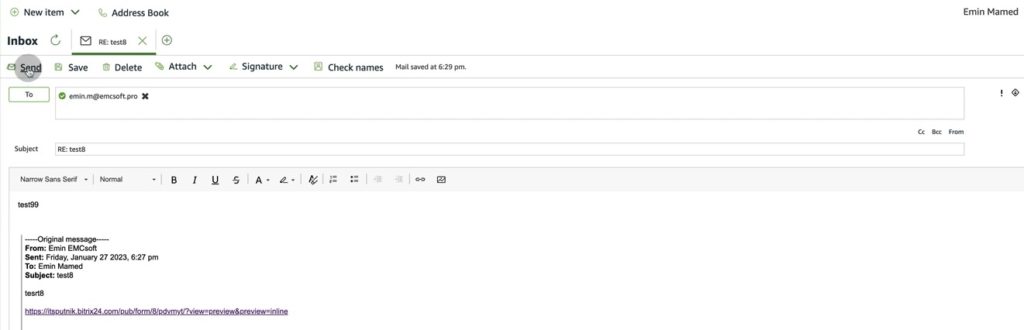
7. To check the trigger, we will send an email from the lead page to our work mail.
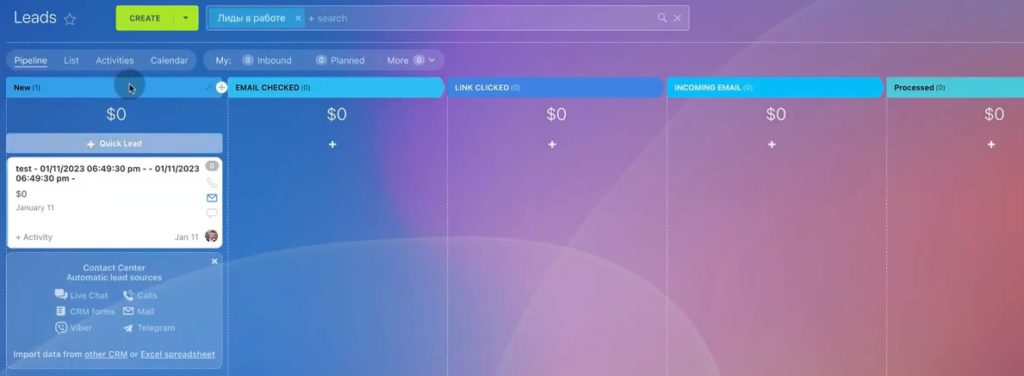
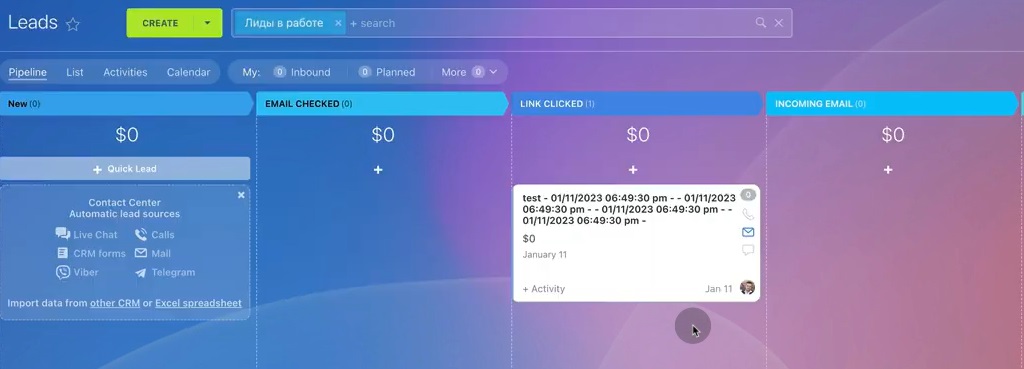
8. Before we open work mail, we see that our lead is in New stage in Bitrix CRM.
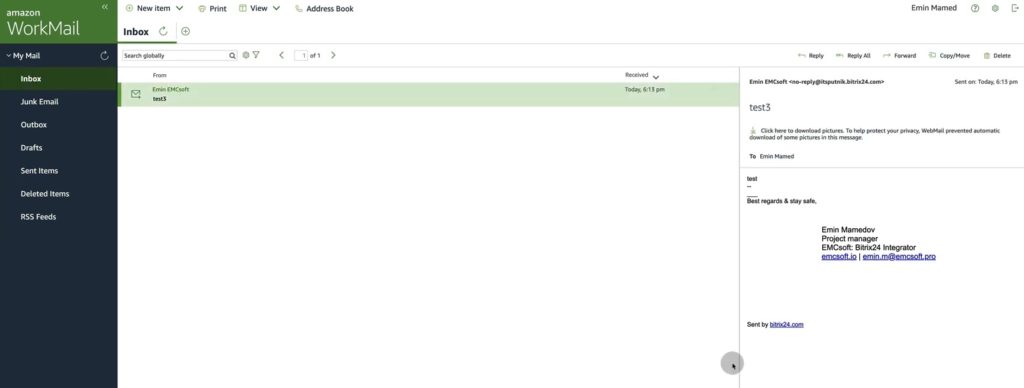
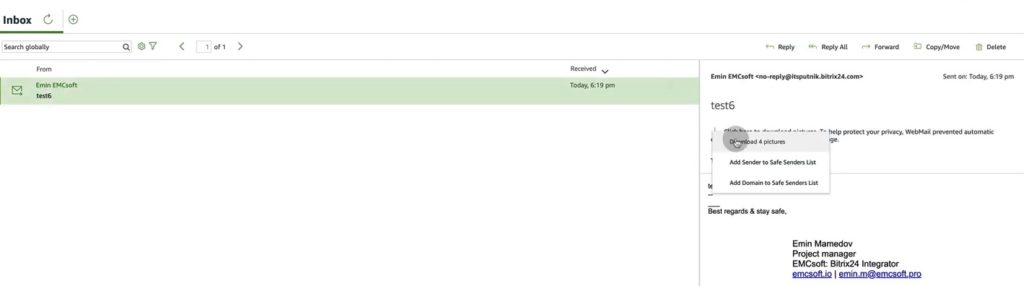
9. Then we open the email in work mail.
10. We see that our Lead moved to Email checked stage.
11. Let’s also create a notification for responsible person in Bitrix. Go back to automation rules and click Create – Employee Alerts – Add notification.
12. Then we move new automation rule to the Email checked stage.
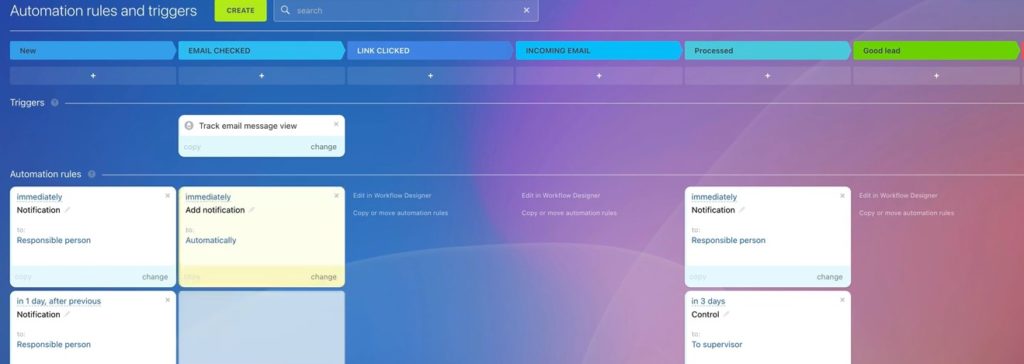
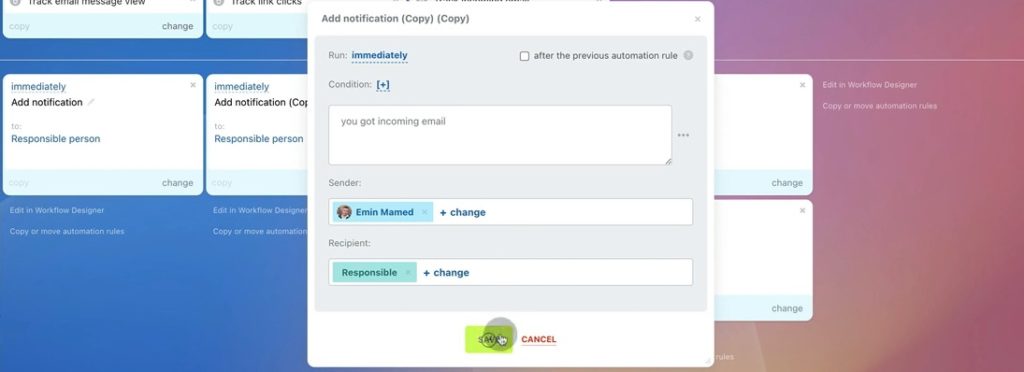
13. Next, we need to make some settings. Click Change on the bottom of automation rule. In Run we leave it as “immediately”. It means this rule will start as soon as client opens an email with no former conditions.

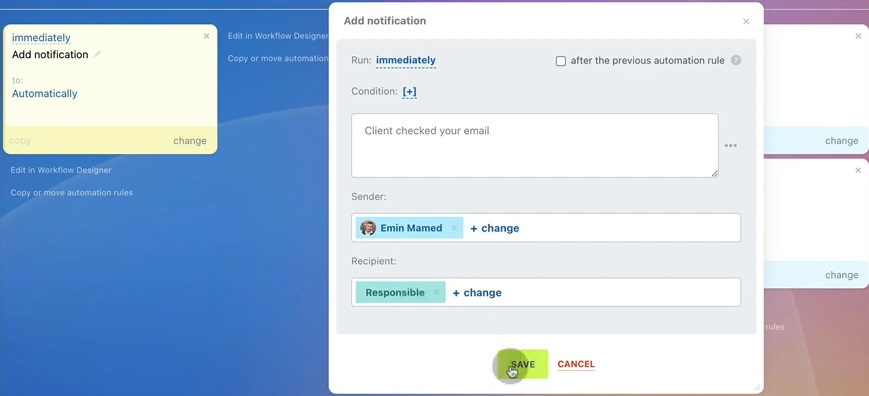
14. Then type a notification message for responsible person. Click Save.
15. We move our lead back to the New stage to properly check our automation rule.
16. Sending another email from Bitrix.
17. Opening it in work mail.
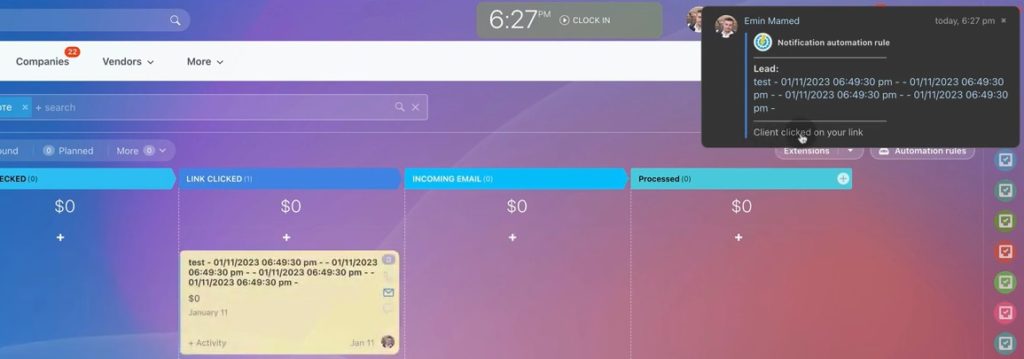
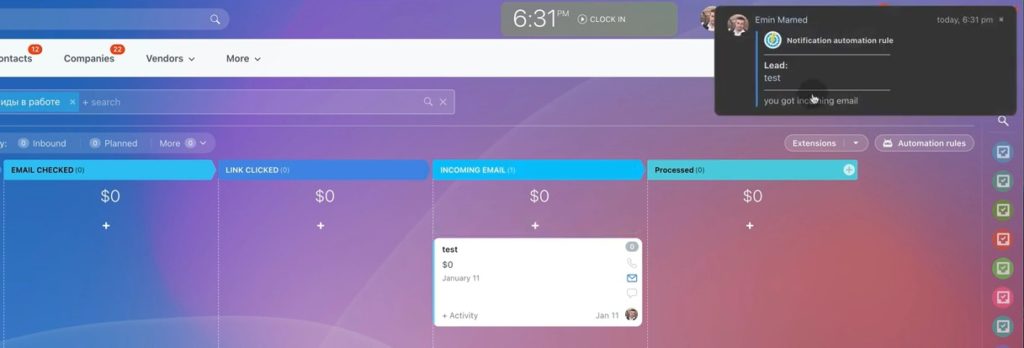
18. In Bitrix we see a new notification that “Client checked your email”.
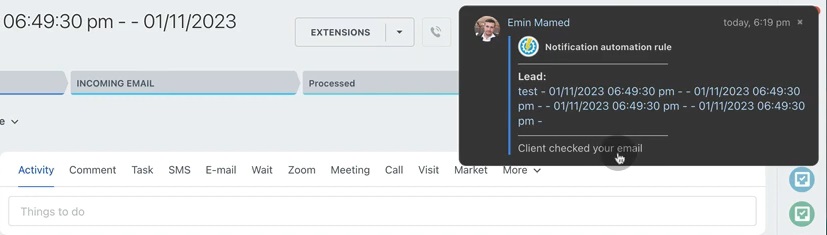
19. Also, we see our lead moving from New to Email checked stage.
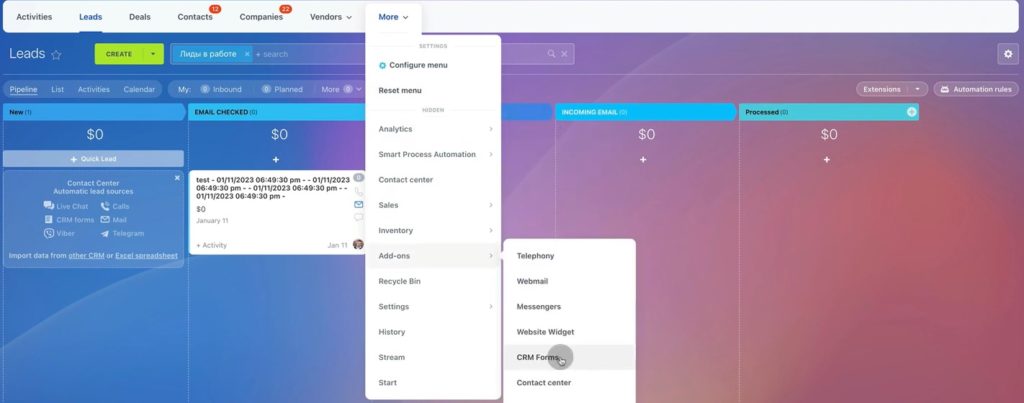
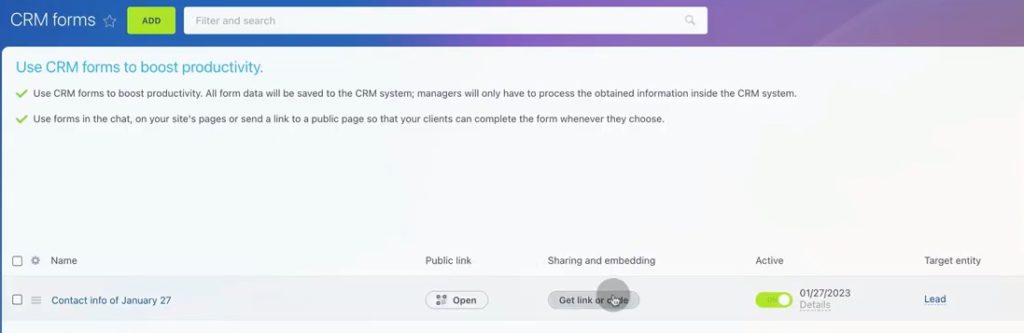
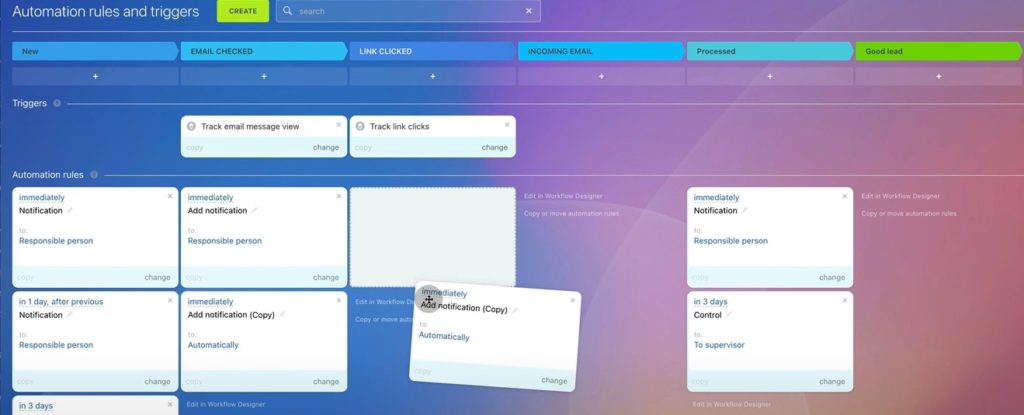
20. Second case – to create a link and make triggers for clicking it by client. To do so, we go to More – Add-ons – CRM forms.
21. We turned off all previous forms and click Add to create a new one.
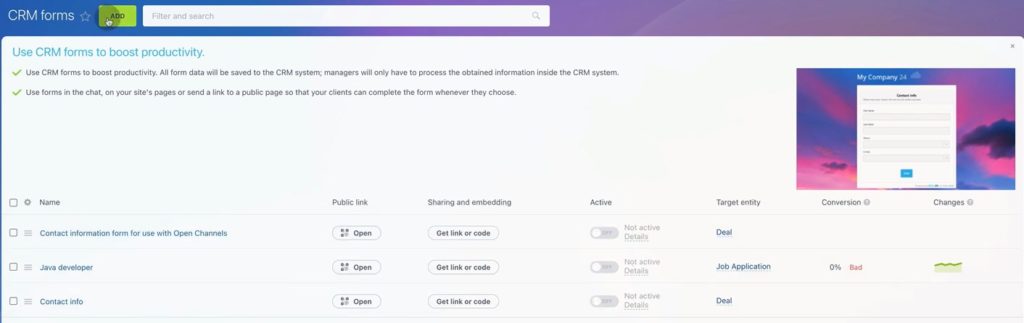
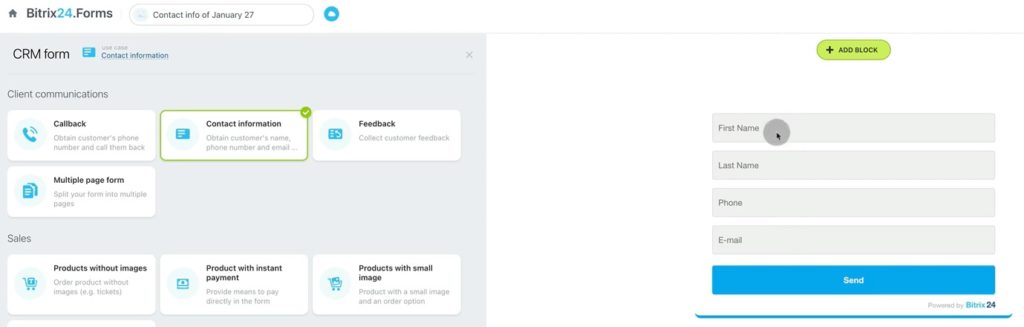
22. We will create a simple Contact information collecting form. Click Save.
23. Then click in Get link or code.
24. In window opened you can find various sharing information. Let’s click on Open site on my computer.
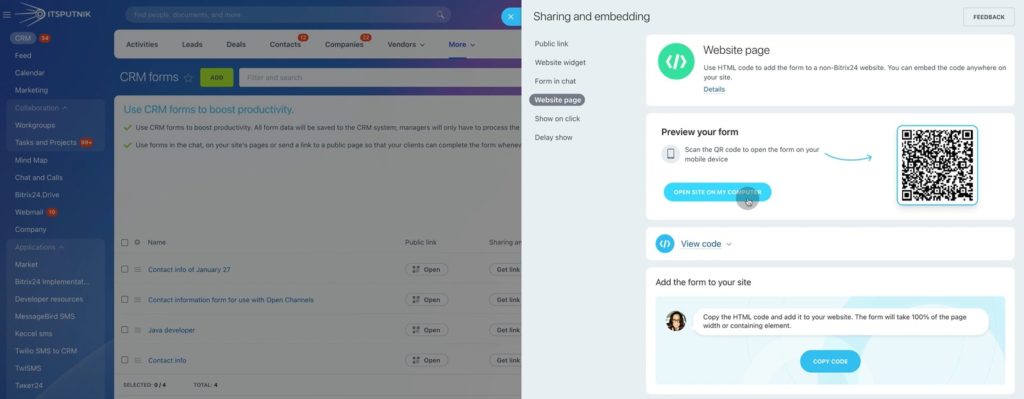
25. We see a page with CRM form. Copy the link provided.
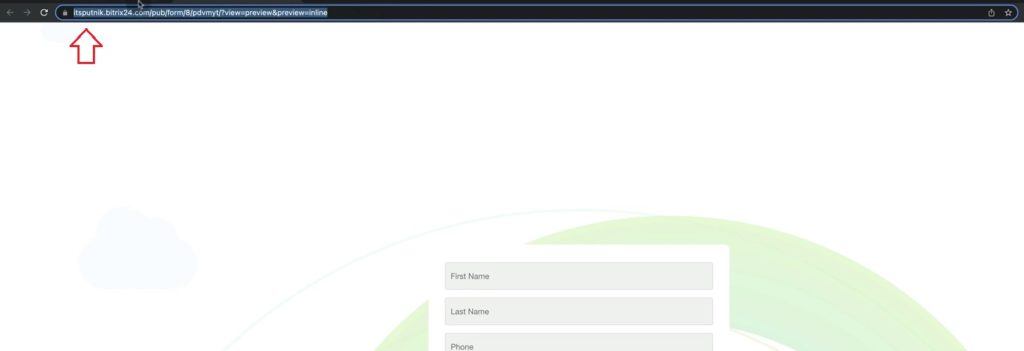
26. Then go back to Automation rules and create a new Trigger as before.
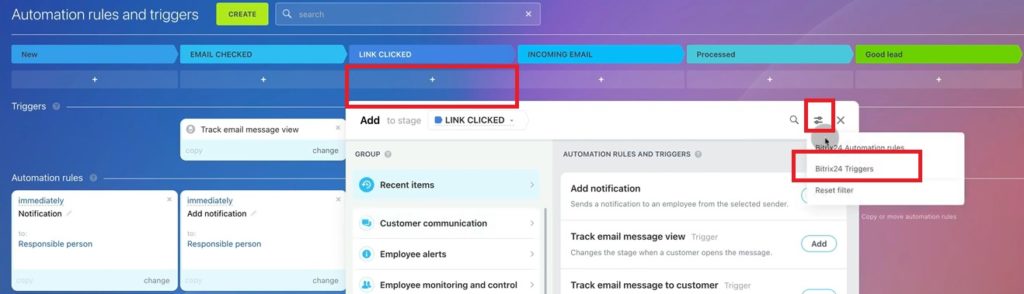
27. Choose Track link clicks.
28. Move that trigger to relevant stage.
29. Then we create another email and put the link in message body.
30. We go through the link in the email.

31. See that page with CRM form.

32. And then go back to Leads, refresh the page and see that our lead moved to Link clicked page.
33. Now we will add one more notification for clicking the link. We go to Automation rules and copy previous notification.
34. Move copied rule to Link clicked stage.
35. We sent another letter and went through the link inside of it.
36. At the same moment we see a notification and our lead moved to Link clicked stage.
37. Next, we will create triggers when client replies to an email. To do so, we need to change our lead name to shorter and meaningful one.
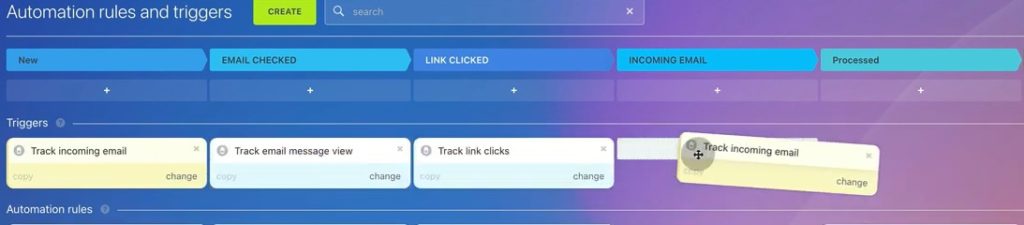
38. Then in automation rules click Create – settings – Bitrix24 triggers – Track incoming email.
39. Move the trigger to a new stage, in our case it’s an Incoming email.
40. To check the trigger, we are sending reply email from work mail to Bitrix mail.
41. Then we create one more automation rule with notification, similar as before.
42. Do not forget to change notification text in that notification.
43. And as before, we will see a notification and lead changing it stage at the moment clients send a reply.
We observed several cases for different actions with outgoing emails:
– when client checks an email;
– clicks a link inside of email;
– sends reply message.
For each case we set up a notification for responsible person and a trigger which moves the lead to certain stage.
Automation rules and triggers help better organize processes in Bitrix CRM. Thanks to automatization you can increase the efficiency and save time of your employees. There are a lot of time reserves that can be improved and Bitrix24 integrators can greatly assist in that.
We in EMCsoft have a wide experience in Bitrix24 customization and integration which we glad to share. So, if you would like to exceed your administration skills, contact us here with reference to Bitrix admin course.
You can also watch this video on Youtube.