| 2463 Views | admin

In many companies, people need to sign important papers like service agreements, invoices, or work contracts. These papers often need to be signed by other people such as clients, team members, or partners. Bitrix24 has a very helpful tool called e-signature that lets you send these papers online and get them signed without printing anything.
This guide teaches you everything about how to use the e-signature feature in Bitrix24. It shows you how to choose who will sign the document and send it to them by email or phone. You can upload a file like a Word document or a PDF and fill in all the details like names, dates, prices, and more.
You will also learn how to pick the person in your company who is sending the paper and the person who needs to sign it. The video shows how you can type in their information like their name, email, phone number, and company details. You can also choose where the person needs to sign on the paper.
Once everything is ready, the document is sent. The person who gets it will open it, enter a code, and sign the document using their finger or by typing their name. After both sides sign it, everyone gets a copy of the signed paper. You can also check when and who signed it.
This tool helps you save time, avoid printing, and keep everything in one place. The video also explains how you can track your documents using a board view (like sticky notes), and how Bitrix24 can do some steps for you automatically.
If you work with documents and need signatures, this feature in Bitrix24 makes it easy, fast, and clear.
“Detailed Instructions are given below”
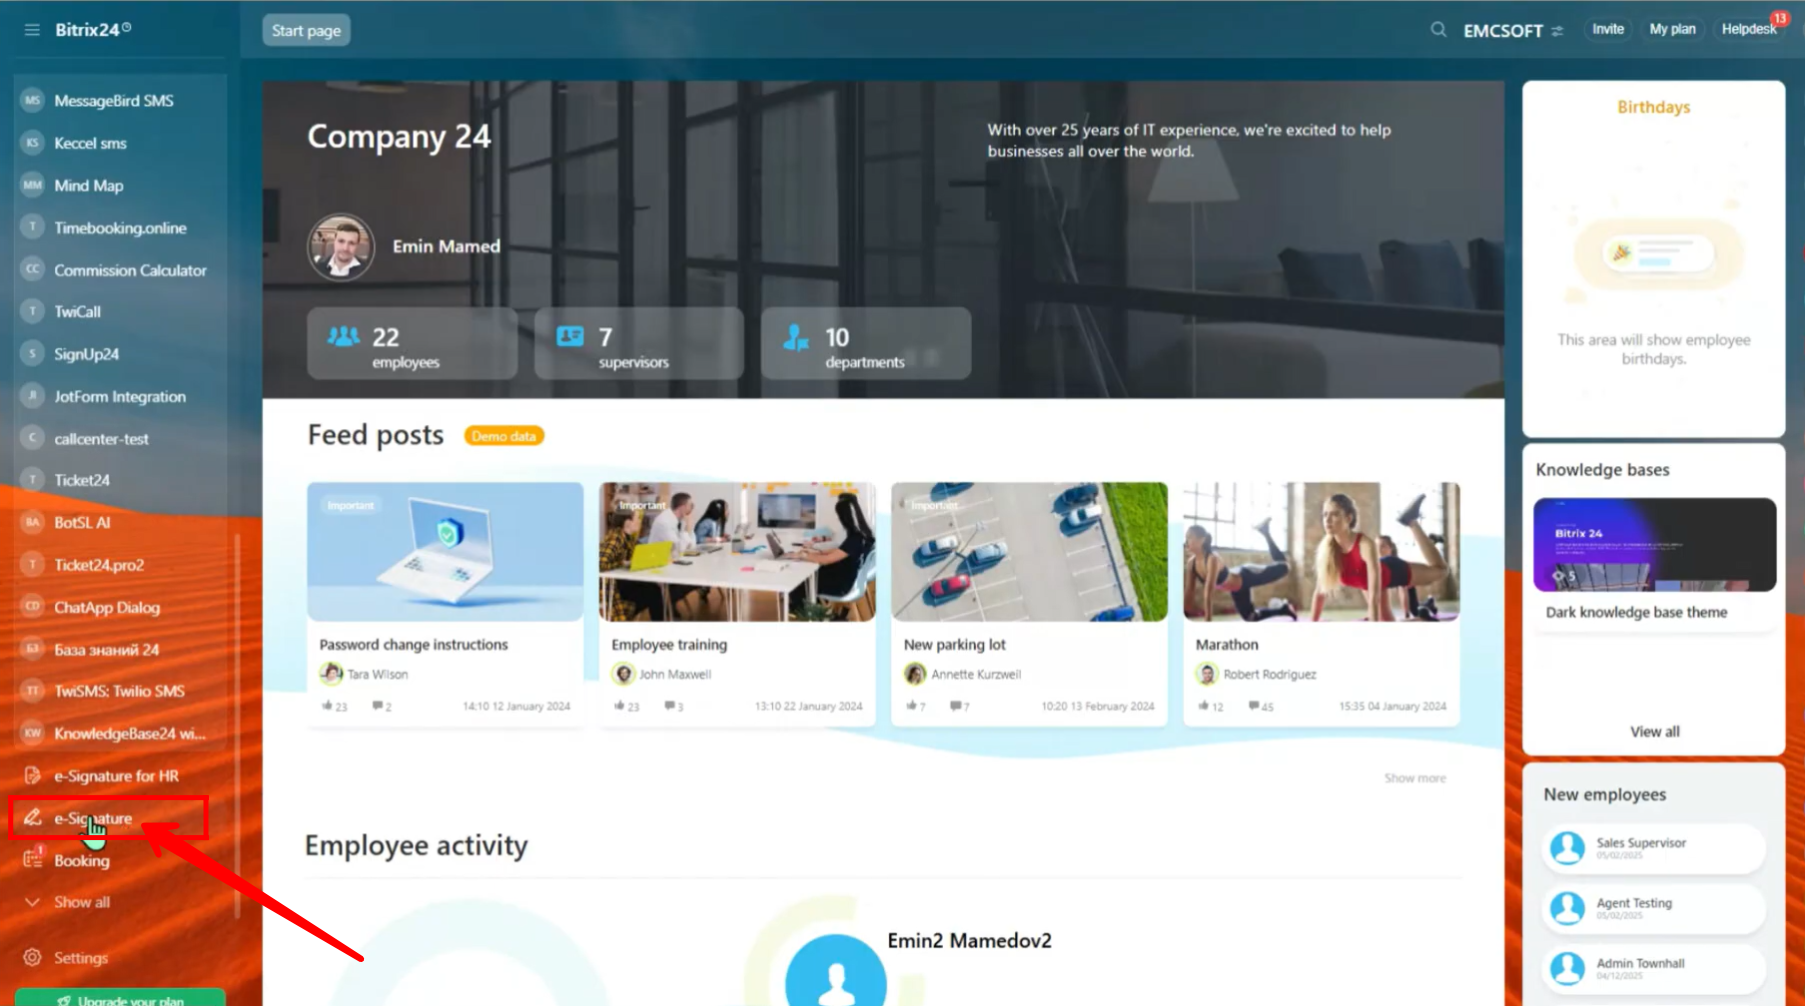
1. Go to the “E-signature” section or type “e-signature” in the search bar to find it.
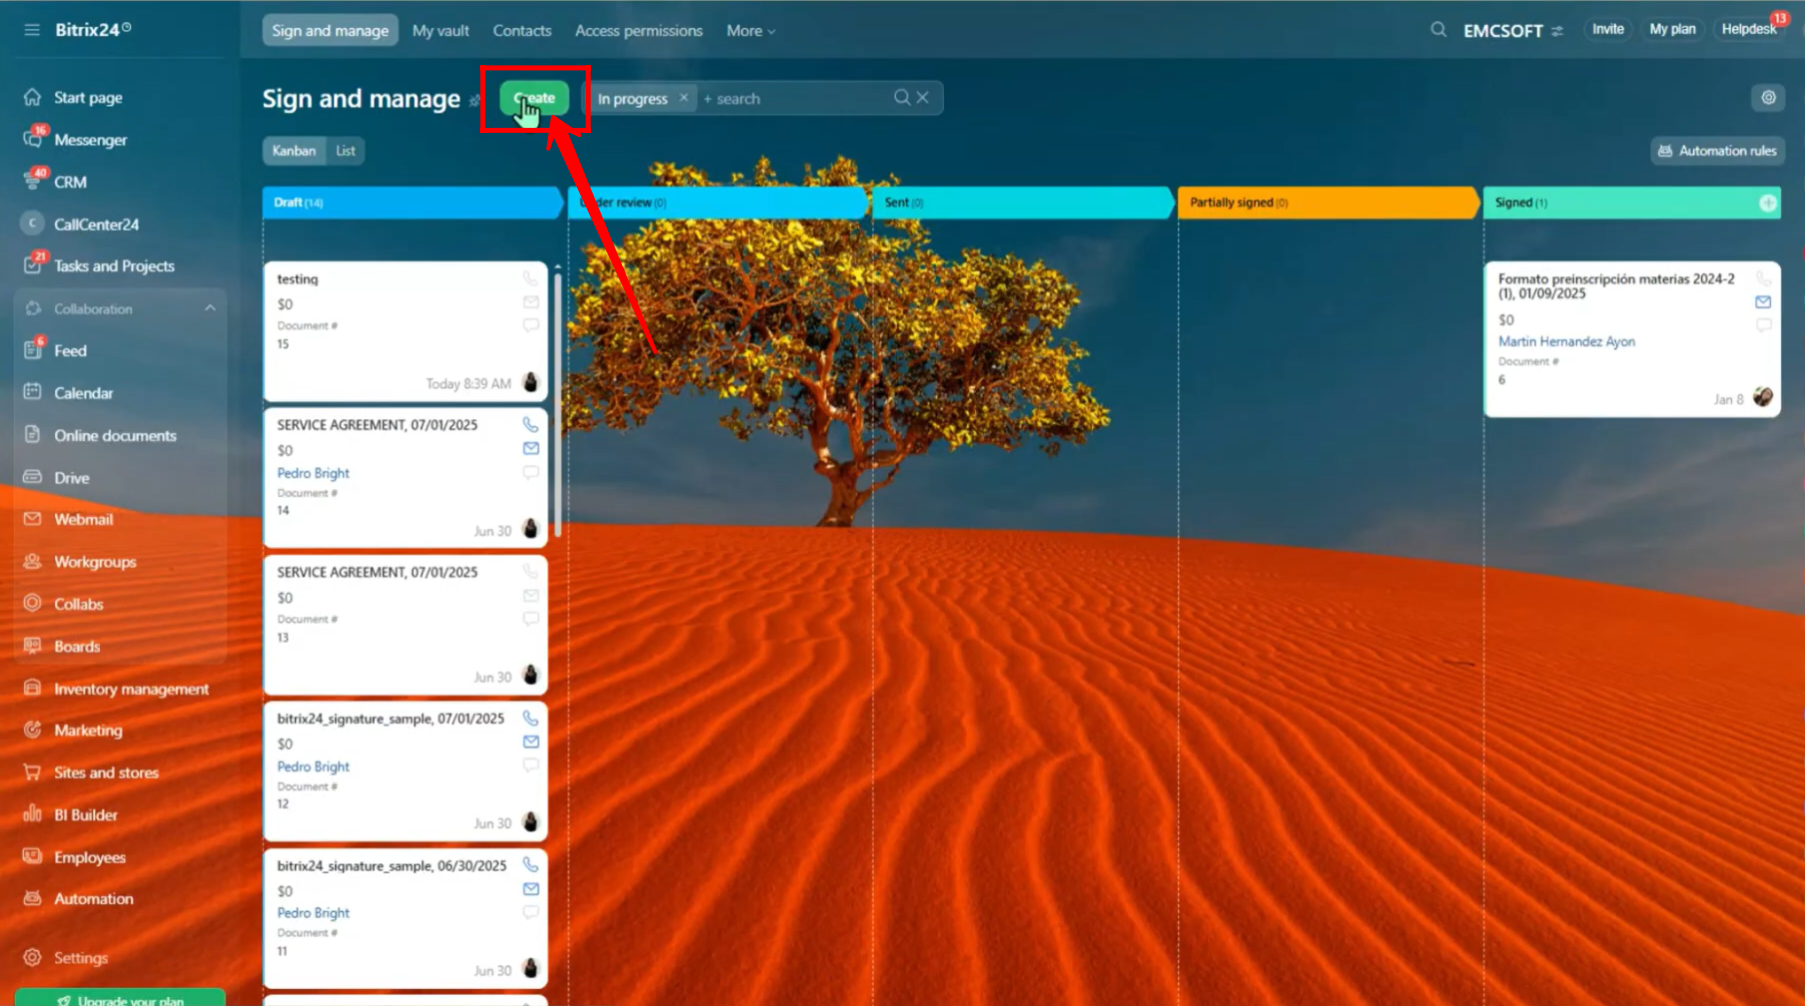
2. In the “Sign and Manage” tab, click on “Create” to start a new document for signing.
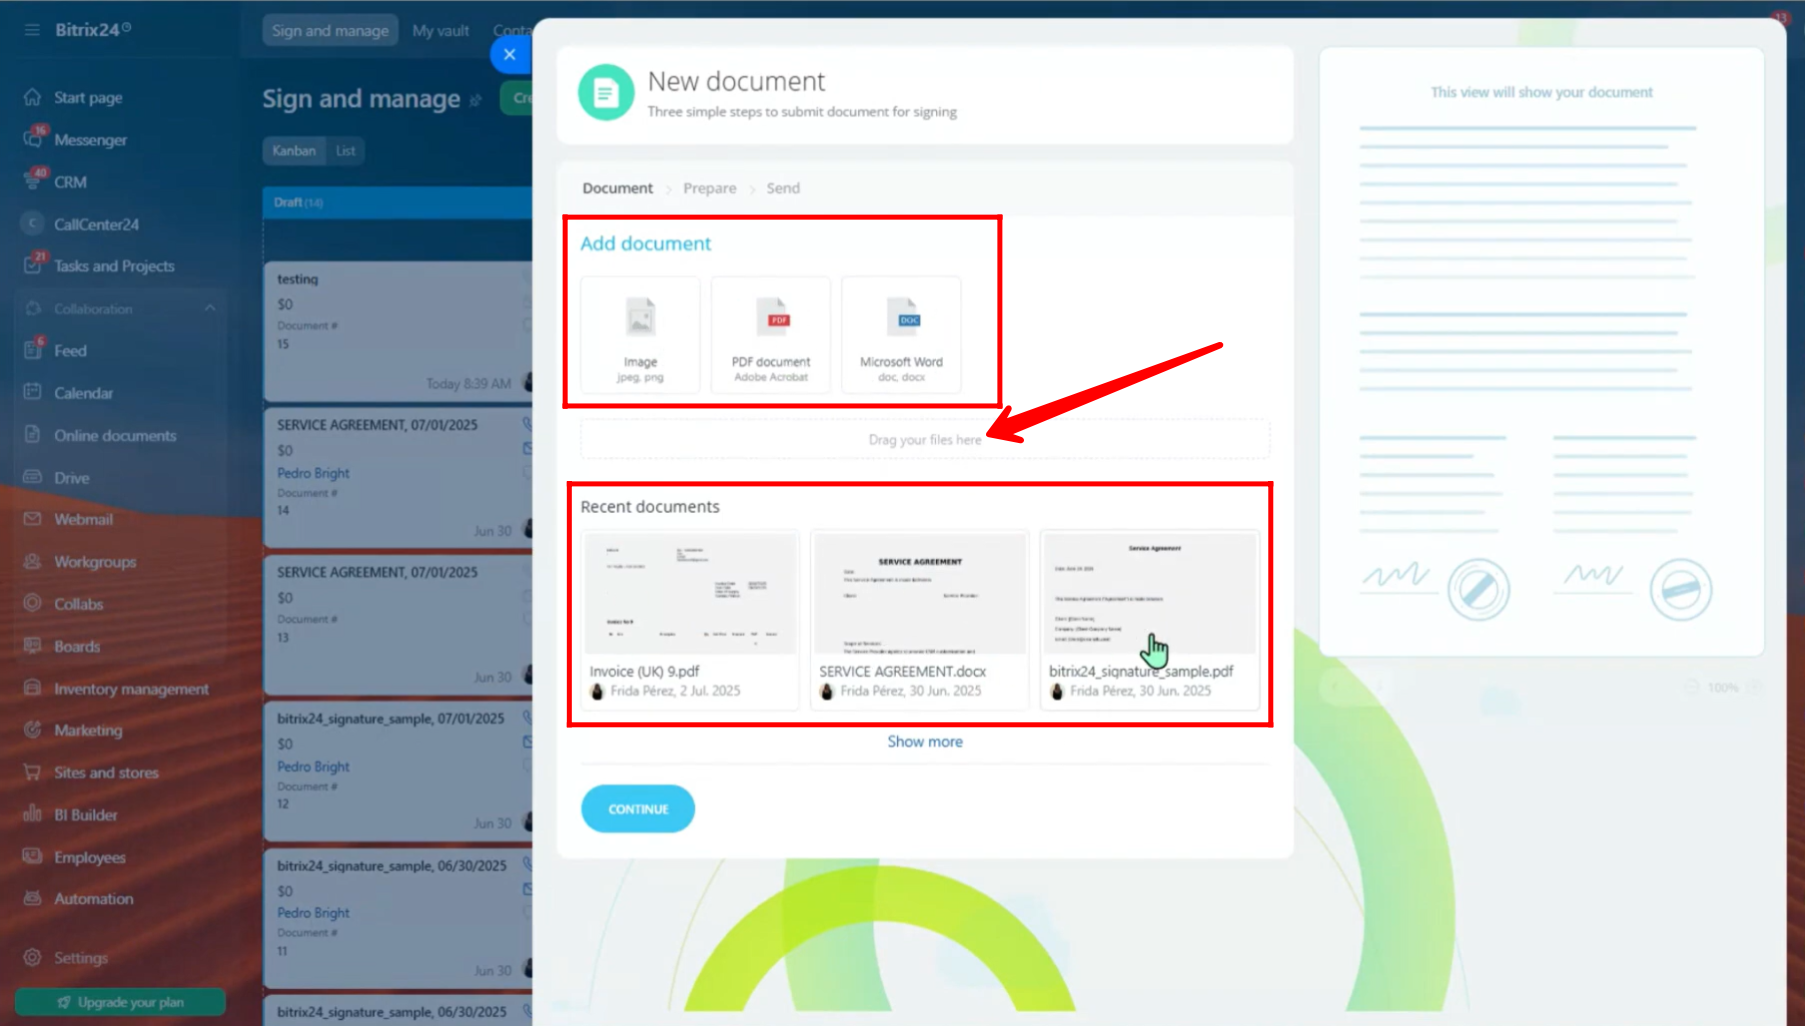
3. You can add documents in three ways: as images (JPEG or PNG), PDF files, or Word (DOC) files. You can also pick a recent document if you already uploaded it before.
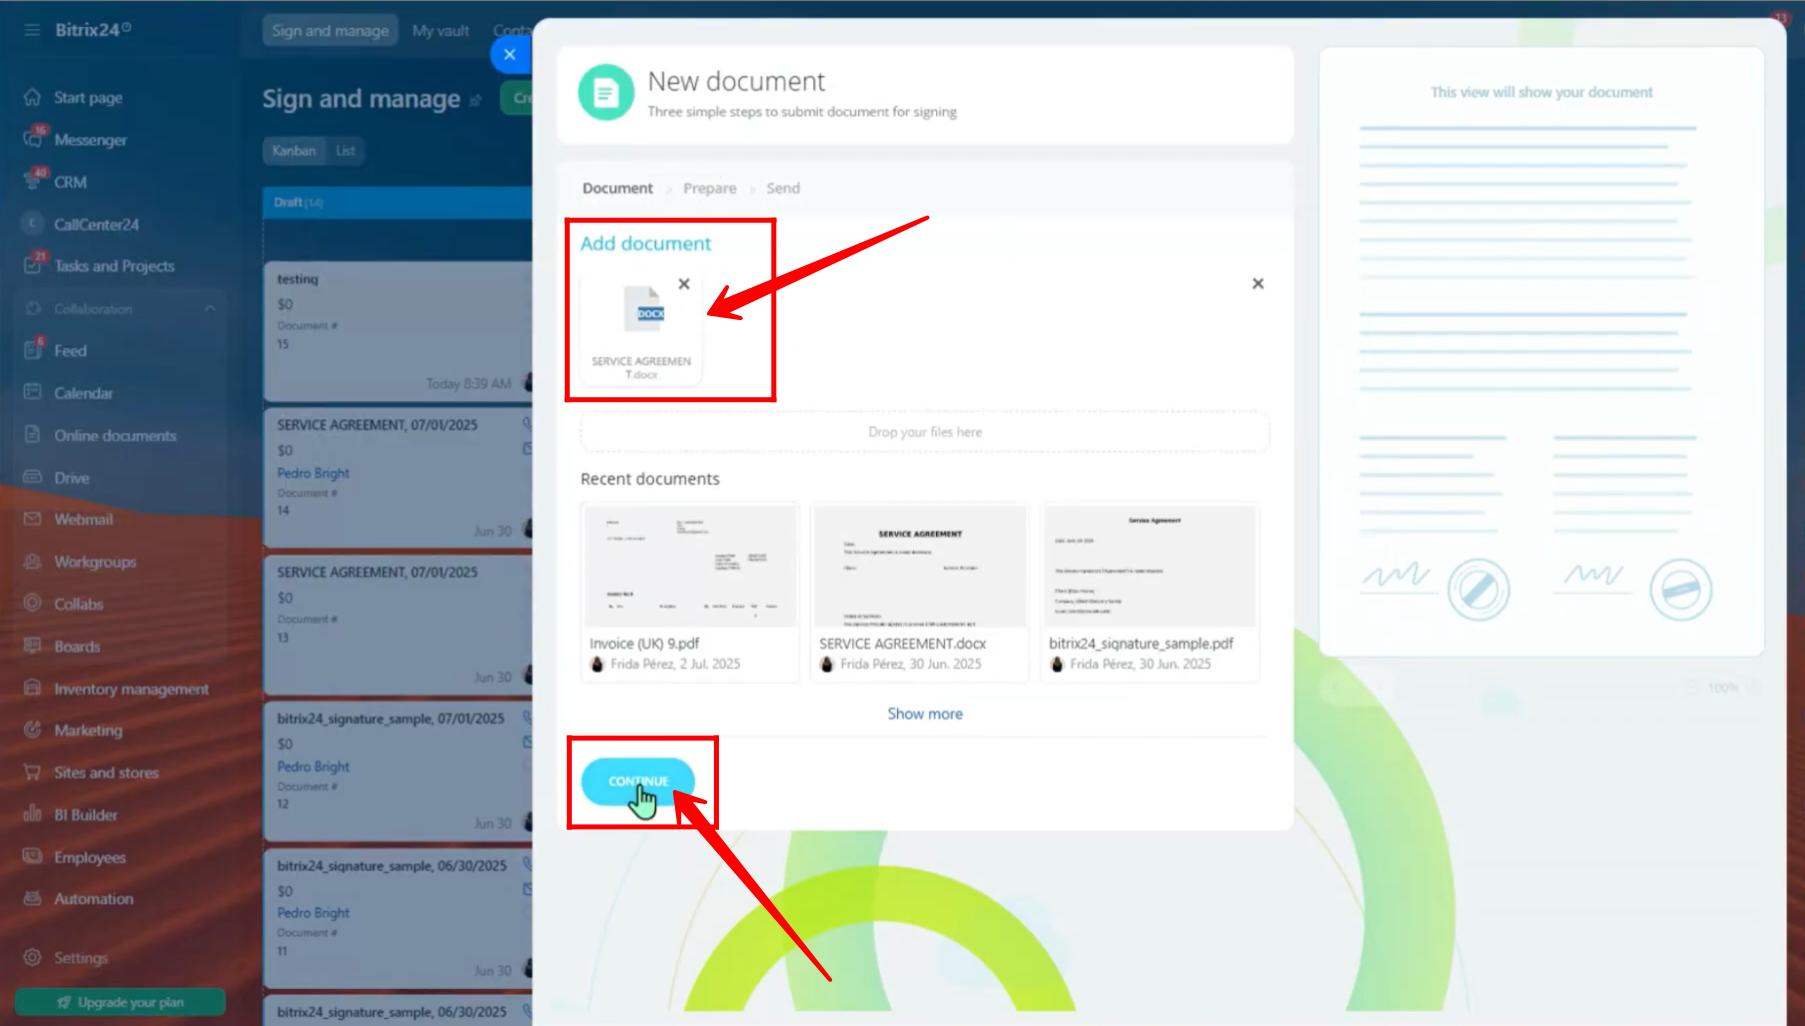
4. In this example, a Word document (like a Service Agreement with some sample text) is uploaded. Click “Continue” to see and edit the document.
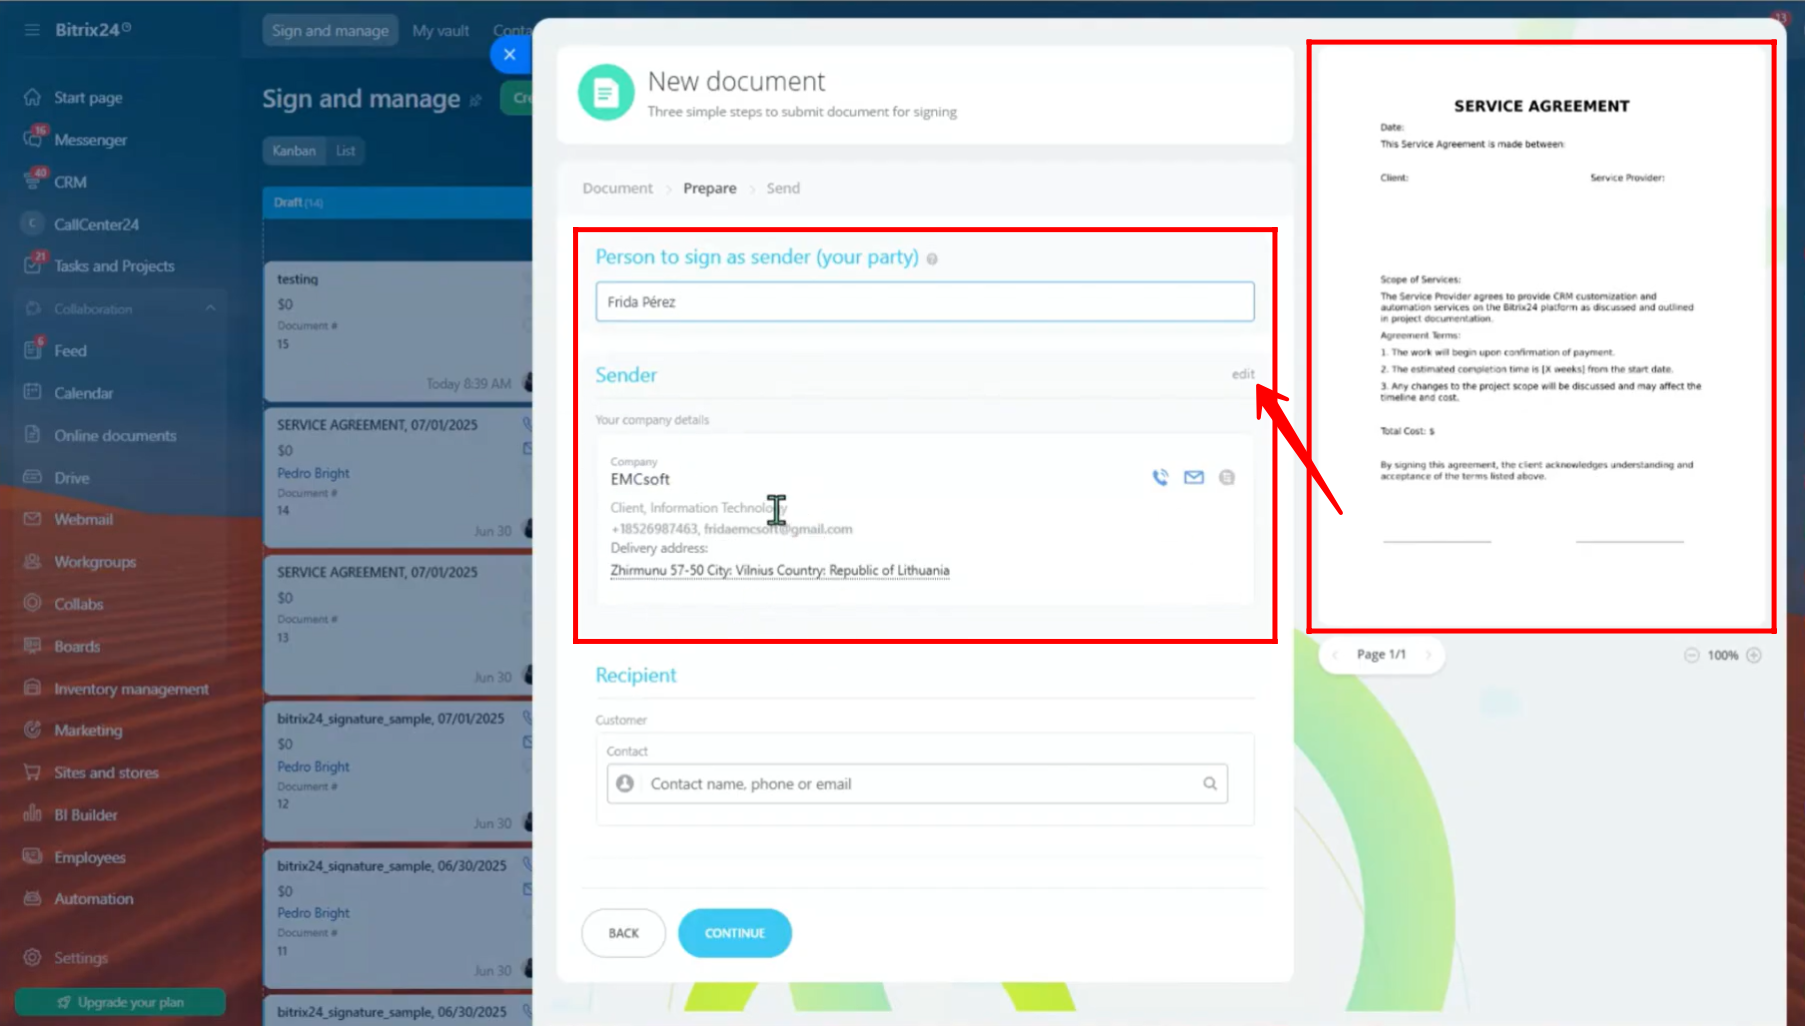
5. Now you can see the document on the right side. On the left side, you need to fill in some details.
– Write the name of the person who is sending the document (your side).
– Choose the sender’s company from saved details, or click “Edit” to change the company information.
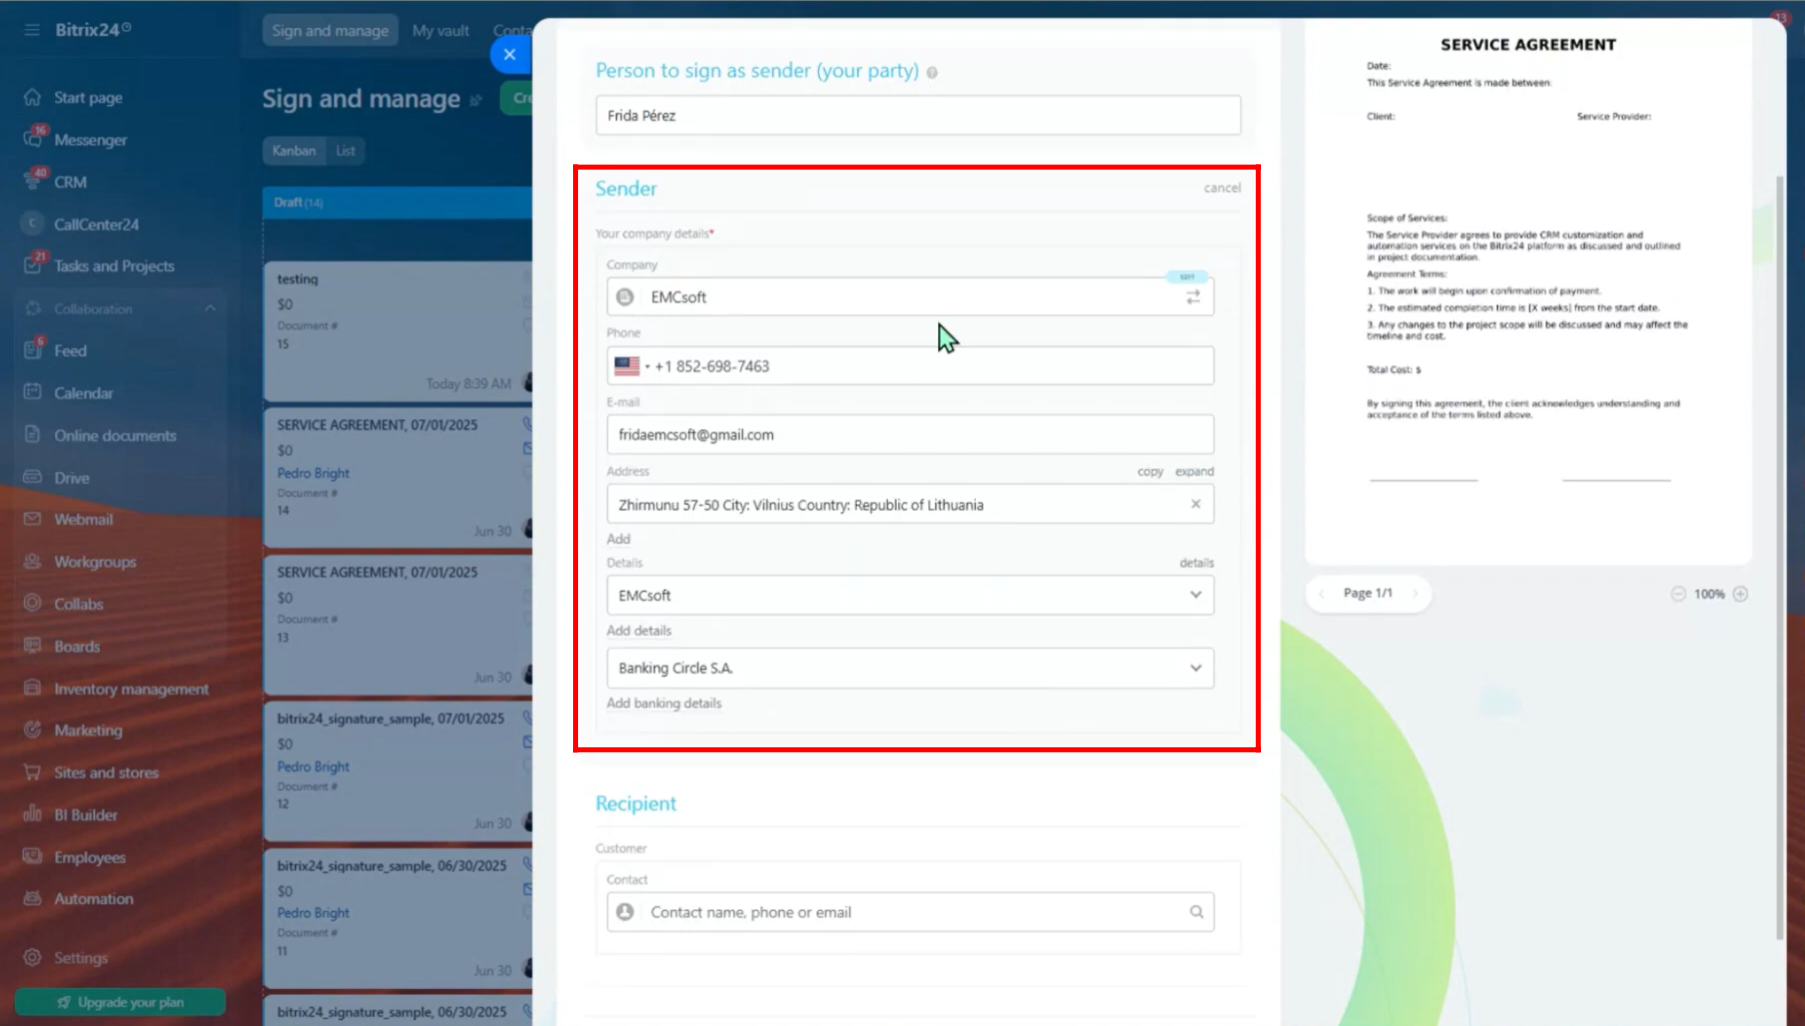
6. Here, you can change the company details like the company name, phone number, email, address, bank information, and more.
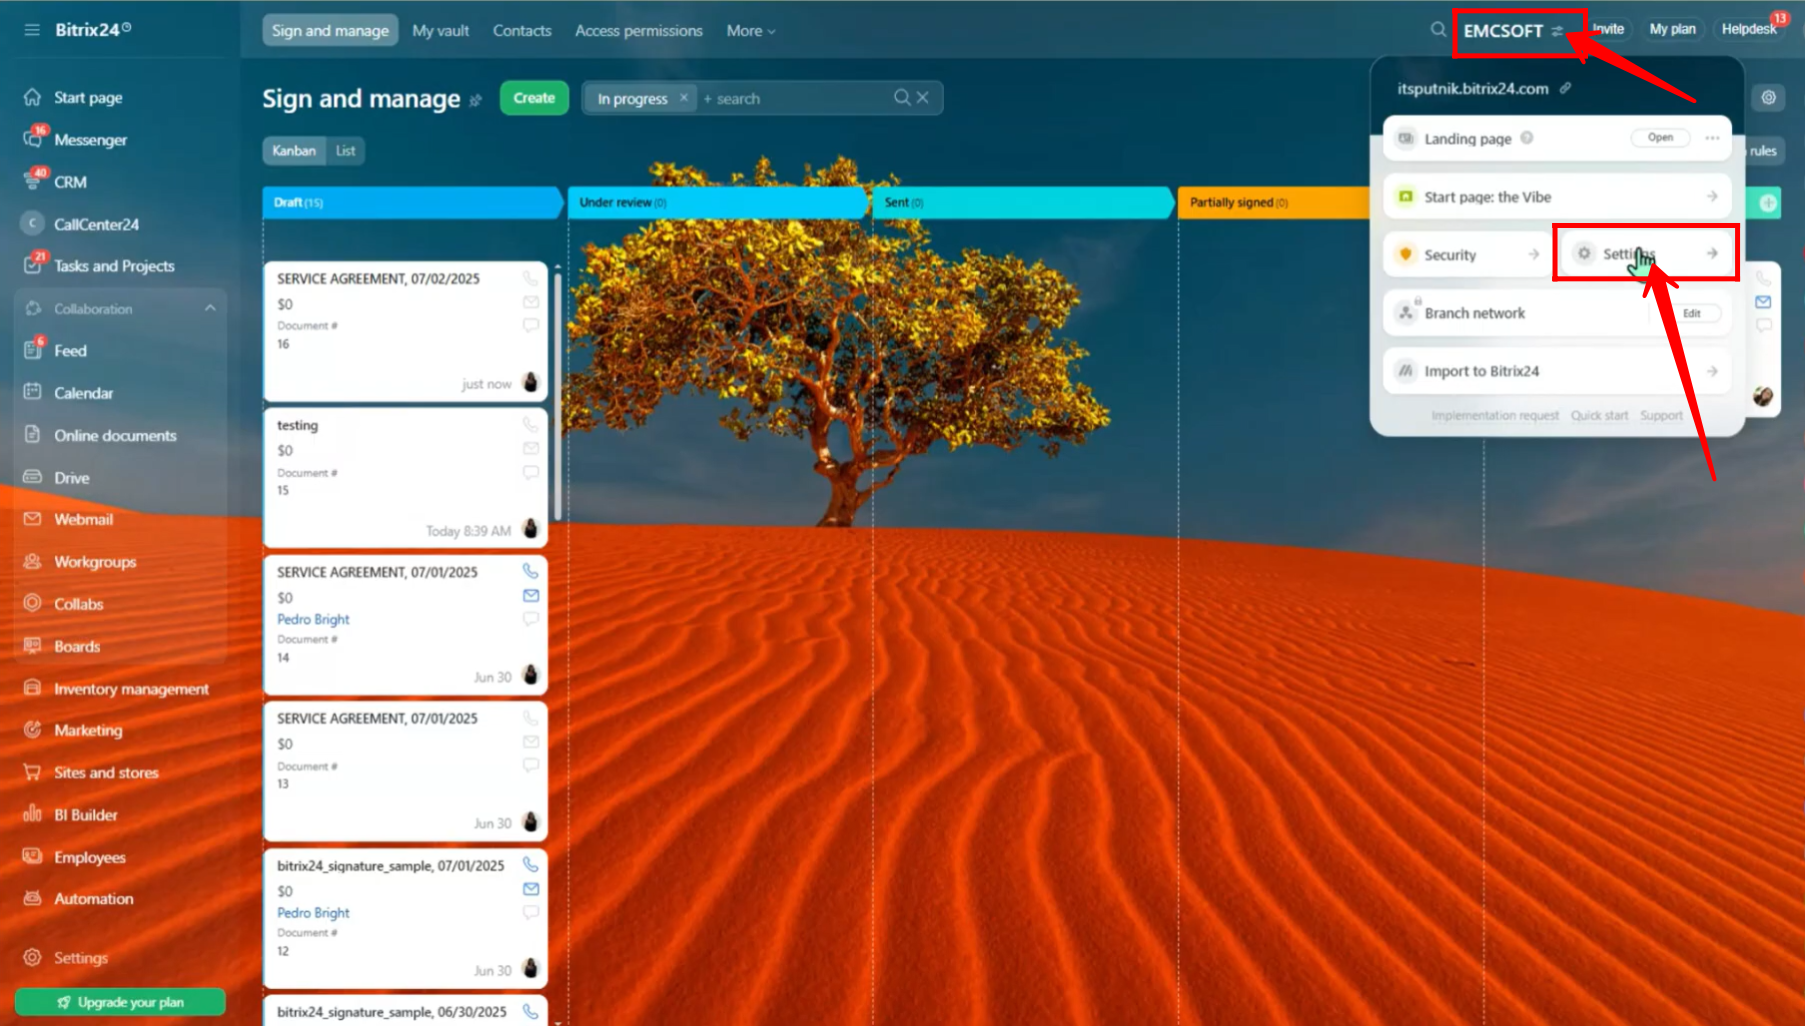
7. If you want to save the company details so you can use them again later, go to the settings.
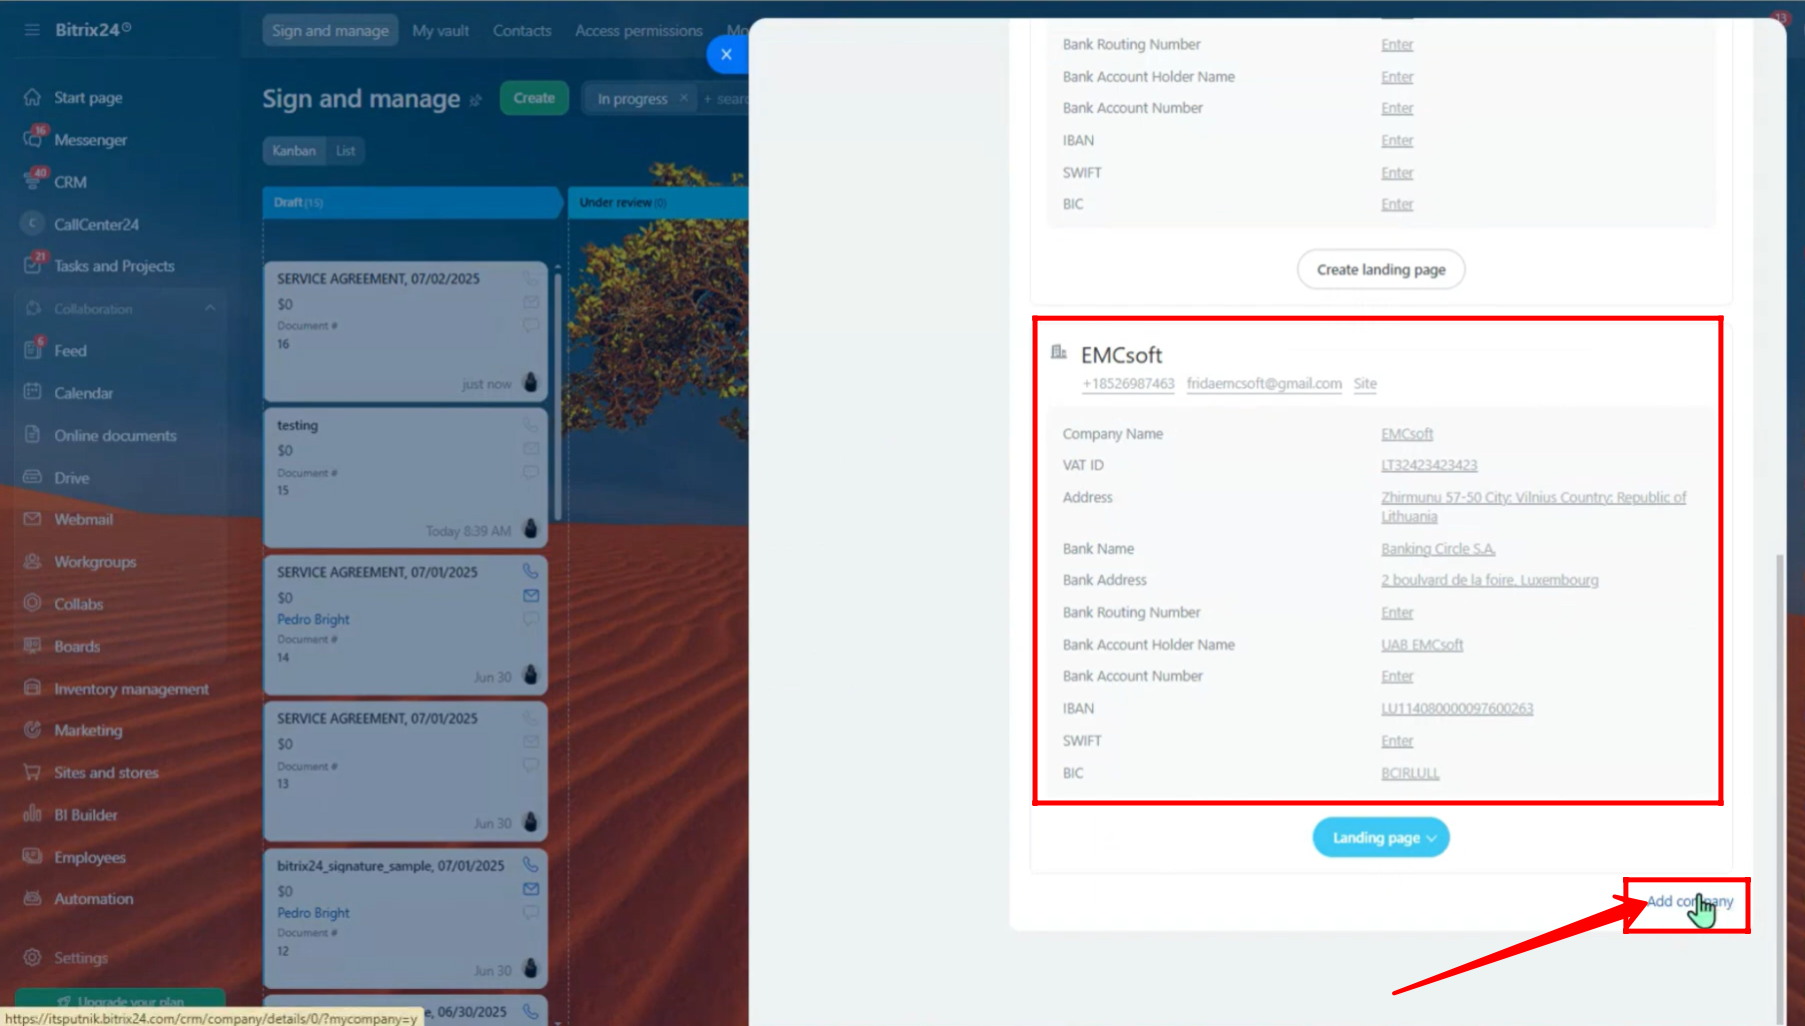
8. You can see the company details you saved before. To add a new company (for example, if you have more than one branch with different details), click “Add Company”.
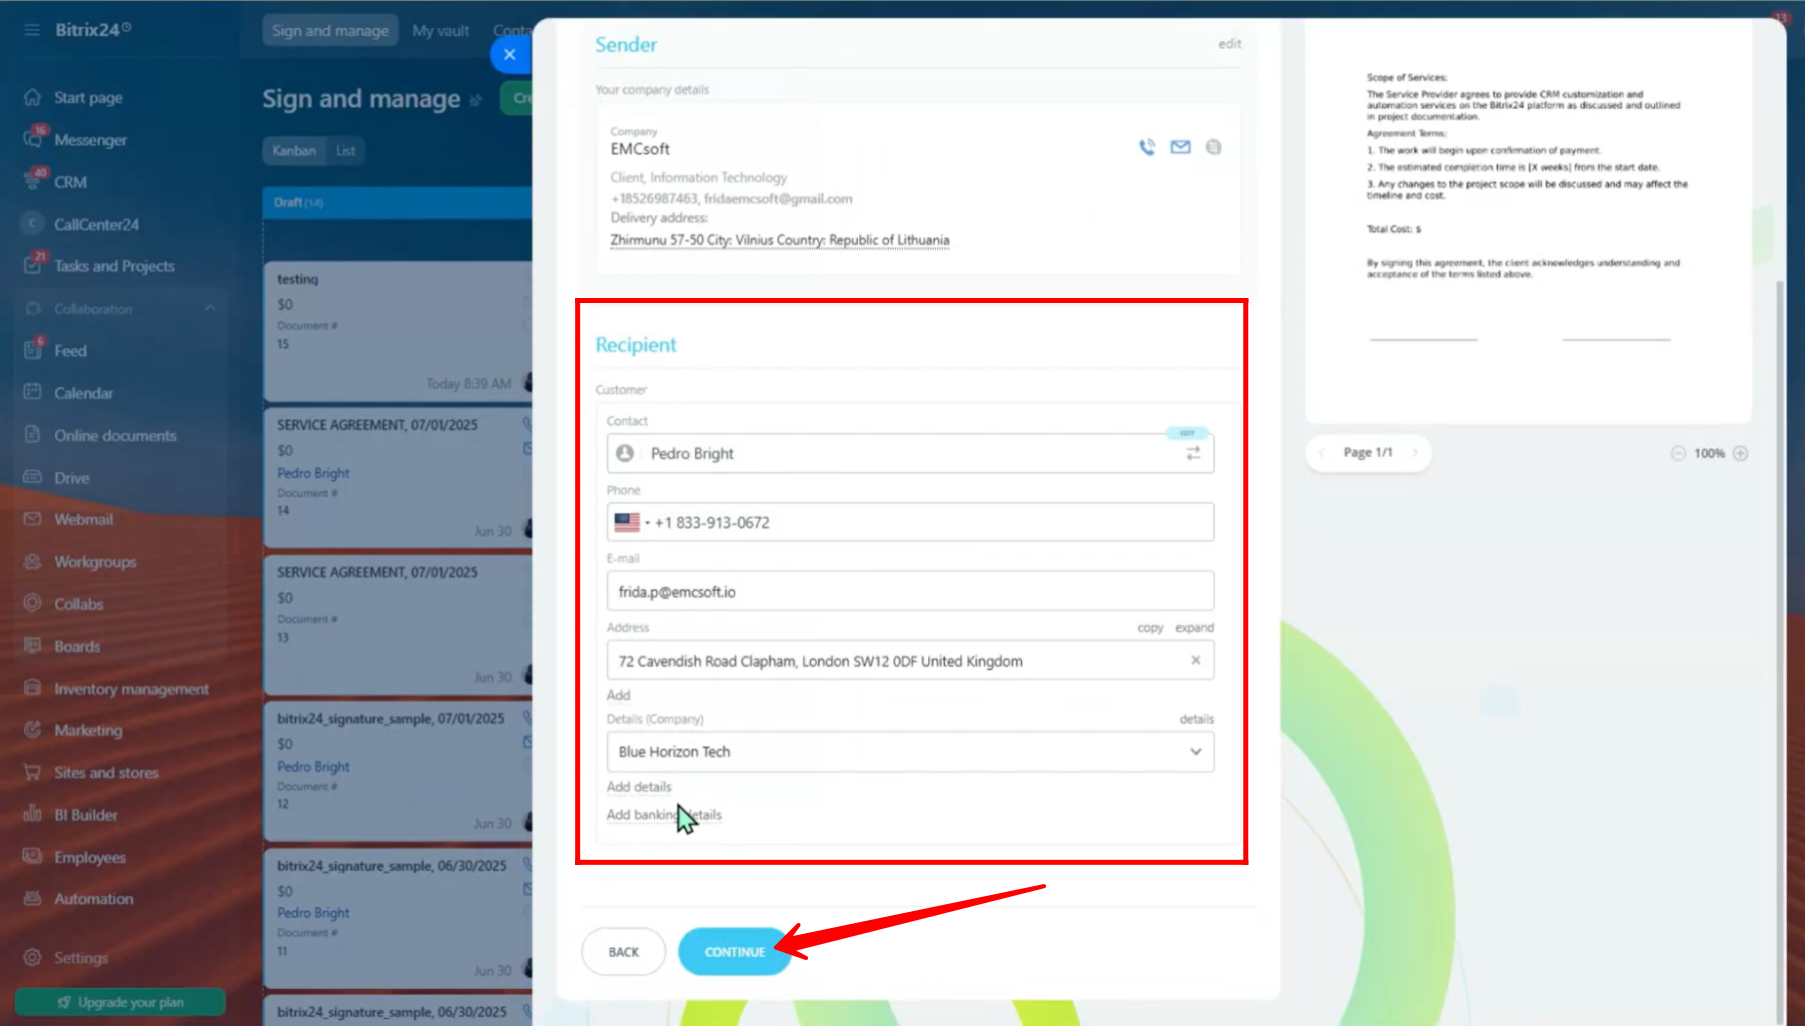
9. Now go back to the document signing setup. Add the details of the person who will sign the document. You can only choose a recipient from your saved contacts (as a customer). You can also add their bank details here if needed. Then, click “Continue”.
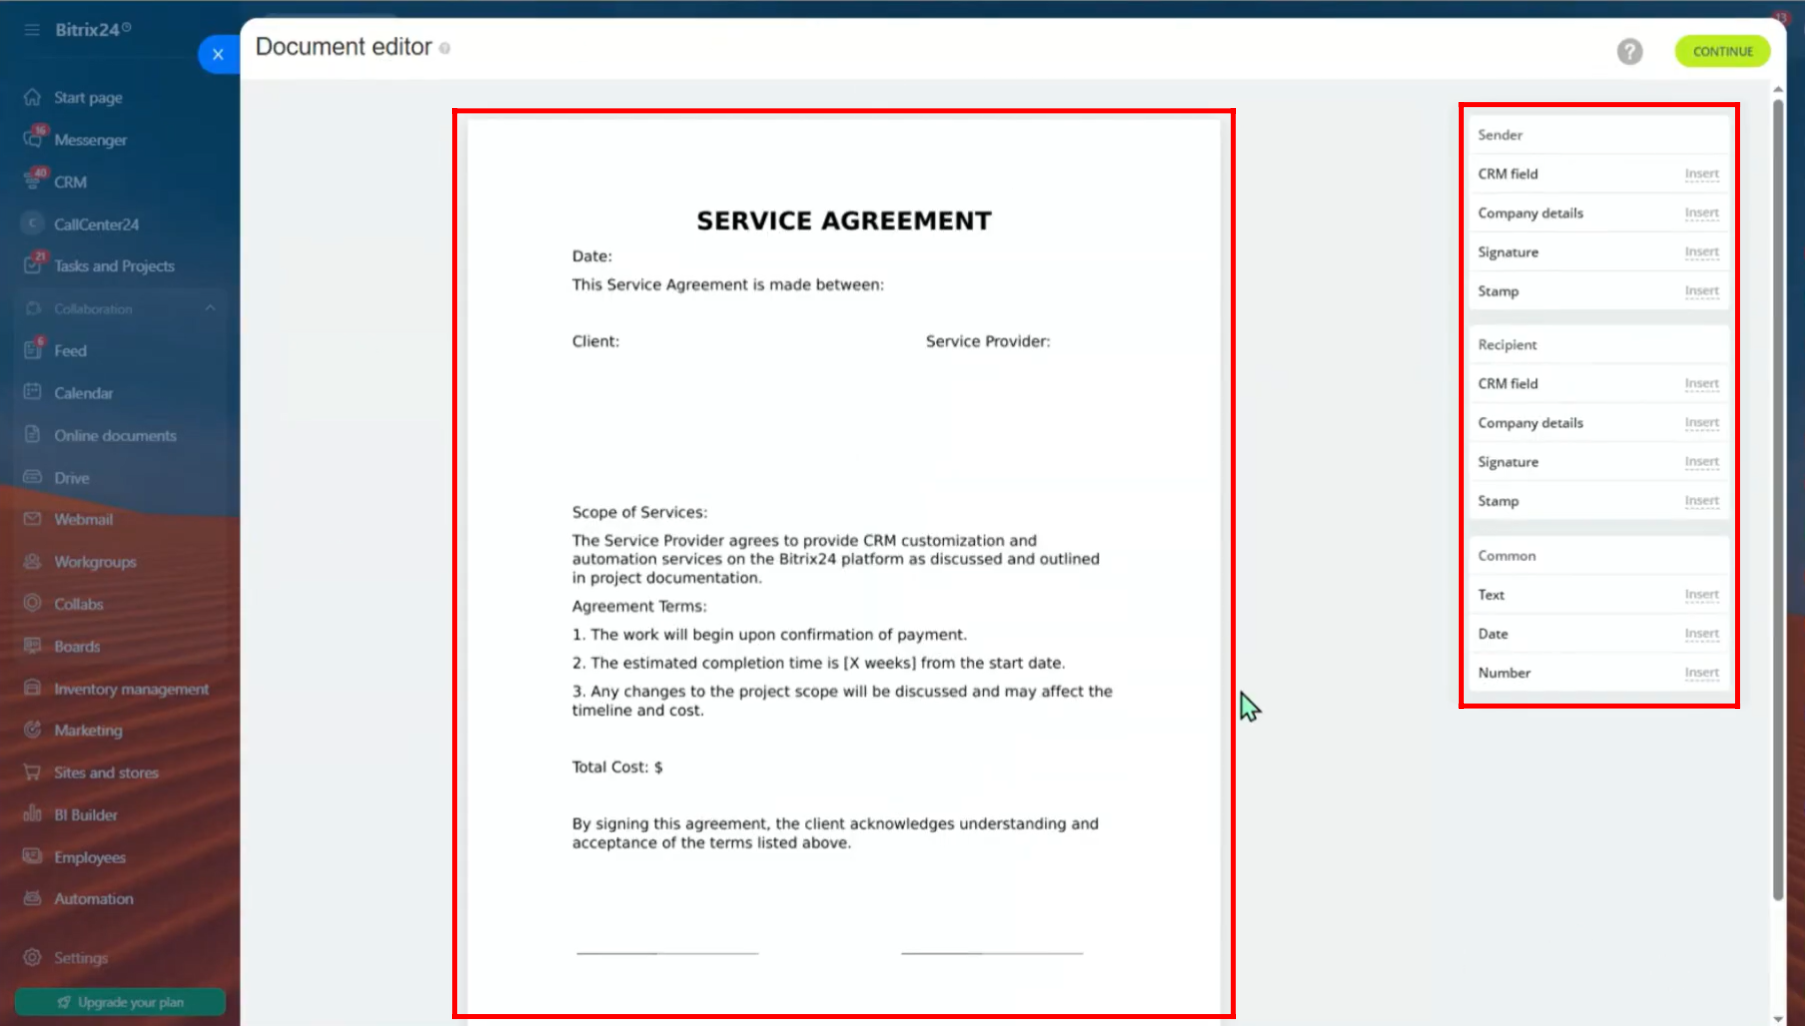
10. Now you are in the editor where you can add information to your document. You can choose details from the sender, the recipient, or use common fields to add into the document.
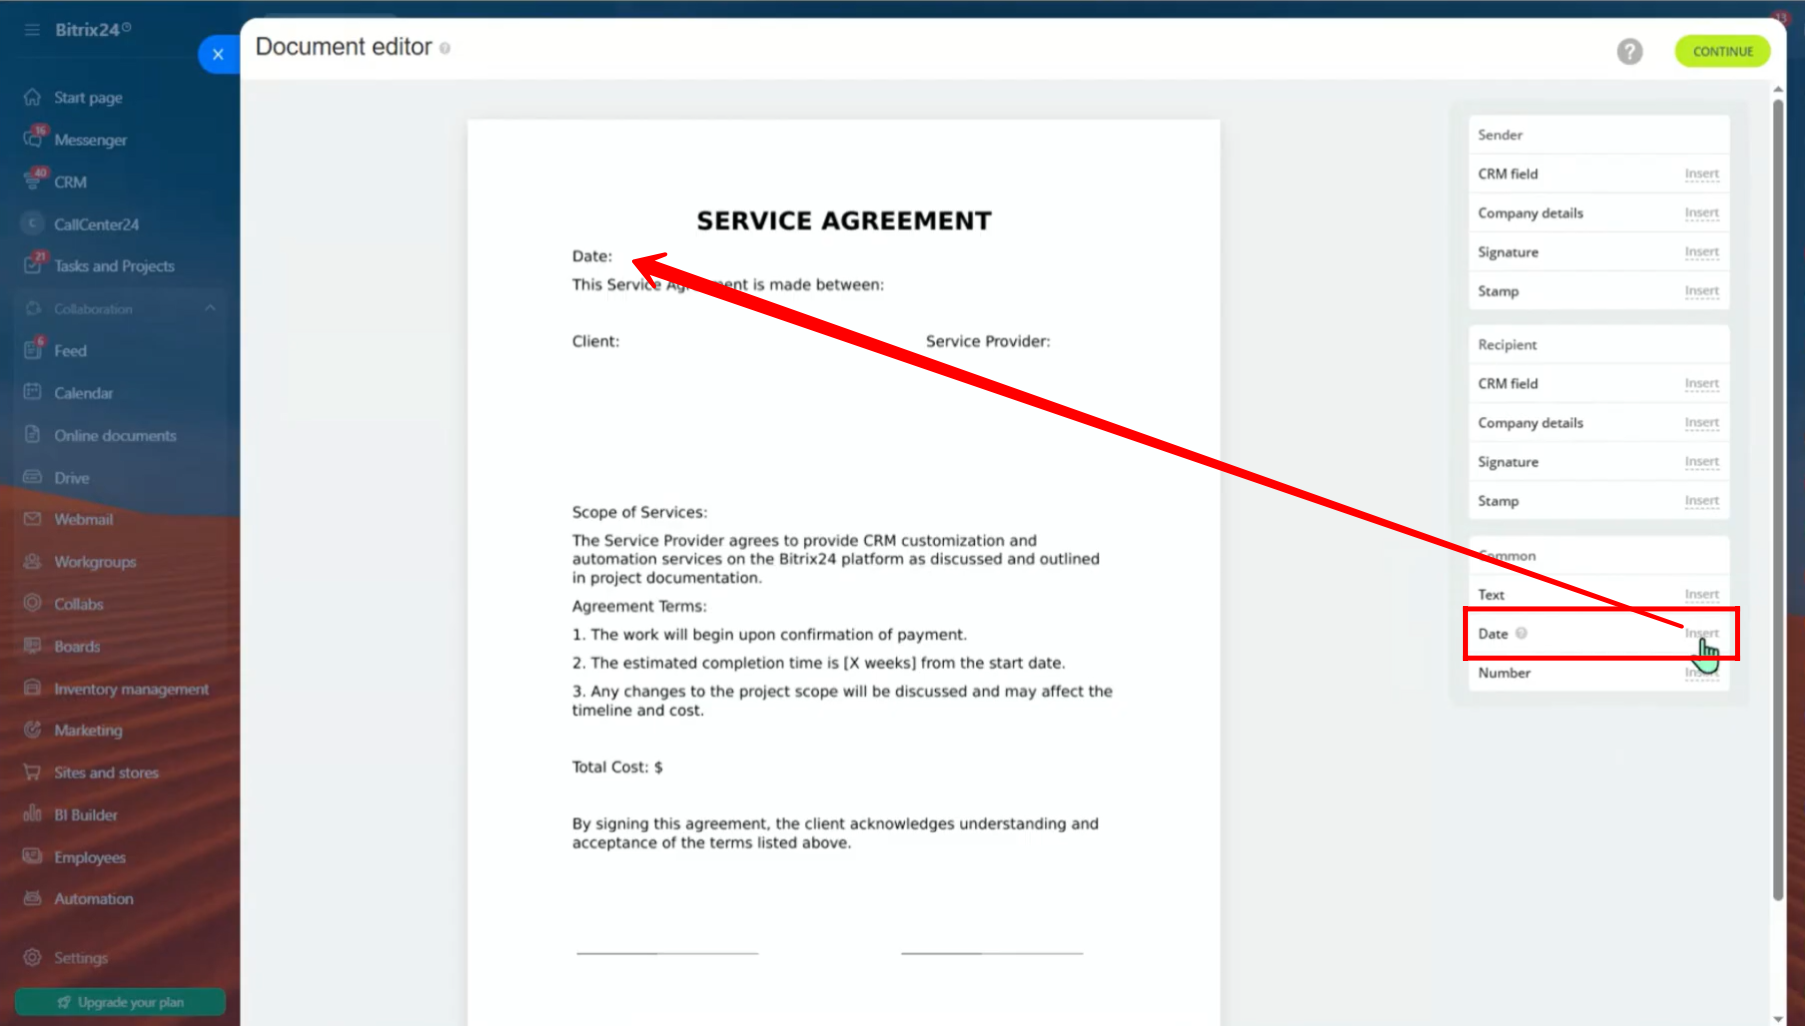
11. For this document, let’s add the date first. In the “Common” section, click “Insert” next to “Date”.
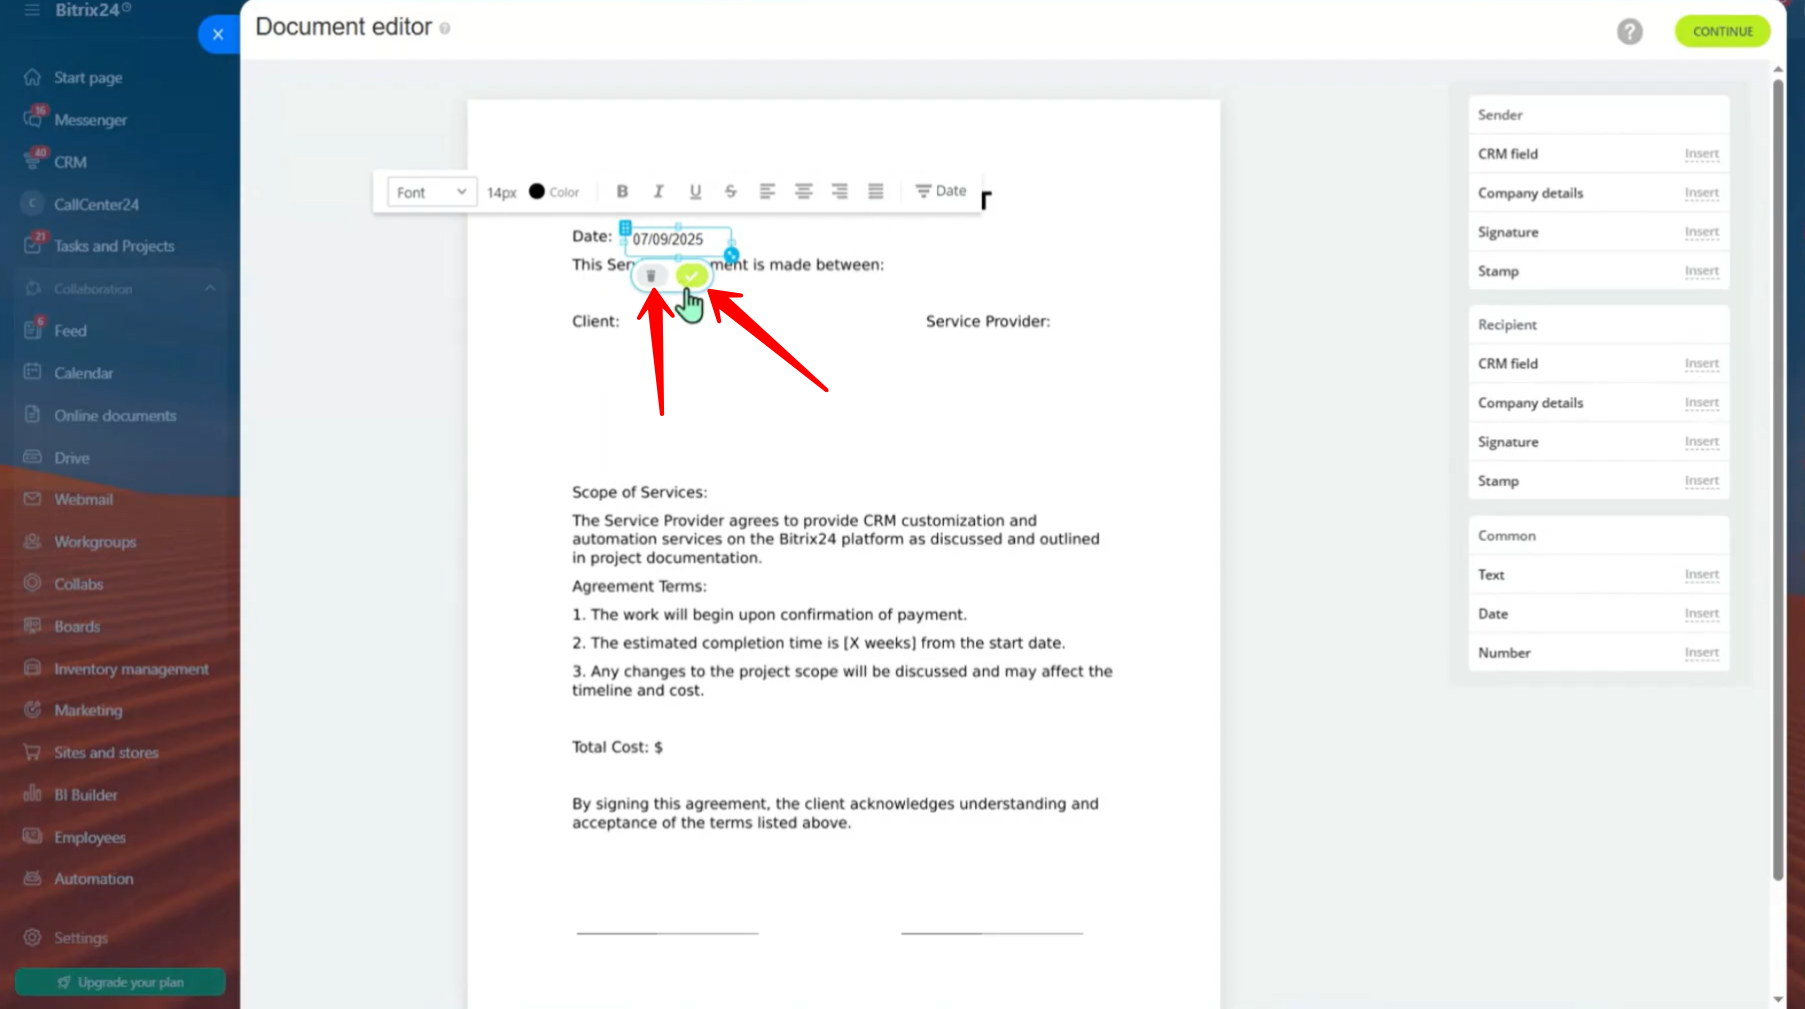
12. Drag the date to where you want it to appear in the document. You can change its color, alignment, font, and more using the editor. You can also pick a date from the calendar.
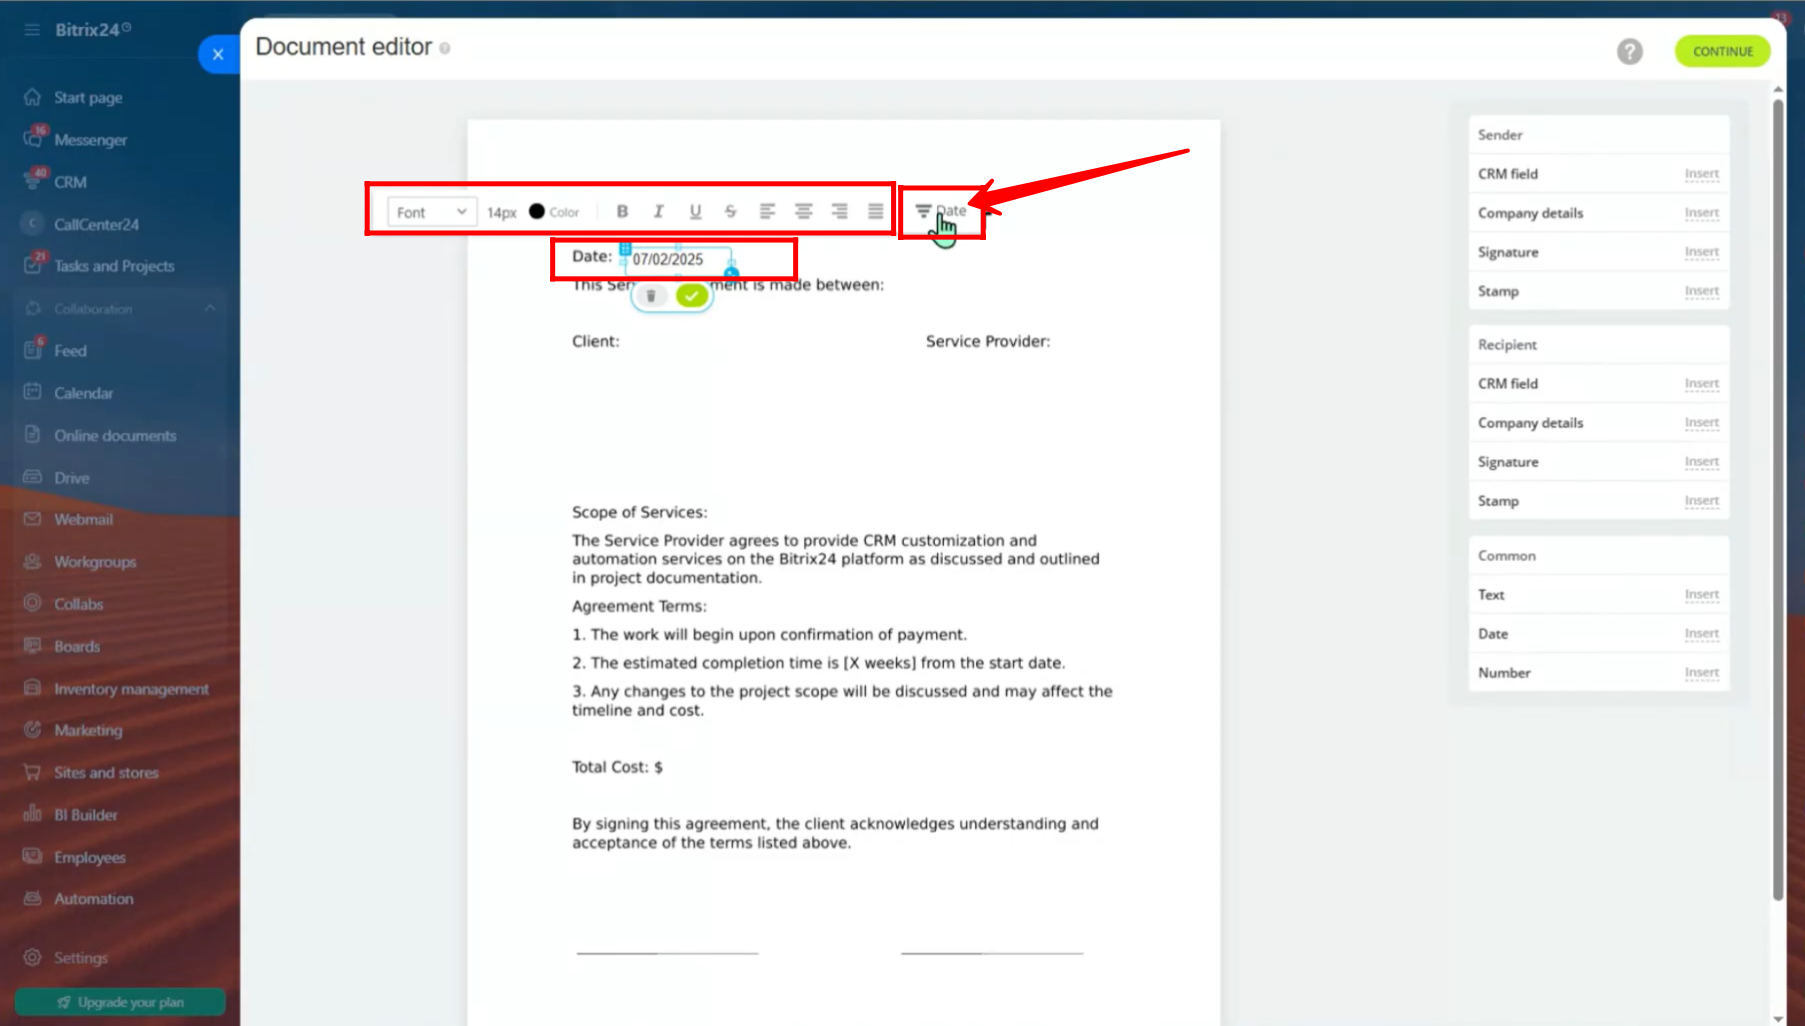
13. Click the green checkmark to save the date field. If you want to remove it, click the delete icon.
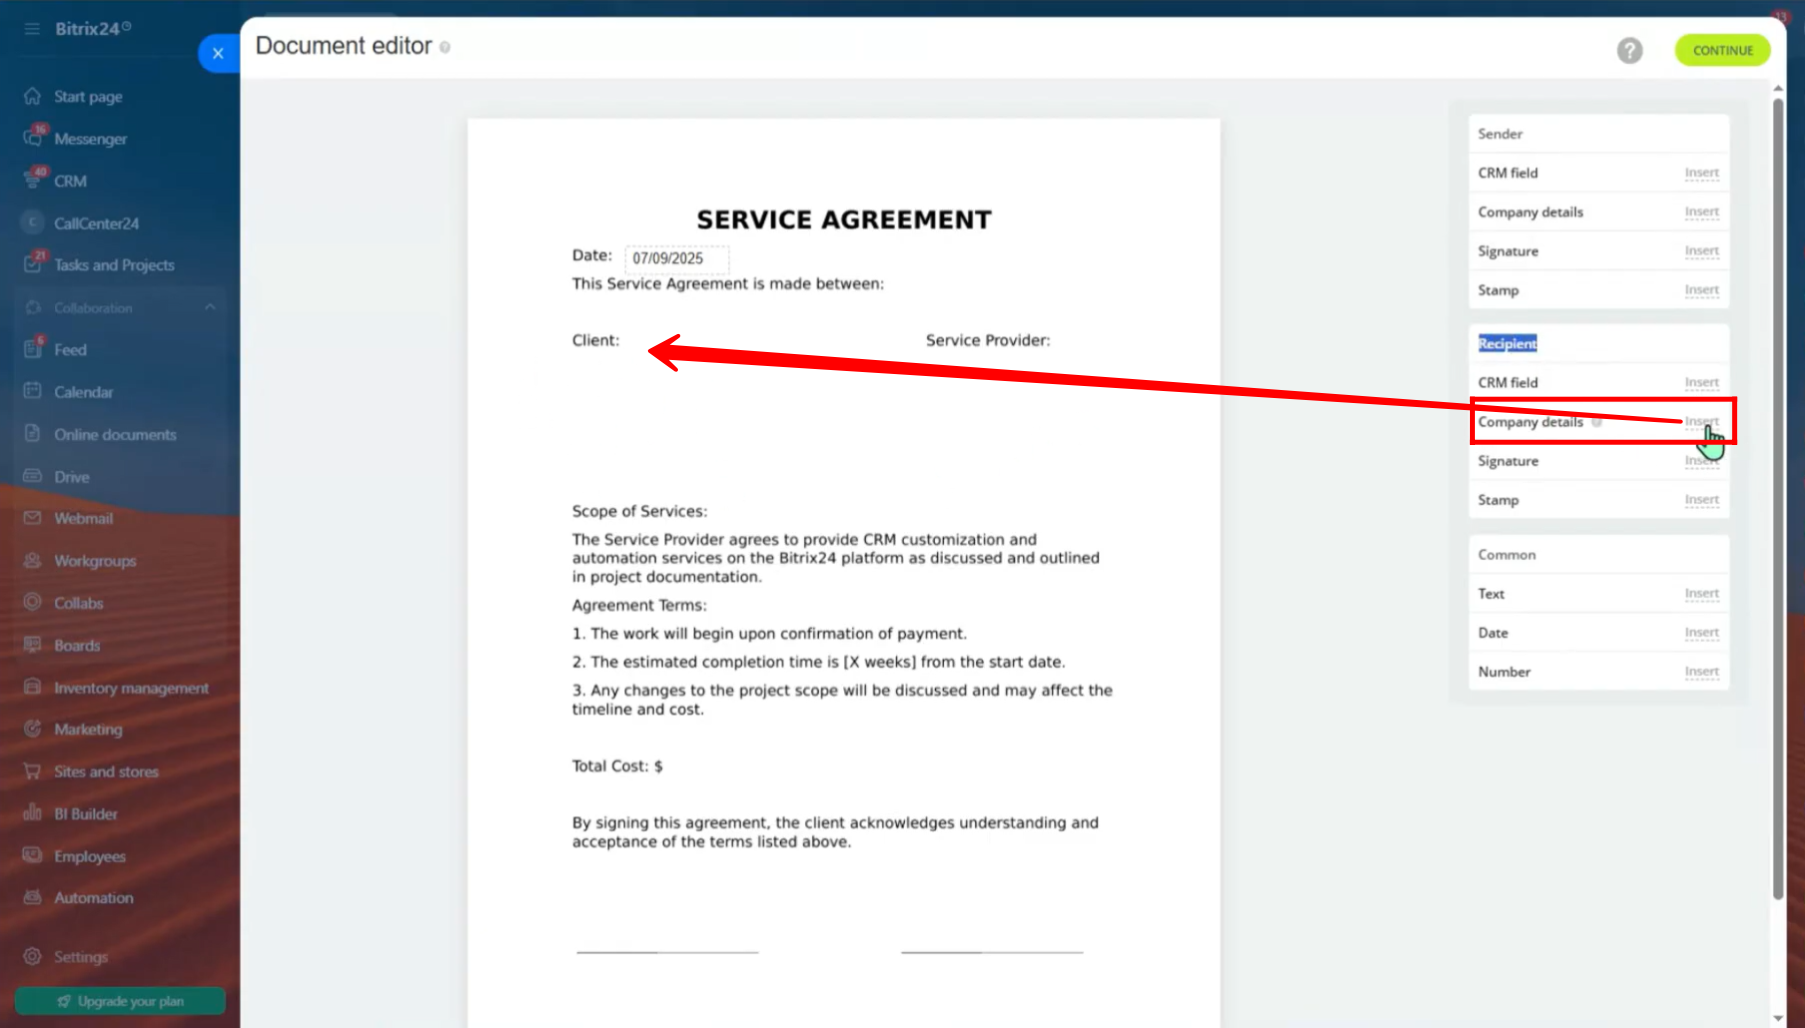
14. You will see a part in the document where you need to add the client’s (customer or target company’s) details. Click “Insert” next to “Company Details” in the recipient section.
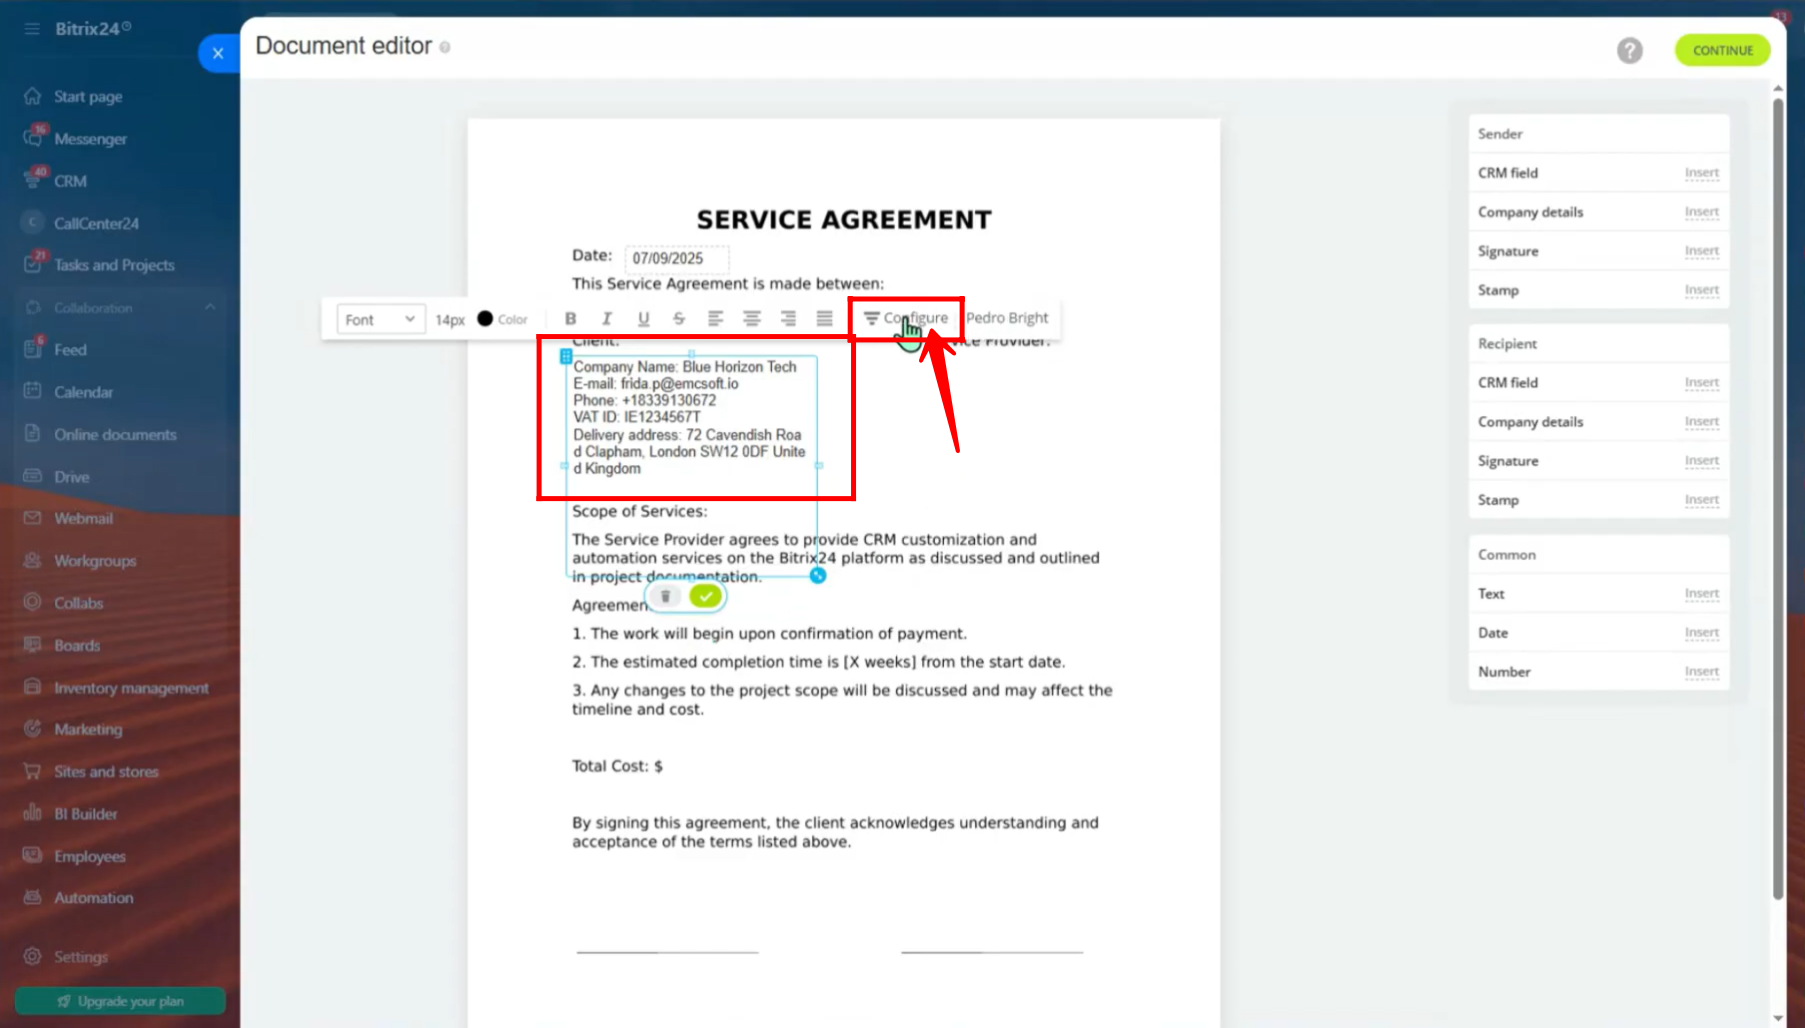
15. Drag the details to the place where you want them to appear. In the same way, you can also edit the client’s company details. Click “Configure” for more editing options.
16. If you forgot to update any company field earlier, you can change it here. Click on “VALUE” to update the information.
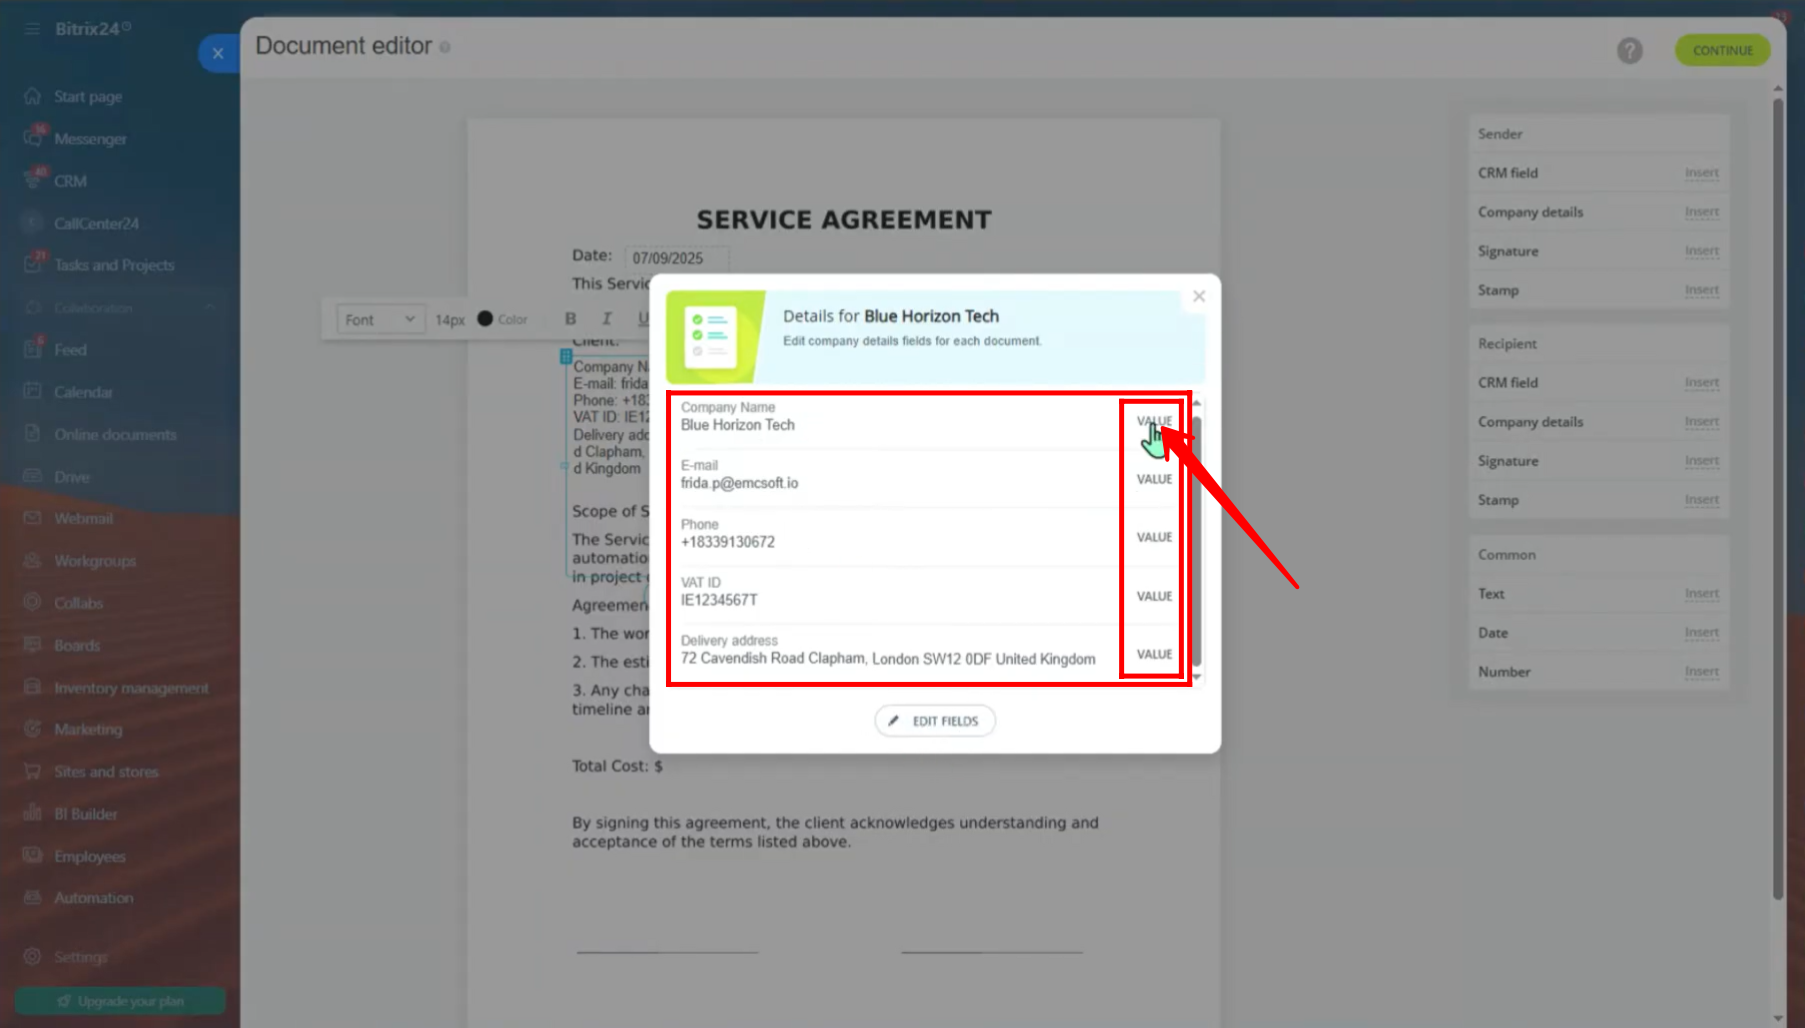
17. Here, you can edit the company name, address, VAT ID, bank details, or any other needed information.

18. Next, click “Edit Fields” to add more fields to the company details or to change or delete any fields you added earlier.
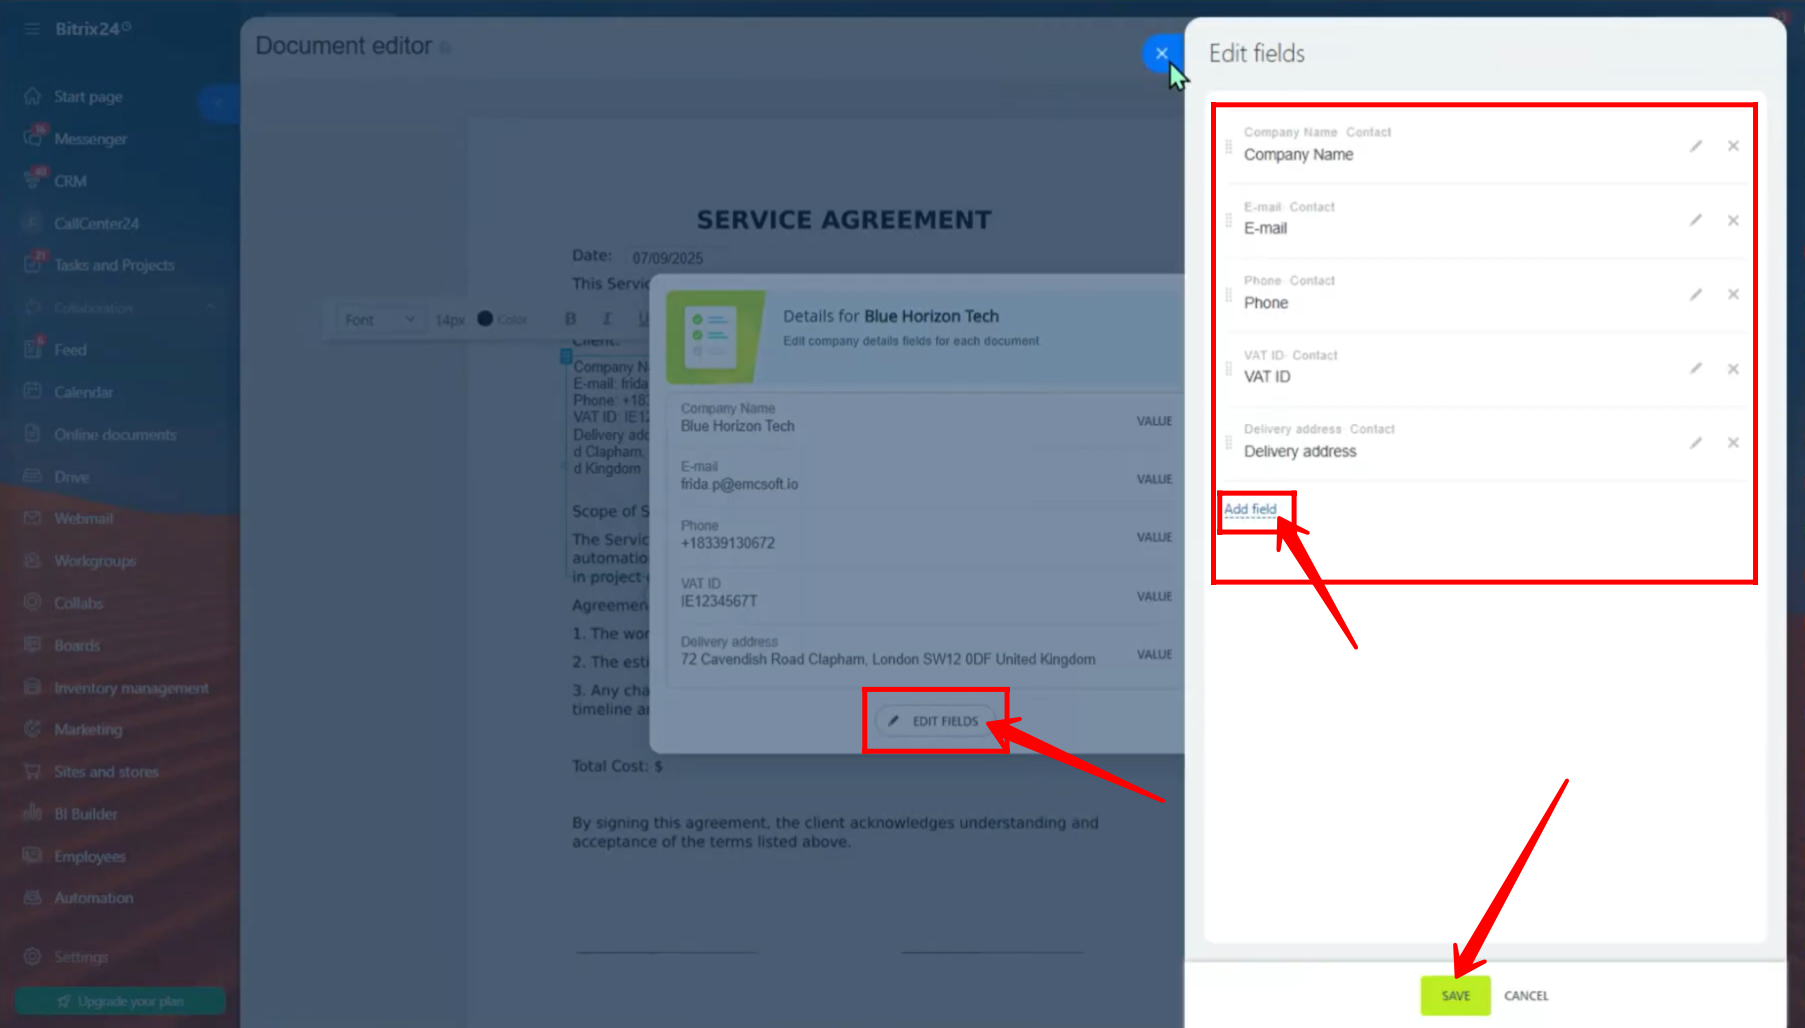
19. Remember, you can only add new fields to the company details from the Contact section. Make sure you have added the needed fields in the Contact section under CRM Settings.
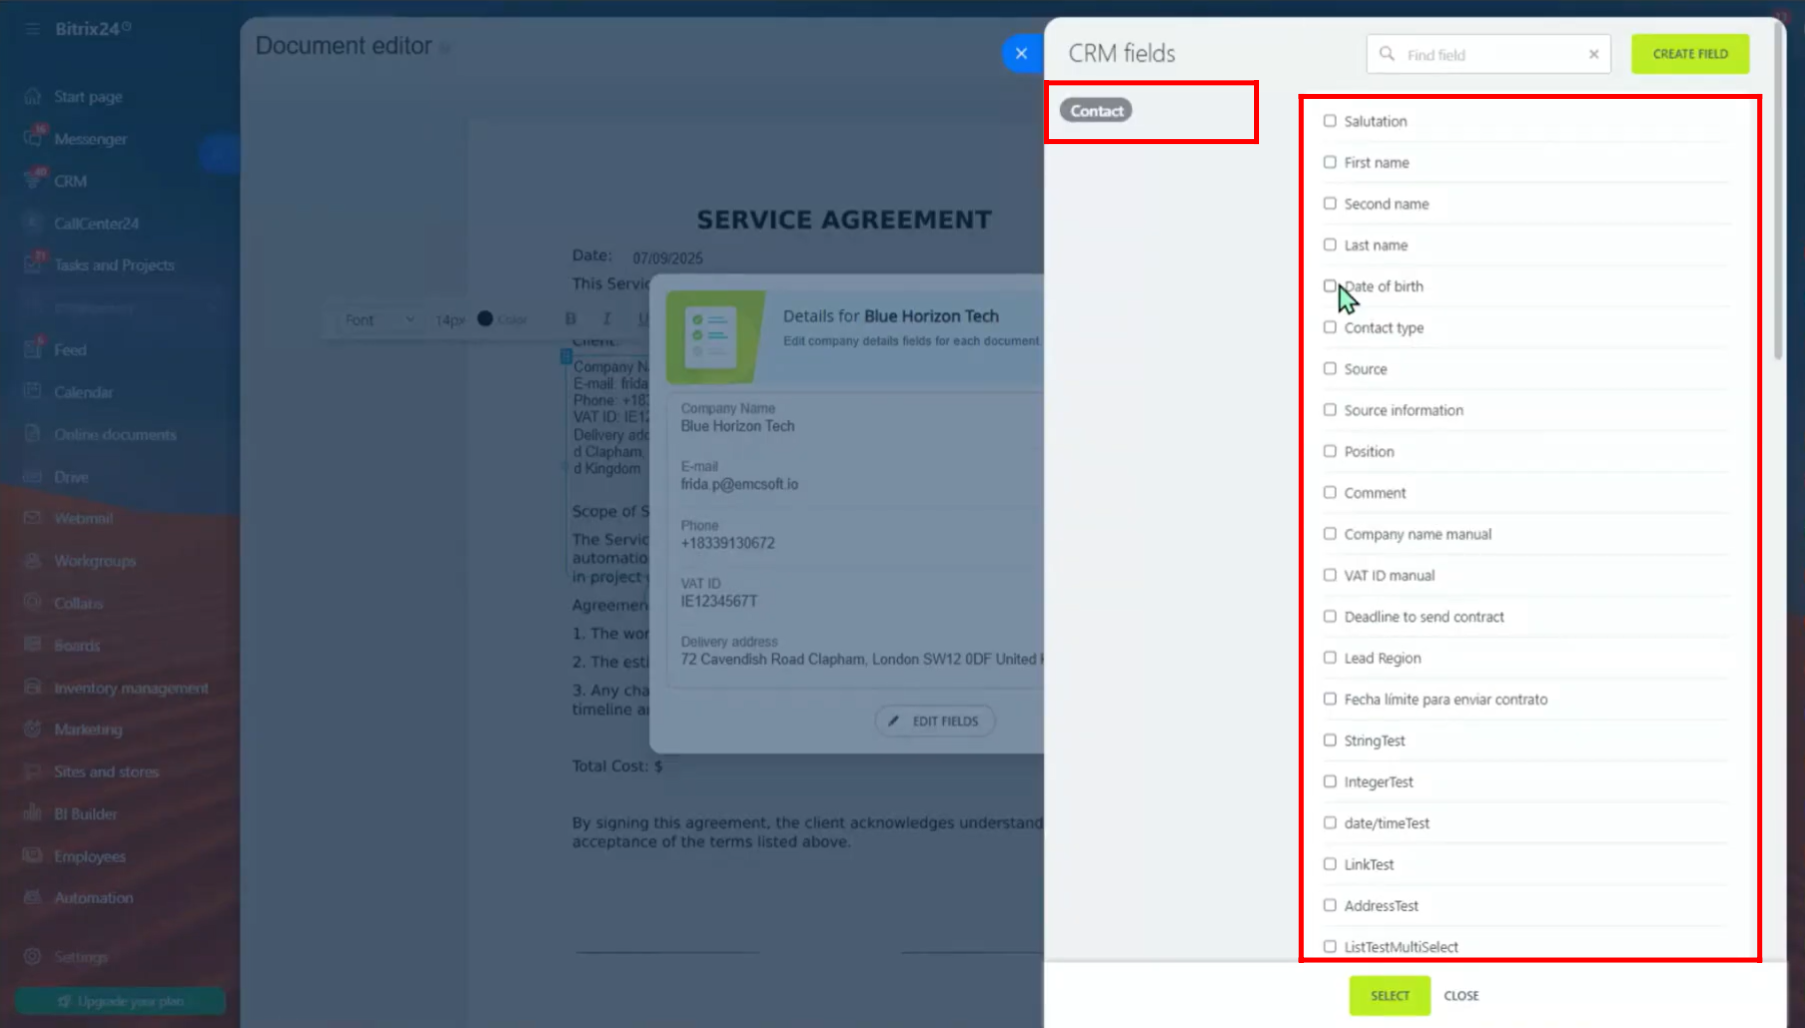
20. Now, the document has a section for the “Service Provider (Sender)” too. To add the sender’s company details, click “Insert” next to “Company Details” in the sender section of the editor.
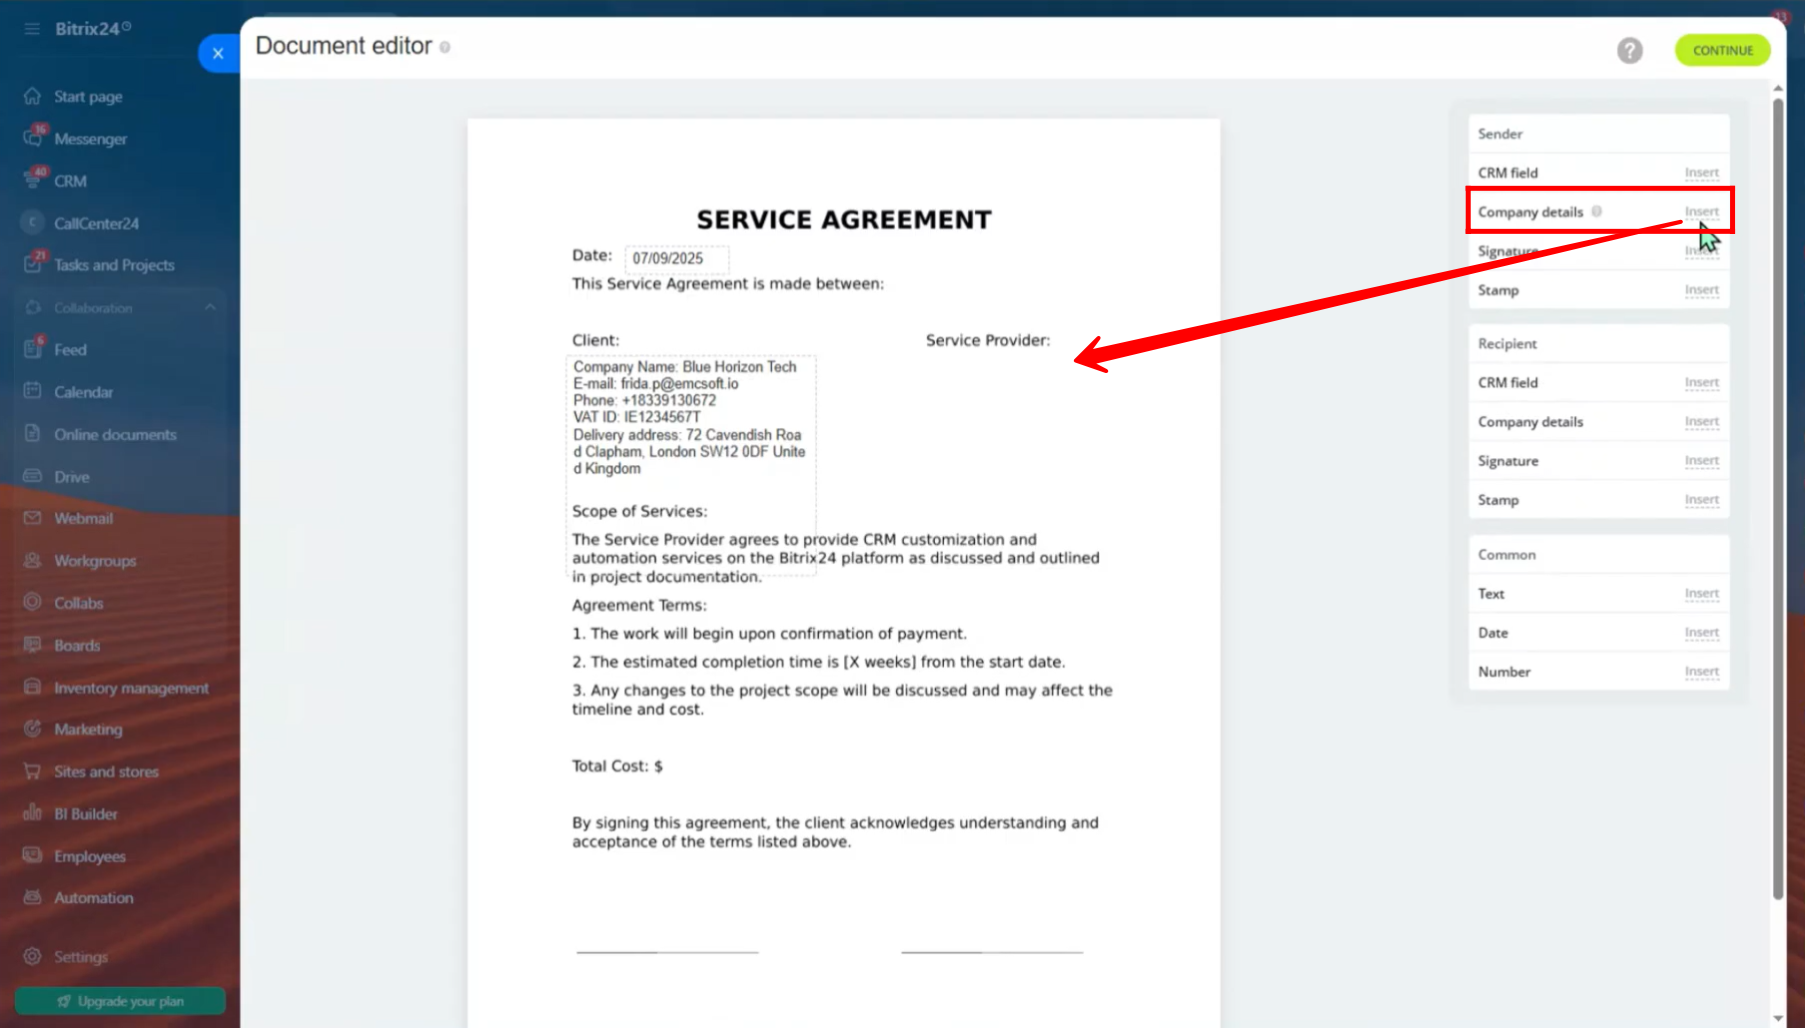
21. You can edit the sender’s company details just like you did for the recipient—add new fields, change field names or values, and adjust color, alignment, font, etc.

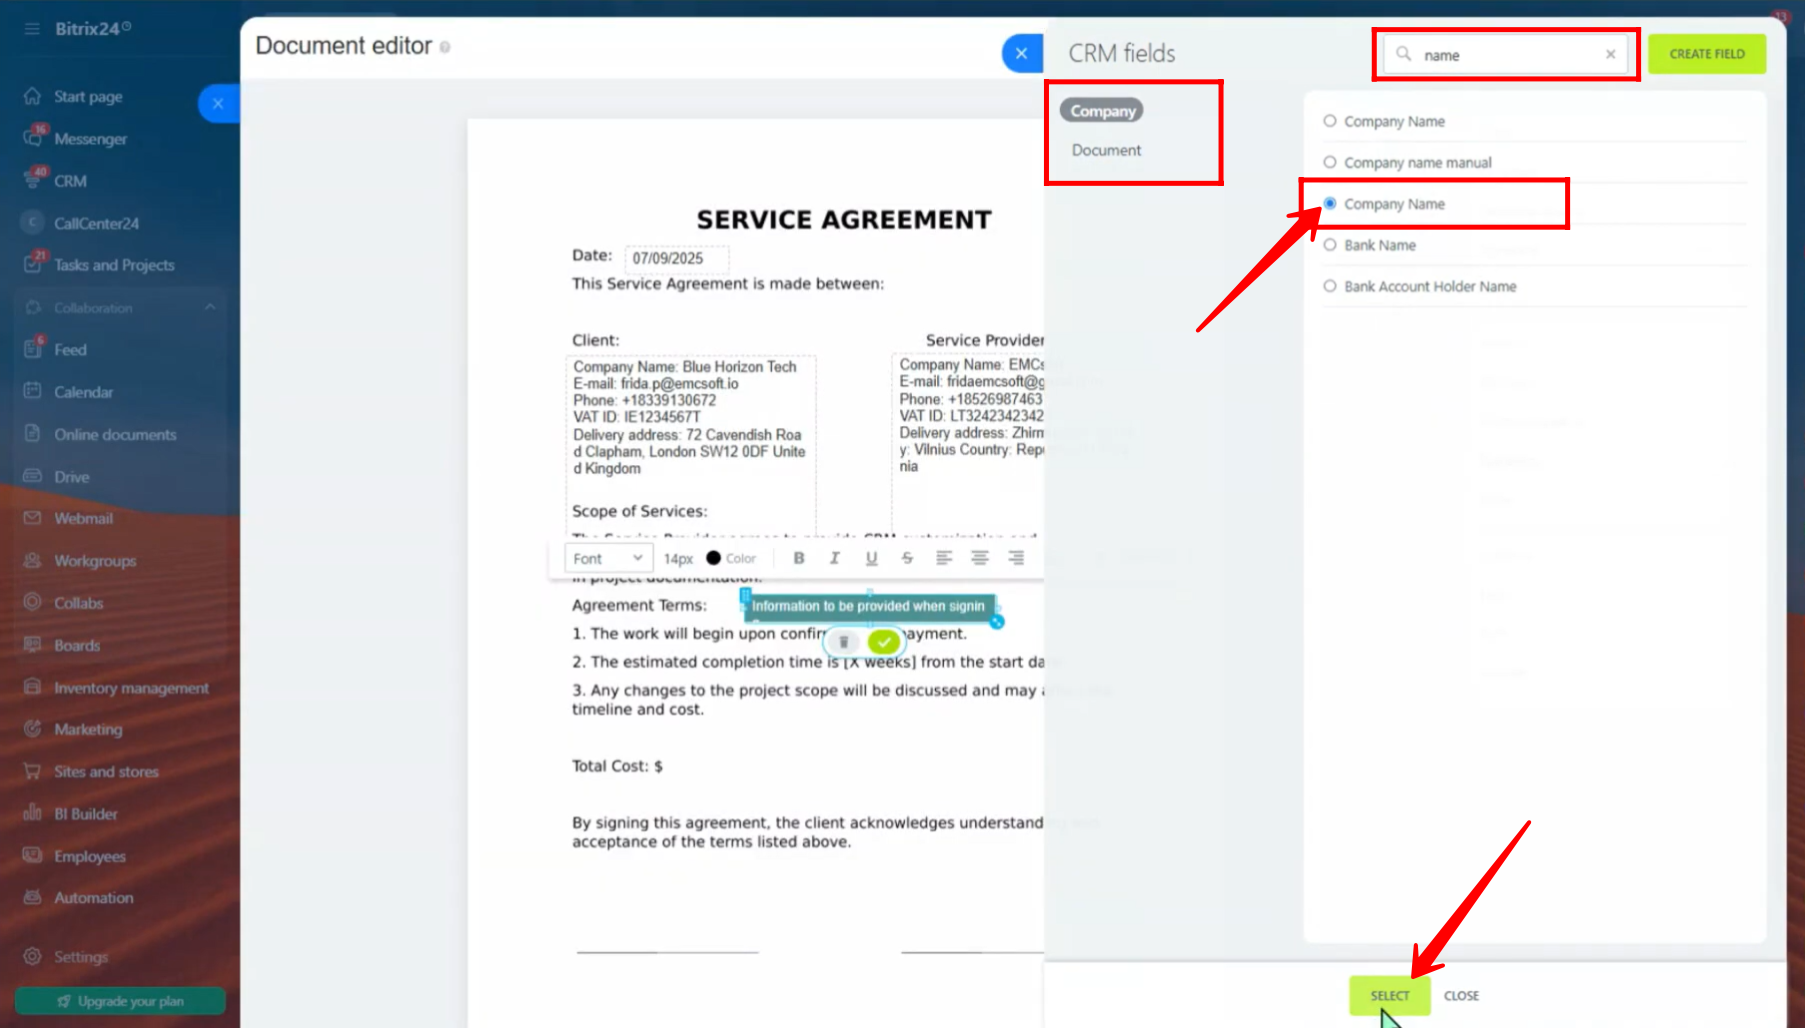
22. You can also add a single CRM field into the document. To test this, go to the “Sender” section and click “Insert” next to “CRM Field.”
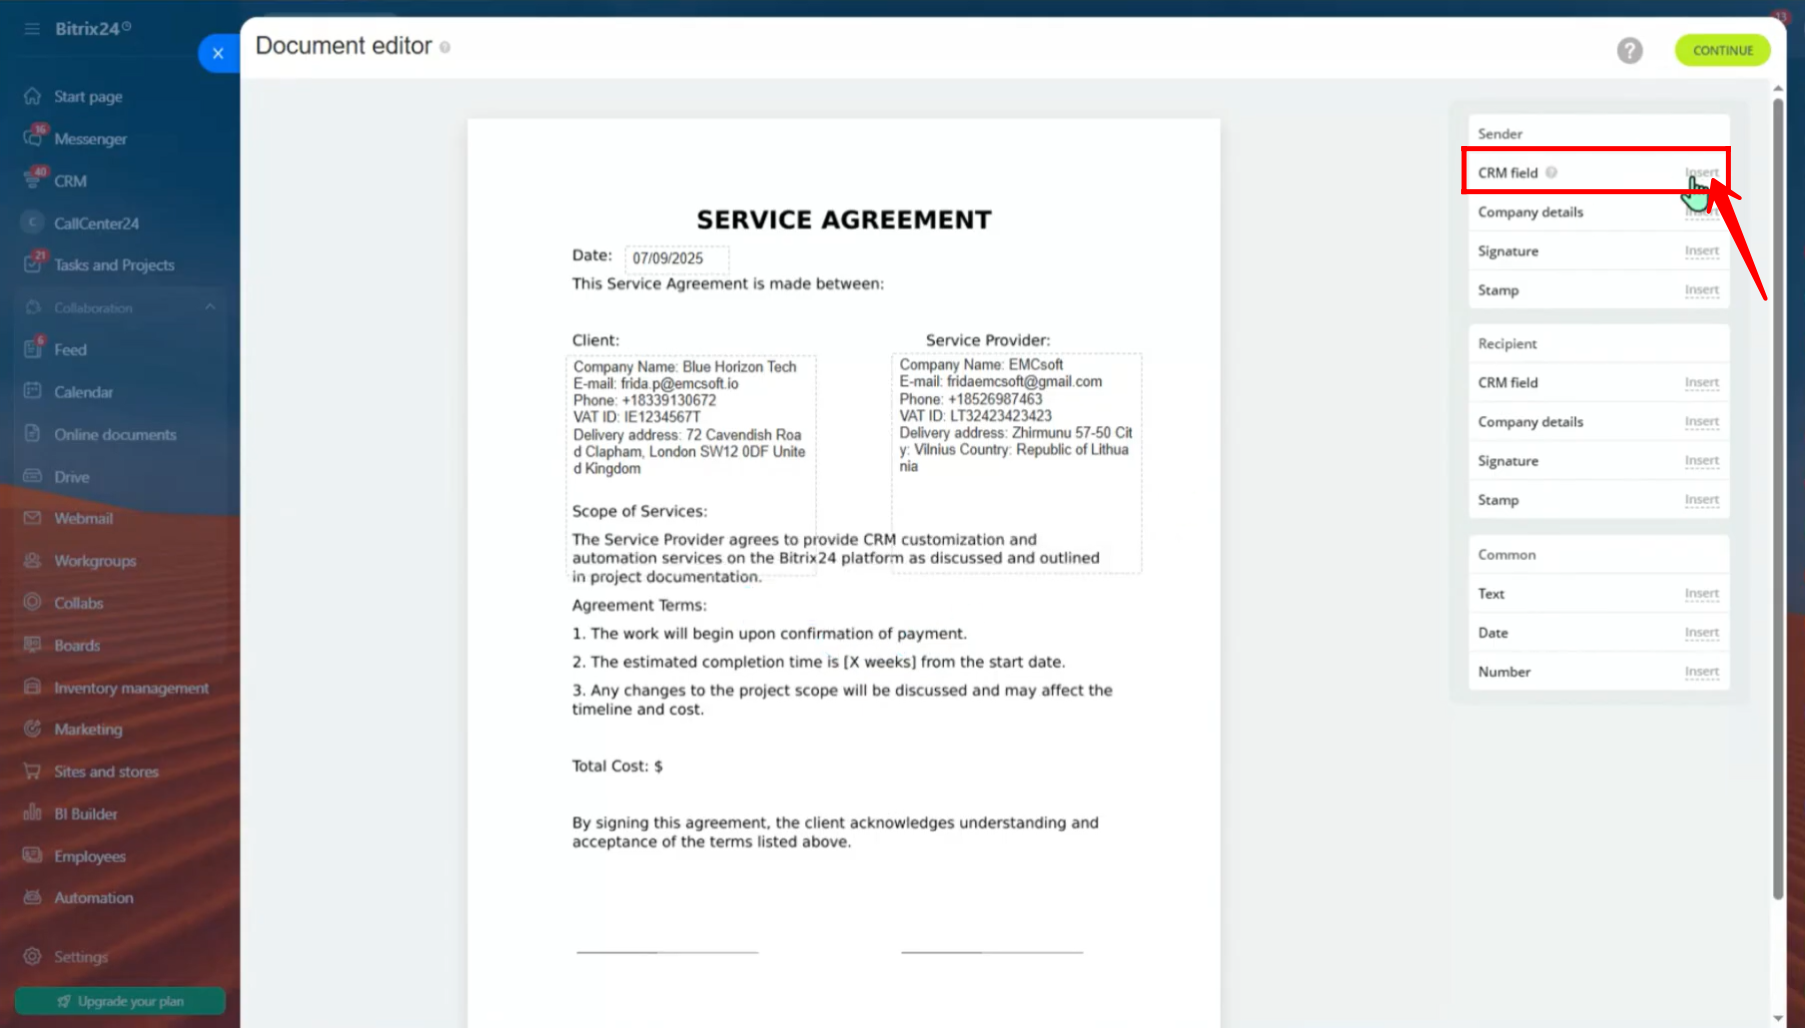
23. You can choose fields to add from the “Company” or “Document” entities. For example, here we are adding the “Company Name” from the “Company” entity.
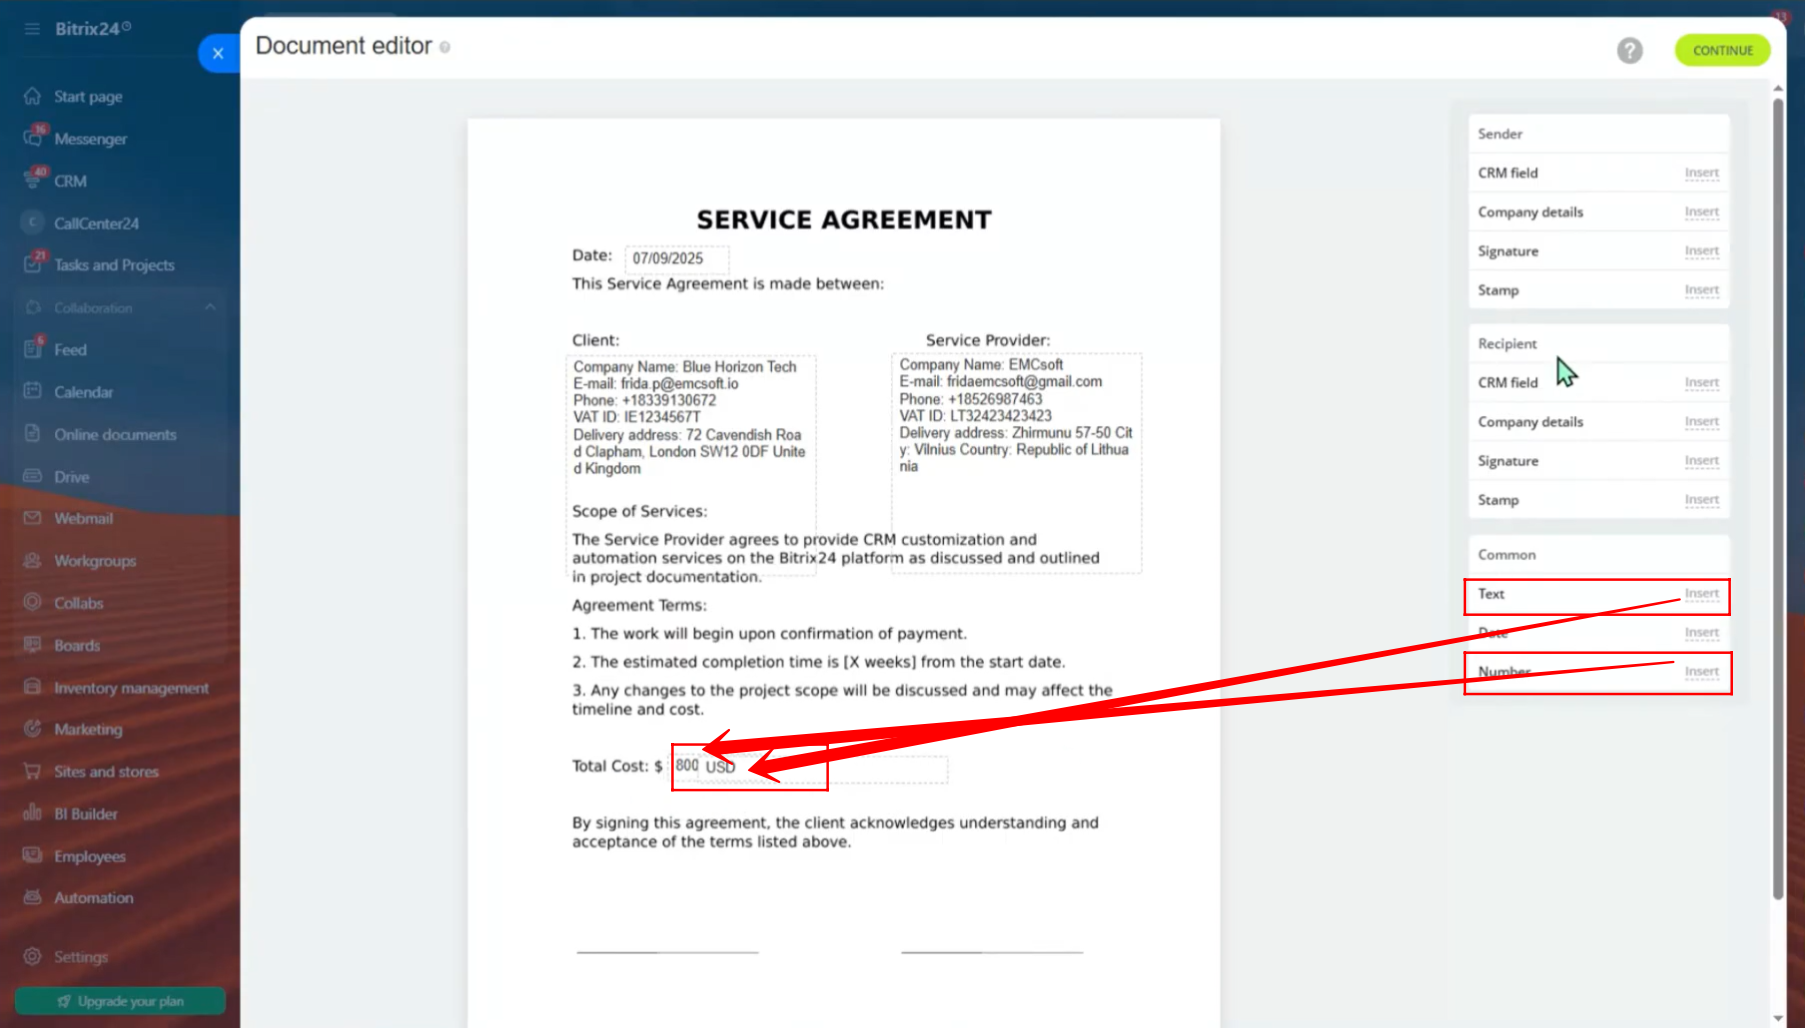
24. You can also add a number to the document. Go to the “Common” section and click “Insert” next to “Number.”
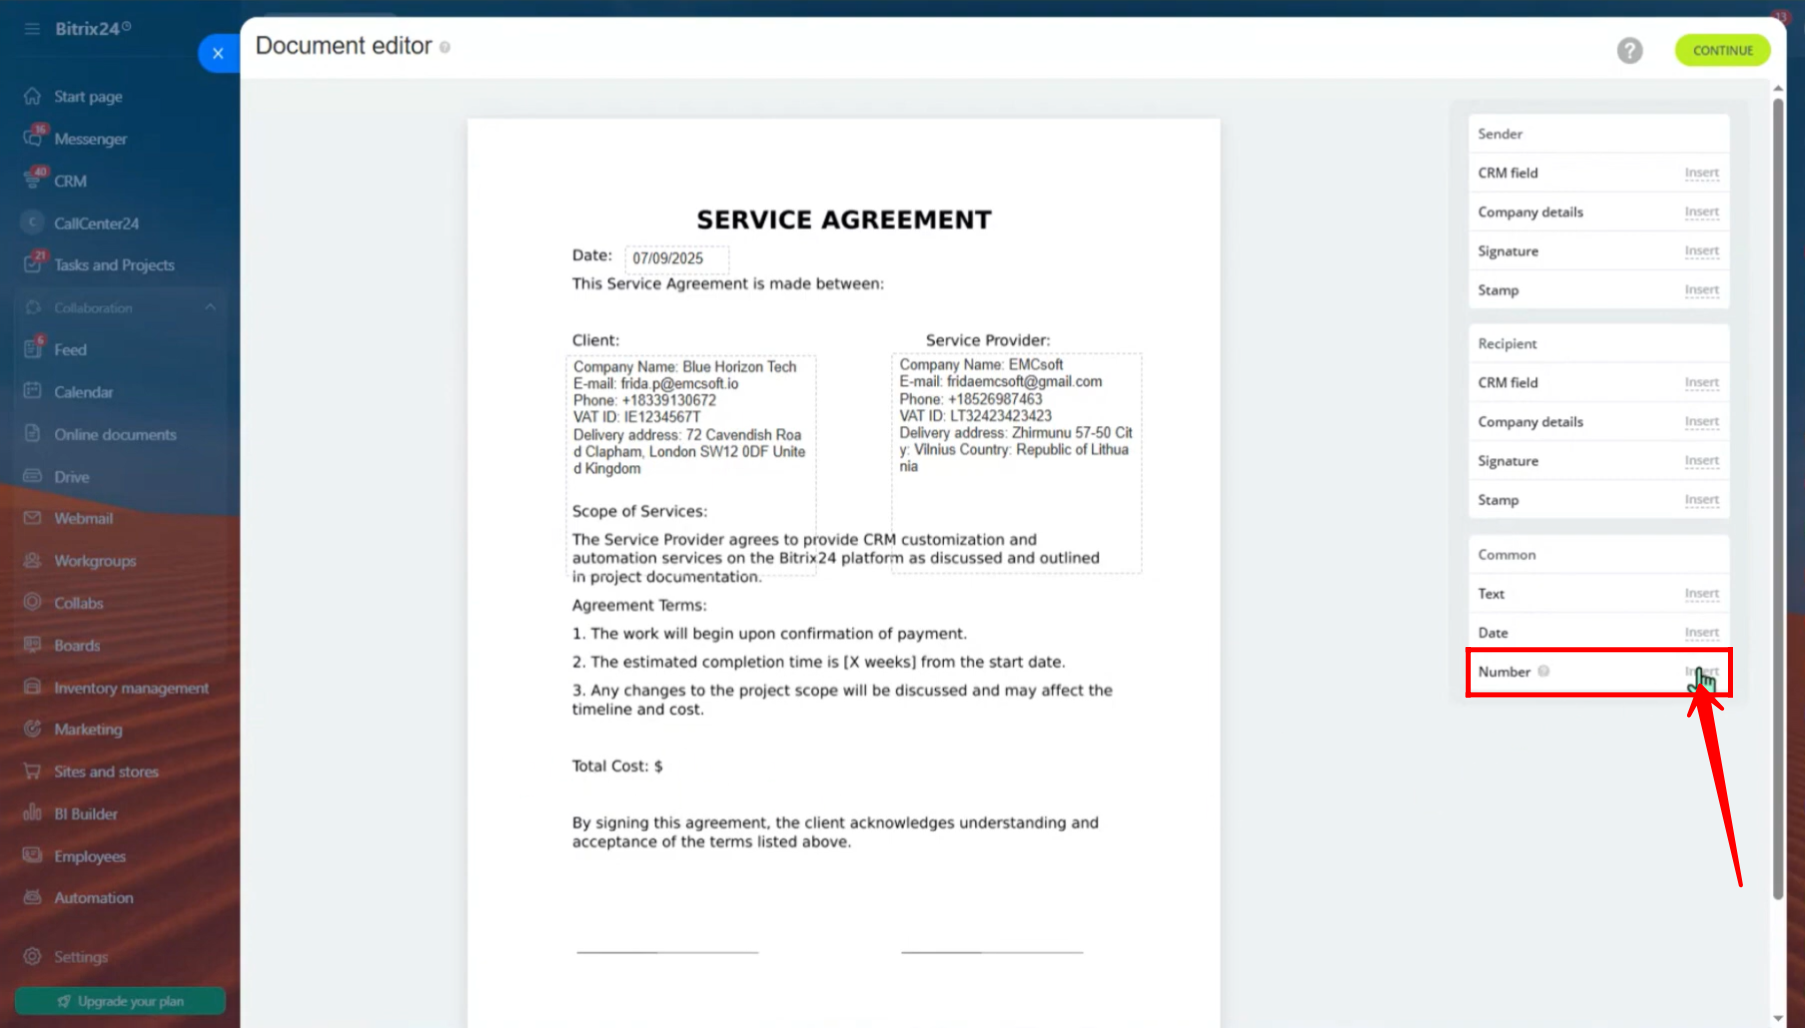
25. A static number has been added to the document. Click on the number to edit it and make changes as needed.
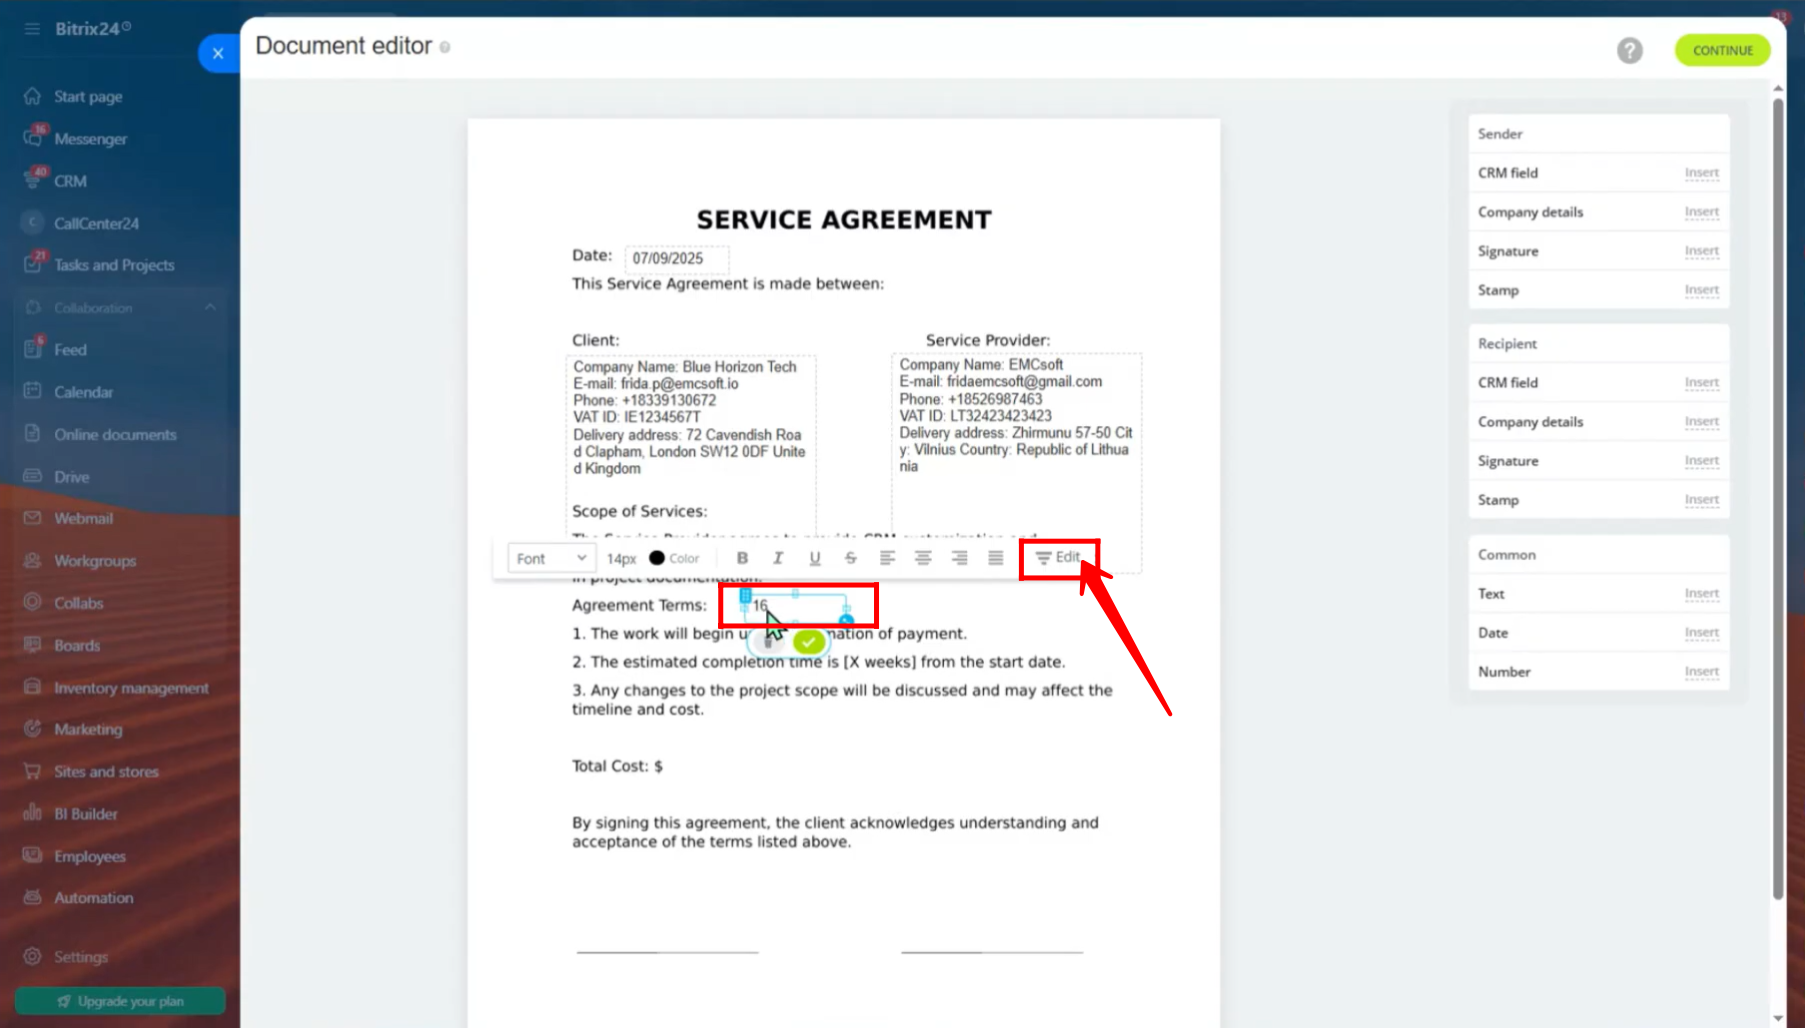
26. To keep it simple, the static number “16” is changed to “800”.
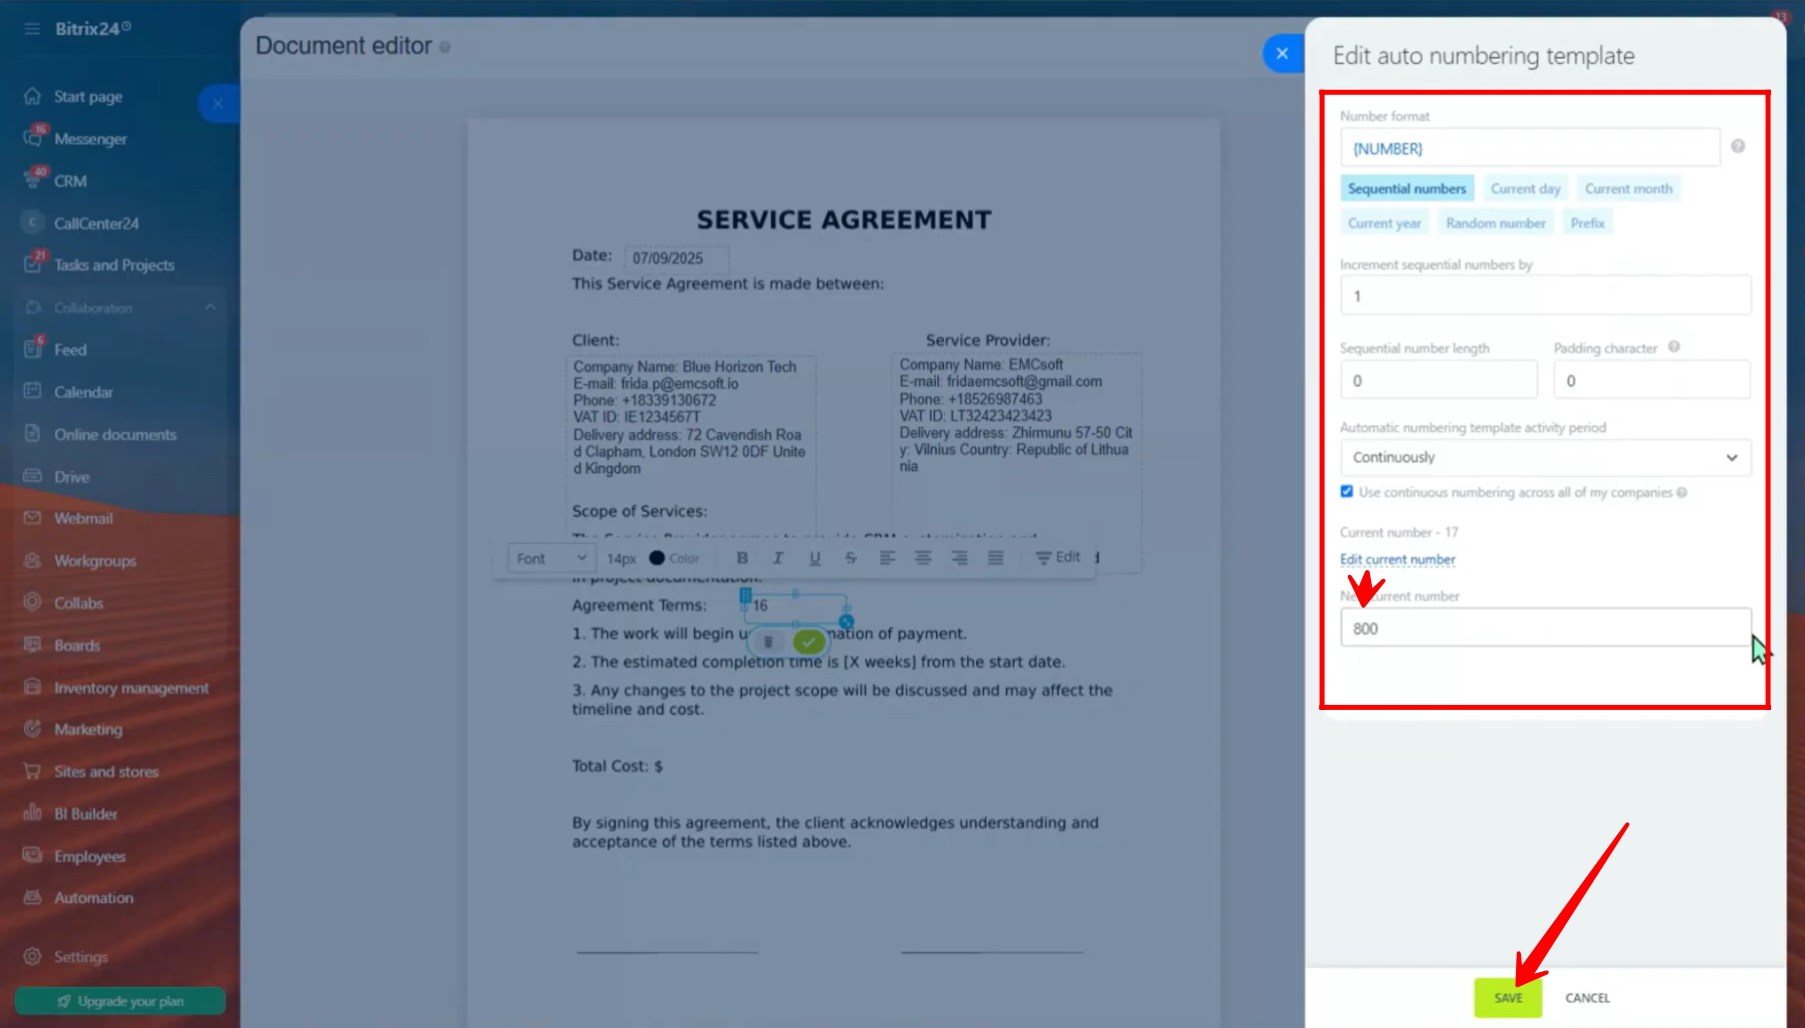
27. The number 800 is then placed in the correct position, right next to Total Cost. You can also insert text by clicking “Insert” next to “Text” in the Common section. For example, “800 USD” combines both the number and the text.
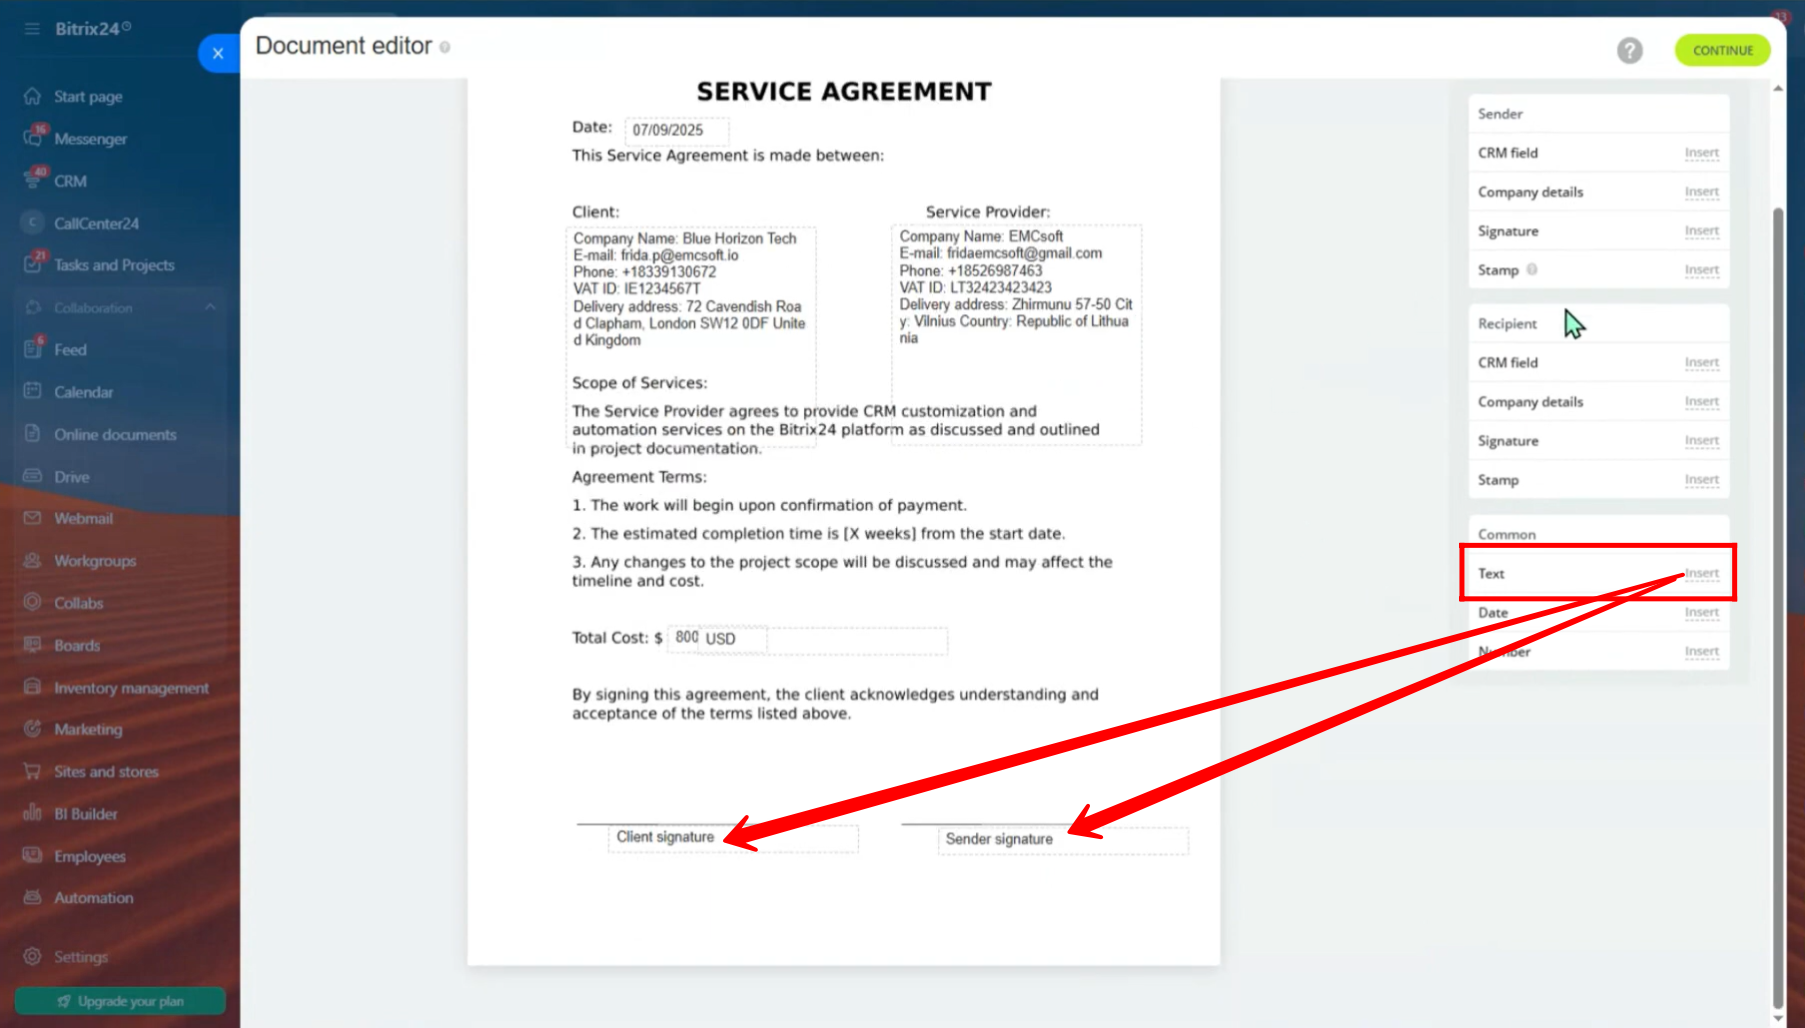
28. Next, two text fields were inserted using the “Insert” option in the Common section — labeled as “Client Signature” and “Sender Signature” respectively.
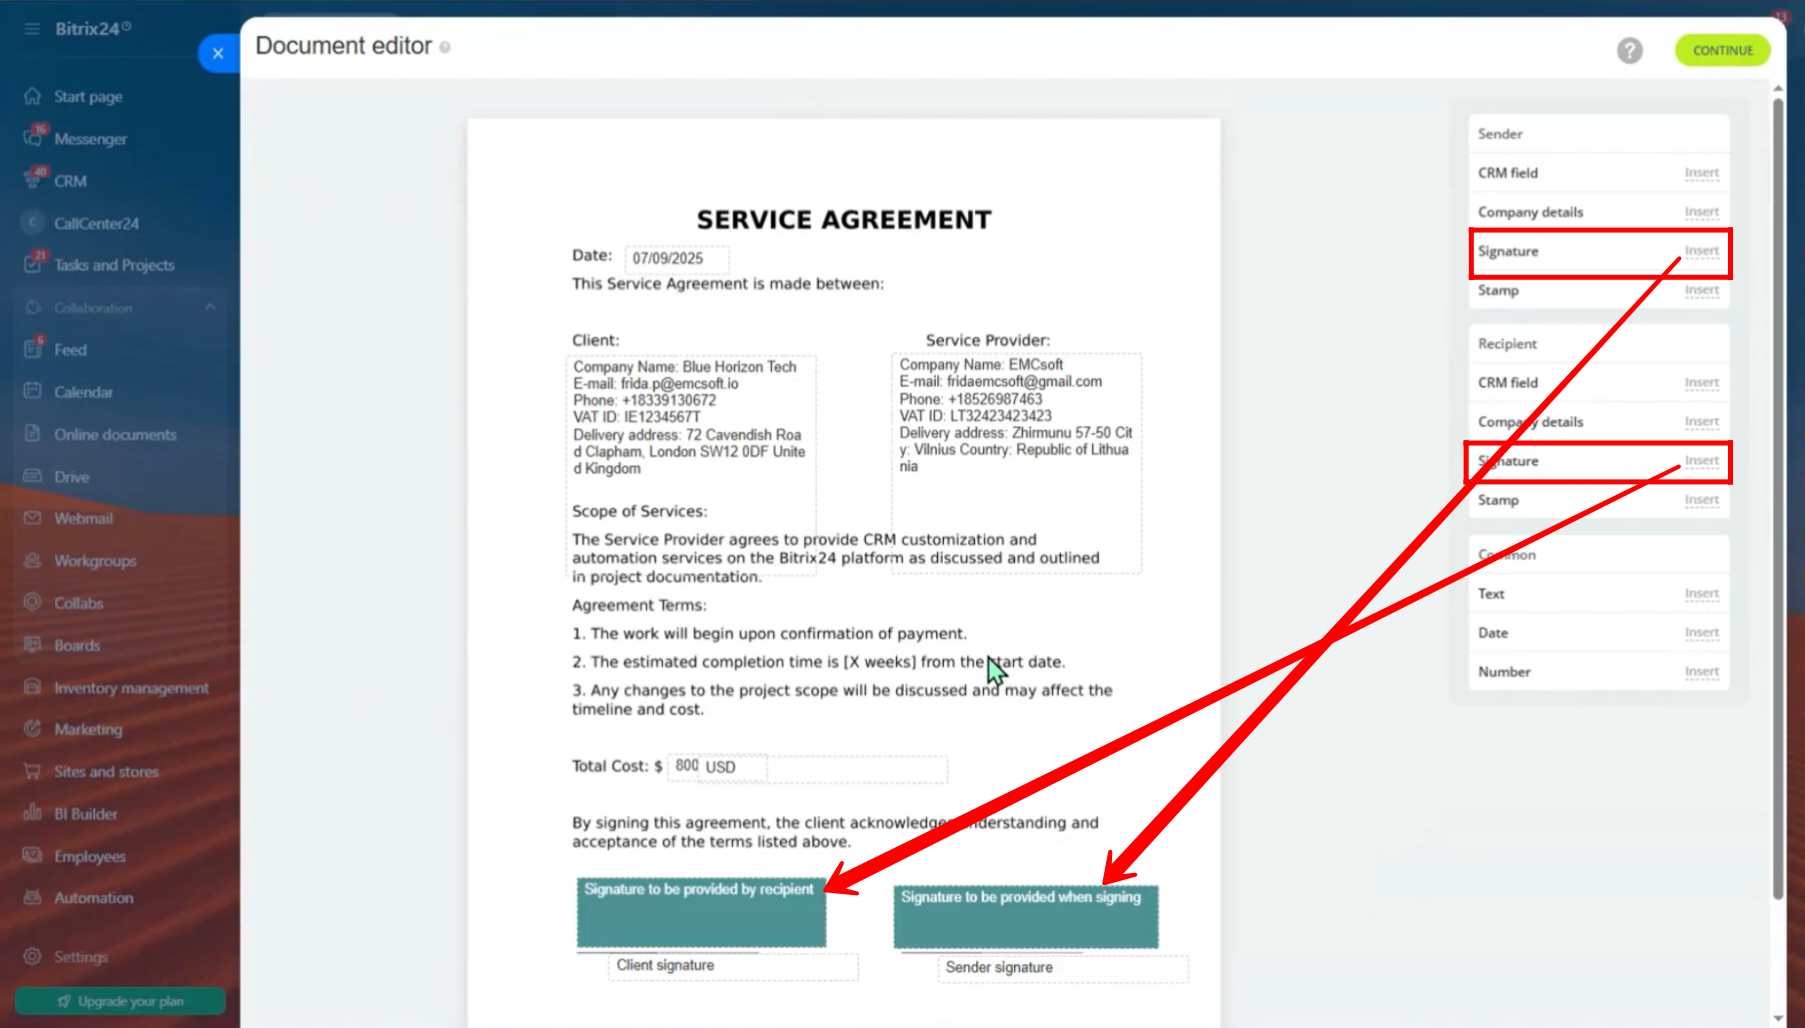
29. Two signature areas were placed above the “Client Signature” and “Sender Signature” texts:
– The recipient’s signature area was inserted above the Client Signature text using the Recipient section.
– The sender’s signature area was inserted above the Sender Signature text using the Sender section.
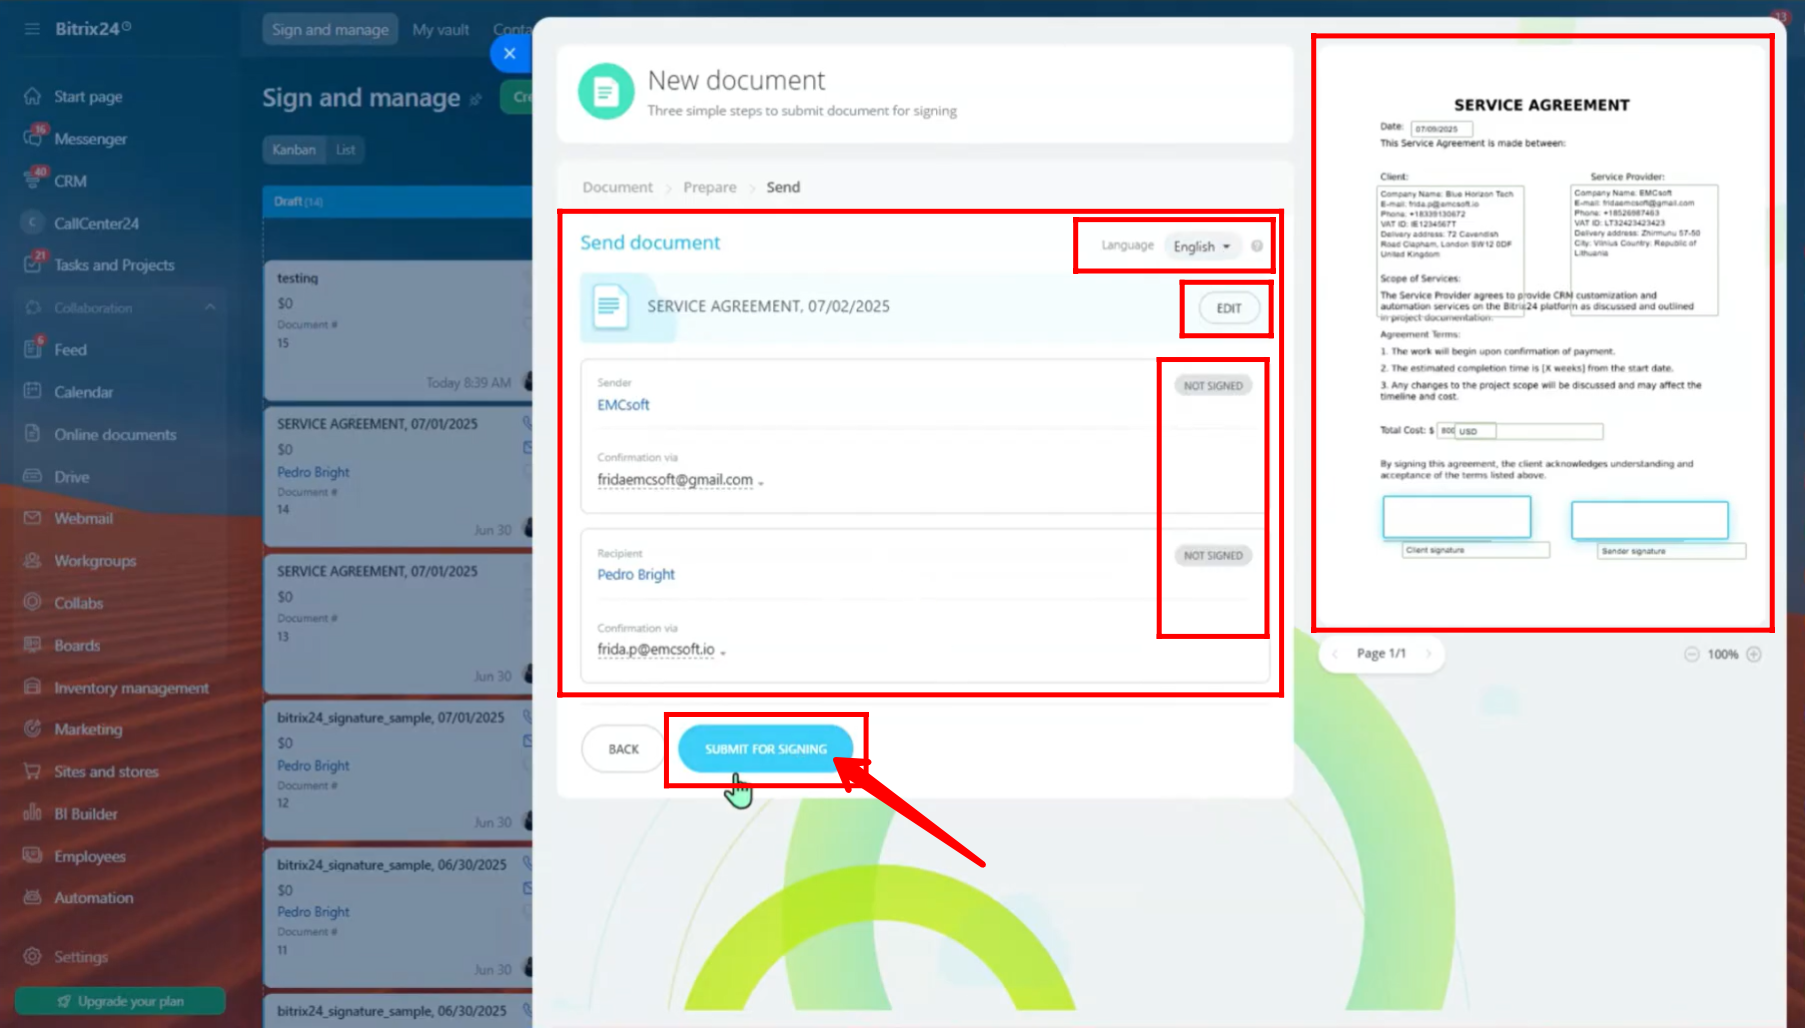
30. Now, preview the document and review all the details and changes you’ve made before submission. You’ll see all the sections you added or modified, along with the sender and recipient details. Each party will be marked as “NOT Signed” at this stage.
If needed, you can still edit the details of either party here. Once everything looks correct, click “Submit for Signing” to proceed.
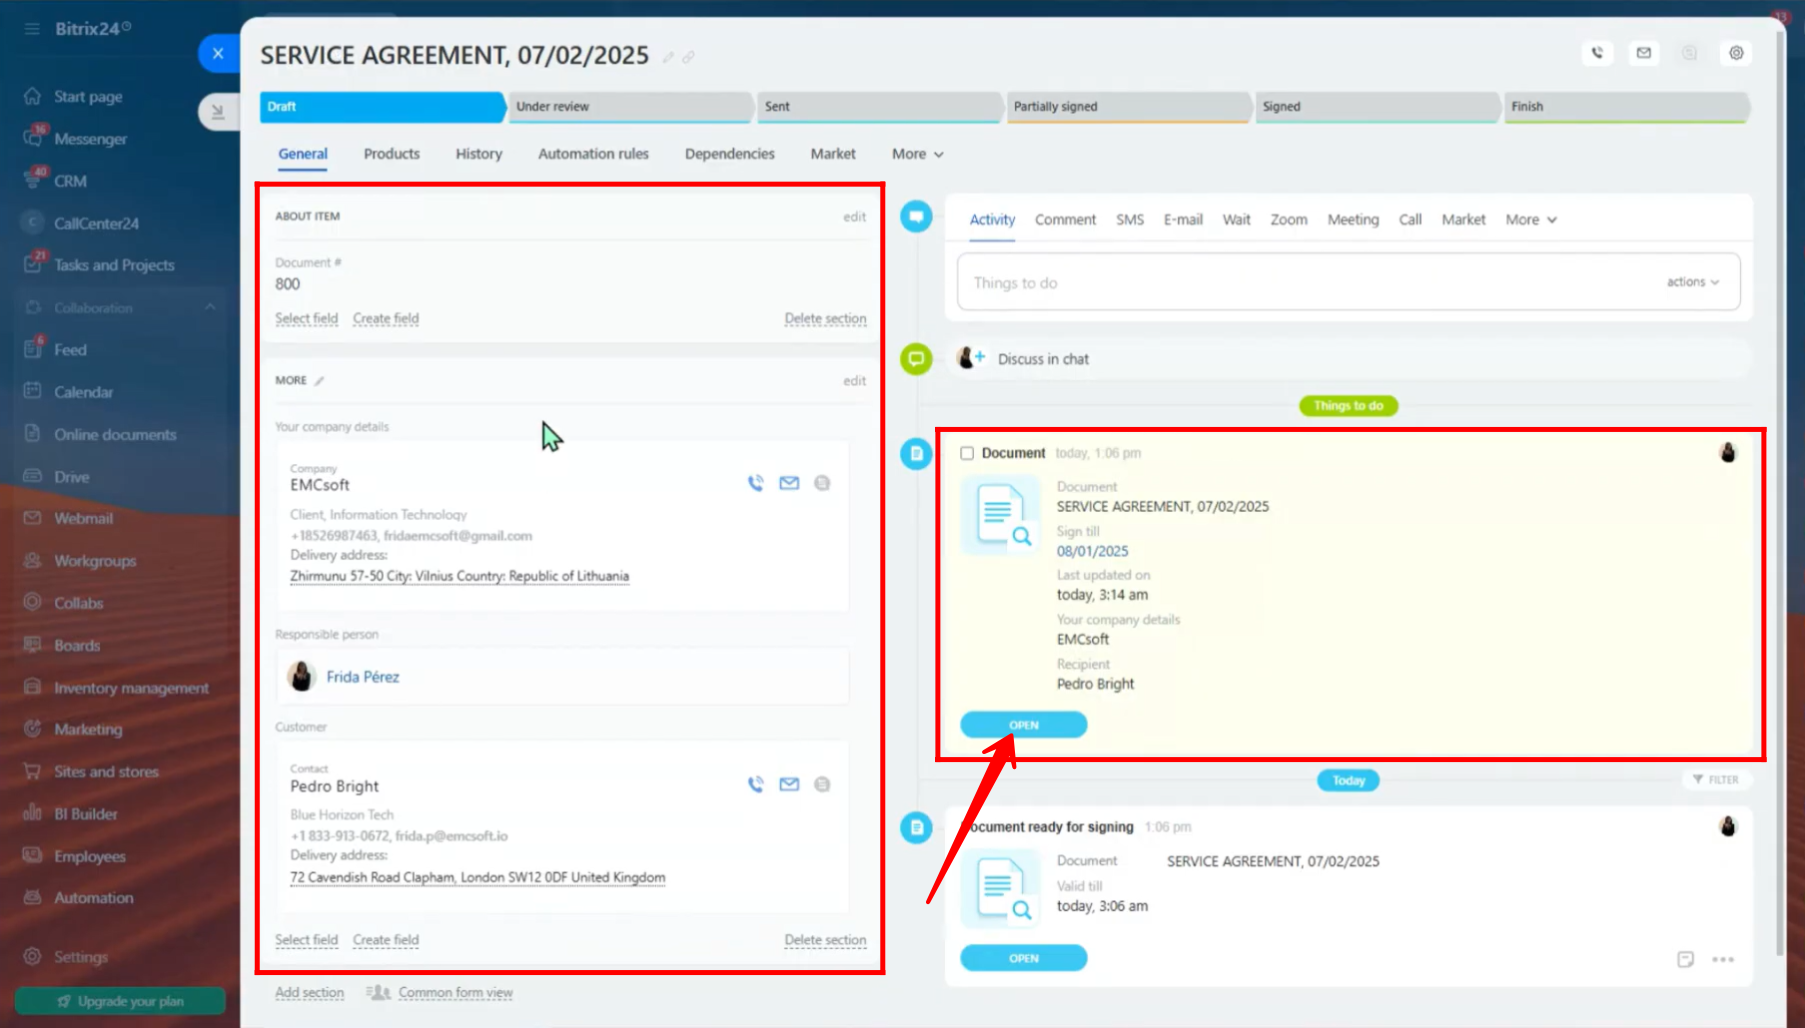
31. Navigate to the “e-Signature” section in your panel again and open the specific entity item you previously configured.
Here, you’ll see all the configured details and the document linked to that entity. Since you’re the one who initiated the process, you will logically appear as the Sender. Now, within the Activity area, open the document — and proceed to sign it as the sender.
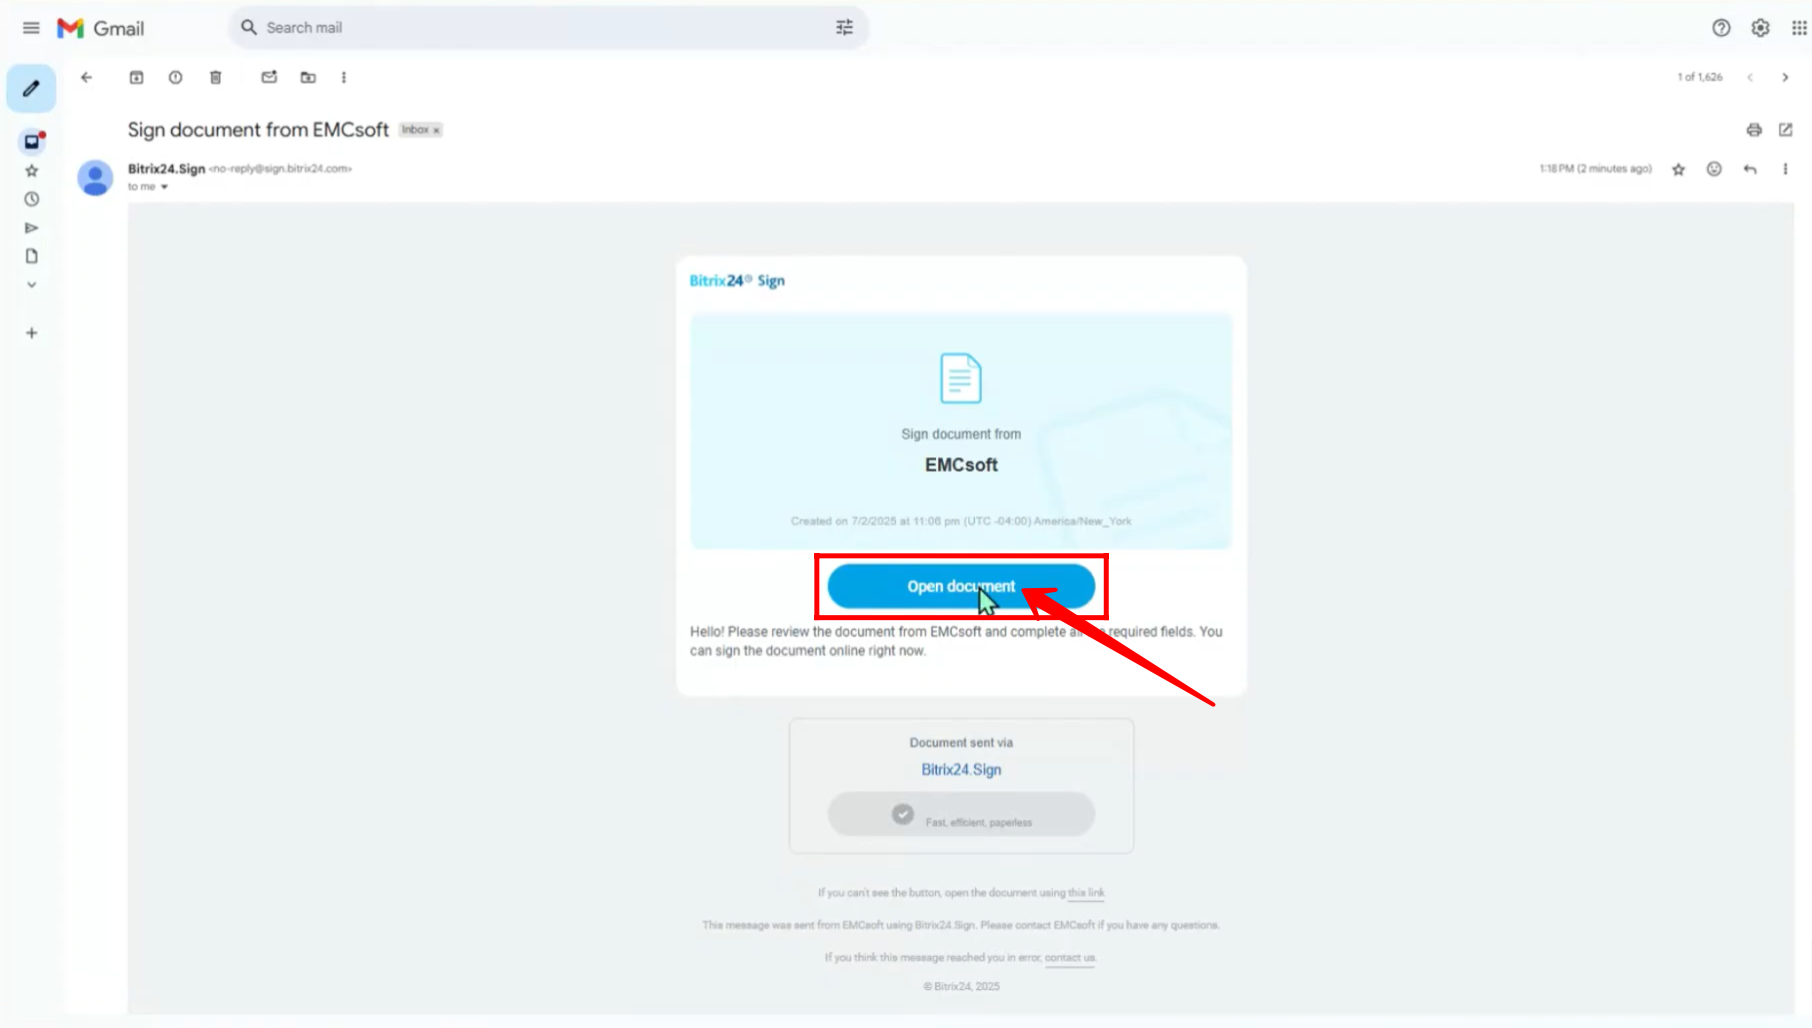
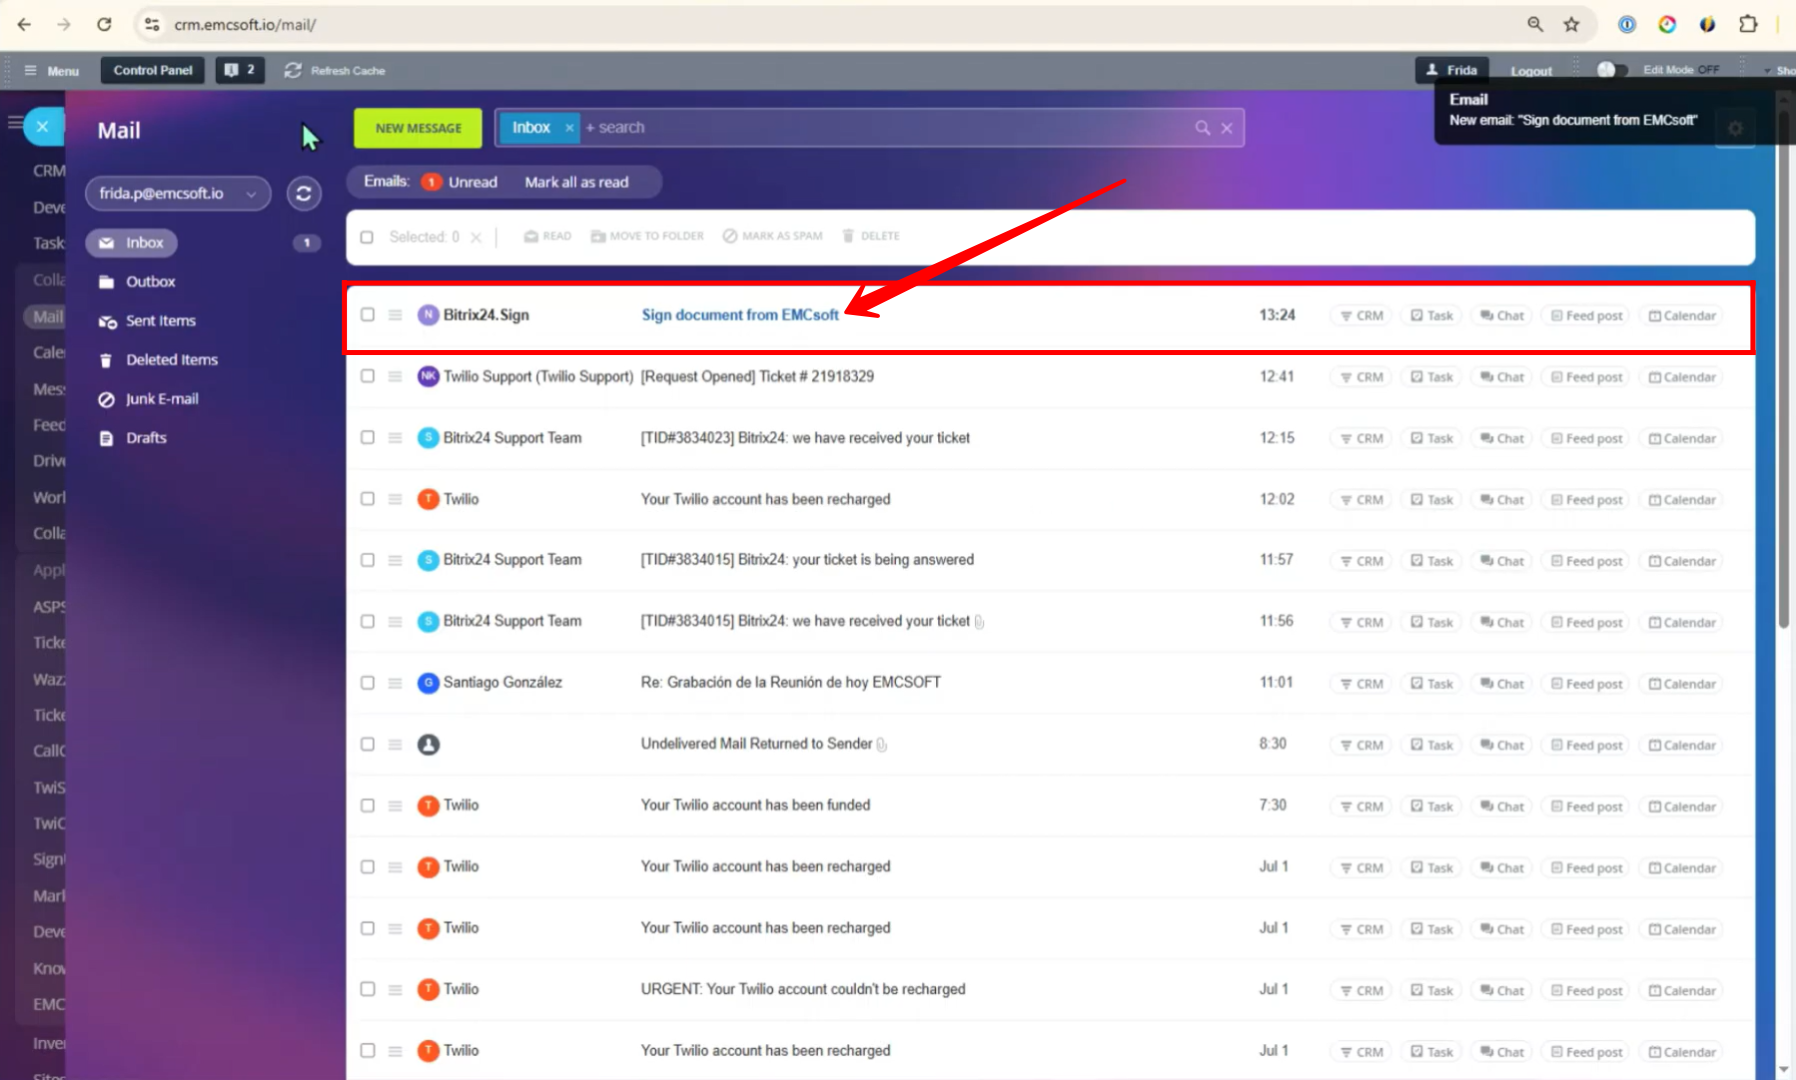
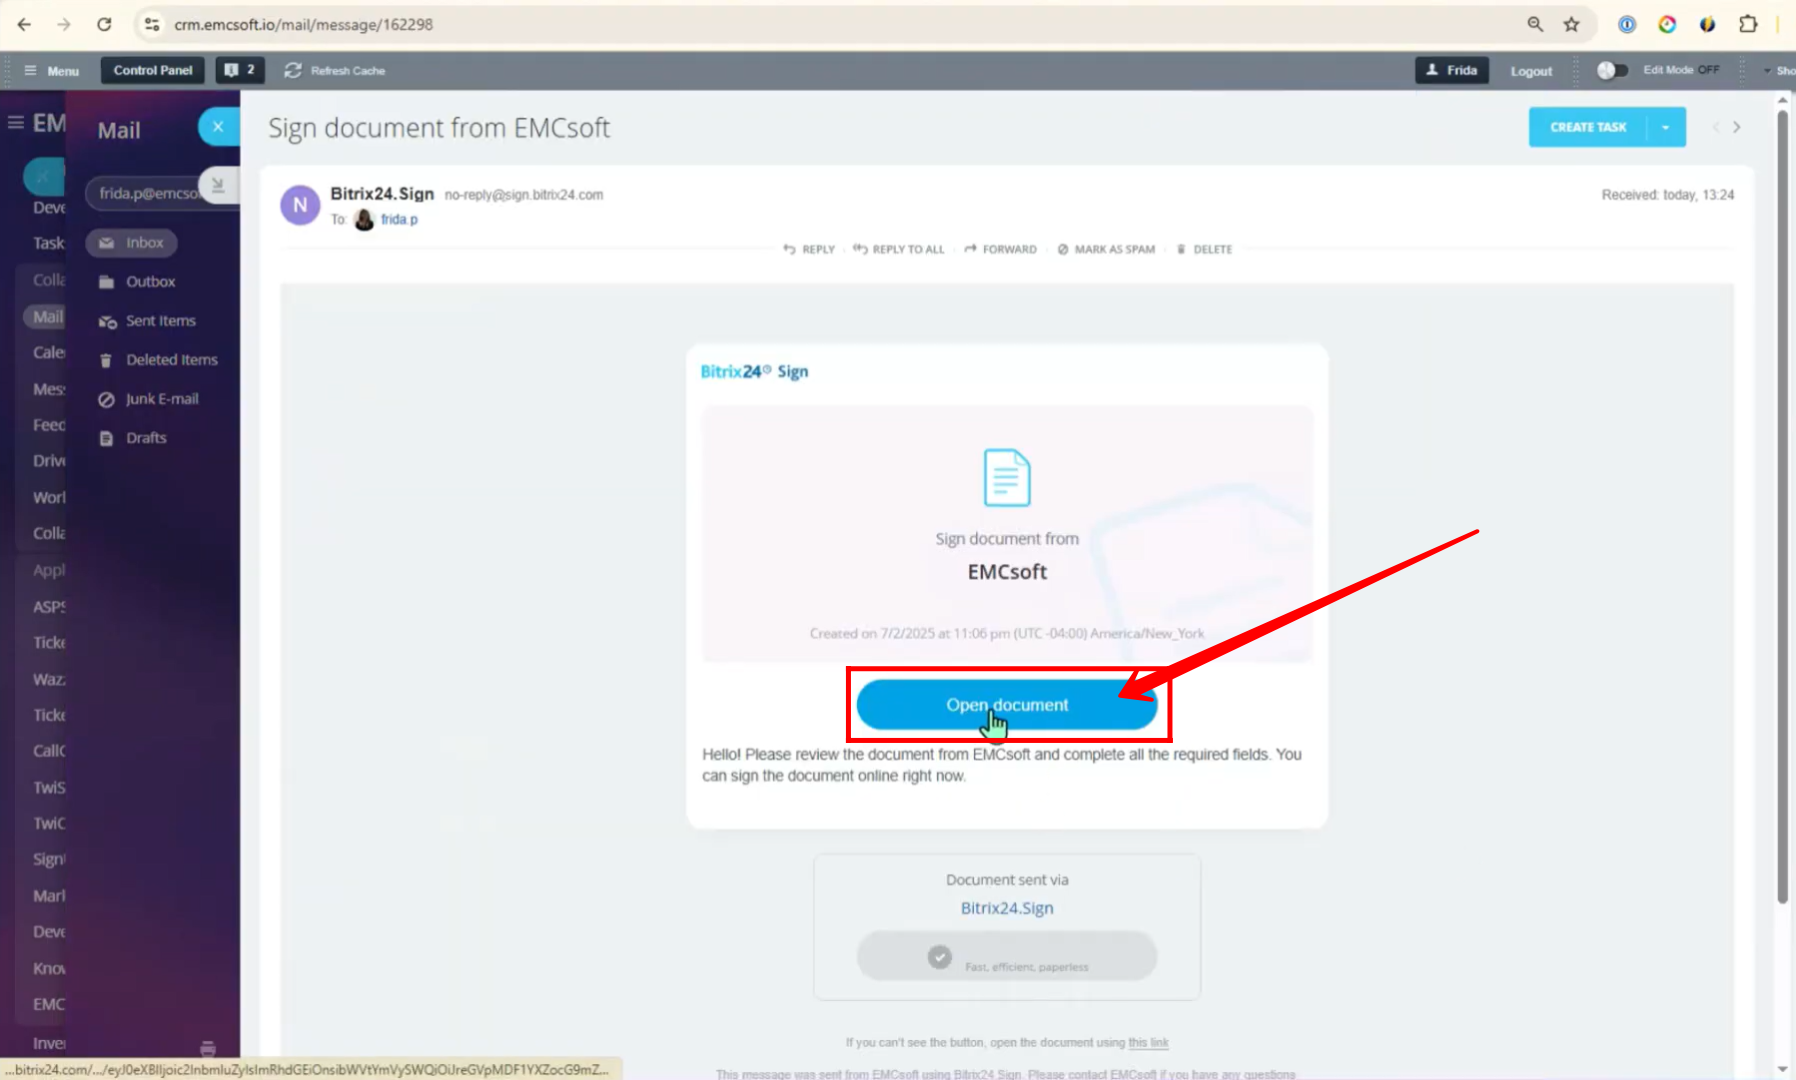
32. Alternatively, the sender will also receive an email containing the document to be signed.
Open that email, and click the provided link or “View Document” button to access the document directly. Once the document opens, you can proceed to review and sign it from there.
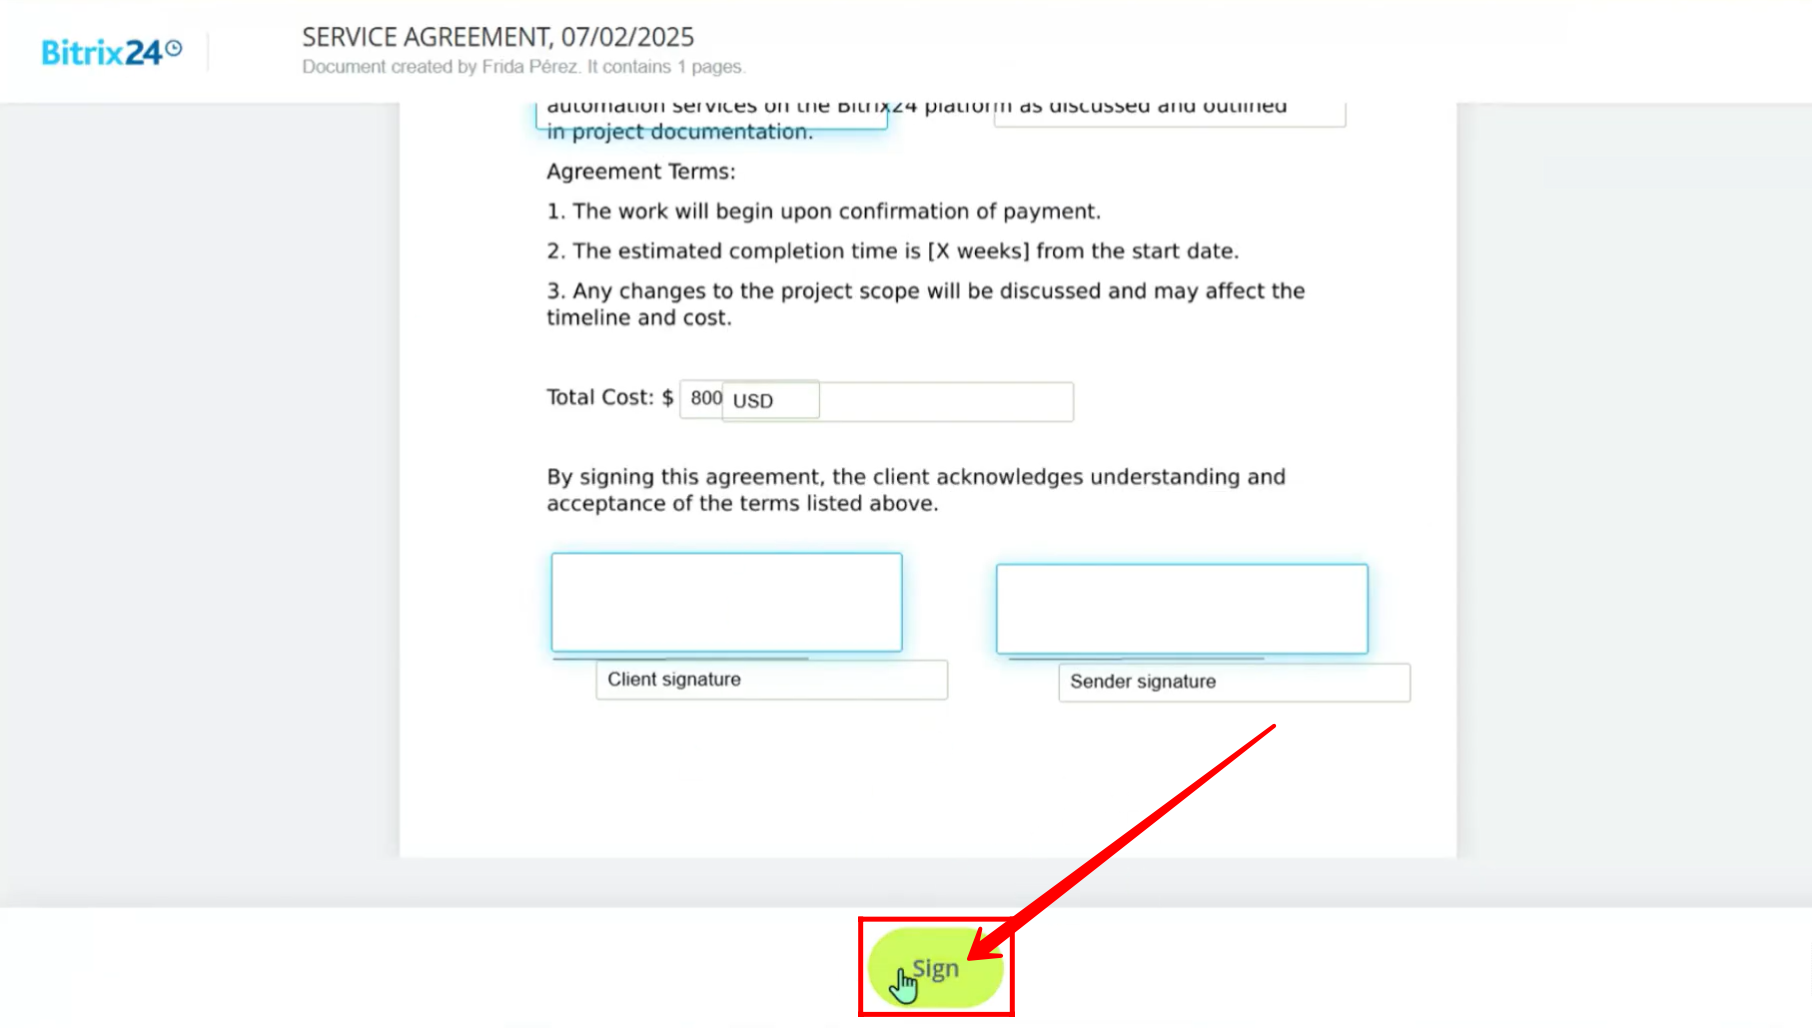
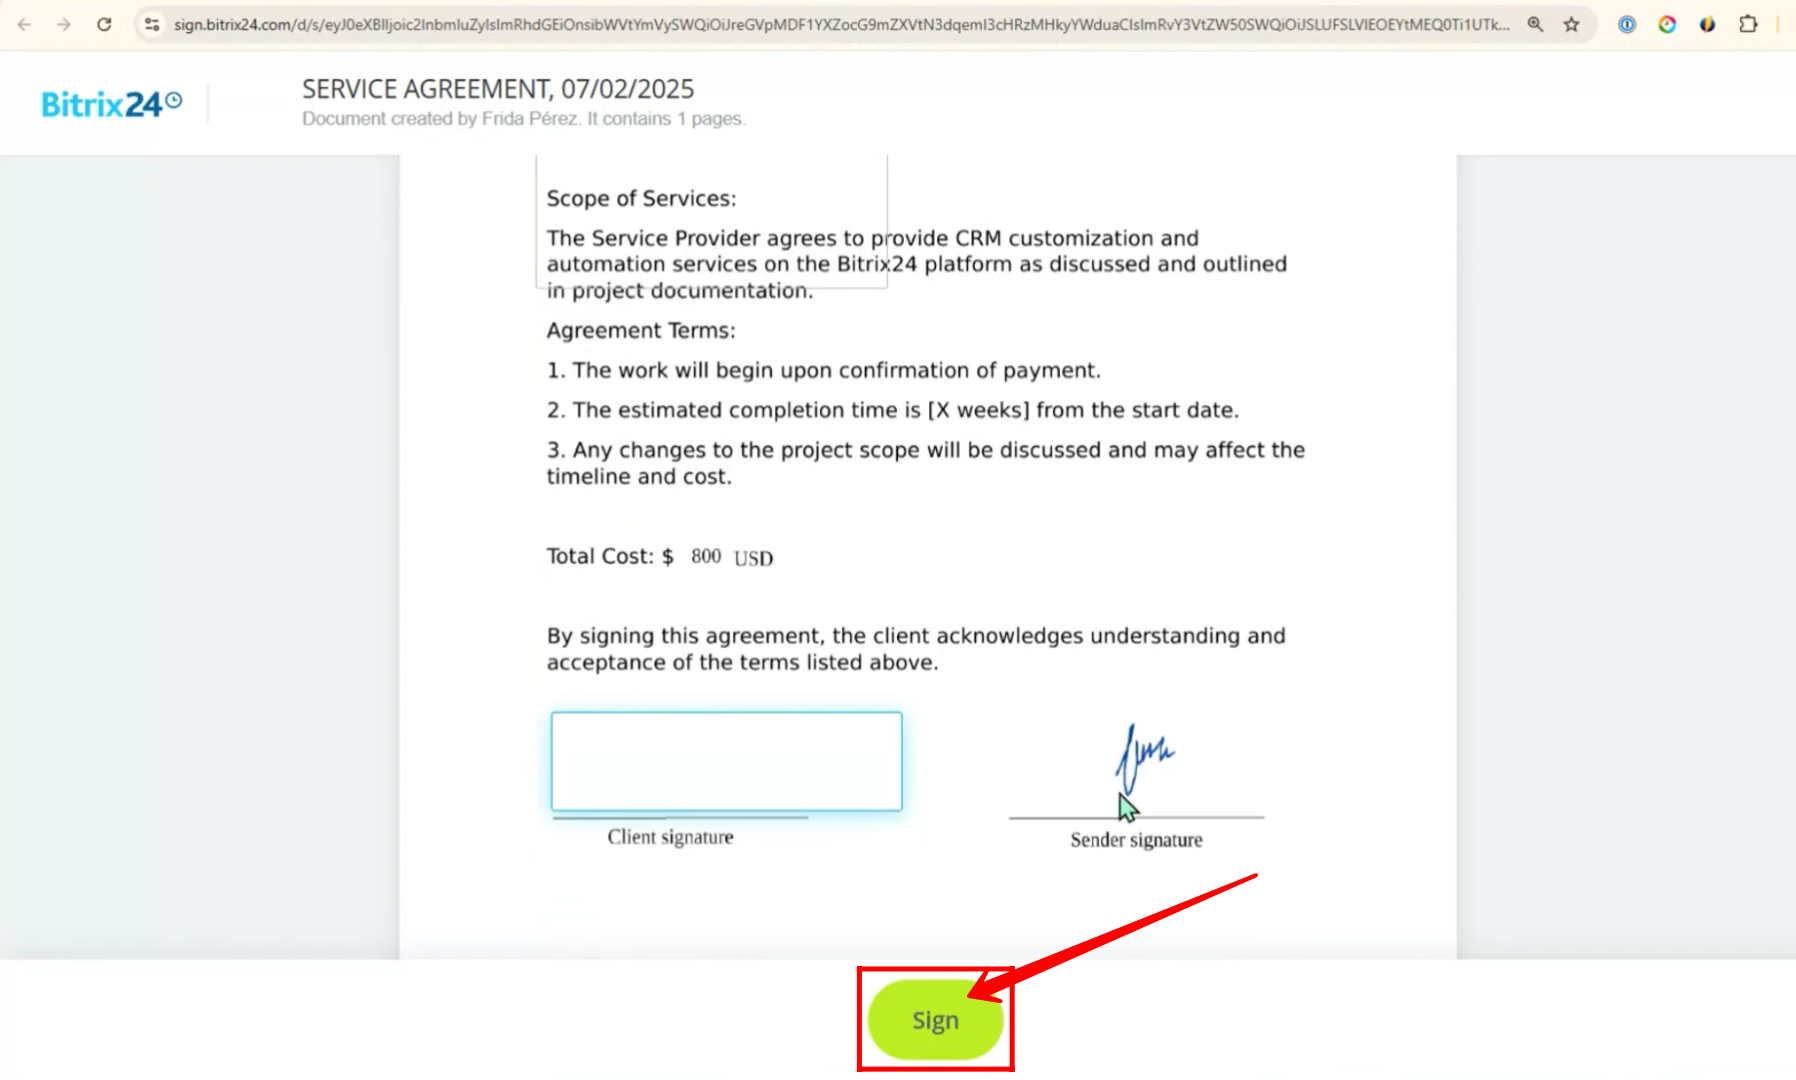
33. Click the “Sign” button to proceed with adding your signature to the document.
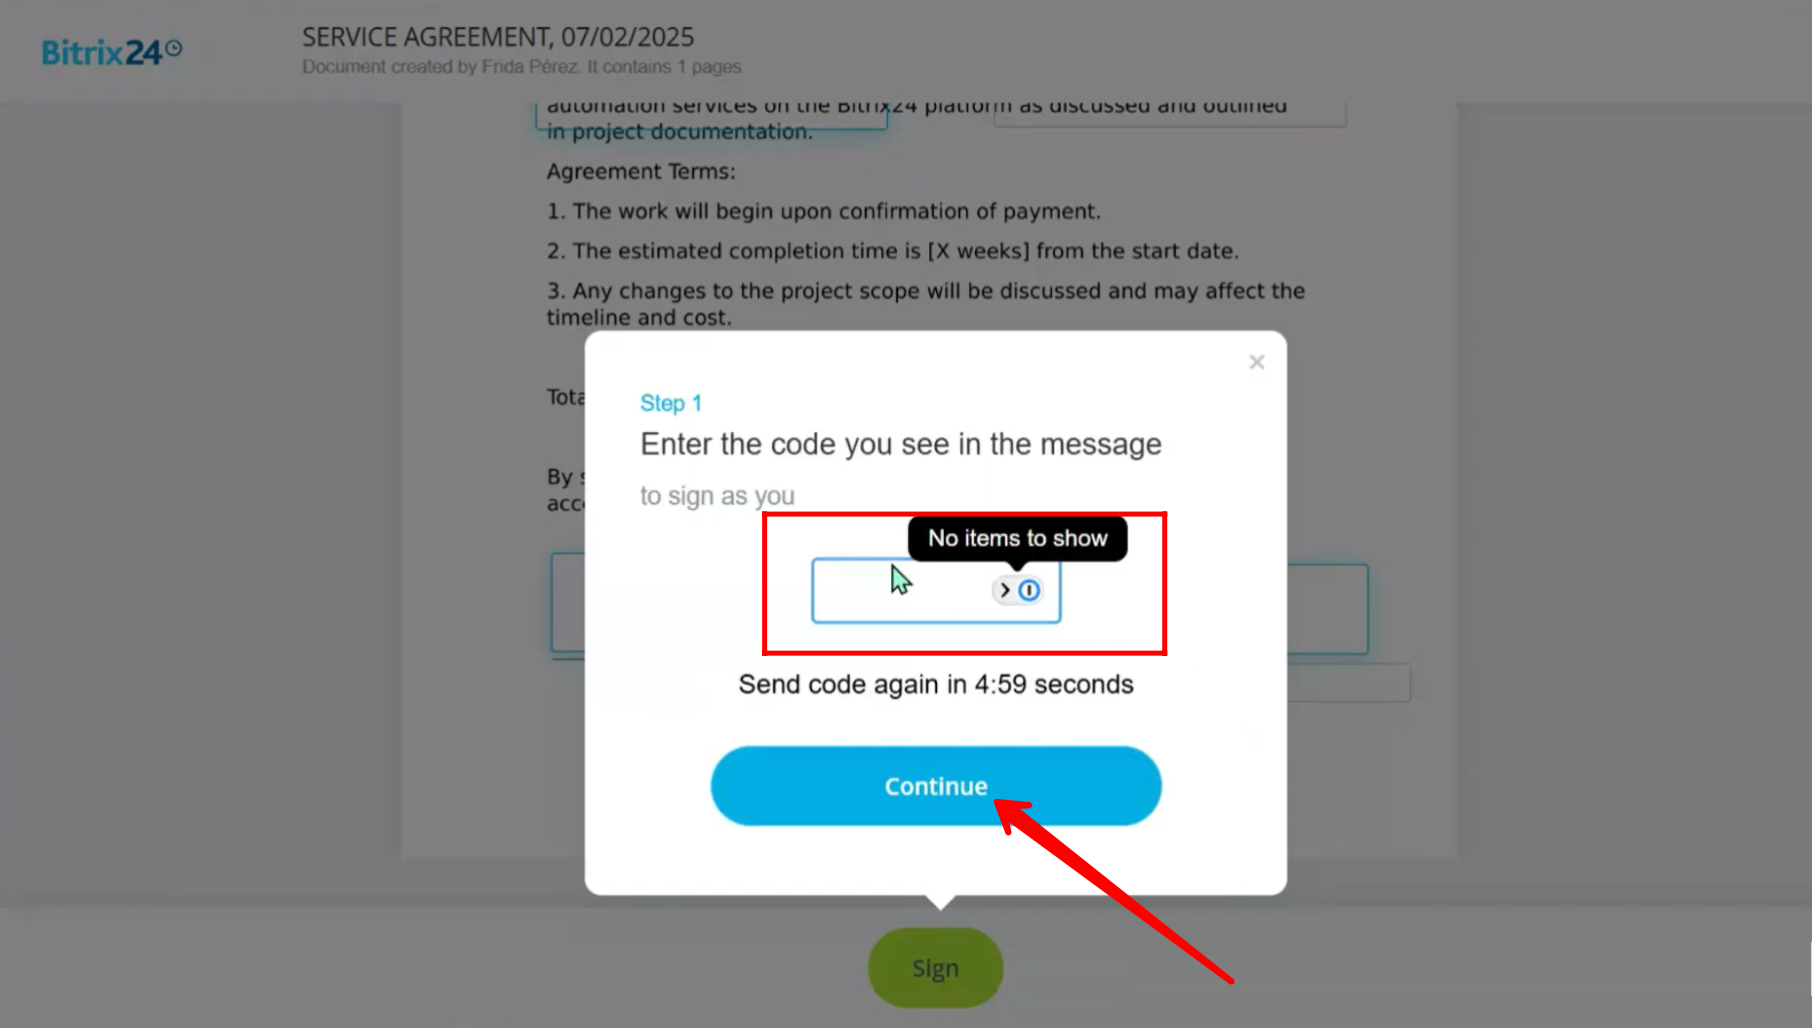
34. You will now see a prompt asking you to enter a verification code that has been sent to your email.
- Go to your inbox and copy the code.
- Paste the code into the prompt.
- Then click “Continue” to proceed with signing the document.
This step ensures the signature is securely authorized.
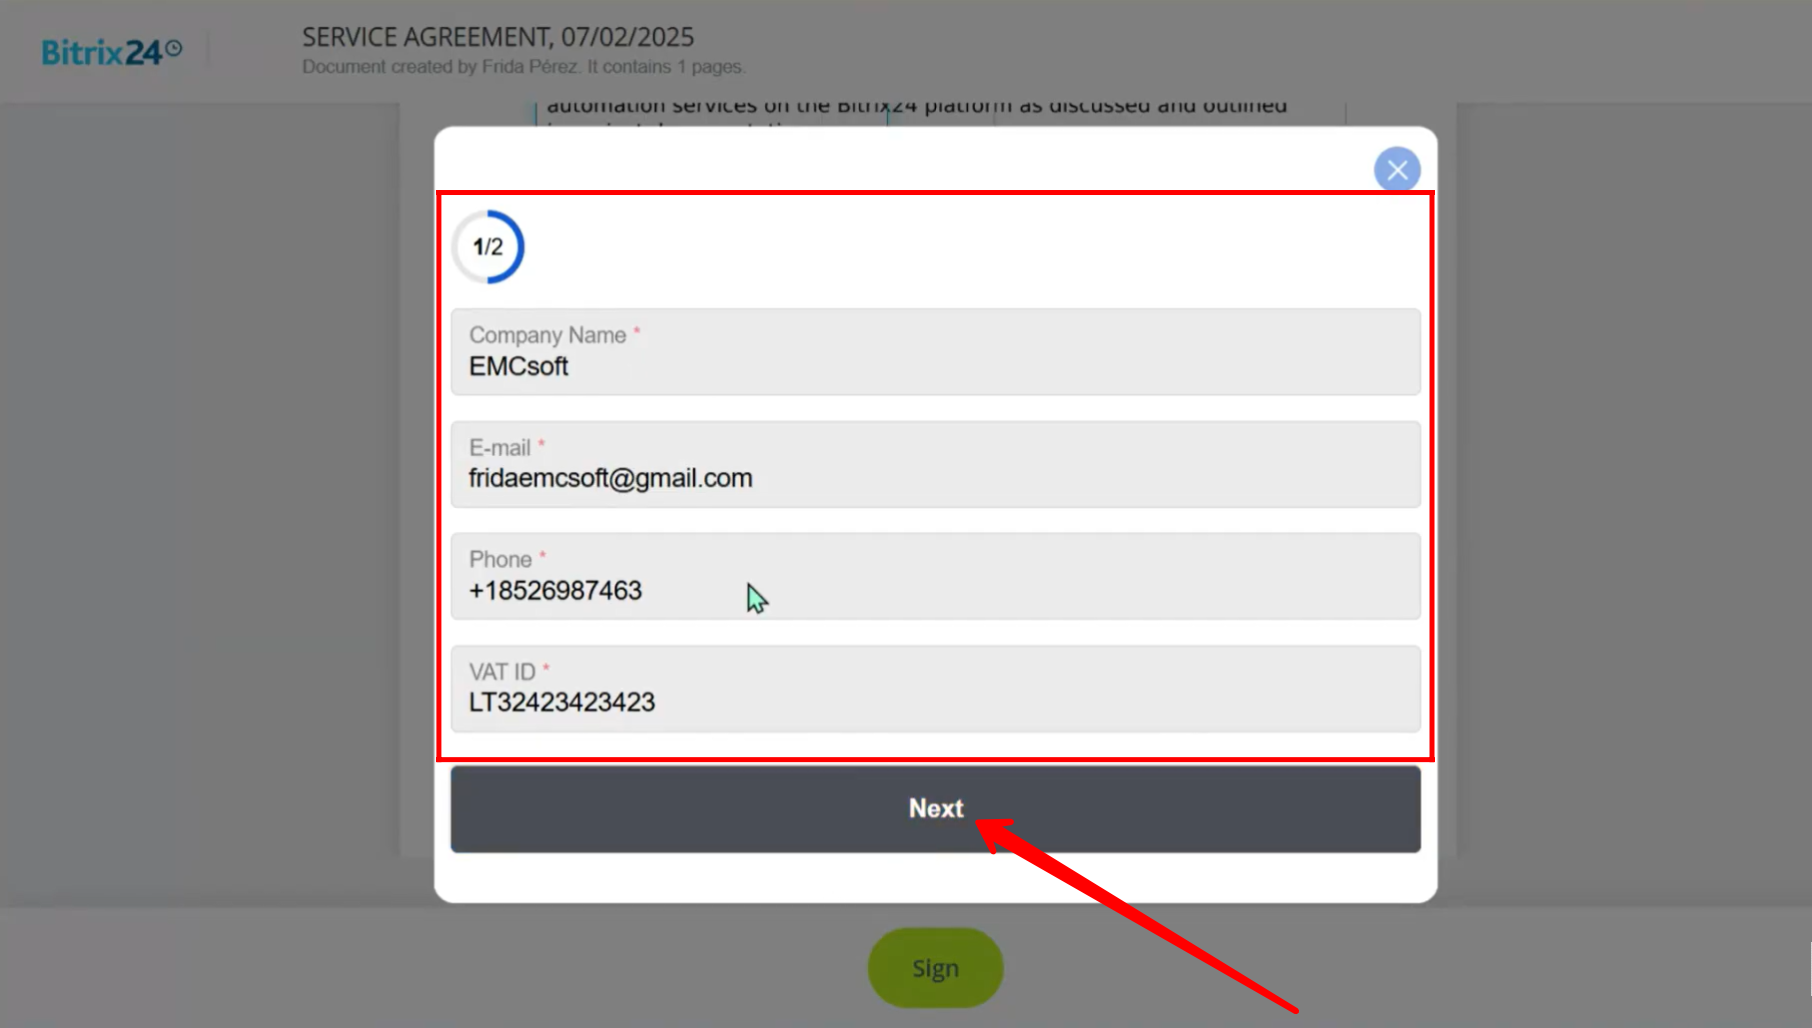
35. Before signing, you’ll be prompted to verify your company details as the sender. Make sure the following information is correct:
- Company Name
- Email Address
- Phone Number
- VAT ID
If any detail is incorrect, Edit to update it before continuing.
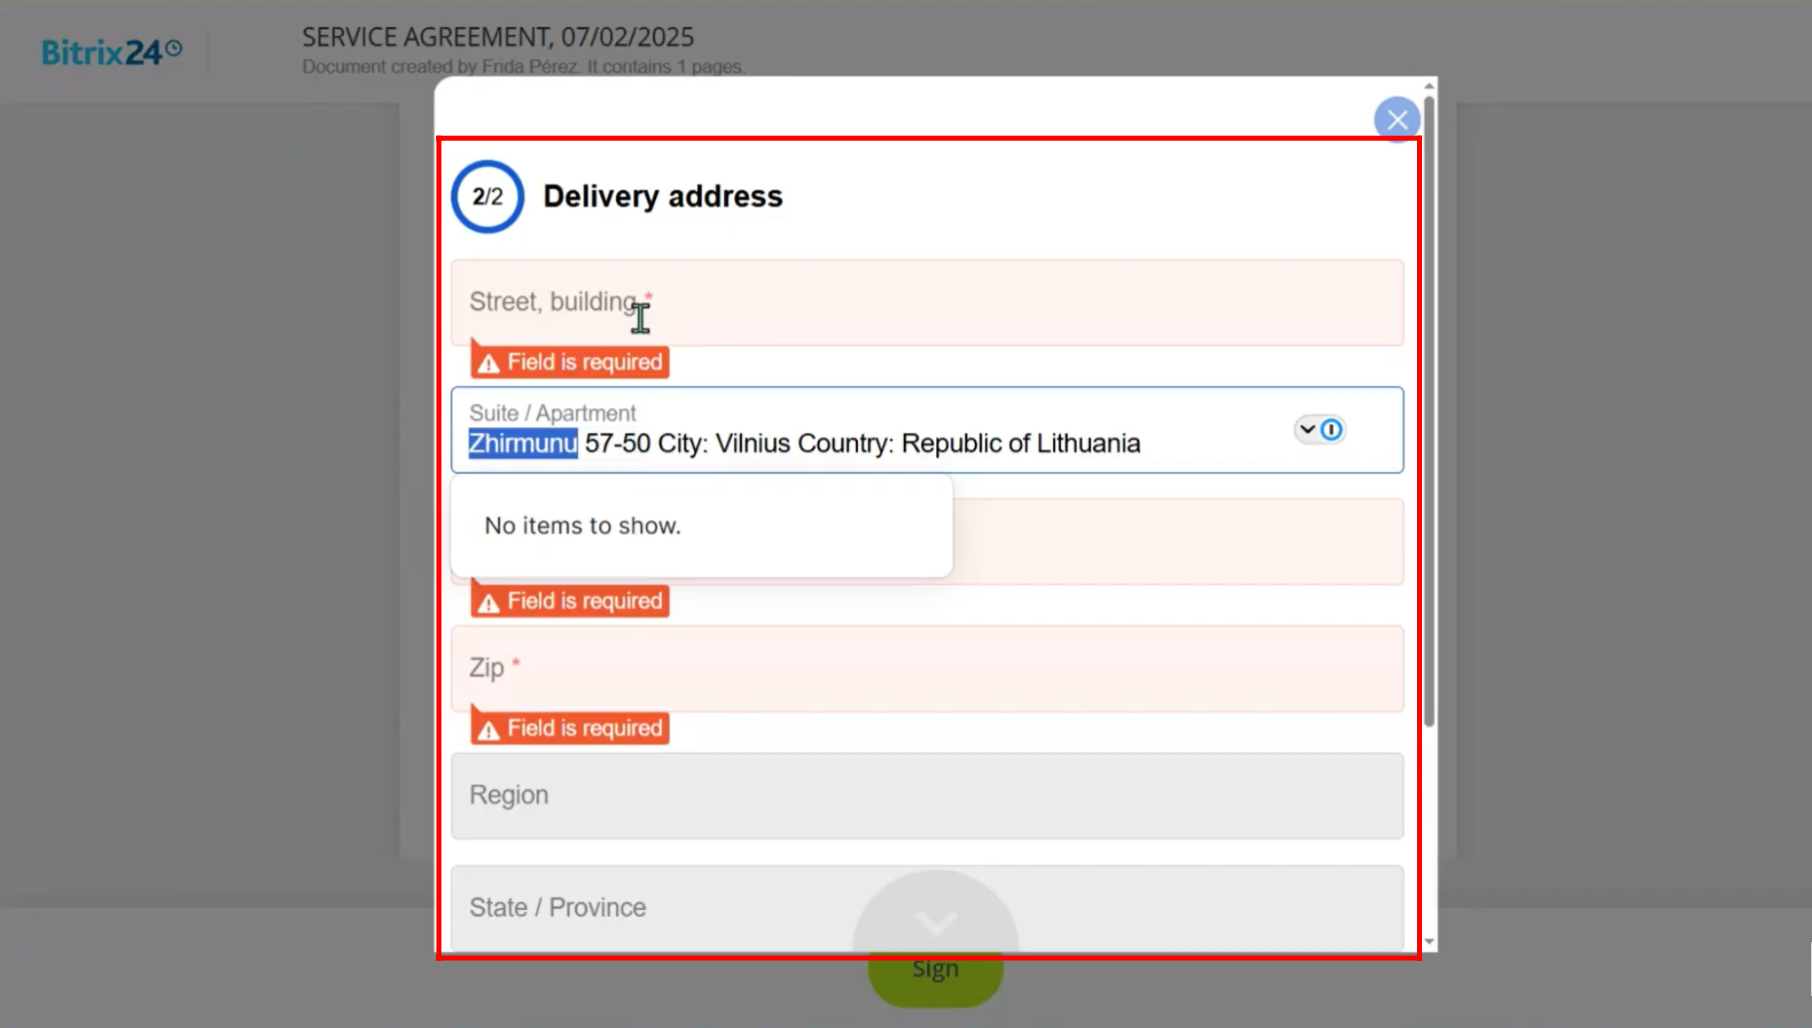
36. Next, verify the Delivery Address of your company. Ensure the following:
- Street Address
- City
- State/Province
- Postal/ZIP Code
- Country
If everything is accurate, Continue to proceed to sign the document. If you spot an error, Edit to correct it before signing.
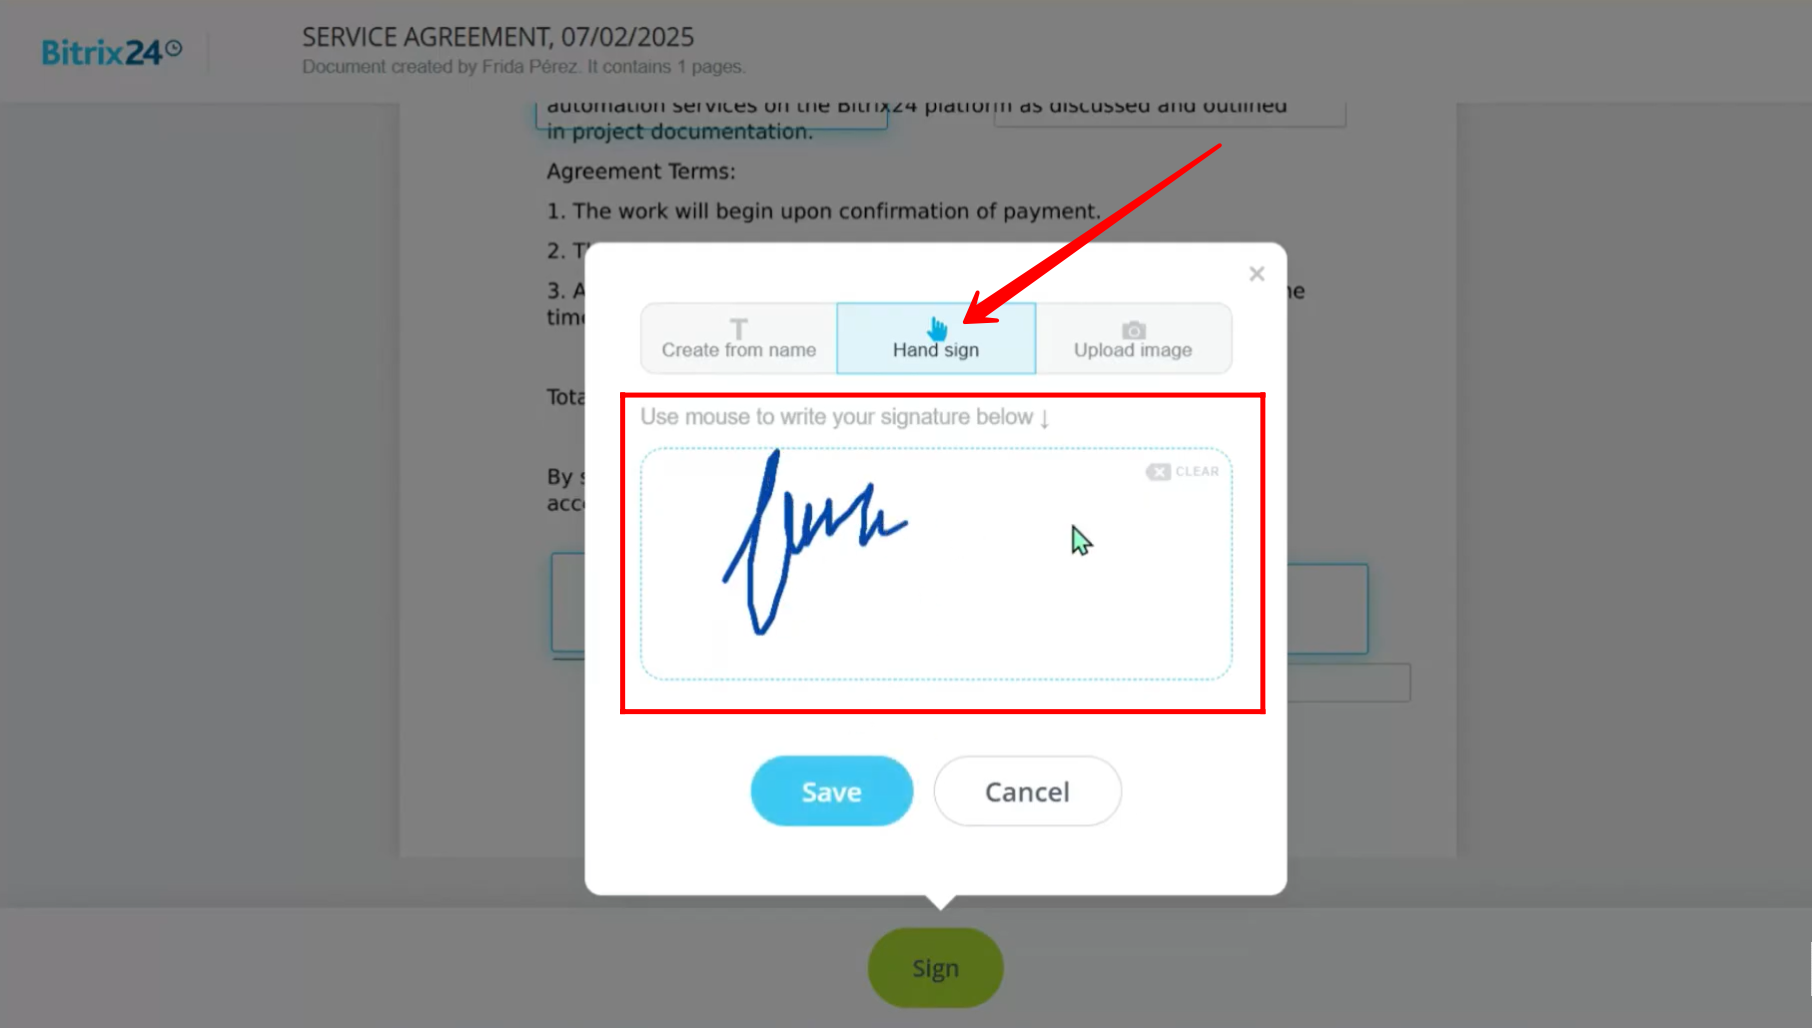
37. At this stage, you’ll be prompted to create your signature in one of the following ways:
- Type your name to generate a styled signature
- Draw your signature using your mouse or touchscreen
- Upload an image of your existing signature
In this example, the signature is drawn manually to proceed.
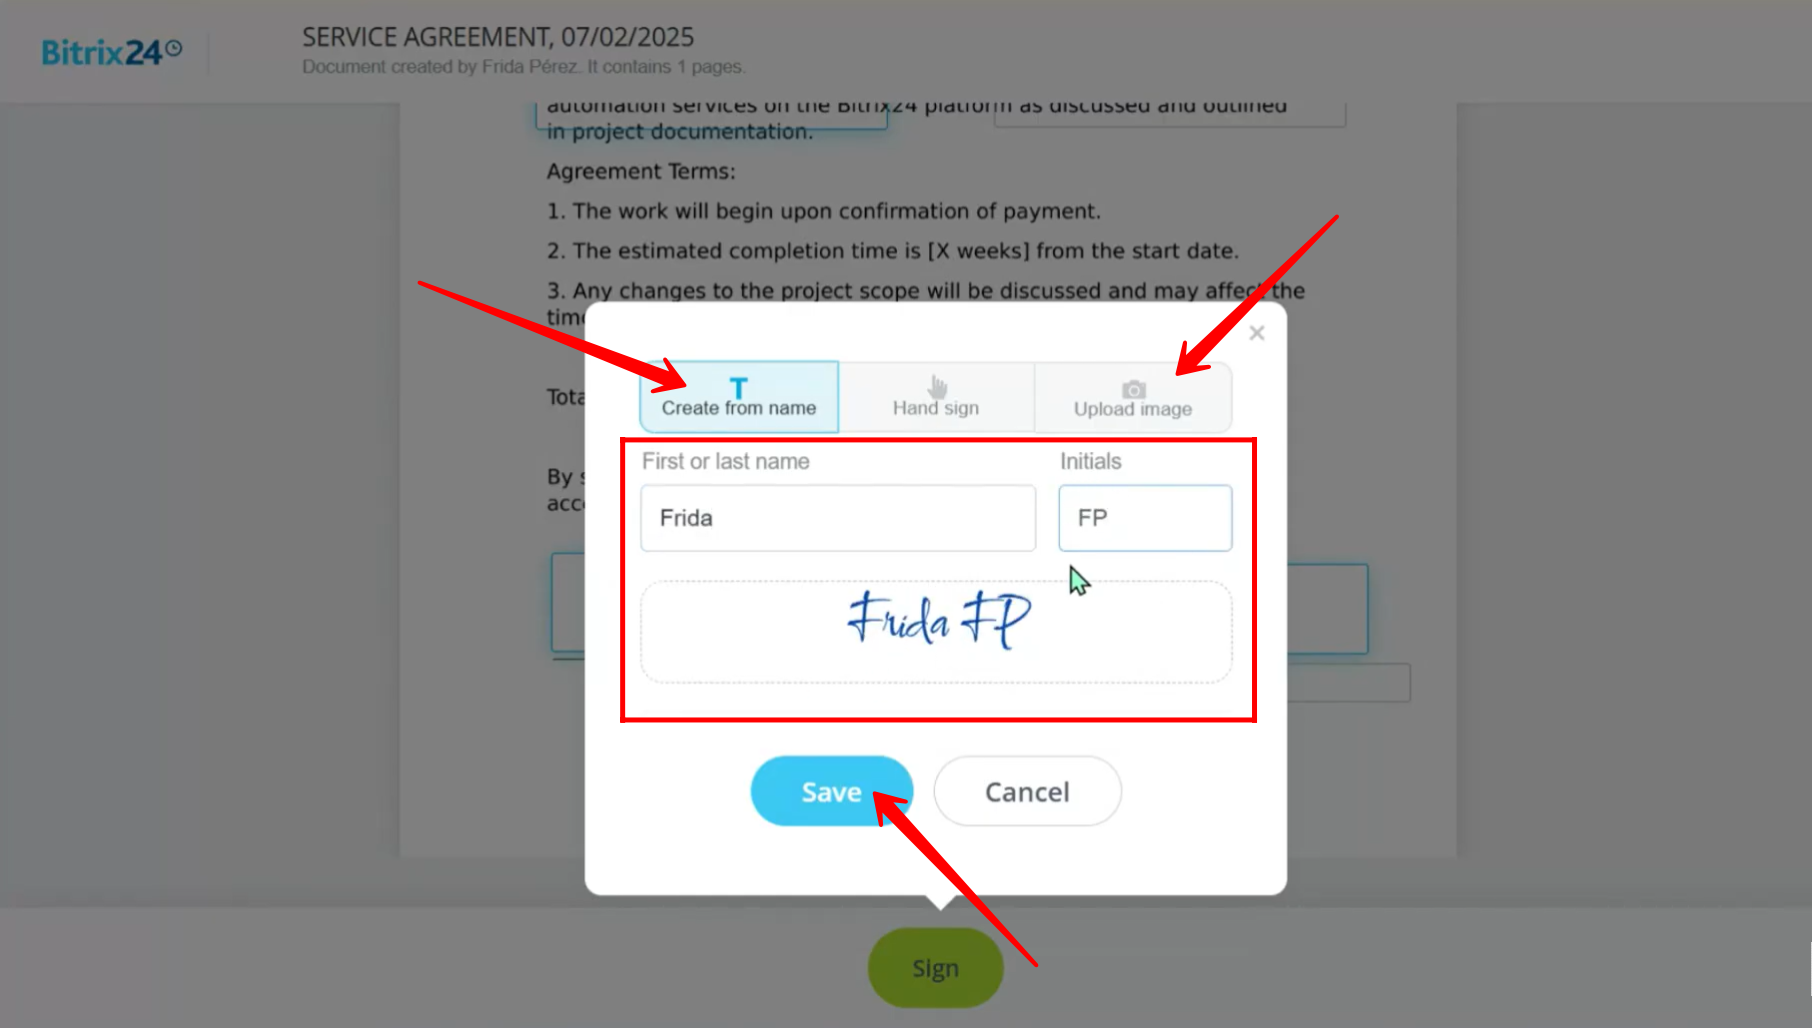
38. Likewise, in the “Create from Name” section, you can:
- Enter your First or Last Name
- Provide your Initials
This will automatically generate a styled signature for you. Once you’re happy with the preview, click Save to proceed.
You can always choose the type of signature you prefer — whether it’s typed, drawn, or uploaded.
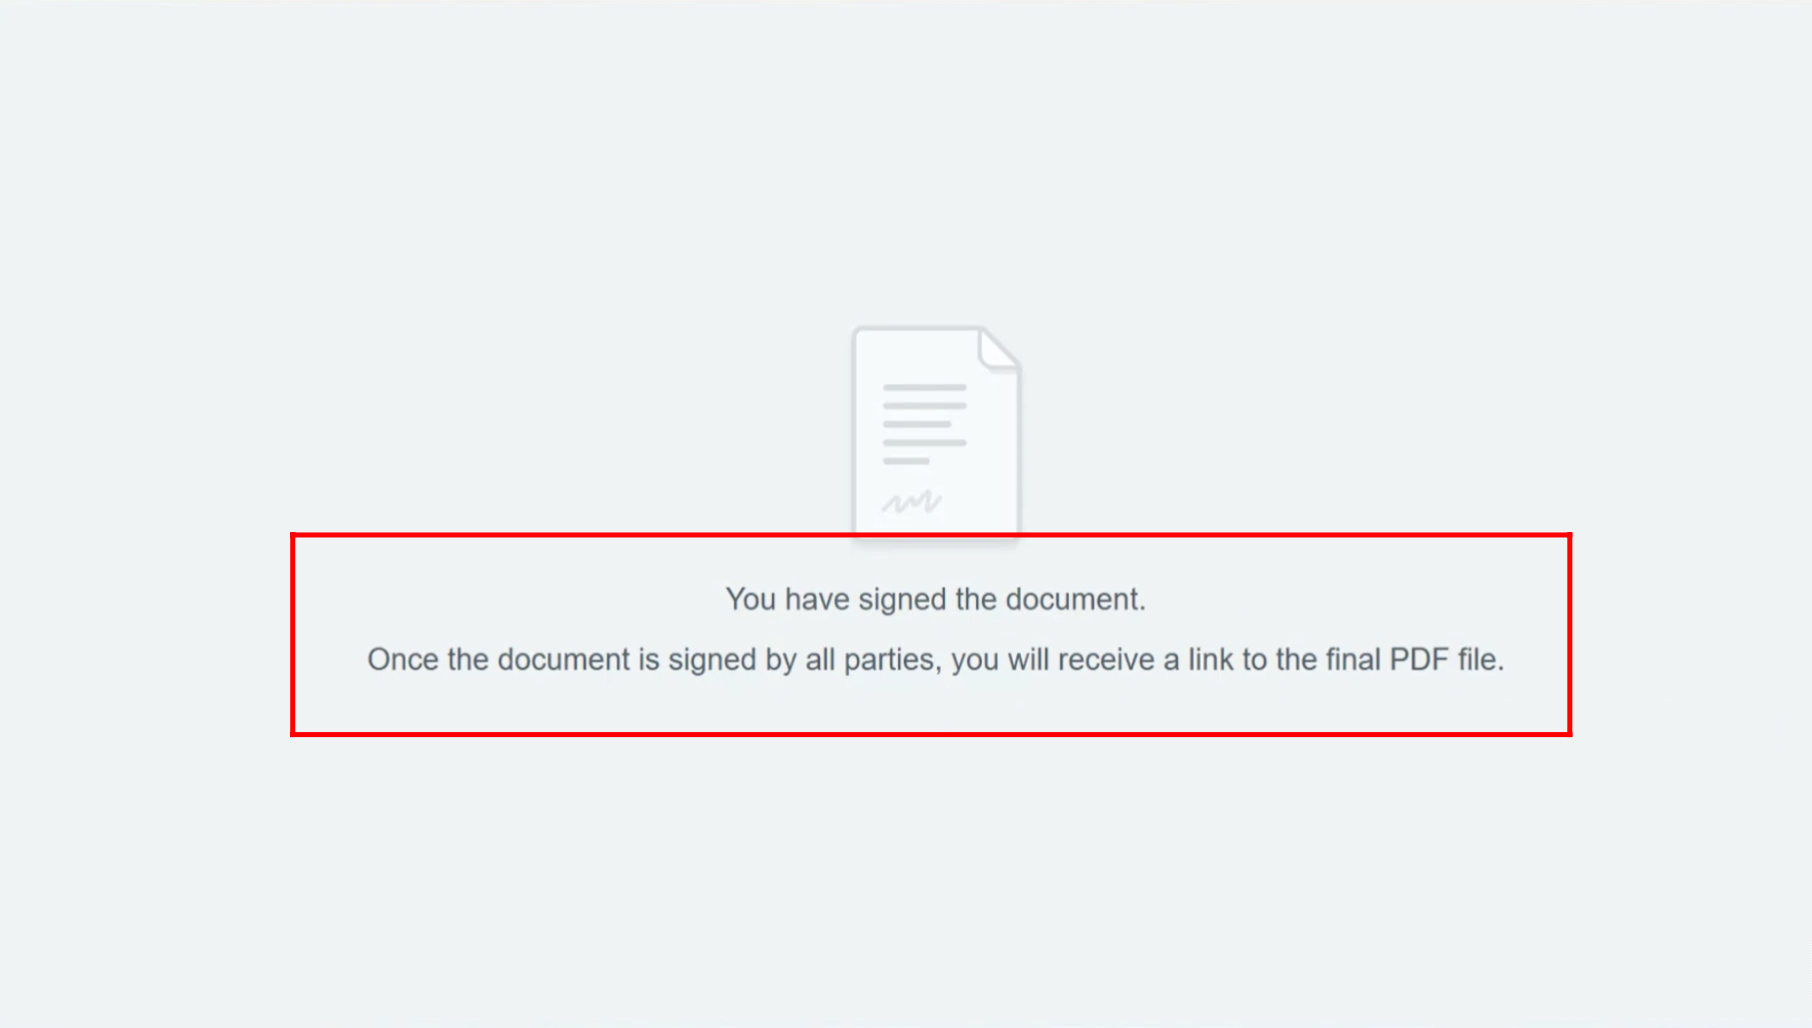
39. After completing your signature, you’ll see a confirmation prompt stating that you have signed the document.
Once all parties have signed, a final PDF version of the document will be generated, and you will receive a link via email to download or view the signed document.
40. Just like the sender, the recipient will also receive an email prompting them to sign the document.
In this example, since we used our own email for testing, go ahead and open your mailbox and locate the email related to the e-signature request.
41. Click the link inside the email to begin the recipient-side signing process.
42. Here, you can see that the sender’s signature is already applied.
Now, as the recipient, click the “Sign” button to proceed.
The recipient will follow the same process as the sender — verifying via email, confirming company details, and providing a signature by typing, drawing, or uploading an image.
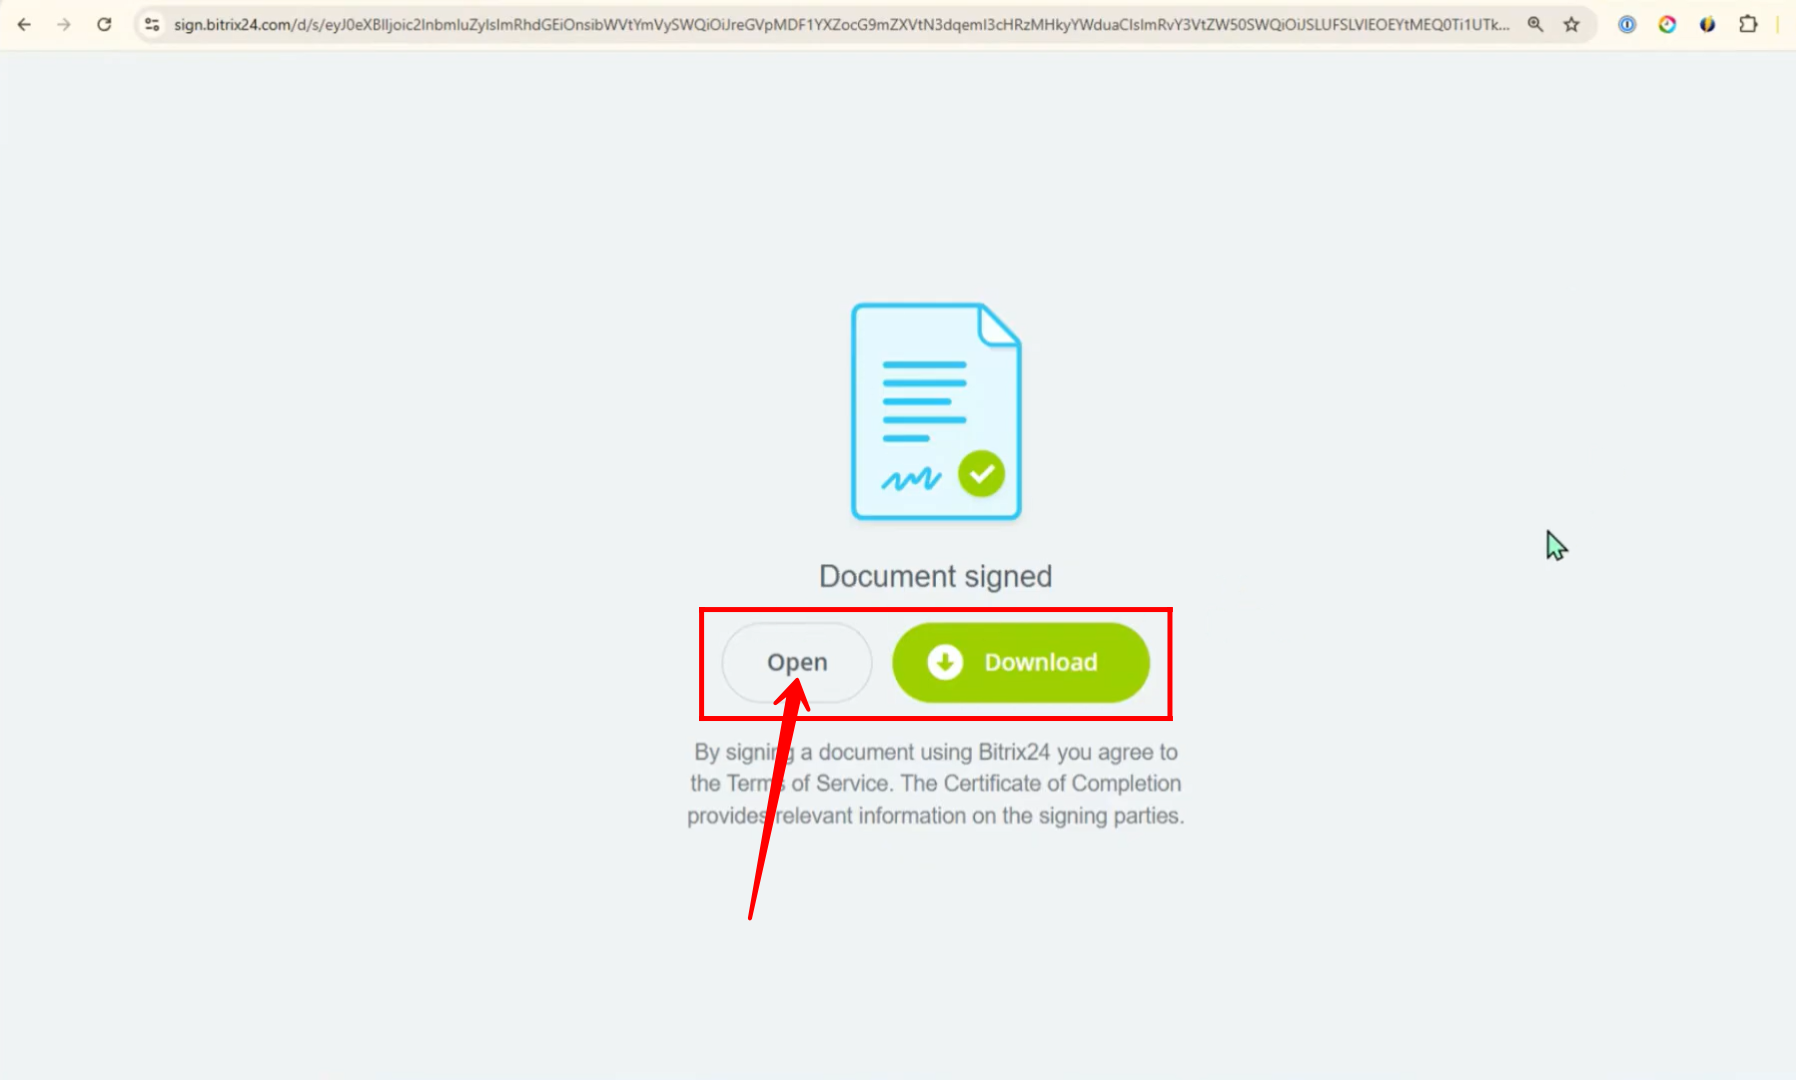
43. Once both parties have signed the document:
A final signed document will be automatically generated with all signatures included. Each party (sender and recipient) will receive a link to the signed document.
You can then:
- Open the document directly from the link, or
- Download the PDF copy for your records.
This completes the e-signature process successfully.
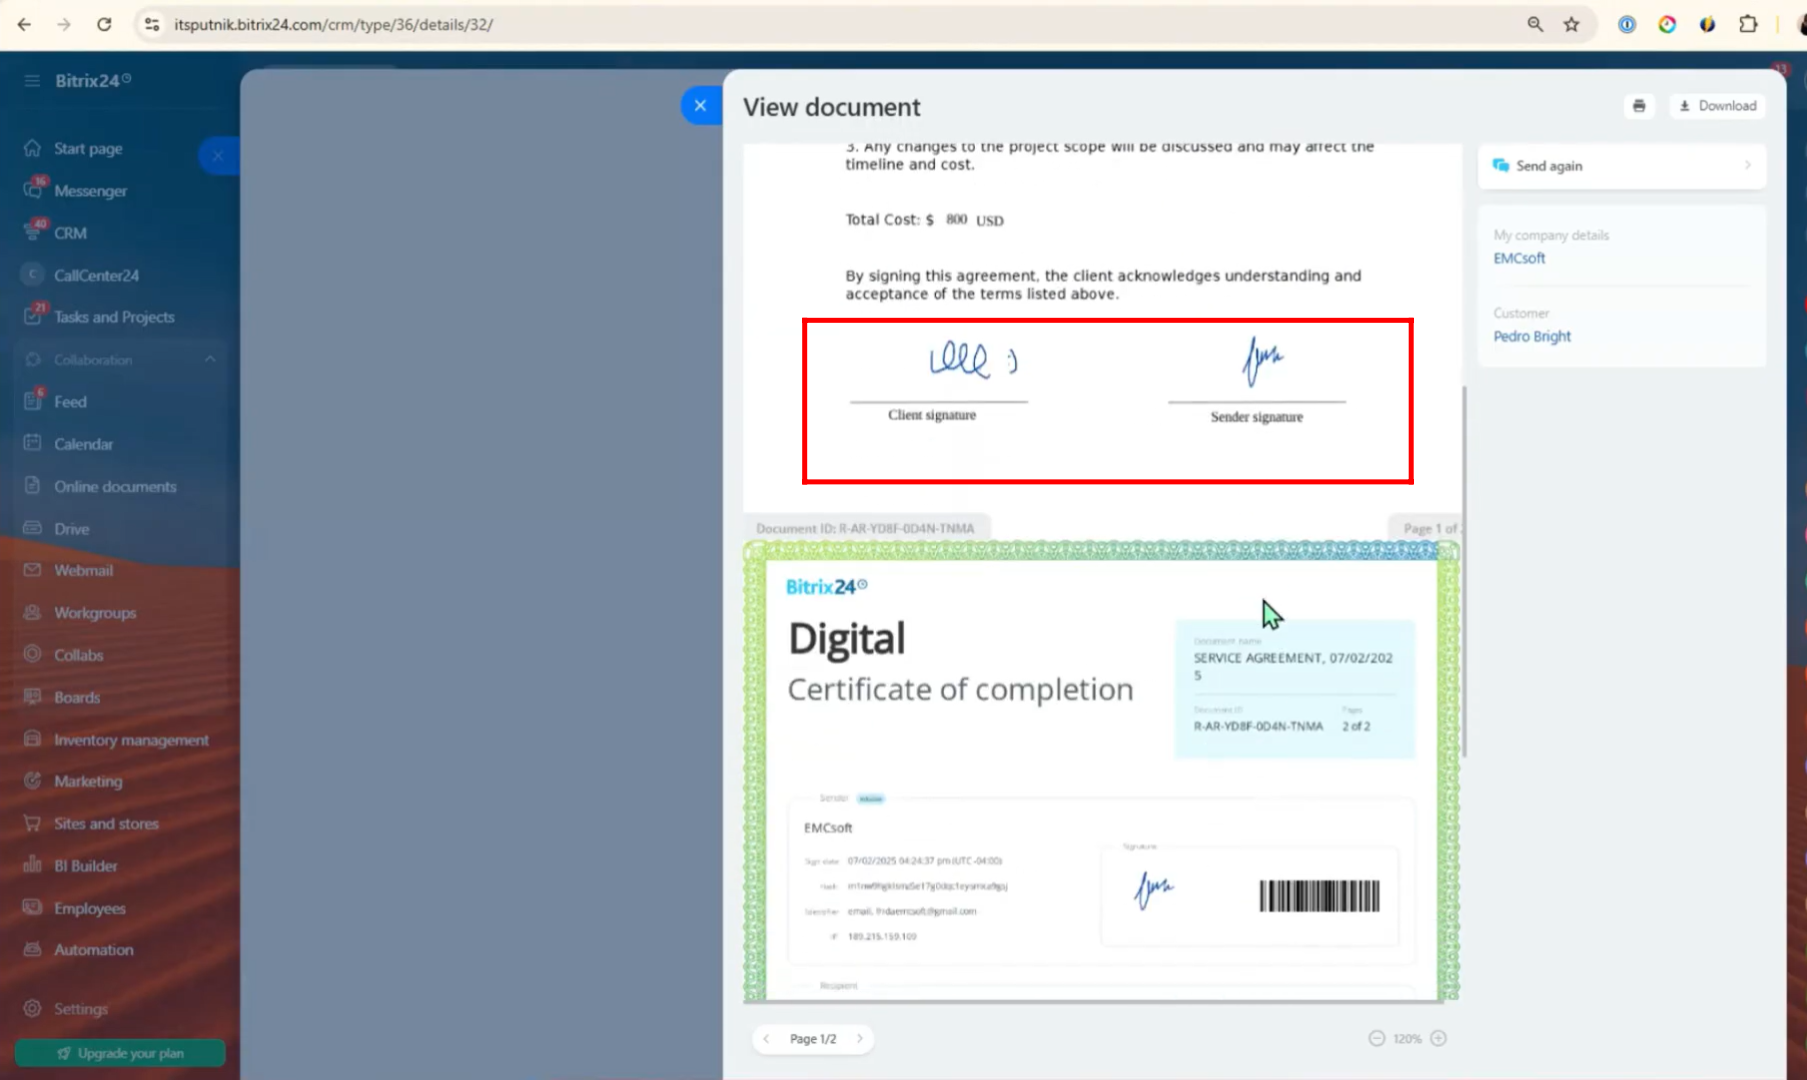
44. You’ll now notice that both signatures appear in their respective positions within the document — exactly as configured:
- The Sender’s Signature is shown above the designated “Sender Signature” label.
- The Recipient’s Signature is shown above the “Client Signature” label.
This confirms that the document setup, placement, and signing flow worked correctly from start to finish.

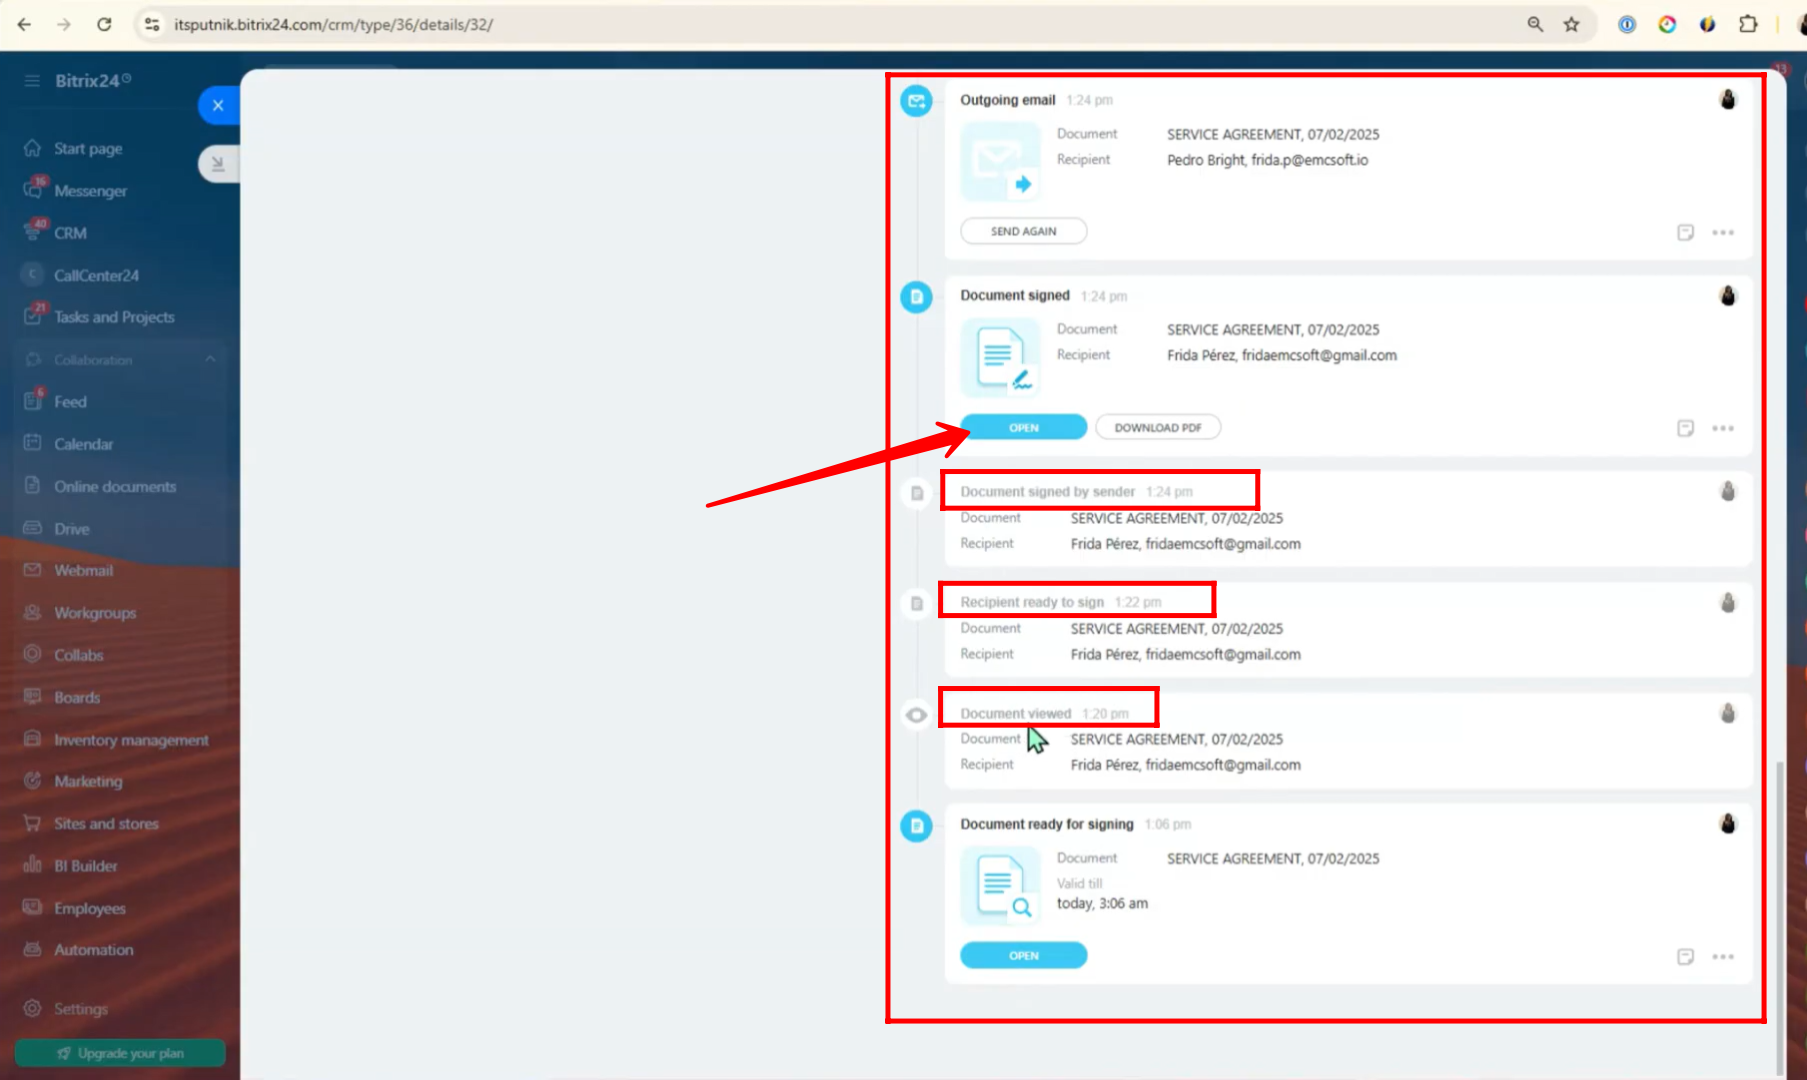
45. Open the e-signature entity in your panel. There you’ll find a complete activity log, showing:
- When the document was viewed
- When the sender signed
- When the recipient signed
You can also open the signed document directly from this section to verify all signatures and details once again. This helps ensure everything is properly completed and recorded.
46. In the preview of the document, you’ll be able to clearly see the signatures of both parties placed at their respective positions—just as configured during setup. This final view confirms that the document has been successfully signed by both the sender and the recipient.
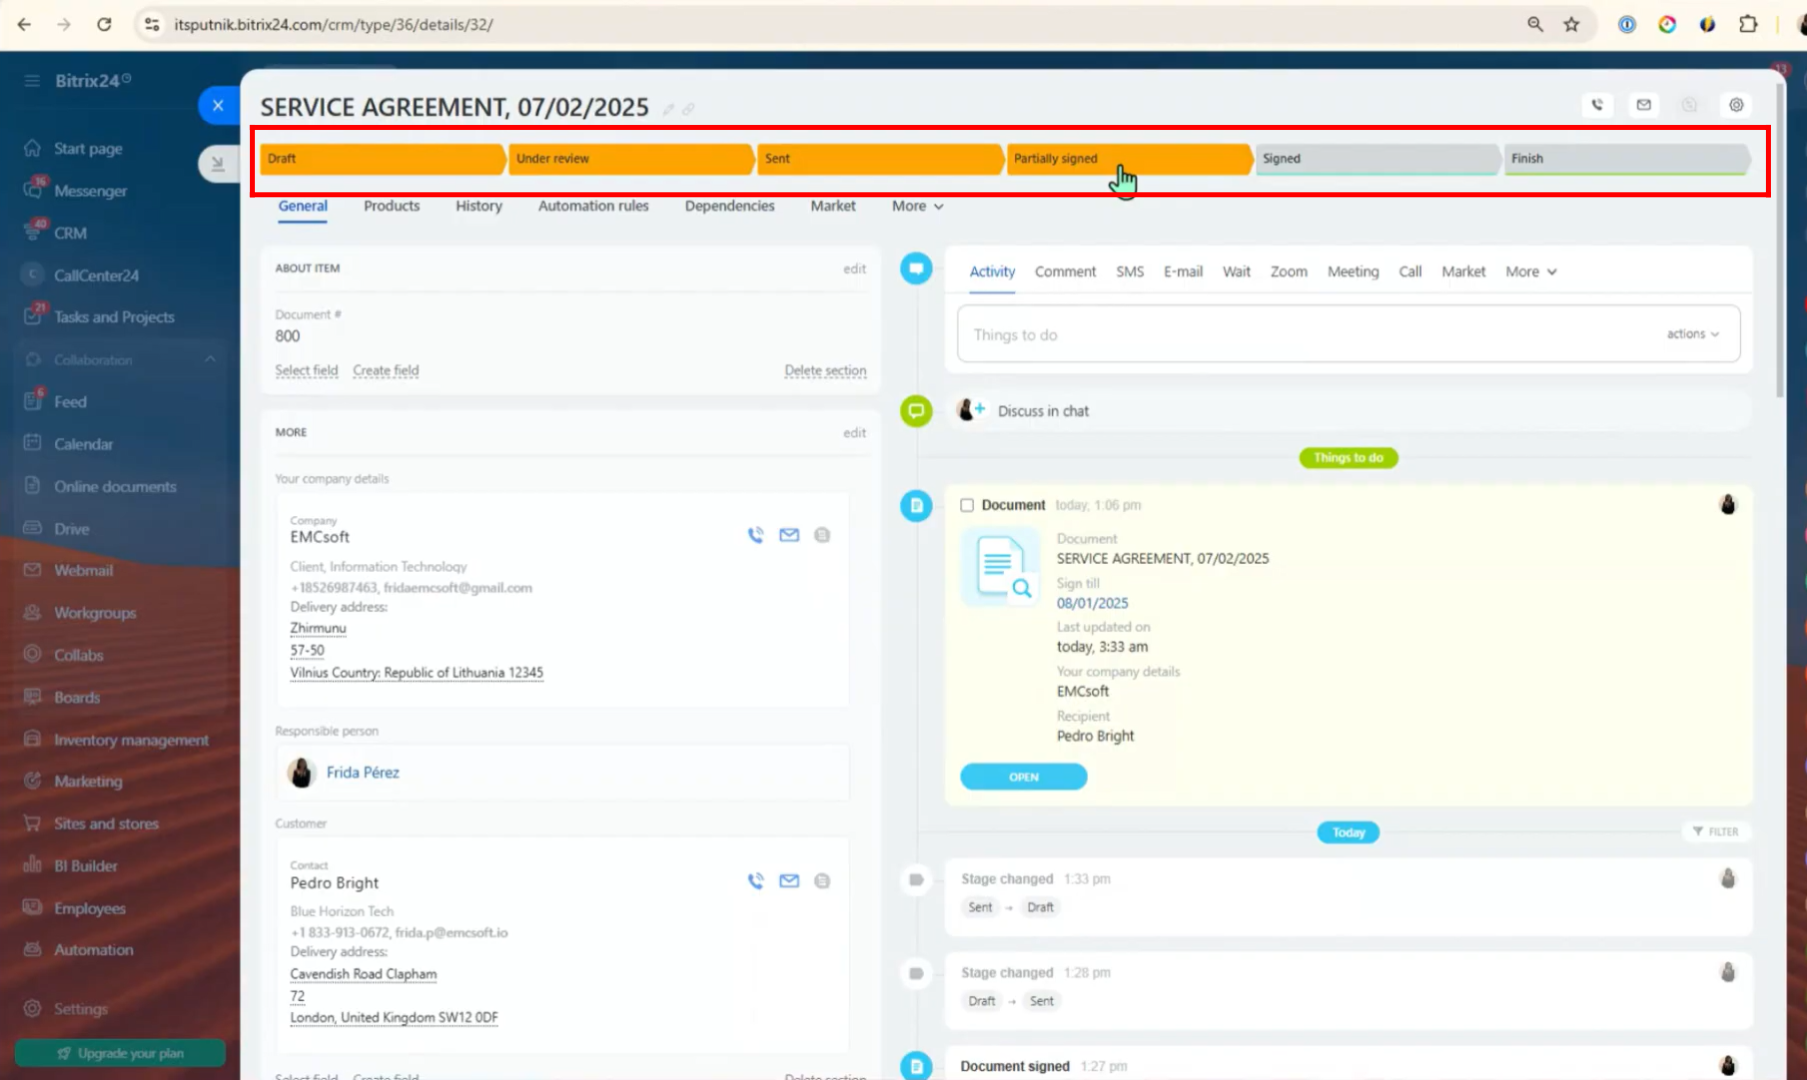
47. You can manually change the stage of the e-signature entity based on the current status or workflow needs. For example, if a document has been reviewed but not yet signed, you might set the stage to “Under Review” or “Awaiting Signature”. Once signed, you can move it to “Completed” or any custom stage defined in your process to reflect progress accurately.
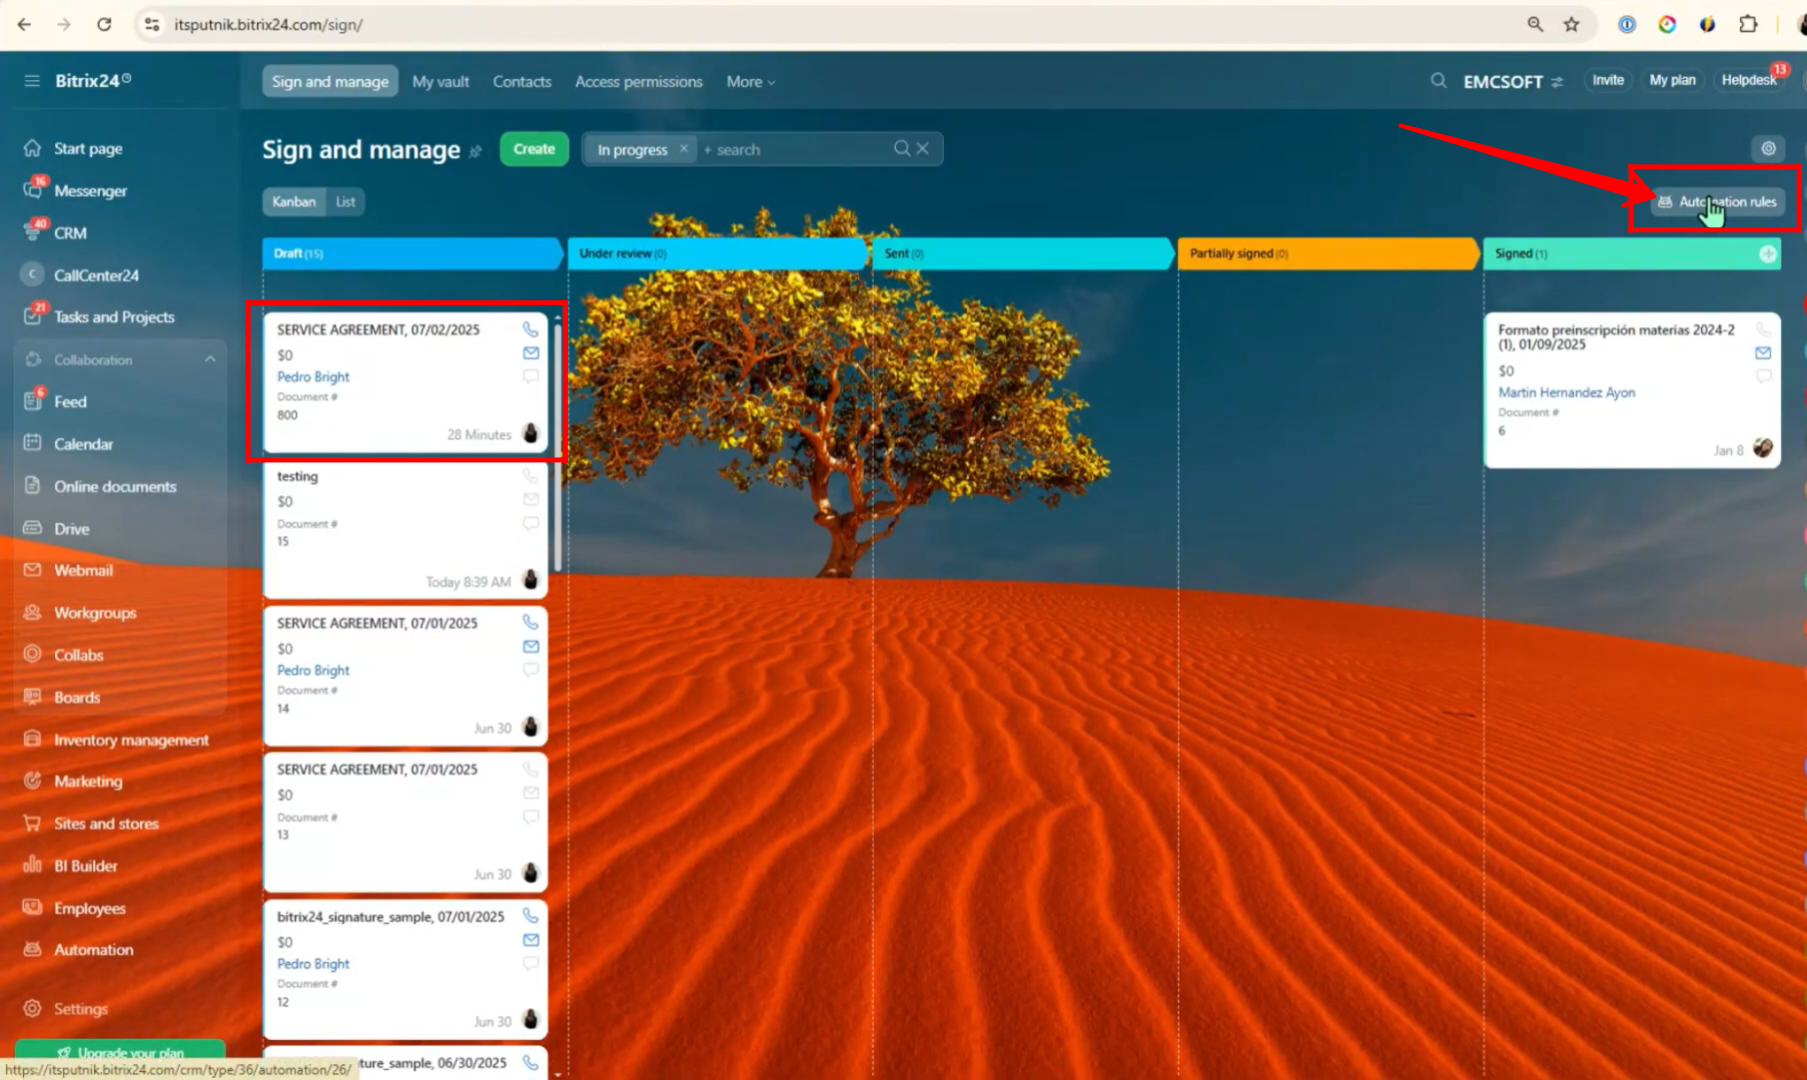
48. Similarly, you can create automation rules to track and manage the document signing process more efficiently. In the E-Signature panel, click on “Automation Rules”.
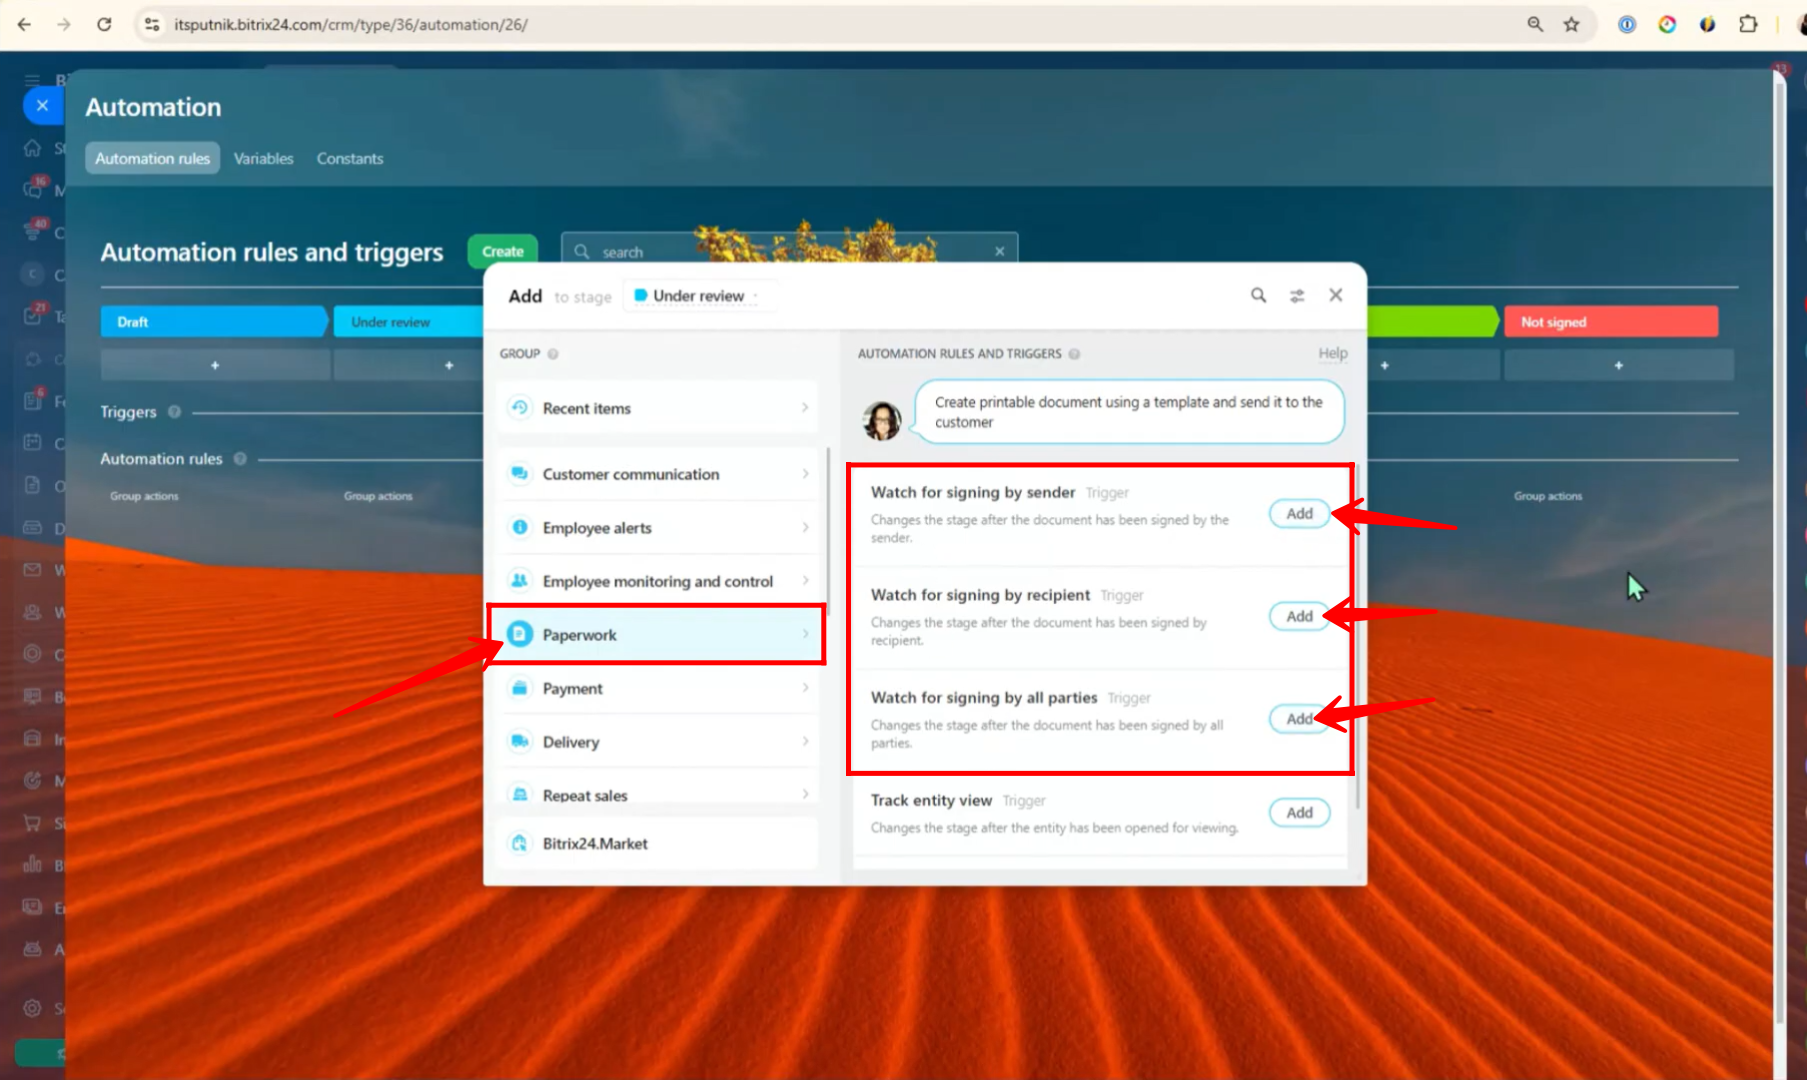
49. Go to “Paperwork”. Here, you can configure specific triggers to track the signing progress of documents. You’ll find options such as:
- Watch for signing by sender – Trigger actions once the sender signs the document.
- Watch for signing by recipient – Trigger actions when the recipient completes their signature.
- Watch for signing by all parties – Trigger actions only after all required parties have signed.
These triggers help automate follow-up steps, status changes, or notifications based on who has signed the document and when.
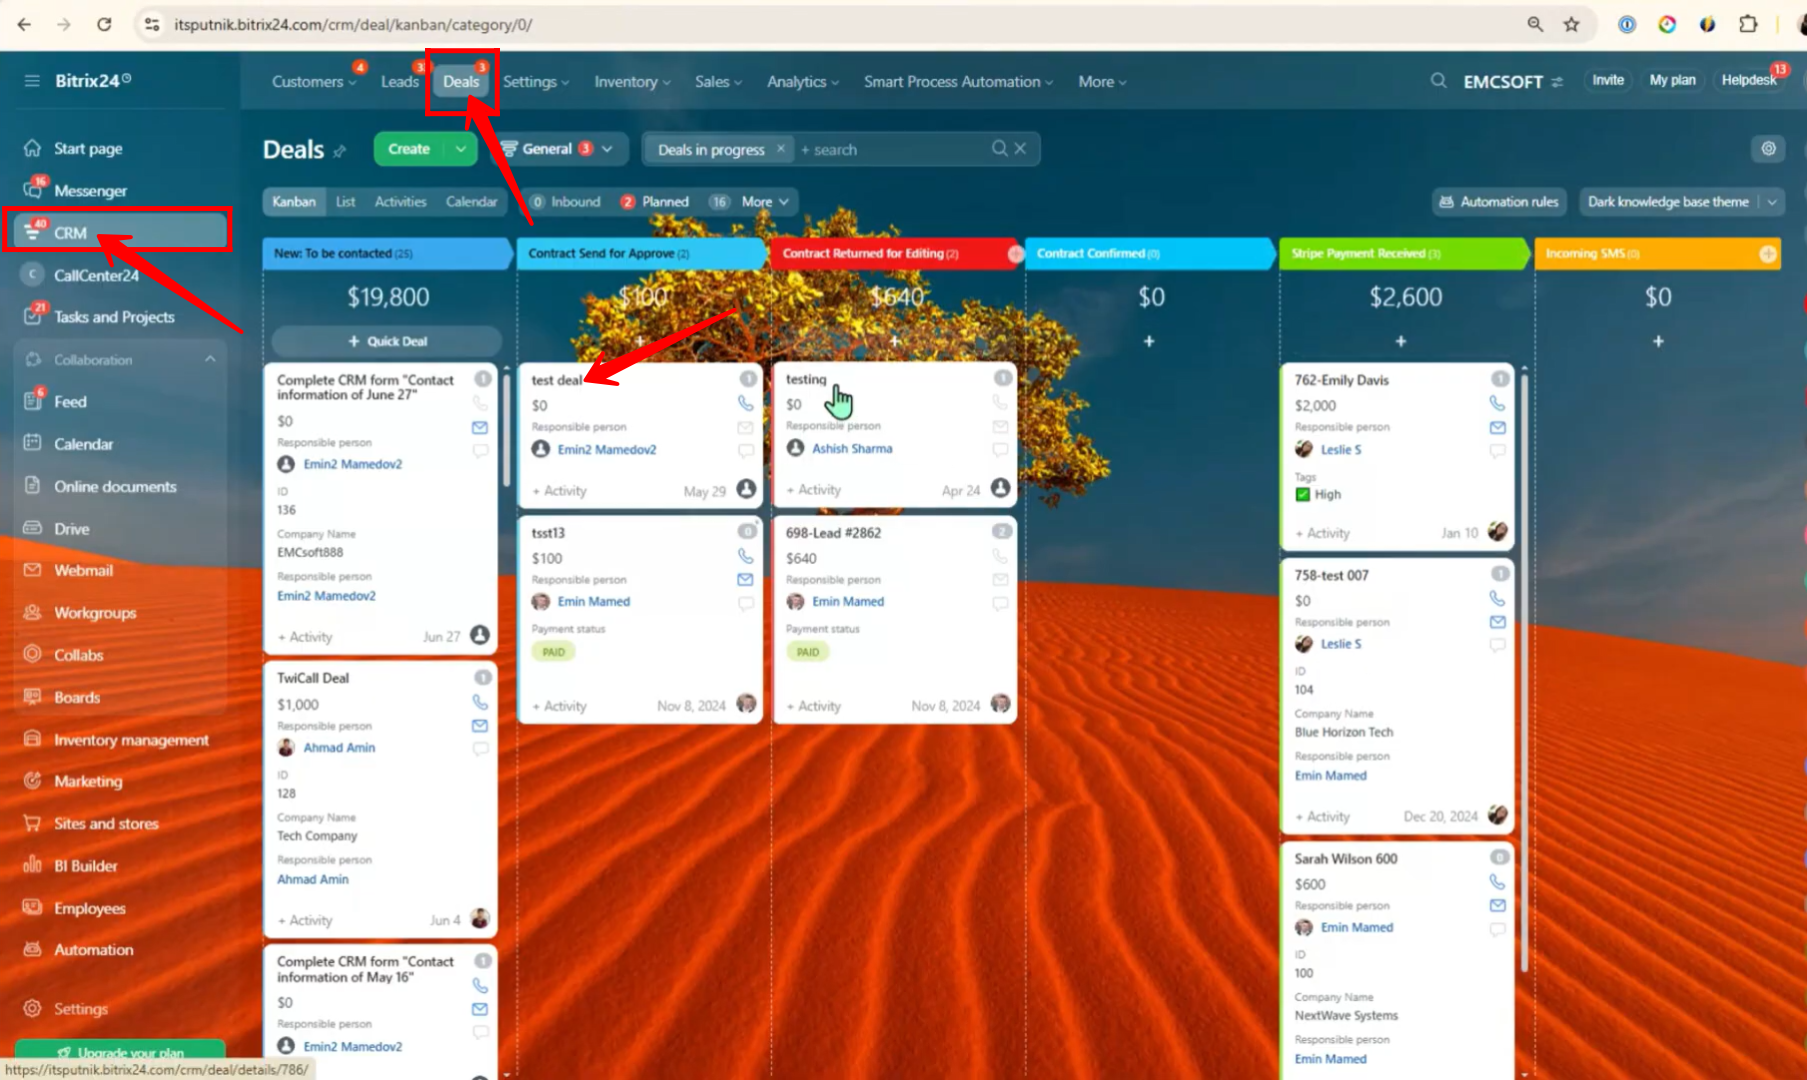
50. You can configure the same e-signature process within the Deals section of your CRM. Here’s how:
- Go to CRM from your left-side panel.
- Select “Deals” from the CRM menu.
- Create a new deal or open an existing one for testing purposes.
This allows you to attach and manage e-signature documents directly within a deal, keeping all client communication and approval records organized in one place.
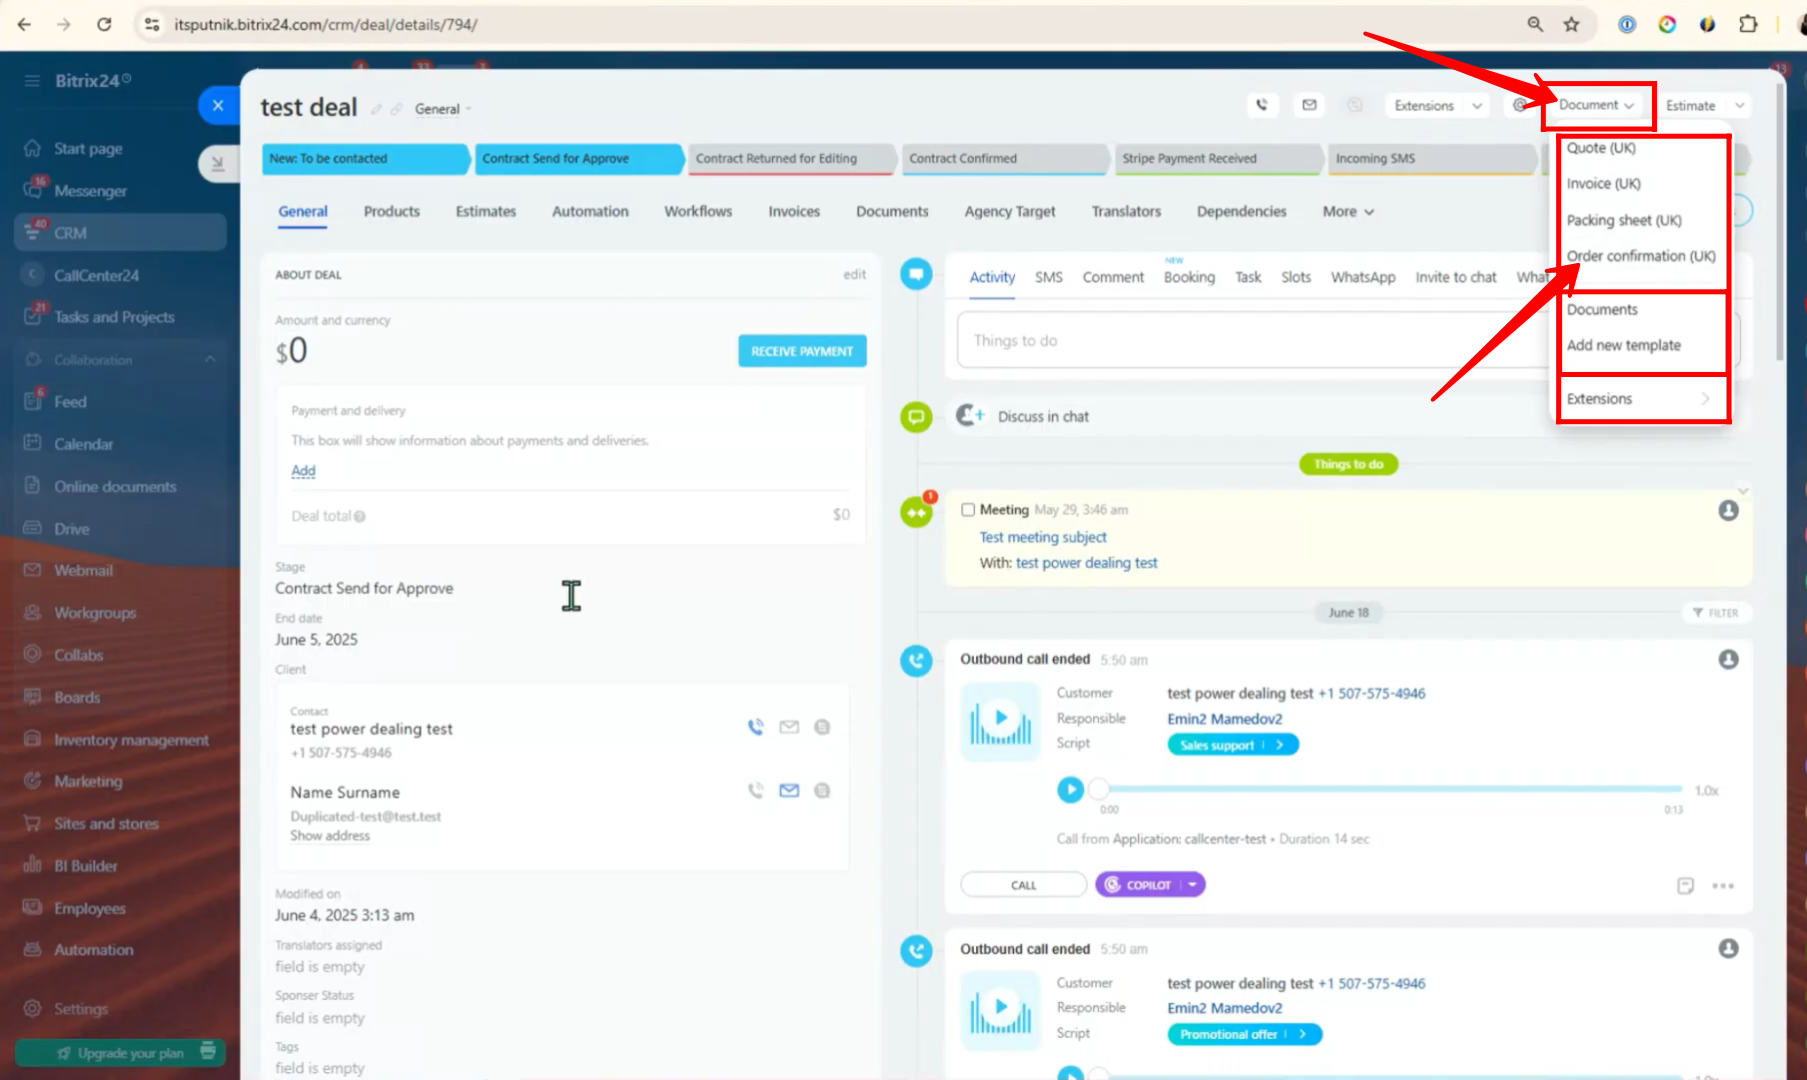
51. Within the deal:
- Go to the “Documents” tab.
- Choose the previously configured document or add a new template.
- If you’re unfamiliar with creating a new template from scratch, refer to this helpful video: Document Template Guide.
- In this example, we’re selecting the “Order Confirmation (UK)” template for testing purposes.
This allows you to quickly generate and send documents for signature within the deal workflow.
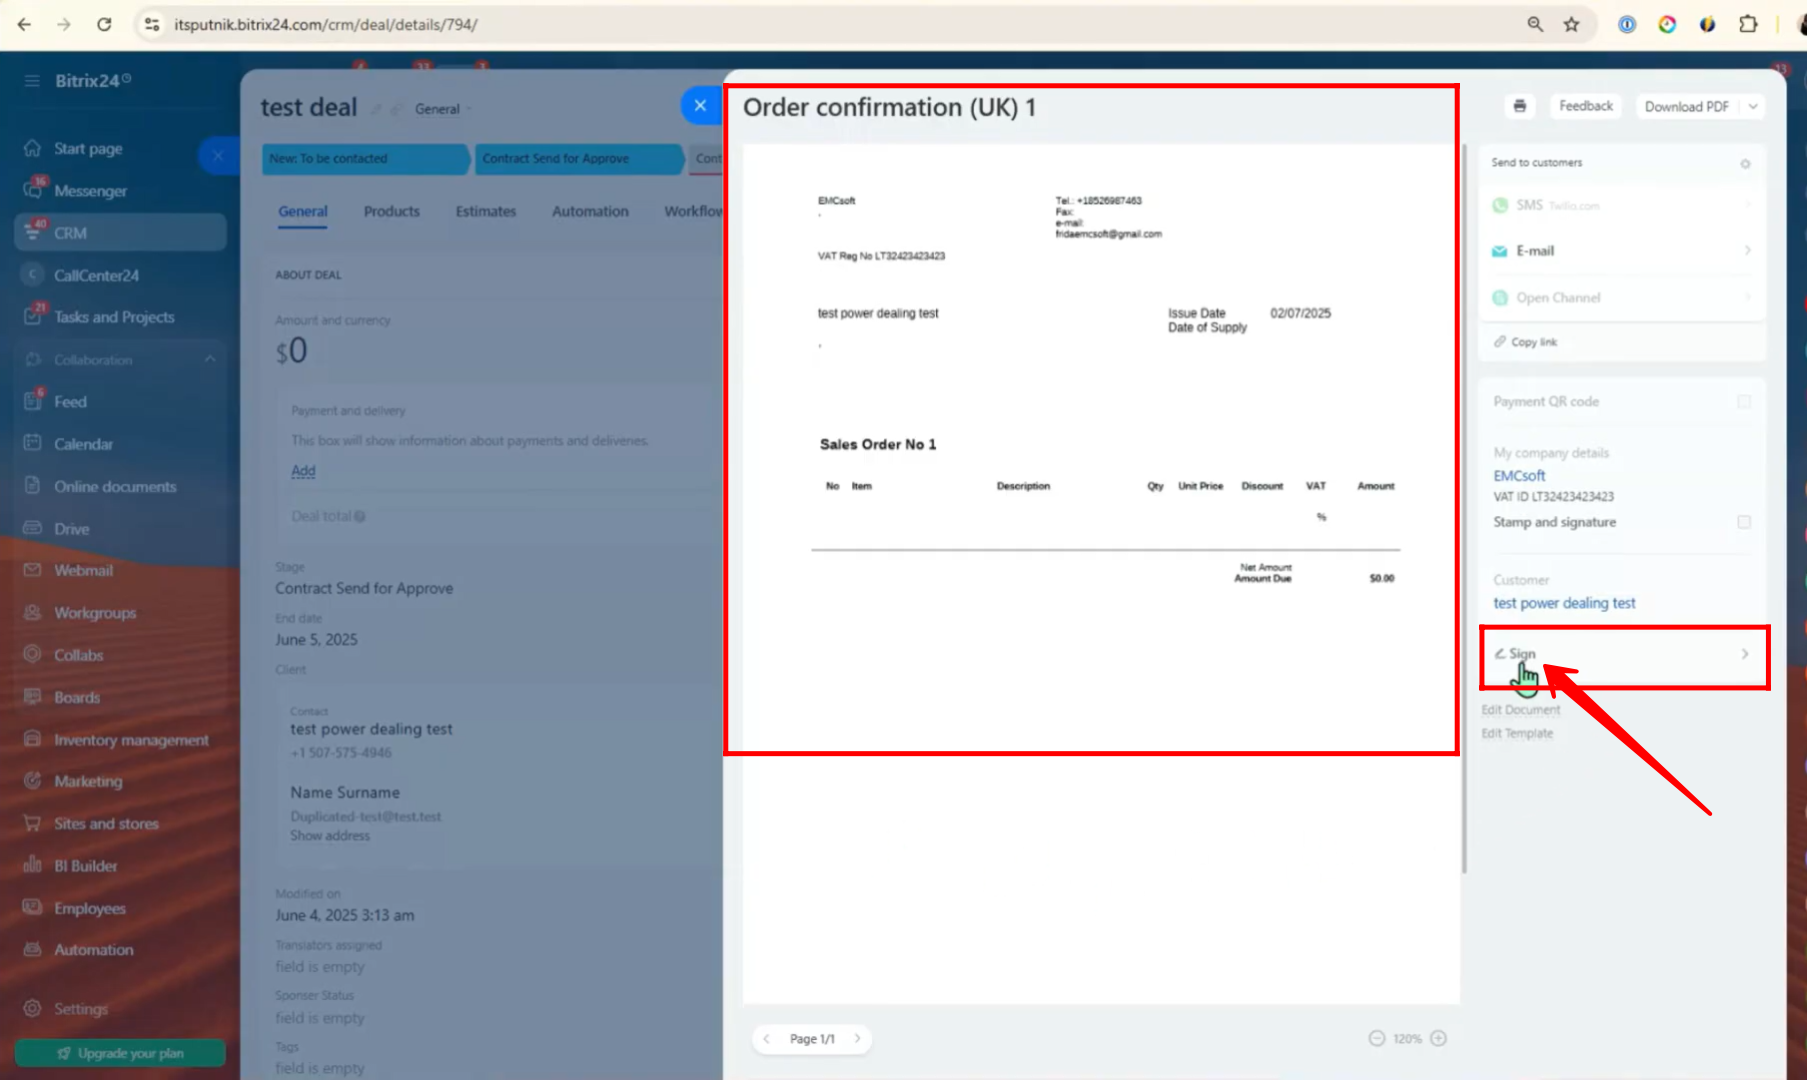
52. Here, you can preview the selected template to ensure all details are correct. Once reviewed, click the “Sign” button to initiate the e-signature process.
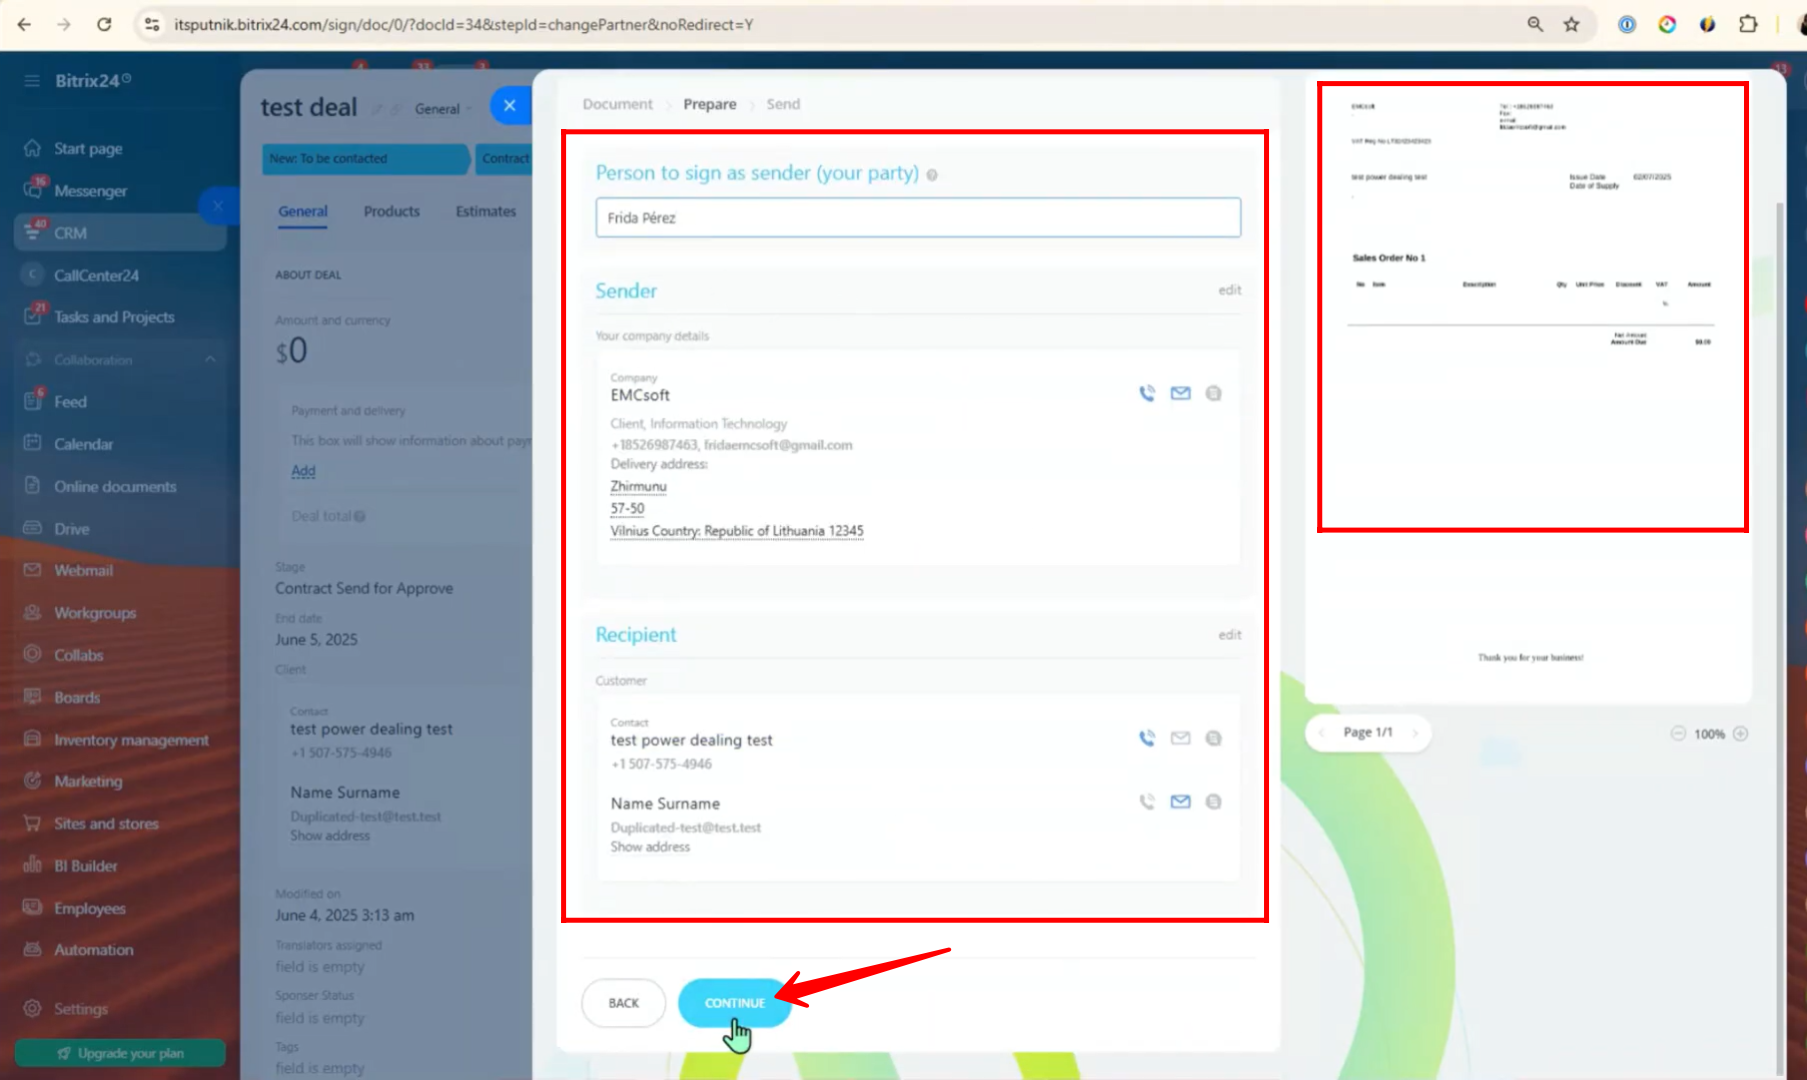
53. At this point, you’ll be directed to the same e-signature configuration screen we used earlier. You can now proceed with setting up recipients, adding signature fields, and configuring the document just as before.
“You can also watch this video on youtube”