| 3500 Views | admin

CRM forms are an essential part of collecting and managing customer information directly through your website or communication channels. They allow businesses to create structured forms for inquiries, registrations, feedback, or any other type of data collection. Once created, these forms can be shared, embedded, or connected with widgets and chat tools, making it easy for visitors to interact and for teams to capture information in one place.
Within the form settings, users can configure how and where a form will appear. Options such as background customization, embedding on web pages, connecting to website widgets, or attaching forms to live chat channels give flexibility in how customers engage. Settings also provide advanced features like timed display, popup appearance, and alignment control, ensuring that the form shows up at the right moment and in the right way to capture attention.
By using these settings effectively, businesses can align forms with their website or communication flow, making it simpler to manage interactions and gather meaningful customer data. This structured setup not only helps in improving response rates but also ensures that the collected information goes directly into the CRM for follow-up and analysis.
Detailed Instructions are given below
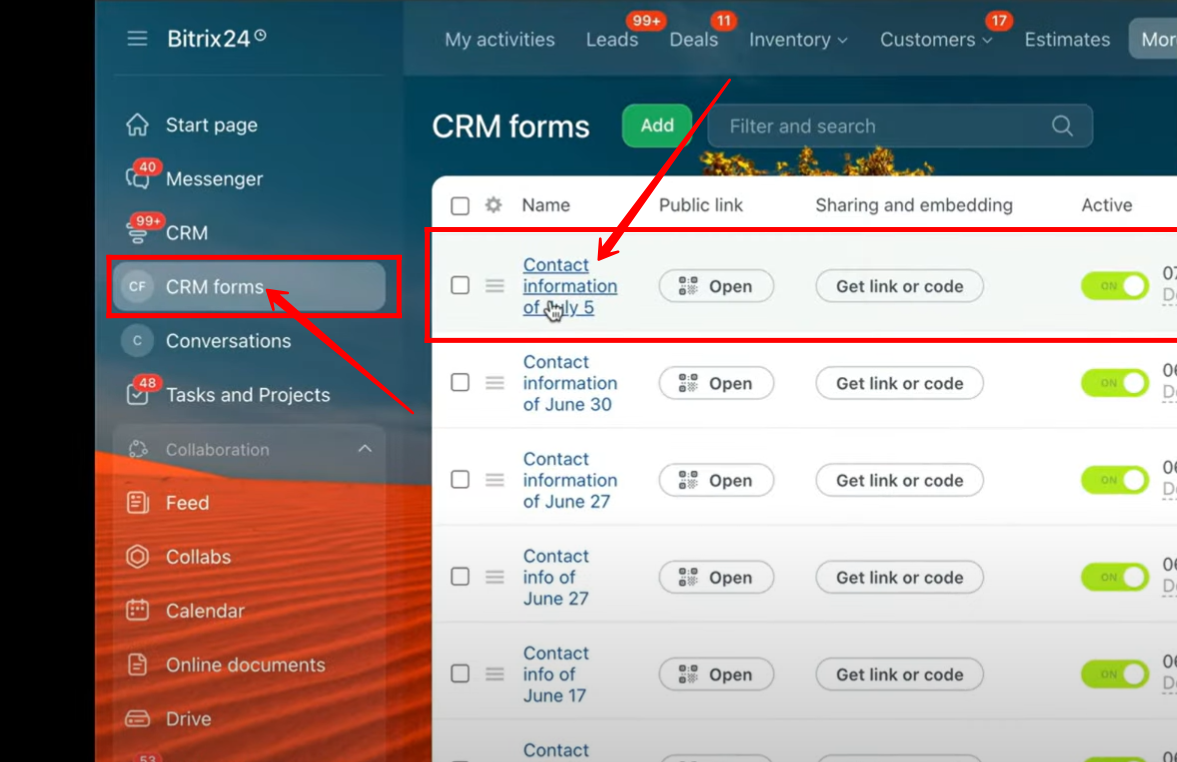
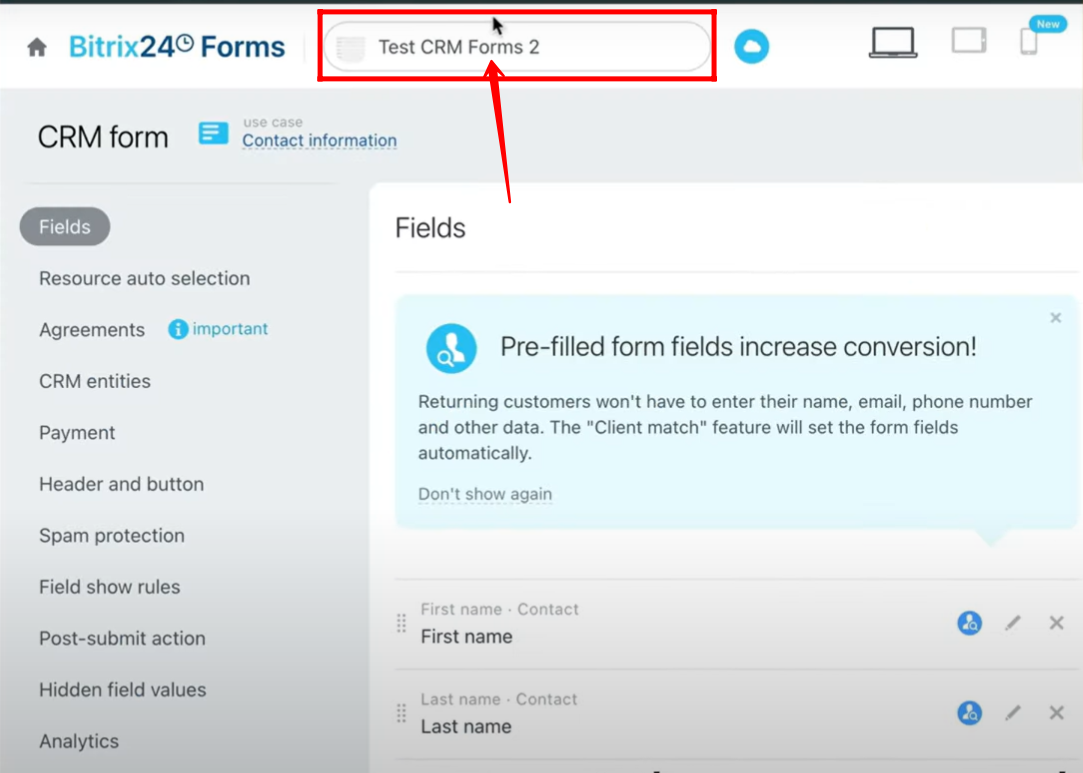
1. Open CRM Forms. You will find a list of forms that were already created. You can either open one of the existing forms to check its settings or create a new form if needed.
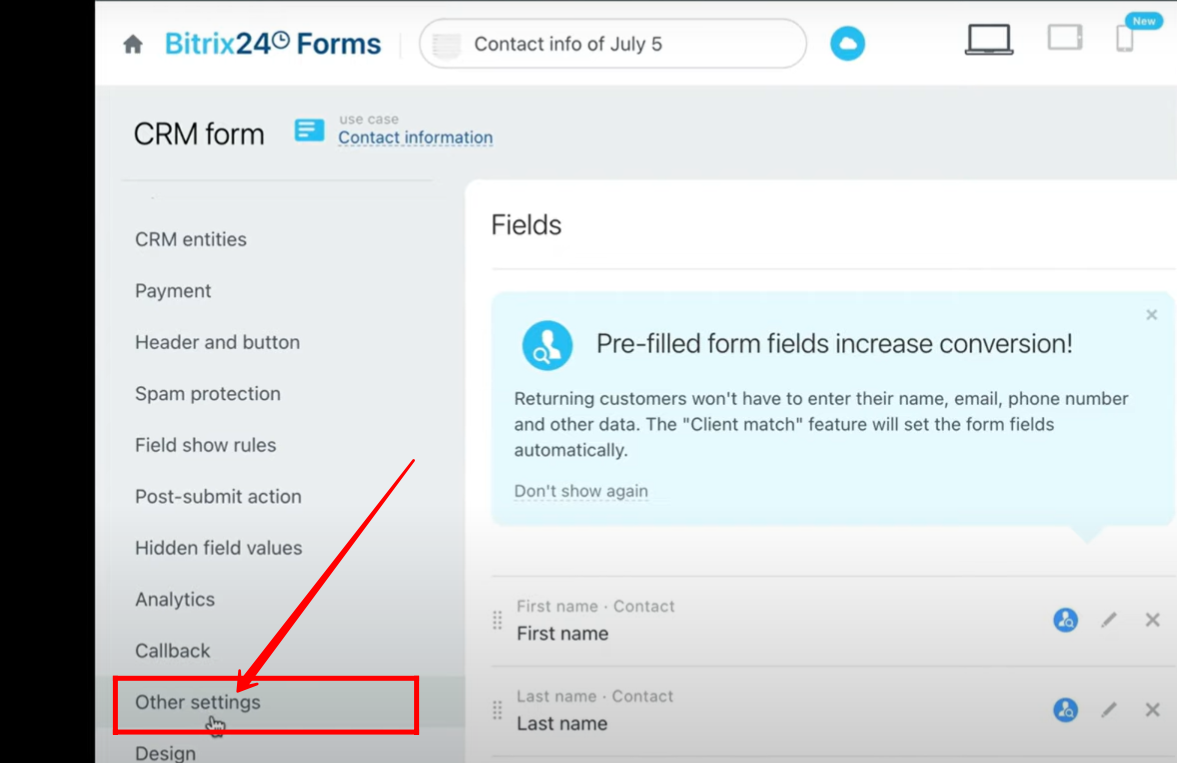
2. In the form’s configuration panel, navigate to Other Settings.
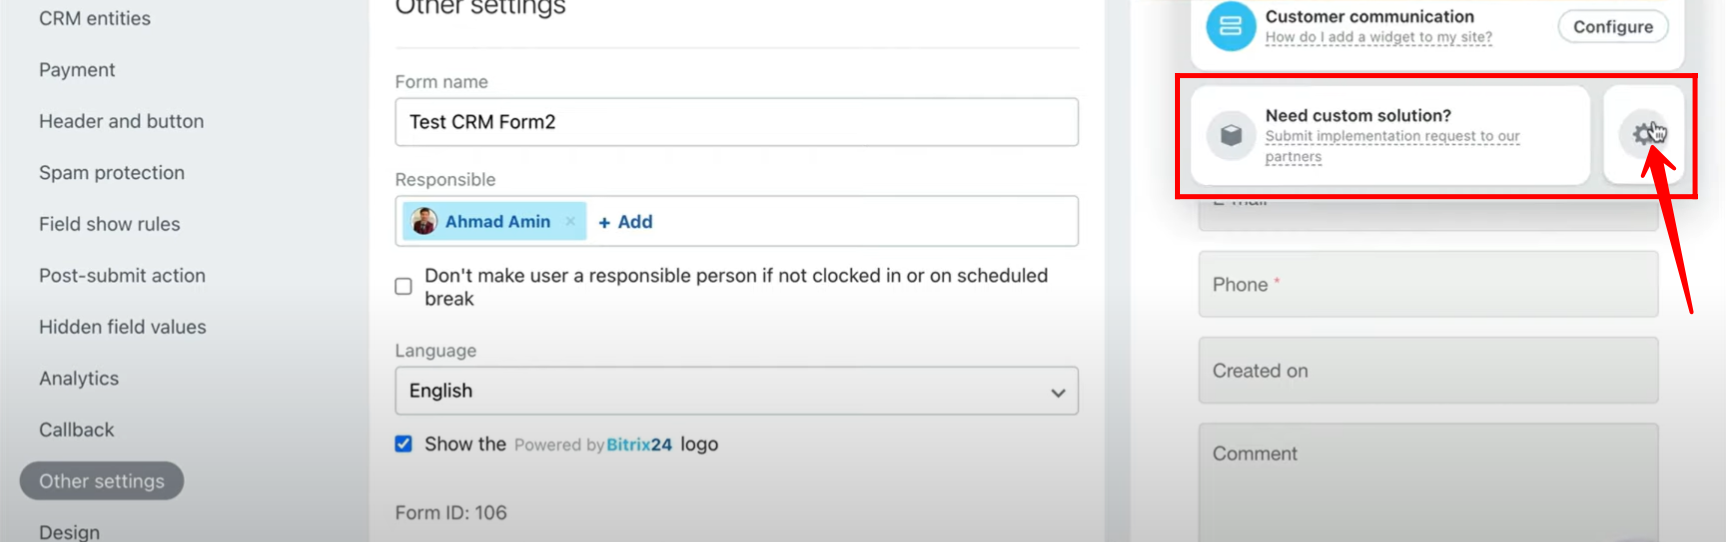
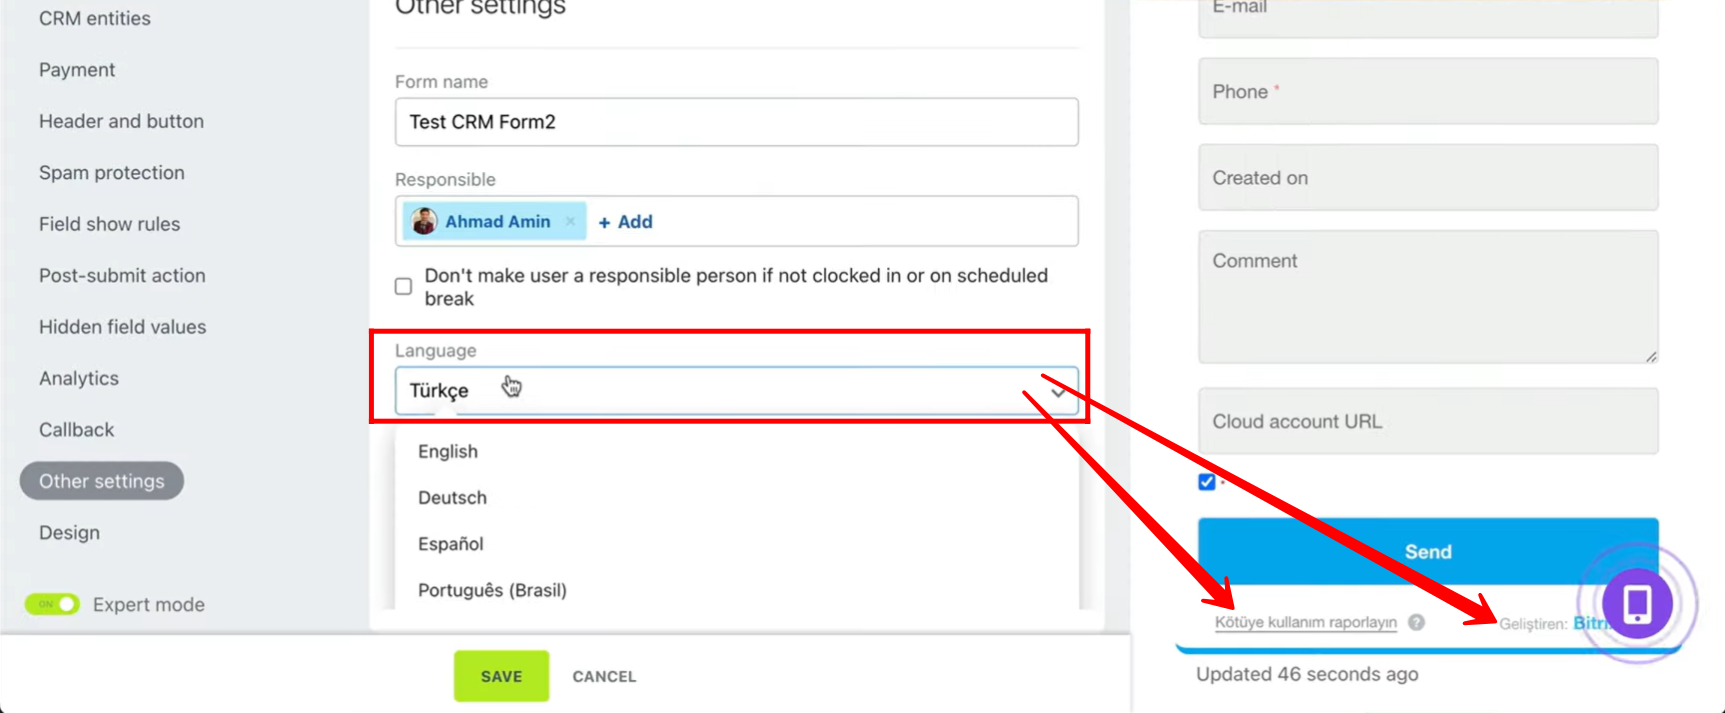
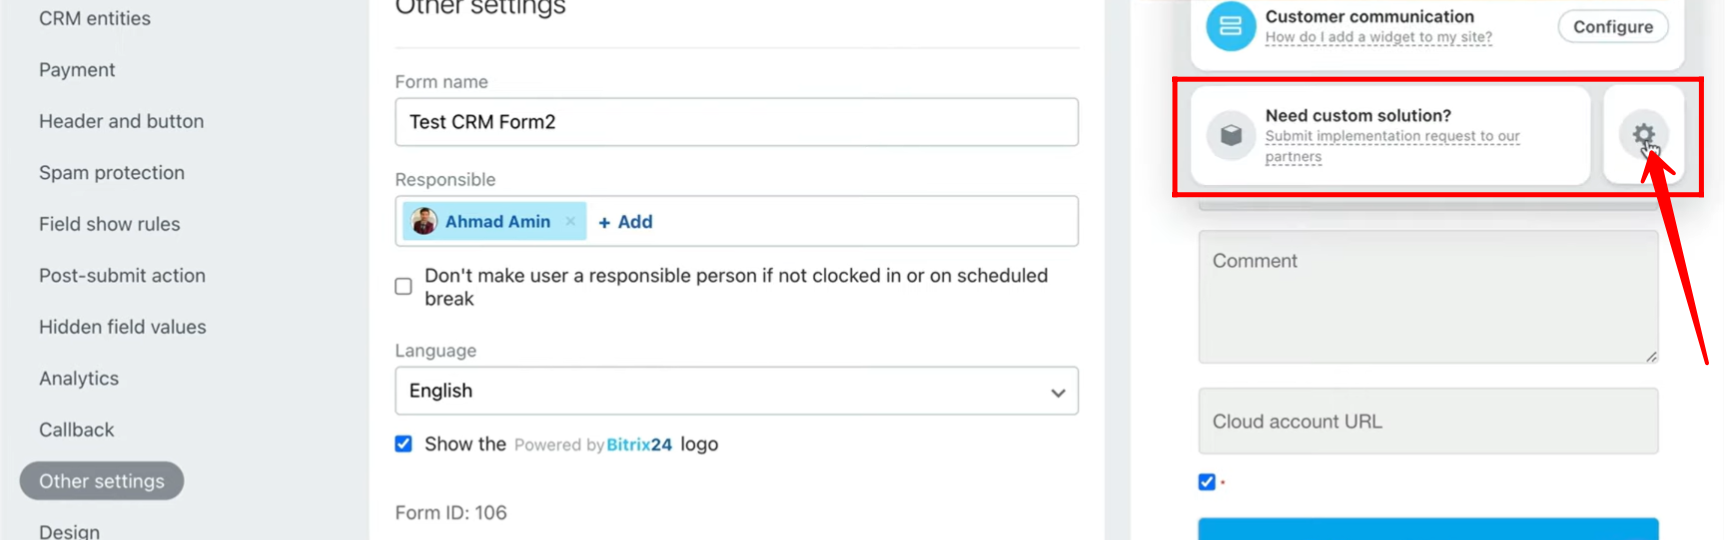
3. Set up the form name, assign a responsible person, and choose the language for the form. You can also decide whether to display the Bitrix24 logo by checking or unchecking the box. Additionally, enable the option “Don’t make a user responsible person if not clocked in or on a scheduled break” if needed.

4. Go to Form Features and click on the settings icon to access additional options.
5. Go to Page Settings and update the page name or modify the page address as needed.
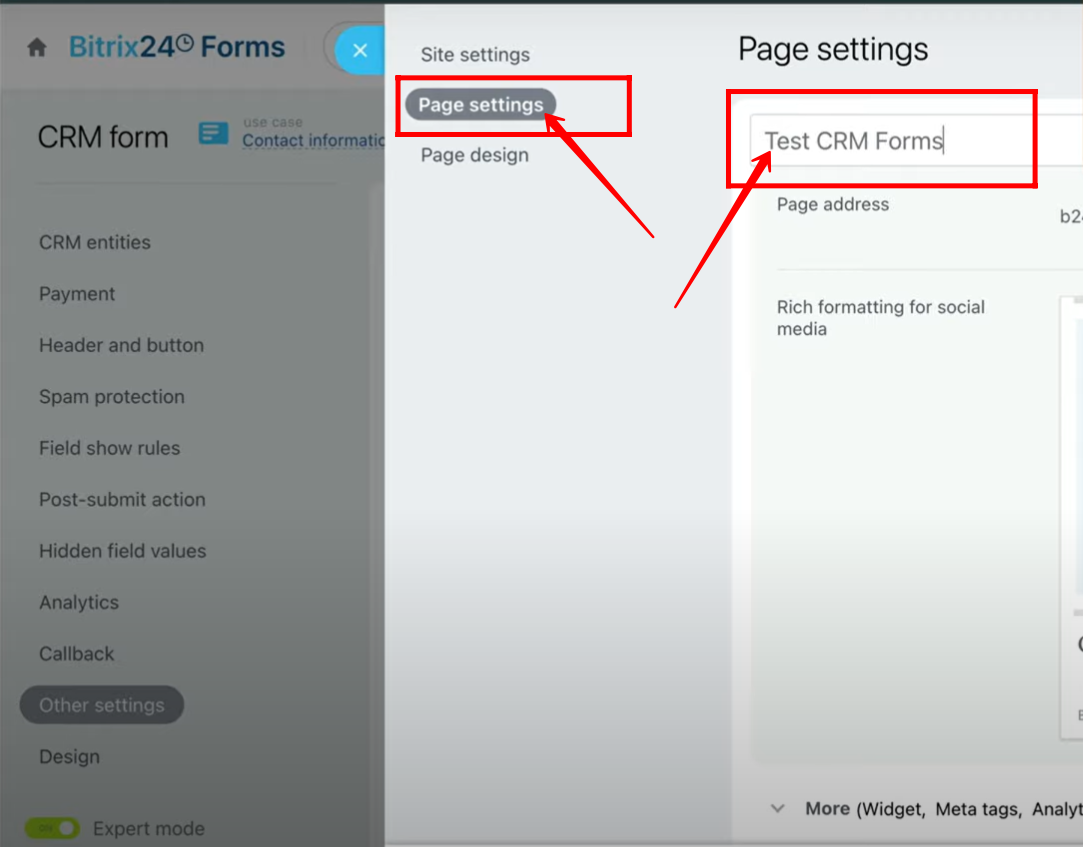
6. You will notice that the page name has been updated along with the form name.
7. As you can see, the language has been switched to Türkçe, and the descriptions or help texts in the form where language settings are applied are now displayed in Turkish.
8. Once again, go to Form Features and click on the settings icon to access the available options.
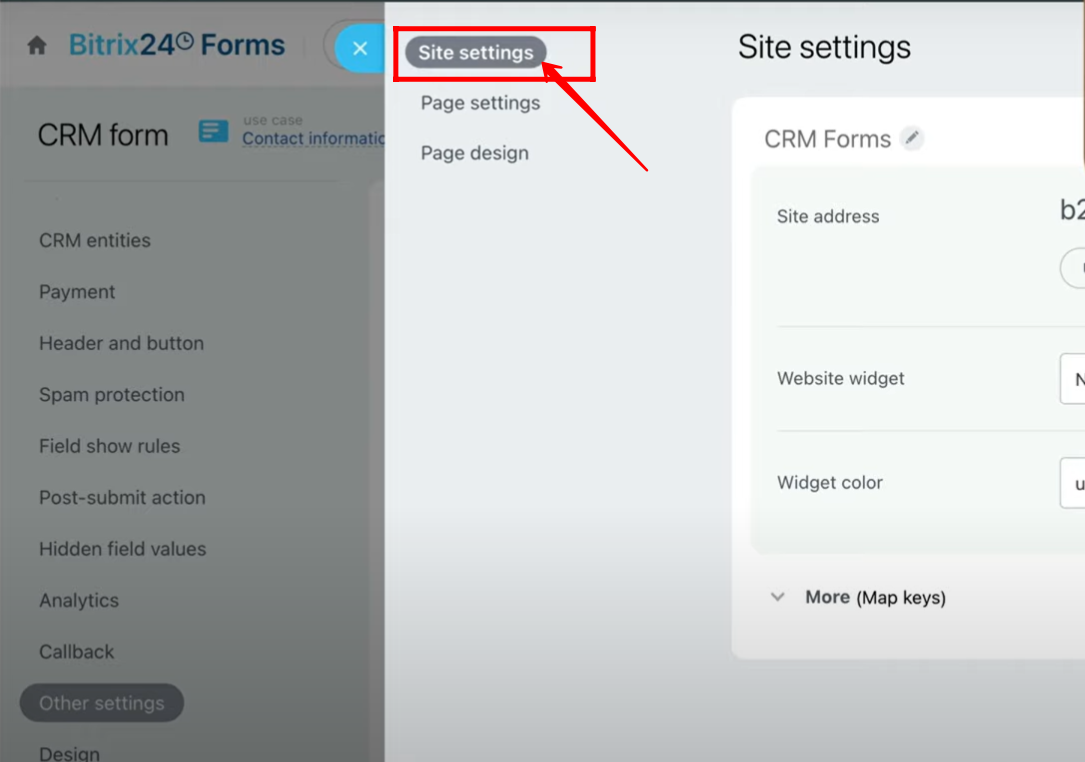
9. Next, go to Site Settings to adjust how the form will appear and function on your website.
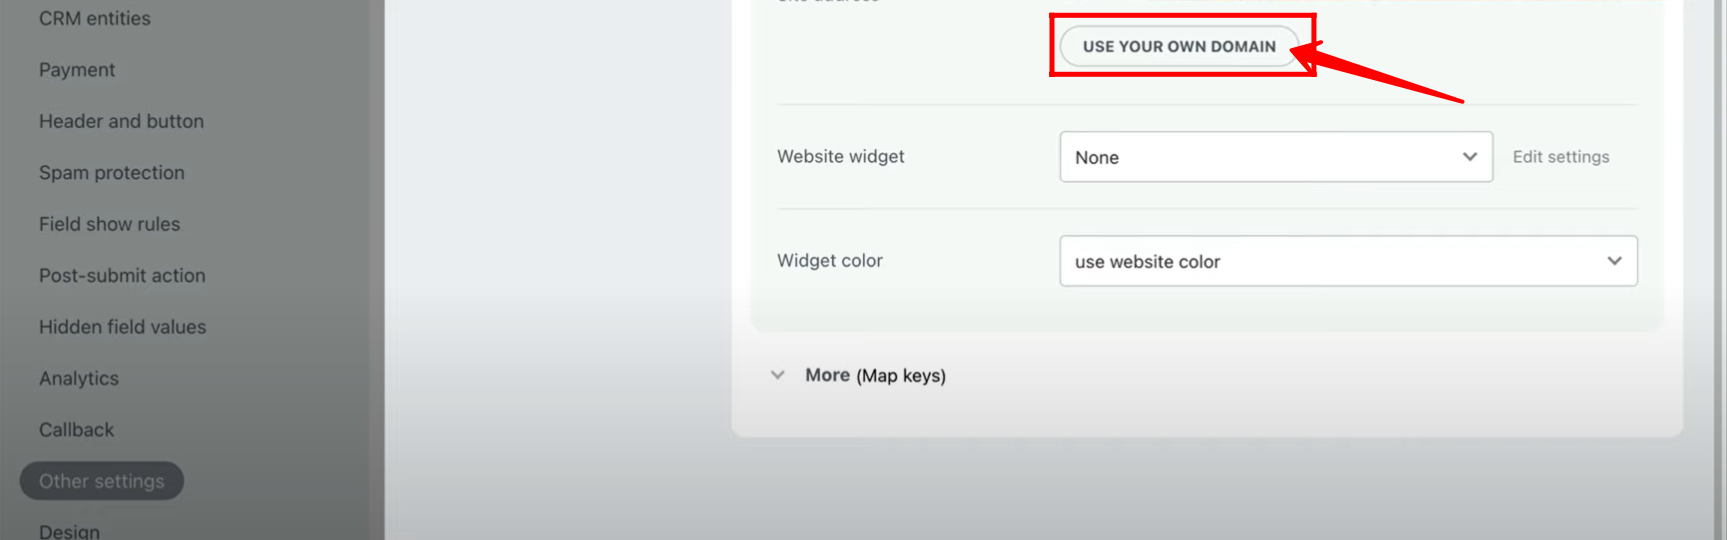
10. Click on “Use your own domain” if you want to connect and display the form directly on your website.
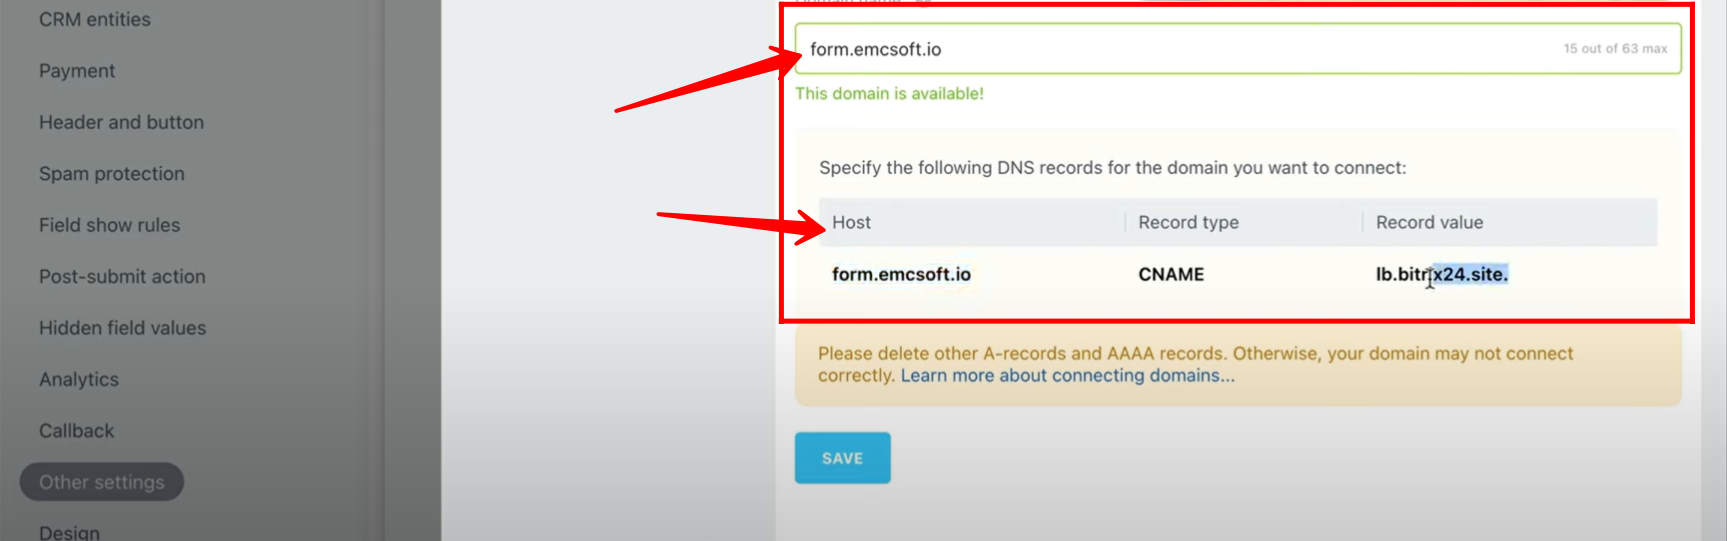
11. Here, you should use a subdomain (for example, form.emcsoft.io) from your actual domain to place the form on your website. Copy the details for Host, Record Type, and Record Value, then add them in your domain provider’s panel settings.
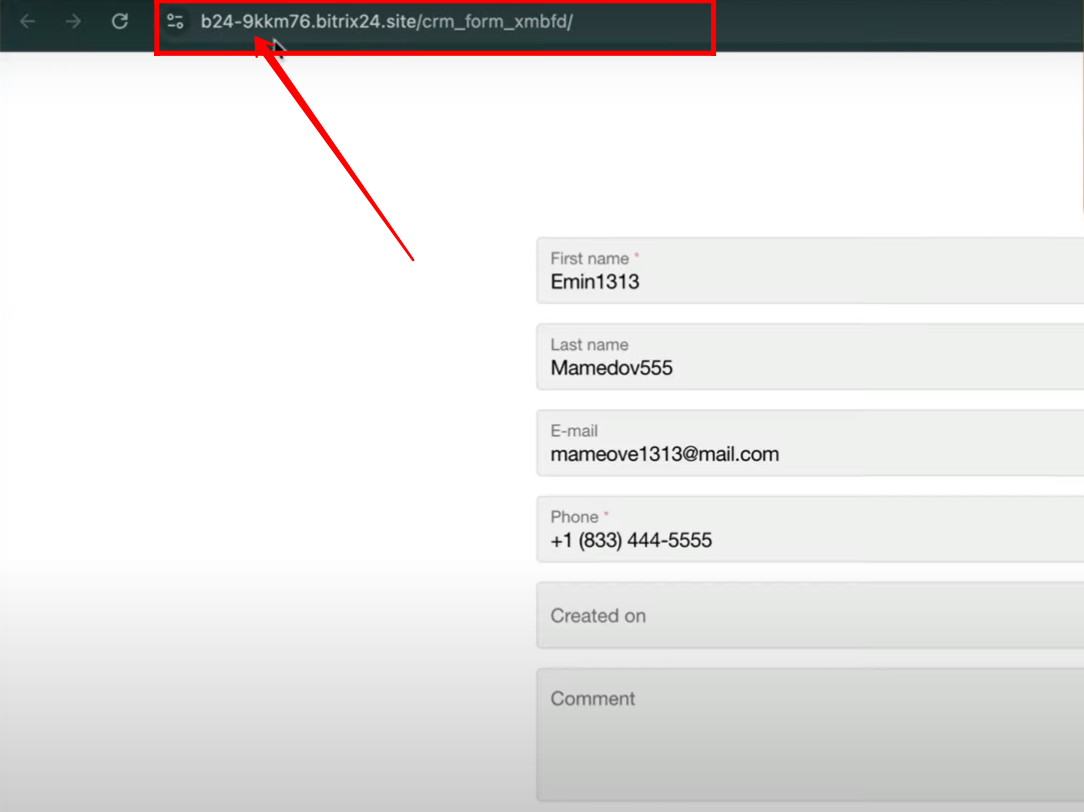
12. Save the settings and then open your form. You will notice that the form URL is now updated to show your chosen subdomain followed by the form’s unique ID.

13. Here, you can see that if the form URL is not configured, the system will automatically generate a random URL, which usually appears as a subdomain of bitrix24.site.
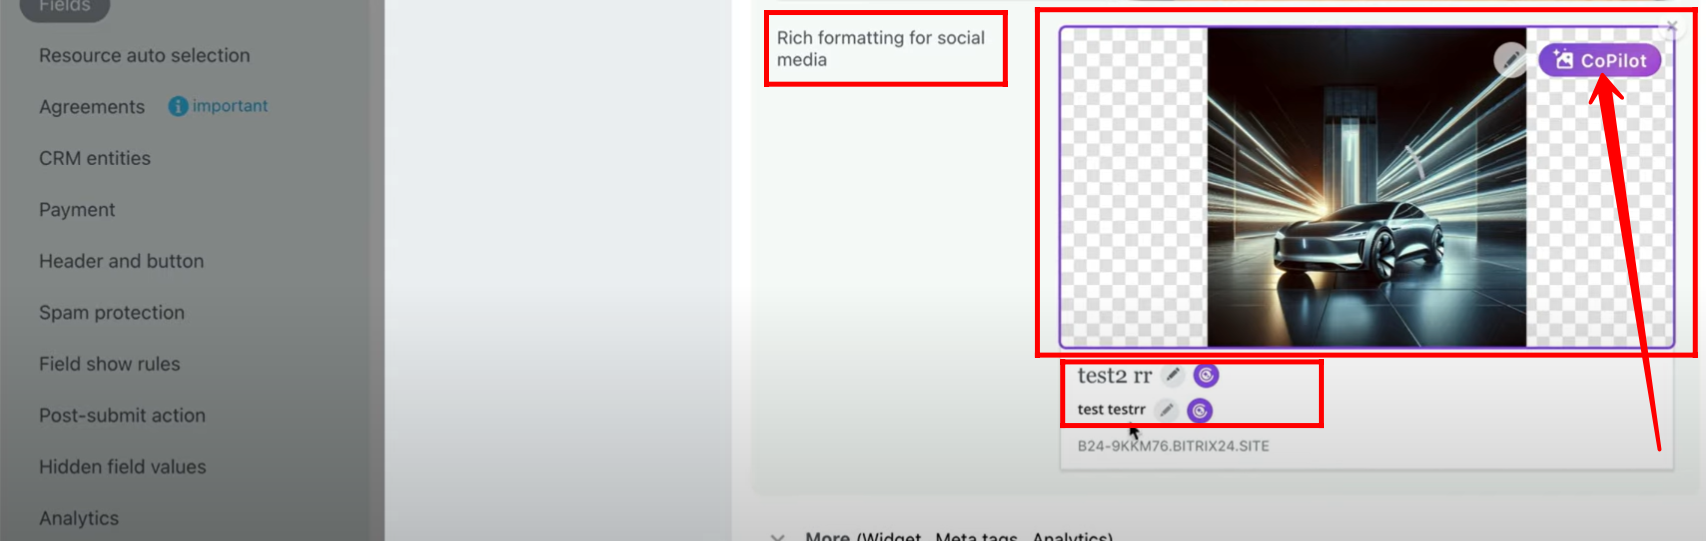
14. Go to Page Settings again, and under the “Rich formatting for social media” section, you can add an image, page title, and description. You can also use the Copilot option to generate the image, title, or description for you.
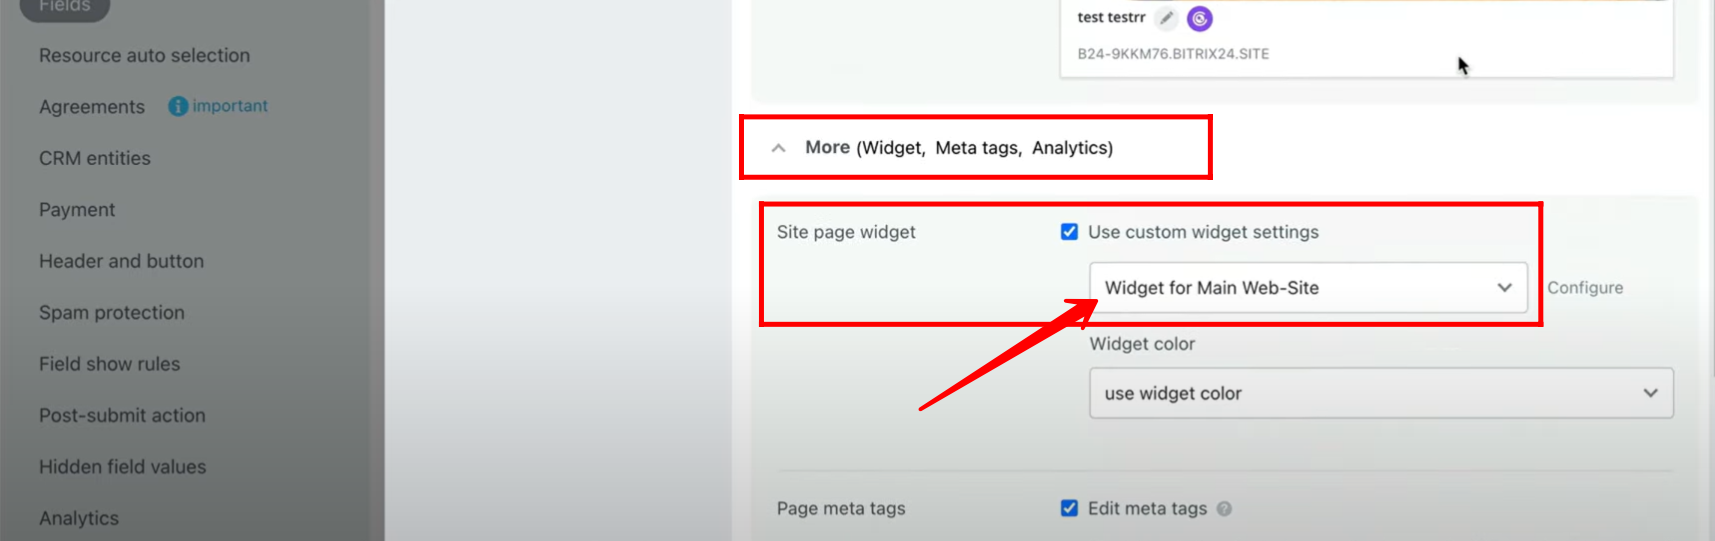
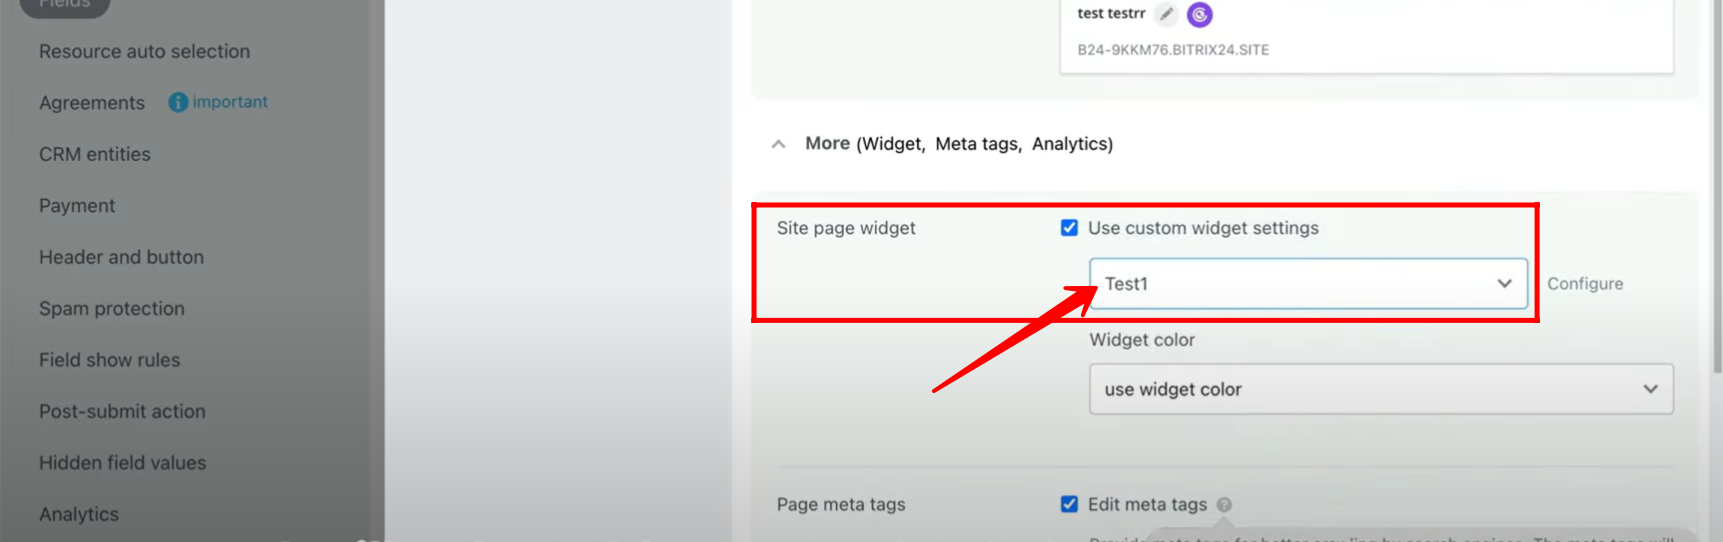
15. Go to “More (Widget, Meta tags, Analytics)” within Page Settings, and select the site page widget option.
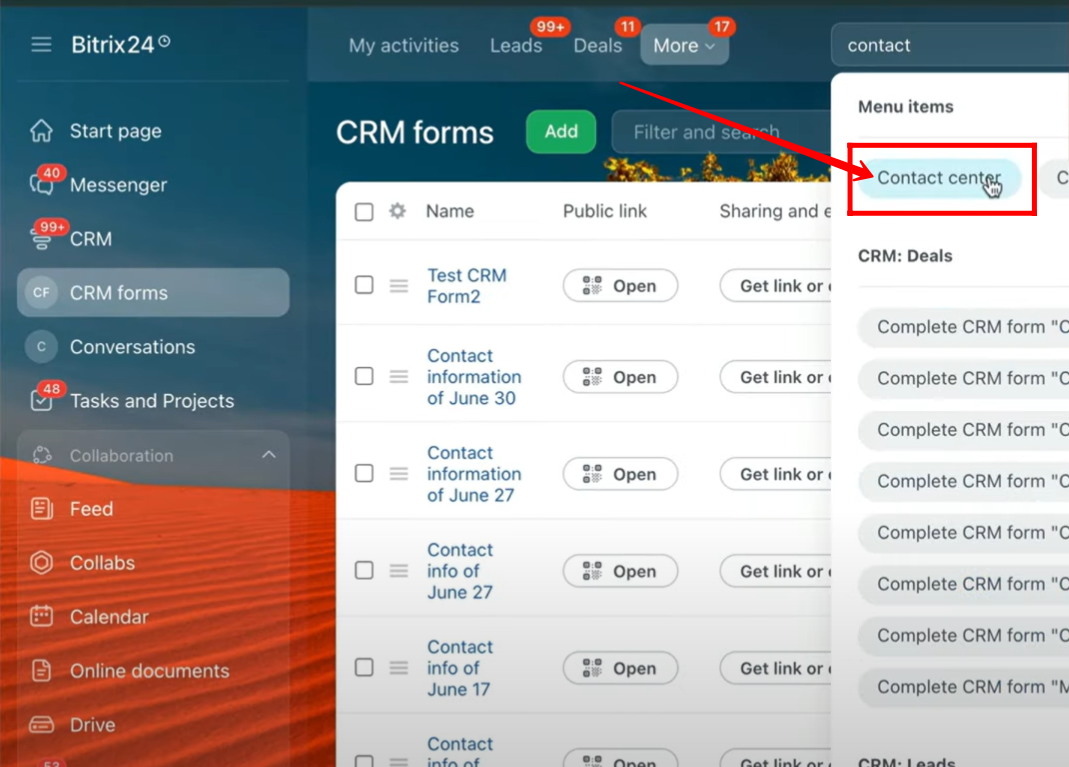
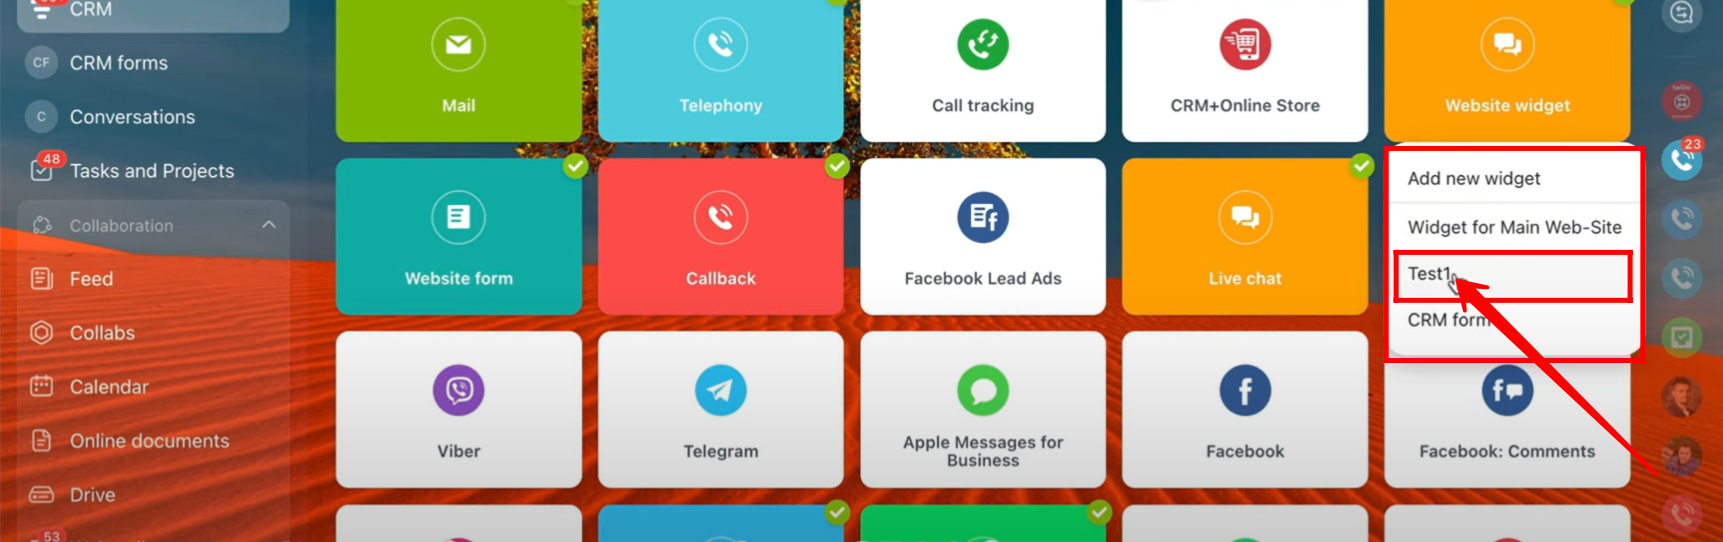
16. Go to “Contact Center” to explore additional options available for your form.
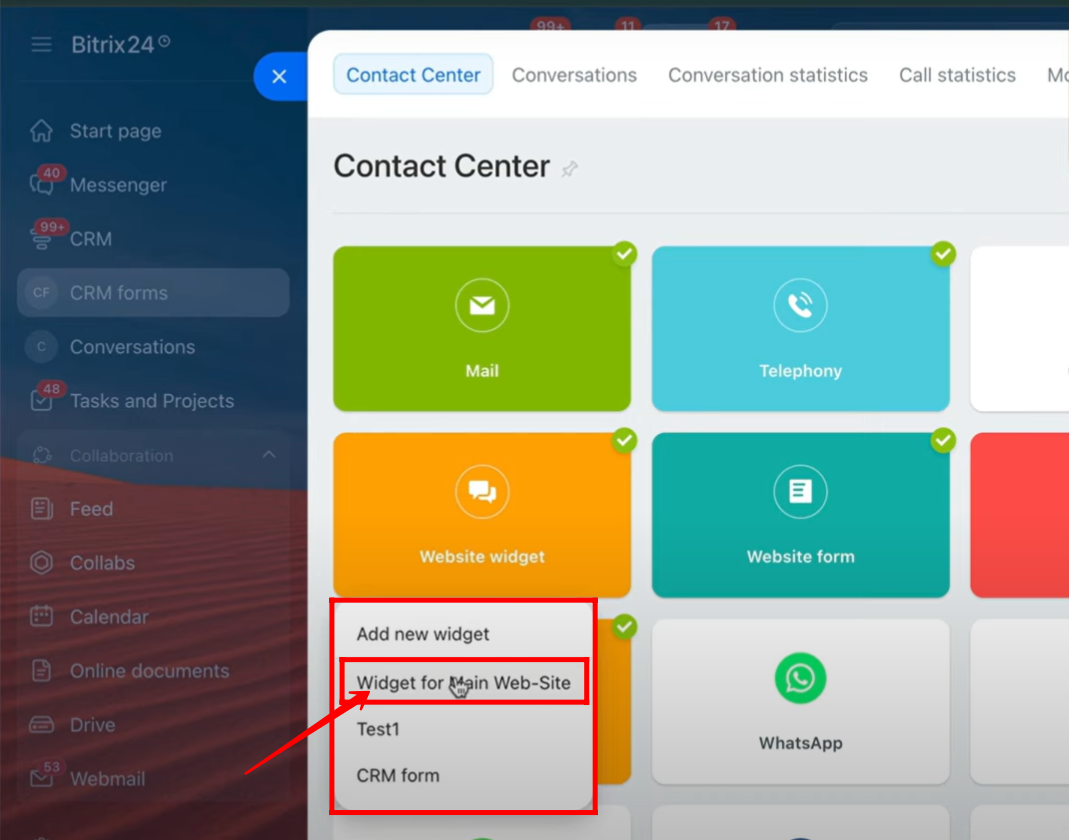
17. Click on the “Website Widget” card, then open the widget you previously selected in the page settings of your form configuration.
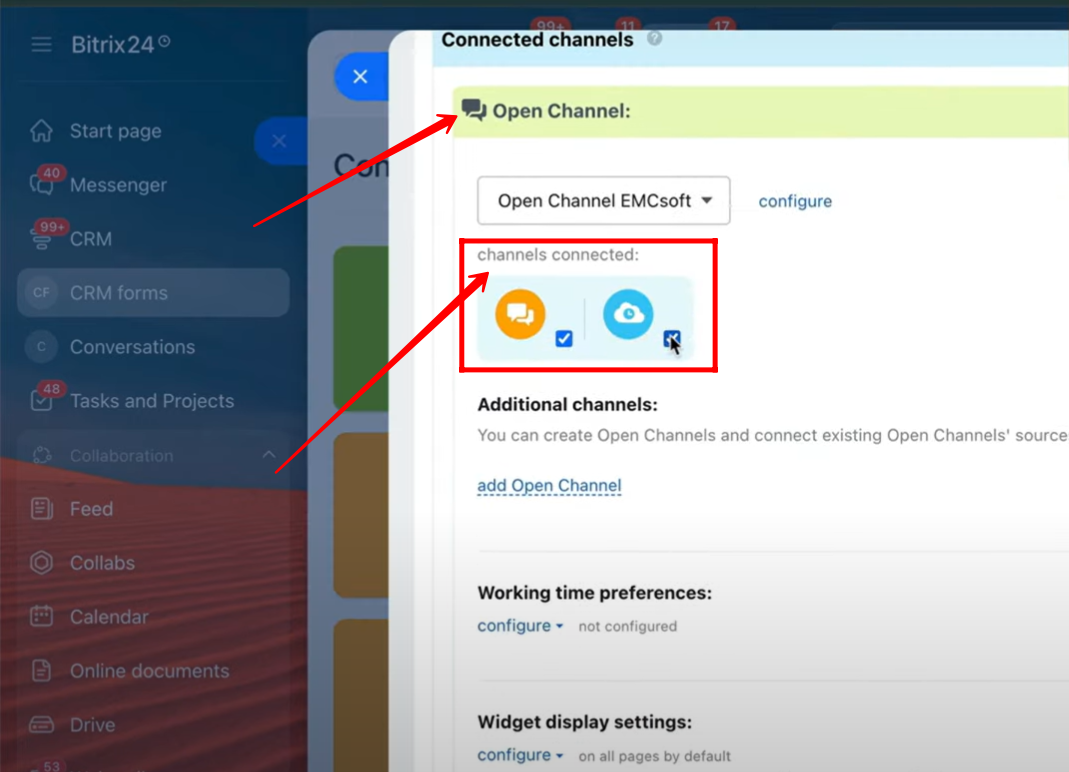
18. In the widget configuration, you will see the connected channels with their icons. One of the connected channels is named “Open Channel EMCsoft.”
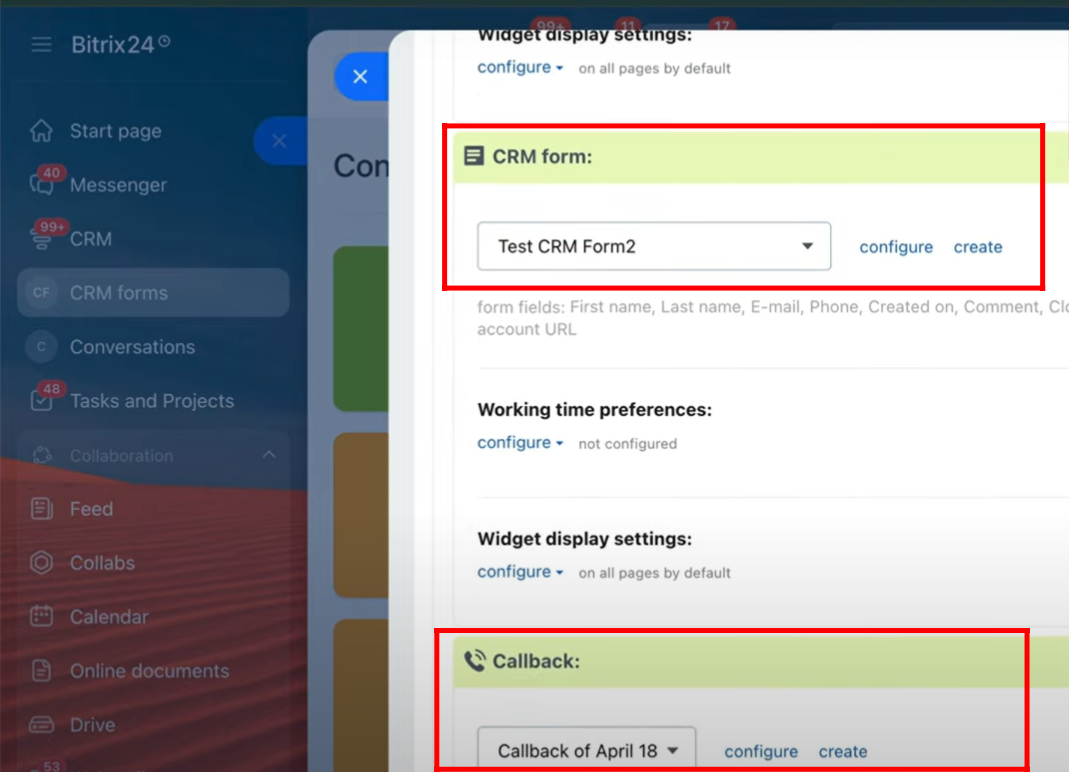
19. Within the widget configuration, you can also view the connected CRM form and the Callback option linked with the widget.
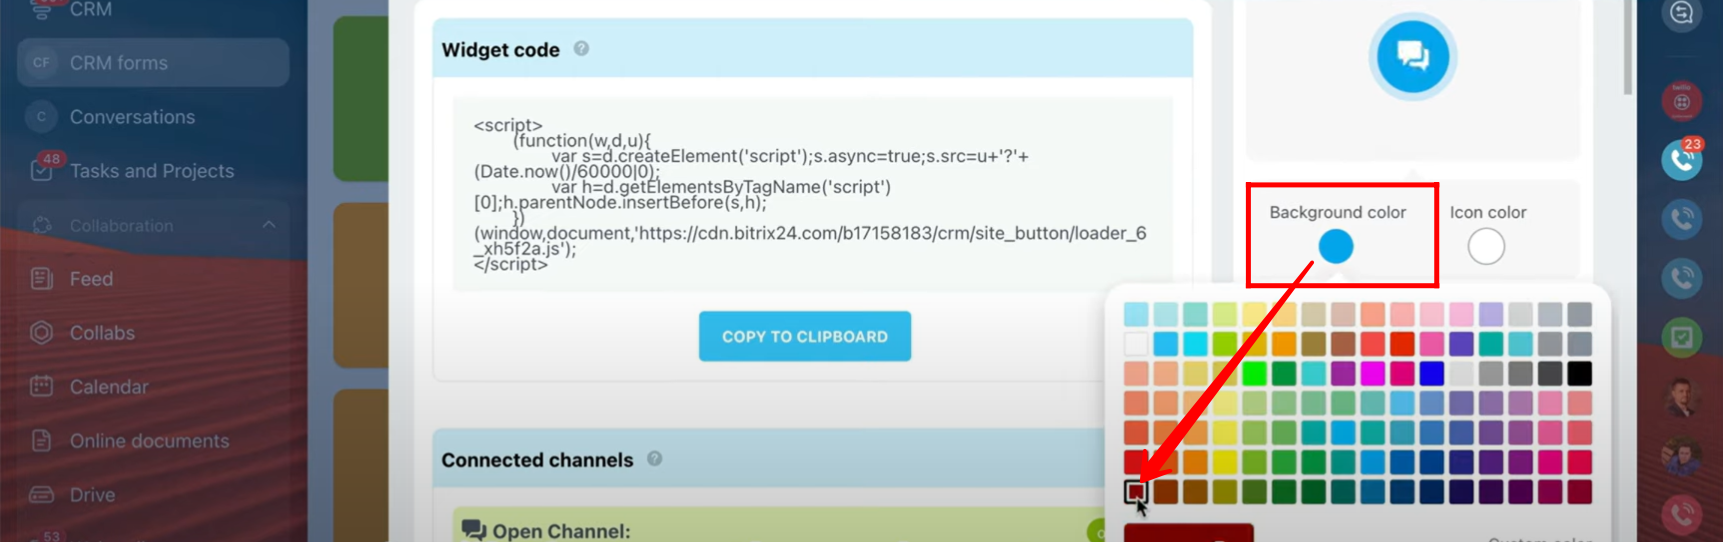
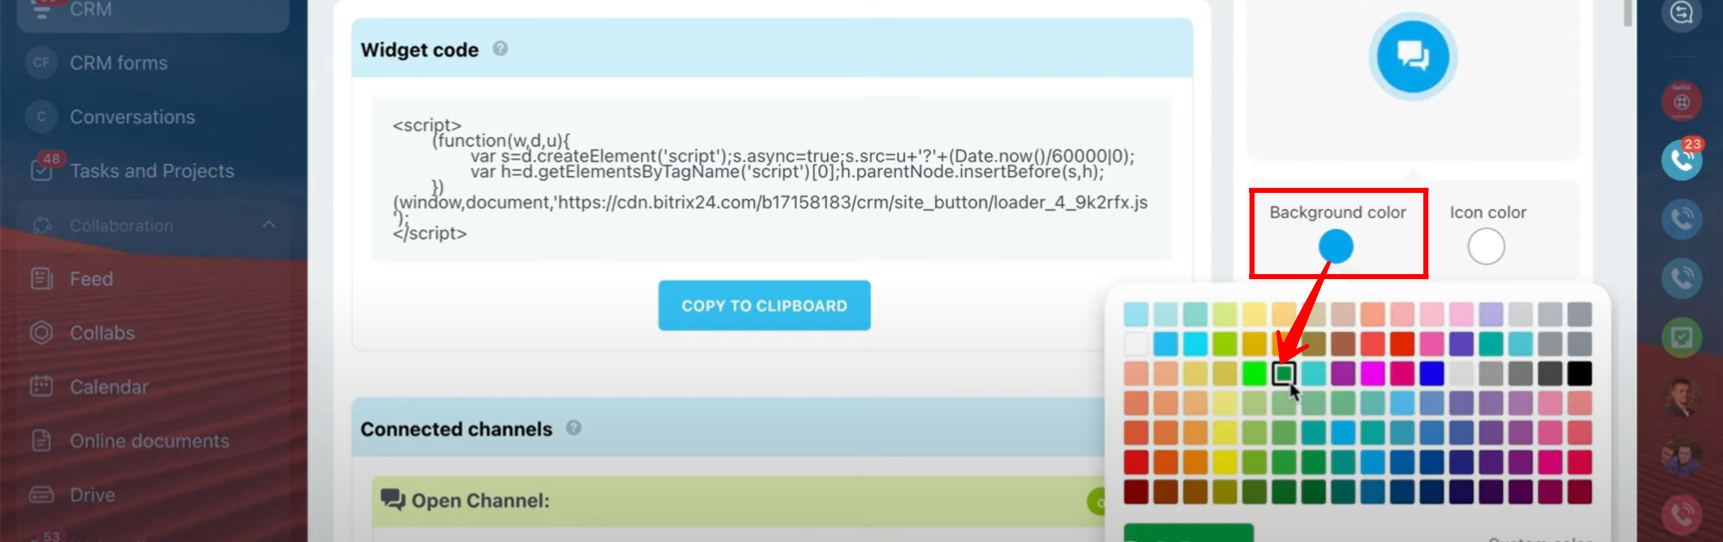
20. You also have the option to customize the widget color according to your preference.
21. After saving both the widget and form settings, open the form. You will now see the applied configurations such as the new form name, page name, subdomain URL, language, and the customized widget color.
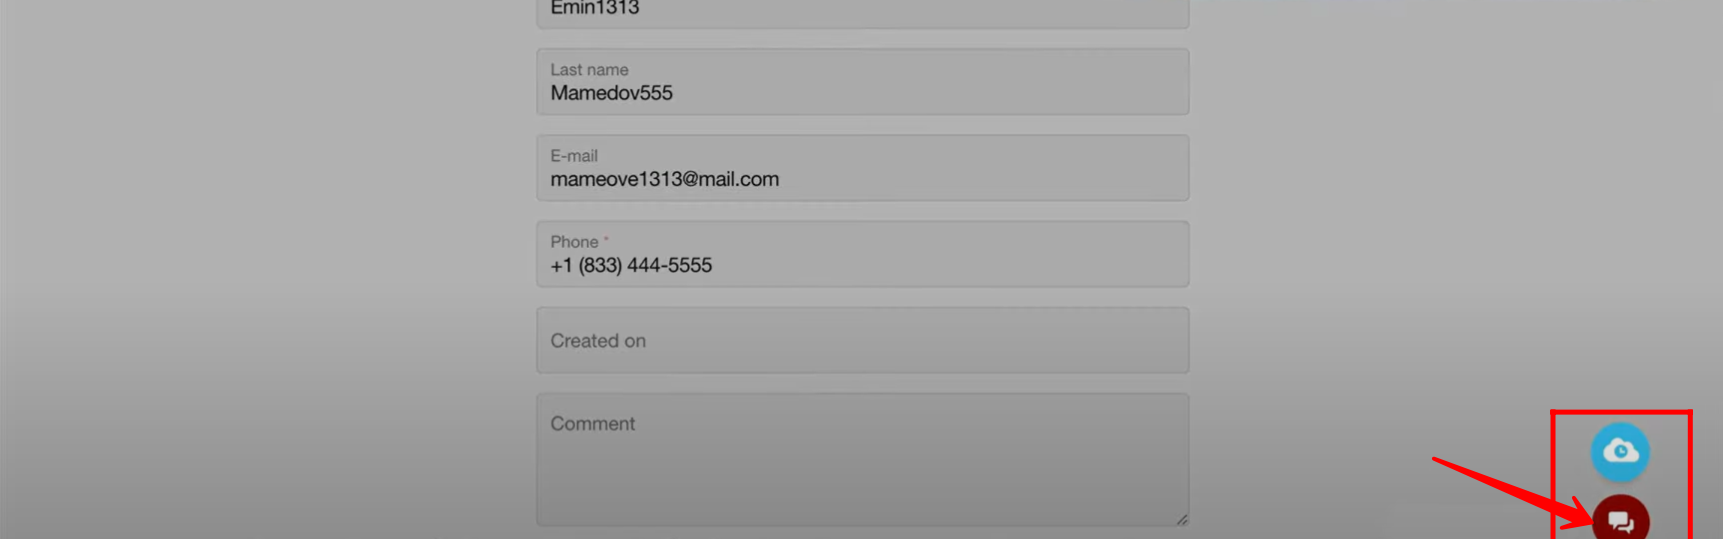
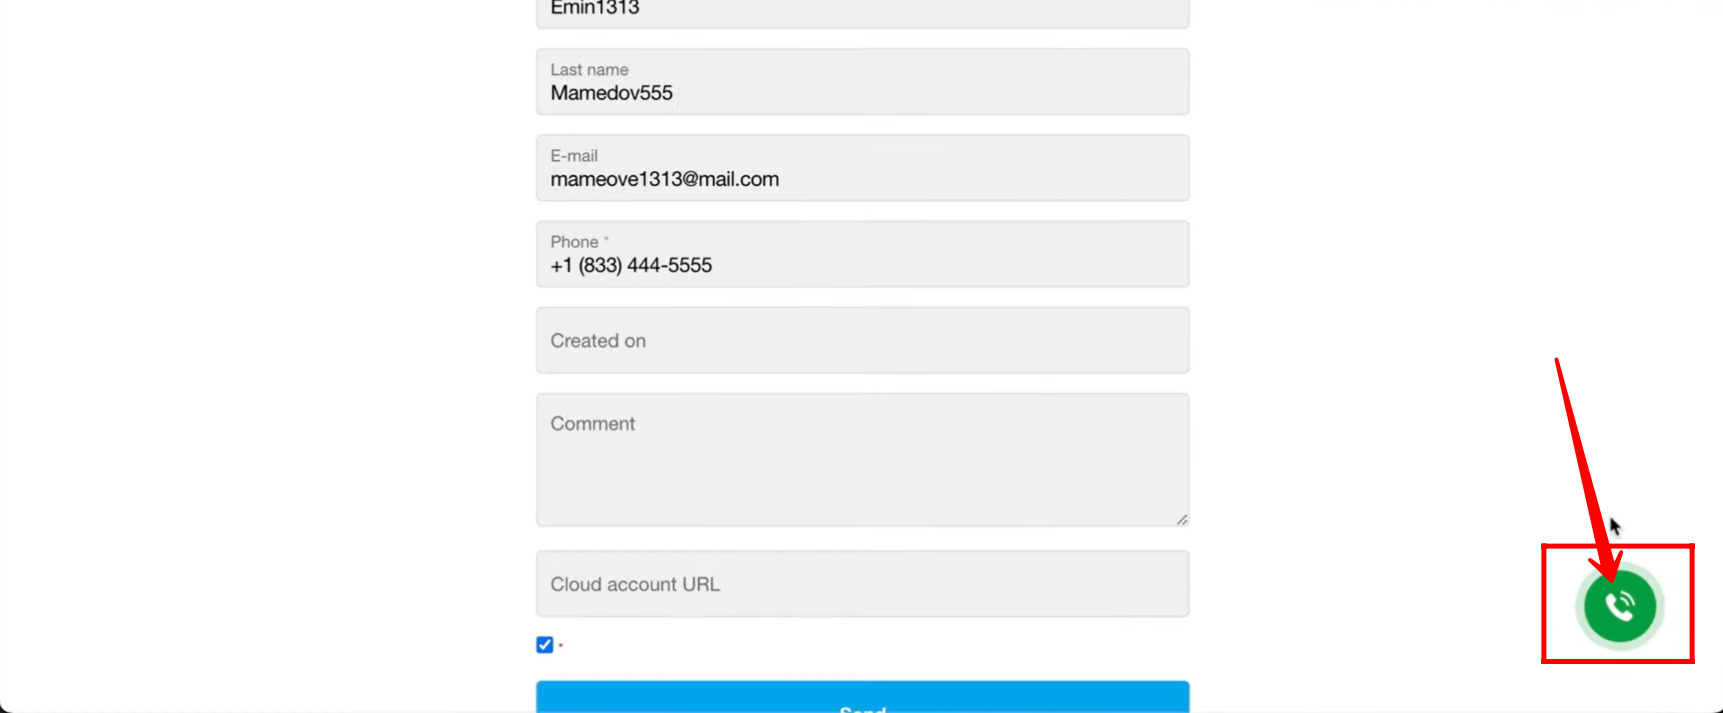
22. Once you open the form, you’ll notice that the chat icon channel color on the bottom-right side of the form page has been updated to match the new widget color you selected.
23. Navigate back to Contact Center → Website Widget, and select a different widget from the list to open its configuration panel.
24. Inside the widget configuration panel, go to the “Design / Color” settings, pick a new color for the widget, and then save the changes.
25. Inside the form configuration → Page Settings → More (Widget, Meta tags, Analytics) → Site Page Widget, select the new widget you just reconfigured. Save the settings, then open the form again.
26. Now when you refresh and open the form, you’ll notice that the call icon widget in the bottom-right corner has changed to the new color you set in the widget configuration.
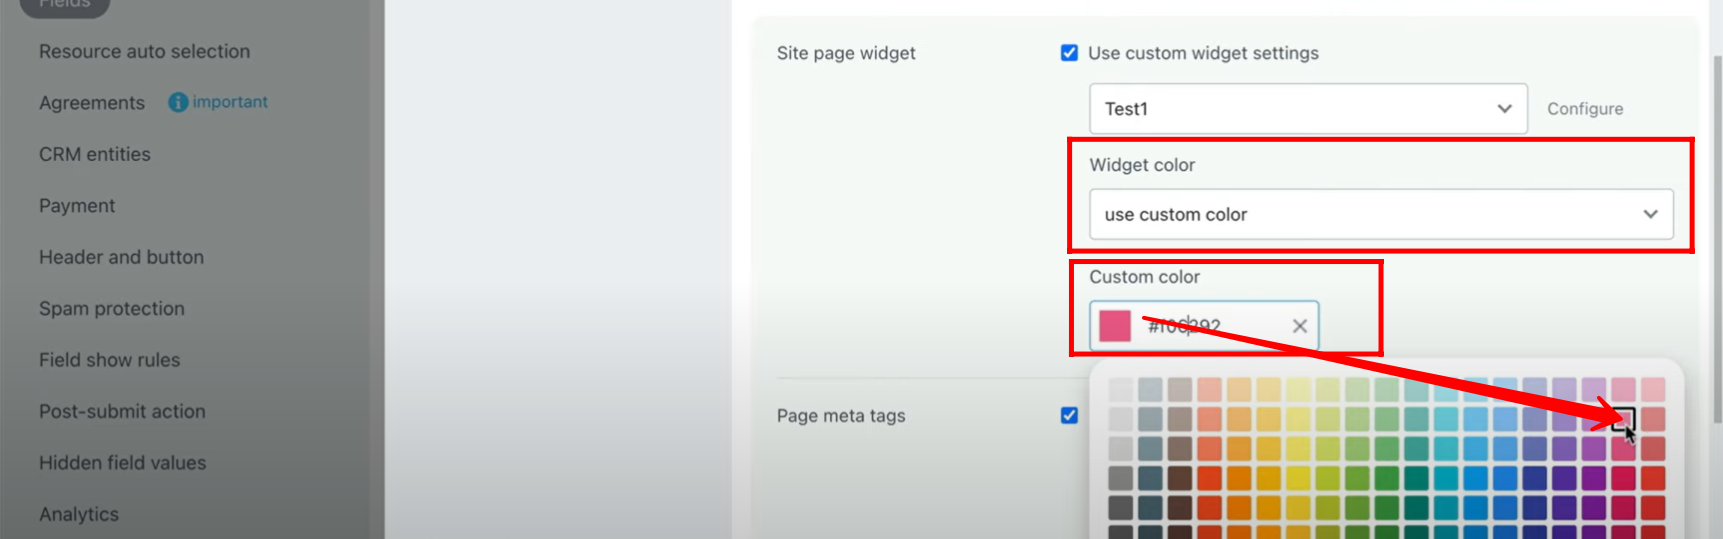
27. Yes — inside Site Page Widget settings (within the form configuration), there’s an option to pick a custom color for the widget.
By selecting a custom color here, you can override the default widget color and instantly update how the chat/call icon widget looks on the bottom-right side of your form page.
28. Inside Page Settings → More → Meta Tags, you can update:
Meta Title → the page title that appears on the browser tab and in search results.
Meta Description → the description that search engines and social platforms show when your form page link is shared.

29. Inside Page Design settings of your Bitrix24 form page, you can:
Upload your own background image (from your device or gallery).
Use Copilot AI to generate a background image for you based on a description (e.g., “modern business theme” or “abstract blue gradient”).
Position the background → stretch full width, repeat, align left/right/top/bottom depending on your design choice.
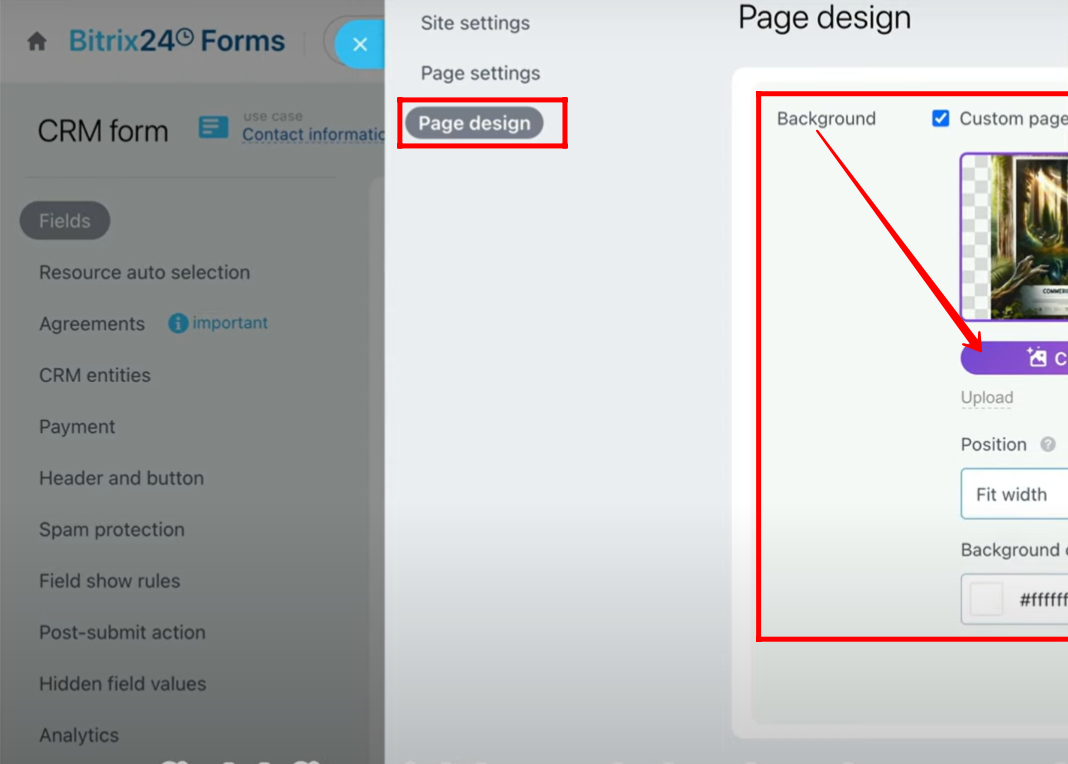
30. After applying the background image in Page Design settings, you will now see that the form’s background has changed to the one you uploaded/generated with Copilot.

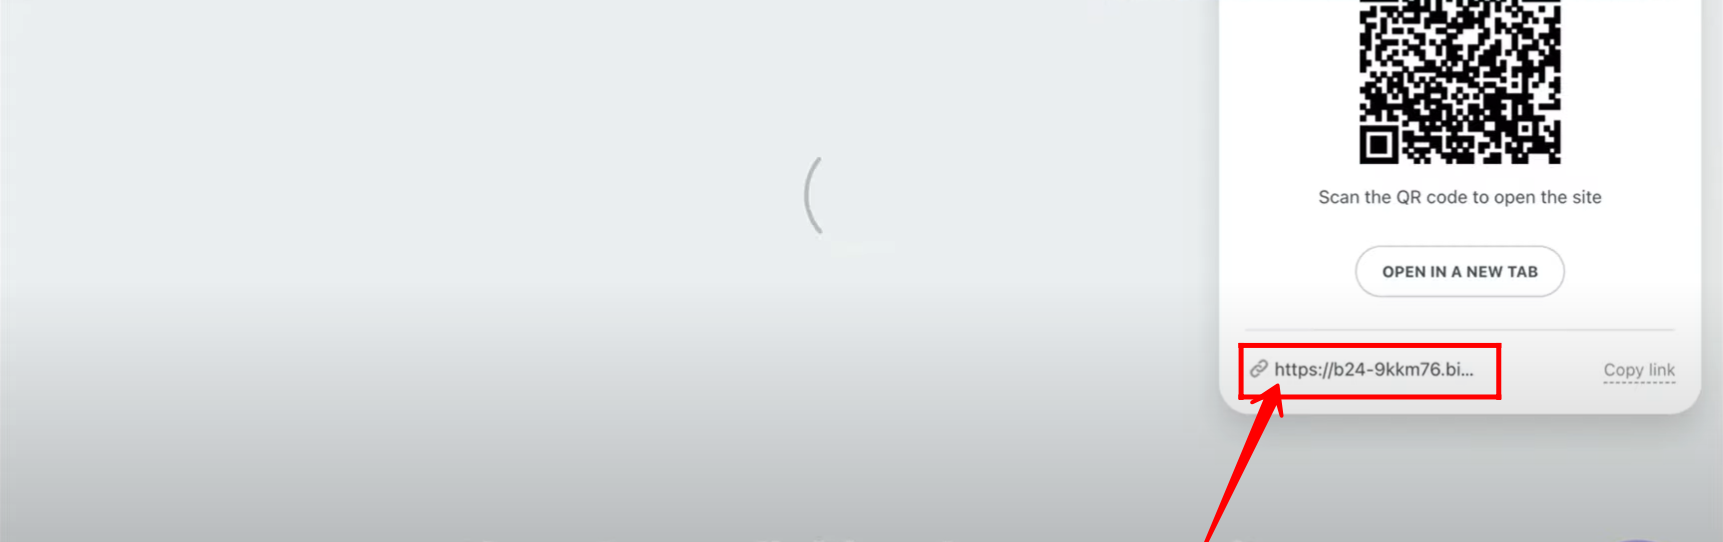
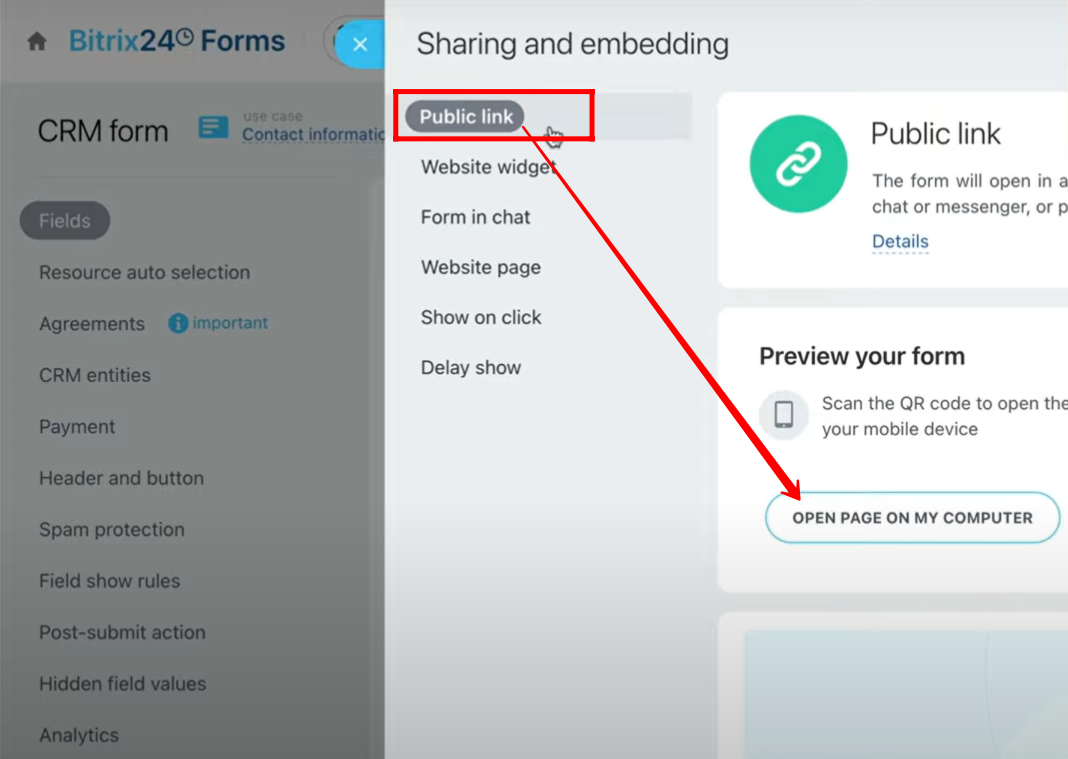
31. Within Form Features → Sharing and Embedding, click on Public Link where you can either open the form in another tab to copy its public link for sharing, or simply scan the QR code from your mobile device to instantly open the form on your phone.
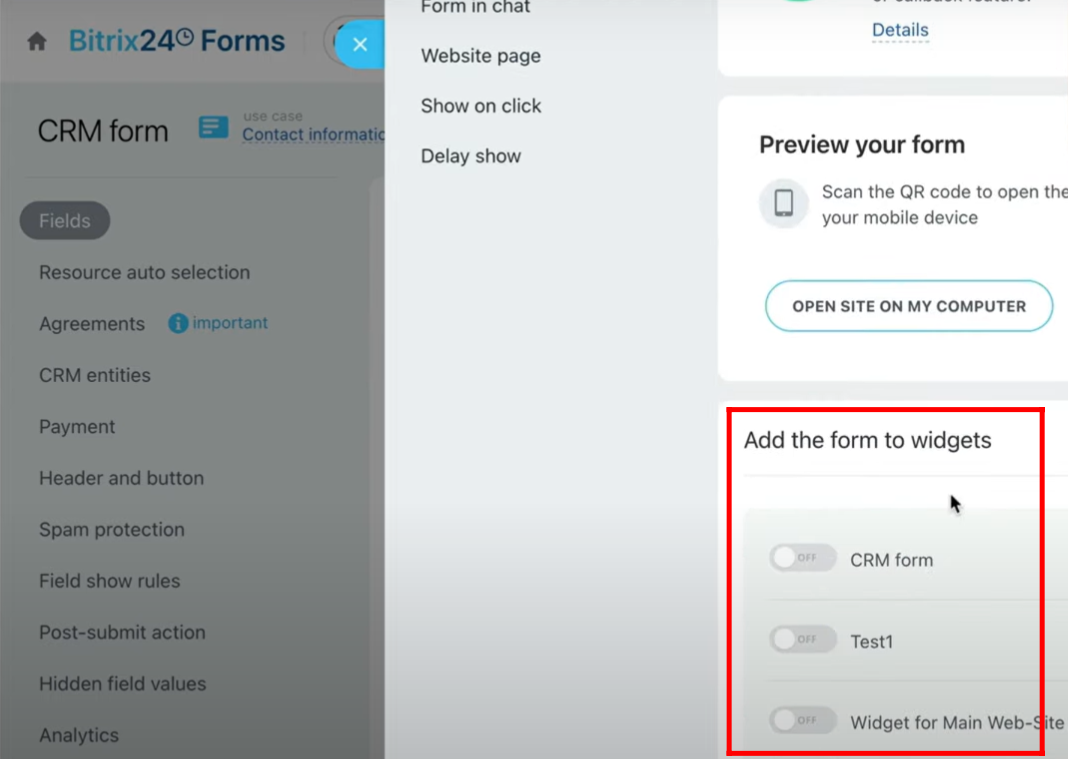
32. Go to the Website Widget tab, where you will see a list of available widget names; simply turn on the toggle icon beside the widget name, and that widget will be connected to the form.
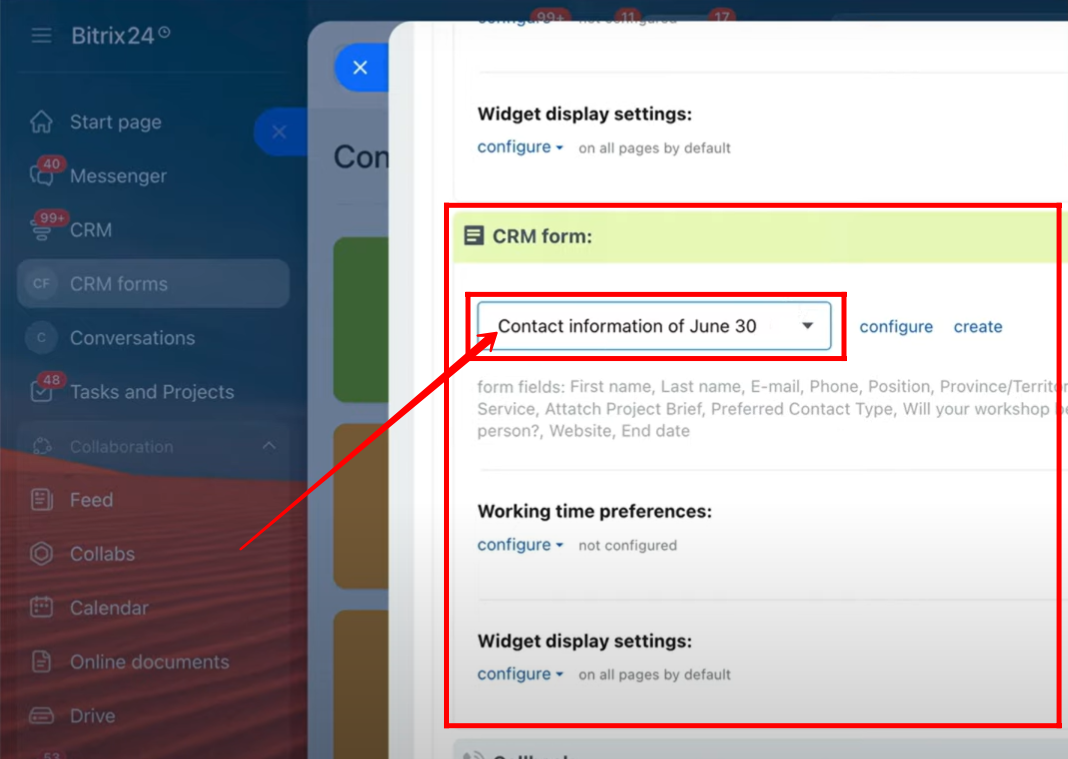
33. Alternatively, you can go to the Website Widgets configuration within the Contact Center, where you can also connect a form to a widget; for example, you can see that the form “Contact Information of June 30” is currently connected to the widget “Widget for main Web-Site.”
34. Now, in the Form Features → Sharing and Embedding settings, turn on the widget “Widget for main Web-Site” to connect it directly to the form.

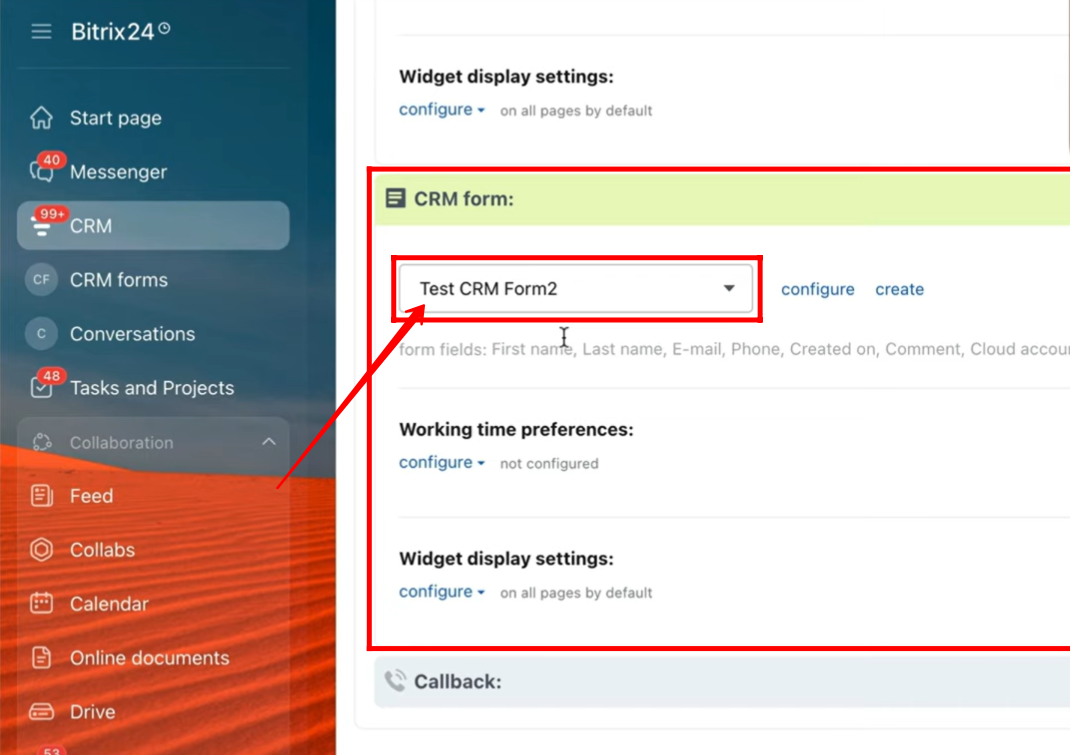
35. Go to the configuration of “Widget for main Web-Site”, and you will now see that the connected form name has been updated to “Test CRM Form2”.
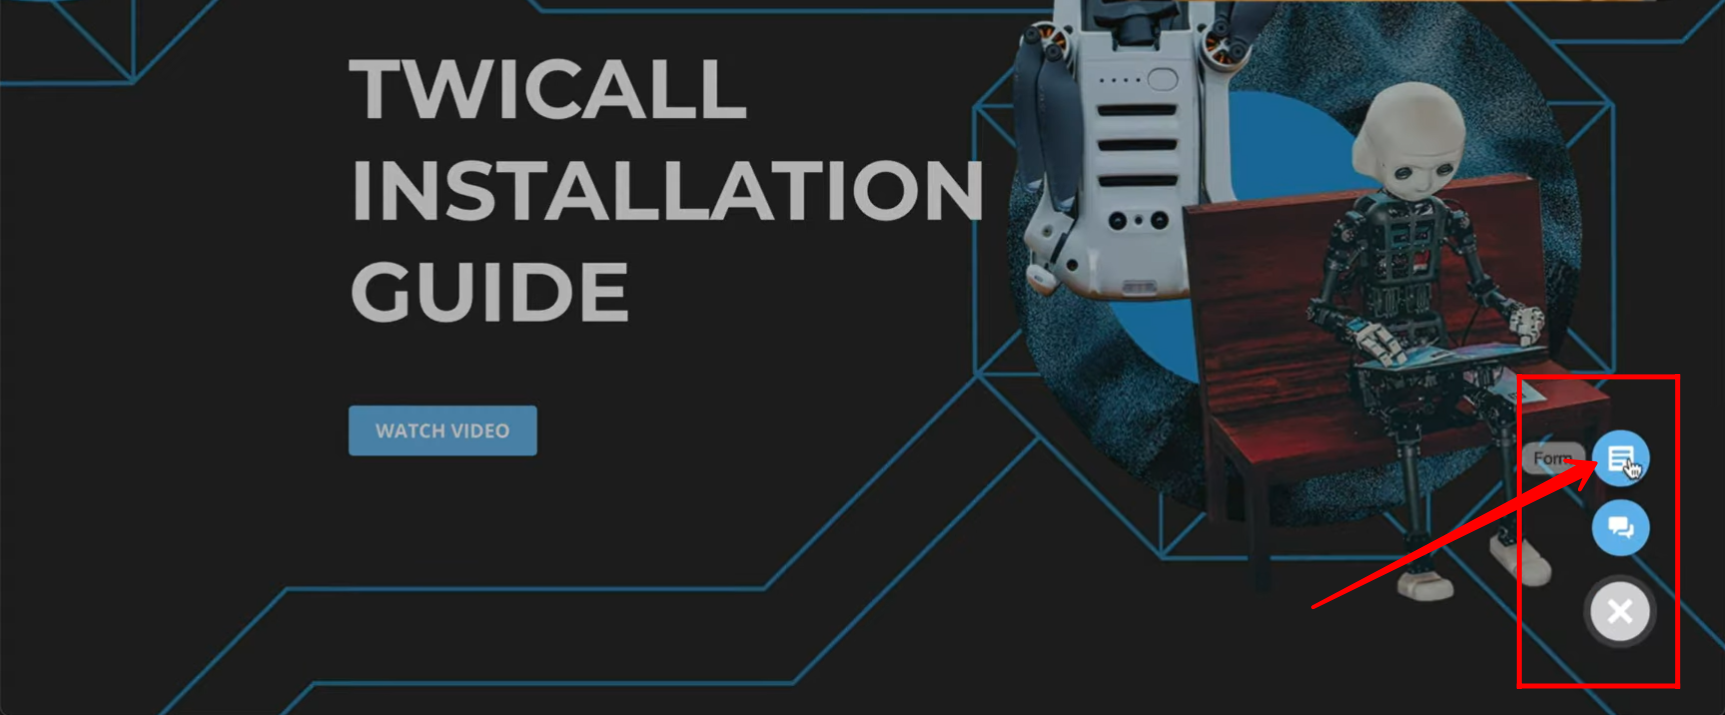
36. Open the website where the form is connected, then click on the form widget icon at the bottom right.
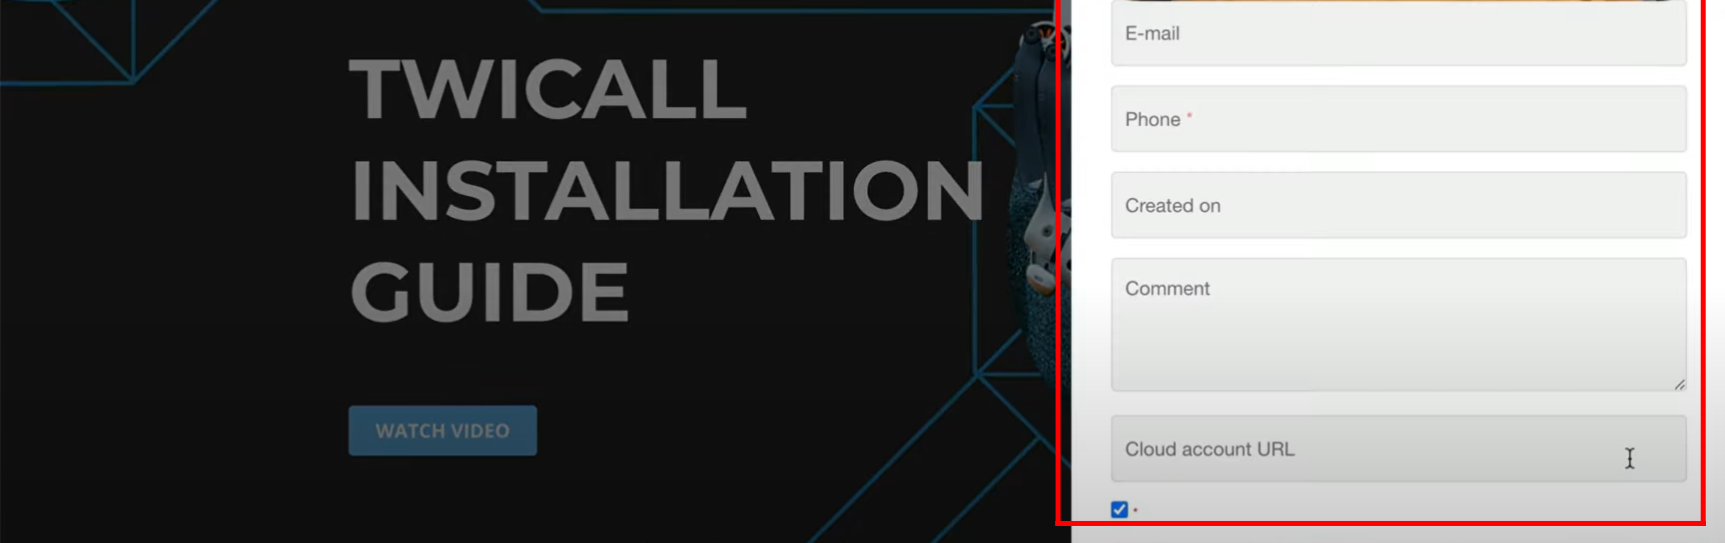
37. The form “Test CRM Form2” will now appear, confirming the connection.
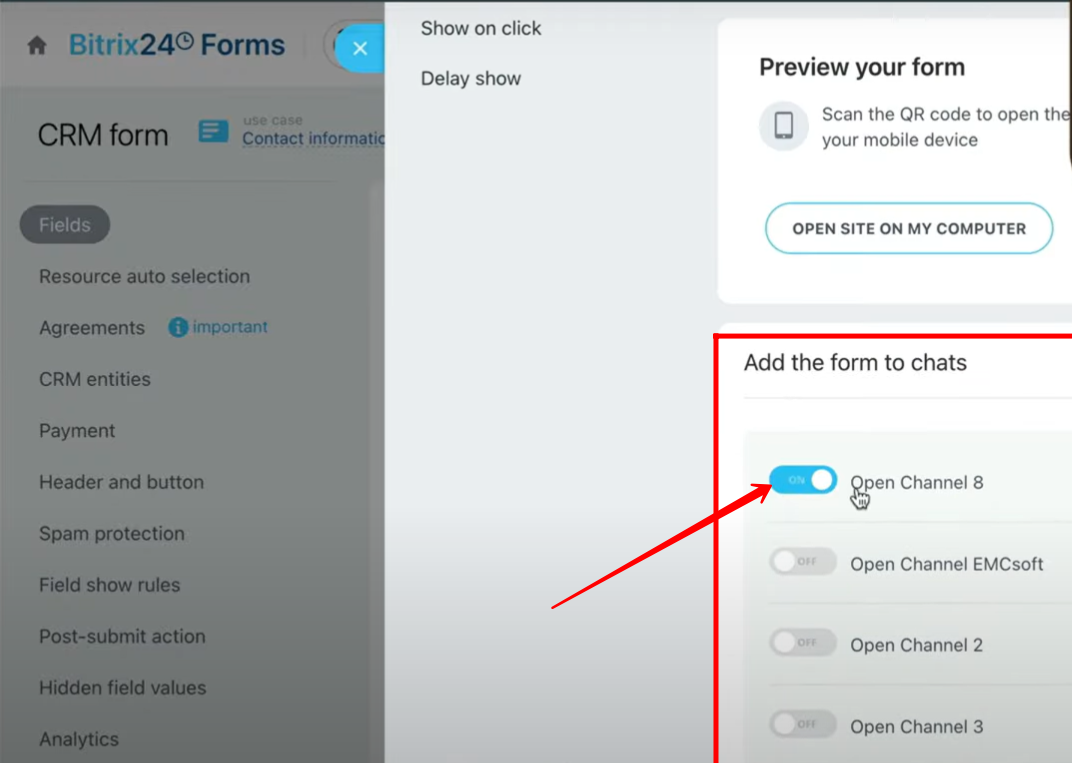
38. Go to “Form in Chat” within the “Sharing and Embedding” settings of form features, and select the option to connect the form with chat instead of a widget. Here, choose the turned-on chat channel “Open Channel 8” so the form will be displayed inside that chat channel.
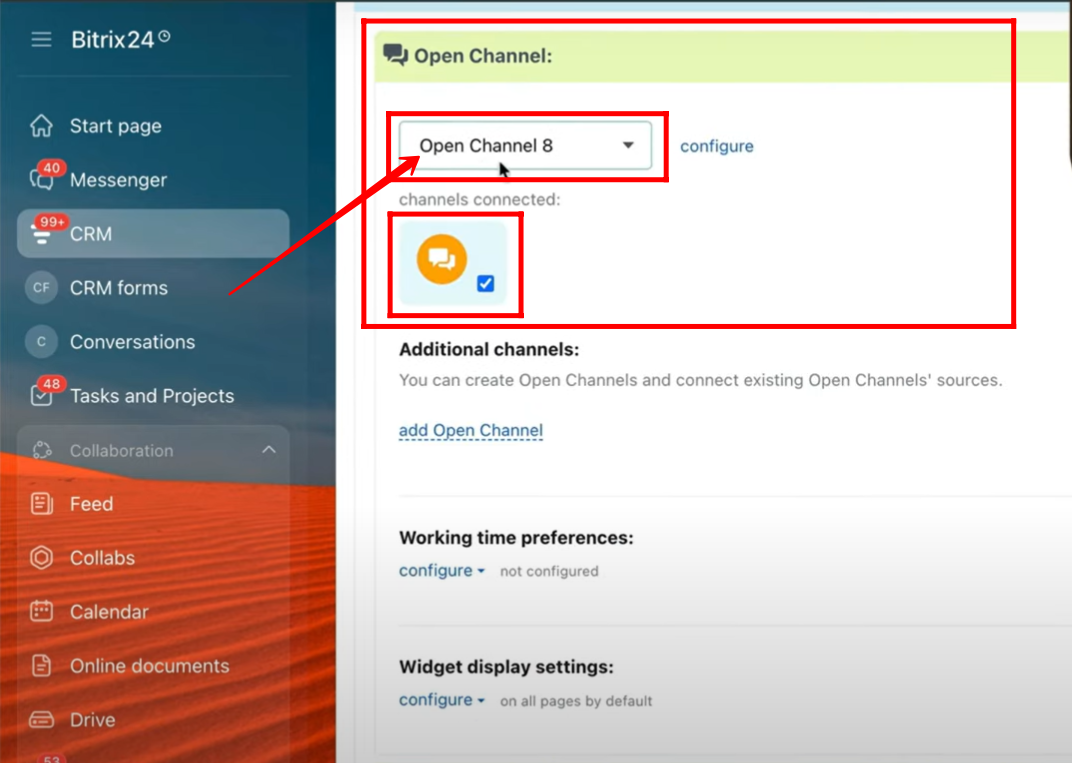
39. Navigate to the Widget configuration within the Contact Center, and here you can verify that the connected form and the linked chat channel (“Open Channel 8”) are the same as the ones you set in the form’s sharing and embedding settings.
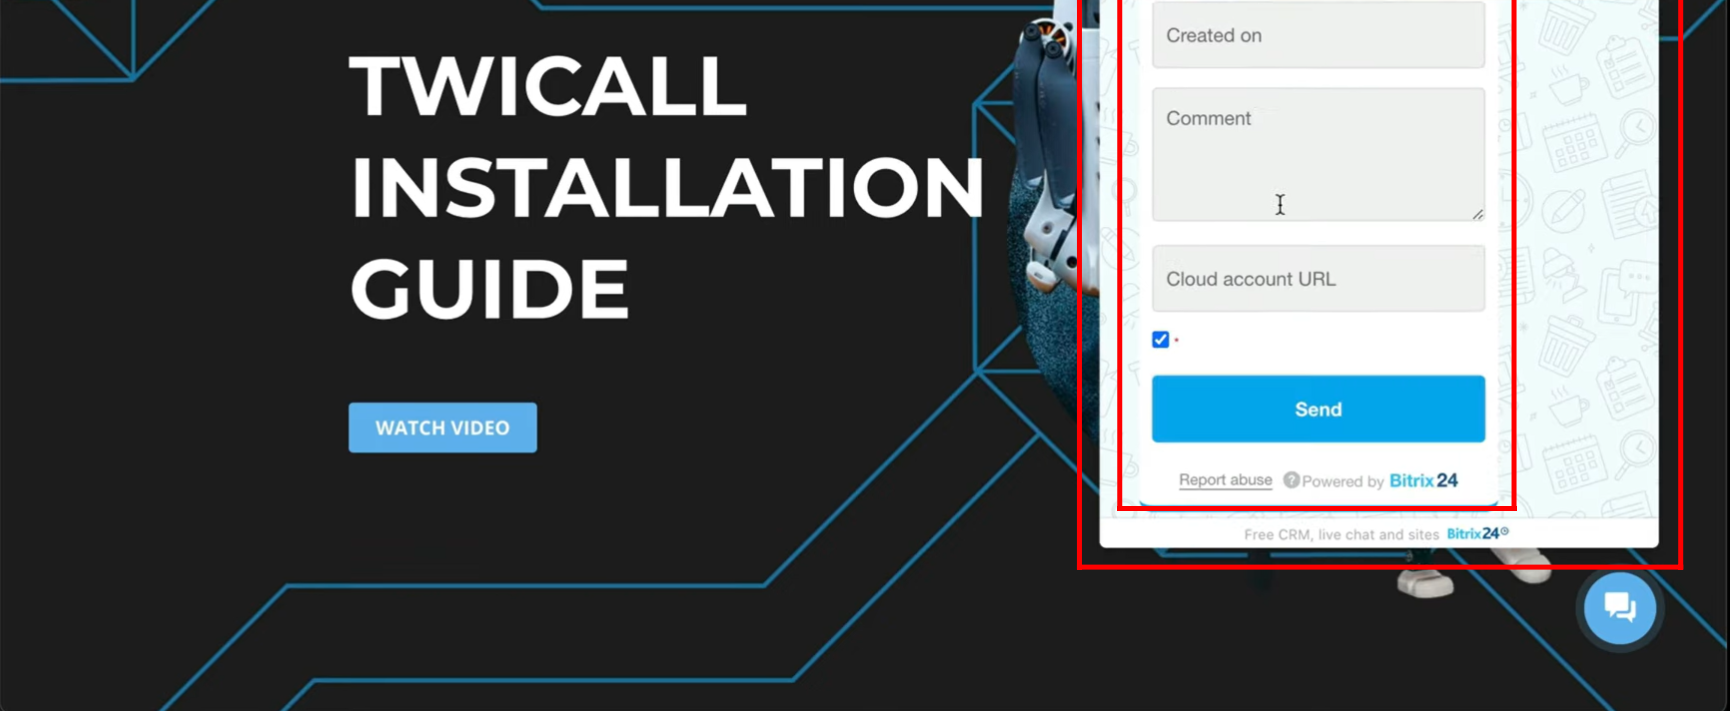
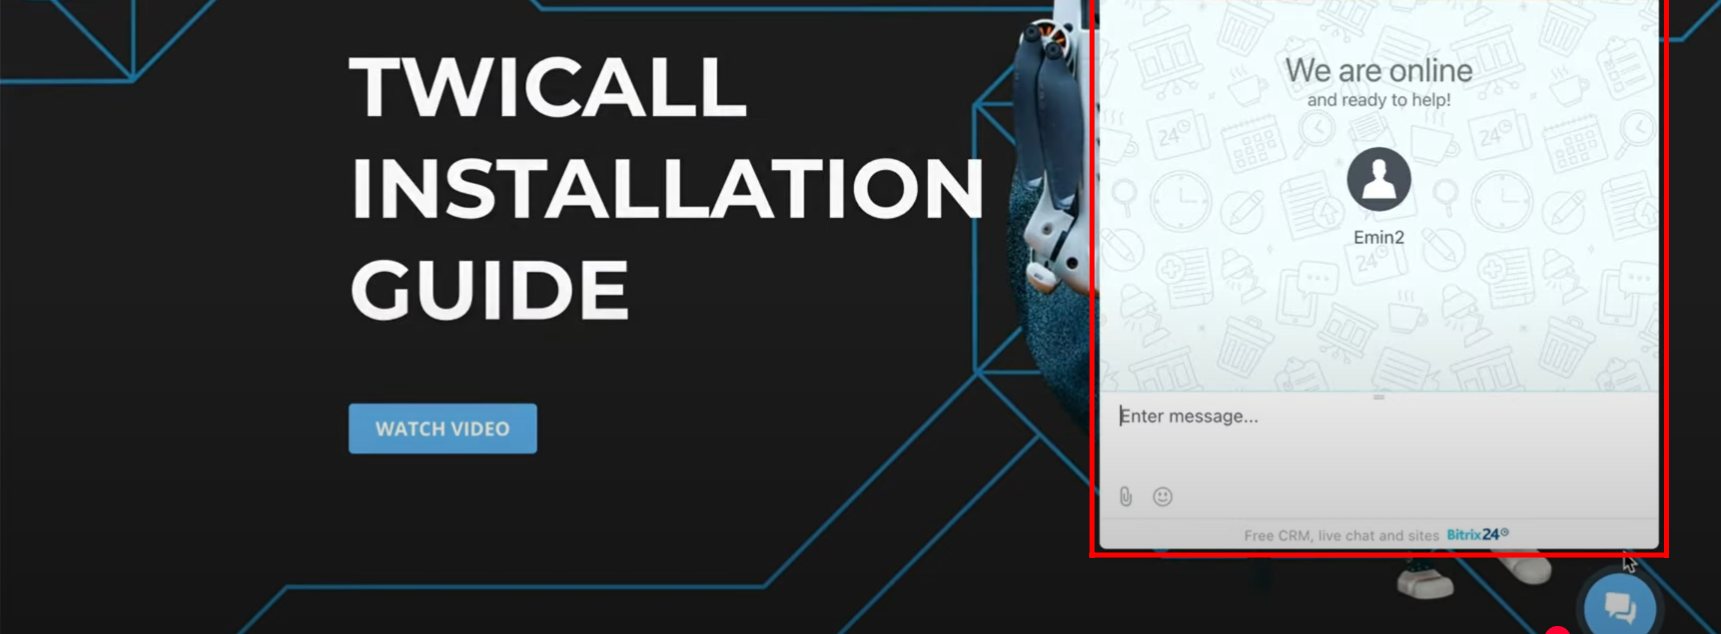
40. Now, open the connected website and click on the chat widget icon at the bottom right.

41. You will see the form appearing inside the chat interface since it has been connected through the “Form in Chat” option with the Open Channel 8.
42. For testing, go to Form Features → Sharing and Embedding → Form in Chat and turn off the toggle icon for “Add form to chat – Open Channel 8”. This will disconnect the form from the chat widget.
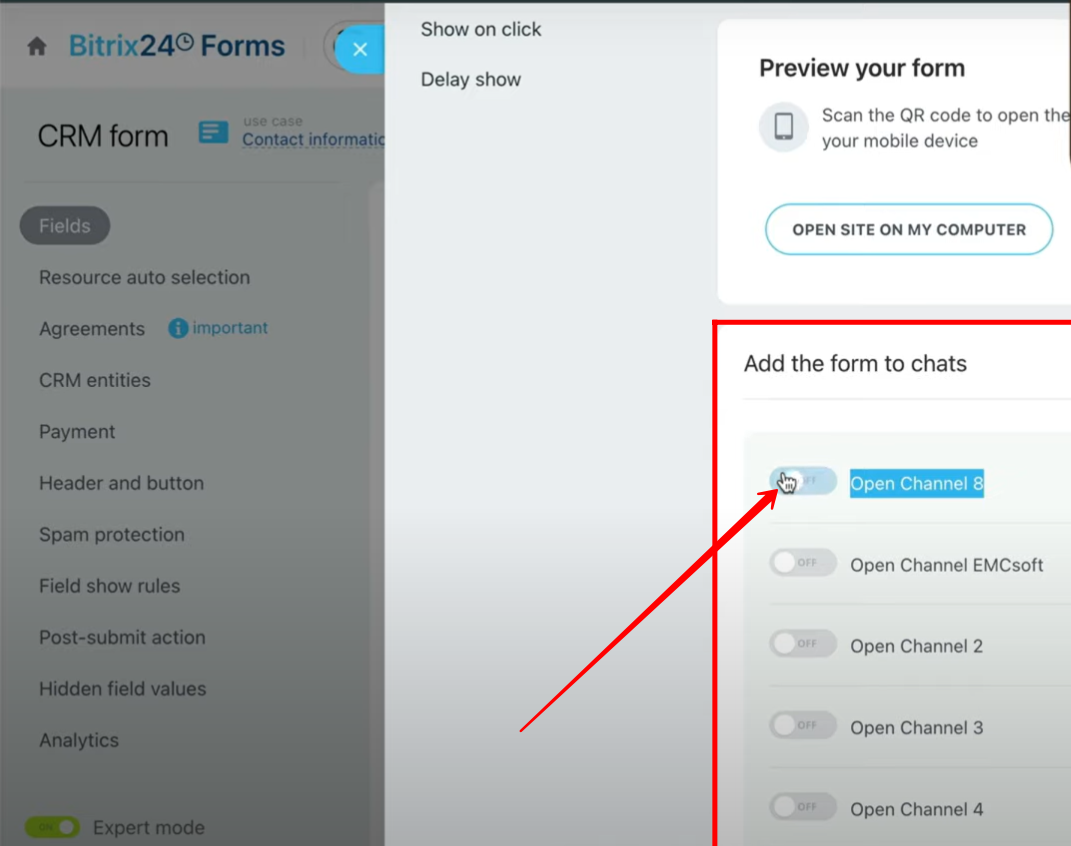
43. Now, if you open the website and click the chat widget icon, the form will no longer appear since the “Add form to chat – Open Channel 8” option has been turned off.
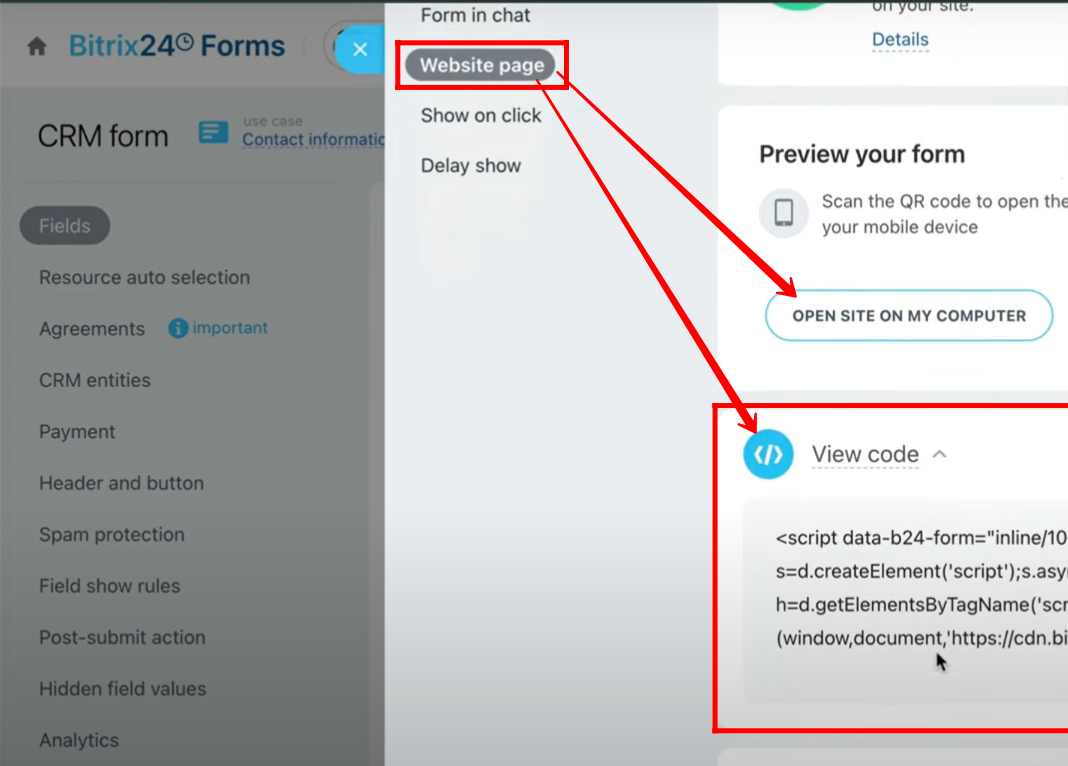
44. Within “Website Page” in the form features settings, you can open the page where the form is embedded in another tab, scan the QR code to access it on your mobile, or alternatively copy the embed code to place it on your own website and display the form there.
45. Go to the “Show on Click” tab within the sharing and embedding settings of the form, where you can configure how the form will appear (appearance type) and adjust its alignment on your website.
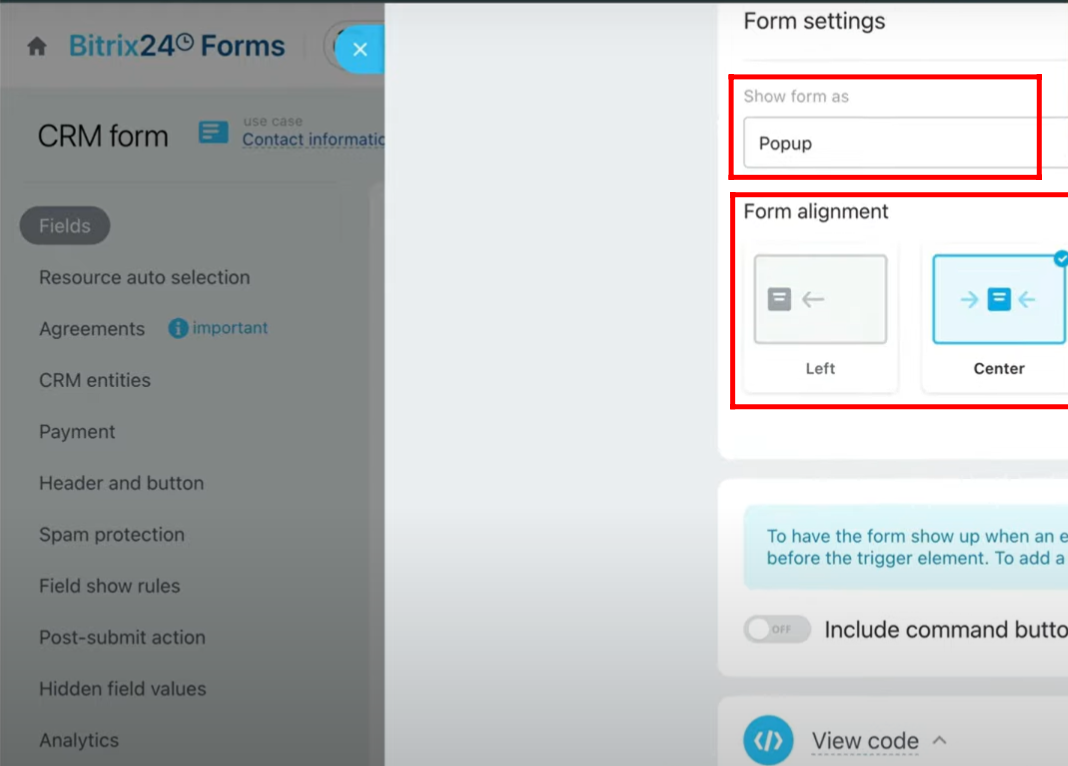
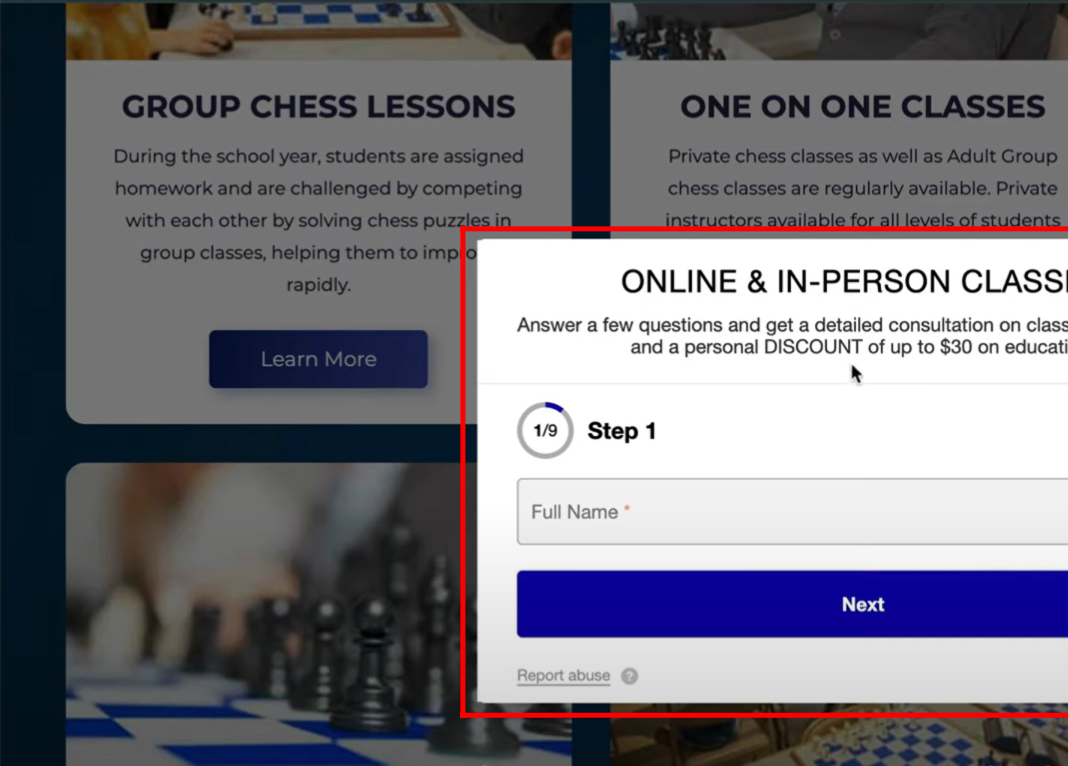
46. When the form is set to be shown as a popup, it will appear as an overlay window on the website, opening in front of the page content while keeping the background visible but inactive.
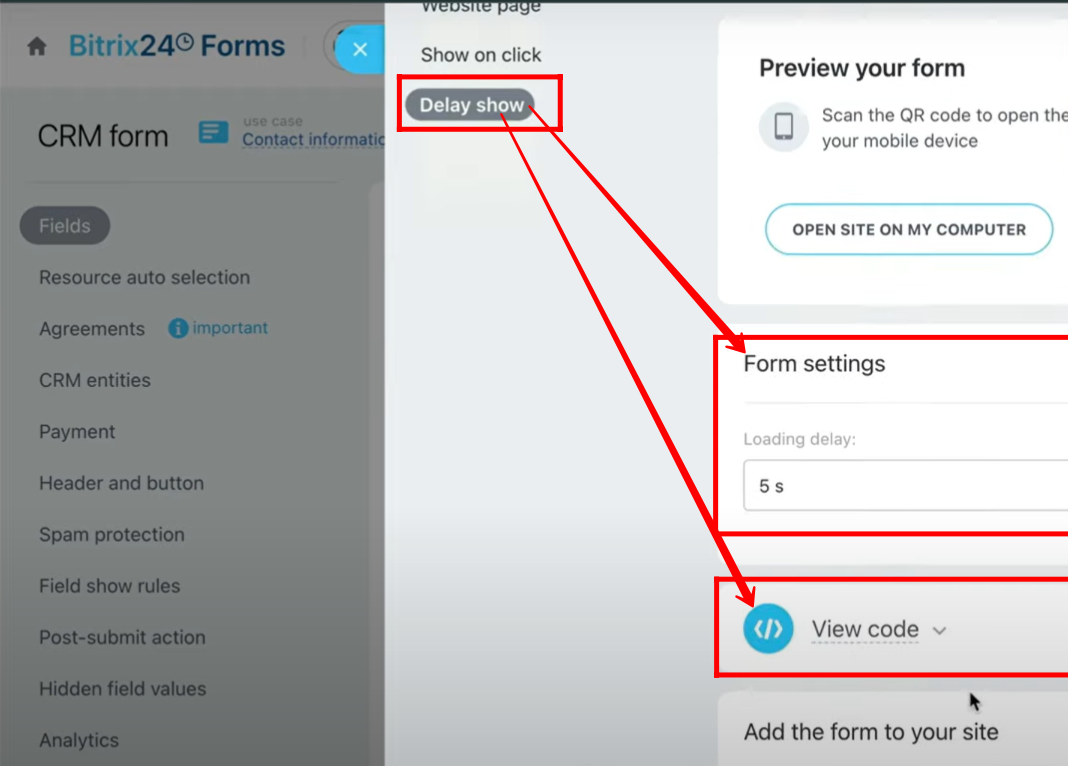
47. Inside the “Delay Show” option under sharing and embedding settings of the form, you can configure how many seconds the form will wait before appearing on the website after the page loads. You also have the option to view and copy the embed code, which can then be placed on your website to apply the delay show behavior.
You can also watch video on Youtube