| 2788 Views | admin

Welcome to this quick guide on connecting your Facebook Lead Ads directly to Bitrix24!
If you’re generating leads through Facebook and want them to flow automatically into your CRM—this video is for you. We’ll show you how to link your Meta Business Suite with Bitrix24’s Contact Center, so every time a form is filled on Facebook, it instantly creates a lead, deal, or contact in your CRM.
This connection saves you time, reduces manual work, and makes your sales process faster and more organized. Whether you’re managing one form or multiple campaigns, this integration keeps everything in sync—so you never miss a potential lead.
Let’s take your marketing automation to the next level—starting with a bridge between Facebook and Bitrix24.
1. First, log in to your Meta Business Suite using your business Facebook account. Make sure you’ve selected the correct Facebook and/or Instagram account associated with your lead ads. Once logged in, click on “All Tools” from the left-hand menu to access the full range of Meta features.
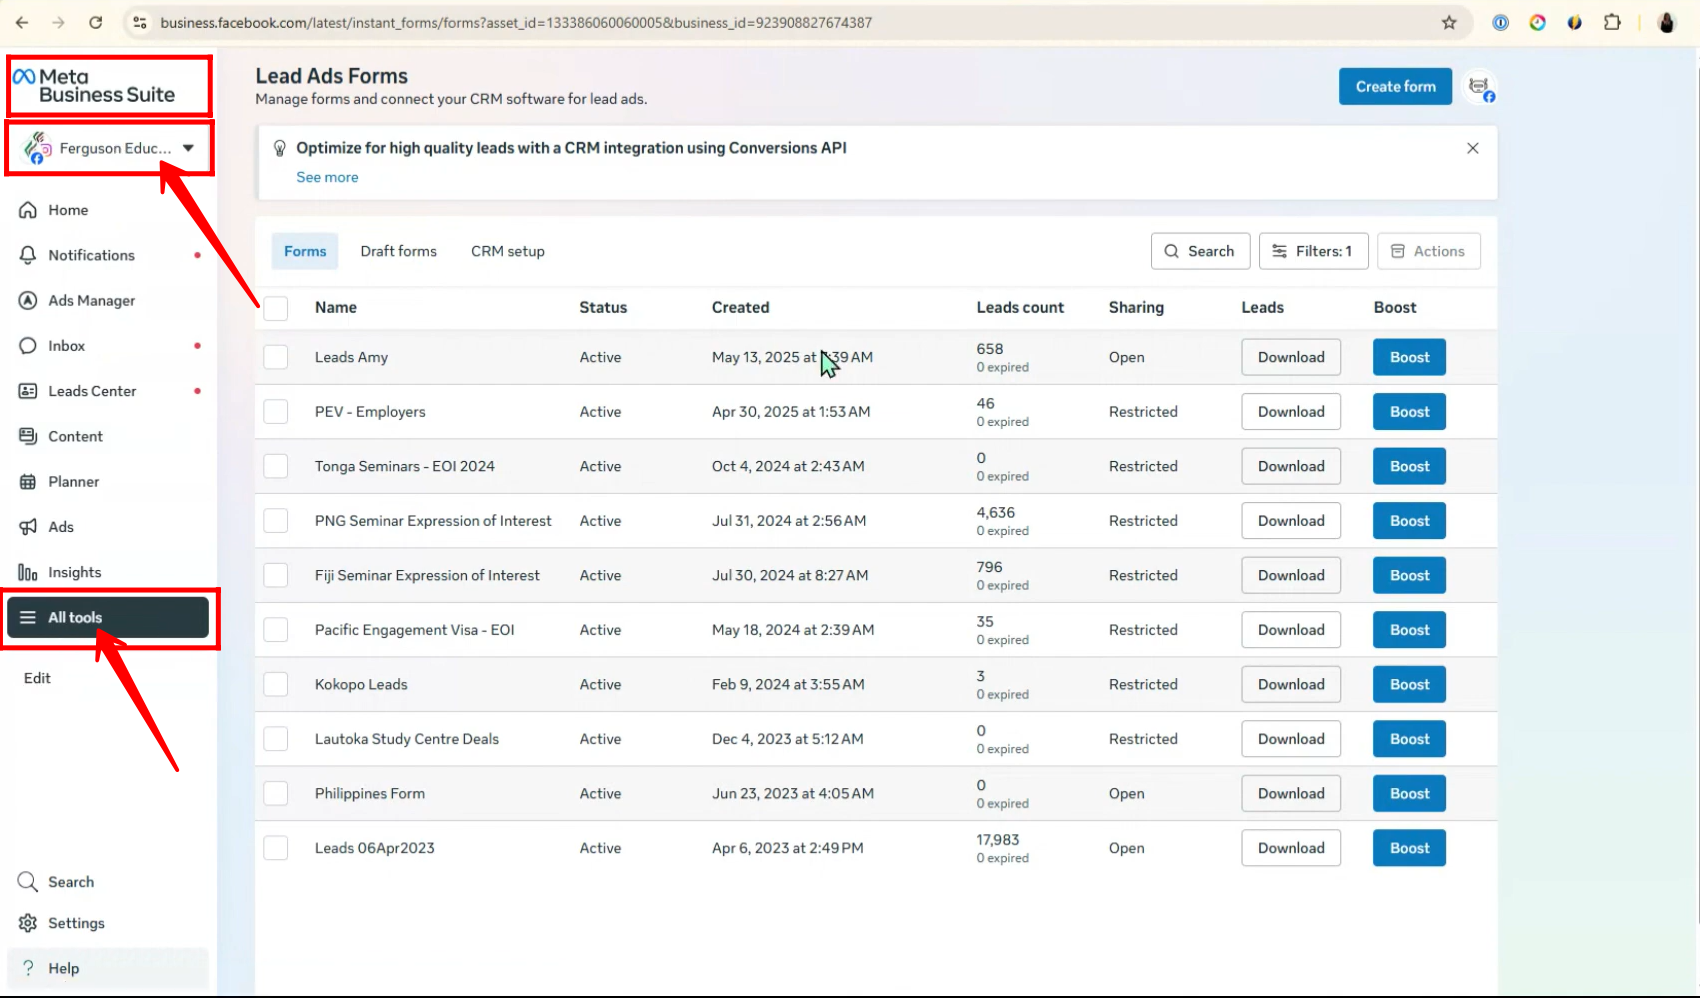
2. In the All Tools section, use the search bar to type “Instant Forms” and click on it when it appears. This is where all your lead forms created through Facebook Lead Ads are managed.

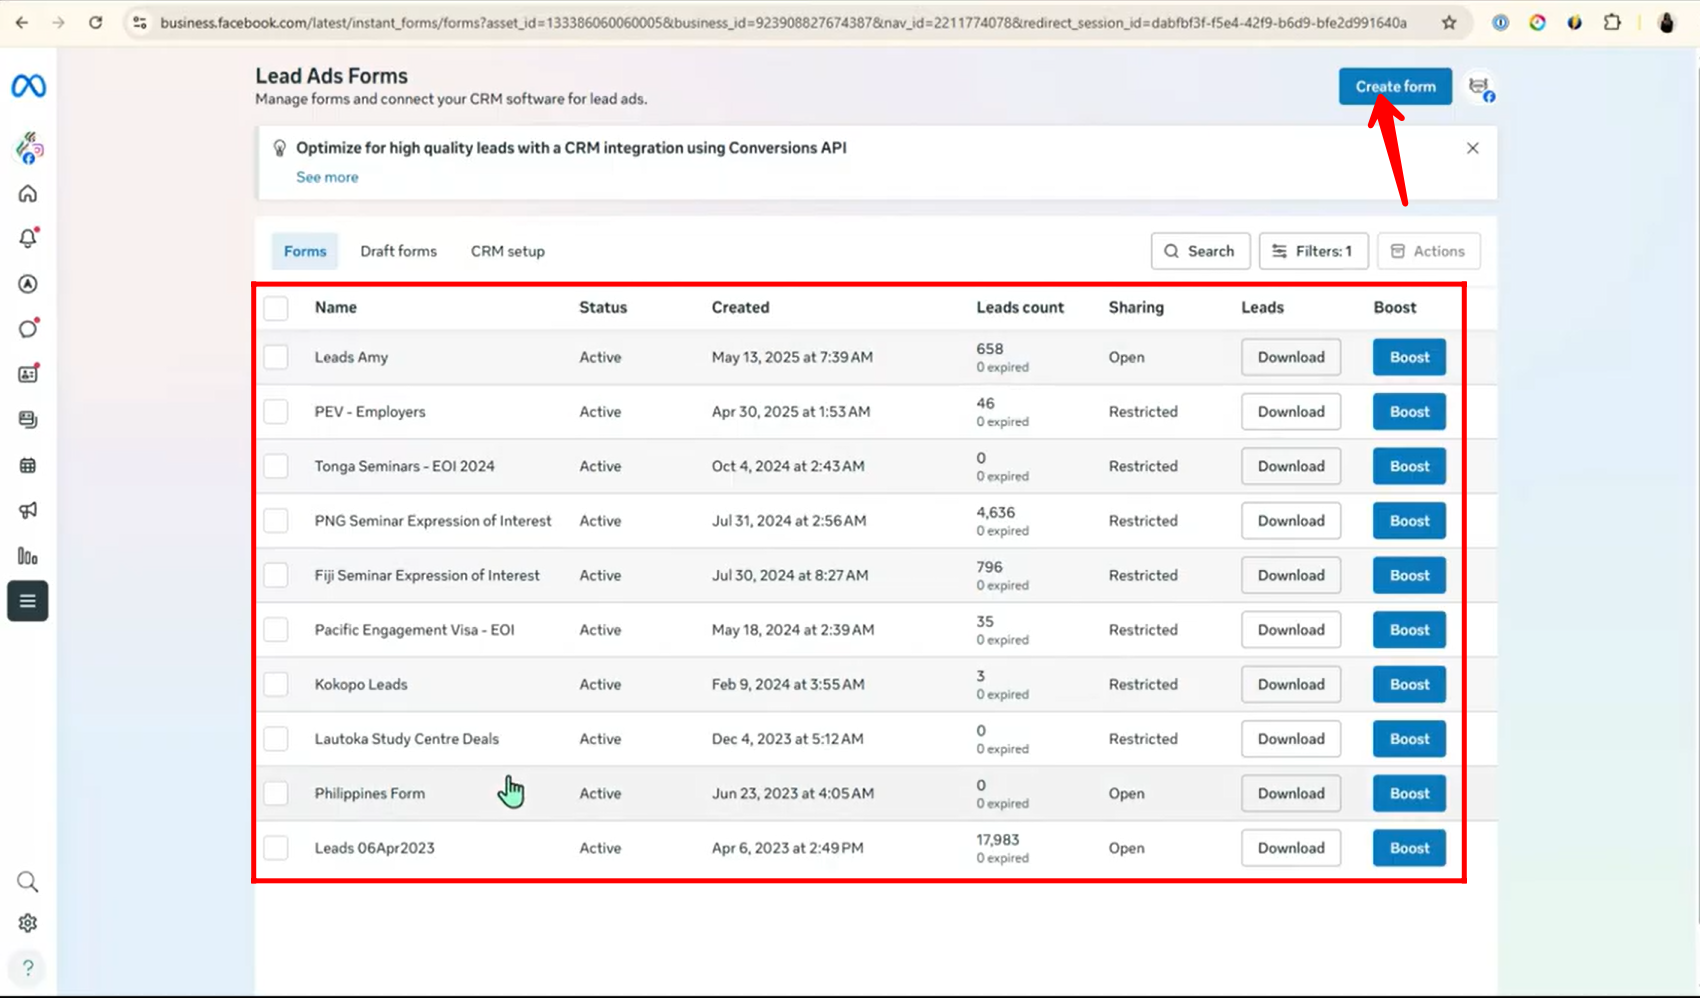
3. Once you’re in the Instant Forms section, you’ll see a list of all your configured Facebook Lead Ads forms. If you haven’t created one yet or need a new form for a specific campaign, simply click on “Create Form” to start building a new lead capture form.
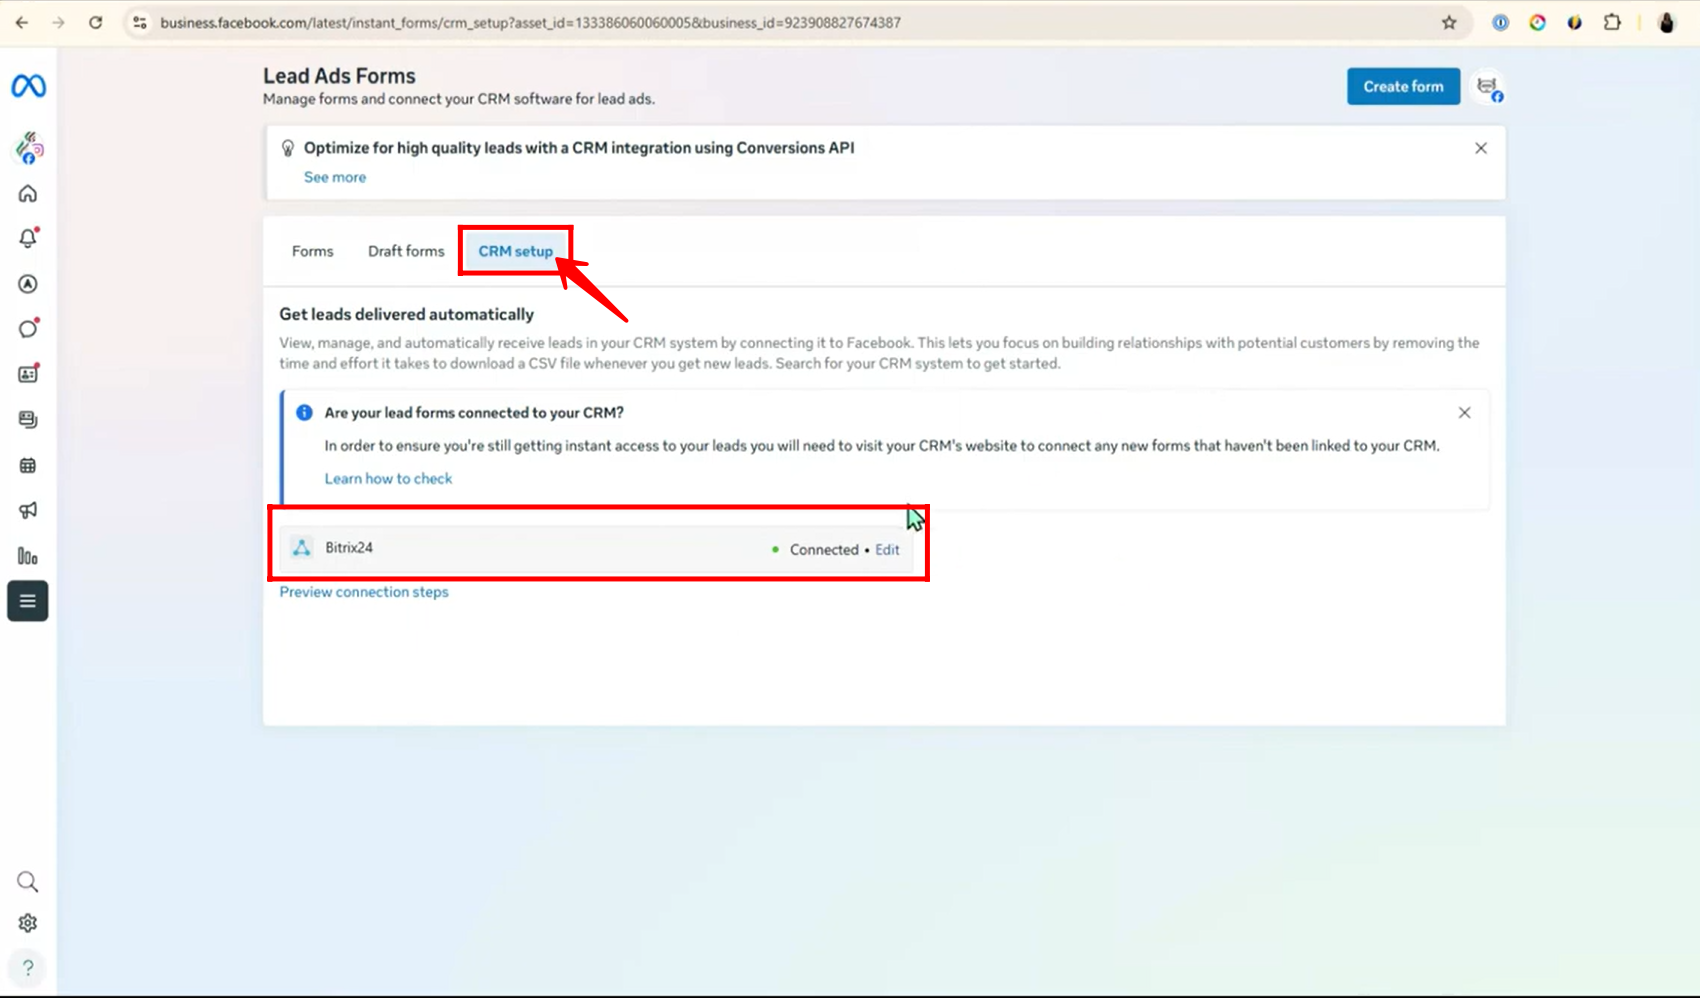
4. Next, go to the “CRM Setup” tab within your Lead Ads Forms section. Here, you’ll be able to see if Bitrix24 is already connected to your Meta account. If it’s connected, you’re good to go. If not, connecting it is simple.
We won’t cover the full connection process here, but you can follow the official Meta guides linked below for easy step-by-step instructions:
🔗 Connect your CRM system to Meta Business Suite
🔗 Create a lead ad with instant form in Meta Ads Manager
5. Alternatively, instead of connecting Facebook through Meta’s side, you can directly manage the connection from within Bitrix24.
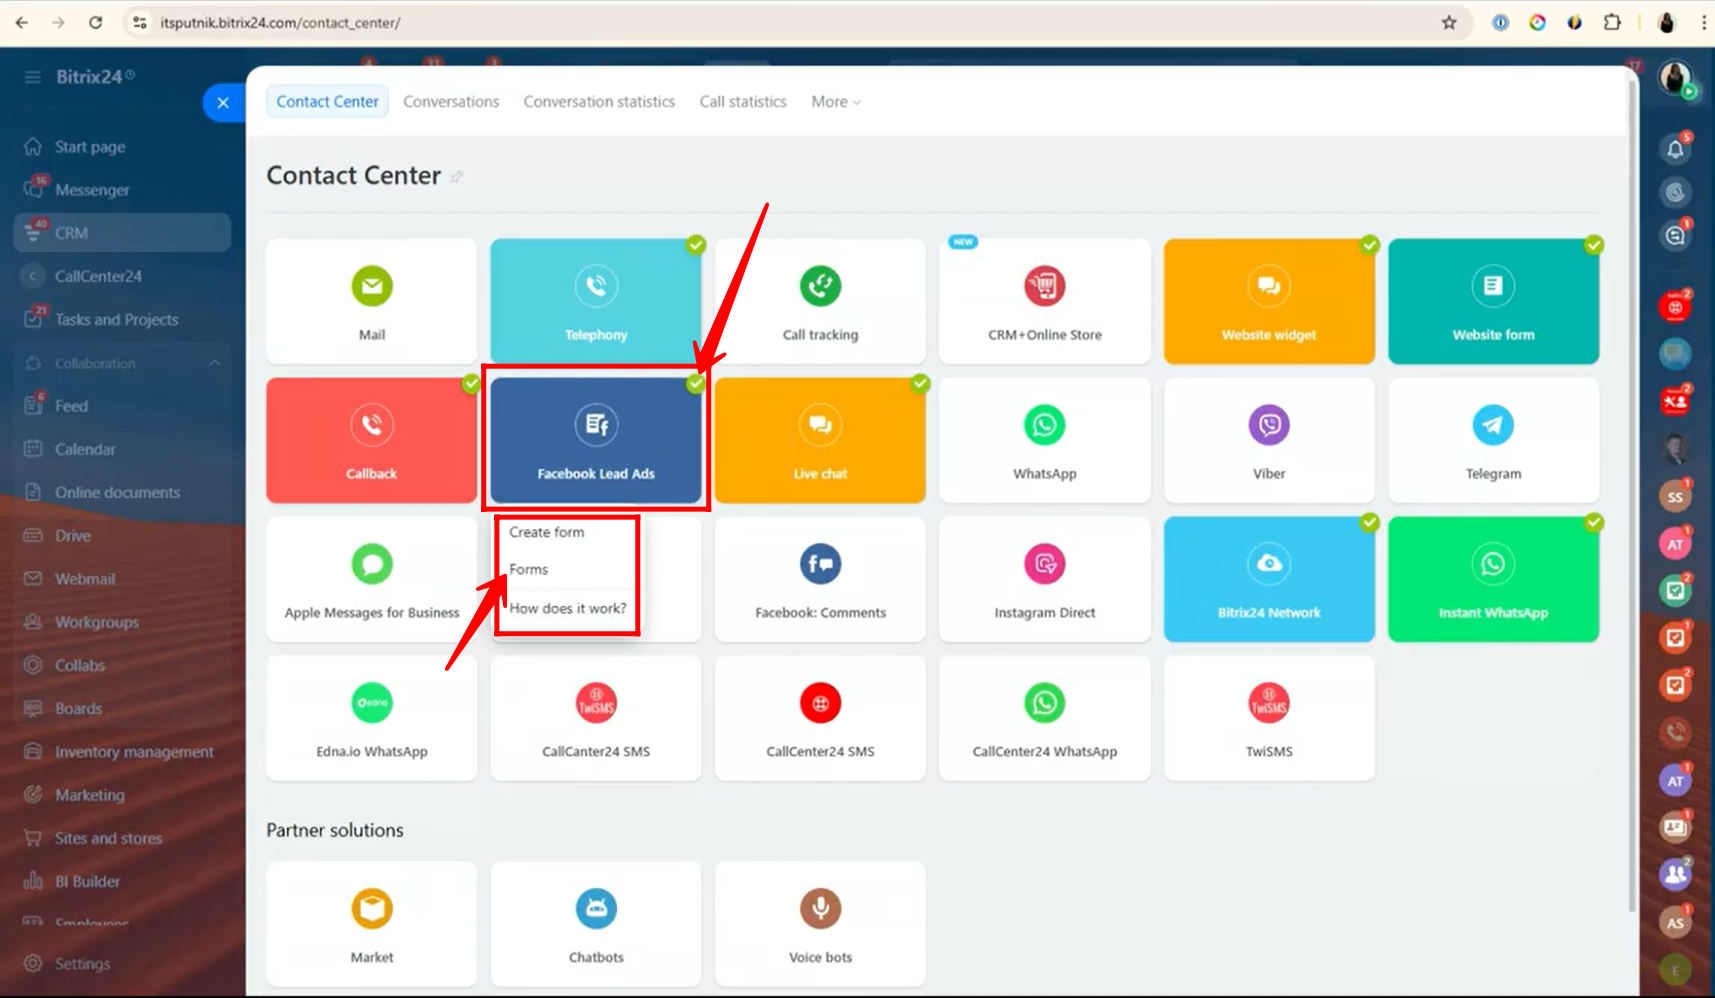
To do this, go to the “Contact Center” section inside your Bitrix24 CRM. From there, click on “Facebook Lead Ads”, and then select “Create Form.” This will initiate the setup process to link your Facebook forms directly with Bitrix24, allowing you to capture leads into your CRM. We’ll now walk through this integration in detail.

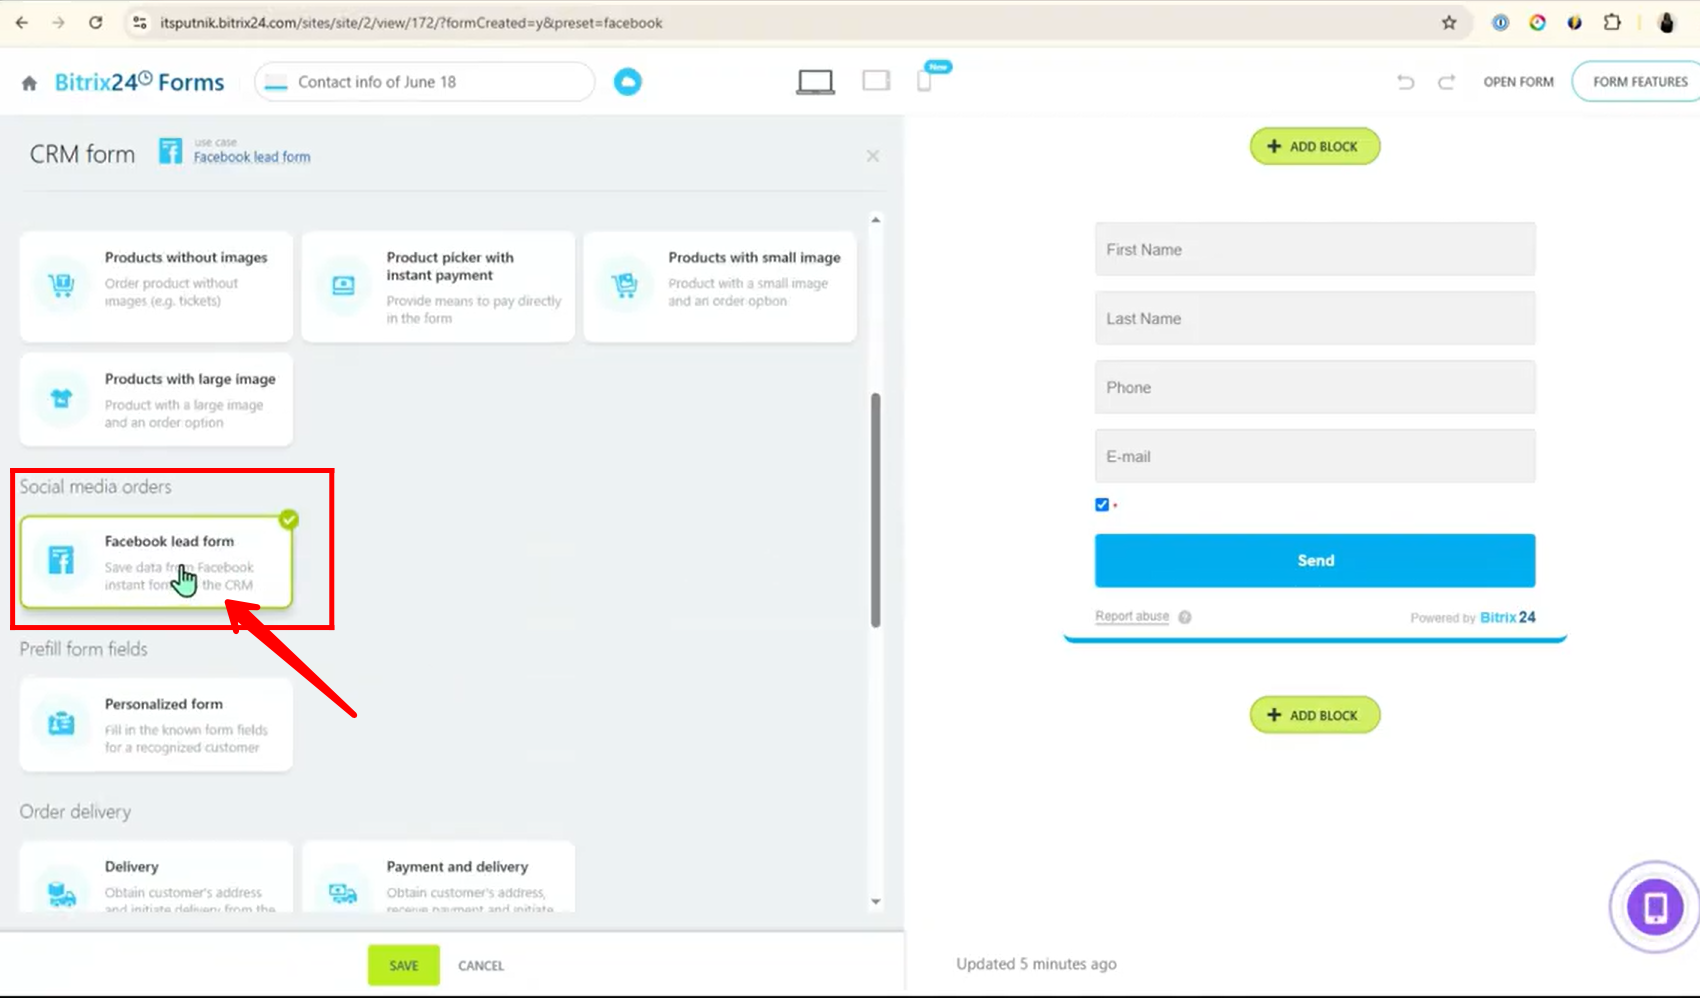
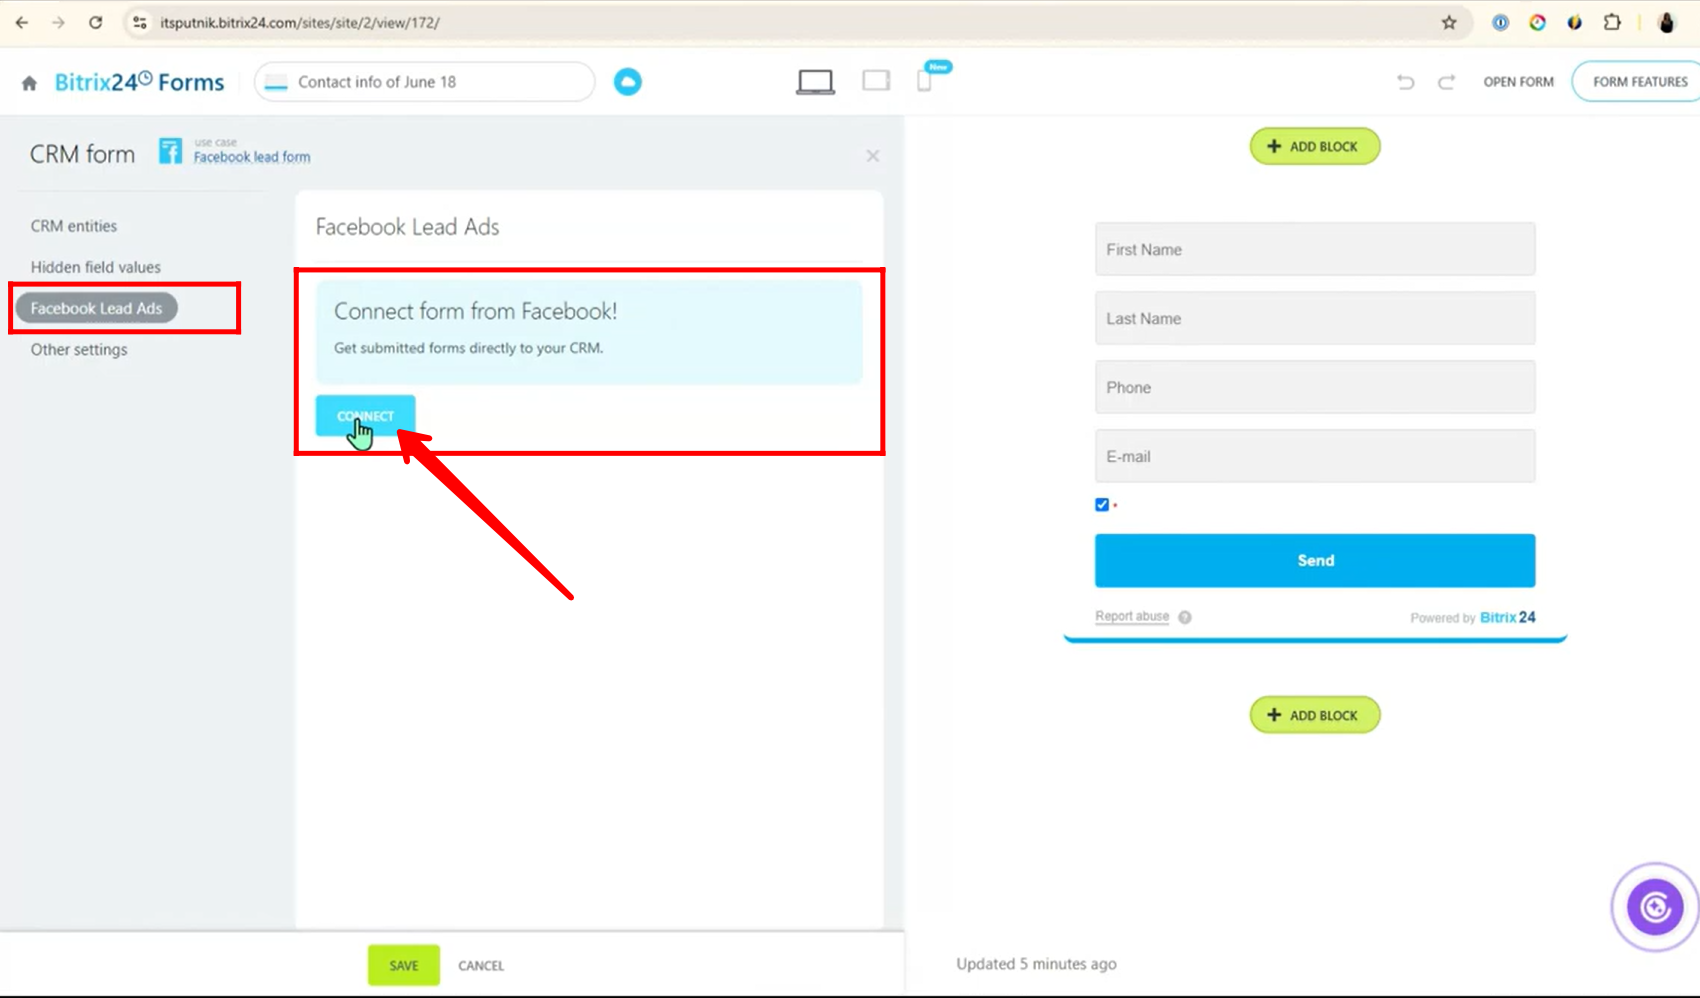
6. Within the “Create Form” window, scroll down to the “Social Media Orders” section and click on “Facebook Lead Form.” This option allows you to connect a specific Facebook form with Bitrix24 so that incoming leads are automatically recorded in your CRM.
7. In the left-hand panel, navigate to “Facebook Lead Ads” and click on the “Connect” button. This will begin the authorization process to link your Facebook Business account with Bitrix24, enabling real-time lead syncing from your Facebook forms directly into your CRM.
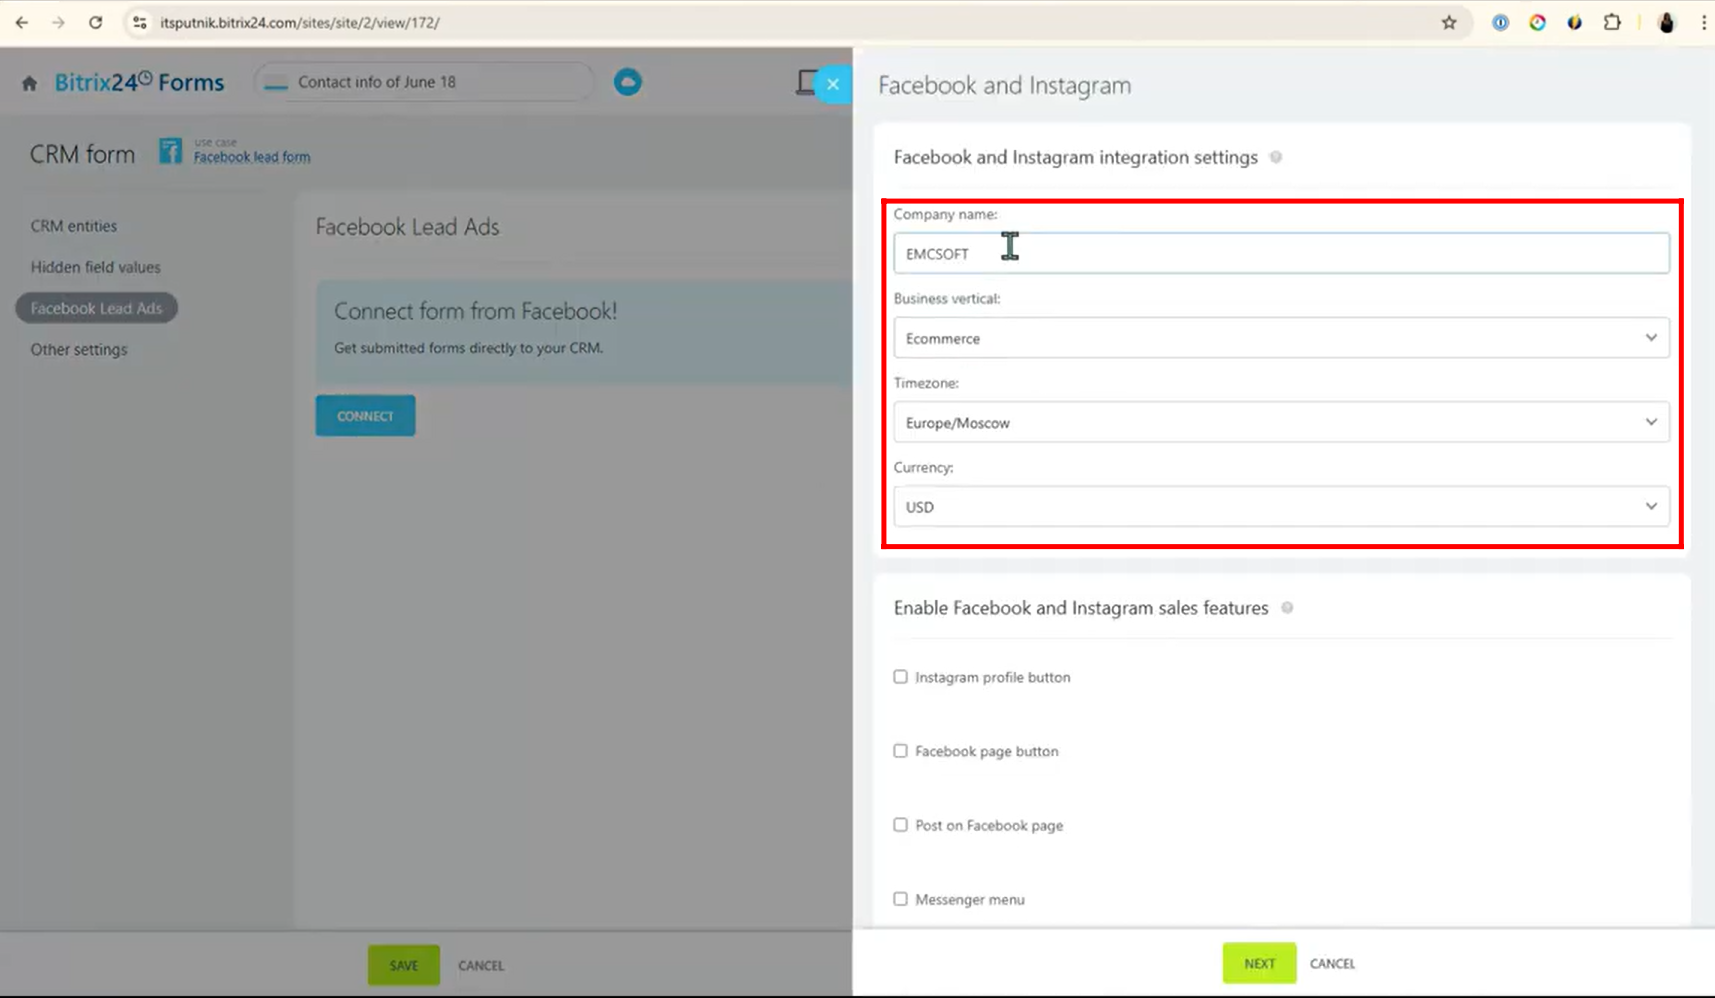
8. In the integration settings, enter your Company Name, select the appropriate Business Vertical (e.g., Services or E-commerce), choose your Time Zone, and set the Currency.
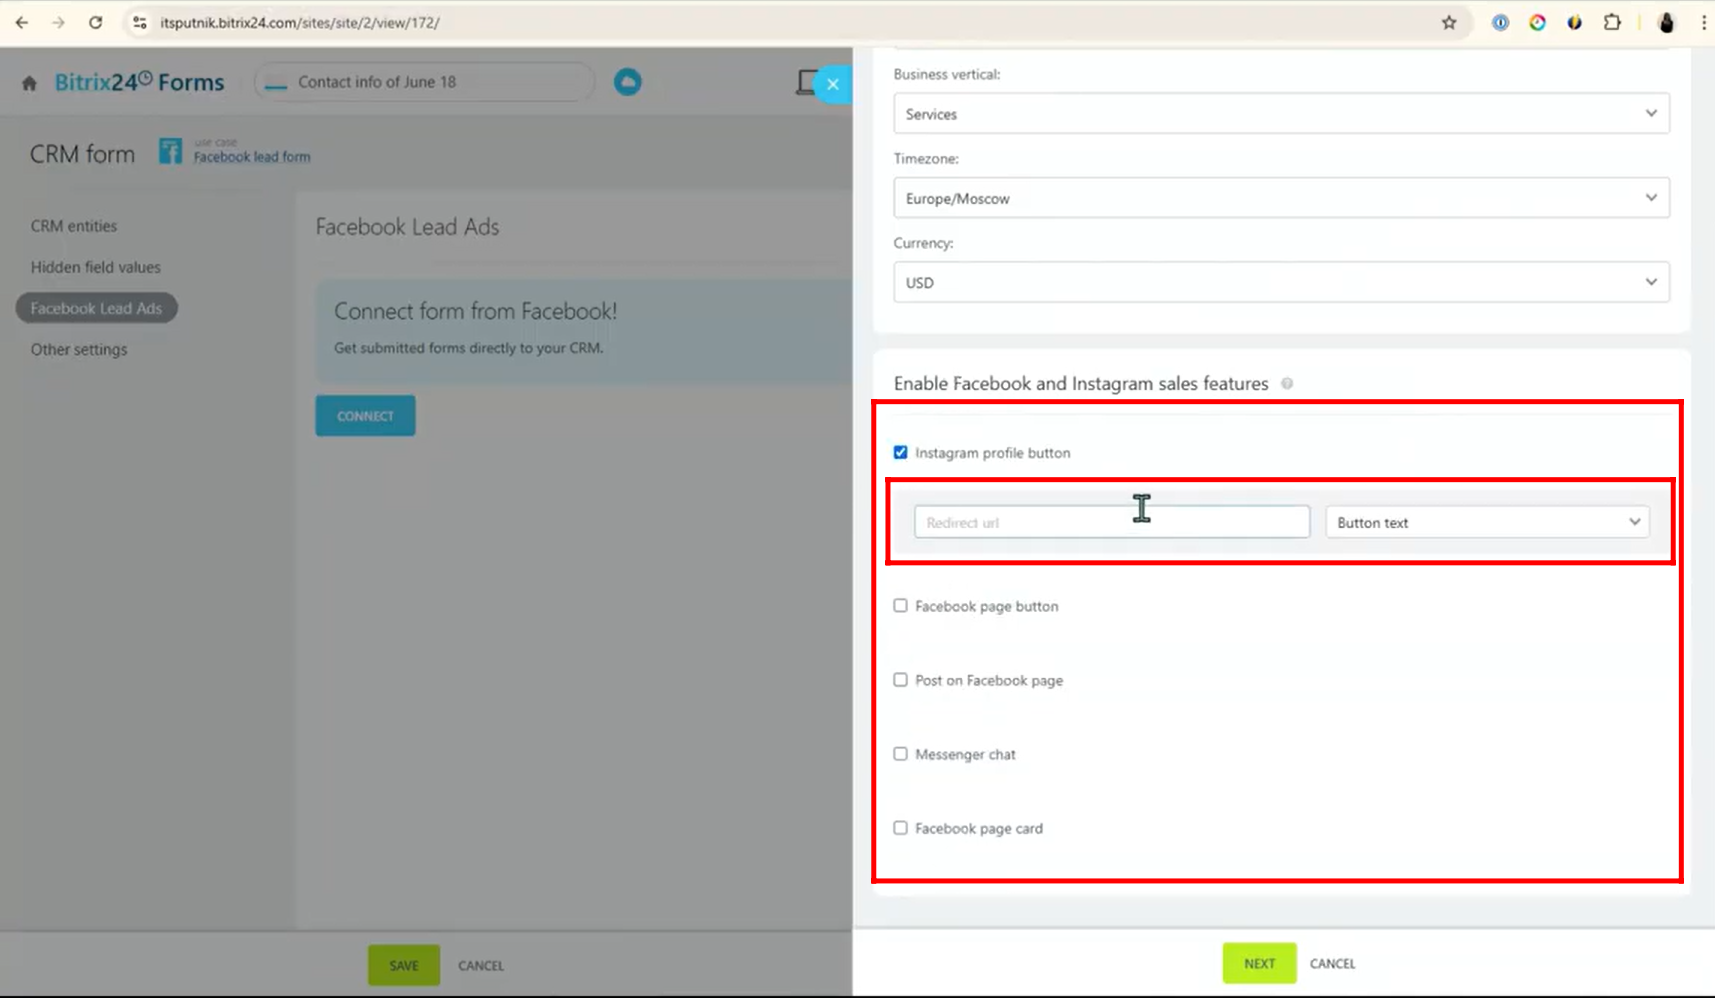
9. You can also enable additional Sales Features to enhance your integration. These include options like adding your Instagram Profile button, Facebook Page button, enabling Posts on your Facebook Page, activating Messenger Chat, and displaying a Facebook Page Card. Enable the features that best suit your marketing and communication strategy.
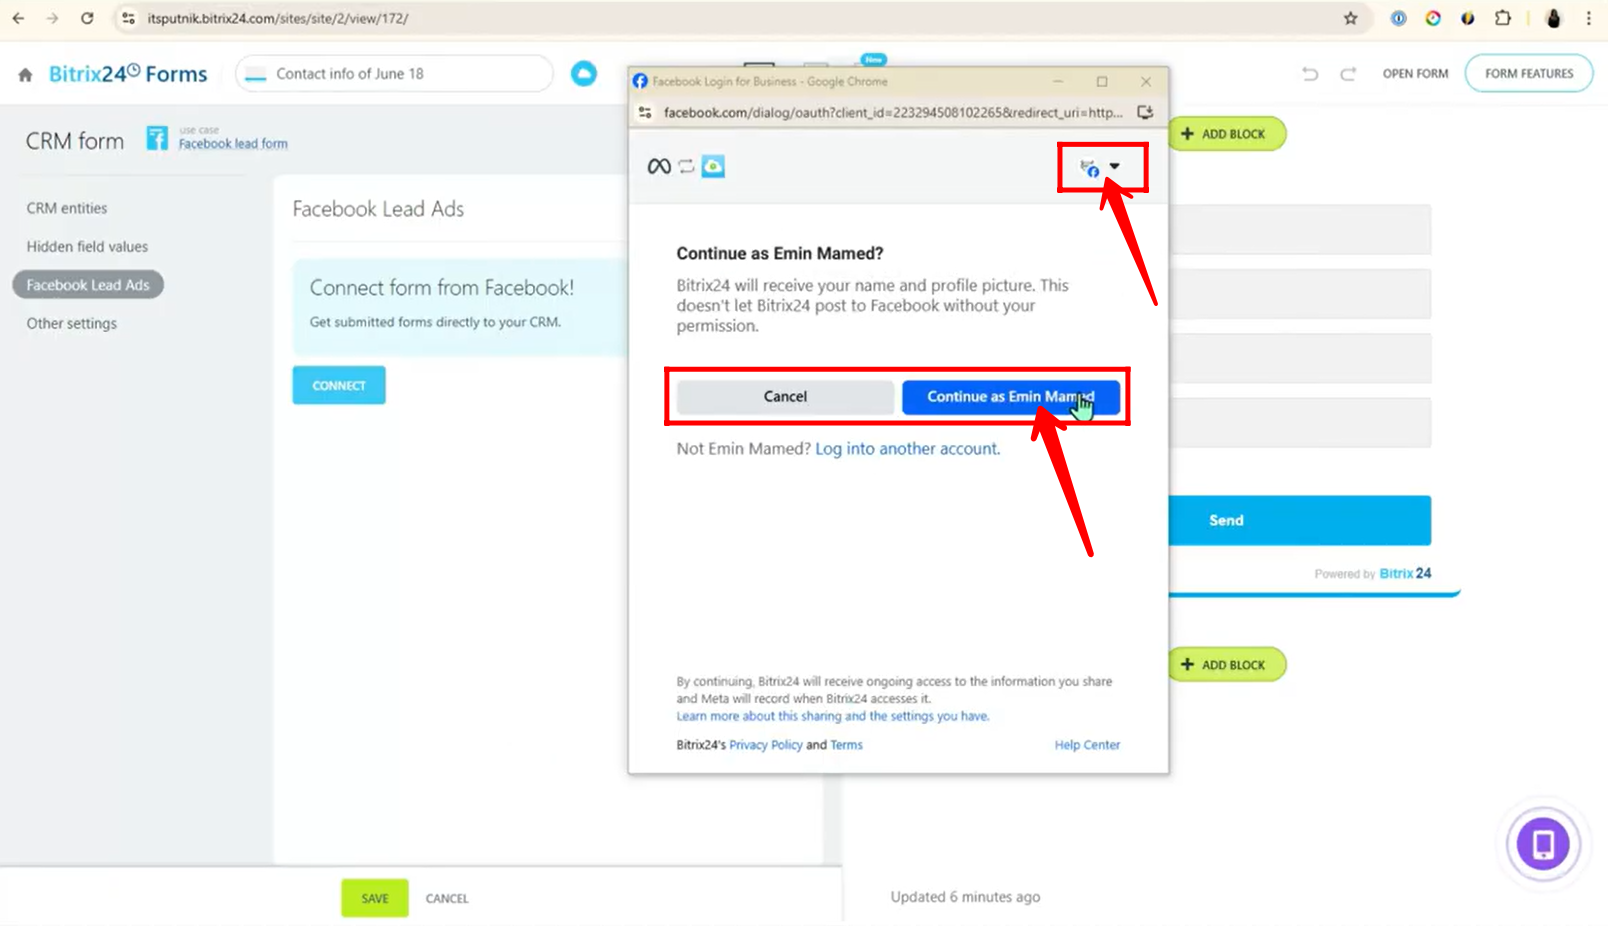
10. Next, select the correct Facebook profile that manages your business assets, and click “Continue as [Your Profile Name]” to authorize access. This ensures that Bitrix24 connects with the right Facebook Business account linked to your lead forms.
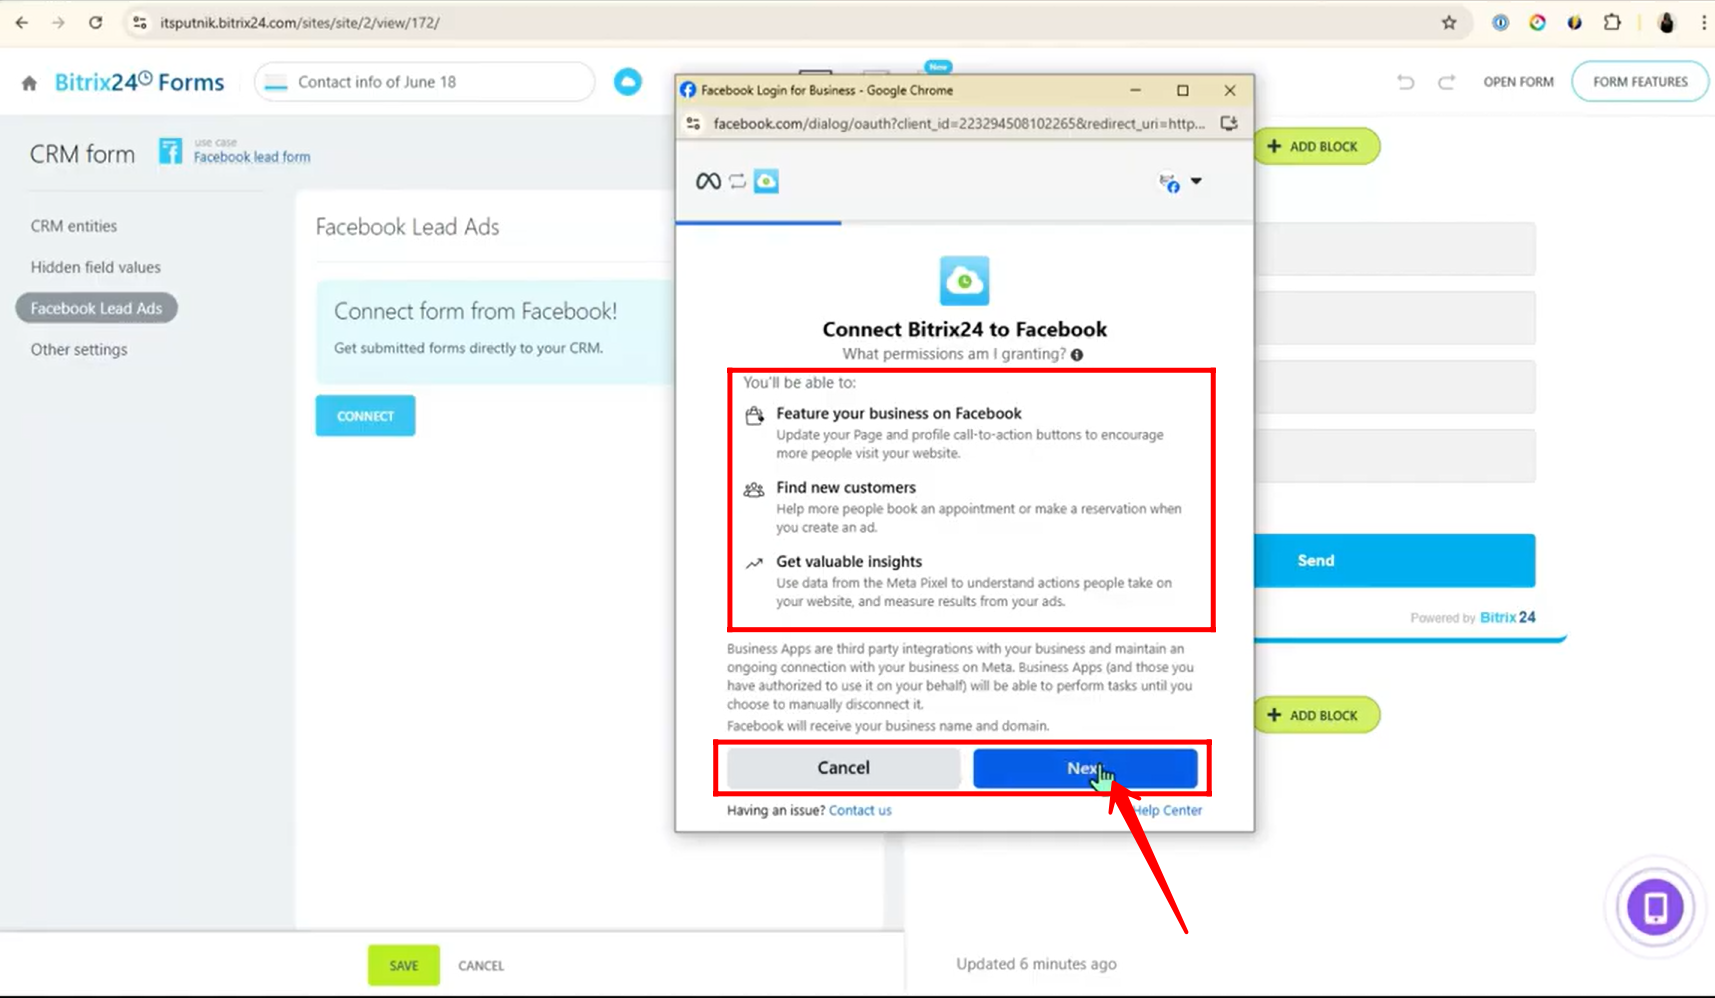
11. You’ll now see a prompt highlighting the benefits of the integration, such as the ability to “Feature your business on Facebook,” “Find new customers,” and “Get valuable insights.” Review the information and click “Next” to proceed with the connection.
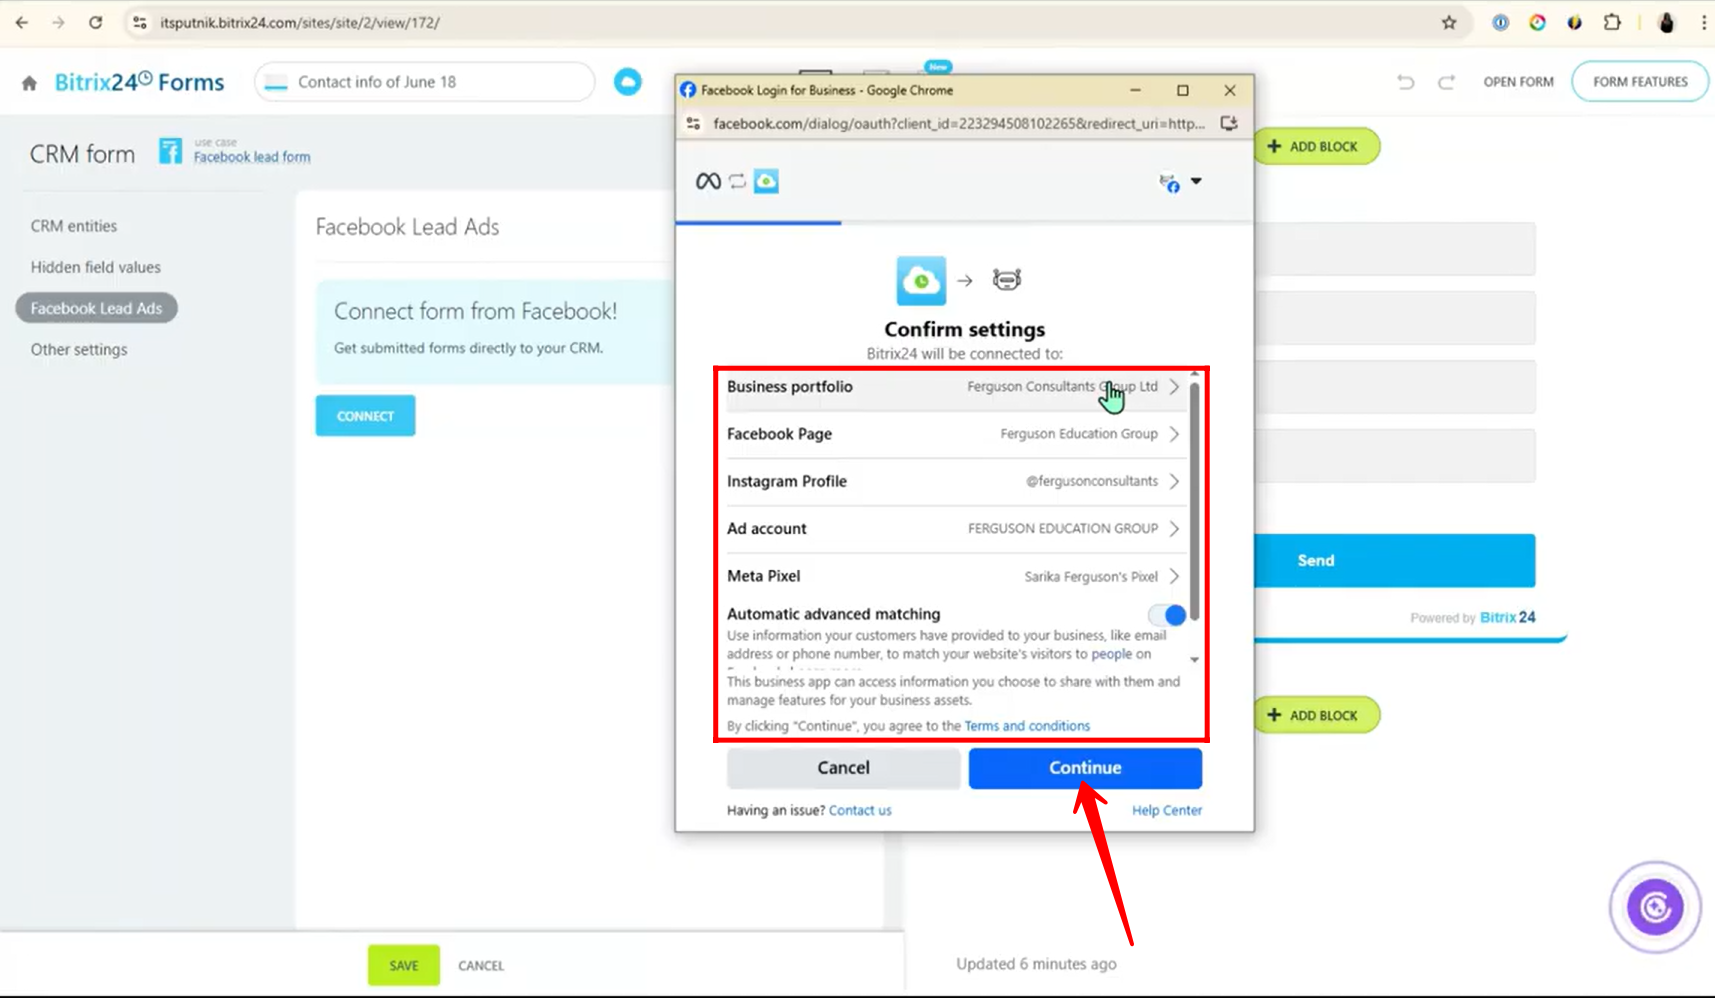
12. Review and confirm your integration settings, including the selected Business Portfolio, Facebook Page, Instagram Profile, Ad Account, Meta Pixel, and Automatic Advanced Matching options. Once you’ve verified everything is accurate, click “Continue” to finalize the setup.
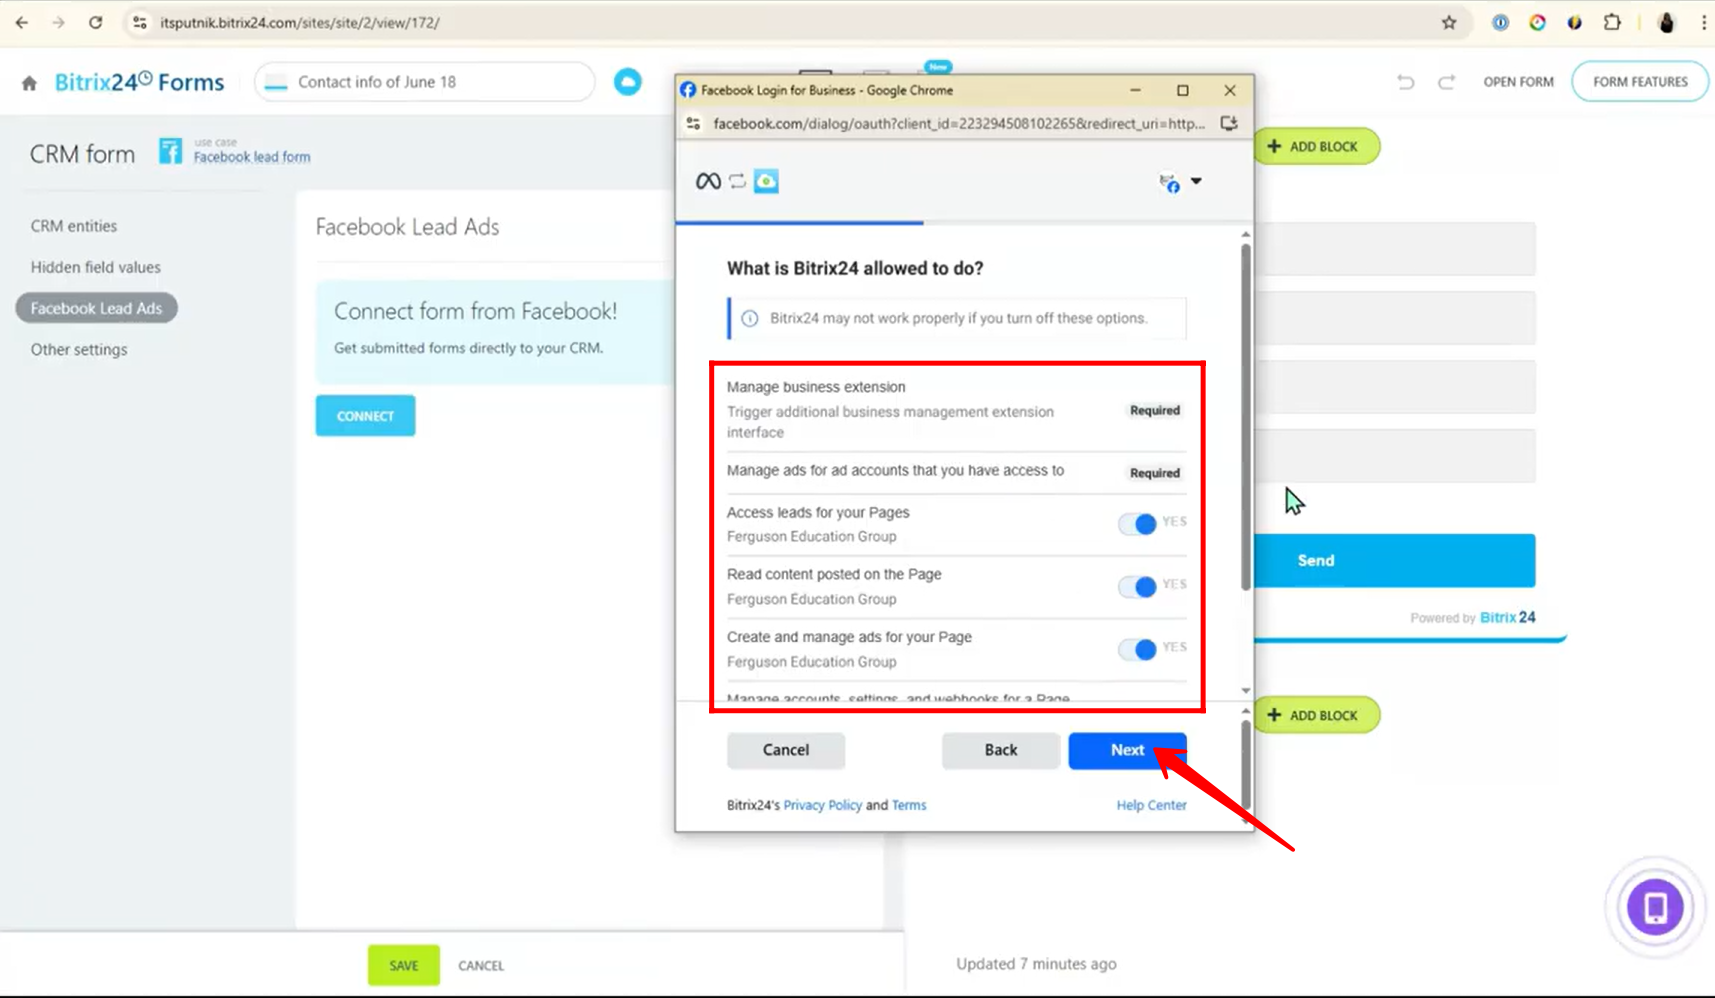
13. On the permissions screen titled “What is Bitrix24 allowed to do?”, you’ll see required permissions such as Manage business extension and Manage ads for ad accounts you have access to already checked. Below that, you’ll find optional permissions like Access leads for your pages, Read content posted on the page, Create and manage ads for your page, and more. It is highly recommended to turn on all permissions to ensure full functionality and avoid future integration issues. After selecting all, click “Next.”
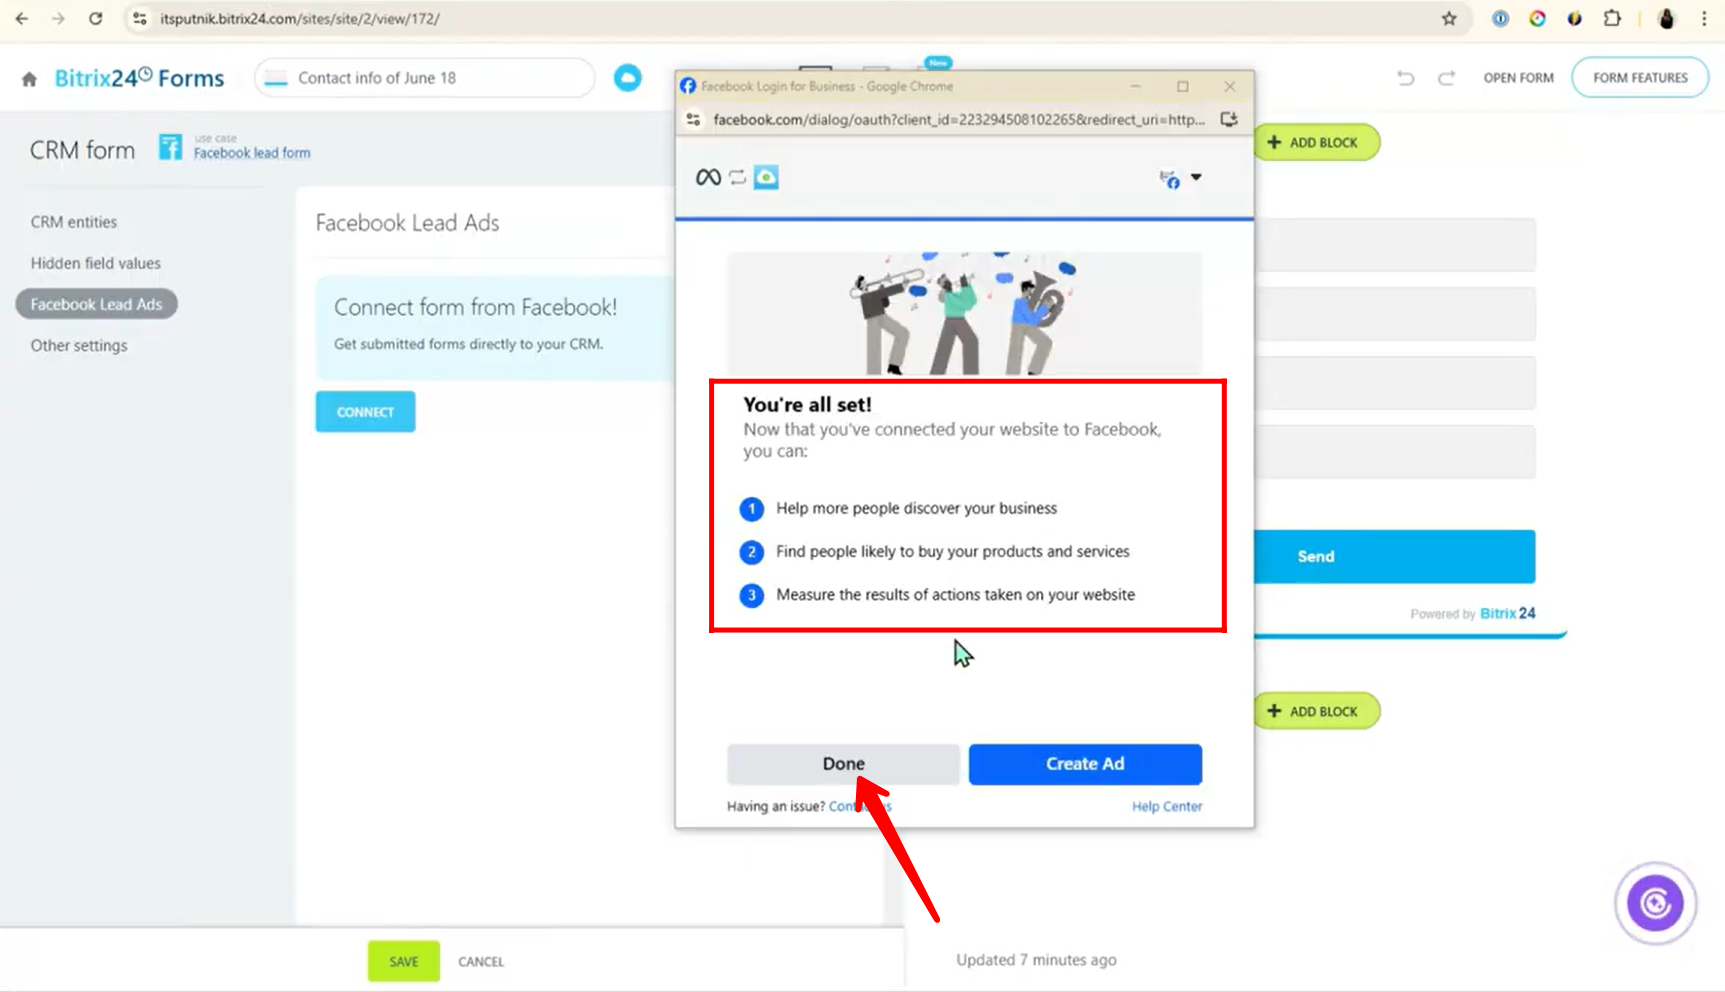
14. You’re now all set! Simply click “Done” to complete the connection process between Bitrix24 and Facebook Lead Ads.
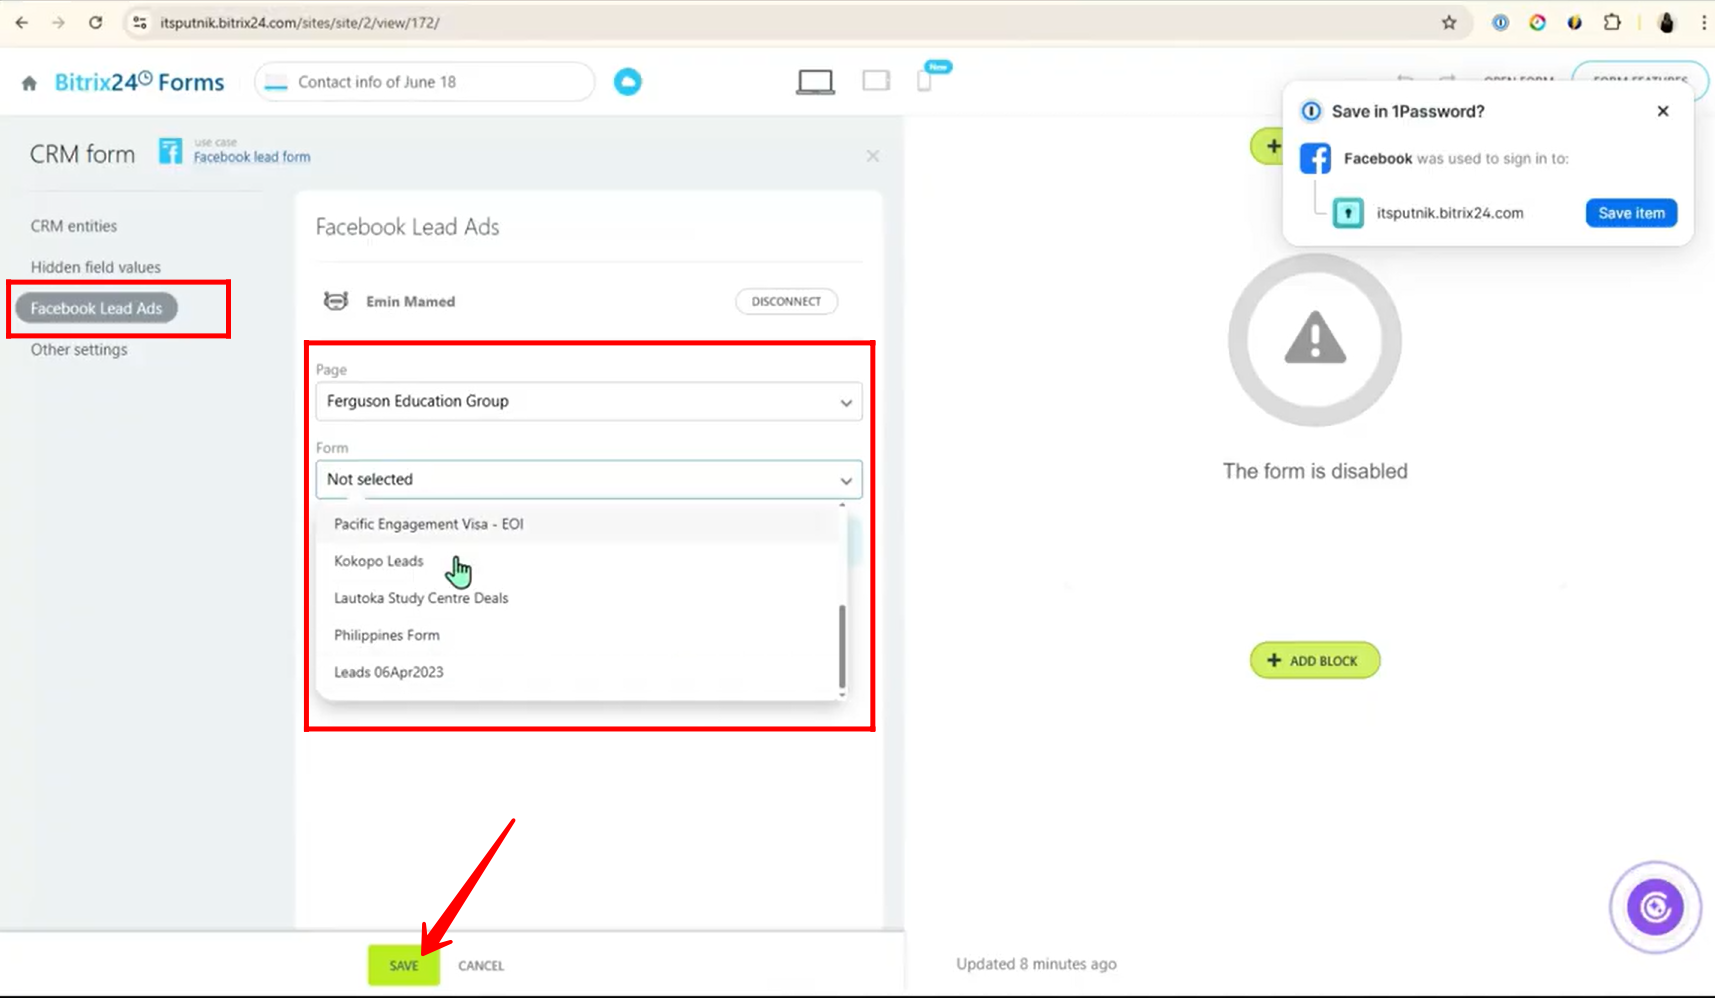
15. Now, select the correct Facebook Page and choose the exact lead form you want to link with Bitrix24. Once selected, click “Save” to finalize the form integration and begin syncing leads directly into your CRM.
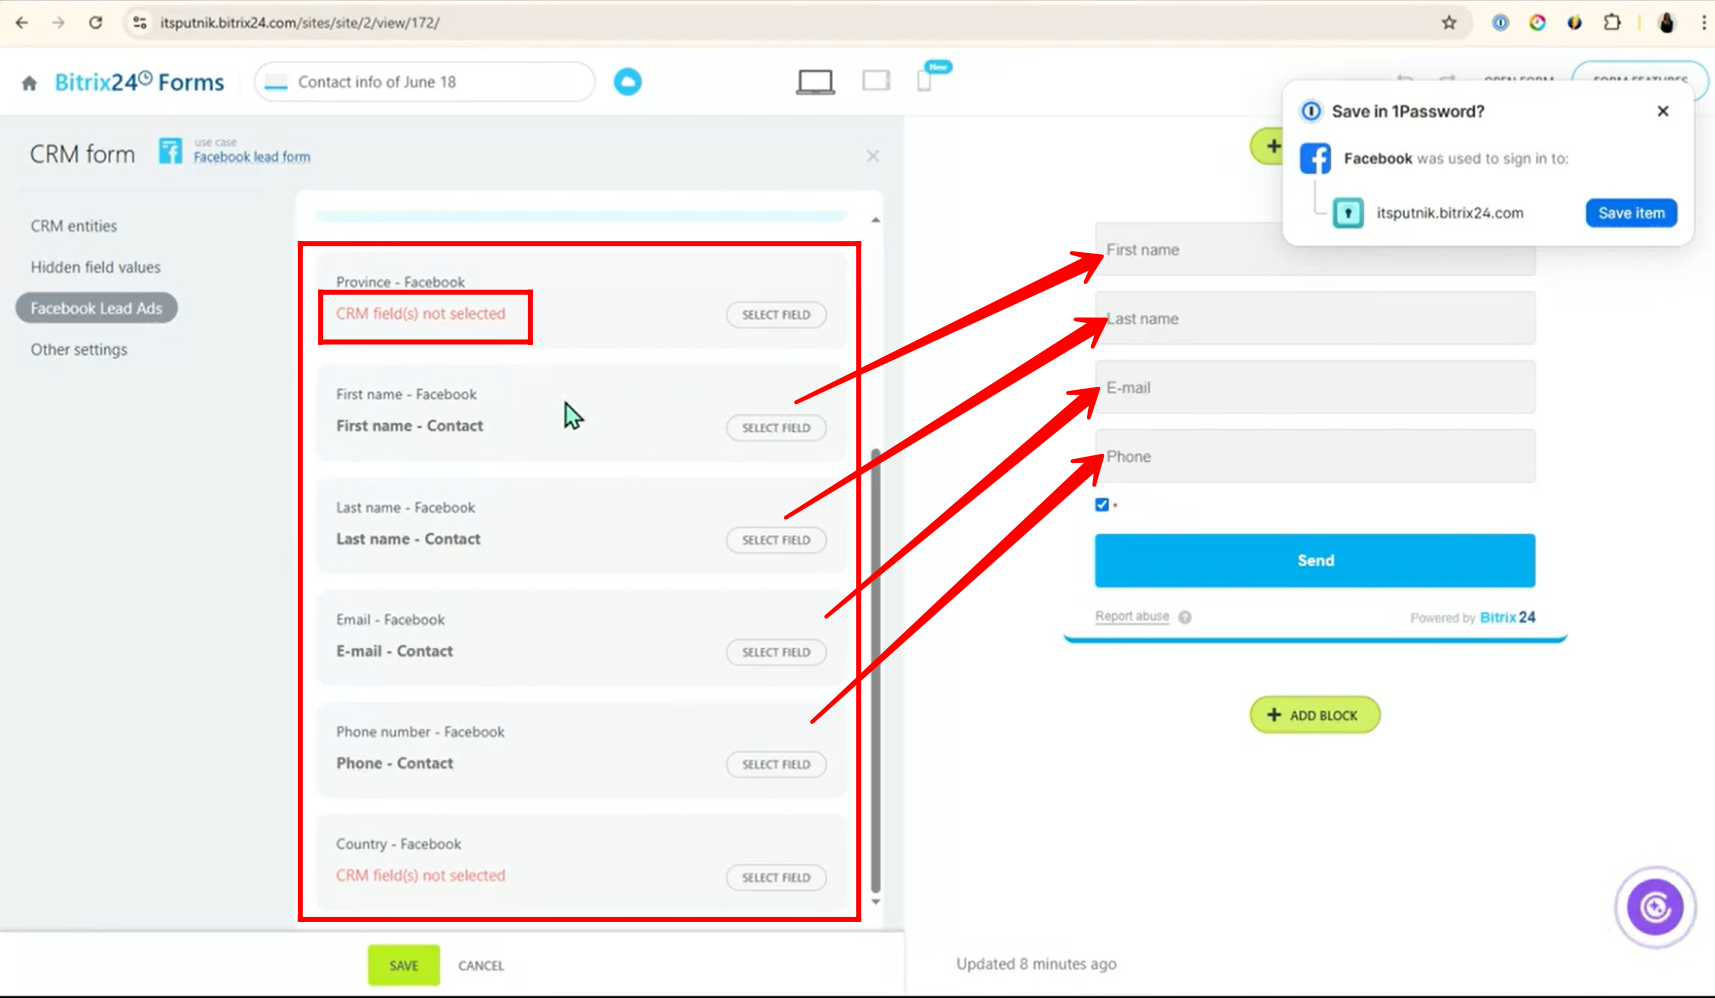
16. You’ll notice that the default fields in Bitrix24 are automatically mapped to their corresponding fields from the selected Facebook form. Any fields that remain unmapped will be highlighted. You can customize these by manually selecting and mapping them to any available field in your Bitrix24 CRM, ensuring all necessary data from your Facebook form is captured accurately.
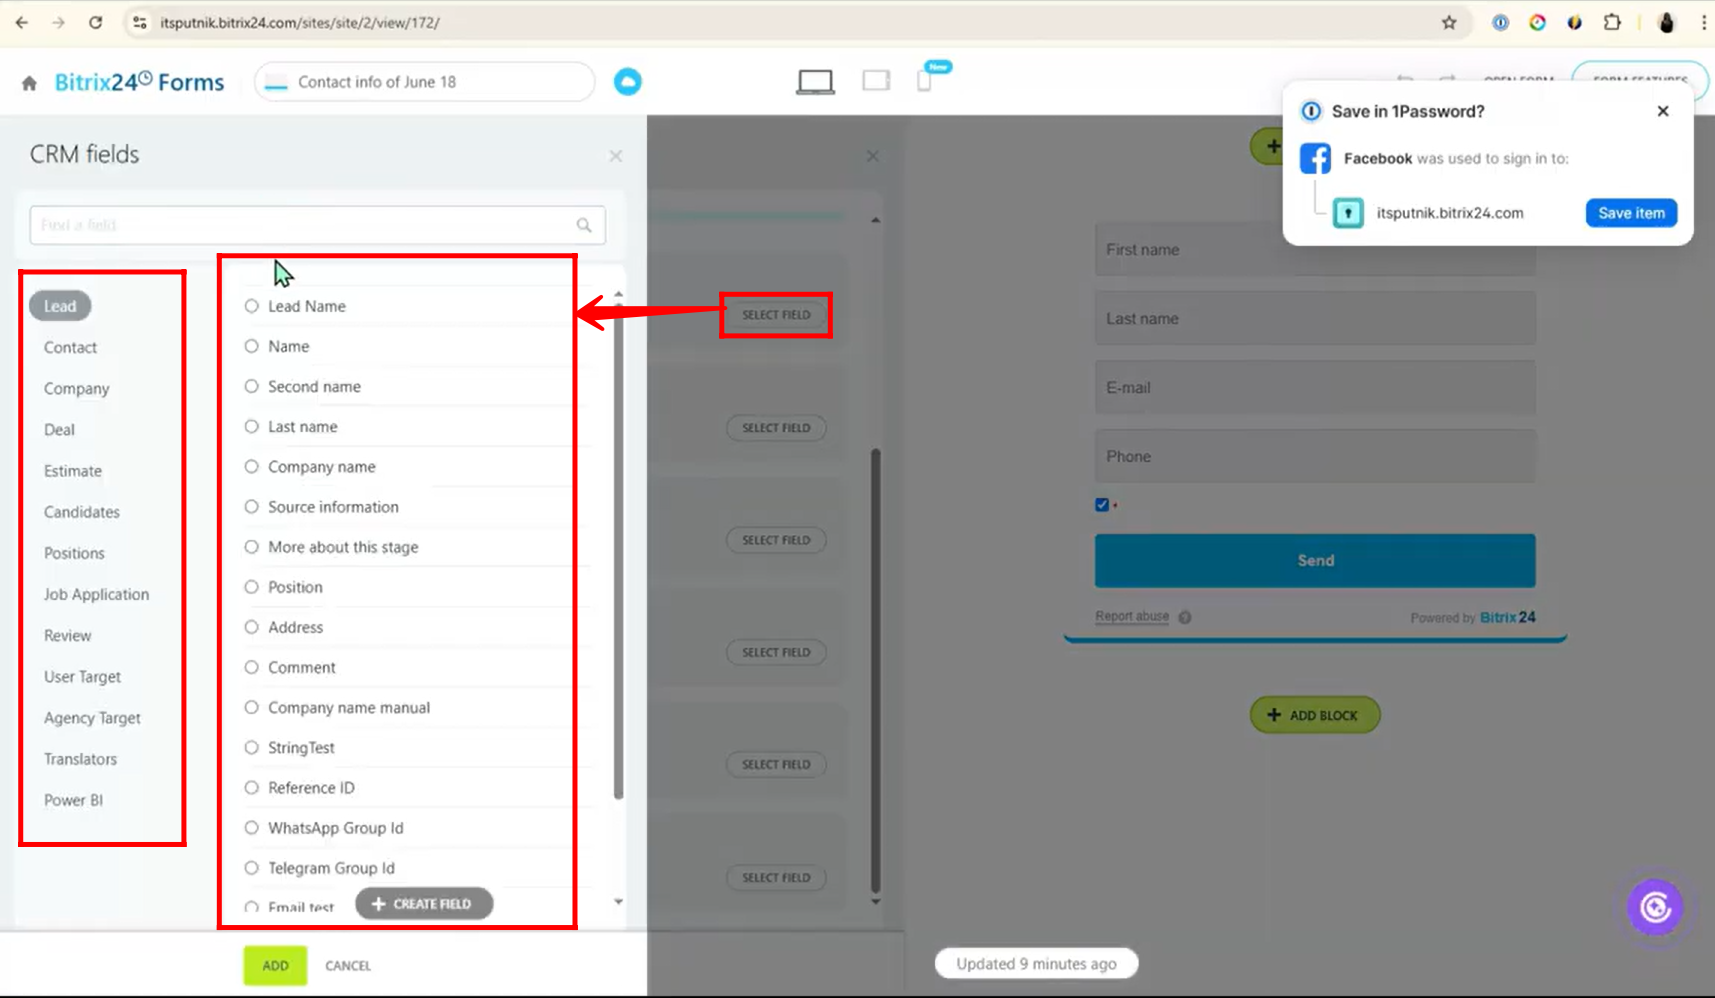
17. After clicking “Select field” to map an unmapped Facebook form field, you can choose from any available fields in your CRM, including those under Leads, Contacts, Companies, Deals, and Estimates. This flexibility allows you to match incoming data precisely to the correct CRM entity for better organization and automation.
18. Go to the “CRM Entities” section and select the appropriate entity for storing the incoming leads—options include Lead, Customer, Deal + Customer, Estimate + Customer, Invoice, or Smart Process Automation. In this example, we’ll choose Lead, but you can select whichever suits your workflow. Then, enable “Expert Mode” to unlock advanced settings. For the question “How do you want to handle duplicates?”, choose one of the following: Allow duplicates, Replace duplicates, or Merge duplicates, depending on how you want Bitrix24 to manage repeated entries.

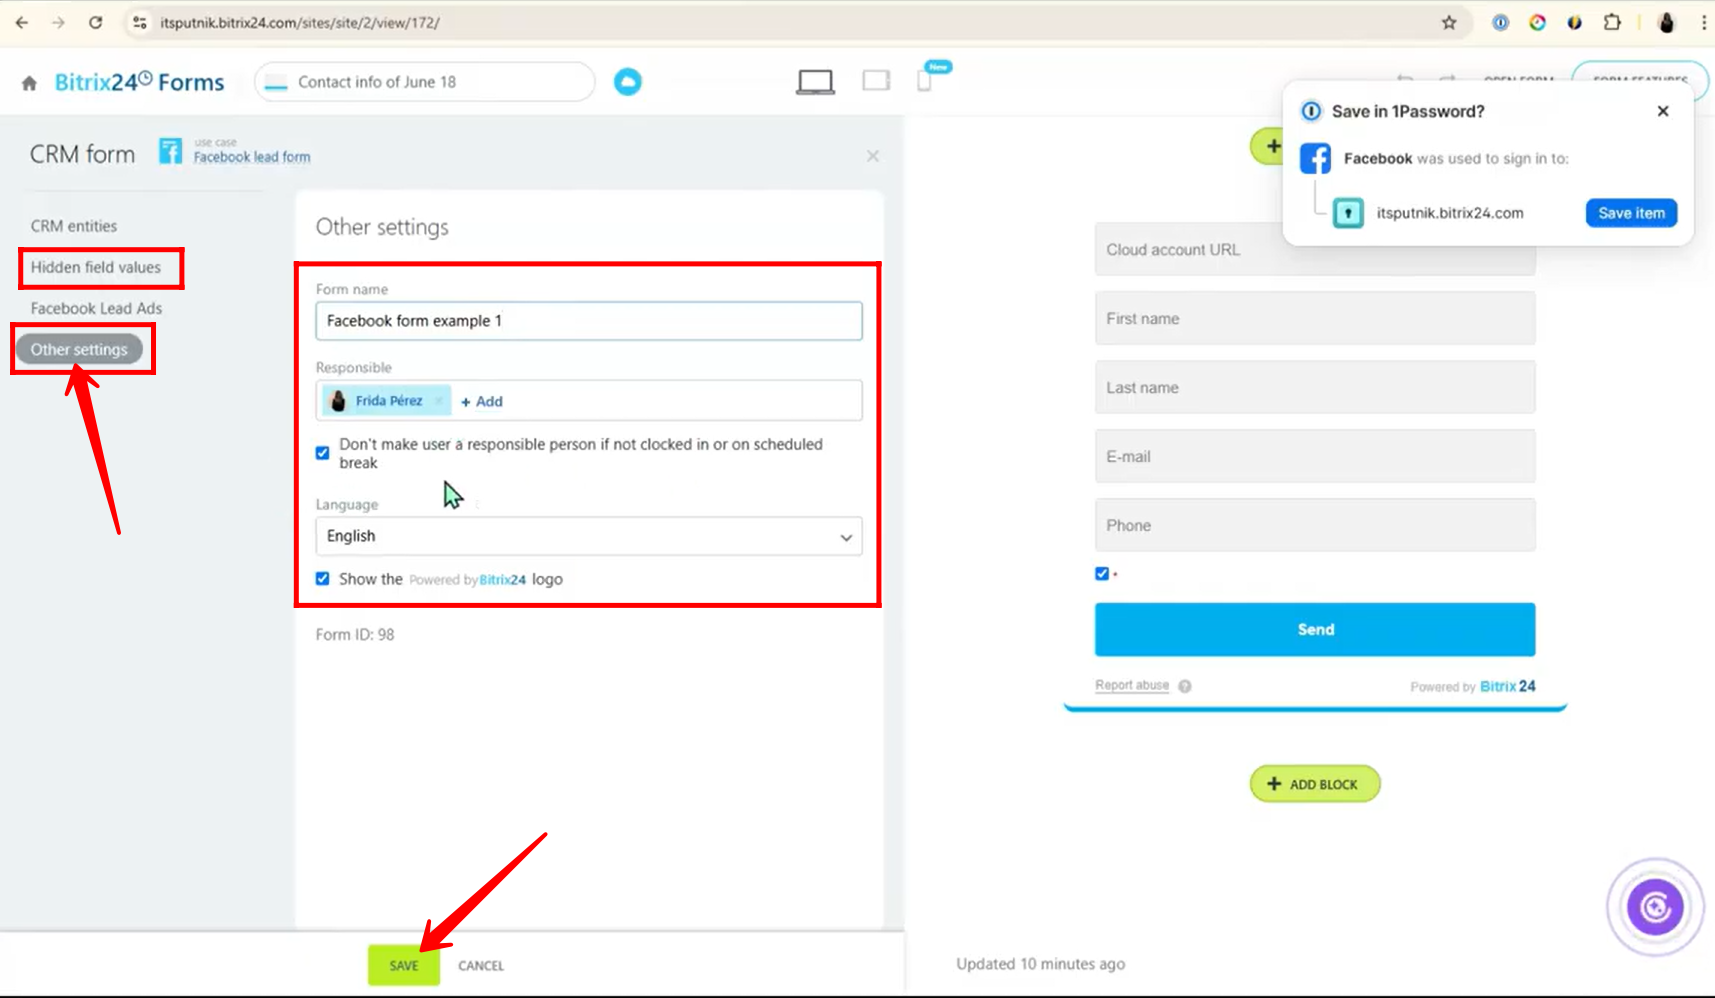
19. To manage hidden inputs, navigate to the “Hidden Field Values” section where you can add any static or invisible data you want passed into the CRM. Then, go to “Other Settings” to customize your setup—here you can edit the form name, assign a responsible person, and select the language for the integration. Once everything is configured, click “Save” to finalize the connection.
20. Back in the Contact Center, you’ll now see a green checkmark on the “Facebook Lead Ads” card, indicating a successful connection. Click on the card to open it and view the configured form(s) that are now linked to your Bitrix24 CRM.
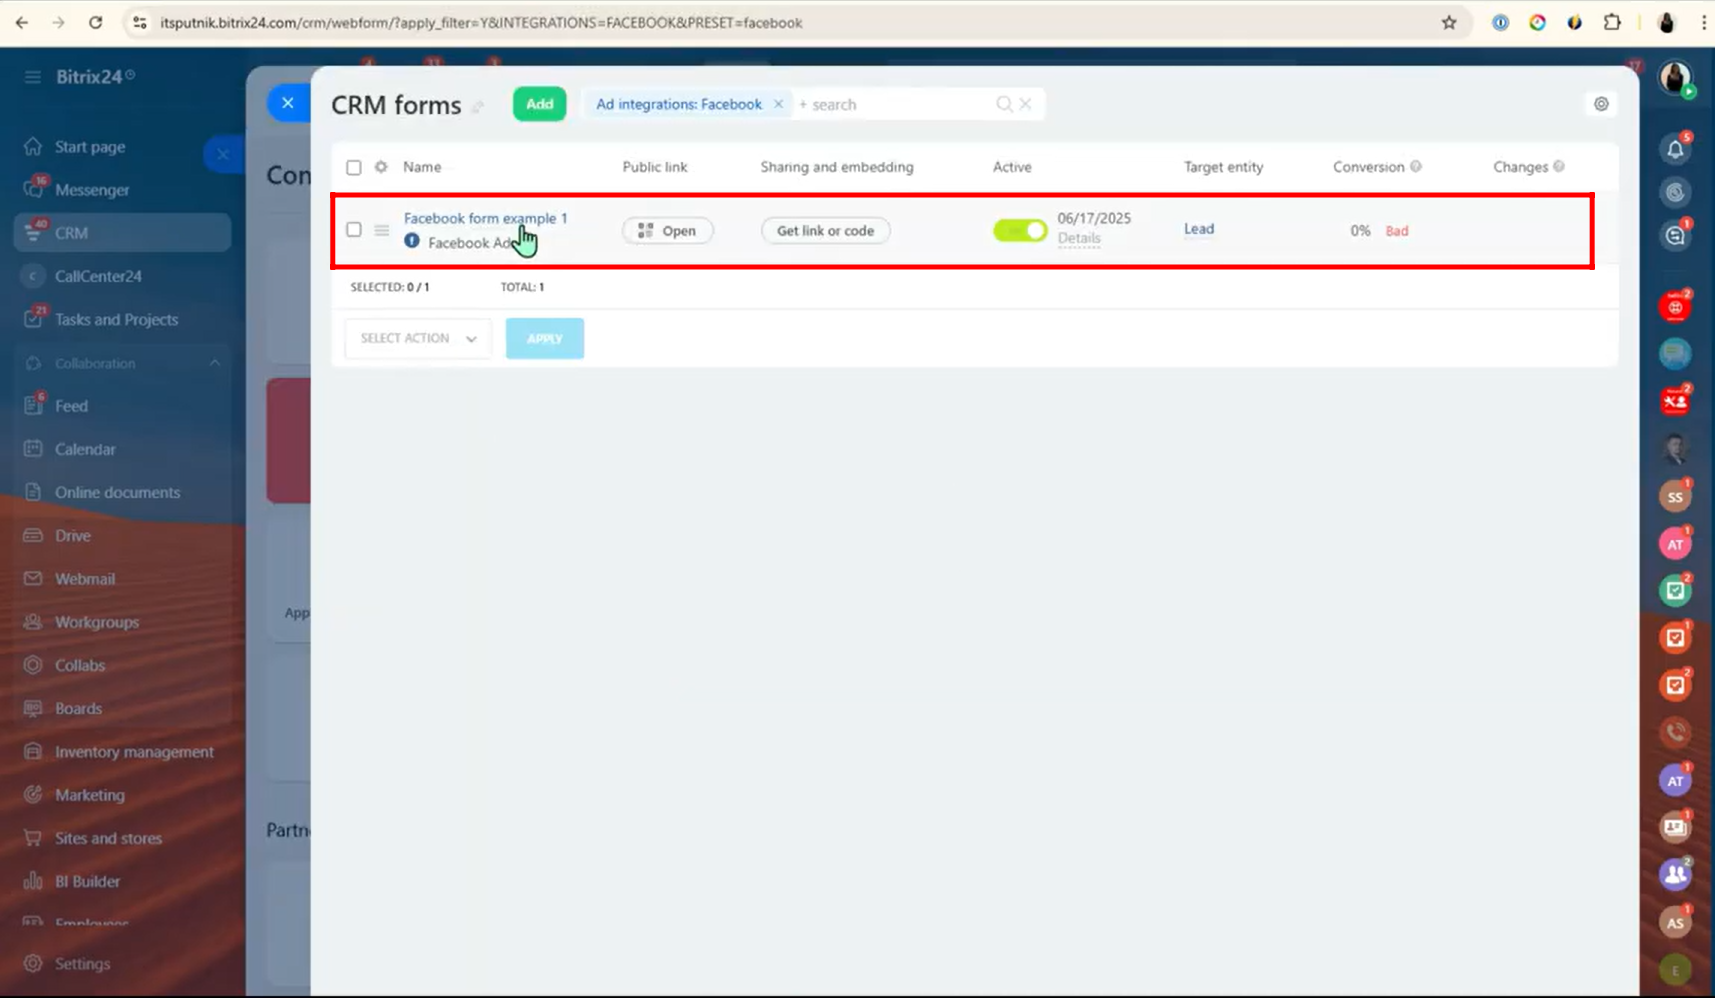
21. Now you can view the configured form inside Bitrix24. From here, you can access the public link, share the form, and monitor conversion statistics such as views, submissions, and overall performance—making it easy to track how well your lead generation efforts are working.
If you need help with any of the configurations or want expert assistance setting up your CRM integrations, feel free to contact us here — our team at EMCSoft is ready to support you!
“You can also watch this video on Youtube”