| 1348 Views | admin

This guide walks you through the process of configuring and managing forms effectively within your system. It covers everything from submission settings to hidden field values, ensuring that data collection remains accurate and efficient. Each step is explained with practical examples so you can clearly understand how the setup works in real use cases.
You’ll see how post-submit actions can be customized, such as allowing users to submit the form again with a single click. This flexibility ensures that multiple entries can be added quickly without starting from scratch. Additionally, hidden field values demonstrate how you can capture important data, like lead sources, without asking the user to fill those details manually.
Automation rules further enhance the process by updating records automatically based on conditions you define. For instance, a lead’s name can be modified if it matches a specific source, helping keep your database organized. These examples highlight how each configuration ties directly into day-to-day business requirements.
Lastly, the callback option ensures that submitted forms can connect with phone-based services. By assigning a configured number and adding a message to be spoken before connecting, you maintain clear communication between your team and the contact. Together, these steps create a consistent and reliable form management workflow.
Detailed Instructions are given below
1. Open any form you have created for testing, go to the “Agreements” section, and click “Select user agreement” to attach a consent agreement that was set up earlier.
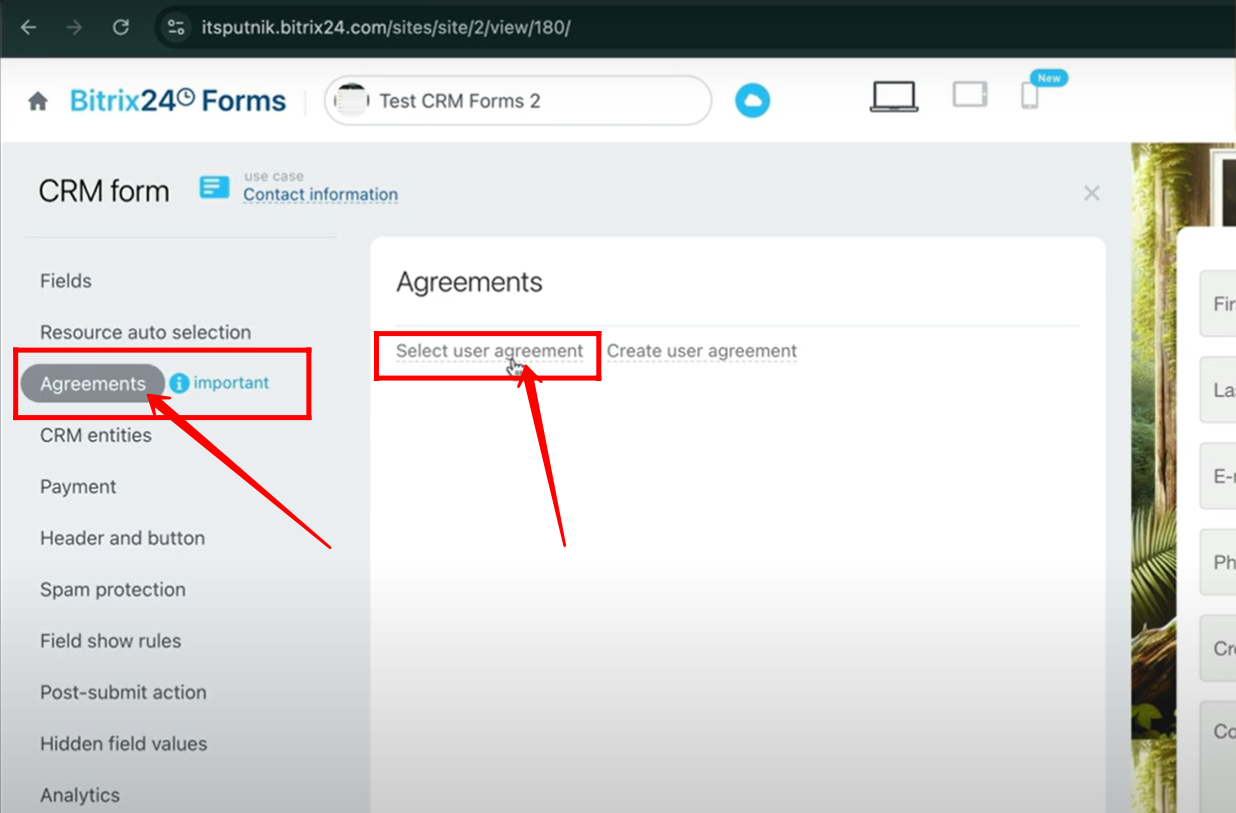
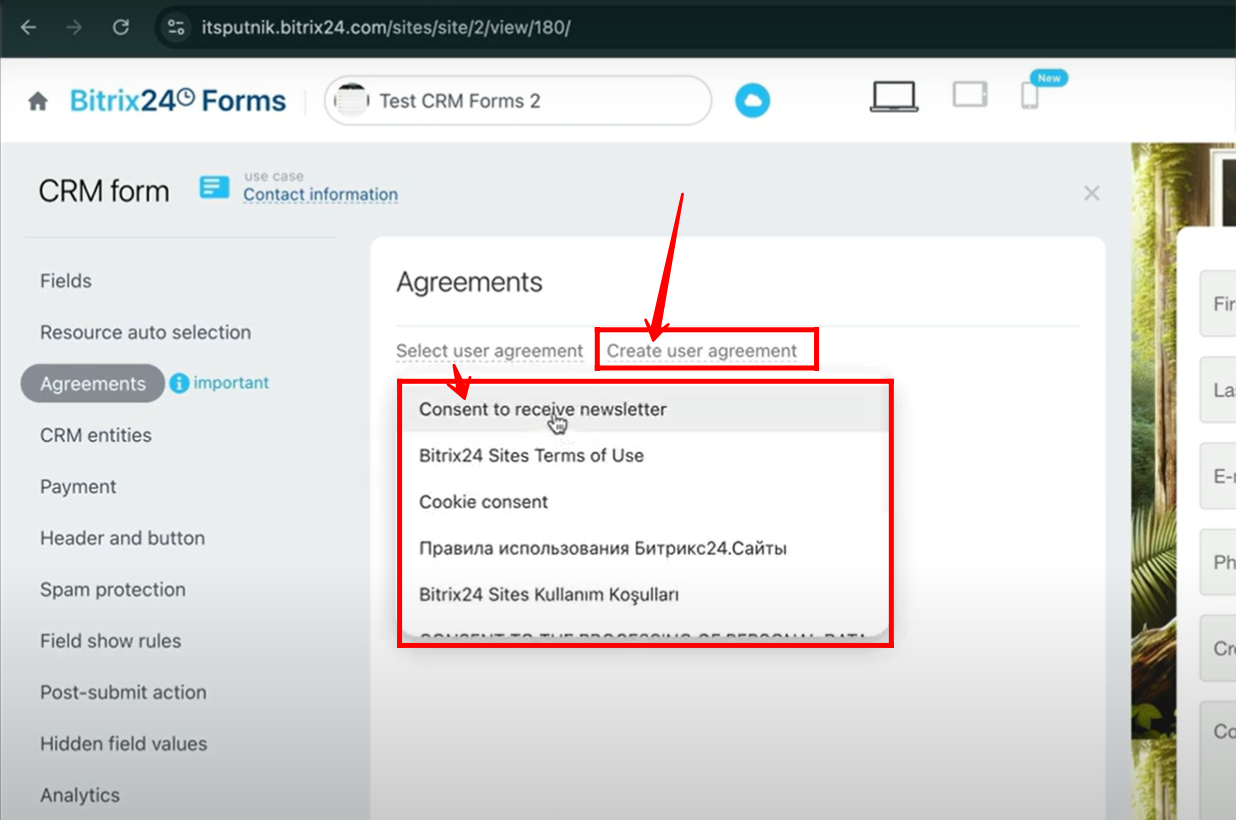
2. Choose from the listed agreement consents by their titles, or click “Create User Agreement” if you want to set up a new consent agreement.
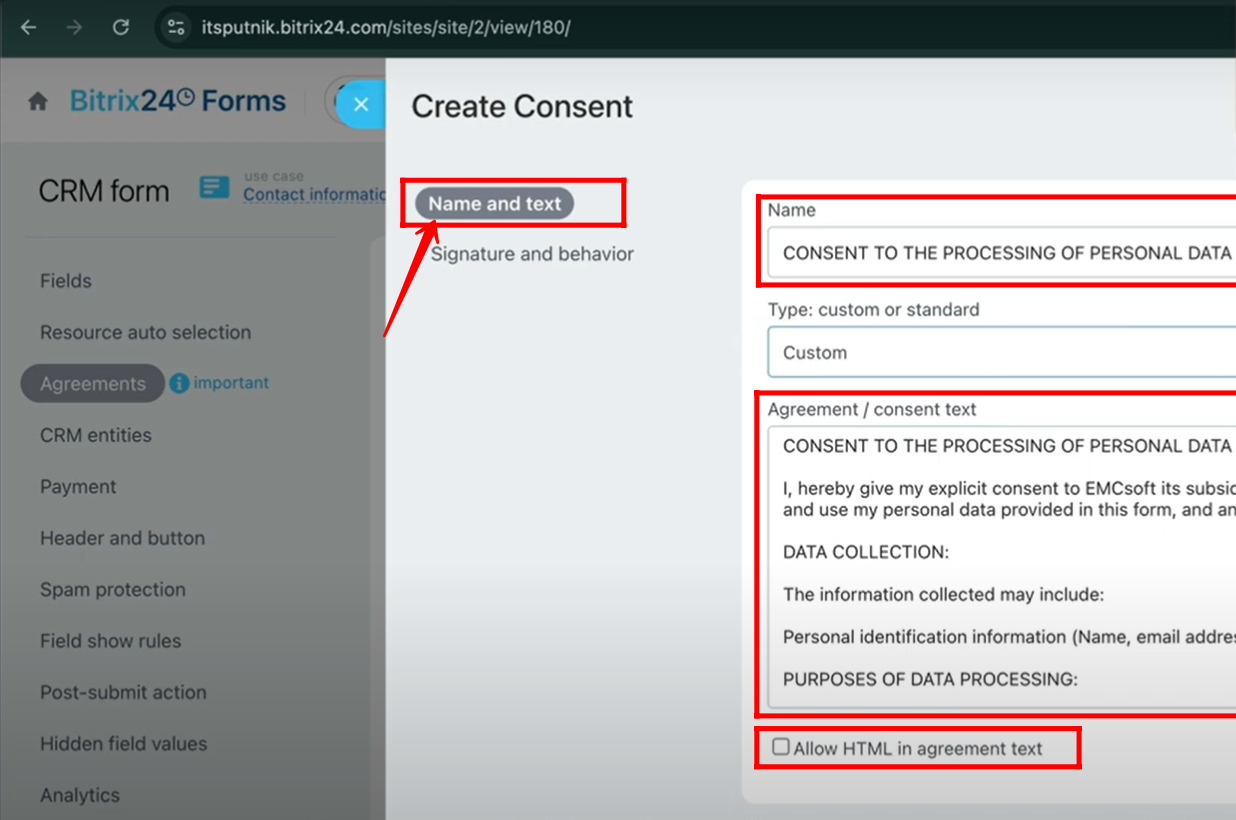
3. To create a new agreement, open the “Name and Text” tab. Enter the agreement name, choose the type (custom or standard). If you select custom, provide the consent text, and optionally enable HTML in the agreement text.
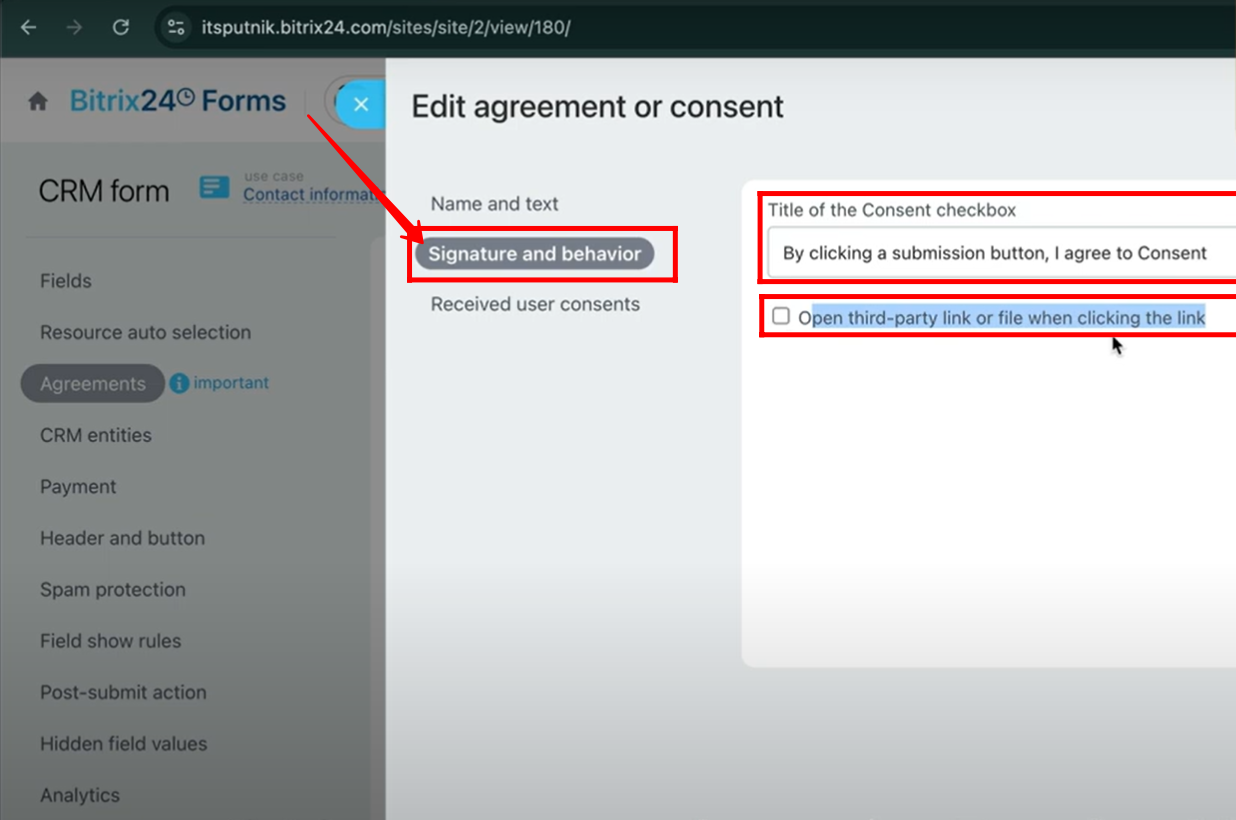
4. In the “Signature and Behavior” tab, enter the title for the consent checkbox. If needed, tick the option that allows a third-party link to open when the user clicks the link.
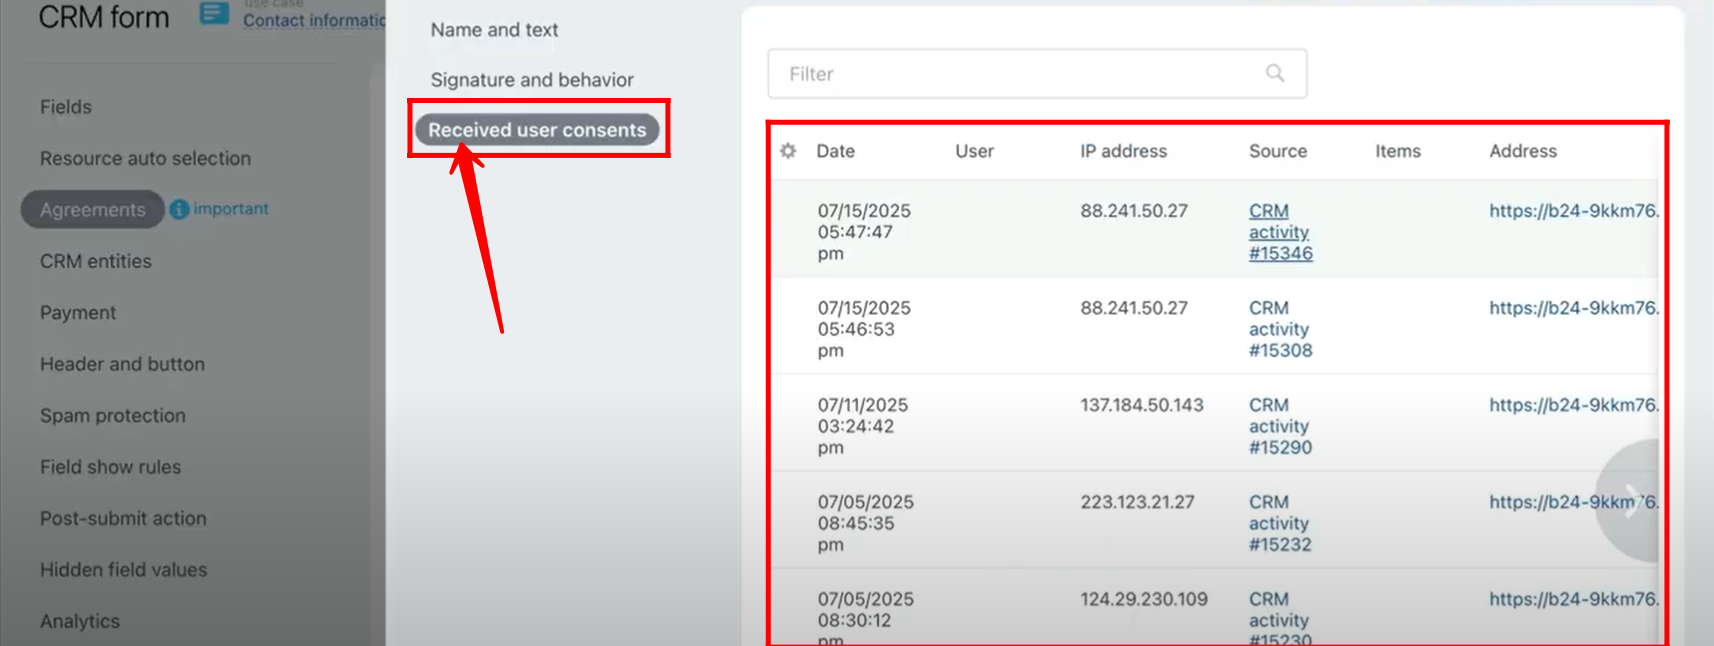
5. In the “Received User Consents” tab, you can view a detailed list of user consents. This includes information such as the date, IP address, source, consented items, user details, and the form URL address link.
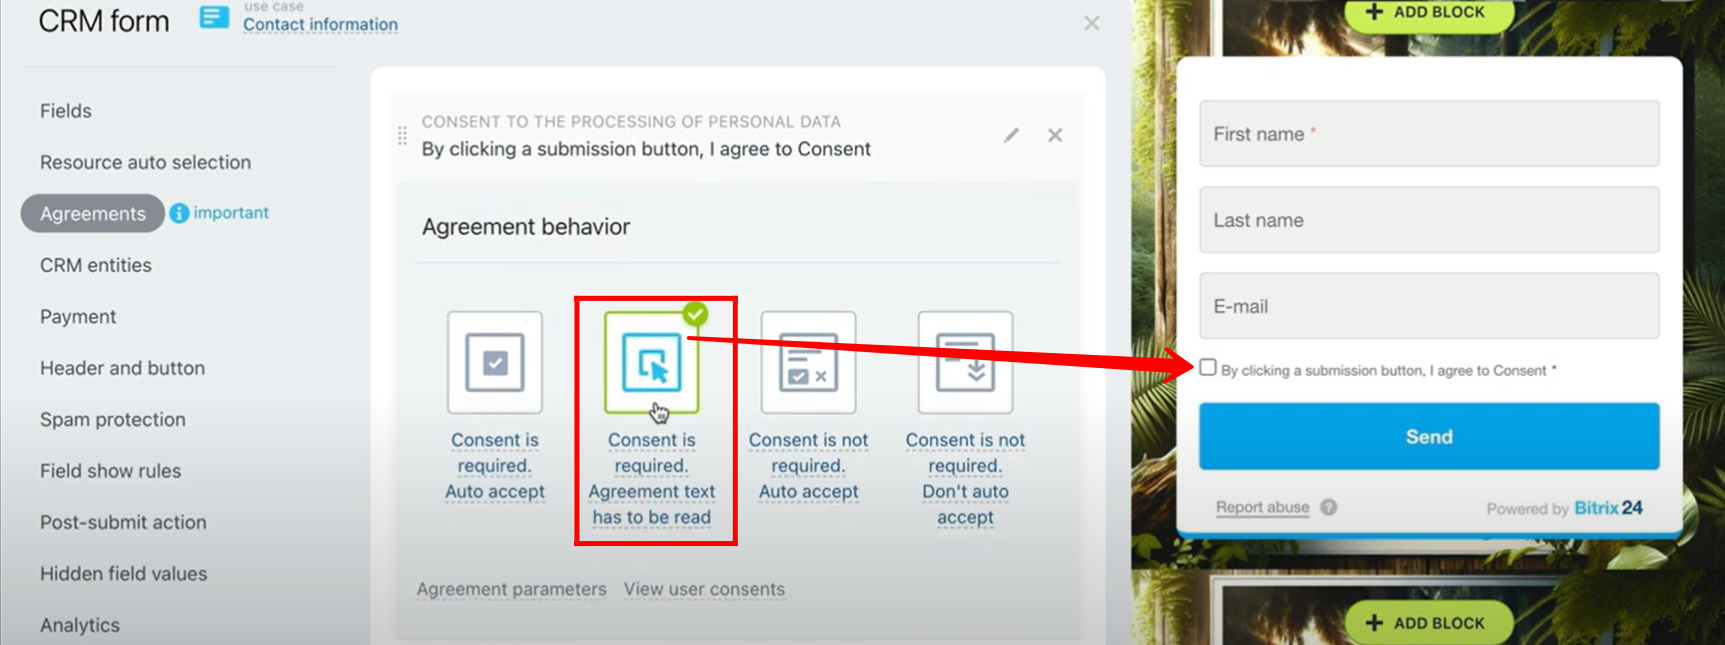
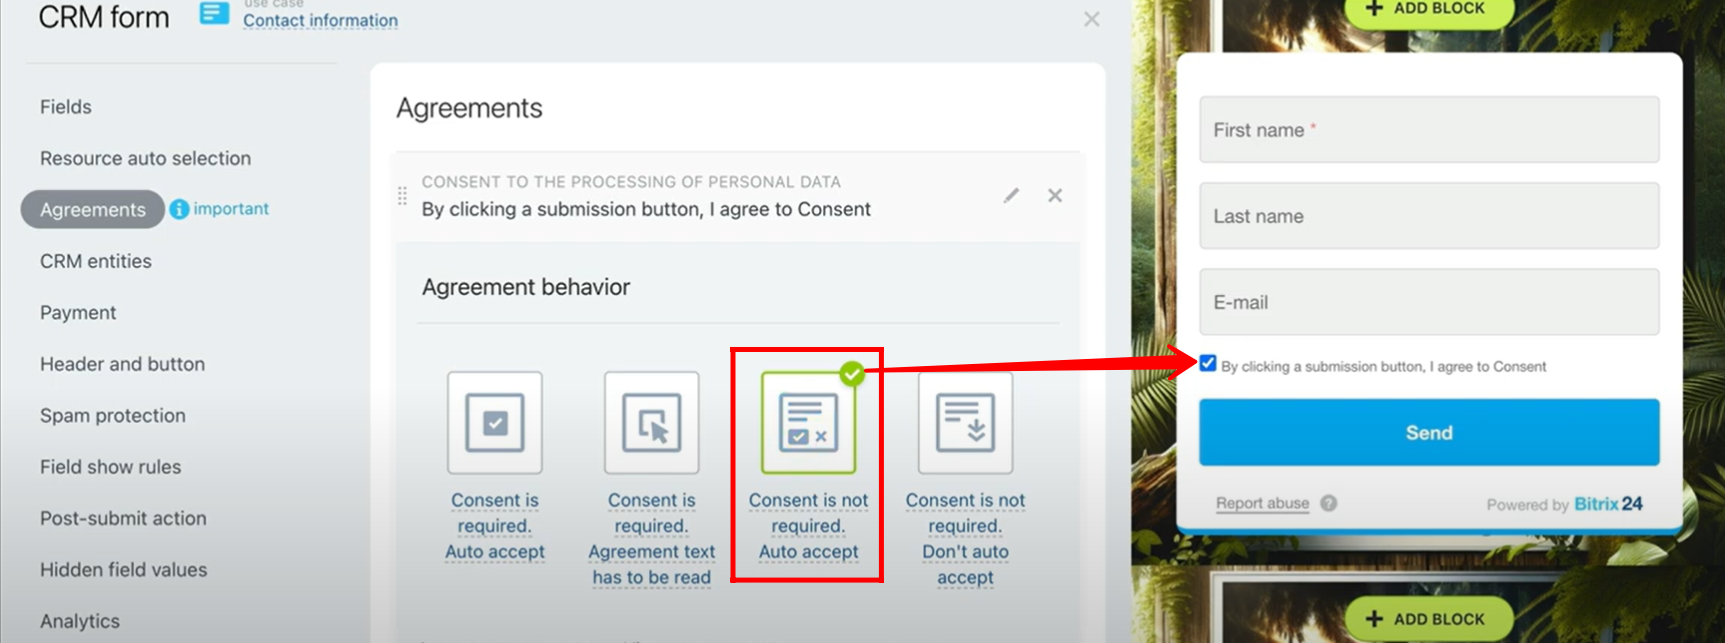
6. After choosing the consent, switch to edit mode and set the agreement behavior. For now, select the first option: “Consent is required, Auto accept.”
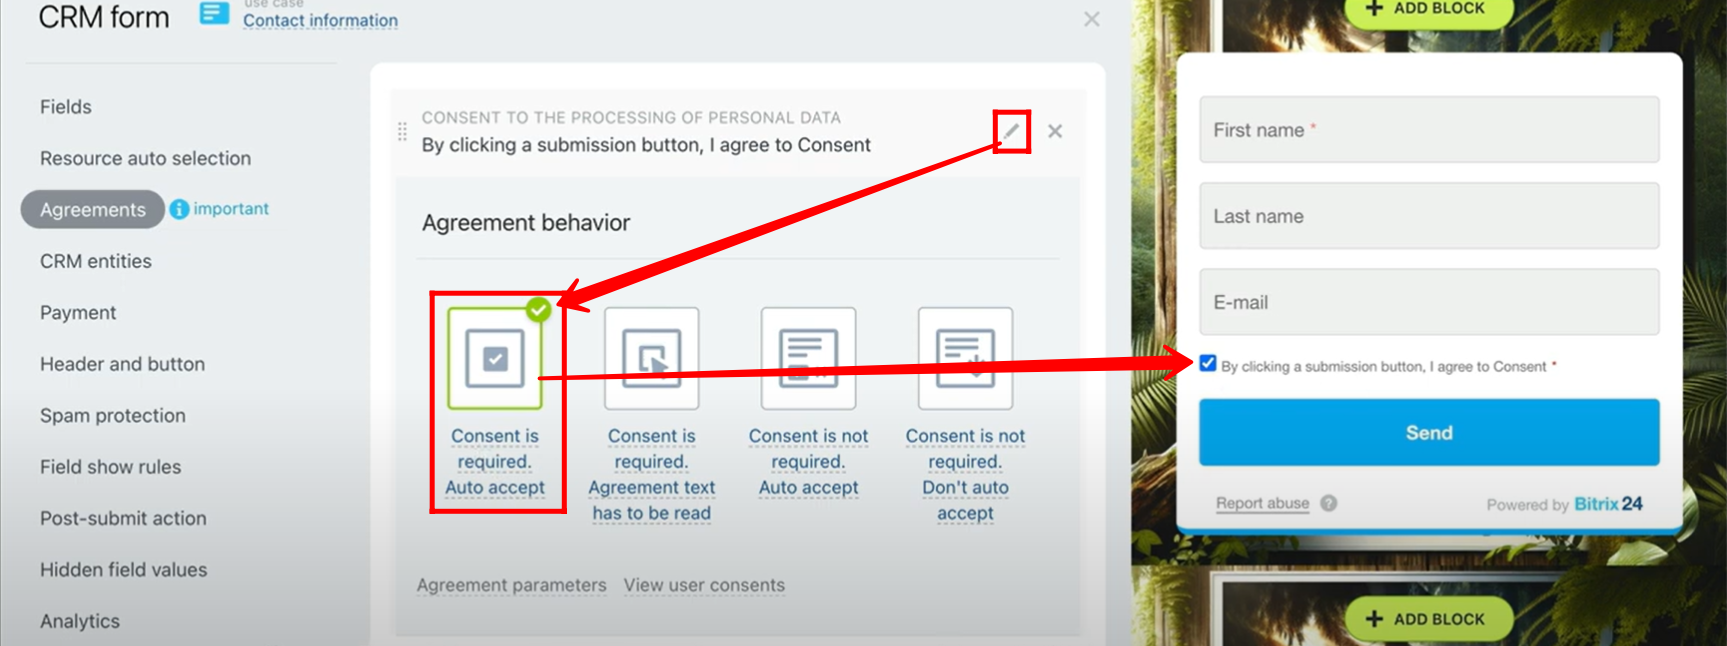
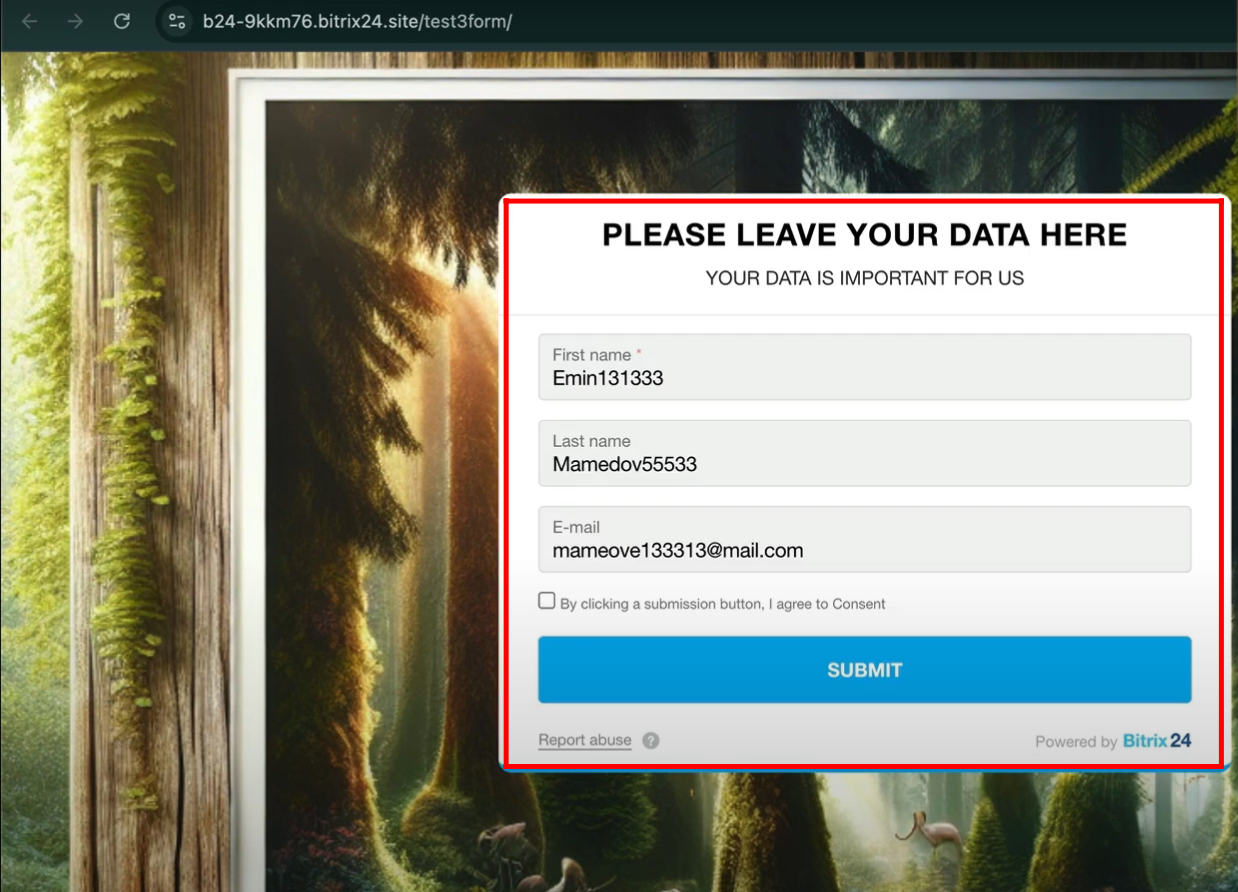
7. Open the form, and you will notice that the consent checkbox is already checked by default. Click on the consent title to view the full consent text.
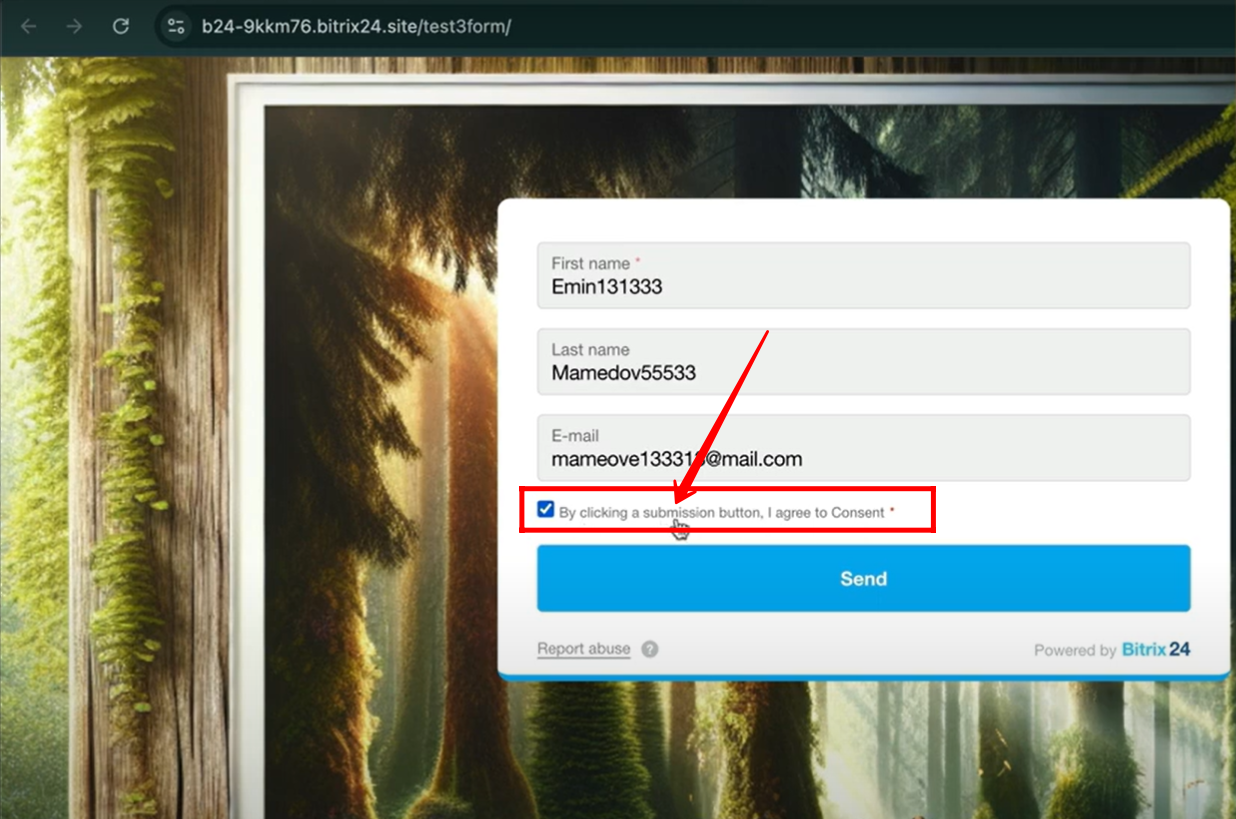
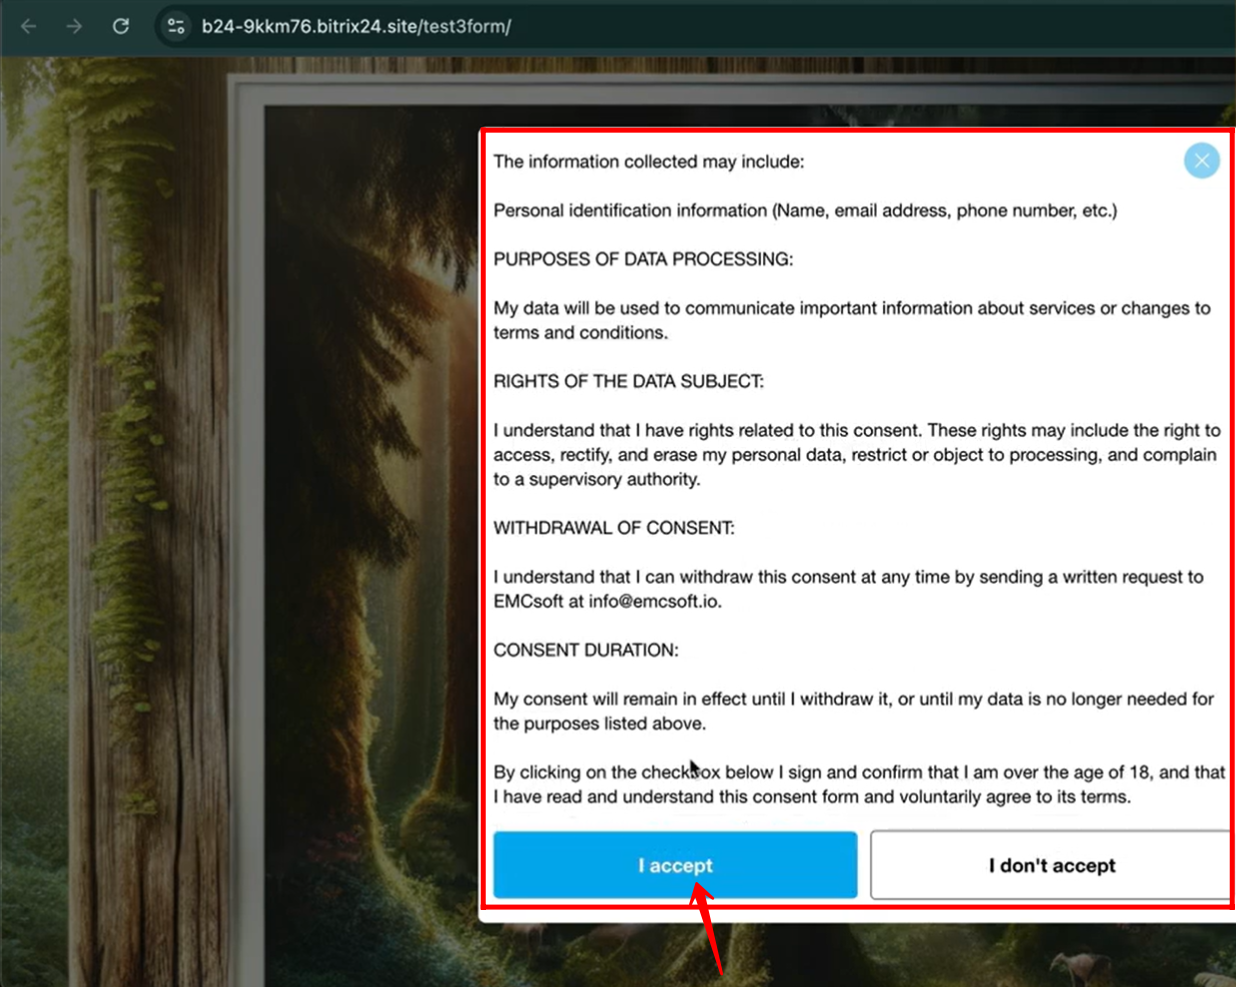
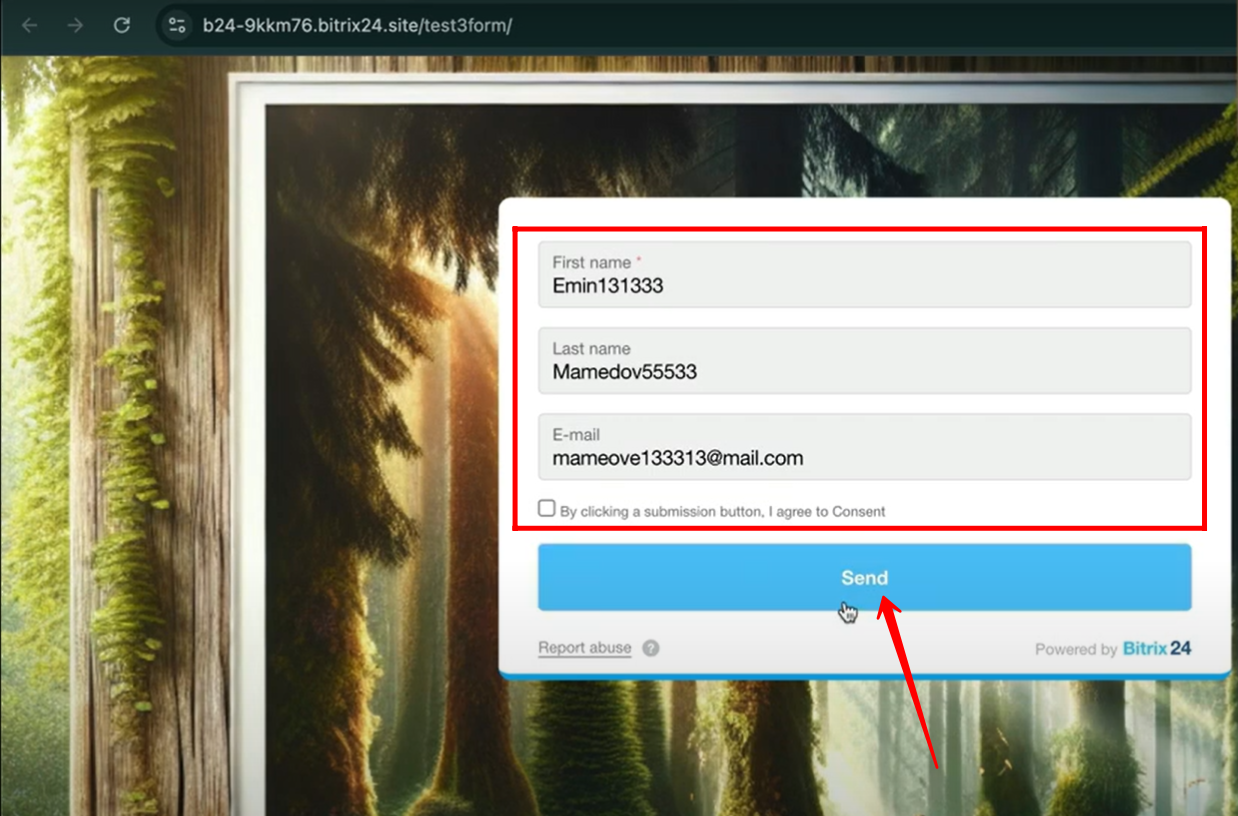
8. Here, you will see two options — either to accept or reject the consent. Based on the configuration, you will not be able to submit the form without accepting the consent since it is marked as required.
9. Now, choose the second option in the agreement behavior settings — “Consent is required, agreement text has to be read.” This means that before submitting the form, users must open and review the agreement text to confirm their consent.
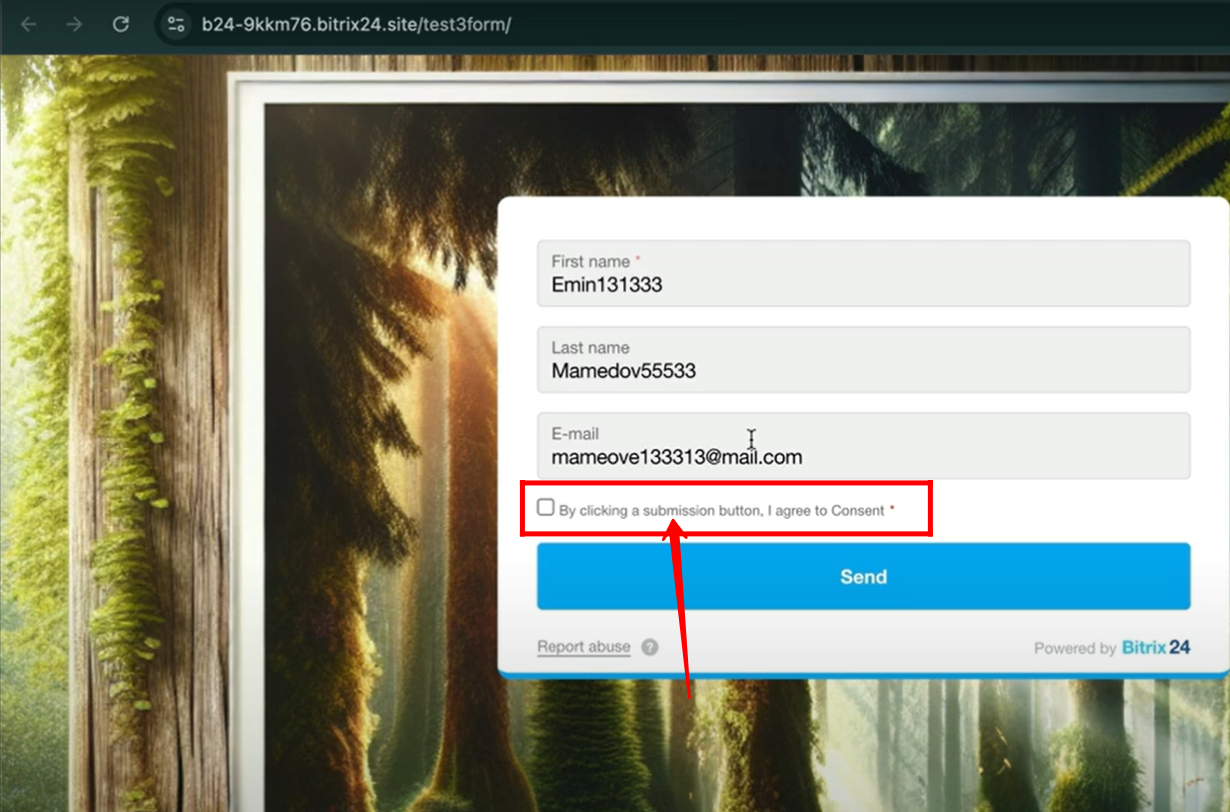
10. When you open the form, you will notice that the consent checkbox is unchecked by default. You cannot mark the checkbox until the agreement text has been opened and read. To proceed, click on the consent title to display the full consent text.
11. After opening the consent text, scroll through and read the entire agreement. Once the full text has been reviewed, the option to accept the agreement becomes available.
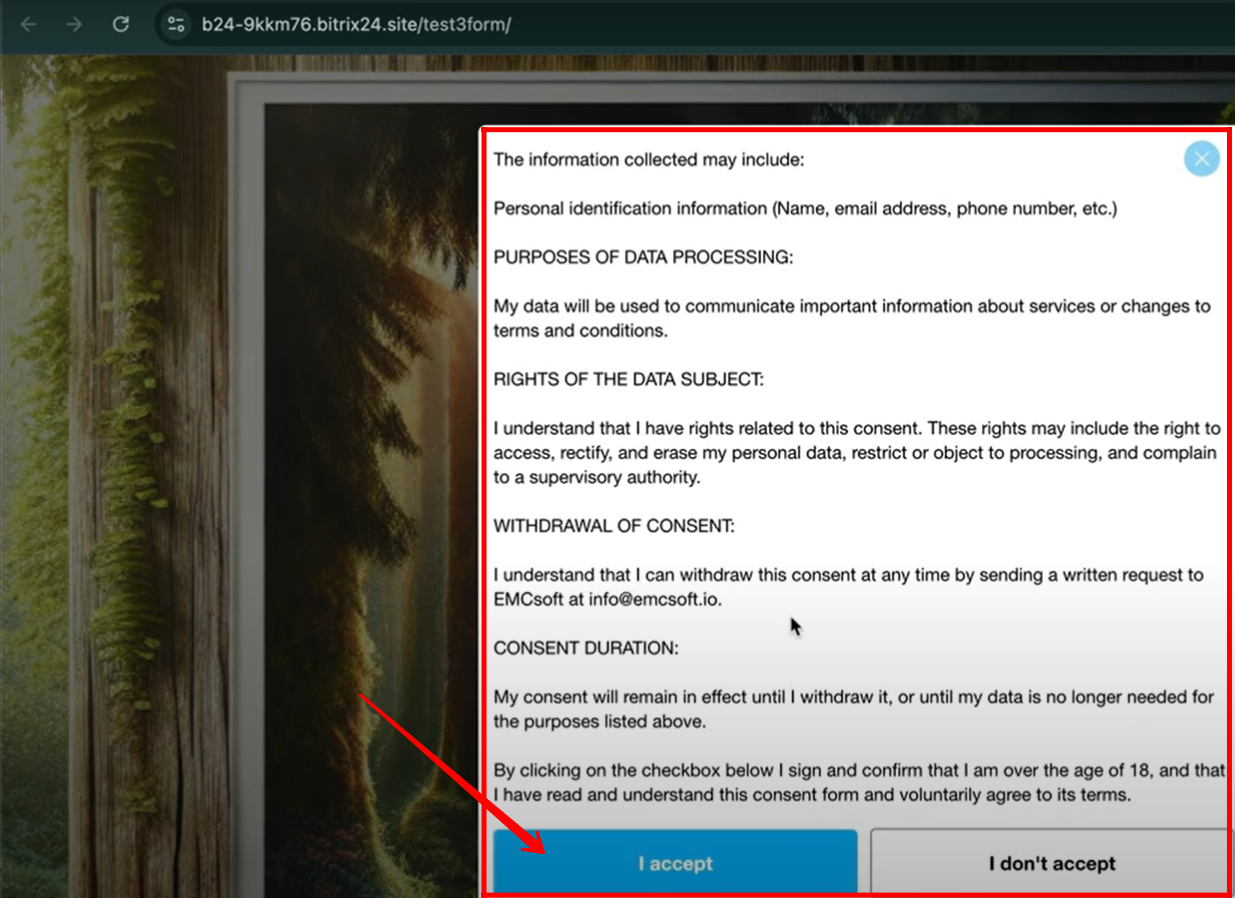
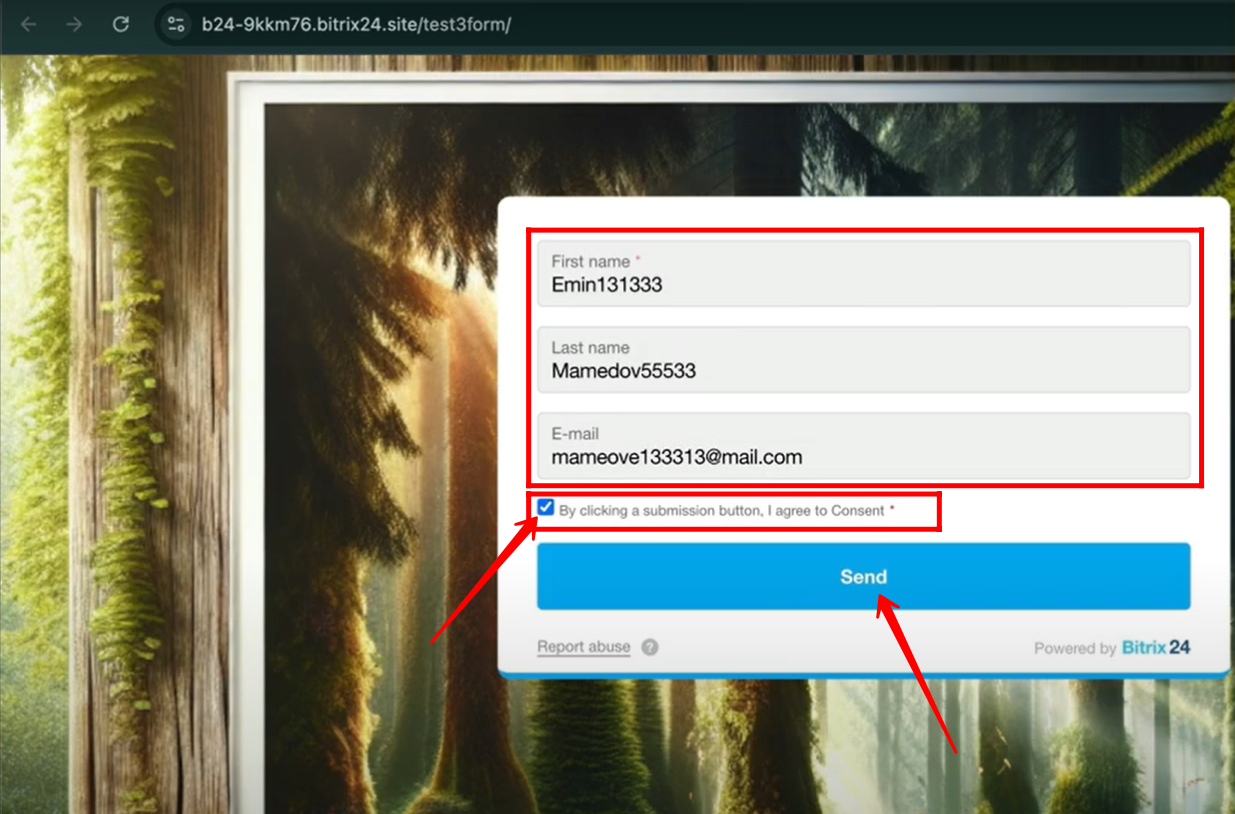
12. You can then check the consent box to confirm acceptance and proceed with submitting the form.
13. In the edit mode of agreement behavior, choose the option “Consent is not required, auto accept.” This setting means the form will automatically treat the consent as accepted, and the user will not see or need to interact with any consent checkbox while filling out the form.
14. When you open the form with this setting, the consent checkbox will appear already checked by default. However, the user has the option to uncheck it if they choose, and they can still successfully submit the form even without keeping the consent checked.
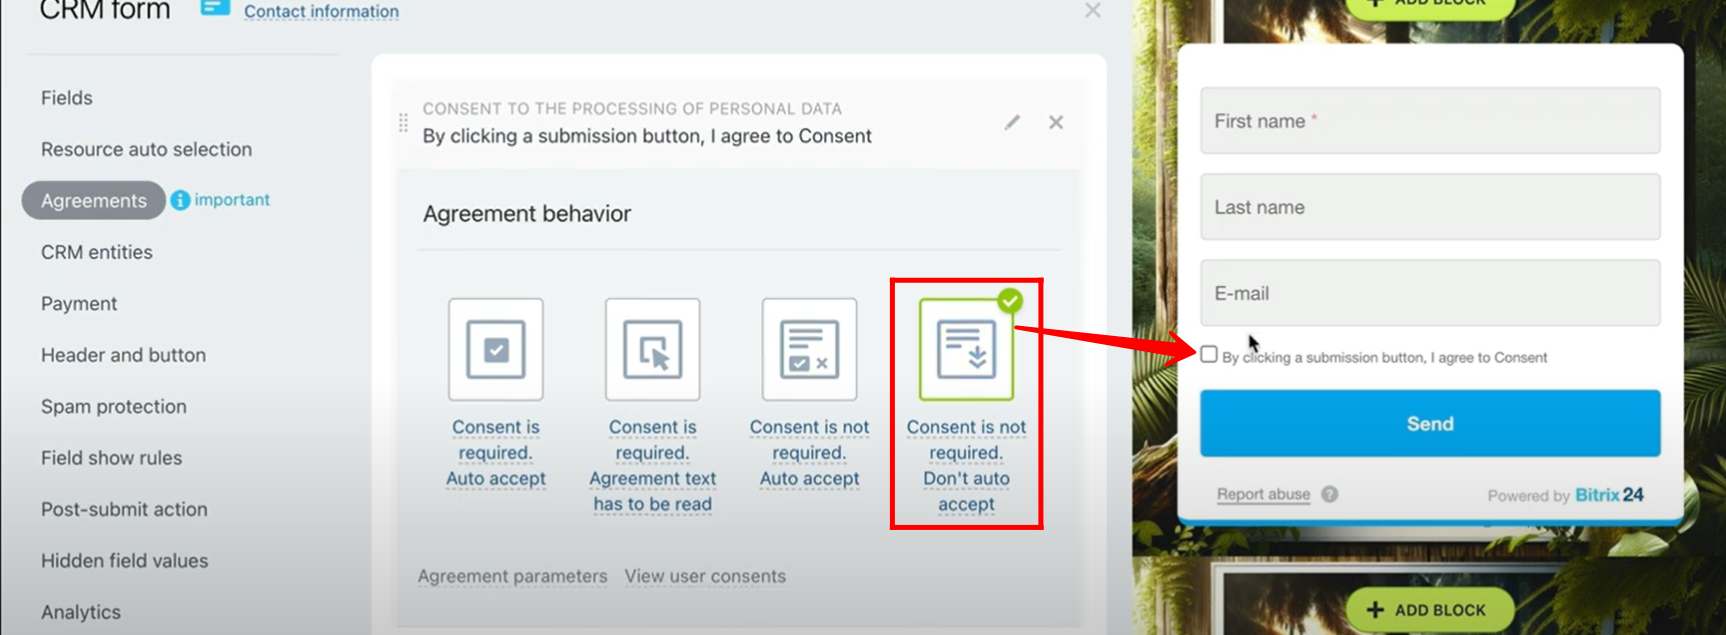
15. When you select “Consent is not required, Don’t auto accept” and open the form, the consent checkbox will be unchecked by default. Since consent is not required in this mode, the user can either check or leave it unchecked and still submit the form without any restrictions.
16. Navigate to the “Header and Button” tab in the form configuration. Here, you can add a form title and a subtitle (with the option to hide the subtitle if not needed). You can also customize the submit button text to match your form’s purpose.
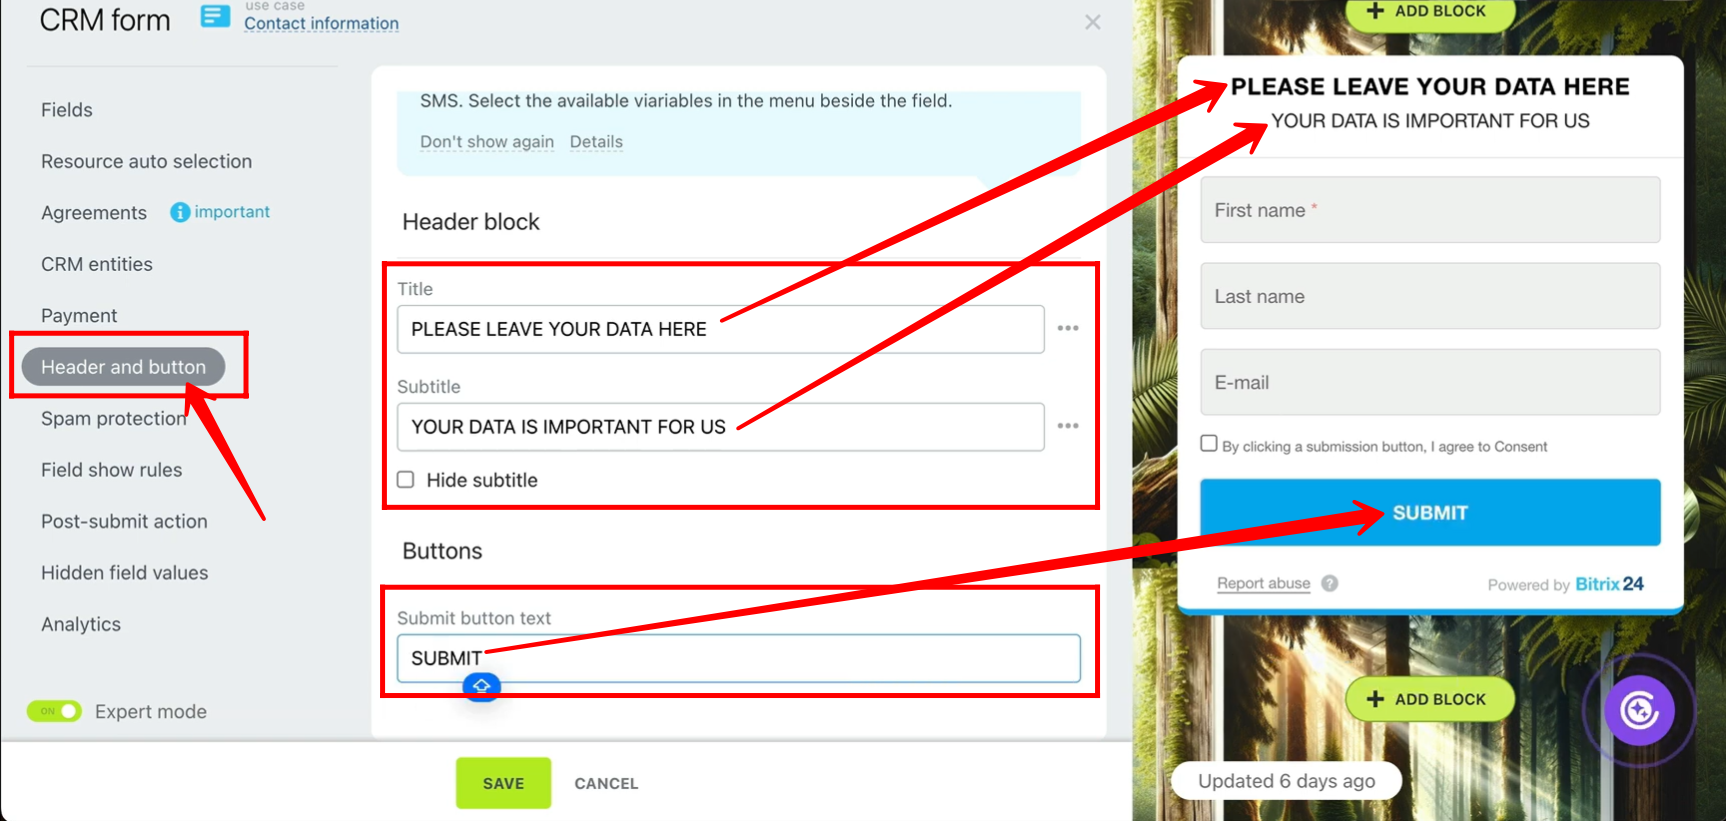
17. Now open the form, and you will see the title, subtitle (if not hidden), and the customized submit button text exactly as you configured in the Header and Button tab. Verify that all details are displayed correctly.
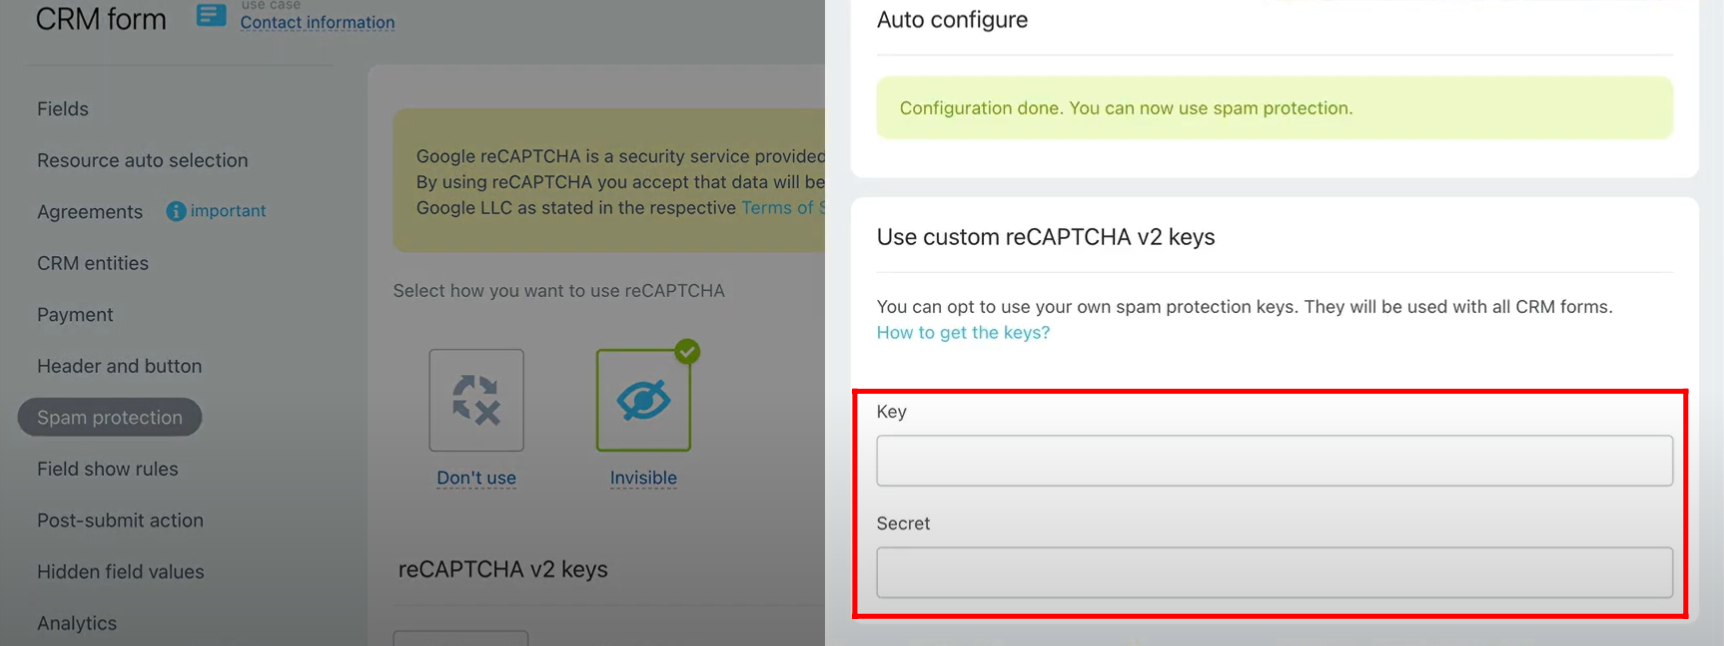
18. Inside Form Configuration → Spam Protection, with “Invisible” reCAPTCHA selected, click on “Edit Keys” under the reCAPTCHA v2 Keys section.

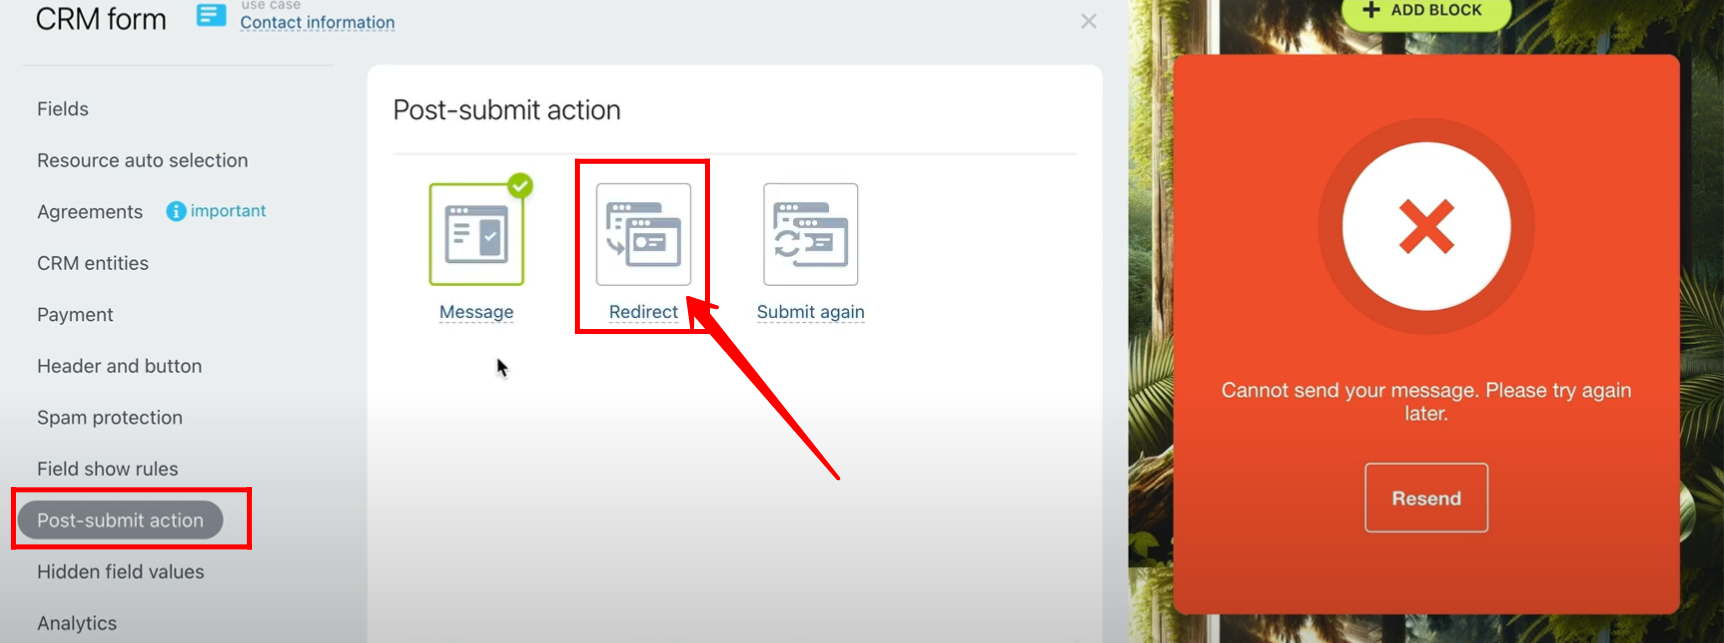
19. Here you can enter or update your Site Key and Secret Key provided by Google reCAPTCHA. Once saved, the invisible reCAPTCHA will be applied to your form for spam protection.
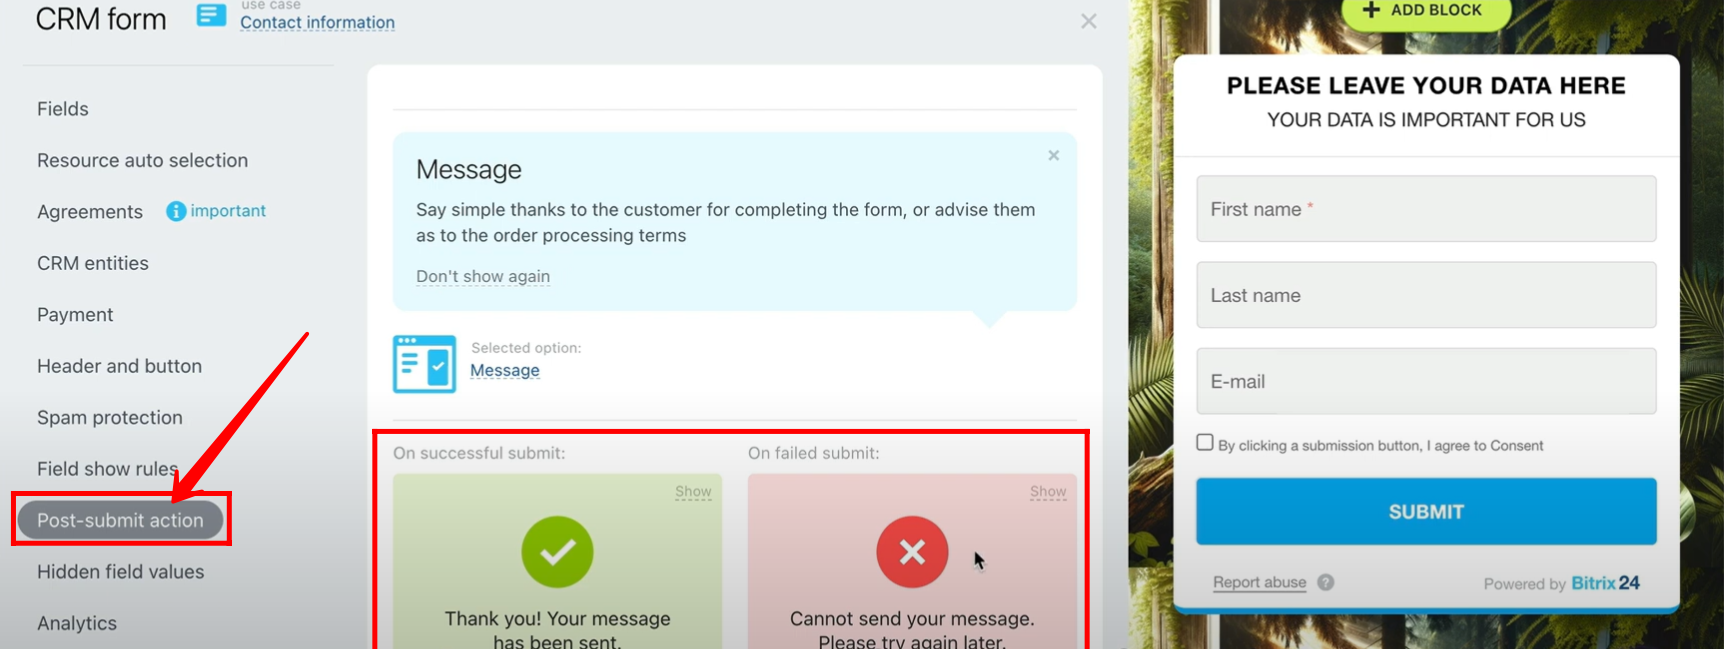
20. Inside Form Configuration → Post-submit action, you can define what happens after a user submits the form:
- On successful submit → configure what users will see (e.g., a success message, redirect to another page, or display a custom view/prompt).
- On failed submit → configure what users will see if the submission fails (e.g., error message, retry instructions, or another prompt).
This allows you to fully control the user experience after submission.
21. In the Post-submit screen configuration, you can edit the displayed text for both successful and failed submissions; for example, during testing, the “On successful submit” green card message was changed from “Thank You! Your message has been sent” to simply “Thank You!”, and in the same way, you can also update the text shown on the “On failed submit” screen.

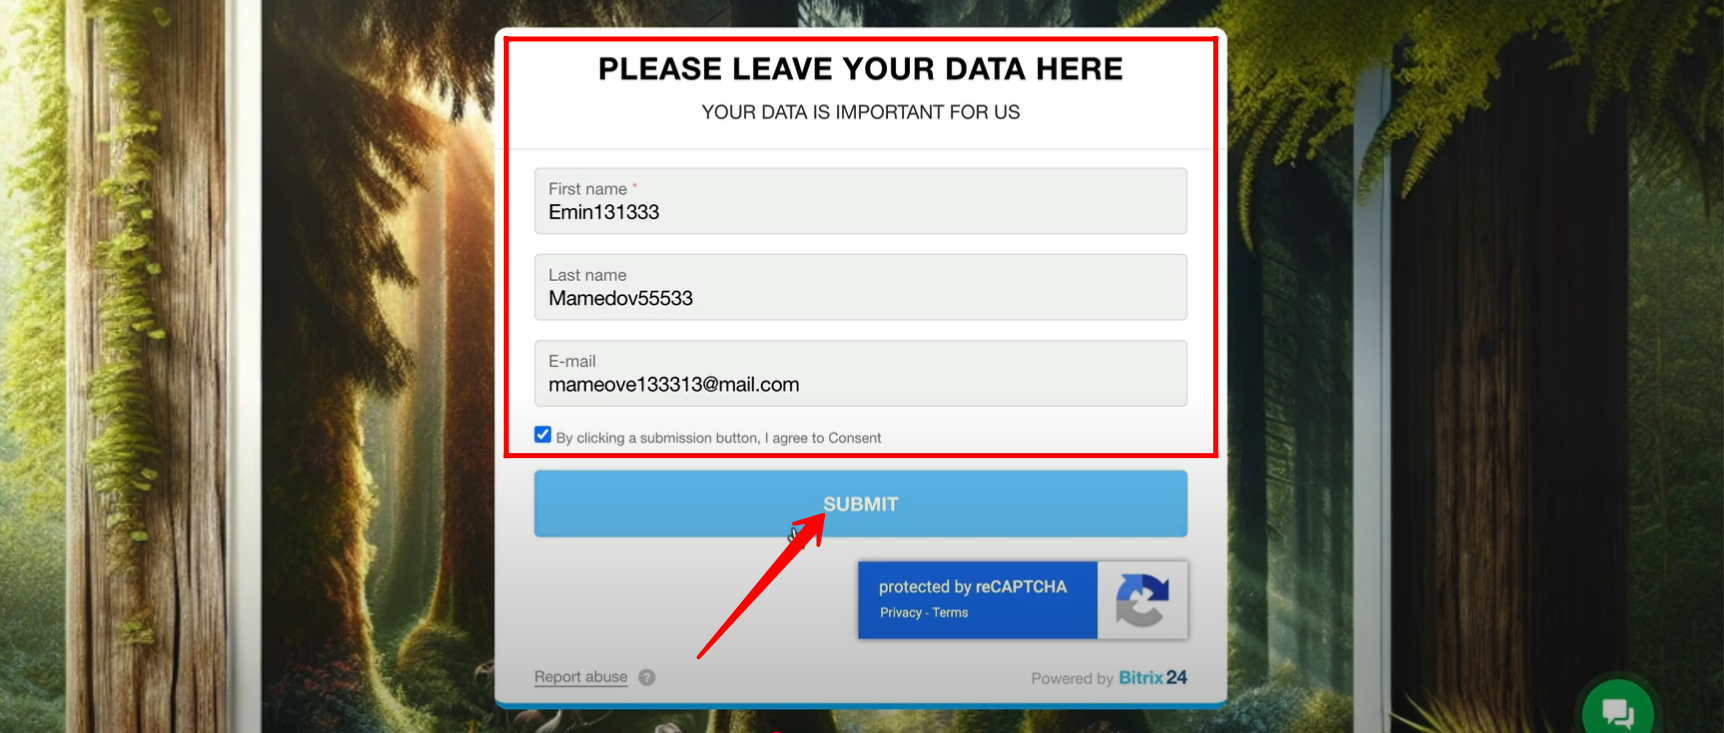
22. Open the form, fill in the required fields, and click the submit button to test the configured post-submit action screen; based on the setup, you’ll either see the customized success message (e.g., “Thank You!”) or the failed submit screen if the submission is unsuccessful.
23. You can now see the customized success message displayed as “Thank You!” after submitting the form.

24. In the “Post-submit action” section, we previously explored the “Message” option; now, let’s select the “Redirect” option.
25. In the redirection configuration, the URL “https://emcsoft.io/“ has been added under the “On successful submit” option, while “https://emcsoft.io/about/“ has been set for the “On failed submit” option. Additionally, you can configure a delay before the redirection takes place.
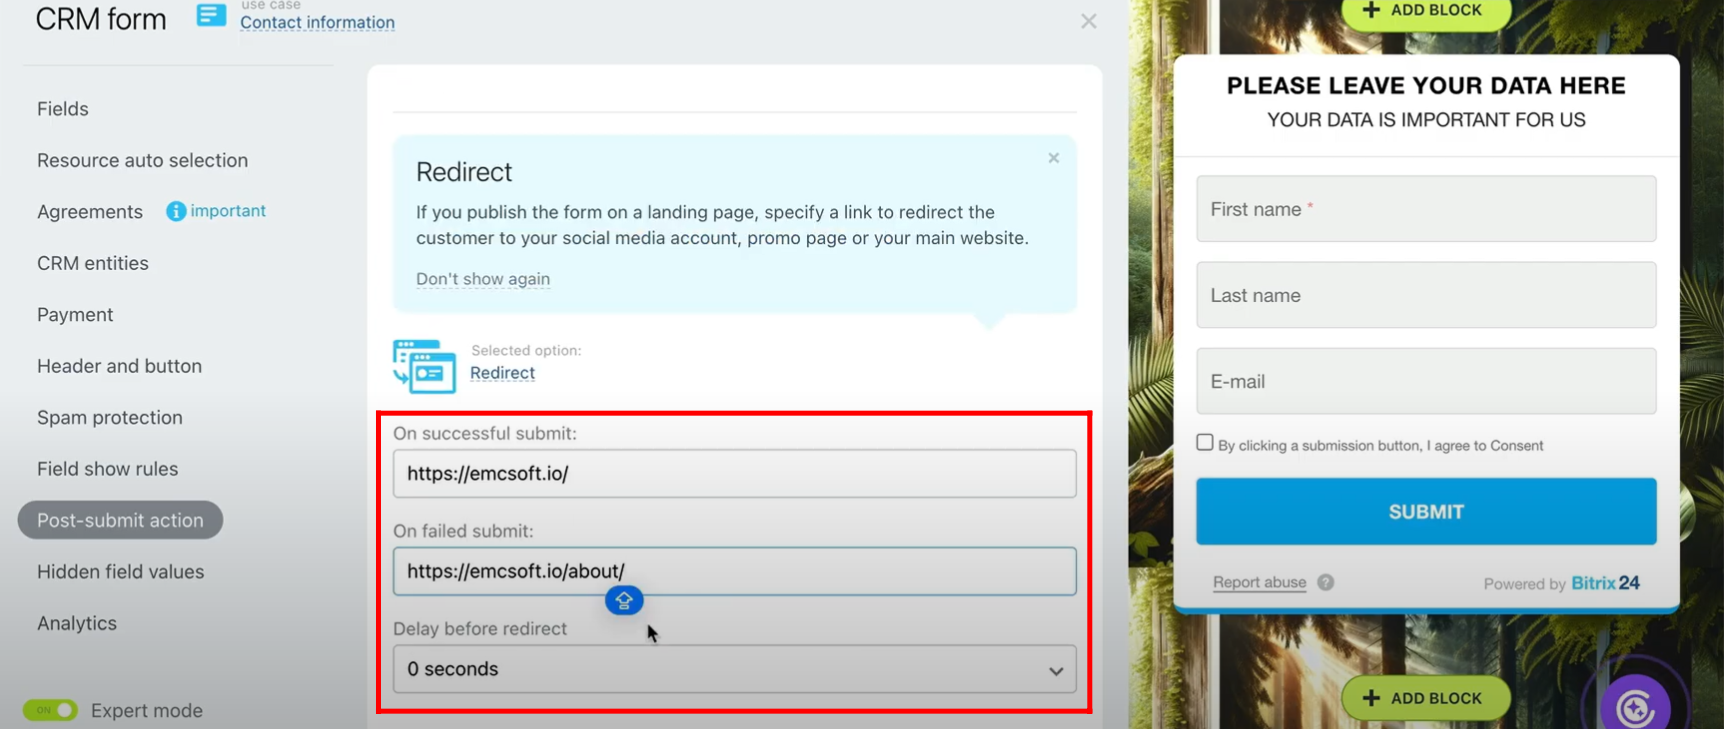
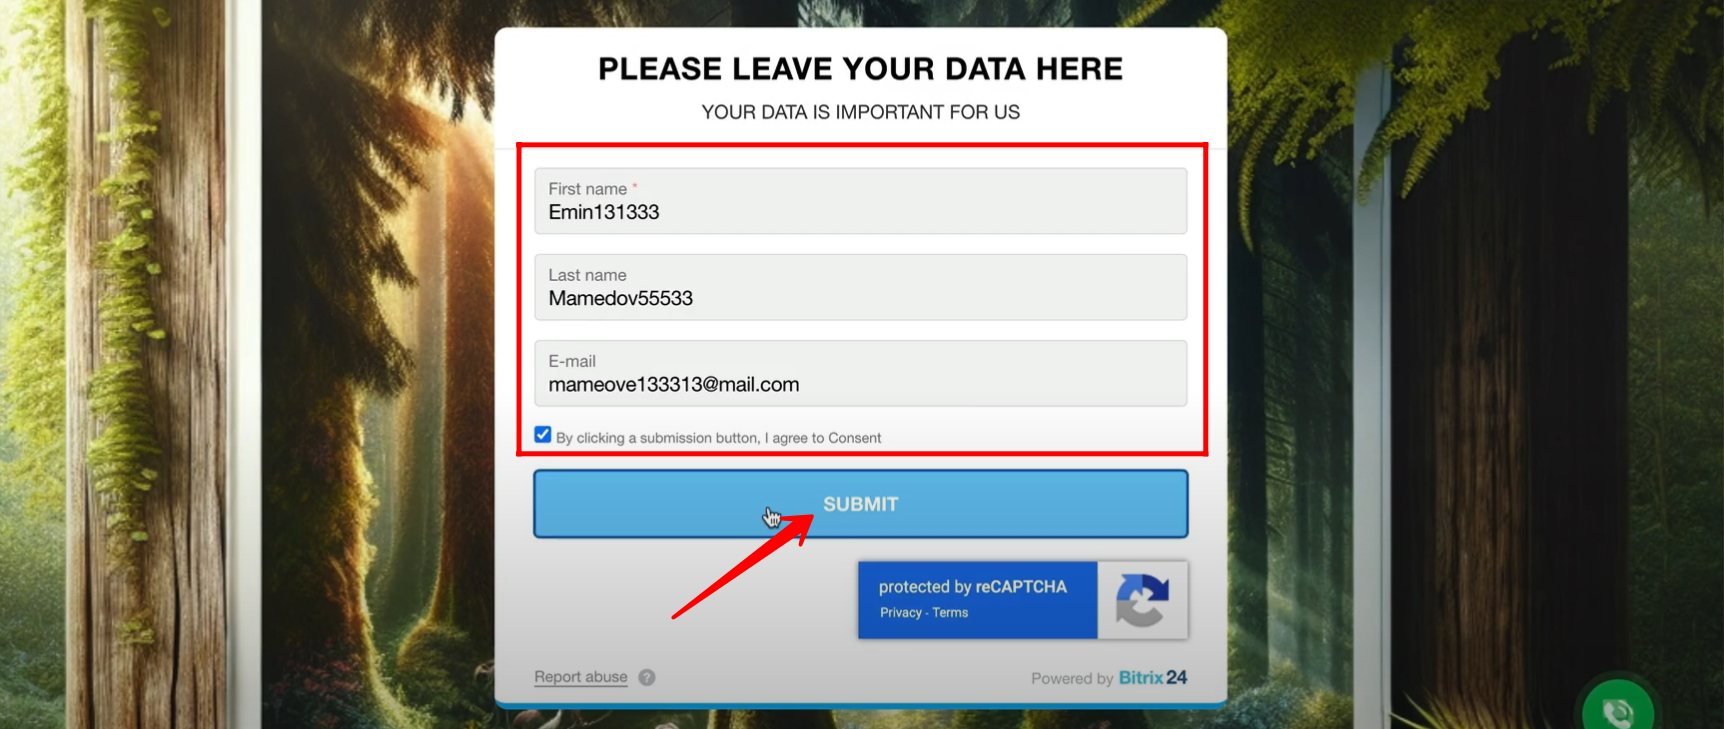
26. Now, open the form, enter the required details, and submit it to verify whether the redirection works as configured.
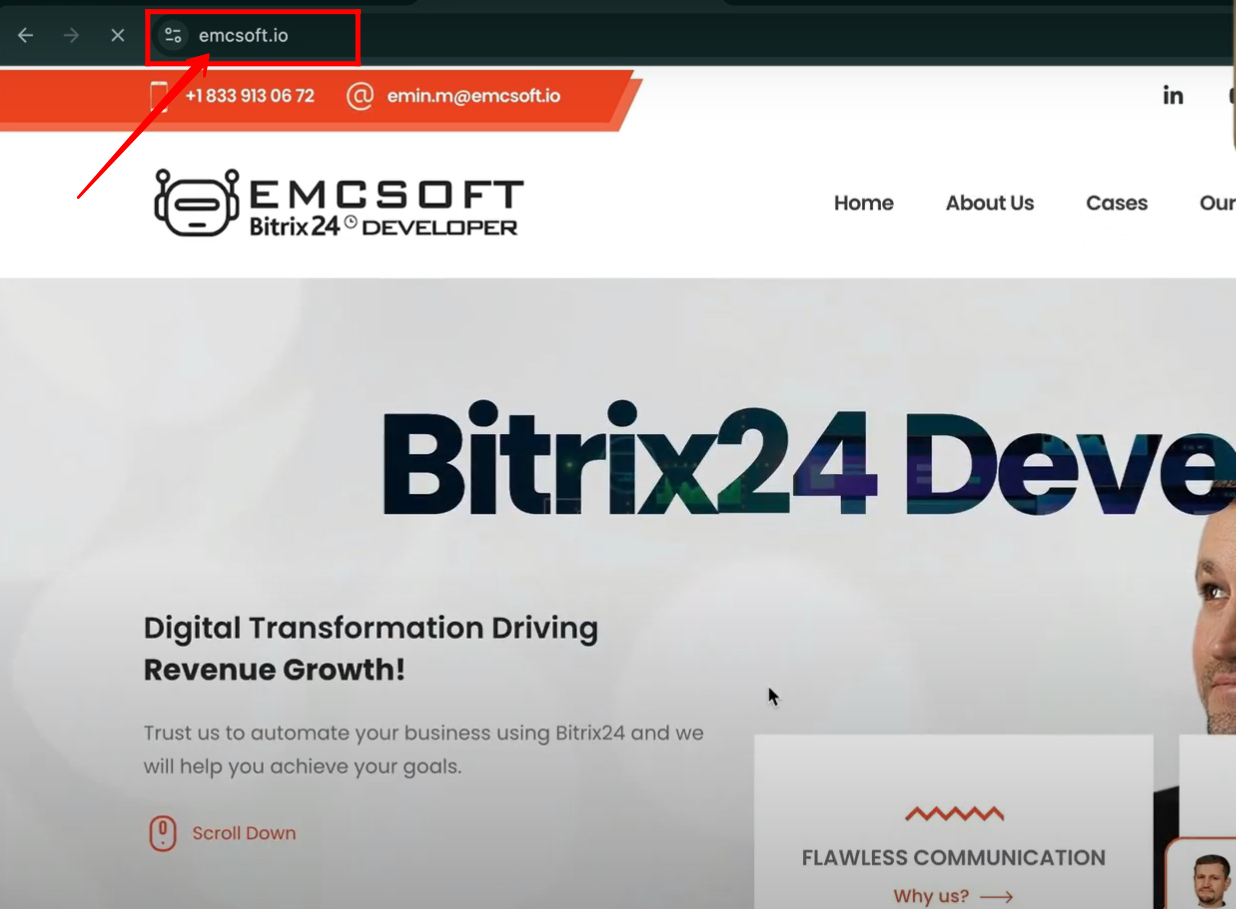
27. After submitting the form, you can see that it successfully redirected to https://emcsoft.io/ as configured.
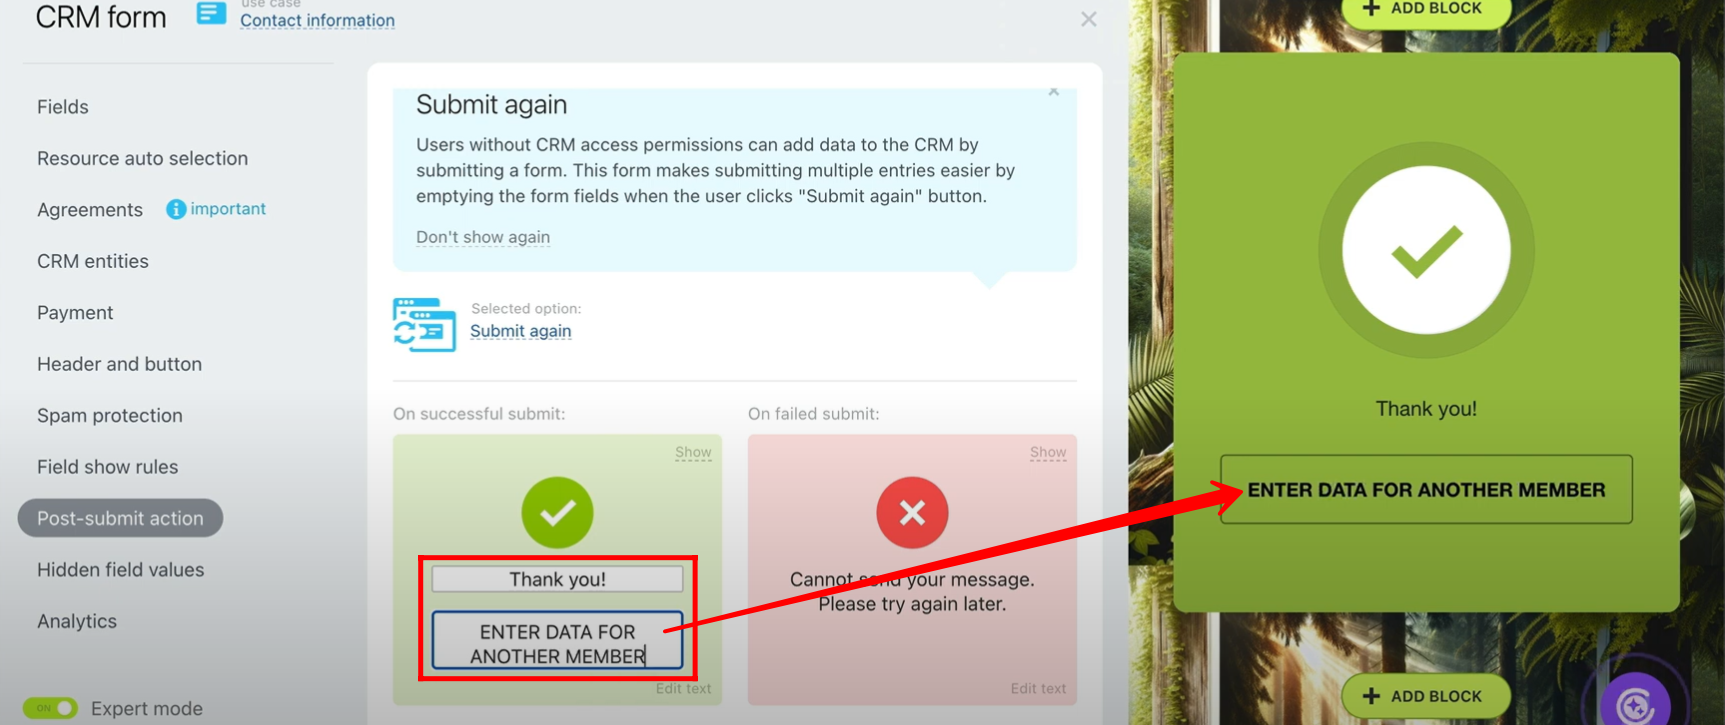
28. Now, go back to the “Post-submit action” tab and select the option “Submit Again” to explore its behavior and configuration.

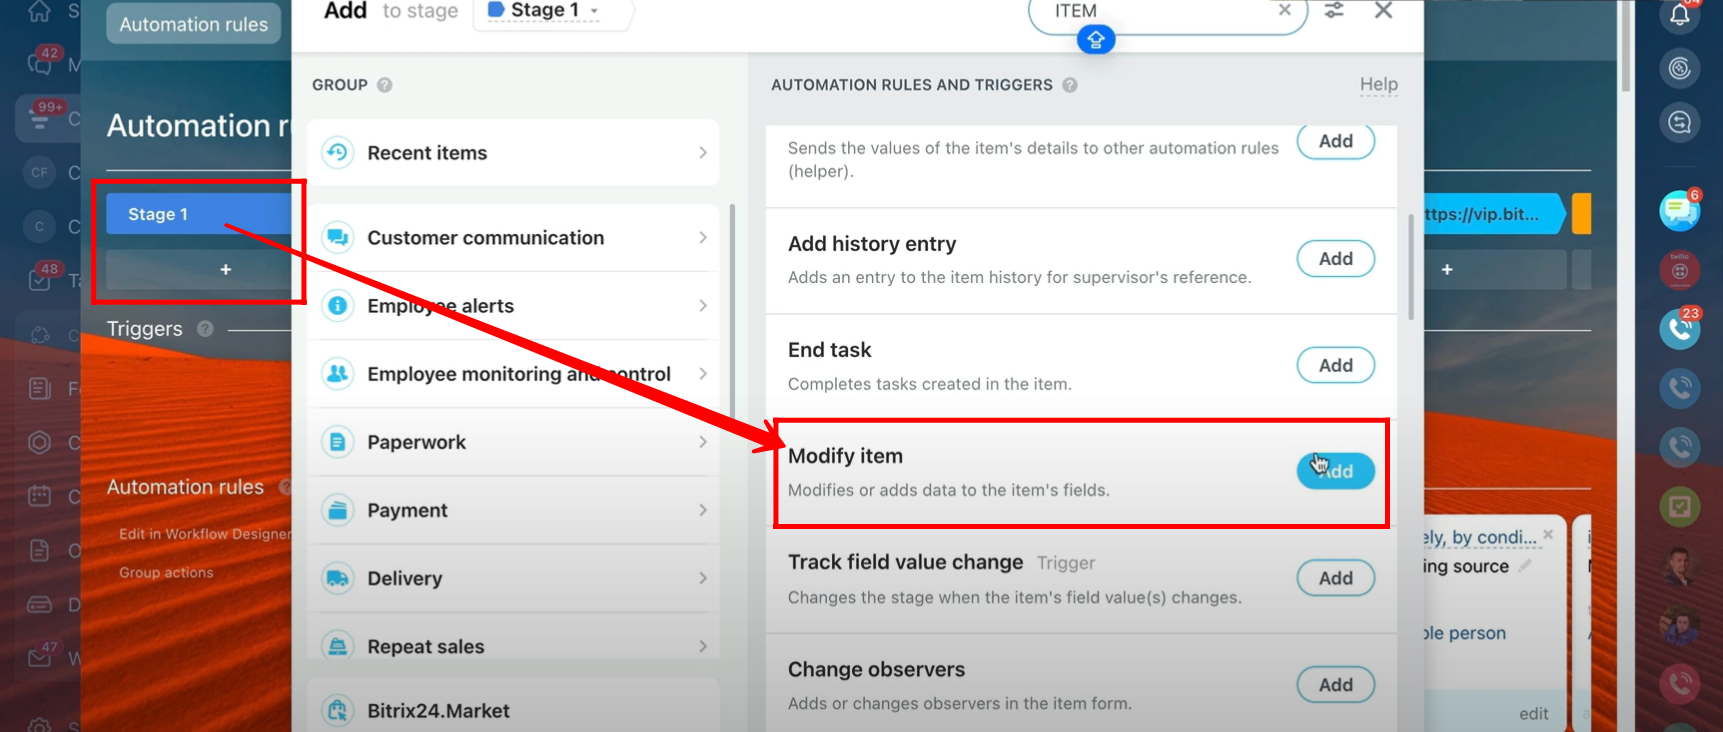
29. In the “Submit Again” configuration window, you can customize both the “On Successful Submit” and “On Failed Submit” messages to allow users to return to the form for another submission, depending on your specific requirements. In this case, the “On Successful Submit” message has been edited: beneath the “Thank You!” text, a button labeled “Enter Data for Another Member” is displayed, enabling users to submit the form again.
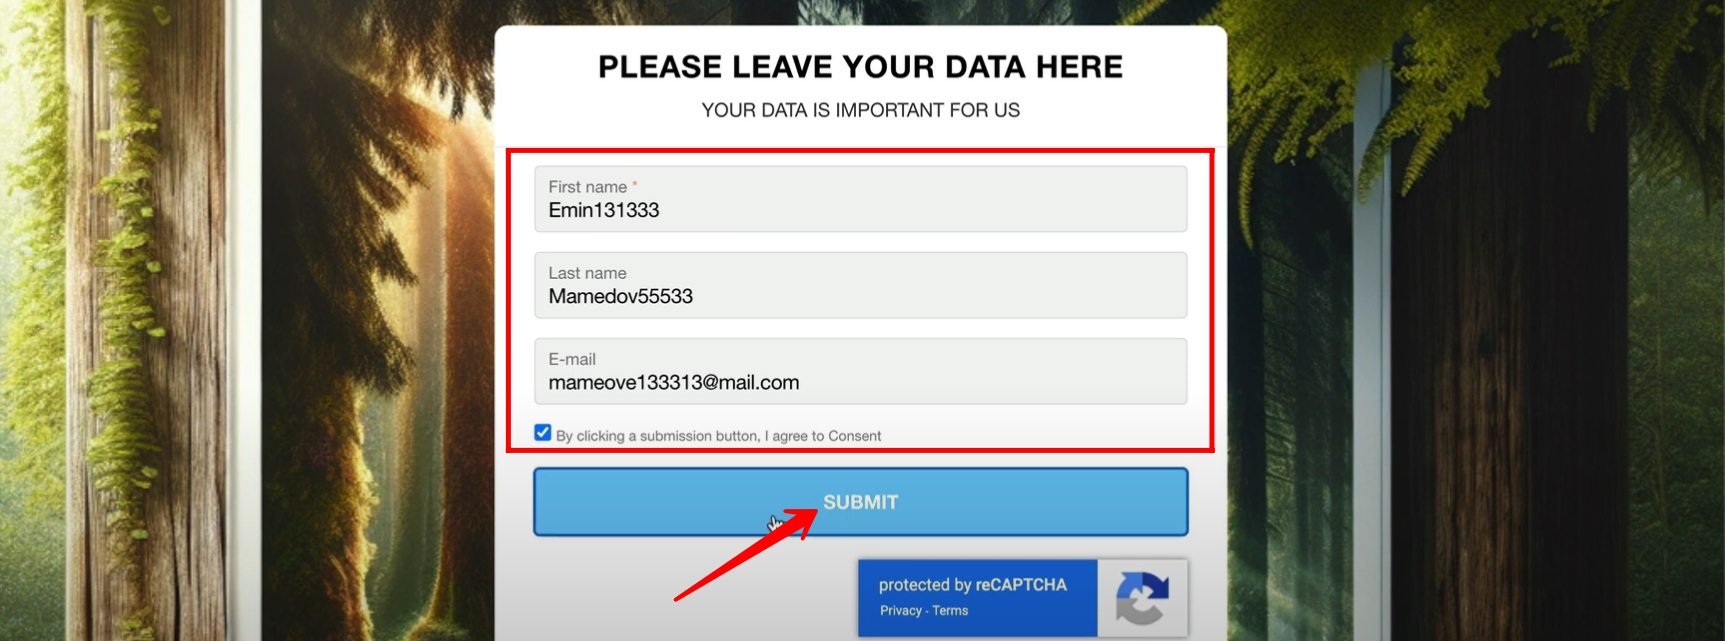
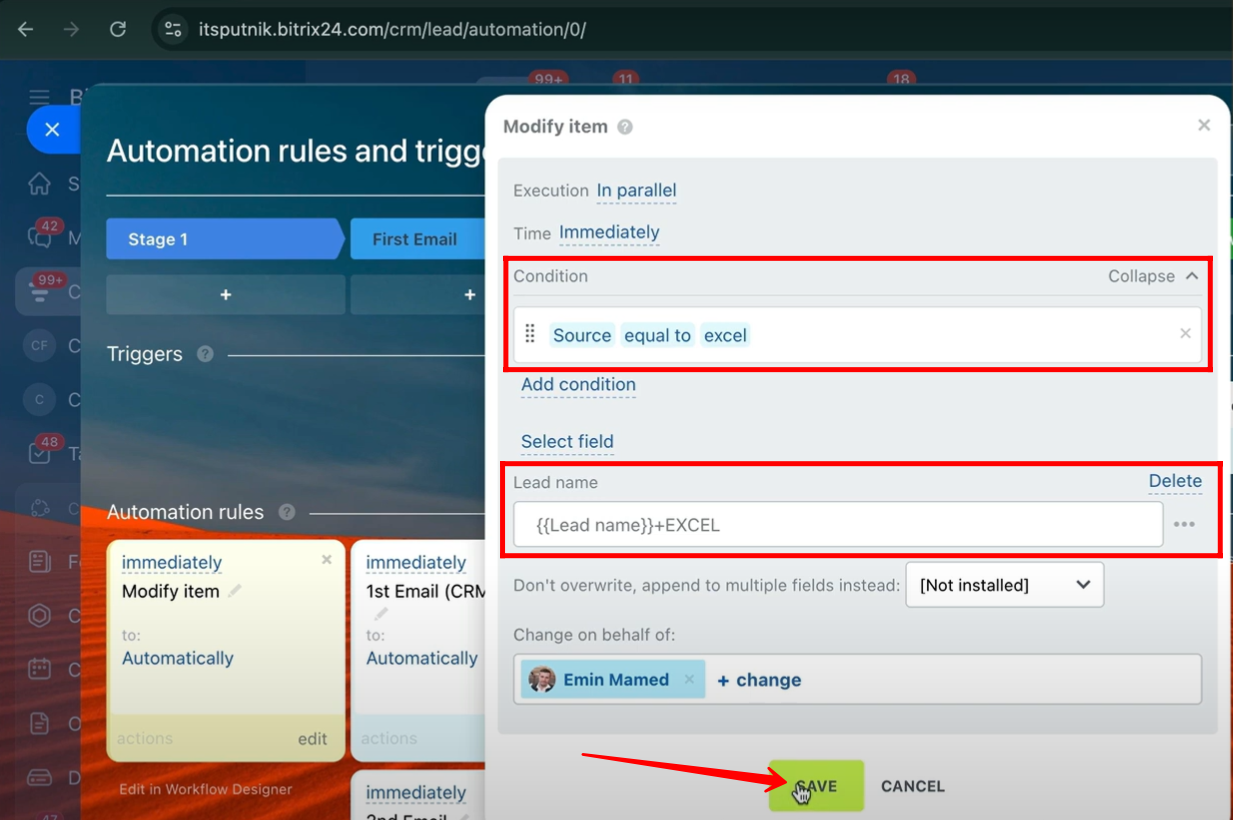
30. Open the form, enter the required details, and submit it to test the “Submit Again” configuration in action.
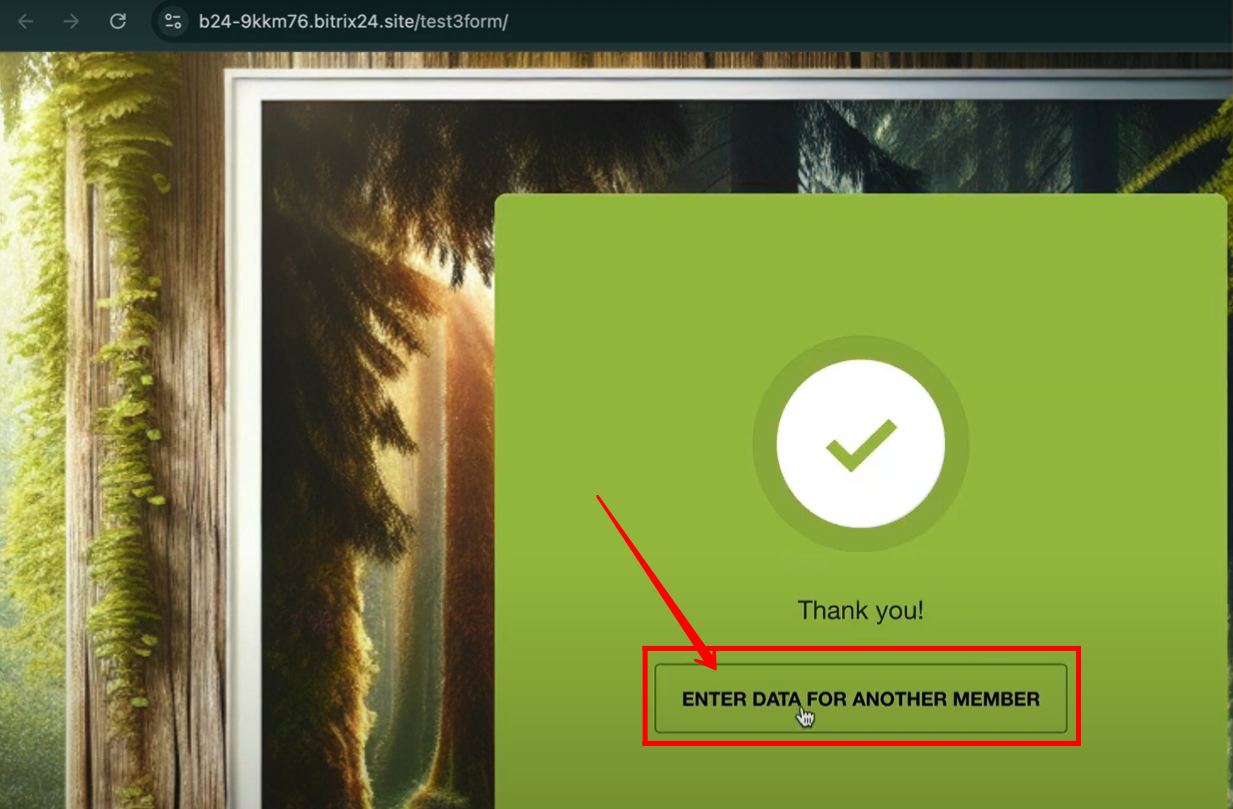
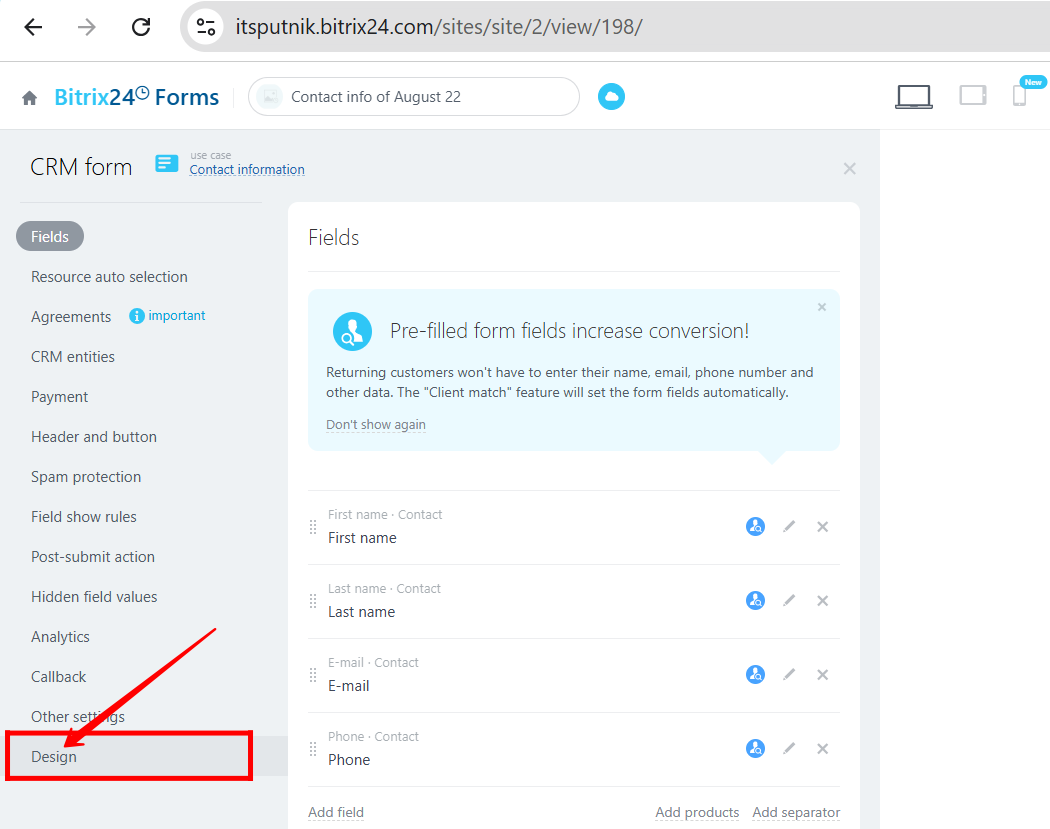
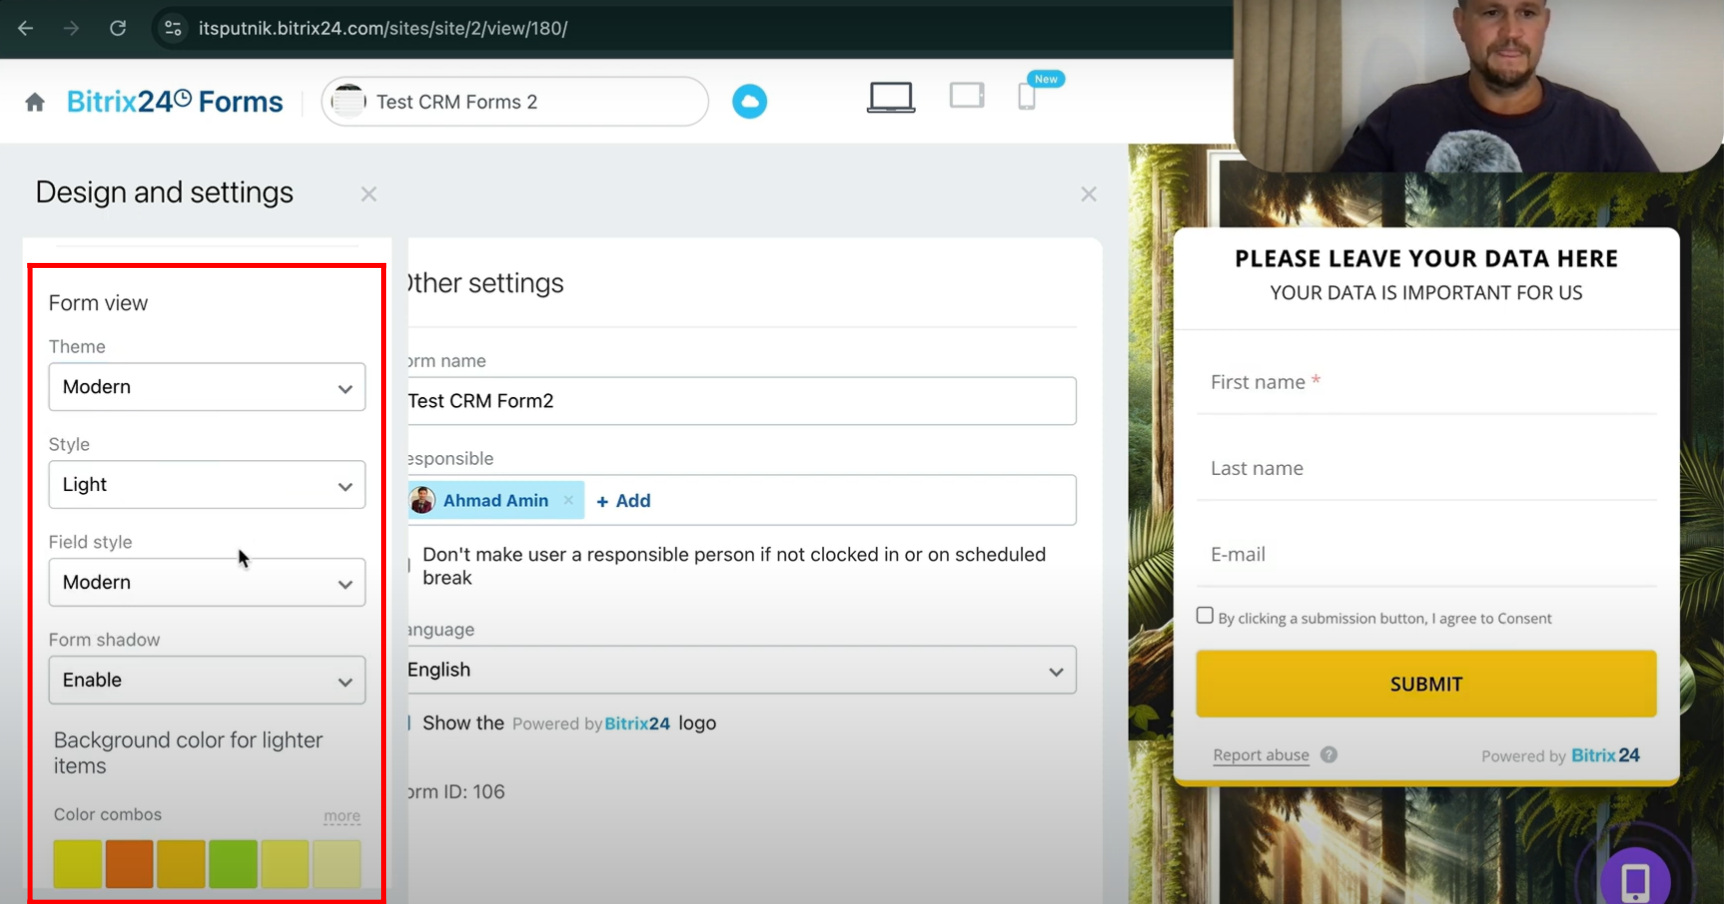
31. On the successful submit screen, you can now click the button labeled “Enter Data for Another Member”, which will redirect you back to the form so you can fill it out again.
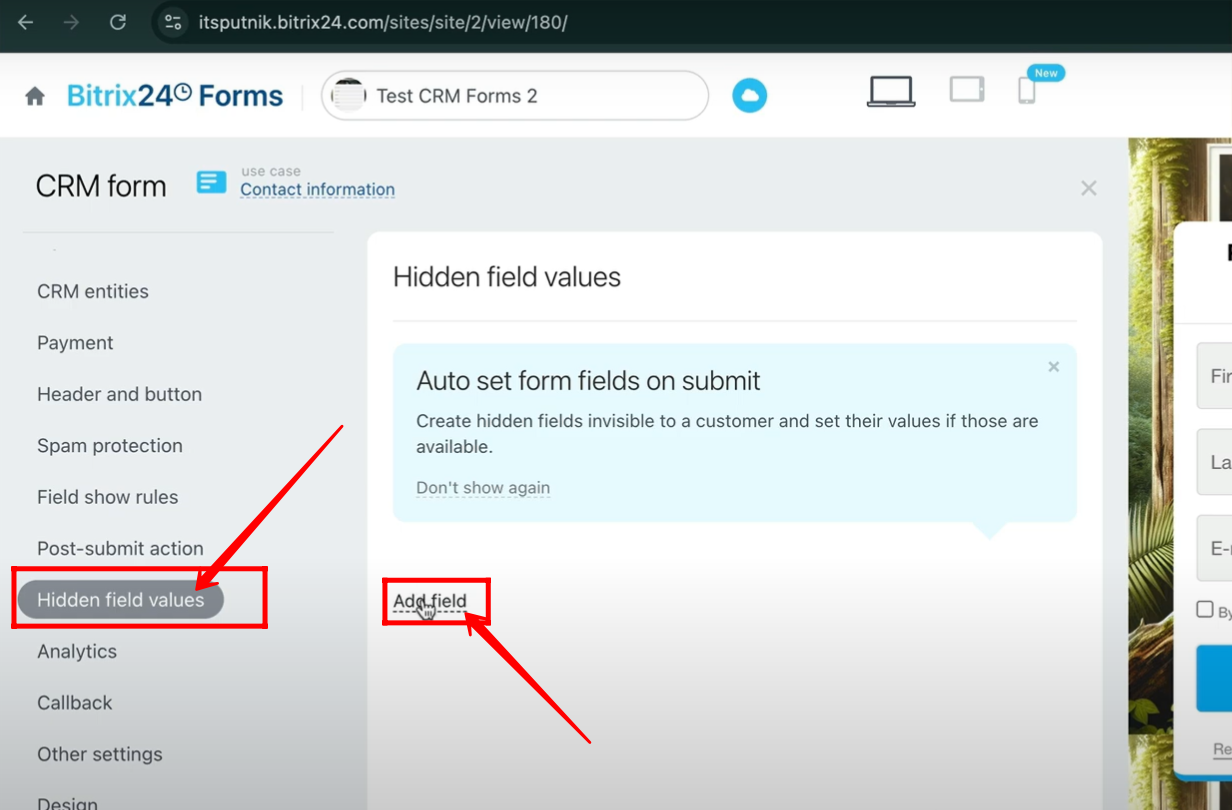
32. In the form configuration, navigate to the “Hidden Field Values” tab and enter the values for the fields you want to keep hidden. Click “Add Field”.
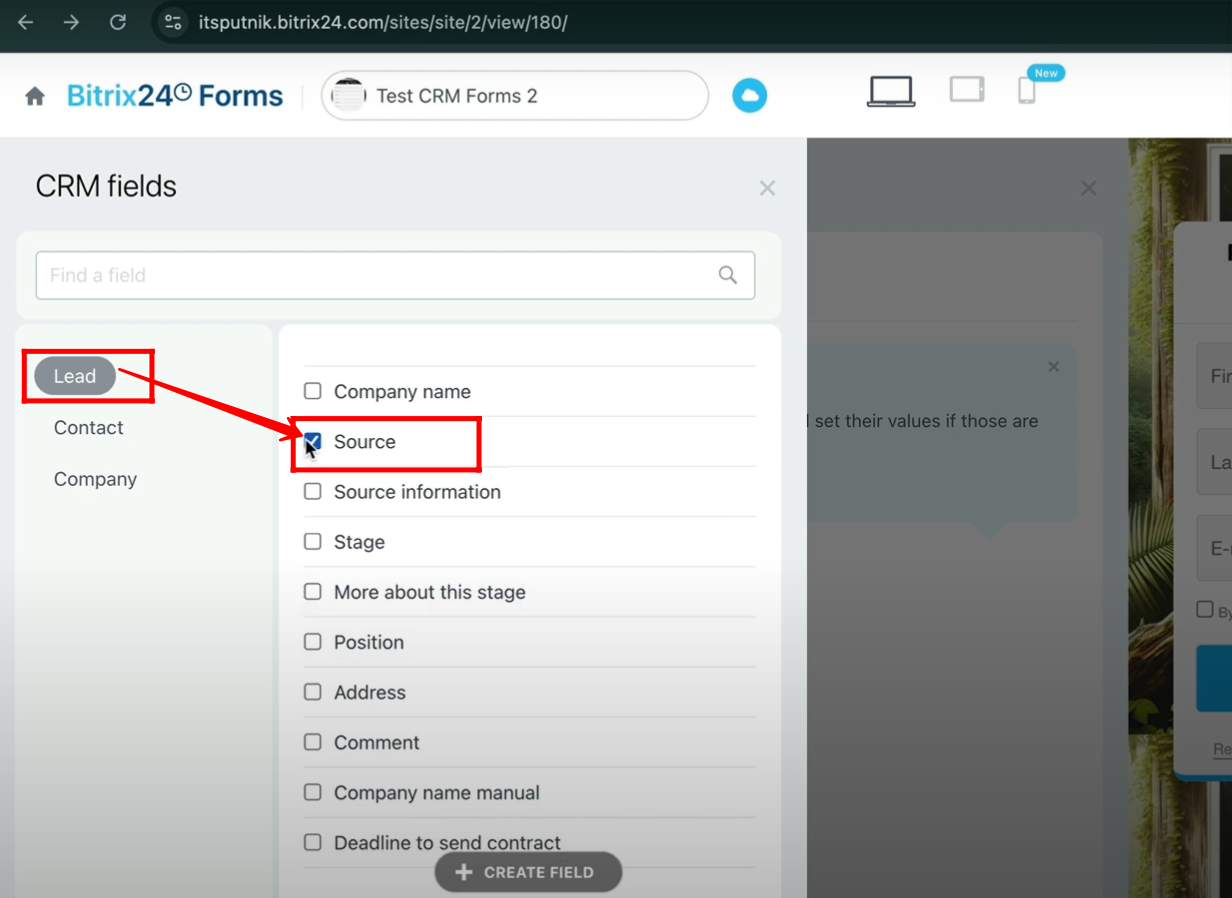
33. Within the “Hidden Field Values” tab, you can add fields from multiple entities such as Lead, Contact, or Company. Here, under the Lead entity, a new hidden field called “Source” has been added.
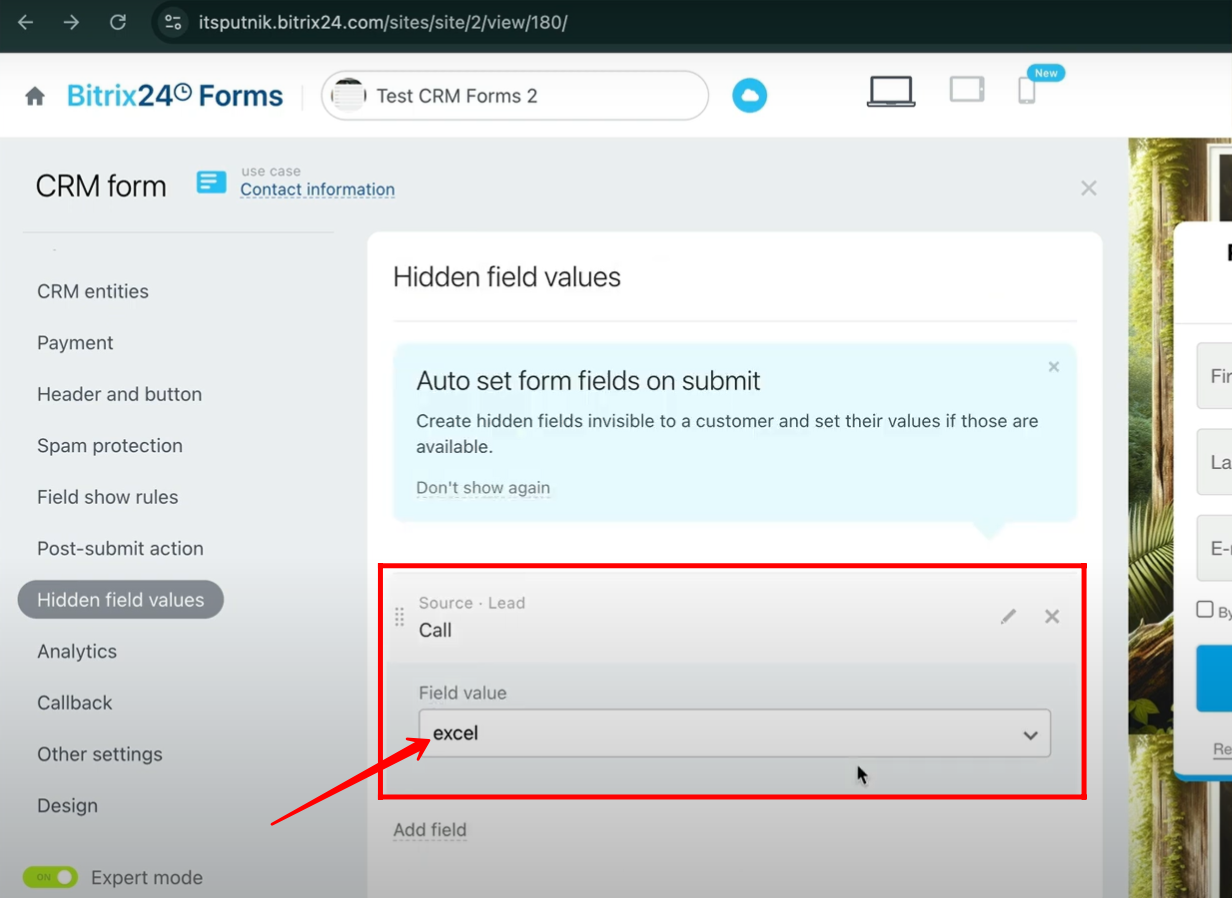
34. In the Hidden Field Values tab, the newly added “Source” field under the Lead entity has its value set to “excel”.
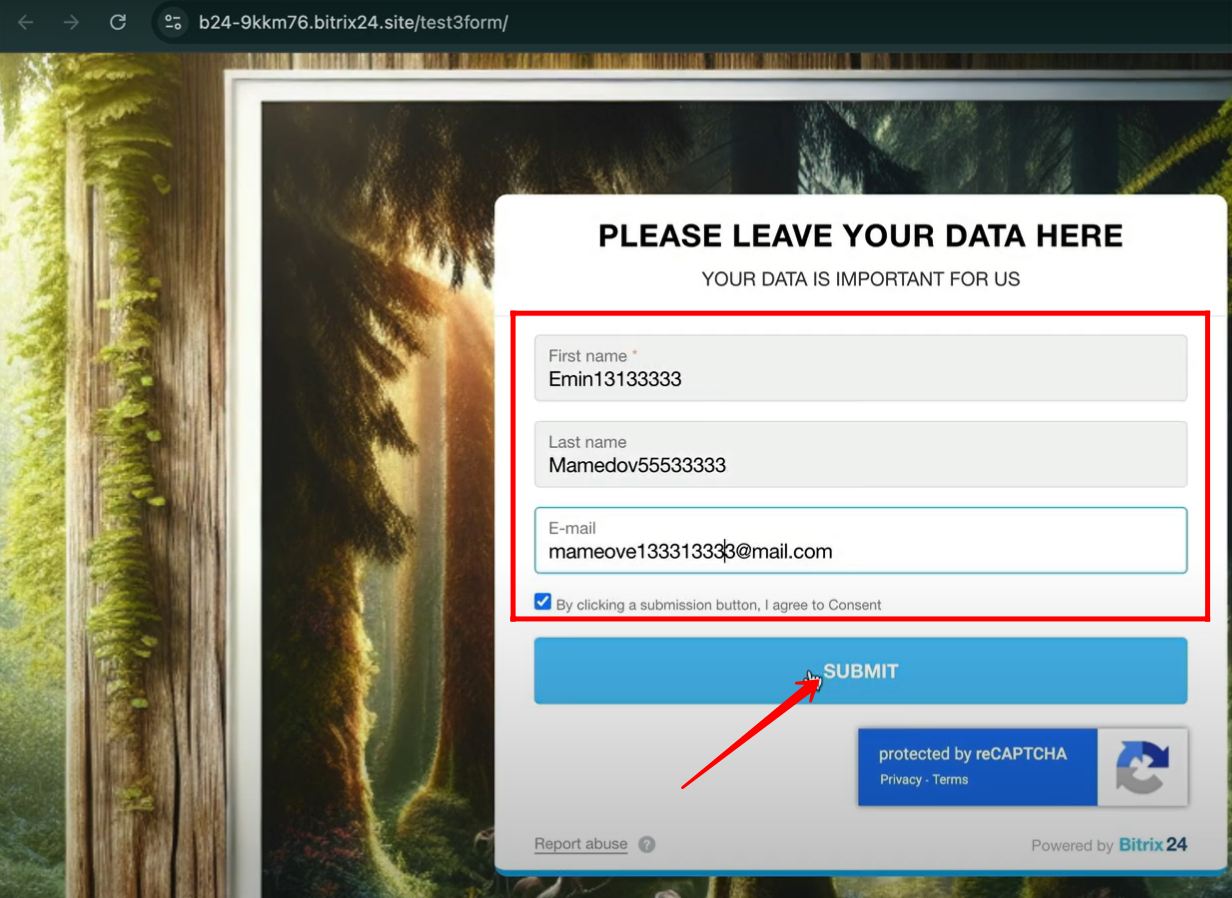
35. When you open the form, you’ll notice that fields like First Name, Last Name, and Email are visible for input, but the Source field does not appear since it is hidden. However, once the form is submitted, the Source field will still be sent with its fixed value in the submission data.
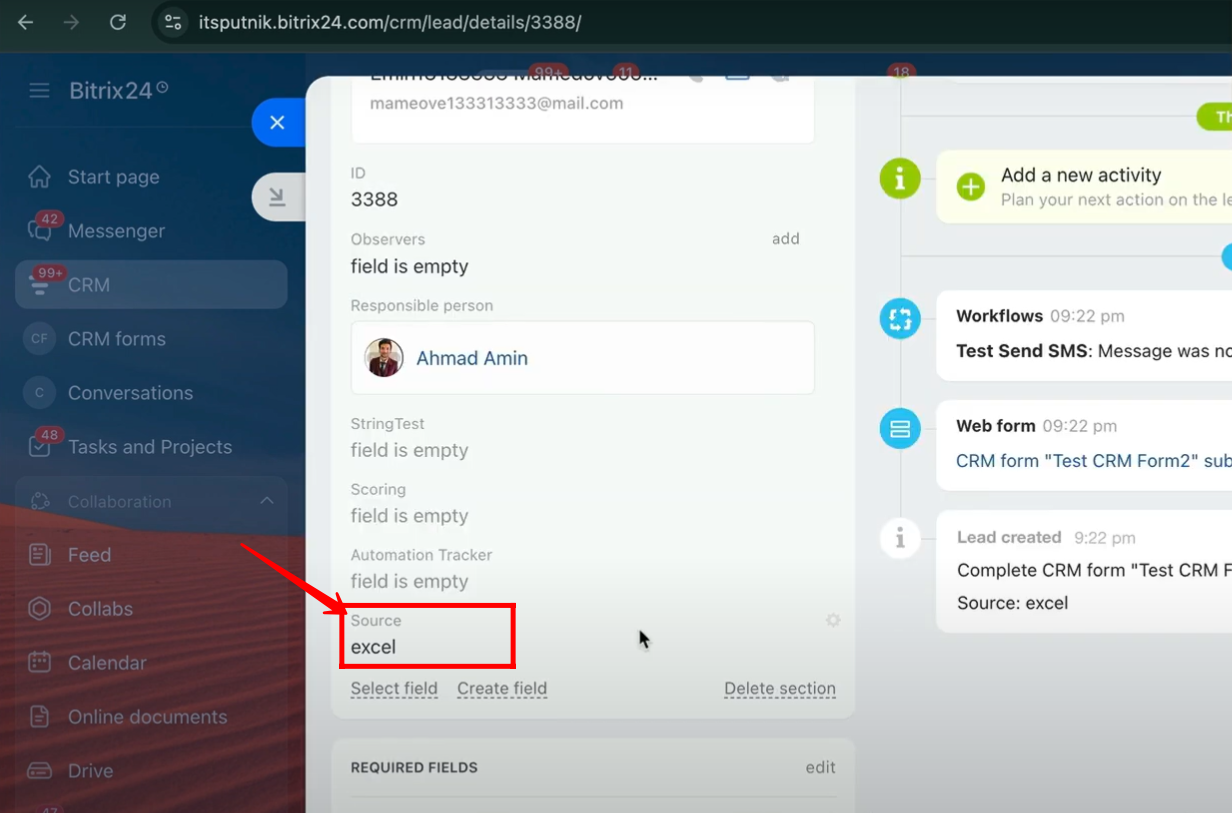
36. After submitting the form and creating a new lead, you can verify in the Lead data that the field “Source” is present, and it automatically carries the fixed value “excel” that was configured as a hidden field.
37. You can configure automation rules to update or modify items dynamically based on specific field values. For example, when a lead is created with the hidden field Source = “excel”, the automation can trigger actions like assigning the lead to a specific owner, adding it to a pipeline, updating status, or sending a notification.
38. In the “Modify Item” automation rule, a condition has been set as “Source equals excel”. Based on this, the Lead Name is updated to “{{Lead Name}} + EXCEL”. However, you can fully customize these modification rules and conditions depending on your specific business requirements—such as updating statuses, assigning owners, or appending values to other fields.
39. In the Form Configuration panel, go to Design tab.
40. Here, you can customize the overall appearance and layout of the form, including styling, structure, and field arrangement, ensuring it matches your branding and provides a smooth user experience.
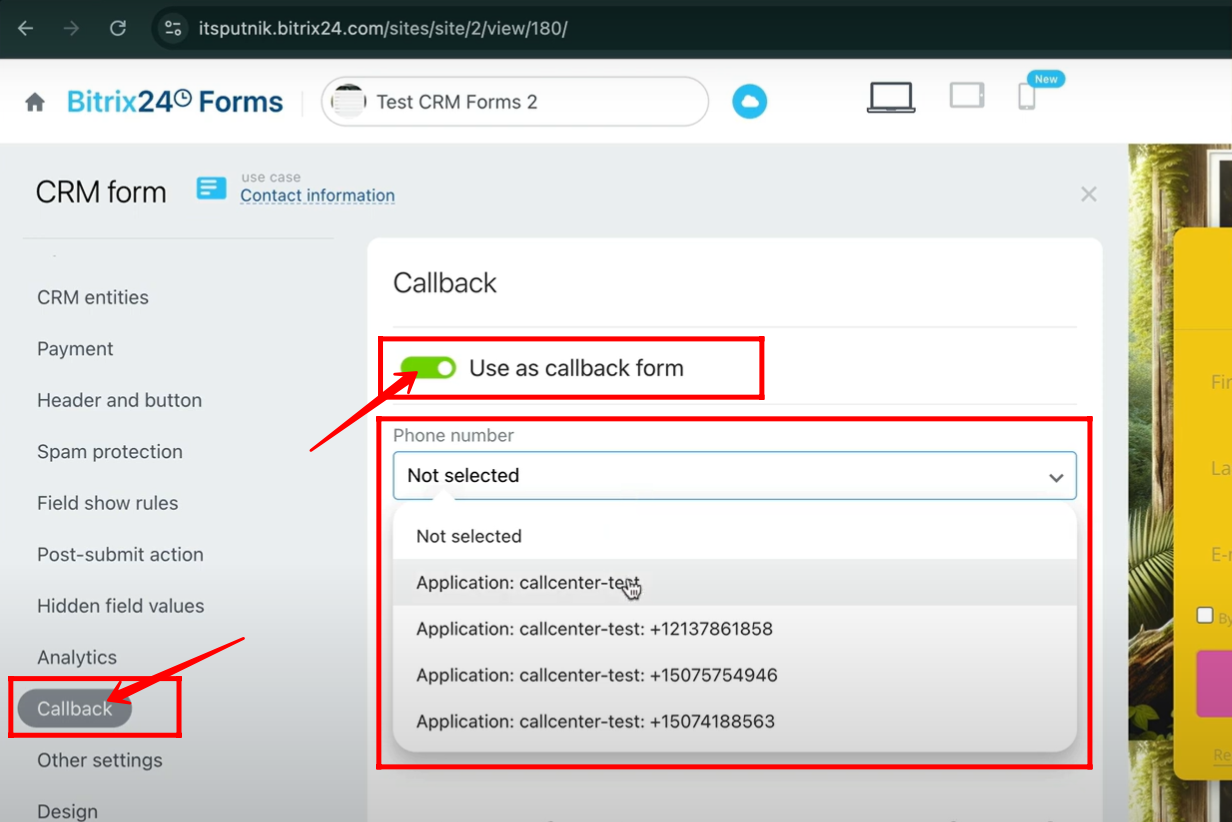
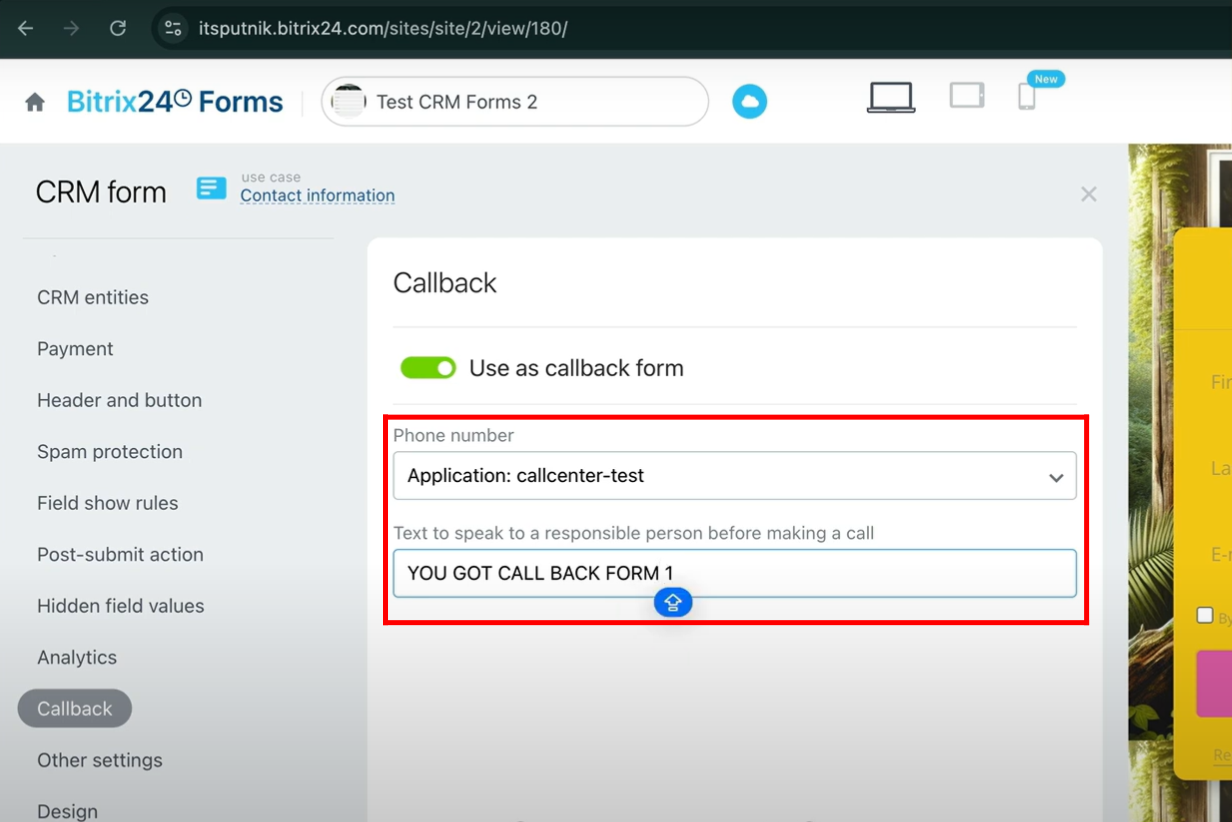
41. In the Callback tab, enable the “Use as Callback Form” option and then select the appropriate phone number that has been configured with a service like Call Center, so that form submissions can automatically trigger a callback request to that number.
42. In the Callback tab, you can also add a “Text to speak to a responsible person before making a call” message; for example, here the text entered is “You got call back: FORM 1”, which will be spoken to the person handling the call before it gets connected.
You can also watch video on Youtube