| 1421 Views | admin

Forms are no longer limited to collecting basic information. With advanced configuration options, they can now function as multi-page structures, interactive platforms, or even as dynamic websites. This makes them highly useful for businesses, organizations, and individuals who want more control over how data is gathered and presented.
One of the most powerful aspects of form configuration is the ability to divide information into multiple pages. Instead of overwhelming users with a long list of fields, multi-page forms provide a structured way to collect details step by step. This not only makes the process easier for users but also helps in organizing data more effectively.
In addition to multiple pages, separators and headers can be used to enhance the form layout. These elements allow you to break content into meaningful sections, add progress indicators, or highlight important details. Each component plays a role in improving the overall user experience while filling out the form.
Beyond traditional data collection, forms can also be configured to act like websites. By adding covers, text, images, columns, buttons, and even menus, a form can transform into a space that looks and feels like a web page. This flexibility opens new possibilities, which we will explore further in upcoming articles.
Detailed Instructions are given below
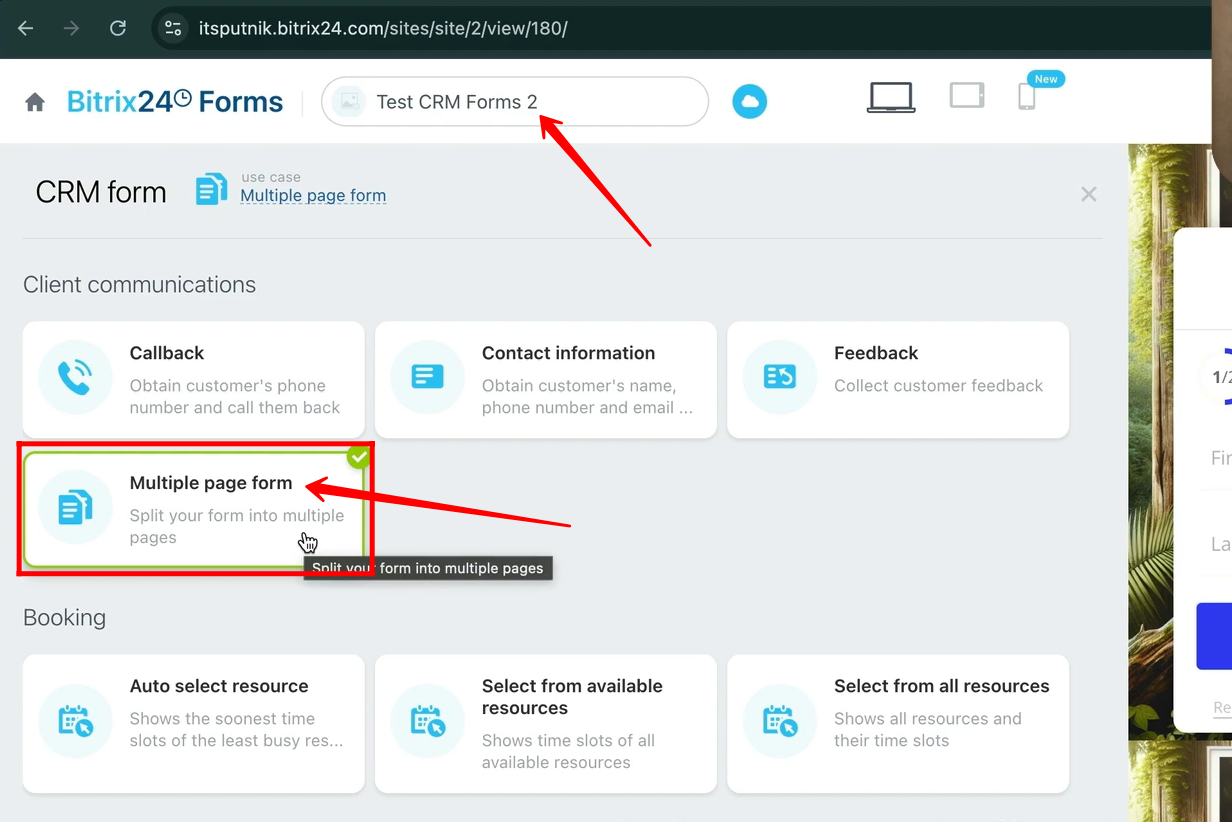
1. Open an existing form you’ve already configured for testing, or create a new one. In the Client Communications section, select Multiple Page Form to begin setting up a form with several pages. The type of form you create—such as Callback, Contact Information, Feedback, or others—will depend entirely on your specific requirements.
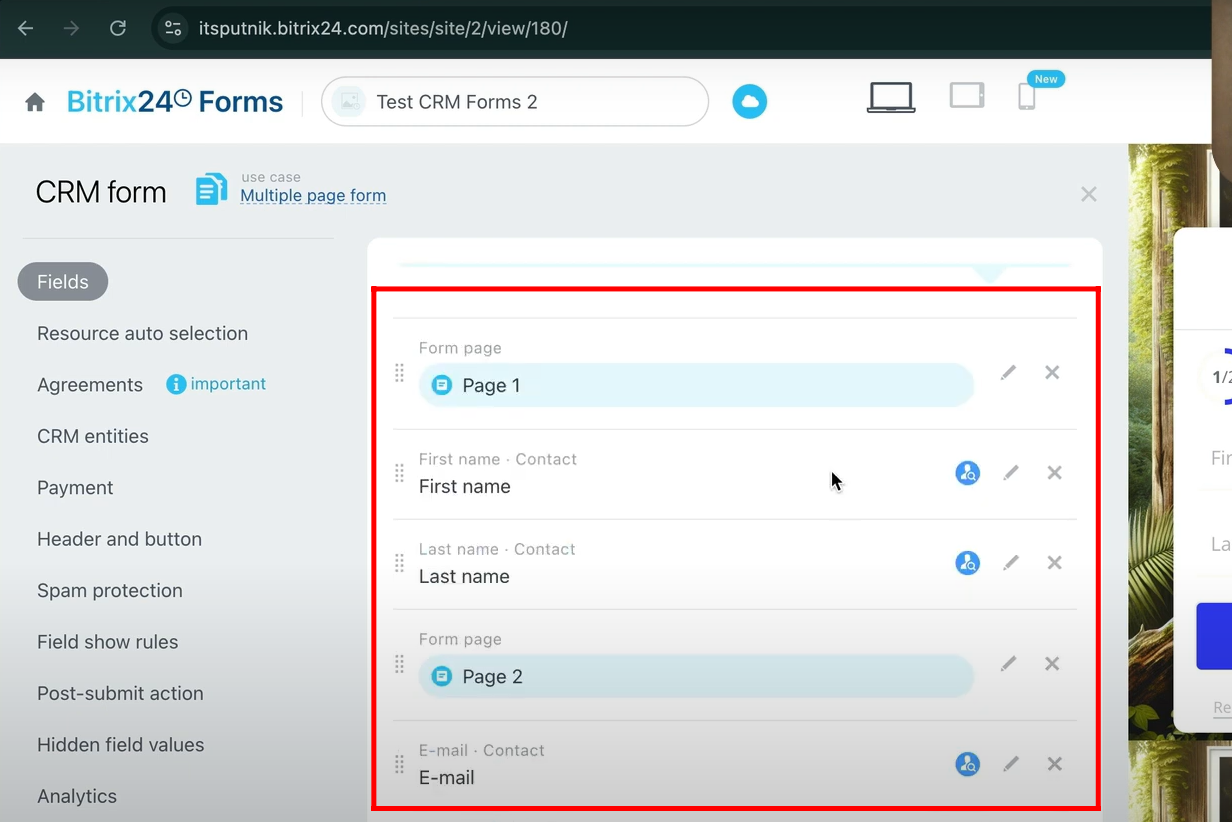
2. You will notice a pre-made template for a multiple page form, which consists of two pages. On the first page, there are two fields—First Name and Last Name—while the second page contains the E-mail field.
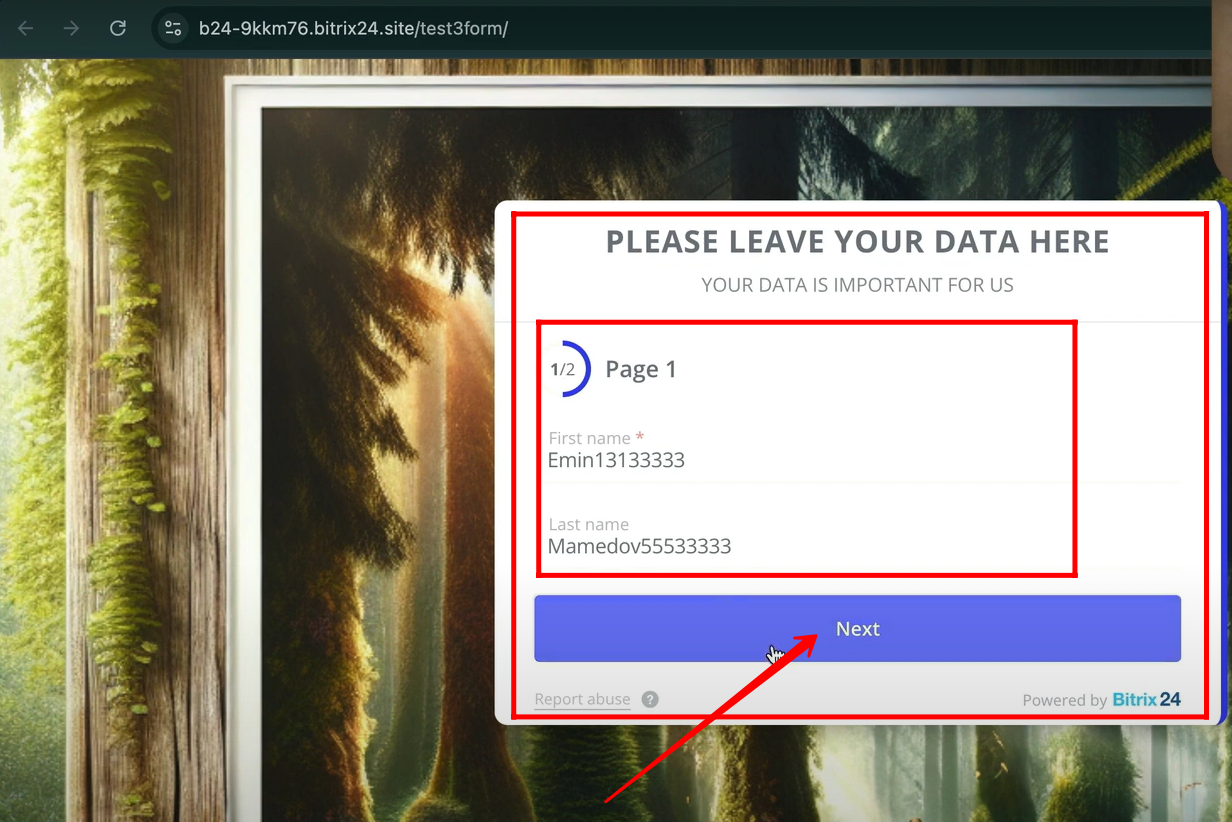
3. When you open the form, a circular progress bar will appear showing 1/2, indicating that you are on the first page. Enter the First Name and Last Name, then click Next to move to the second page of the form.
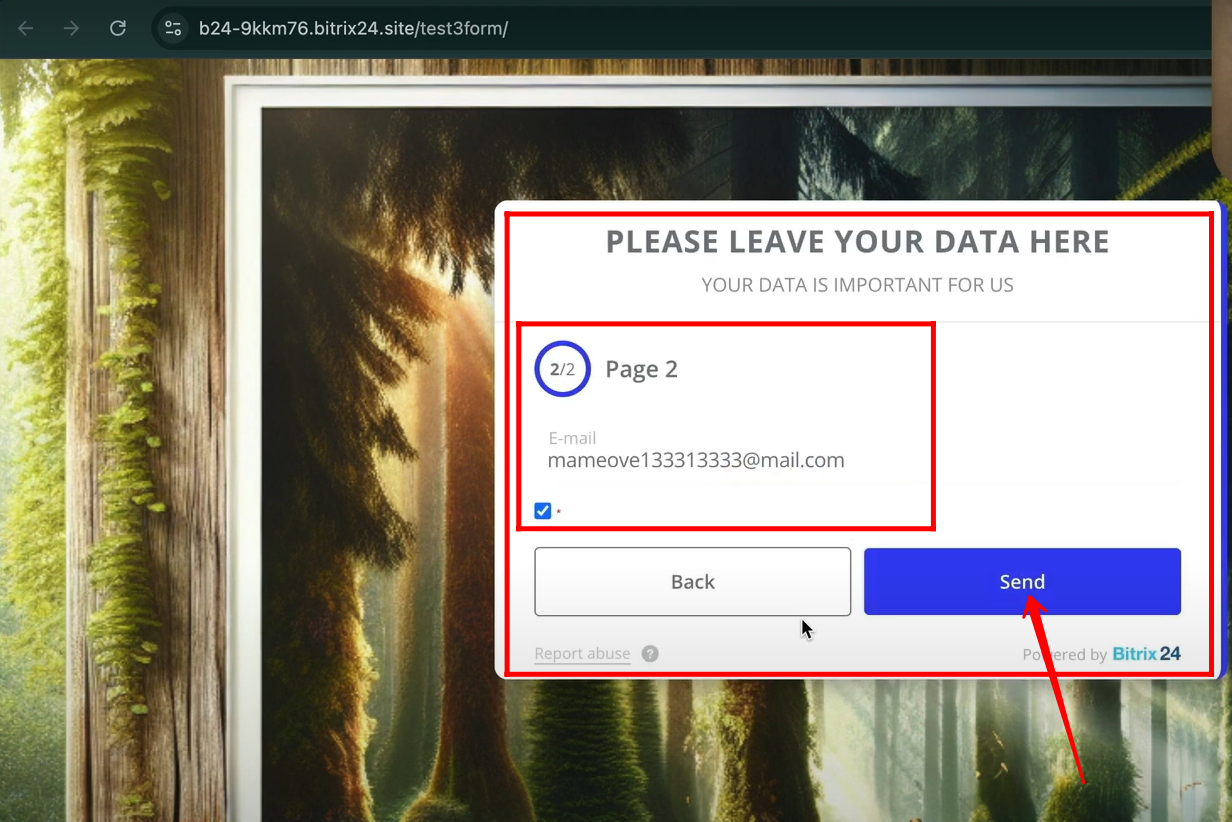
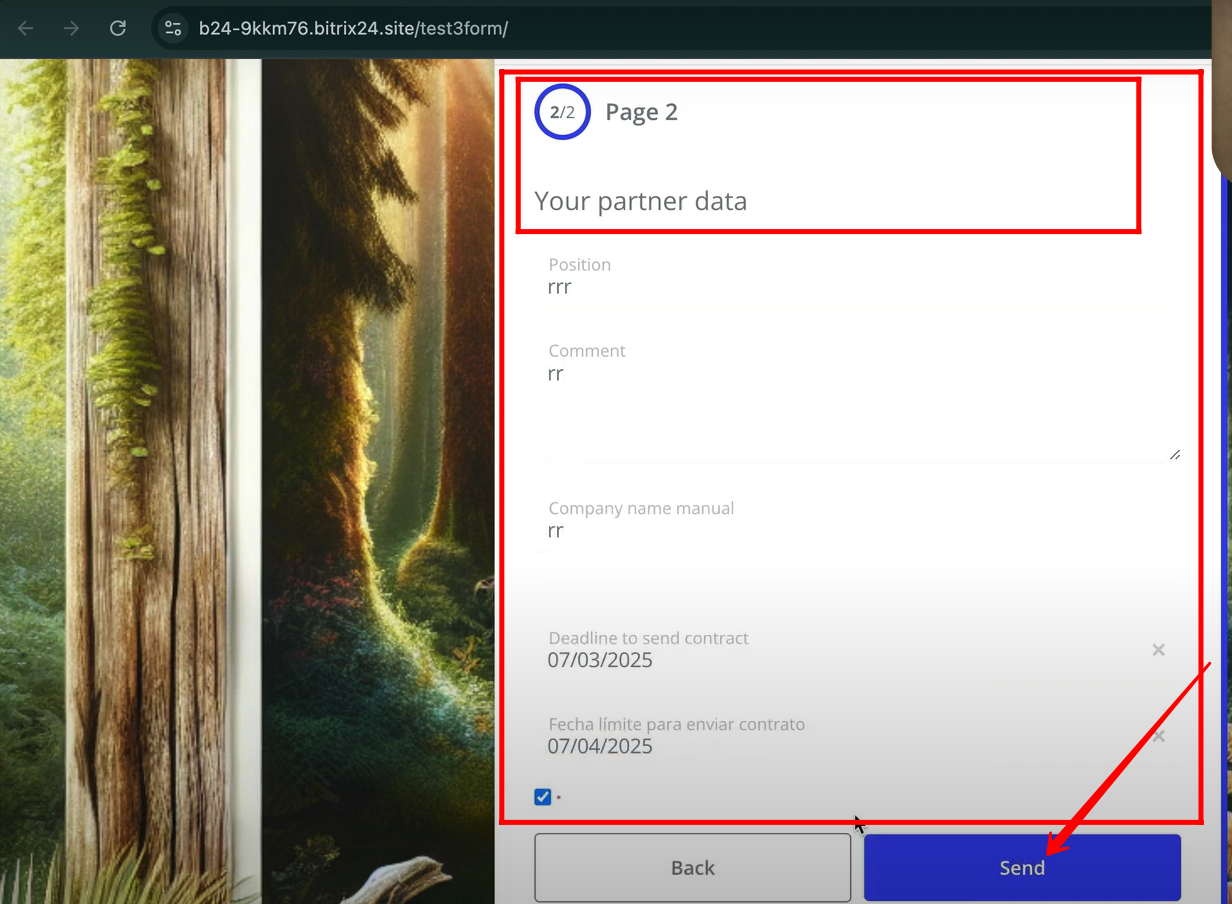
4. On the second page, the circular progress bar displays 2/2. Enter your E-mail in the provided field and click Send to submit the form.
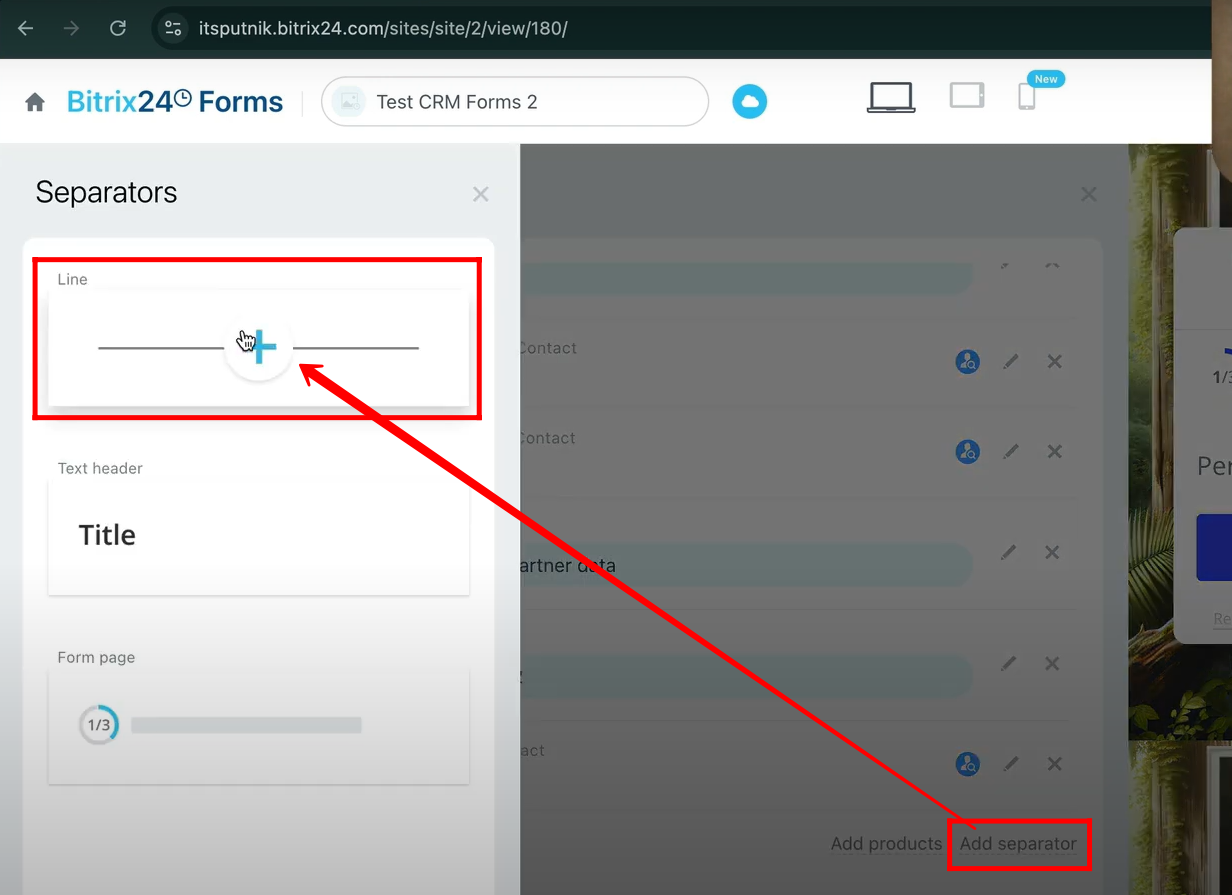
5. To begin configuring the multiple page form, click on “Add Separator”. This option allows you to split the form into different sections, creating multiple pages for users to fill step by step.
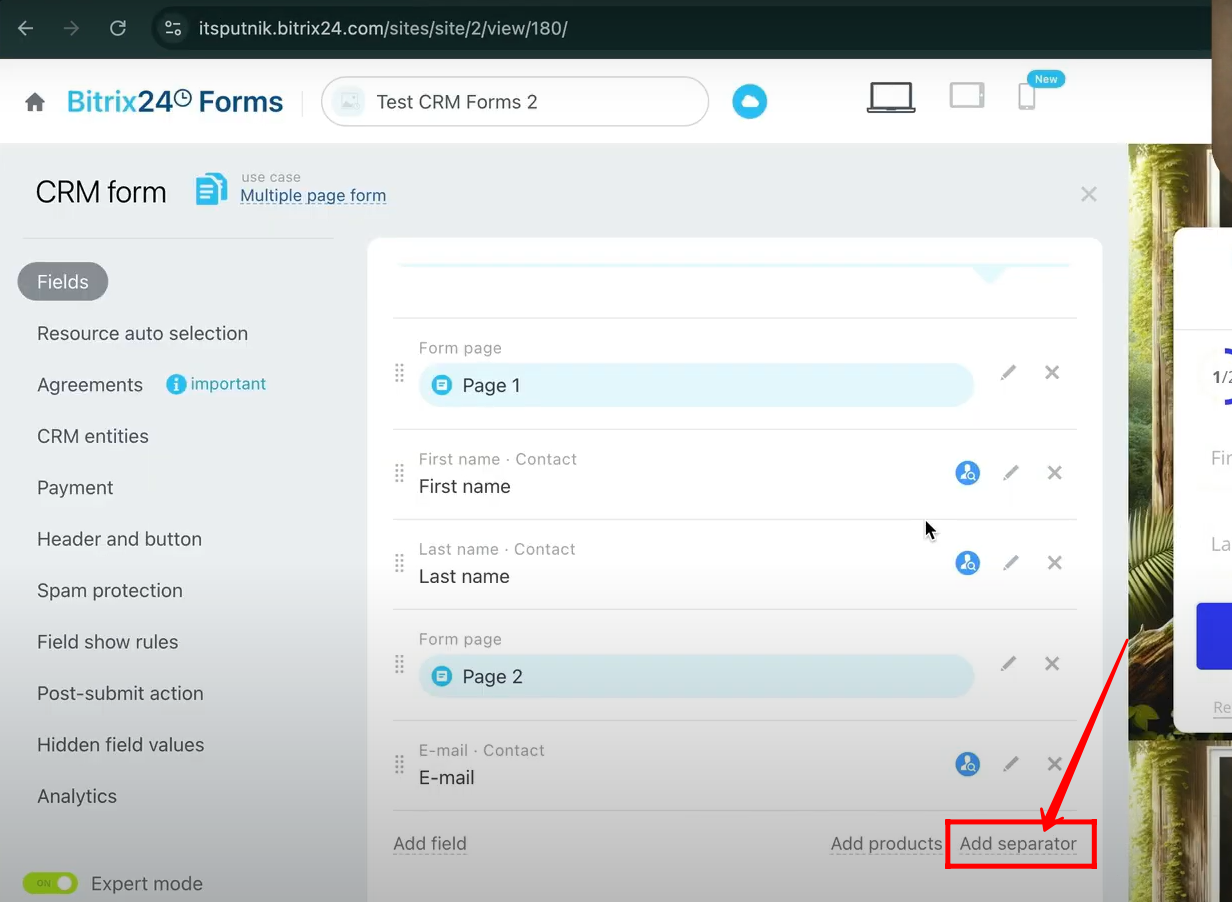
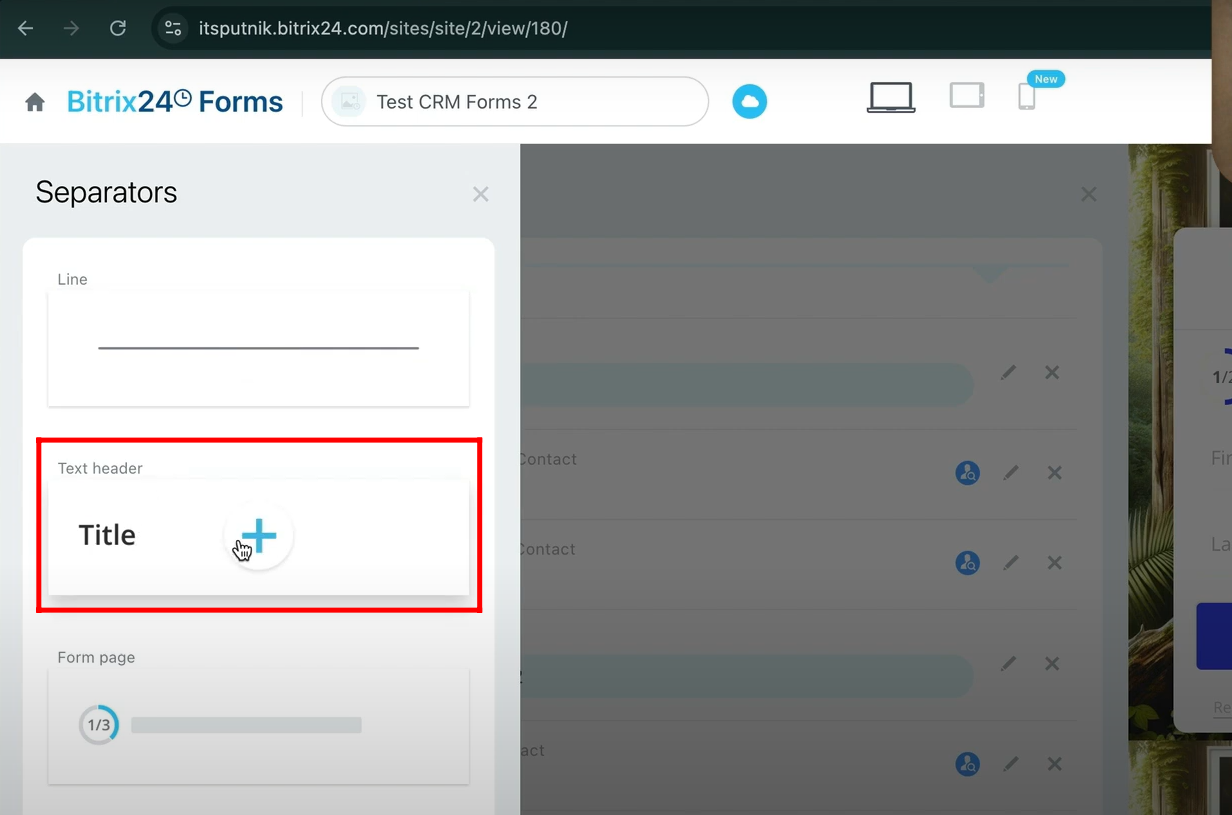
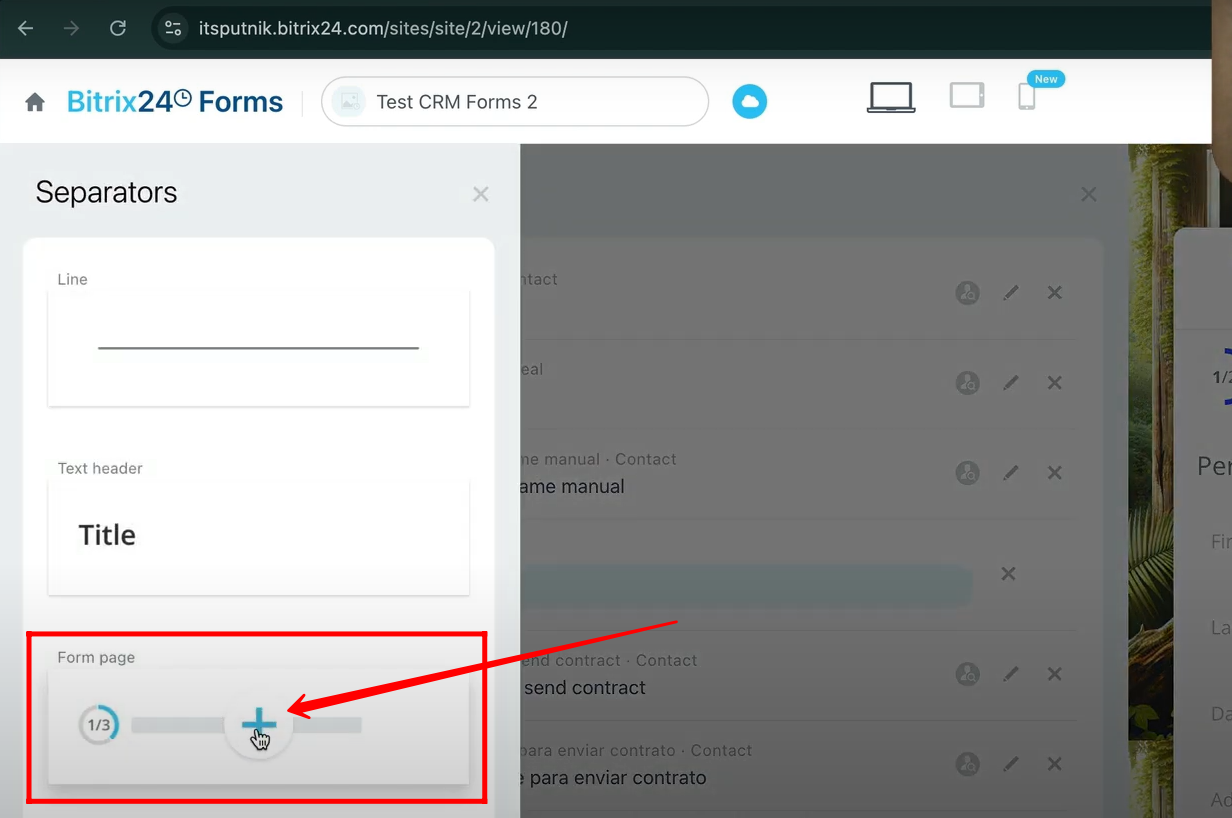
6. You will find three separator options available: Line, Text Header, and Form Page. Start by adding a Text Header, which allows you to insert a title or descriptive text between fields, helping to better organize and guide users through the form.
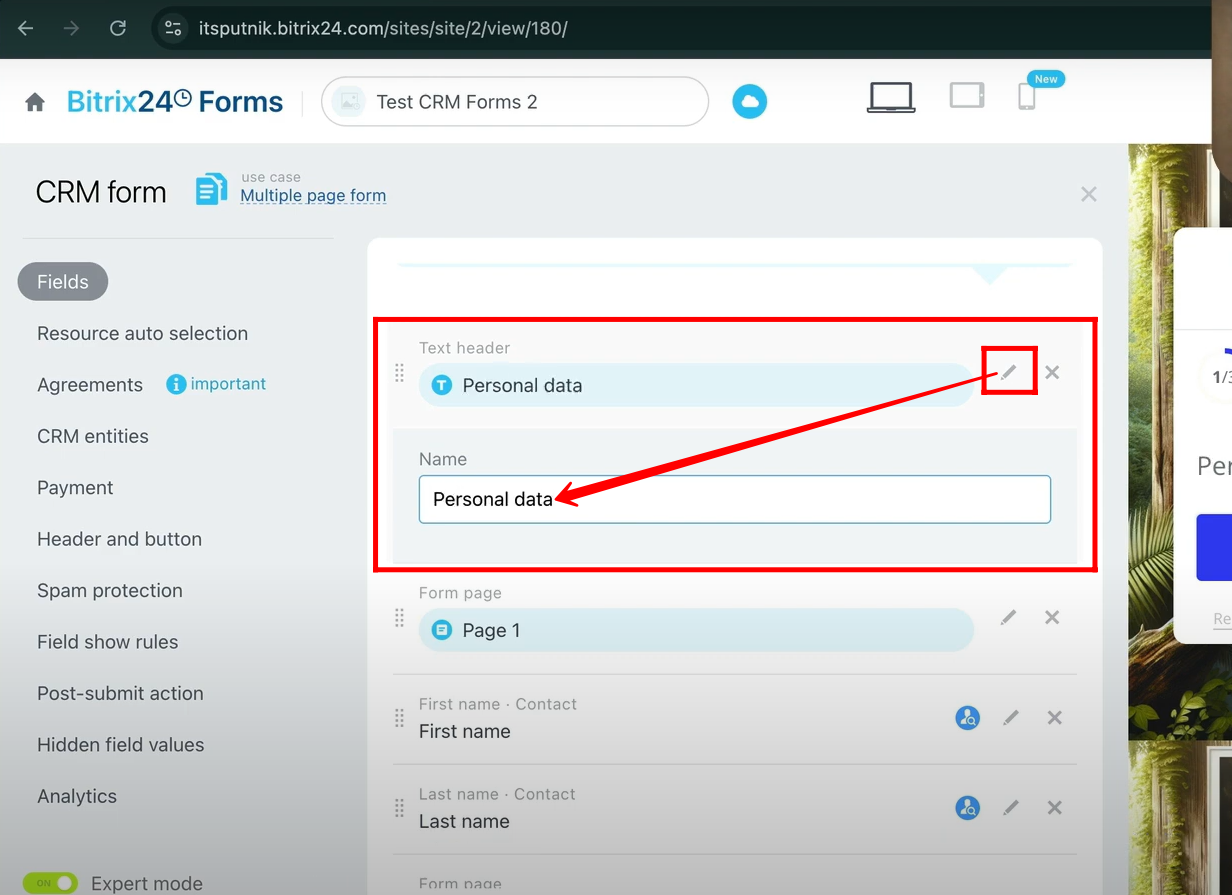
7. Here, the page header has been added. By clicking on the edit icon, you can modify its name. In this example, the header has been renamed to “Personal Data”.
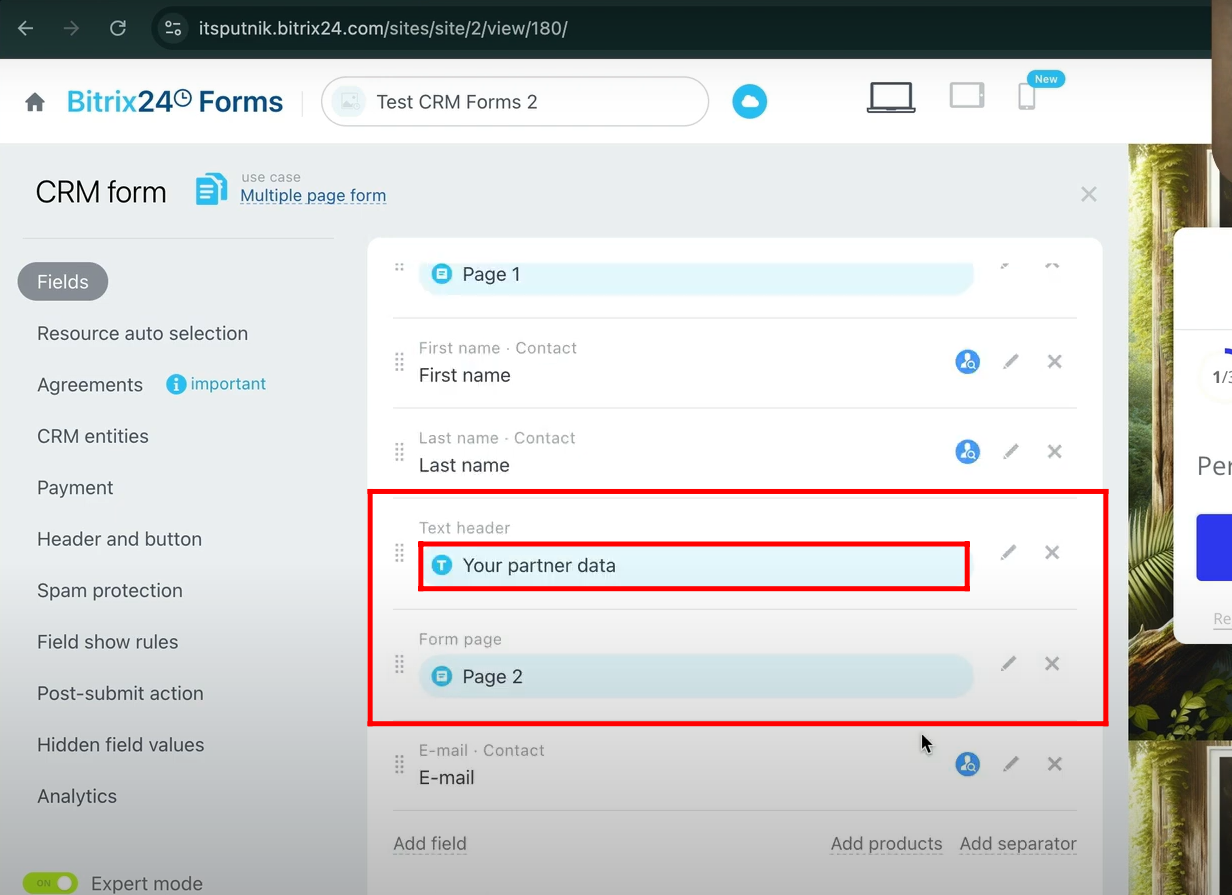
8. On page 2, a new text header has been added and named “Your Partner Data”.
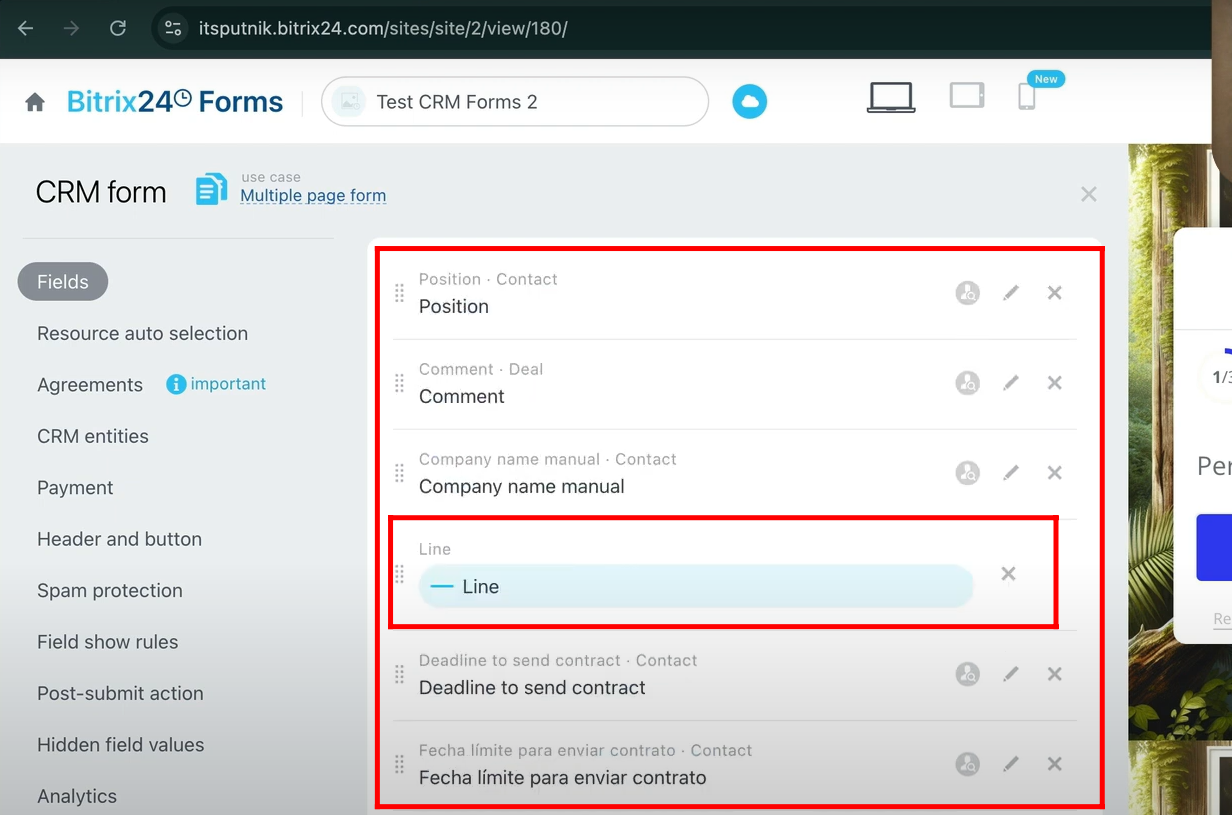
9. Now, add a new separator by selecting “Line”, which will insert a horizontal divider into the form layout.
10. Here, the line separator clearly divides the fields into distinct sections, making the form more organized and easier to follow.
11. Make sure that the “Text Header” is always placed after a “Form Page” separator. If the “Form Page” is placed after the “Text Header”, then the “Text Header” will be treated as the start of a new page in the form.
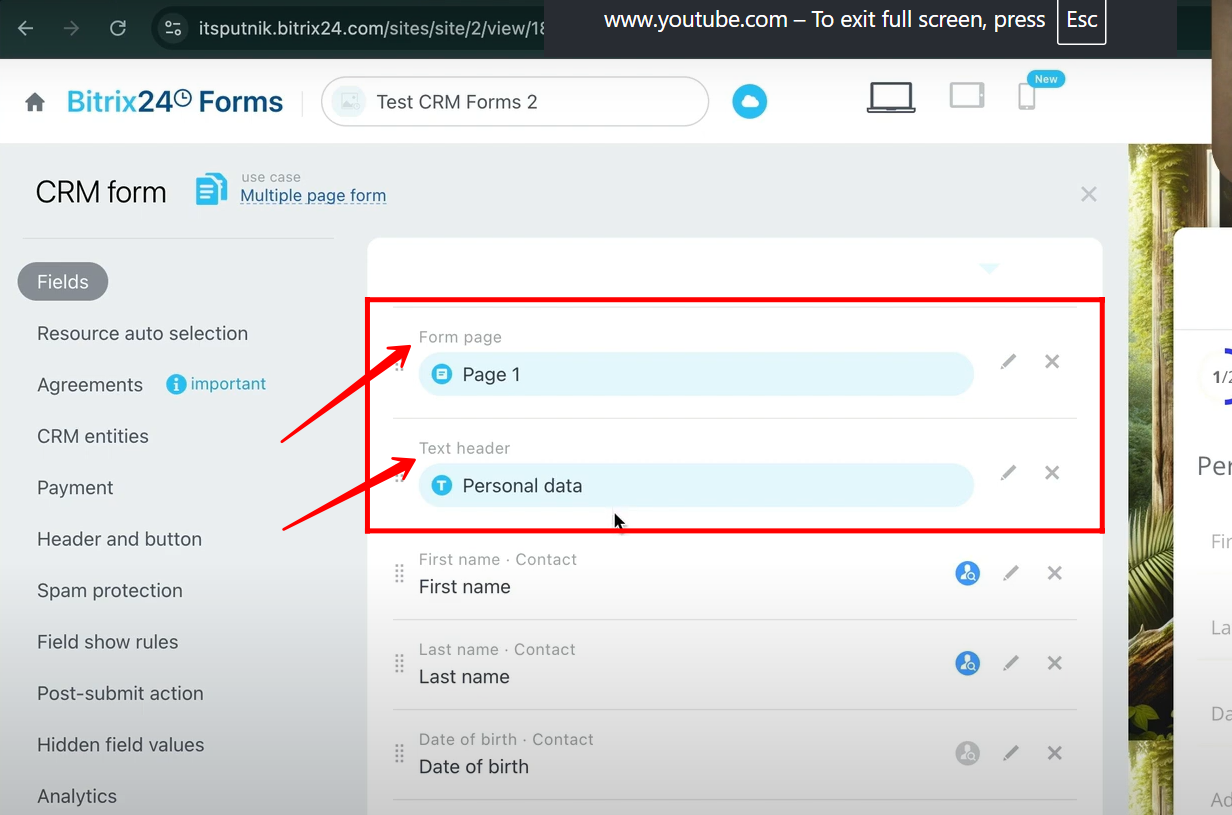
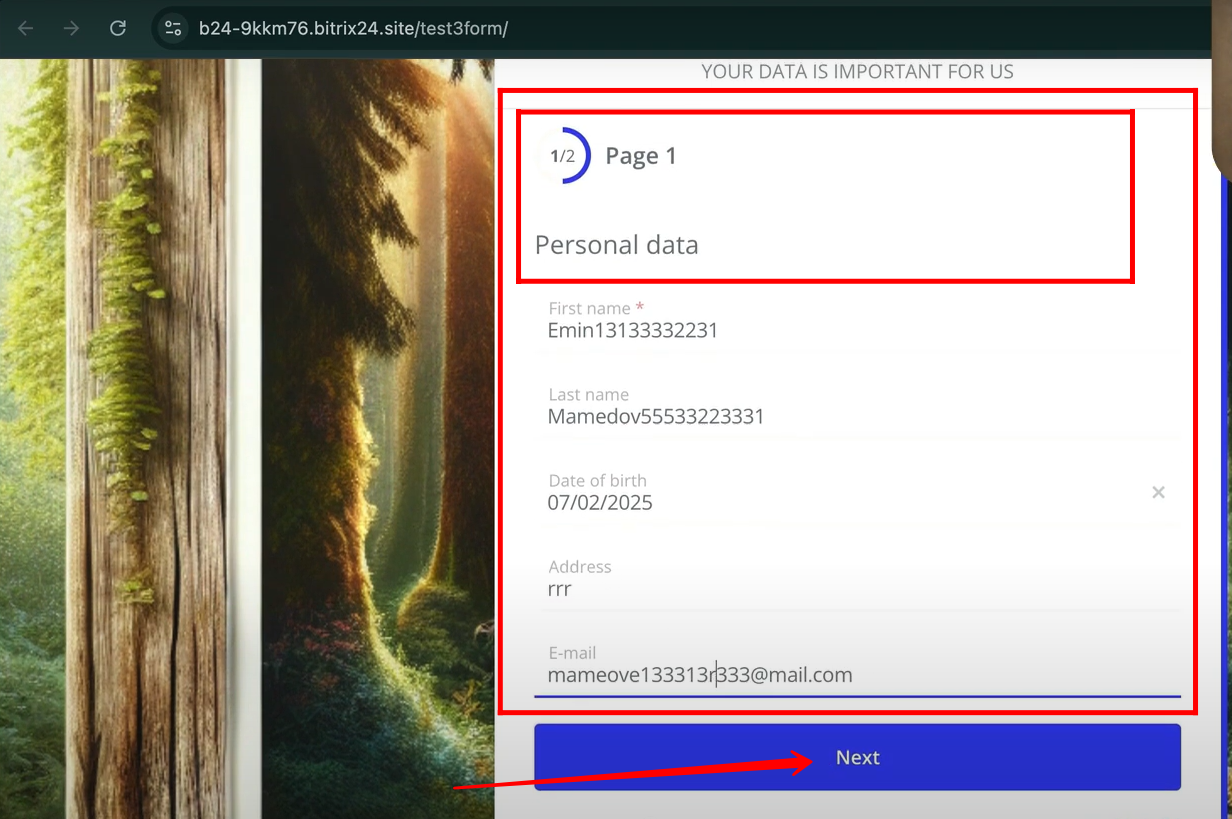
12. You can see that the text header “Personal Data” is added under the circular progress bar. Open the form, fill in the required details on the first page, and then click Next to proceed to the second page of the form.
13. On the second page of the form, complete the required fields and click Send to submit the form. Both, the text header “Your Partner Data” and the “Line” separator are added. The process of adding fields within page is not explained here, as it has already been covered in detail in earlier articles.
14. Now, let’s test the third separator, “Form Page.” You can add as many form pages as needed; each added page will appear in the circular progress indicator (e.g., 1/3, 2/3, 3/3) to show users where they are in the process.
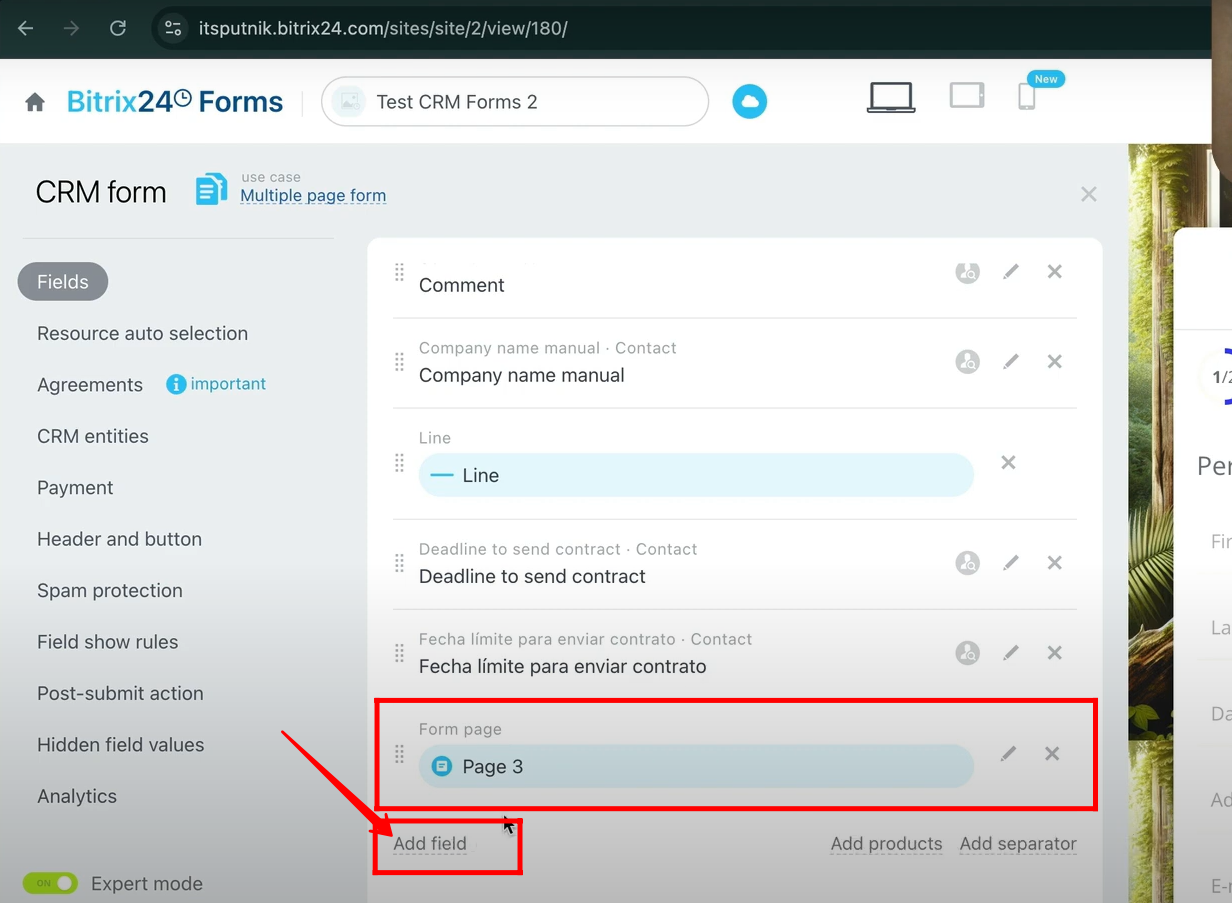
15. The third page has now been added in the configuration, and you can freely insert the required fields into this page of the form based on your needs.
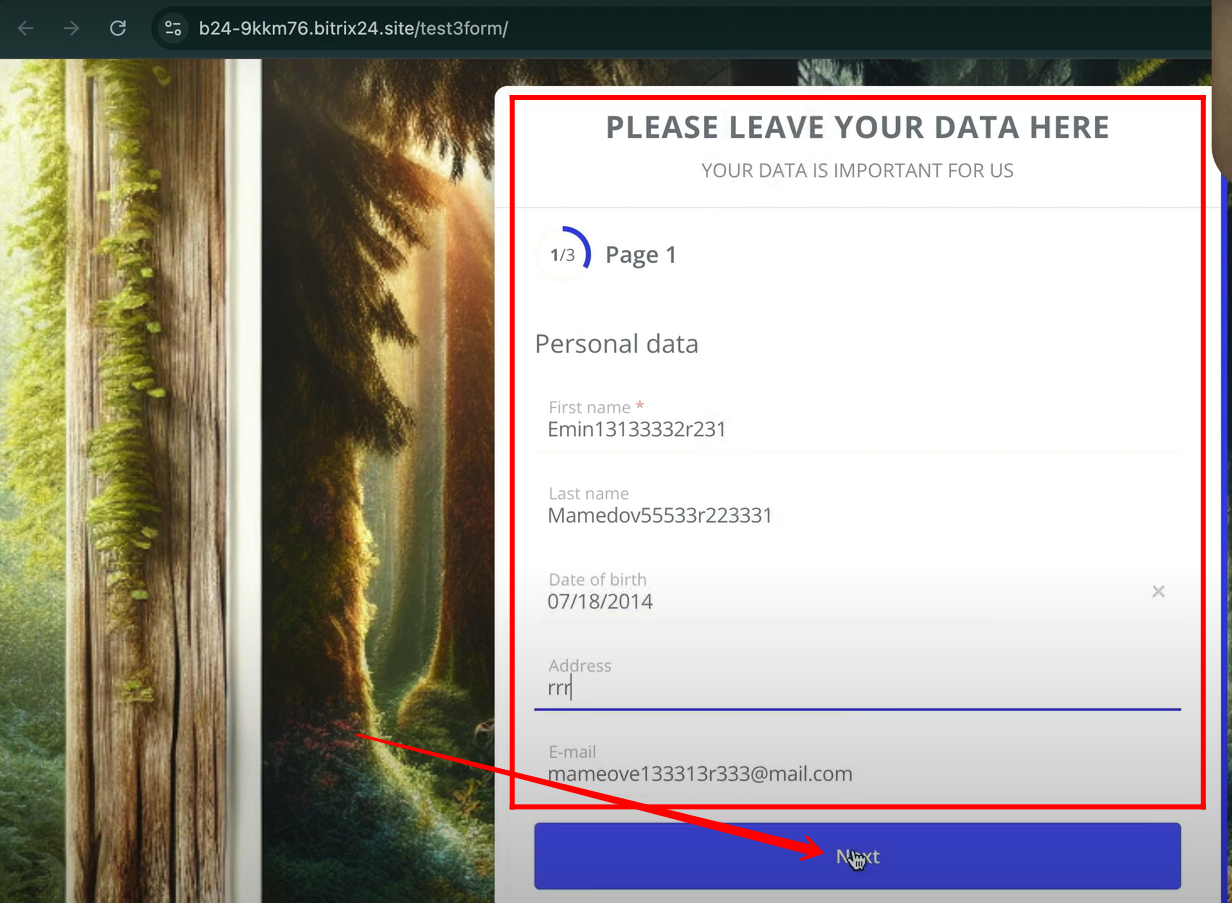
16. When you open the form, the progress bar shows 1/3, along with the text header on the first page. Fill in the required details, then click Next to proceed to the second page of the form.
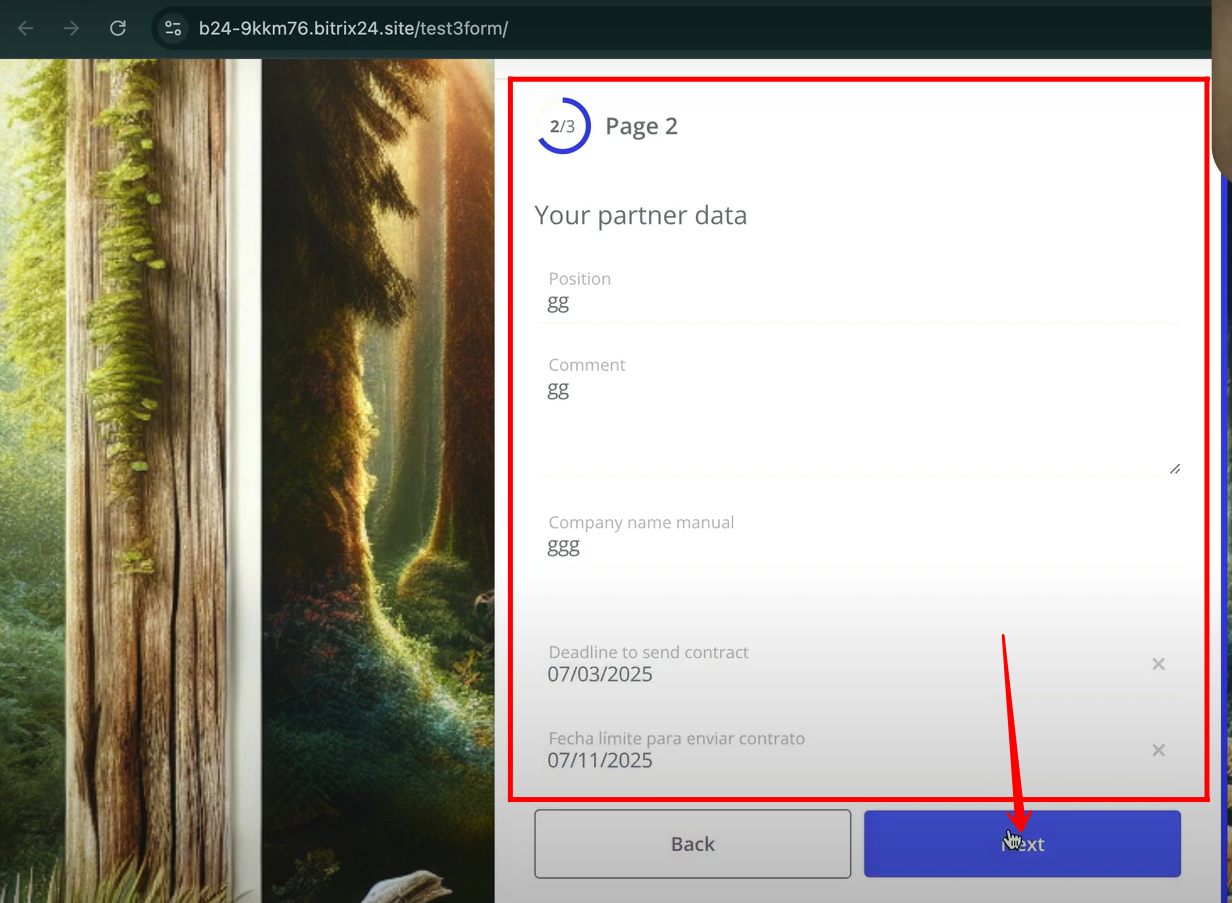
17. On the second page, the progress bar shows 2/3 with a text header displayed at the top; fill in the required details and then click Next to move to the third page of the form.
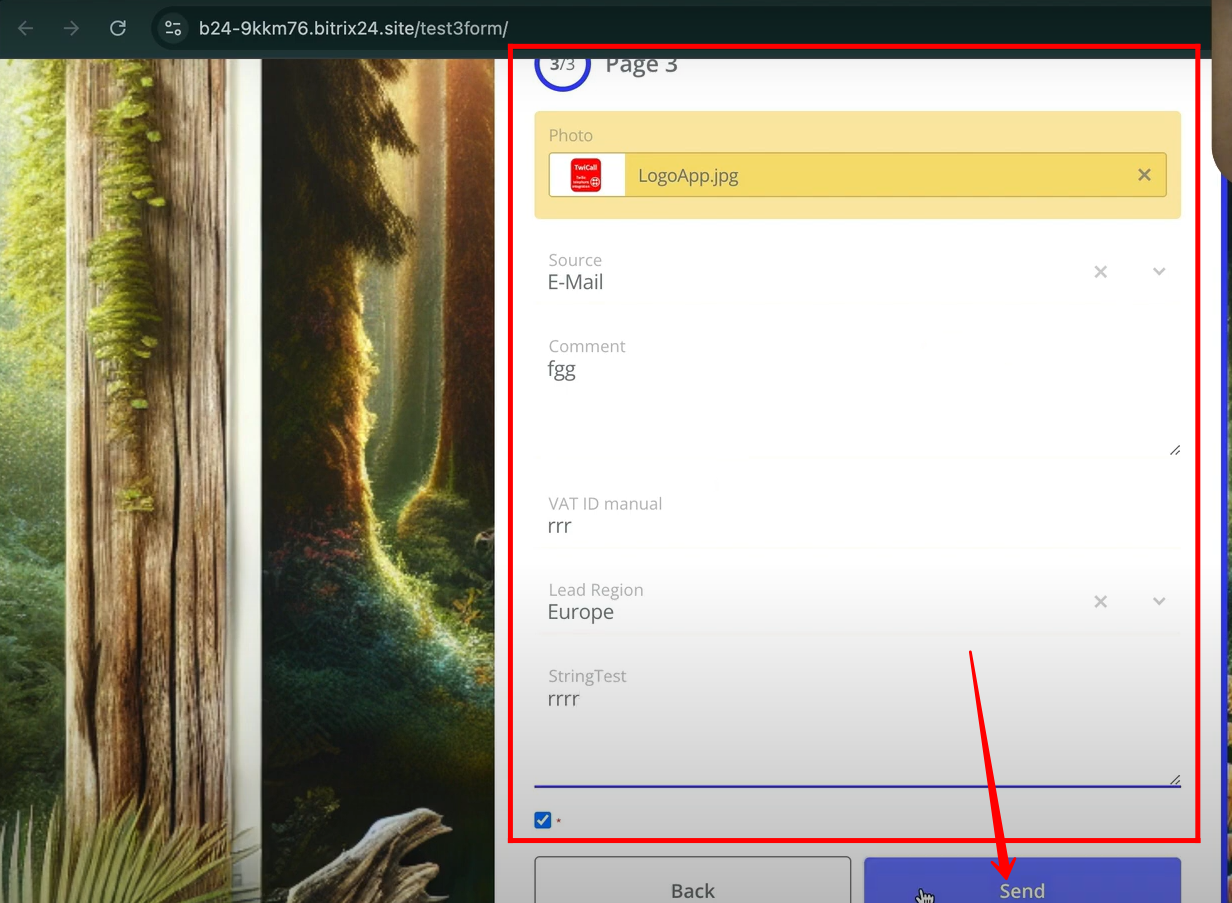
18. On the third and final page, the progress bar displays 3/3; complete the required details and click Send to submit the form.
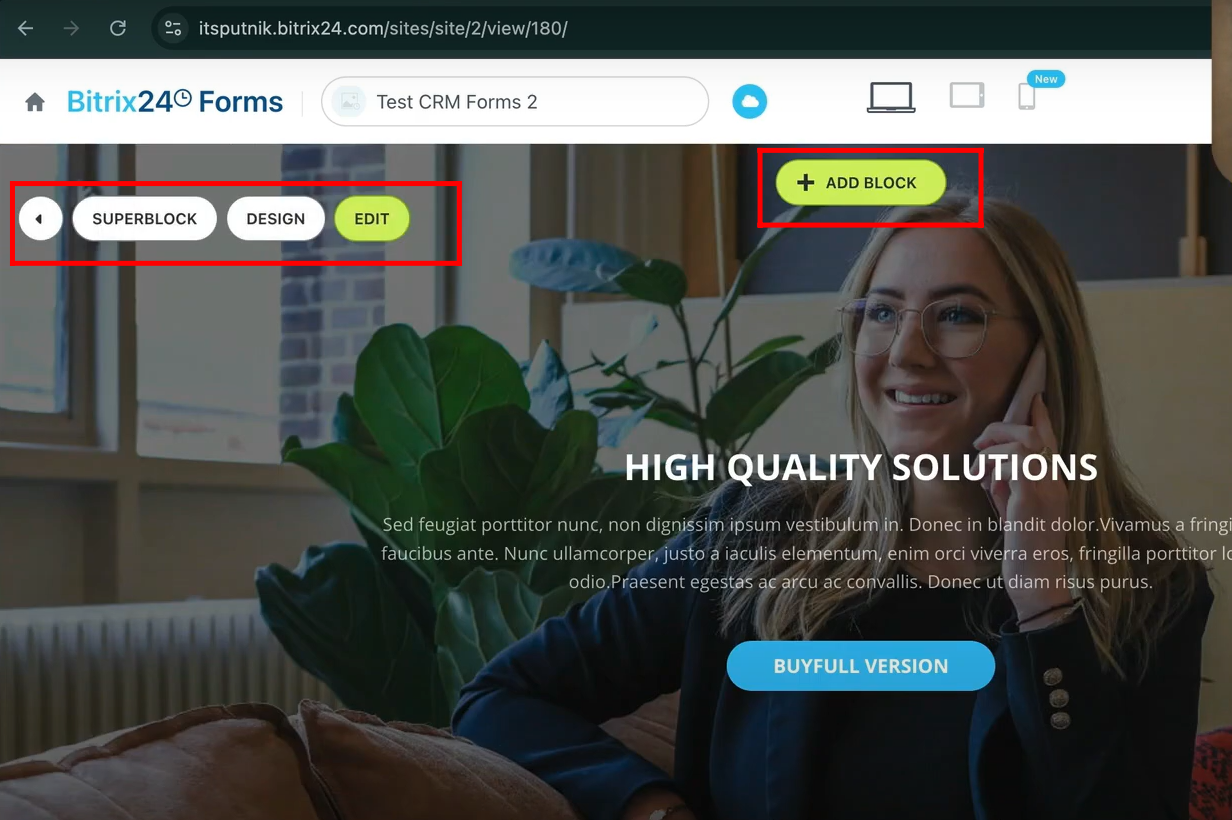
19. You can also configure the form as a website. The platform allows you to:
- Add a Superblock – works like the main container for your layout.
- Add a Block – insert functional blocks (form, text, image, etc.).
- Add a Section – divide content into structured areas.
- Design & Edit – customize the look and feel to match your branding.
- Different Sections – arrange and manage sections as if working in a CMS, but with more flexibility and interactive features.
It feels similar to CMS-style editing, but it goes beyond by giving you form-centric customization, design freedom, and user interaction management.
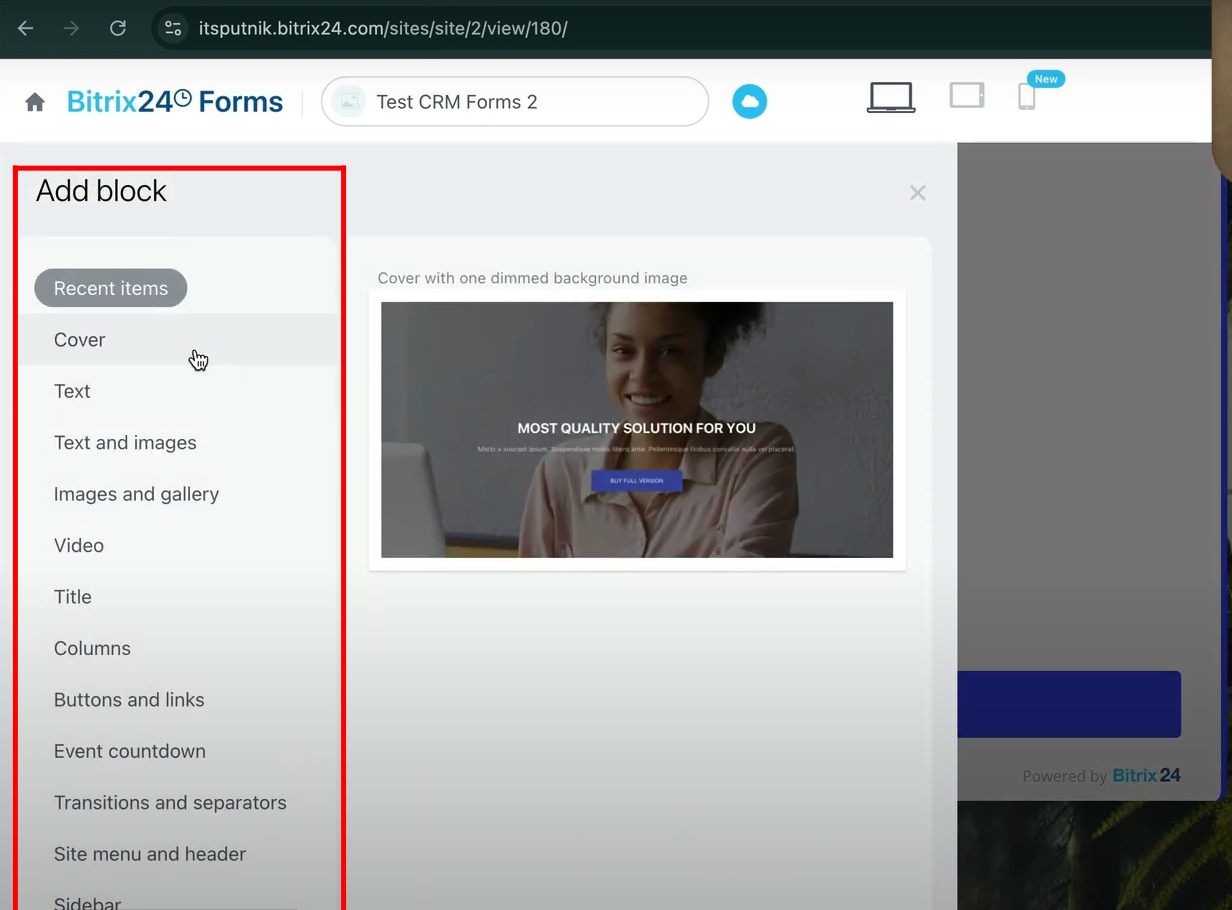
20. Here’s an overlook of the entities that can be added to a form to make it function like a website—such as cover, text, images, titles, columns, buttons and links, event countdowns, transitions, separators, sidebar, site menu, and more. The detailed process of configuring a form as a website will be discussed later in upcoming articles.
You can also watch video on Youtube