| 893 Views | admin

Collecting feedback directly within a CRM system helps businesses understand their customers’ needs and experiences more effectively. By setting up automated workflows, companies can send feedback requests at the right stage of a deal, ensuring that valuable insights are gathered without manual follow-up. This not only saves time but also ensures that no opportunity for feedback is missed.
When a customer receives an automated email containing a personalized form link, they can easily share their thoughts by filling out key details such as their name, company, comments, and rating. Once submitted, the information flows back into the CRM, where it is stored alongside the customer’s profile and deal history. This creates a clear and organized record of interactions, making it easier for teams to review and act on feedback.
By connecting feedback forms directly with deals and contacts, businesses gain real-time visibility into customer experiences. This helps identify strengths, address areas of improvement, and build stronger client relationships based on genuine input.
Detailed Instructions are given below
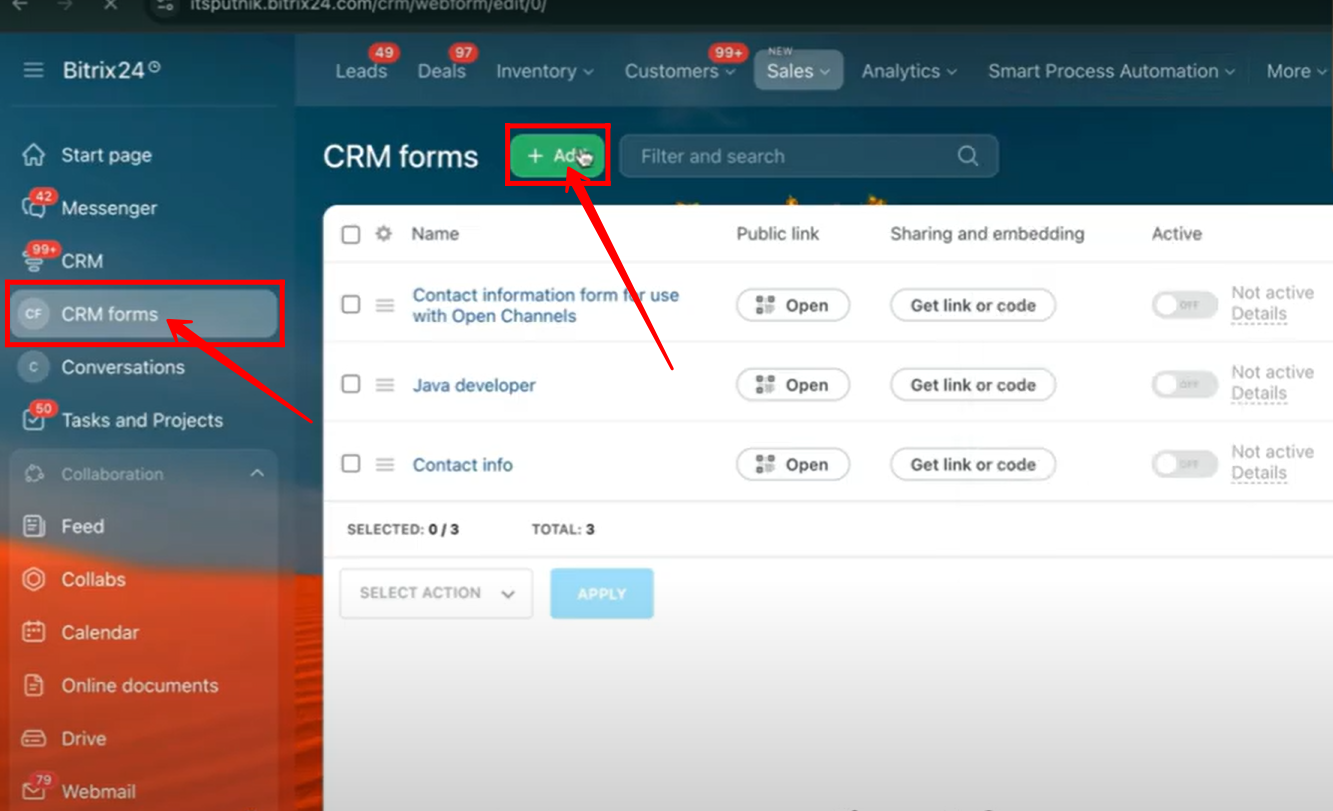
1. To create a new form in Bitrix24, navigate to CRM Forms and click on the + Add button. This will allow you to start setting up a new feedback form.
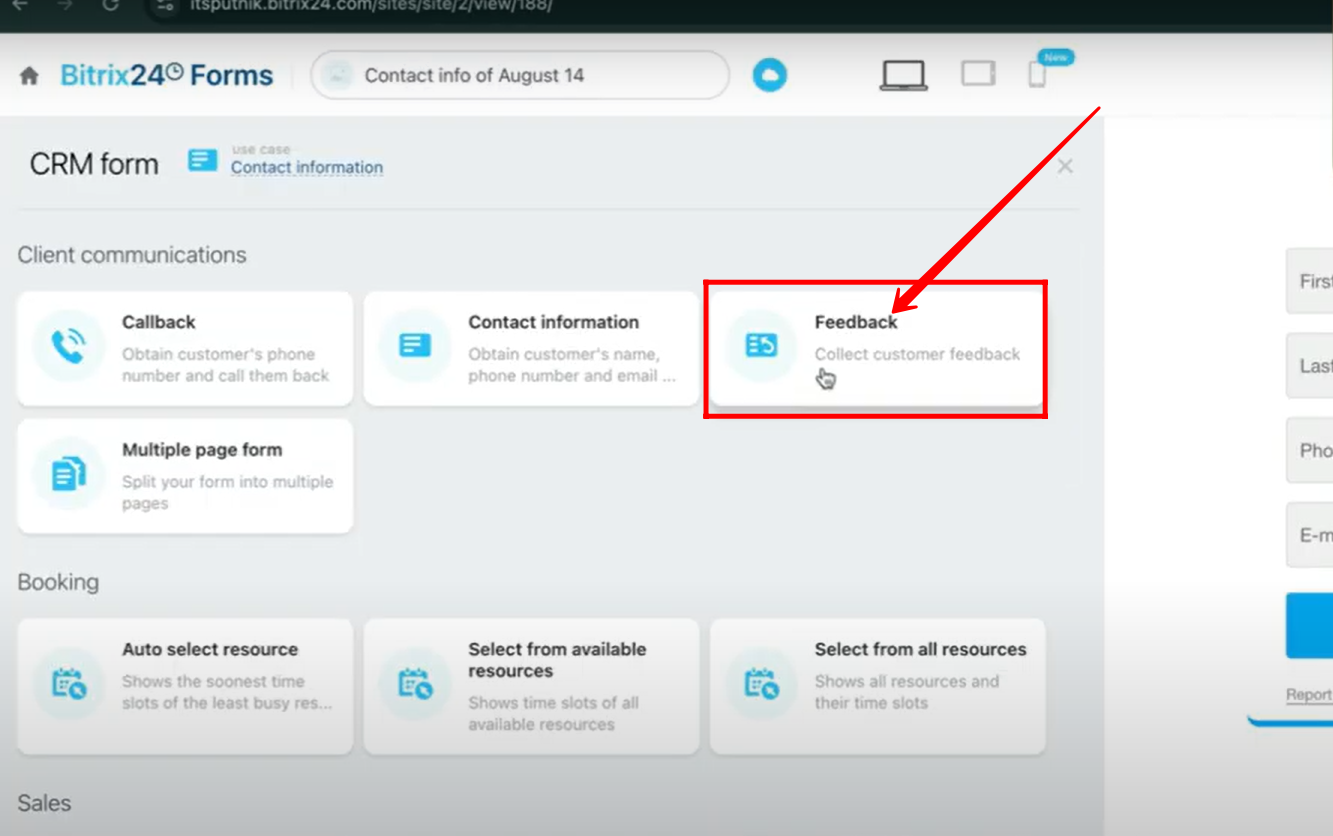
2. In the Client Communication section, select Feedback to generate a feedback form designed for collecting customer responses.
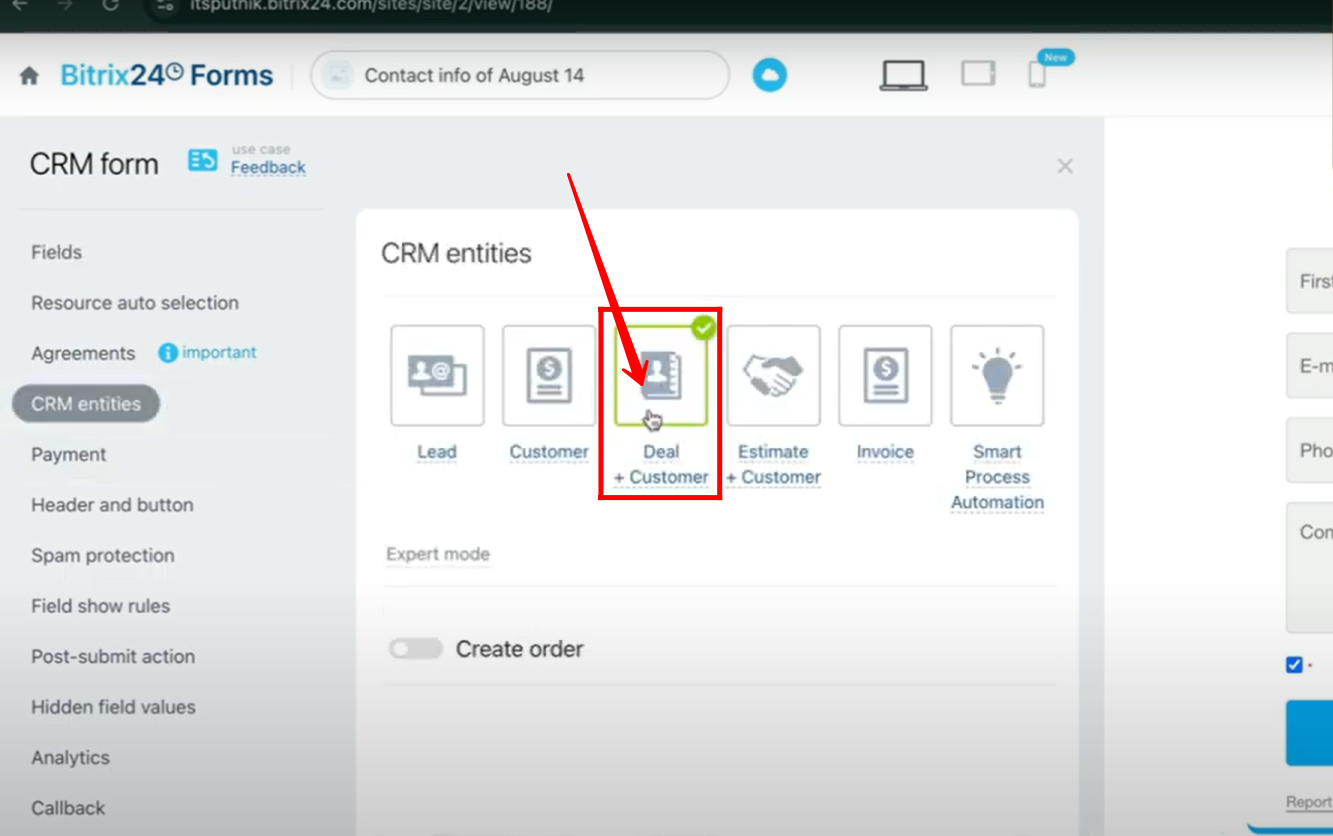
3. In the CRM Entities tab, you will see that Deal + Customer is selected by default, which is well-suited for gathering feedback. However, you also have the option to choose other entities if needed.
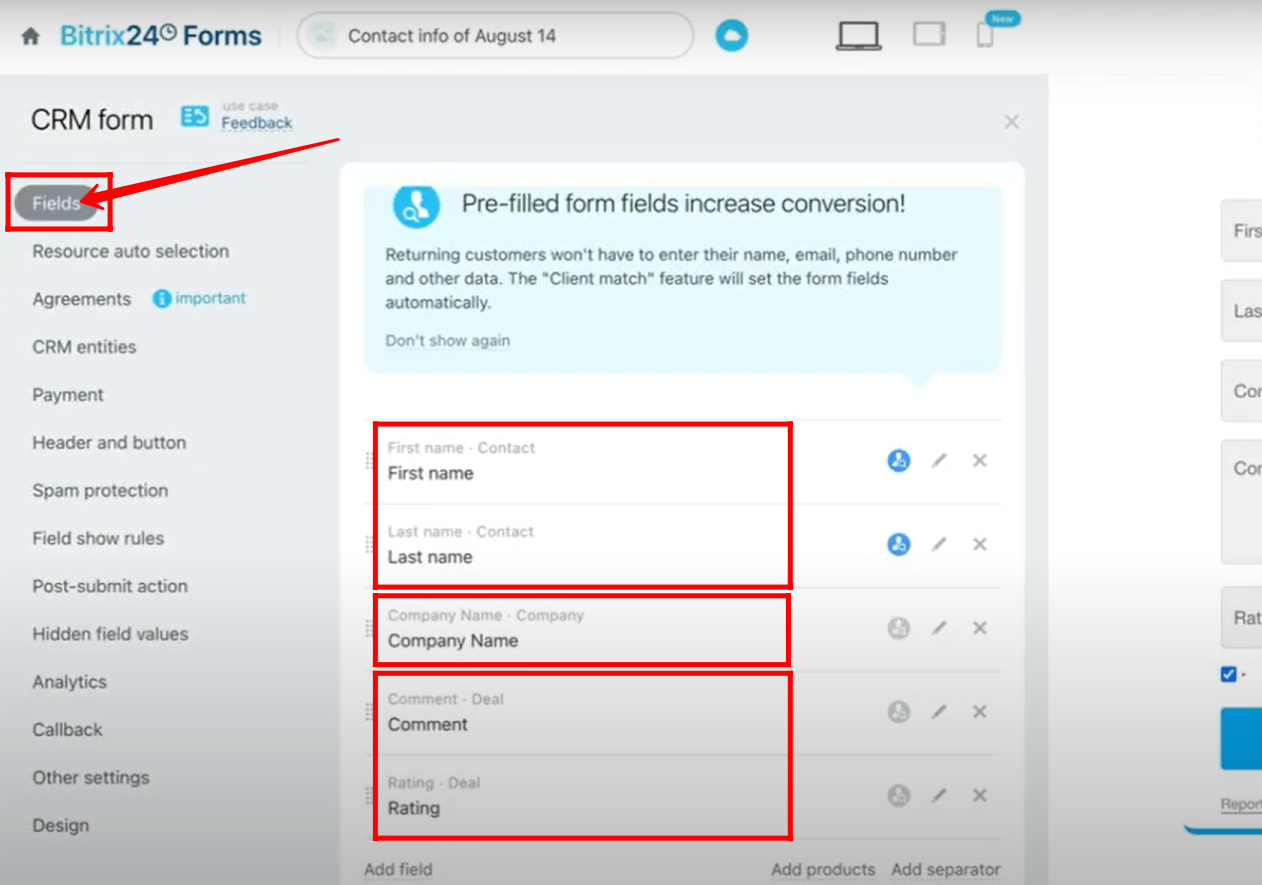
4. In the Fields tab, you can add fields of your choice. For example, from the Contact entity, the First Name and Last Name fields are included with autocomplete enabled; from the Company entity, the Company Name field is added; and from the Deal entity, the Comment and Rating fields are selected. You can freely include any additional fields as needed.
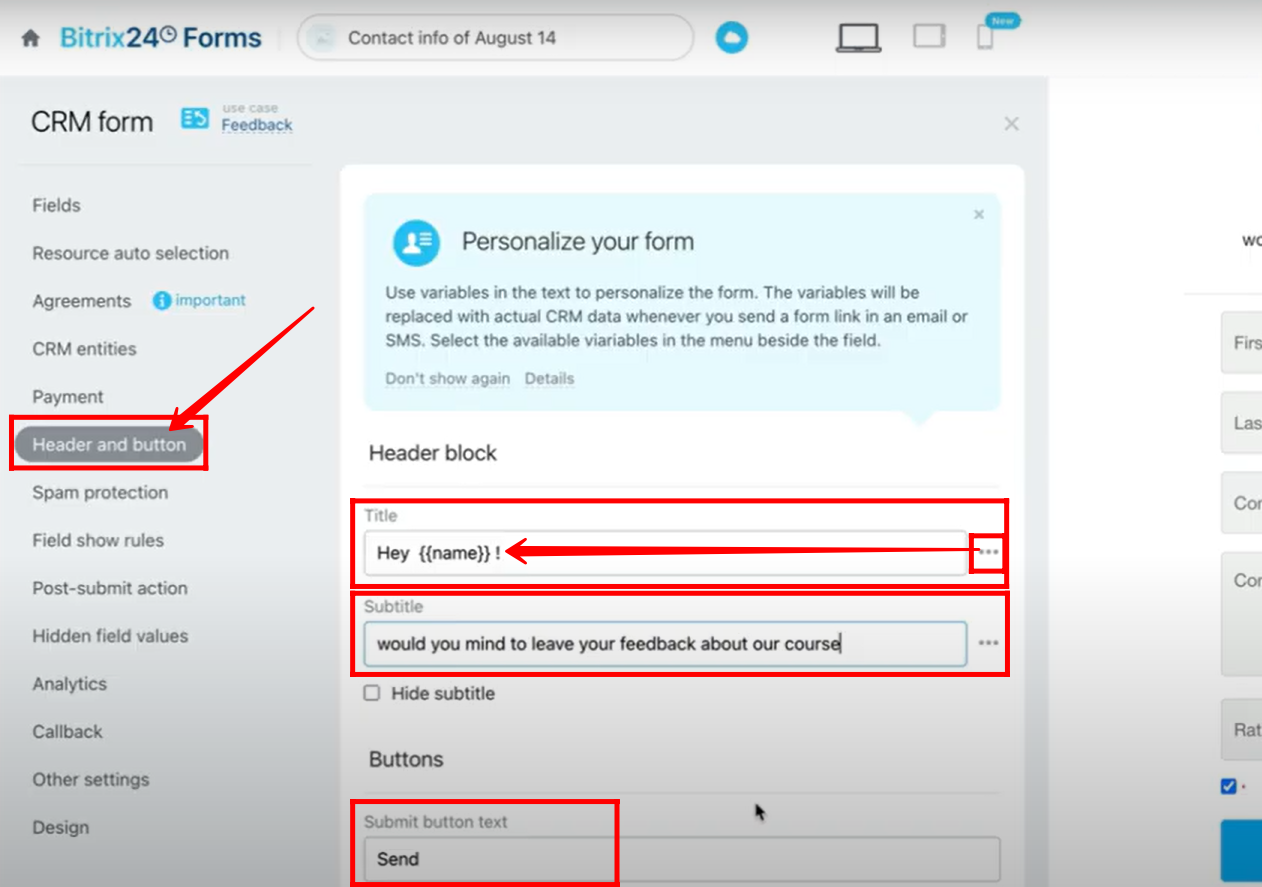
5. In the Header and Button tab, you can set the title and subtitle of the form. For instance, the title added is “Hey {{name}} !”, where the dynamic field “{{name}}” , (contact name) is inserted using the three-dot menu. You can also include other dynamic fields in both the title and subtitle, and customize the text of the submit button as needed.
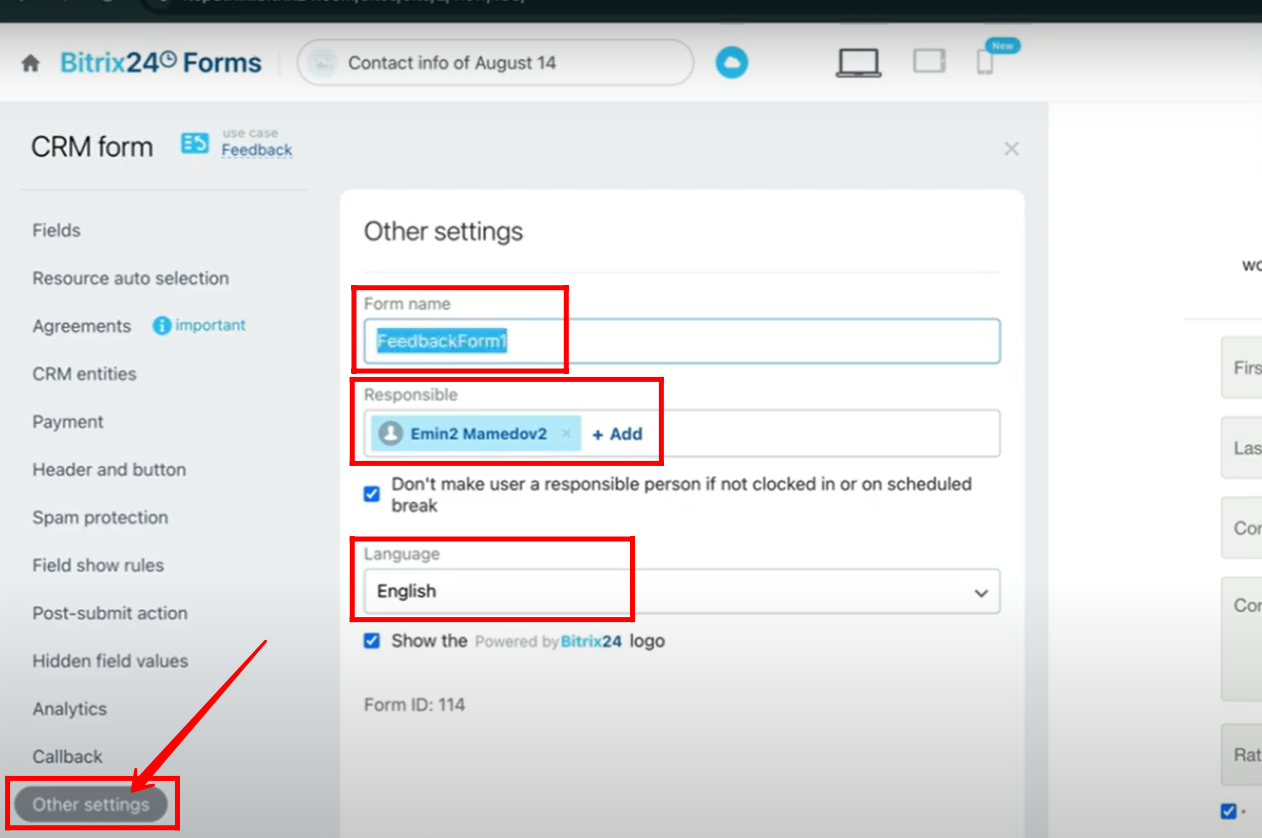
6. In the Other Settings tab, you can configure the Form Name, assign a Responsible Person, select the form language, and decide whether to display the default Bitrix24 logo on the form.
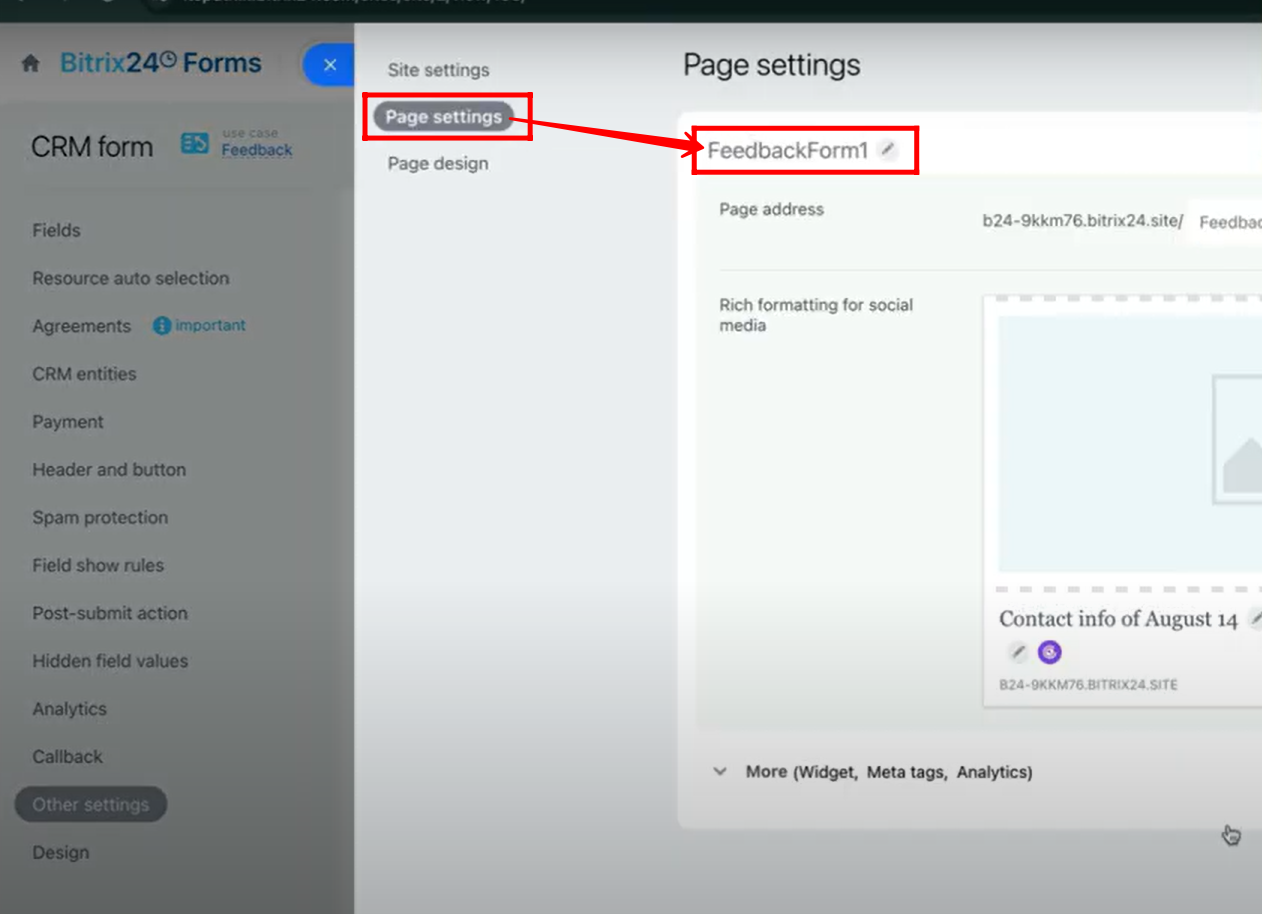
7. Within the Form Features settings, navigate to Page Settings, where you can set a Page Name (different from the form name), customize the Page Address (URL), and add rich formatting for social media to enhance how the form appears when shared online.
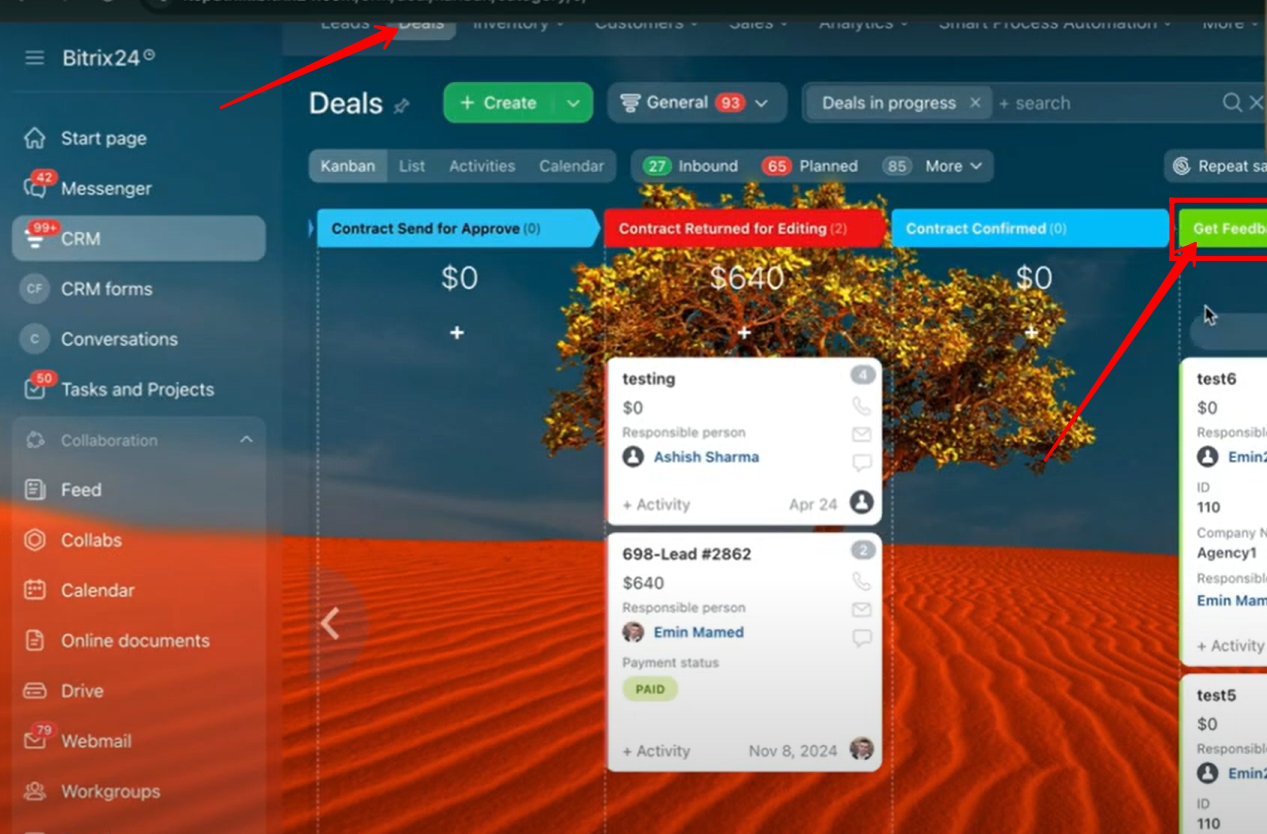
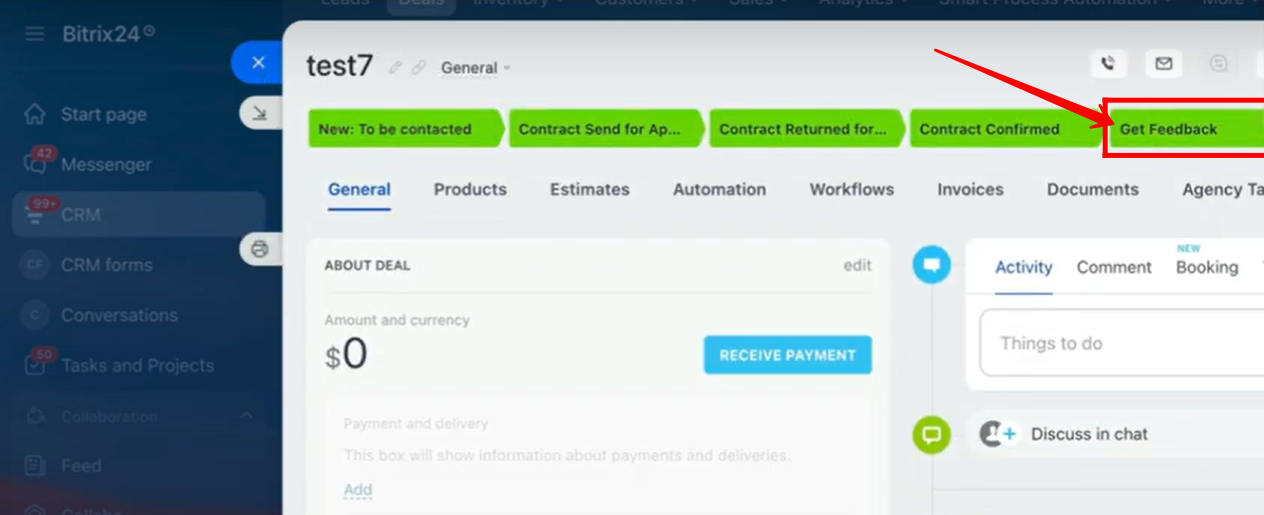
8. Go to Deals and create a new stage named “Get Feedback” for testing purposes. You can also add or modify stages as needed based on your specific requirements.
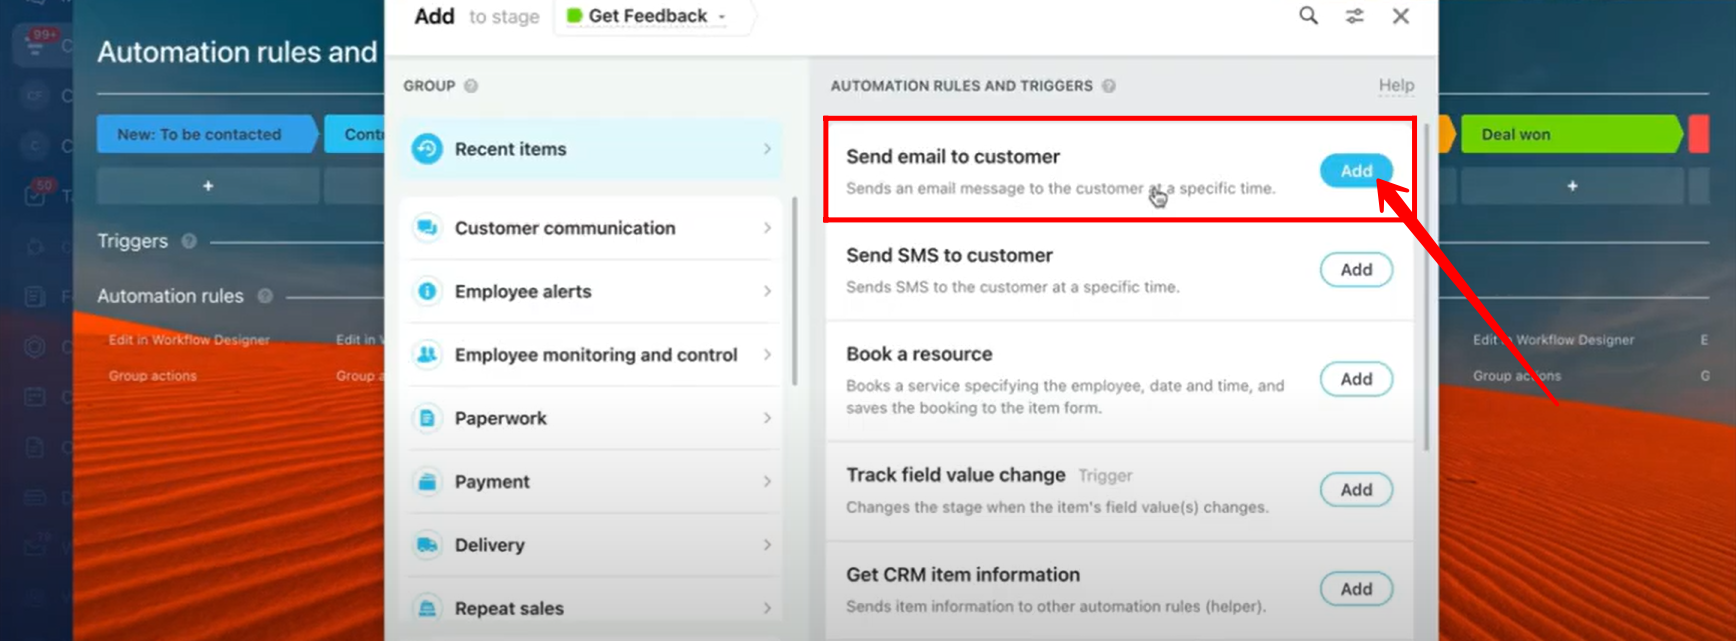
9. Add a new automation rule called “Send email to customer.” Configure it so that when a deal moves into the Get Feedback stage, an email containing the feedback form link is automatically sent to the customer for their input.
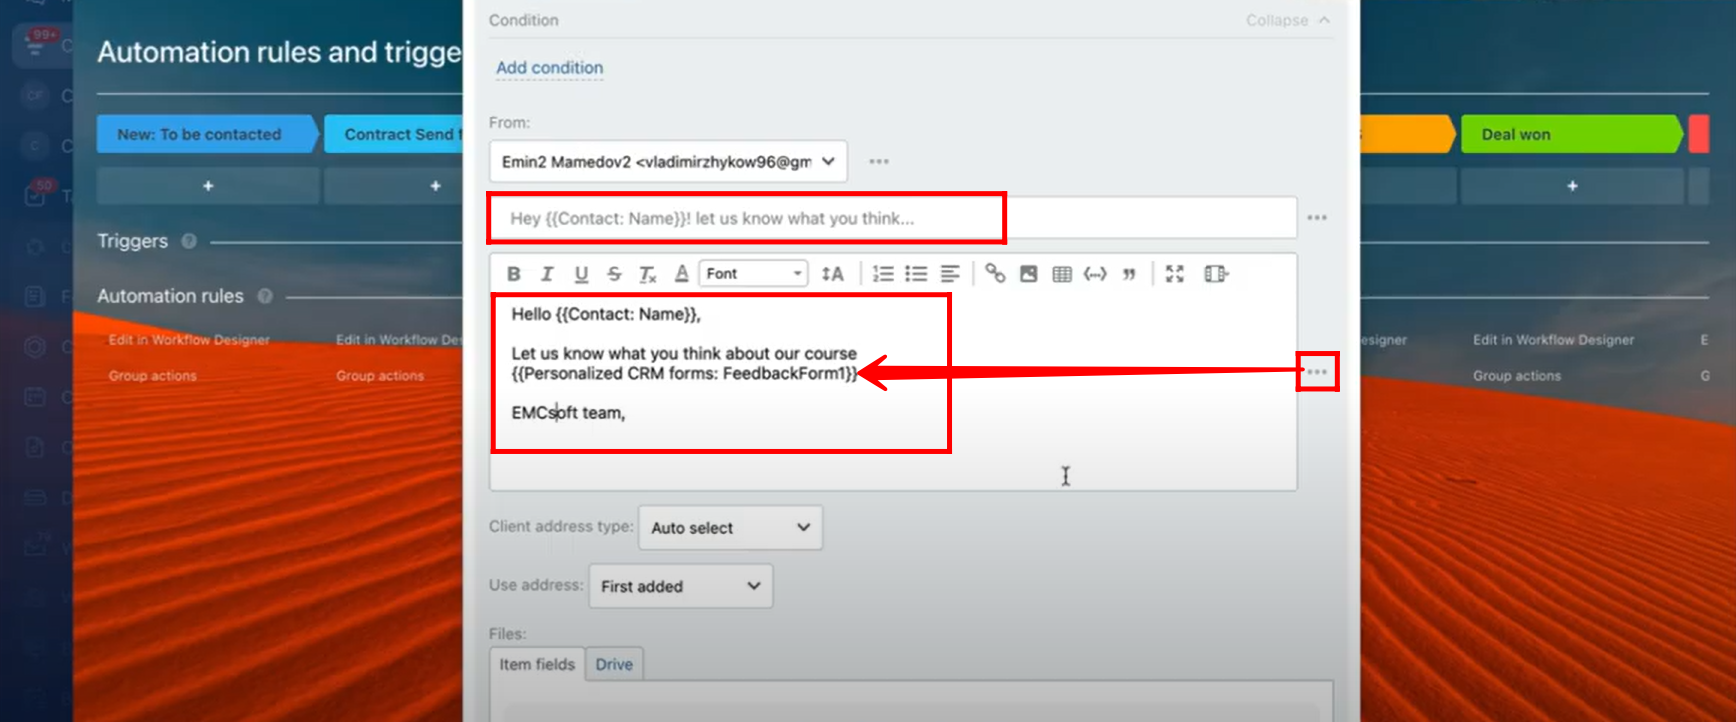
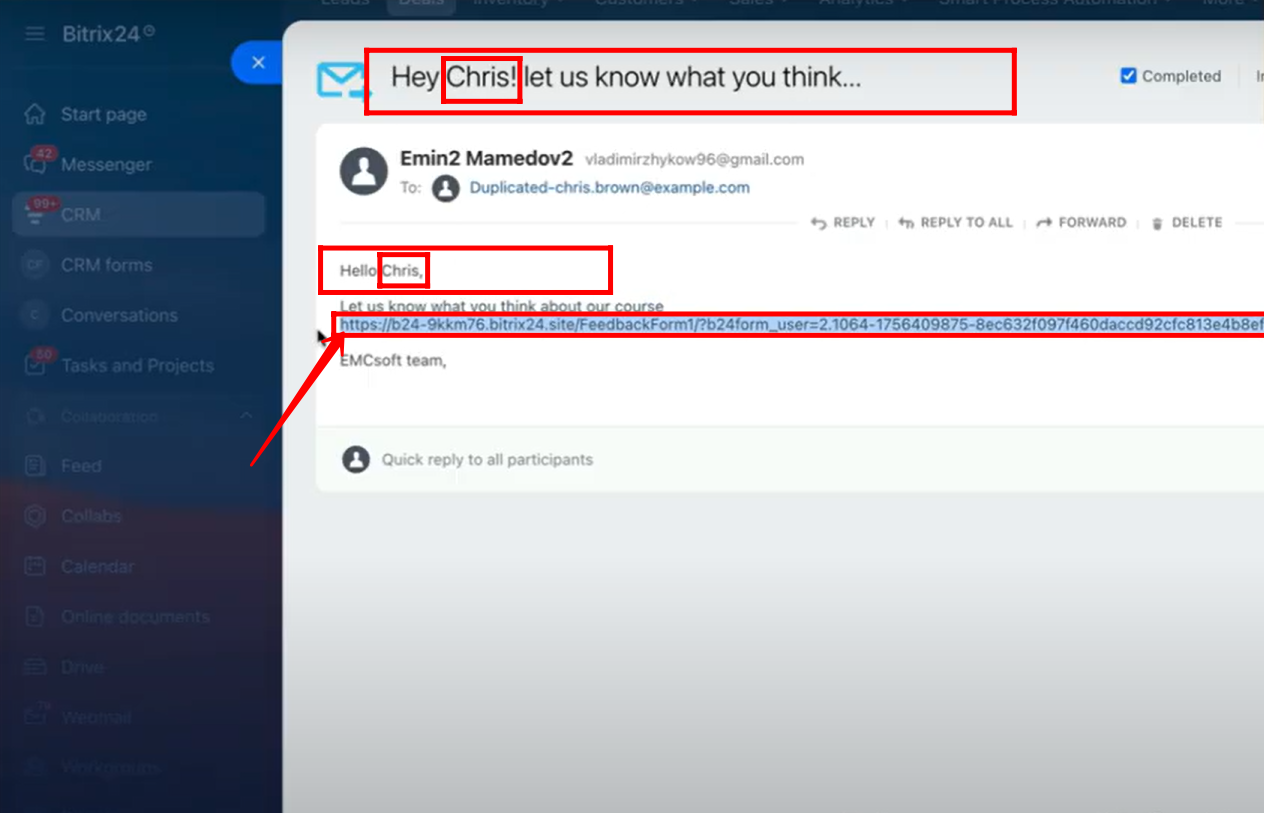
10. In the automation rule configuration, enter the email title and body, and insert dynamic fields such as {{Contact: Name}} and {{Personalized CRM Forms: FeedbackForm1}} using the three-dots menu. Once everything is set up, save the automation rule.
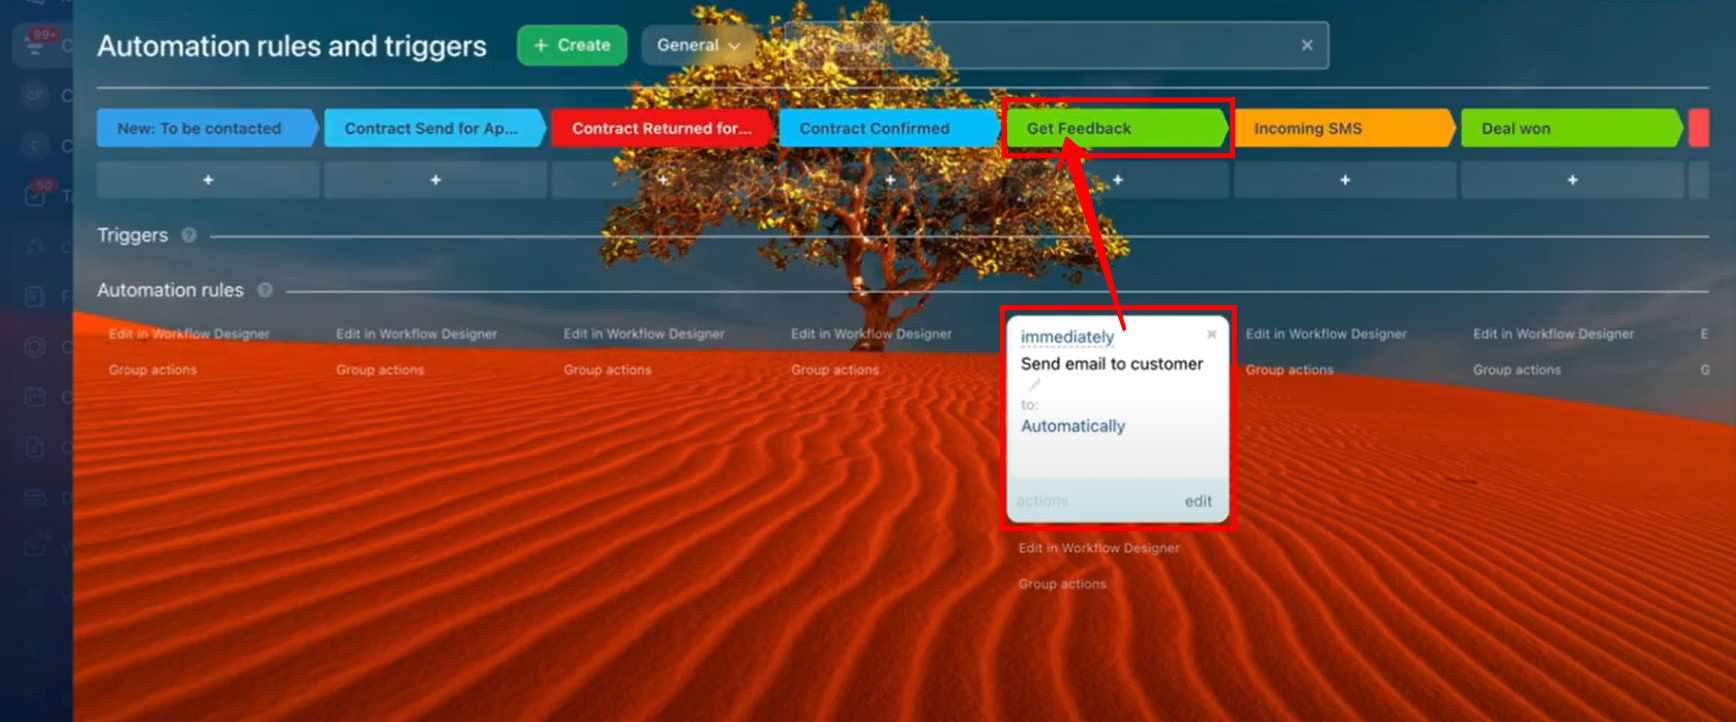
11. Make sure to place the automation rule in the “Get Feedback” stage so that the email with the feedback form link is automatically sent to the customer when a deal reaches this stage.
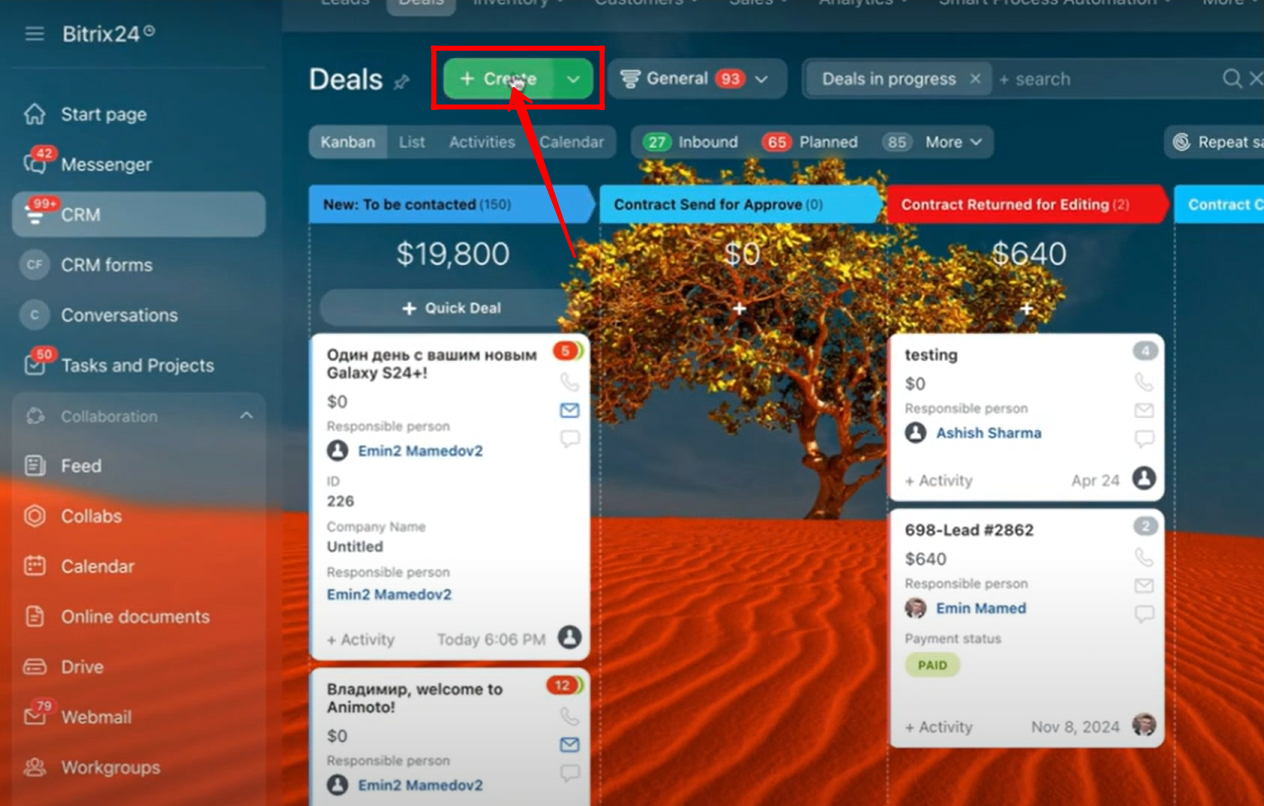
12. Go back to “Deals” and click the “+ Create” button to create a new deal.
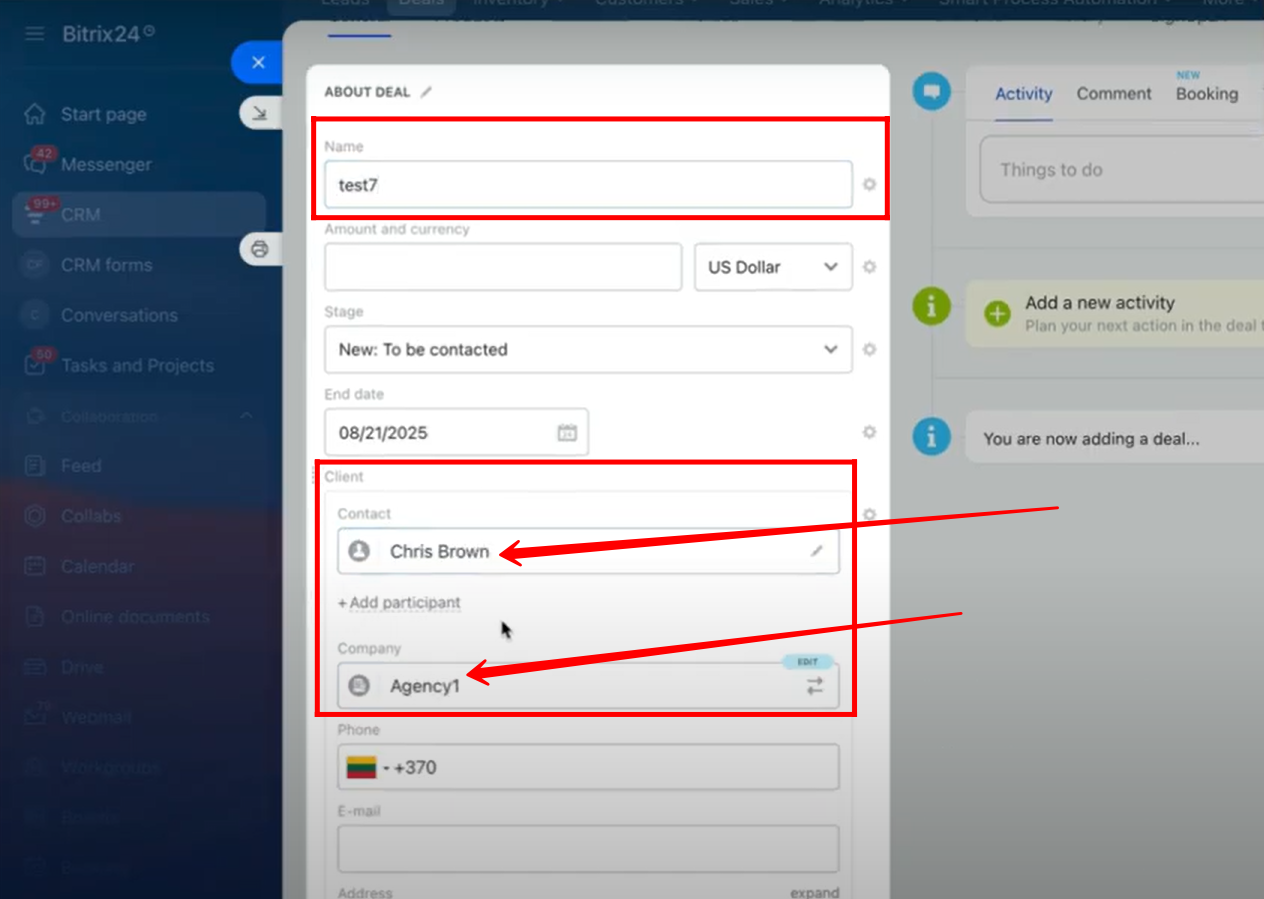
13. Add a deal name (for testing, the name entered is “test7”). In the Client section of the deal, select a company; if a contact is already linked to that company, it will be automatically selected, otherwise, manually select the contact as well.
14. After saving the deal, move it to the “Get Feedback” stage.
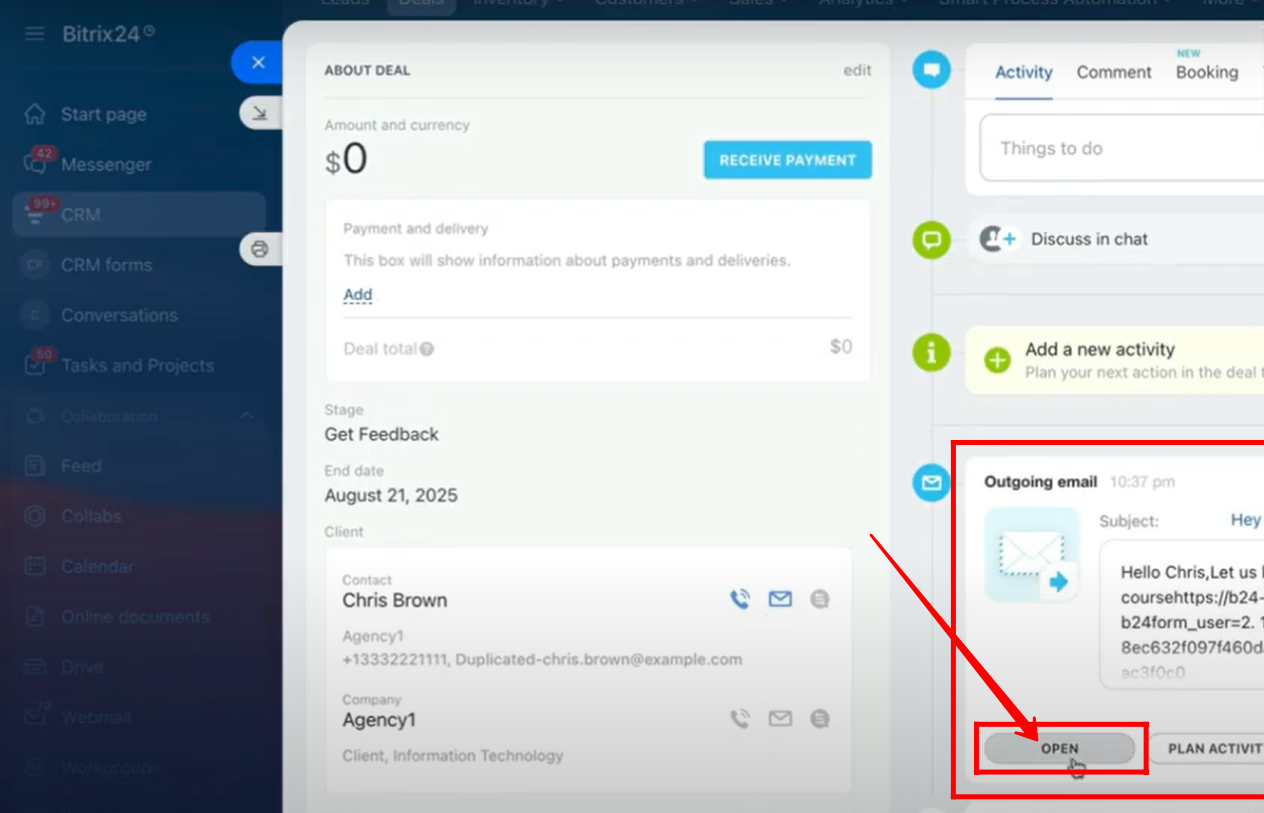
15. After moving the deal to the “Get Feedback” stage, go to the Activity timeline of the deal. Here you’ll see that an email has been sent to the customer/client. Click “Open” to view the email and confirm that the feedback form link and dynamic fields are displayed correctly.
16. Here, you can see the email that was sent with the configured title and description, including dynamic fields such as the contact name and the form link. The customer will open this form link to submit their feedback in the provided fields; since we are testing, let’s go ahead and open the form link.
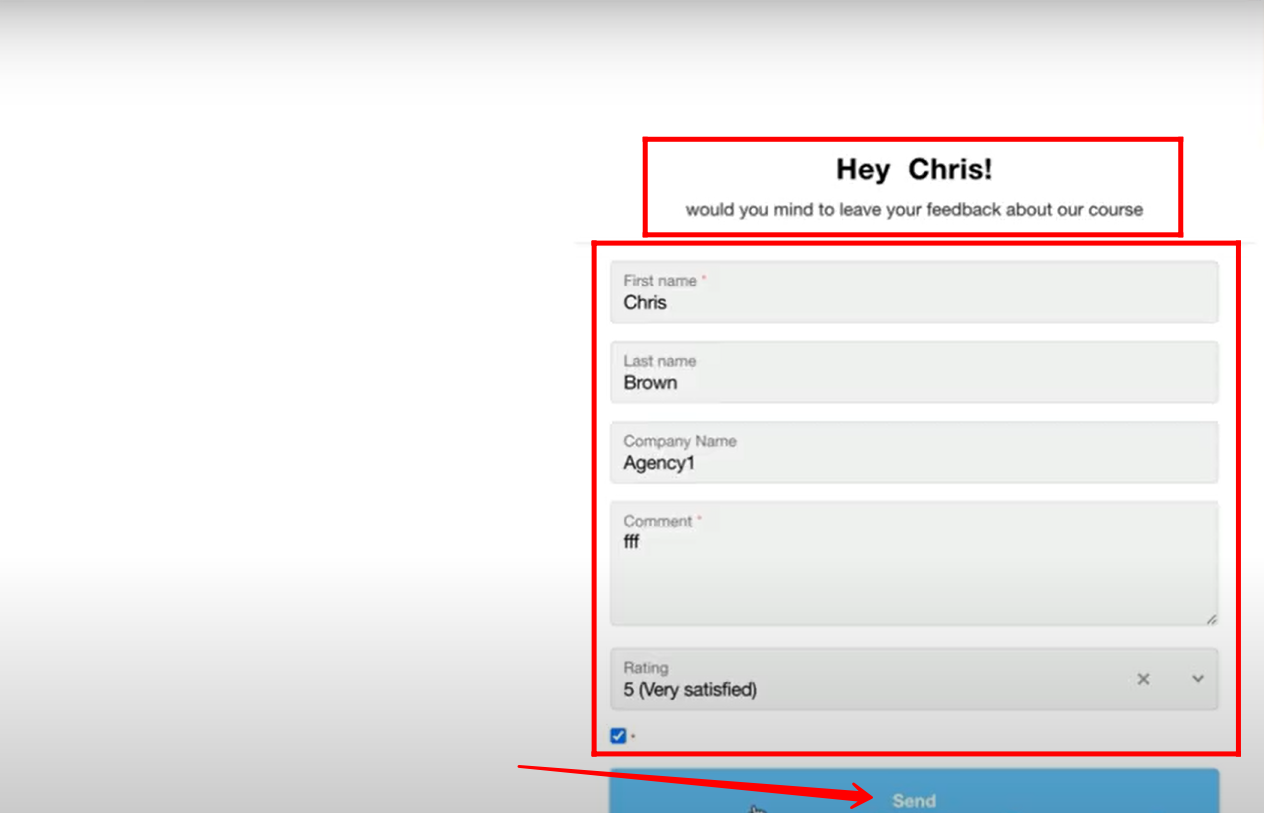
17. Here, you can see the form with its title and subtitle, where the dynamic field has embedded the contact name (Chris) into the title. The First and Last Name fields are automatically filled with the contact’s details, while additional fields such as company name, comment, and rating can be used to capture feedback. Depending on your needs, you can customize these fields or use alternatives. Once completed, submit the form.
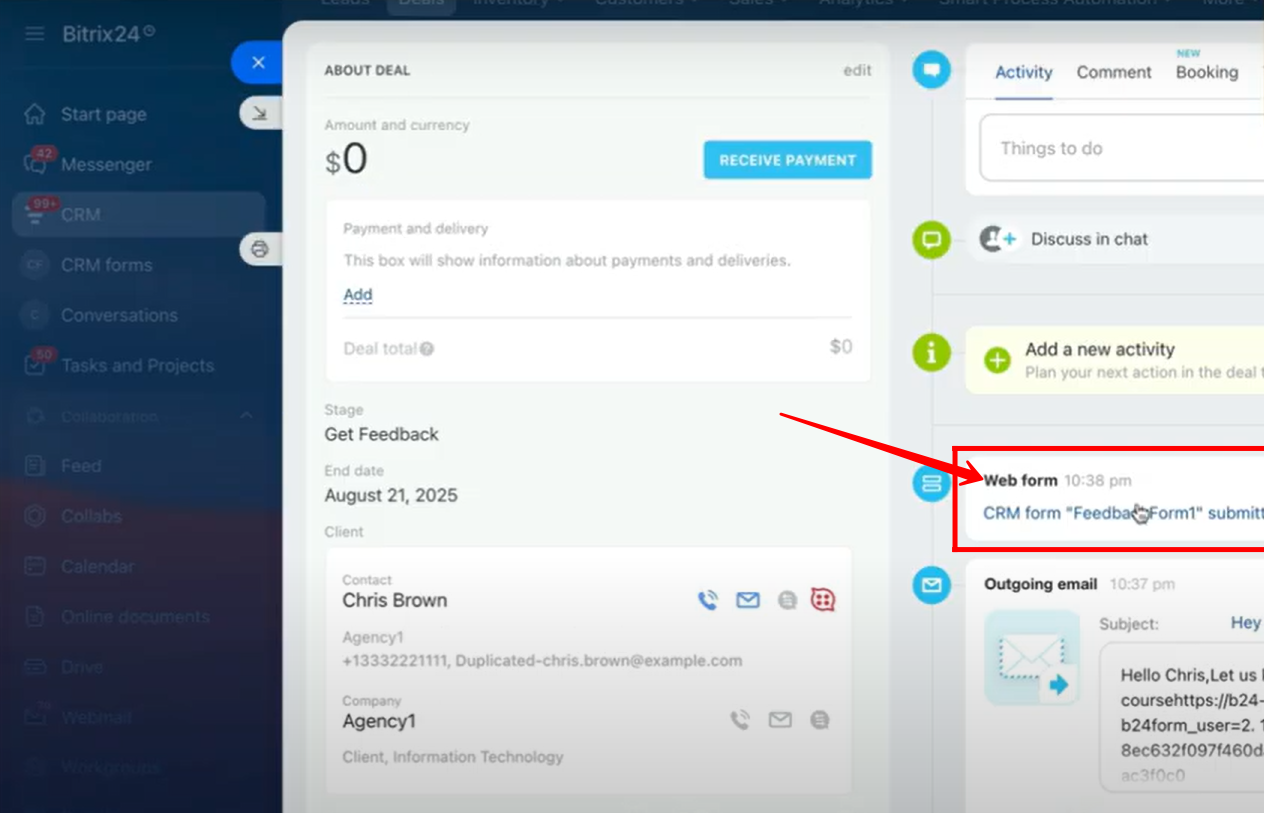
18. Go back and open the deal, where in the activity timeline you will see a web form submission alert. Click on it to open and view the details of the submission.
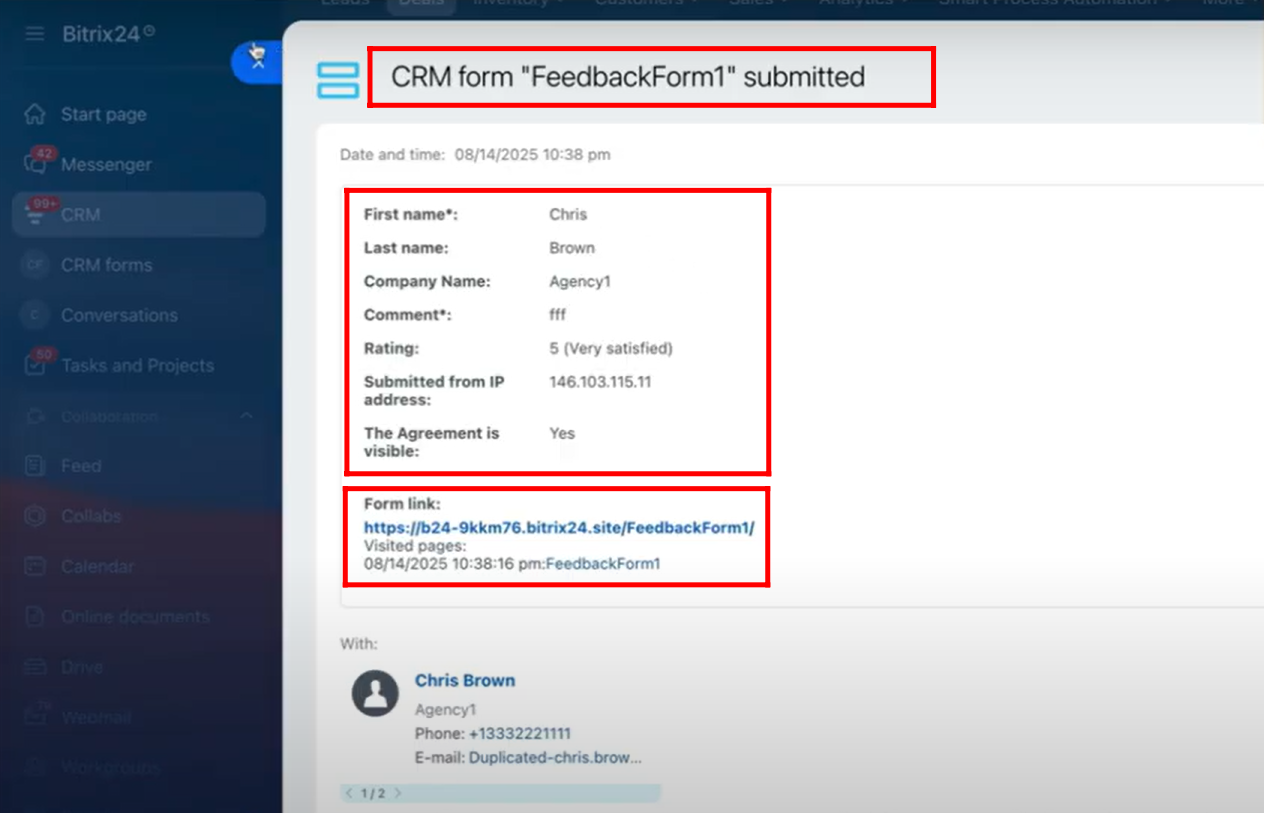
19. Here, you can see that the CRM Form “FeedbackForm1” has been successfully submitted, along with the date and time of submission. All the respective field values are captured, including the form link, and the submission is automatically linked with the contact’s details.
You can watch the video on Youtube
