| 1313 Views | admin

Bitrix24 CRM Forms provide a flexible way to collect information from clients, leads, or event participants and directly store it in your CRM system. These forms can be configured to handle a variety of scenarios, including online and offline event registrations, adding CRM data, and collecting custom preferences from users. By using CRM forms, businesses can ensure that all submitted data is accurately recorded in the relevant CRM entities, such as deals, contacts, or leads, making it easier to manage interactions and maintain organized records.
The system comes with pre-defined fields like first name, last name, email, phone, and more, which can be used as-is or modified to fit the specific needs of your form. Additionally, users can add new fields from existing CRM entities or even include product lists directly in the form for purchase requests or service selections. This functionality allows organizations to capture detailed information while maintaining a clear structure in how data is collected and stored.
CRM forms also include advanced options such as hidden fields, custom deal naming, and linking submissions to multiple entities while maintaining a primary record. Users can also enhance the appearance of forms by customizing colors, fonts, separators, and even dividing the form into multiple pages for better readability. This makes CRM forms not only functional but also visually organized, providing an intuitive experience for both internal users and external clients submitting information.
“Detailed Instructions are given below”
1. To begin working with CRM Forms in Bitrix24:
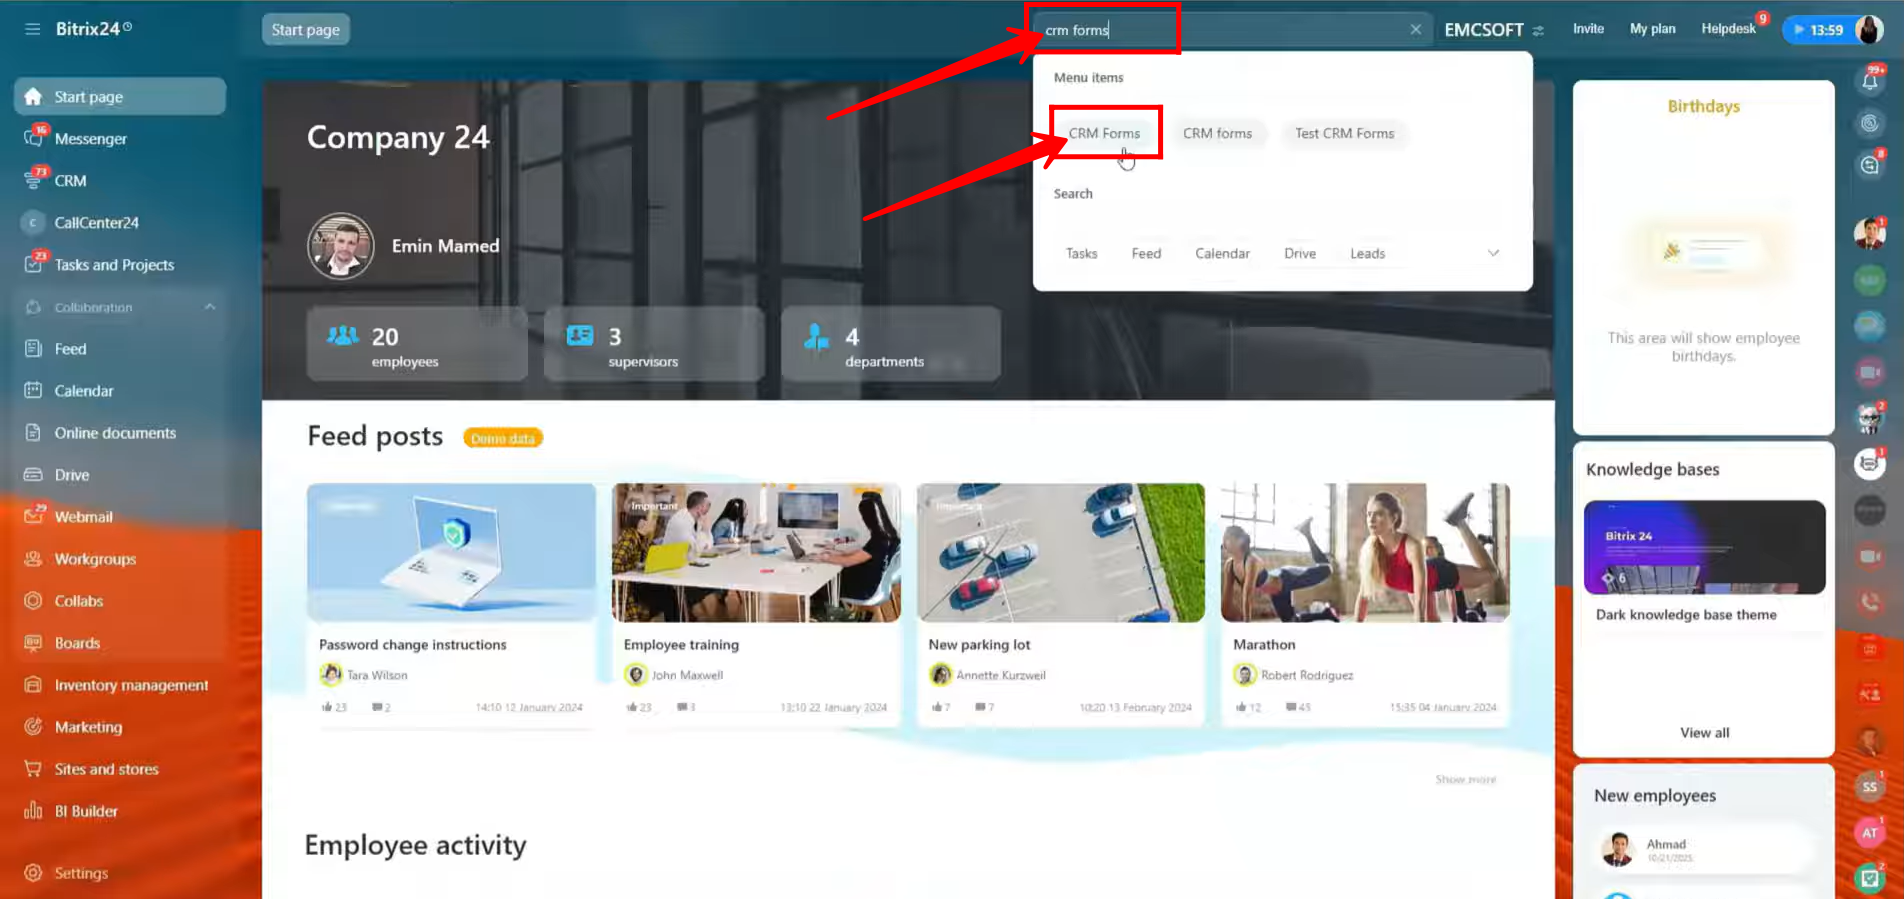
- Go to the search bar at the top of your Bitrix24 portal.
- Type “CRM Forms” in the search field.
- From the search results, click on “CRM Forms” to open the module.
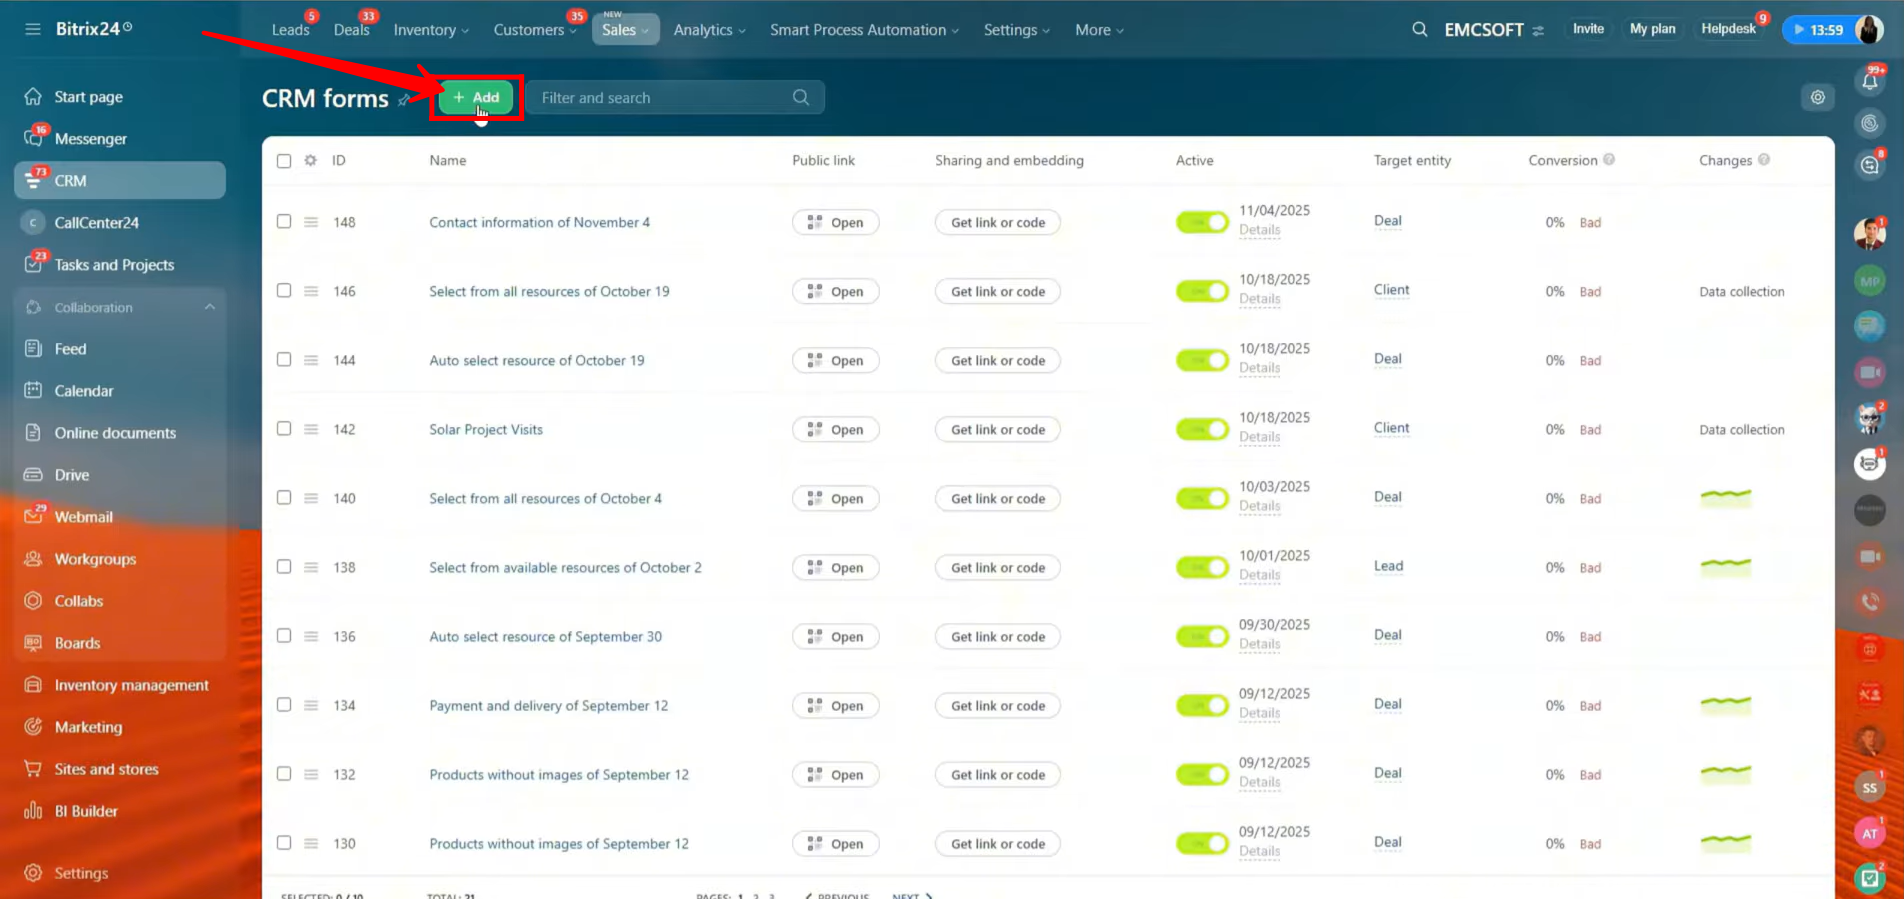
2. Once you’re inside the CRM Forms section, click the “+ Add” button. This will allow you to create and configure a new form from scratch.
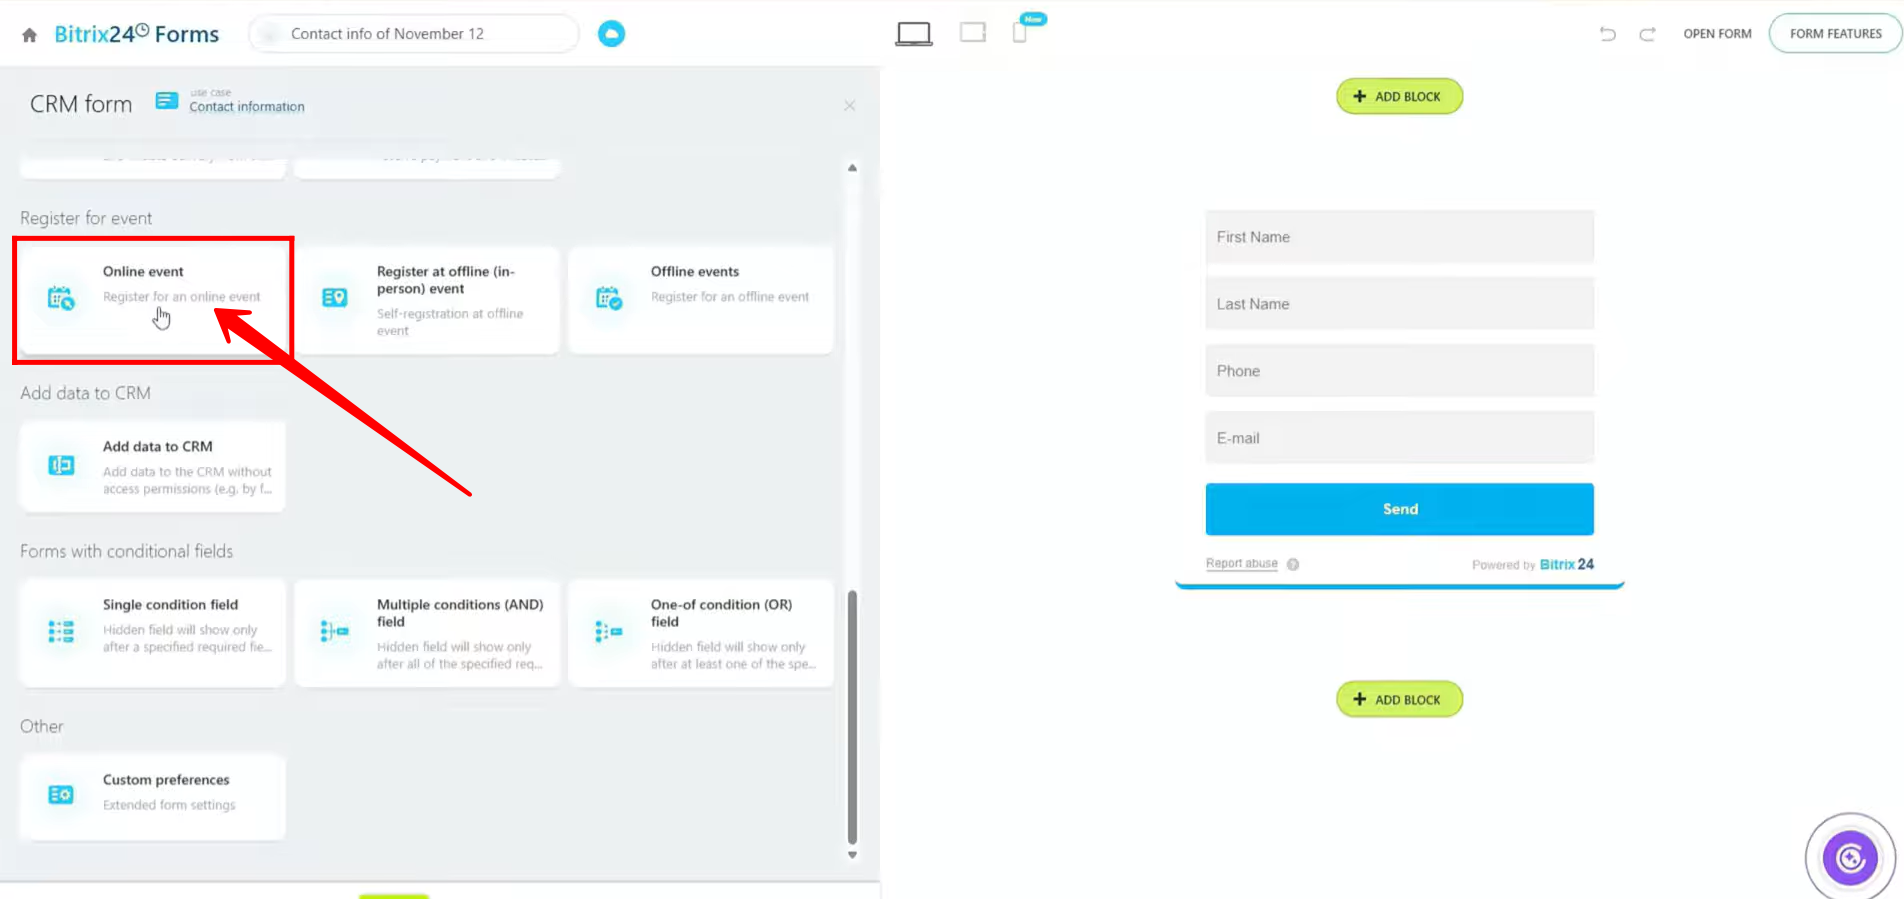
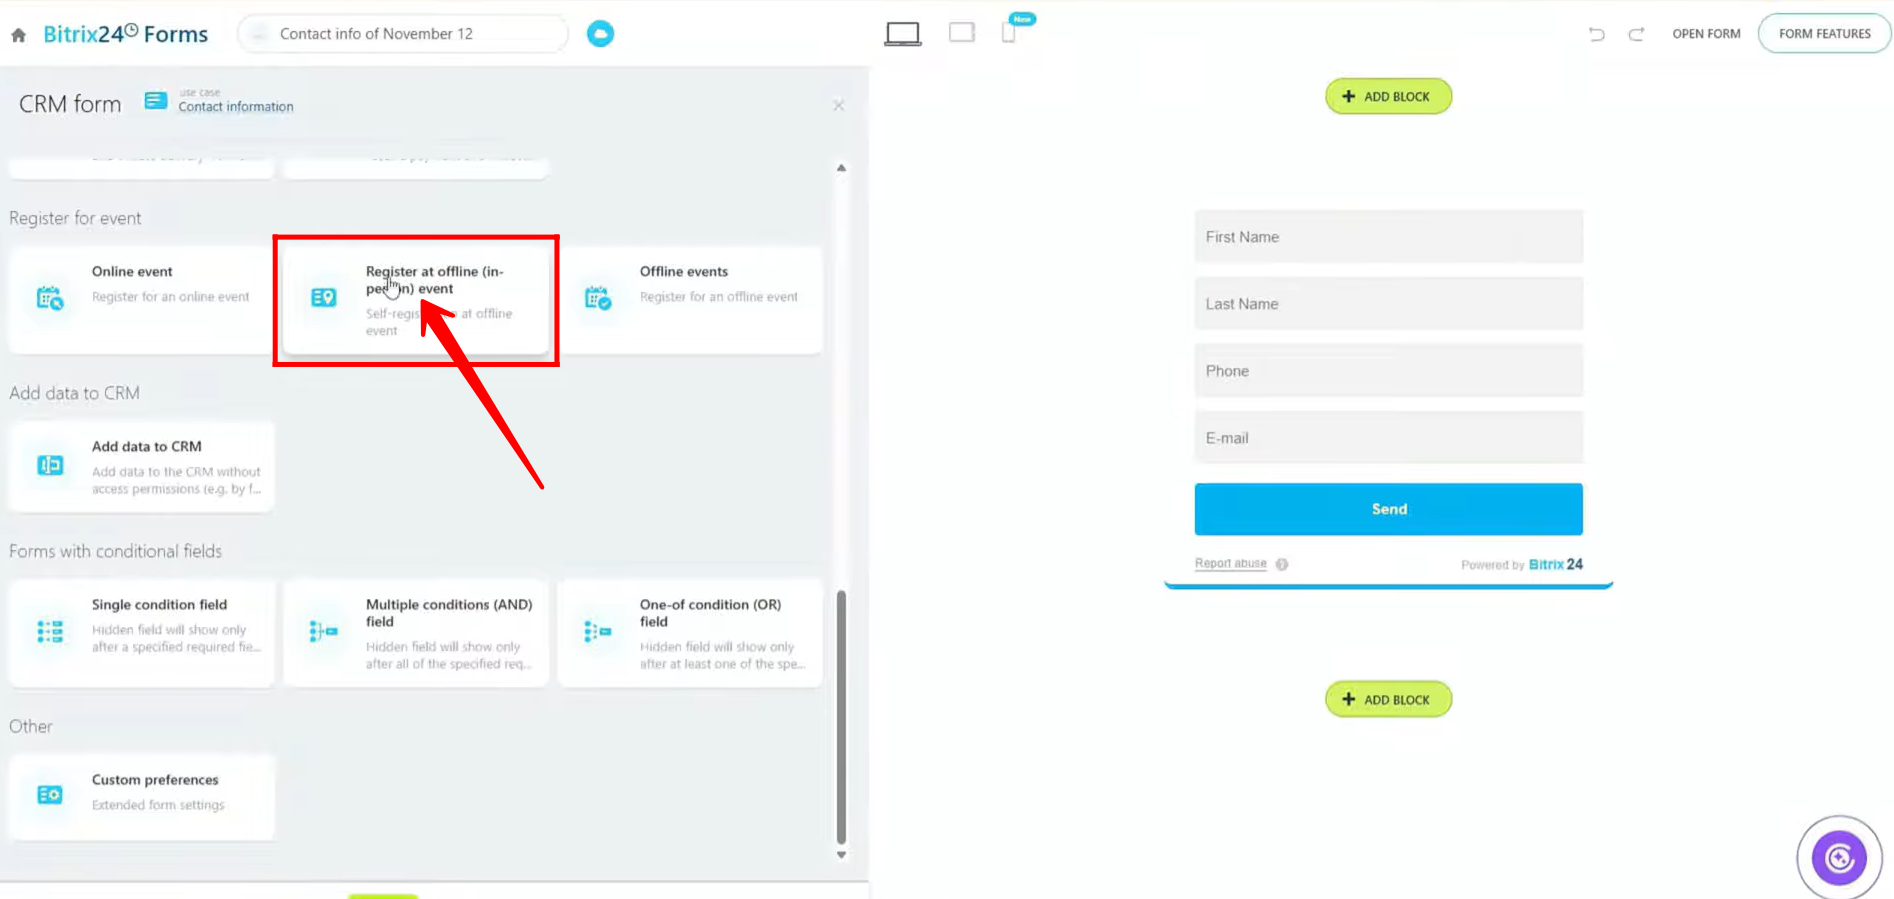
3. To create an event-specific form, go to the “Register for event” section. You will see three types of form options available: Online Event, Register at Offline (In-Person) Event, and Offline Events. For now, we will proceed with creating an Online Event form.
4. You will see several pre-configured fields such as First Name, Last Name, Phone, and others. You can add additional fields as needed based on your requirements. In this event-specific form, you will also find a predefined field linked to the Deal entity, called “Event Format.”
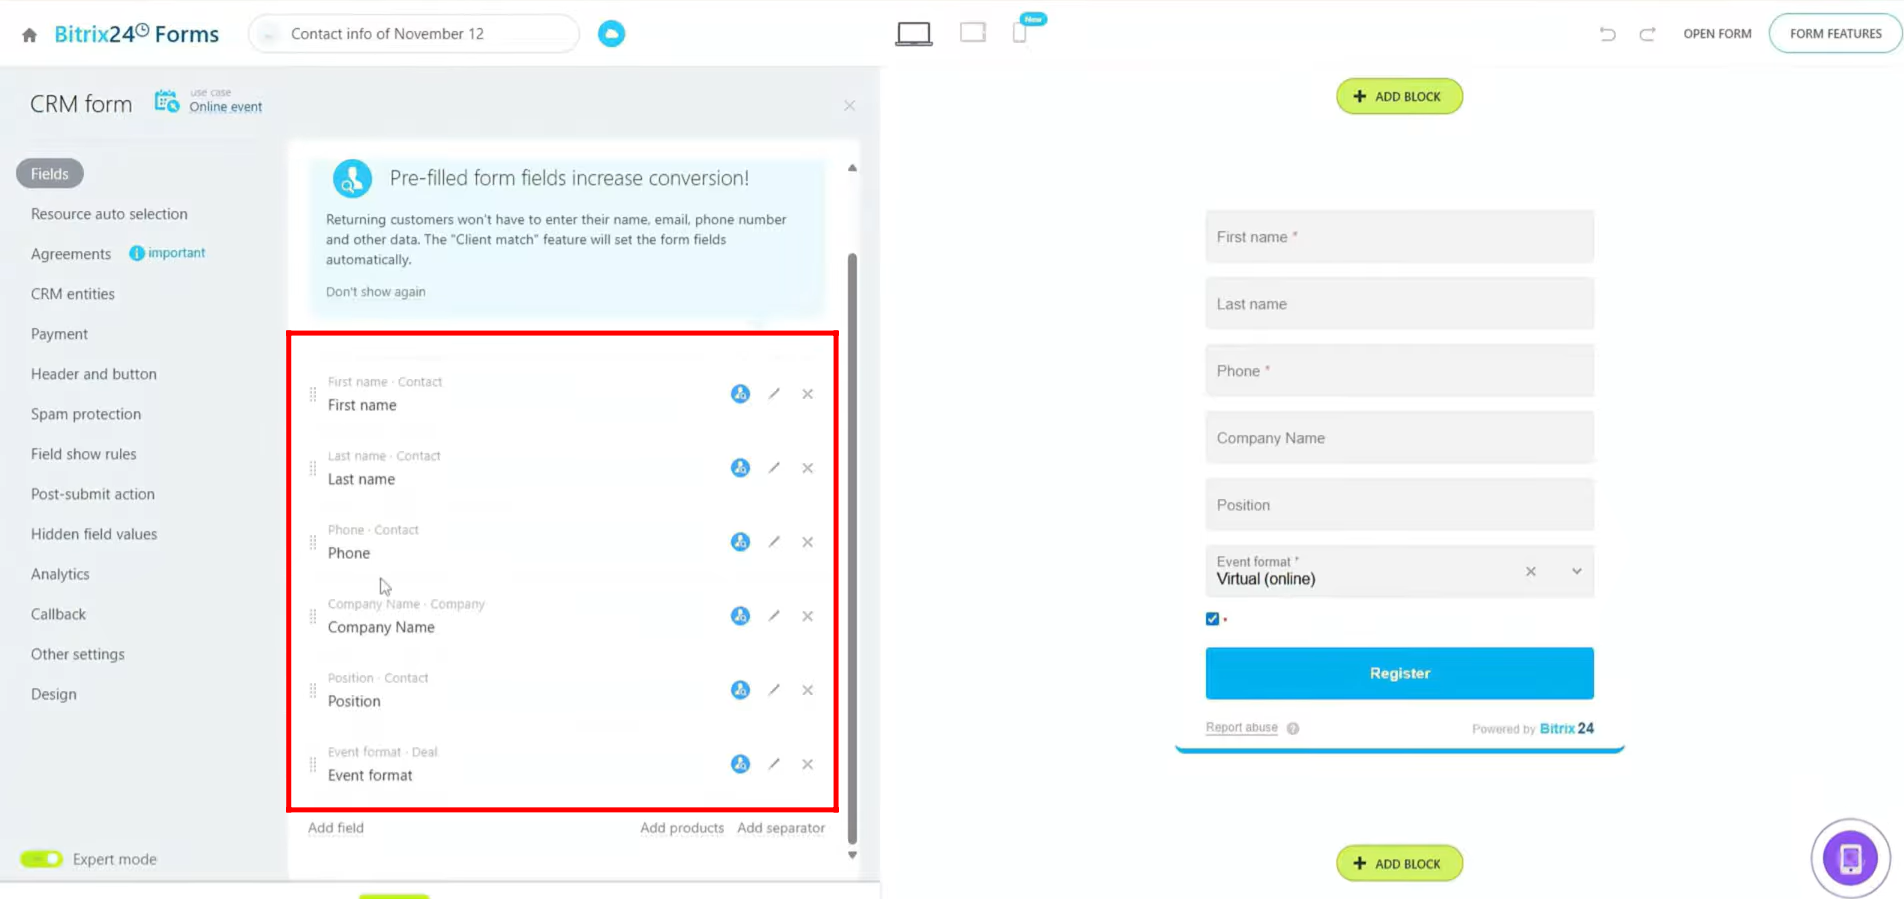
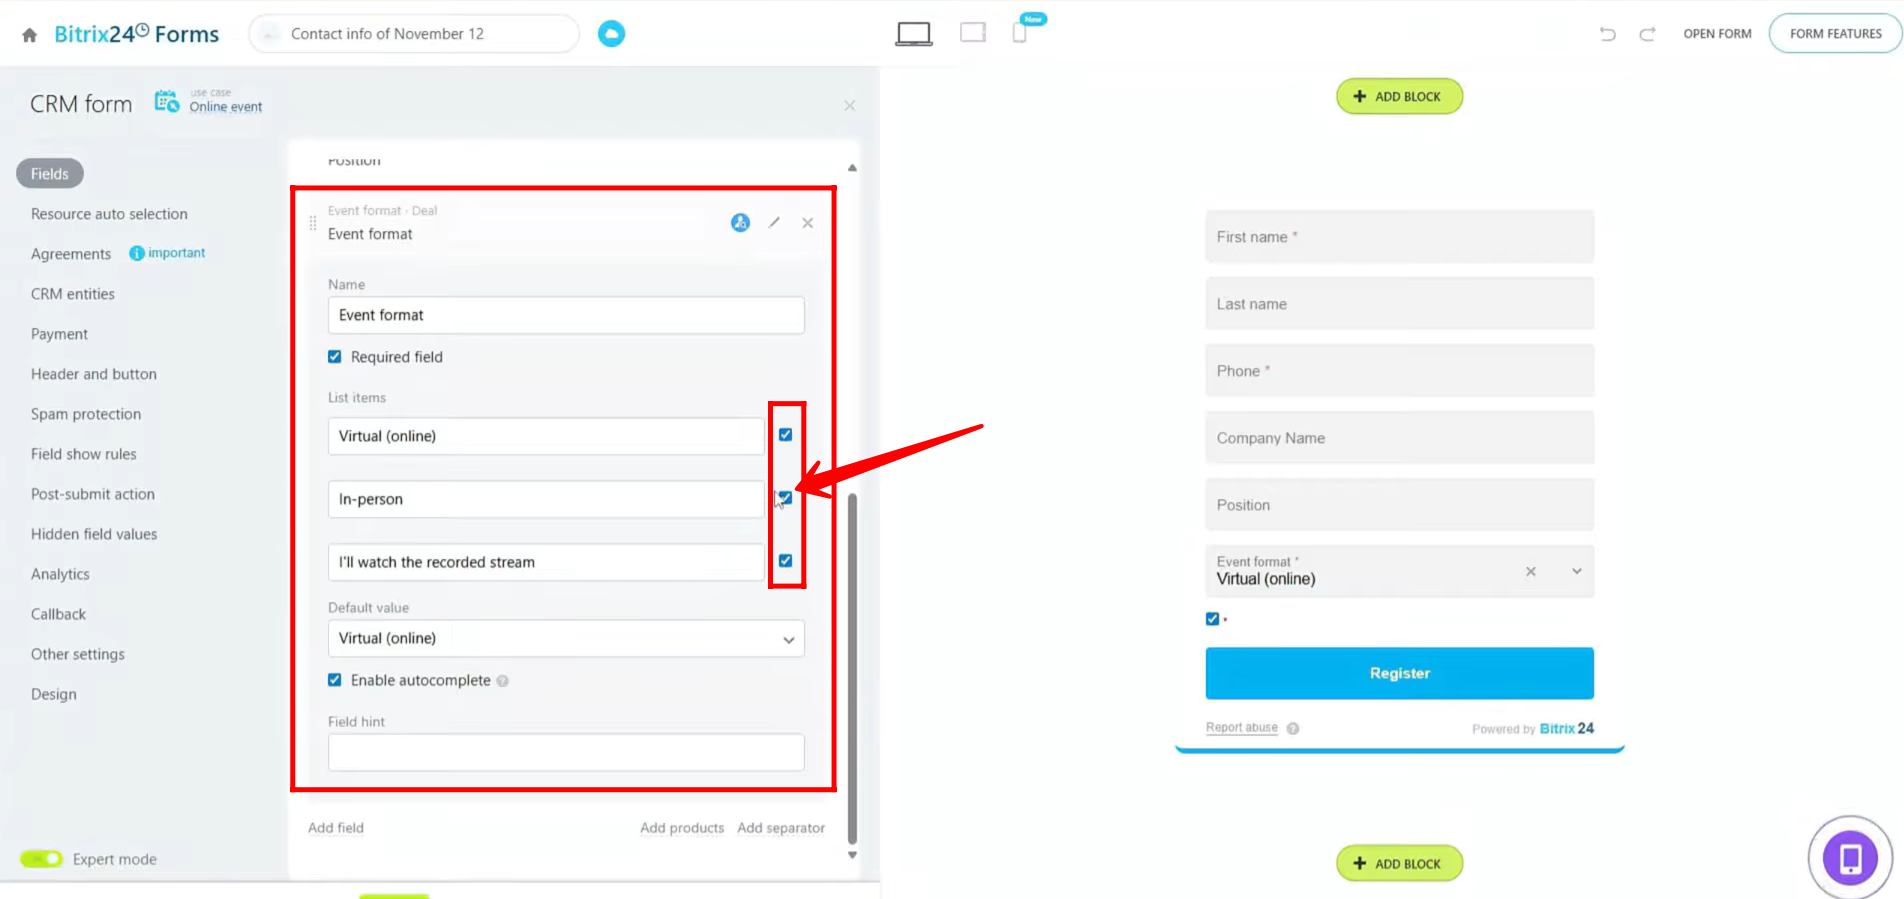
5. Click the pencil icon on the “Event Format” field to open its settings. From here, you can rename the field, choose whether it should be required, and manage the list items shown to the user.
The default list options include:
- Virtual (Online)
- In-Person
- I’ll watch the recorded stream
Since we are creating an online event form, you may choose to uncheck “In-Person” or rename the list items based on your needs. You can also set a default value, enable or disable autocomplete, or add a field hint to guide the user.
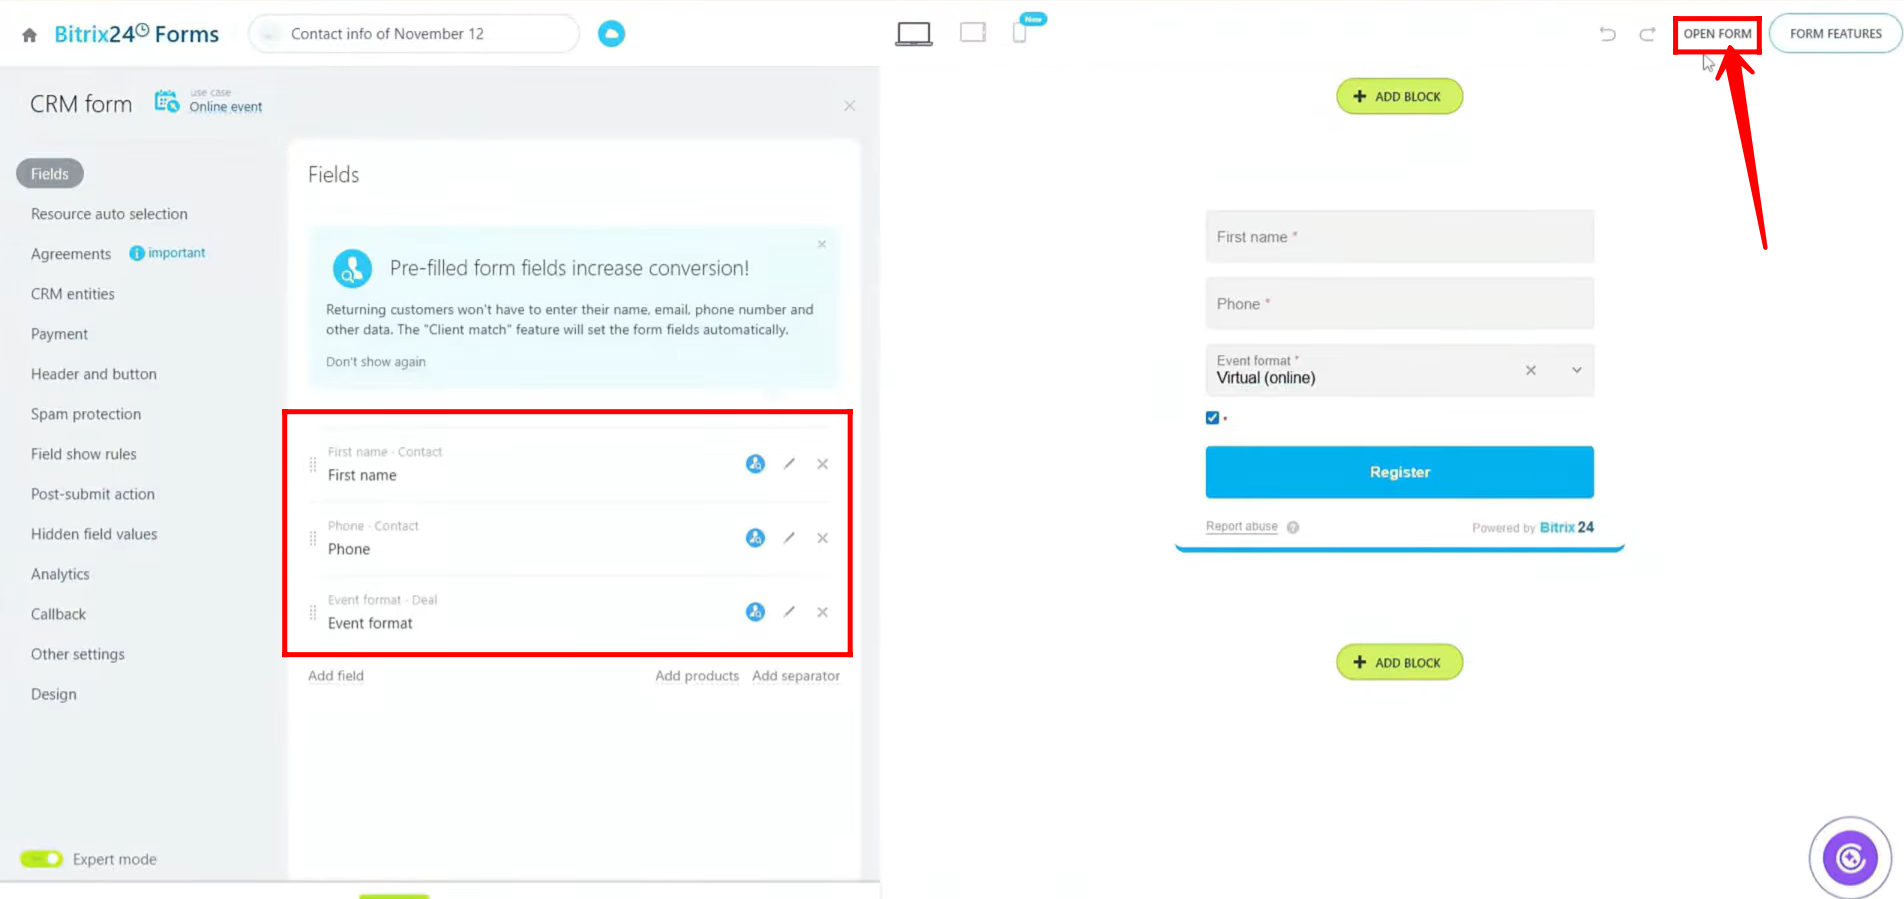
6. For simplicity, we have removed the extra fields and retained only First Name, Phone, and Event Format. Click “Open Form” to open it in a new tab and review the configurations.
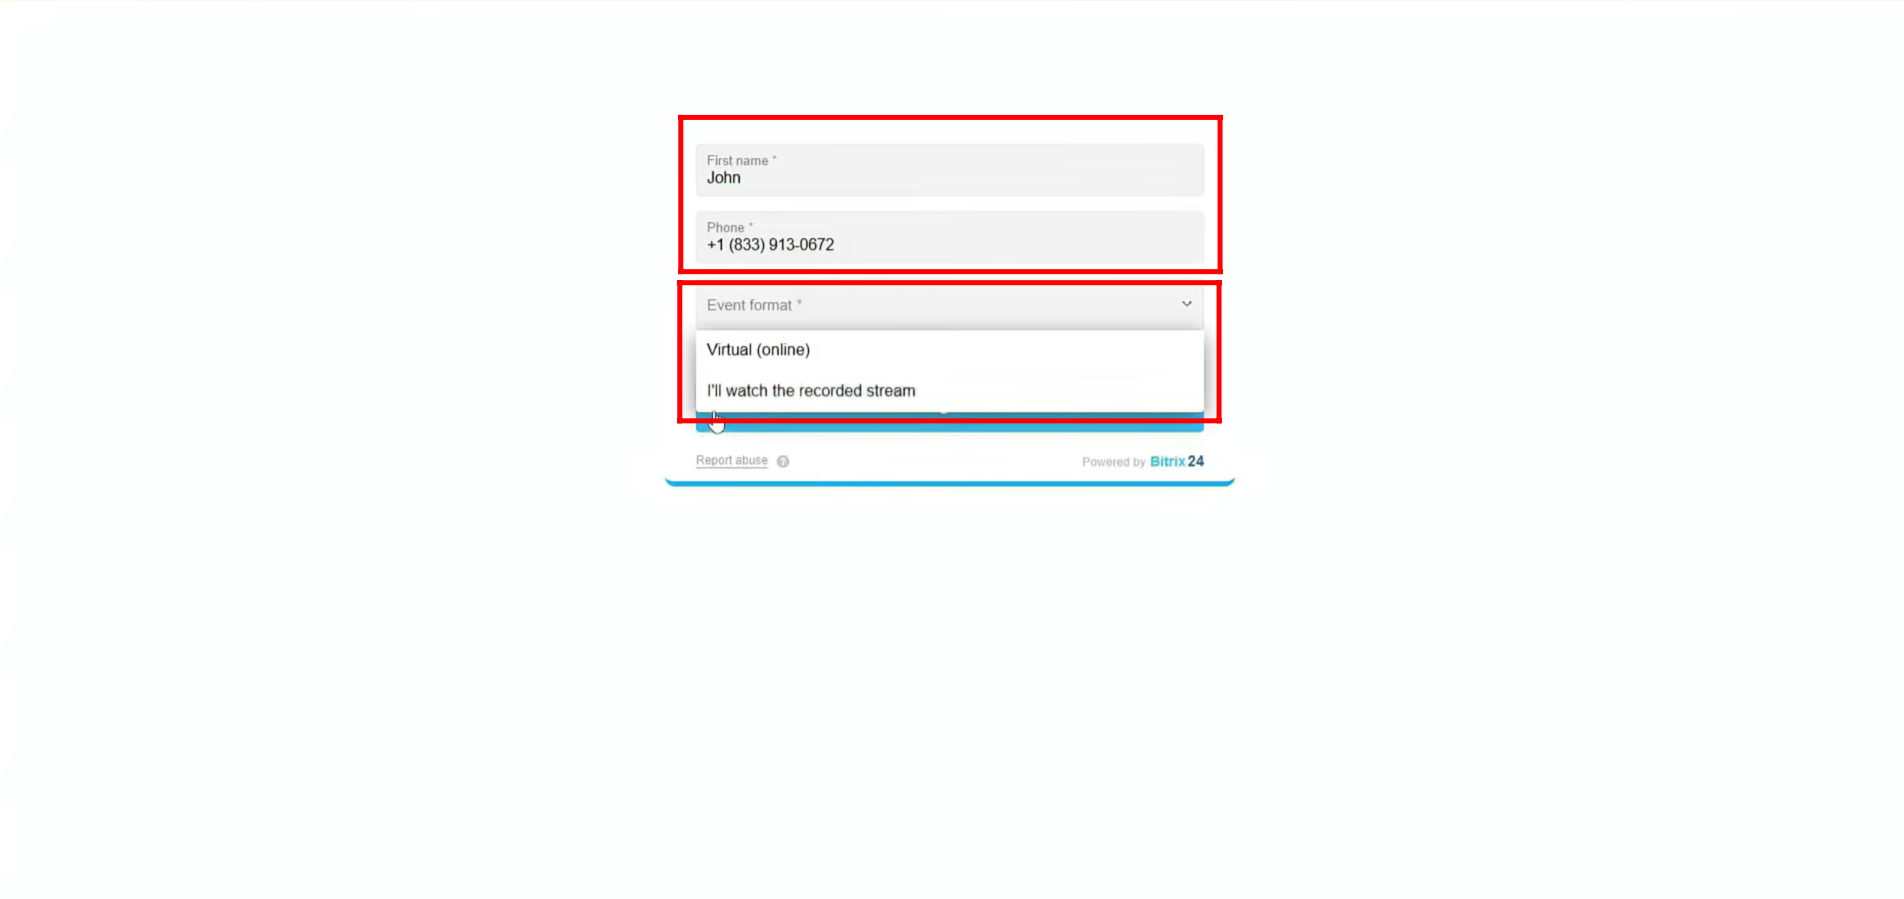
7. You can see that the form now has three fields, and in the Event Format field, only two options are available: “Virtual (Online)” and “I’ll watch the recorded stream”, since we unchecked the third option, “In-Person.”
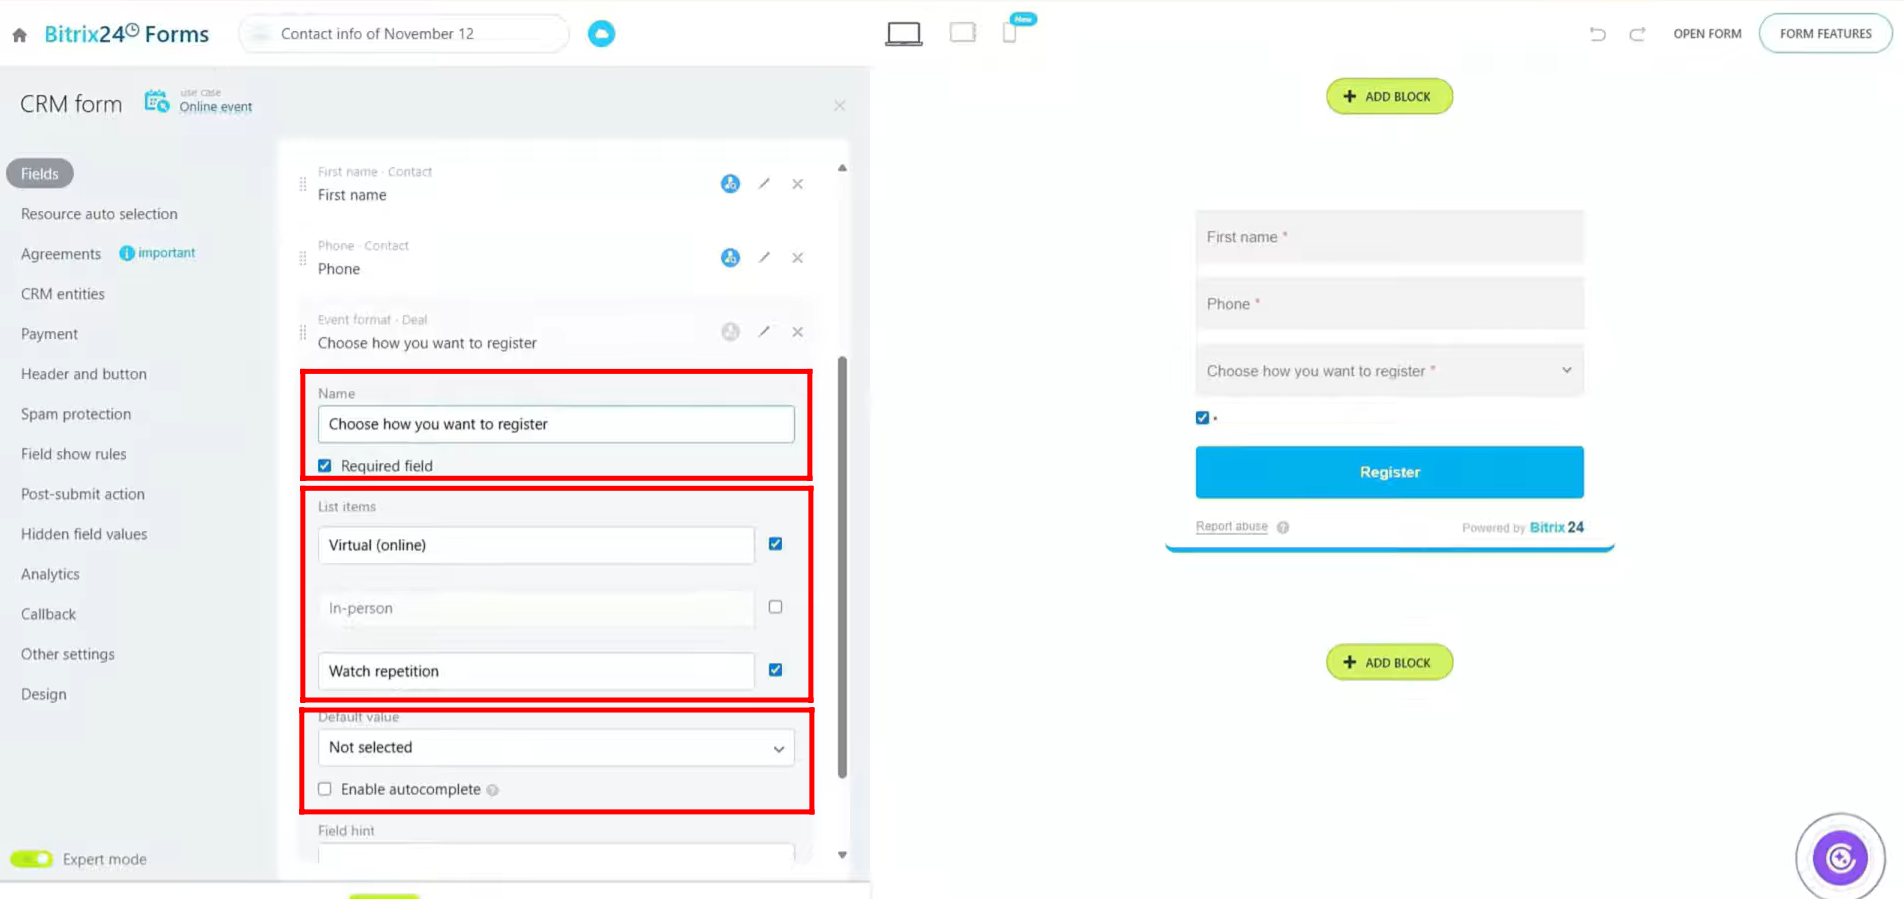
8. To verify, you can see that the “In-Person” list item has been unchecked. Now, the field name has been updated, and you can adjust the configurations further as needed to suit your requirements.
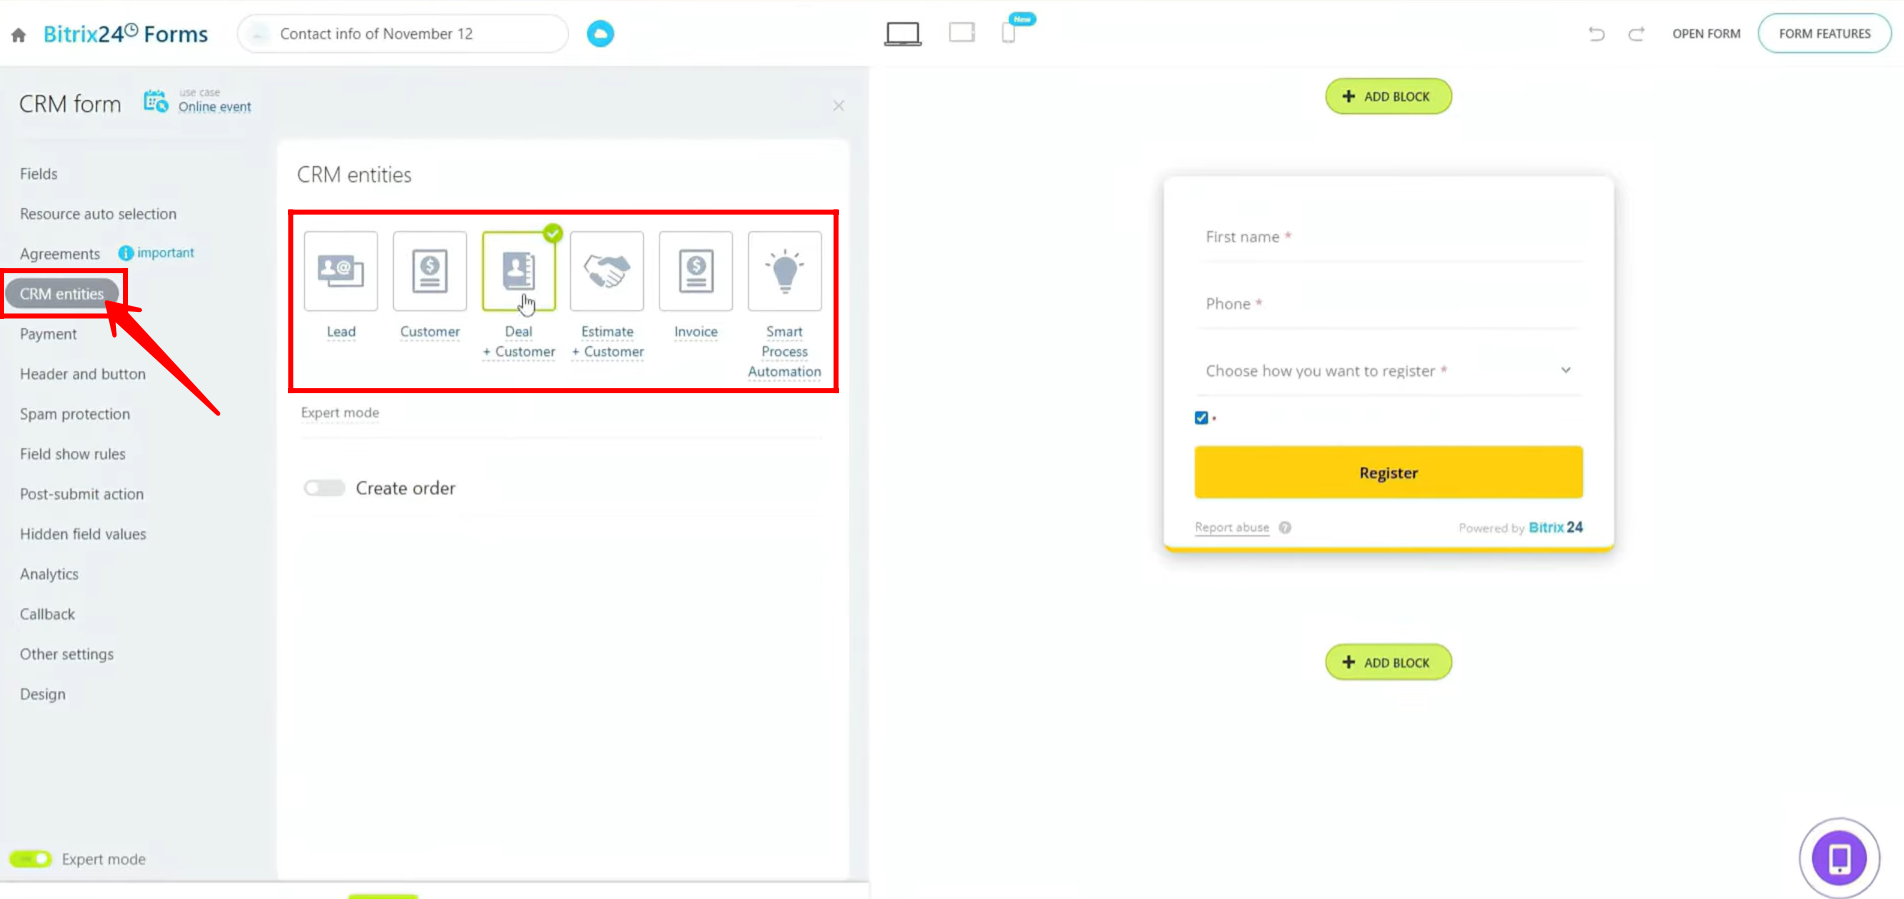
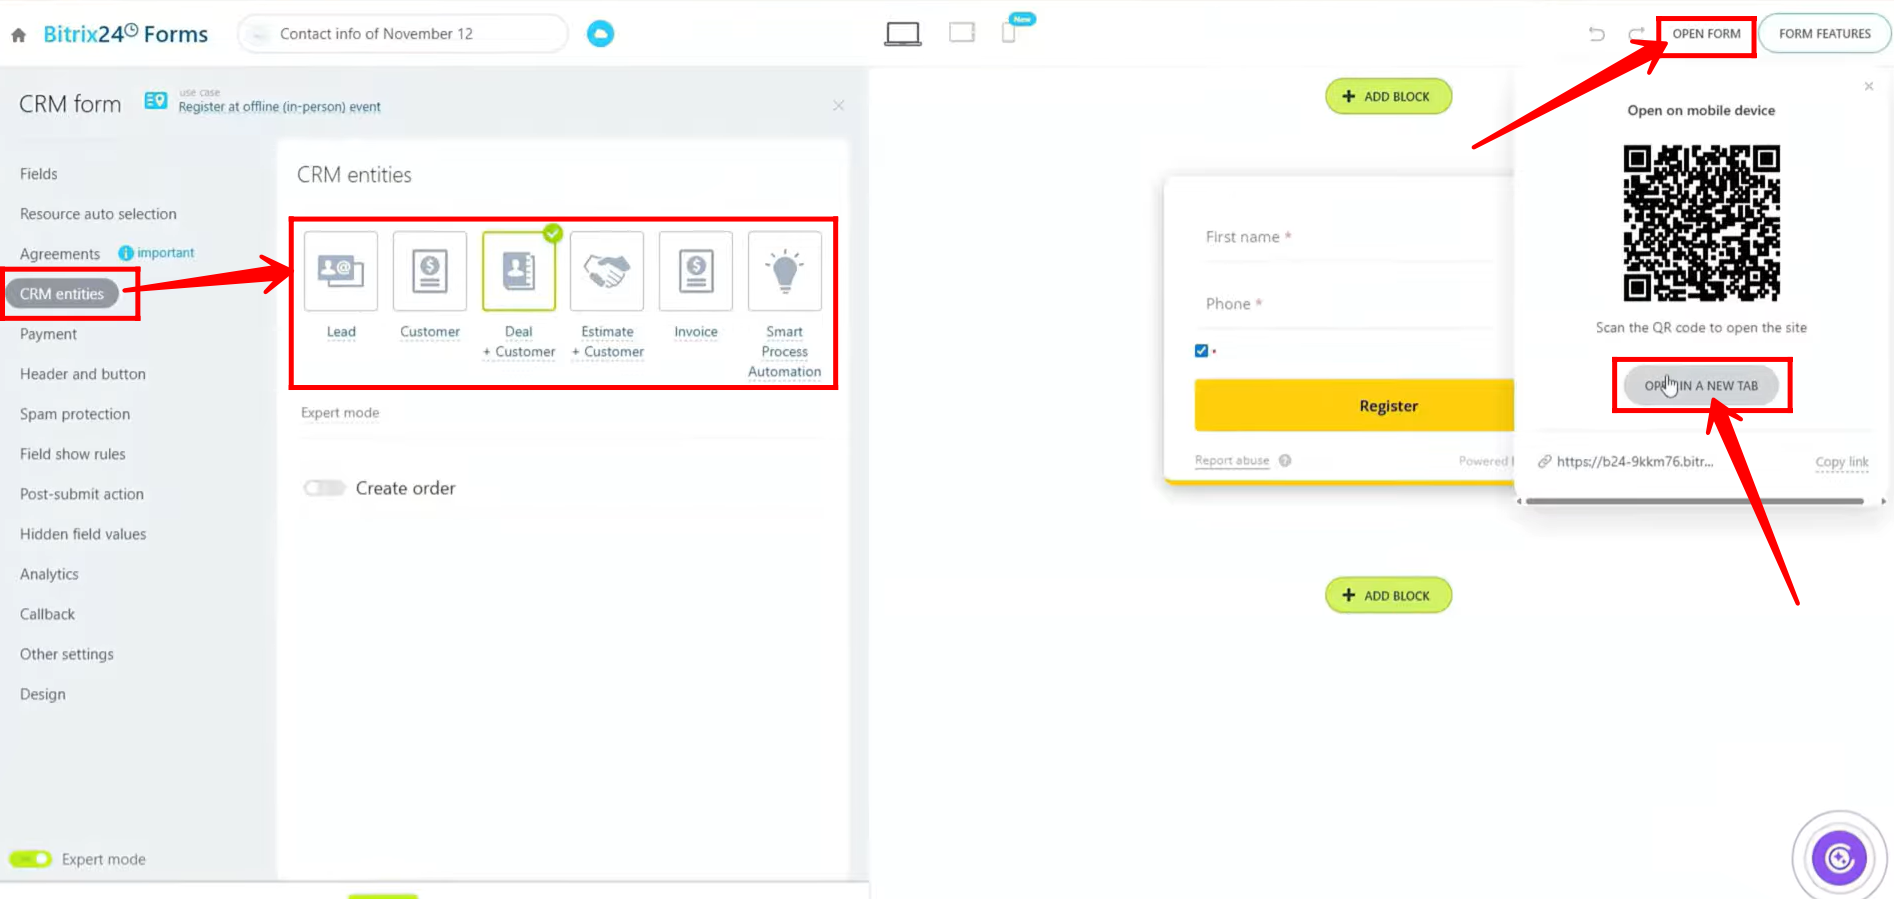
9. Next, go to CRM Entities and select which entity the form should be linked to. For now, the form is linked to Deal + Customer. Other available options include Lead, Customer, Deal + Customer, Estimate + Customer, Invoice, and Smart Process Automation. Additionally, you can customize the form’s design, including colors, fonts, and other visual elements.
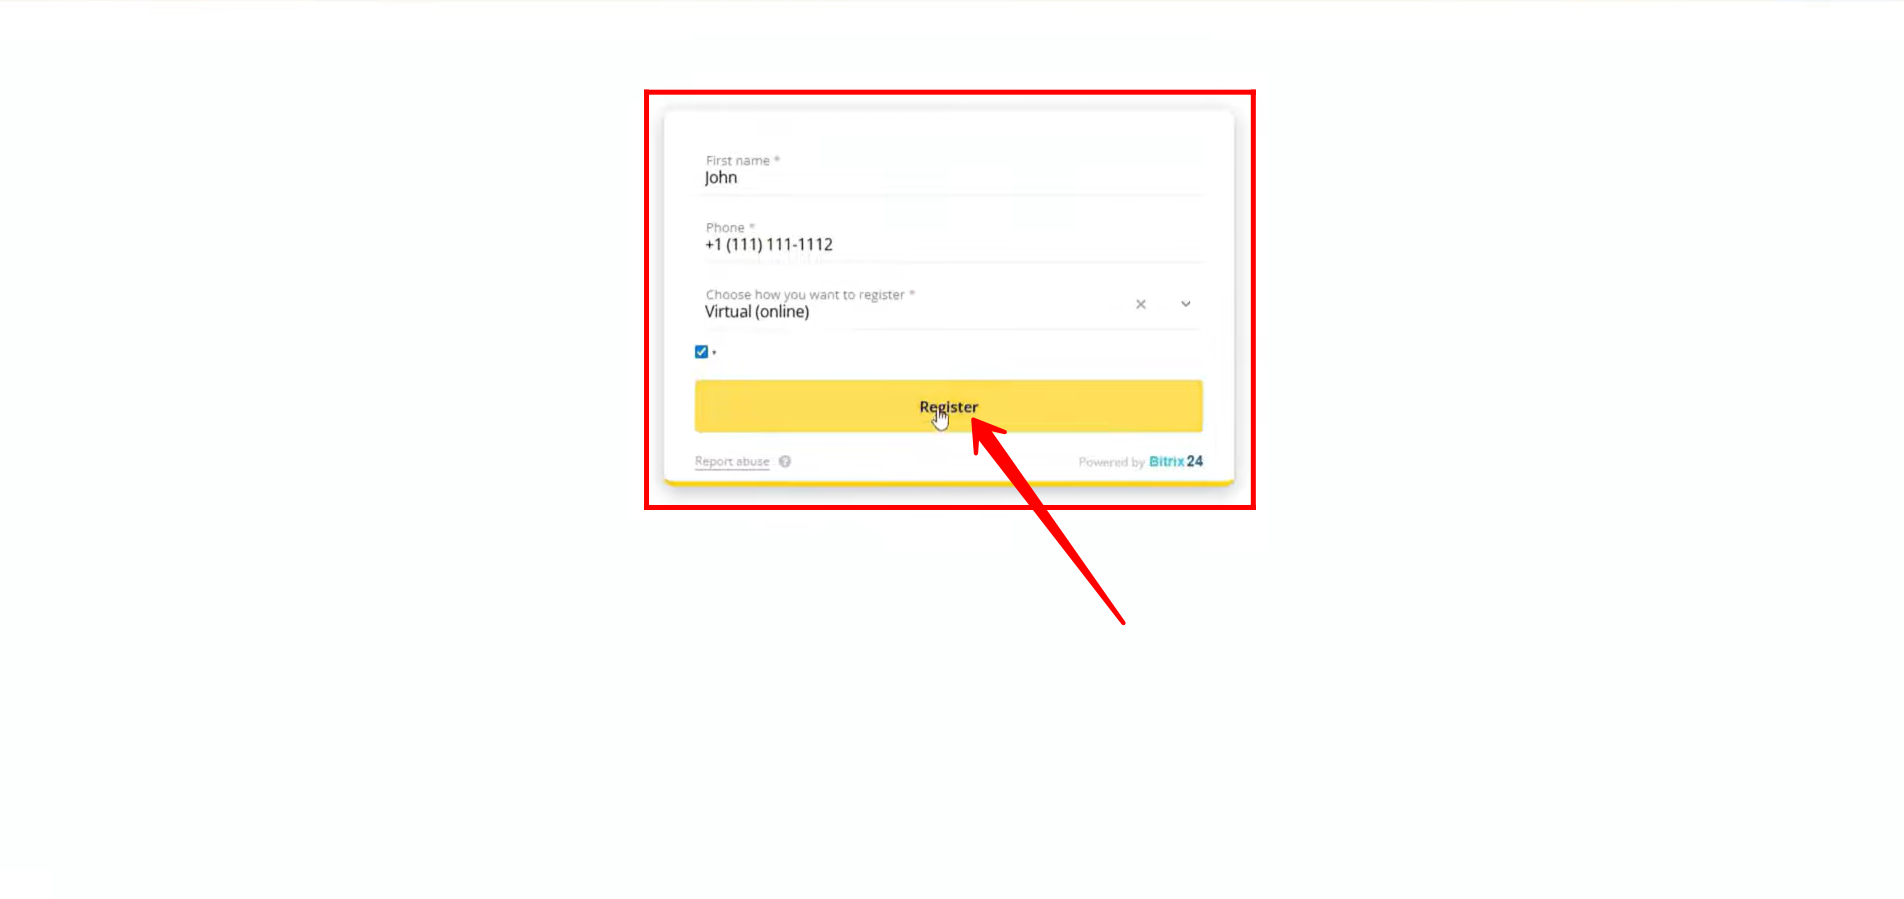
10. Open the form and fill in the required details to submit it, testing your configurations as usual. For this example, we have also updated the Register button color.
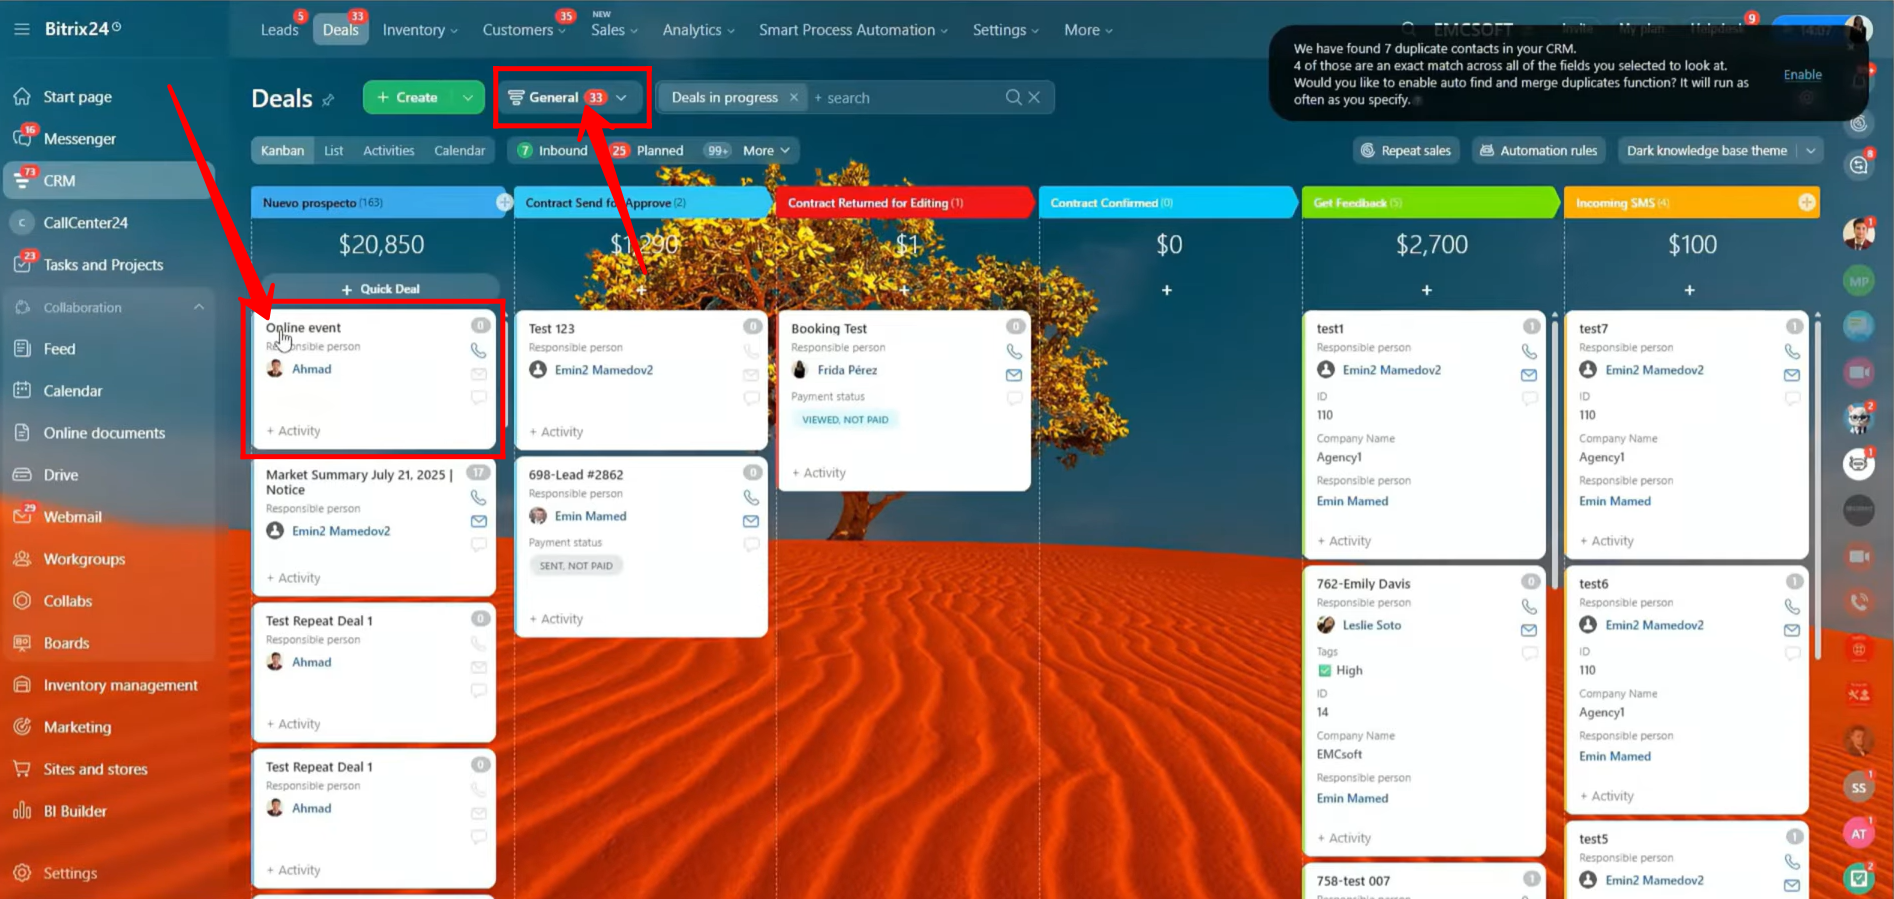
11. After submitting the form, navigate to Deals, and you will see that a new deal titled “Online Event” has been created. The deal appears in the General Pipeline, and within the form configuration, you can control in which pipeline the deal should be created after submission.
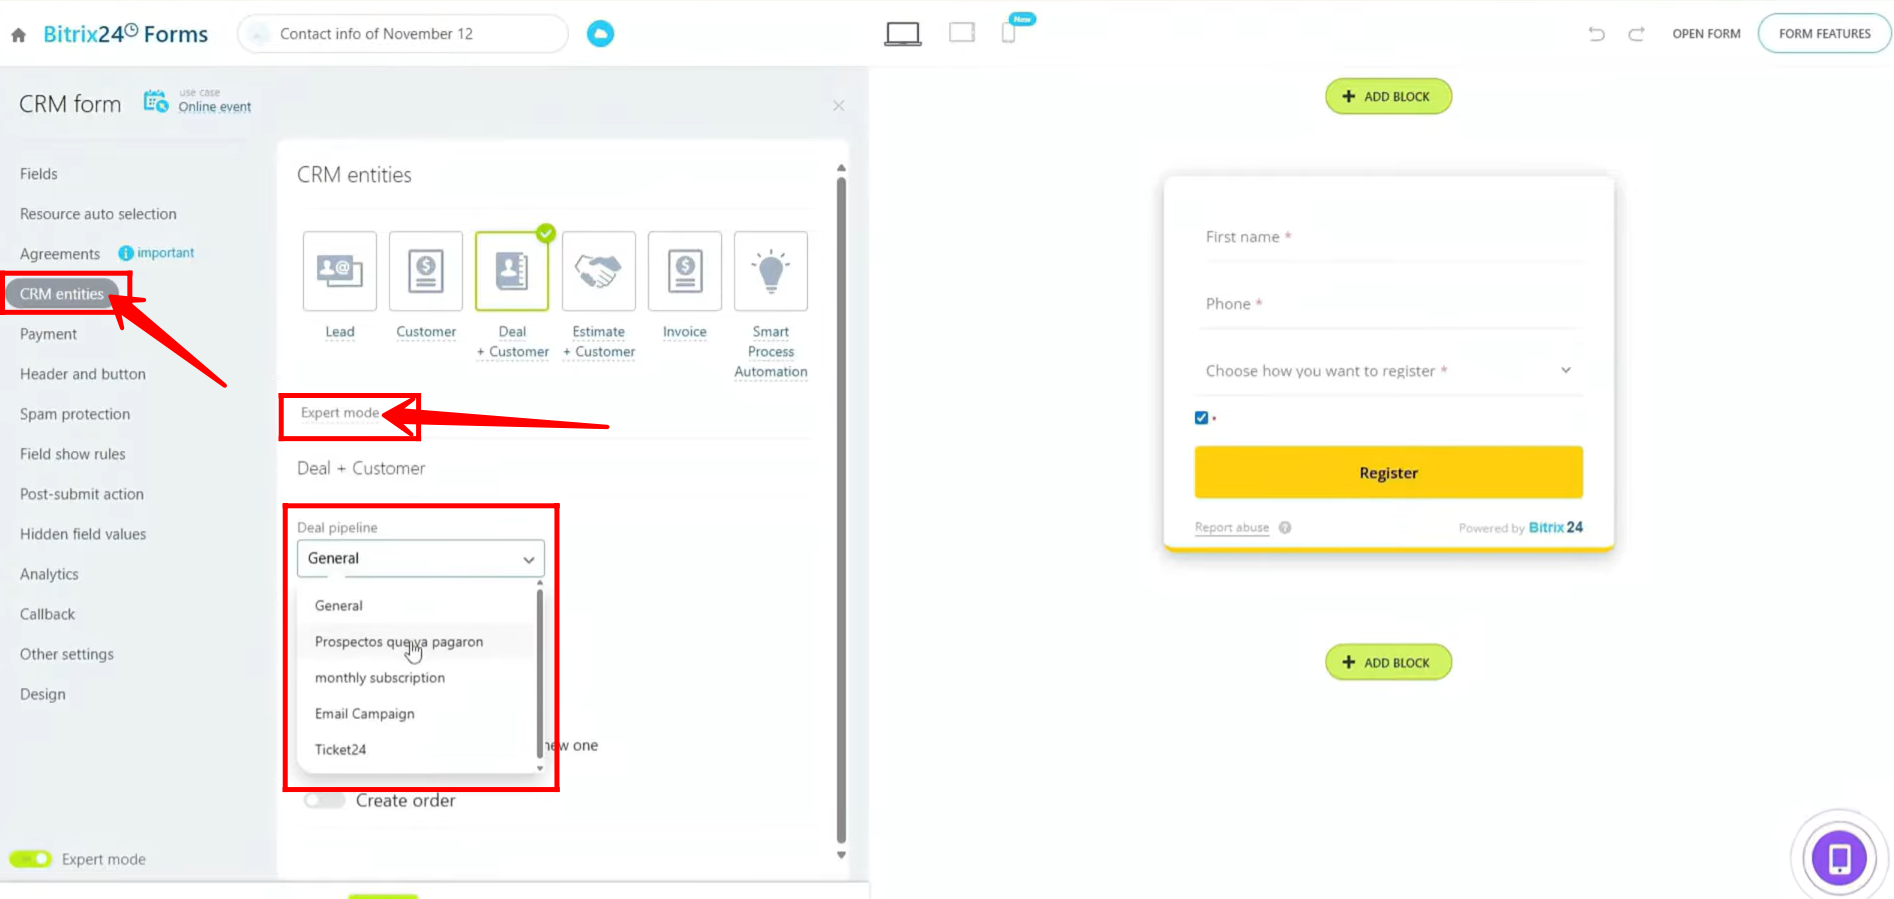
12. In the form configuration, navigate to CRM Entities, click on Expert Mode, then use the dropdown under Deal Pipeline to select the desired pipeline where new deals should be created after form submission.
13. Next, we will create an event-based form of the type “Register at offline (in-person) event.” This form is designed for registering attendees at a physical, in-person event and allows multiple submissions, so attendees can be added one after another.
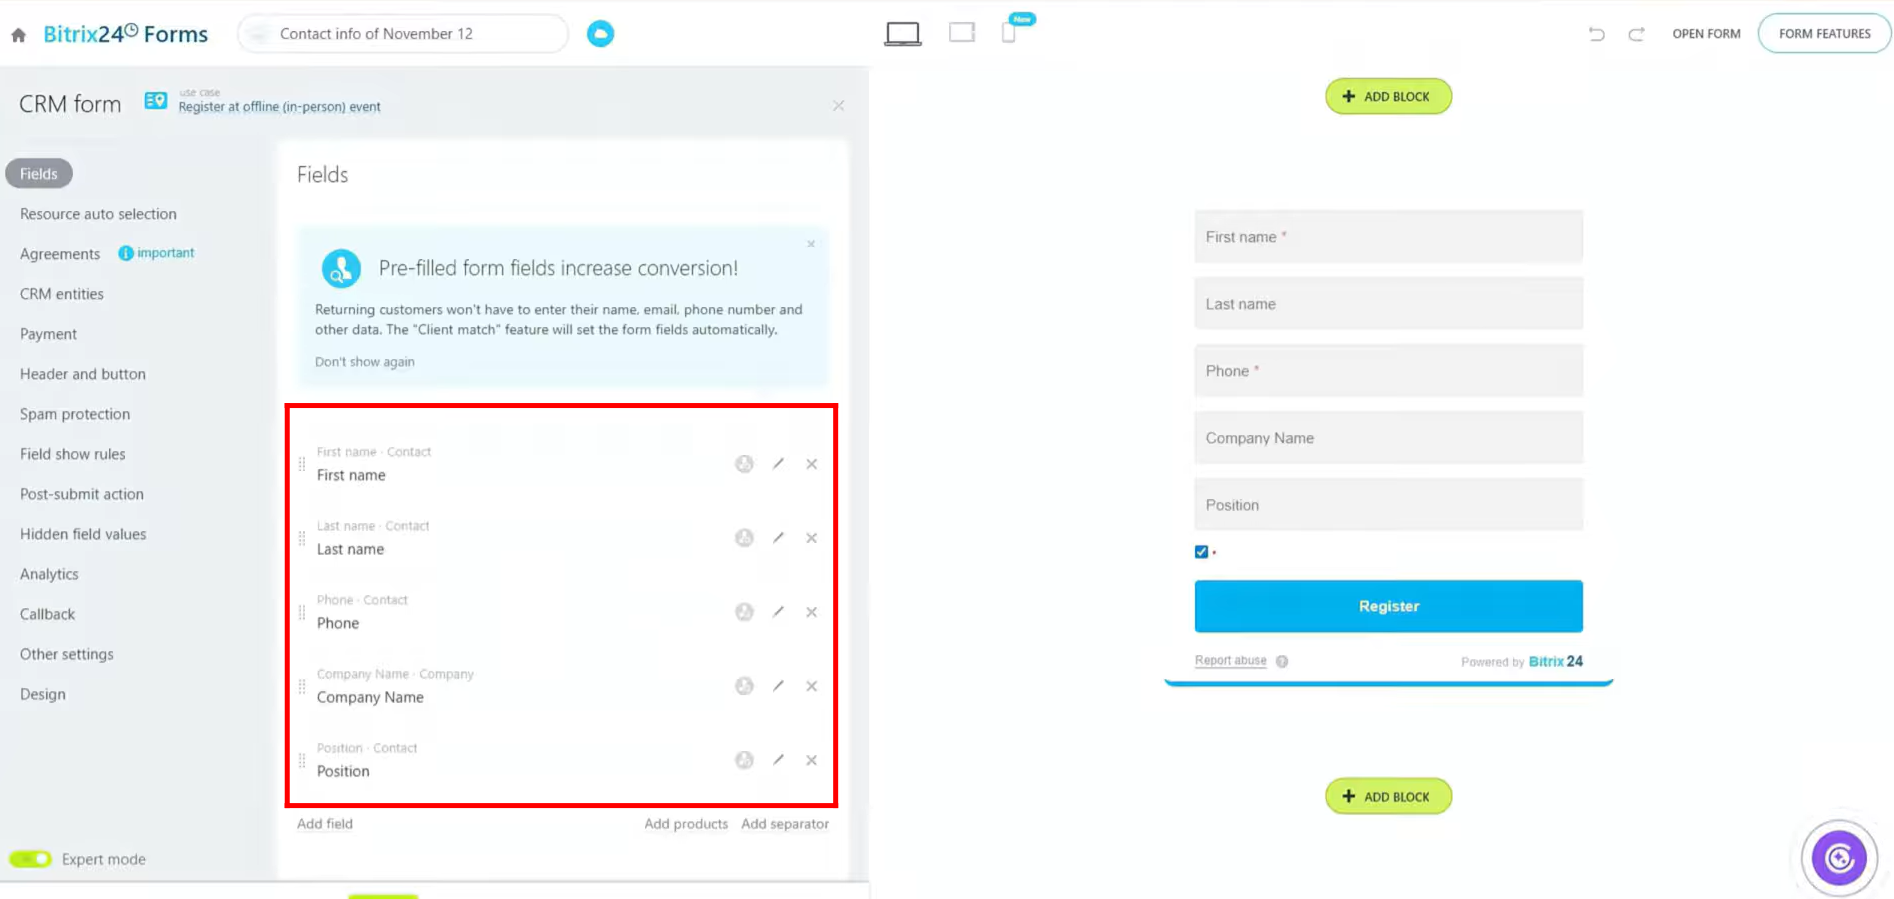
14. Similar to the previous form, you can customize this offline event form by clicking “Add field” to include additional fields, rather than relying solely on the default fields provided.
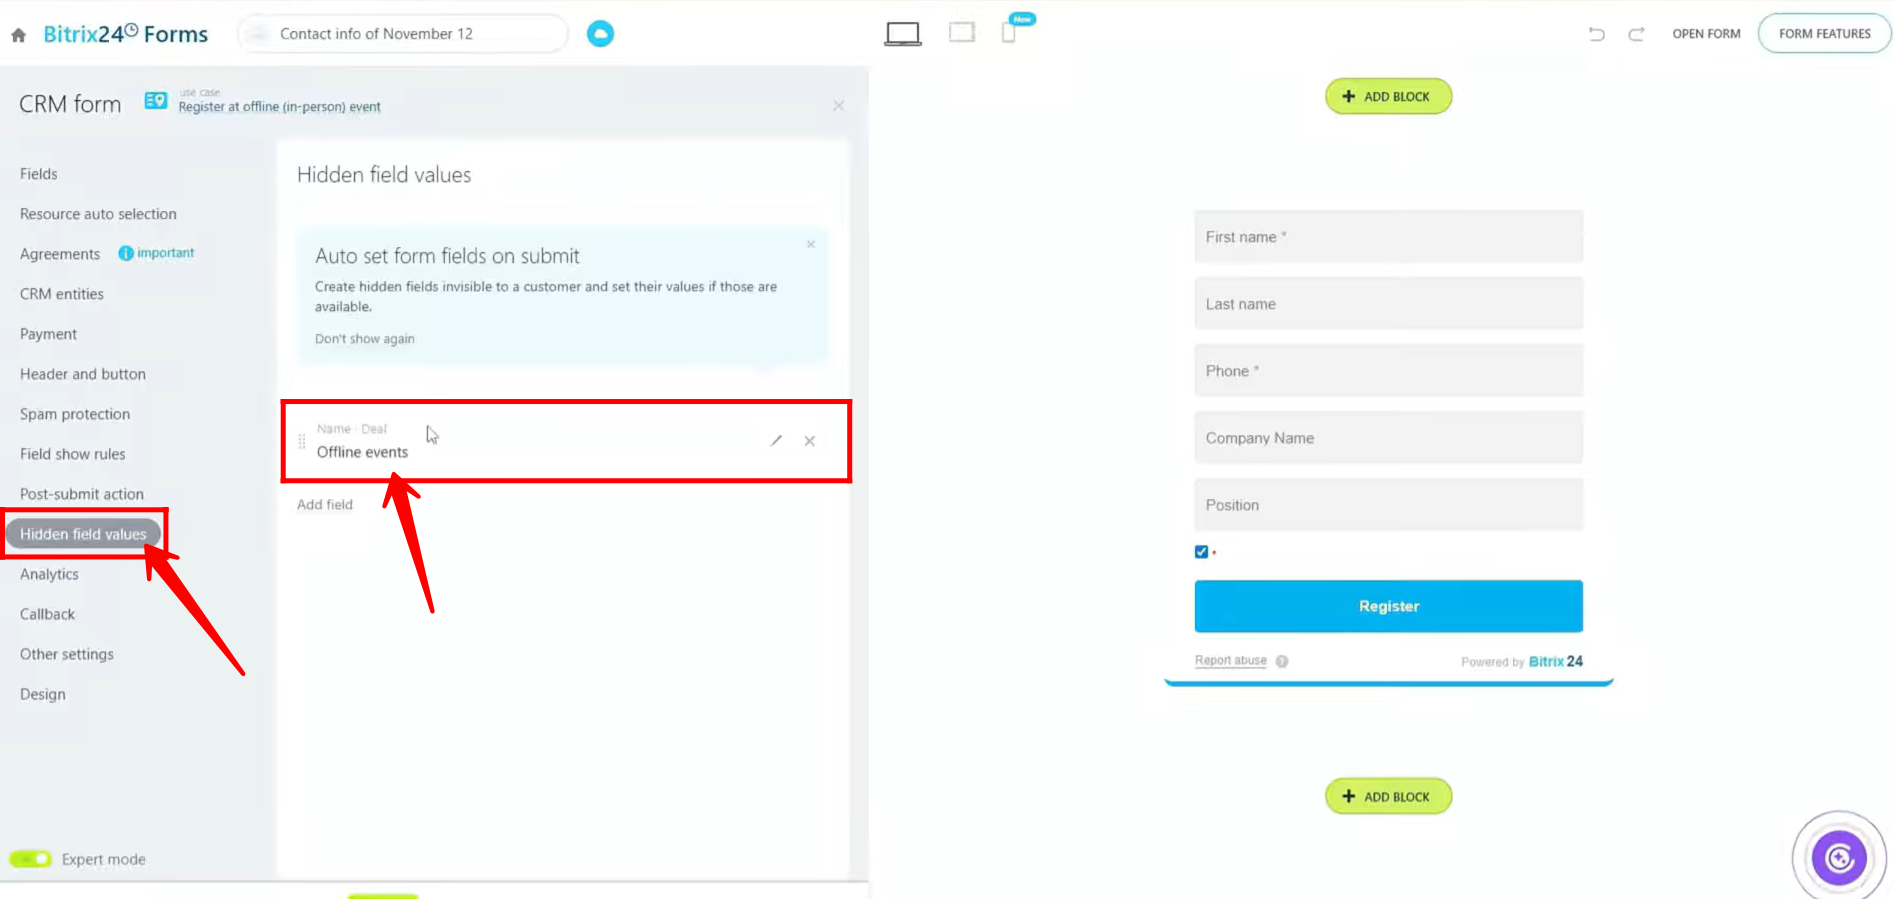
15. In the Hidden Field Values section, you’ll notice a key difference from online event forms: a default hidden field is set with the name “Offline events.” This field automatically assigns the deal name whenever a user submits this form, similar to how it works with the Online Event form. You can customize the name of this hidden field as needed. Note that this field remains invisible to the person submitting the form.
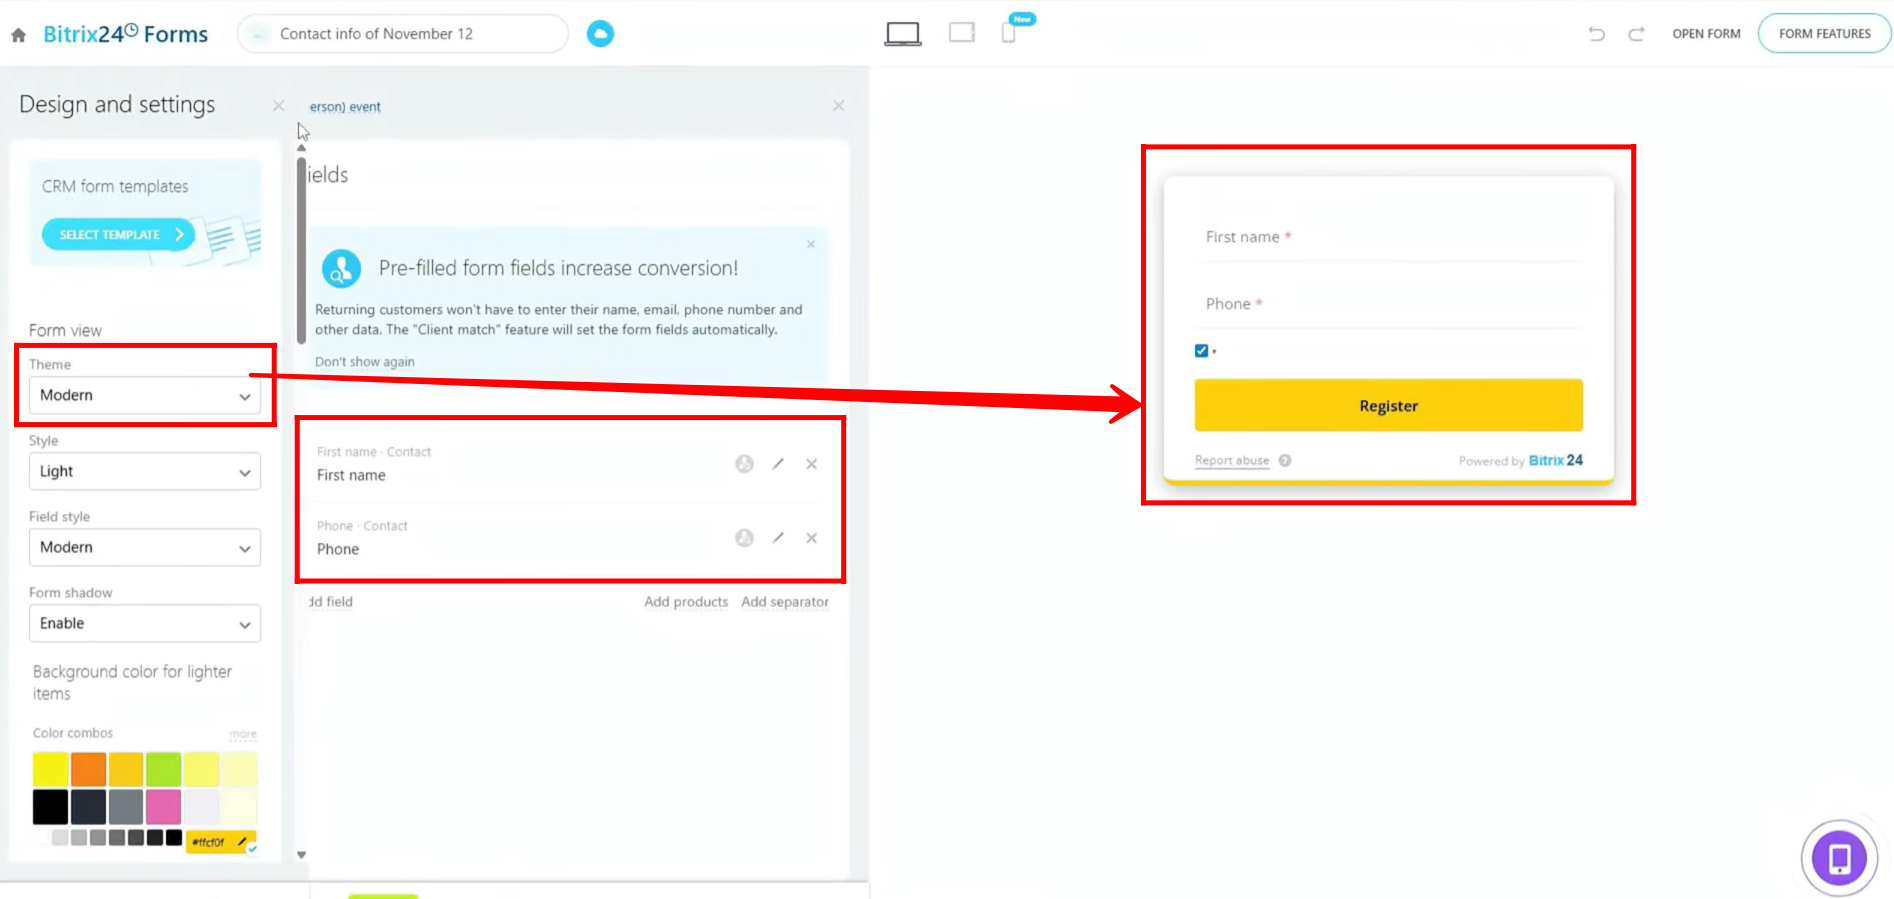
16. In the Design tab, you can fully customize the form’s appearance, including theme style, field styles, shadows, colors, and more. For simplicity and testing purposes, we have removed all additional fields and kept only “First Name” and “Phone” fields.
17. Next, go to CRM entities and choose the entity you want to link the form with. In this example, we linked it with “Deal + Customer” as usual. After selecting the entity, click “Open Form” to open it in a new tab for testing.
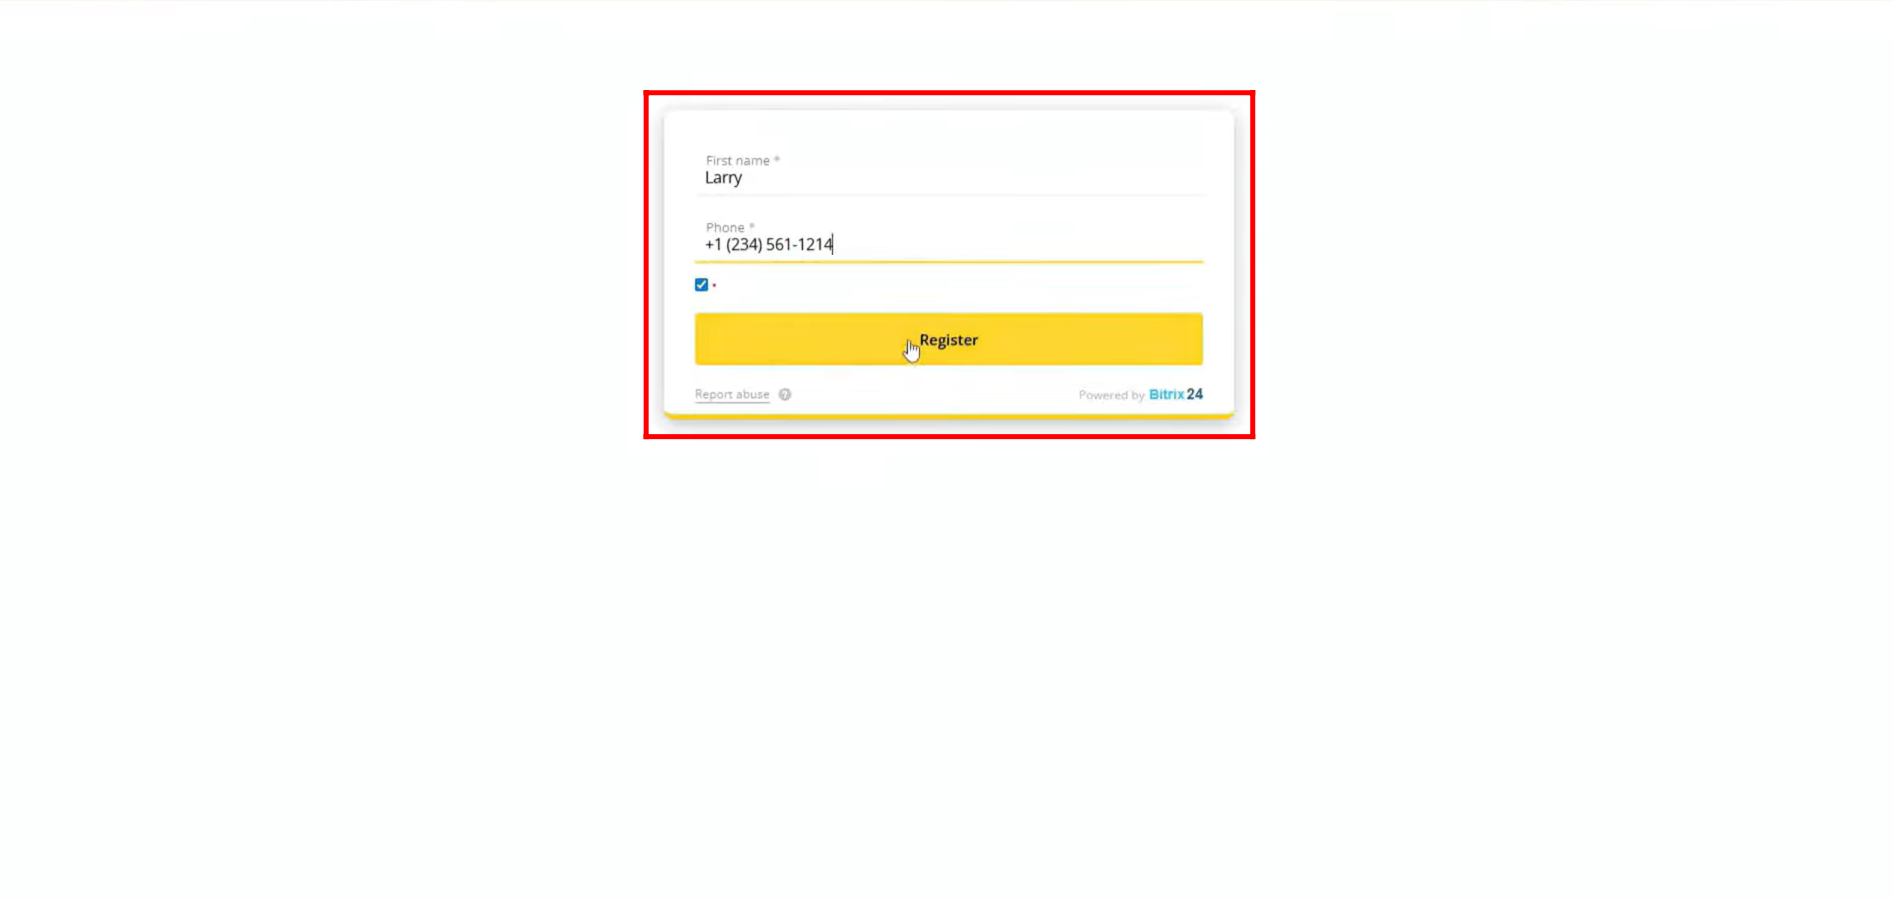
18. Fill in the required details (for now, only First Name and Phone fields are available), then click “Register” to submit the form.
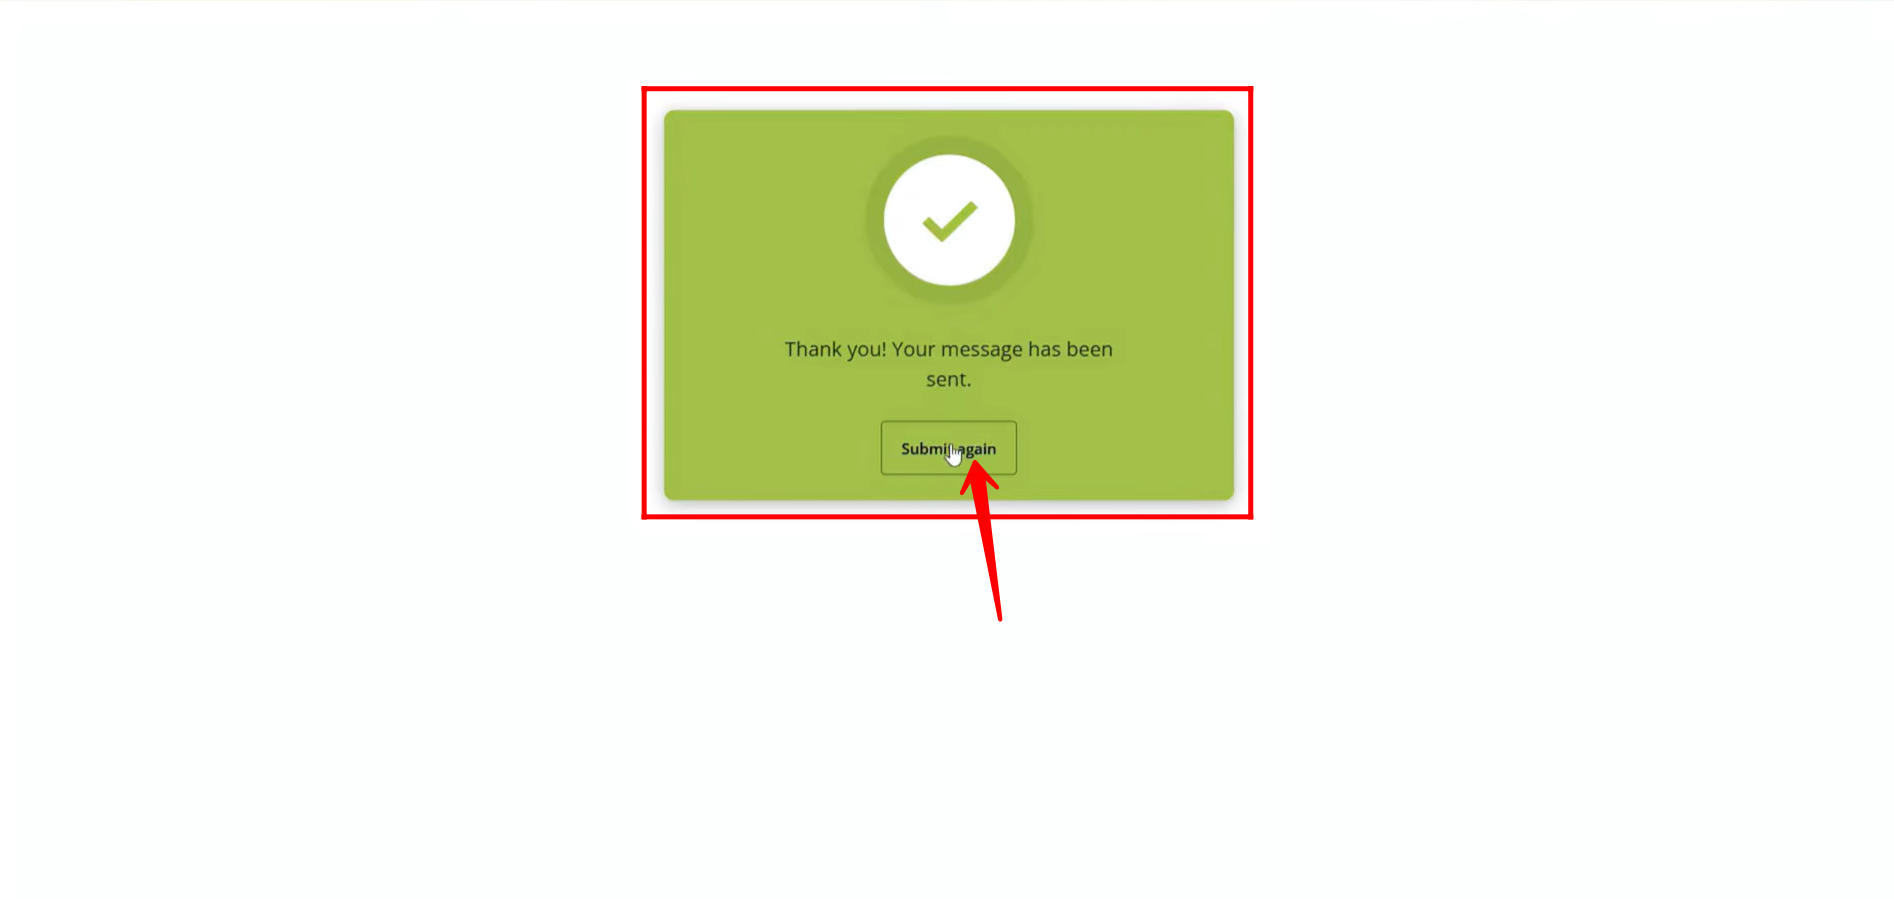
19. After submitting the offline event form, the Thank You page will display a “Submit Again” button, allowing you to reopen the form and enter details for another attendee.
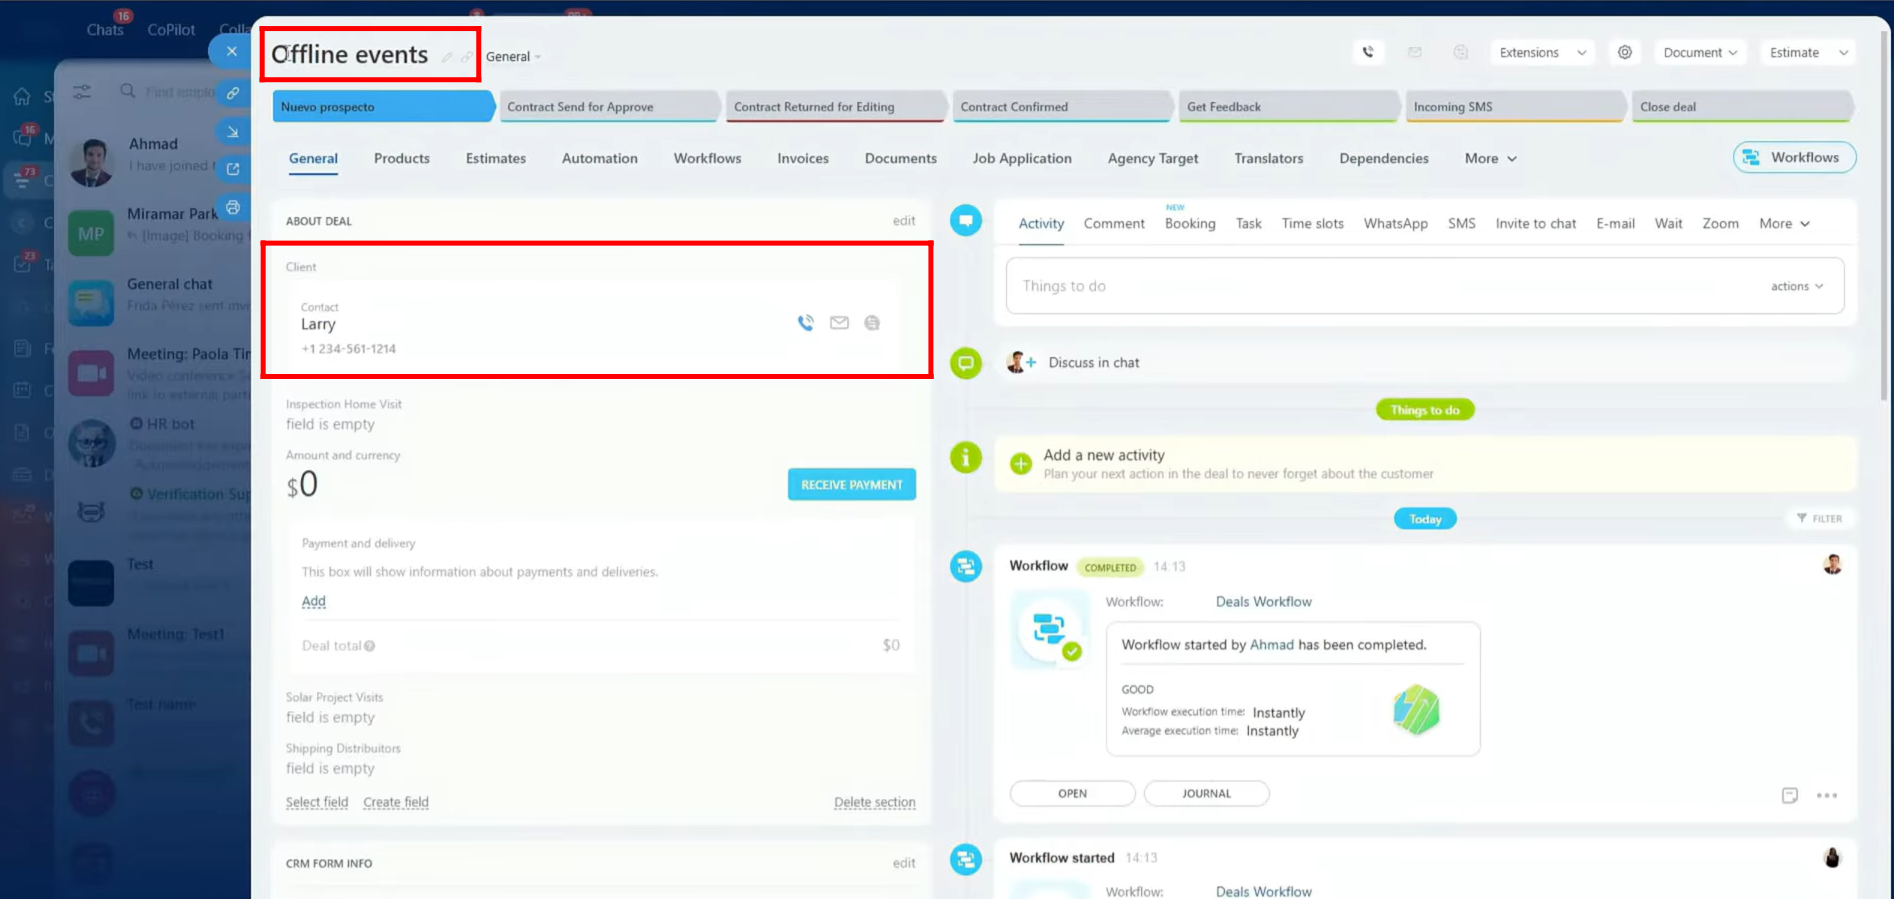
20. After submitting the form, open the deal that was automatically created. You will see that the contact details you entered during form submission are already populated in the deal.
21. In the Hidden Field Values tab, you can configure the field names and specify where their values should be saved, such as the Name of the Deal or a specific source field of the deal. These hidden fields can be customized to indicate which form was submitted, allowing you to track submissions accurately without displaying the fields to the user.

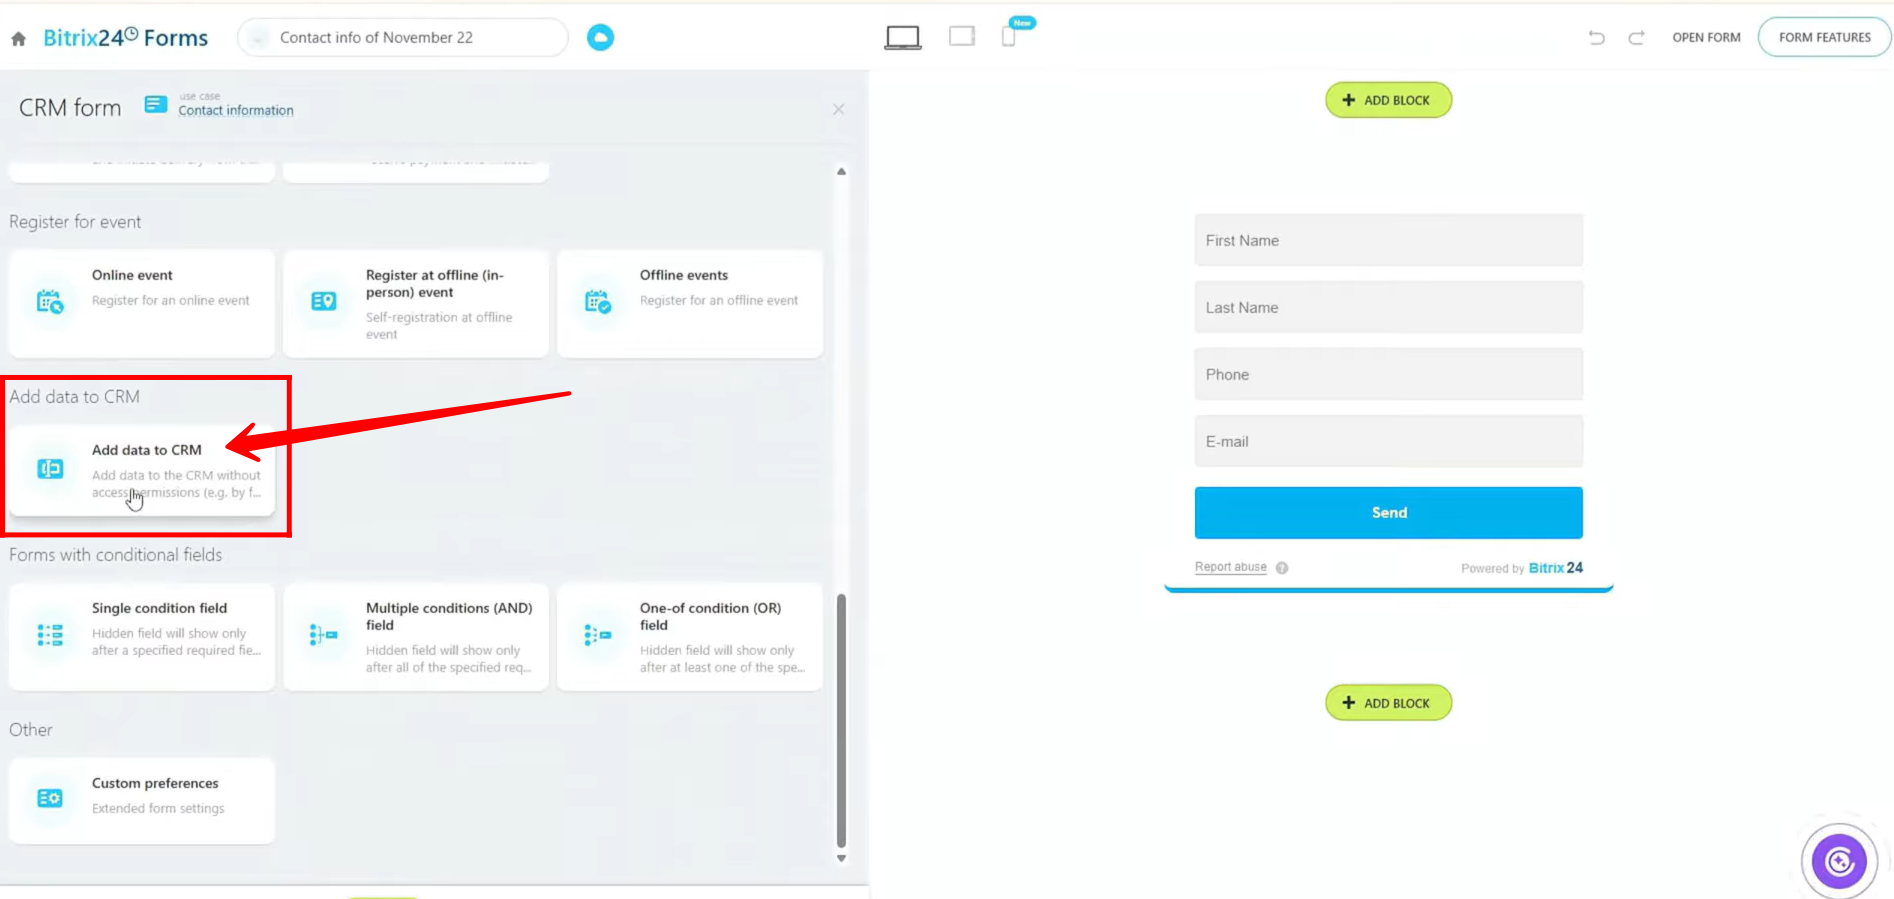
22. Next, we move to the “Add Data to CRM” section of form type configuration. By choosing this type of form, the submitted data will be added directly to the CRM without requiring access permissions. While other form types also add data to the CRM, this type allows you to differentiate forms based on configuration and your specific business needs, giving you flexibility in how submissions are processed and managed.
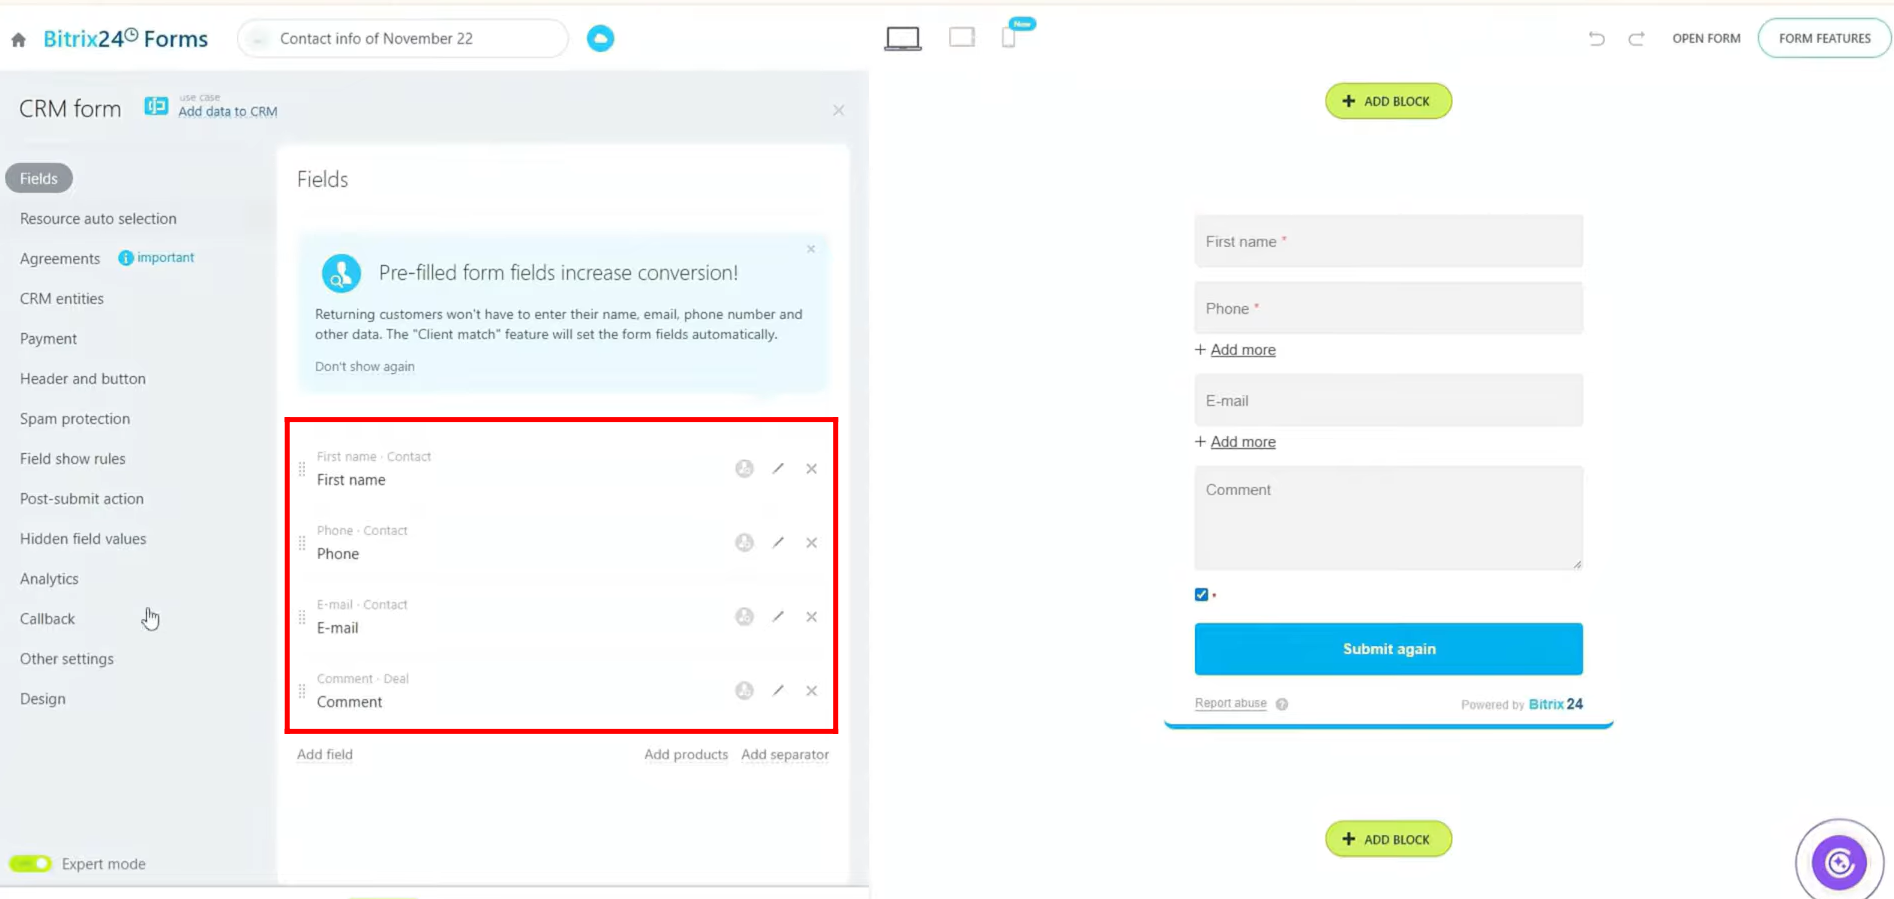
23. In this form type, you can see all the fields are pre-defined, but you also have the option to add multiple custom fields as needed. These fields can be linked to multiple CRM entities; however, only the primary entity; the one to which the form is linked; will be created upon form submission. Data from other linked entities will simply be associated with this primary entity.
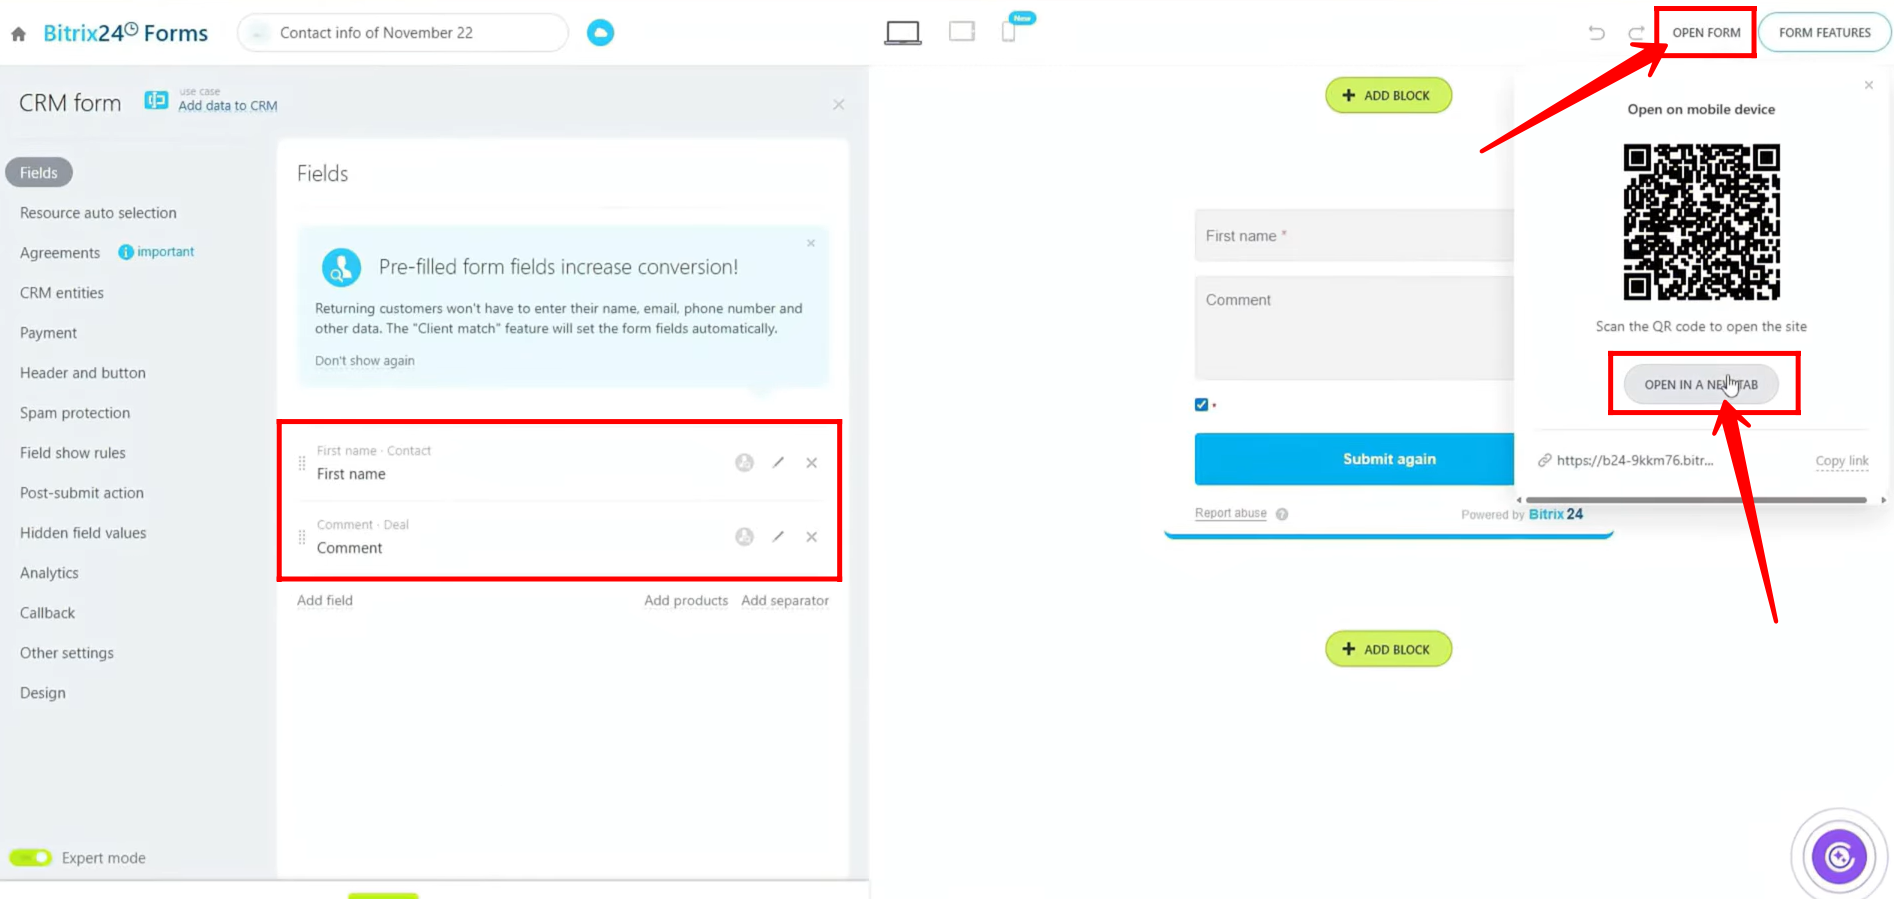
24. For testing purposes, we have removed the additional fields and retained only First Name and Comment fields. After saving the configurations, open the form in a new tab to check and test the setup.
25. After filling in the fields, click the Submit button to send the form data to the CRM.
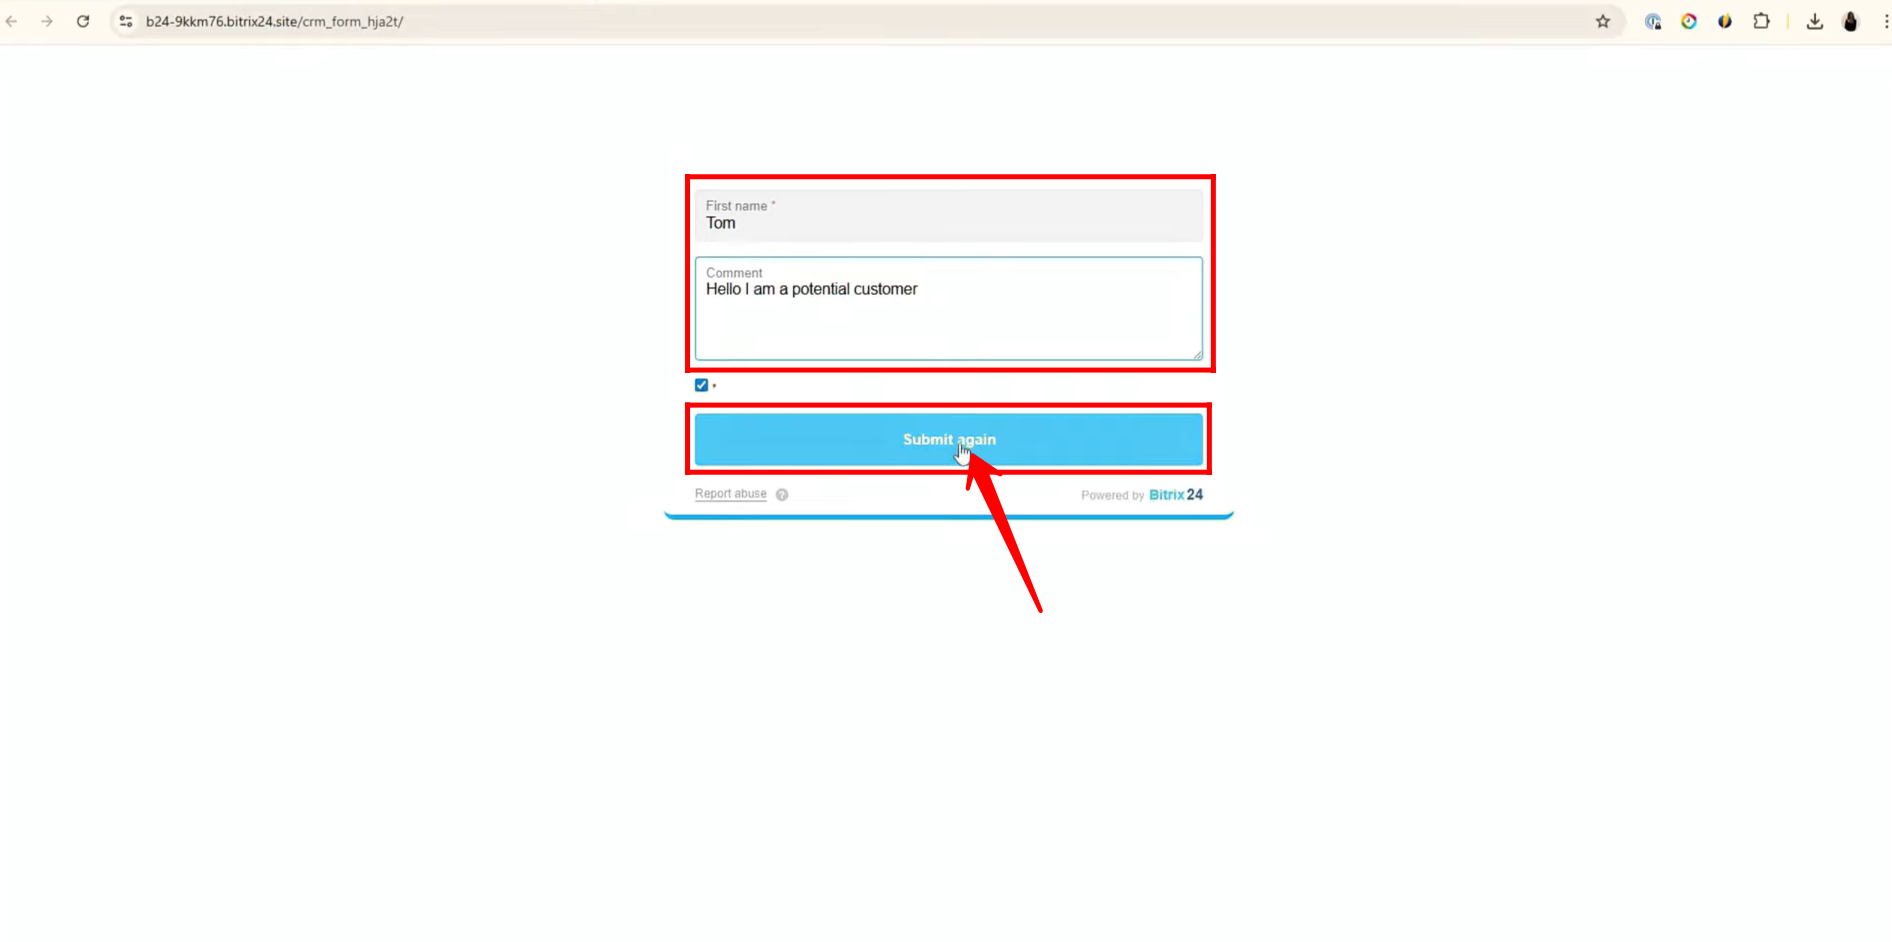
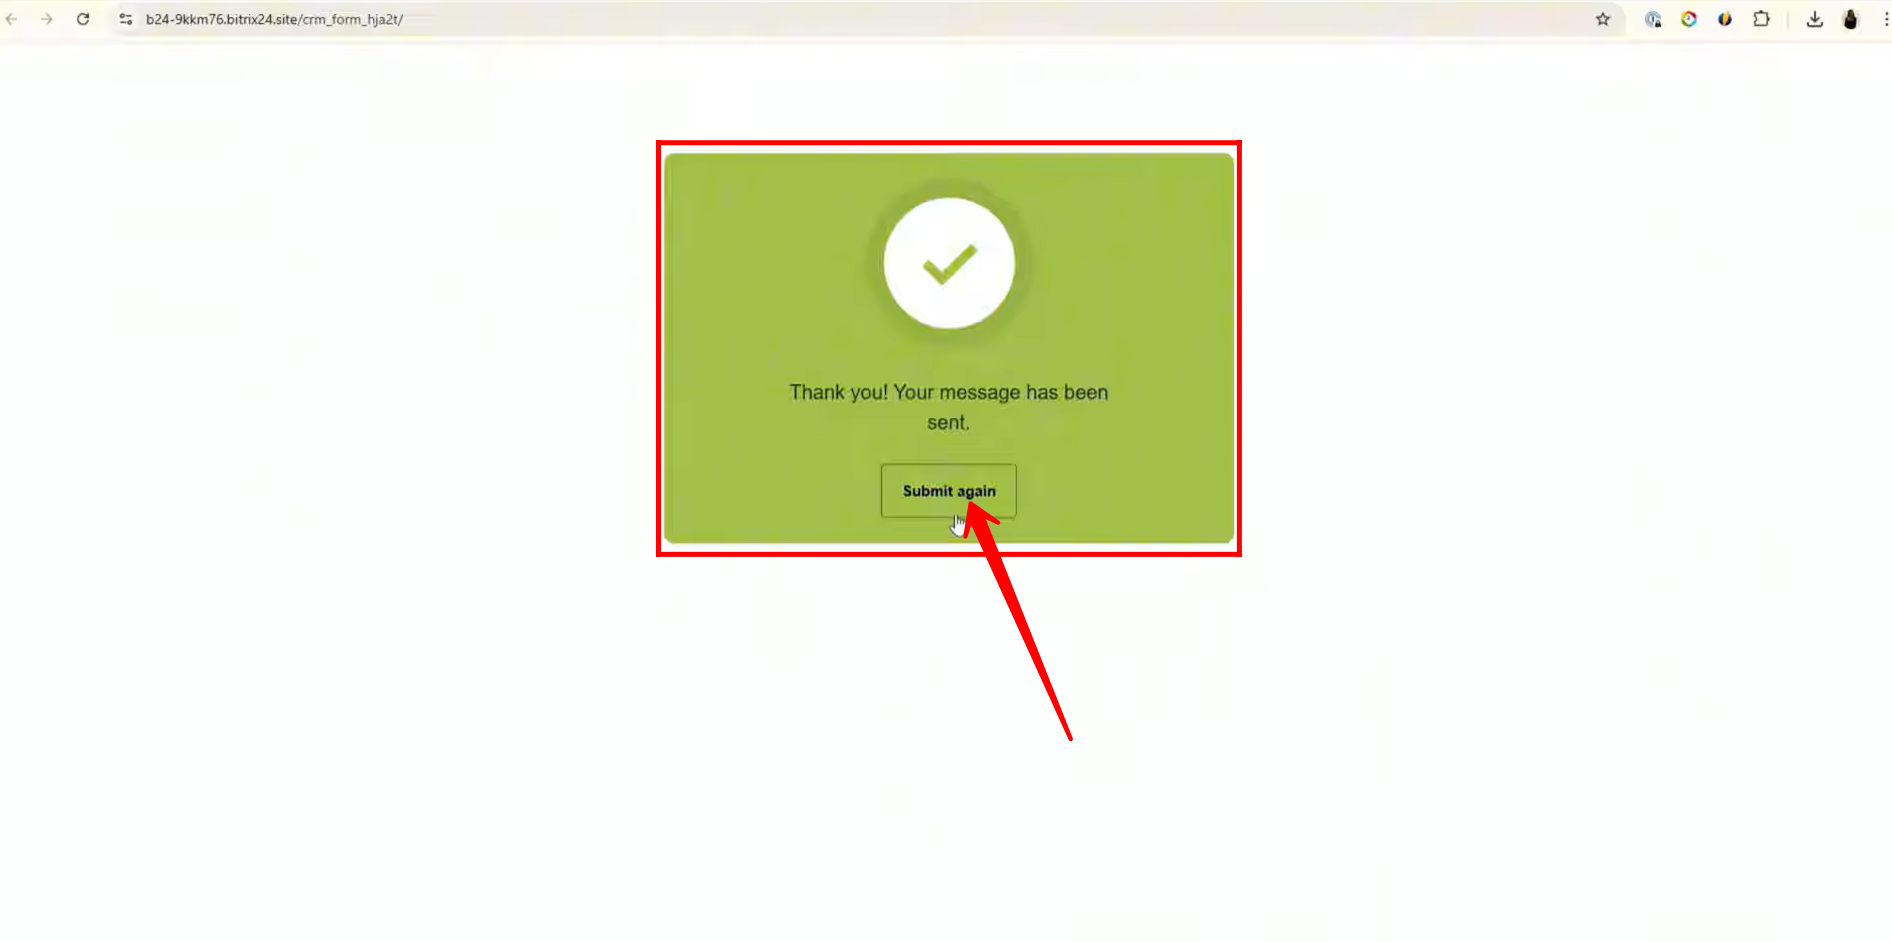
26. After the form is submitted, the Thank You page will appear. Here, you will see a “Submit Again” button, allowing you to open the form once more and submit details for another entry if needed.
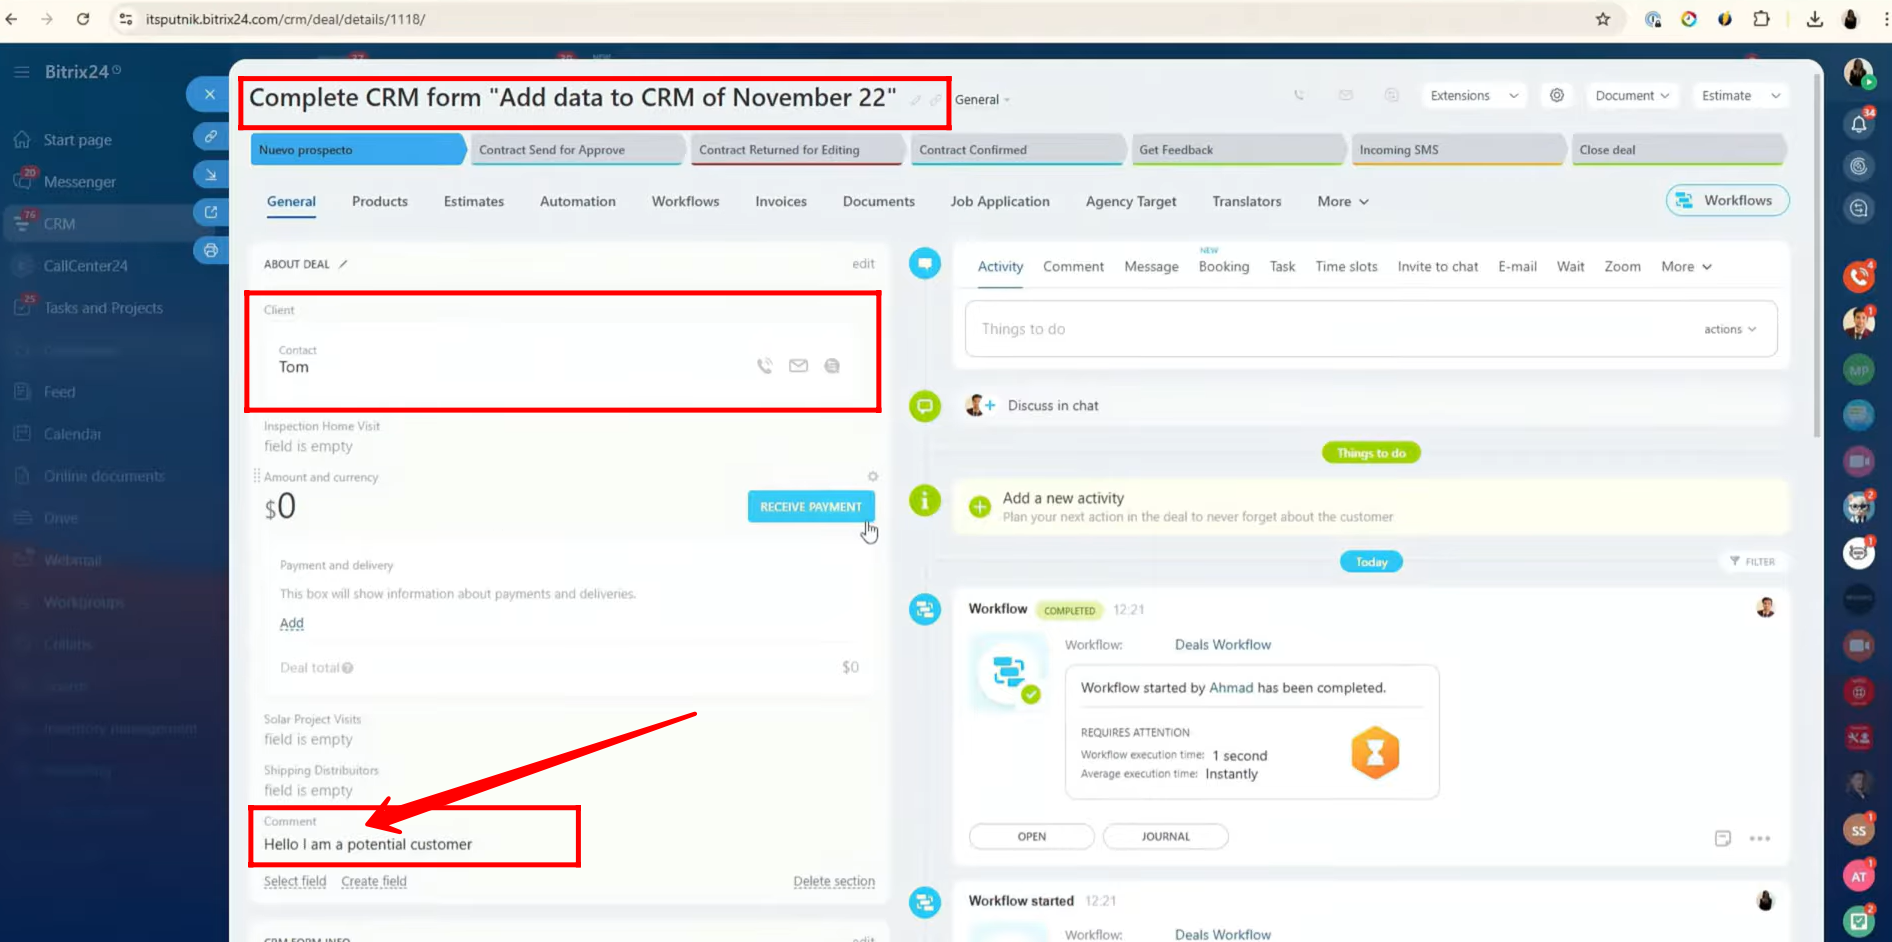
27. After the form submission, a new deal will automatically be created in the CRM. All the details you entered in the form will be reflected in this deal. For example, since the First Name field is linked to the Contact entity, the submitted name will appear under the Client section of the newly created deal.
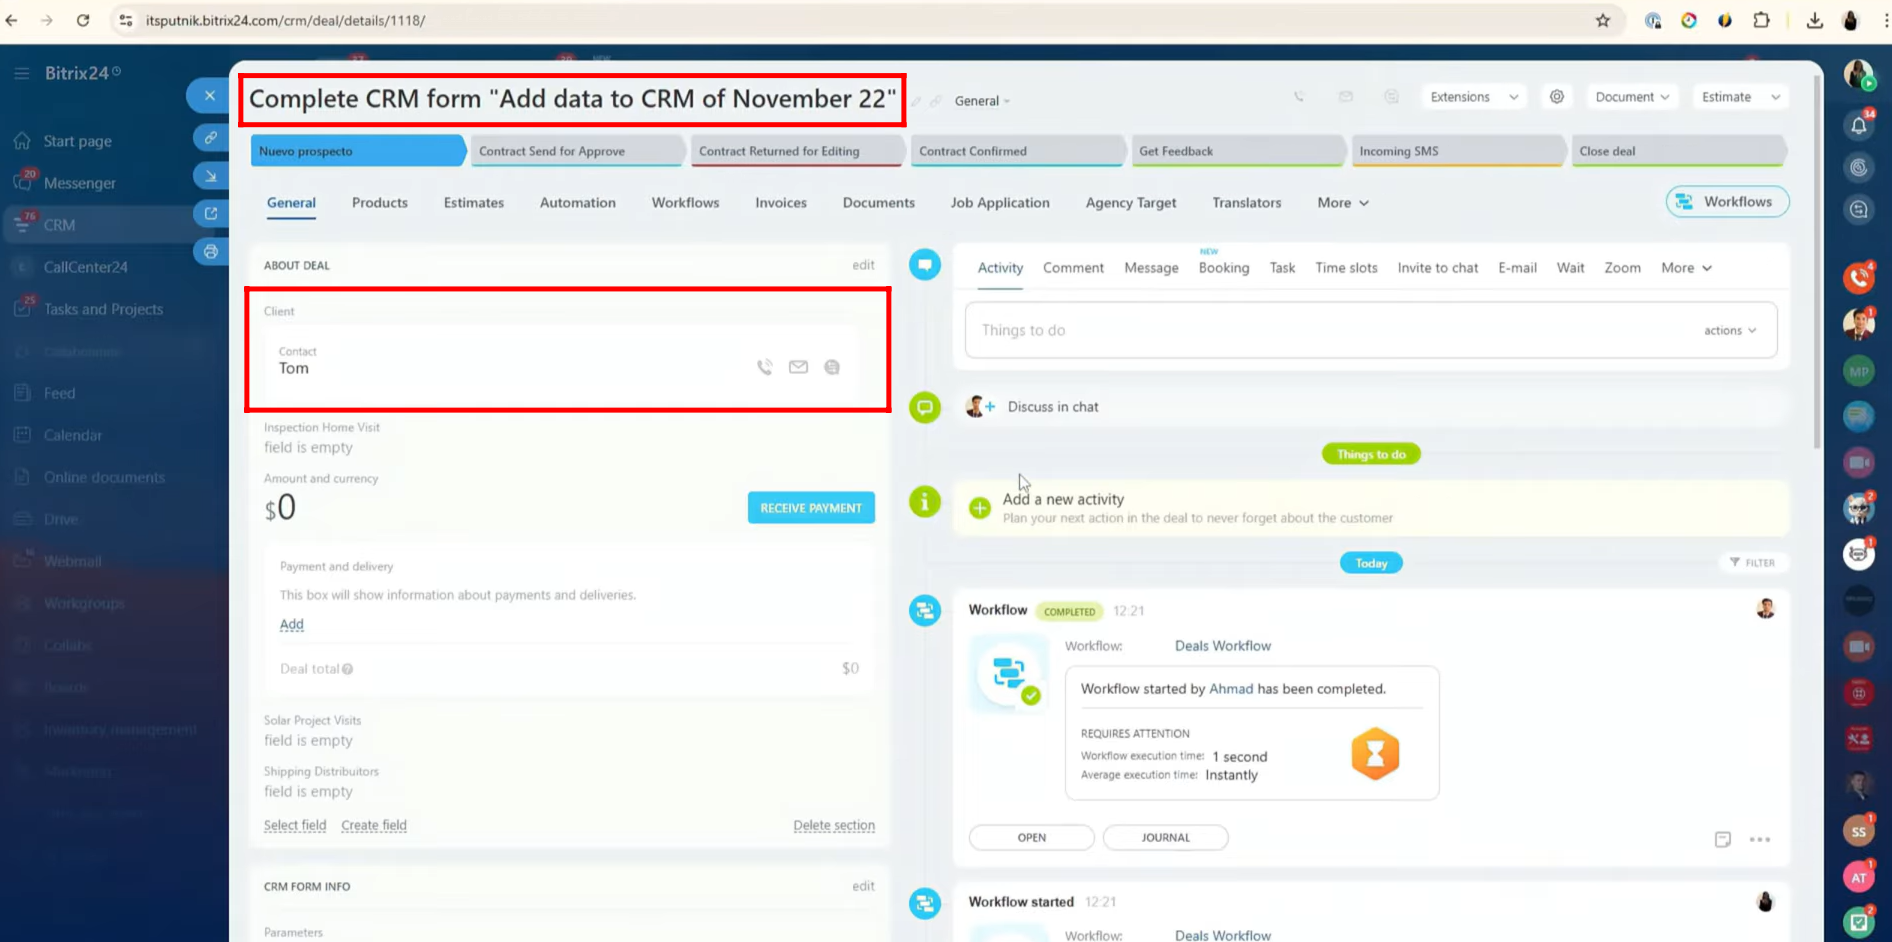
28. The Comment field you filled during form submission may not be visible by default in the deal view. To make it appear, click on “Select Field” and enable the field to unhide it. This will allow you to view the submitted comment within the deal details.
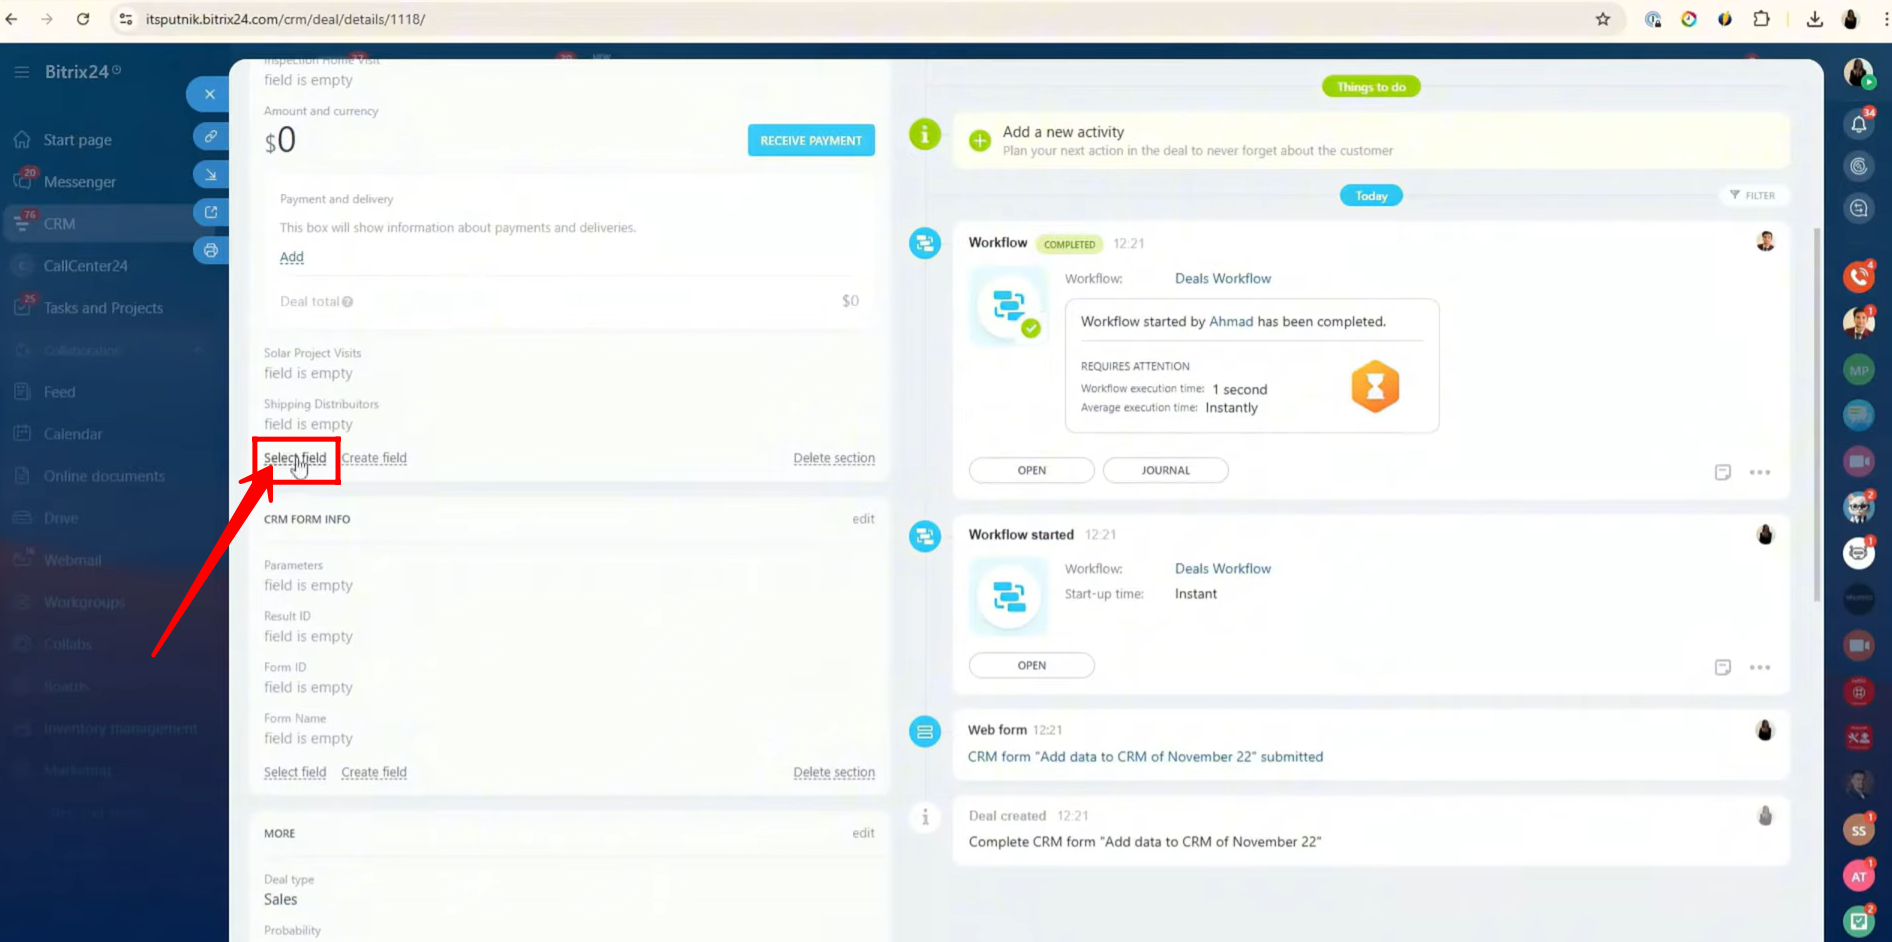
29. To unhide a field, search for the specific field name in the Select Field panel, then check the box next to it. This will make the field visible in the deal or CRM view.
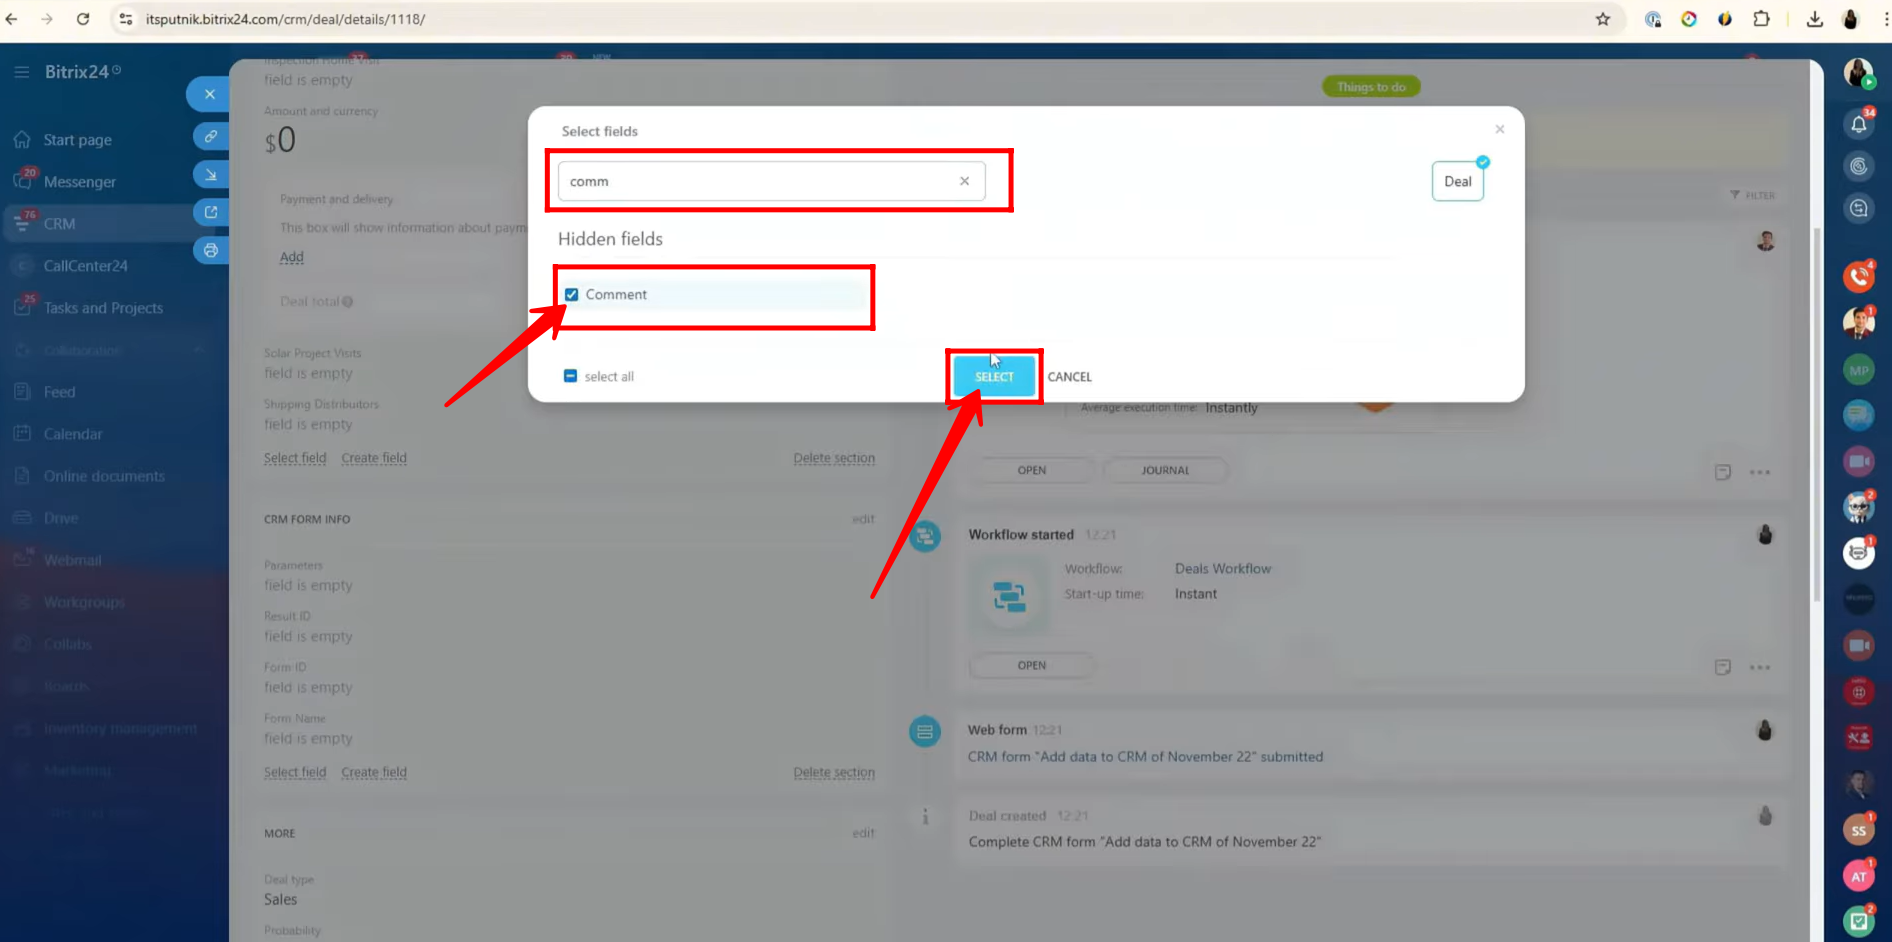
30. Now the Comment field is visible, displaying the information that was entered during the form submission. This ensures that all data submitted through the form can be viewed and tracked within the CRM.
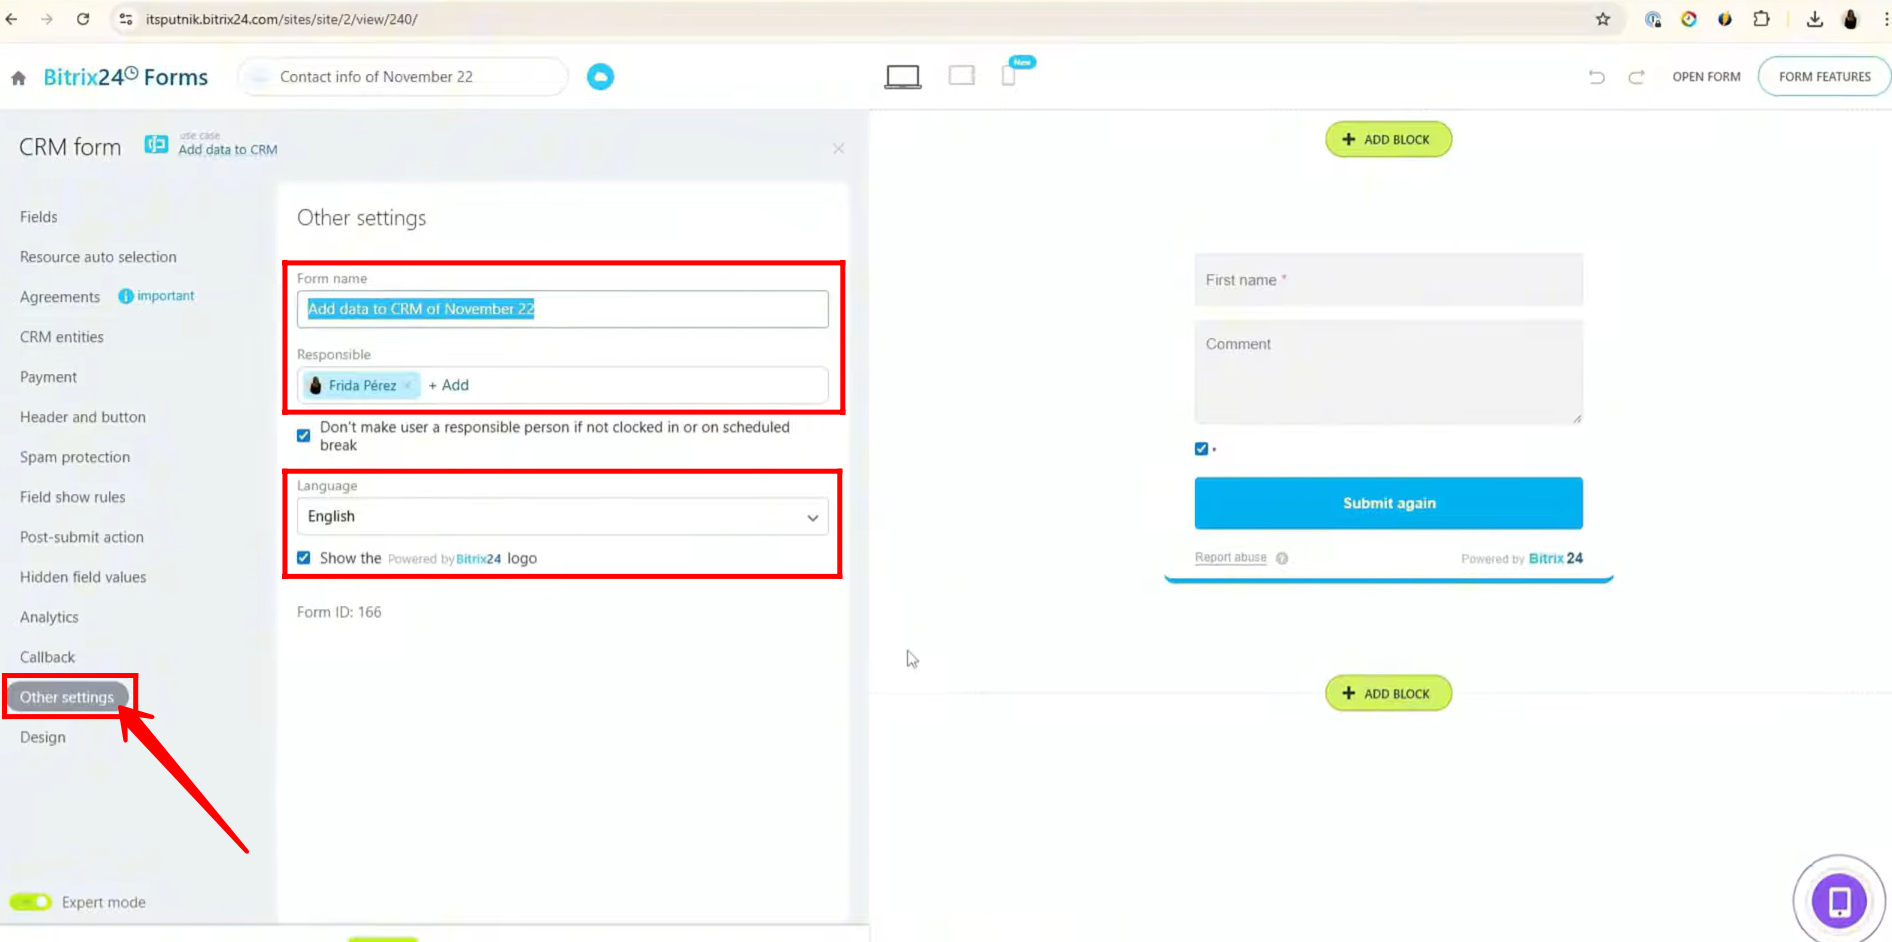
31. Go to “Other settings” within the form configuration. Here, you can:
- Customize the form name
- Change the responsible user for all incoming submissions
- Set the form language
- Choose whether to show or hide the “Powered by Bitrix24” logo
These settings help you personalize the form according to your branding and workflow requirements.
32. Now, let’s move to creating the “Custom Preferences” type of form in the Other section.

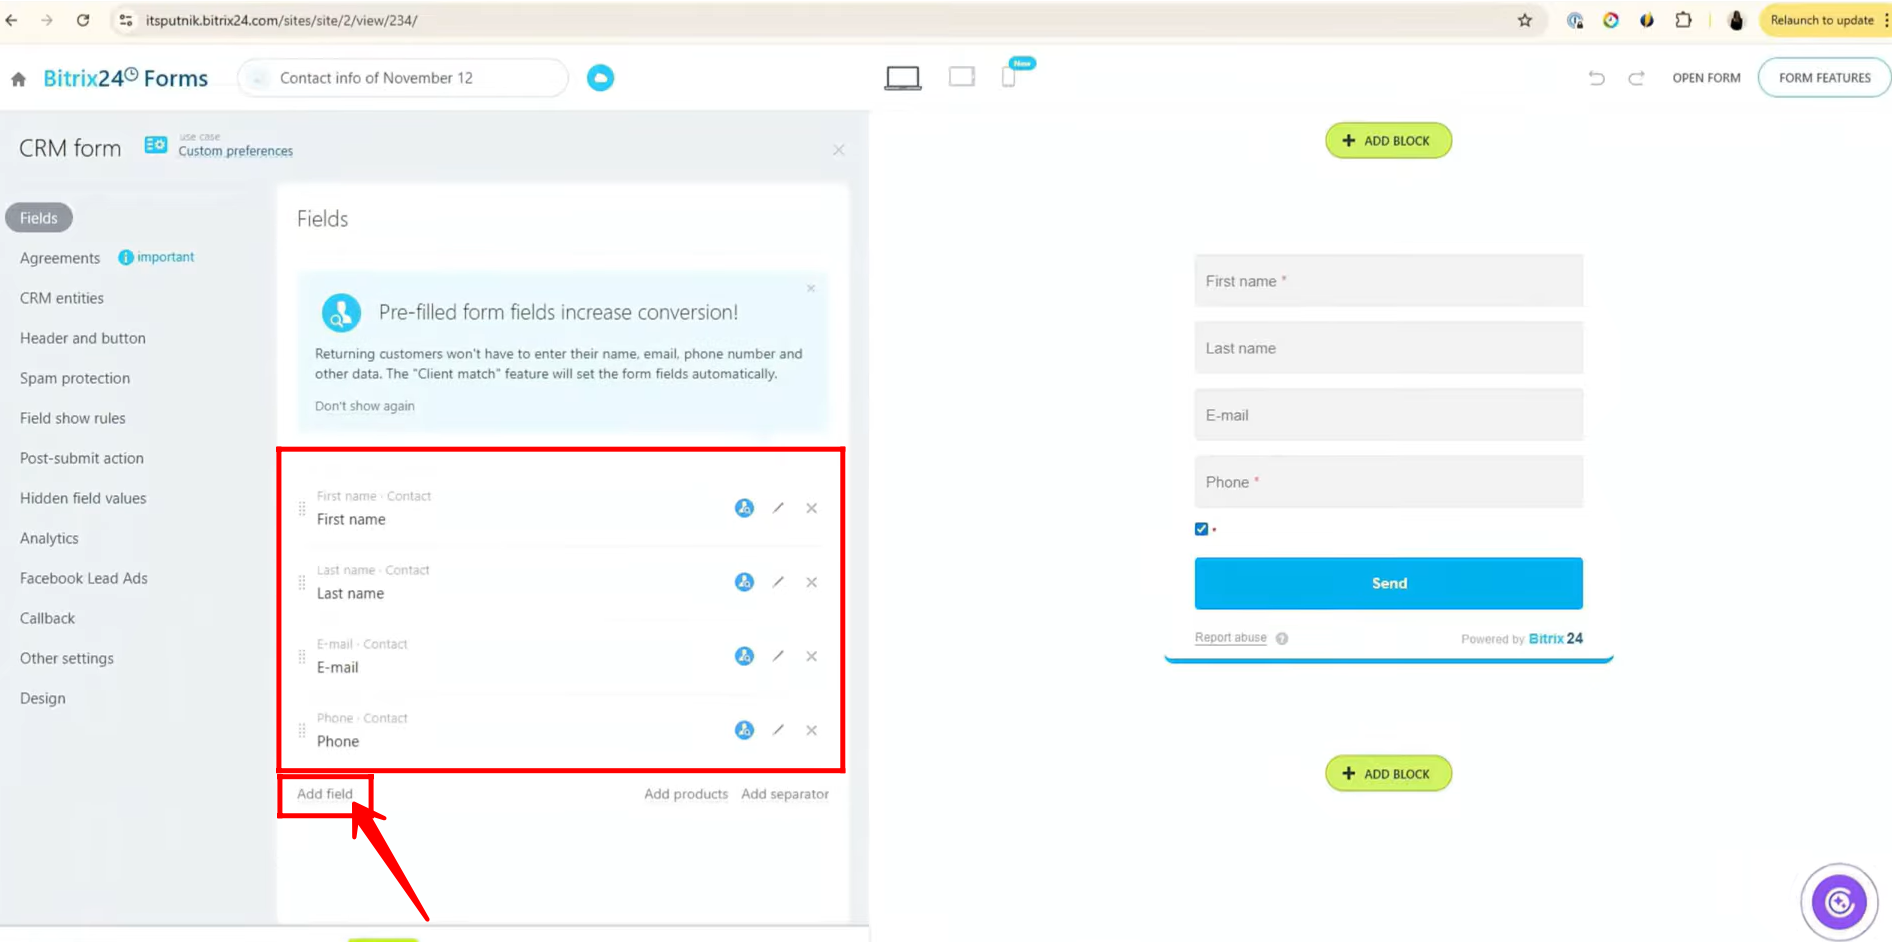
33. You will see the predefined fields of the form, such as First Name, Last Name, E-mail, Phone, etc.
To add more fields of your choice, click “Add field”.
From here, you can select additional fields from the existing CRM entities or SPAs.
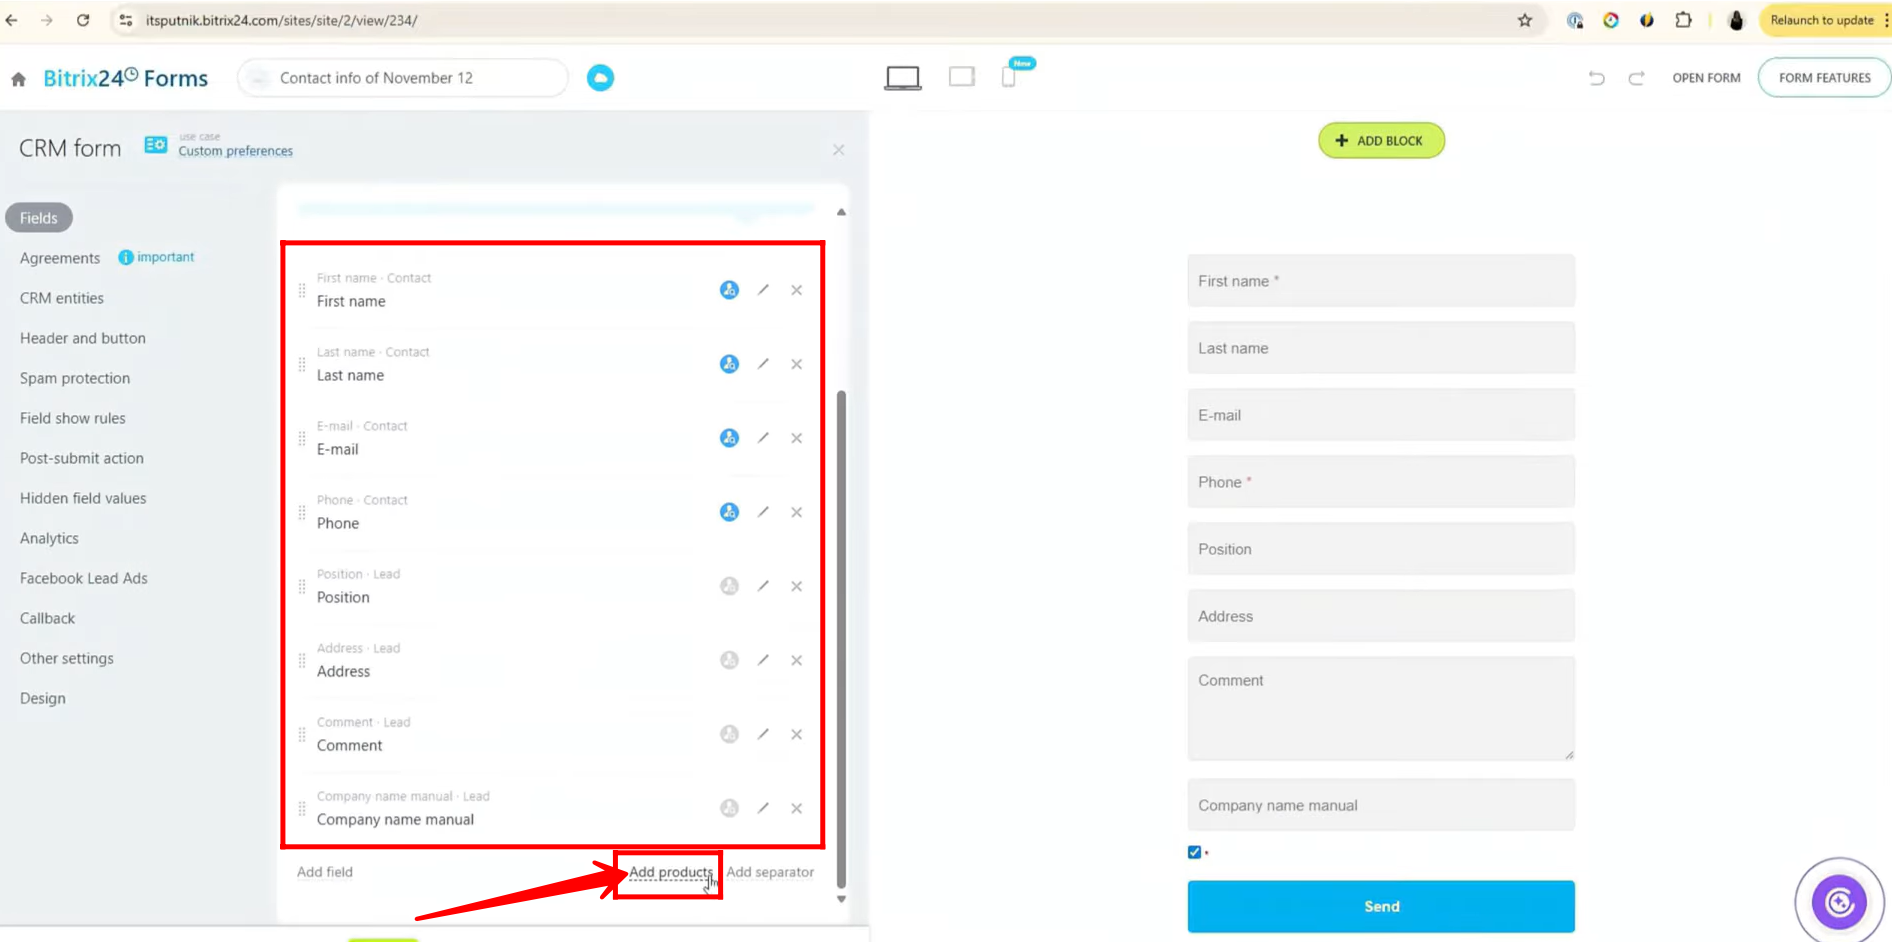
34. Here, we added new fields connected to the Lead and Contact entities.
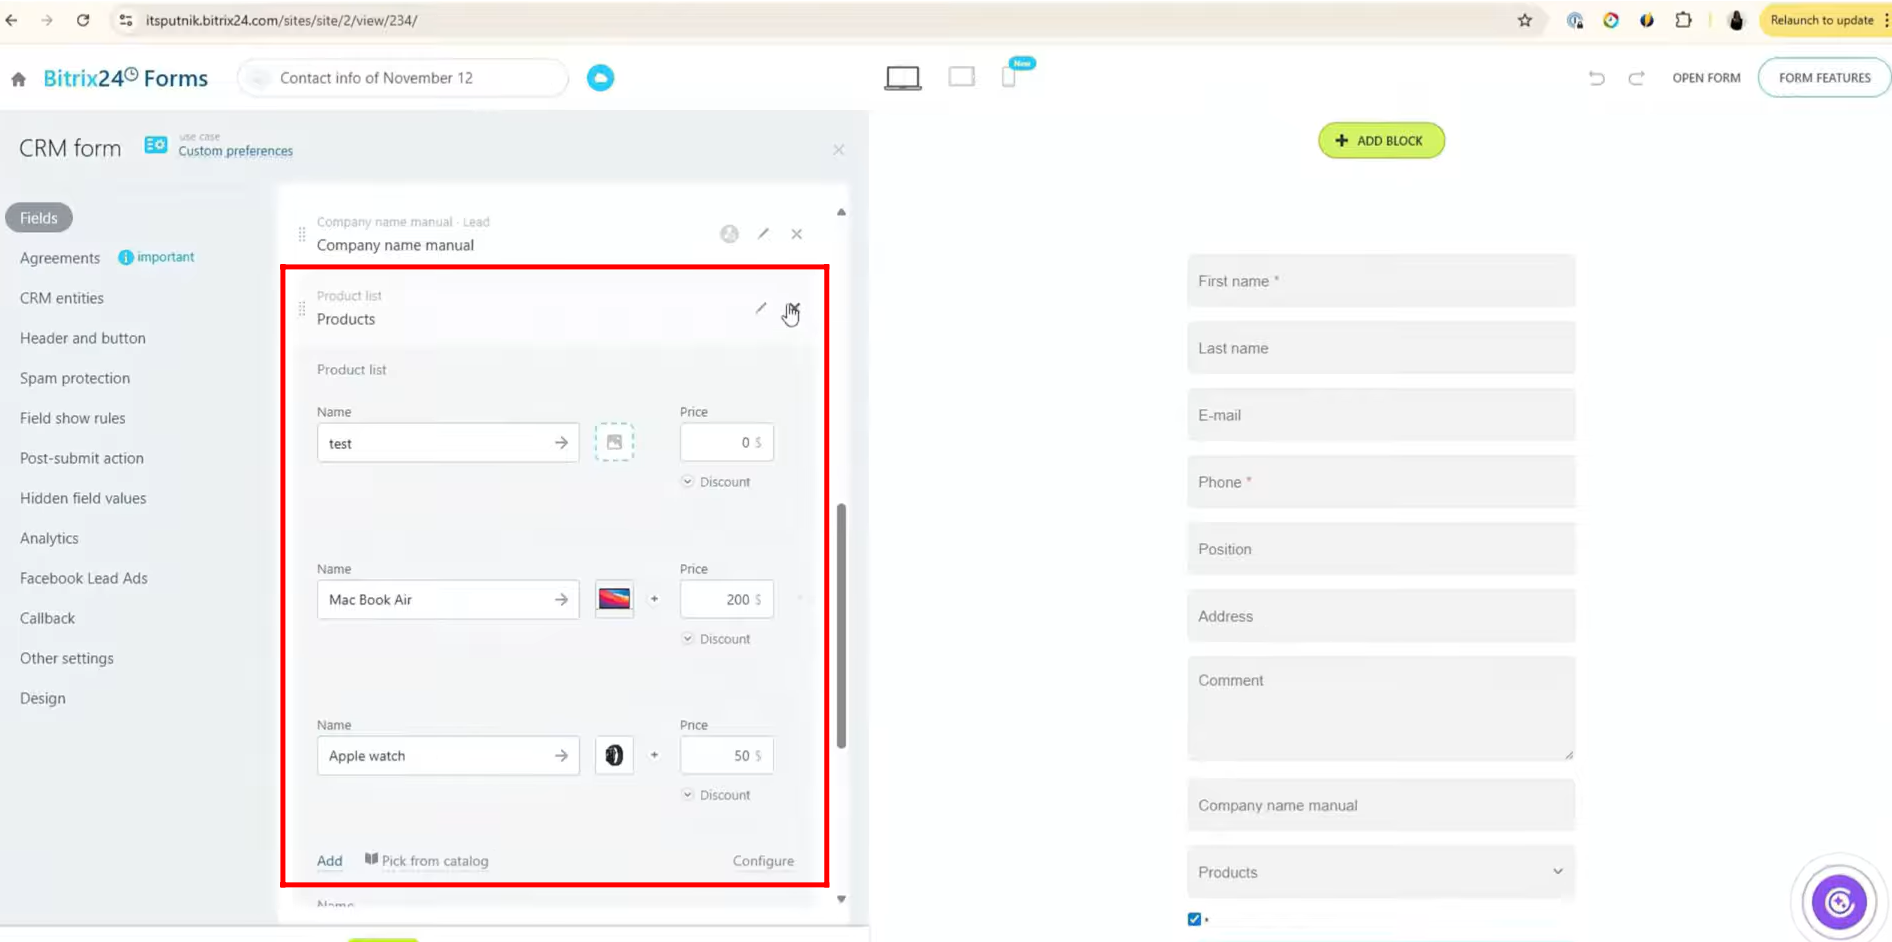
Next, click “Add products” to insert a dropdown-type field that contains the full product list from your Product Catalogue. This allows users to select a product when submitting the form — for example, if someone is filling out the form to purchase one of your products.
35. Here, you can see the list of products that will be displayed to users in the Products List field. You can customize the names, images, and prices of existing products by picking from the product catalogue. Additionally, you can add new products directly to this field from here.
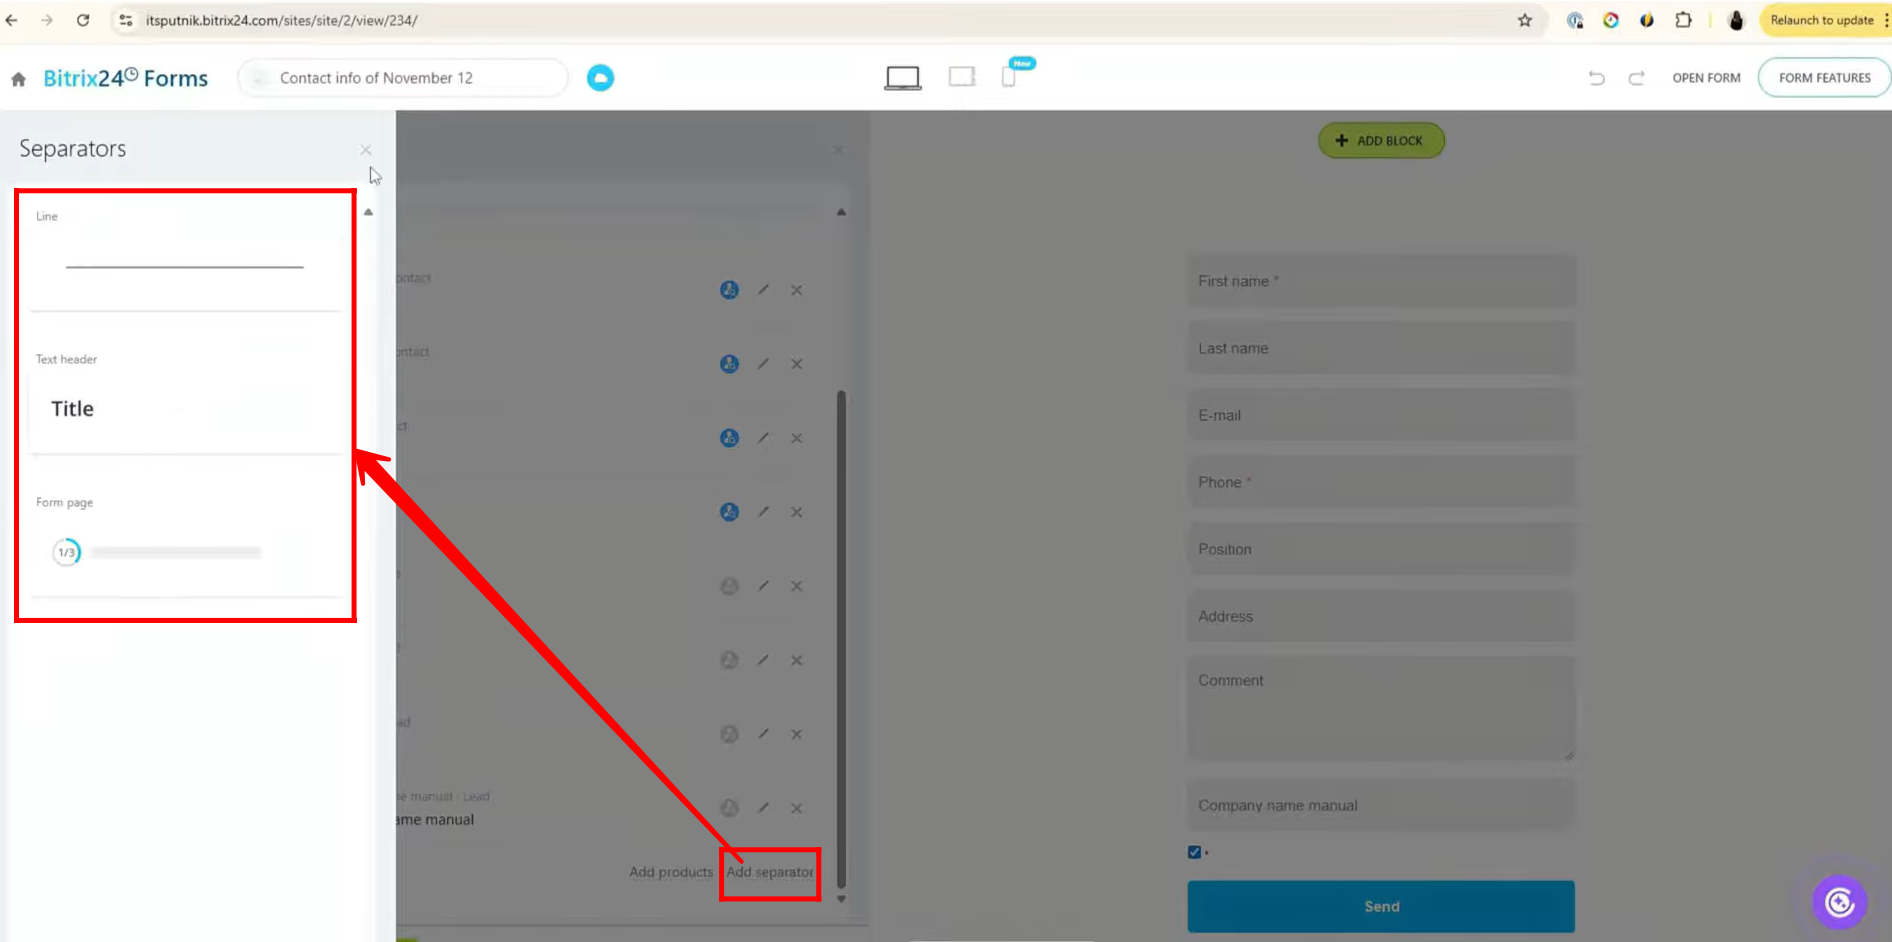
36. You can click “Add Separator” to insert separators within the form during configuration.
The available types of separators are:
- Line – to visually separate sections
- Text Header (Title) – to add a heading for a section
- Form Page (Pagination Effect) – to divide the form into multiple pages
“You can also watch a video on Youtube”