| 1449 Views | admin

The article “e-Signature for HR” explains how human resources departments can use electronic signatures to manage important documents more efficiently. It walks through the entire process of creating, editing, and sending documents for signing, making it easier for HR teams to handle approvals and employee agreements without relying on paper. The guide also shows how to involve multiple parties, including approvers, field editors, and employees, while keeping track of each step in the system.
It begins with setting up the company details and adding information for multiple branches if needed. The article highlights how HR can configure fields, make them required, and arrange them in the correct order within the document. This ensures that all essential information is captured before the document is sent out for review and signing.
Next, the guide explains the roles of approvers and field editors. Approvers review and confirm that the document is ready, while field editors check and complete any missing fields. Only after these steps is the document sent to employees for signing. The article emphasizes the importance of following signing agreements and laws to make the electronic signature legally valid.
Finally, the article covers how employees receive notifications and sign the documents using mobile or desktop portals. It explains how the signed PDF includes all signatures, a unique document ID, and a QR code to verify the electronic signatures. HR can track the progress of documents, download archives, and set up automation rules to monitor each stage of the signing process. This system helps HR manage agreements quickly and keeps a clear record of all signed documents.
Detailed Instructions are given below
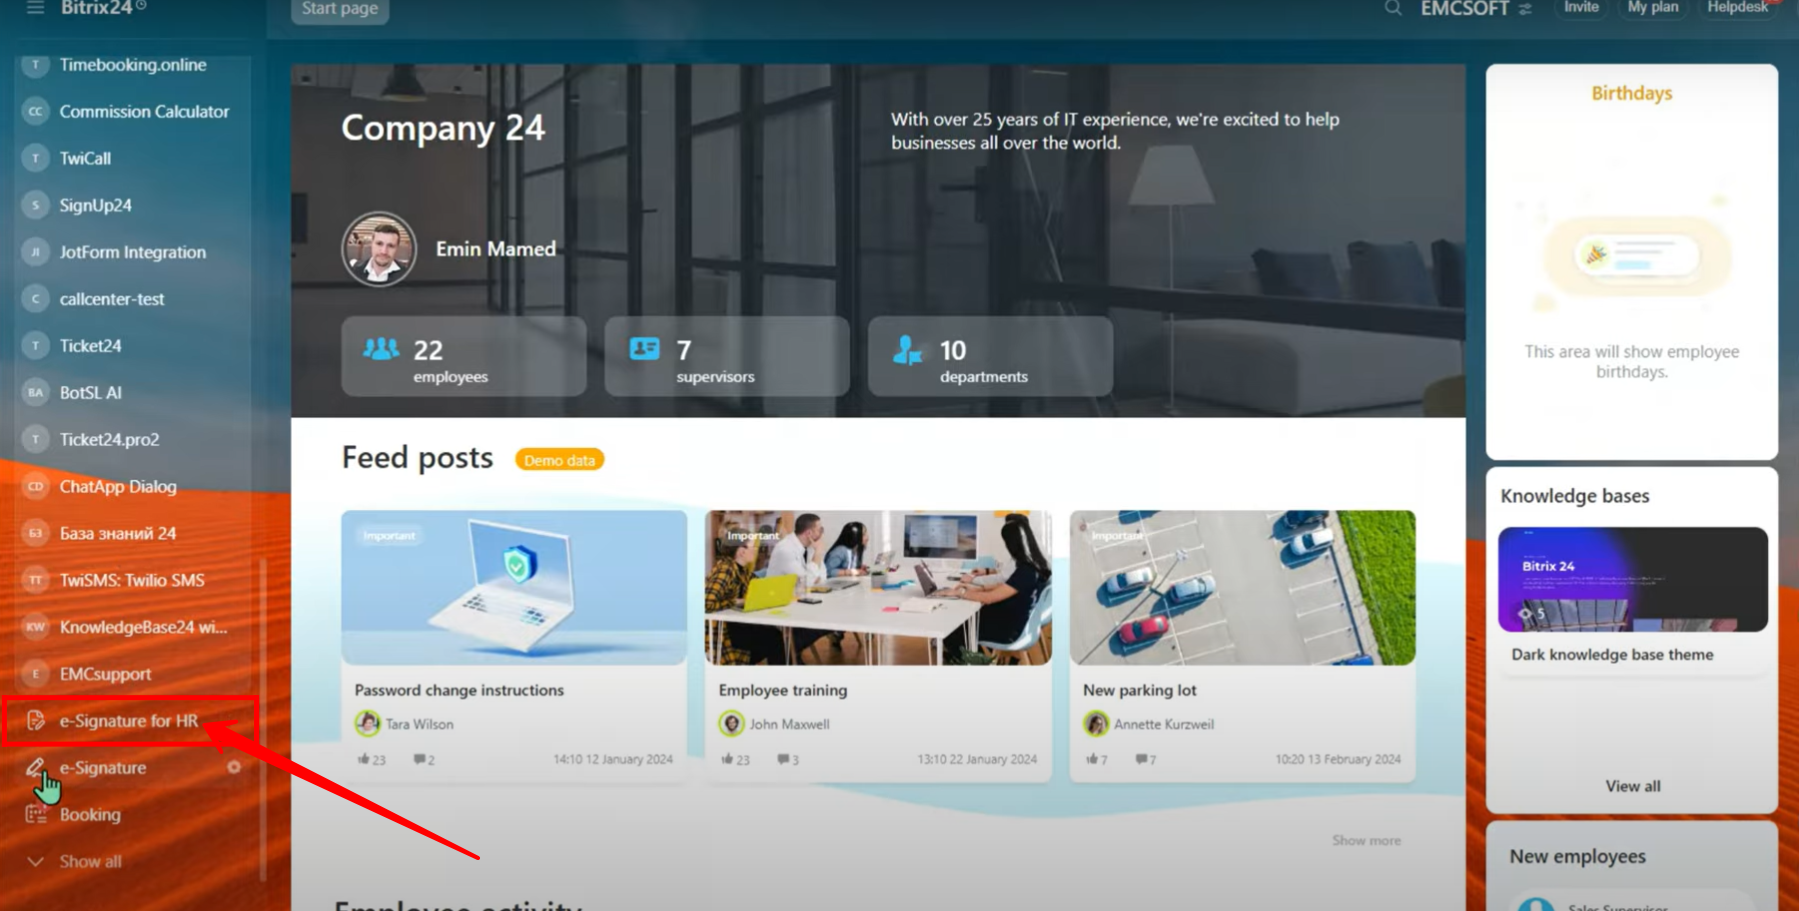
1. Go to “e-Signature for HR” in the menu. Please note that this option is different from the general “e-Signature” feature we discussed earlier.
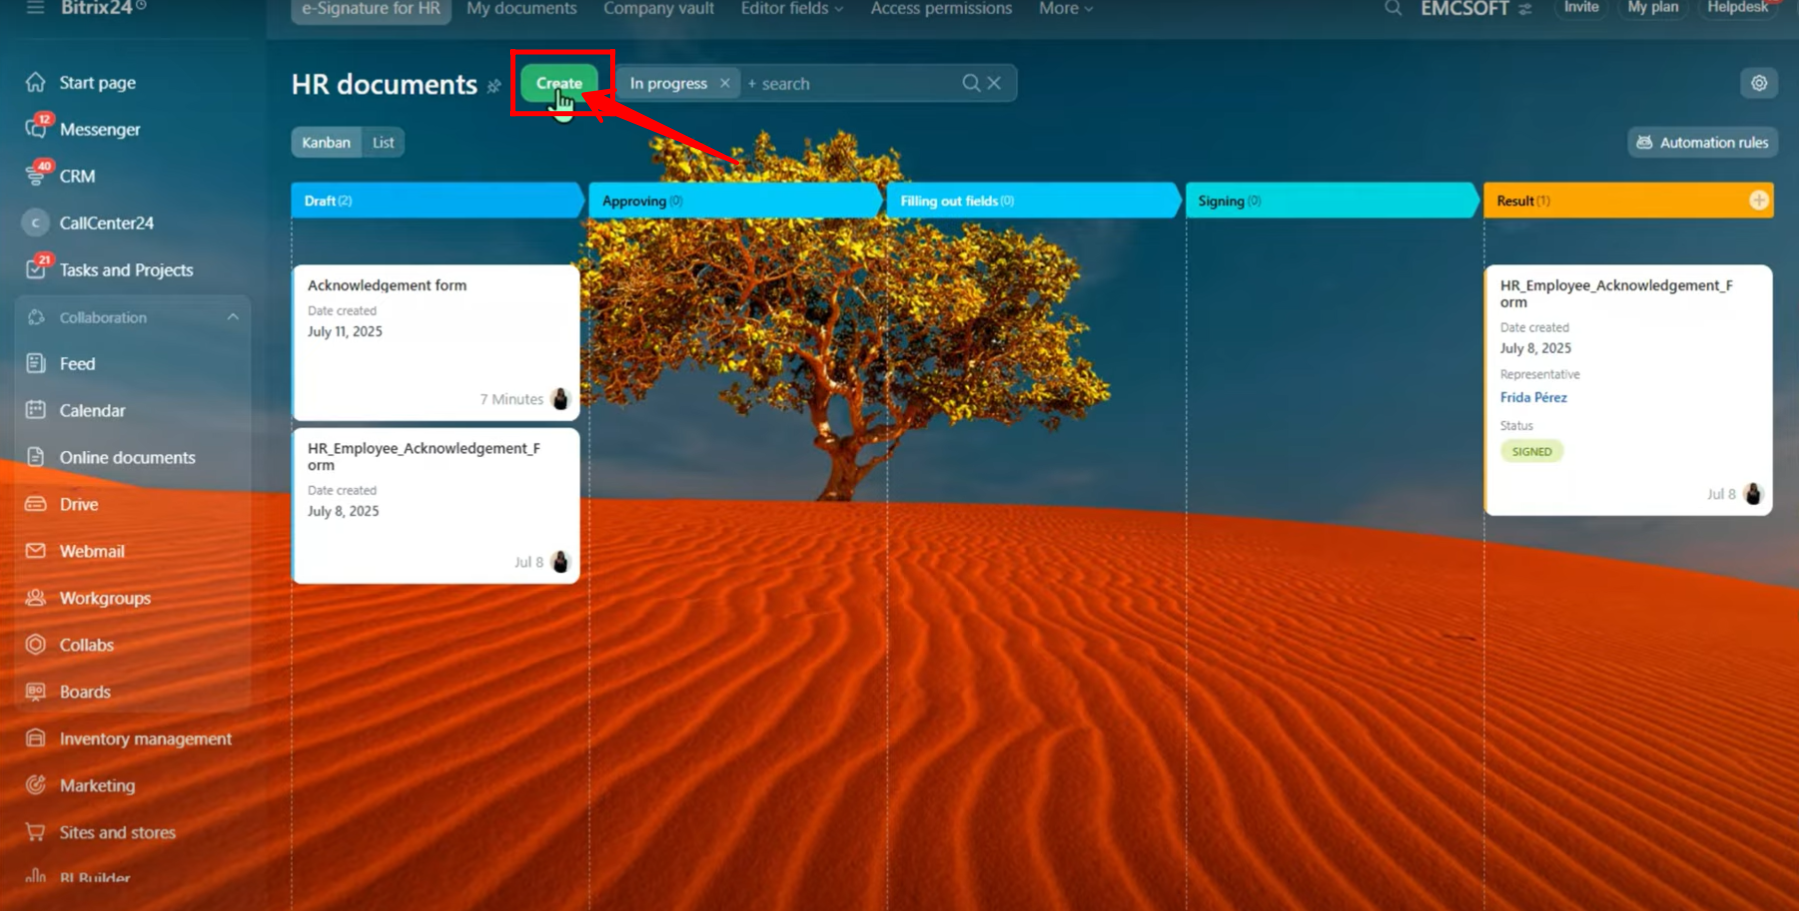
2. Click on “Create” to start setting up a new e-Signature for HR request.
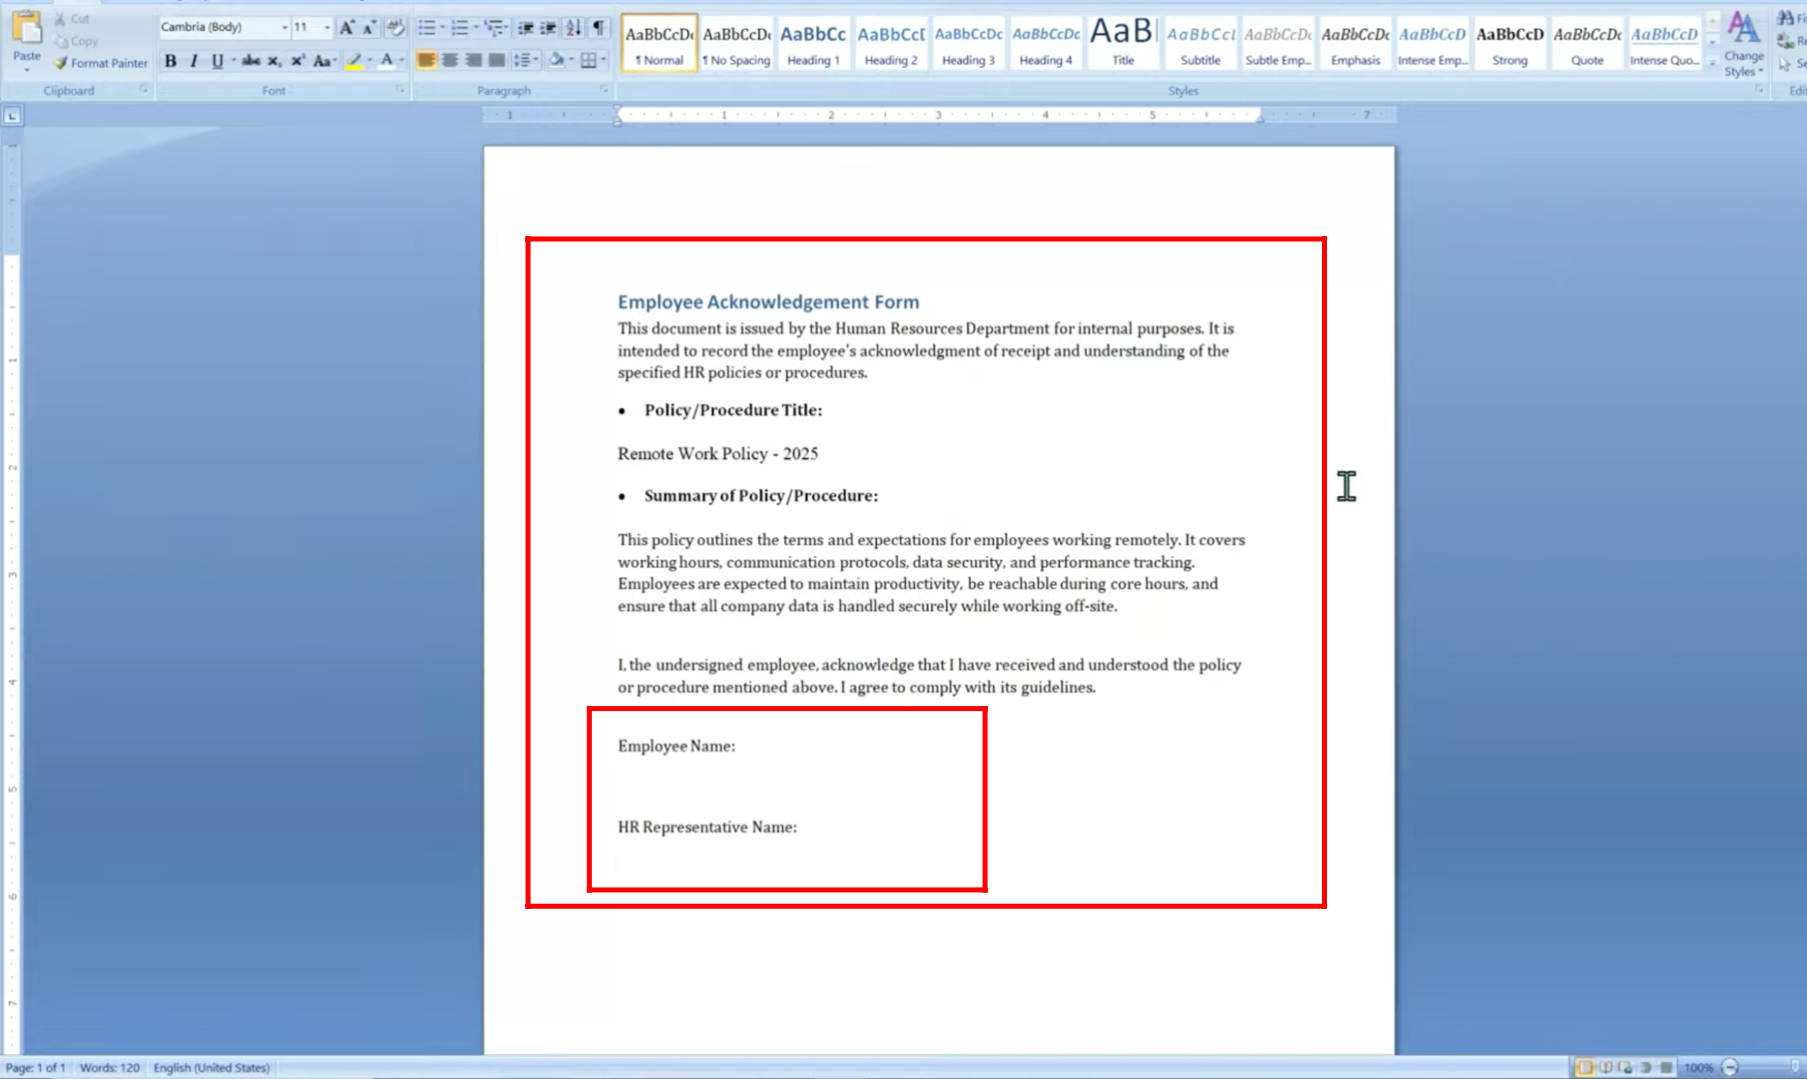
3. Here, you can see an example document formatted with placeholders for the Employee Name and HR Representative Name. Please note that this setup is part of “e-Signature for HR” (electronic signature), which is different from the general “e-Signature” (digital signature).
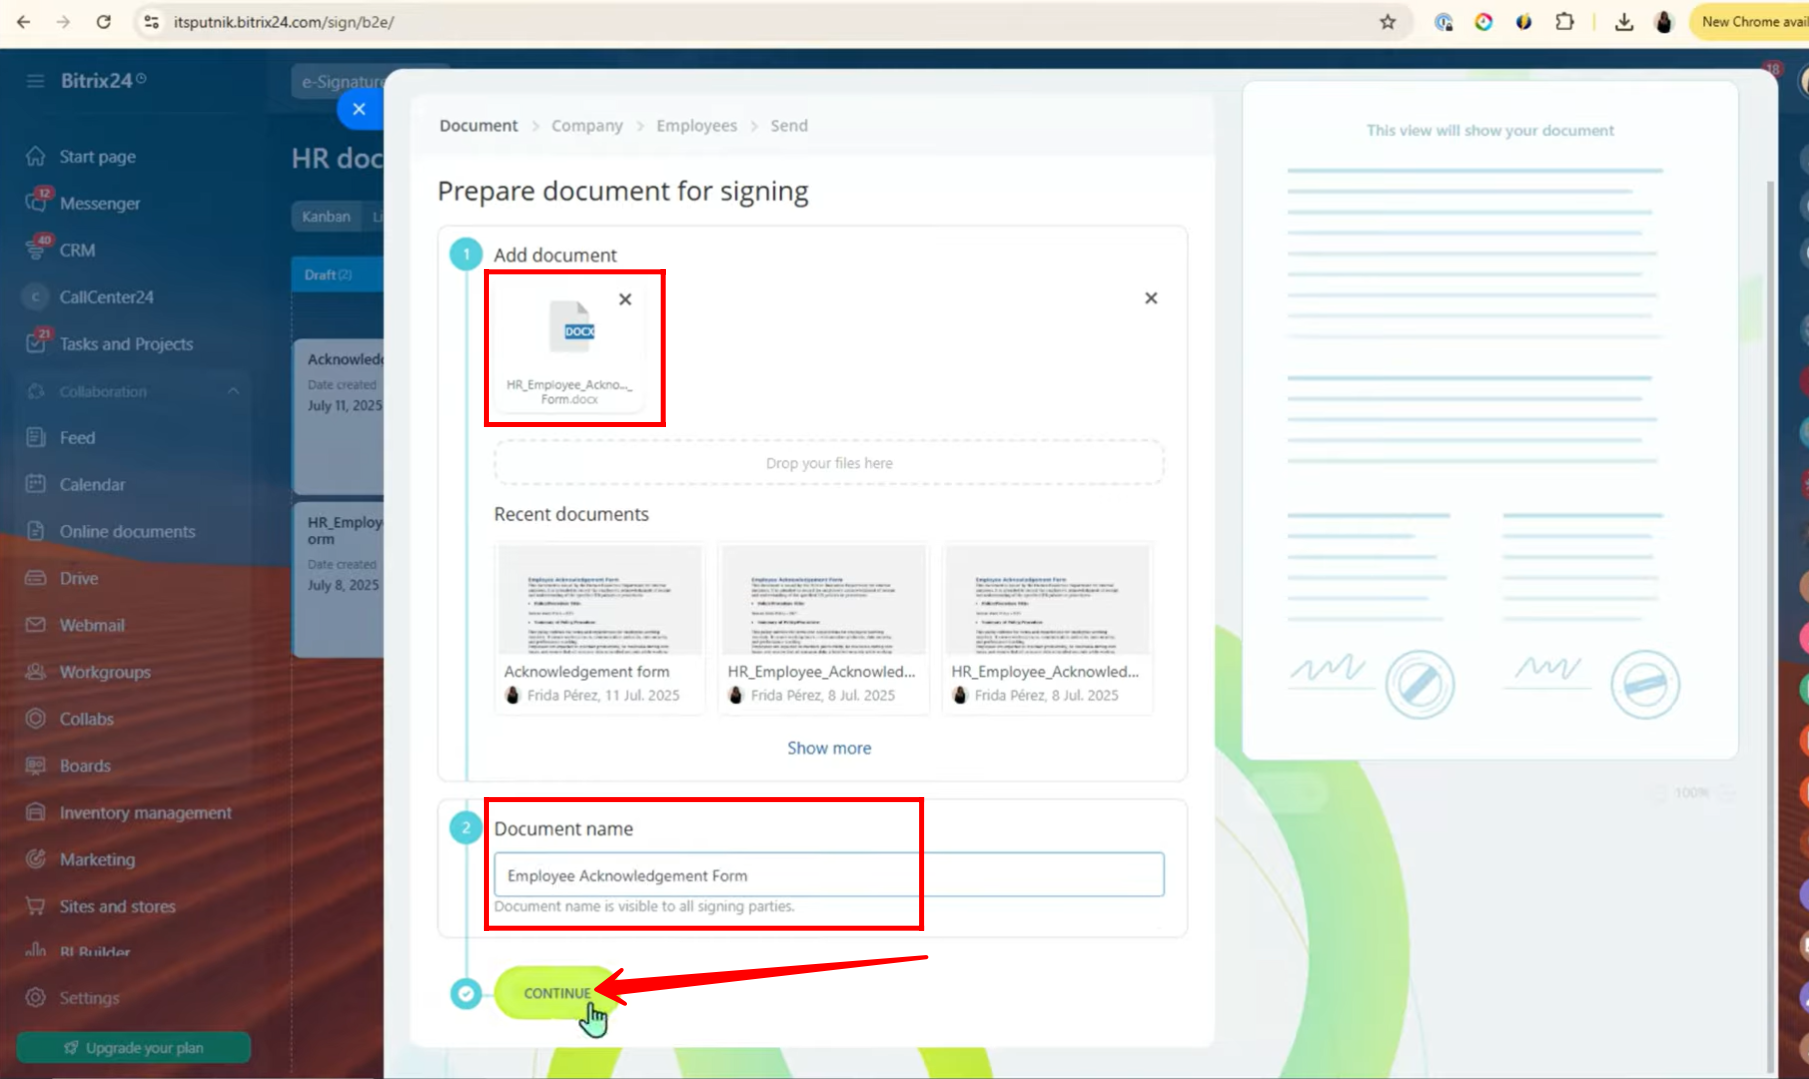
4. You can either upload a document directly from your desktop, drag and drop it into the upload area, or select from recent documents. Supported file types include images, PDF, and Word files.

5. We uploaded a DOC file named “Employee Acknowledgement Form.” You can choose any name as per your requirement. Once done, click Continue to proceed.
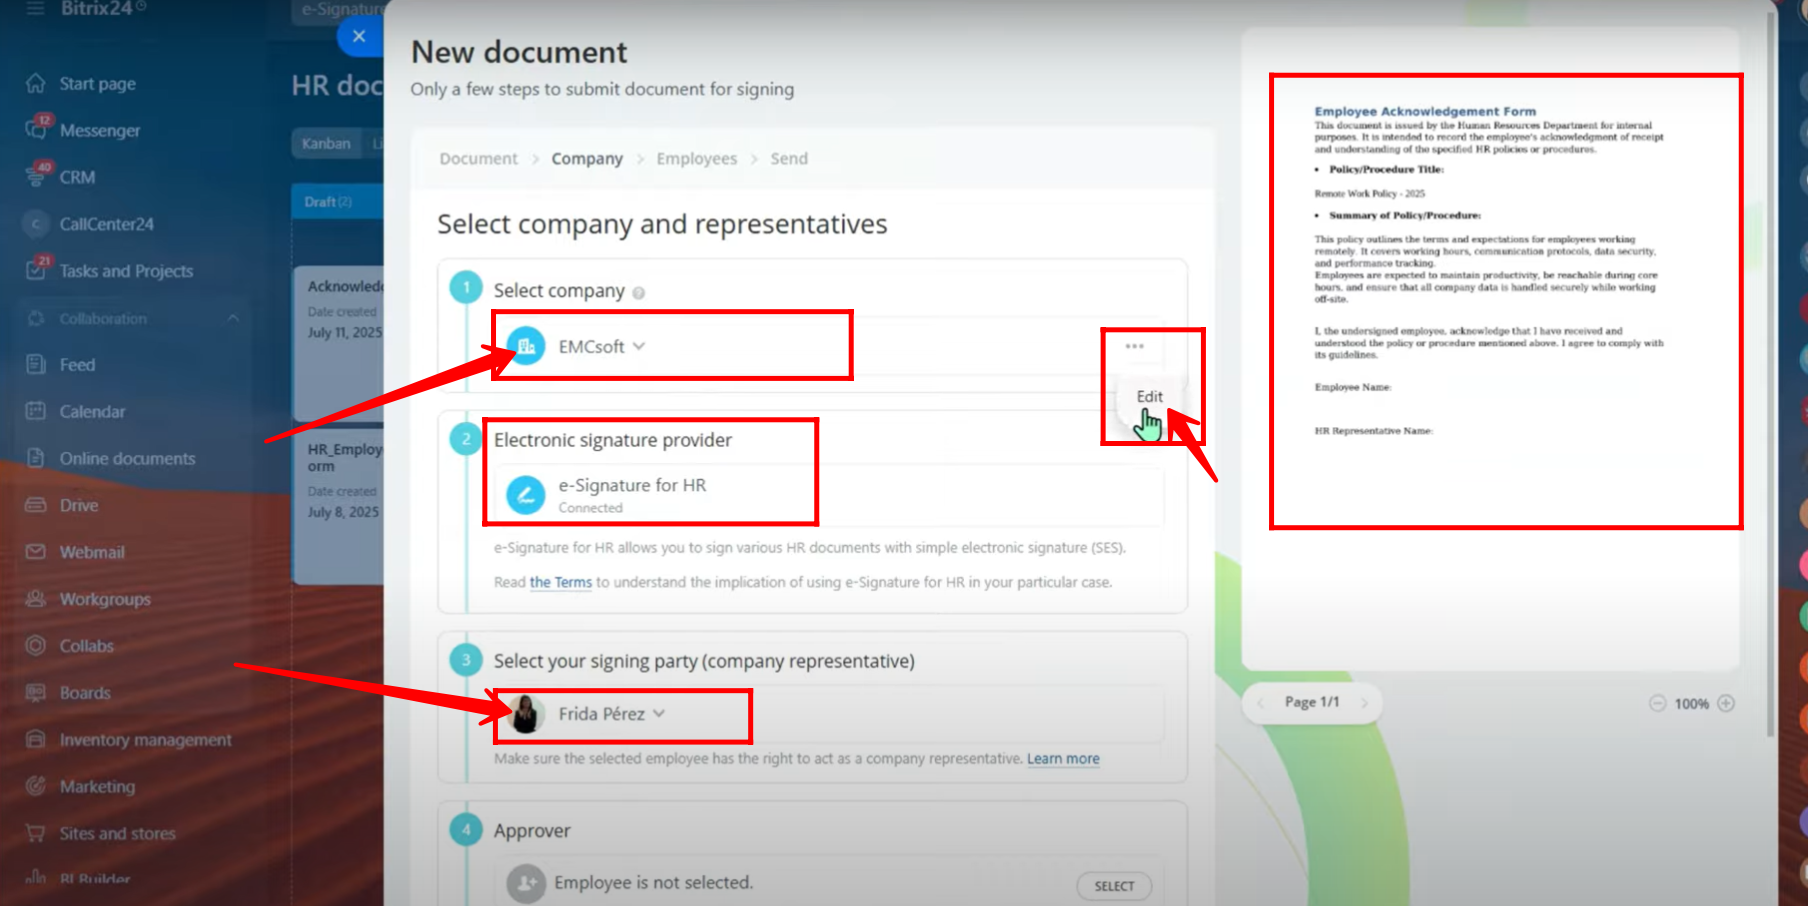
6. After uploading, you can preview the document. Select your company, or click the three dots to edit company details. The electronic signature provider (e-Signature for HR) will show as “Connected.” Please review the applicable terms of electronic signatures, as rules vary by country for both your company and the signing party. You can then select the company representative (the signing party) from your organization.
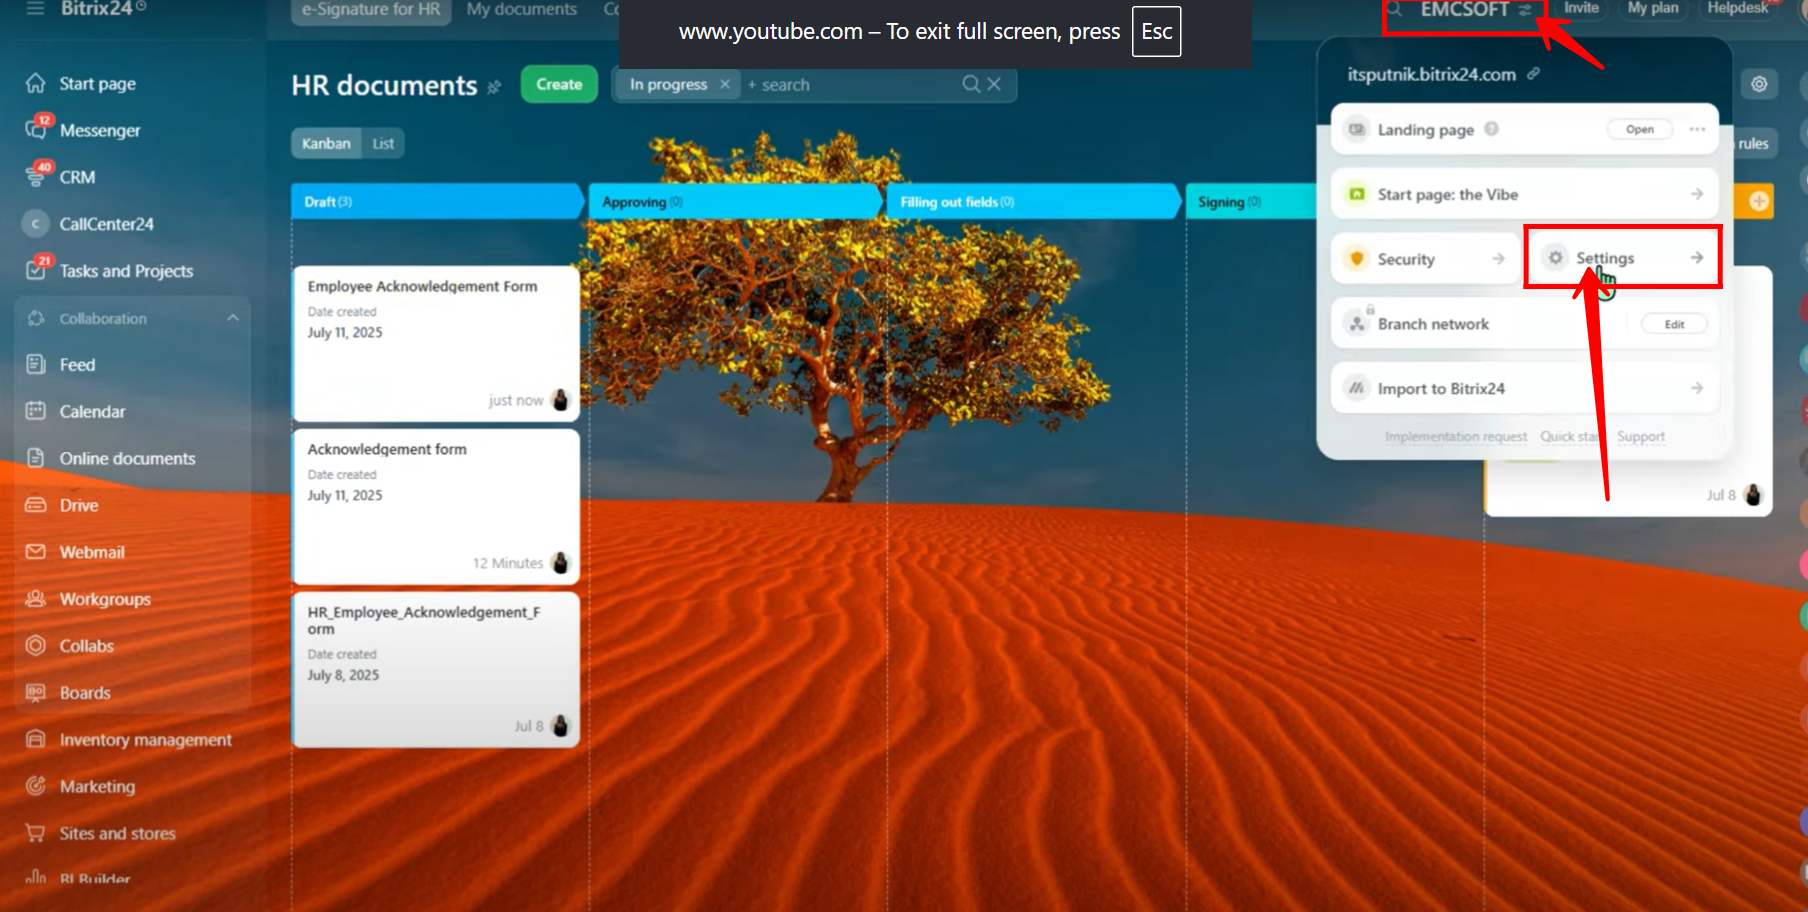
7. If you need to add or update company details separately, navigate to your portal settings and make the changes there.
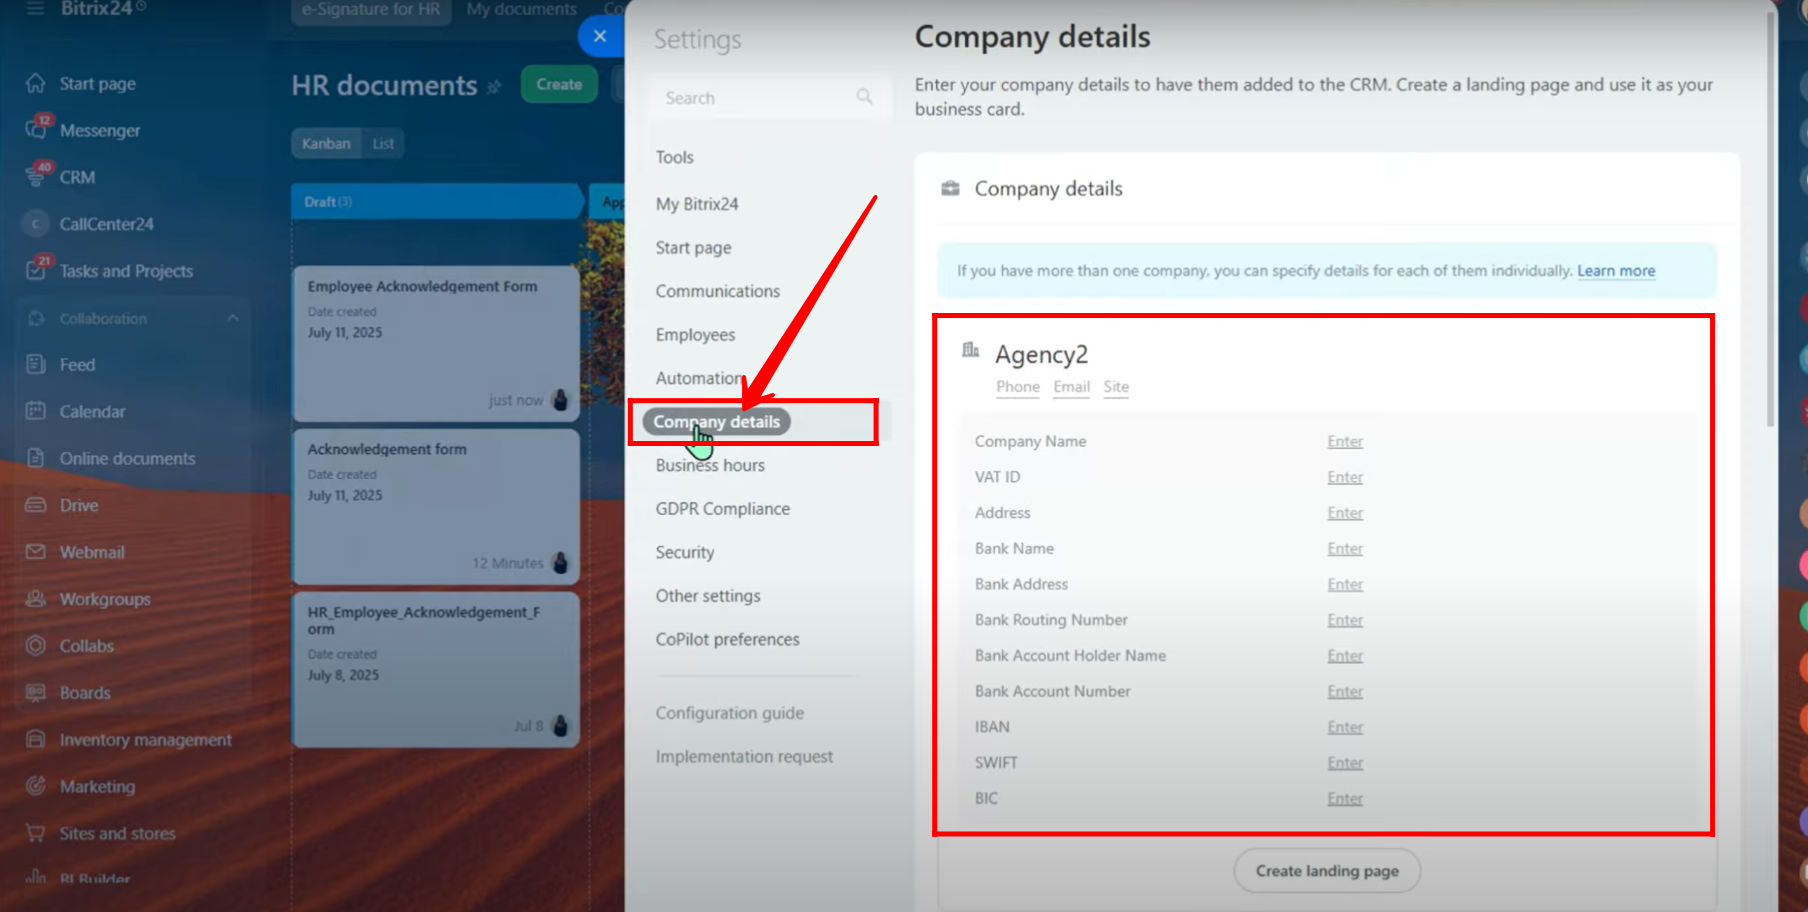
8. In the “Company Details” tab, fill in all available fields related to your company. You also have the option to add multiple companies or different branches of the same company. For a more detailed explanation, you can refer back to the earlier article on “e-Signature.”
9. Next, add the approver(s) for the document. You can assign up to 20 approvers per document. Additionally, designate a file editor who will review the document and address any missing mandatory fields. Once completed, click Continue.

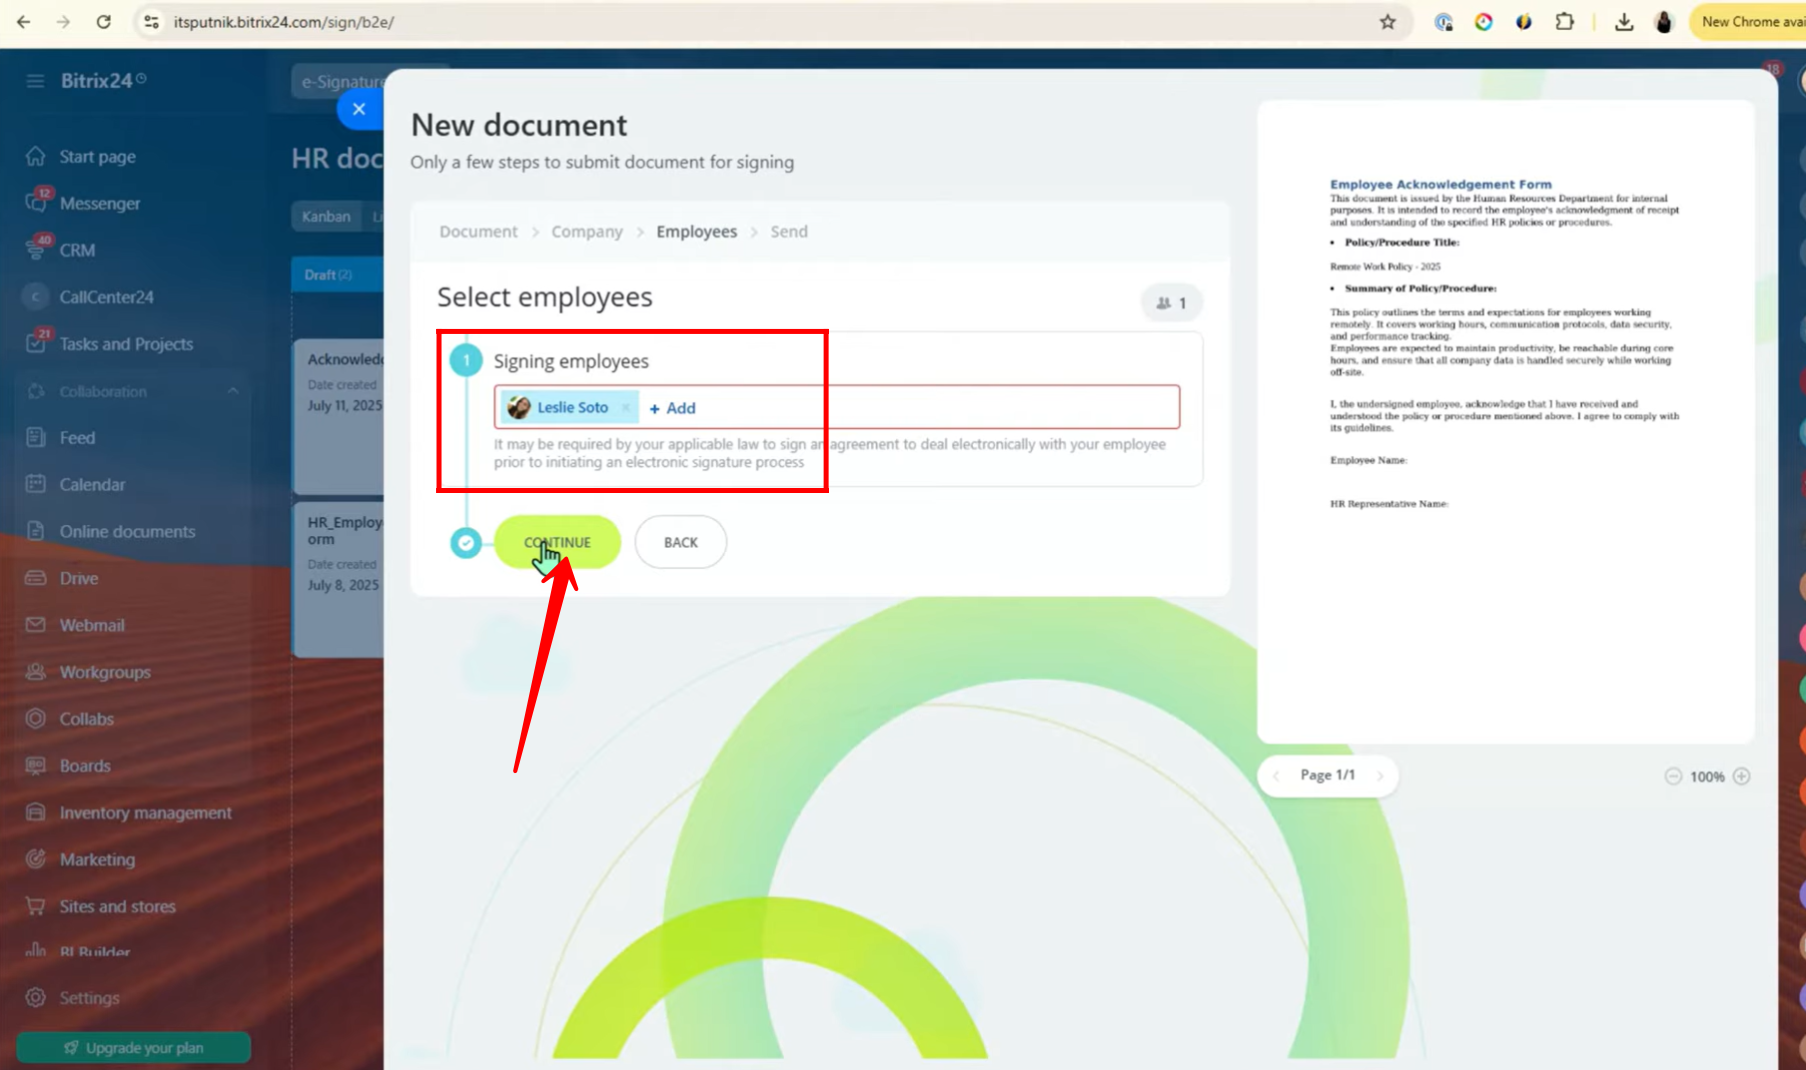
10. Now, add the employees who will be signing the document. Before assigning, make sure to review the applicable signing agreement laws, as they may vary by country. After selecting the employees, click Continue.
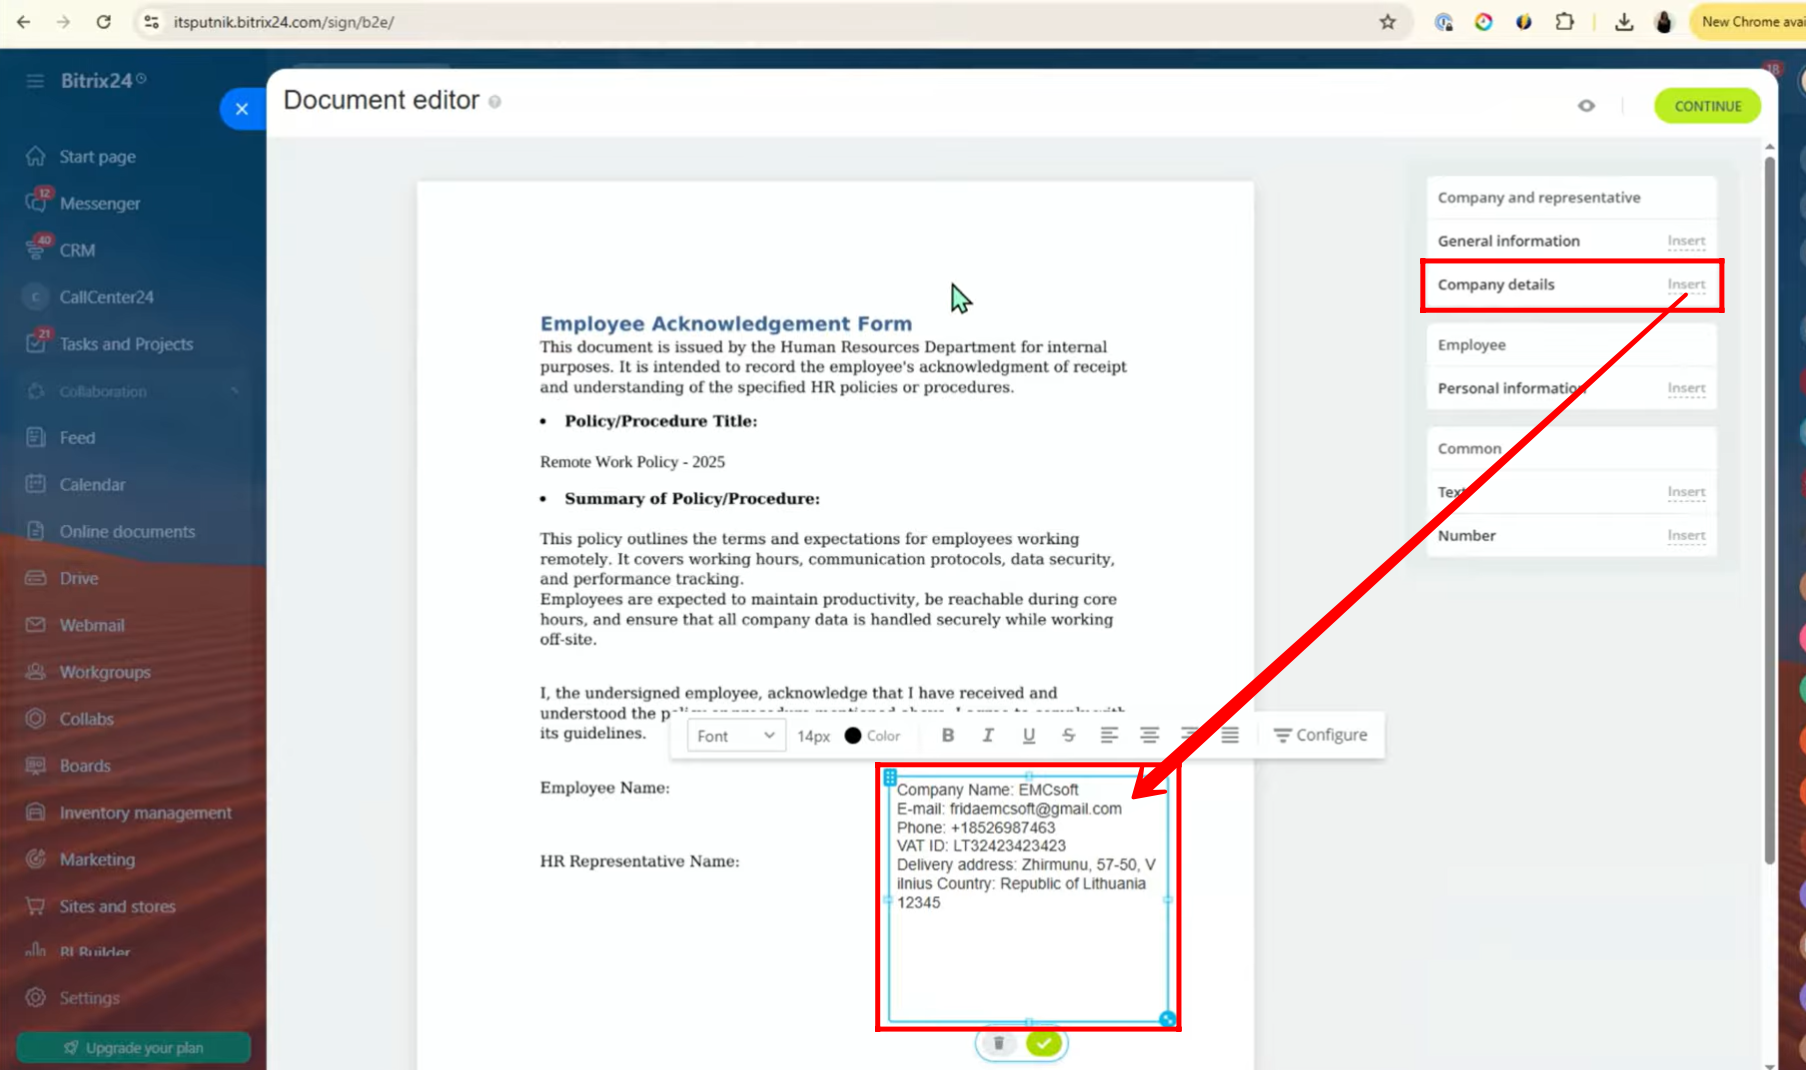
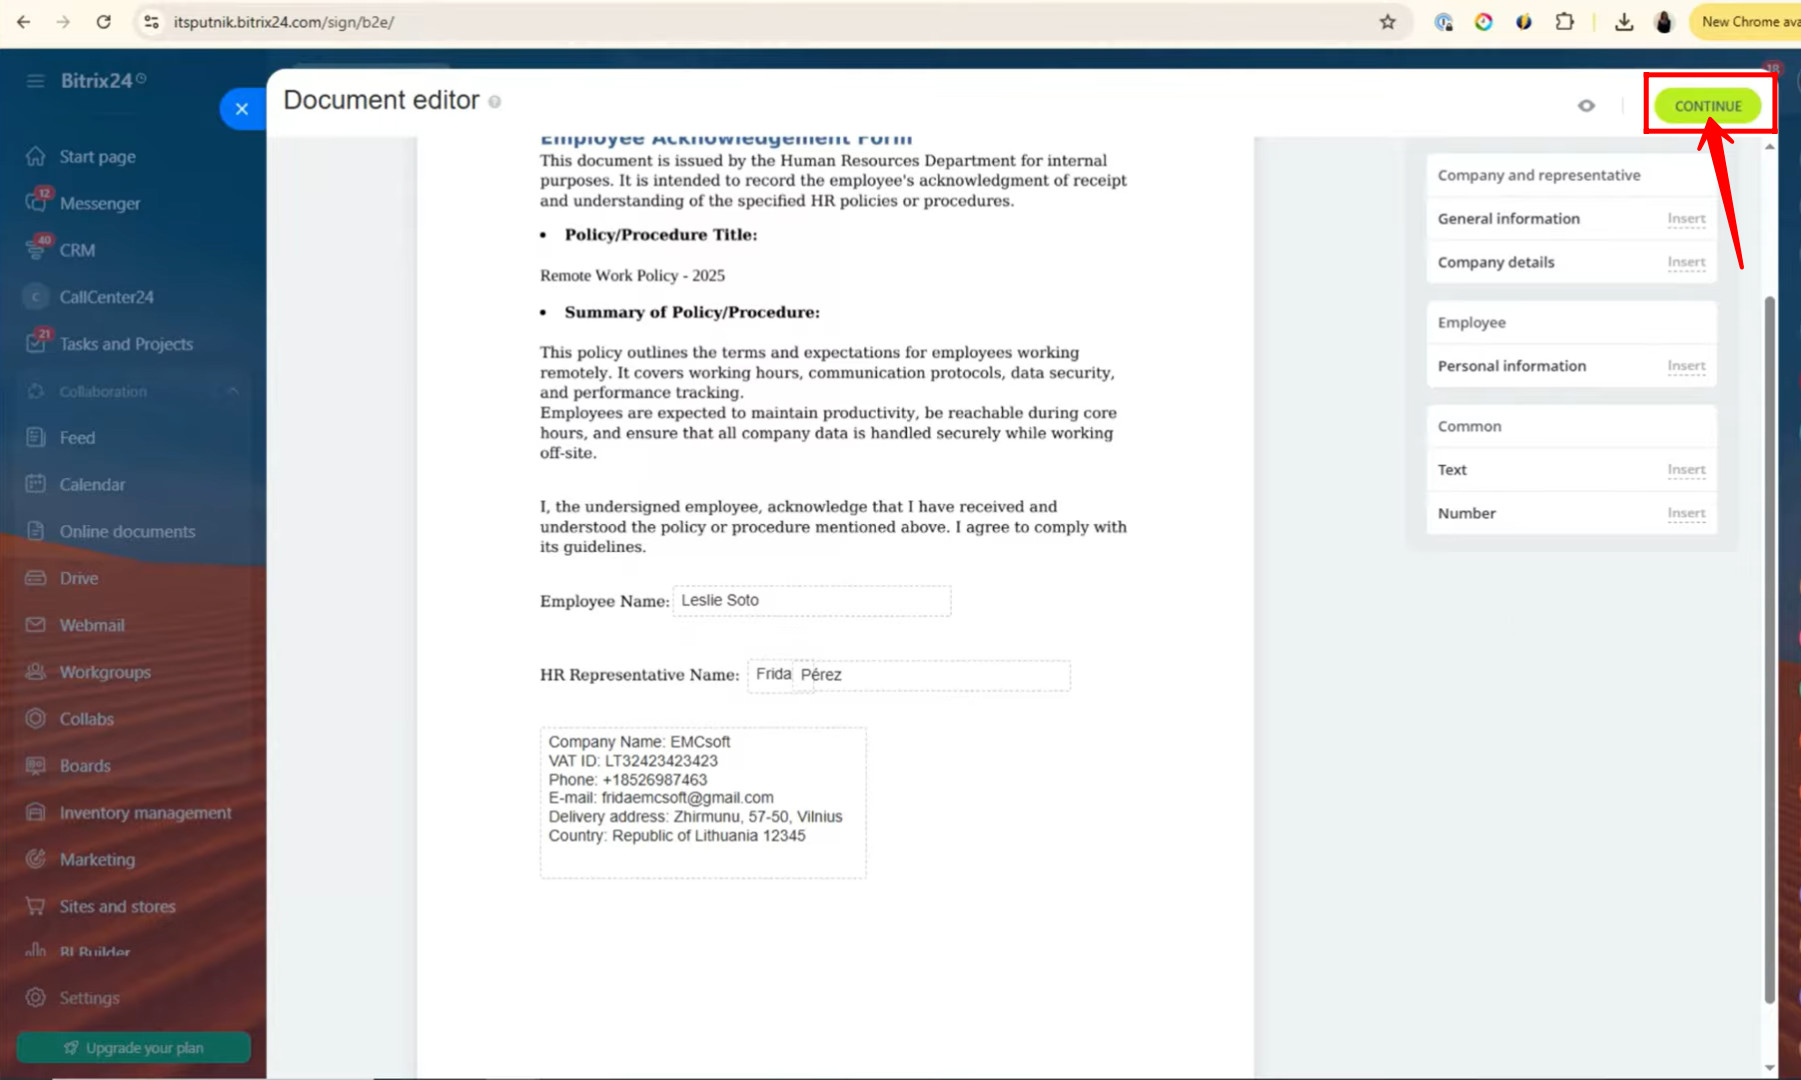
11. Now we are in the document editor. Before moving forward, you can dynamically edit the document here. On the left-hand side, you’ll see the Company Details option, and right next to it the Insert button. By clicking Insert, the complete company details will be placed into the document. You can then drag and drop this information to the required space within the document.
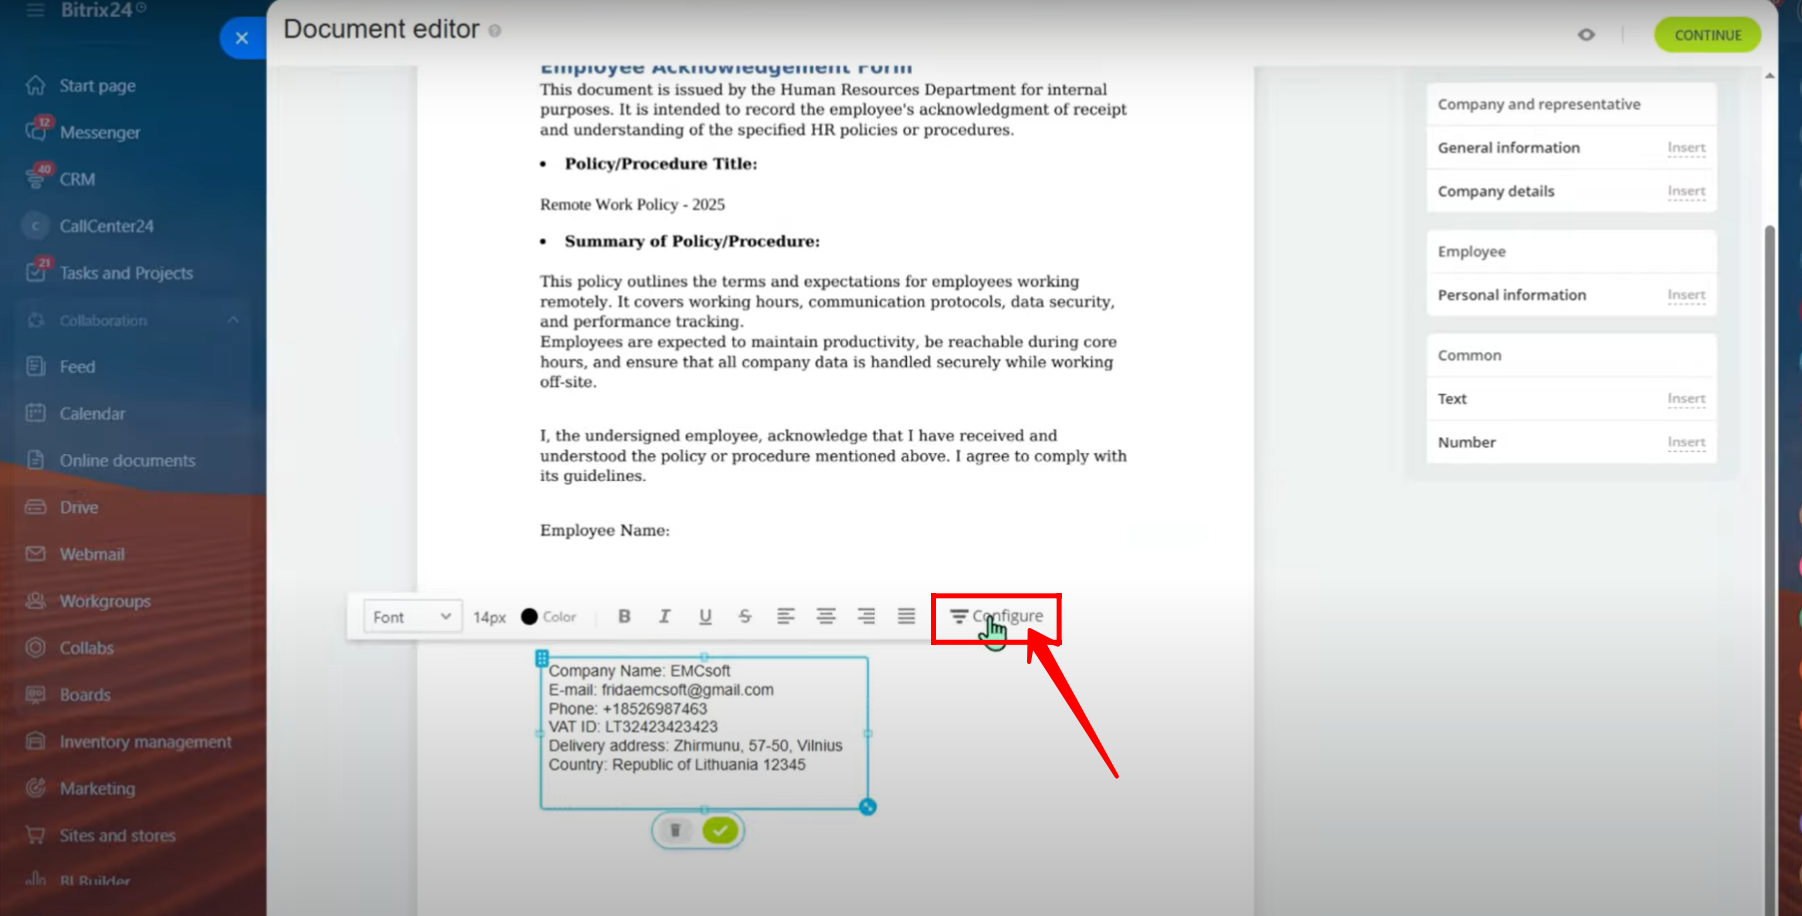
12. By clicking on Configure, you can adjust or update the company details directly from this section.
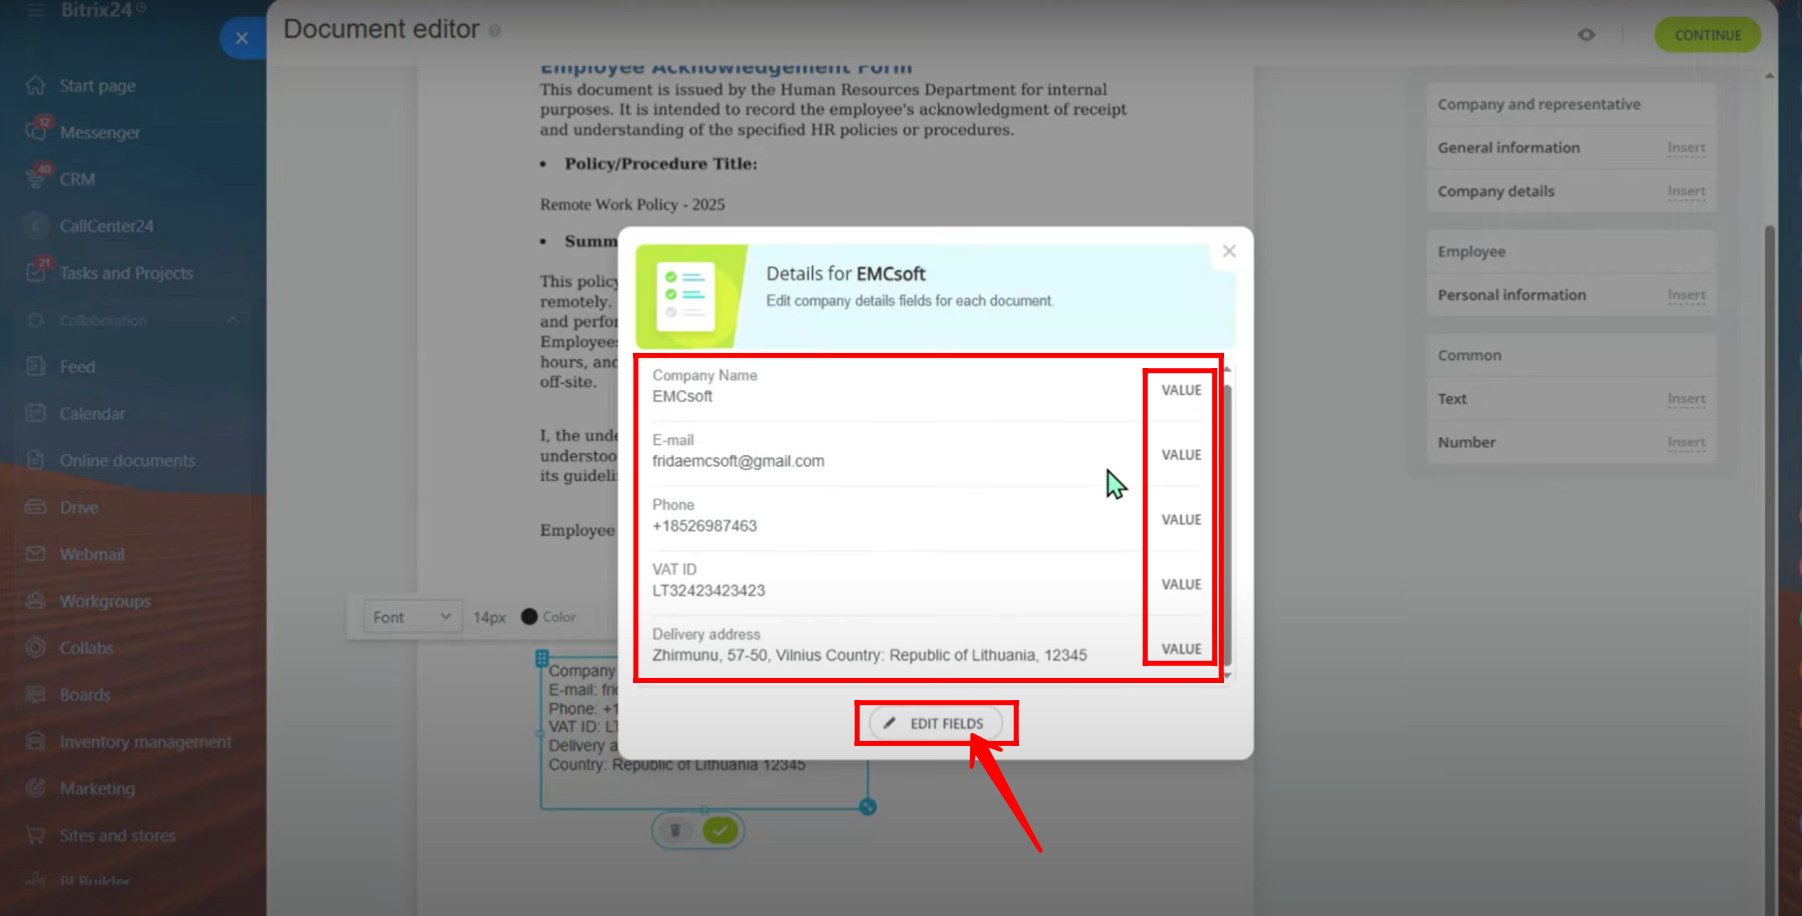
13. You can modify the value of each company detail field individually, or adjust the overall structure by selecting Edit Fields.
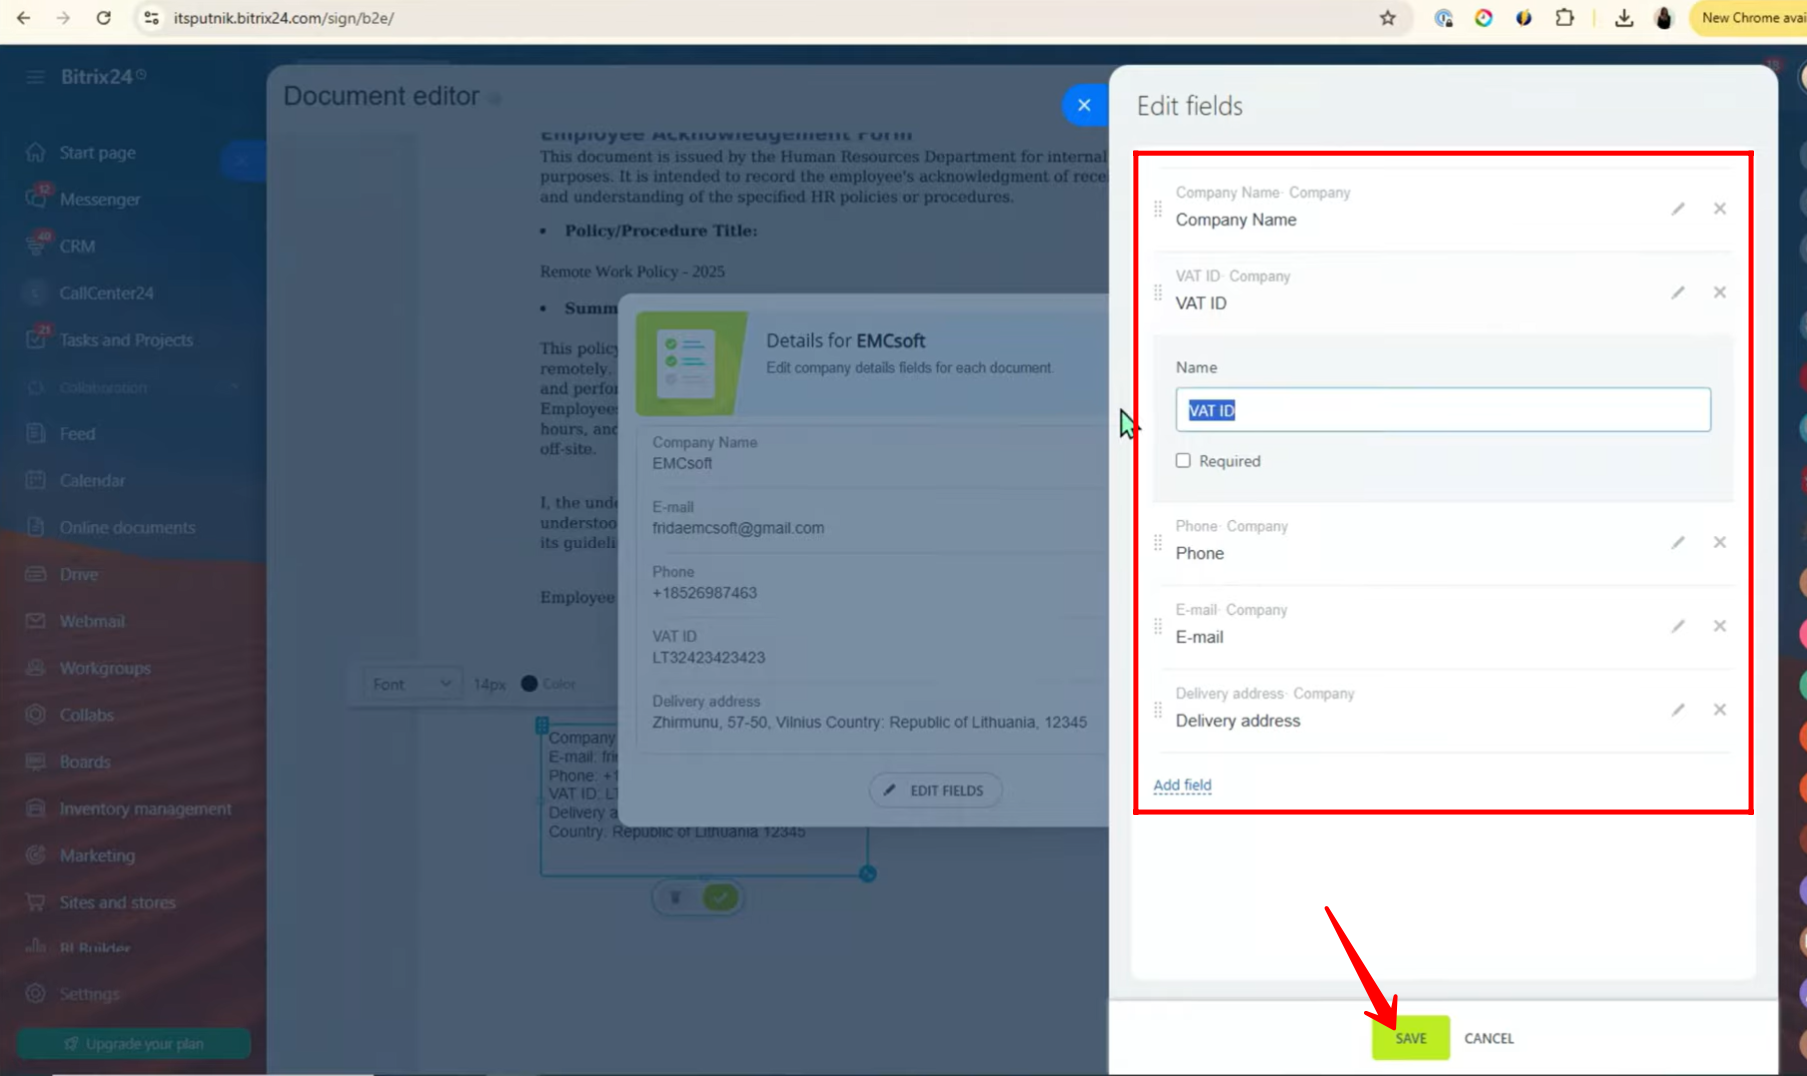
14. At this stage, you can rename any field, mark it as required, or rearrange the order of fields as needed.
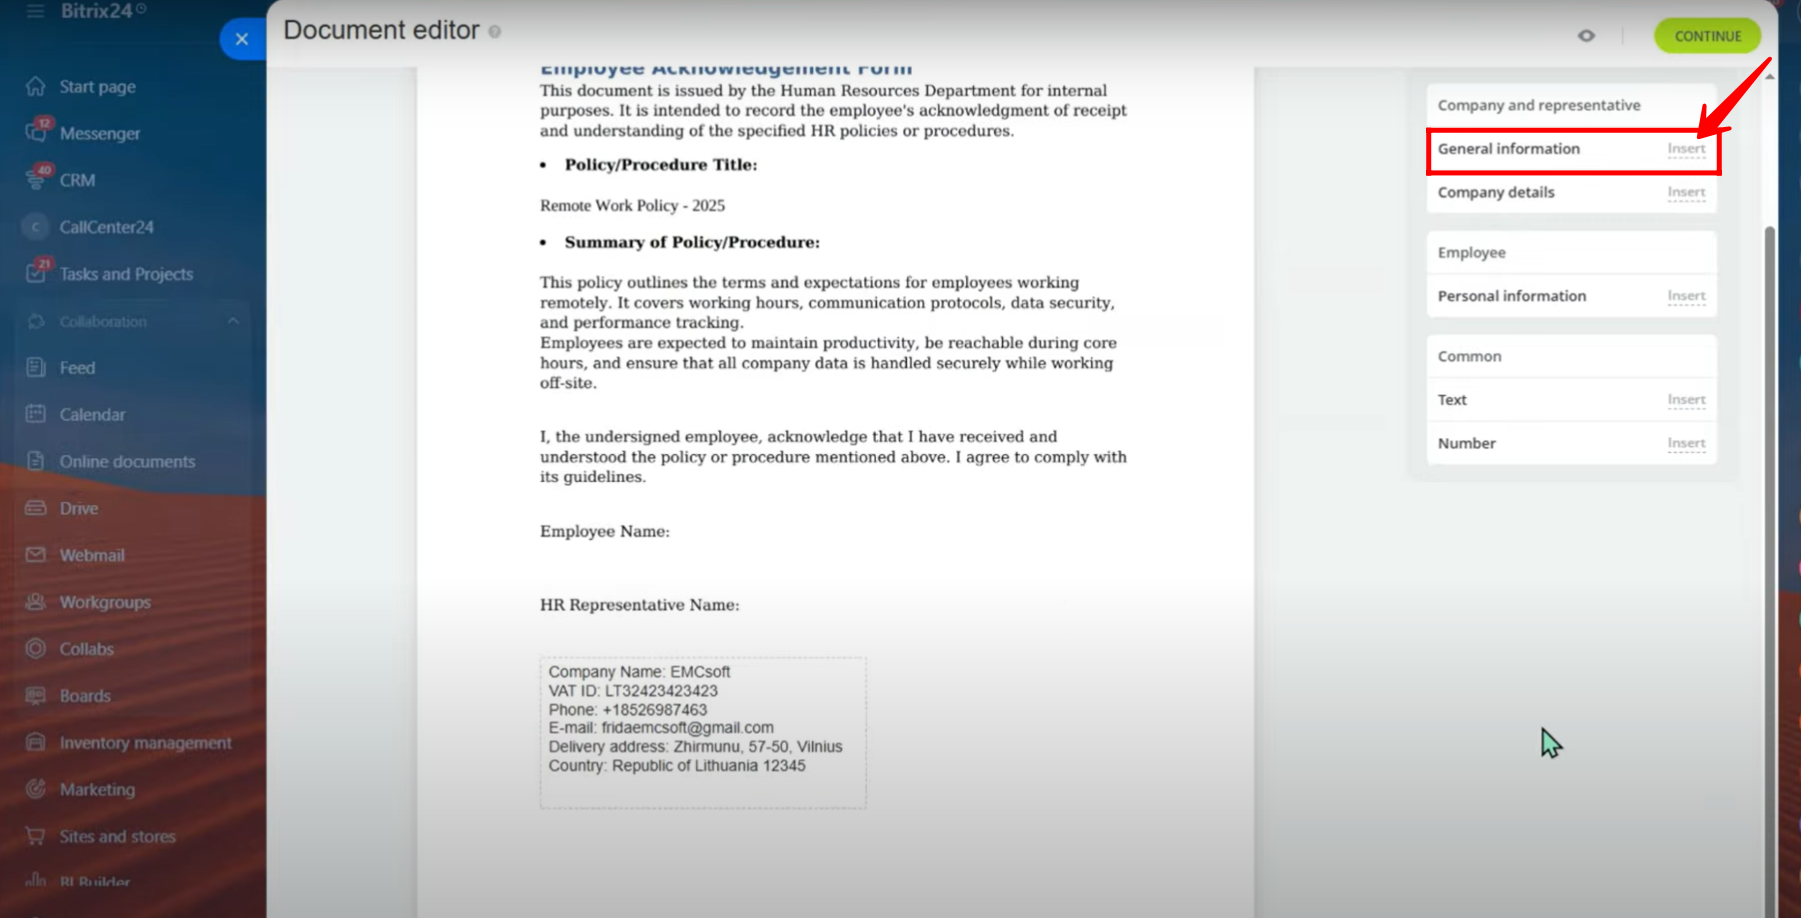
15. If you wish to add information beyond company details, go to the document editor, click on Insert located next to General Information, and choose the details you want to include.
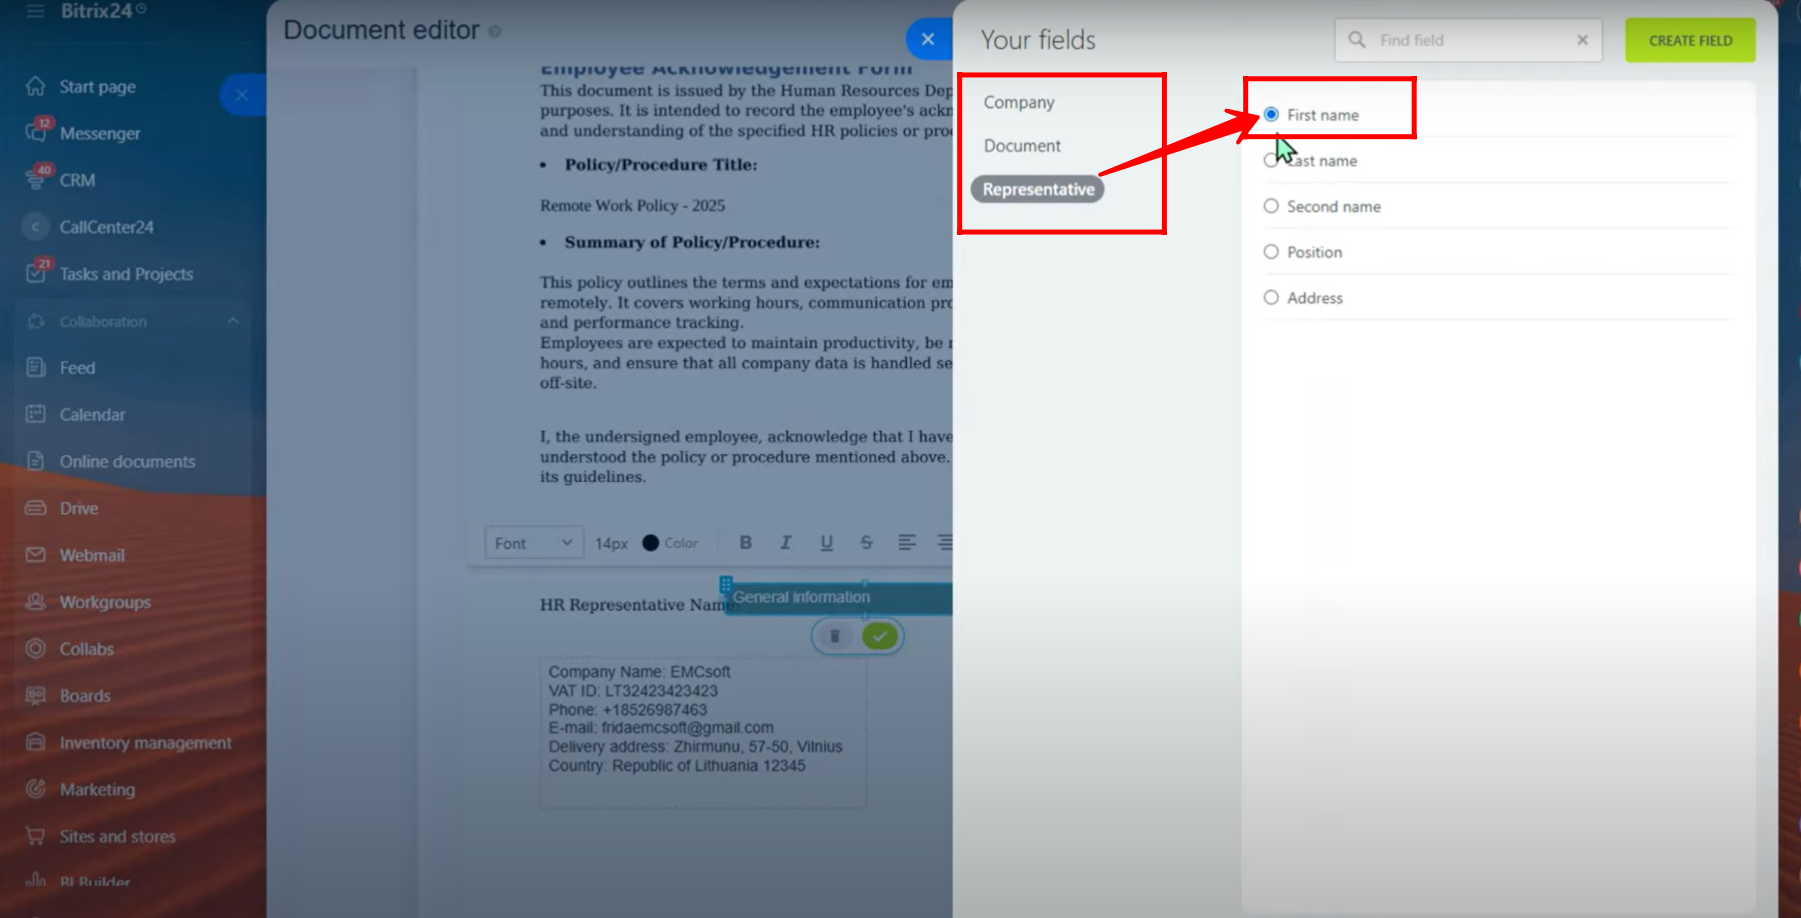
16. In this section, you will see tabs for Company, Document, and Representative. Each tab contains fields that you can select and insert into the document. Currently, we are in the Representative tab, with the First Name field selected.
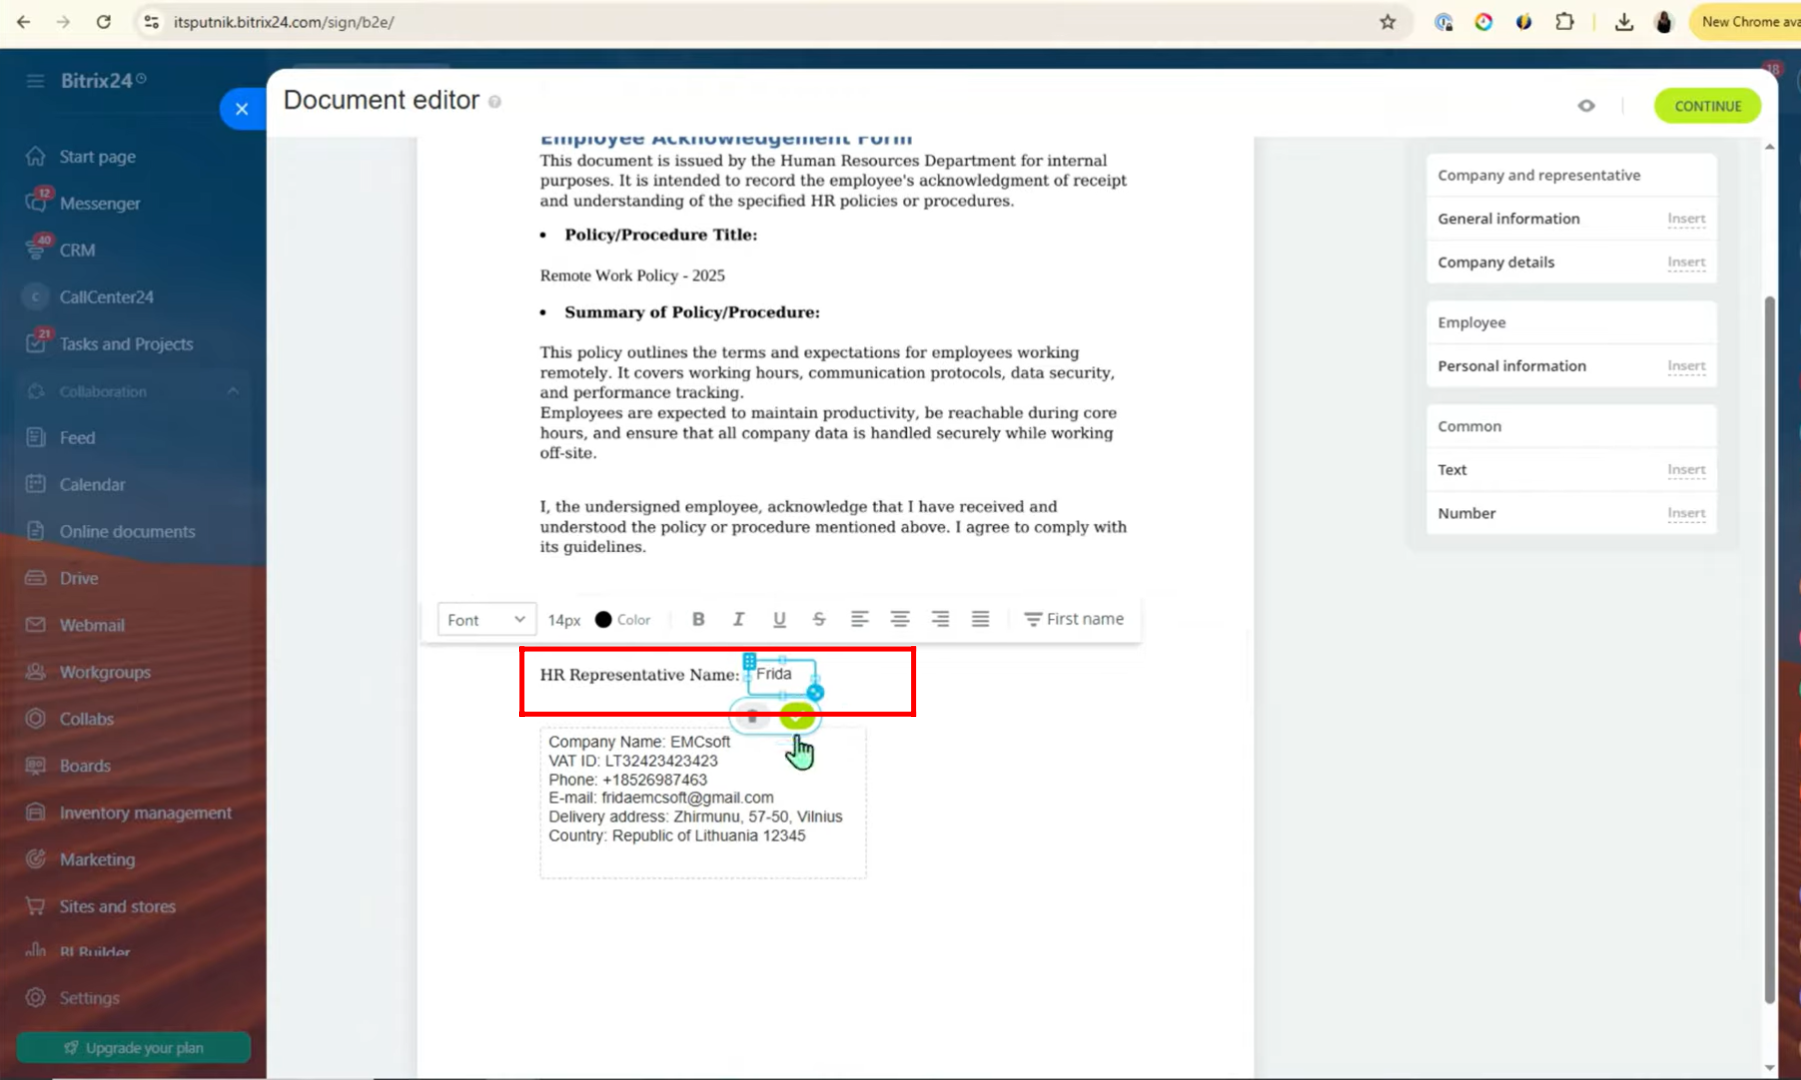
17. Now, we have inserted the First Name field into the document, placing it in the placeholder for HR Representative Name.
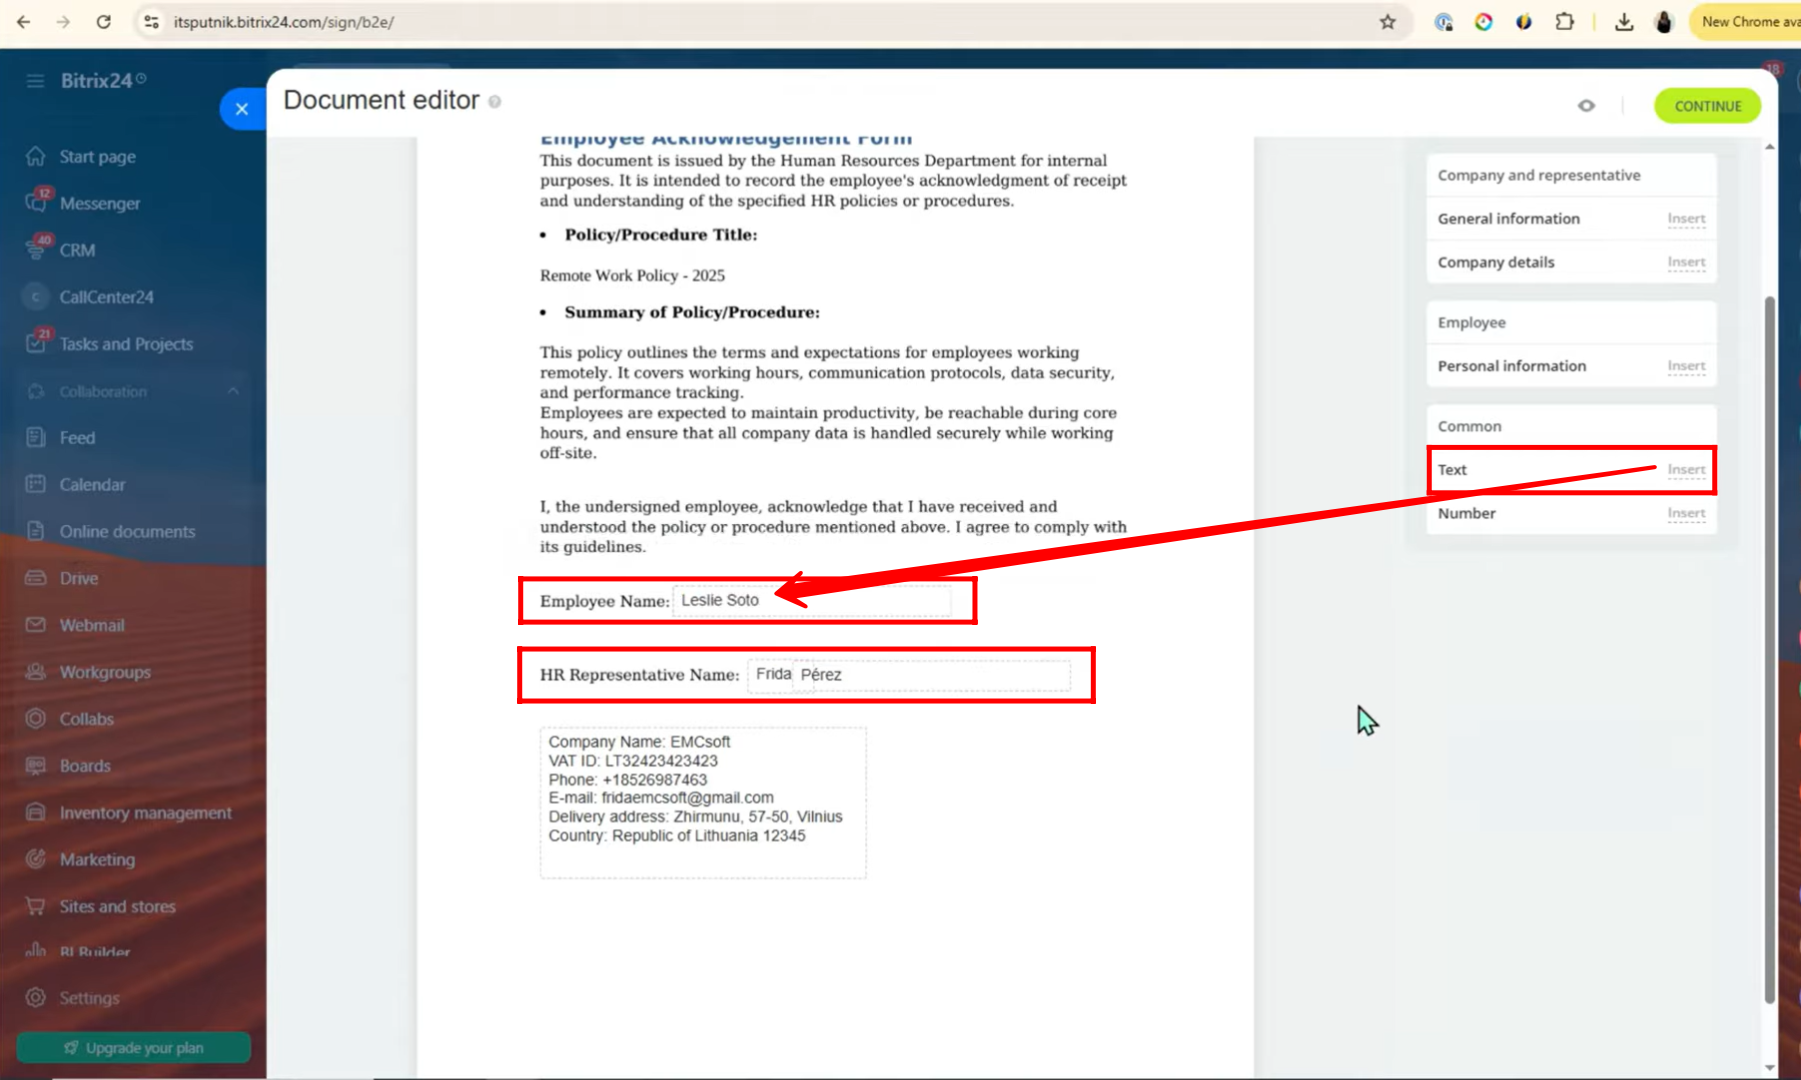
18. Next, we selected and inserted the Last Name field in the same way. However, aligning First Name and Last Name separately can sometimes be tricky. To simplify, you can insert hardcoded text such as “Employee Name” instead of splitting the fields.
19. Once you have edited the fields and inserted all required information into the document, click Continue to proceed.
20. In this prompt, you can preview the document before sending. You also have the option to edit the document name or the entire content again if required. Select the language of the document and set the deadline by which the document should be signed. Verify the details of the Field Editor and Approver. By default, the document link will be sent only through Bitrix24 chat, and this option cannot be changed.
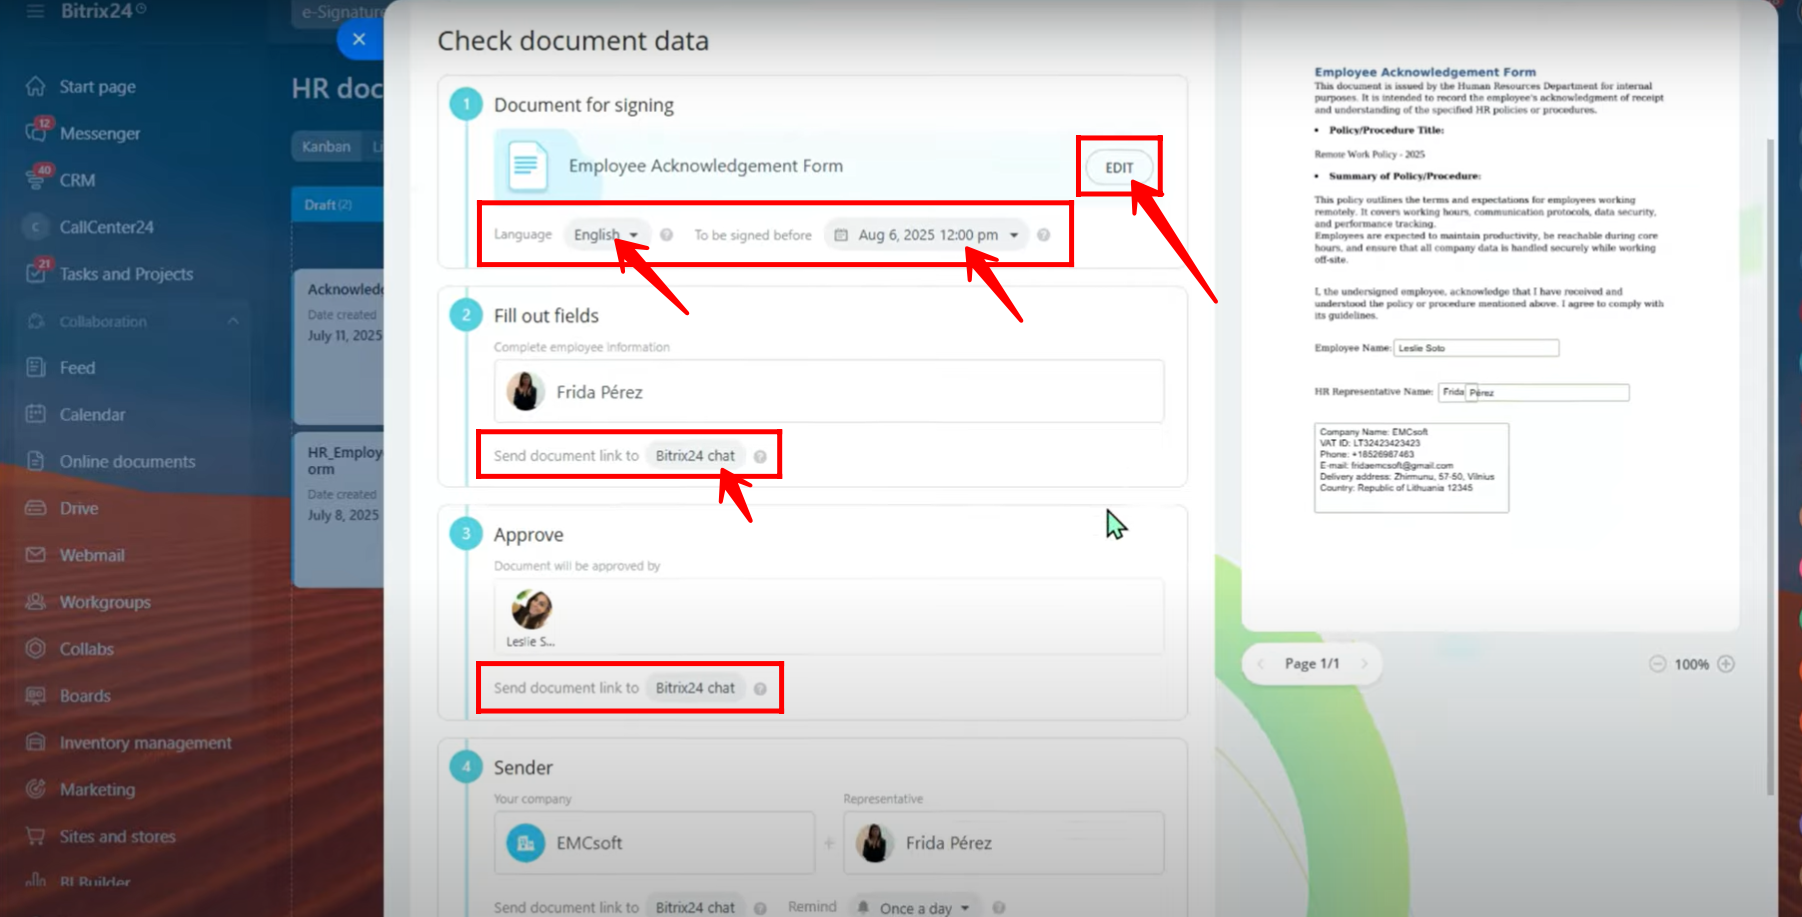
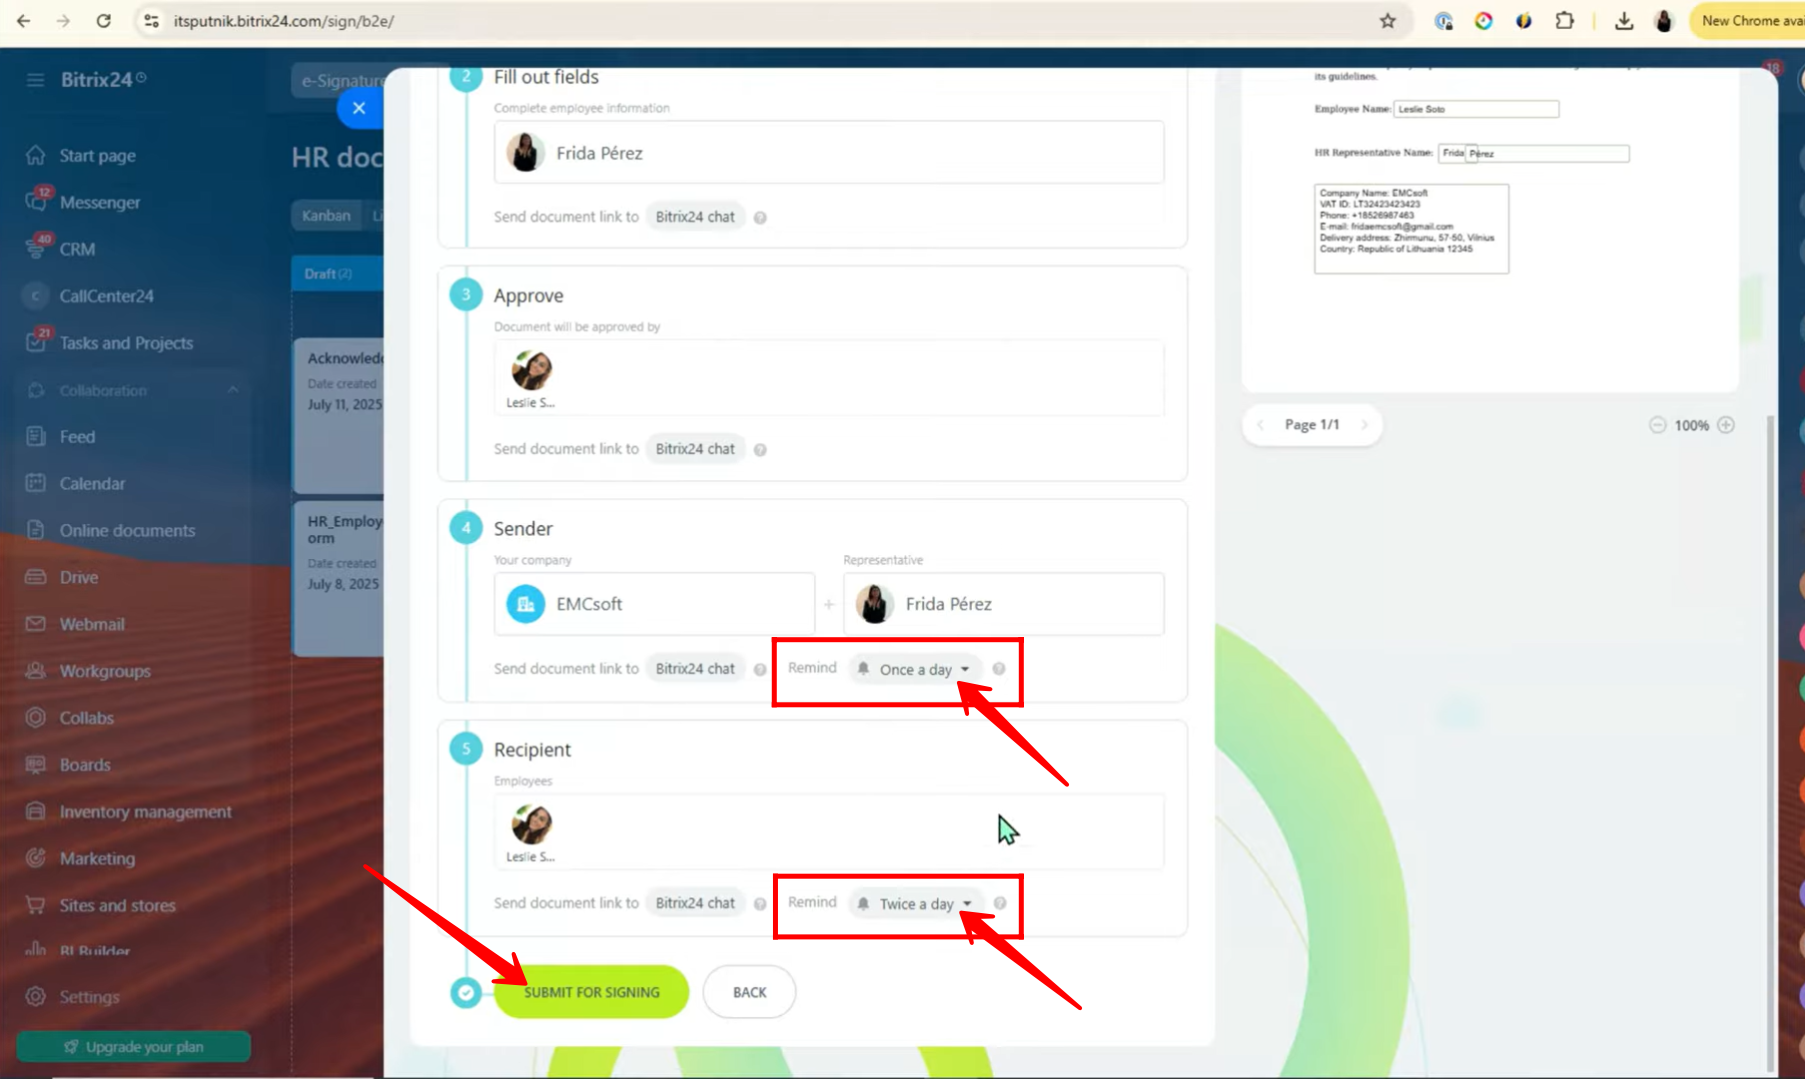
21. You can now verify both the sender and the recipient of the document. Additionally, you can set signing reminders for them, such as “once a day,” “twice a day,” or as needed. After configuring reminders, click on “Submit for Signing” to proceed.
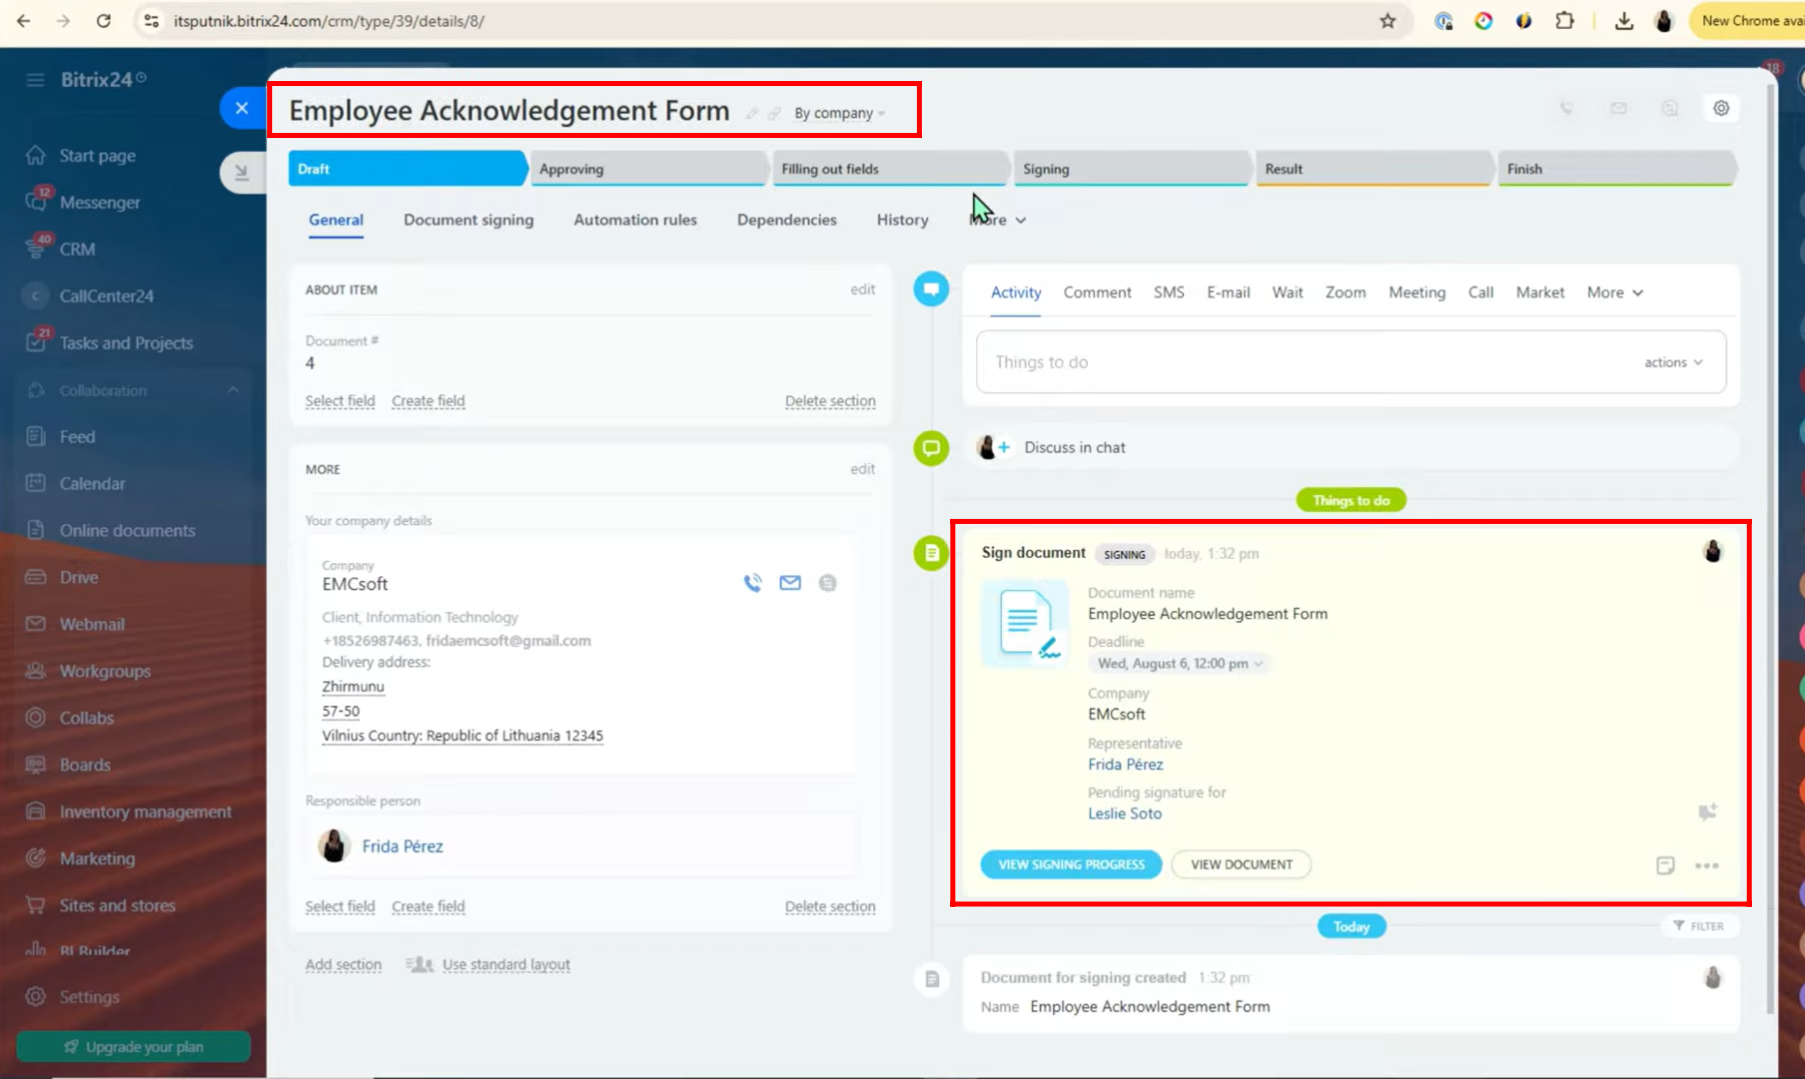
22. Once submitted, an item titled “e-Signature for HR” is created. You can open this item to verify all the details. In the activity sidebar, you will see that the document has been generated for signing. From here, you can also open it anytime to check the signing progress.
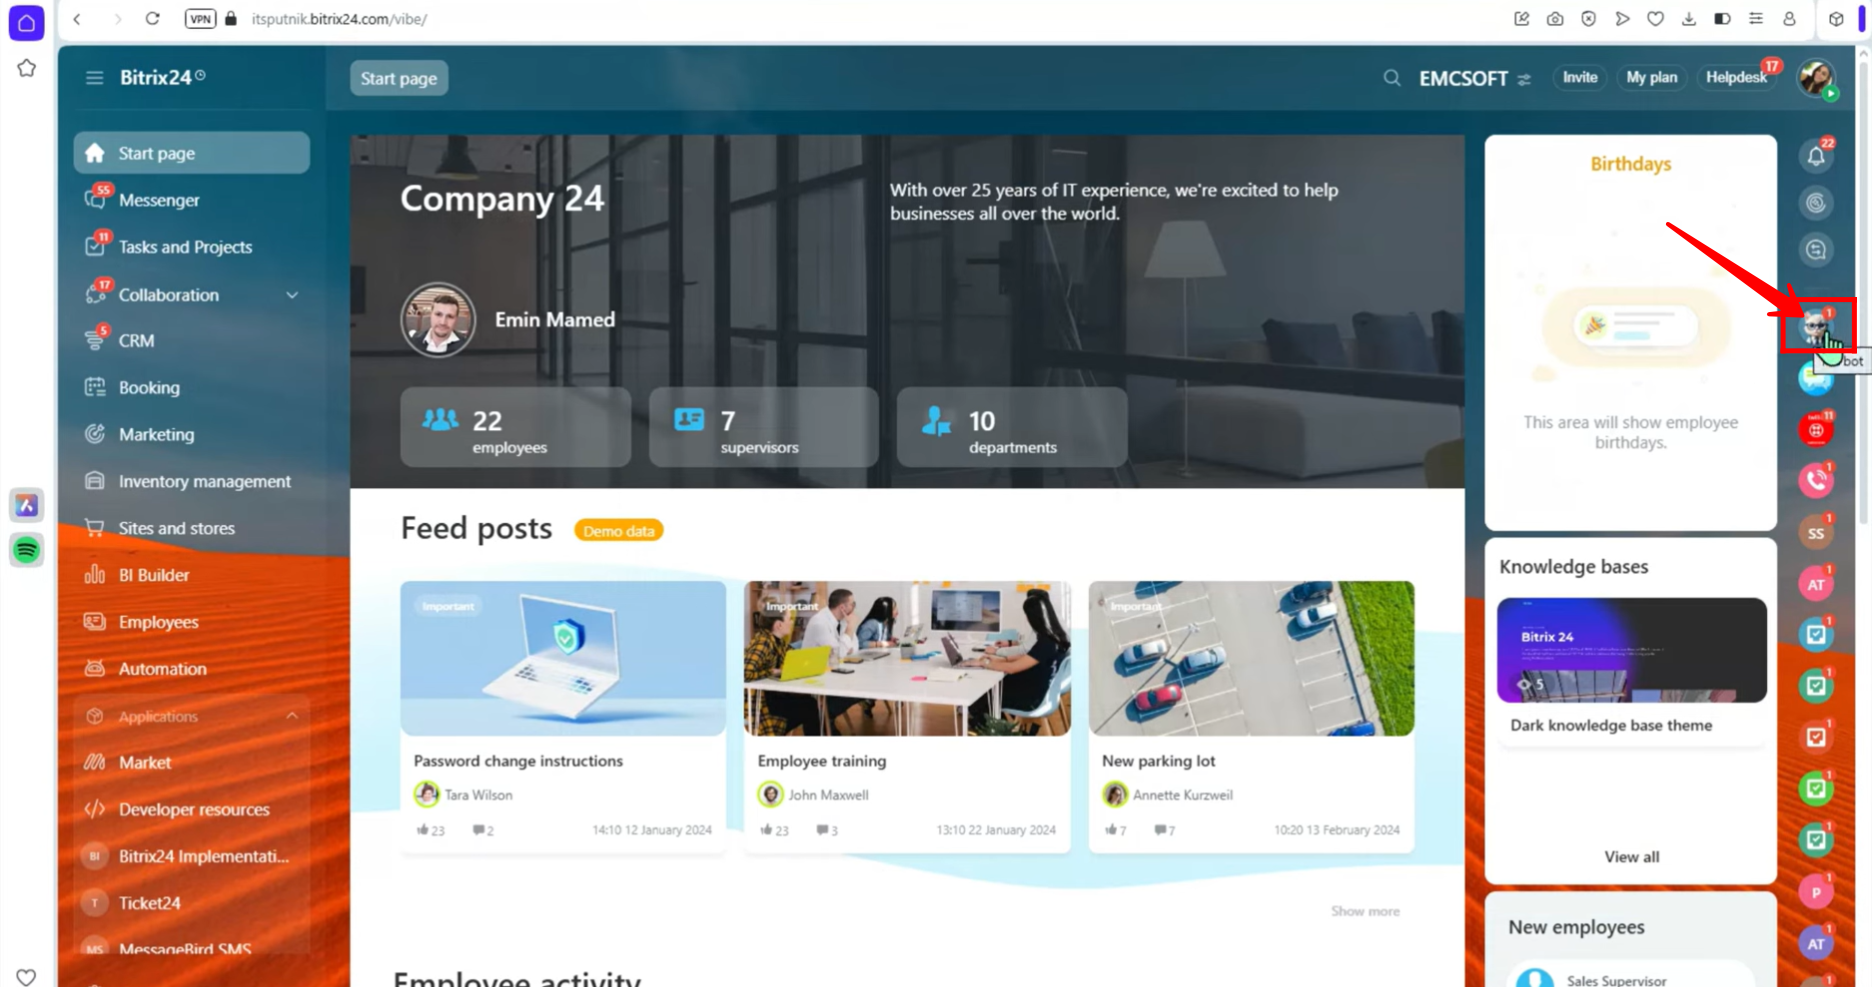
23. As the approver, once you log into the portal, you will see a notification from the HR Bot in the right-hand sidebar panel. A notification icon will also appear indicating that an action is required. Click on the HR Bot to proceed.
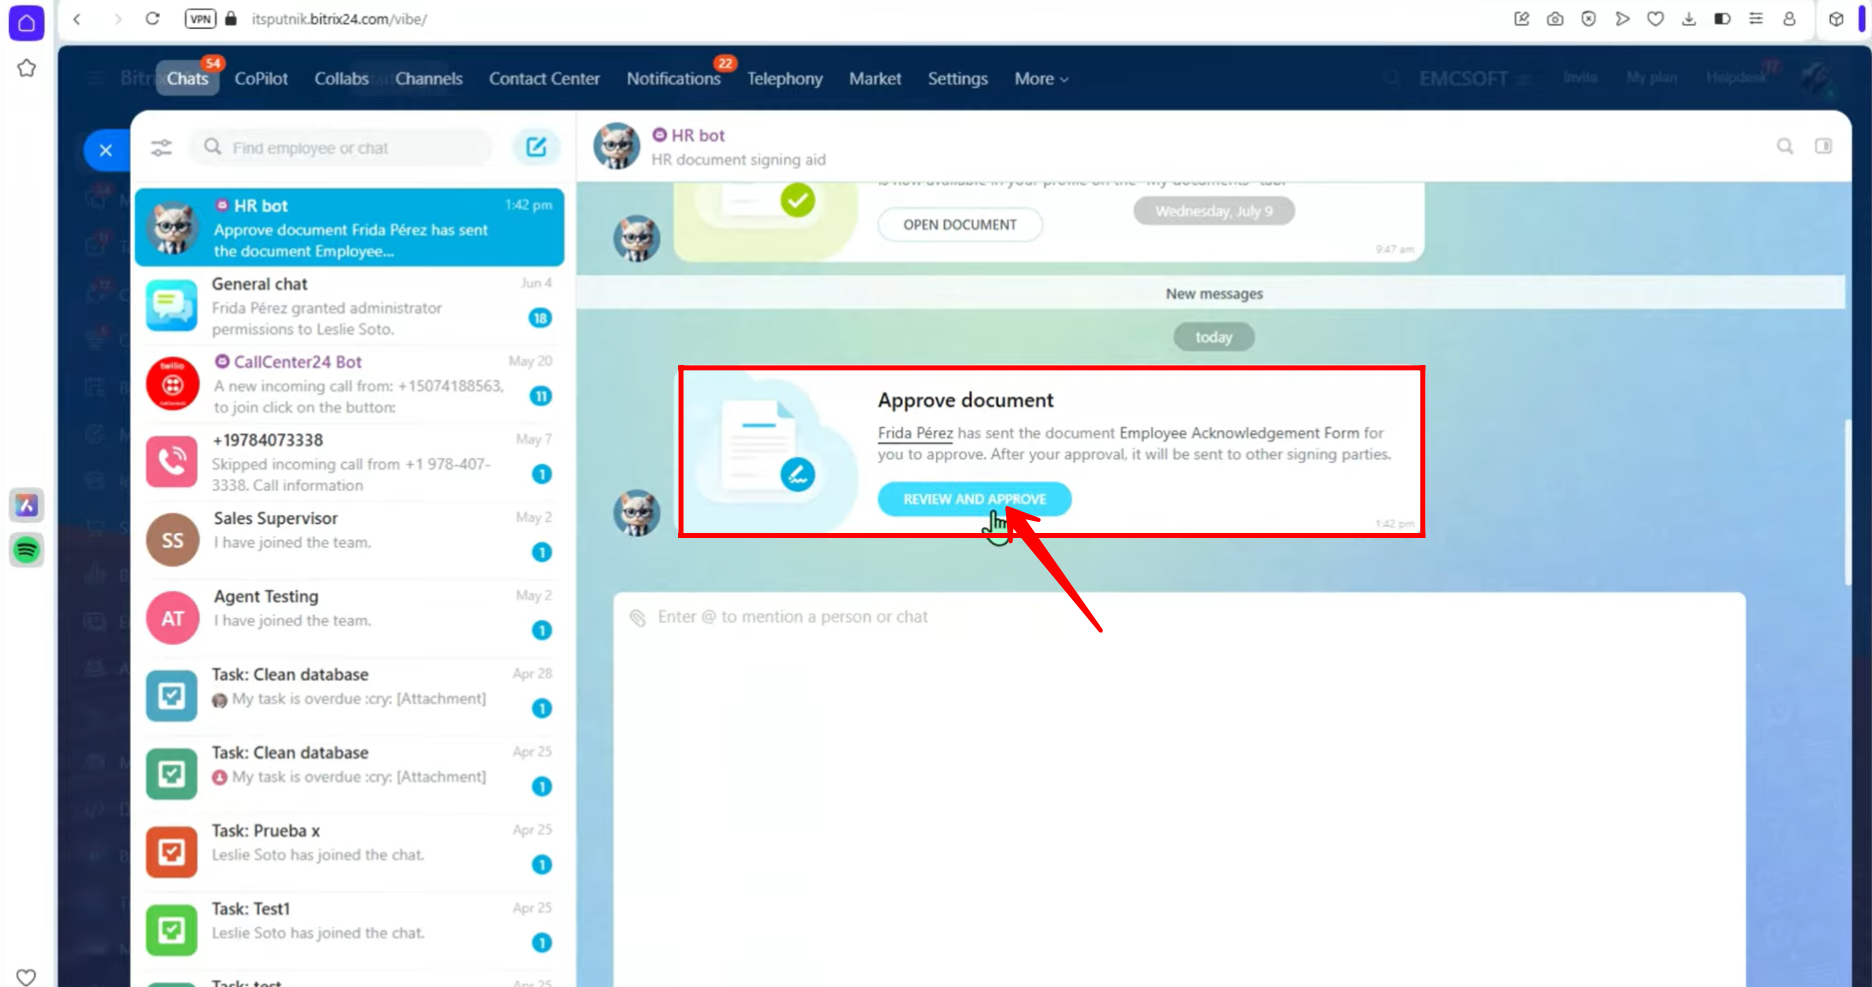
24. Once you click on the HR Bot, a chat window will open. Here, you’ll see a prompt asking you to “Review and Approve” the document. This ensures the approver can carefully check the document before it becomes available in the Field Editor for further processing.
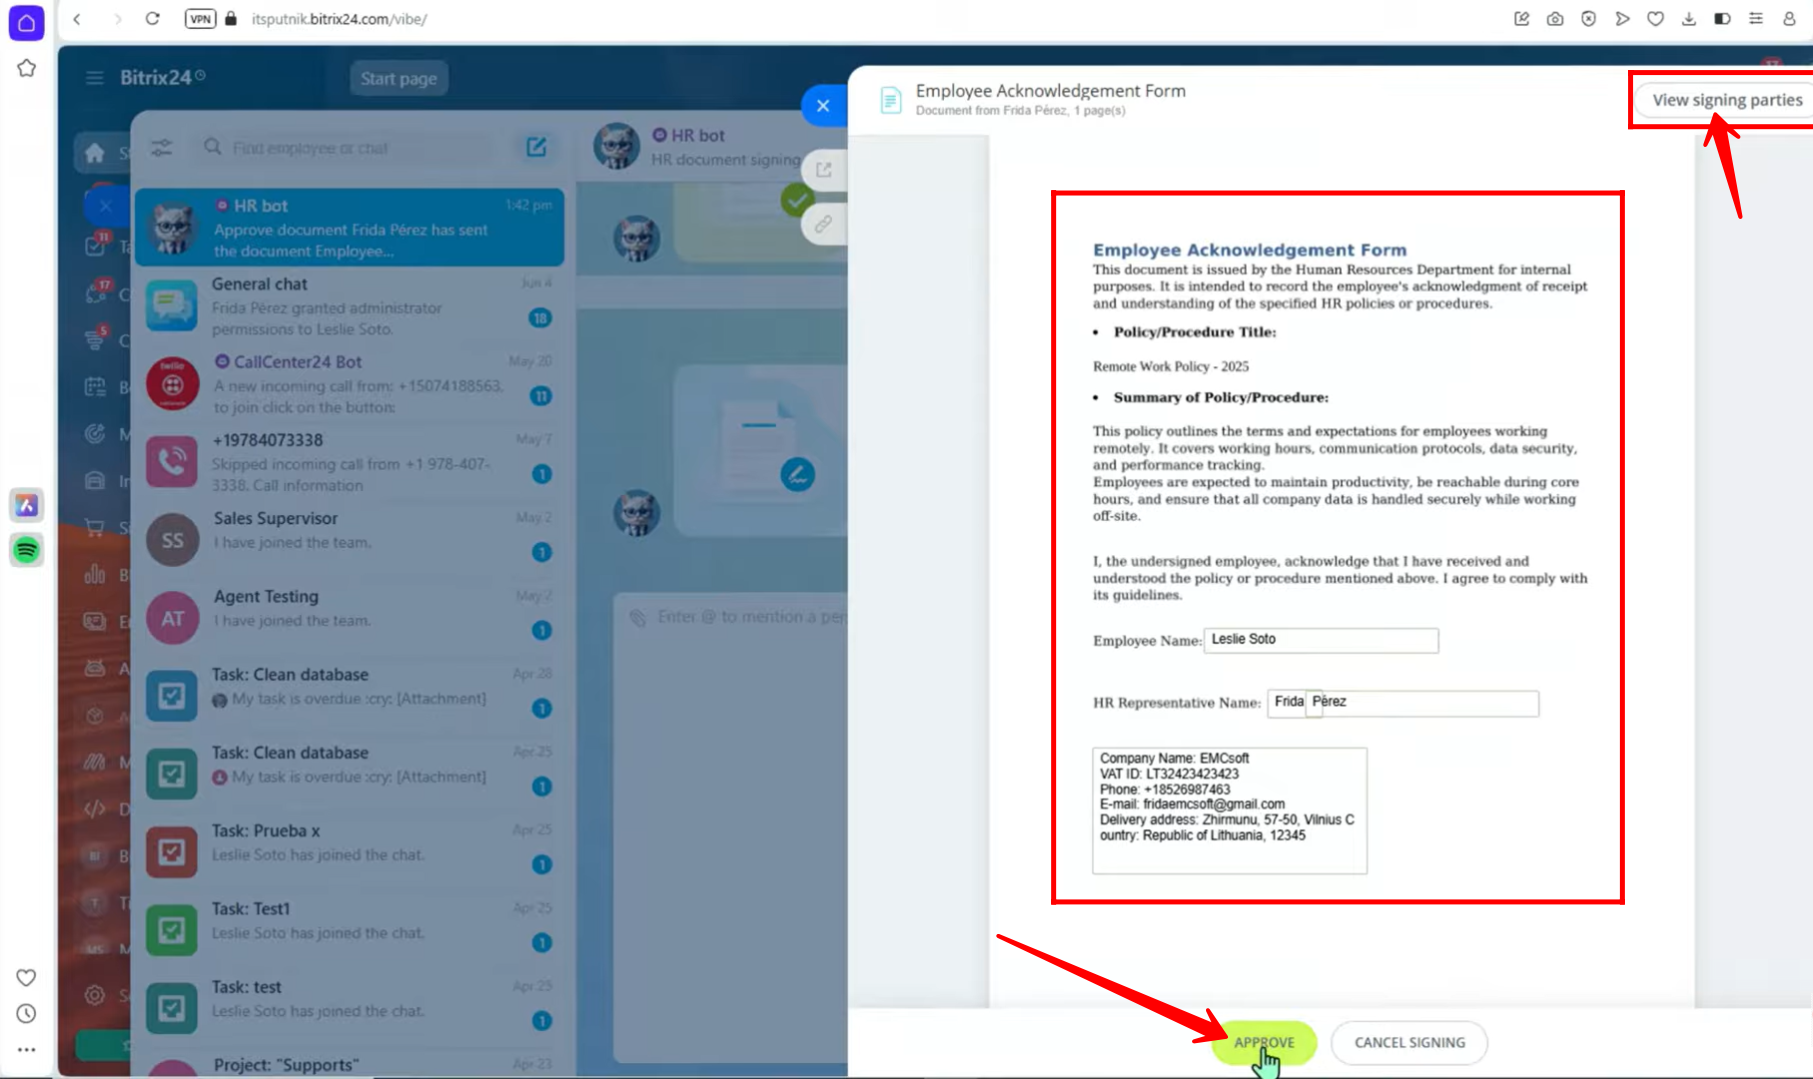
25. Here, the approver can:
- View the signing parties involved.
- Preview the full document before making a decision.
- Choose between two actions:
- Cancel Signing (stop the process if something is incorrect).
- Approve (confirm the document for signing).
In this case, we will select “Approve” to move the document forward.
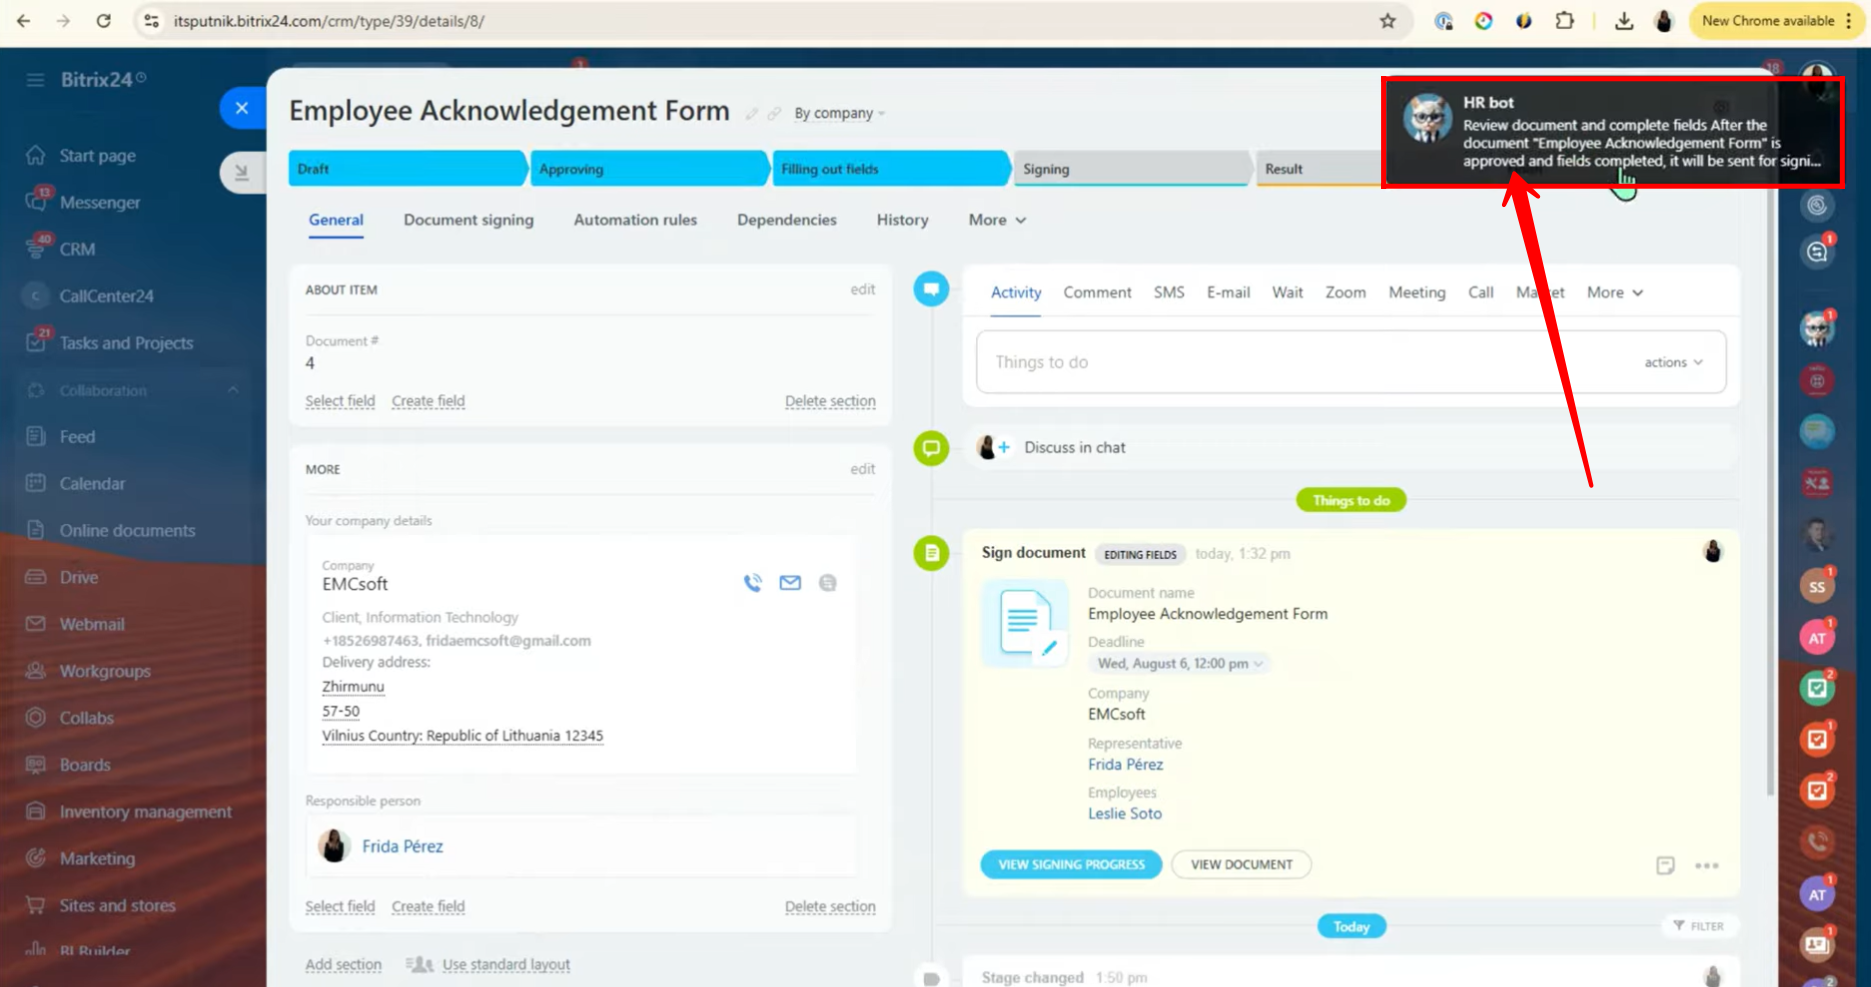
26. Now, in the Field Editor’s portal:
- The Field Editor receives a notification that the document has been approved and needs a final check.
- Their responsibility is to review and complete any missing or required fields.
- Only after this check, the document becomes available to the employees/HR parties for electronic signing.
Note: Until the Field Editor completes this step, the document will not be accessible for e-signing by the recipients.
27. After the Field Editor clicks HR bot in the right sidebar. In the chat window, the Field Editor sees a prompt: “Review and Complete”.
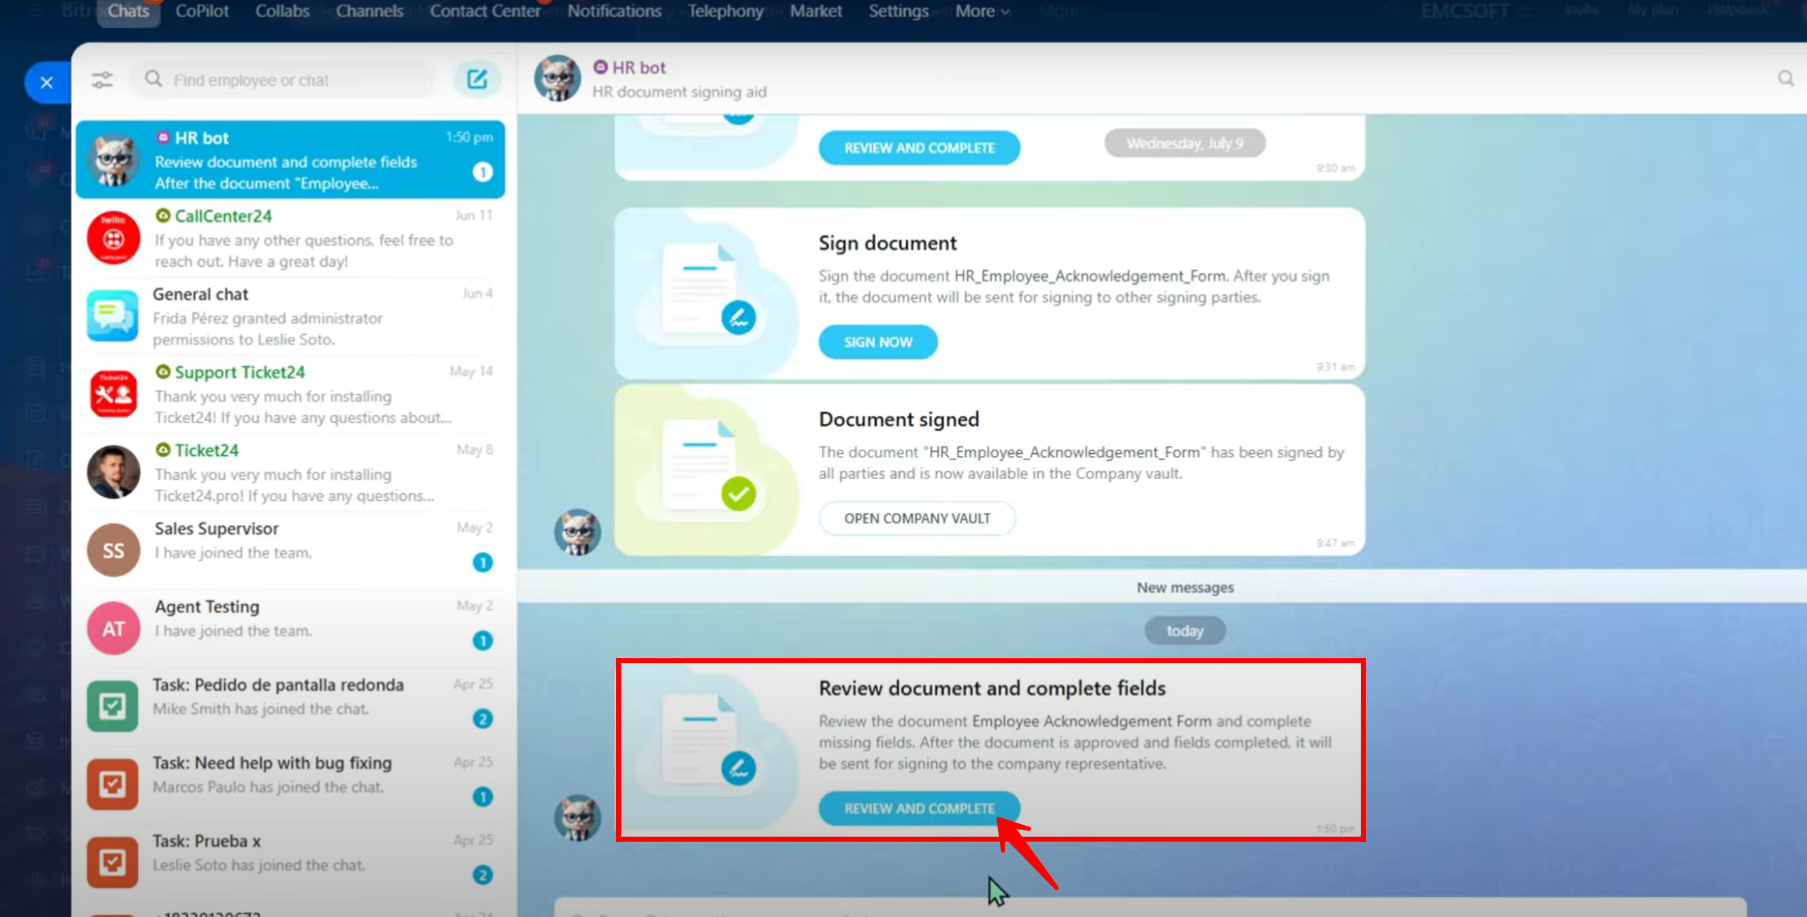
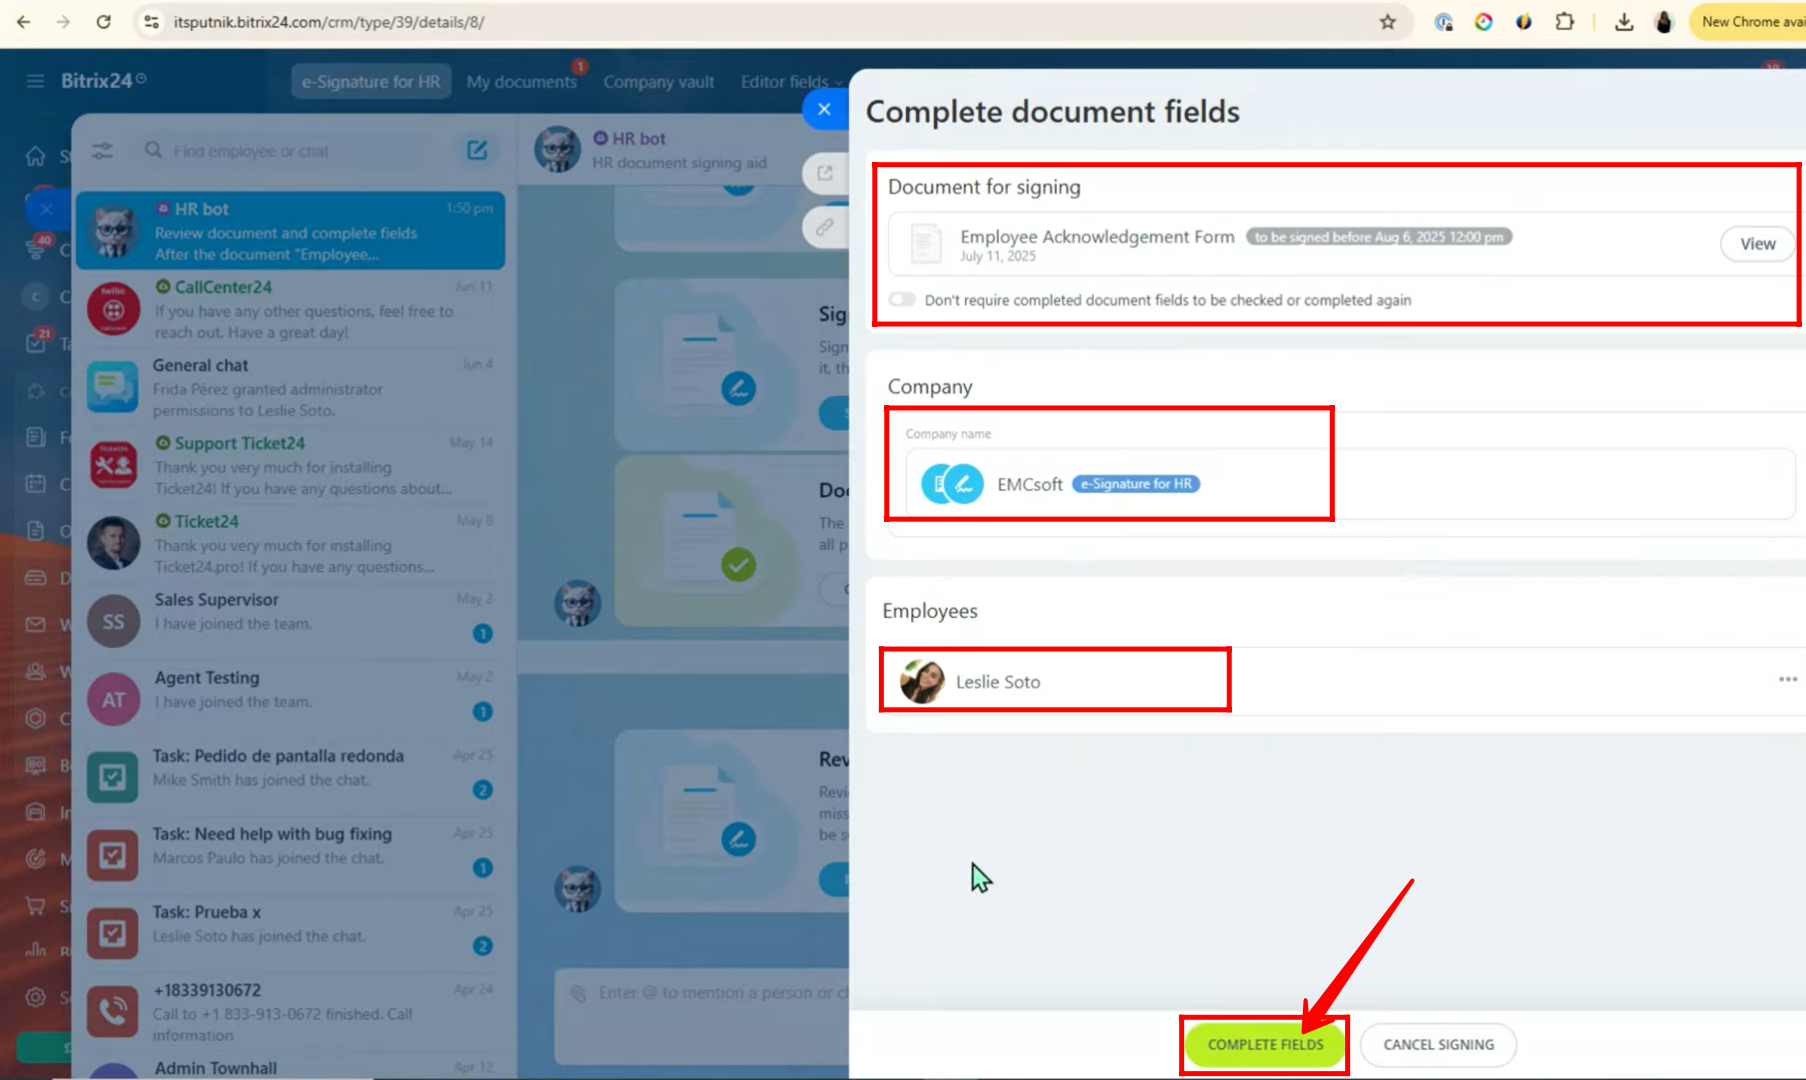
28. Here, the field editor can view the document with the included company name and employee details, and they are given the option to either cancel the signing or click on “Complete fields”; in this example, the “Complete fields” option is chosen.
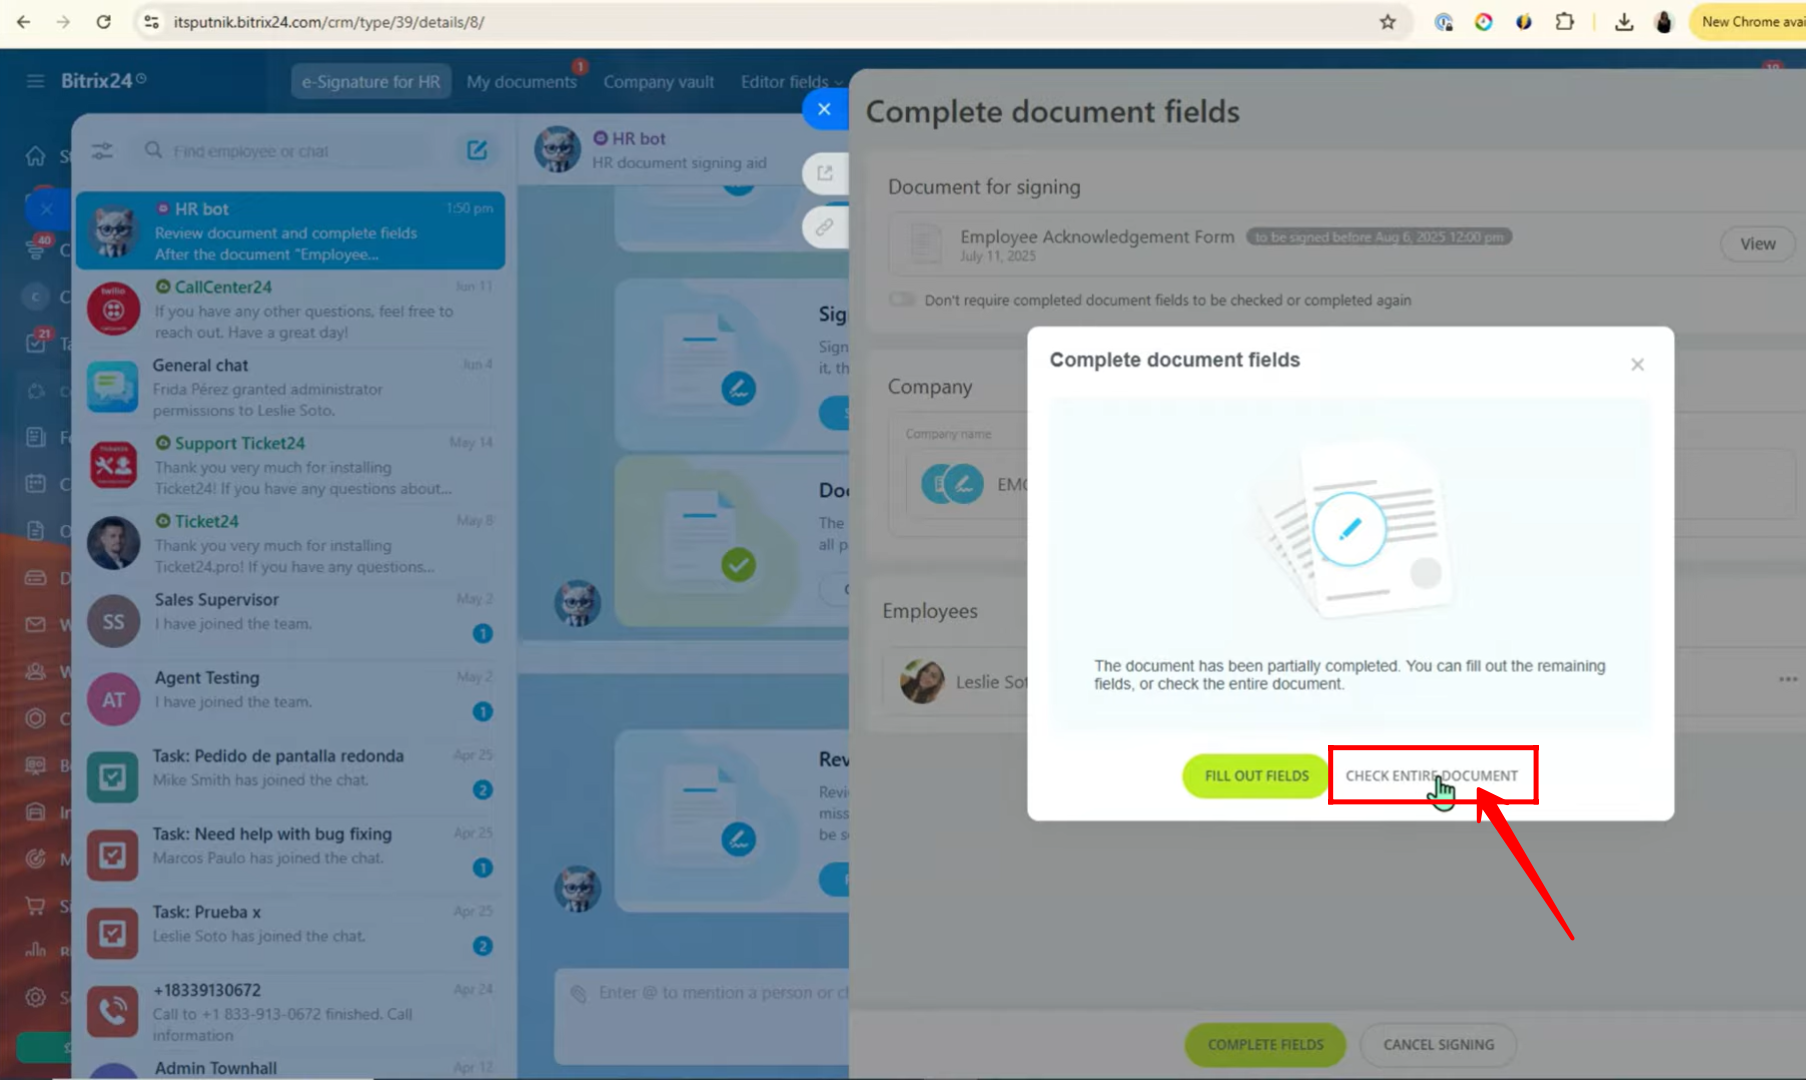
29. Now, in the prompt, the field editor is given the options “Fill out Fields” or “Check Entire Document,” and in this example, “Check Entire Document” is selected.
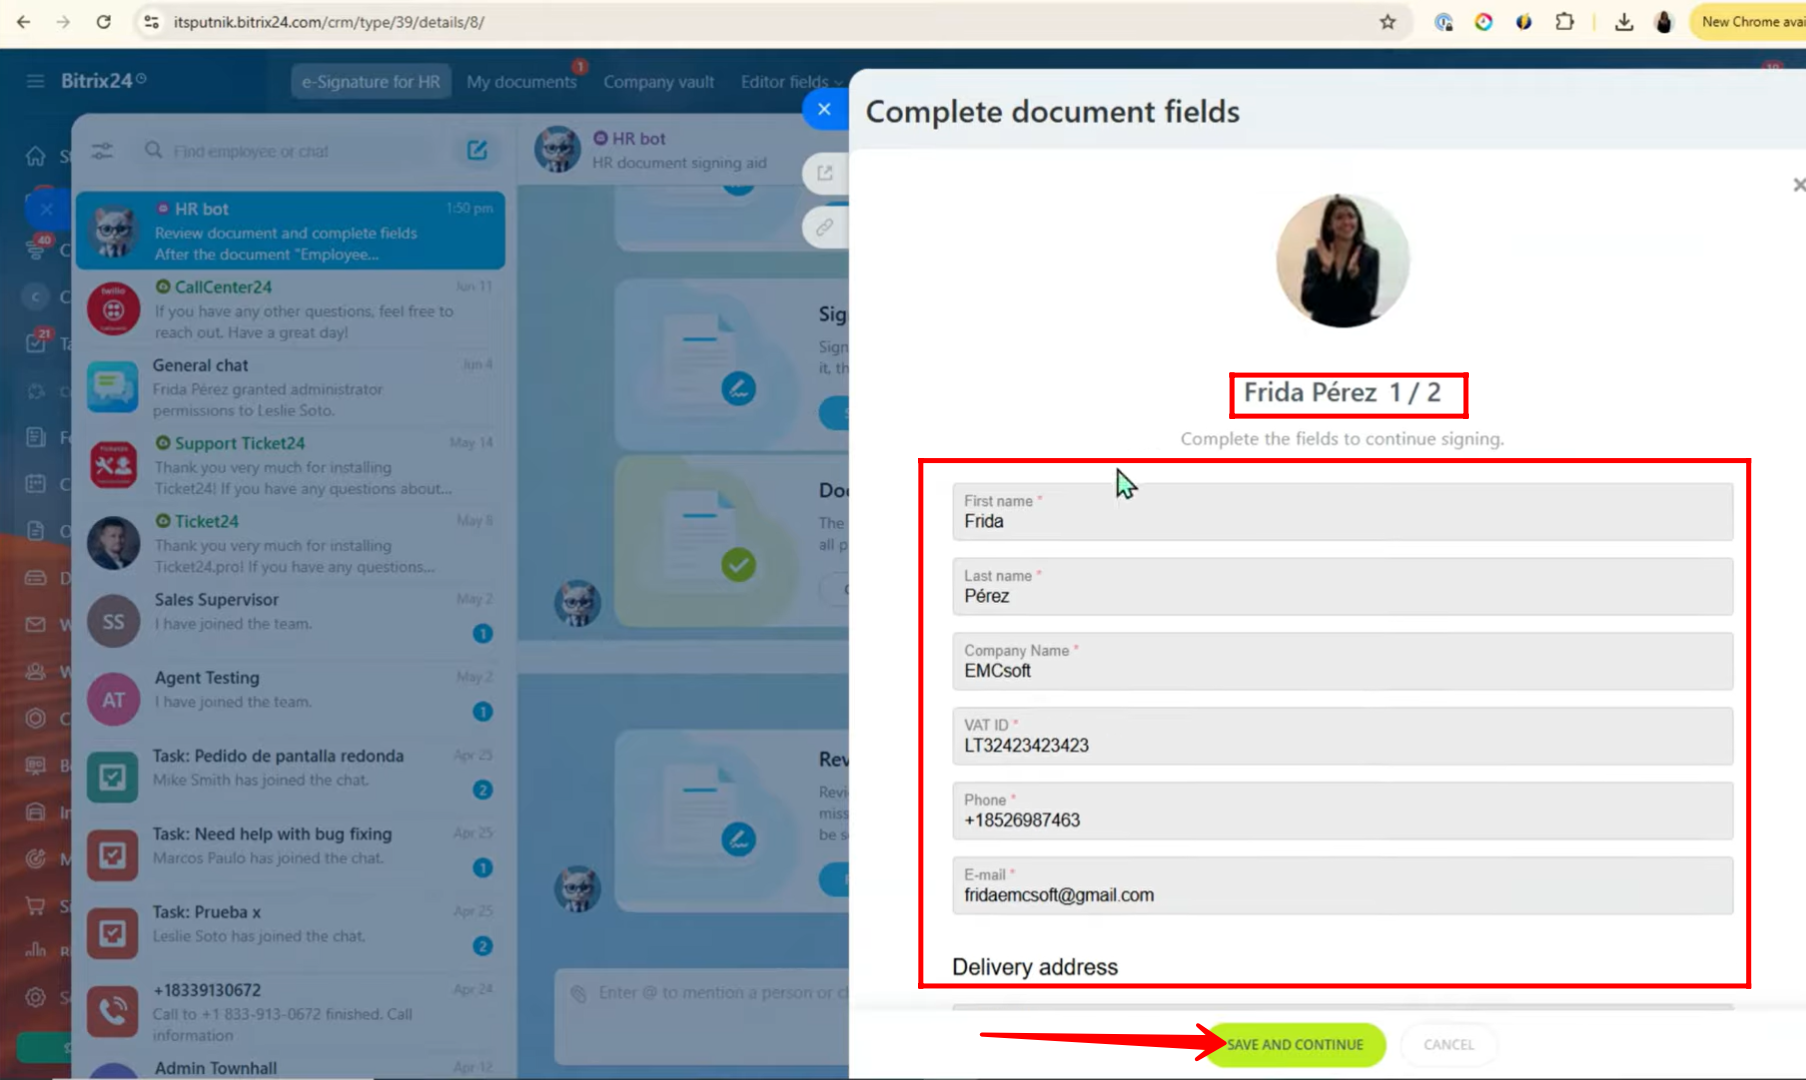
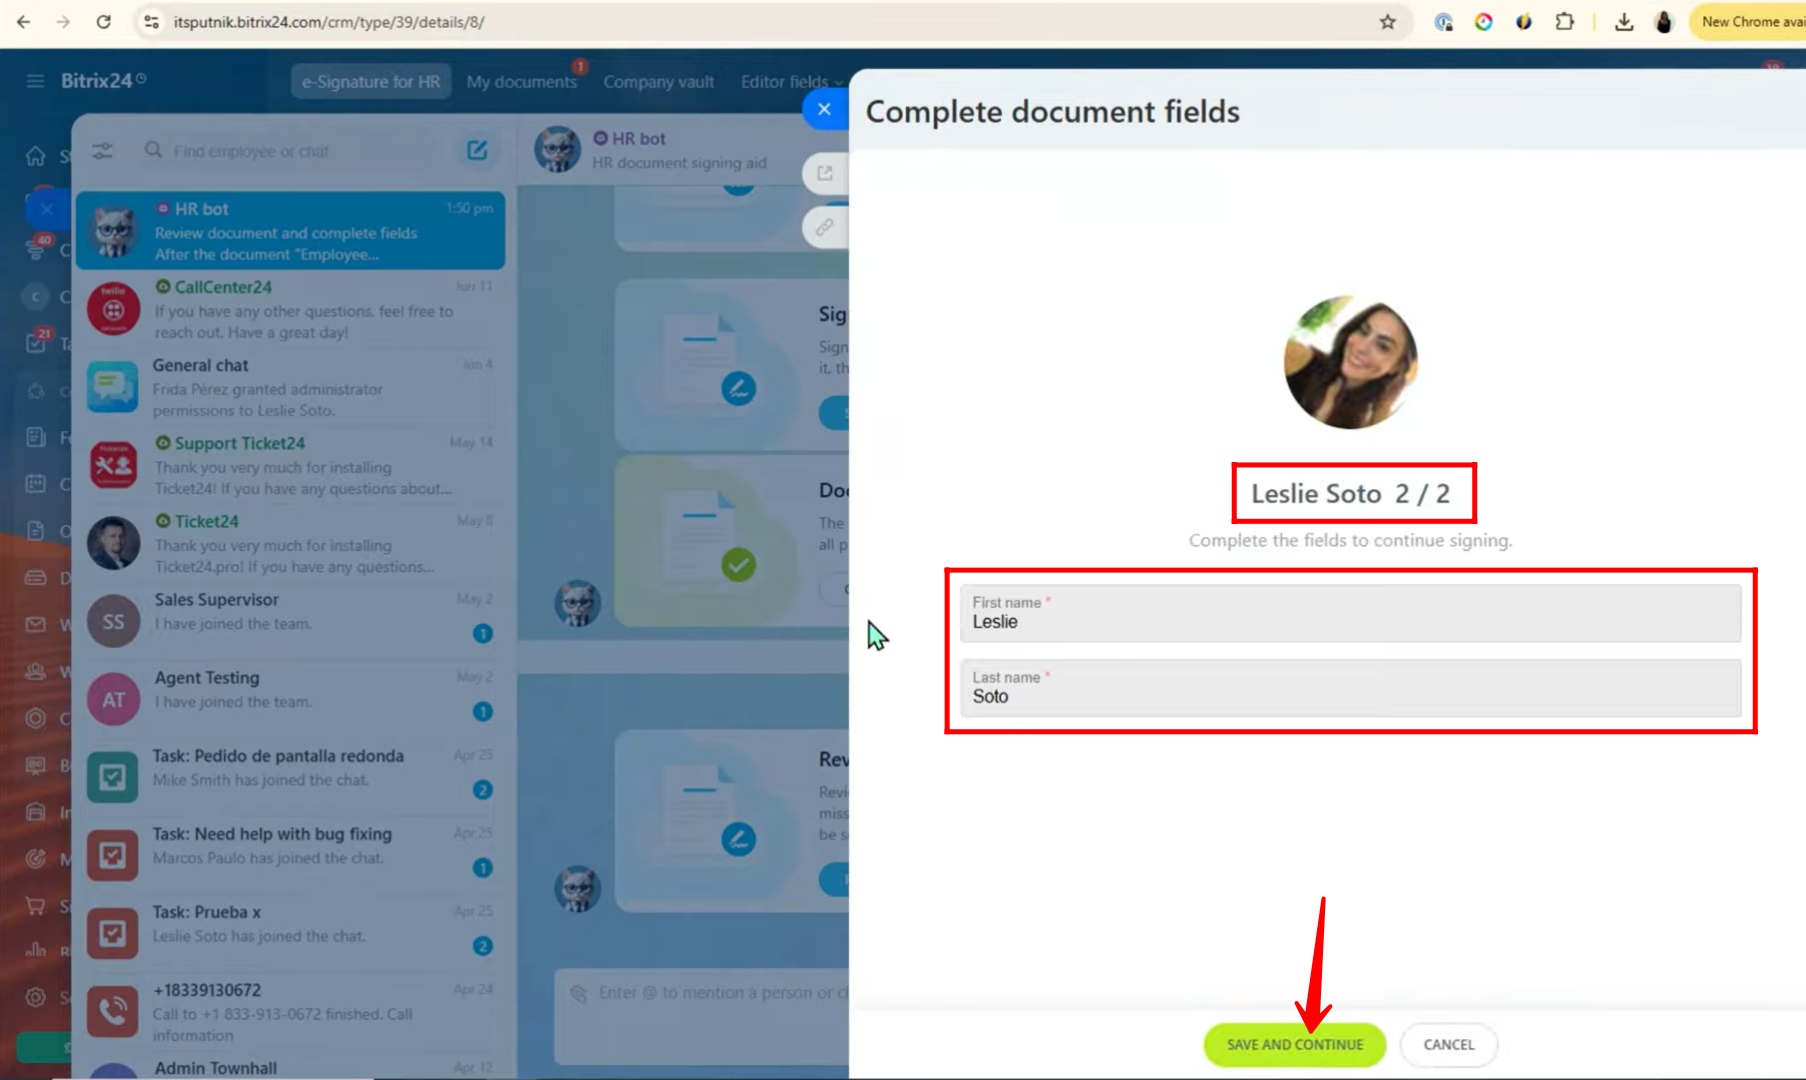
30. Here, the first employee who has to sign the document is displayed, and you can review or edit their details such as first name, last name, VAT ID, company name, phone number, email, or delivery address. Once the information is correct, click Save and Continue.
31. Here, the second employee who has to sign the document is displayed, and you can review or edit their details. Once the information is correct, click Save and Continue.
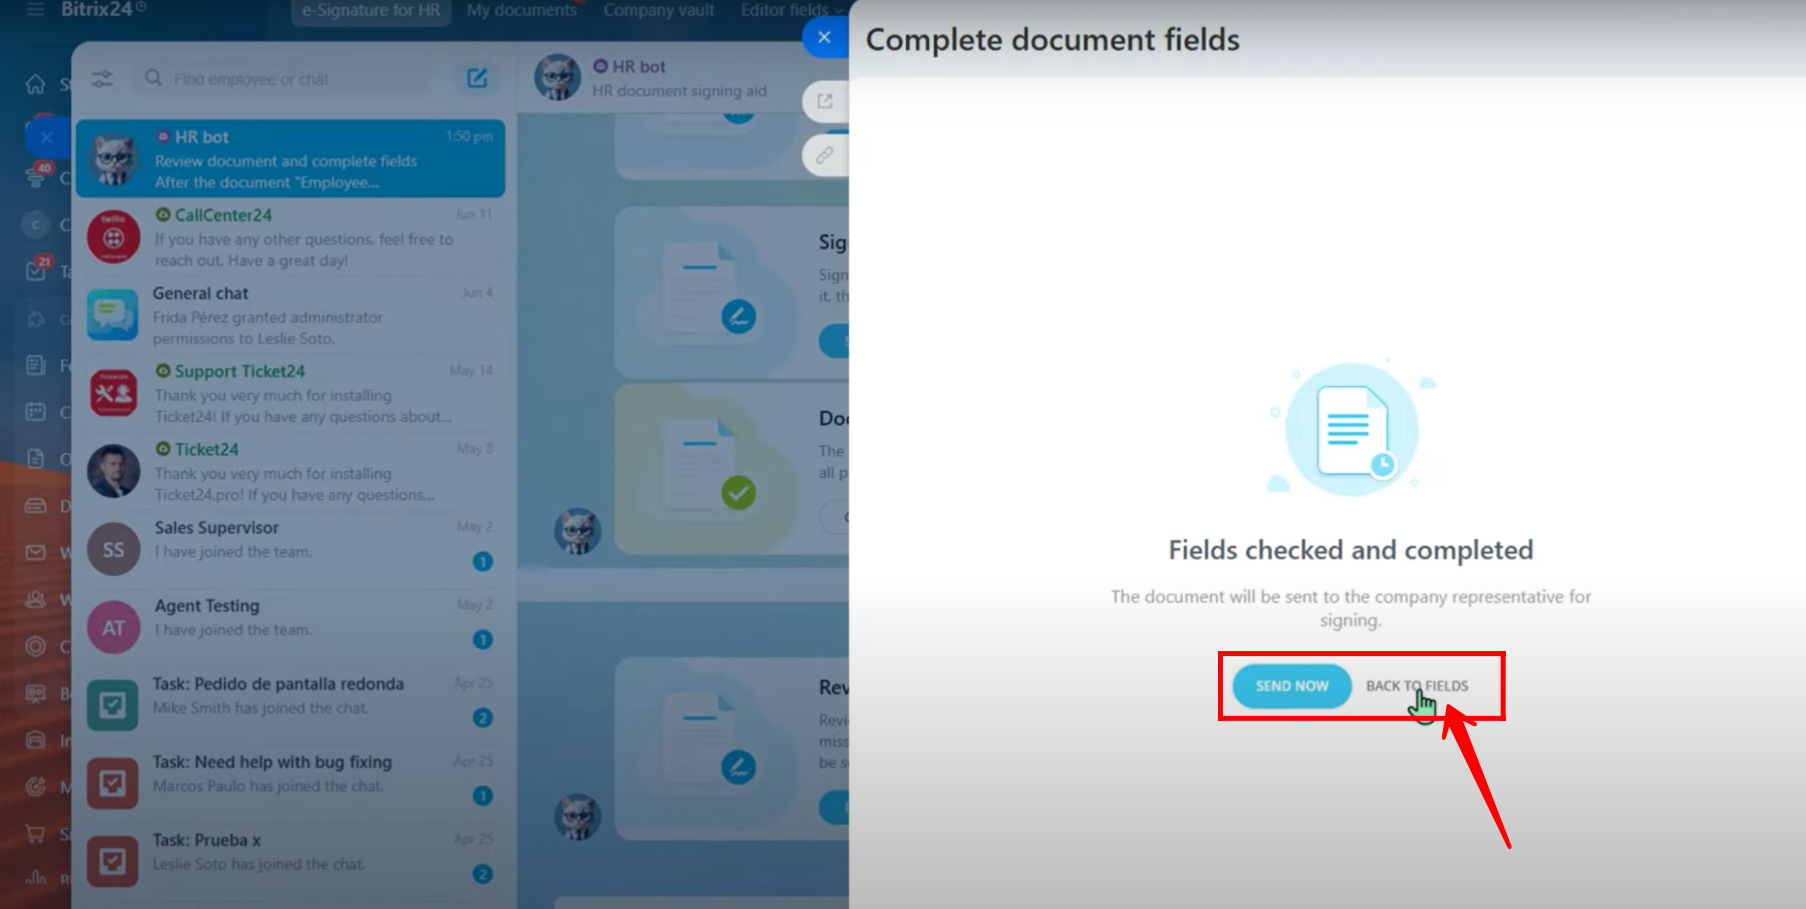
32. Now that the fields are checked and completed, you have two options: send the document directly to employees for signing or return it back to the fields for verification. In this example, let’s return it to the fields again for further verification.
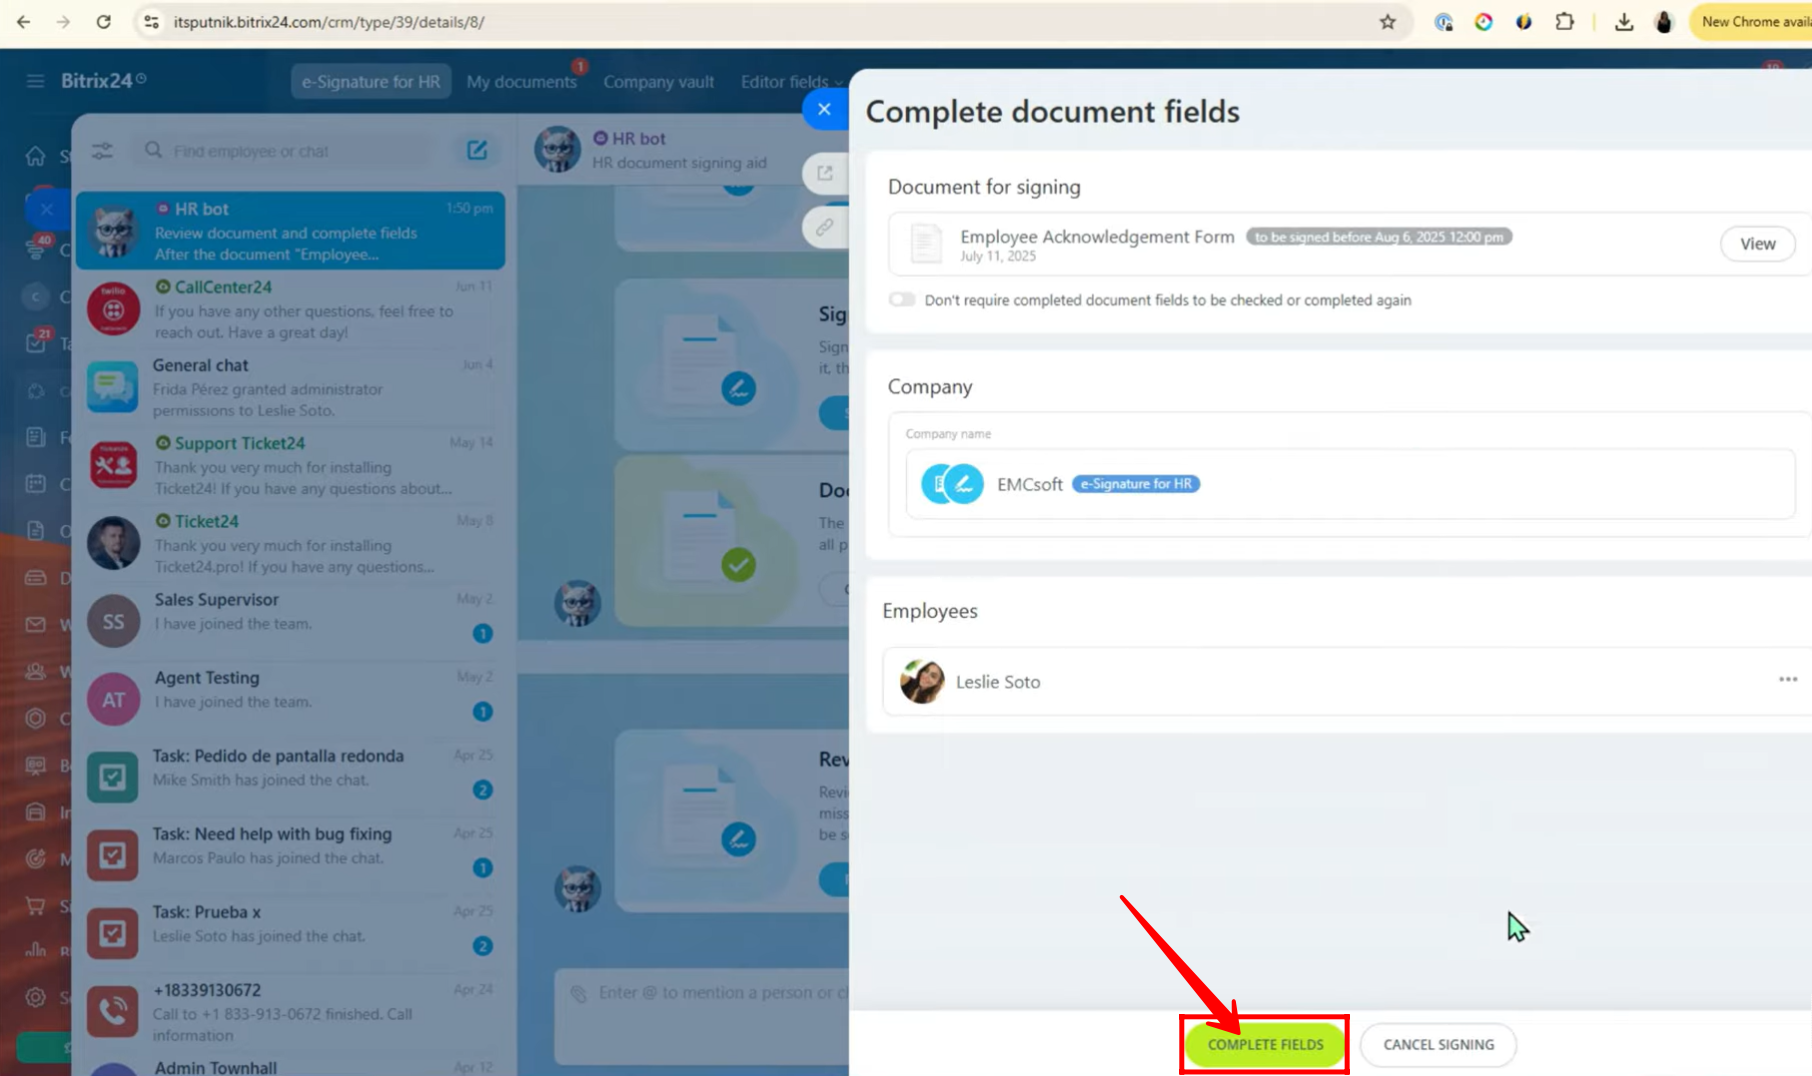
33. Here, you can view the document prepared for signing again, with the company name and employee name clearly shown. Click “Complete fields” to proceed.
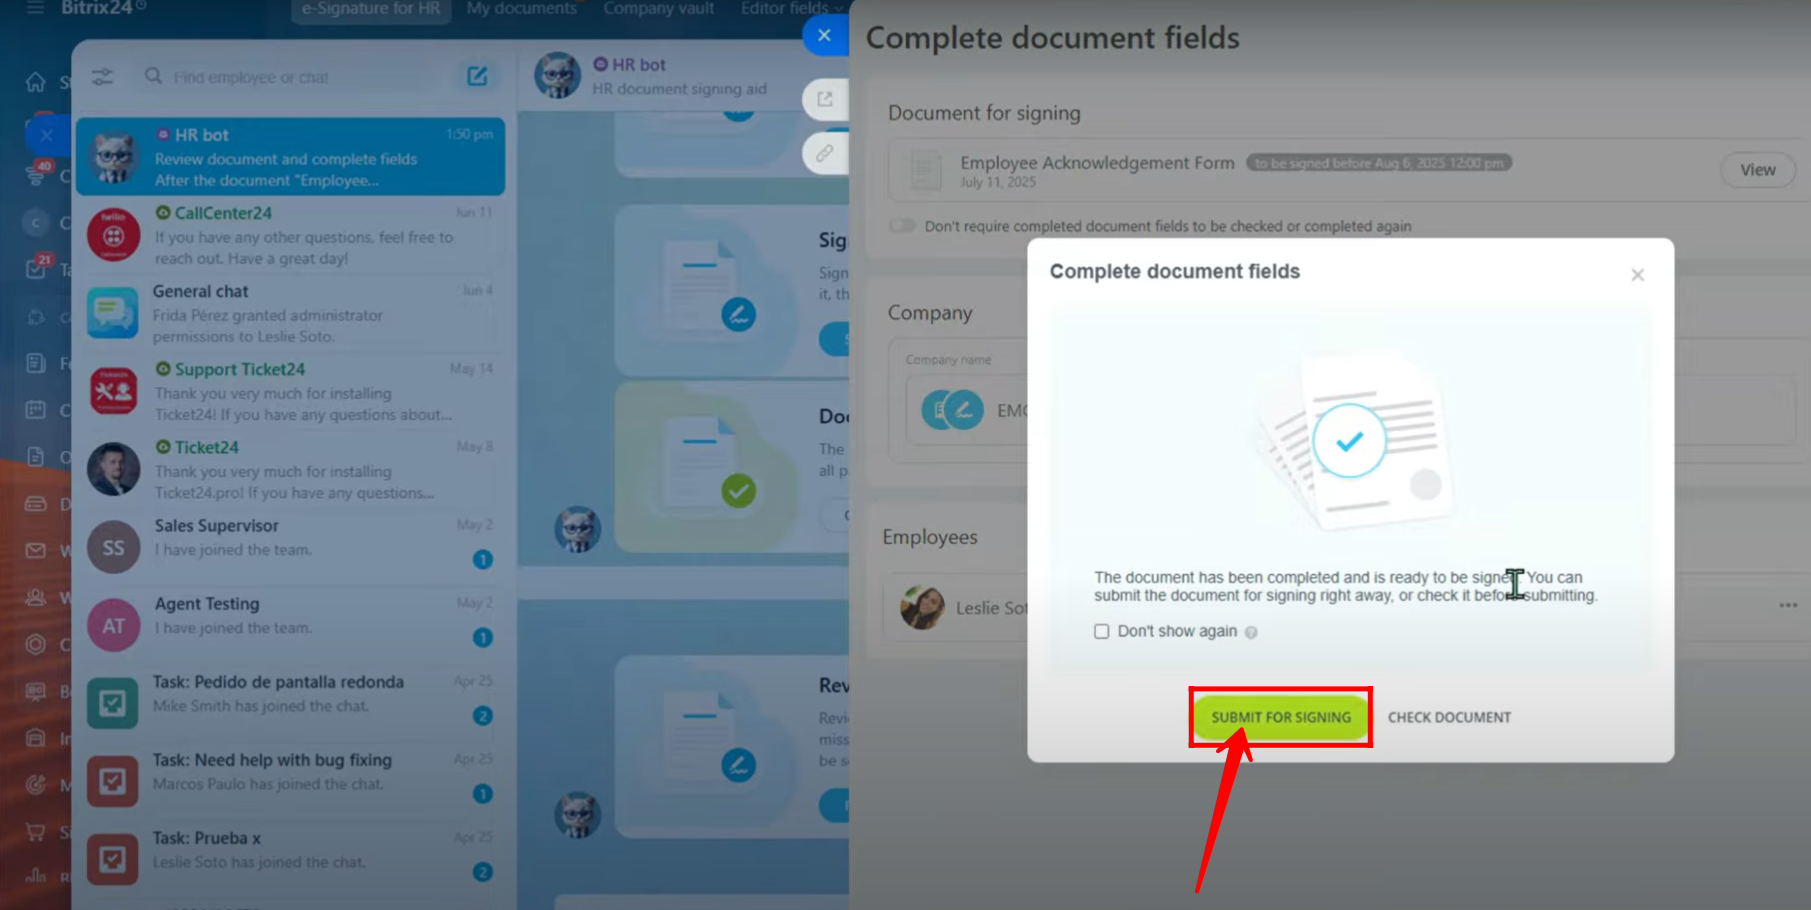
34. After verifying the document, click “Submit for Signing”. Once submitted, the employees will immediately receive notifications in the HR bot prompting them to review and sign the document electronically.
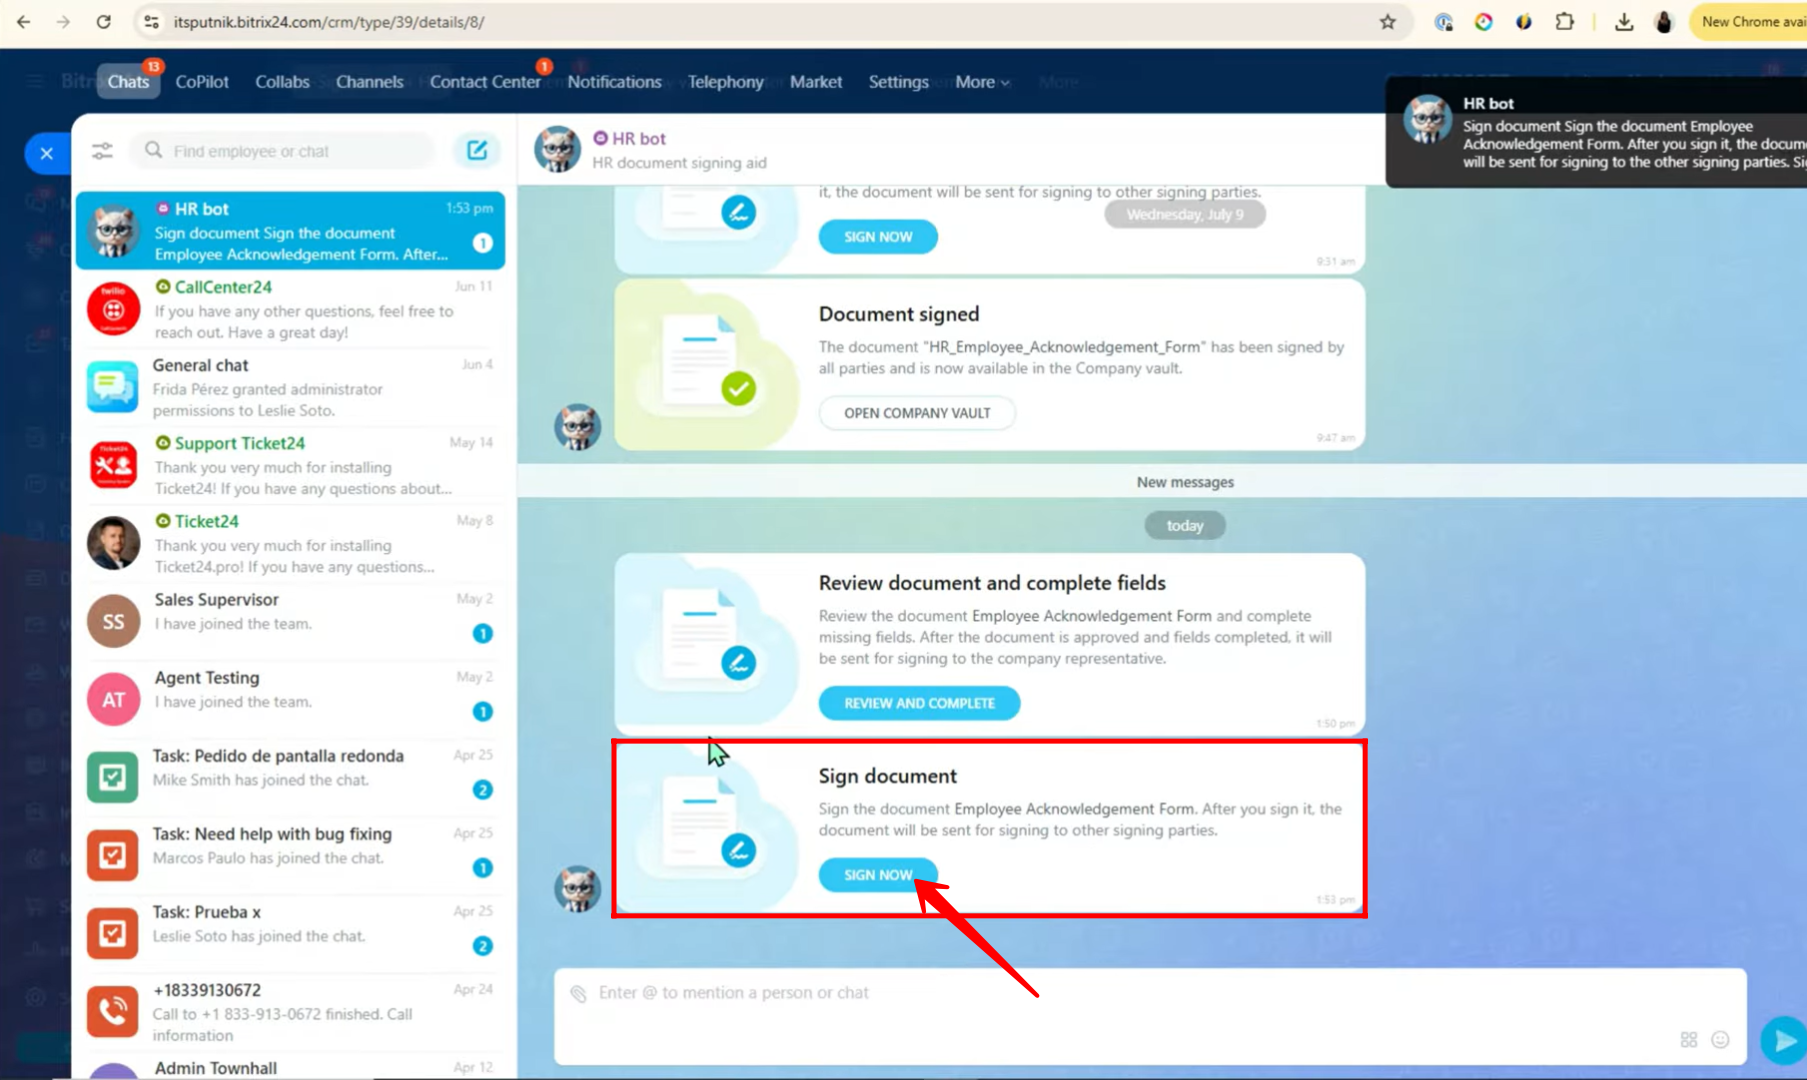
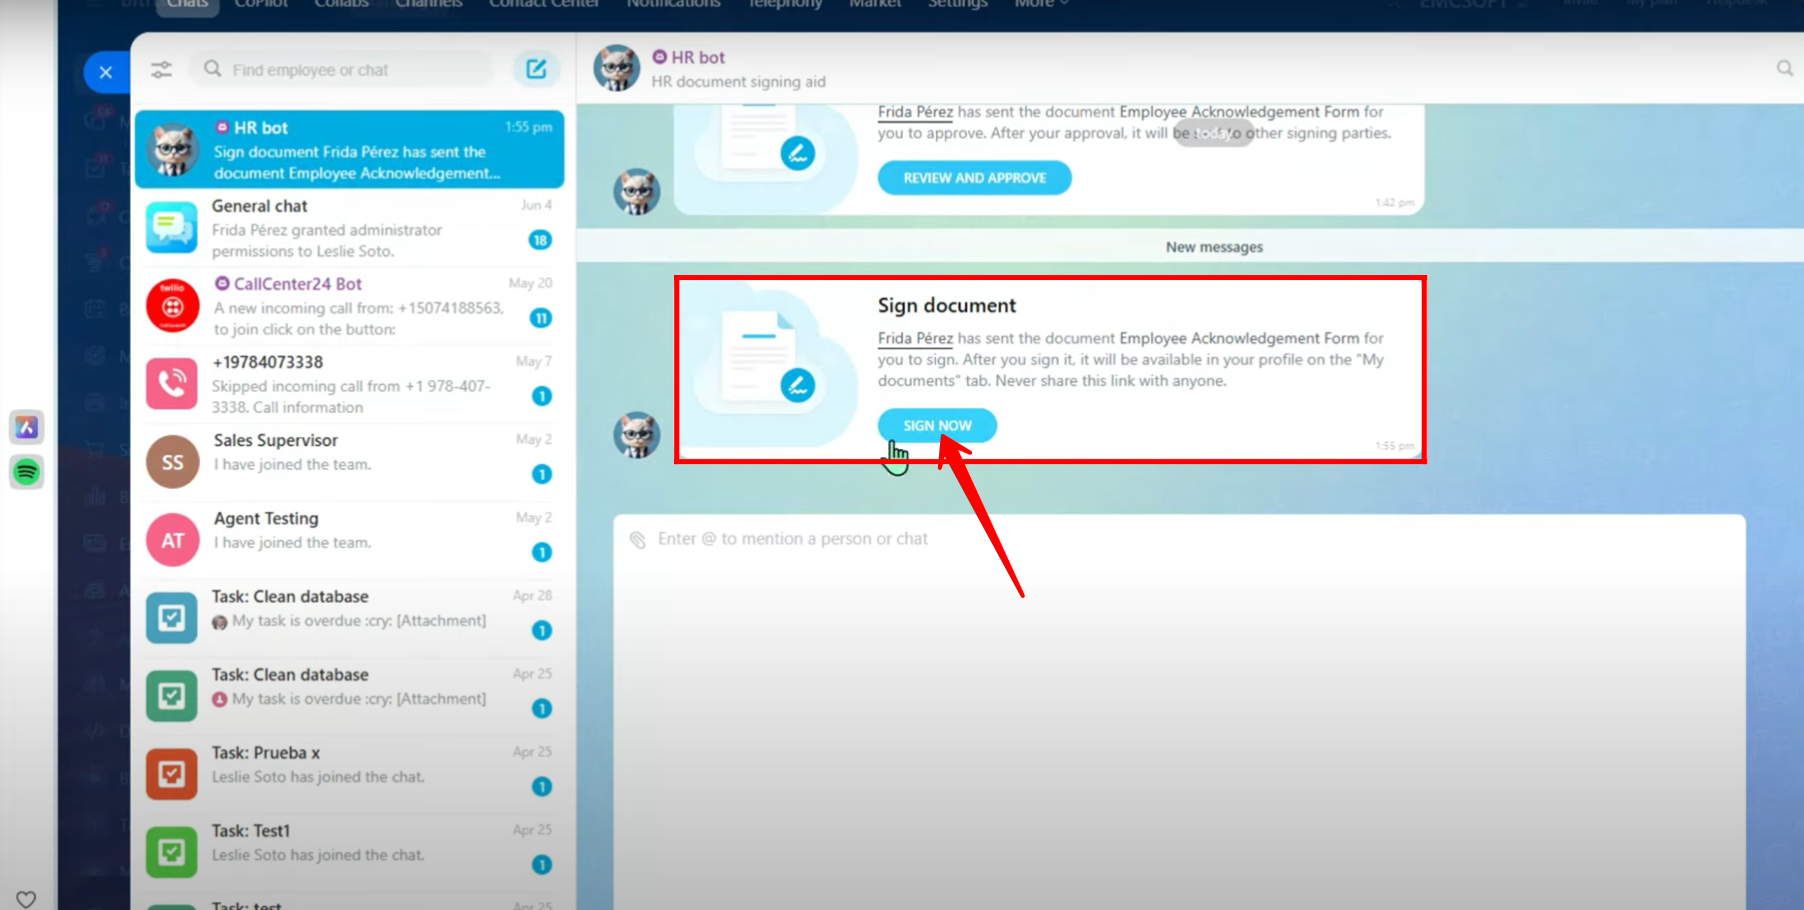
35. In the employee’s portal, a notification appears in the HR bot indicating that a document is ready for signing. In the chat window, the employee will see the prompt “SIGN NOW”, and must click it to proceed with the signing process.
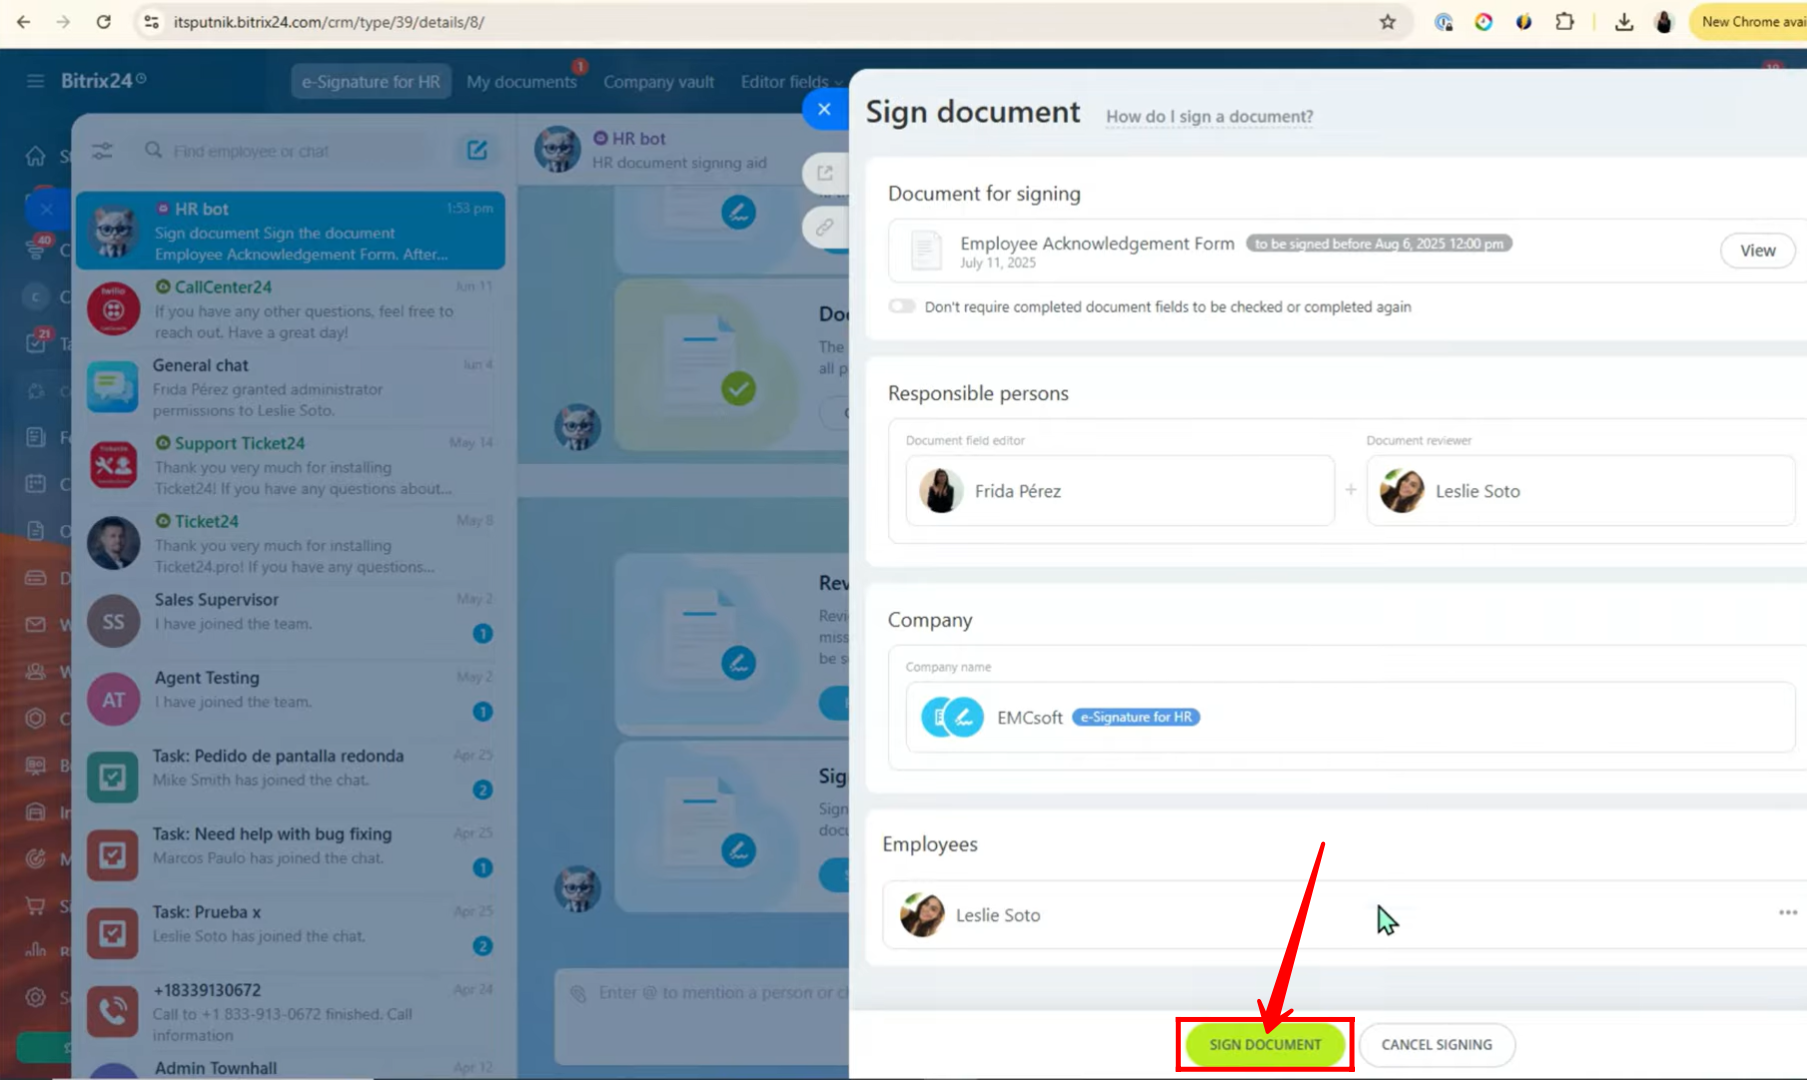
36. The employee opens the document to verify its details, including the company name, responsible persons, and the employee information. After confirming everything is correct, they click “SIGN DOCUMENT” to complete their part of the process.
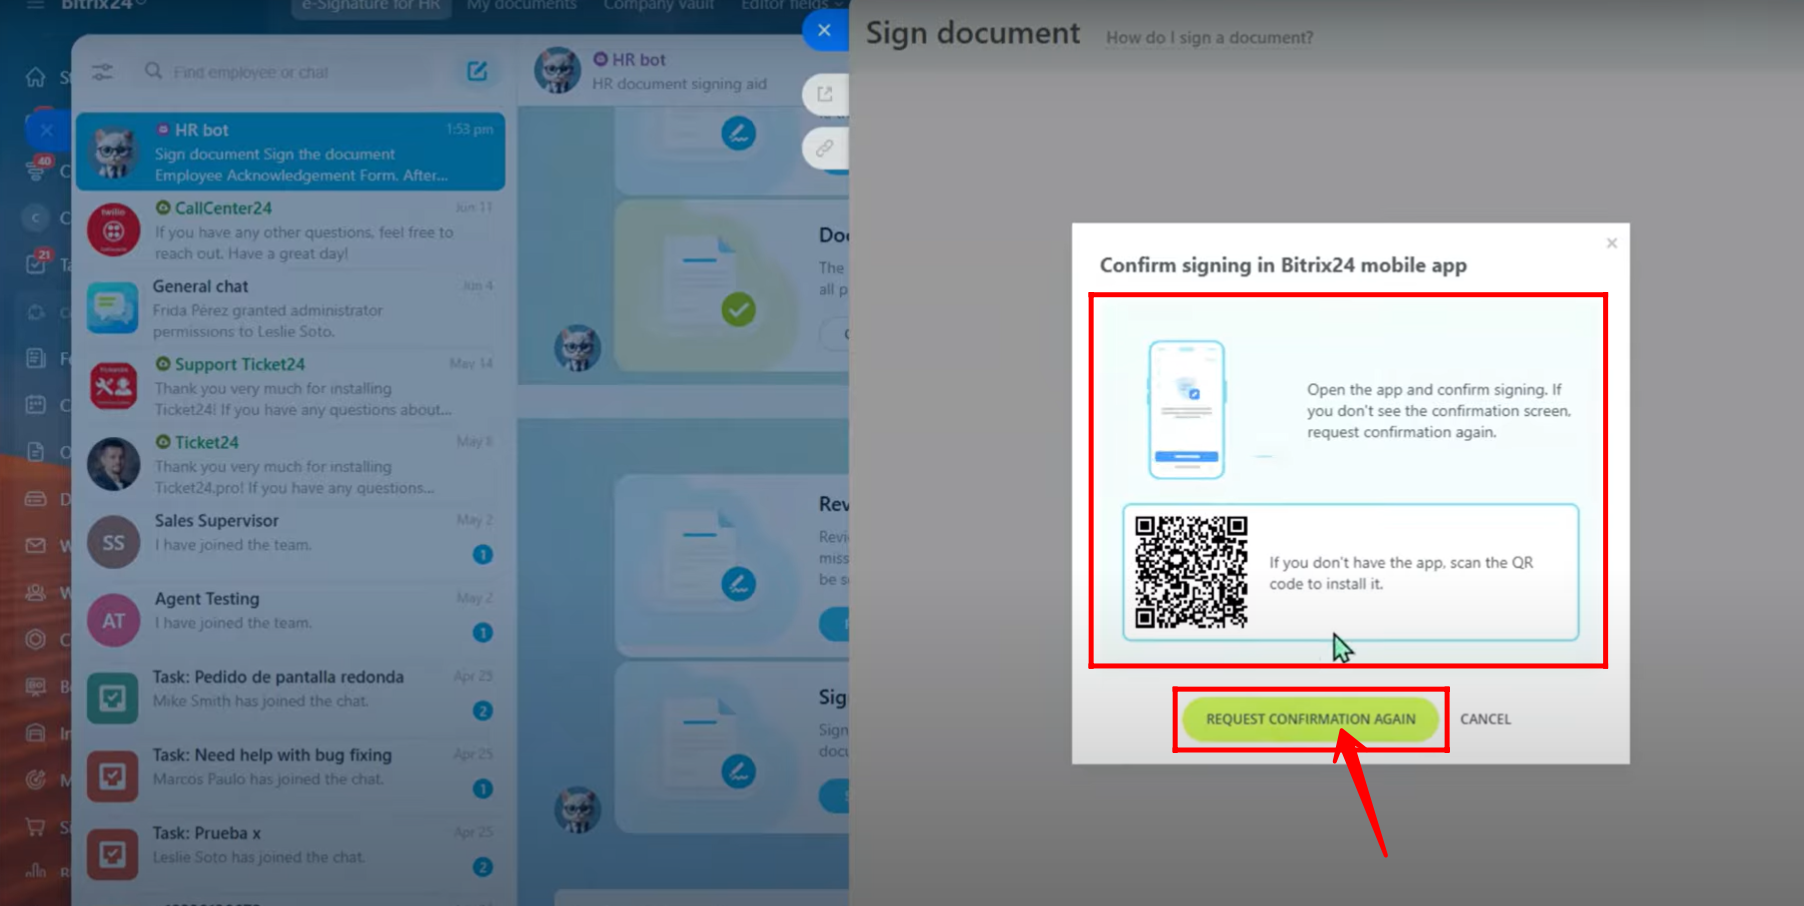
37. To complete the electronic signature, the employee needs to open the Bitrix24 mobile app and scan the QR code displayed on the desktop window. This will open the portal on their mobile, where they finish the signing procedure. Once done, they return to the desktop and click “REQUEST CONFIRMATION AGAIN”, which triggers a prompt on their mobile to verify and confirm the signature.
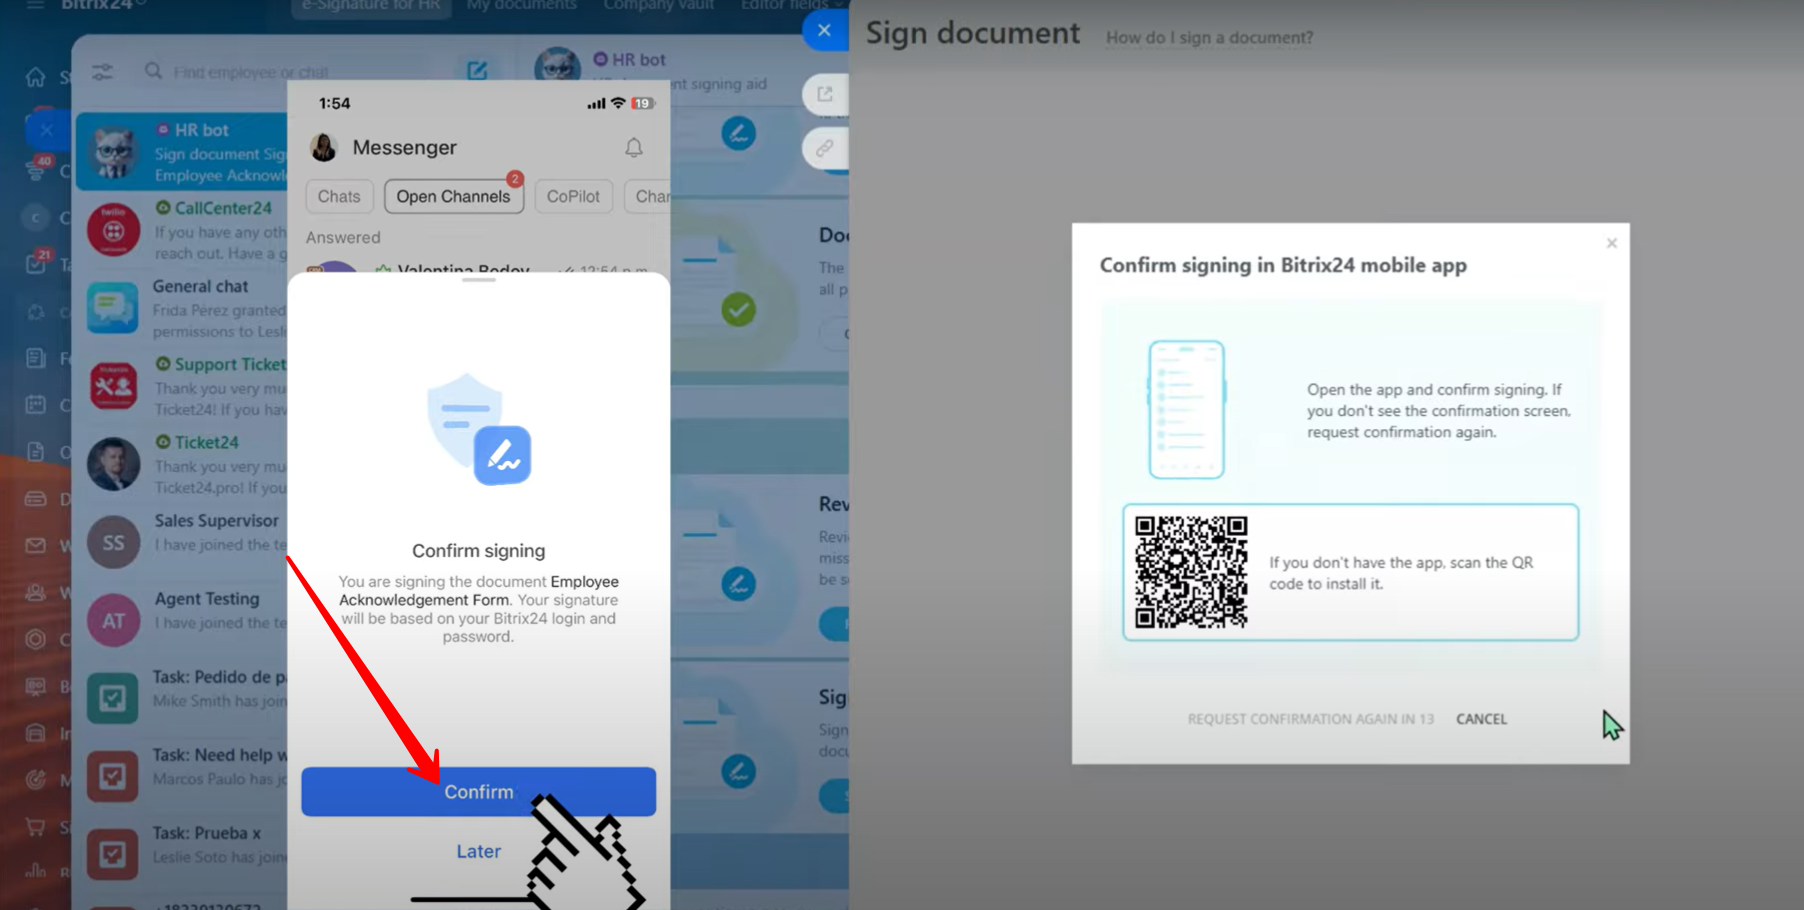
38. After scanning the QR code and completing the signing steps, click the “Confirm” button on your mobile device to finalize the electronic signature.
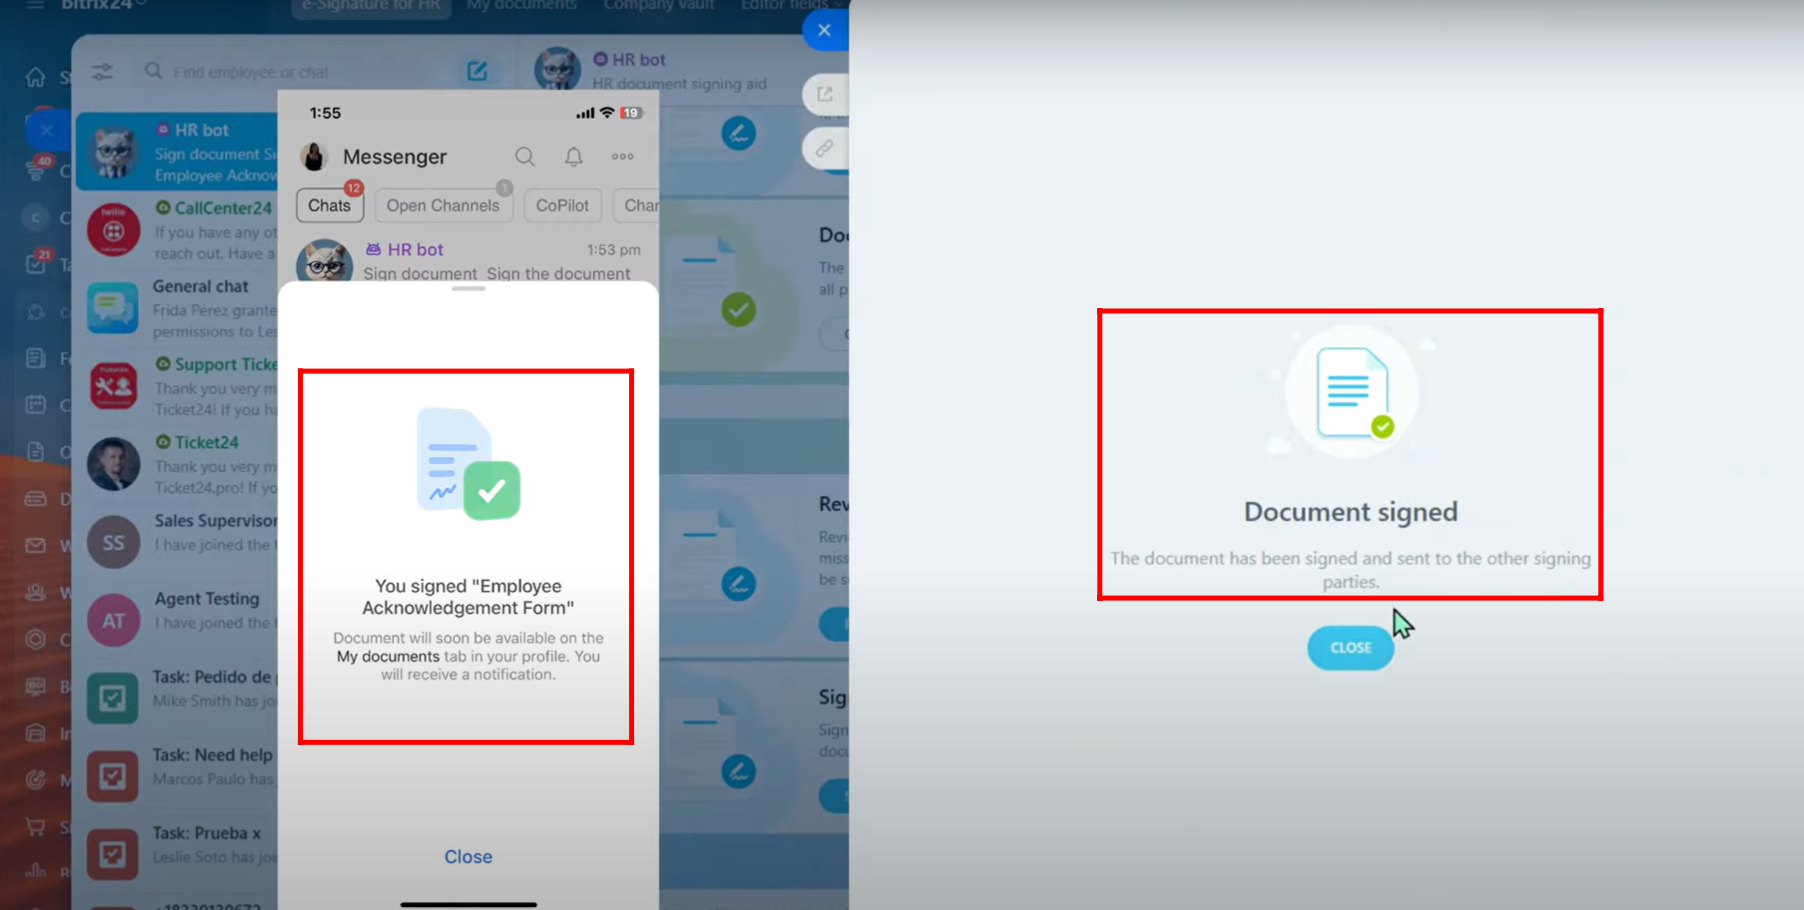
39. Once the signature is confirmed, a “Document Signed” notification will appear on both your desktop and mobile devices, indicating the signing process is successfully completed.
40. The next employee will see the same “SIGN NOW” prompt in their chat window. They need to click it to start the signing process, verify the document details, and follow the same steps to complete the electronic signature.
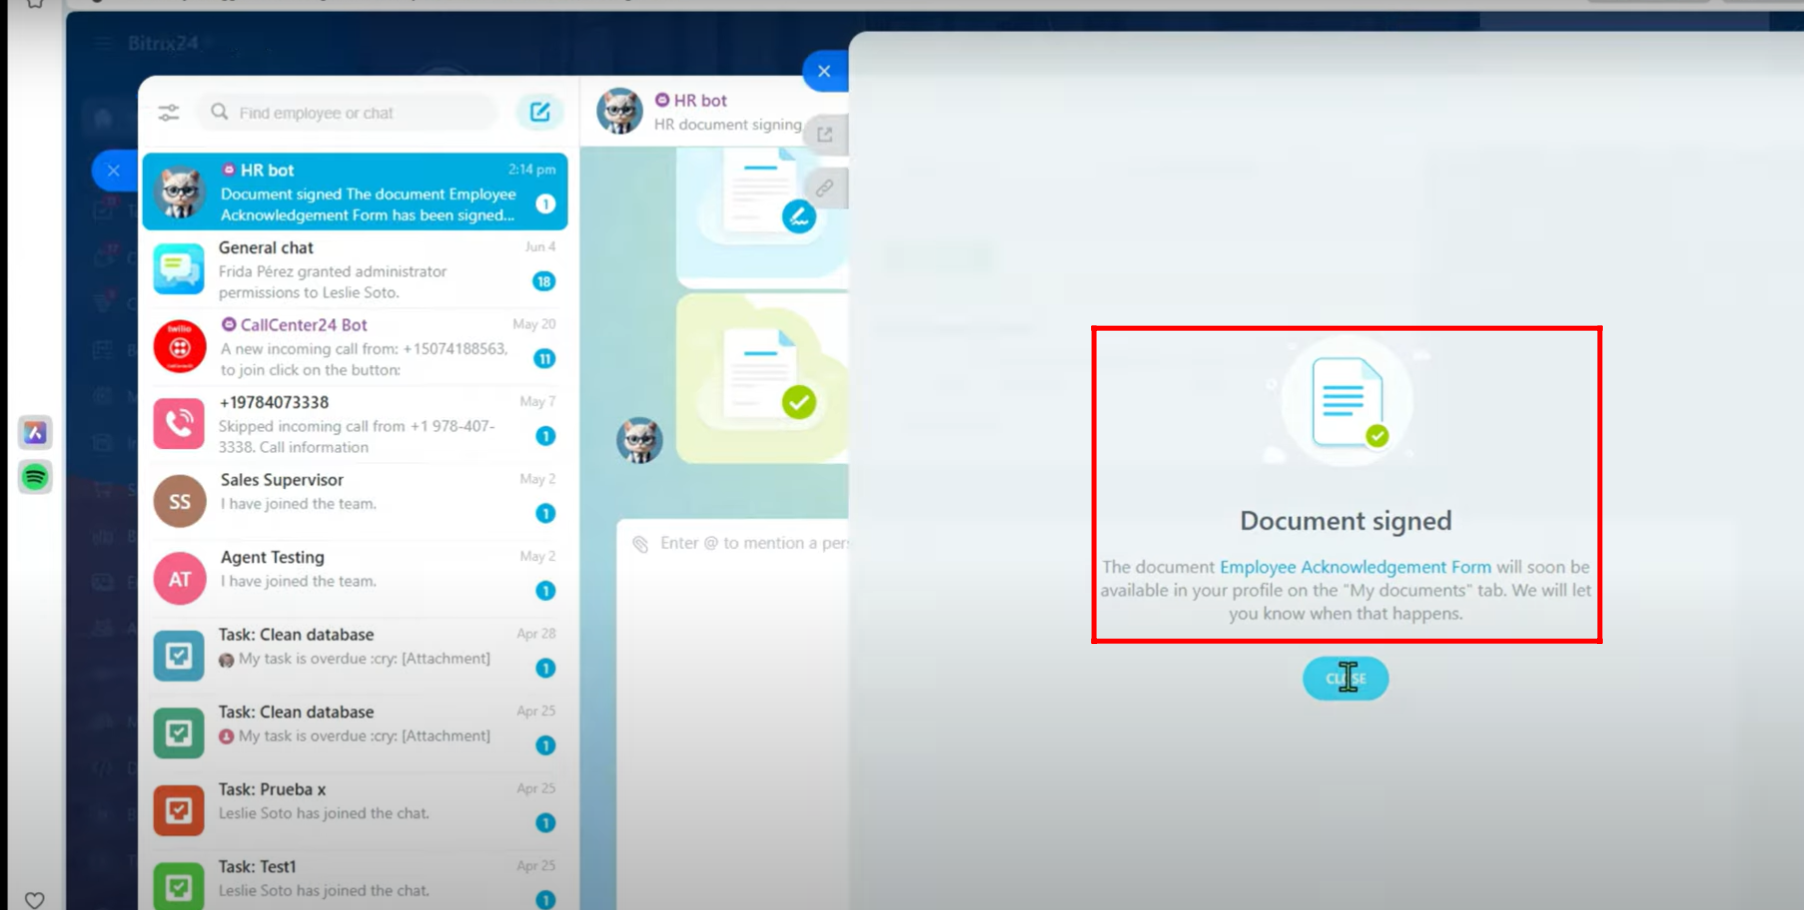
41. Once the second employee completes the signing process following the same steps, the system will display “DOCUMENT SIGNED” confirmation on both their mobile and desktop devices, indicating that the document has been fully signed by all required parties.
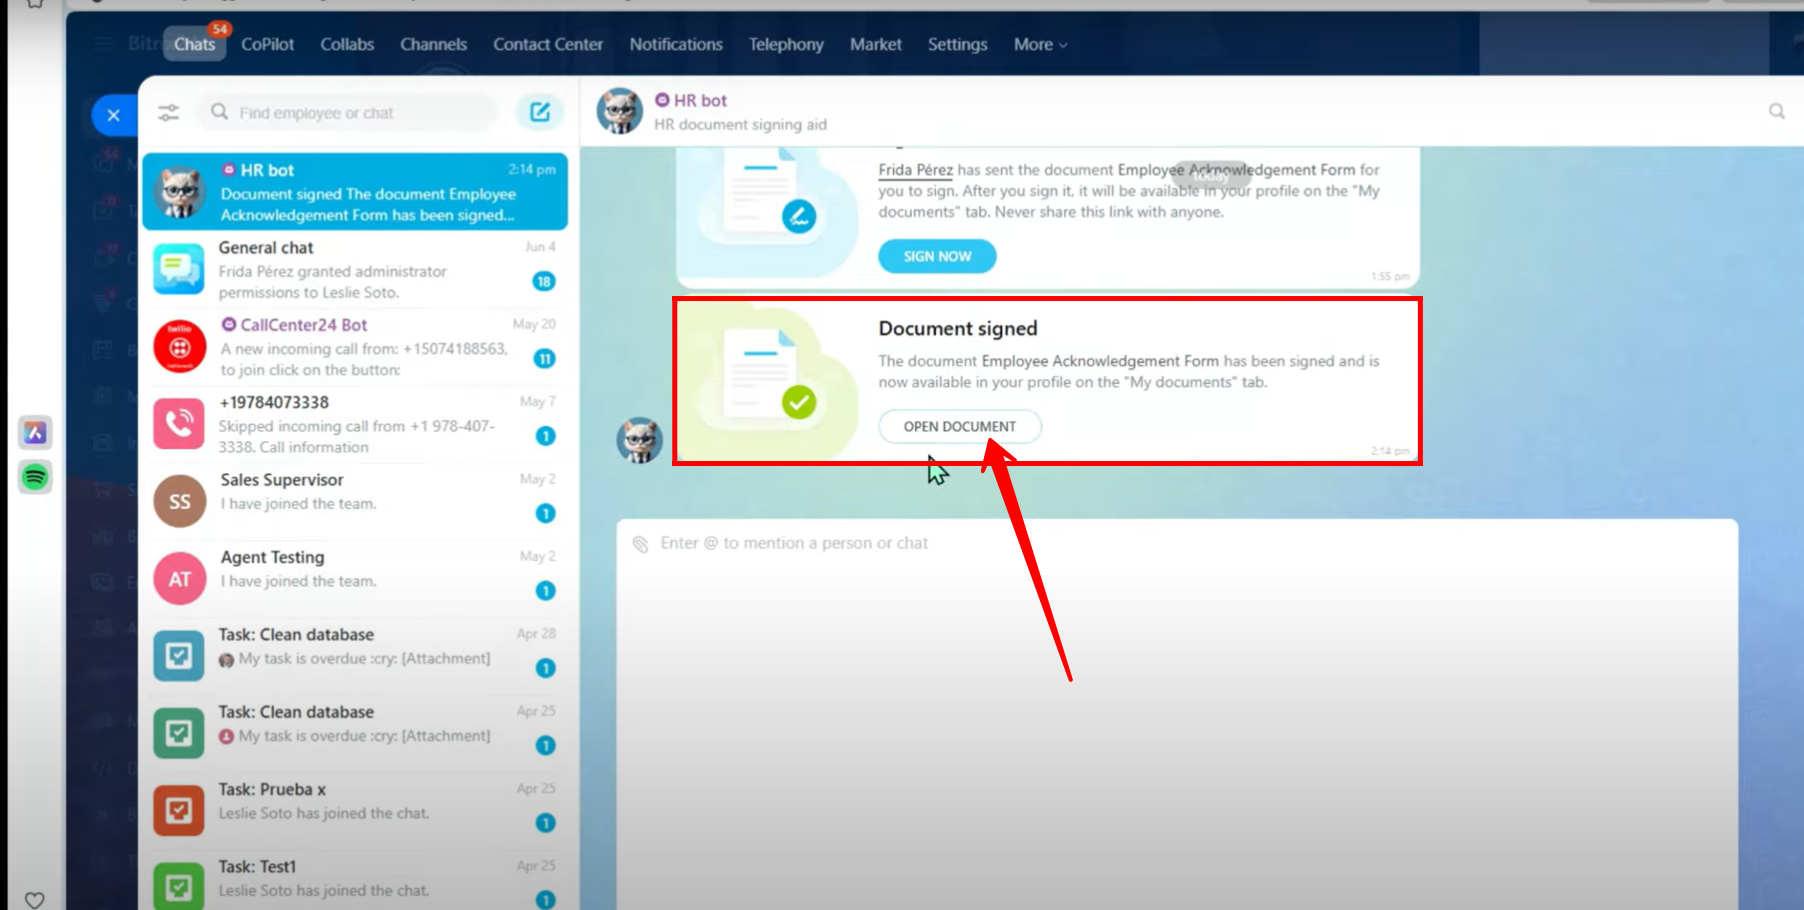
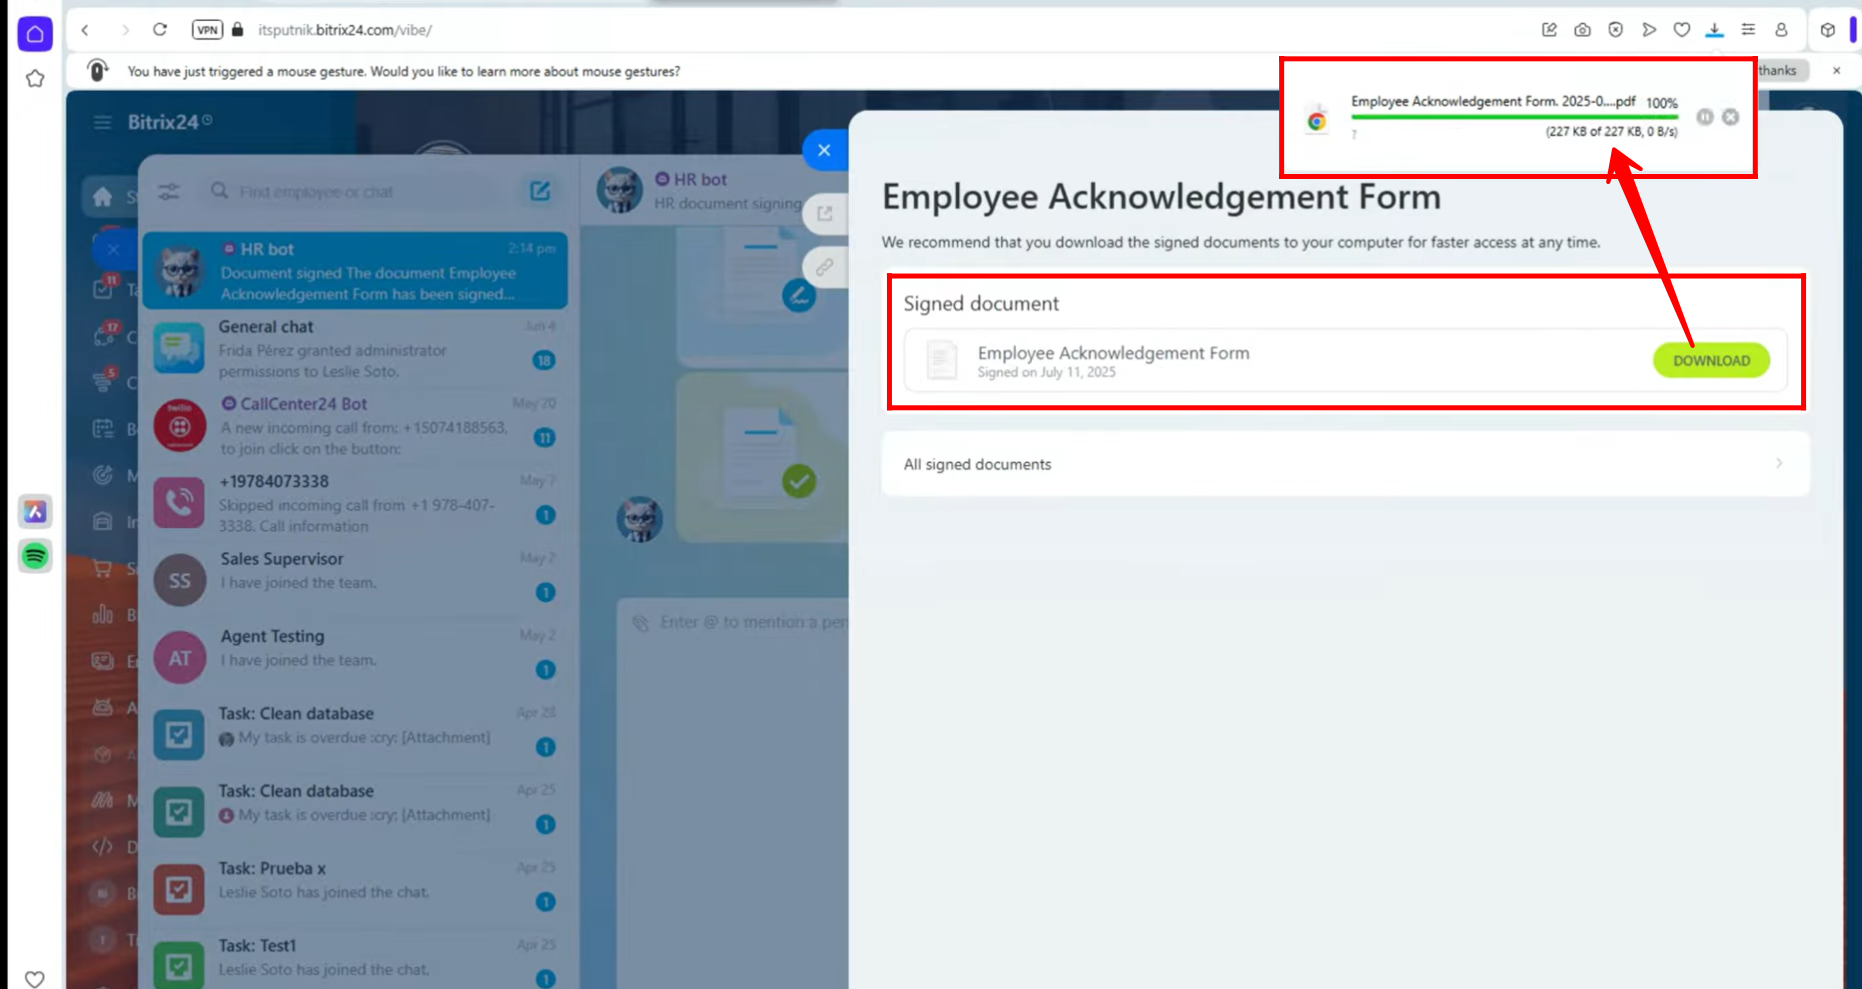
42. After all employees have signed, the HR bot chat window will show the prompt “OPEN DOCUMENT” to all parties, allowing them to access and review the fully executed document.
43. Once you click “OPEN DOCUMENT”, you will have the option to download the signed document for your records or further processing.
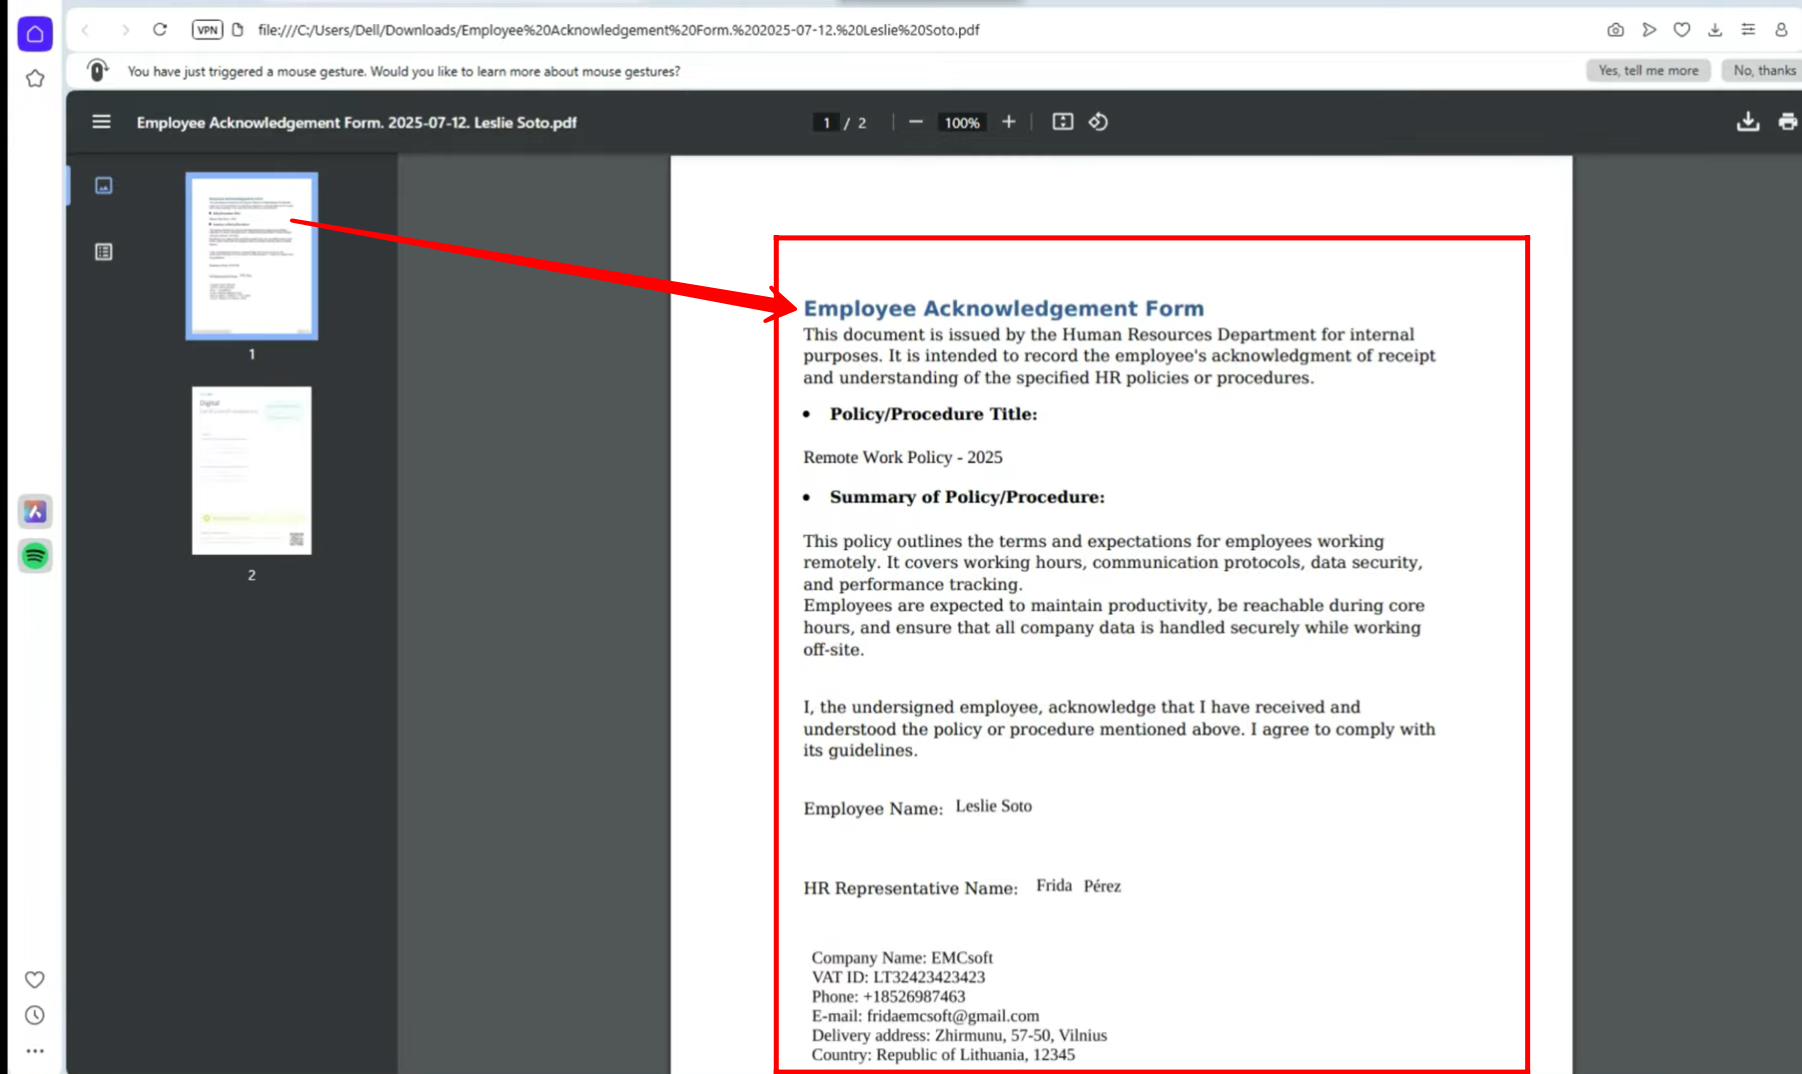
44. In this PDF, the first page will display the document that you configured earlier in the document editor, including all inserted fields such as company details, HR representative, and employee information.
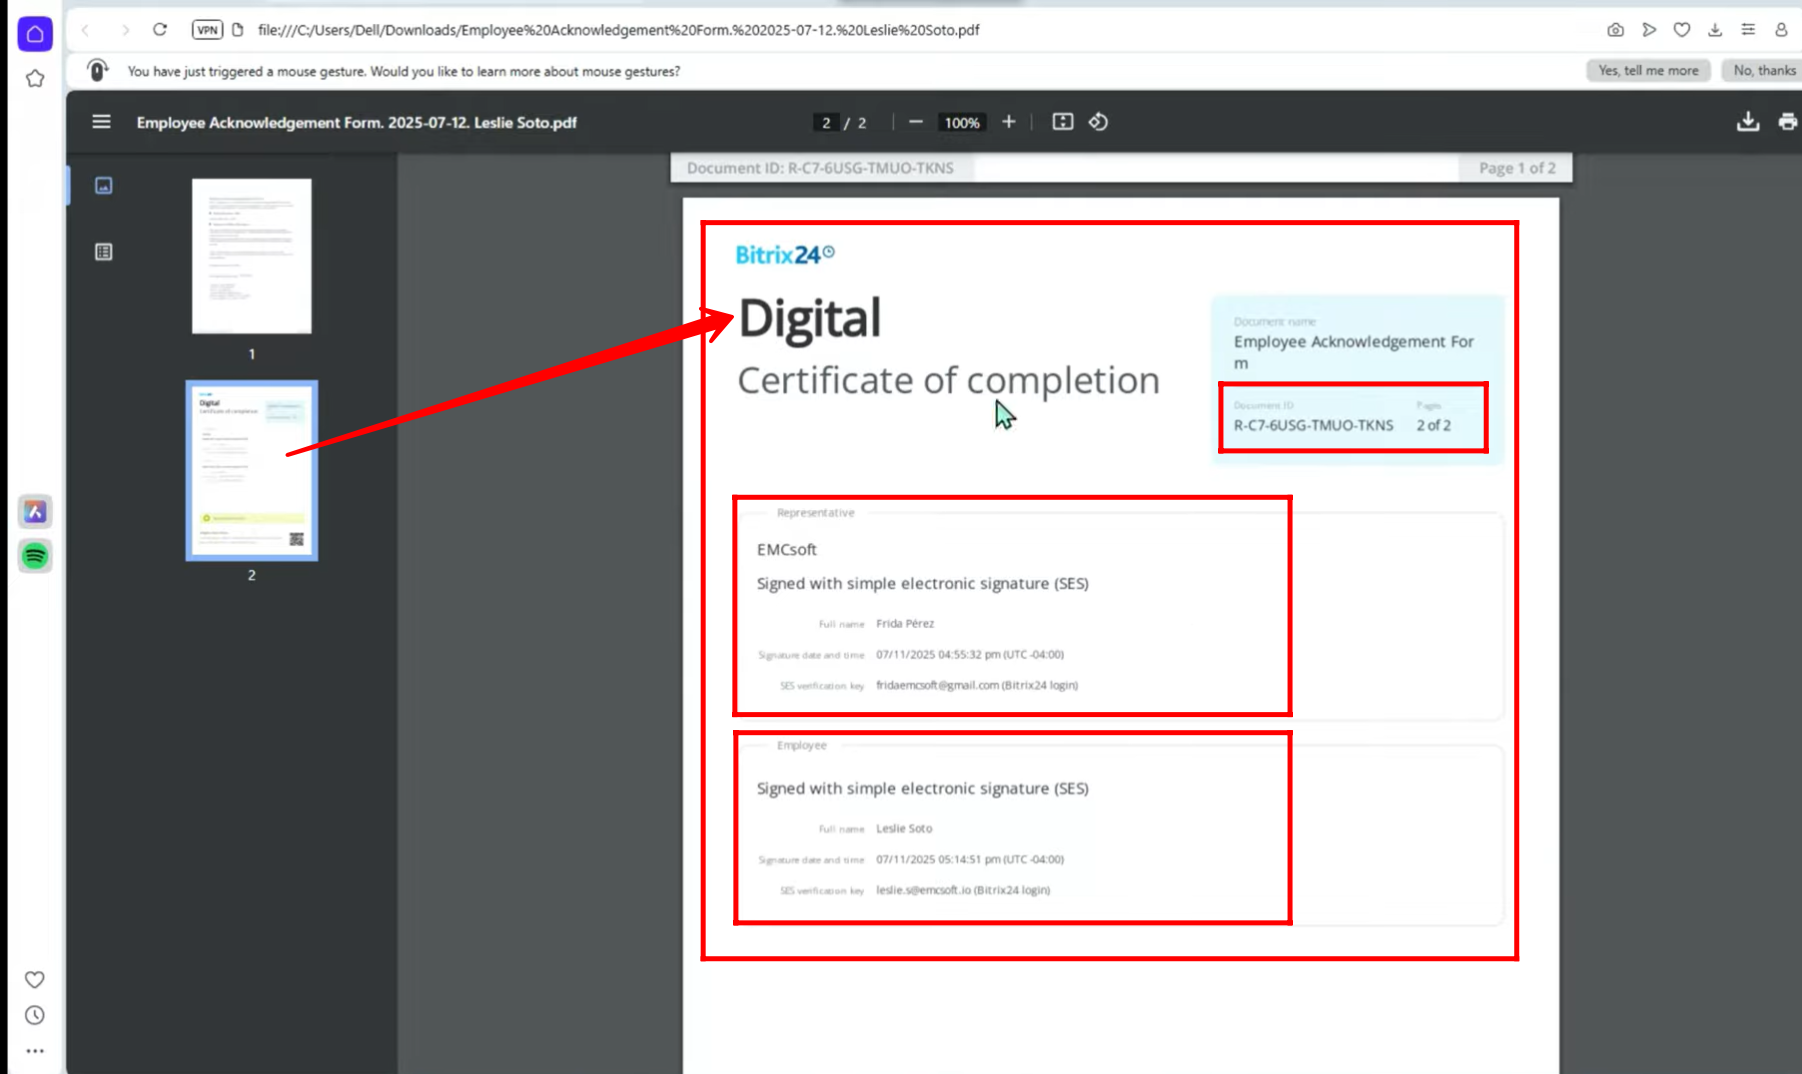
45. The second page of the PDF will show the unique document ID along with the electronic signatures of all signing parties. Unlike a digital signature, this electronic signature includes the details of the employees, such as name, email, and role, making it verifiable and linked specifically to the signing individuals.
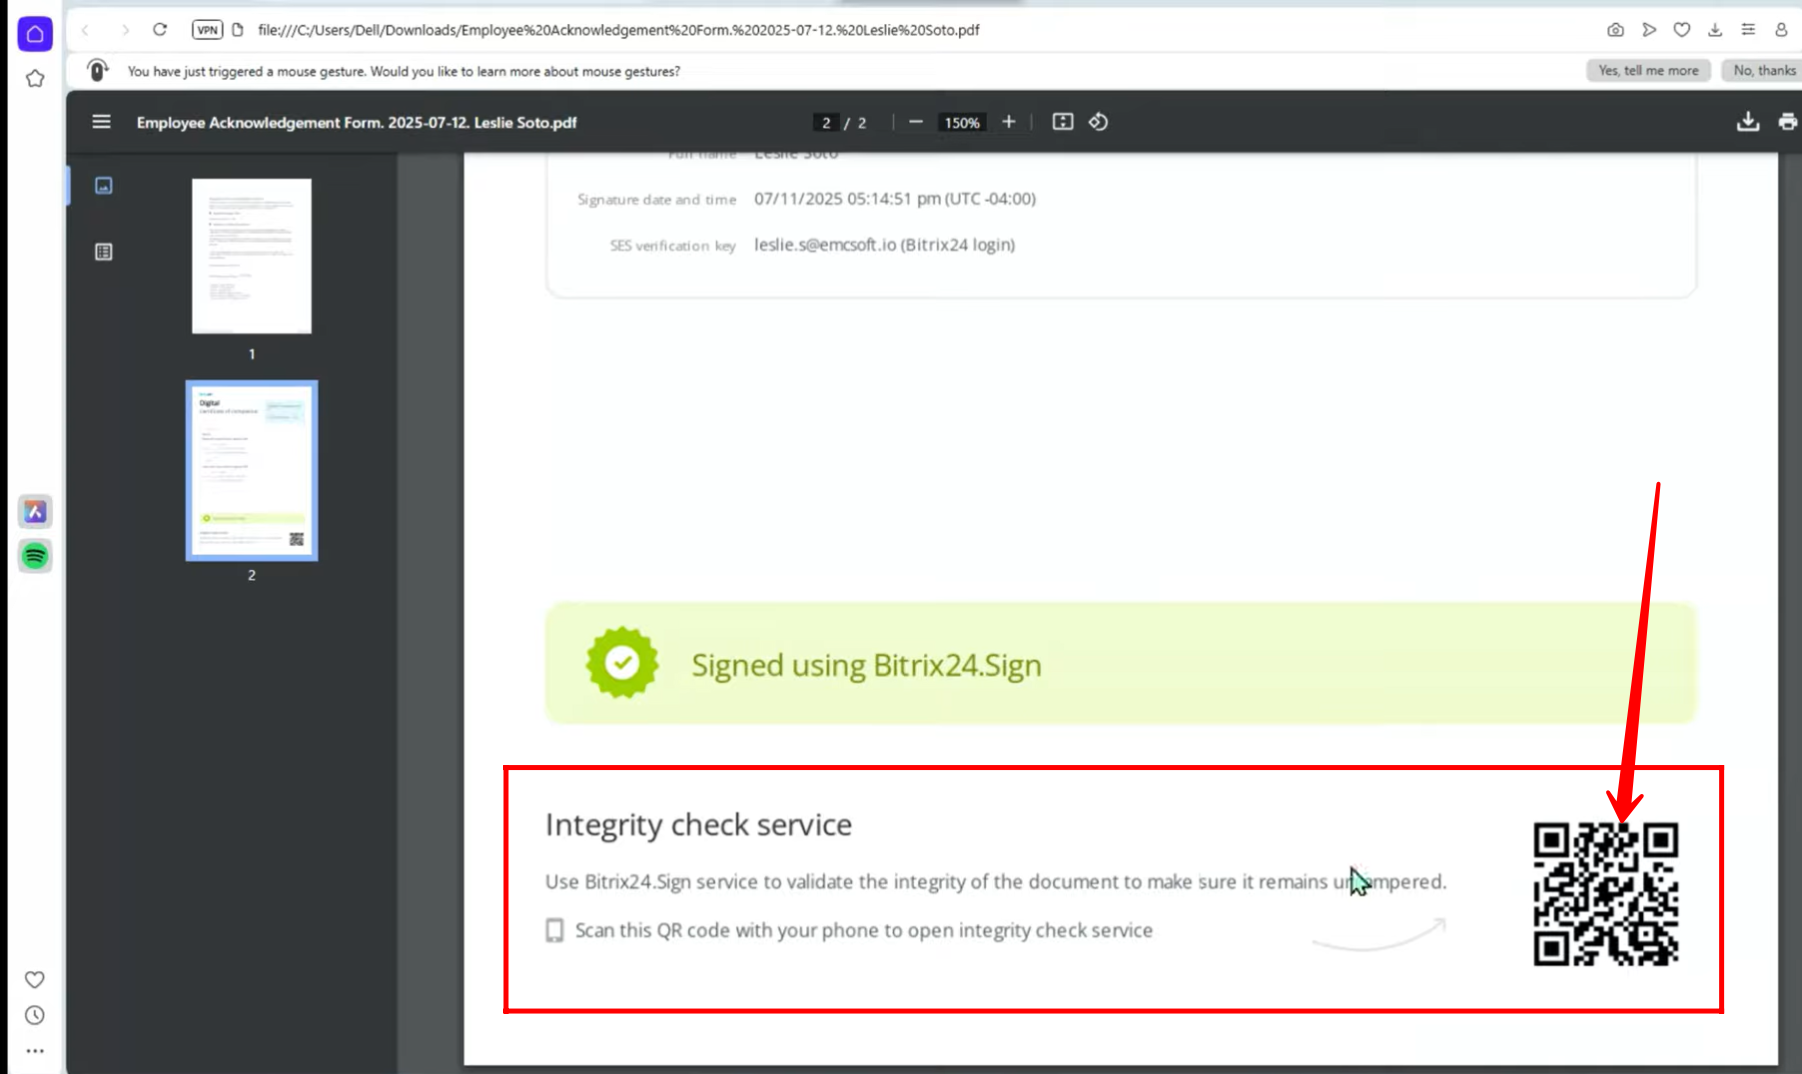
46. On the second page of the PDF, in addition to the unique document ID and electronic signatures, there will be a unique QR code. Scanning this QR code allows anyone to verify the authenticity of the electronic signatures, ensuring that the document and its signatures are valid and unaltered.
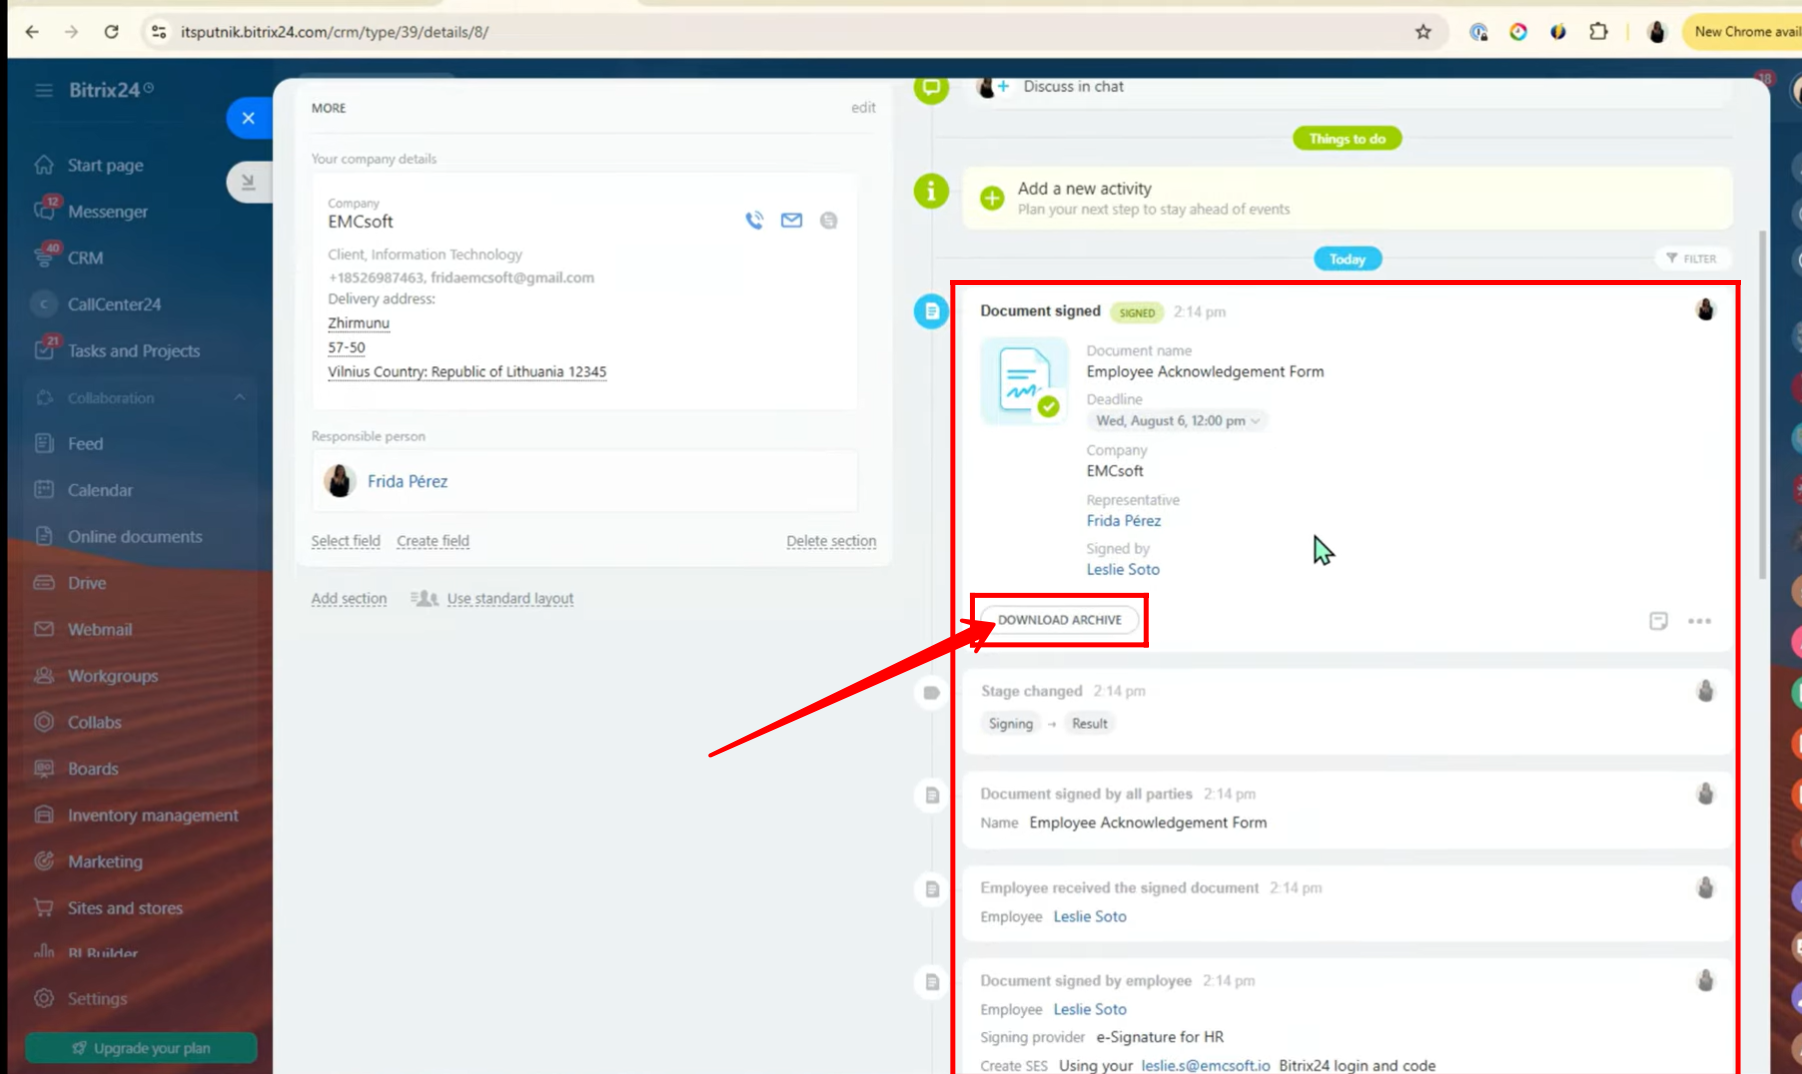
47. When you open the “e-Signature for HR” item again, you will see the entire activity timeline of the document, showing each stage with the corresponding timestamp. To access more detailed records, click “Download Archive”.
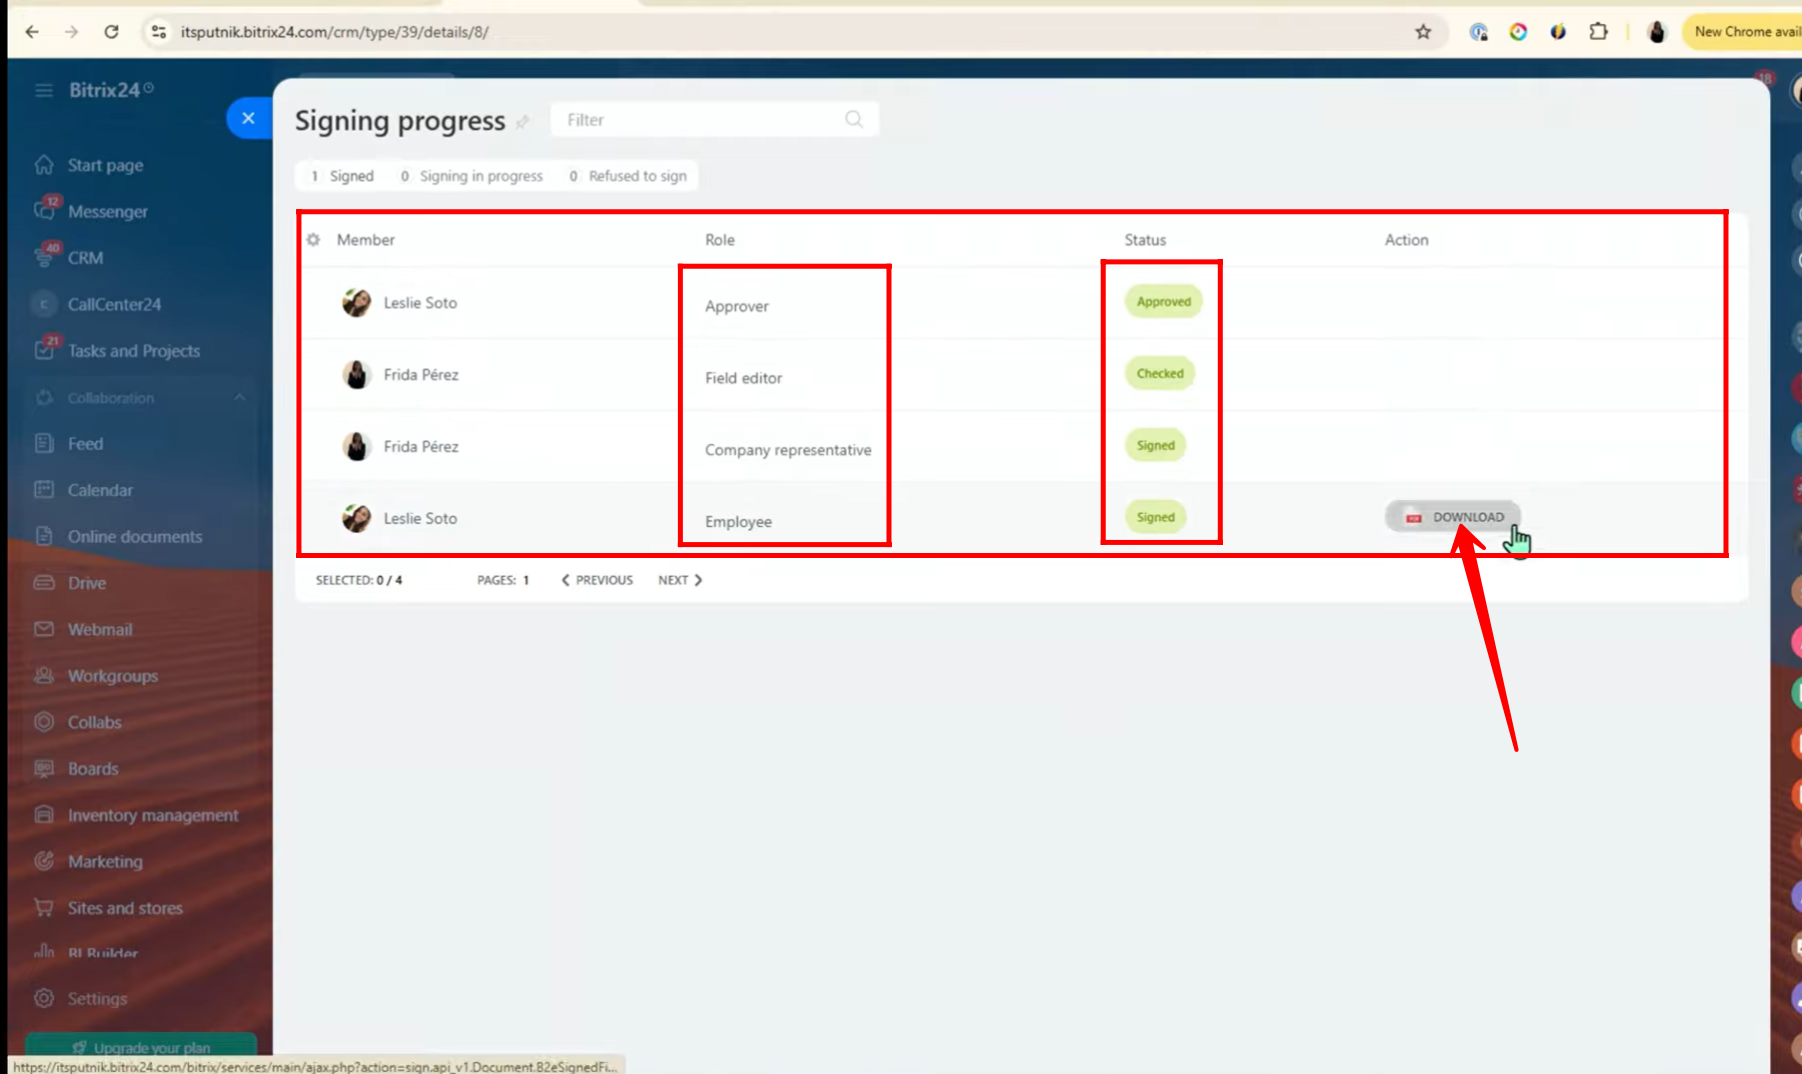
48. Here, you can view all members involved in the e-Signature for HR process, along with their roles, current status, and an option to download the signed PDF again for your records.
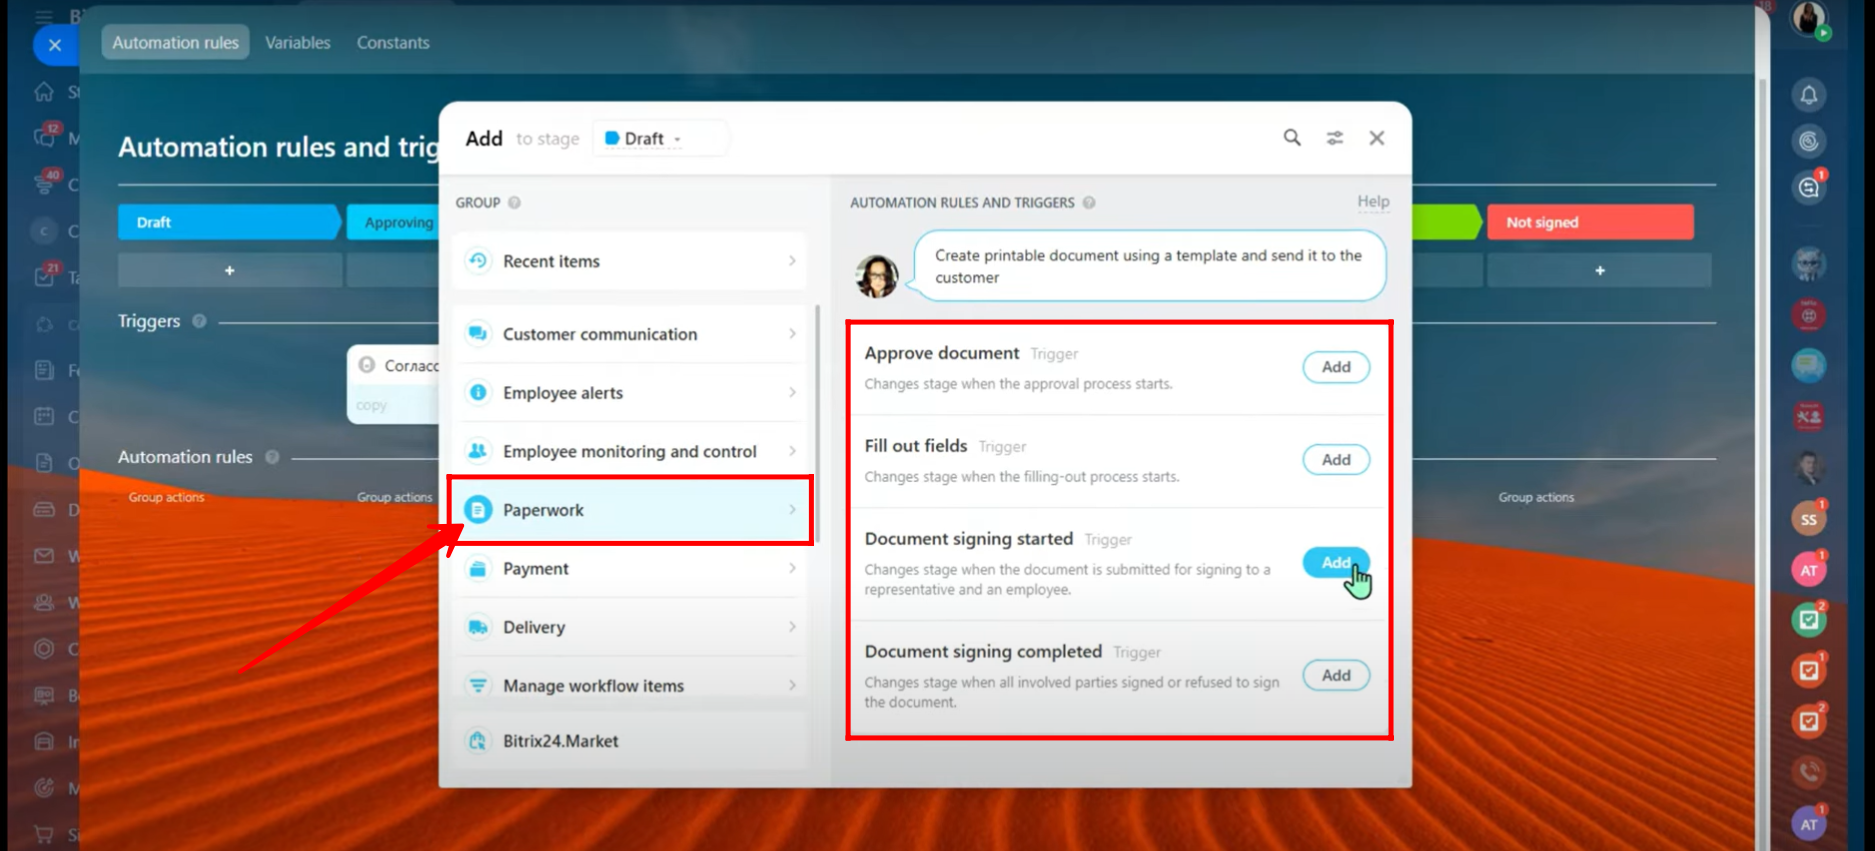
49. Moreover, you can navigate to Automation Rules and add a rule, or trigger from the Paperwork category to automatically track the stages of the document signing process.
You can also watch the video on Youtube