| 664 Views | admin

Collabs in Bitrix24 are designed to help teams work together more effectively, especially when collaboration involves people outside your organization. Instead of using multiple tools or separate chats, Collabs bring conversations, tasks, files, and meetings into one shared space. This makes it easier to keep communication organized and transparent.
With Collabs, internal employees and external guests can communicate in the same chat while staying on their own Bitrix24 portals. This is useful when working with clients, partners, vendors, or external teams. Everyone stays connected without needing to switch platforms or lose context.
In this guide, we will walk through how to create and manage a Collab in Bitrix24. You will learn how to set access permissions, invite internal users and guests, share files, create tasks, schedule meetings, and use built-in tools like polls, calendars, and document signing.
By the end of this article, you will understand how Collabs can be used as a central workspace for communication and coordination. This will help ensure that discussions, tasks, and decisions remain organized and easy to follow for everyone involved.
Detailed Instructions are given below
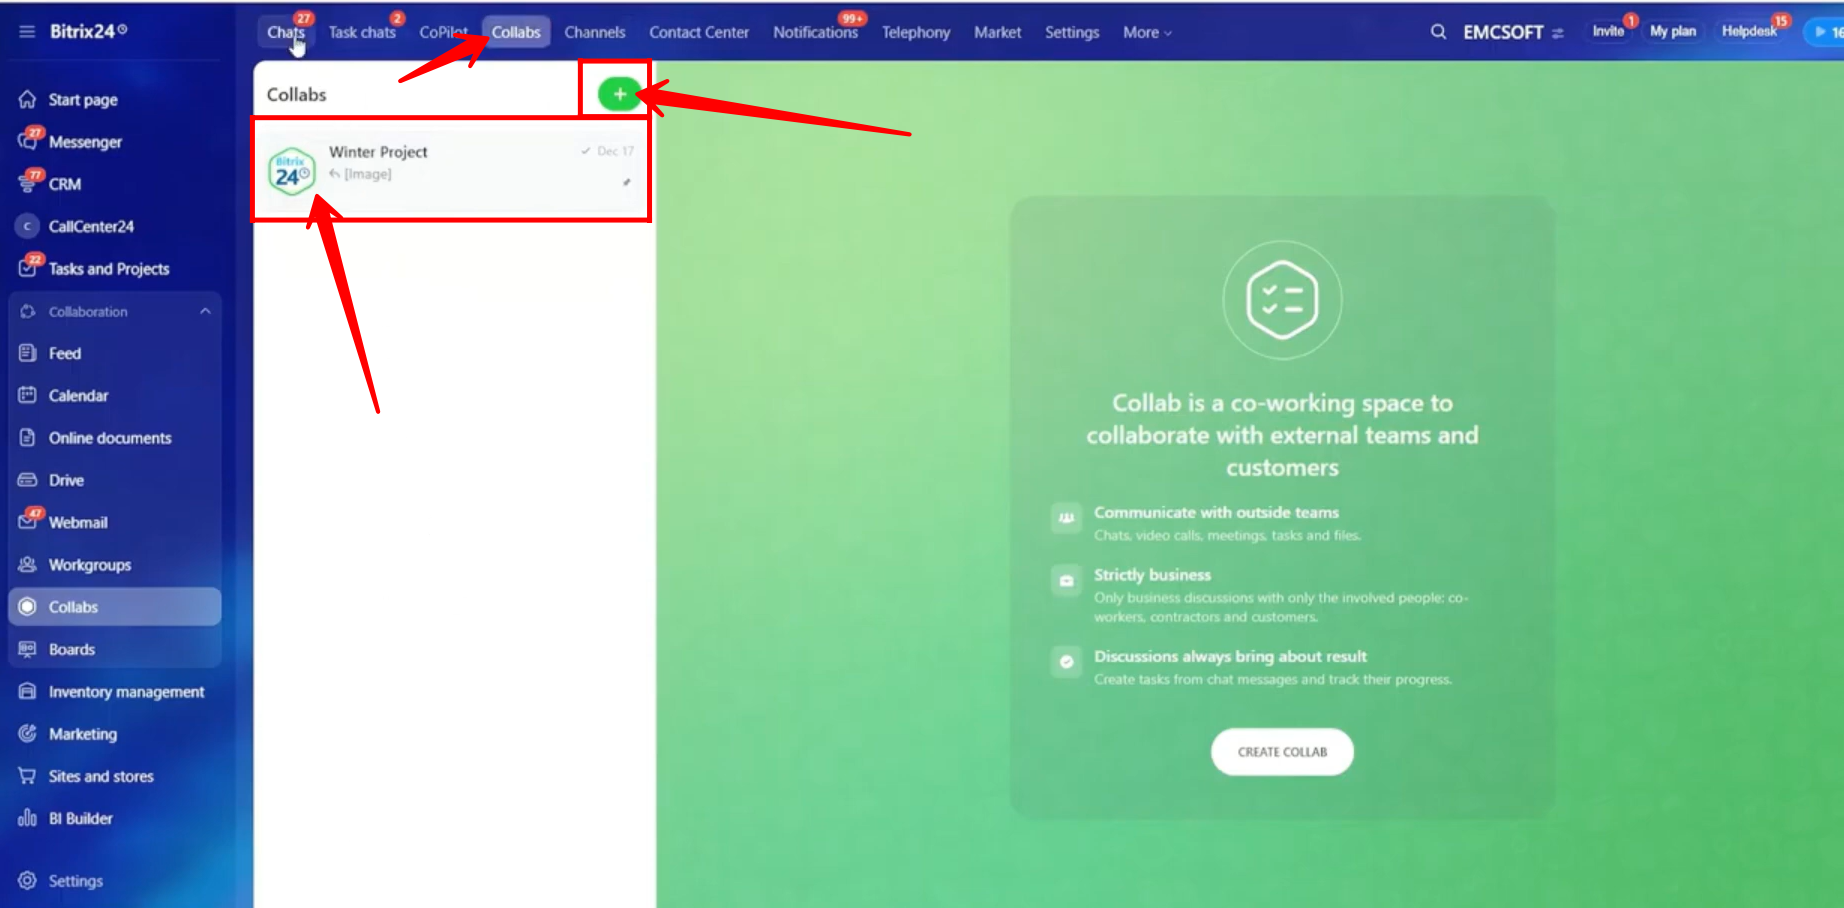
1. Go to Messenger or Collabs in Bitrix24. Collab chats can be accessed from either navigation option.

2. Make sure you are in the Collabs tab if you accessed this section through Messenger. Here, you will see all existing collab chats. Click the “+” icon to create and configure a new collab chat.
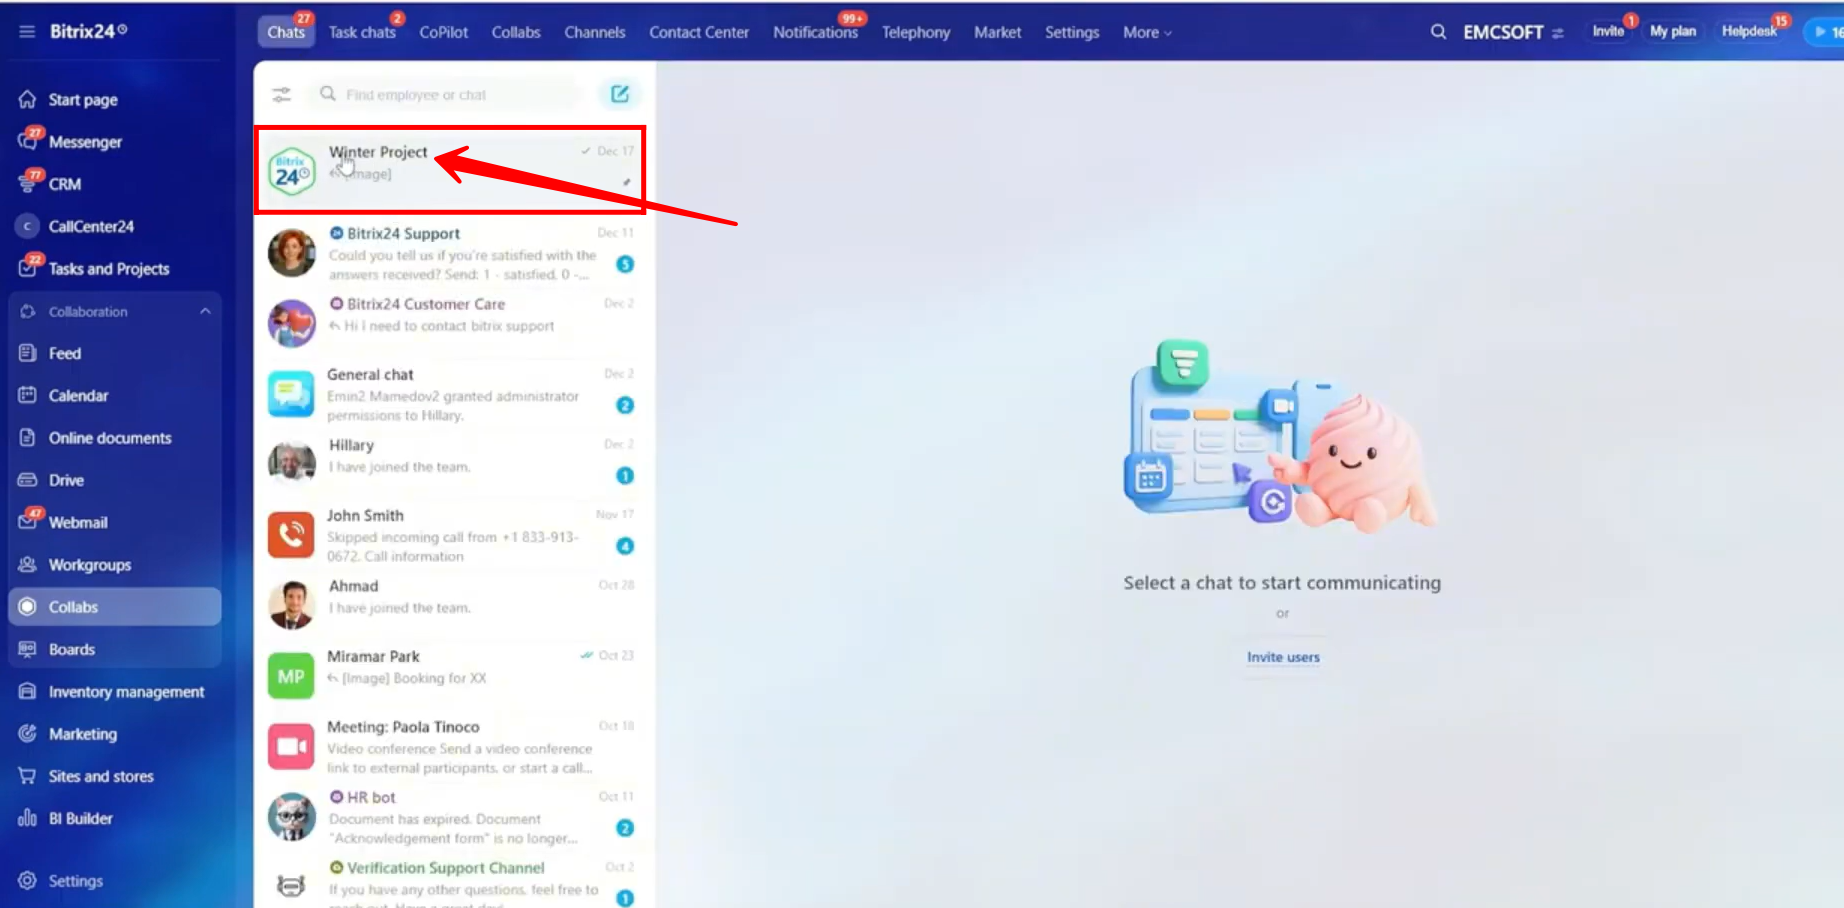
3. If you are in the Chats tab, both general chats and collab chats will appear together. You can pin collab chats here for quicker and easier access.
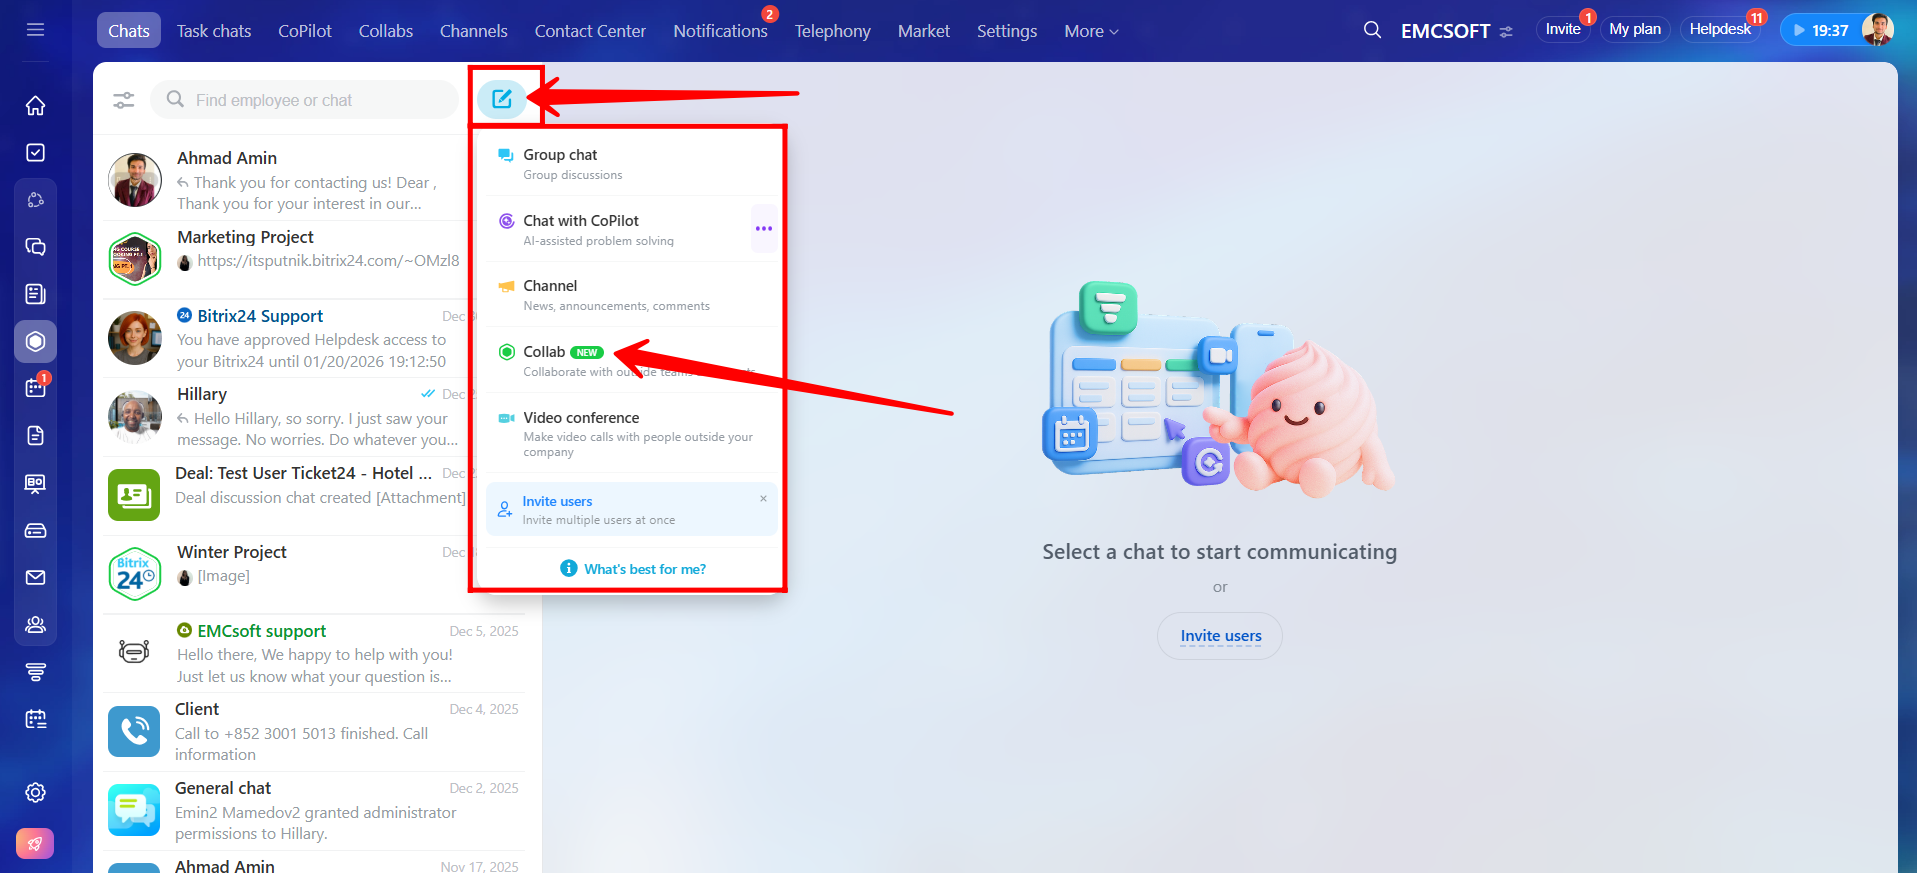
4. Click the Edit (pencil) icon, and you will see an option to create a collab from here as well. Select Collab to proceed.
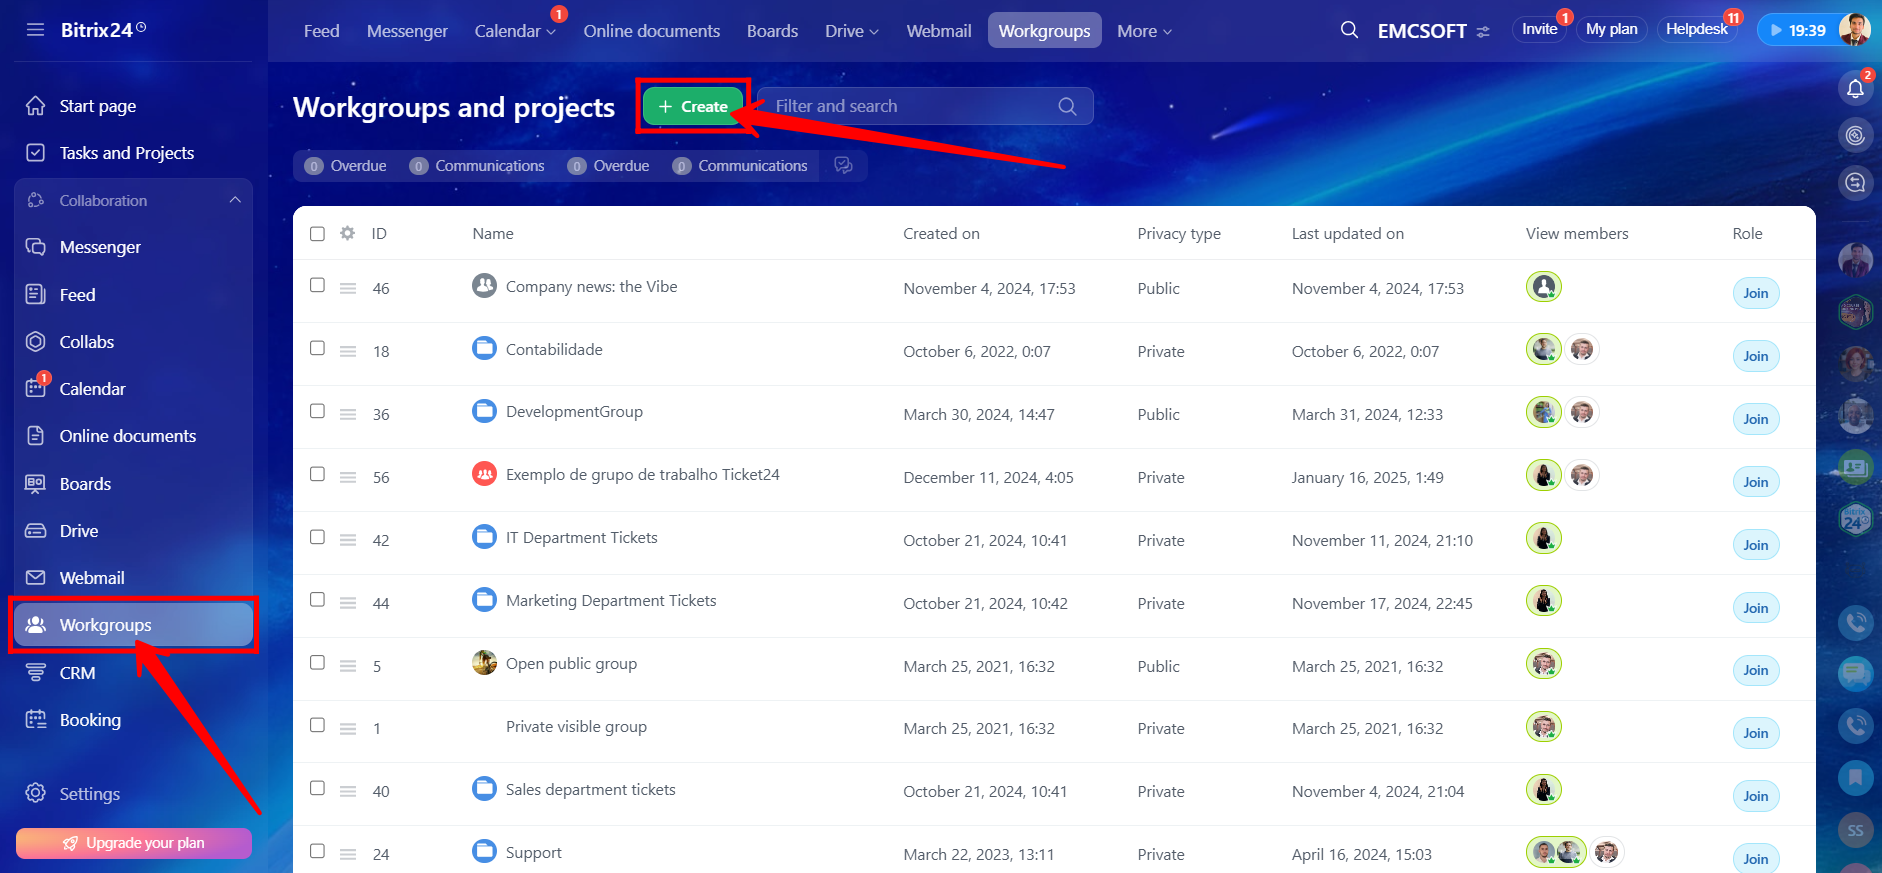
5. Another way to create a collab is to go to Workgroups and click “+ Create.”
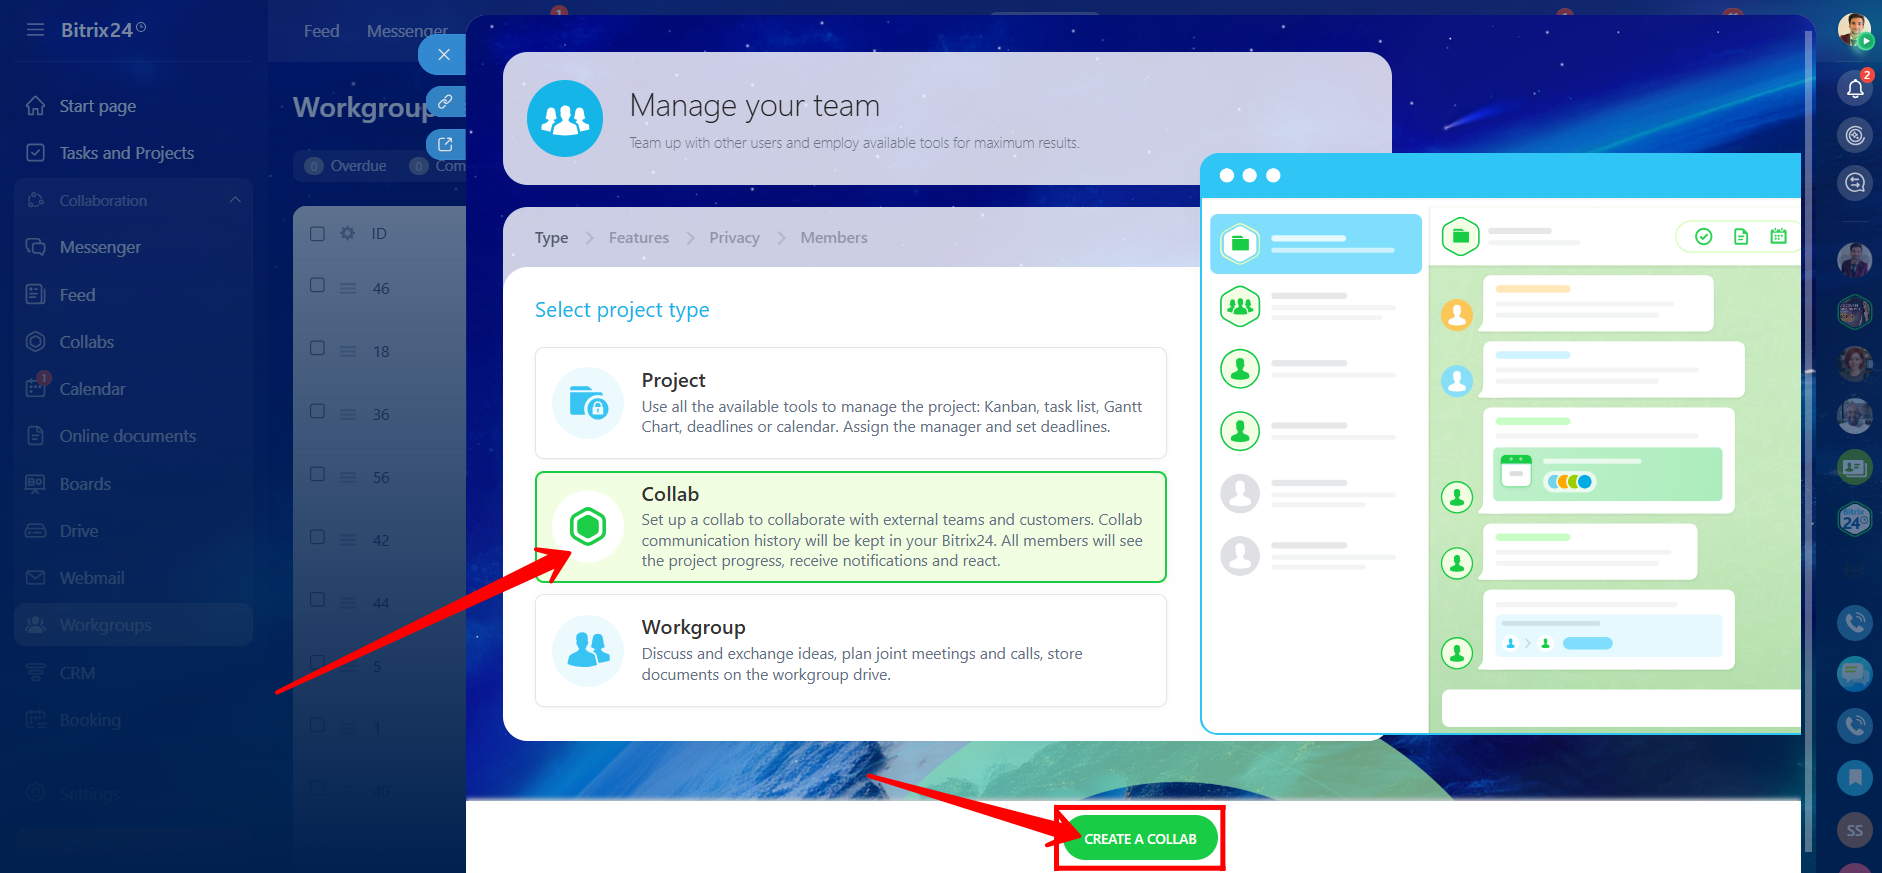
6. Select the project type as Collab, then click “CREATE A COLLAB”.
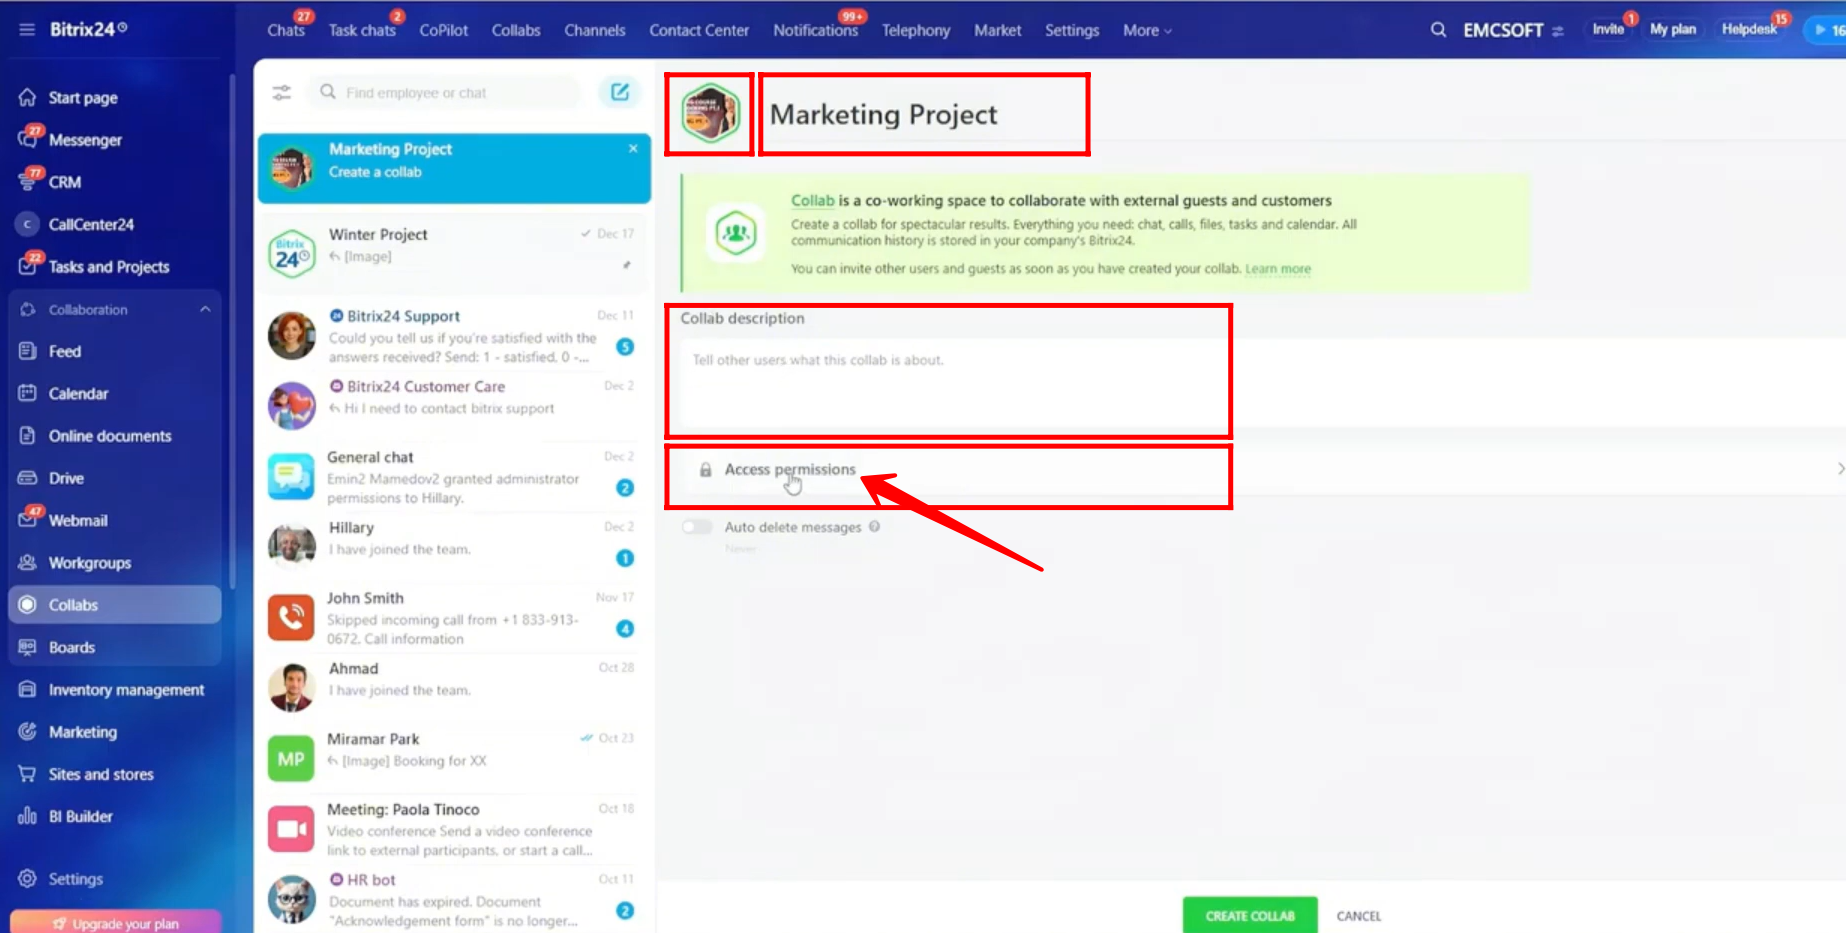
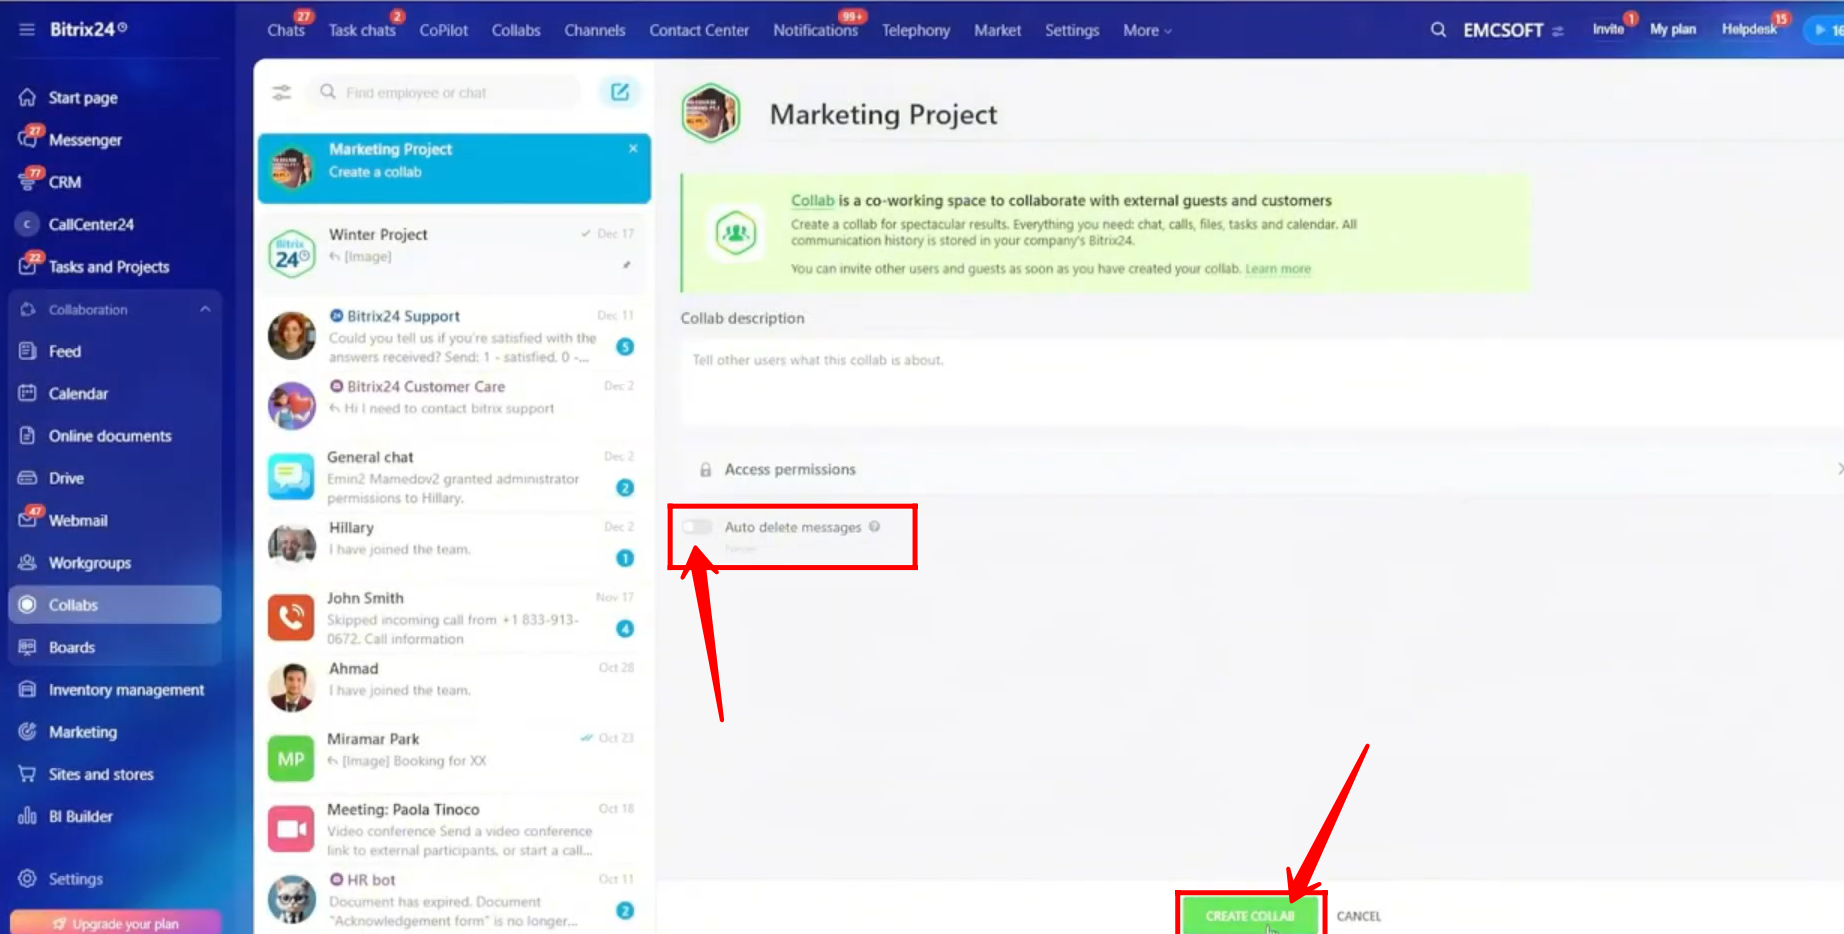
7. Enter the collab chat name, upload a profile picture for the chat, and add a description if needed. Then, navigate to Access Permissions.
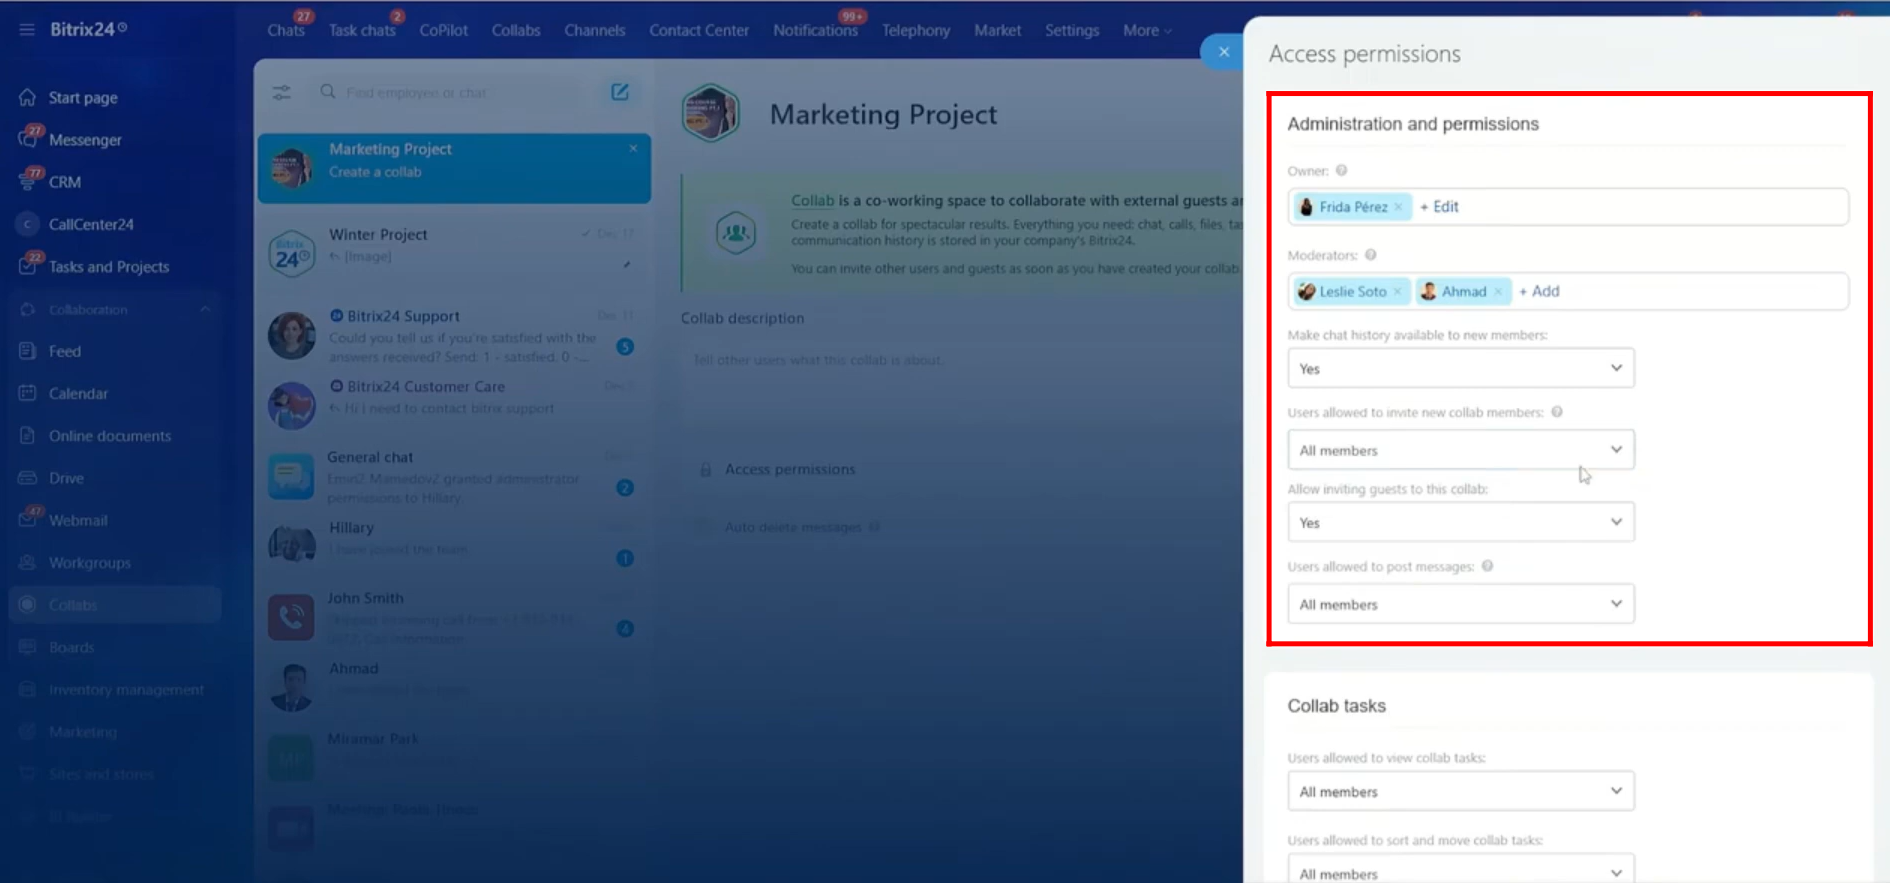
8. Within Access Permissions, under the Administration and Permissions section, you can select the owner and moderators for the collab. Note that owners and moderators can only be users from your own company.
You can then configure the following options by selecting Yes or No, or choosing the appropriate permission level:
- Make chat history available to new members
- Users allowed to invite new collab members: choose from Owner only, Owners and moderators, or All members
- Allow guests in this collab: Yes or No
- Users allowed to post messages: choose from Owner only, Owners and moderators, or All members
The primary purpose of a collab is to collaborate with users from other companies or different Bitrix24 portals in a single shared chat. External members can participate from their own Bitrix24 portals, while your team communicates from your portal within the same collab.
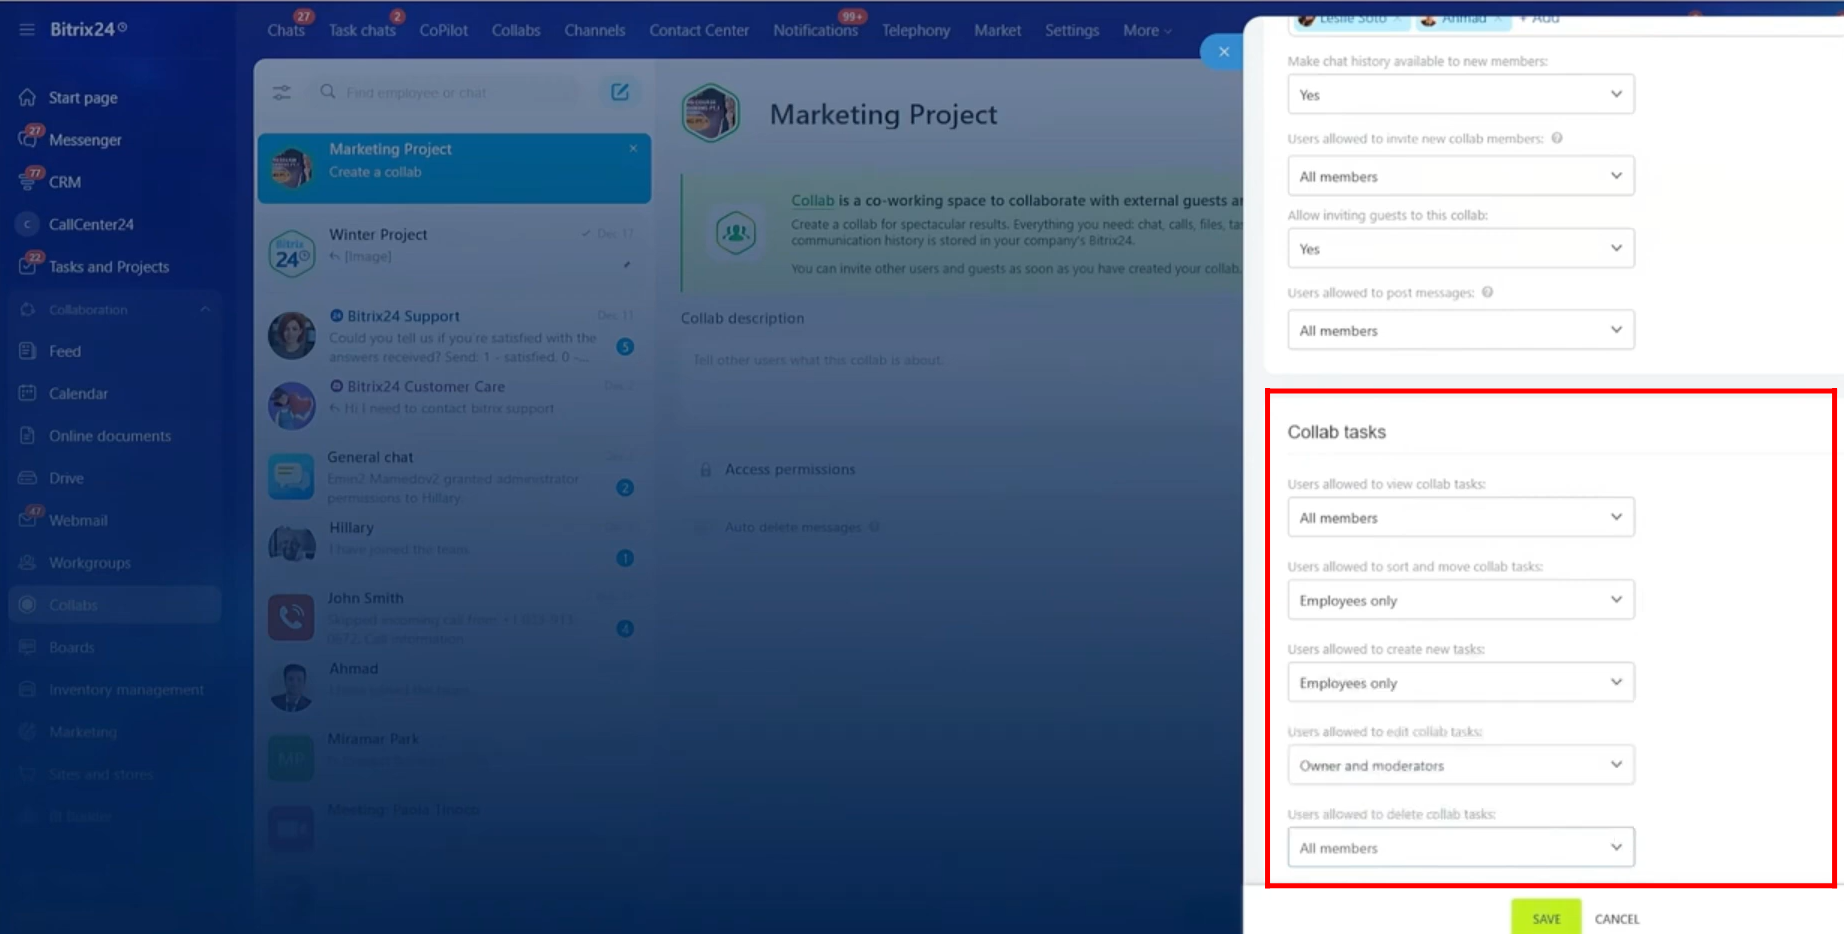
9. In the Collab Tasks section, you can control who can manage tasks within the collab by selecting the appropriate permission level for each action:
- Users allowed to delete collab tasks: Owner only, Owners and moderators, Employees only, or All members
- Users allowed to view collab tasks: Owner only, Owners and moderators, Employees only, or All members
- Users allowed to sort and move collab tasks: Owner only, Owners and moderators, Employees only, or All members
- Users allowed to create new tasks: Owner only, Owners and moderators, Employees only, or All members
- Users allowed to edit collab tasks: Owner only, Owners and moderators, Employees only, or All members
10. After configuring the access permissions, you can choose the Auto-delete messages option and set the duration to Never, 1 hour, 1 day, 1 week, or 1 month. Once selected, click Create Collab to finish the setup.
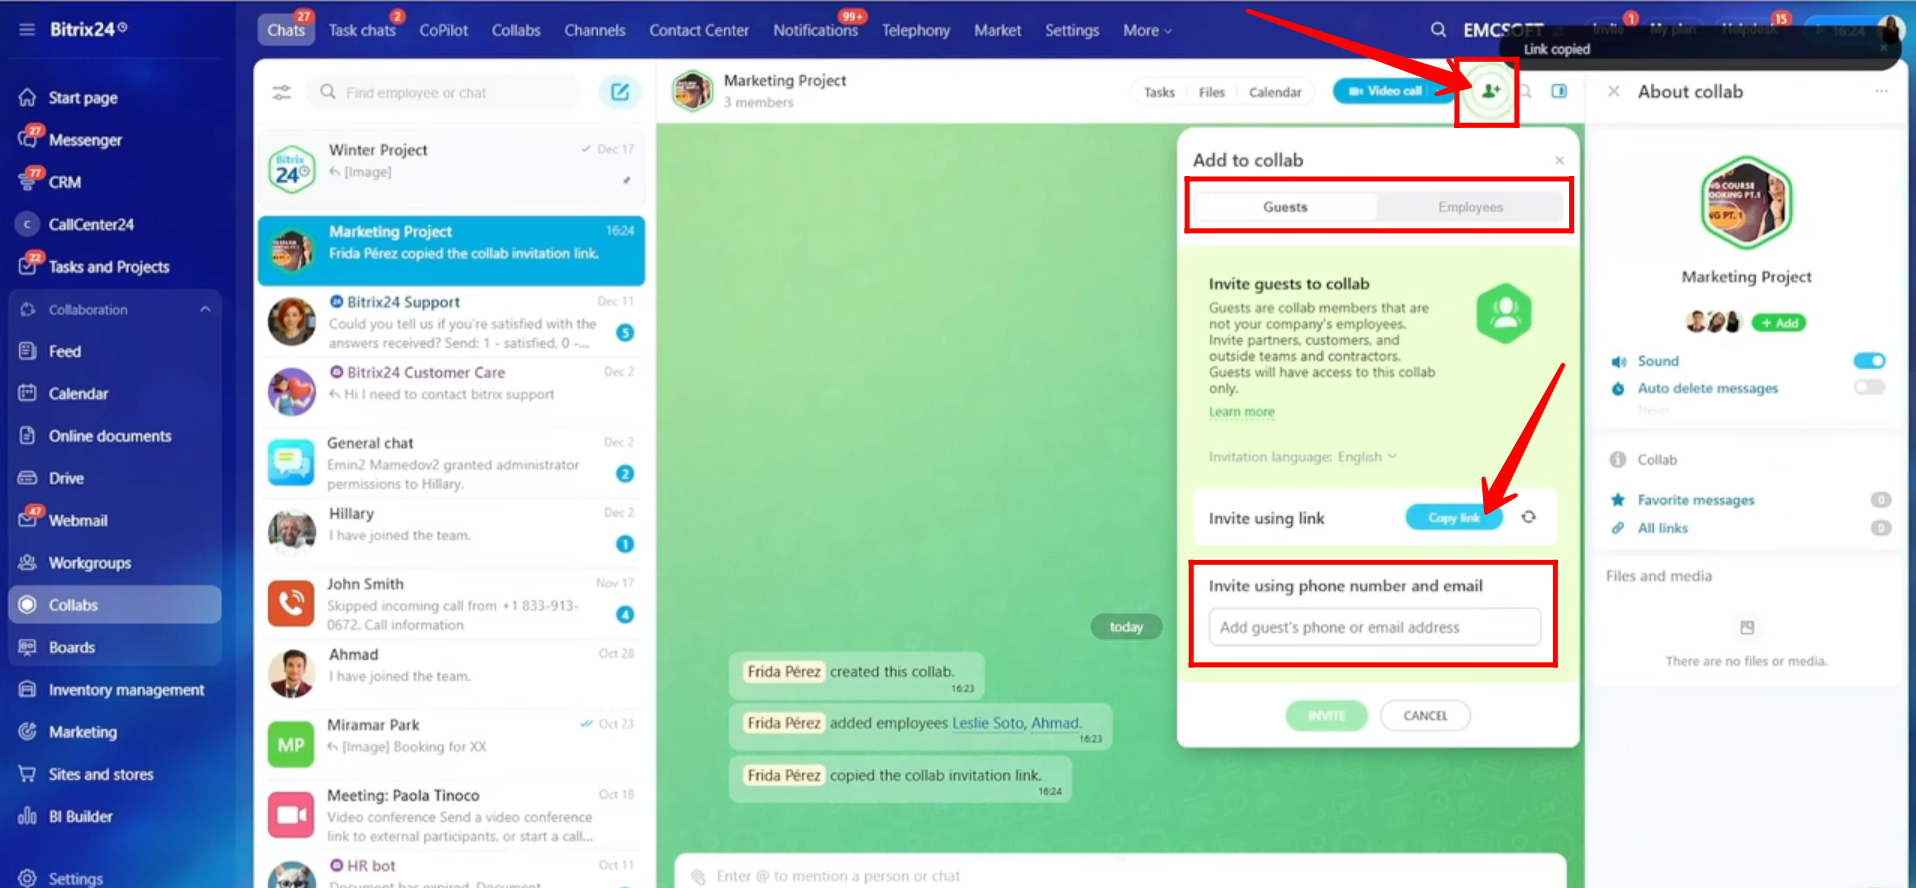
11. Click the highlighted icon to add new members to the collab. Employees from your company can be added easily by selecting them from the list.
To invite someone outside your company, switch to the Guests section. You can copy the collab invitation link and share it with them. When they click the link, they can access the collab chat from their own Bitrix24 portal. Alternatively, you can enter their email address or phone number, and the invitation link will be sent to them automatically.
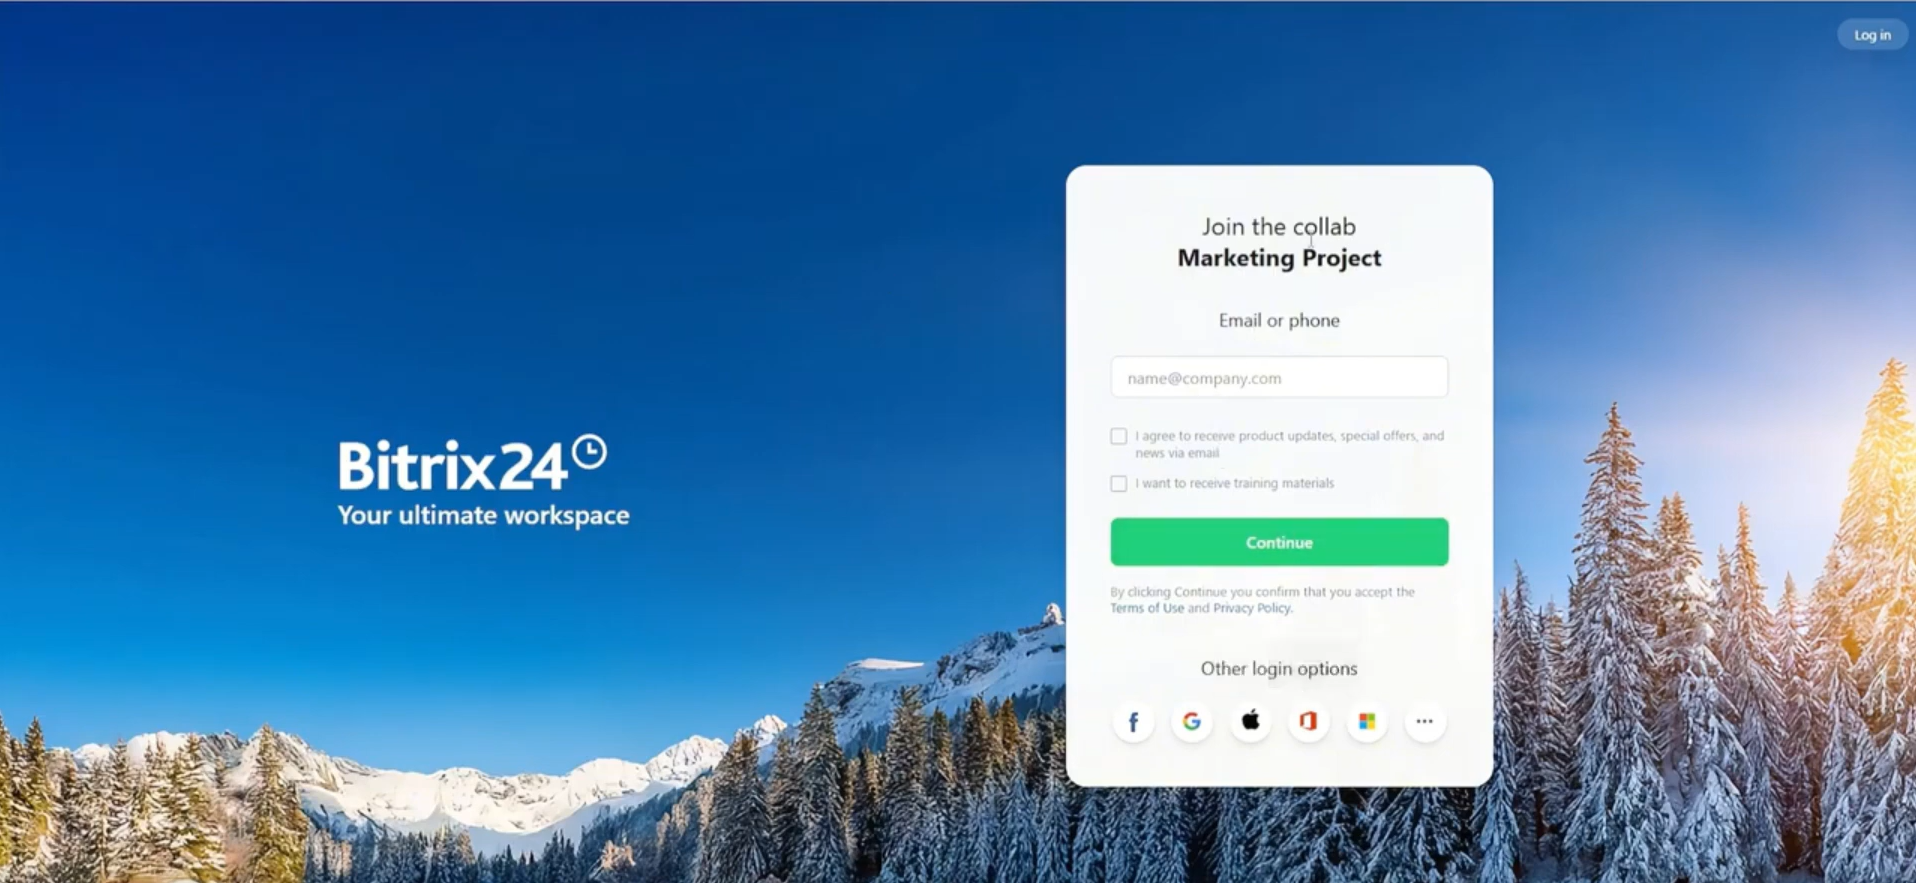
12. When a guest opens the invitation link, they will see a window prompting them to join the collab. If they are not already logged in, they will be asked to sign in first. After logging in, the collab will appear in their chats.
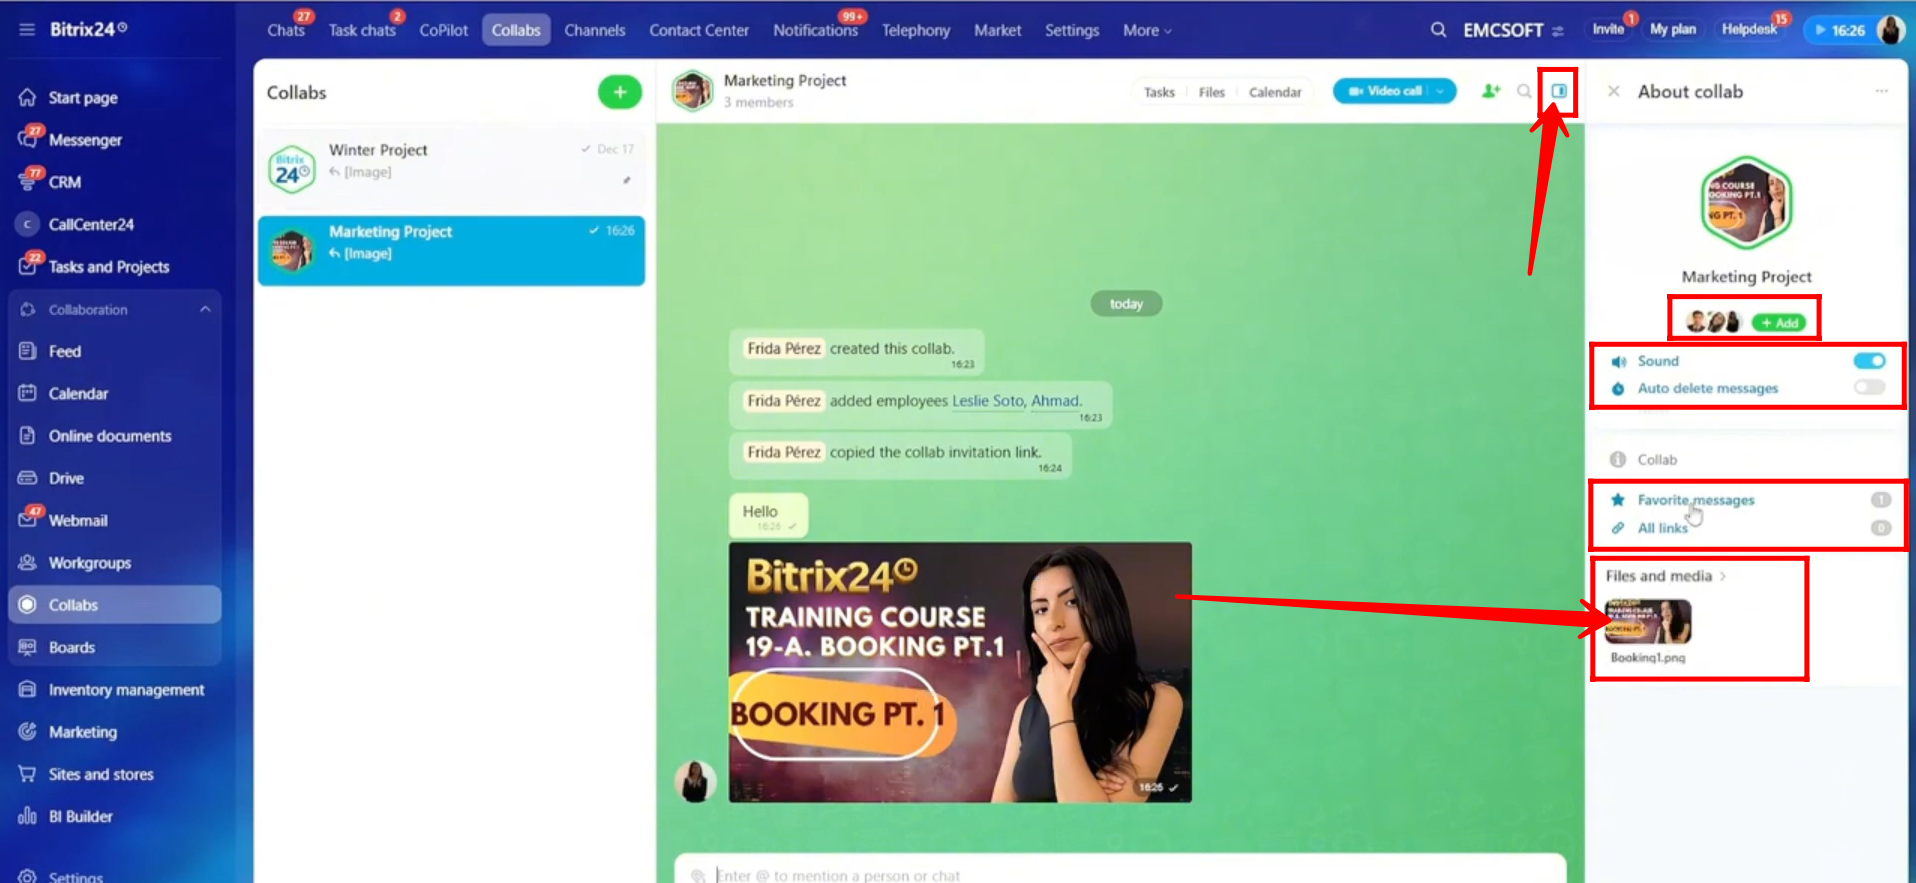
13. Click the highlighted icon to open the sidebar. From here, you can turn notification sounds on or off, enable or disable auto-delete messages, and access all favorite messages, shared links, and media files (documents, images, and videos) from the chats available to you.
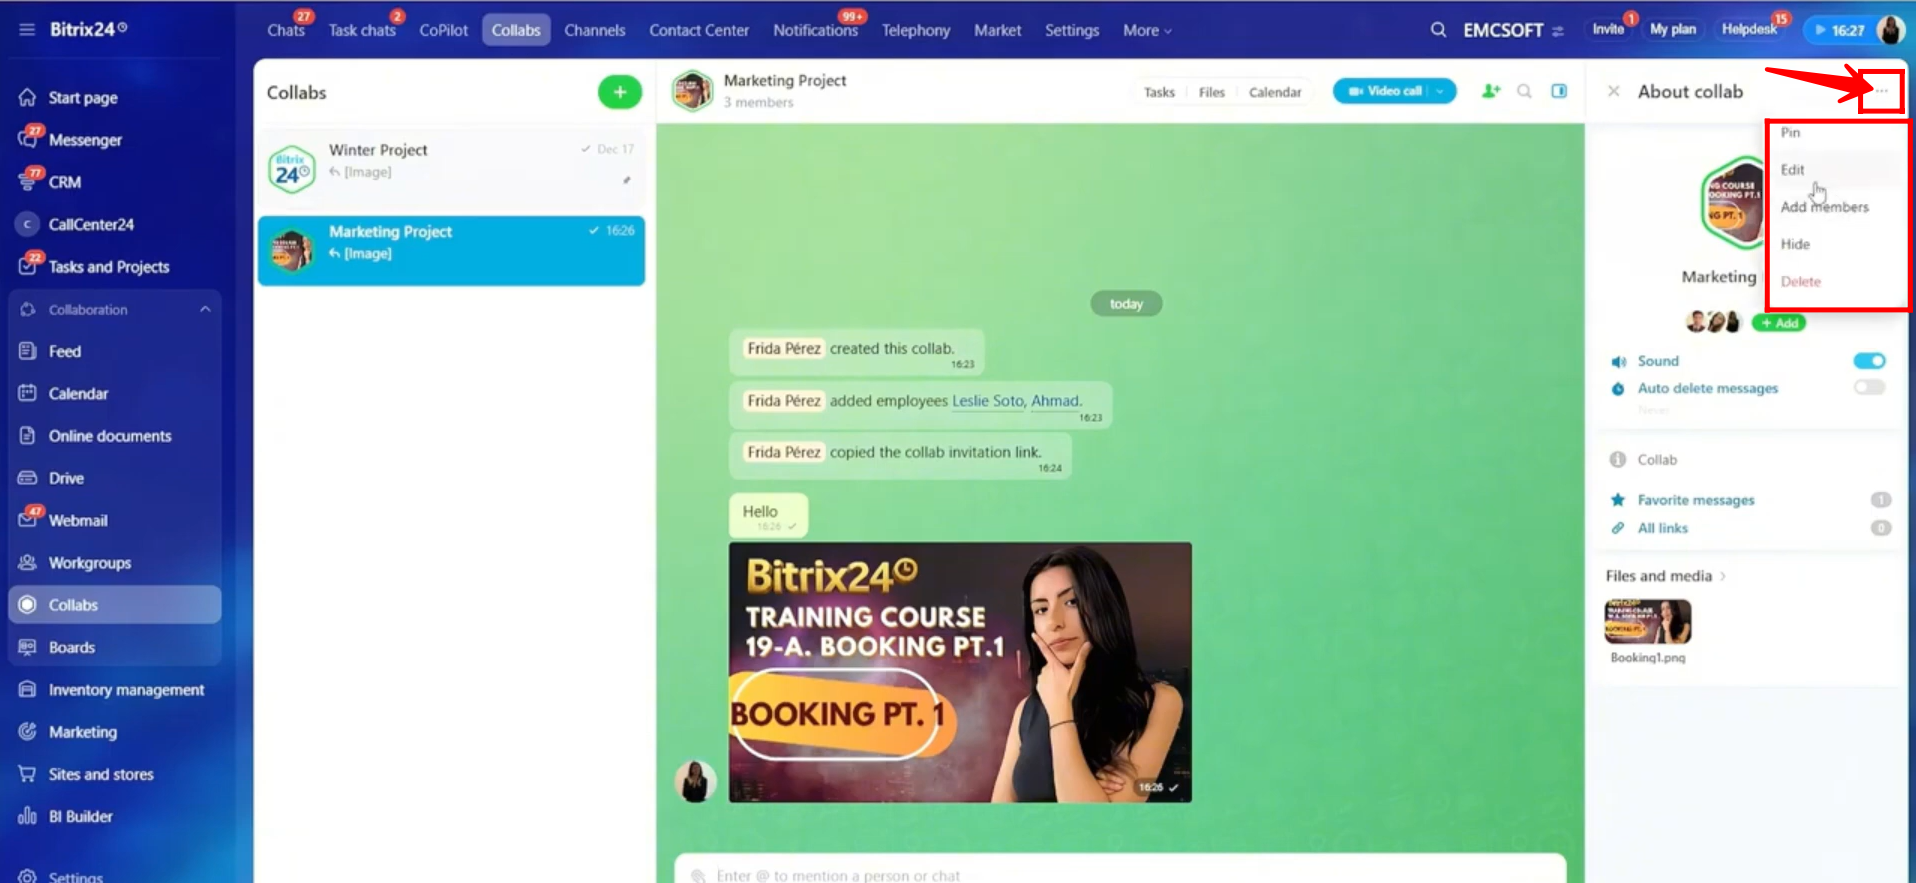
14. If you have the required permissions, click the highlighted three-dots menu. From here, you can pin the collab, edit access permissions, add more members, or hide or delete the collab.
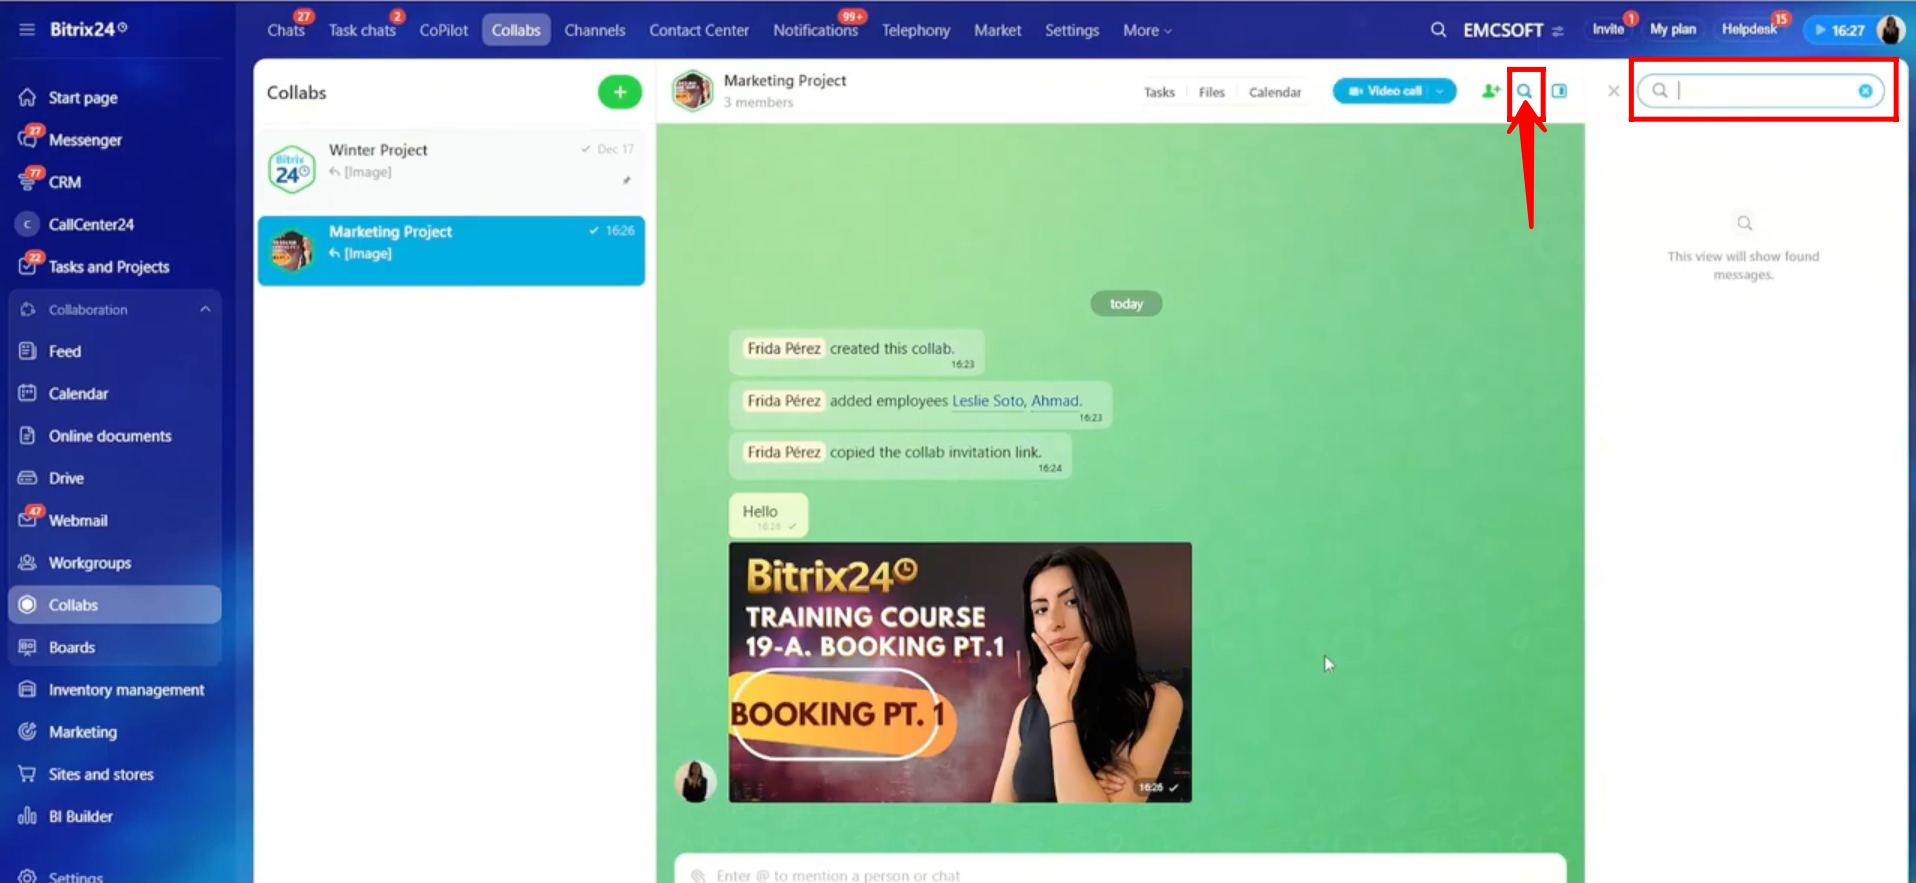
15. Click the highlighted search icon and type in the search bar to find a specific message or file from the collab chat history. When you select a result, you will be taken directly to that message in the chat.
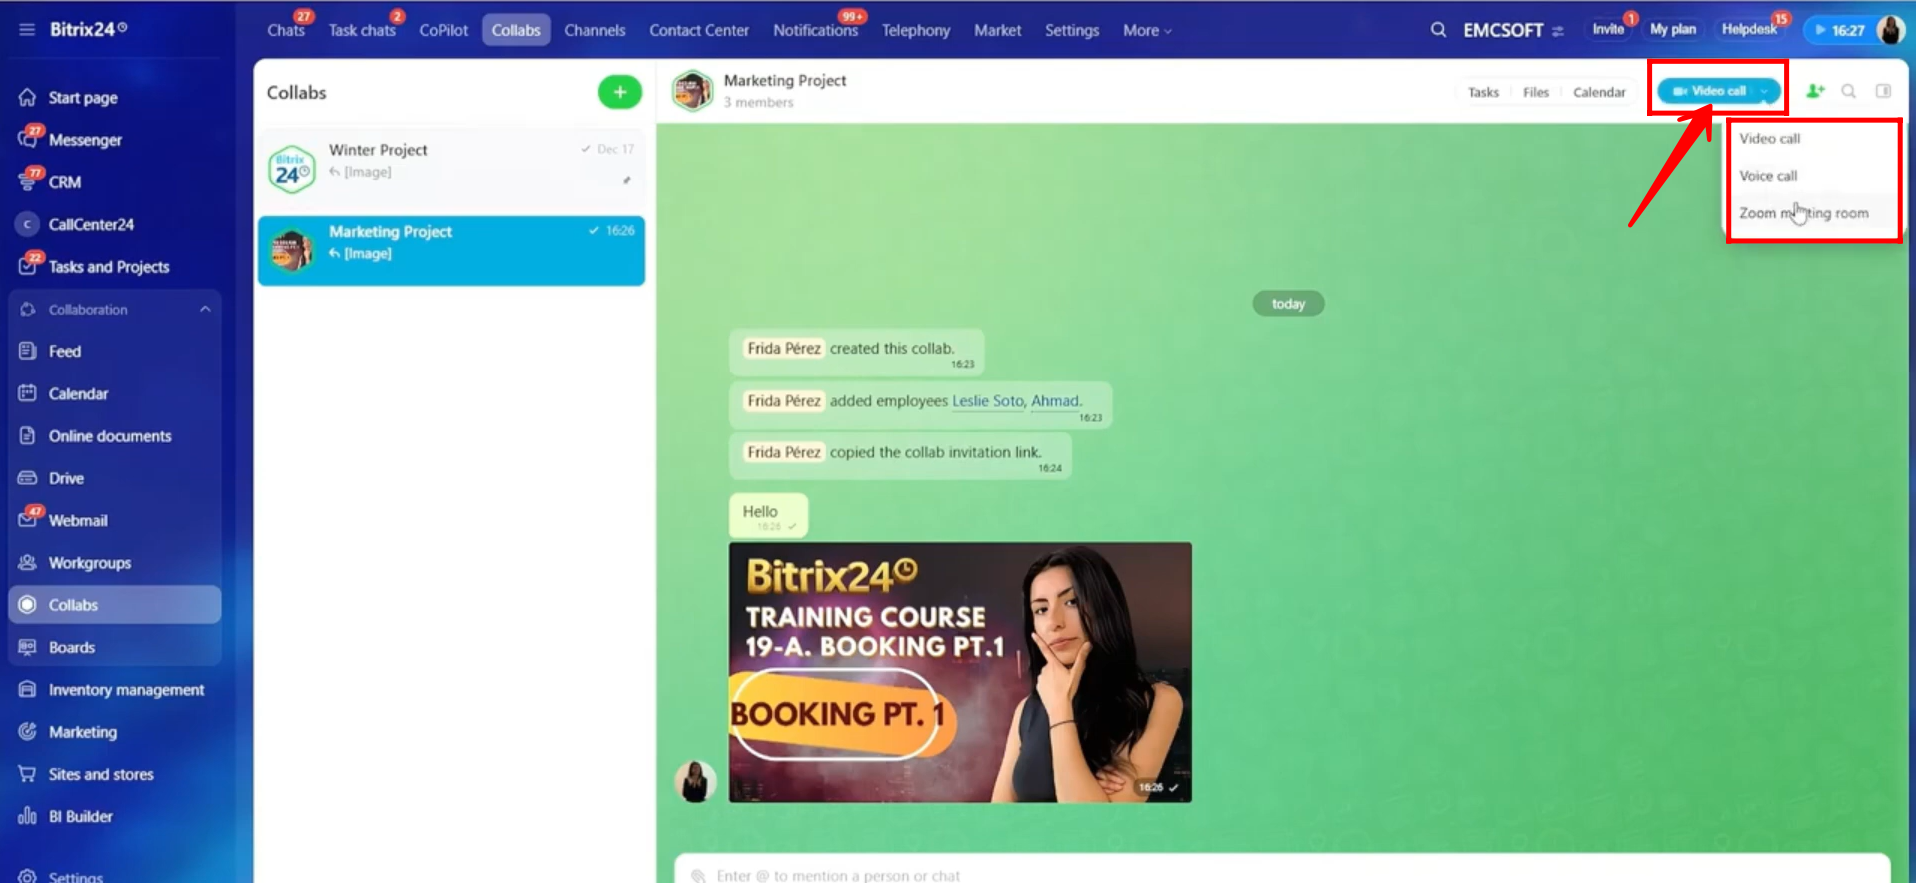
16. Click the highlighted dropdown menu. From here, you can start a voice call, video call, or create a Zoom meeting room directly from the collab.
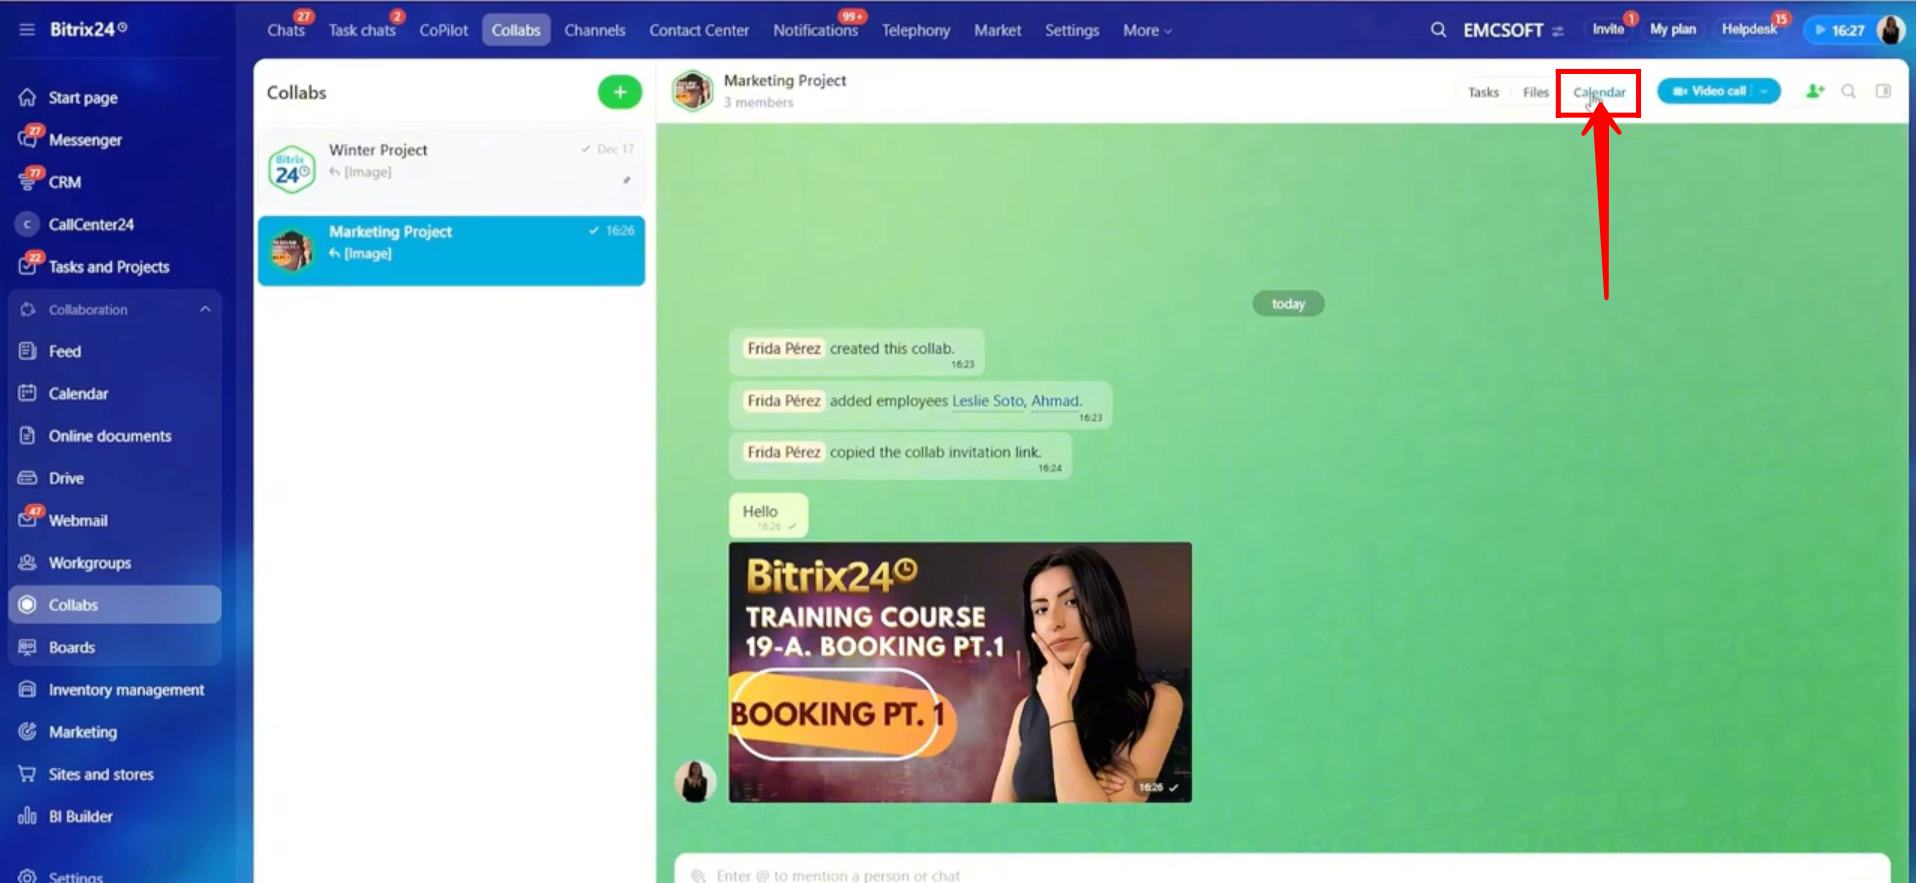
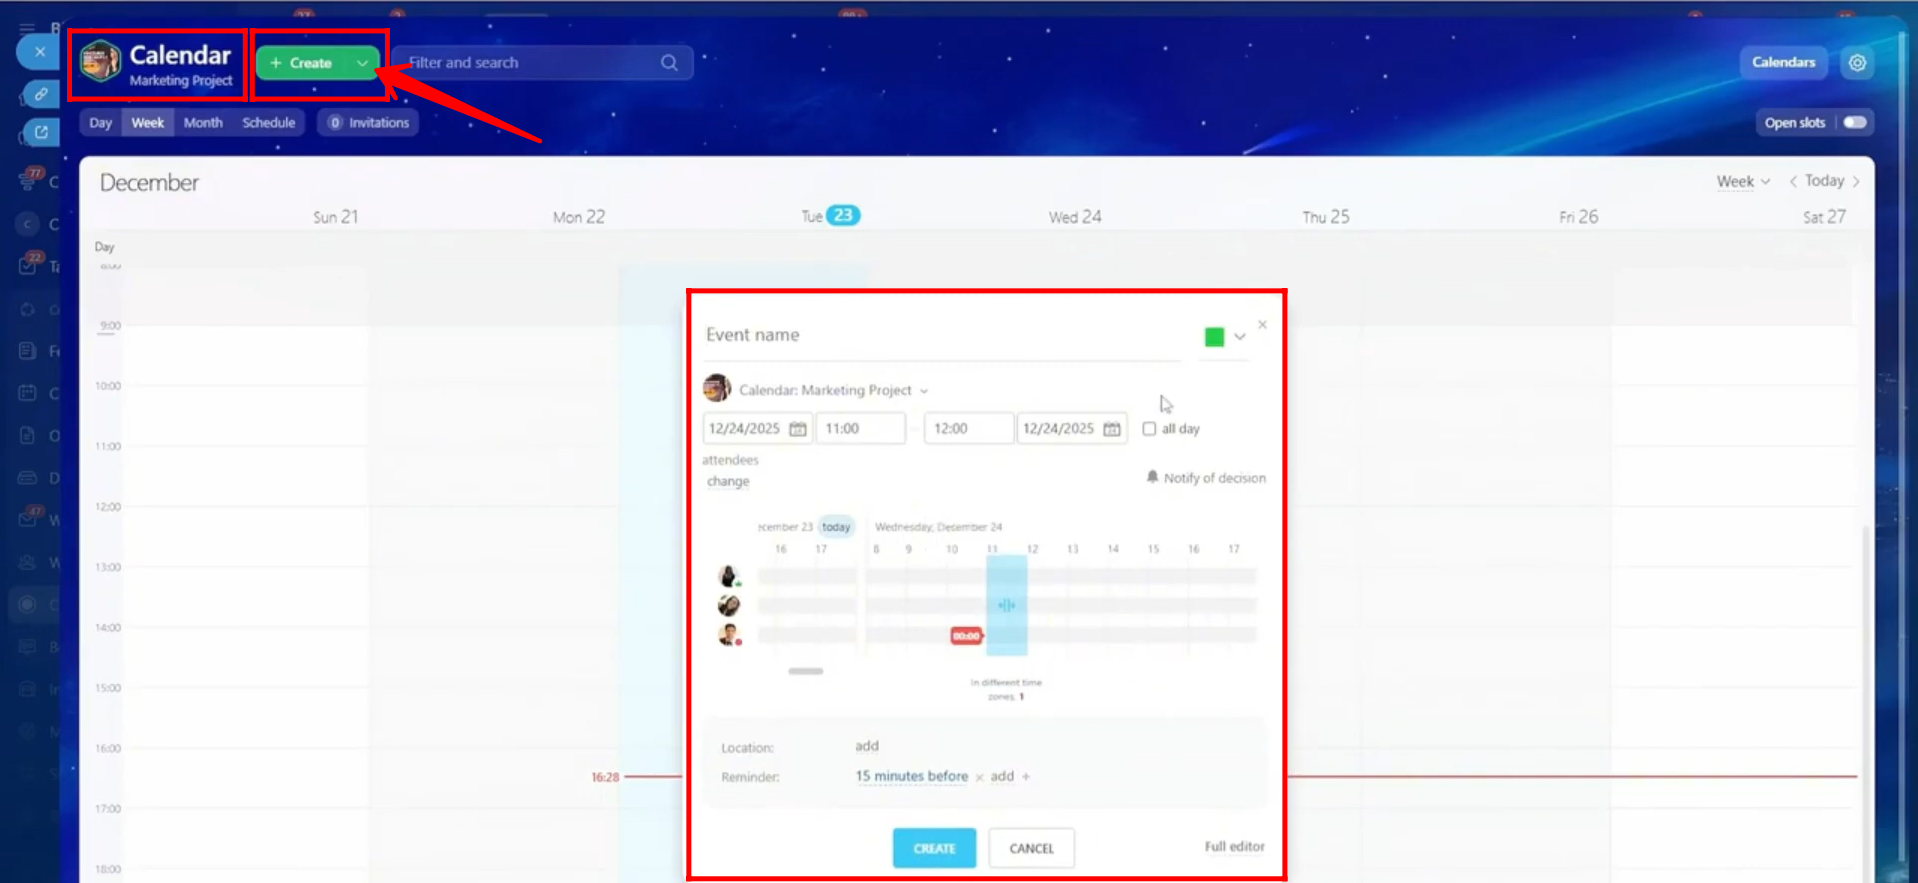
17. Click Calendar to view the calendar created specifically for this collab. This calendar is used to manage events and tasks related to the collab.
18. You can click on a specific time slot to quickly create an event, or use the Create dropdown to choose whether to create an event or a task. You can also click Calendars in the top-right corner, next to Settings, to select multiple calendars and view all related events and tasks at the same time.
19. Now, click Files, and you will be redirected to the Bitrix24 Drive. Here, all files related to this collab are stored in a dedicated folder created specifically for it.

20. Here, you can open the Uploaded Files folder to view all files shared in the collab, or create new files and folders as needed.

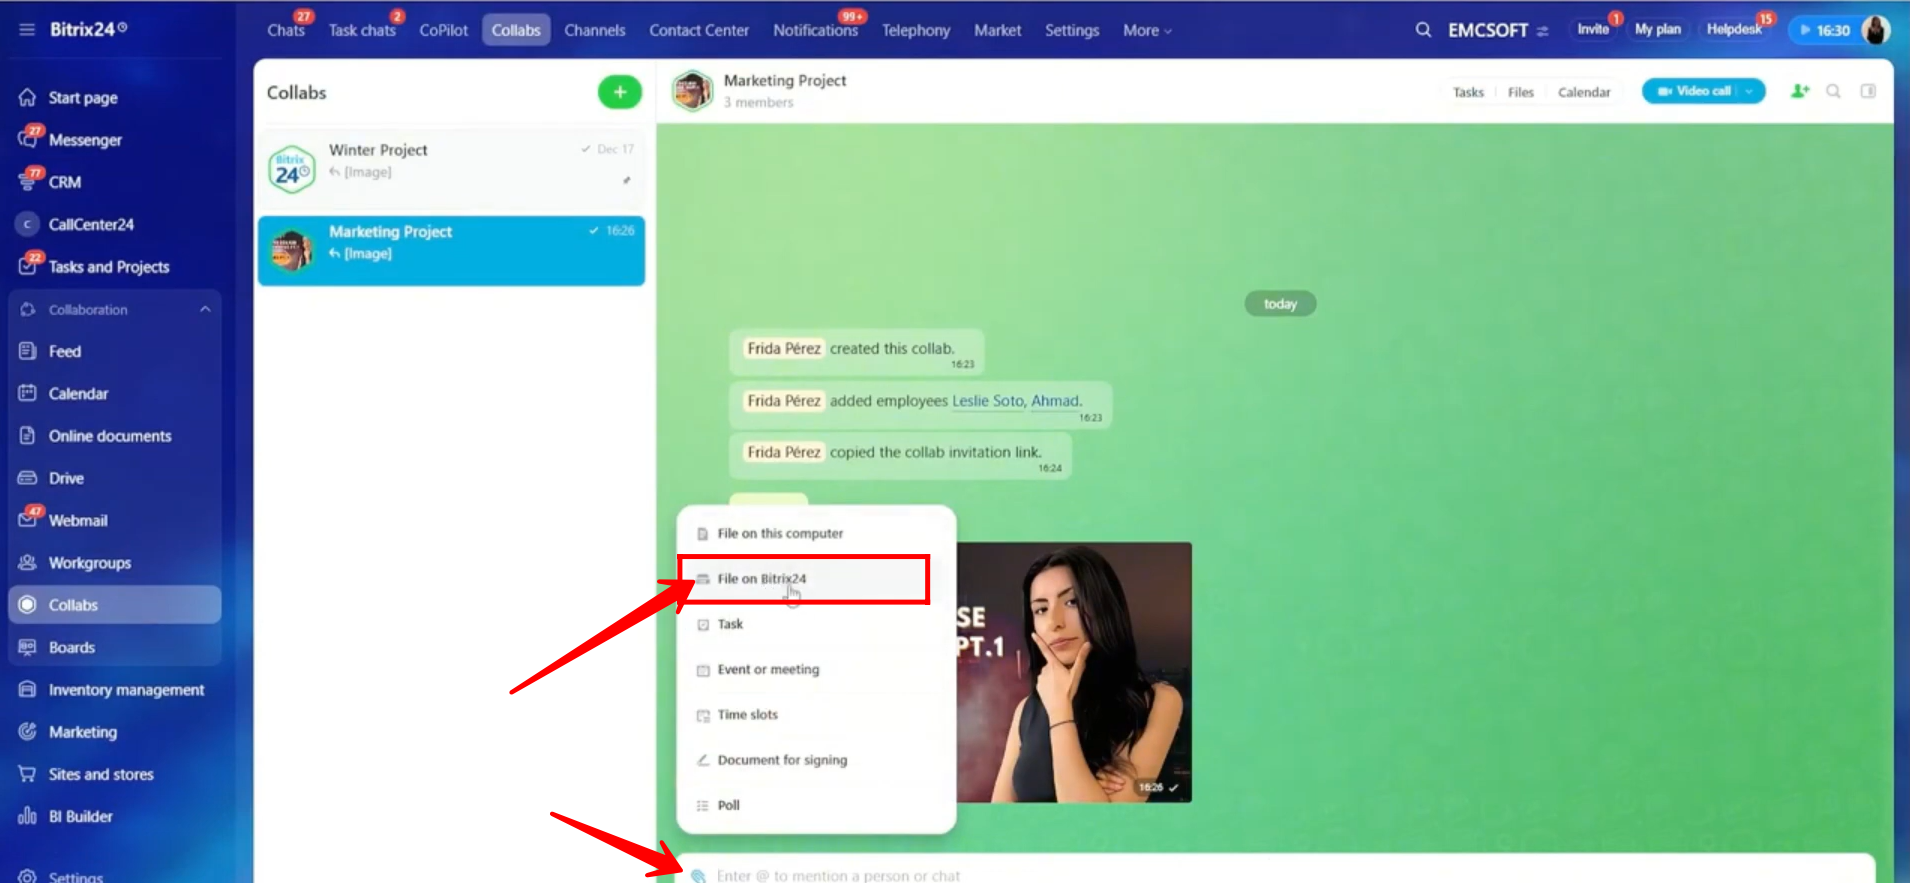
21. In the chat input box, click the highlighted icon. You will see the option “Files on Bitrix24” under “Files on this computer.” Click Files on Bitrix24 to proceed.
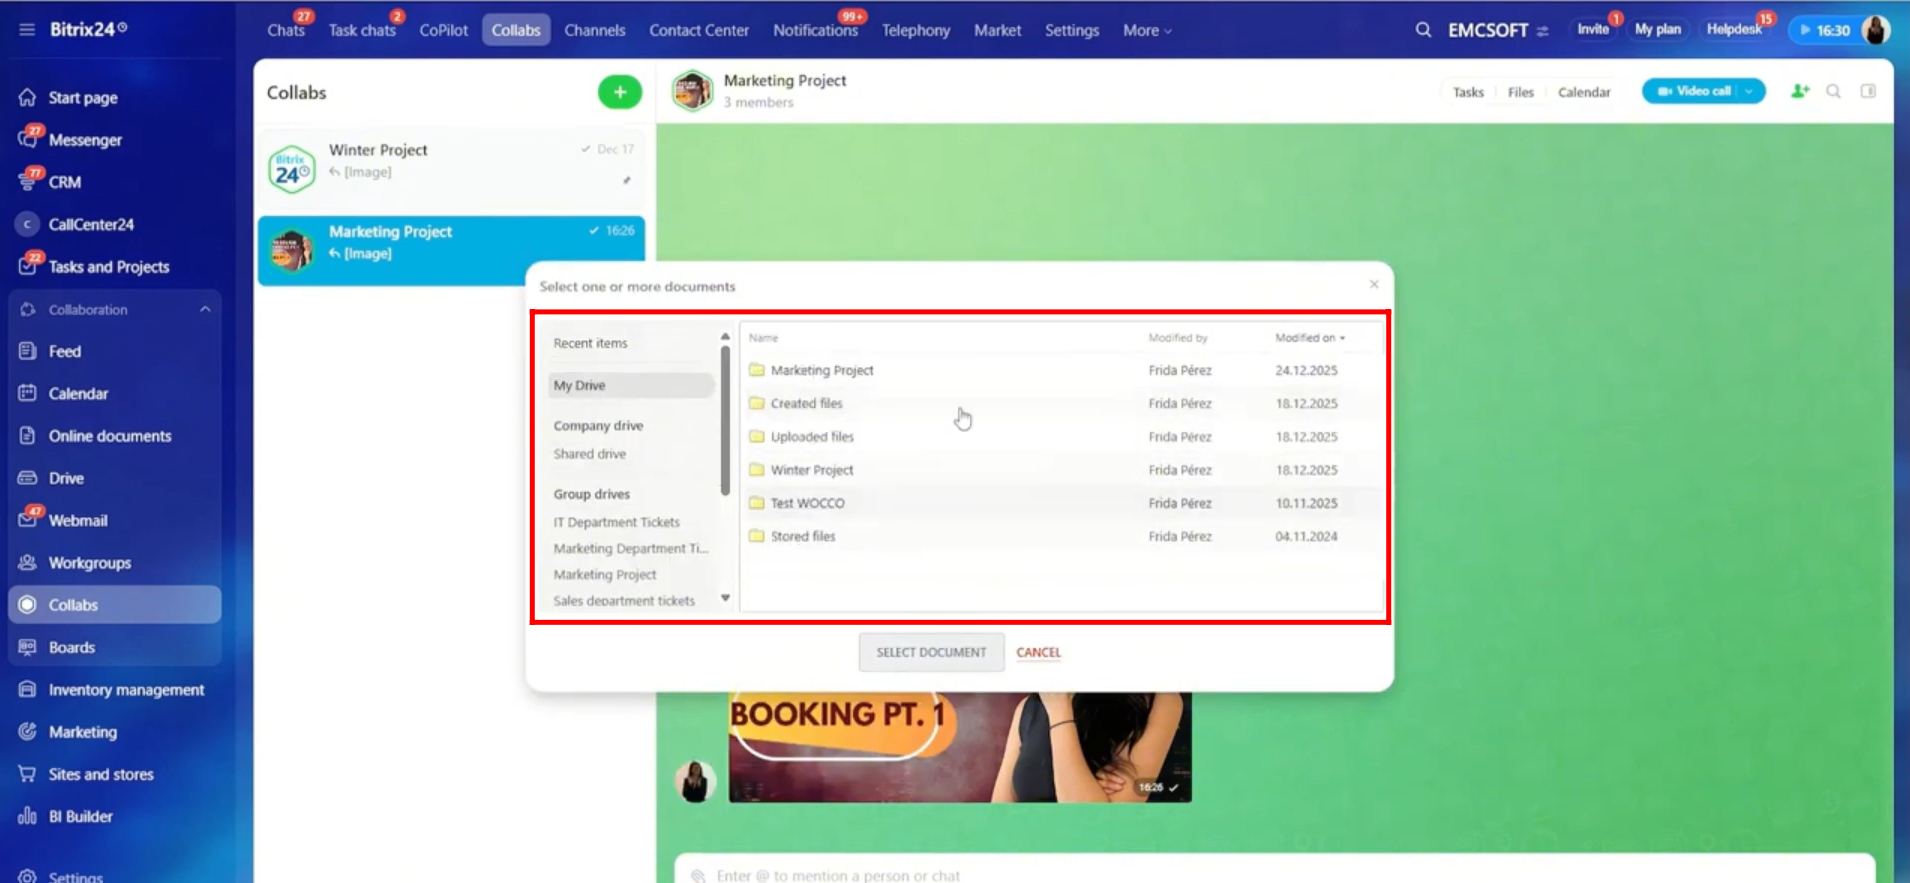
22. Here, you can select any file from the Bitrix24 Drive, not only files related to this collab. Once selected, you can share the file directly in the chat.
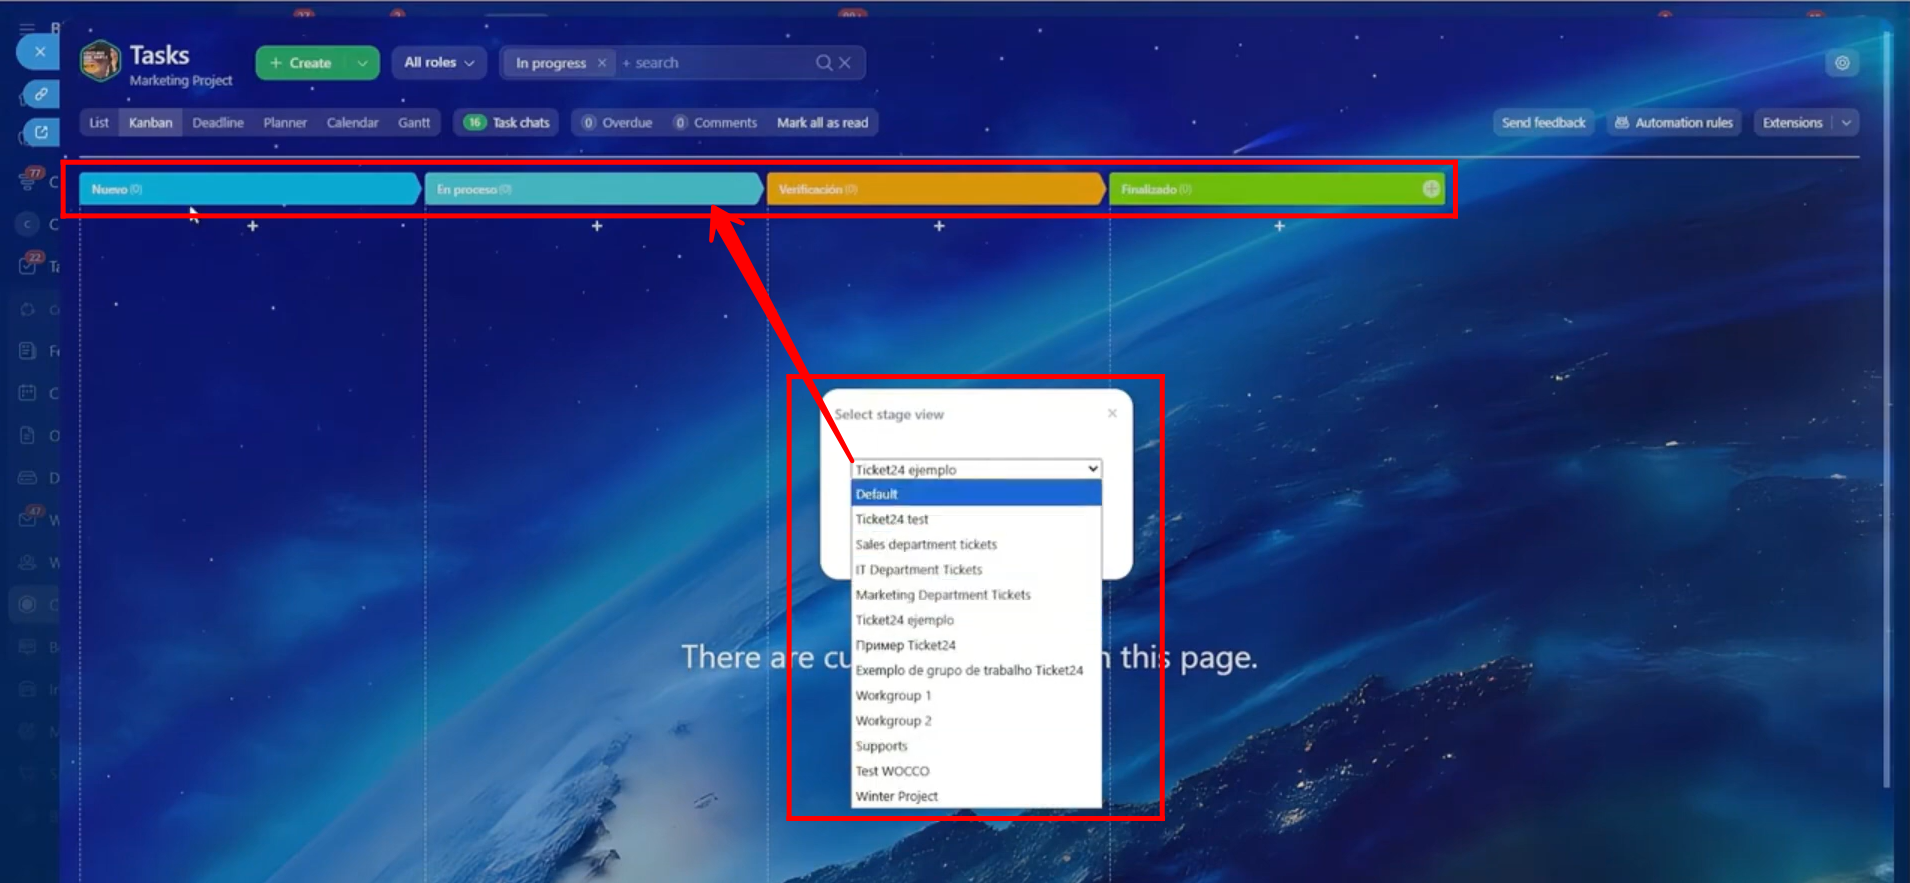
23. Now, click Tasks, and you will be redirected to the Tasks section, where you can manage all tasks related to this collab.

24. Here, you will have the option to set the task stage view, similar to other workgroups or deal pipelines, or switch to the default view as needed.
25. By clicking “+ Create”, a quick task editor will appear, allowing you to add basic information and create a task quickly. You can also click “Detailed form” to open the full task editor and add more detailed information.
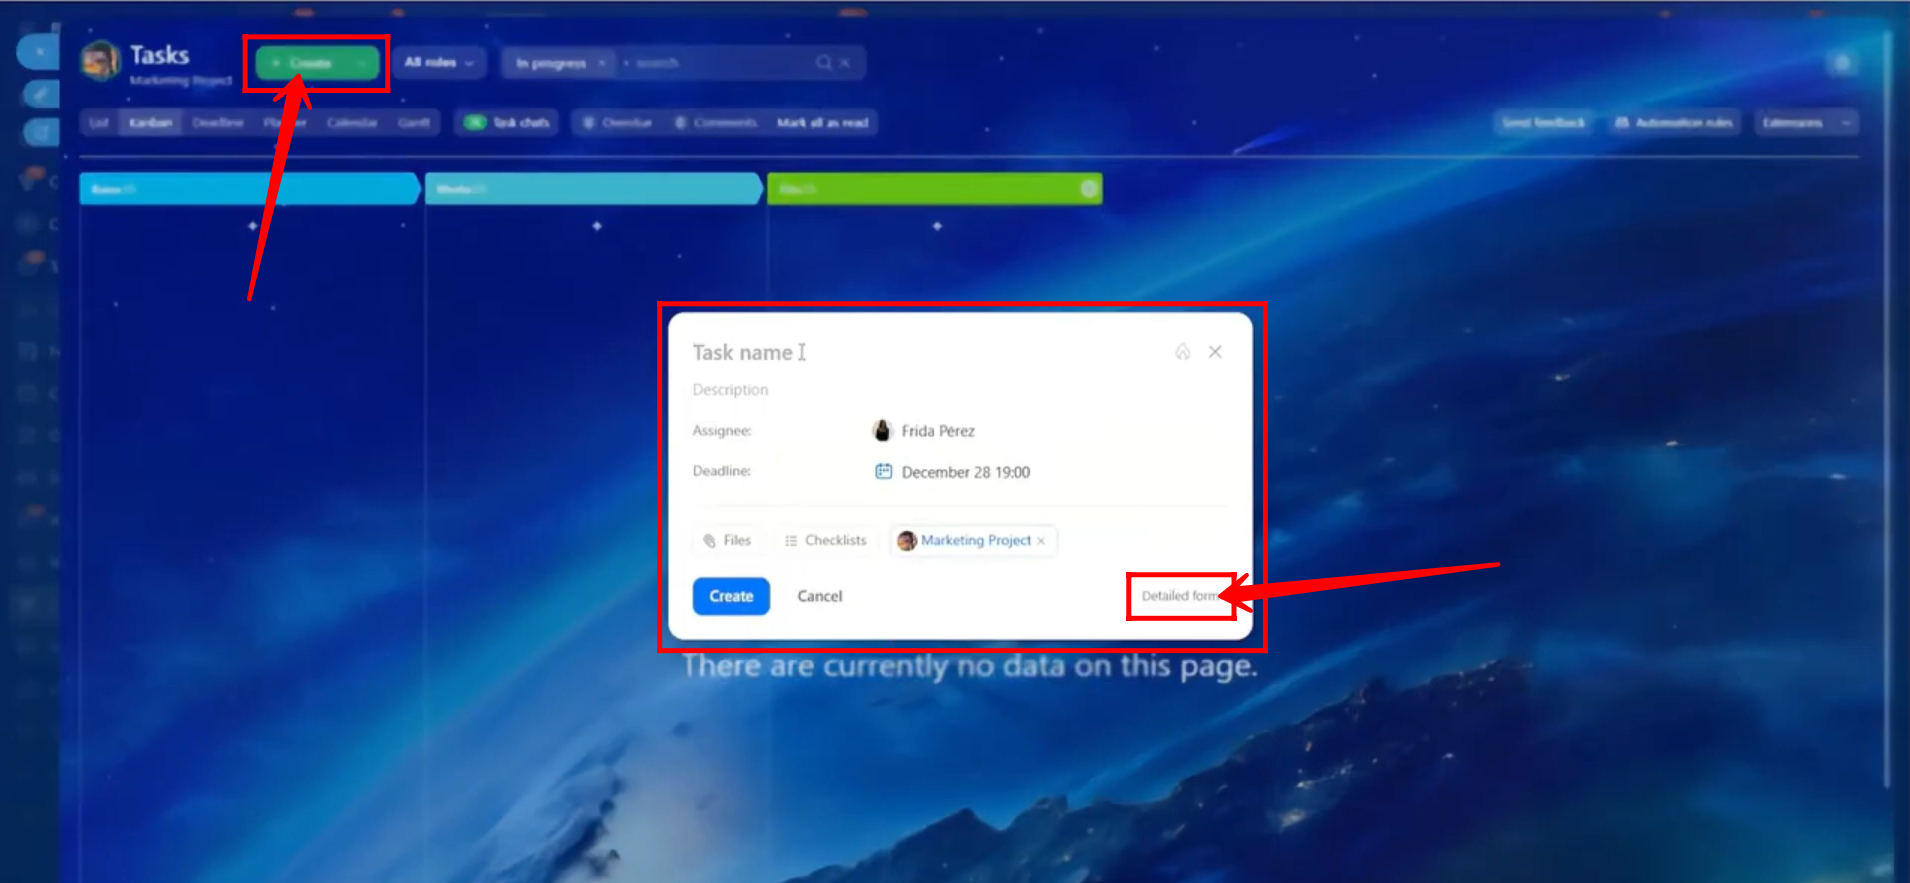
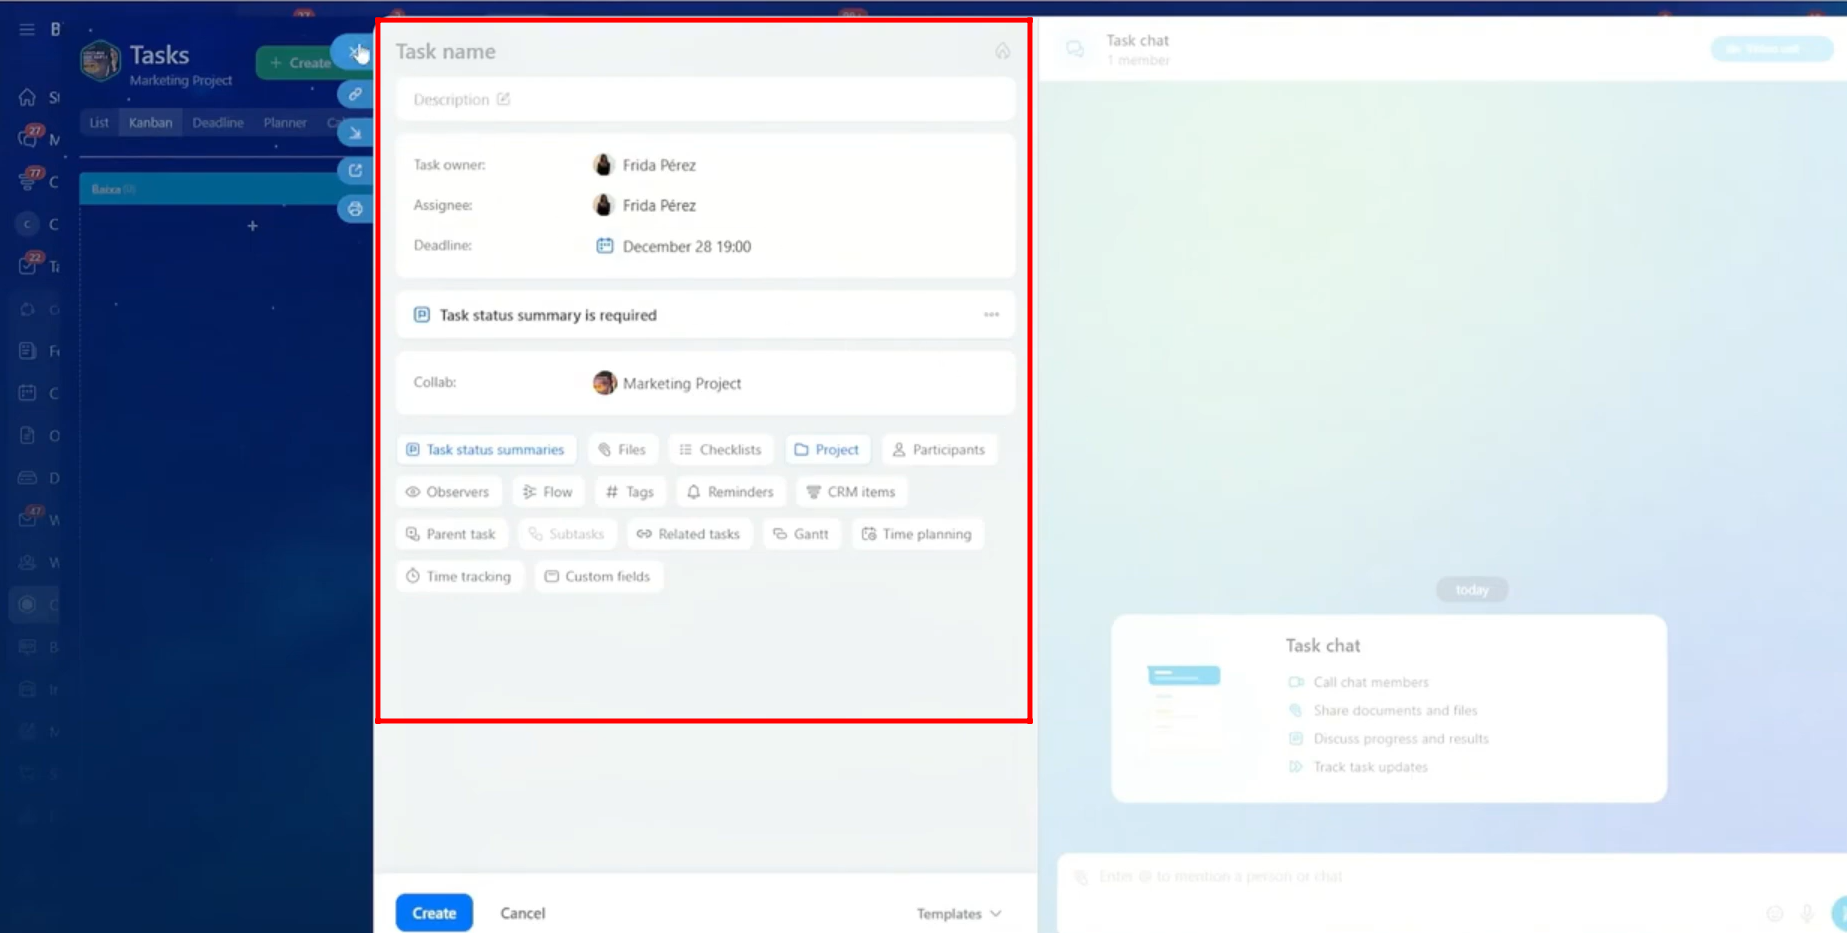
26. You can add the task name, description, task owner, assignee, and deadline. You can also set reminders, add tags, attach files, and include any other required details. This task will be specifically linked to the current collab.
Task members can communicate directly within the task itself, keeping all task-related discussions organized. This ensures that conversations related to a specific task take place inside the task, rather than in the general collab chat.
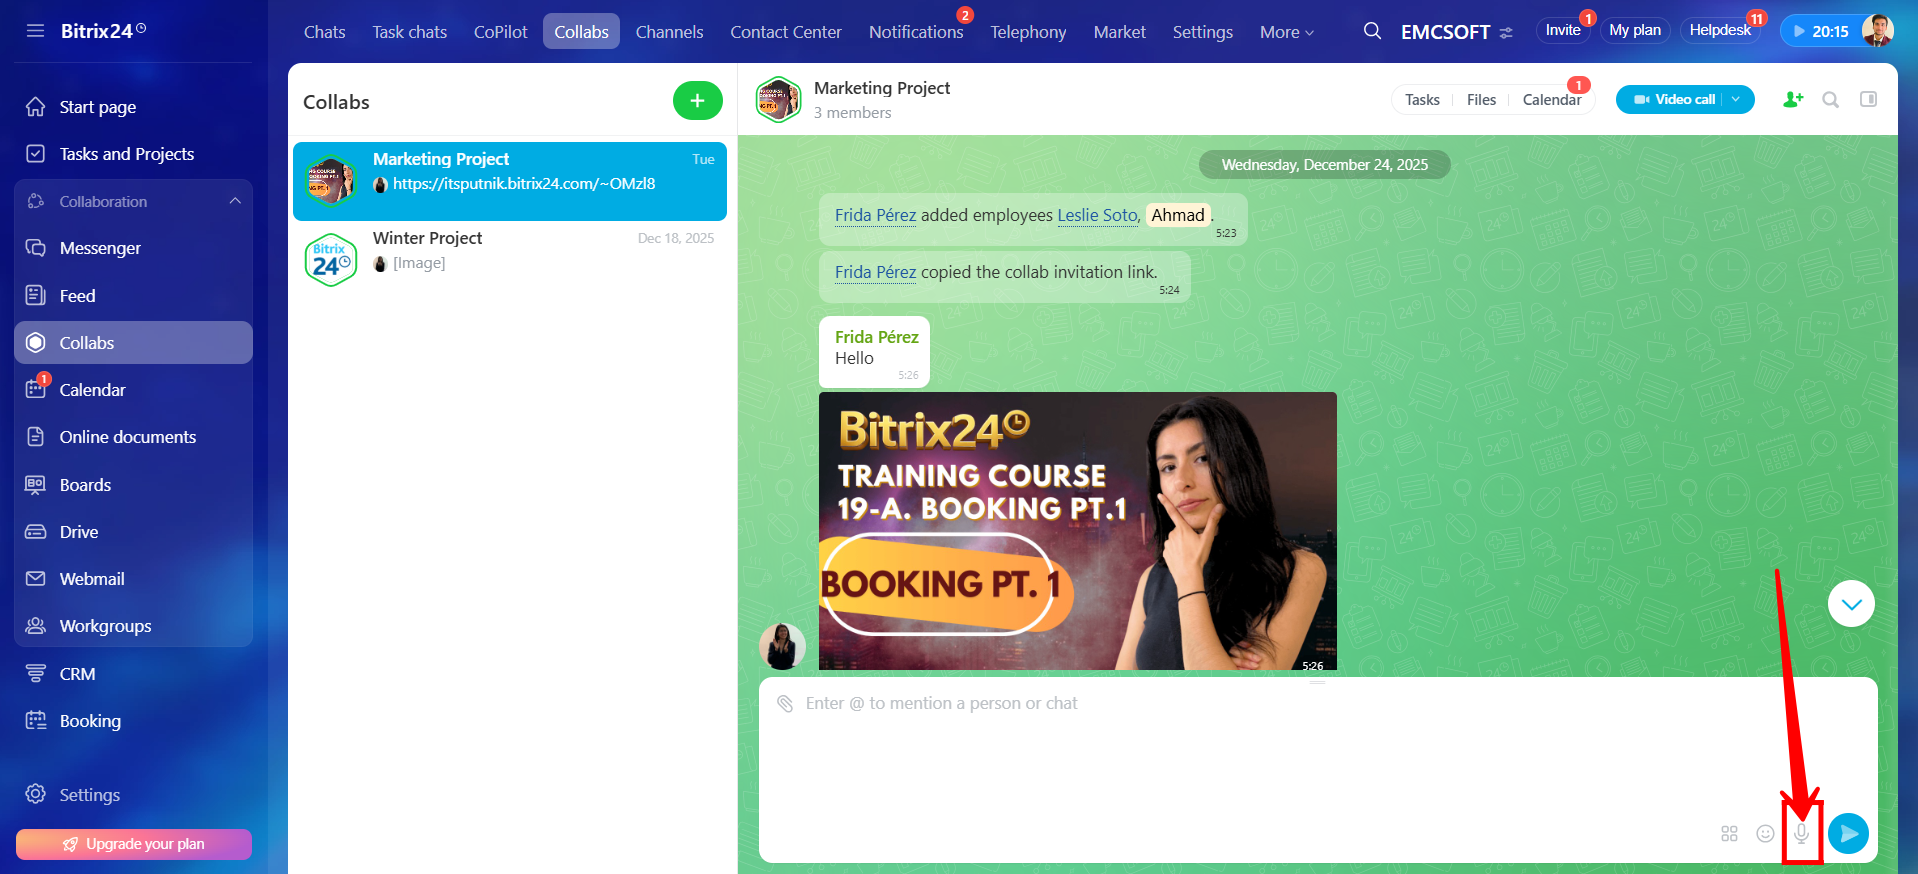
27. In the chat input window, click the highlighted microphone icon.
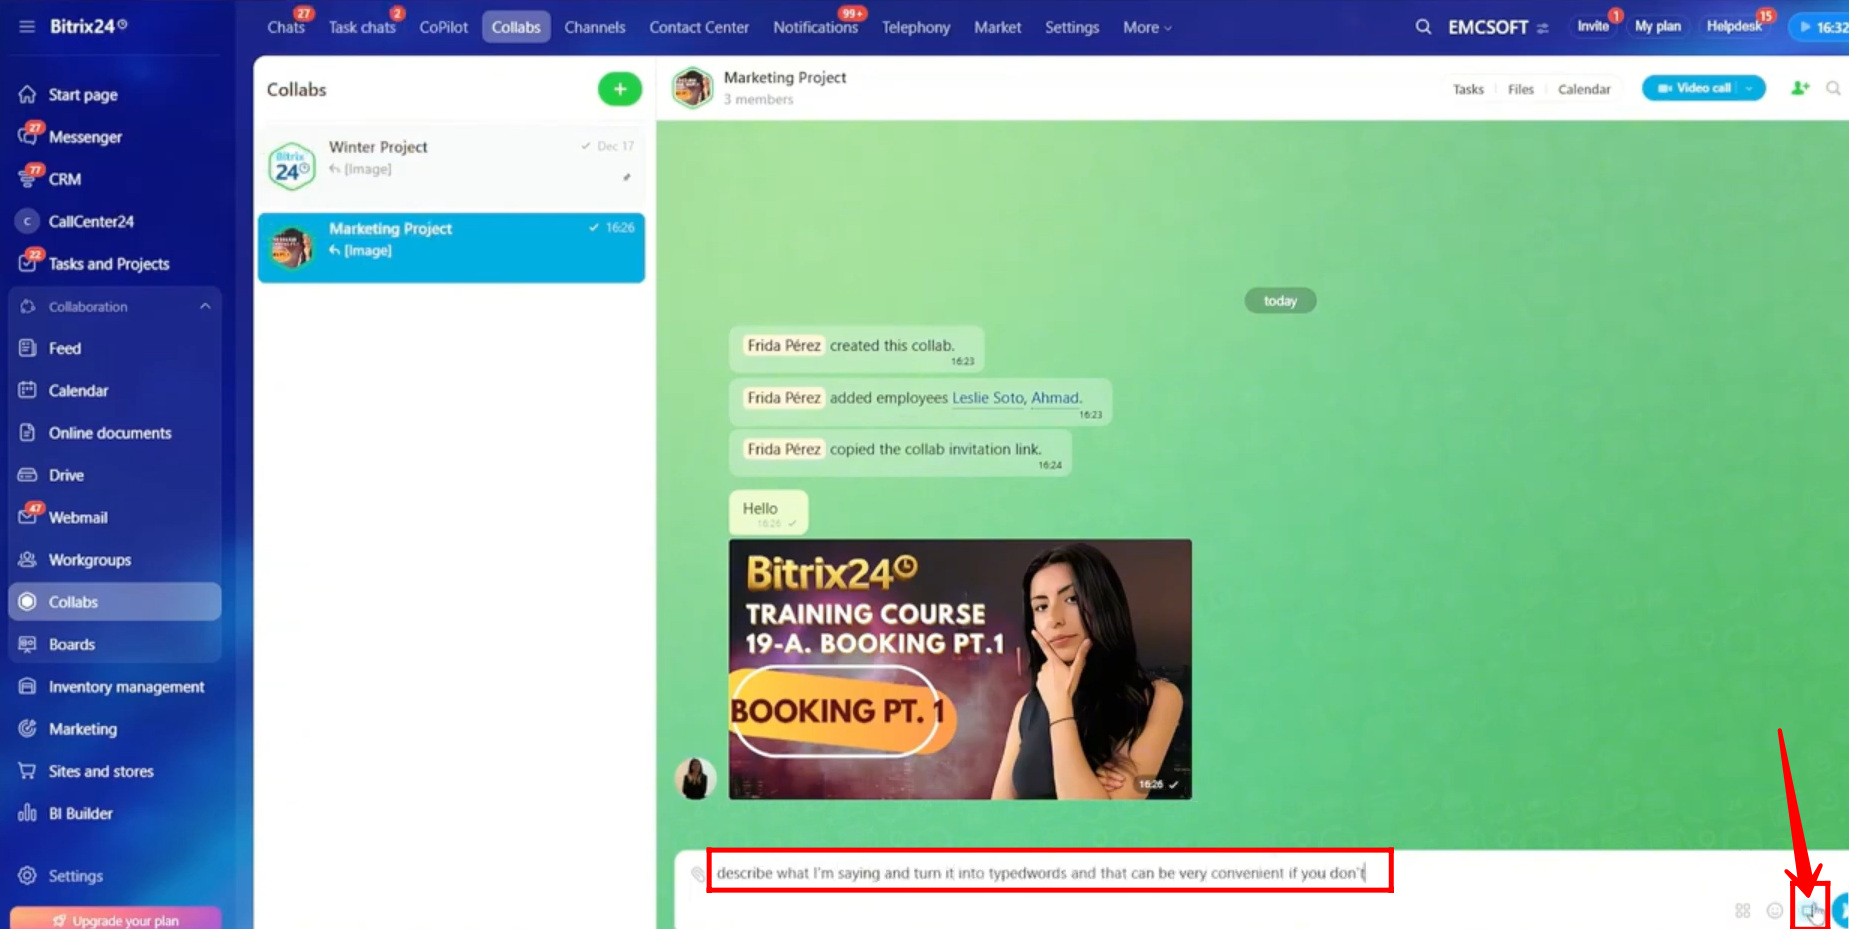
28. Now, whatever you speak will be converted into text. Click the pause icon and send the message. This method saves time, especially when you need to send a longer message.
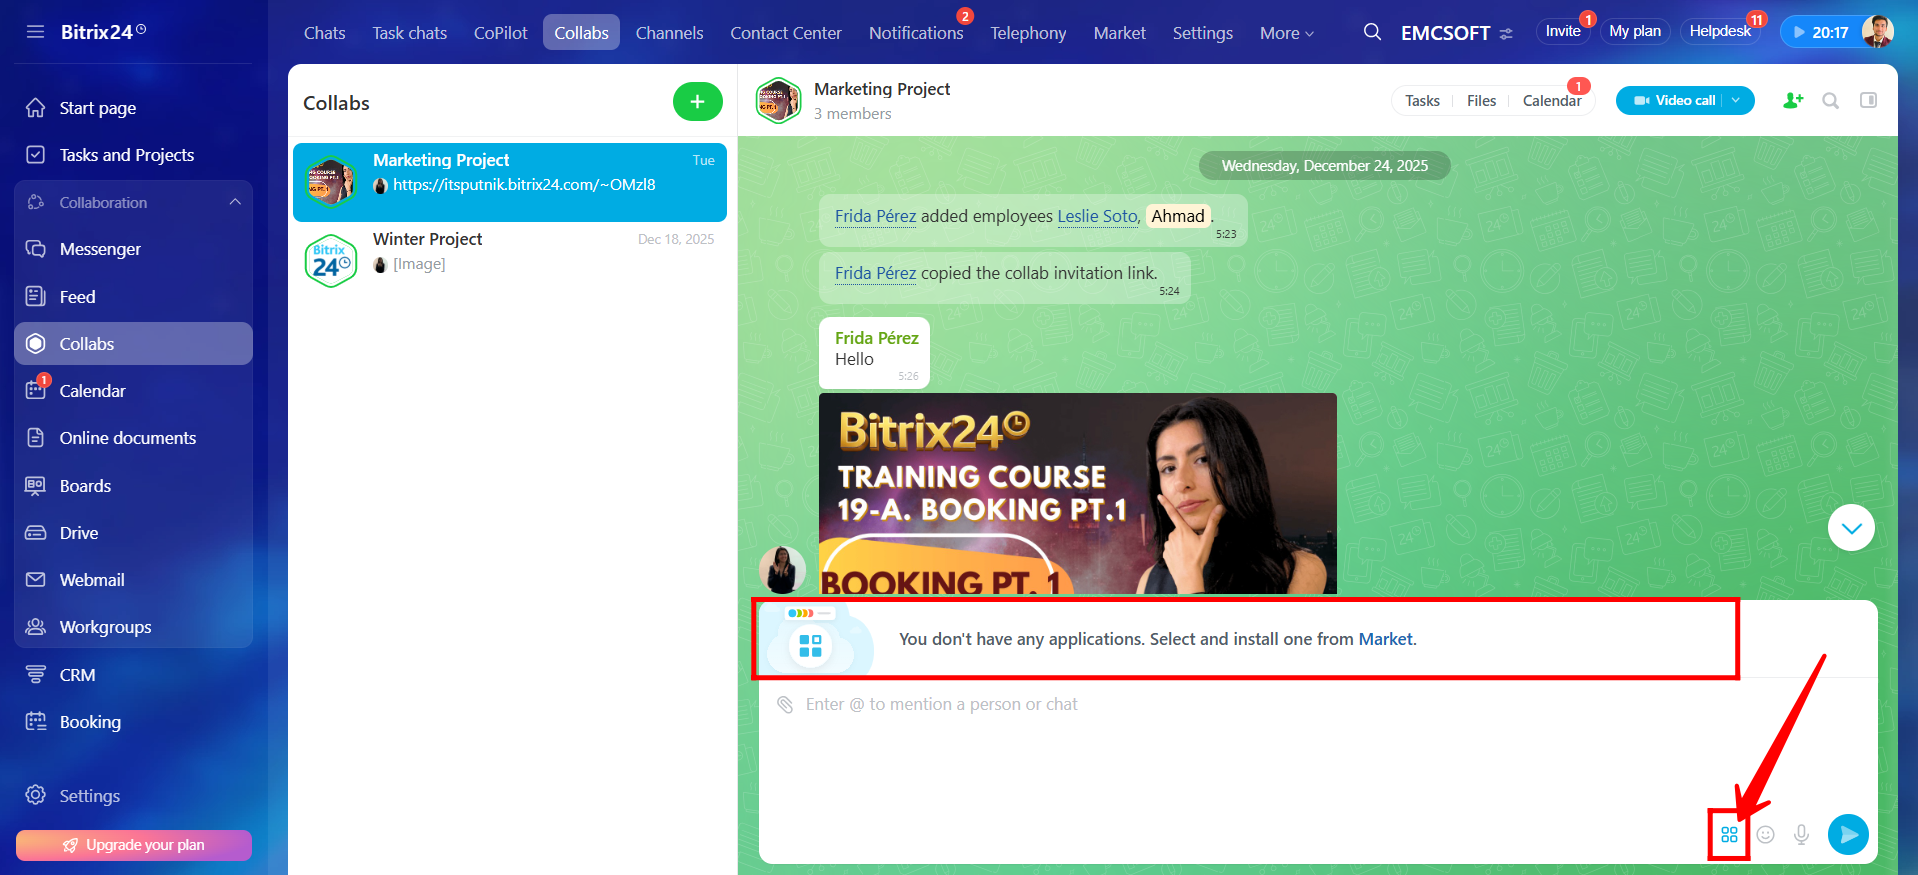
29. You can share application details by clicking the highlighted icon and then selecting the required app. If an application is not installed, you will see a prompt directing you to download it from the Bitrix24 Market.
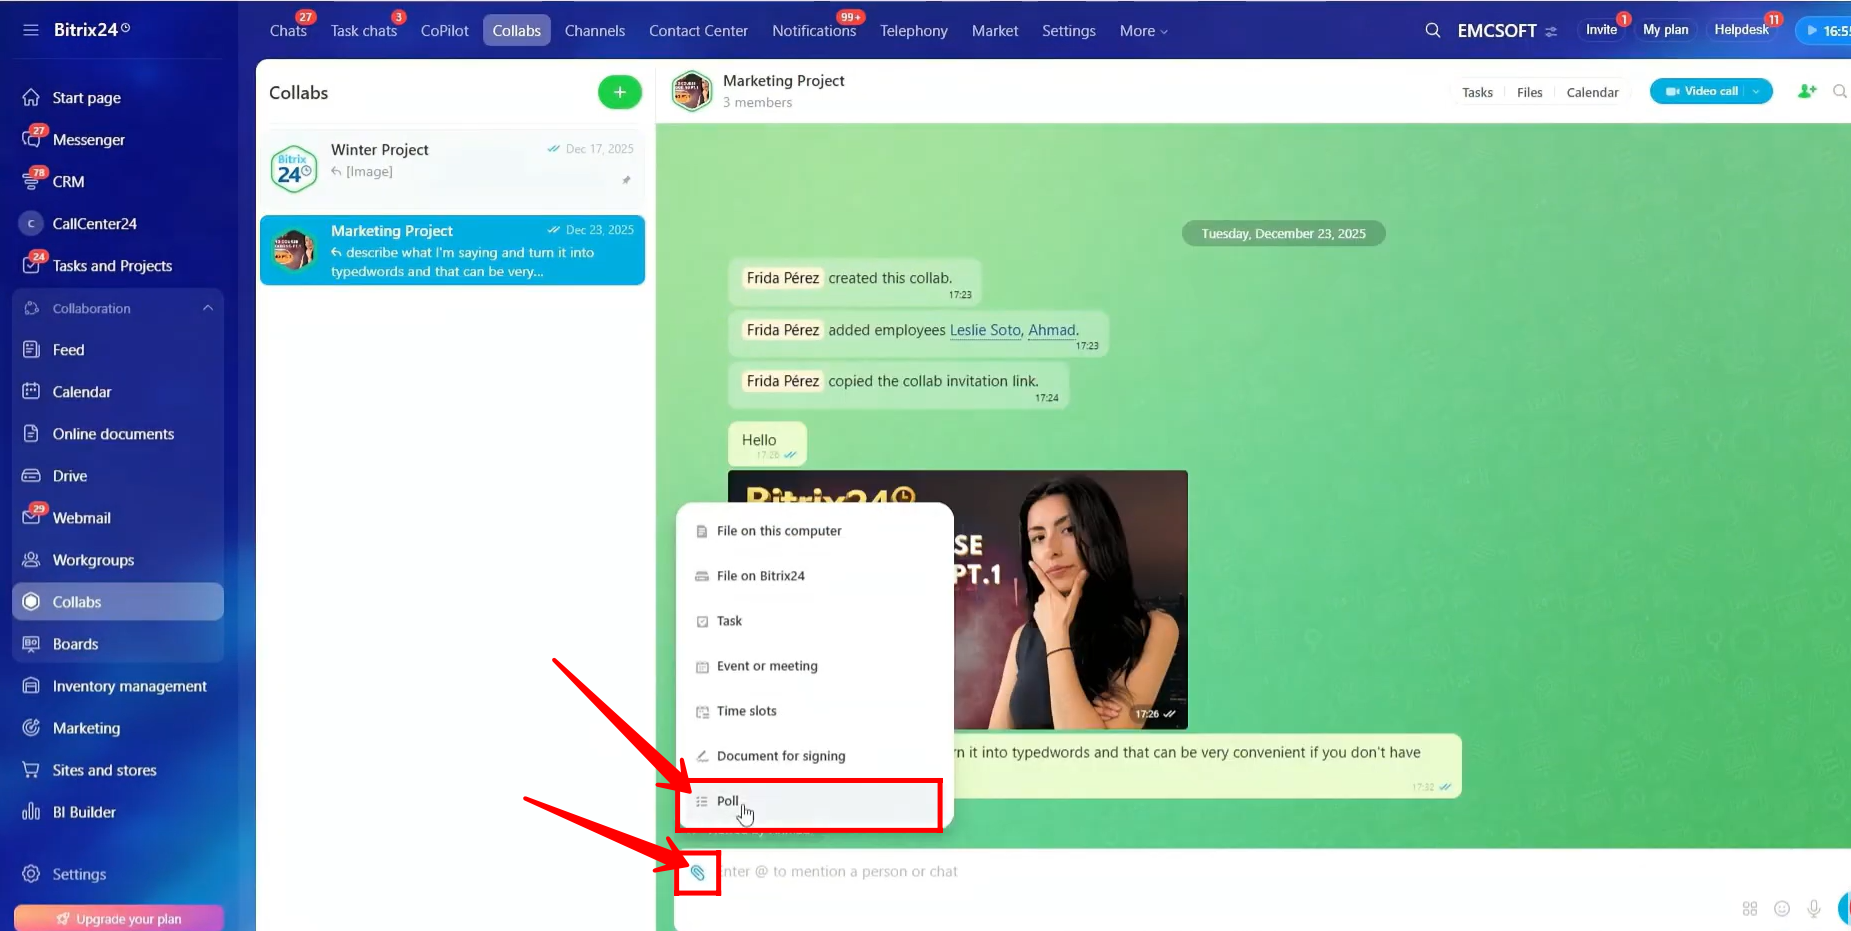
30. You can create a poll in the collab chat. To do this, click the highlighted icon and select Poll.
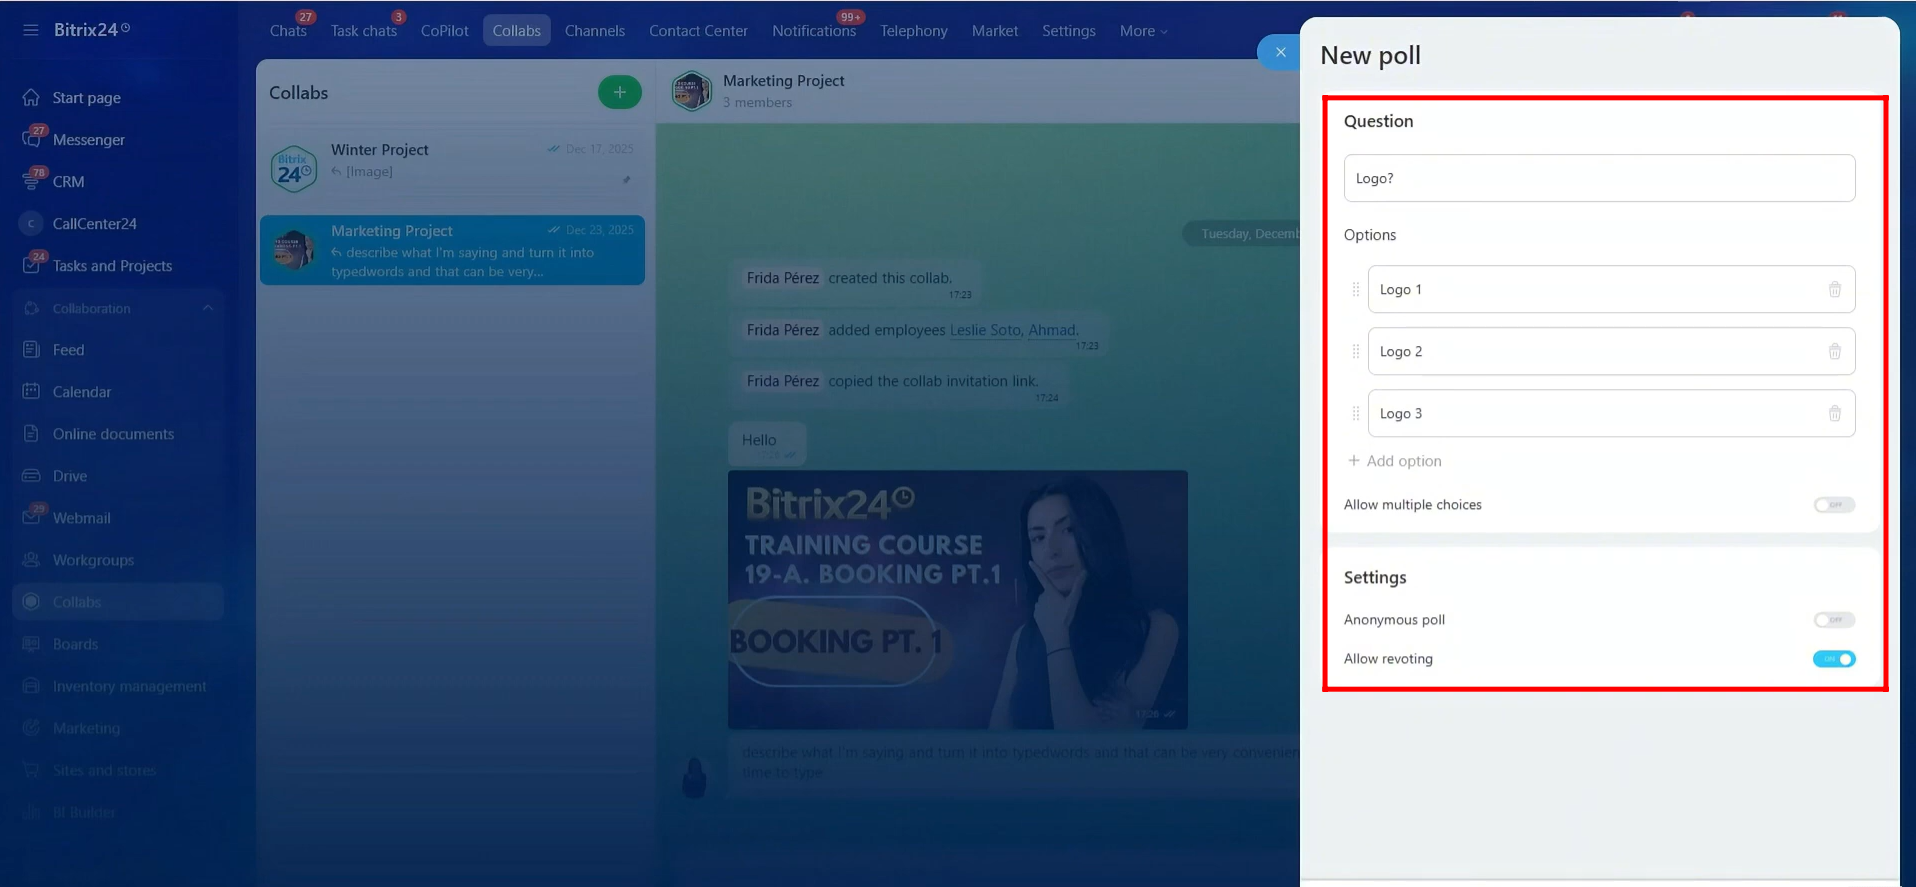
31. Enter the poll question and add the available options. You can enable or disable the option to allow multiple choices. In the poll settings, you can also turn anonymous voting on or off and choose whether to allow revoting.
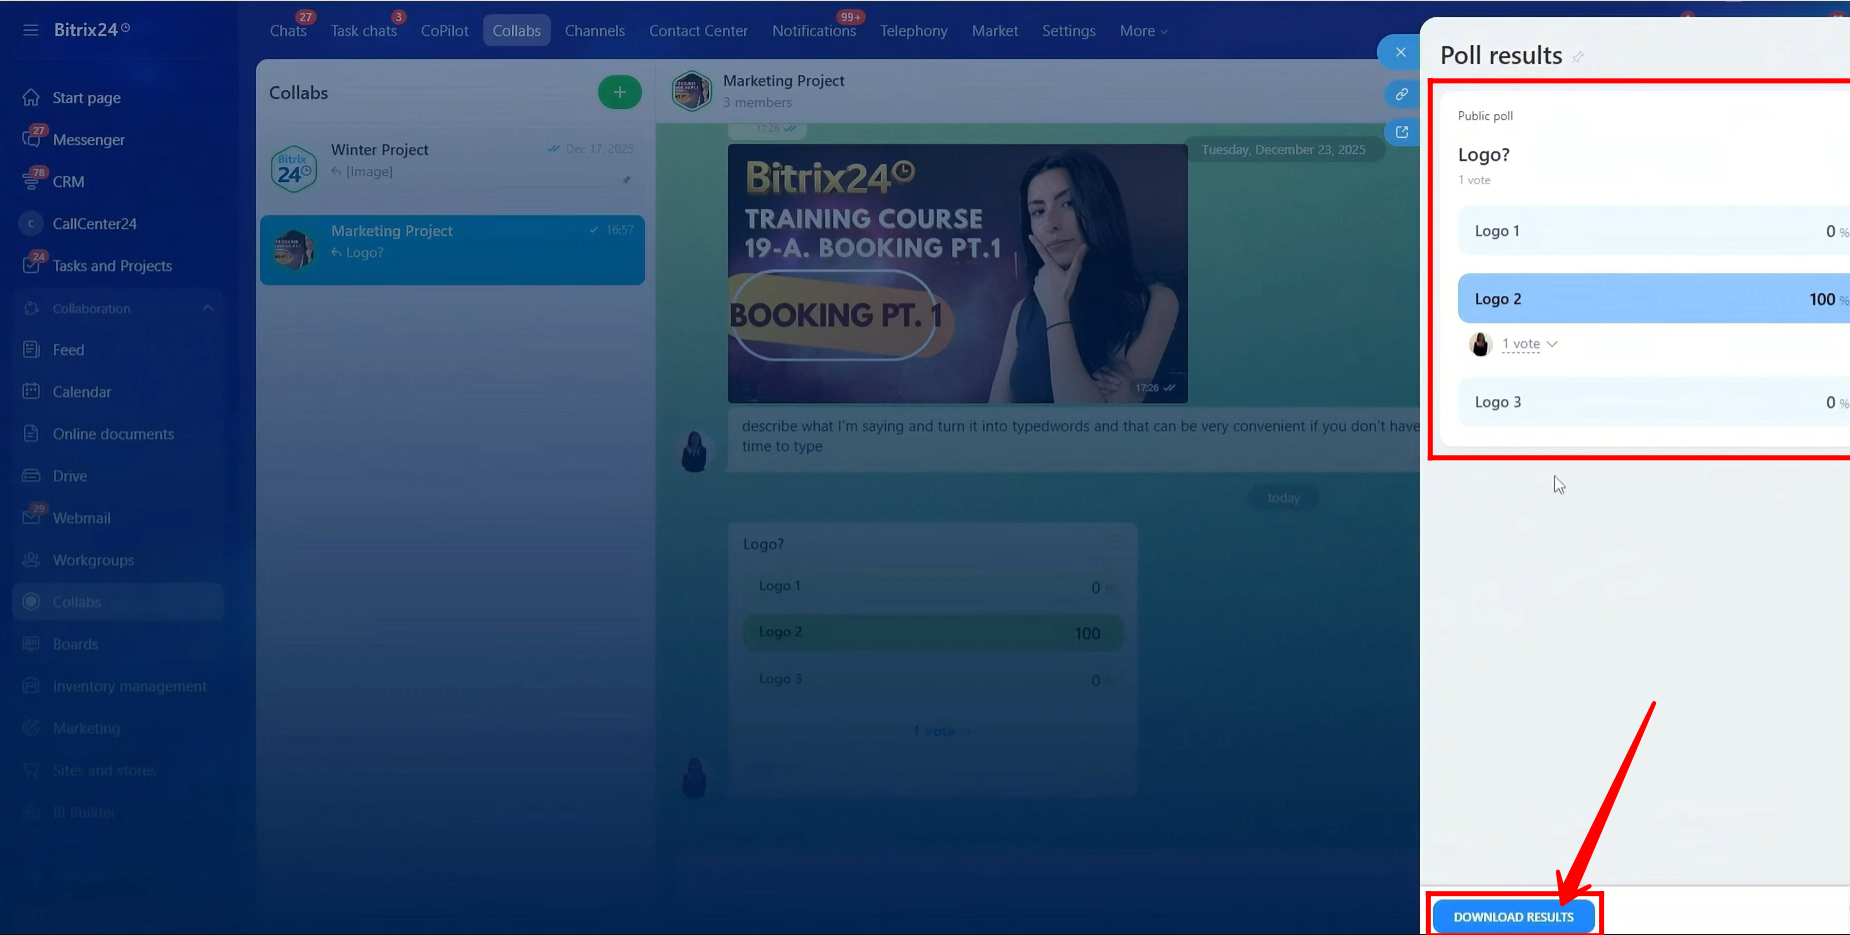
32. When a user votes in the poll, they can change their vote to another option if revoting is allowed. If you have the required permissions, you will also be able to view the poll results and see who voted for each option.
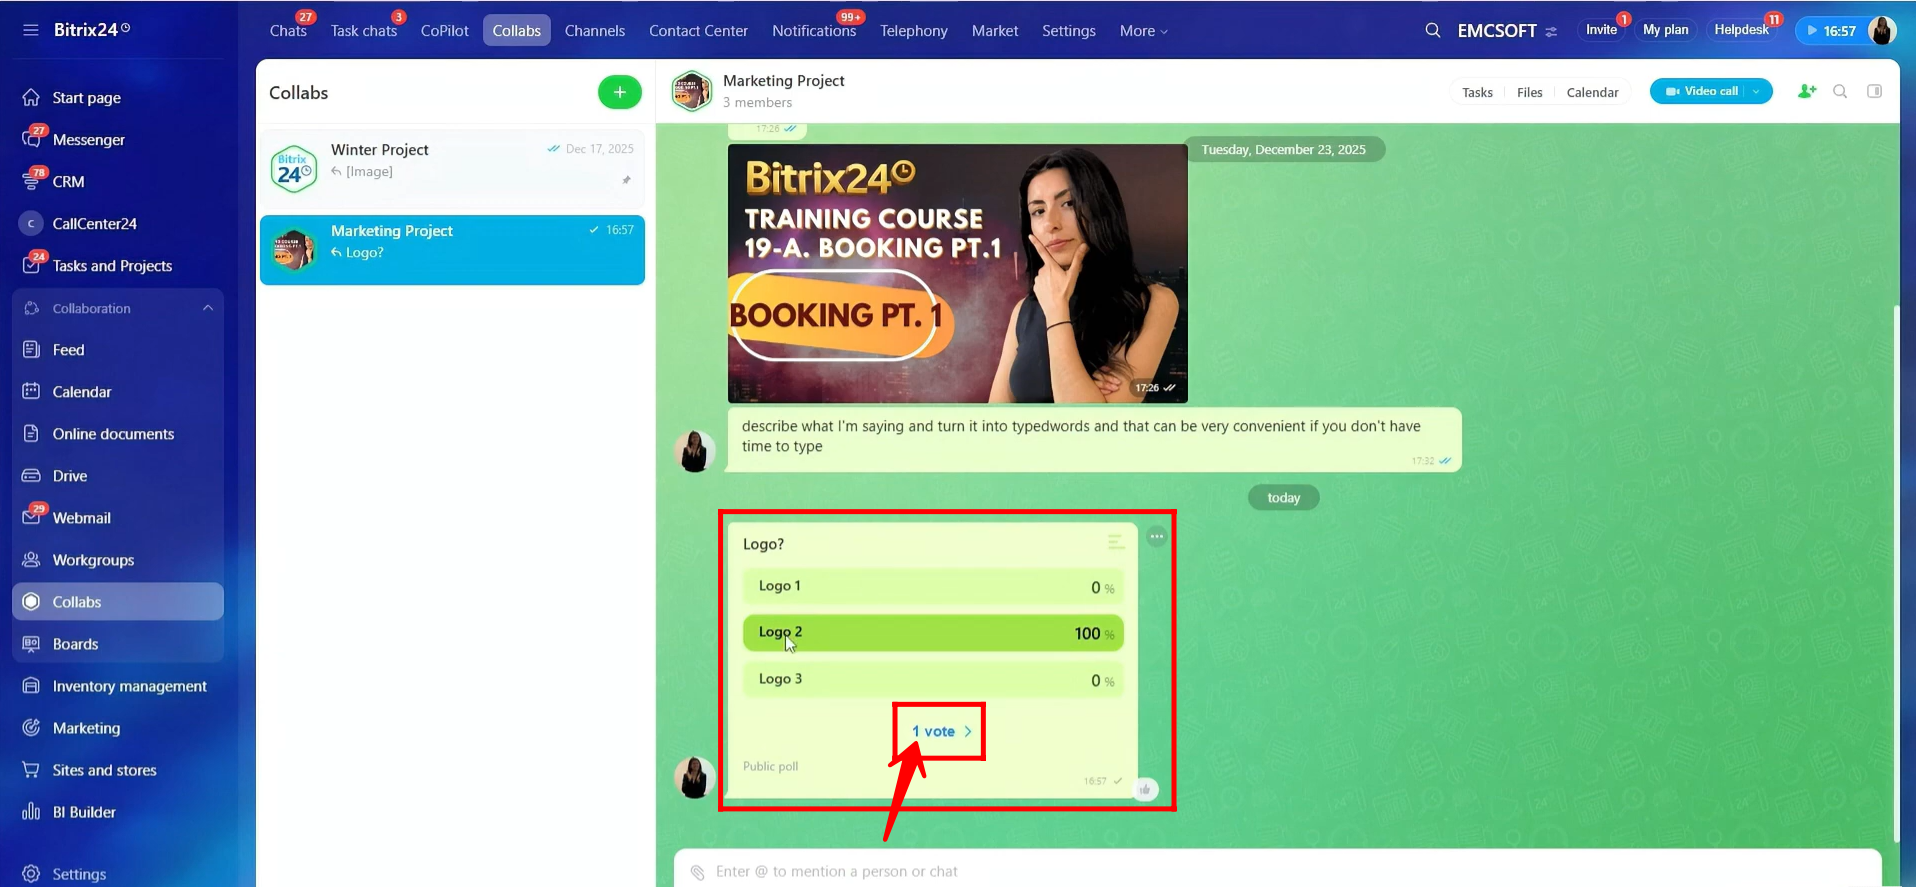
33. Poll results can be viewed in the sidebar, where you will see the percentage of votes for each option along with the profiles of members who voted. You can also download the poll results in Excel format for reference or reporting.
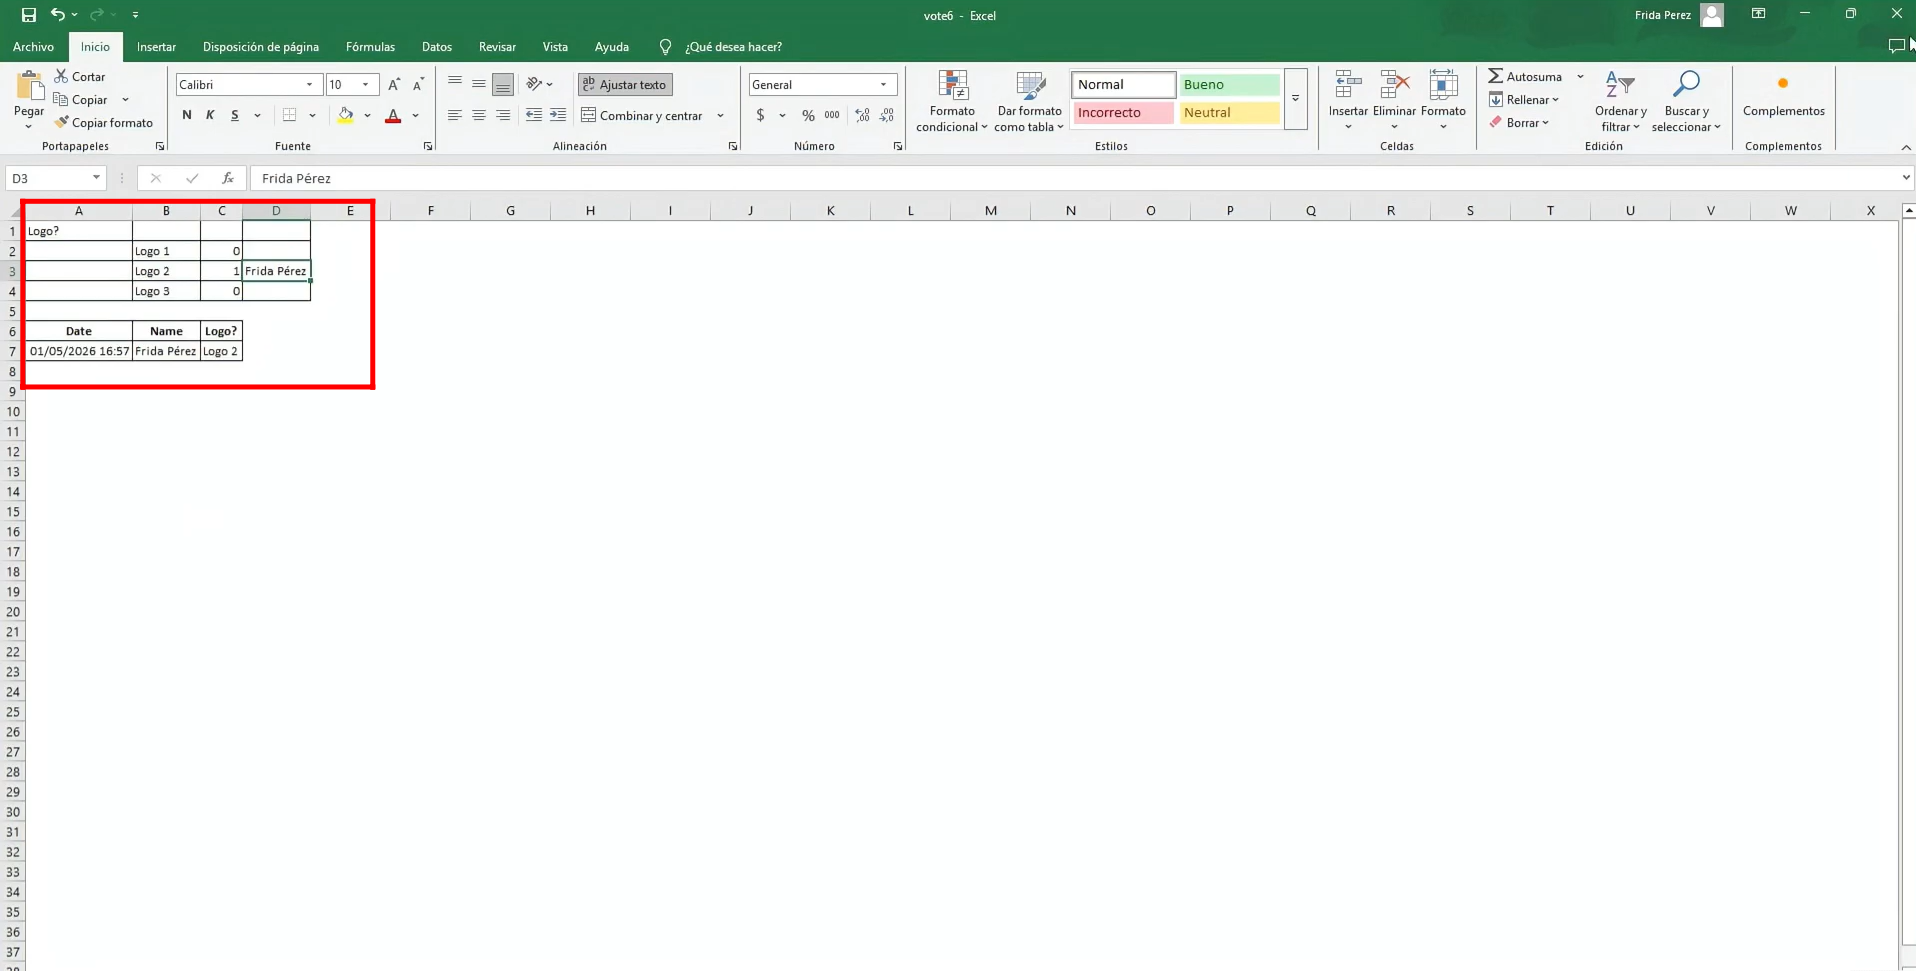
34. In the Excel file, you will see detailed information, including which member voted for which option, the date and time of each vote, and the total number of votes received by each option.
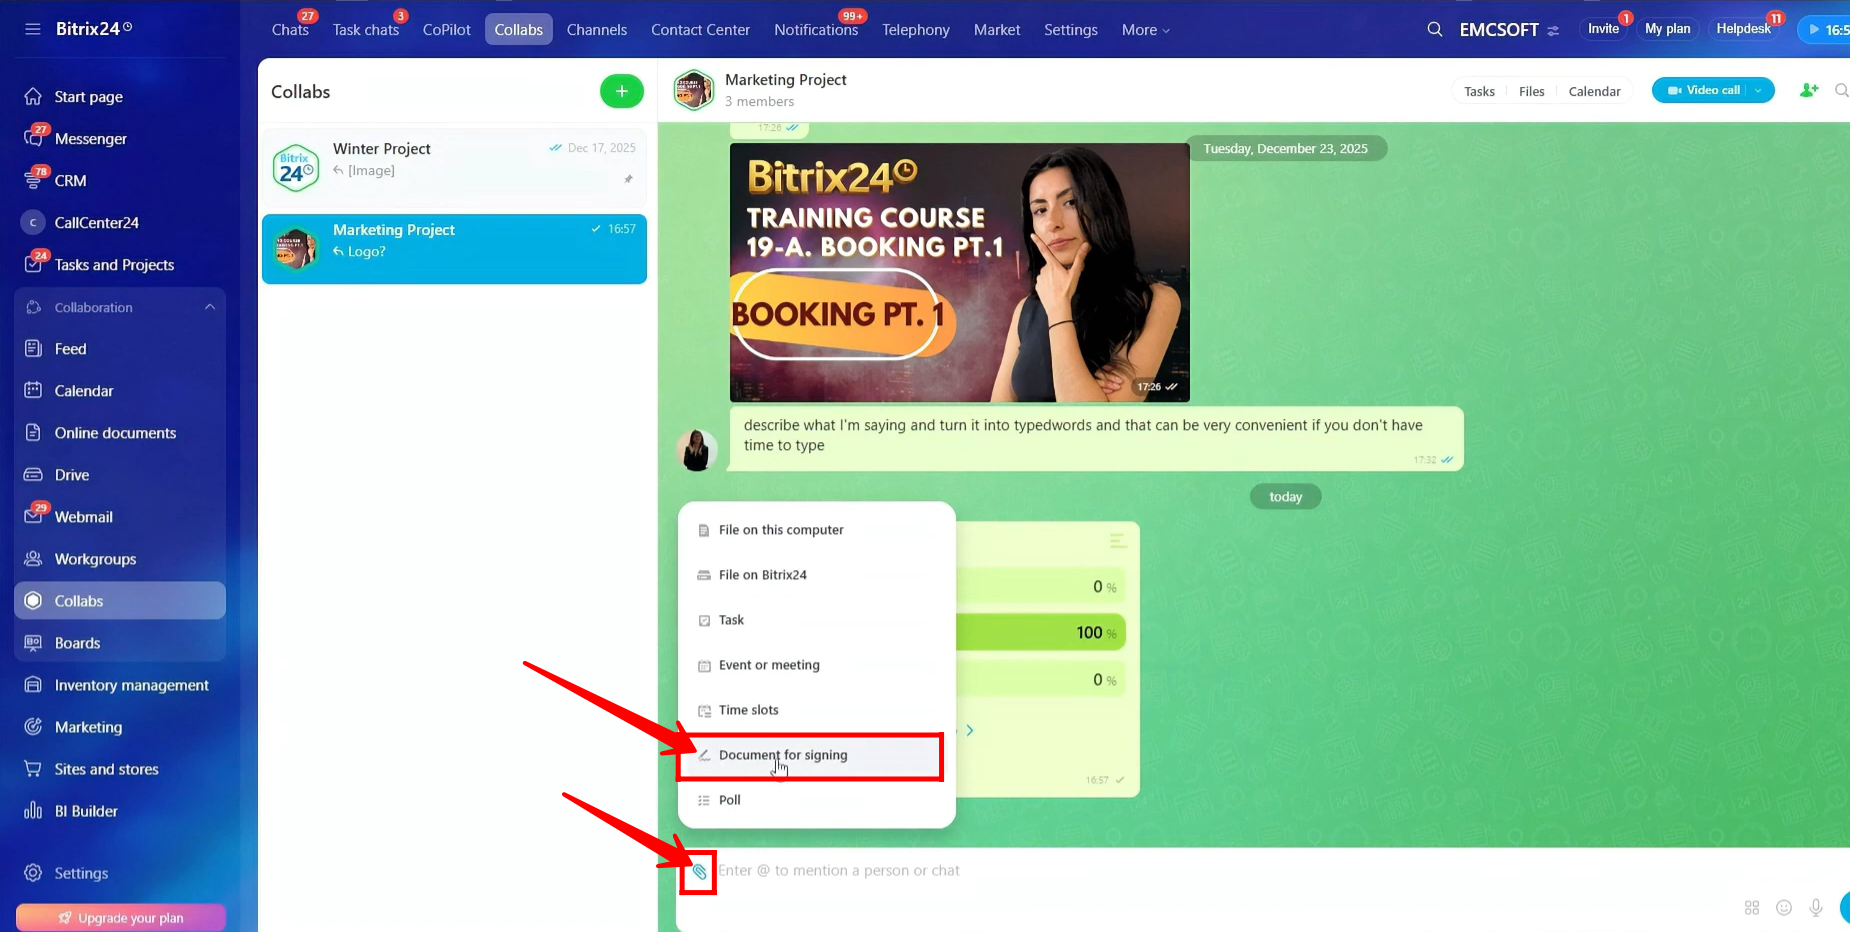
35. Click the highlighted icon in the chat input window, then select “Document for signing.”
36. If you want to learn more about E-Signature in detail, you can watch the following video for a complete walkthrough.
For now, we will not go into deep detail and will cover only a brief overview in the next few steps.
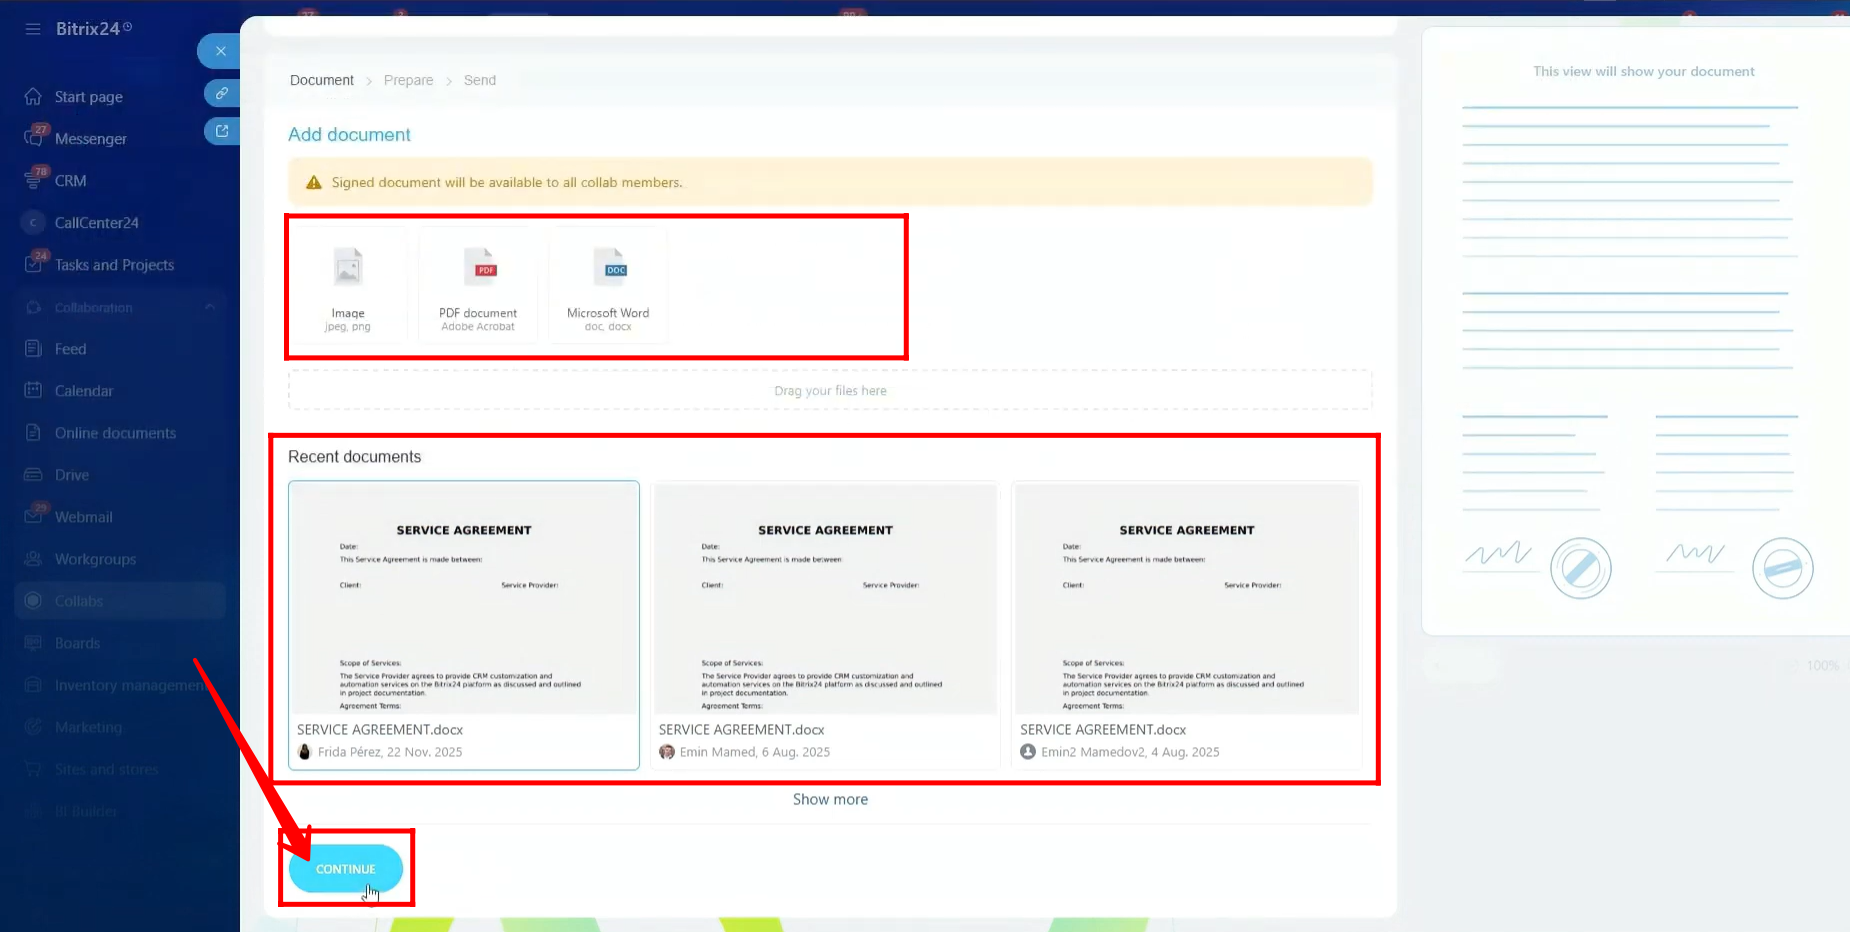
Here, you can upload a document template to be signed or select from recently configured documents. After making your selection, click Continue to proceed.
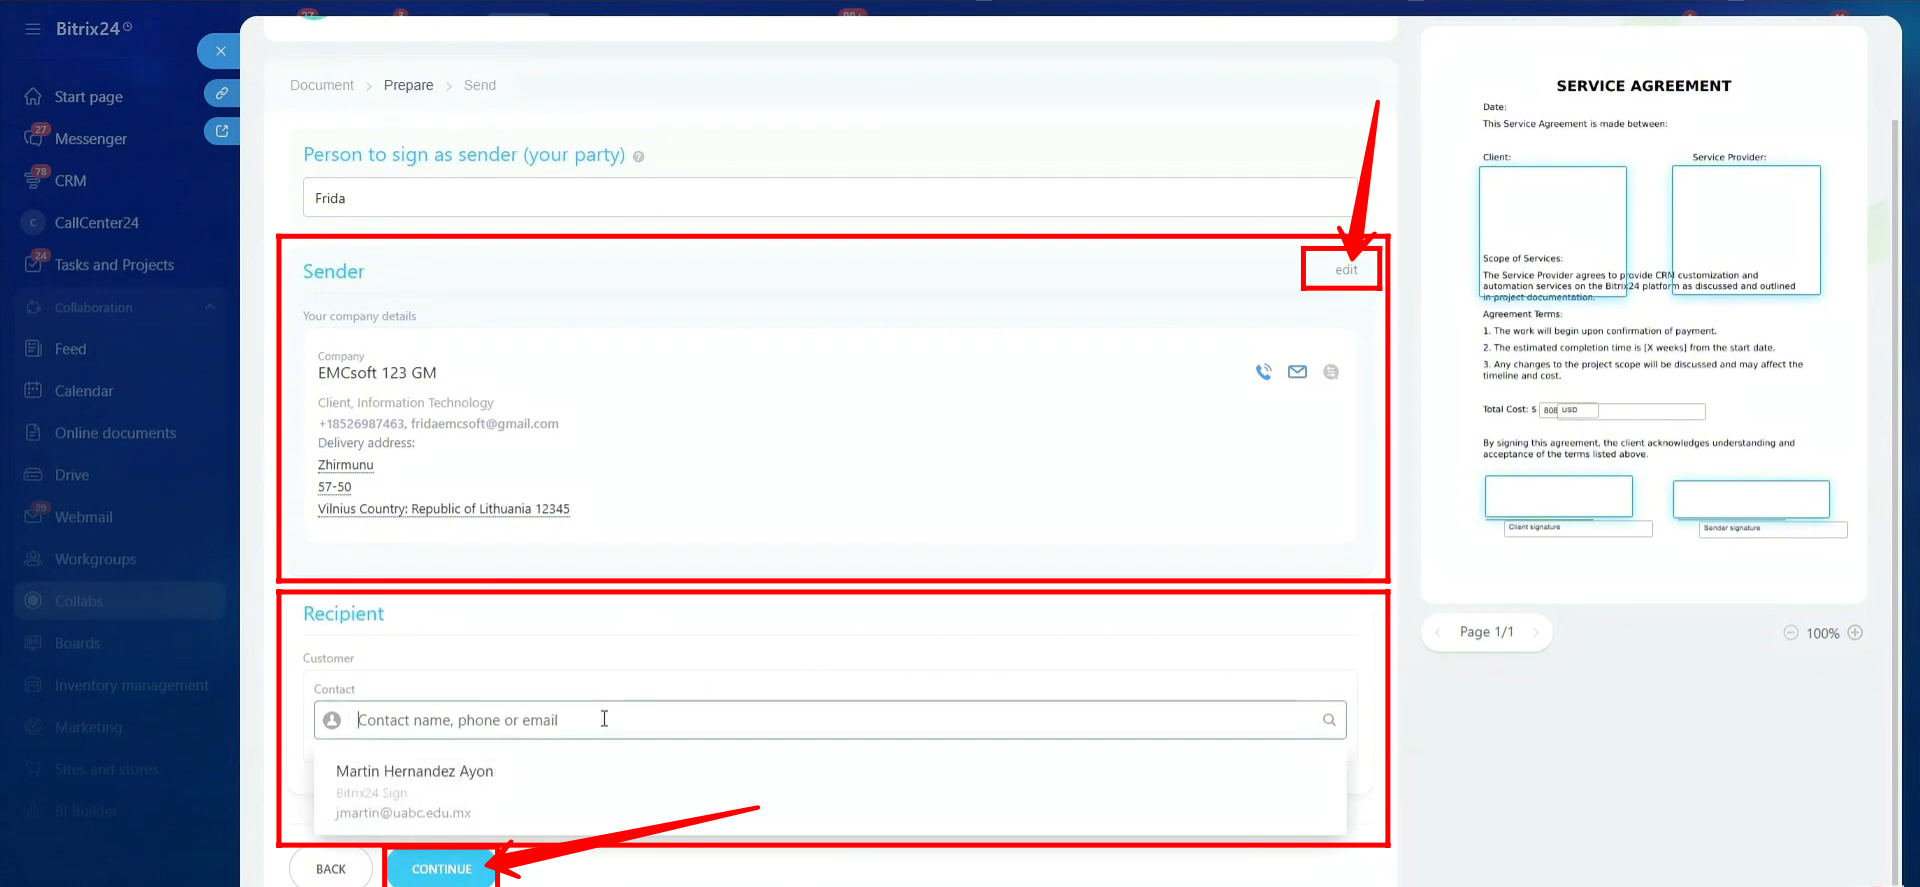
37. Here, select the person who will sign as the sender (your party). You can also edit the company details of both the sender and the receiver. Once everything is set, click Continue to proceed.
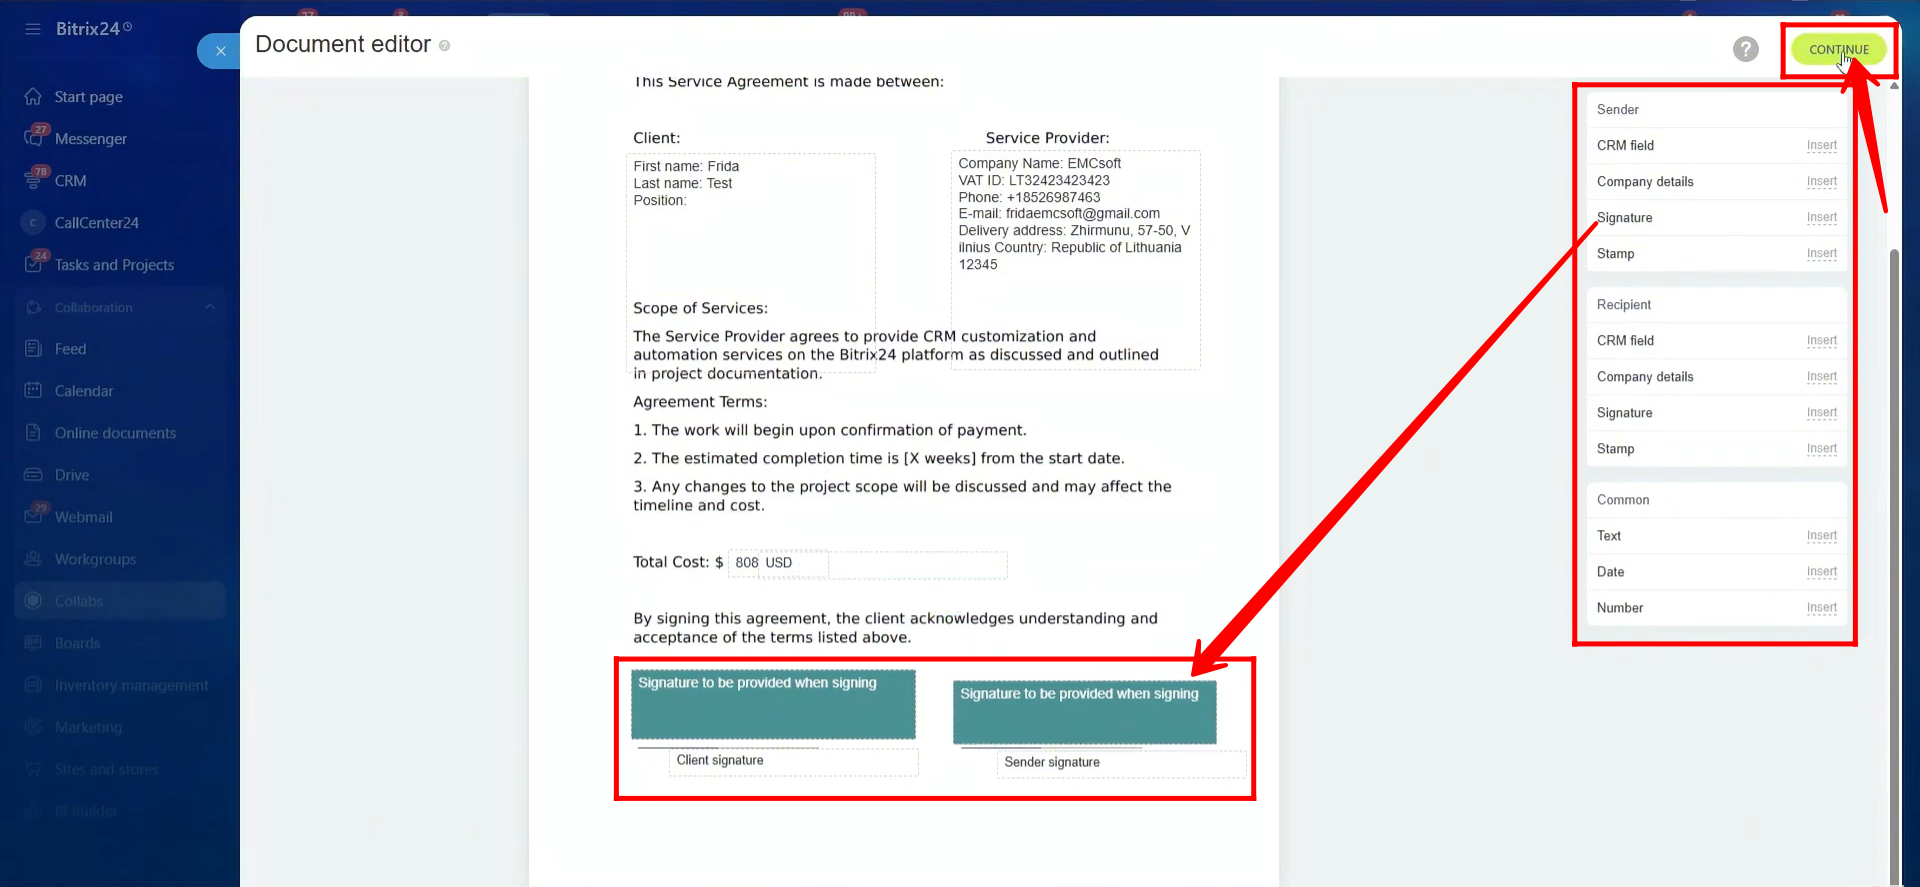
38. In the document edit mode, you can modify the template by placing signature fields for the sender and receiver. You can also add placeholders for company details, include dynamic CRM fields, and insert elements such as date, text, or number fields. Once you’re done, click Continue to proceed.
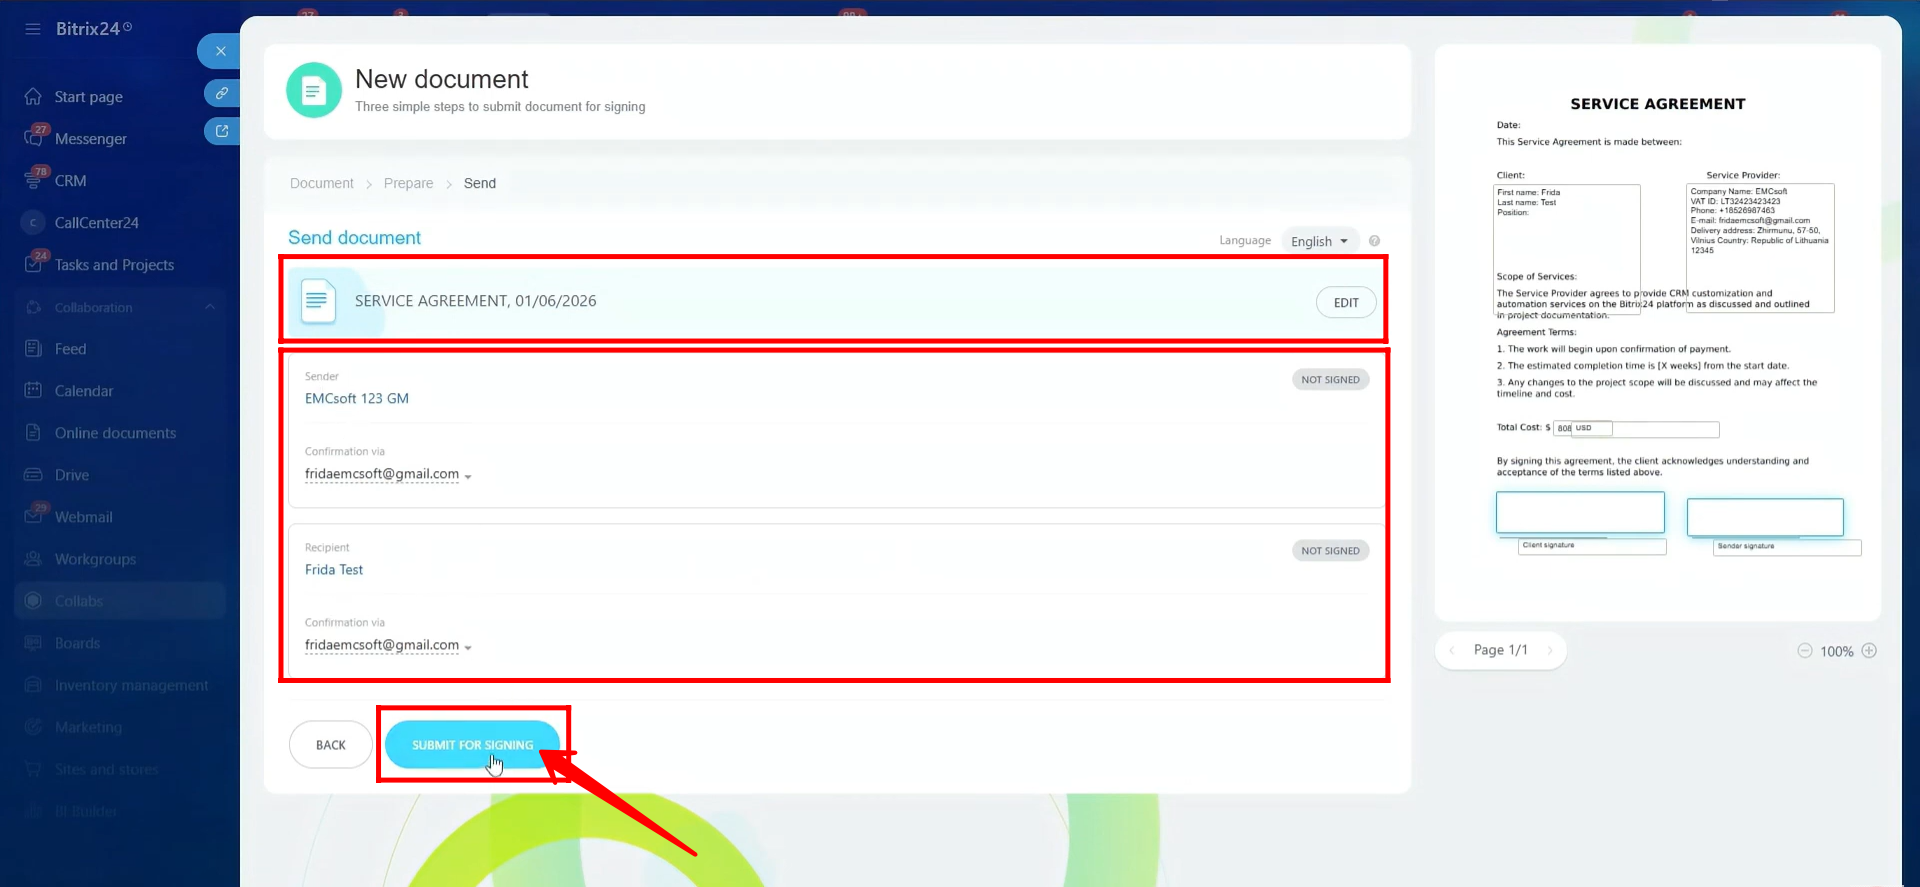
39. Here, you will see the final document with all details, including the document content and sender and receiver information. After reviewing everything, click Submit for Signing to send the document.
40. A new entity item will be created with the document’s name. In the activity timeline, you will see that the document has been sent for signing to both the sender and the receiver at their respective email addresses.
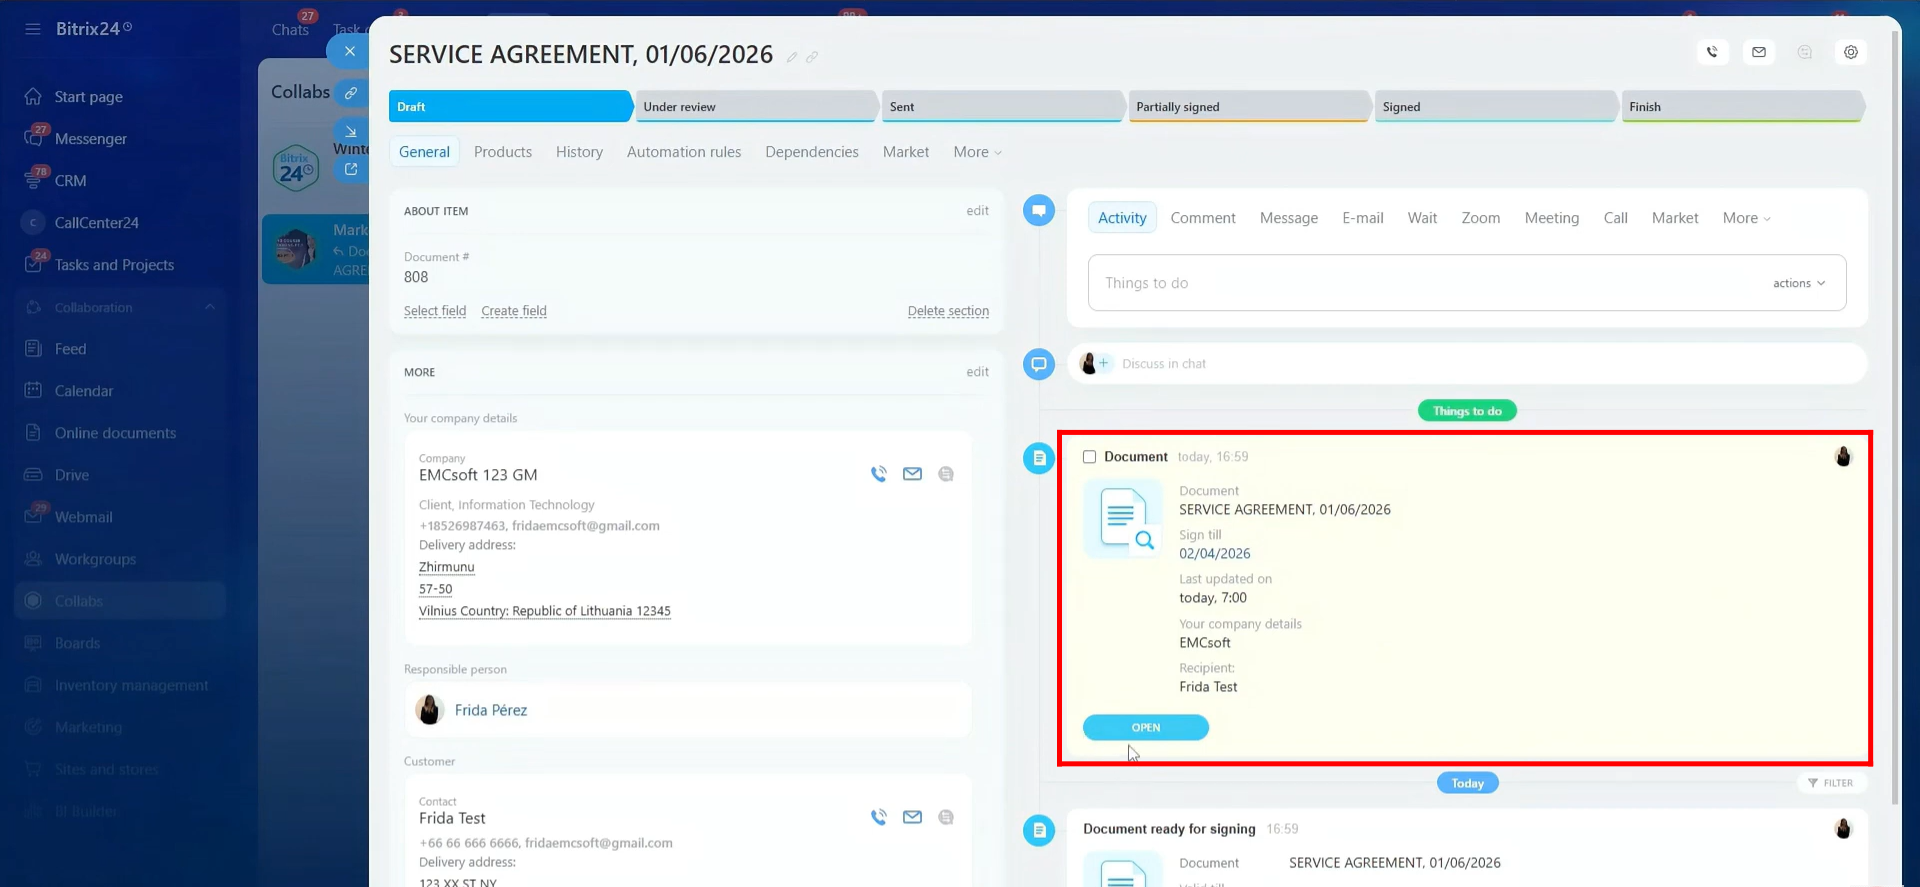
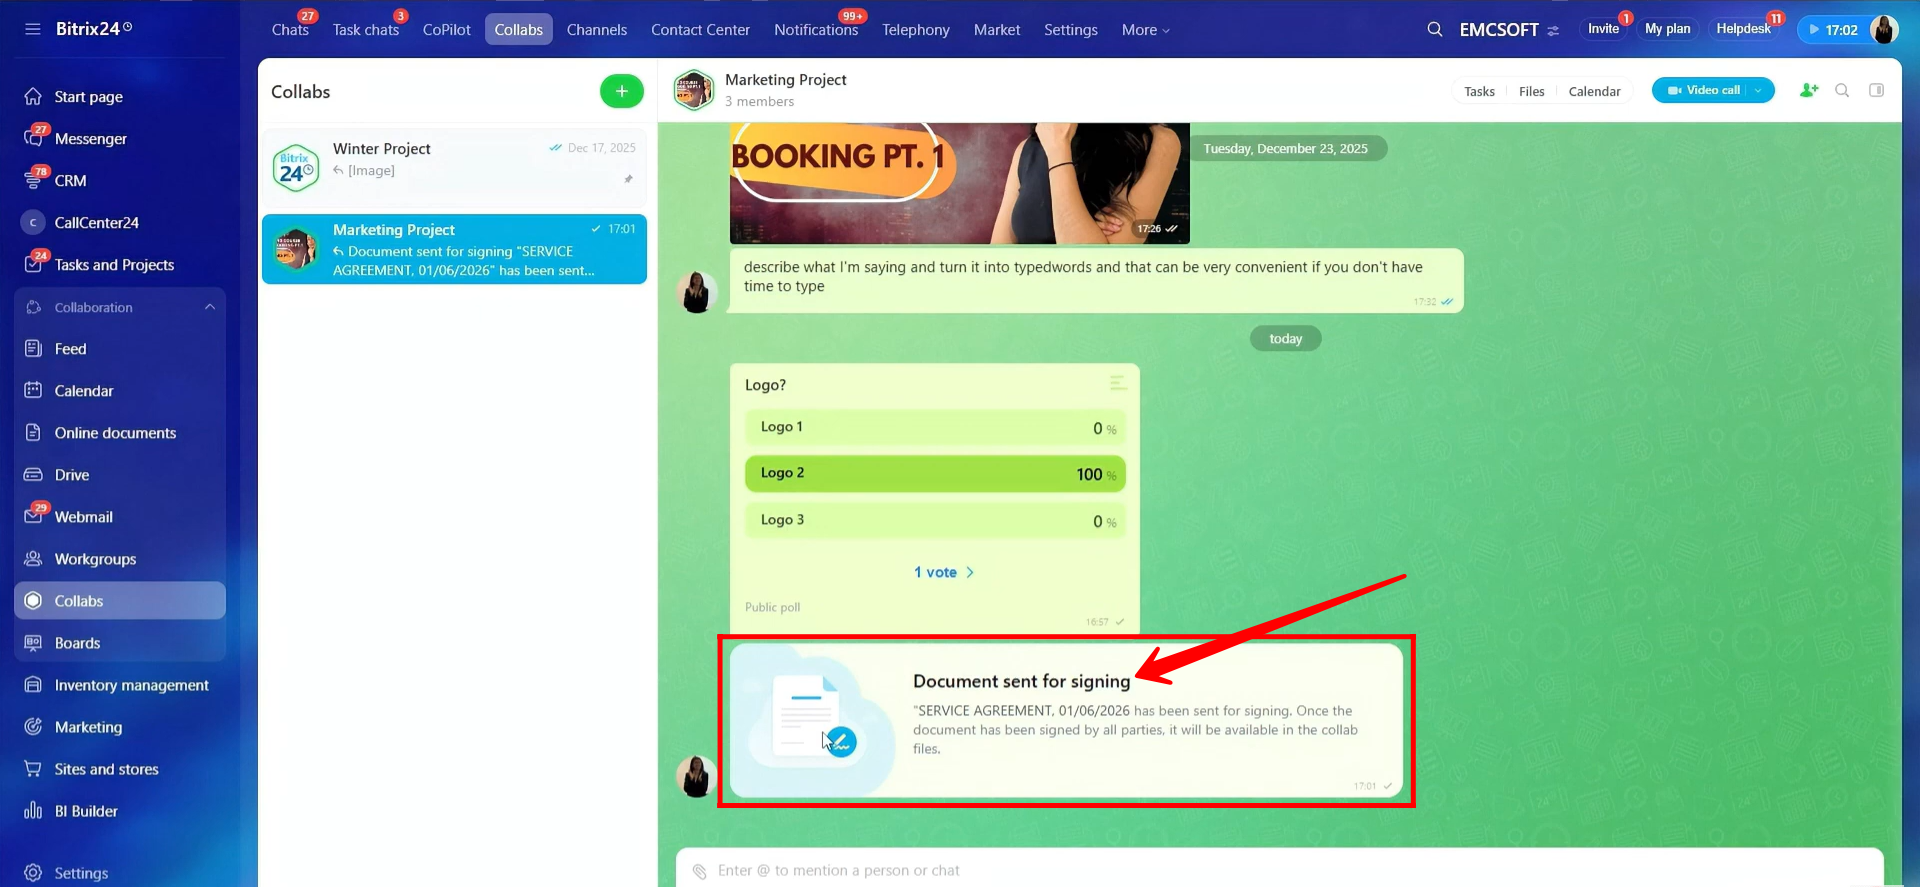
41. In the collab chat, you will see a prompt like this when a document for signing is sent, serving as a record within the chat.
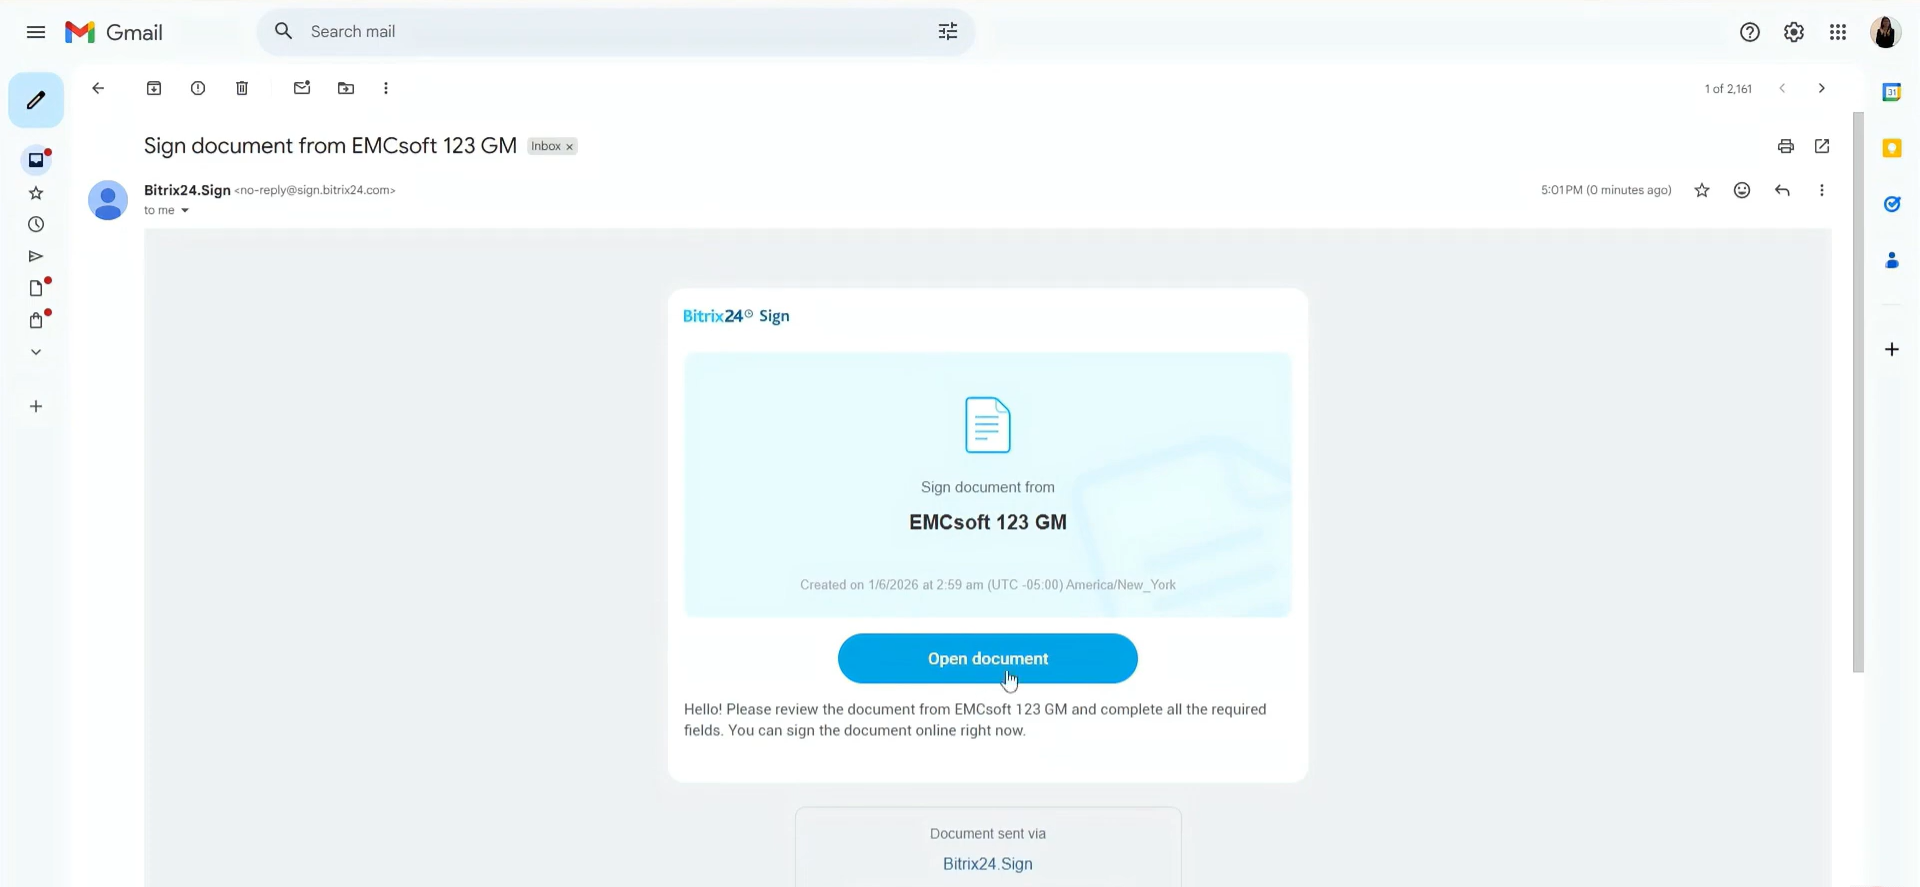
42. This is how the client (recipient) will receive the email to sign the document. They simply need to click “Open document” to review and sign it on their side.
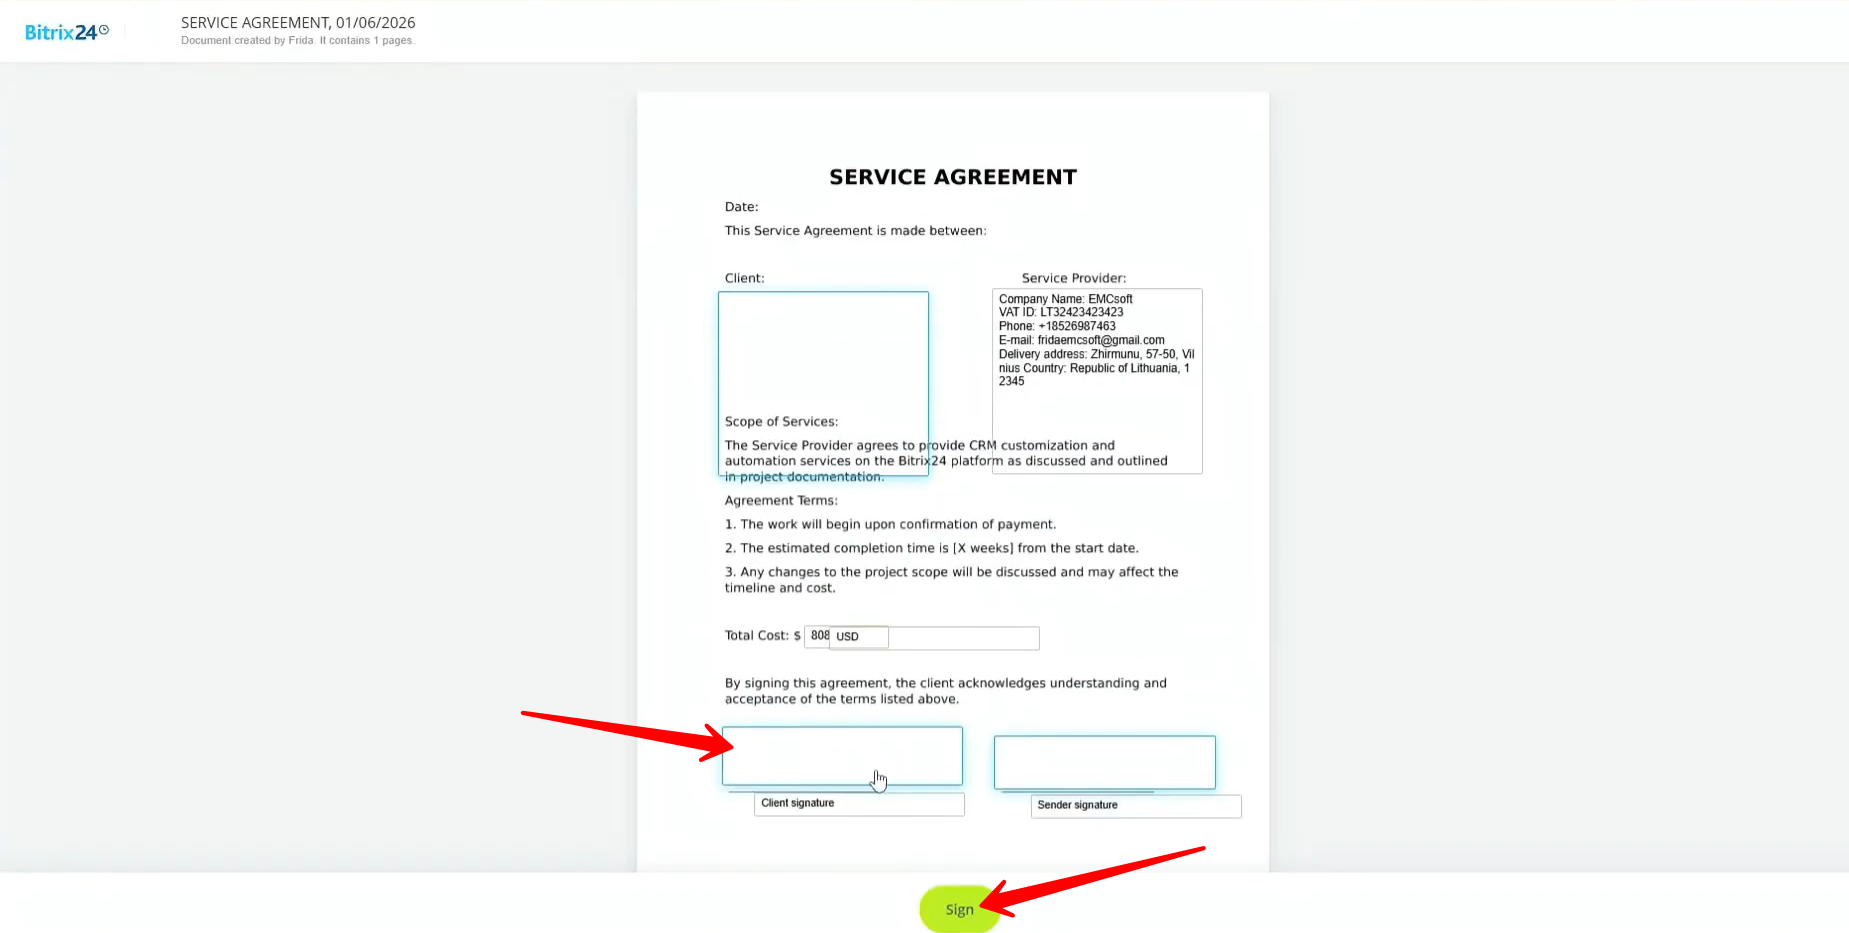
43. They can simply click the Sign button, enter their name or draw their signature, and the signature will be automatically placed in the required location within the document.
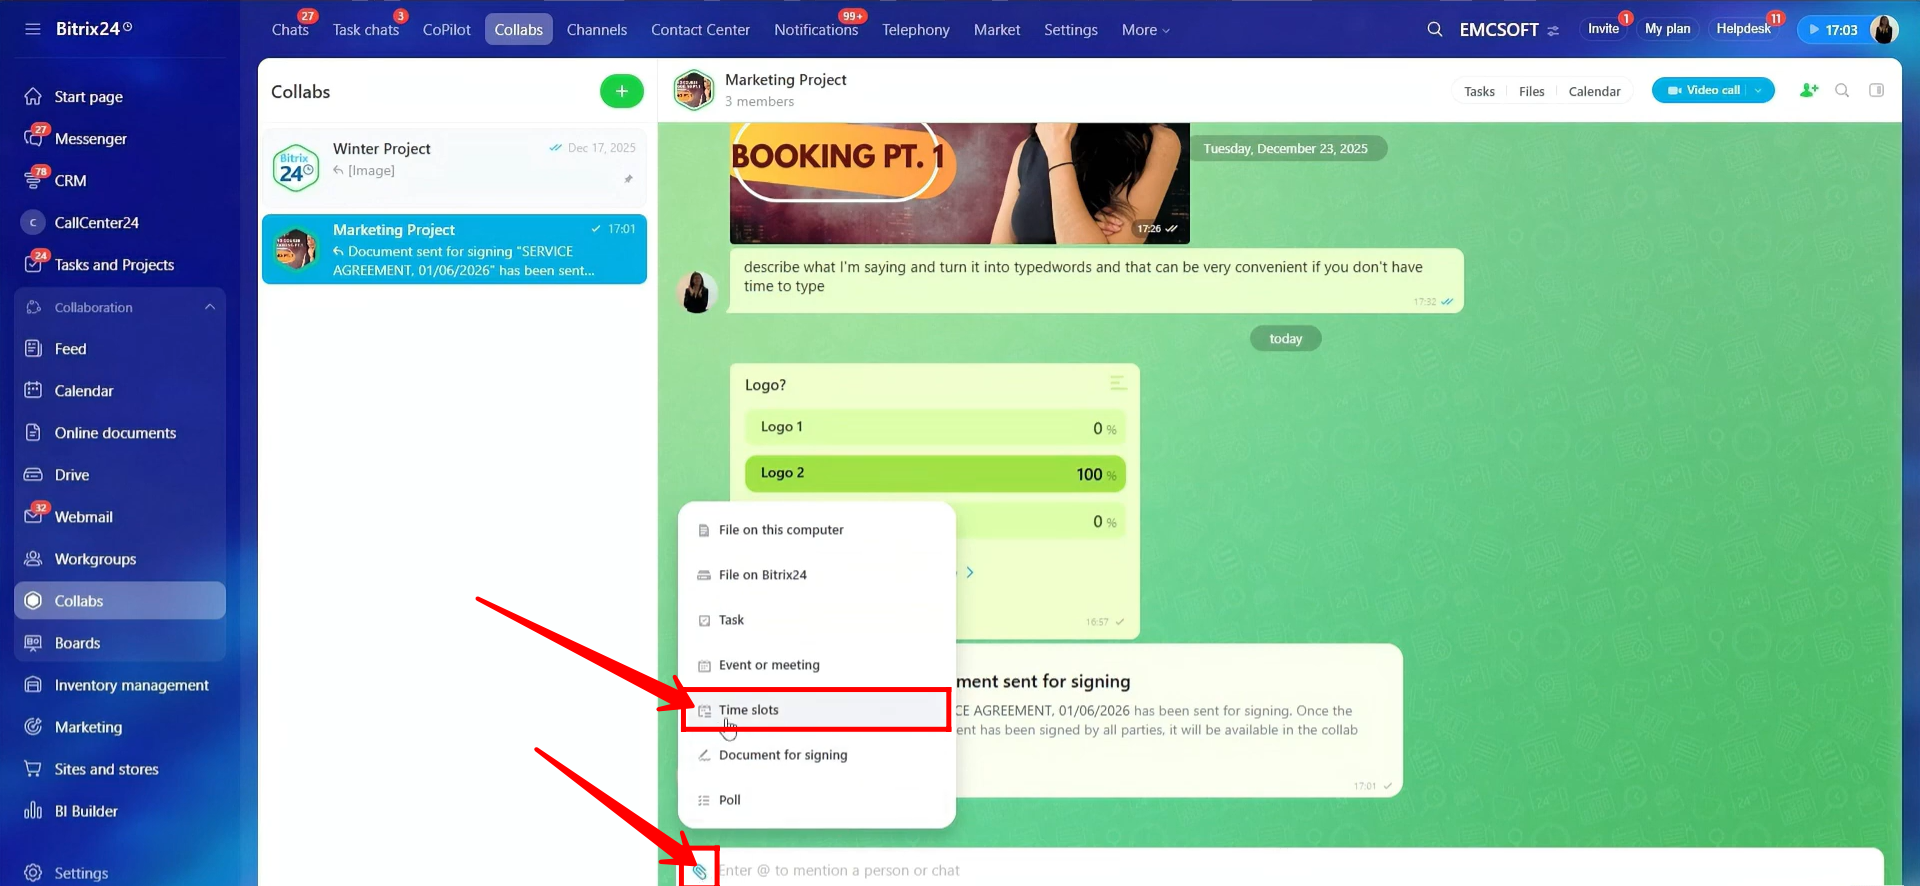
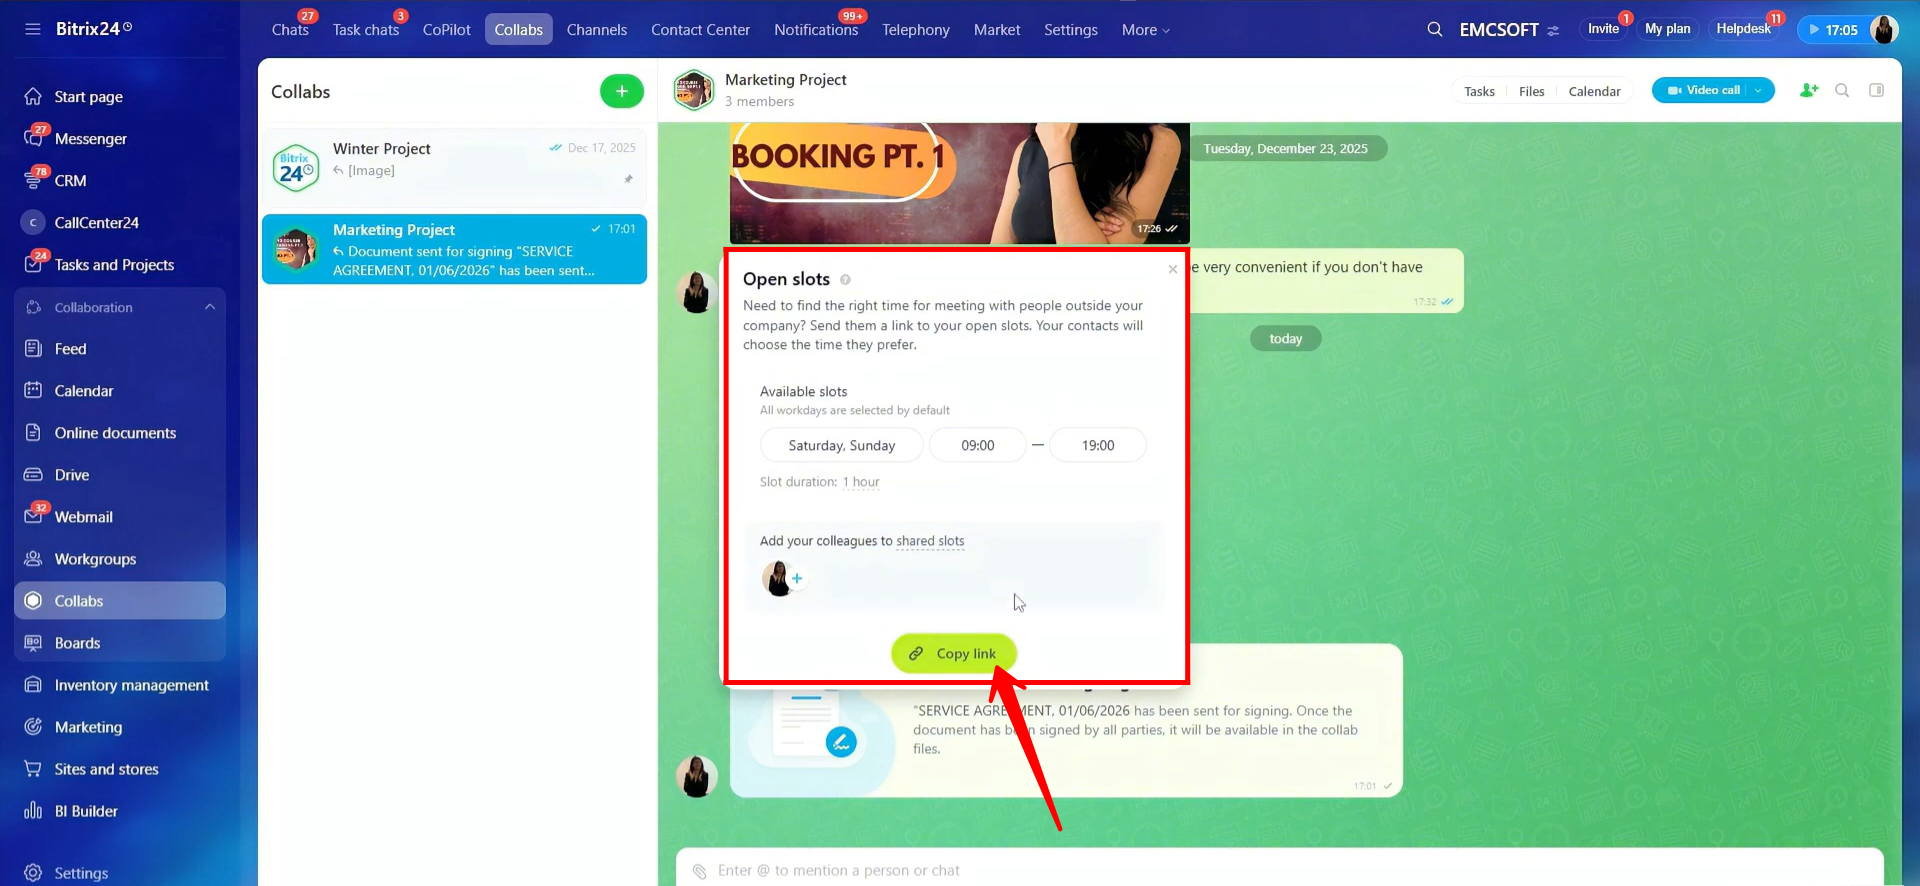
44. To share available meeting times, click the highlighted icon in the chat input window and select “Time Slots.”
45. A prompt will open showing the configured time slots. You can copy the time slot link and share it in the chat, allowing members to select and book a meeting time. Note that time slots cannot be edited from this screen—we will cover how to edit them in the next step.
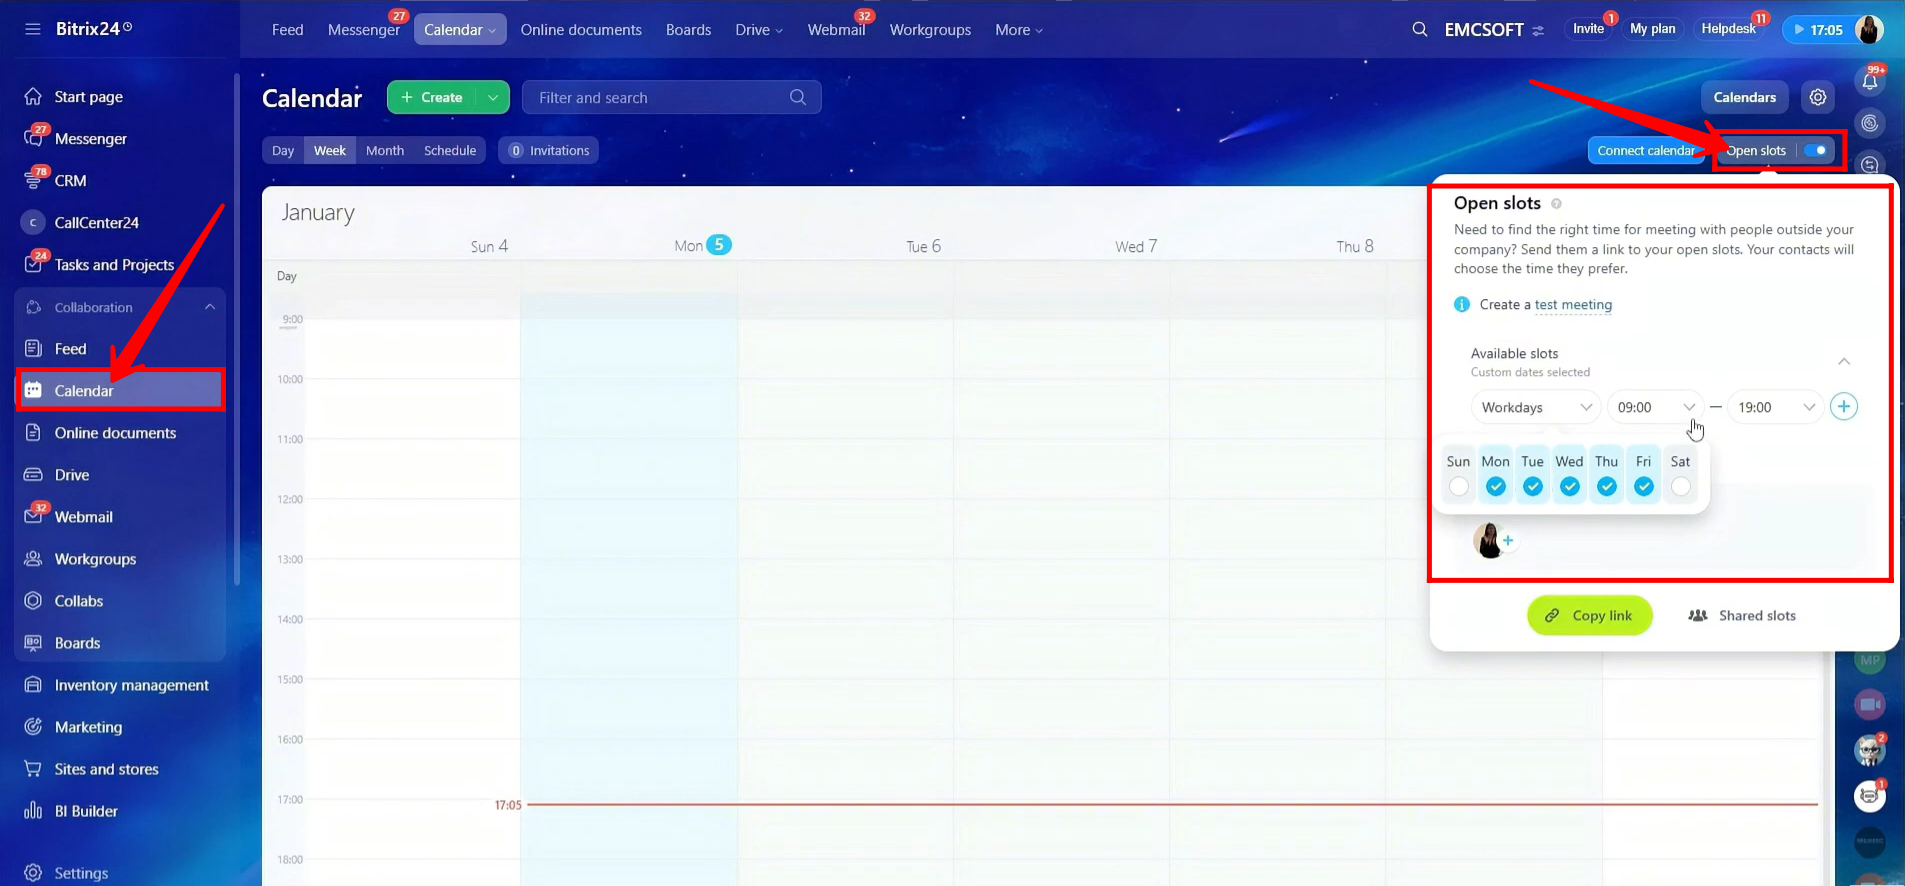
46. Go to Calendar and click Open Slots. Here, you can edit availability for weekdays, weekends, or specific dates, and define the available time ranges for each day. You can also share time slots with other employees, allowing the person booking the meeting to choose a specific employee. From here, you can copy the booking link if needed.
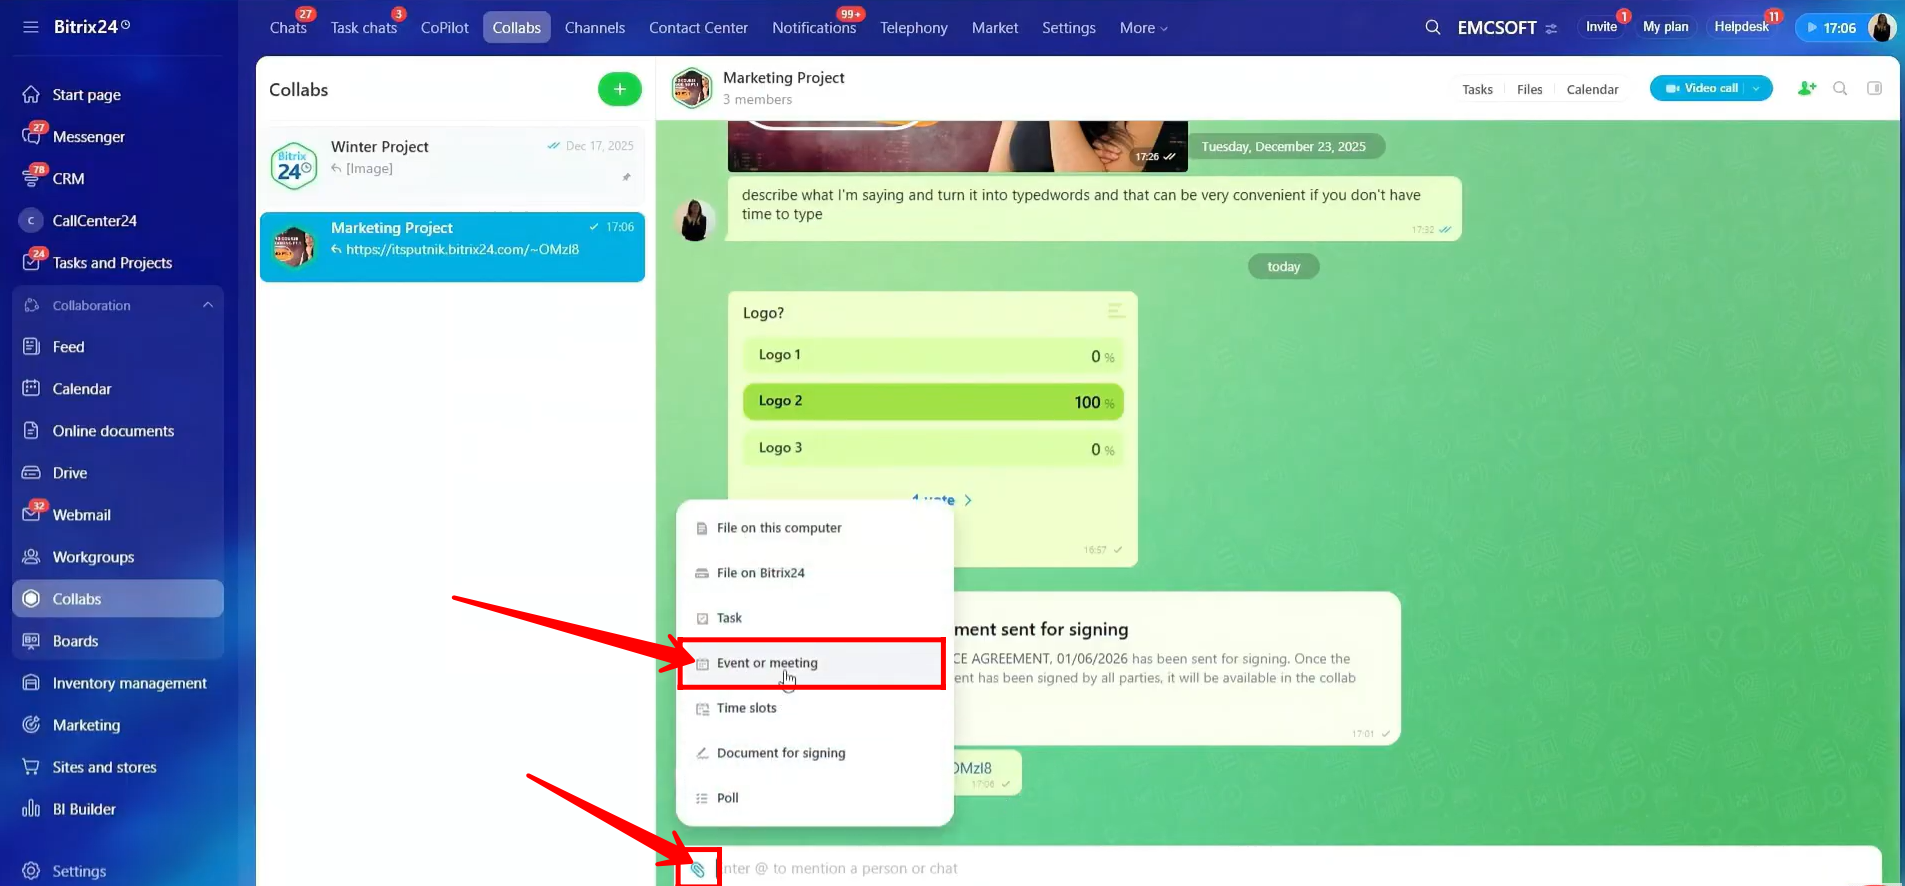
47. To create an event or schedule a meeting, click the highlighted icon and select “Event or meeting.” Alternatively, as explained earlier, you can go to Calendar within the collab and create an event or a task from there.
“You can also watch video on Youtube”