| 632 Views | admin

The Contact Center in Bitrix24 allows businesses to communicate with website visitors through multiple channels in one place. Features like the Website Widget and Live Chat make it easy for clients to reach your team directly from your website. These tools help ensure that customer questions are received and answered without delay.
The Website Widget acts as a single entry point for communication. It can include Live Chat, CRM forms, WhatsApp, Telegram, and other channels, all accessible from one widget on your website. Visitors can choose how they want to contact your team, while employees handle all conversations inside Bitrix24.
Live Chat enables real-time communication between visitors and your support team. Messages sent through Live Chat appear instantly in Bitrix24, where agents can reply, share files, and manage conversations using open channel settings. All chats can also be linked to the CRM for better tracking and follow-up.
In this guide, we will explain how to set up and use the Website Widget and Live Chat in Bitrix24. You will learn how to connect open channels, control widget behavior, and manage how visitors interact with your team through your website.
”Detailed Instructions are given below”
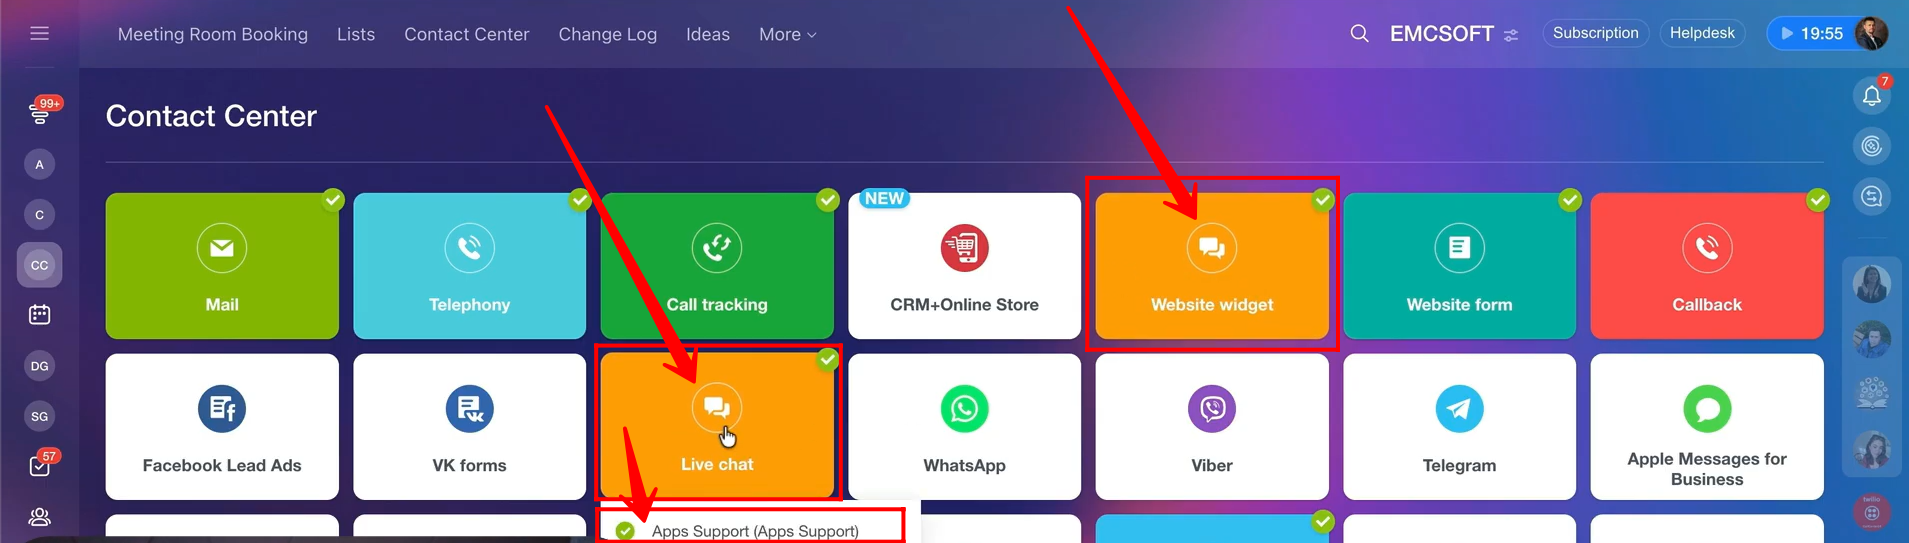
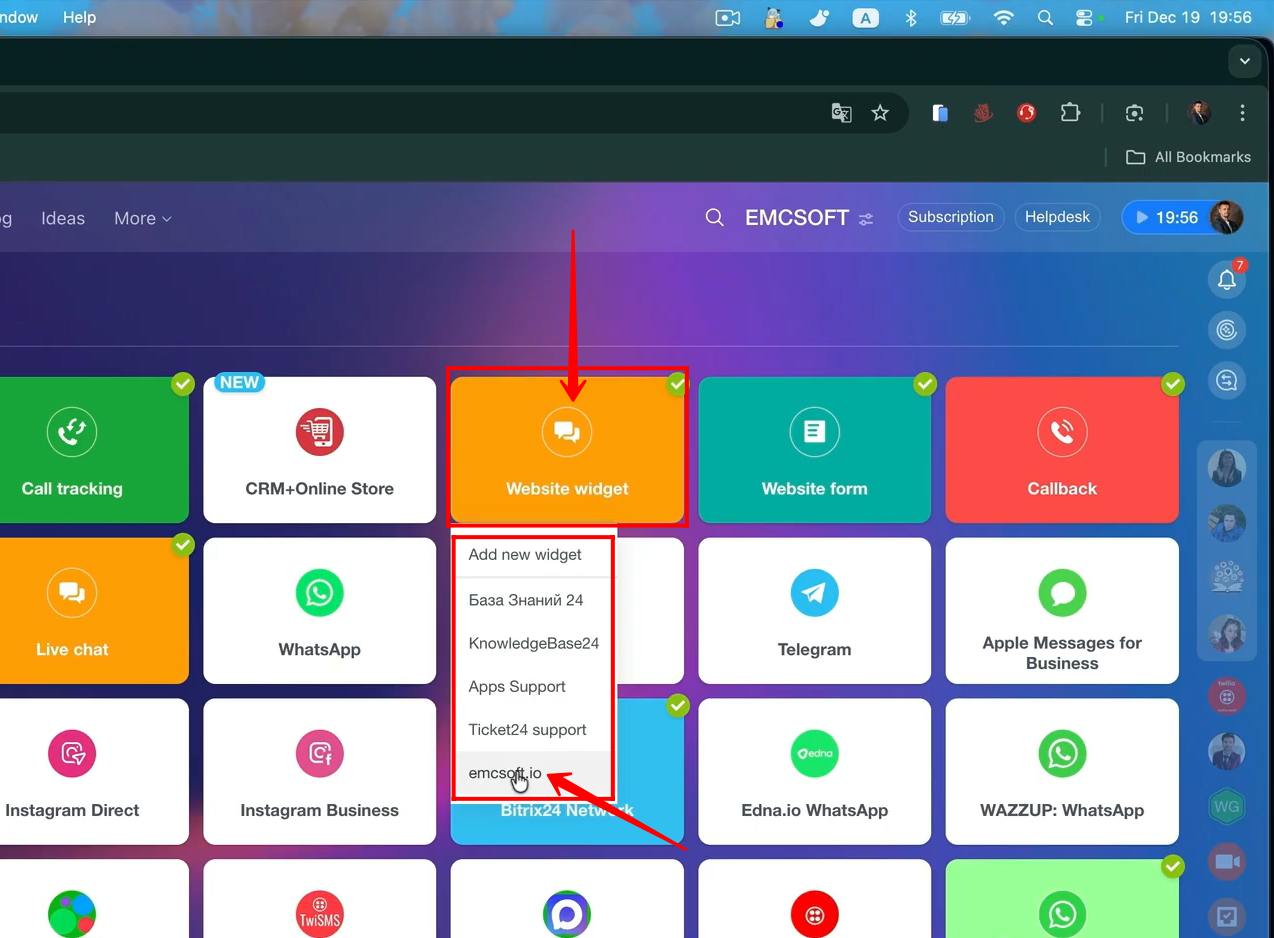
1. Within the Contact Center, you can set up open channels to receive client enquiries through different sources such as the Website Widget, Live Chat, WhatsApp, Telegram, Facebook Lead Ads, and more. In this guide, we will focus on the Website Widget and Live Chat.
When you click on Live Chat, you will either see an already configured open channel connected to Live Chat, or you will be given the option to create a new open channel and connect it to the Live Chat feature.
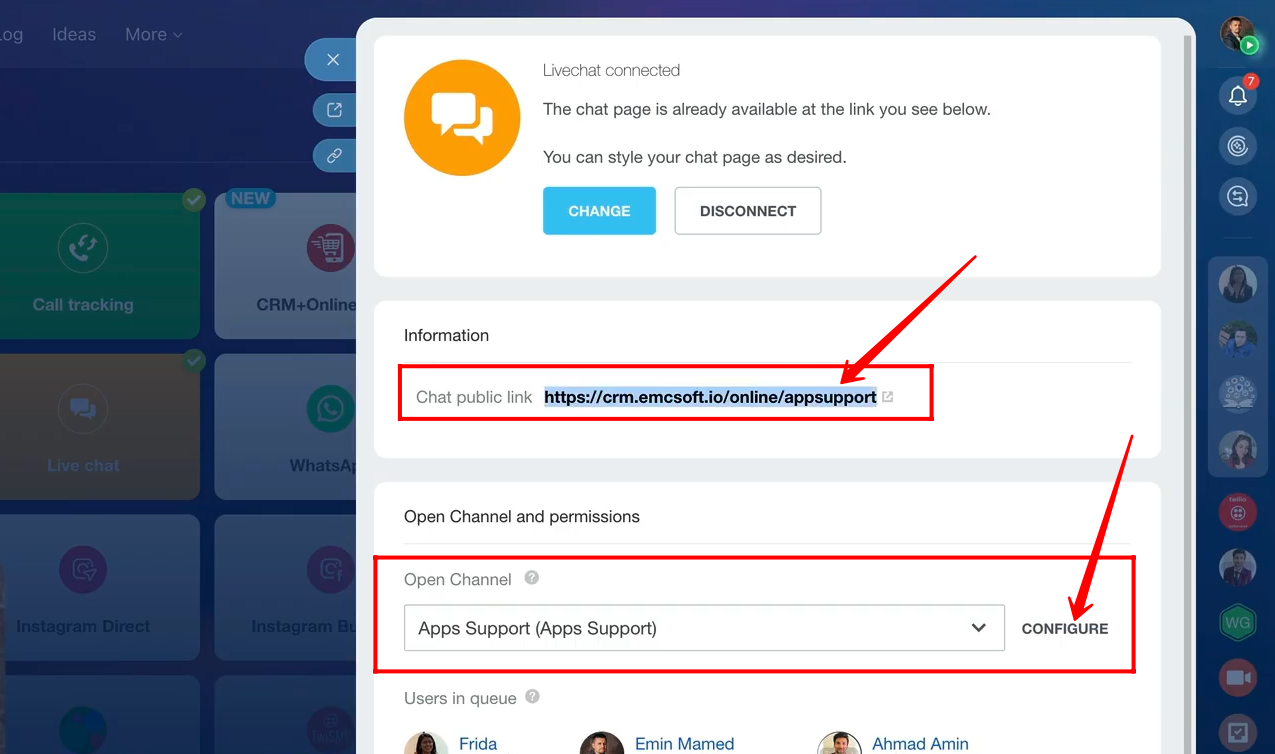
2. Within the Live Chat source configuration, you can connect an open channel and assign users from your company to the queue to receive client enquiries. The open channel setup process has already been explained in detail in our previous video, which you can watch here:
Once configured, a public Live Chat link is generated. When a client opens this link, they are taken to a chat interface where they can start a live conversation with your team members.
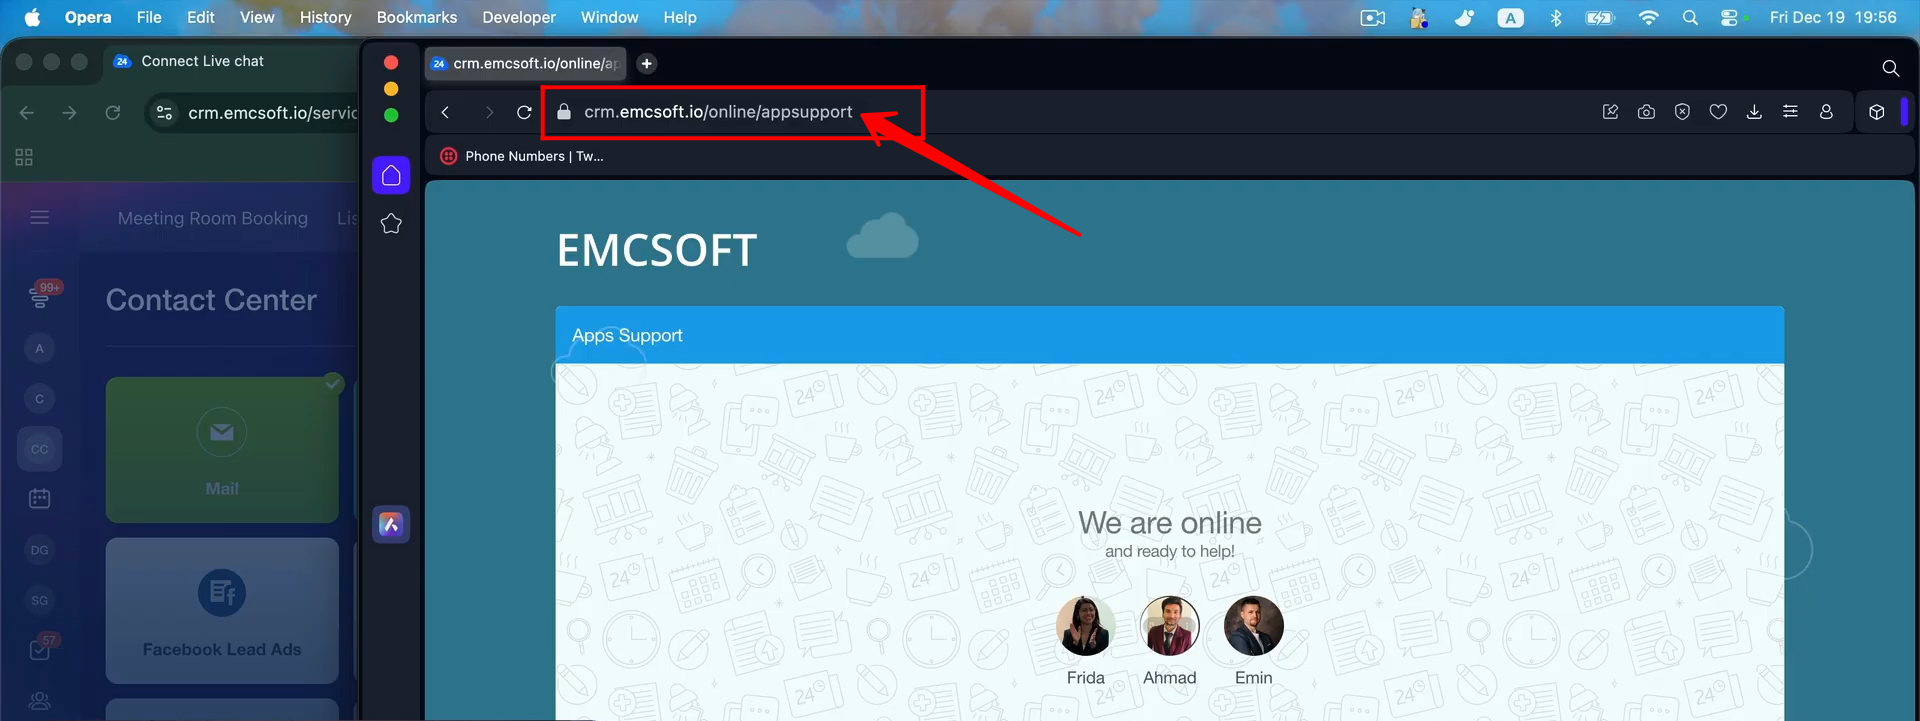
3. Here, you can see that when the public Live Chat link is opened in a browser, the client is presented with a chat window like this. They can also preview the agent profiles of the team members who will handle their chats from your side.
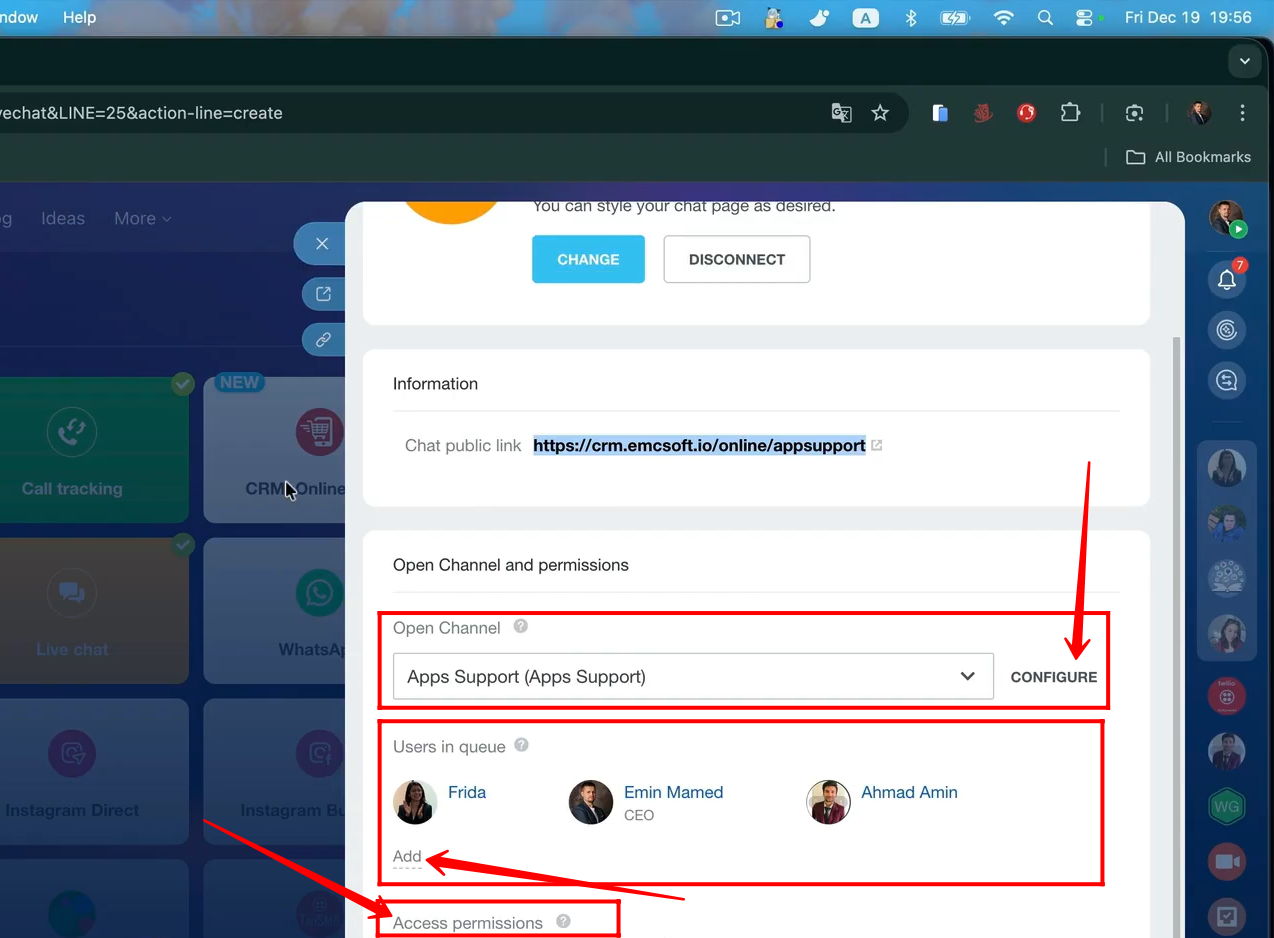
4. A new open channel can be connected to the Live Chat source, or you can configure an existing open channel. You can add or remove agents from the queue as needed and manage access permissions according to your requirements.
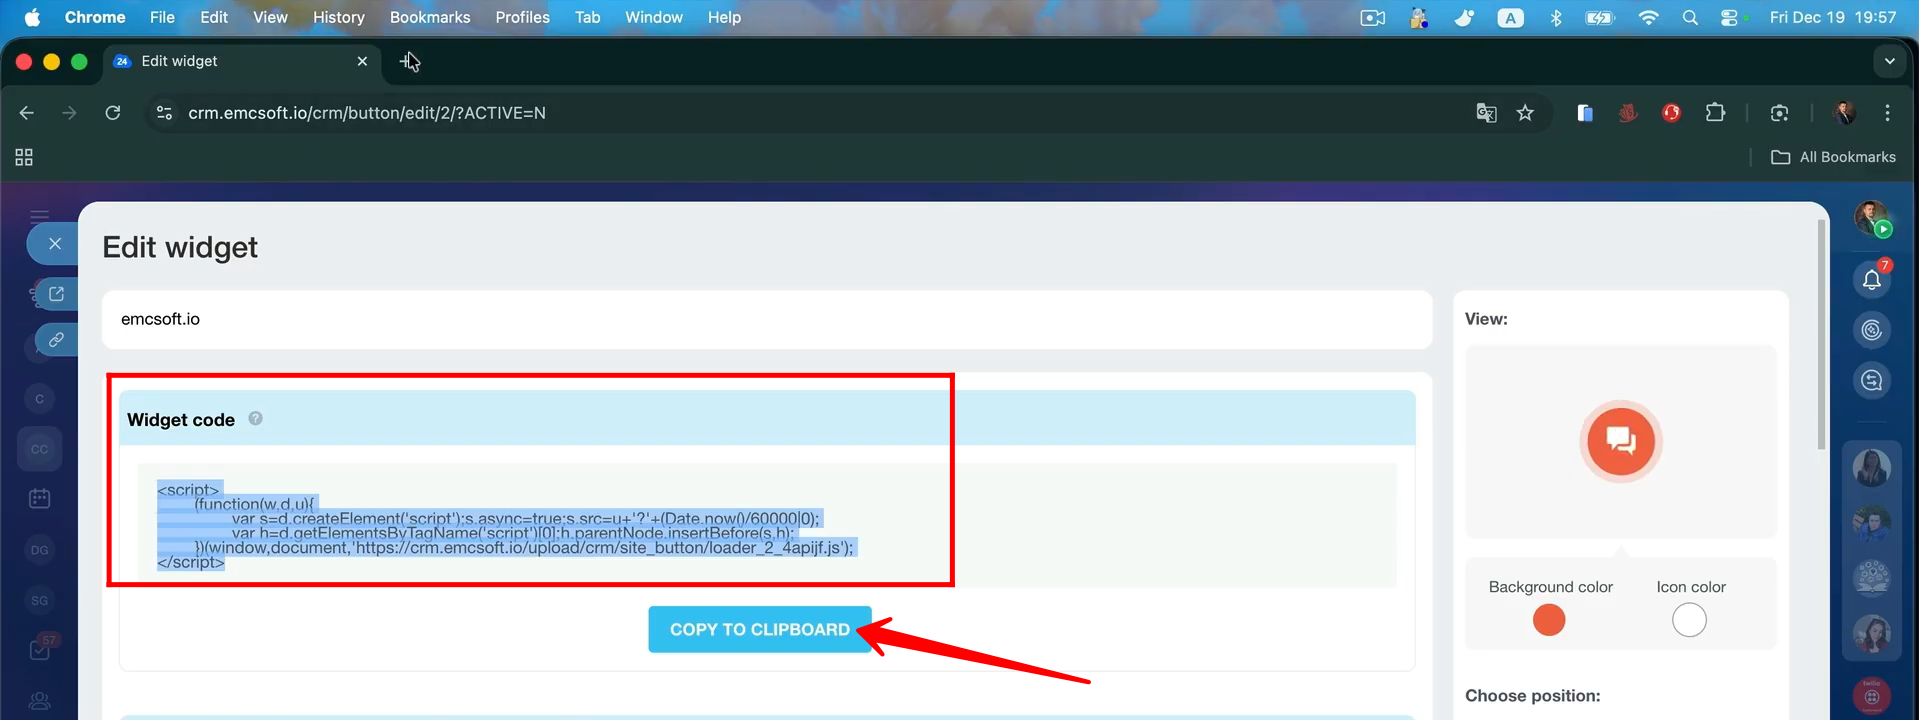
5. Let’s open the Website Widget source. Here, you can connect a new open channel or reconfigure an existing one. In this example, we will open a previously configured website widget that is already set up for our website.
6. You can copy the website widget code and paste it into your website’s header, or share it with your website management team so they can embed it on the site and display the widget.
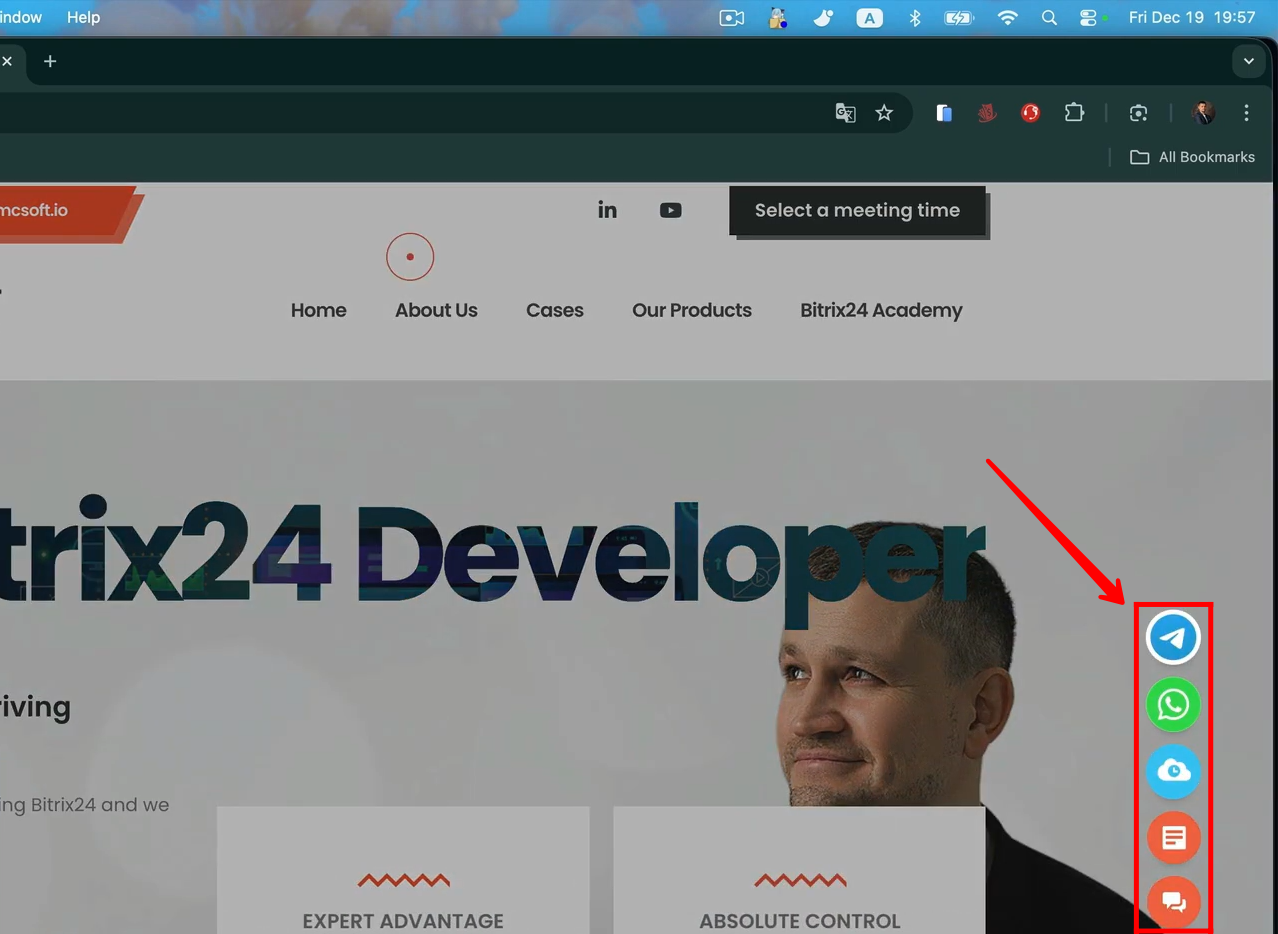
7. As you can see on our website, when you click the chat widget, multiple communication options appear, such as Telegram, WhatsApp, Live Chat, and a form to collect information. Within a single website widget configuration, you can add and manage multiple channels for client communication.
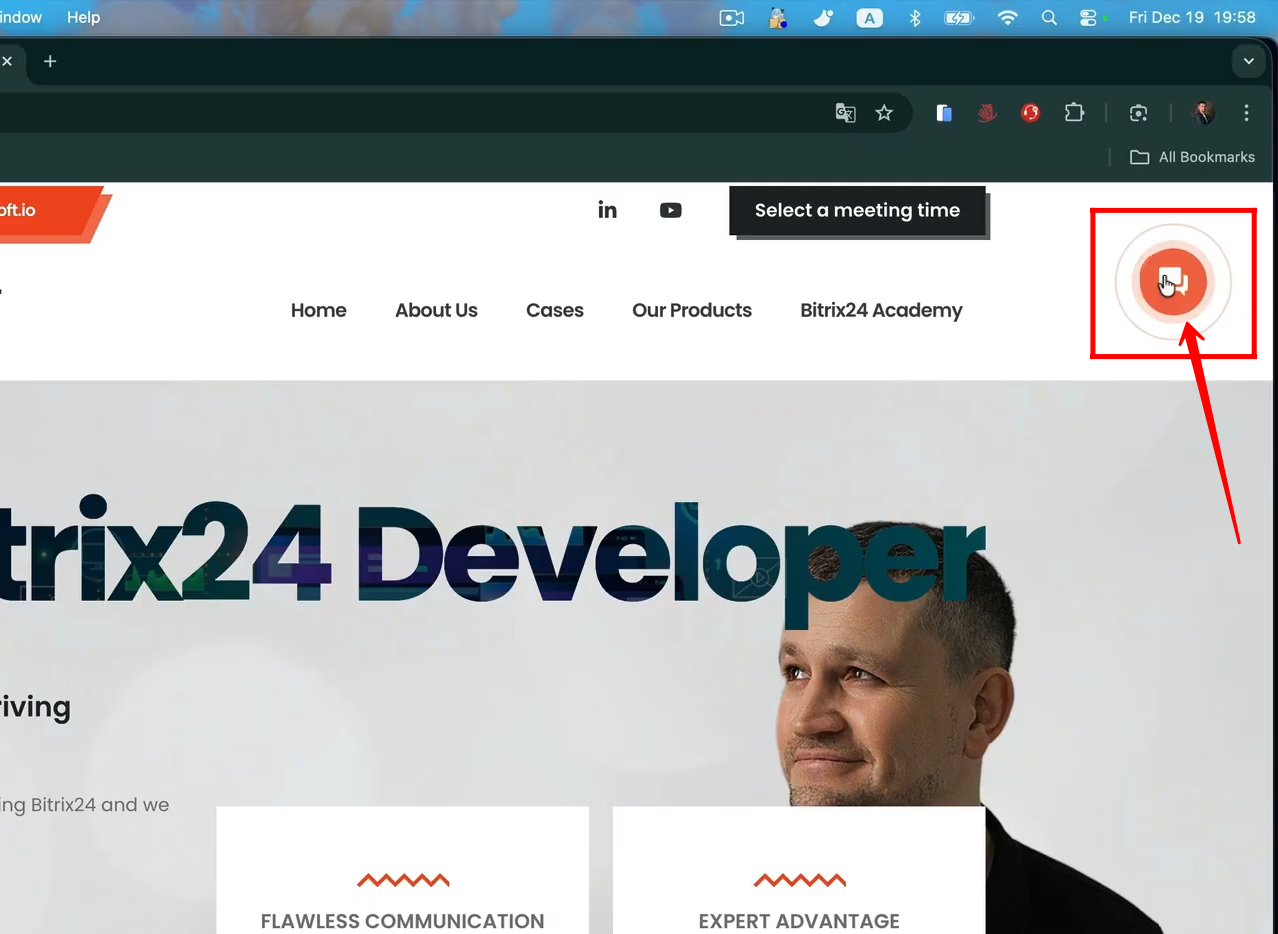
8. Within the website widget configuration, you can customize the color of the widget icon and change the position of the widget on your website. For example, we changed the widget position from the bottom-right corner to the top-right corner.
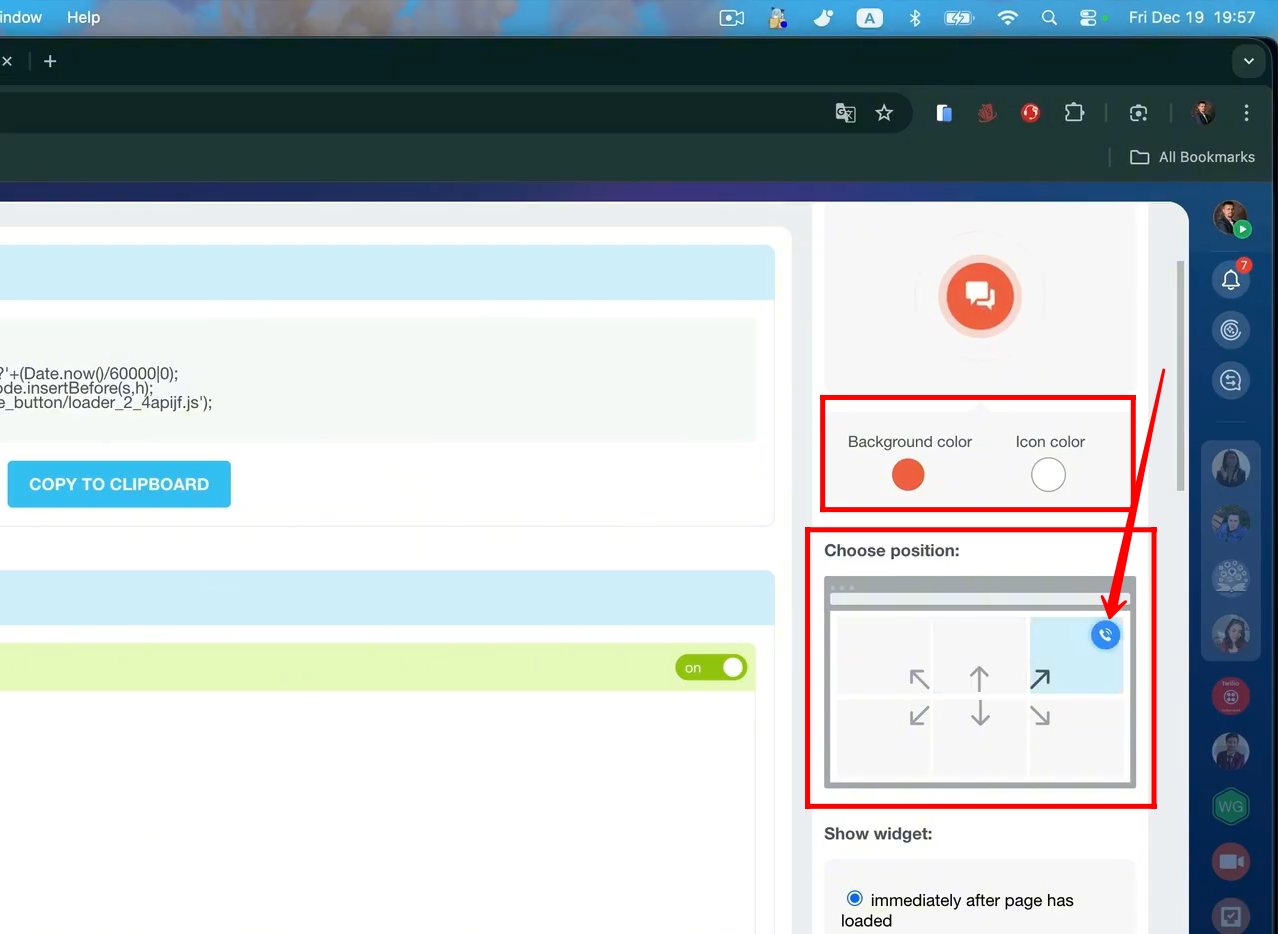
9. The widget has now been placed in the top-right corner of the website.
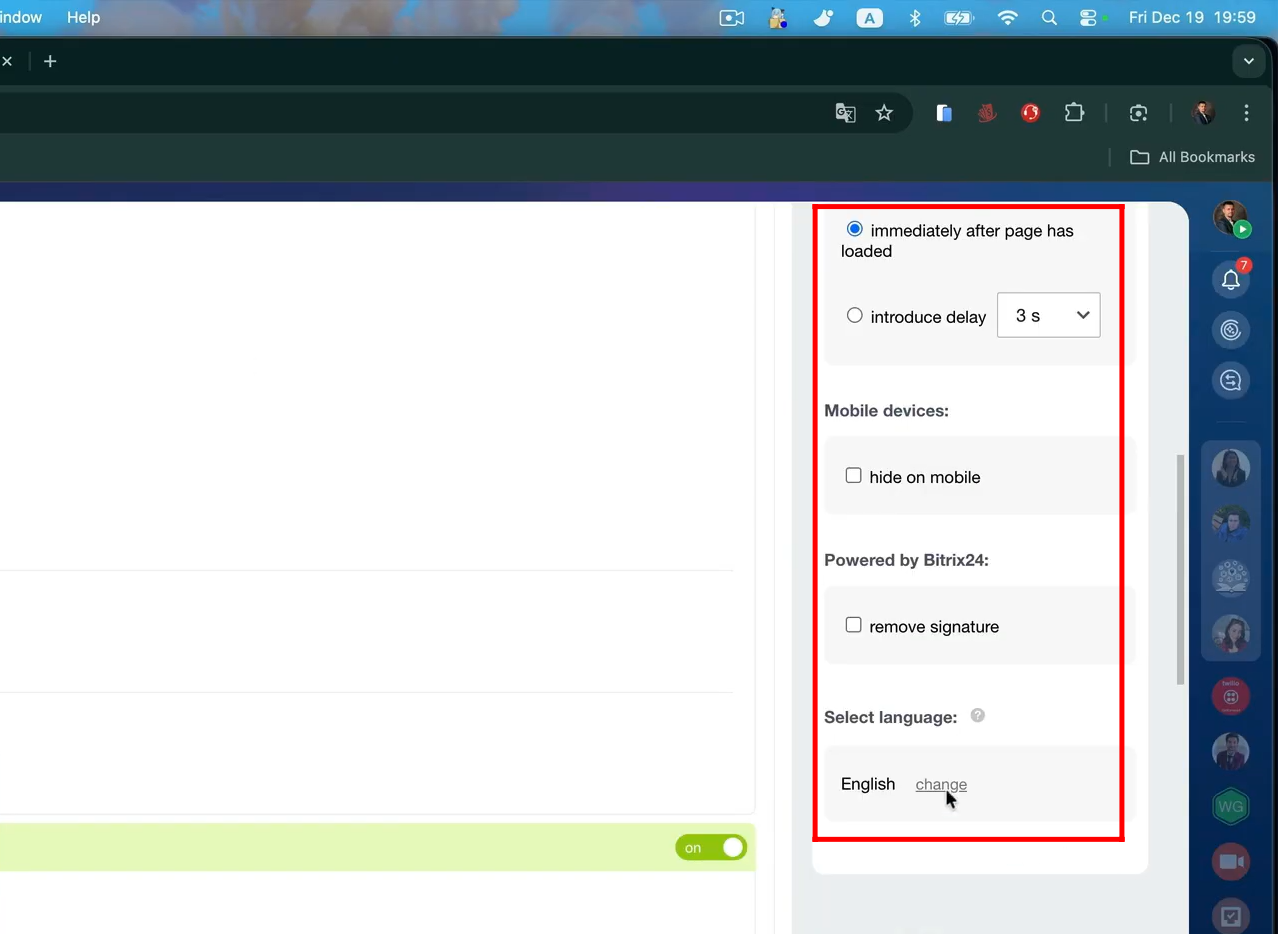
10. Here, you can control when the widget appears, such as immediately after the page loads or after a delay of 2 seconds, 3 seconds, 10 seconds, 15 seconds, or 1 minute.
You can also choose whether to hide the widget on mobile devices and remove the “Powered by Bitrix24” signature when using a form widget embedded on the website.
Additionally, you can select the language of the form displayed in the widget.
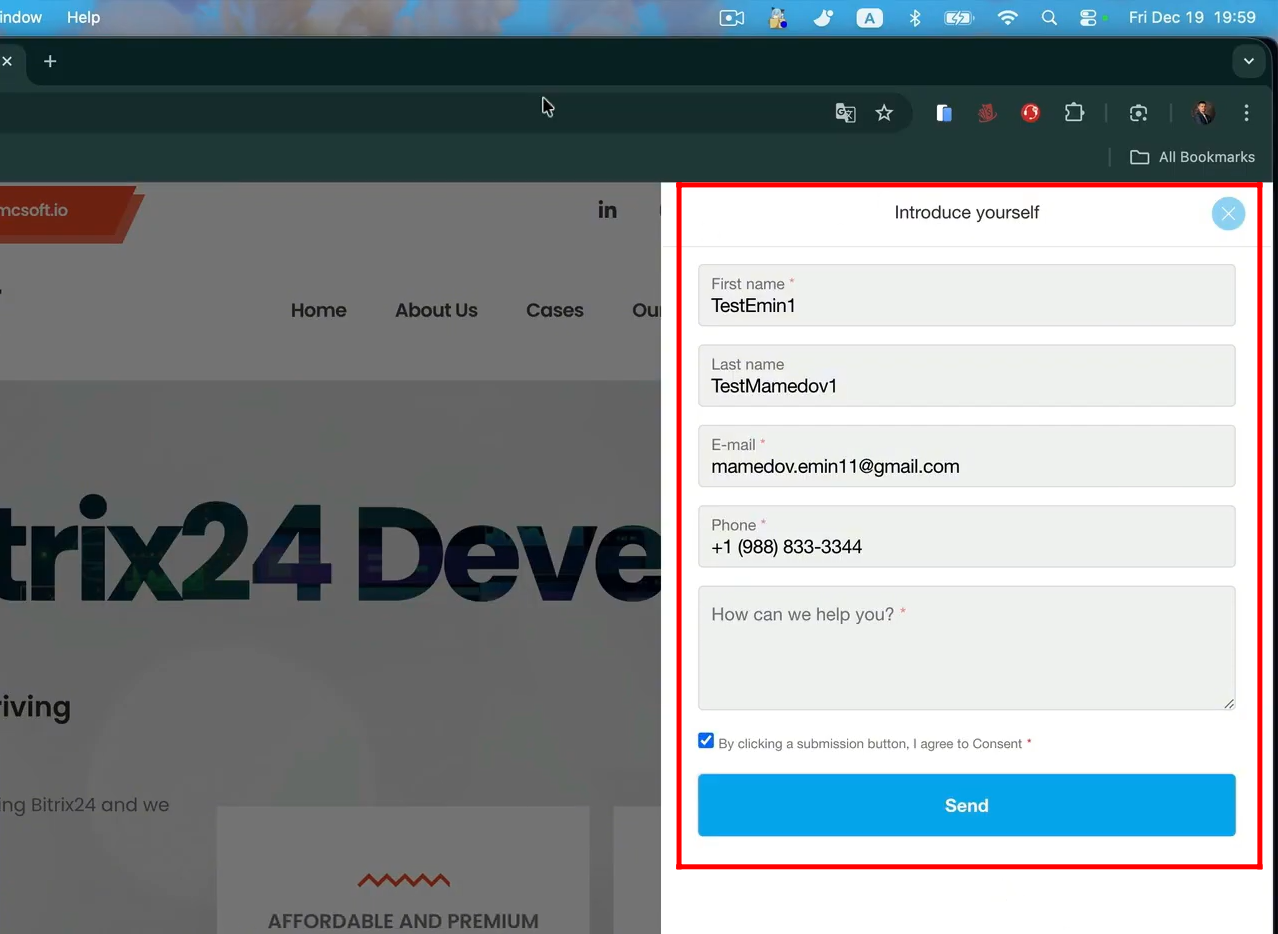
11. This is how the embedded widget form will appear to your clients on the website.
If you want to learn how to create a CRM form in Bitrix24, you can watch this video for a complete walkthrough:
Bitrix24 Training Course 9. CRM Forms: Fields and CRM entities
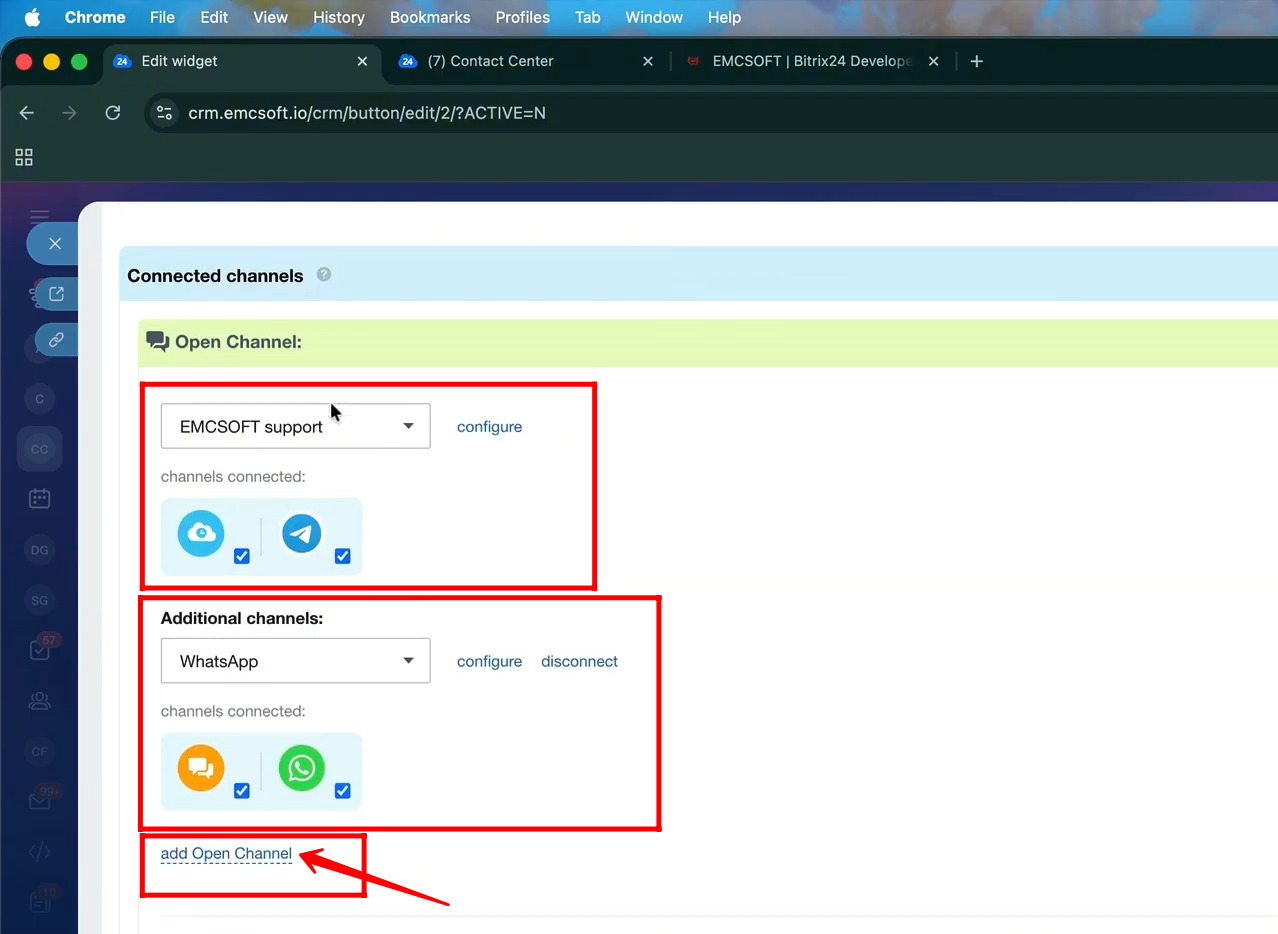
12. Within the Website Widget source configuration, you can connect multiple open channels to a single widget, as shown earlier by the number of channels displayed on the website.
In our case, we selected two open channels: “EMCsoft Support” and “WhatsApp.” The EMCsoft Support channel is connected to Telegram and Channel Chat, while the WhatsApp channel is connected to Live Chat and WhatsApp. As a result, all four sources are embedded together within the same website widget.
If needed, you can click “Add Open Channel” to connect an additional open channel to the widget.
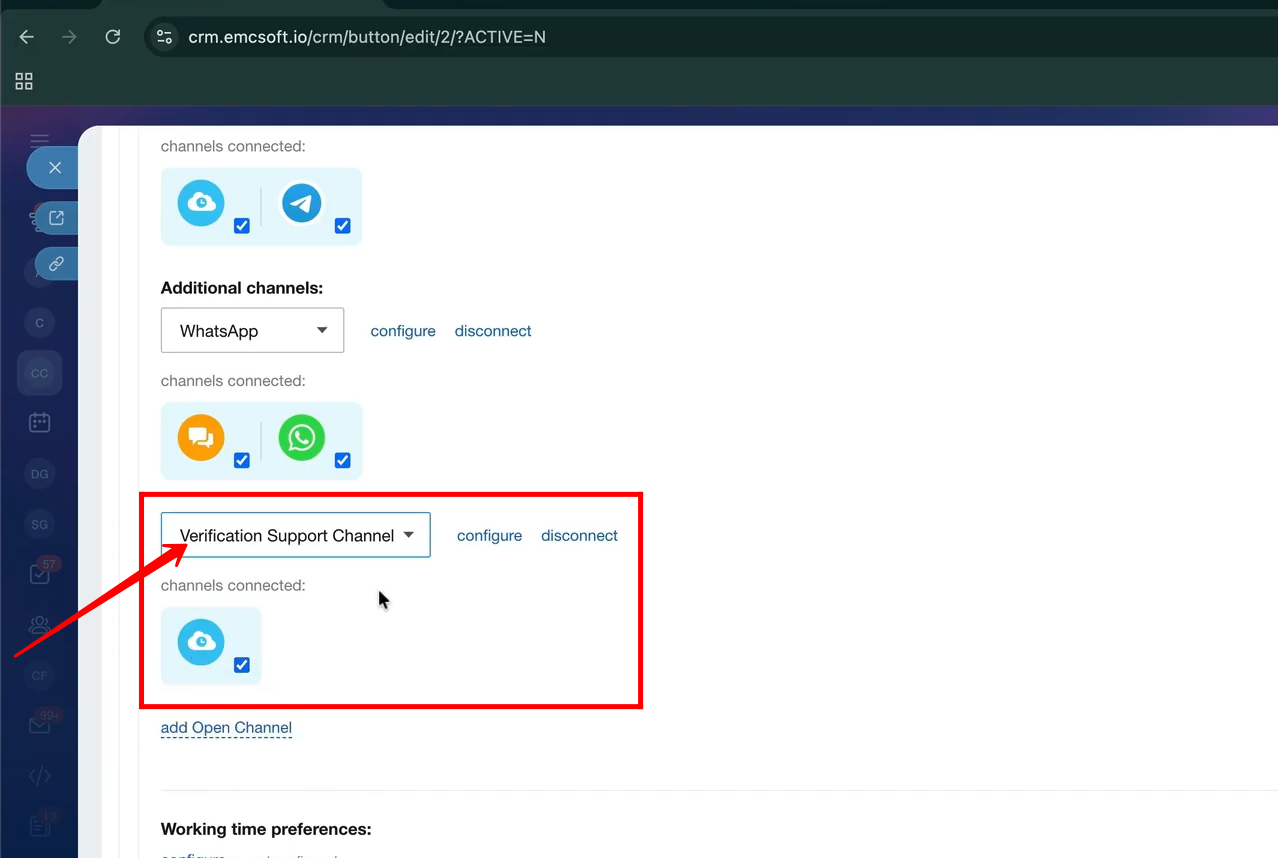
13. For example, we added a new open channel named “Verification Support Channel.” This open channel is connected to a dedicated Live Channel Chat channel for EMCsoft support. When a client accesses it through the website widget, the corresponding chat channel will open for communication.
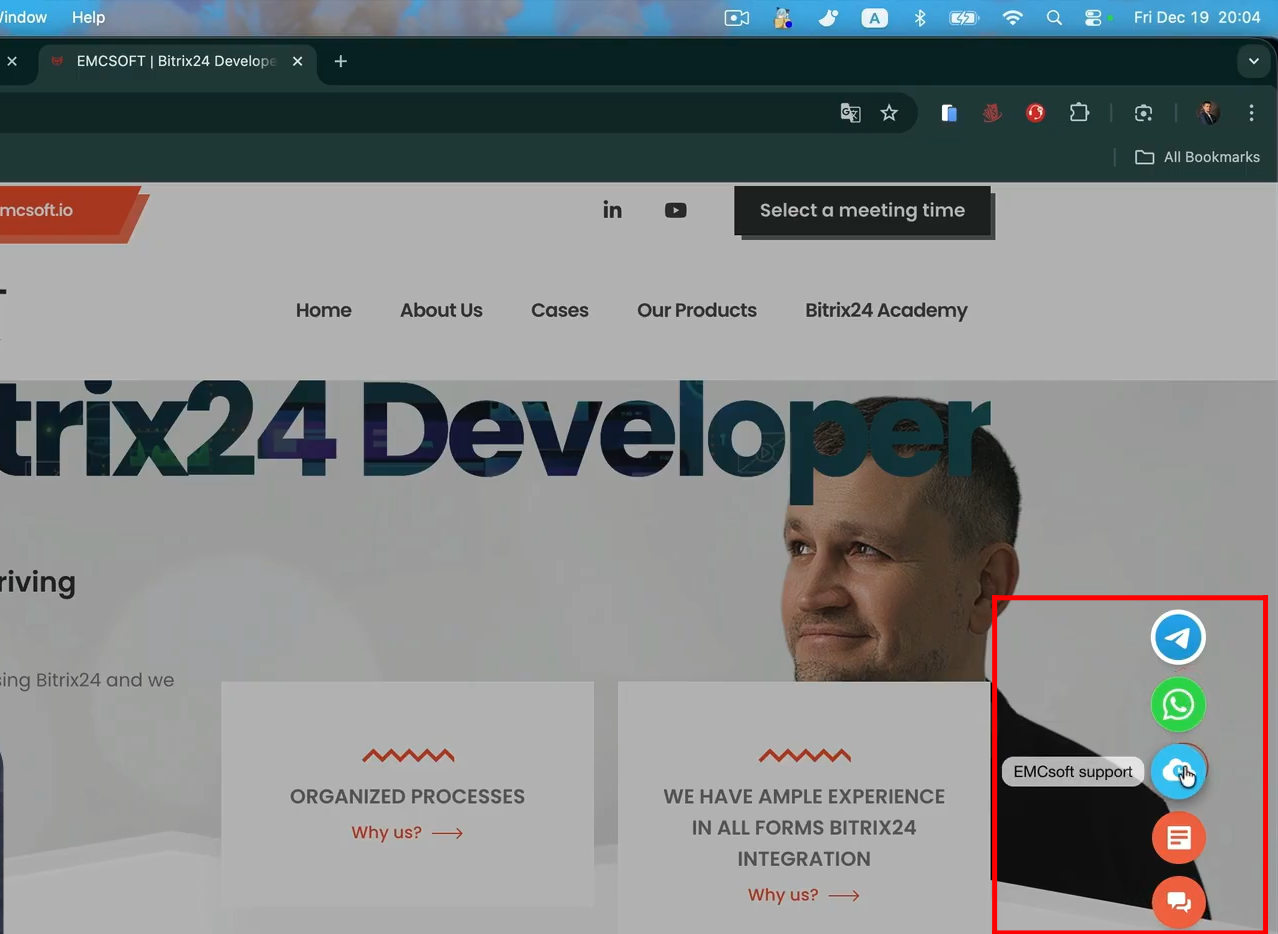
14. You can access this Live Channel Chat channel by clicking the highlighted widget icon on our website and asking any questions related to EMCsoft products or Bitrix24 support.
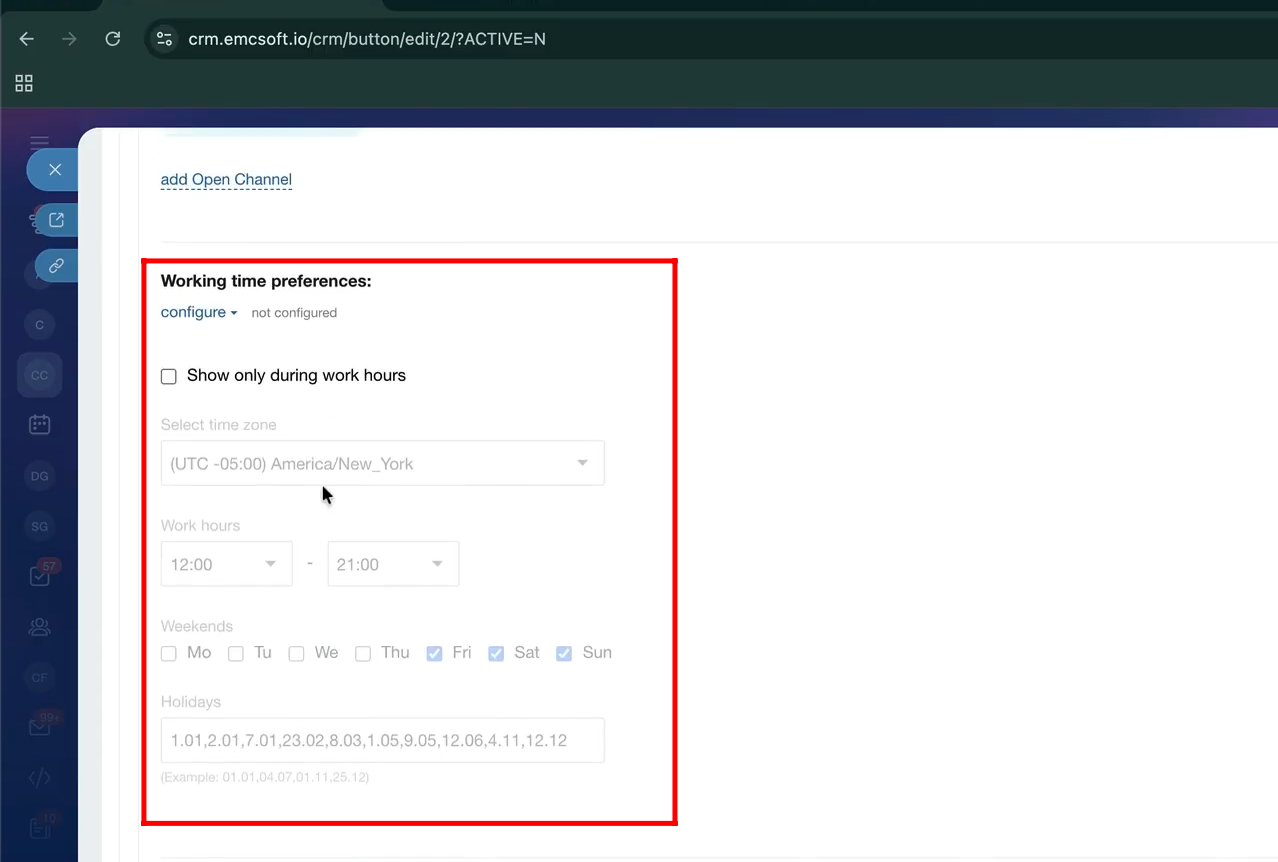
15. You can control the visibility of the website widget using the working time preferences. Here, you can configure the time zone and set specific days and time ranges during which the widget should be shown or hidden. By default, the website widget is visible at all times.
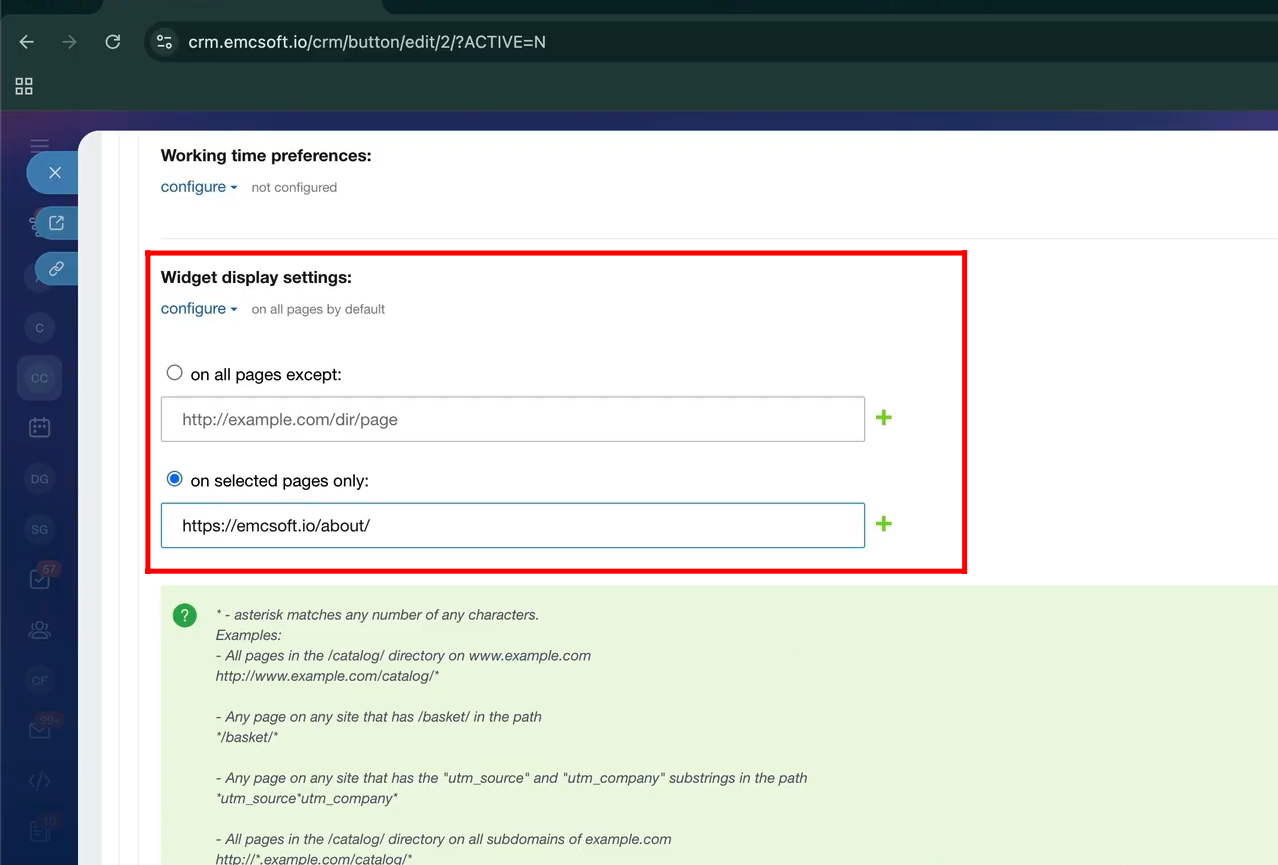
16. In Widget Display Settings, you can control where the widget appears on your website. You can choose to display the widget on all pages except specific ones, or only on selected pages. Simply add the relevant website URLs for your chosen option and save the settings.
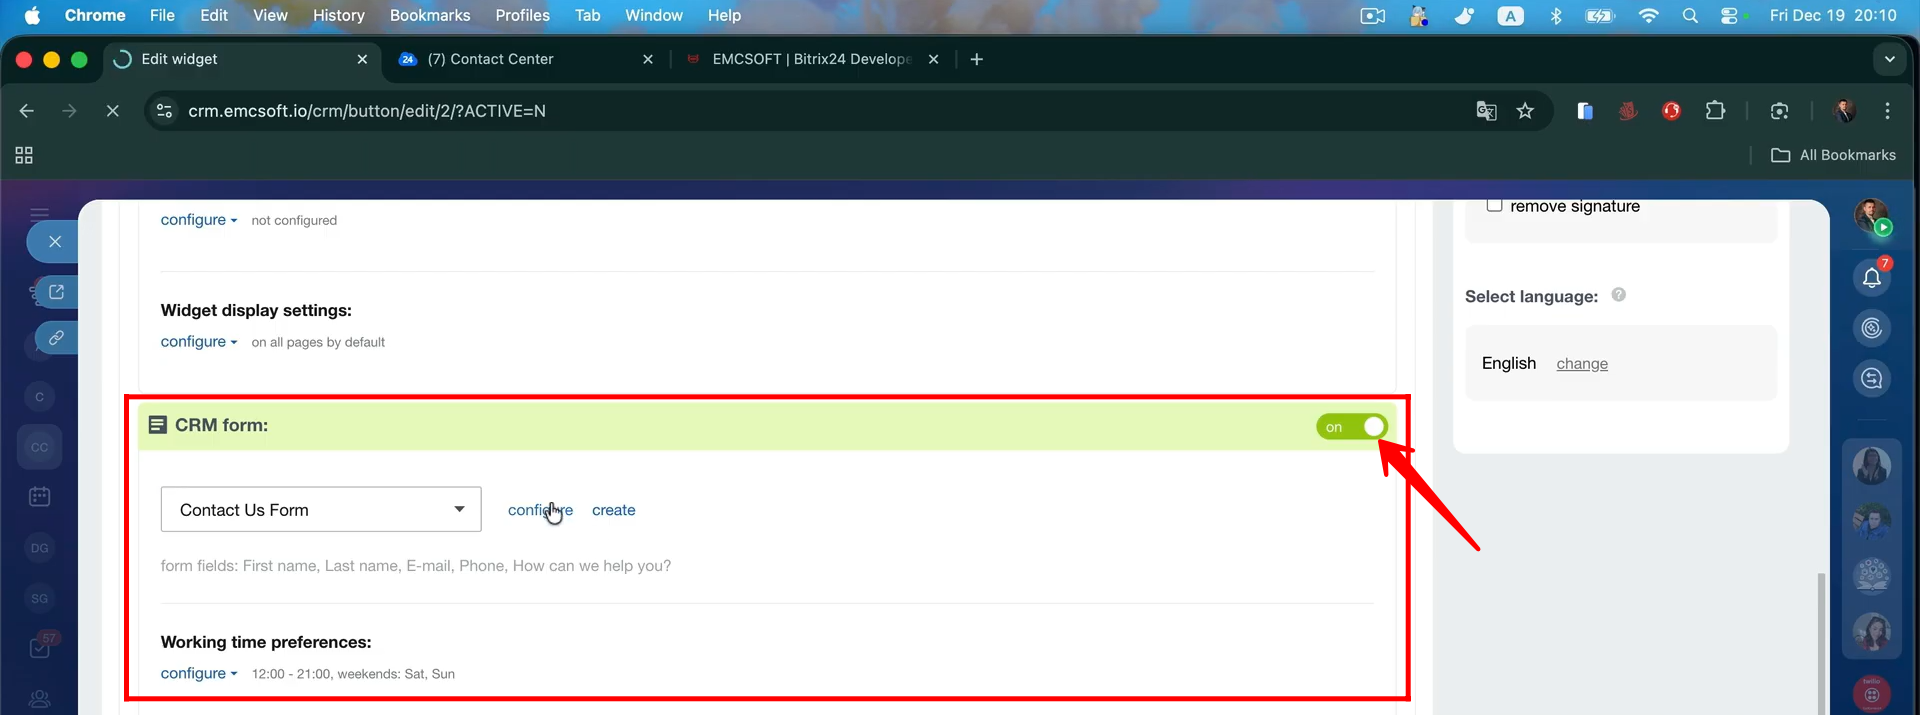
17. You can enable the CRM Form option and add a form widget as a channel. This allows you to collect client information directly through the website widget for specific use cases.
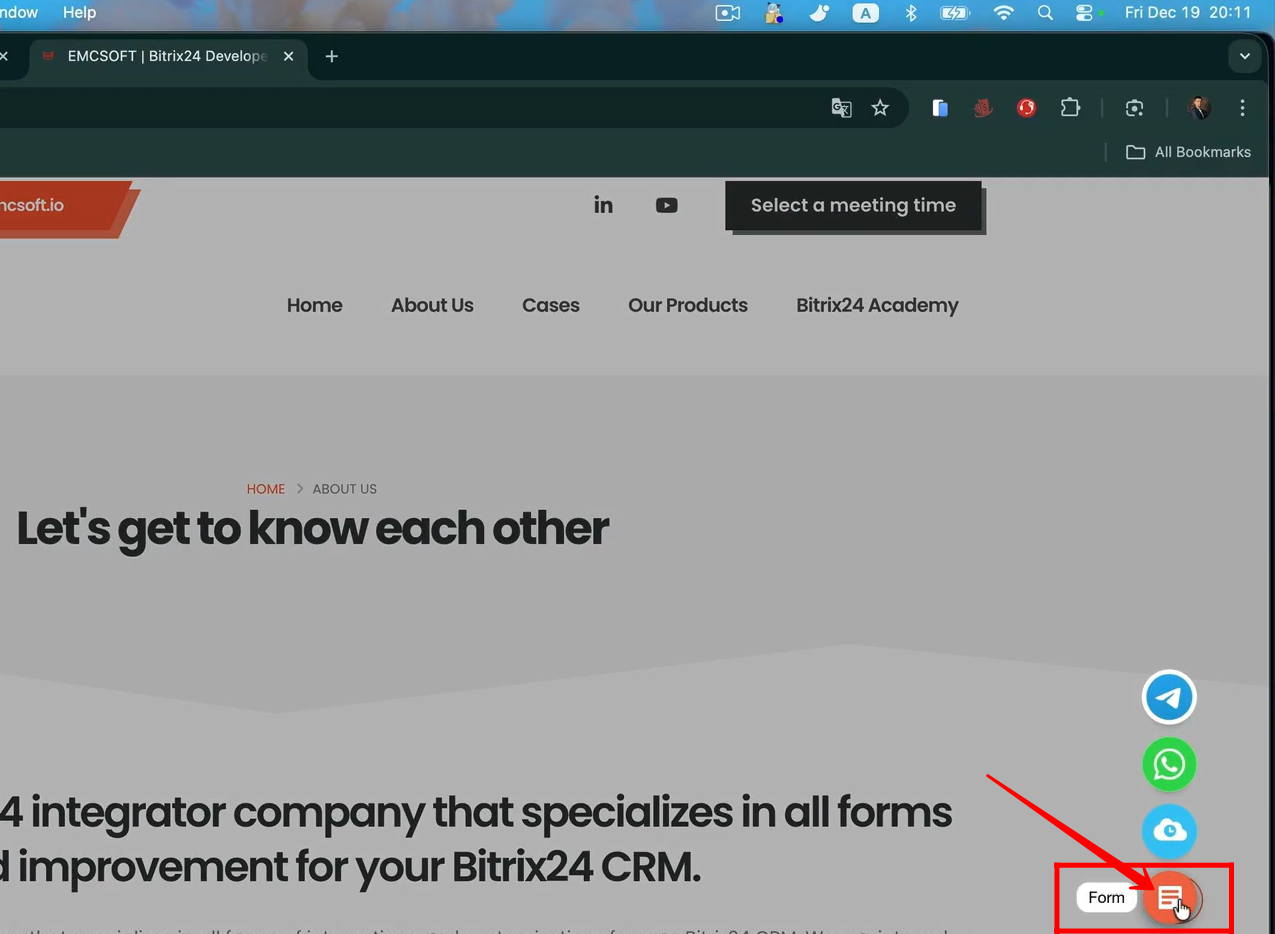
18. This is how the form icon will appear to clients. They can click this widget icon to open the form and fill in their details.
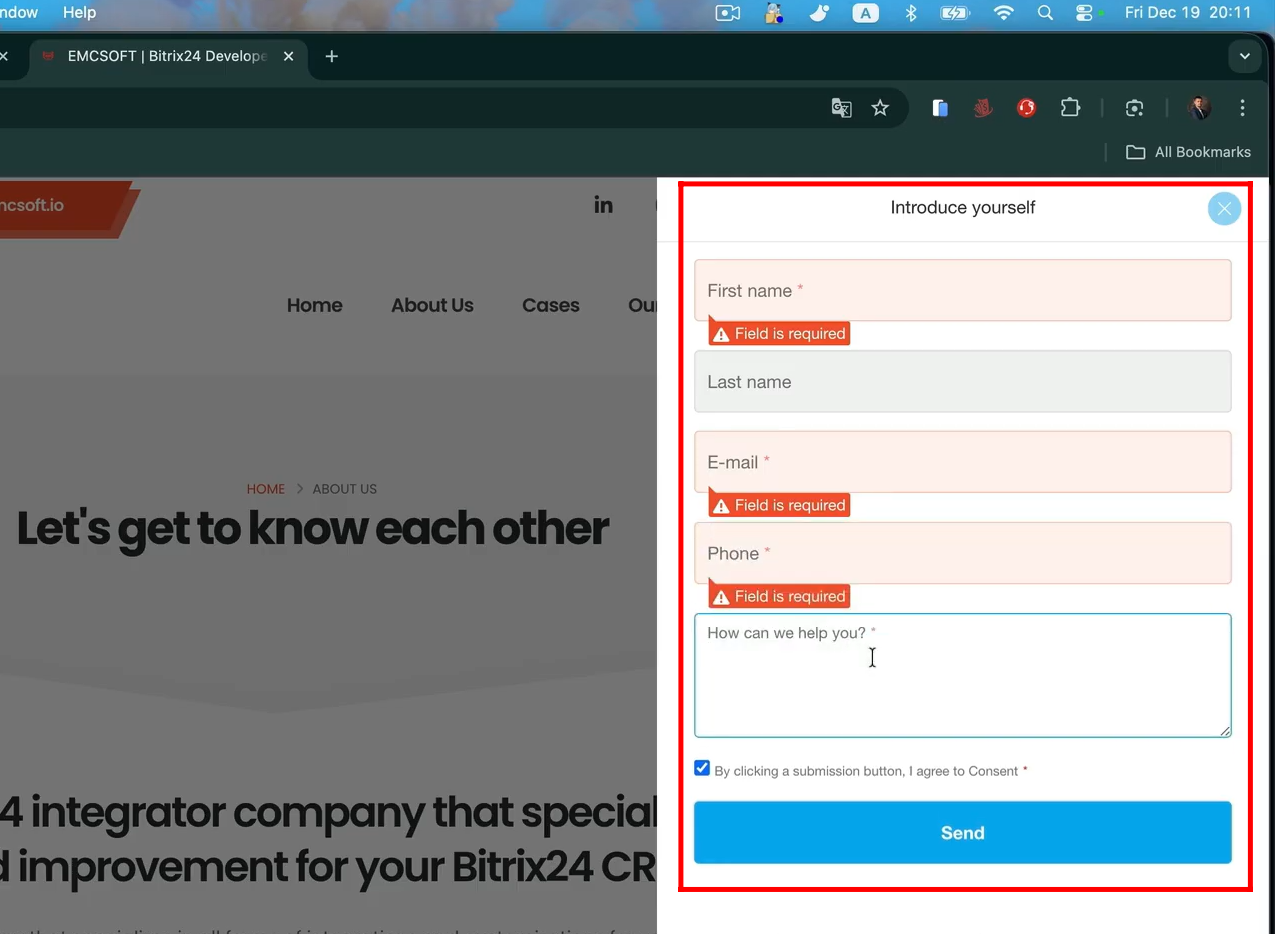
19. This is how the CRM form will appear on the screen, opening as a sidebar for the client to fill in their details.
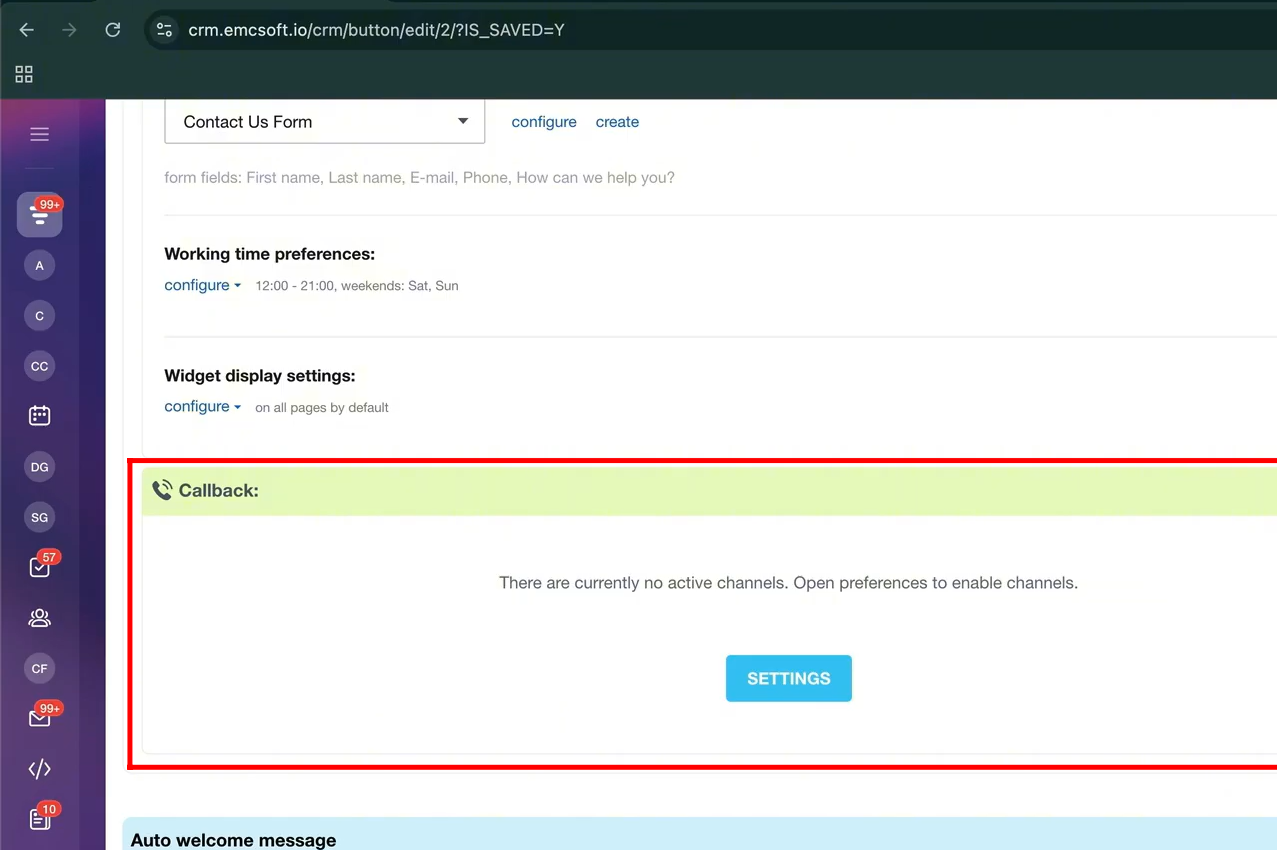
20. You can enable the Callback option and add a callback form as a widget on your website. This allows visitors to submit their phone number and request a call back from your team.
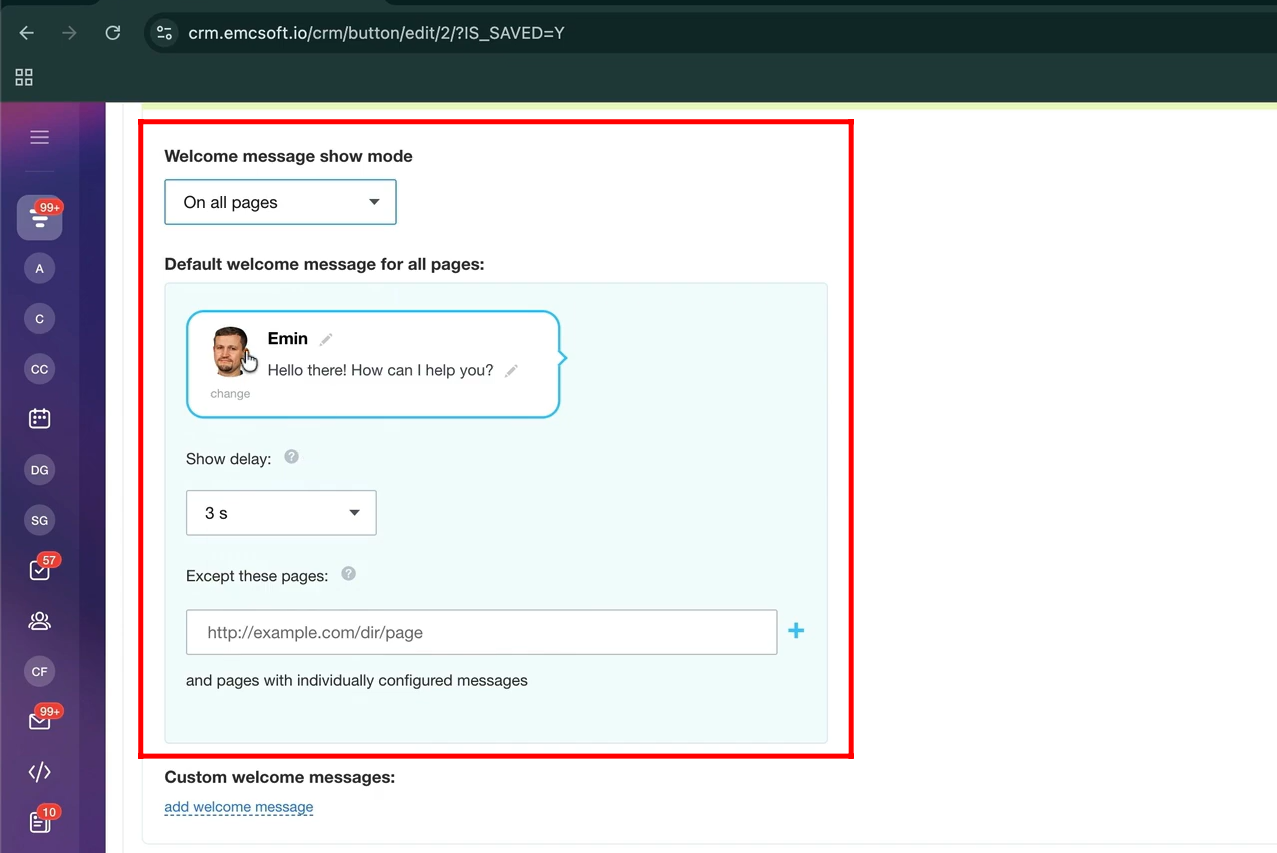
21. You can display a welcome message on all pages or only on specific pages of your website. You can customize the profile image, heading, and message text shown to visitors.
You can also set a delay (in seconds) before the welcome message appears and exclude certain pages by adding their URLs.
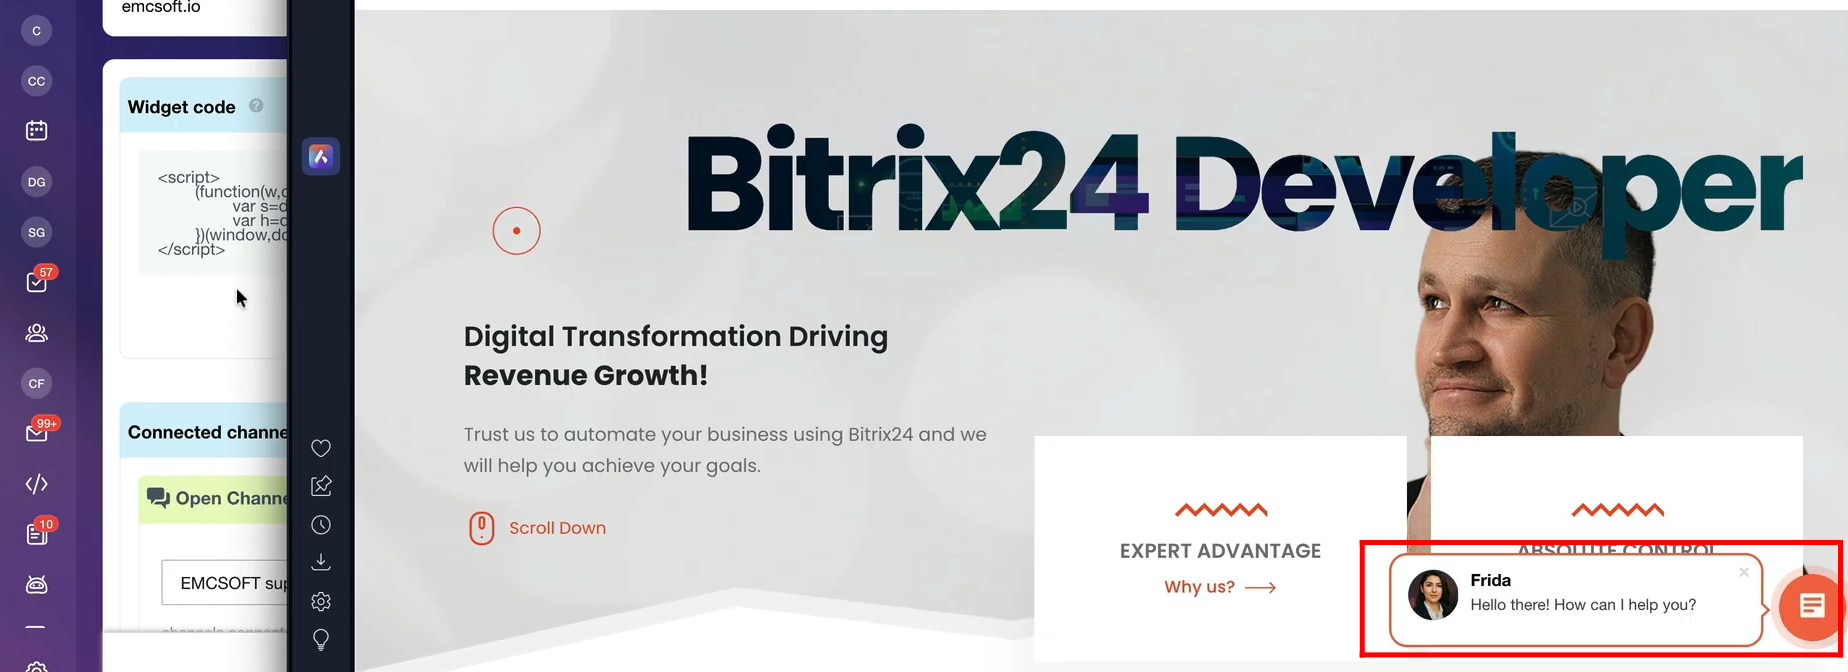
22. The welcome message will be displayed next to the website widget.
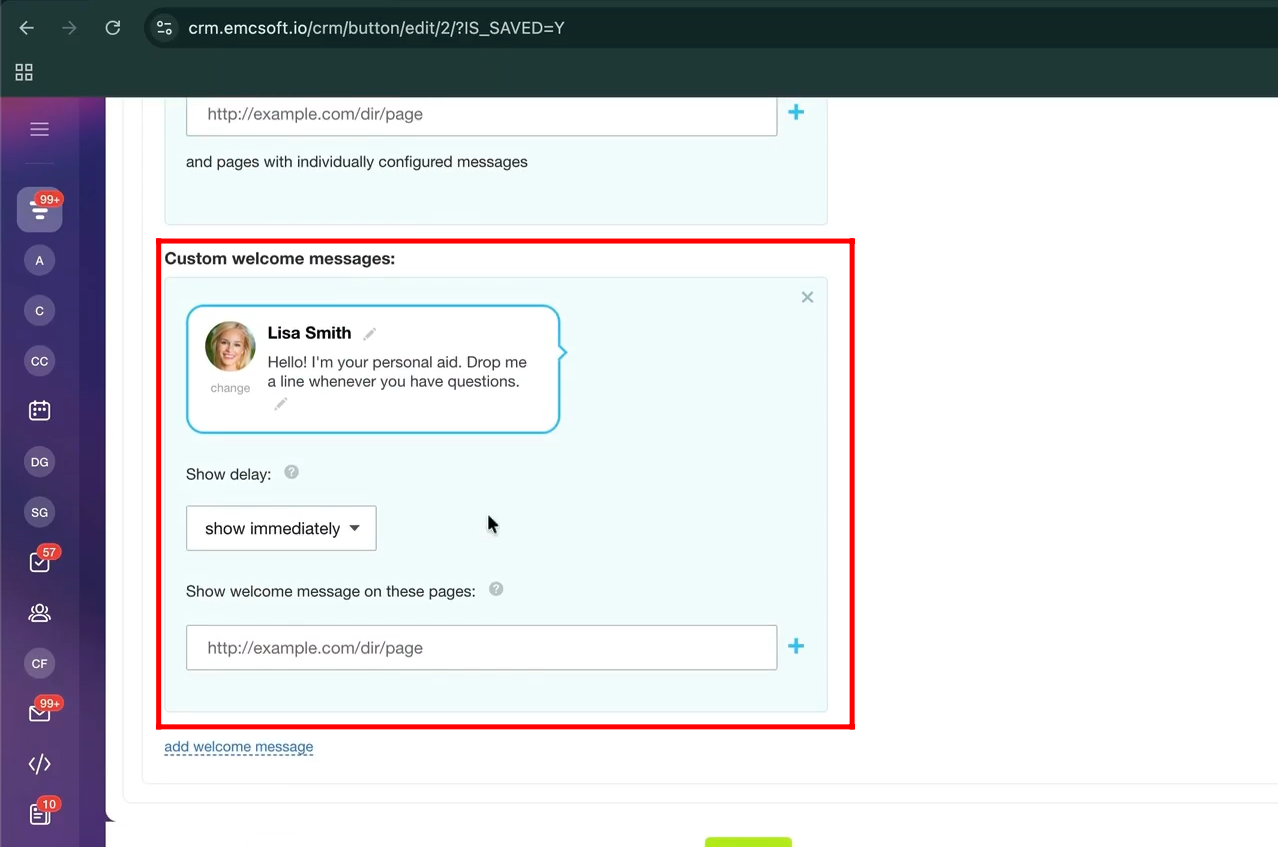
23. Additionally, you can configure custom welcome messages for specific pages on your website. You can create and manage as many different welcome messages as needed, each tied to its respective page.
“You can also watch video on Youtube”