| 3589 Views | admin

This article will help you understand how to use CRM forms in Bitrix24 and how these forms connect with different CRM entities like Leads, Contacts, Deals, and more. You will learn how to create forms, add different fields, and link them to the correct CRM parts so the information is saved properly.
We will also show you how to see the data that comes from the forms inside Bitrix24 and explain how the system creates new records based on what the user submits. By following these steps, you can easily collect customer information, manage deals, and keep everything organized in your CRM.
Whether you want to create a simple contact form or a more detailed form connected to deals or other records, this guide will walk you through the process in an easy-to-understand way.
“Detailed Instructions are given below“
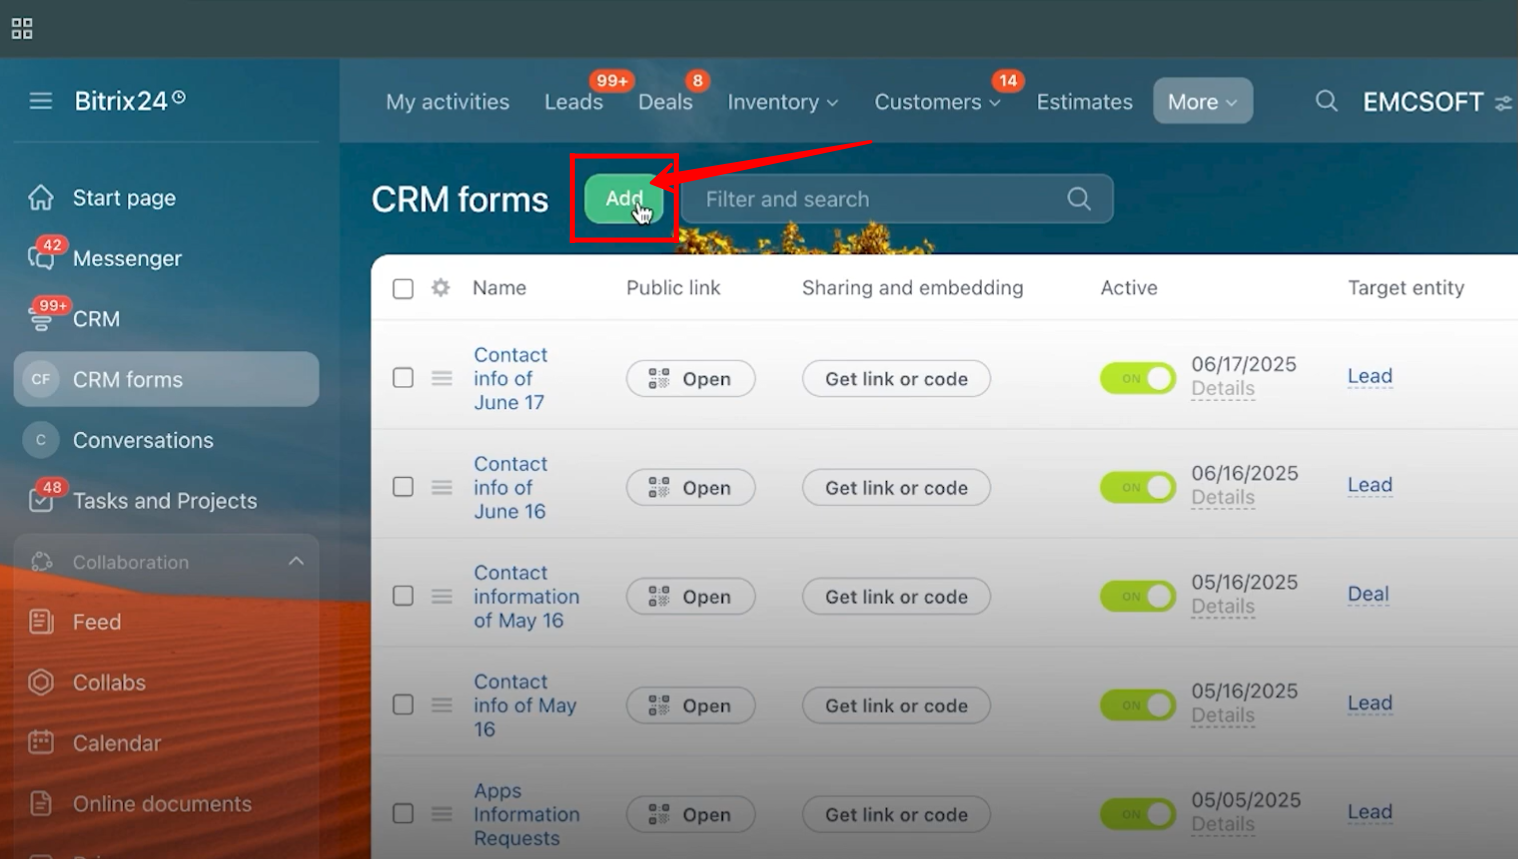
1. Open CRM Forms from the menu, or locate it by clicking the search icon and typing in the search bar.

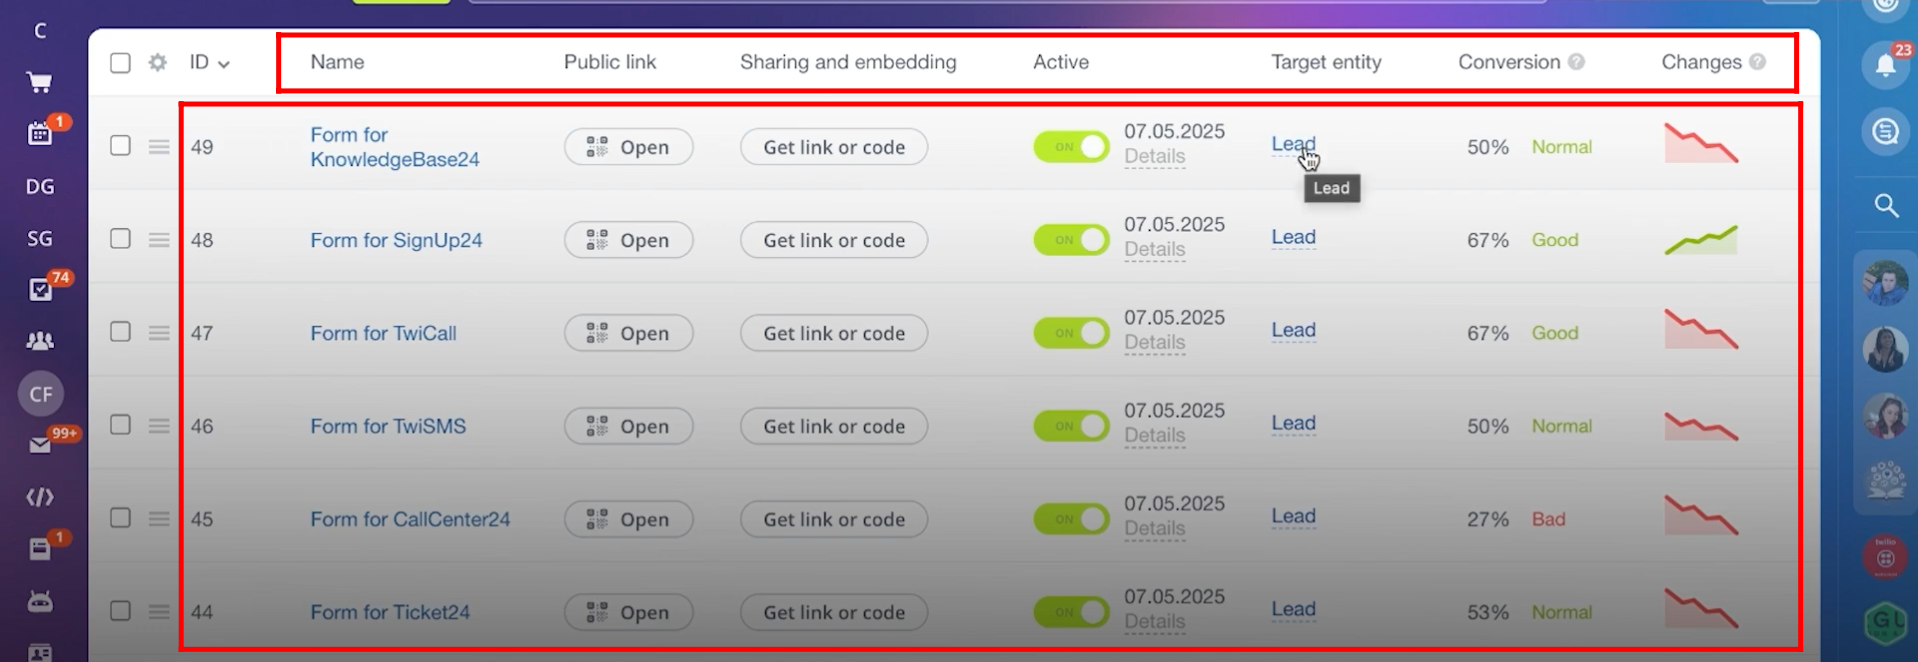
2. You will see a list of all previously created forms, along with details such as the form name, public link, active status, target entity (the entity the form is linked to), conversion statistics, and change trends for each form.
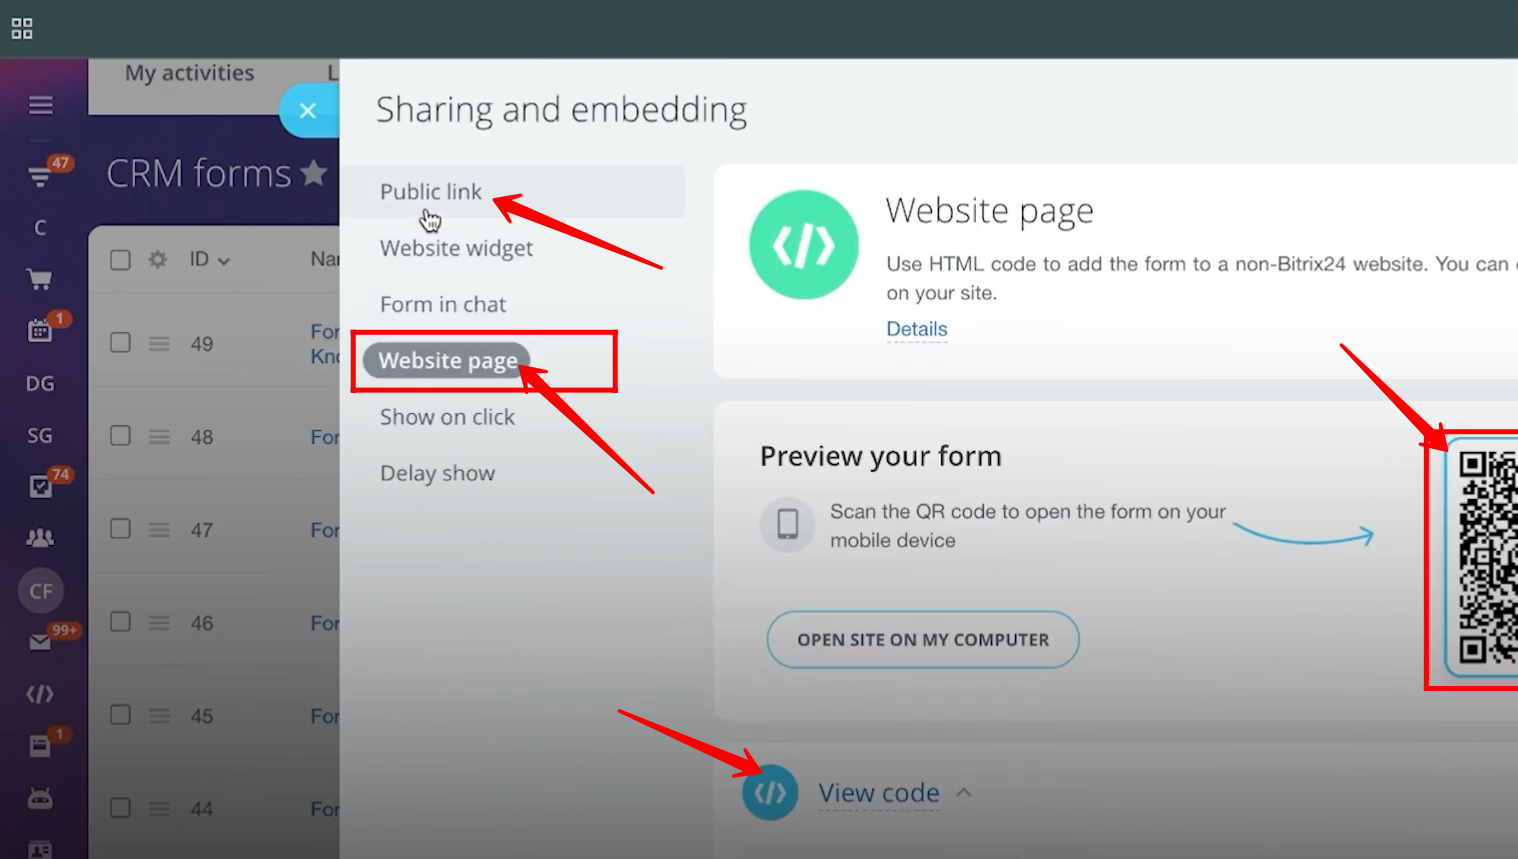
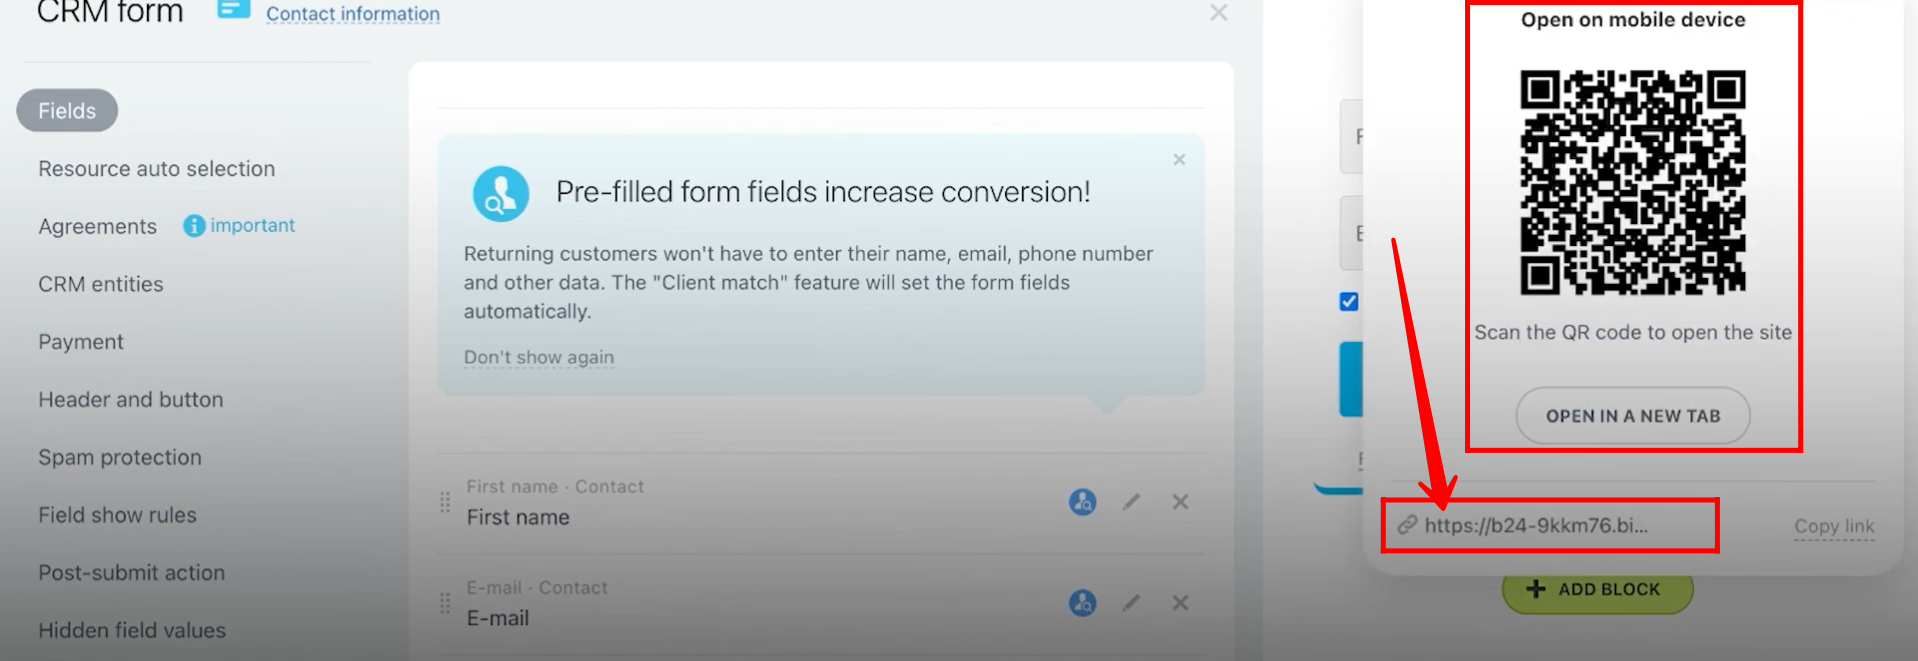
3. Within the “Sharing and Embedding” section, go to the “Website Page” area. Here, you will find a QR code that you can scan to open the form on your mobile device. Additionally, you will get an embed code that can be placed on your website to display the form there.
4. Click the “Add” button to create a new form.
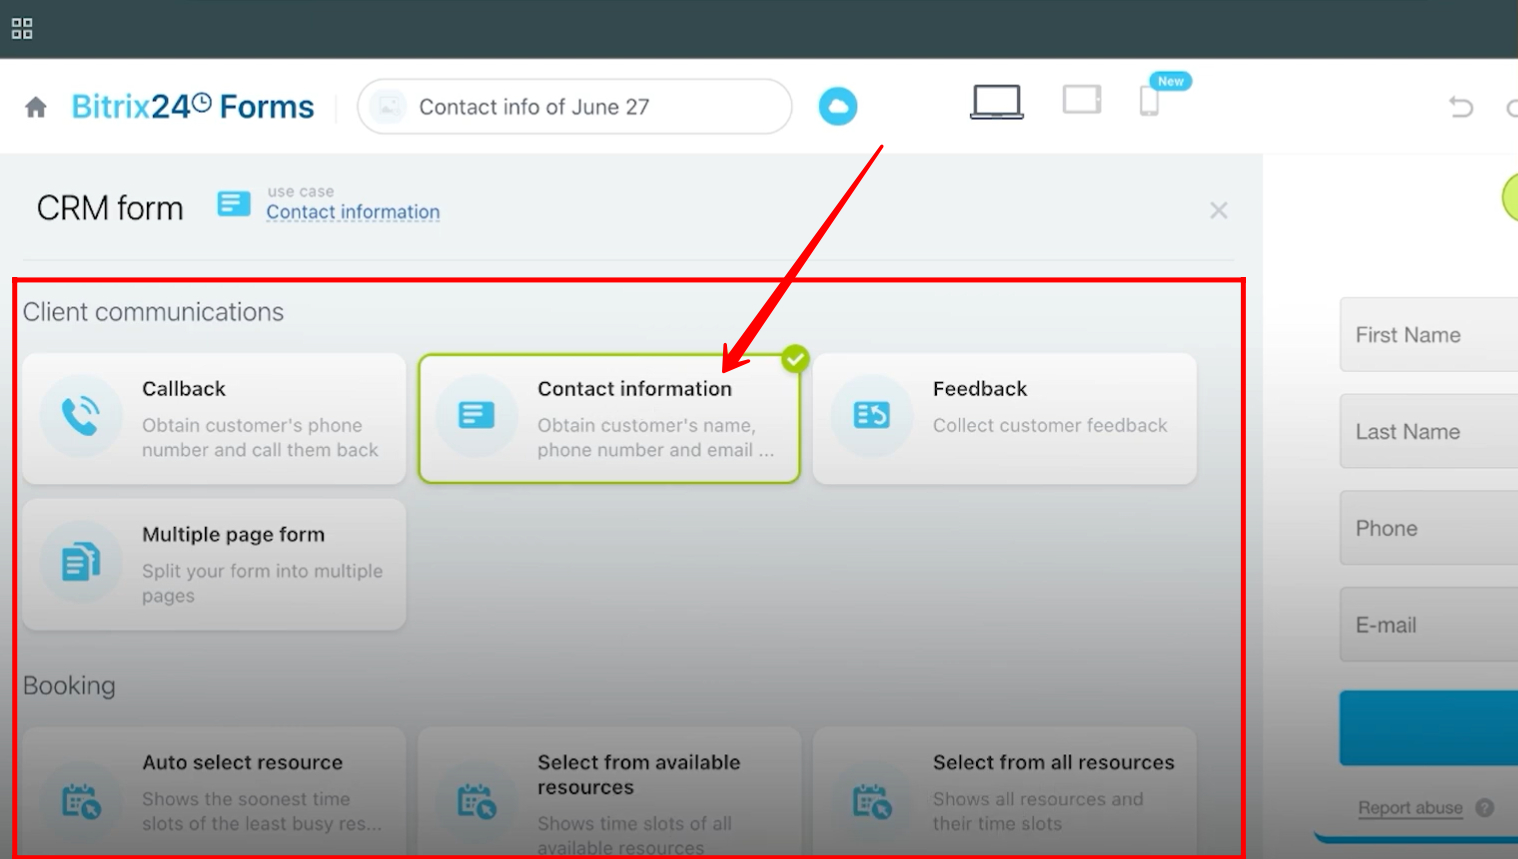
5. Here, you will have the option to create different types of forms, distinguished by the fields used in their pre-built templates. The form categories include Client Communications, Booking, Orders, Facebook Lead Forms, and more. For testing purposes, let’s start by selecting the “Contact Information” form under the Client Communications section.
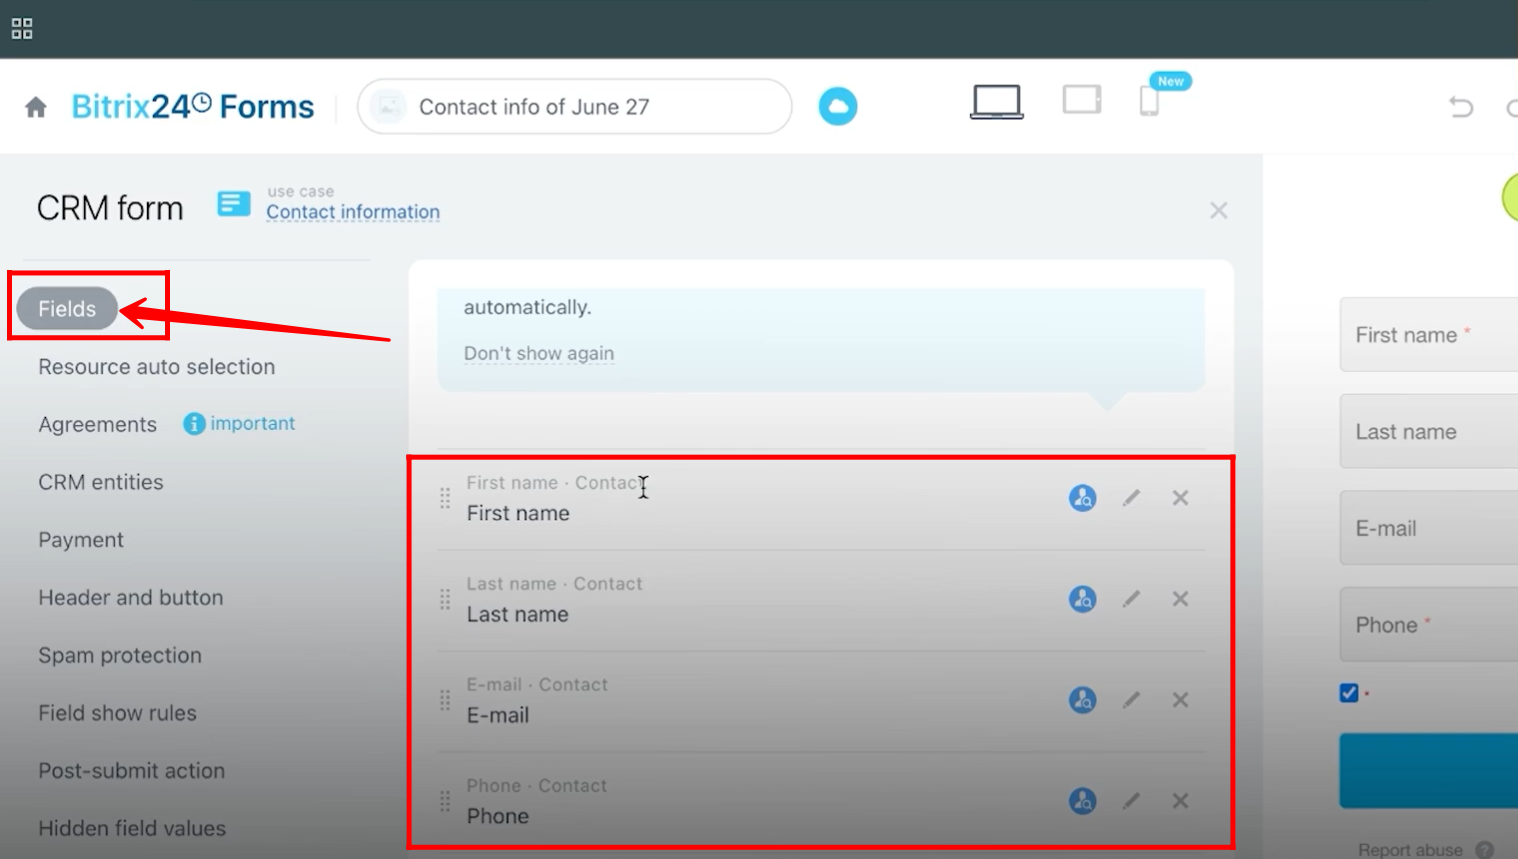
6. Go to the Fields tab to view all the fields included in the form.
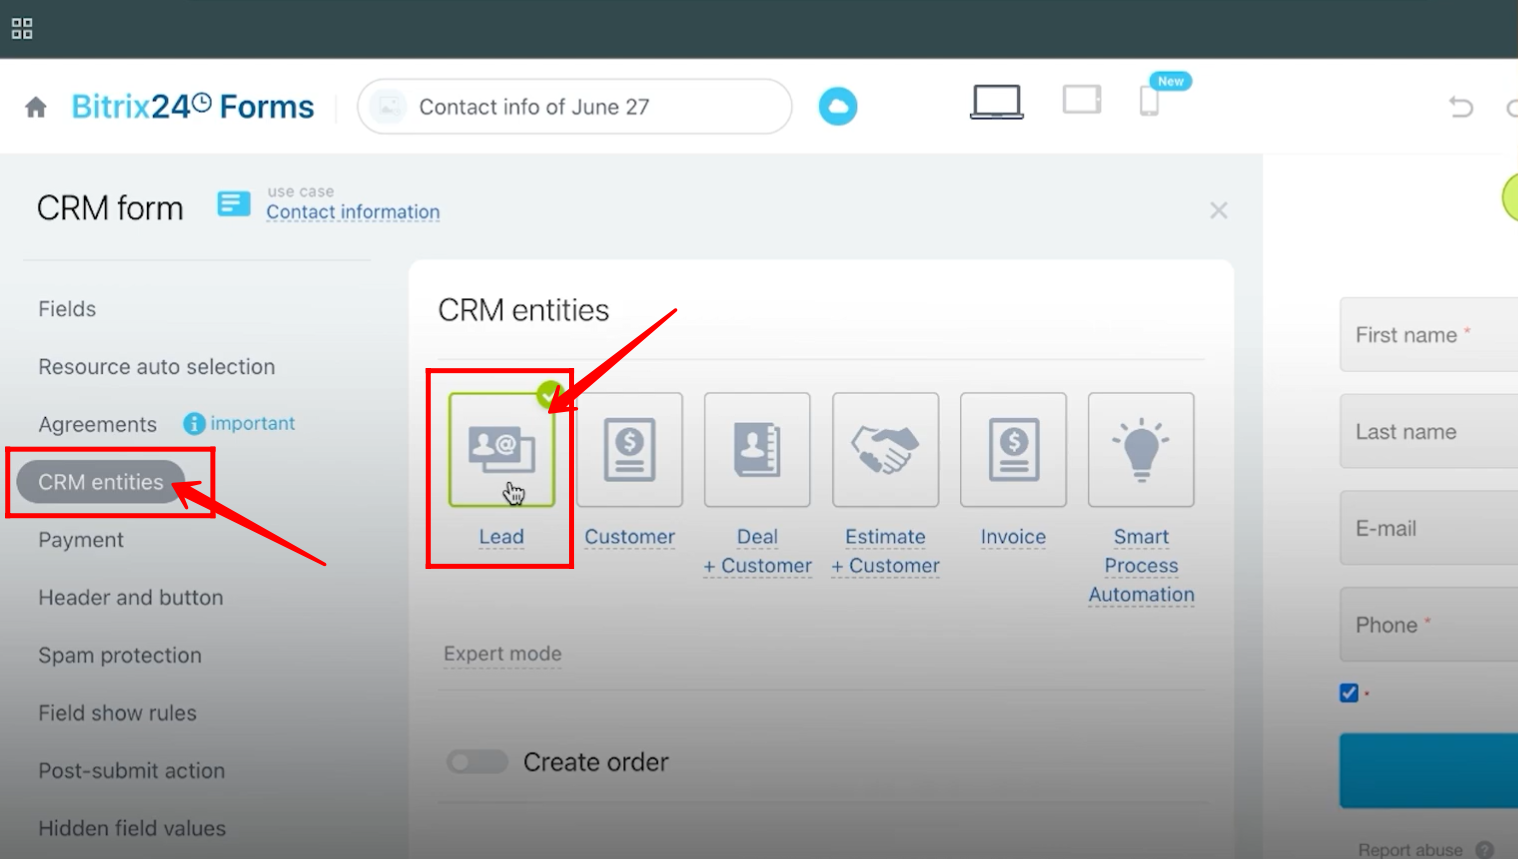
7. In the CRM Entities tab, you can find and select the entity that the form is connected to. For now, select Lead.
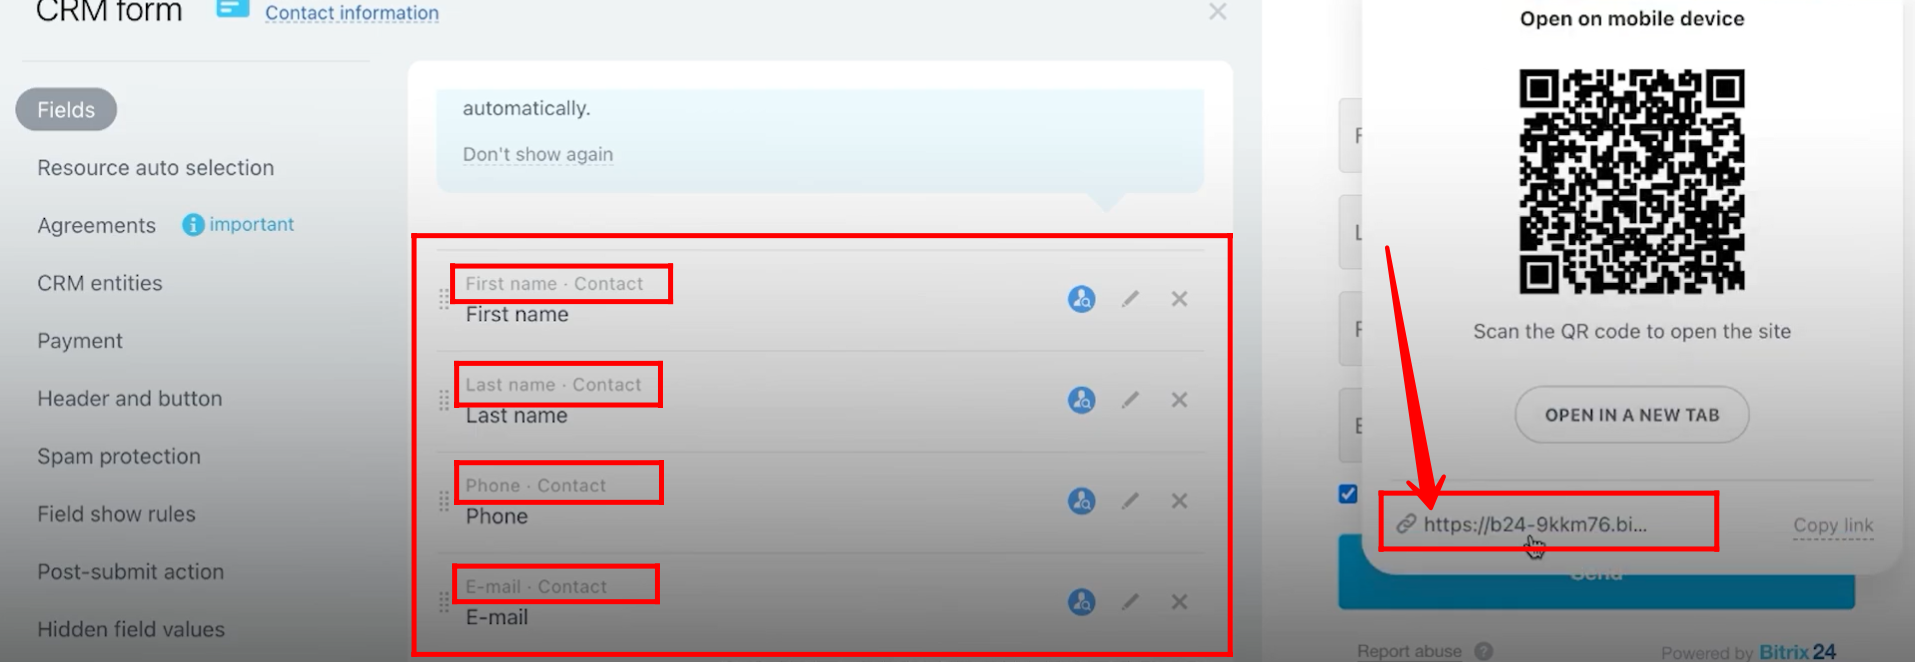
8. Click the public link (Bitrix24’s default auto-generated domain) to open the form.
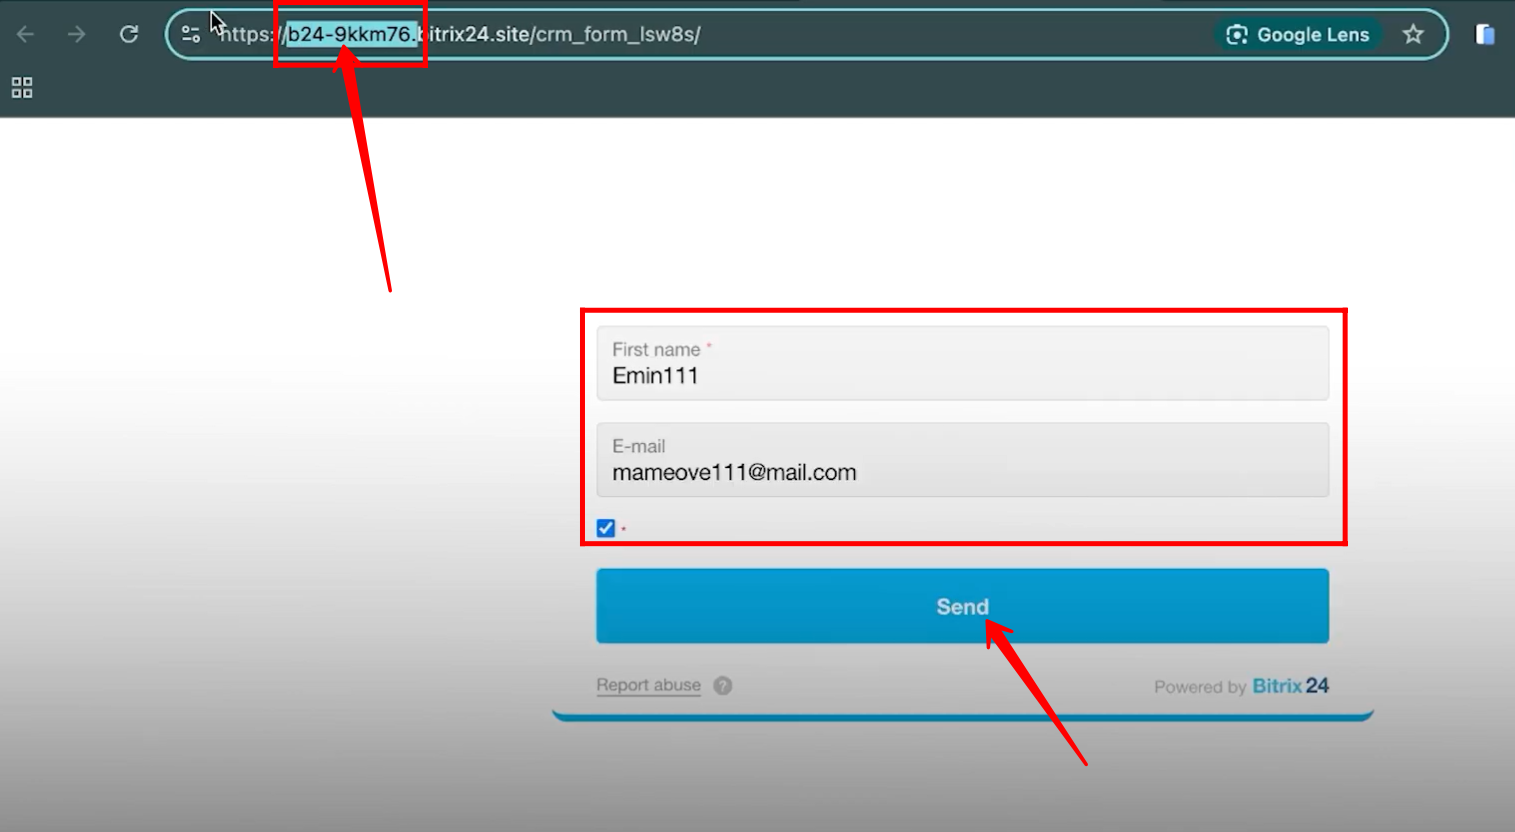
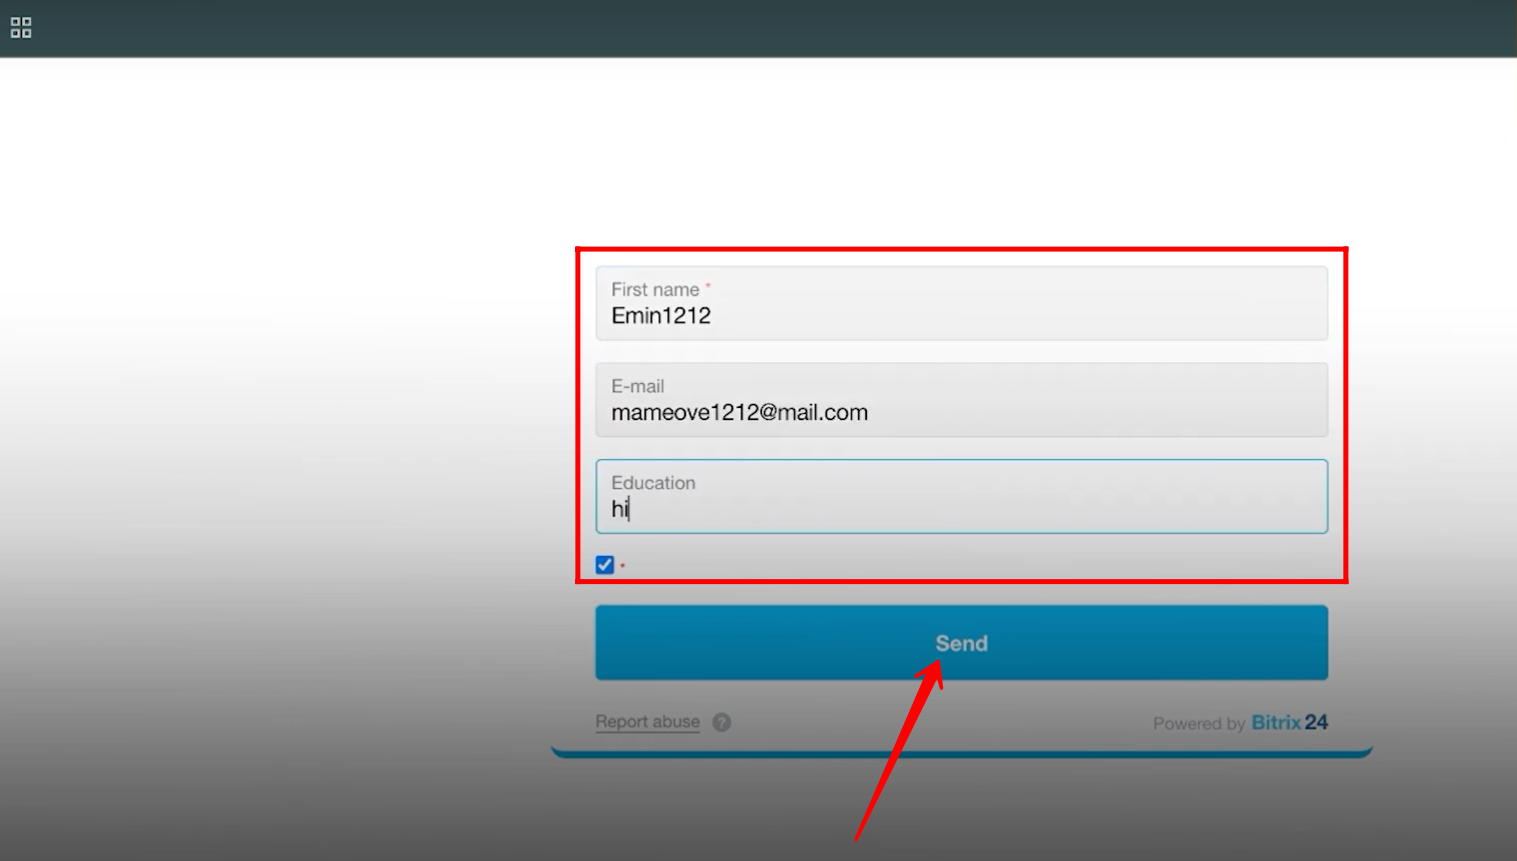
9. Here, you can see the auto-generated portion of the domain before “.bitrix24.com.” You can customize this to use your own domain, but we’ll cover that later. For now, fill in the form — for testing purposes, only two fields have been added: First Name and E-mail. Once completed, click Send.
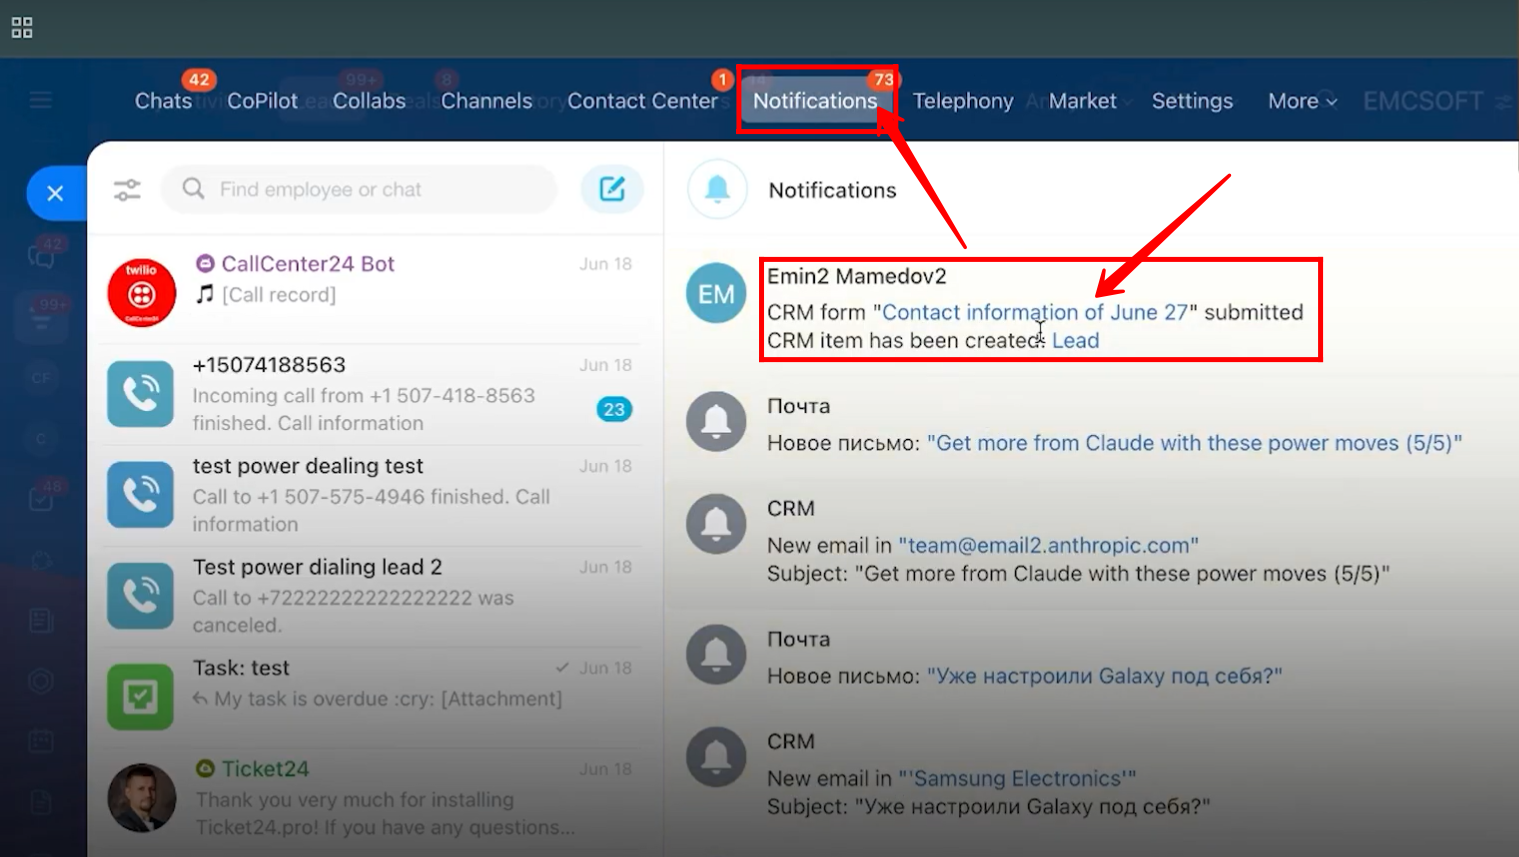
10. You will receive a notification confirming that the form has been submitted and a new lead (CRM entity) has been created. Click on the form name to view the submitted form details.
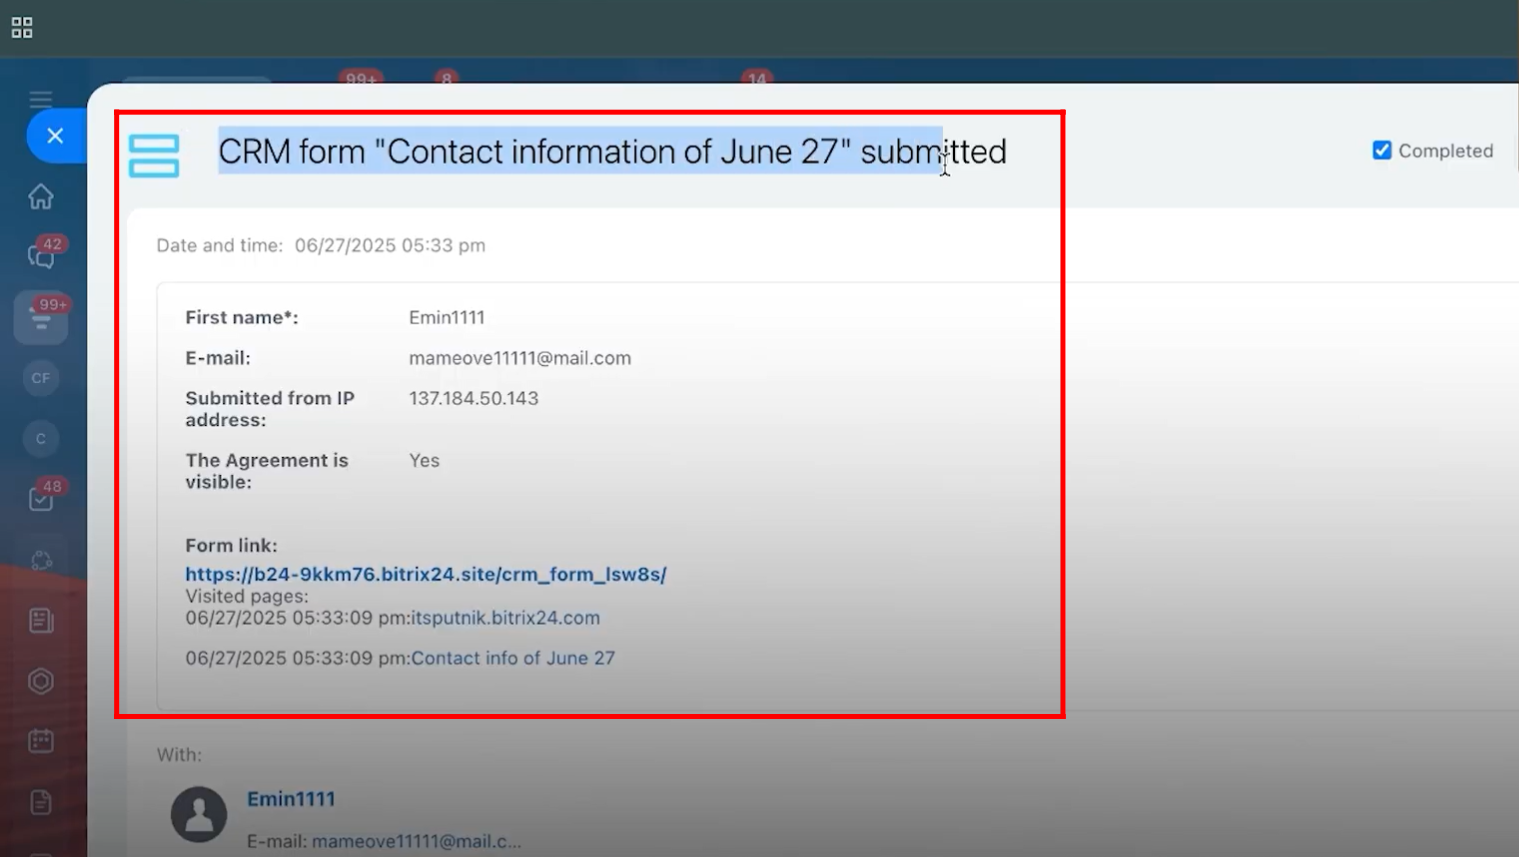
11. You will see all the submitted form details, including the IP address, along with the submission date and time.
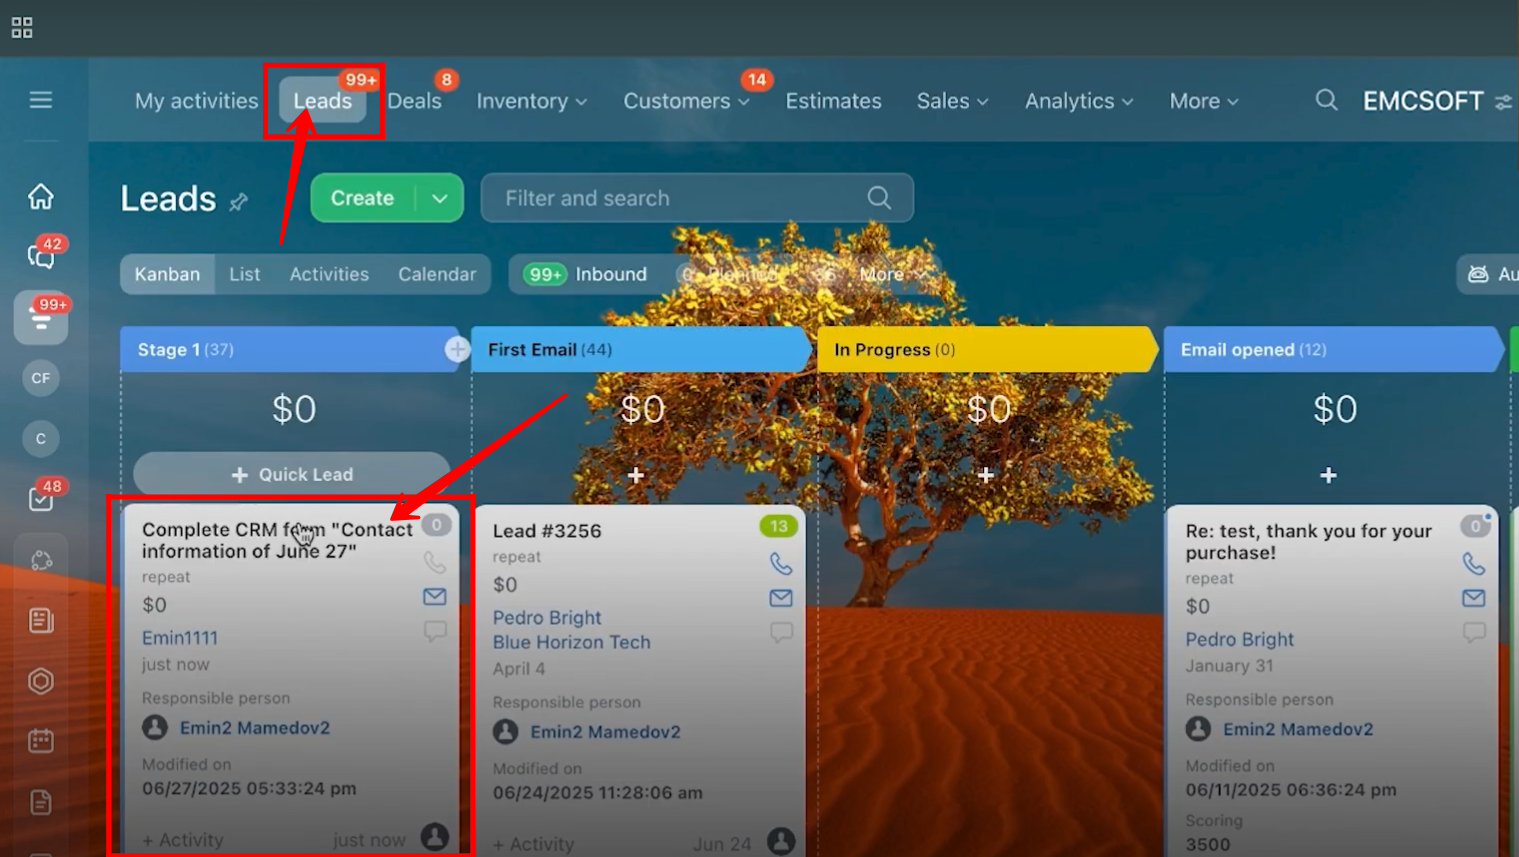
12. Go to the Leads tab, where you can see that a new lead with the form name has been created in the first stage.
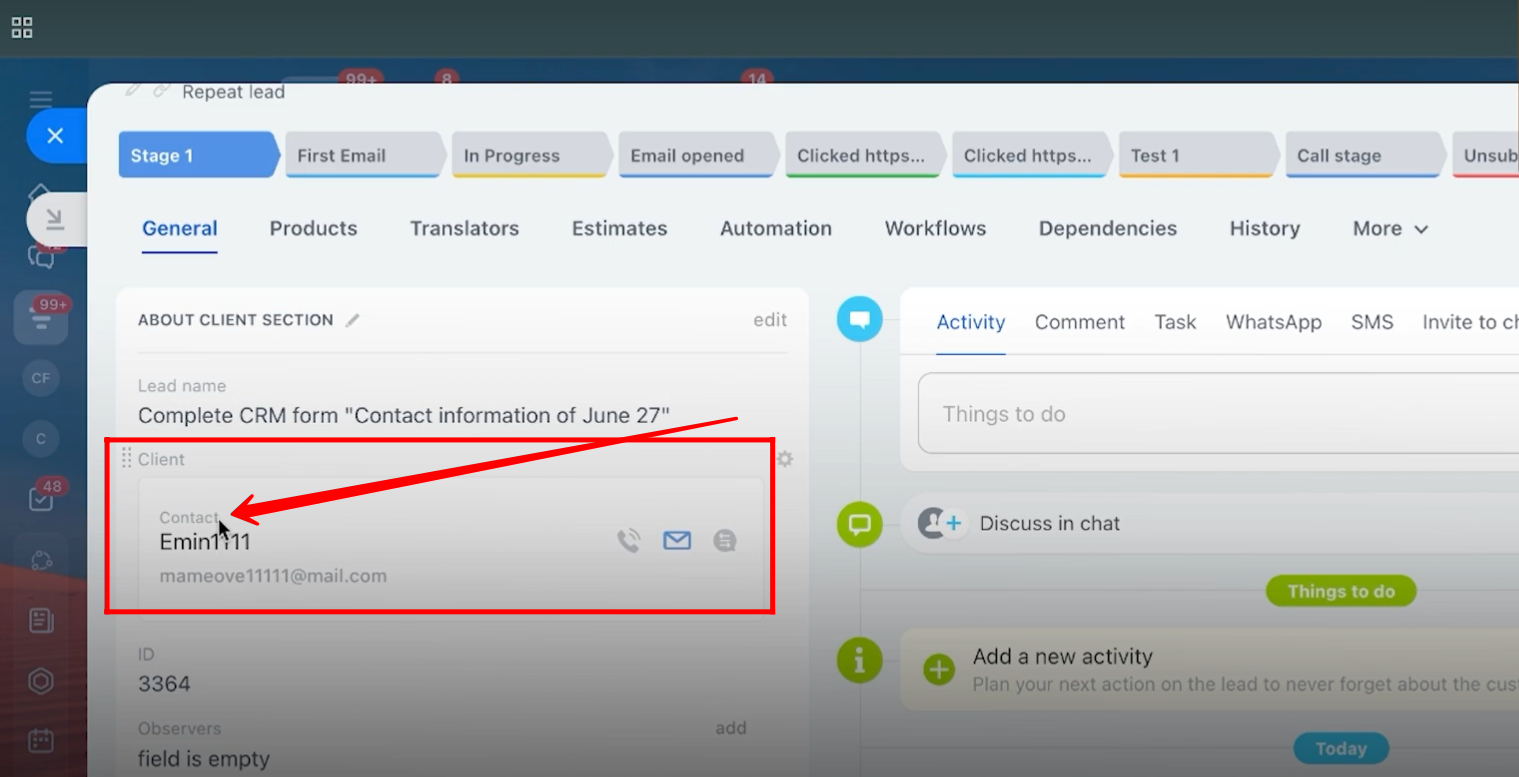
13. By opening the lead card, you can view the contact details submitted through the form. Note that the First Name and Email fields were added from the contact entity in the form.
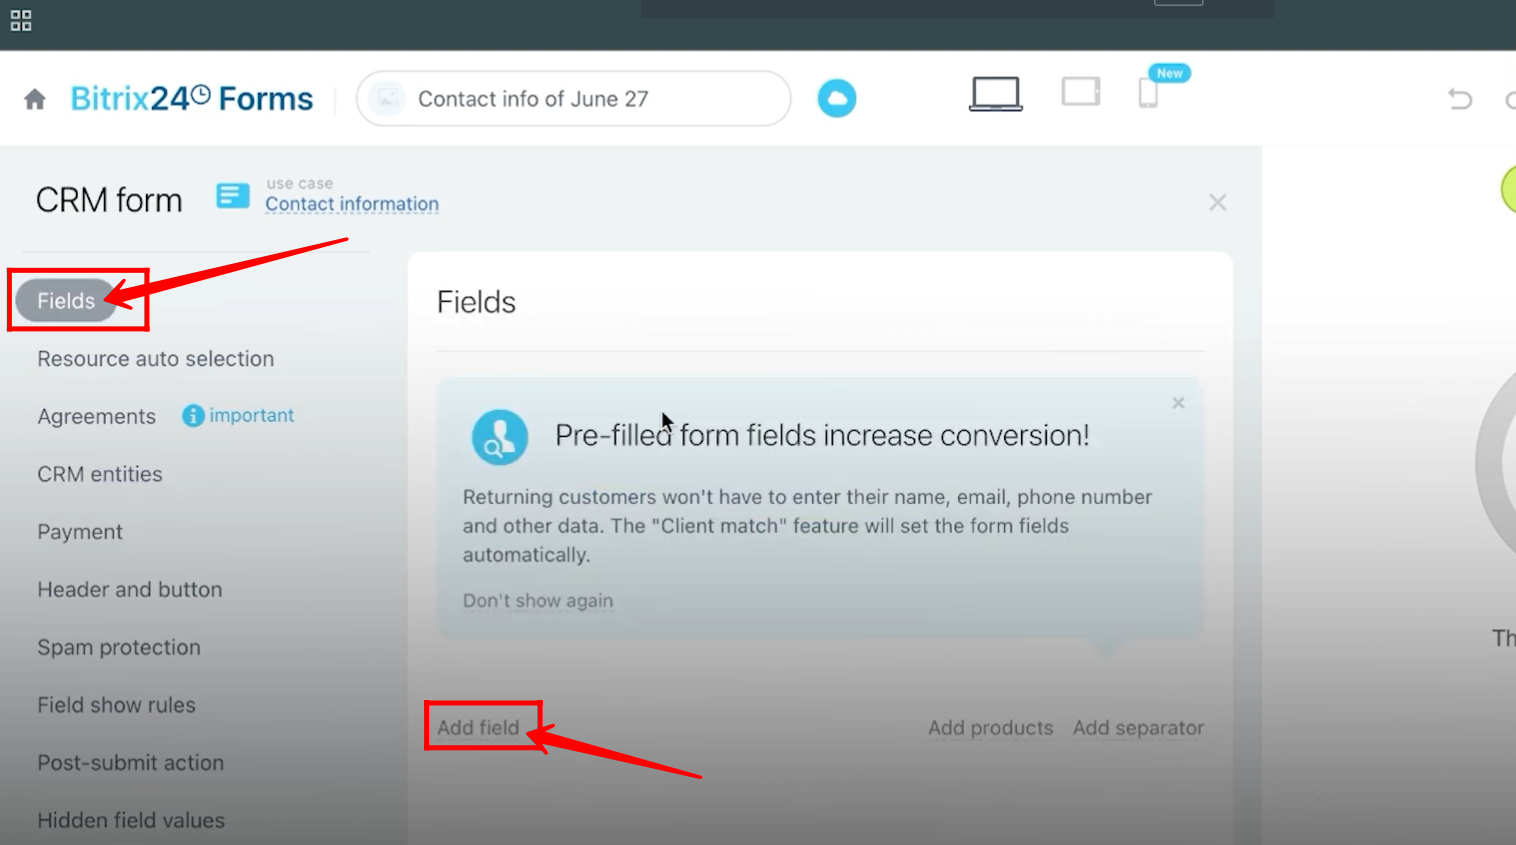
14. Go back to the Fields tab, remove all previously added fields, and click Add Field to add new fields again.
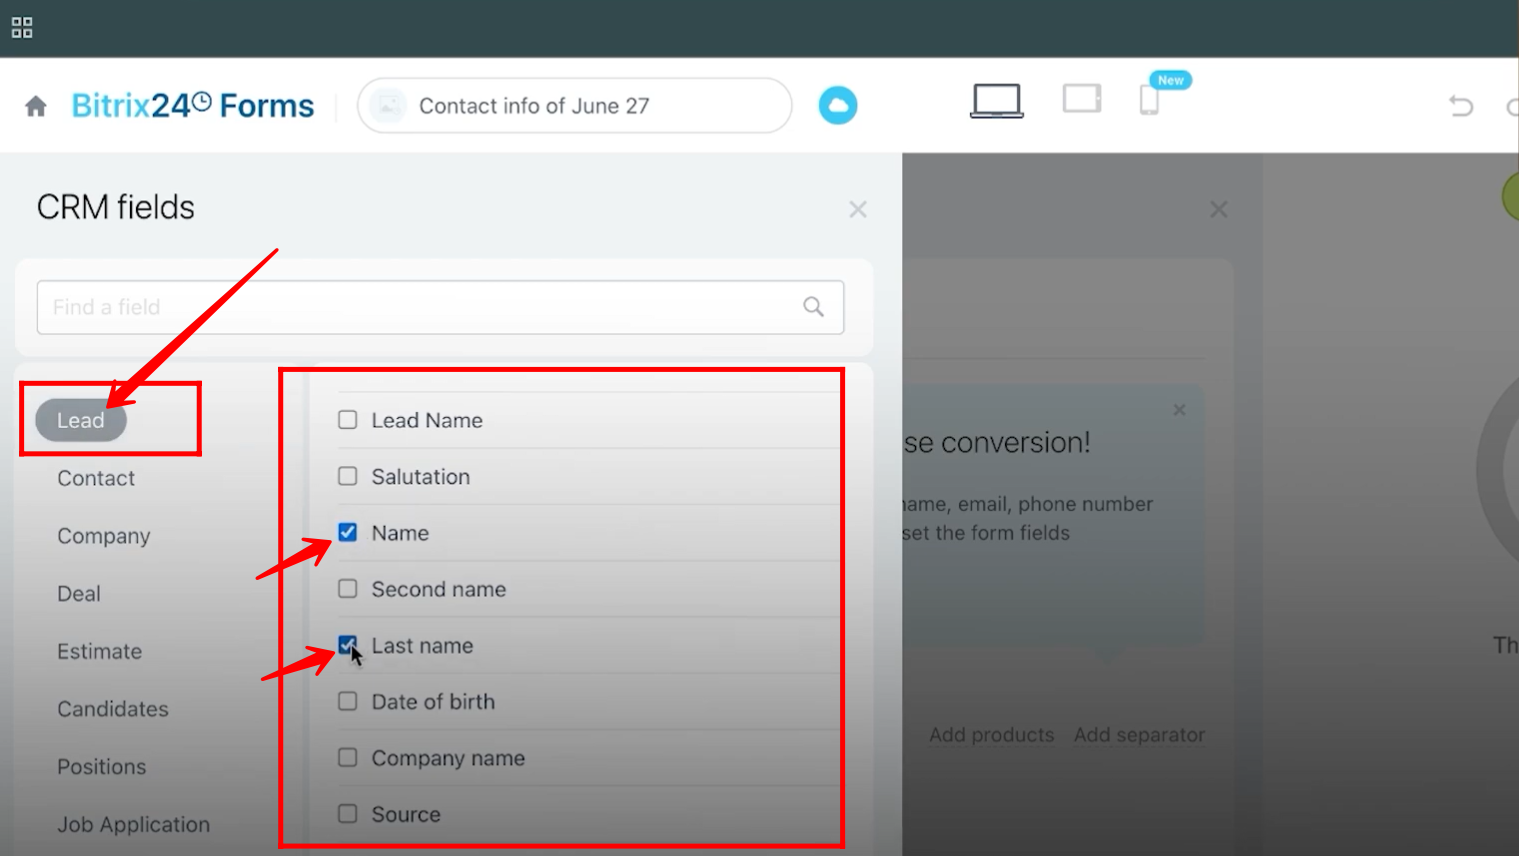
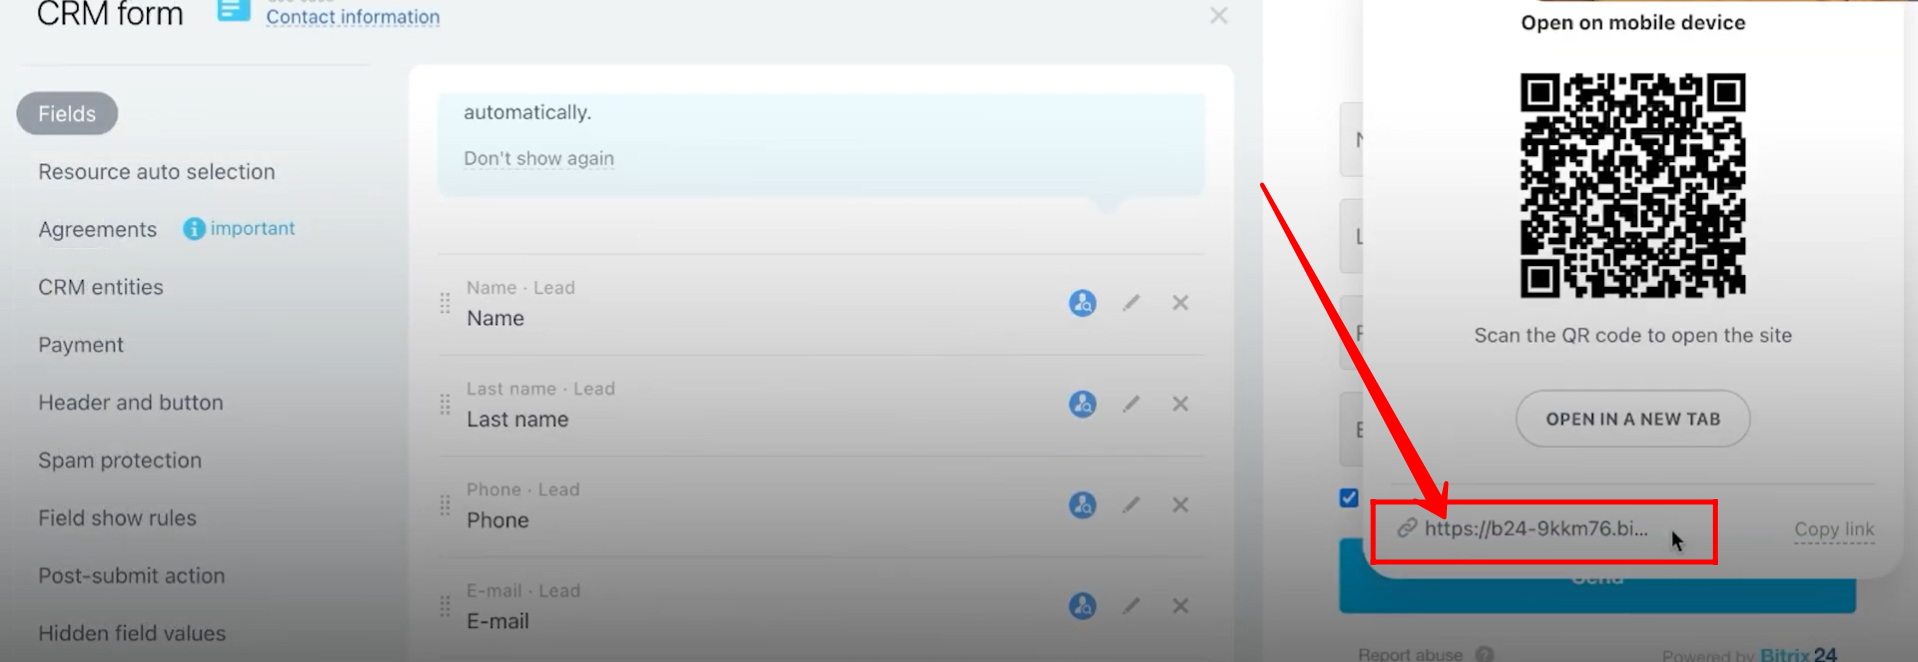
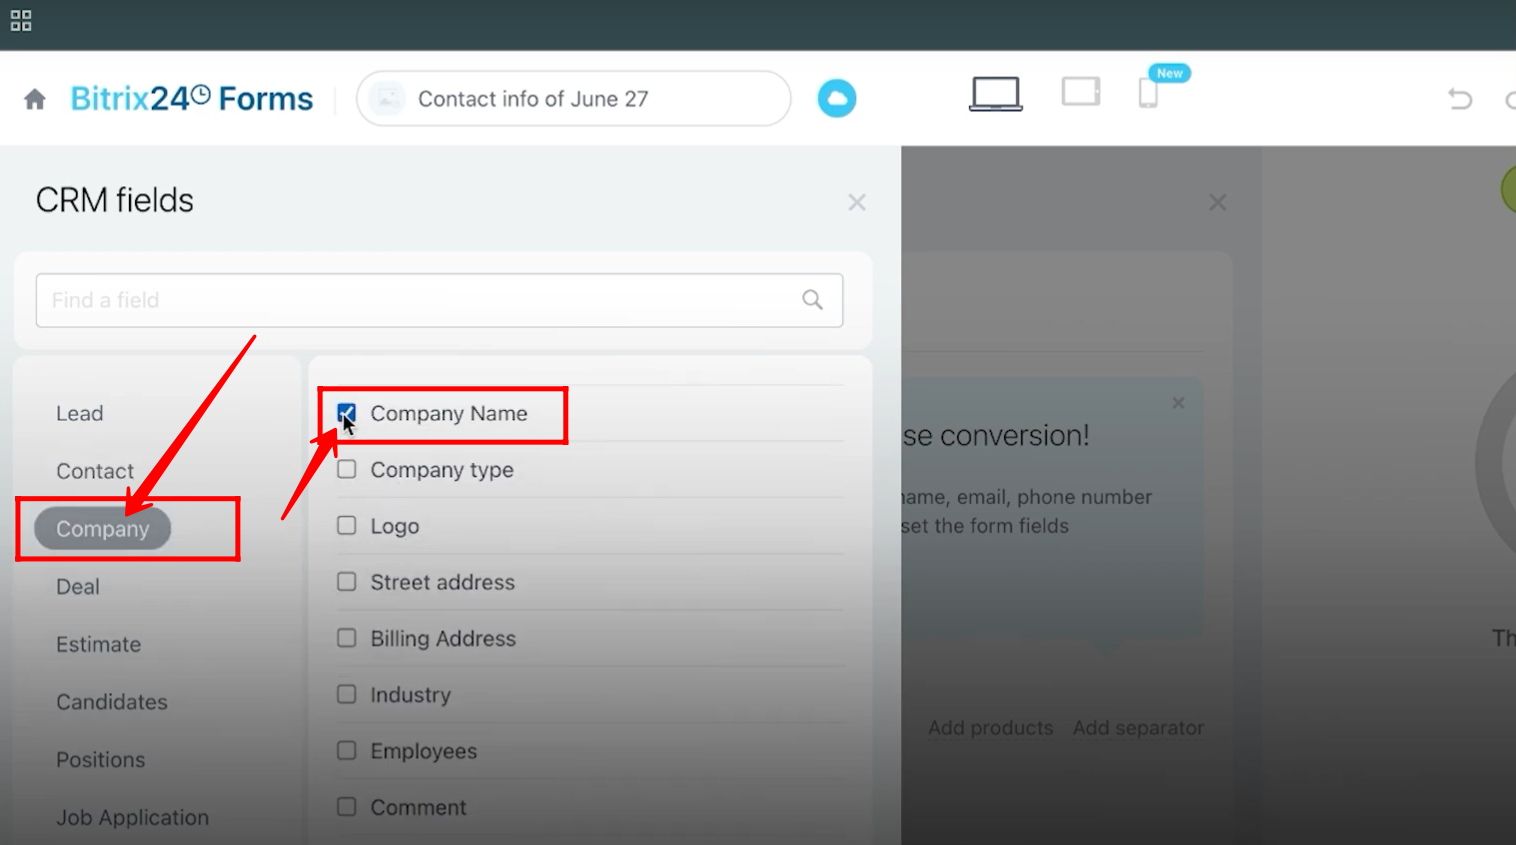
15. Now you can add fields from multiple entities such as Lead, Company, Contact, Deal, Estimate, and more. For now, we will select First Name, Last Name, Phone, and E-mail fields from the Lead entity.
16. After adding the fields, save the form and open it by clicking the Public Link through the Open Form button.
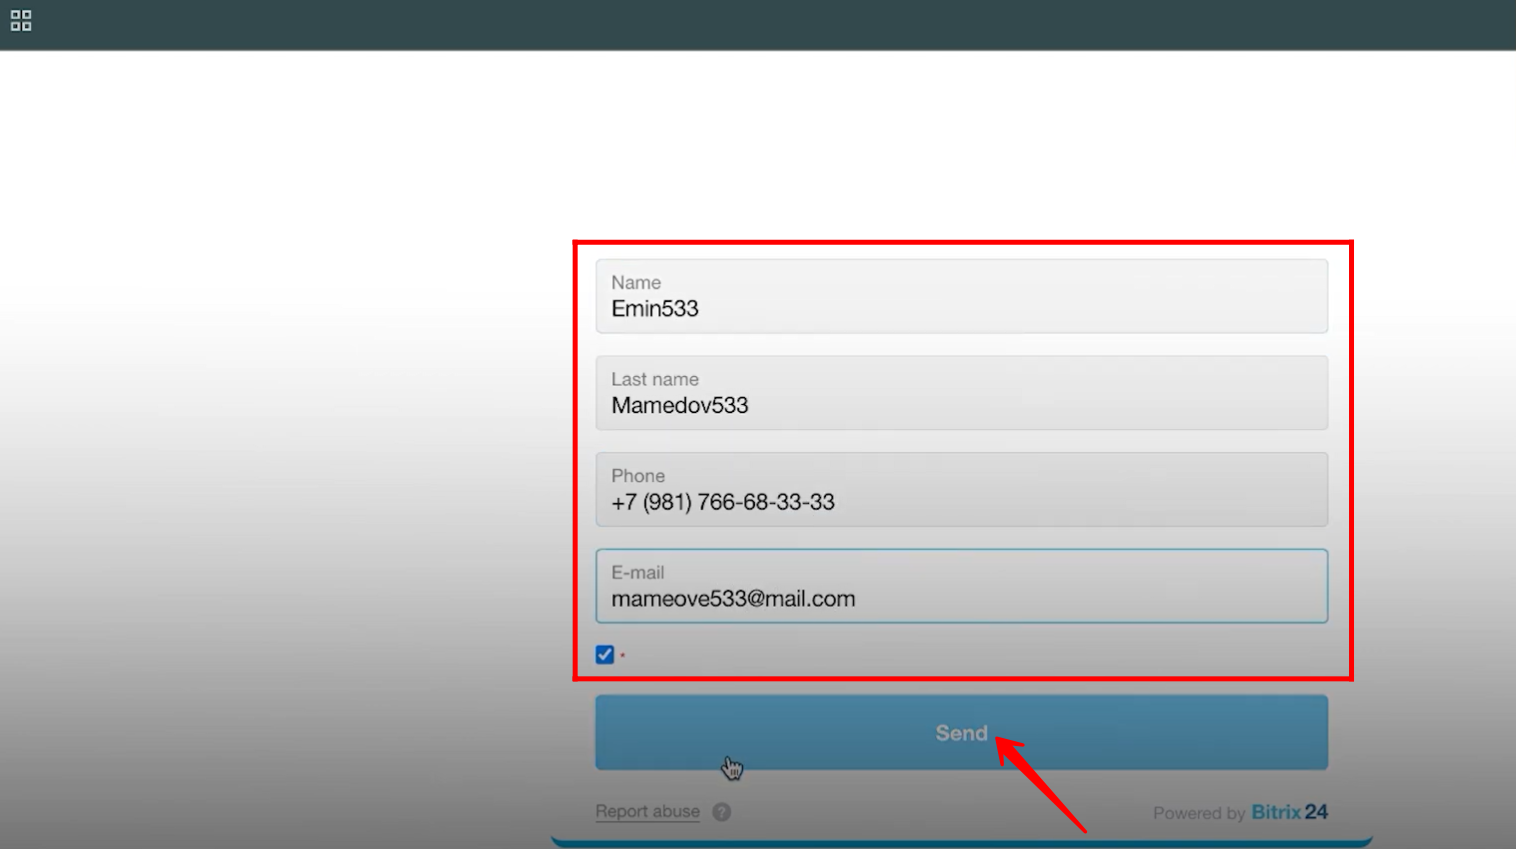
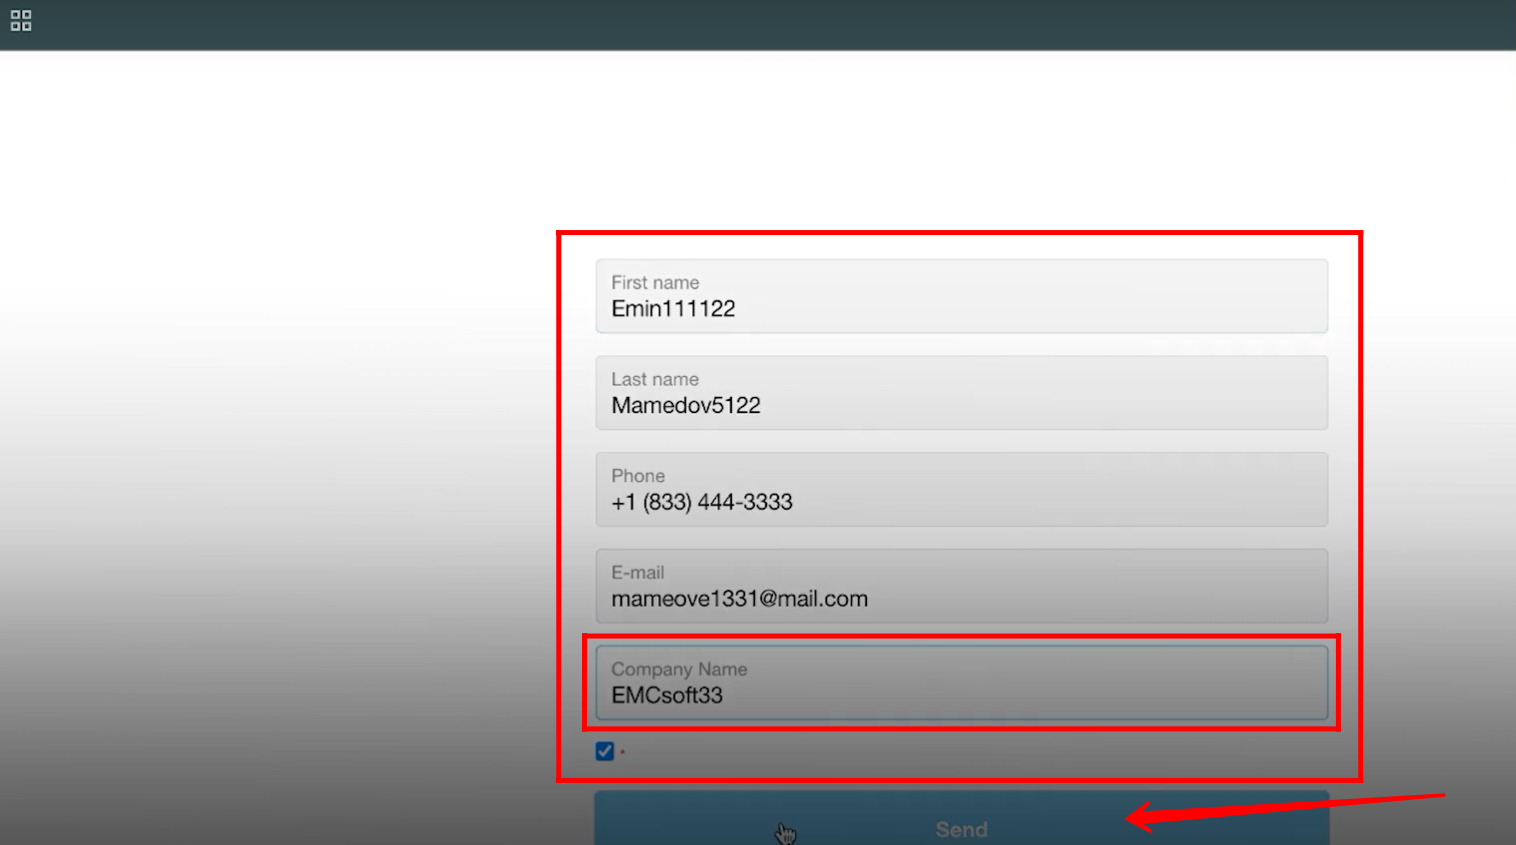
17. Fill in all the required details, then click Send to submit the form.
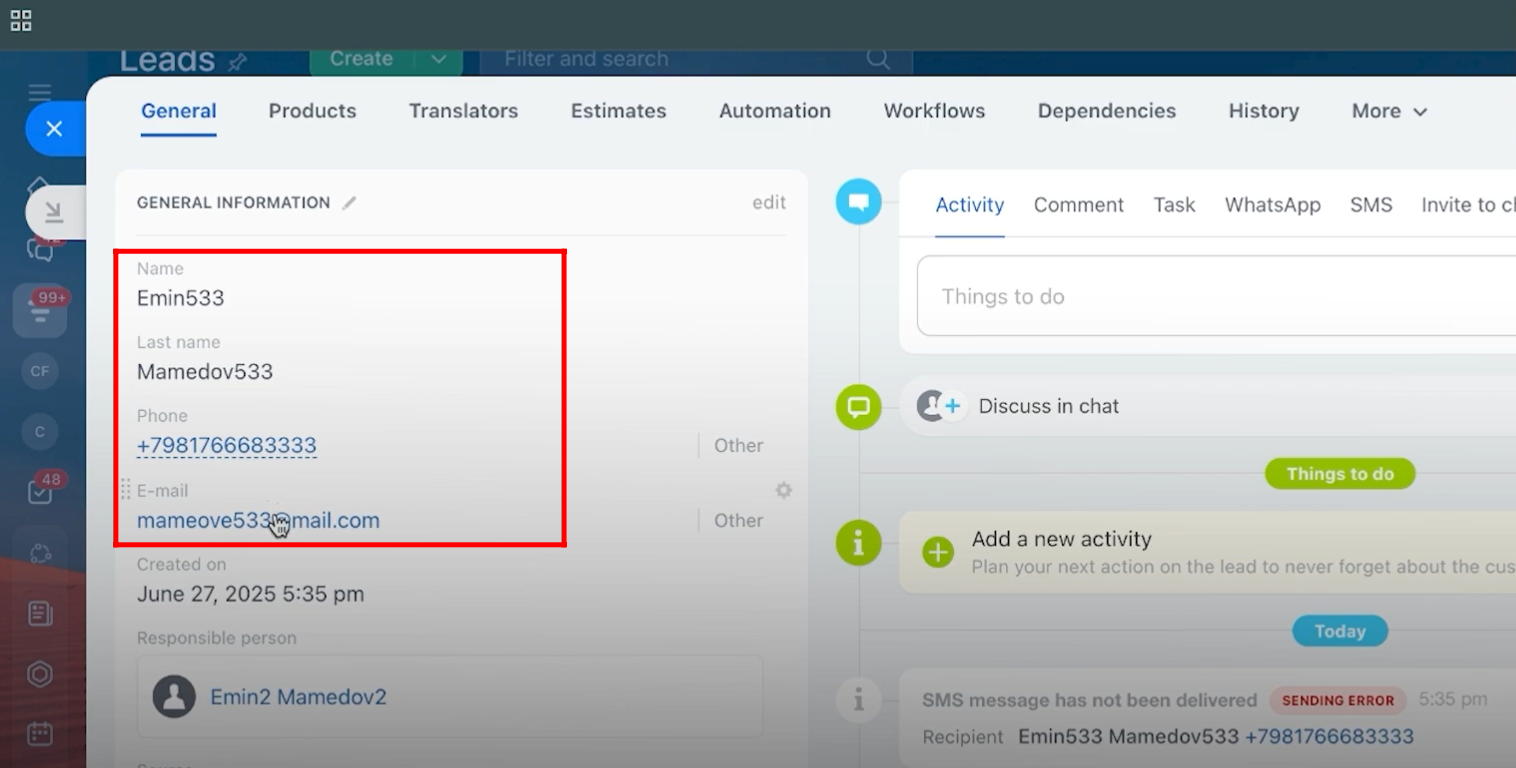
18. Go to the Leads section, where a new lead card will appear in the first stage, labeled with the form name.
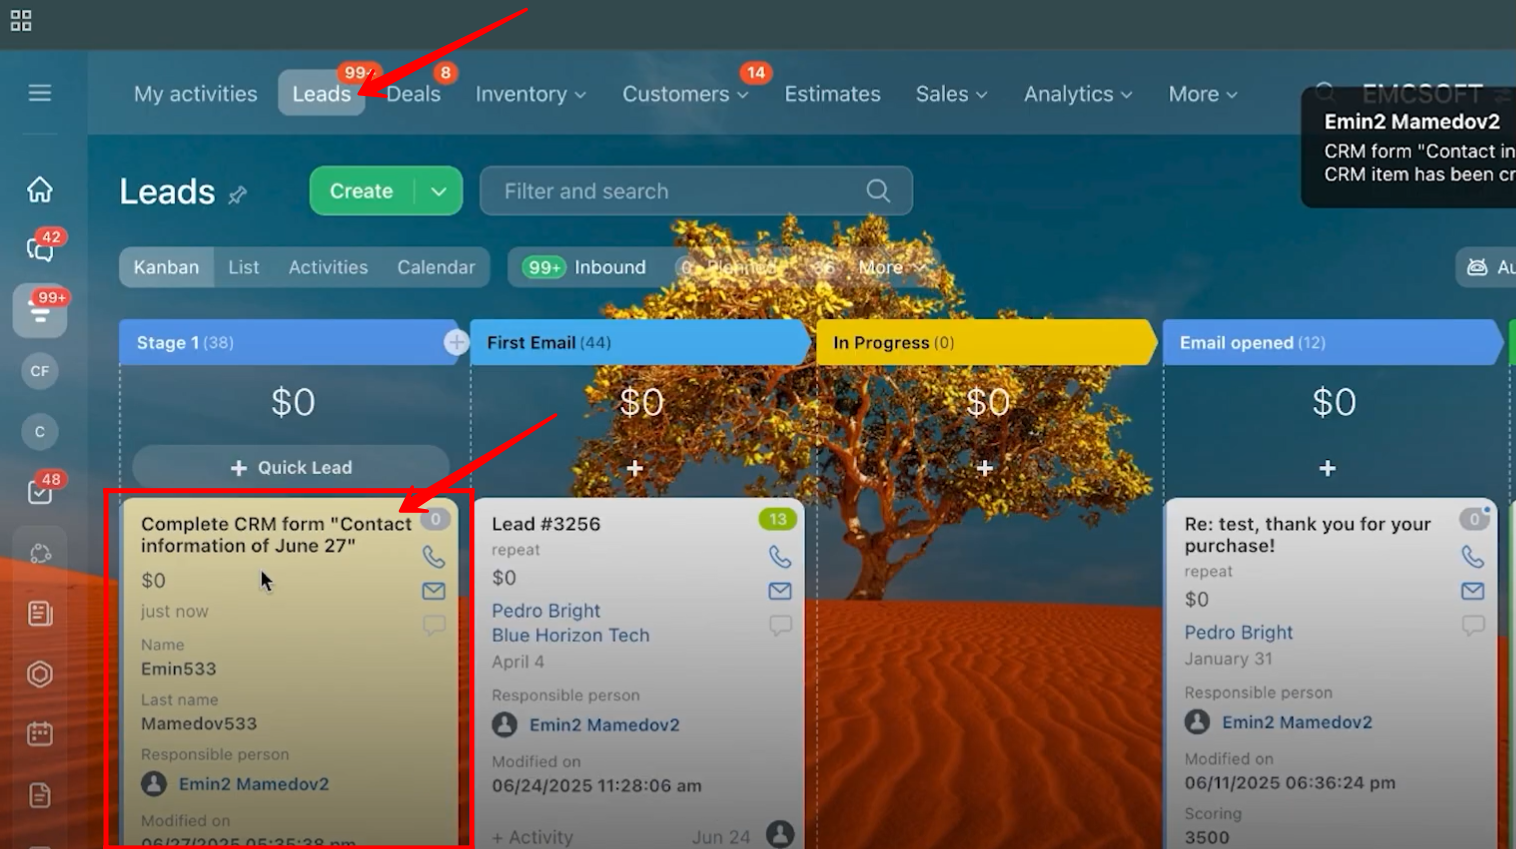
19. Open the lead card, and you will see all the submitted details within the lead itself. However, there will be no separate contact card or contact label inside the lead details because the fields were linked only to the Lead entity. As a result, no separate contact record will be generated.
20. Go back to the form configuration, open the Fields tab, clear all previously added fields, and click “Add field” to add new fields for testing purposes.
21. Now, add the Company Name field from the Company entity.
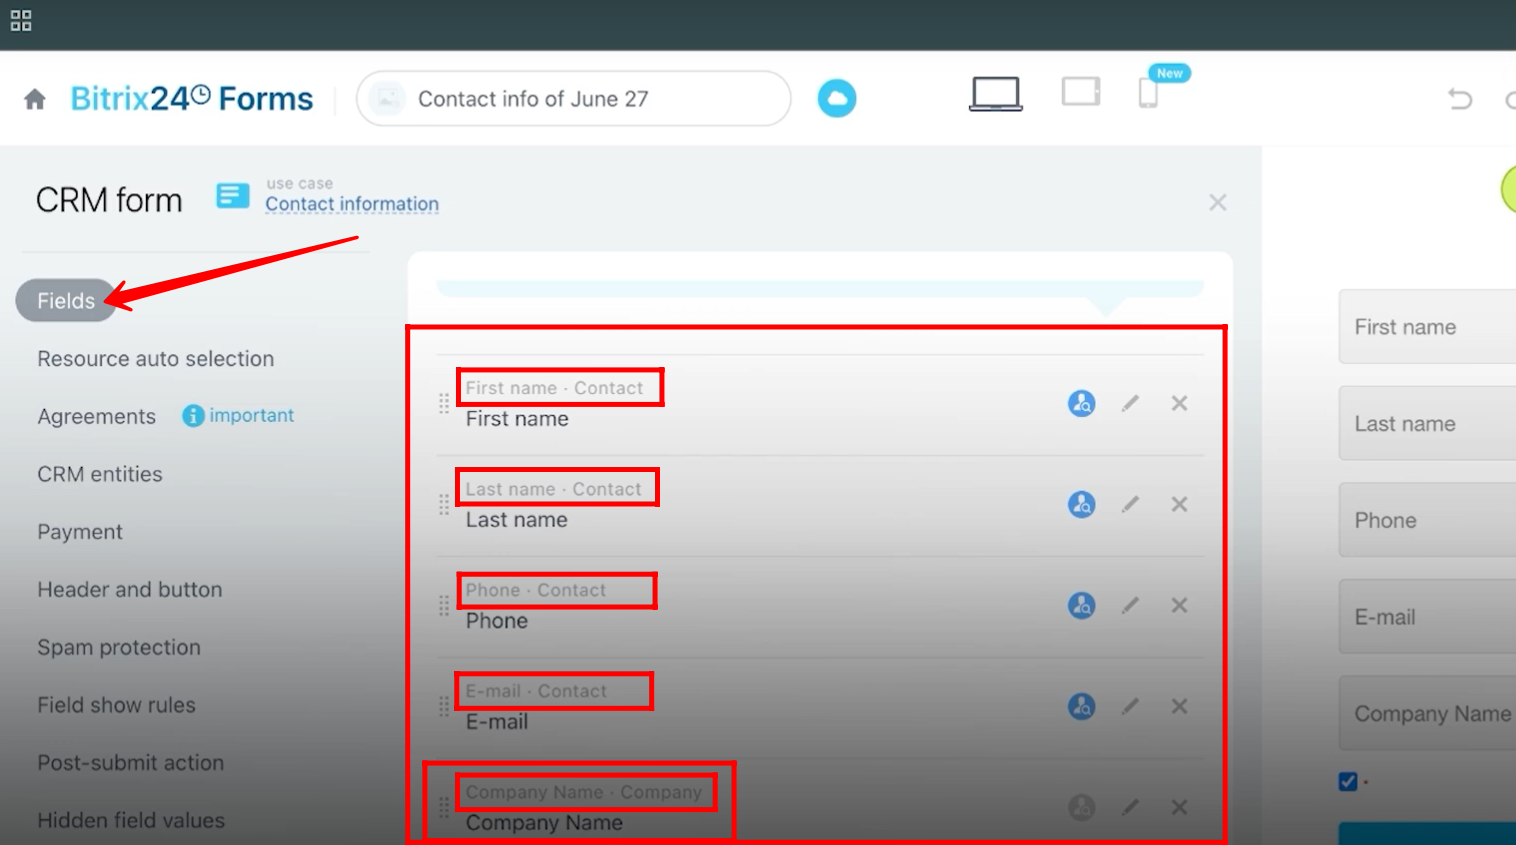
22. Here, you can see that the First Name, Last Name, Phone, and E-mail fields are added from the Contact entity, while the Company Name field is added from the Company entity.
23. Open the form, fill in all the details, and then click Send to submit it.
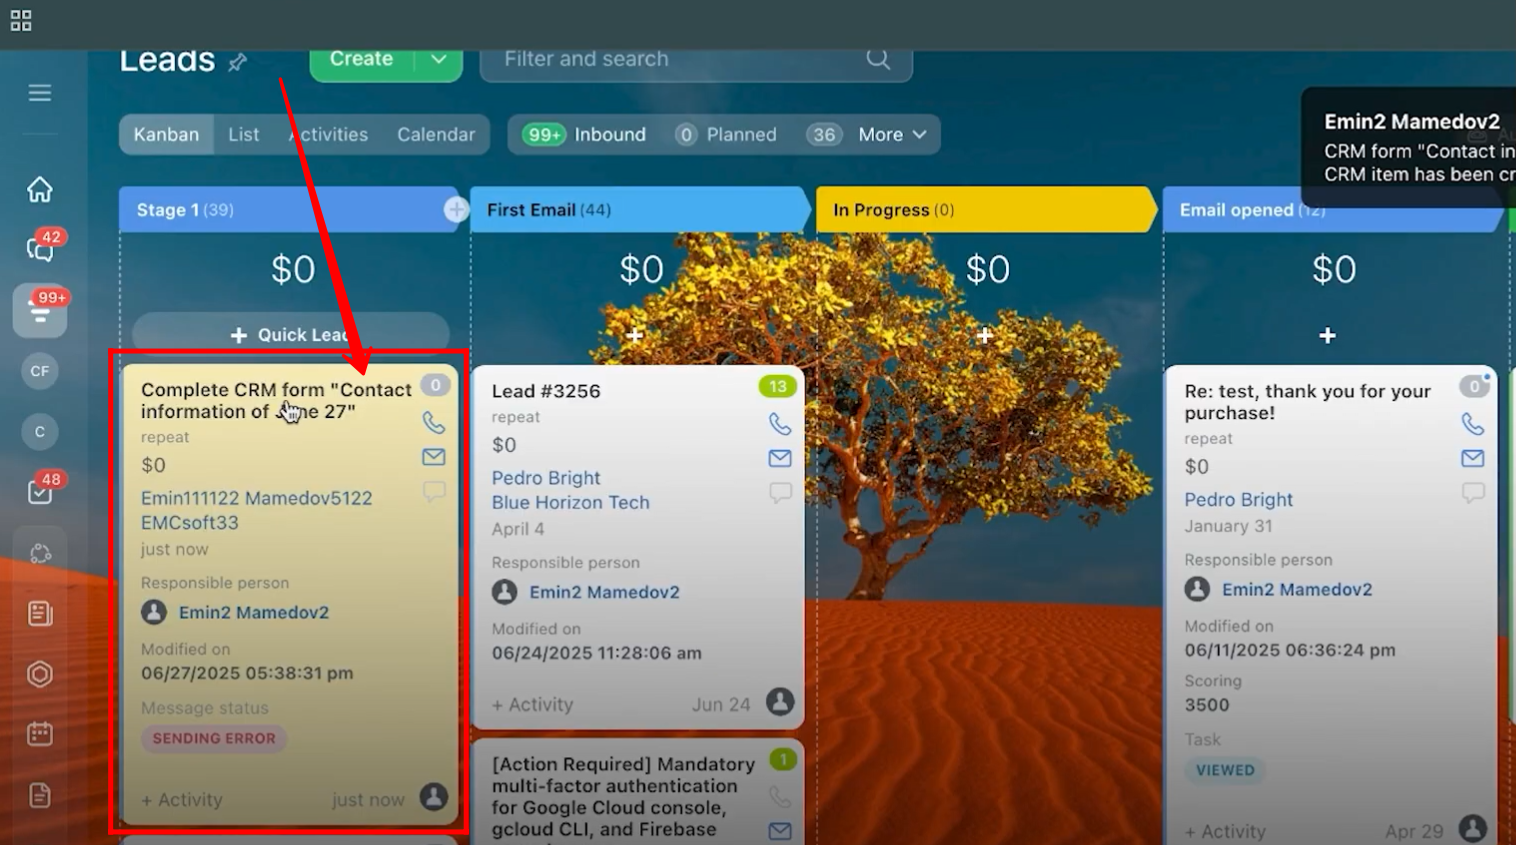
24. Open the newly created lead that was generated after submitting the form.
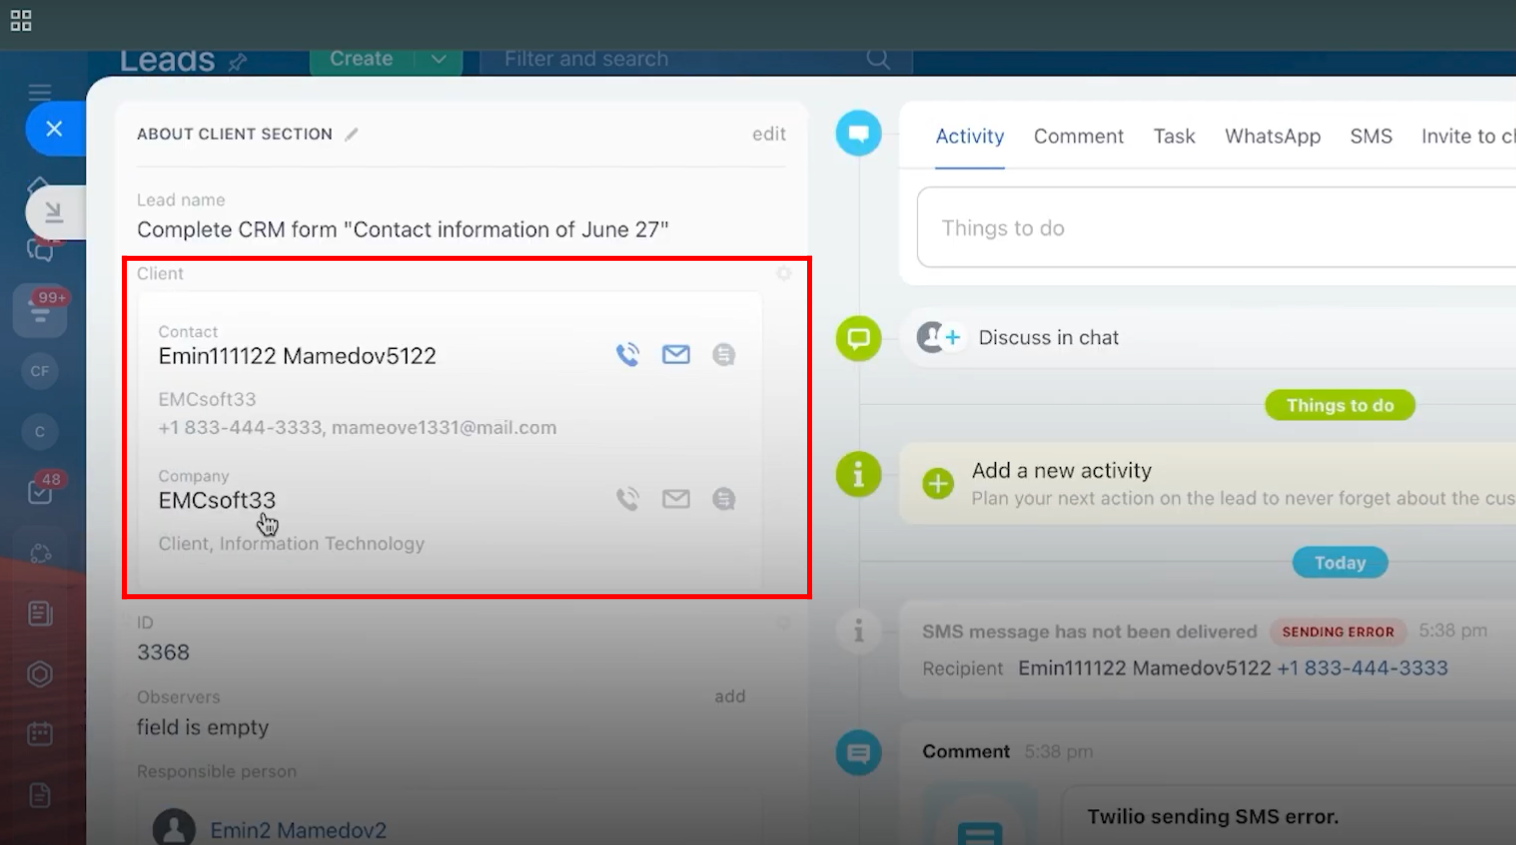
25. Open the lead form, and you will now see the contact entity and company entity details displayed under their respective labels. This indicates that the lead is linked to both the contact and the company. Click on the company name to verify whether a separate company record has been created.
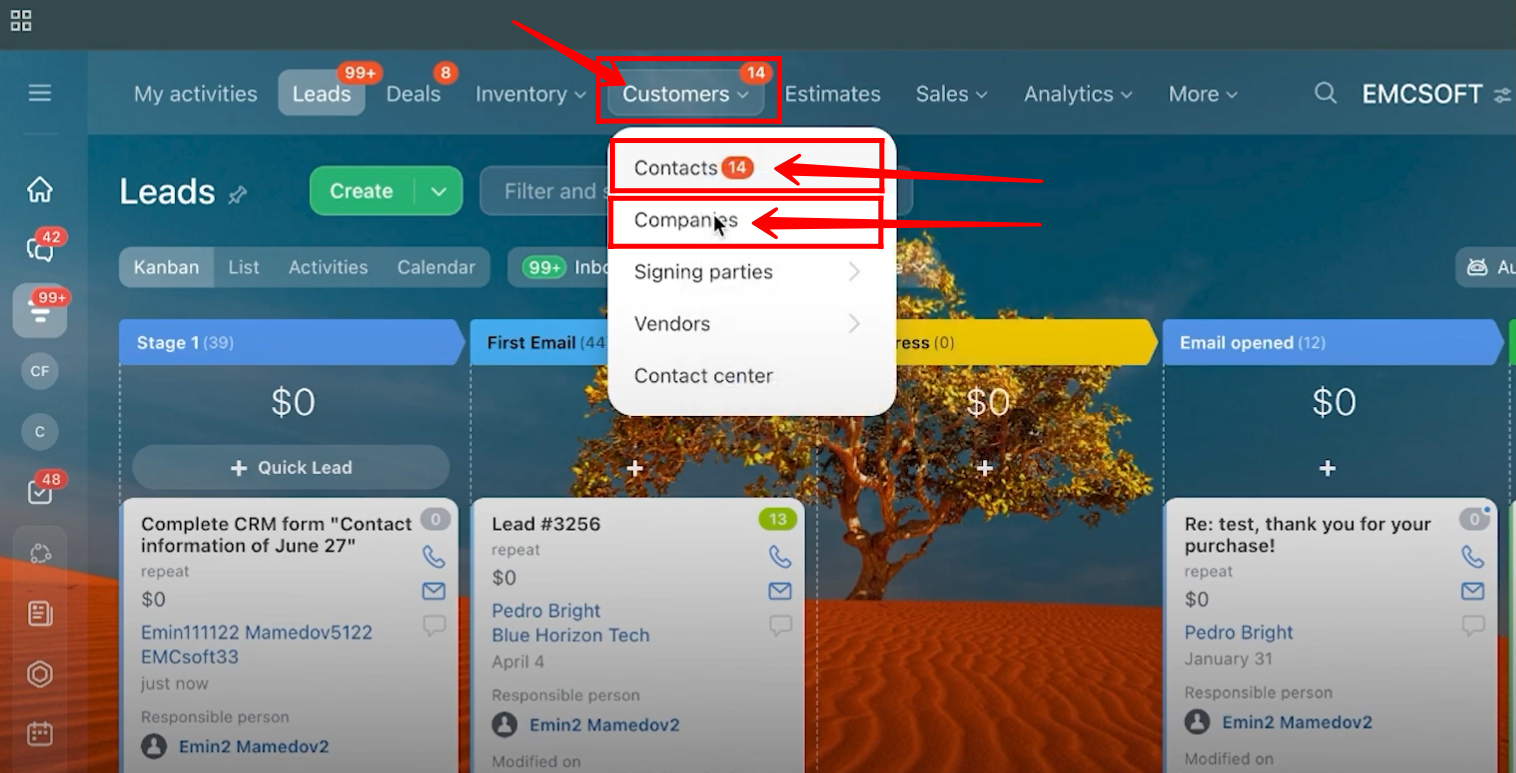
26. Alternatively, go to the Customers section, then open Contacts and Companies respectively to check whether a new contact and company have been generated separately.
27. Here, you can see the newly created contact containing the same details you provided during form submission.
28. By accessing the Companies section, we opened the newly created company card, which contains the exact company details submitted during the form submission.
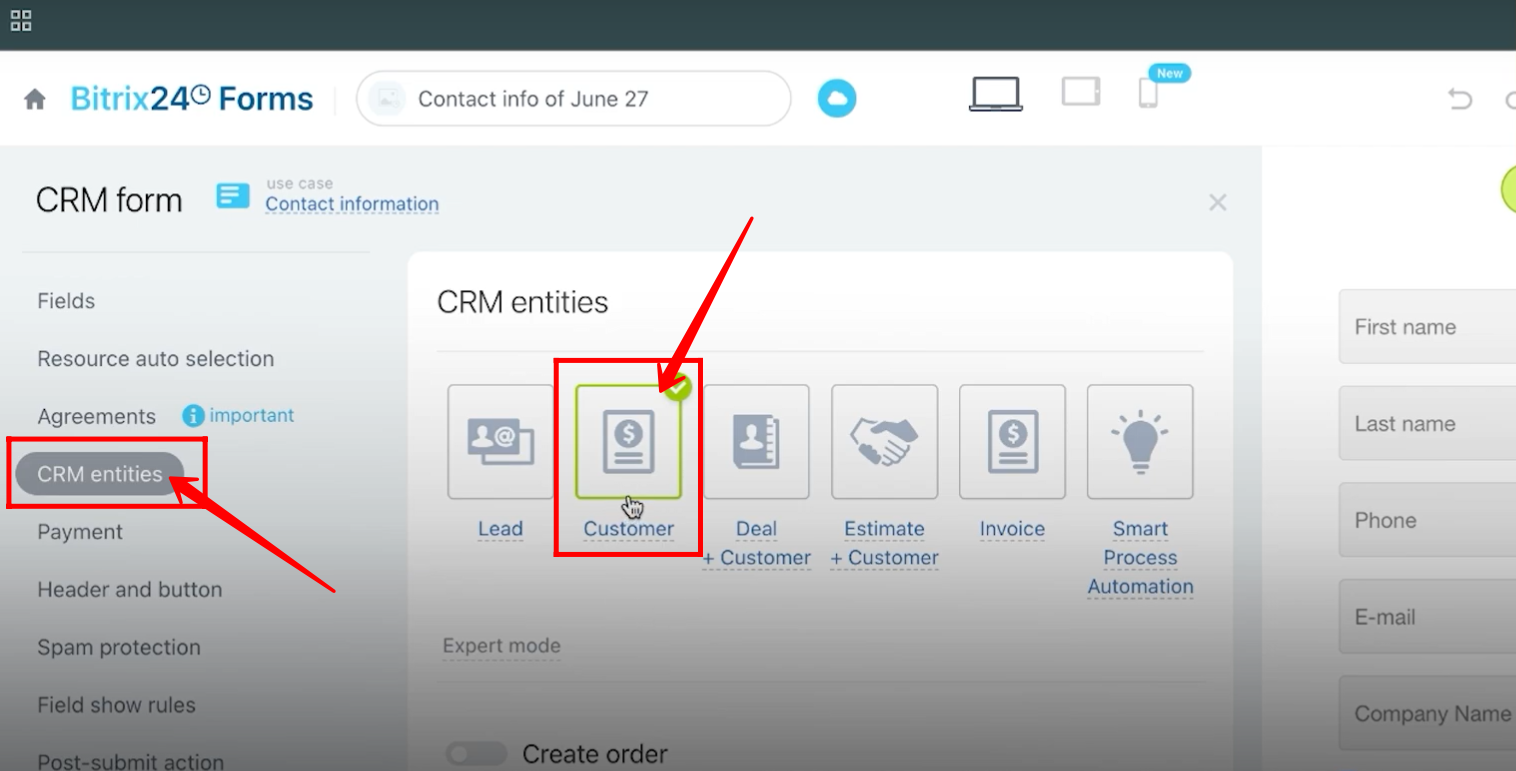
29. Go back to the form configuration, within the CRM Entities tab, select “Customer” instead of “Lead”.
This links the form directly to the Customer (Contact) entity, meaning that after form submission, a new Customer/Contact record will be generated instead of a lead.
30. Go to the Fields tab — here, you’ll see that all the selected fields belong to the Contact entity, since the form is now linked to Customer.
31. Fill in all the required details in the form and click Send to submit it.
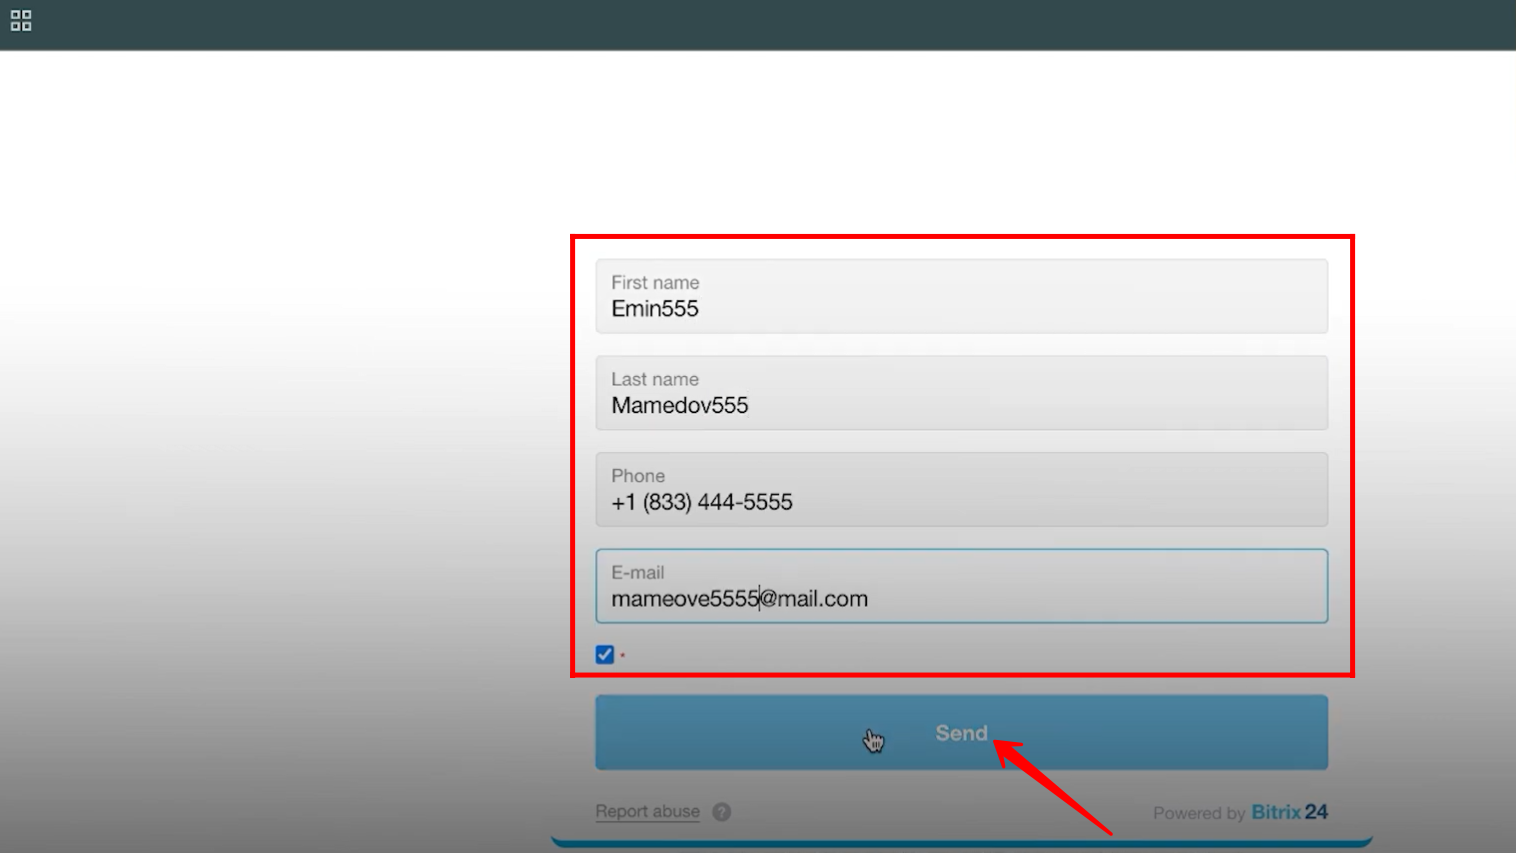
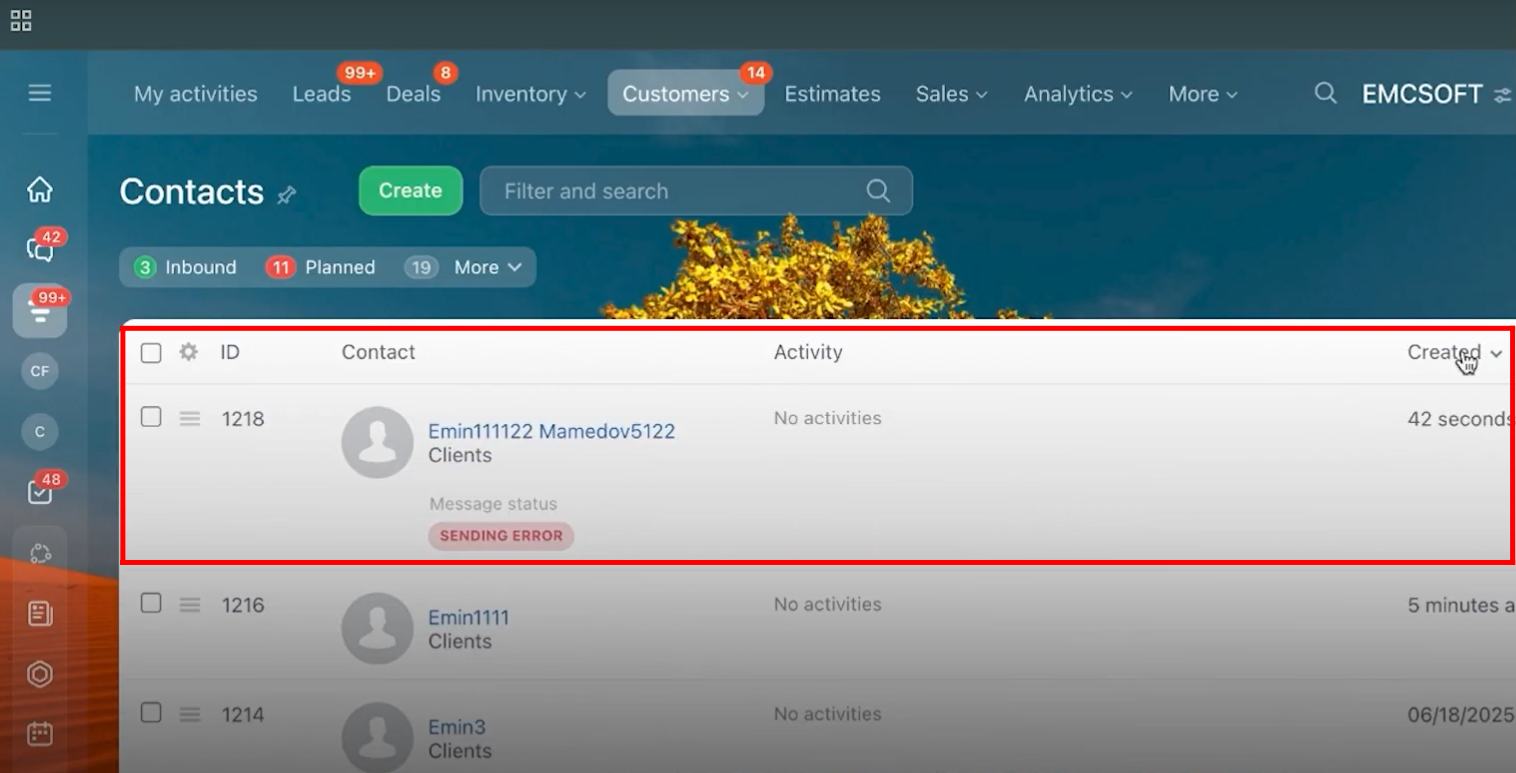
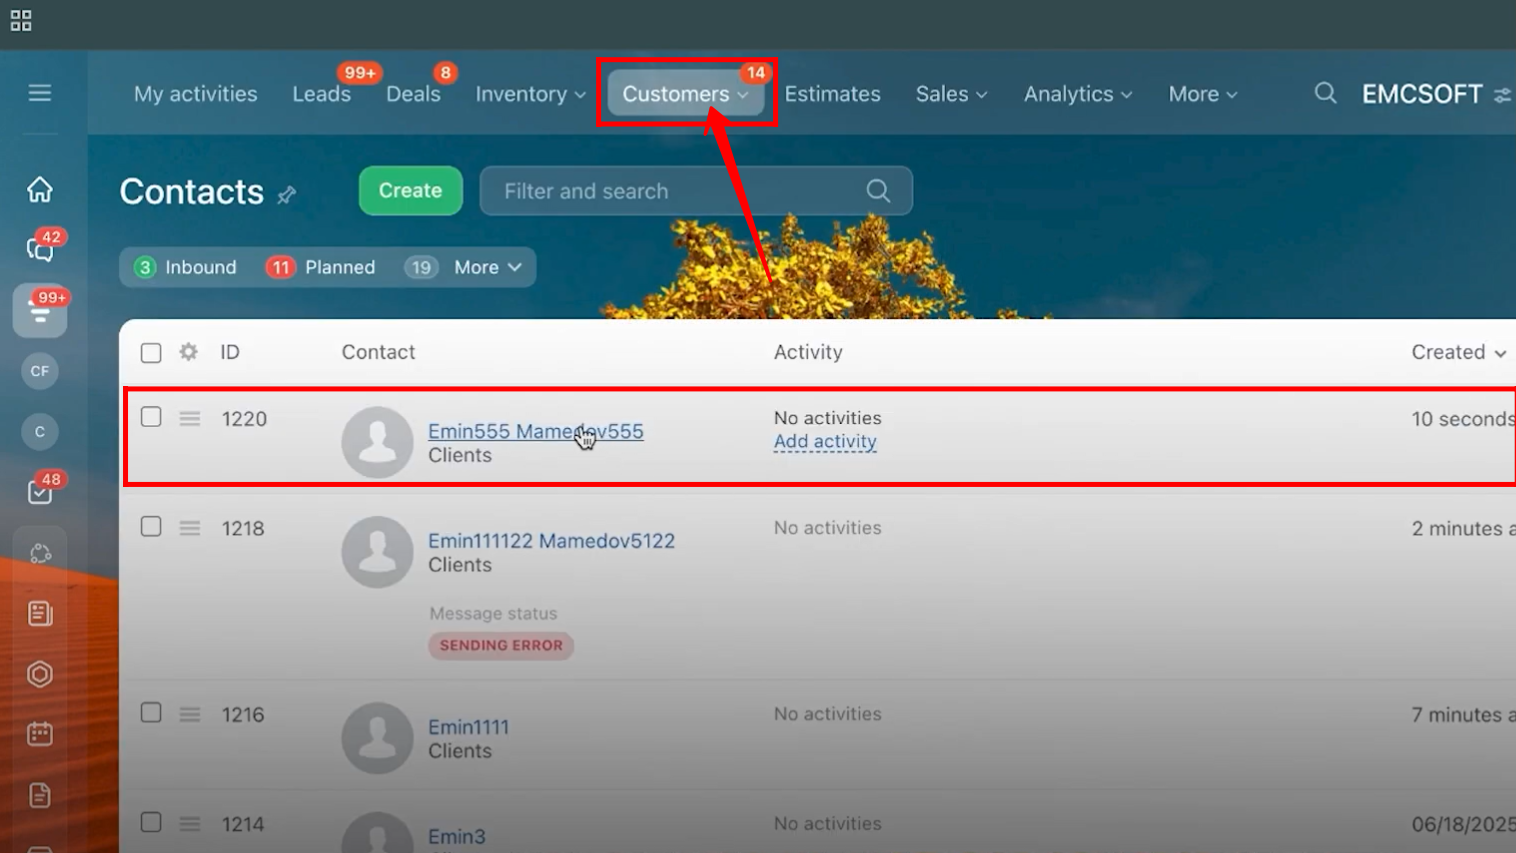
32. Go to Customers → Contacts, and you’ll see the newly created contact with the first and last name you provided during form submission.
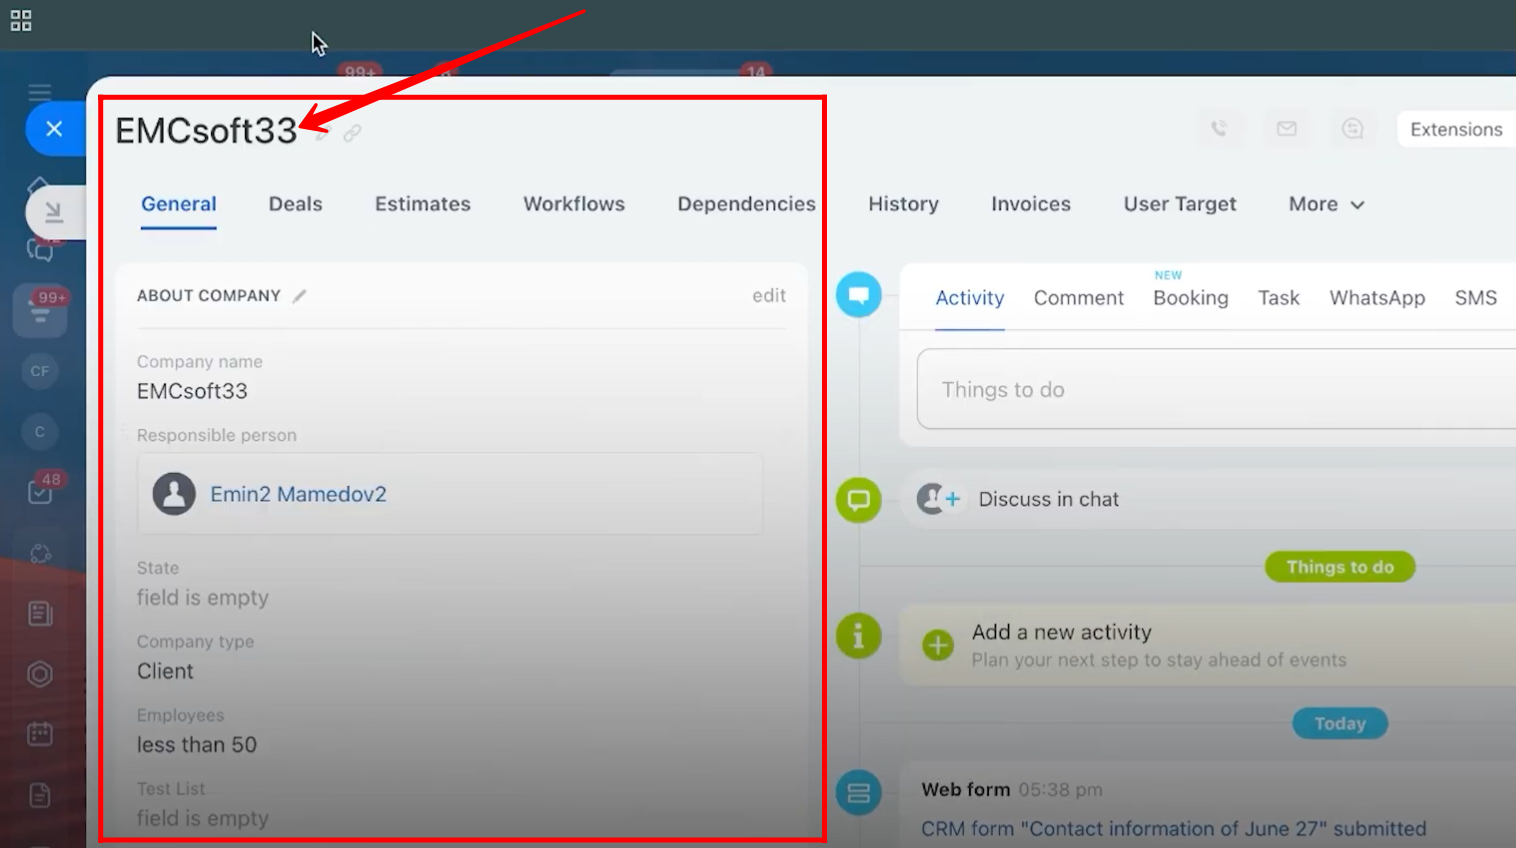
Click the contact to view any additional details you entered in the form.
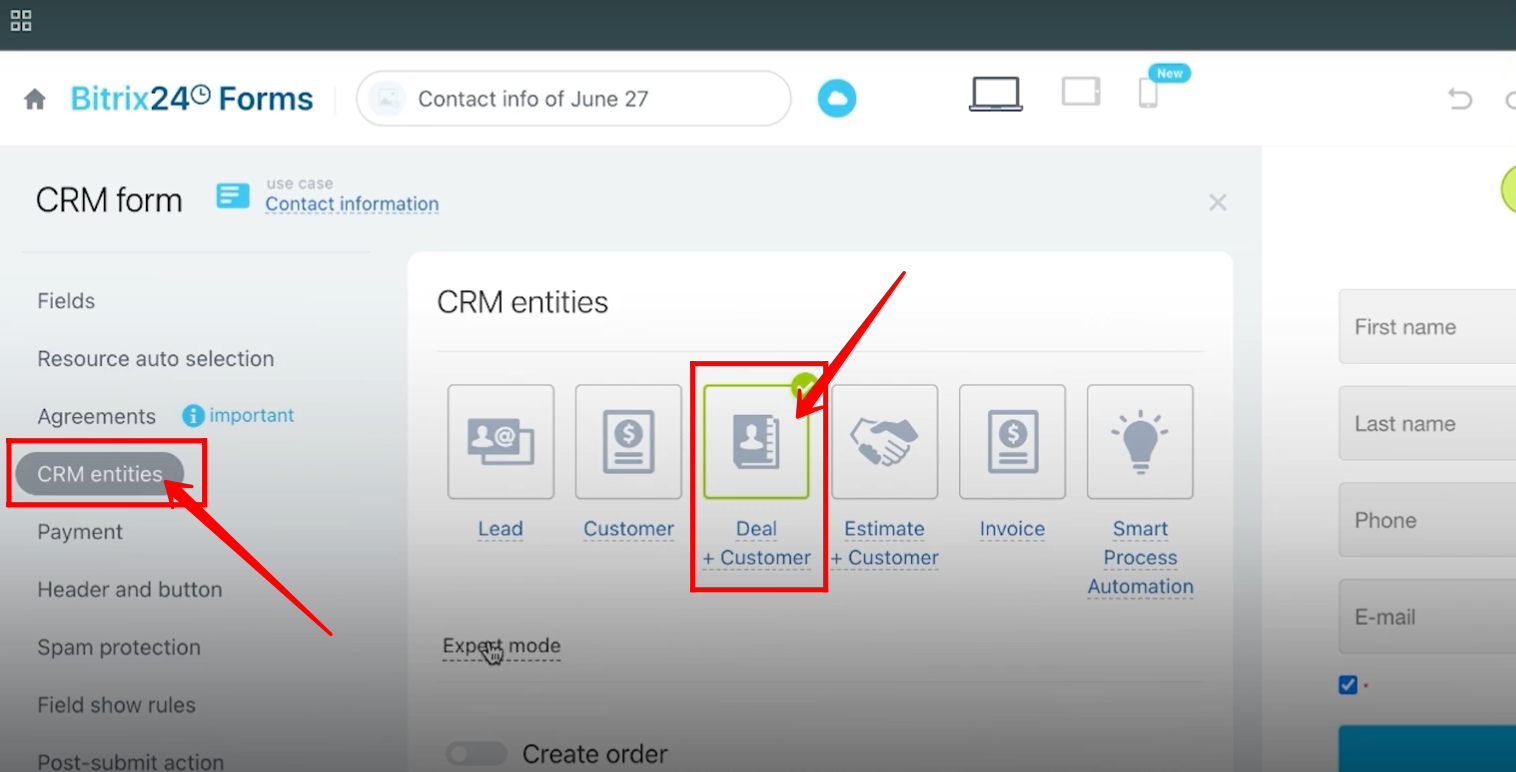
33. Go back to the Form Configuration → CRM Entities tab, then set the linked entity to Deal + Customer. A deal alone cannot be connected to the form because every deal must have a client linked to it.
Enable Expert Mode to view additional configuration options.
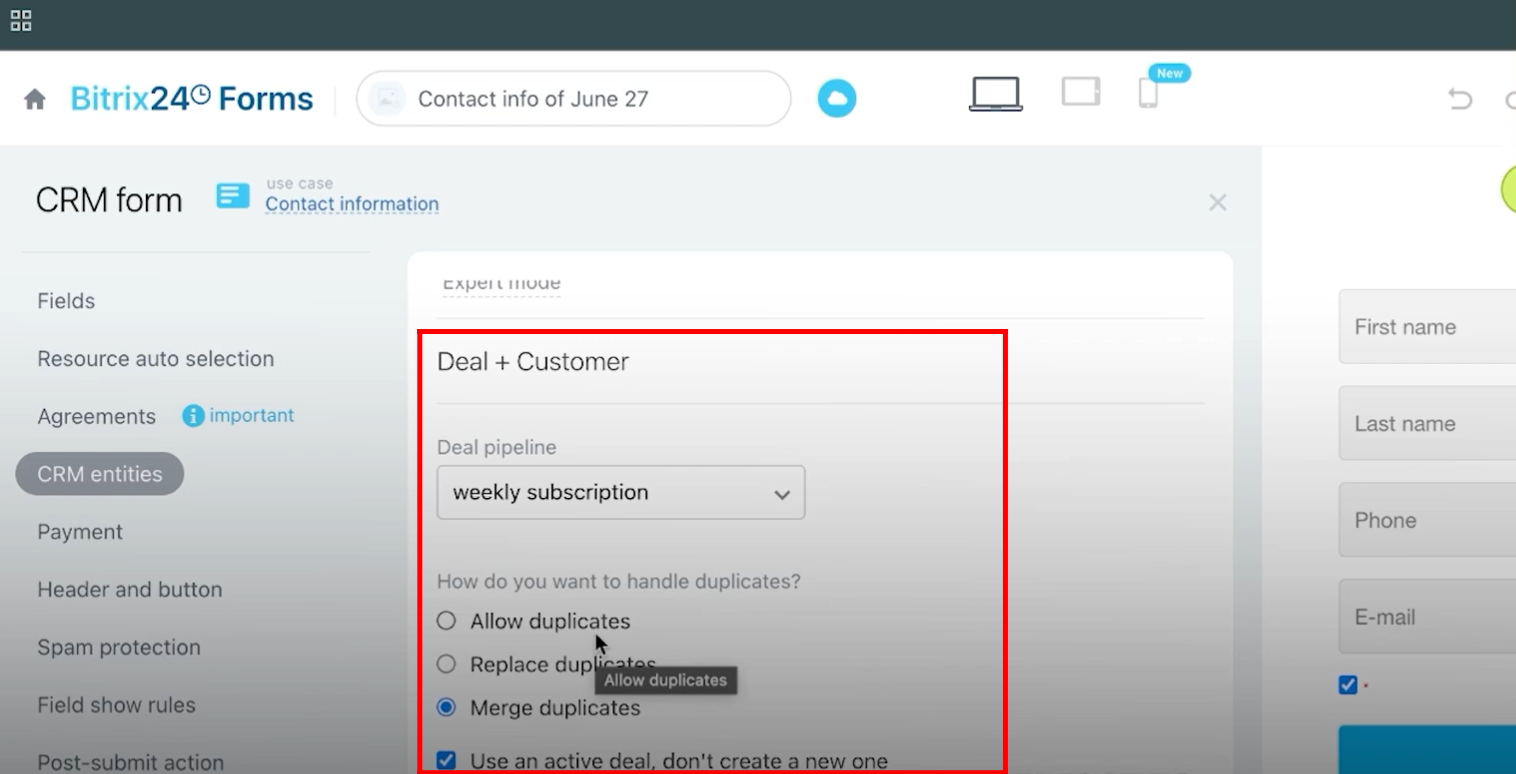
34. In Expert Mode, select the Deal Pipeline where the new deal will be created when this form is submitted.
Next, choose how duplicates should be handled by selecting one of the radio options:
- Allow duplicates – creates a new record even if the same data exists.
- Replace duplicates – overwrites the existing record with the new data.
- Merge duplicates – combines the new data with the existing record.
Finally, check the box “Use an active deal and don’t create a new one” if you want the form submission to update an existing active deal instead of creating a new one.
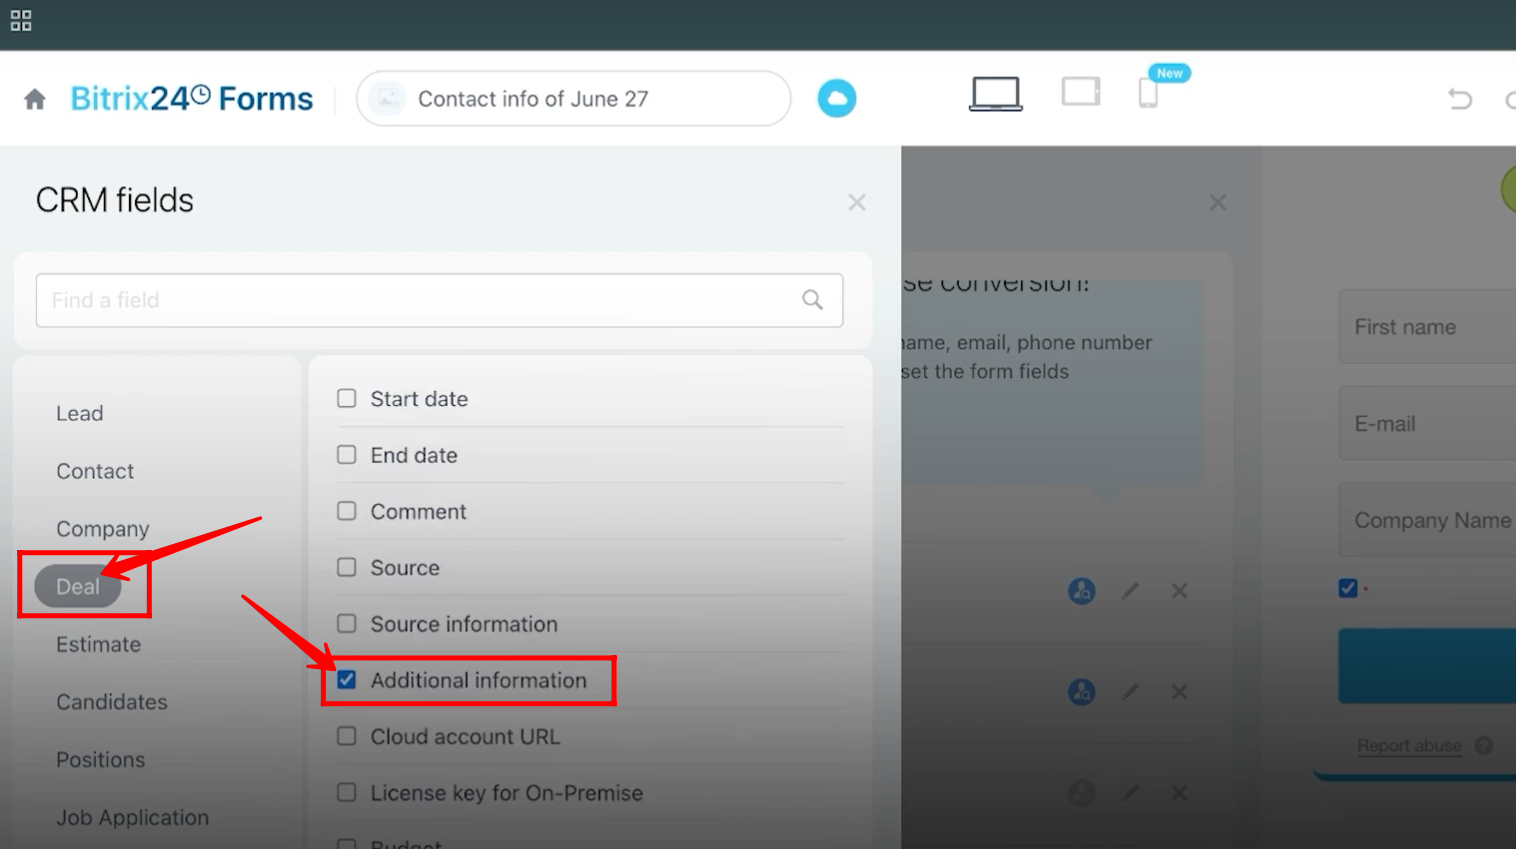
35. Add a new field to the form by going to the Fields tab, selecting the Deal entity, and then choosing your desired field.
In this example, the “Additional Information” field is selected.
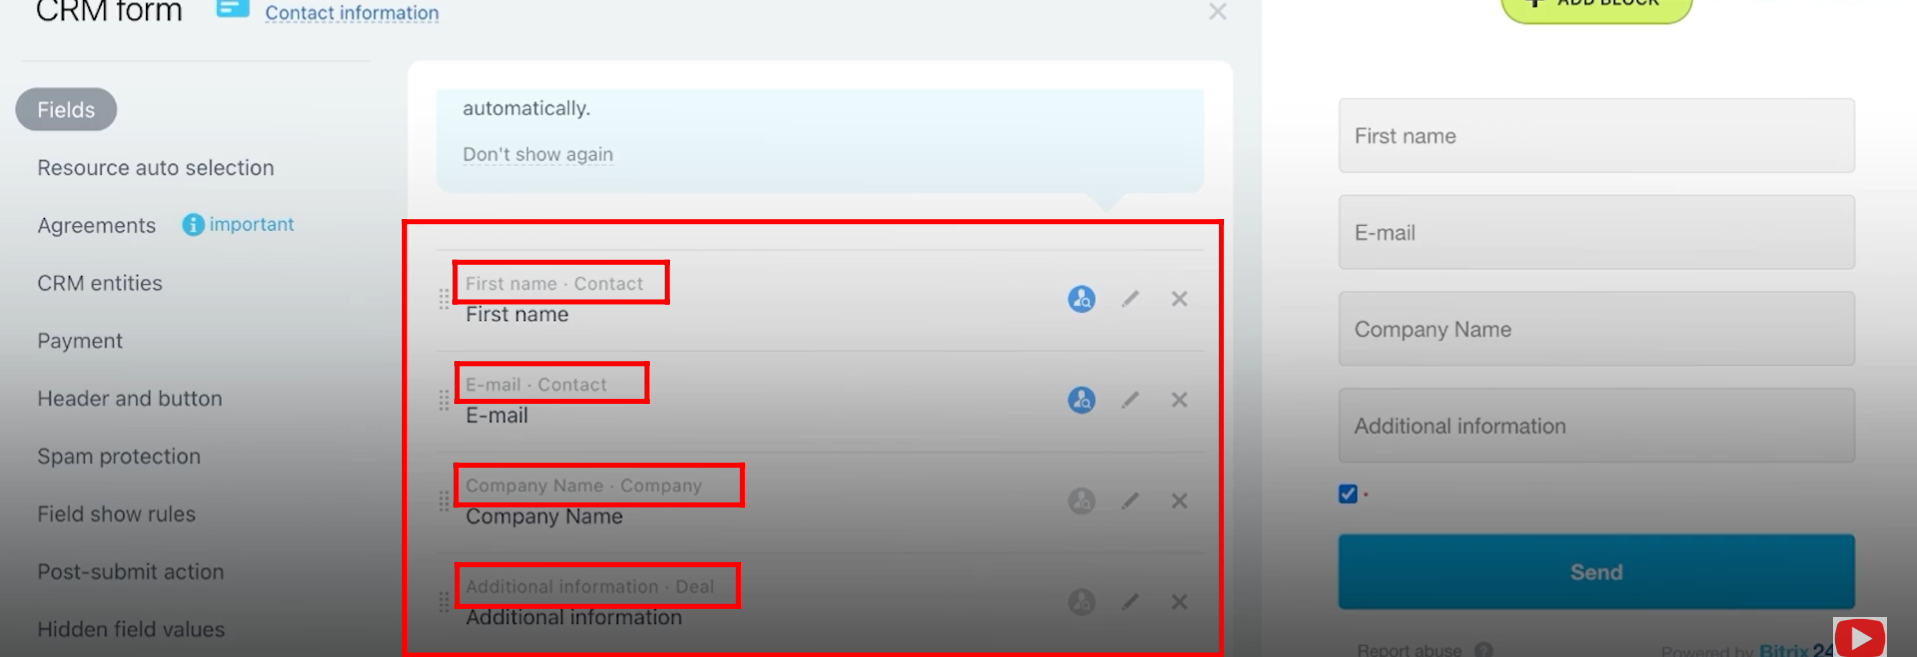
36. You can now see that First Name and E-mail fields are selected from the Contact entity, Company Name from the Company entity, and Additional Information from the Deal entity.
After confirming the selection, save the form to apply the changes.
37. Fill in all the required details in the form, then click Send to submit it. This will create a new deal linked to the customer and company, along with the additional information you provided.

38. Go to Deals, and you’ll notice that in the General pipeline, no new deal has been created from the submitted form.
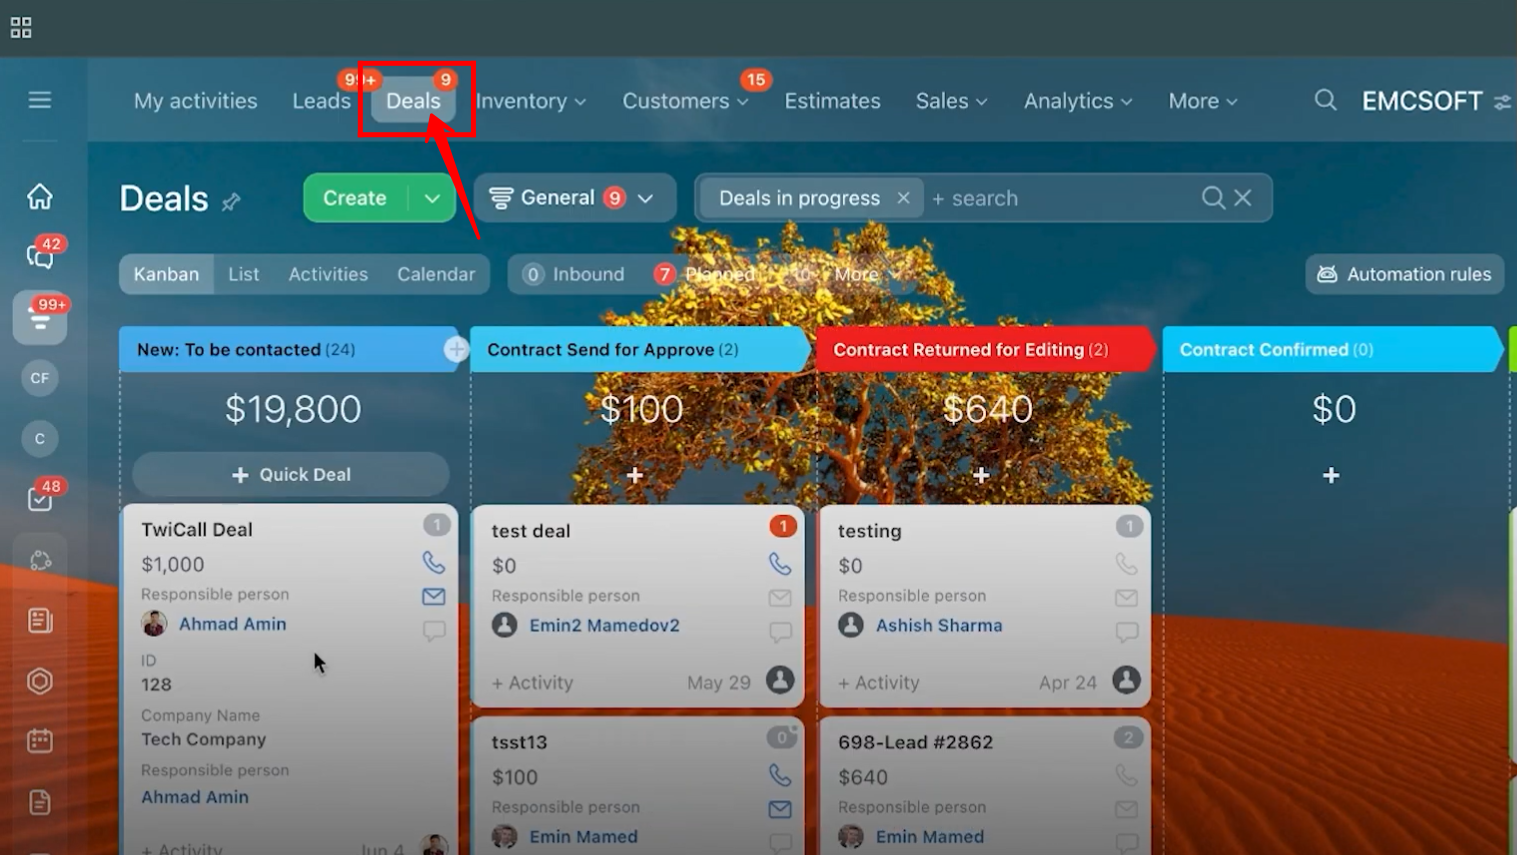
39. Go to the pipeline you selected during form setup — you’ll see that a new deal has been created there from the form submission.

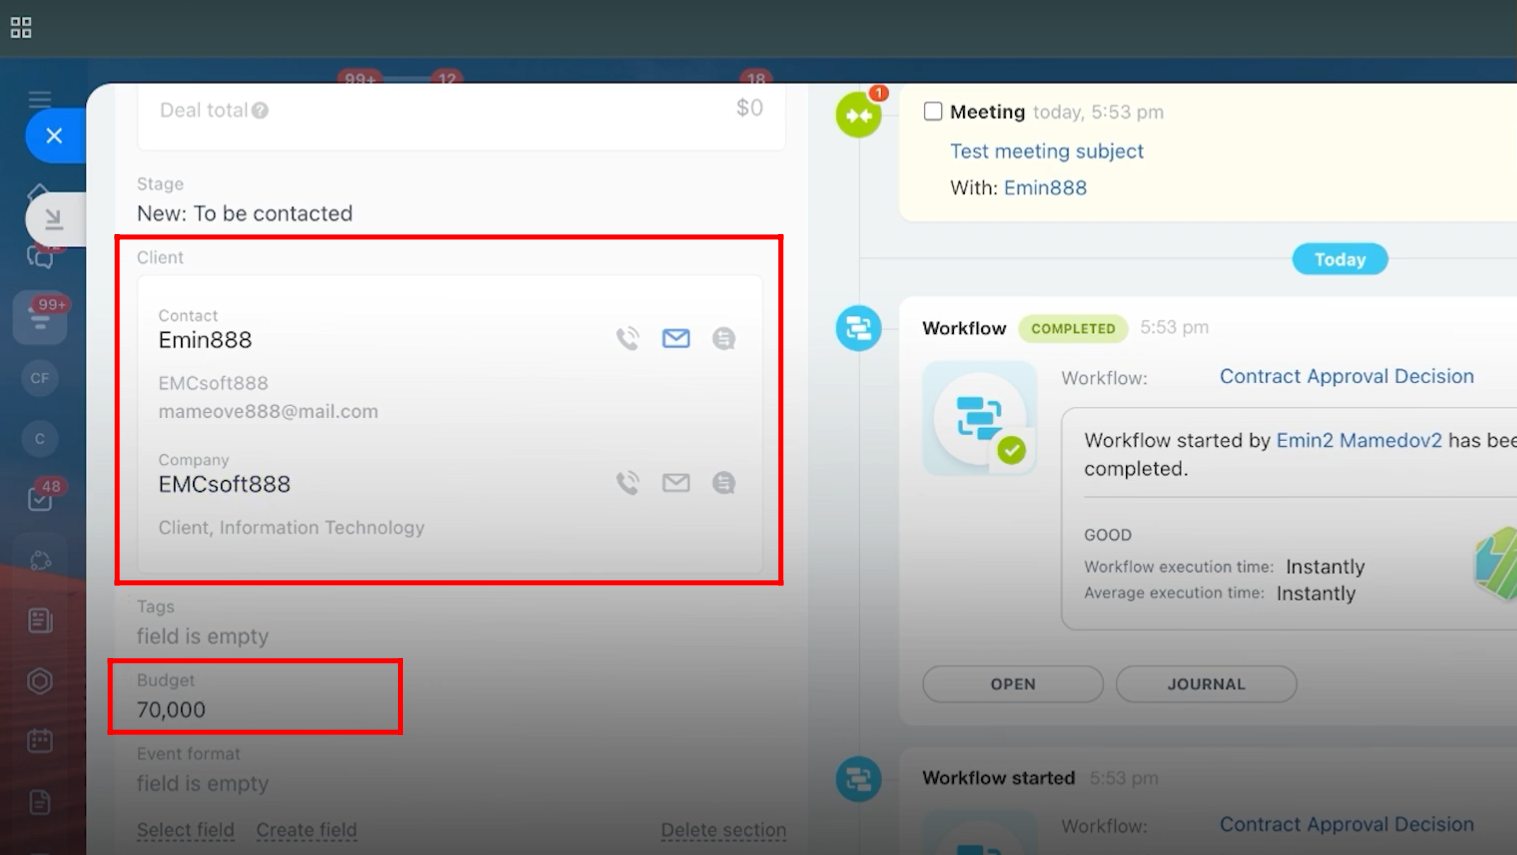
40. Open the deal, and under the Client labeled section, you will find the contact and company details.
Additionally, the field from the deal entity (originally named Additional Information) is also displayed—renamed here as Budget for clarity.
41. Go to the form configuration and open the CRM Entities tab. Select the linked entity as Estimate + Customer.

42. The First Name and E-mail fields are selected from the Contact entity, the Company Name field from the Company entity, and the City field from the Estimate entity.
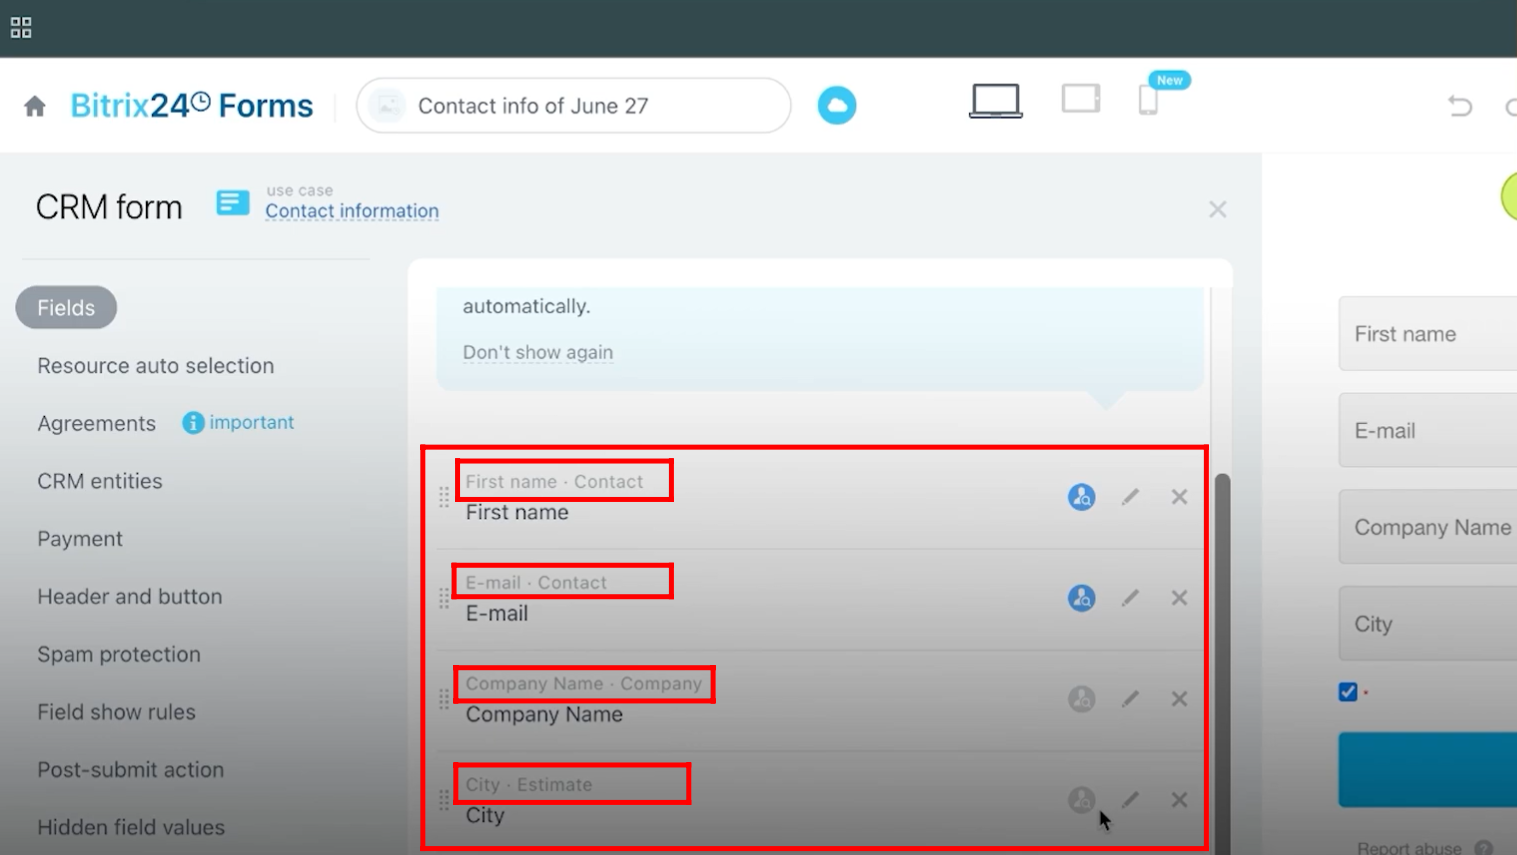
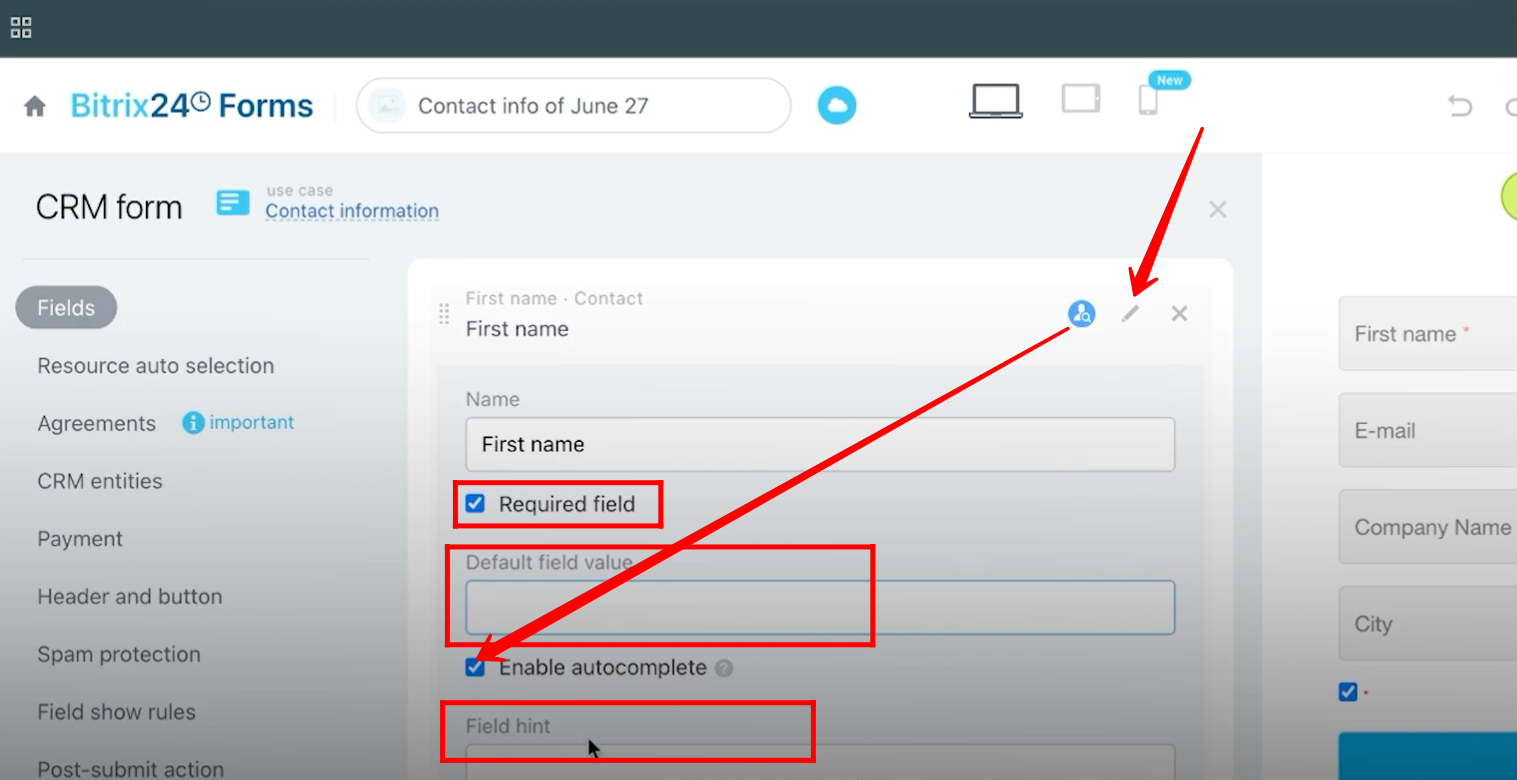
43. The blue icon beside each field indicates that autocomplete is enabled for that specific field.
You can click the pencil (edit) icon to modify the field—this includes renaming it, setting it as required or optional, enabling or disabling autocomplete, adding a field hint, or setting a default value.
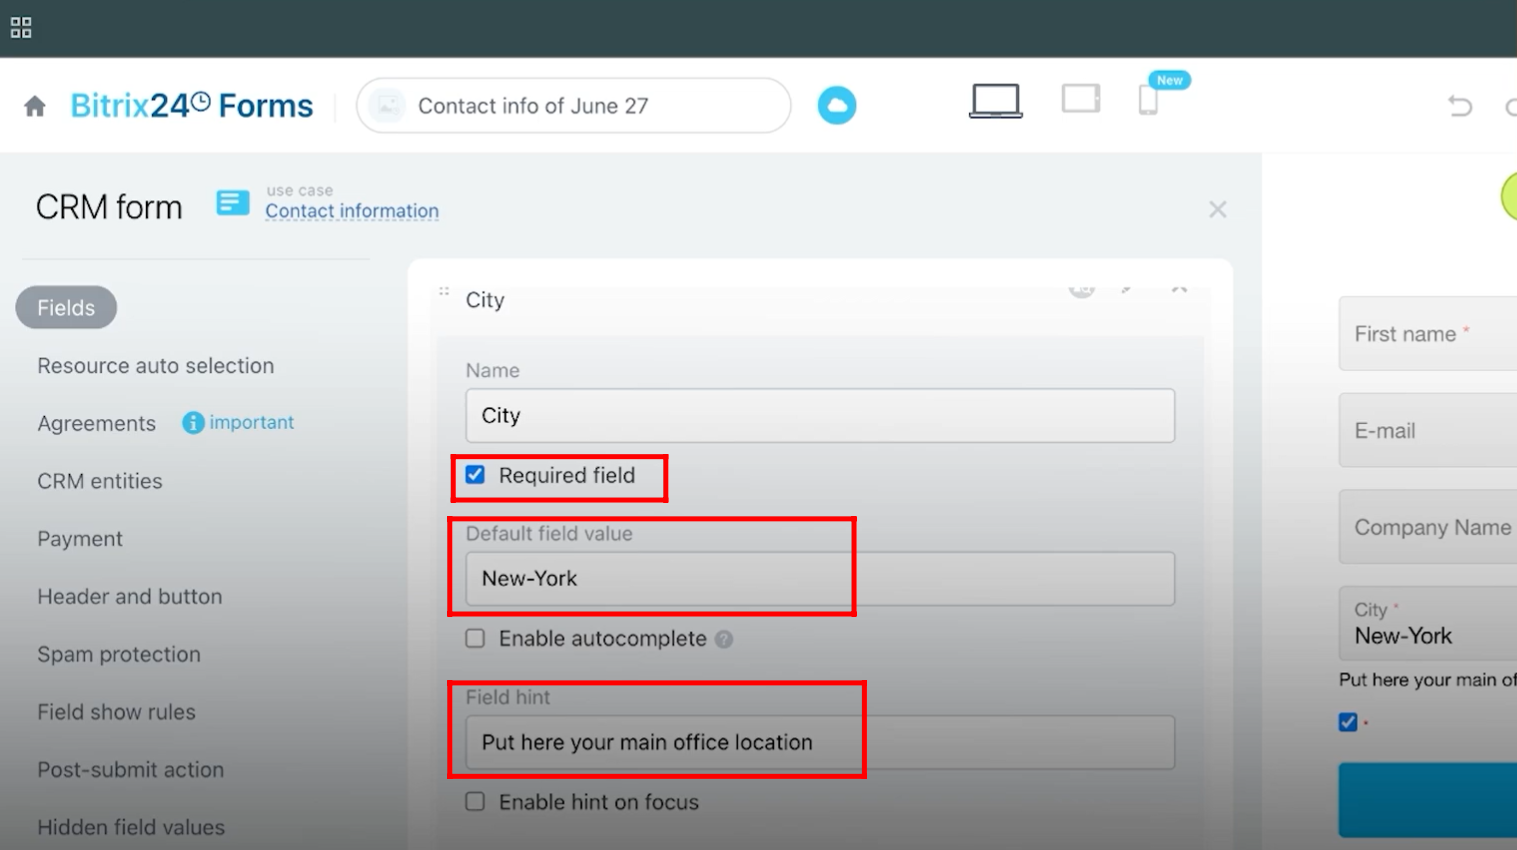
44. You can see that the City field has a default value set to “New York”, is marked as required, and includes a field hint that says, “Put here your main office location.”
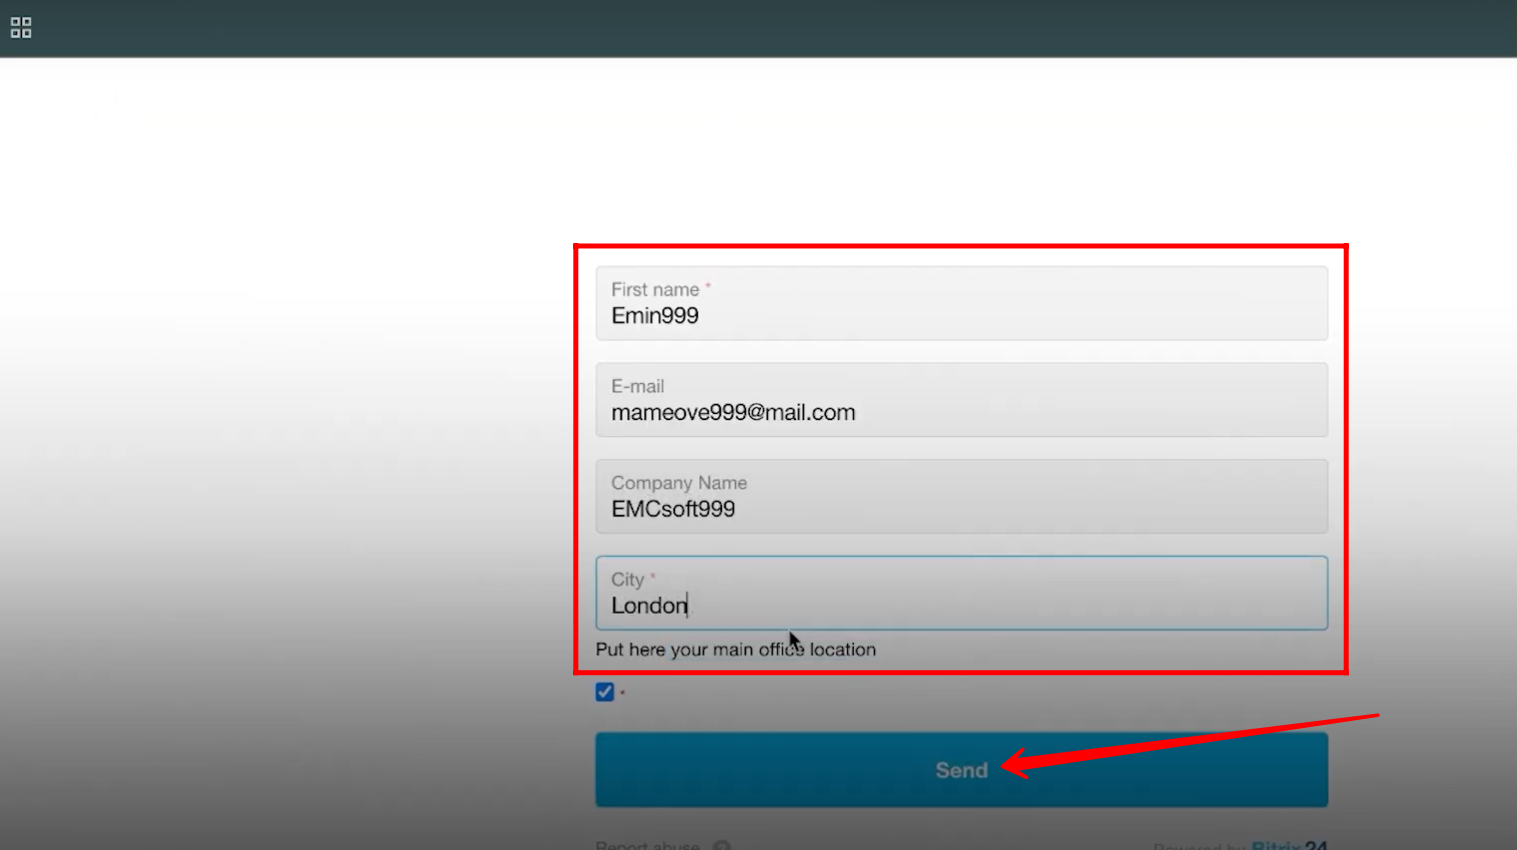
45. Save the form and open it. Fill in all the required details, then click Send to submit the form.
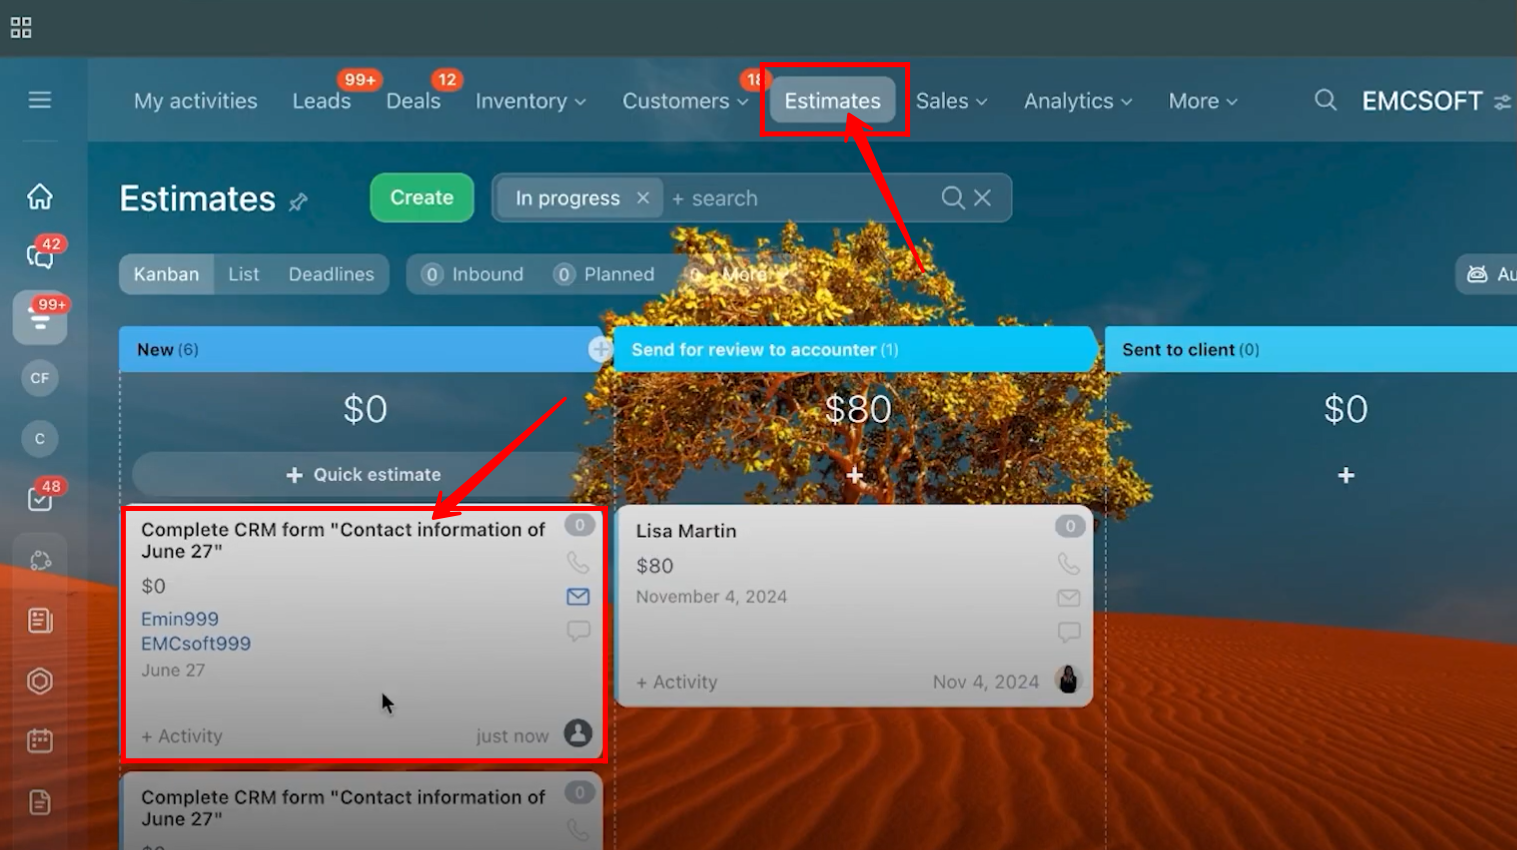
46. Go to Estimates, where you will see a new estimate record has been created.
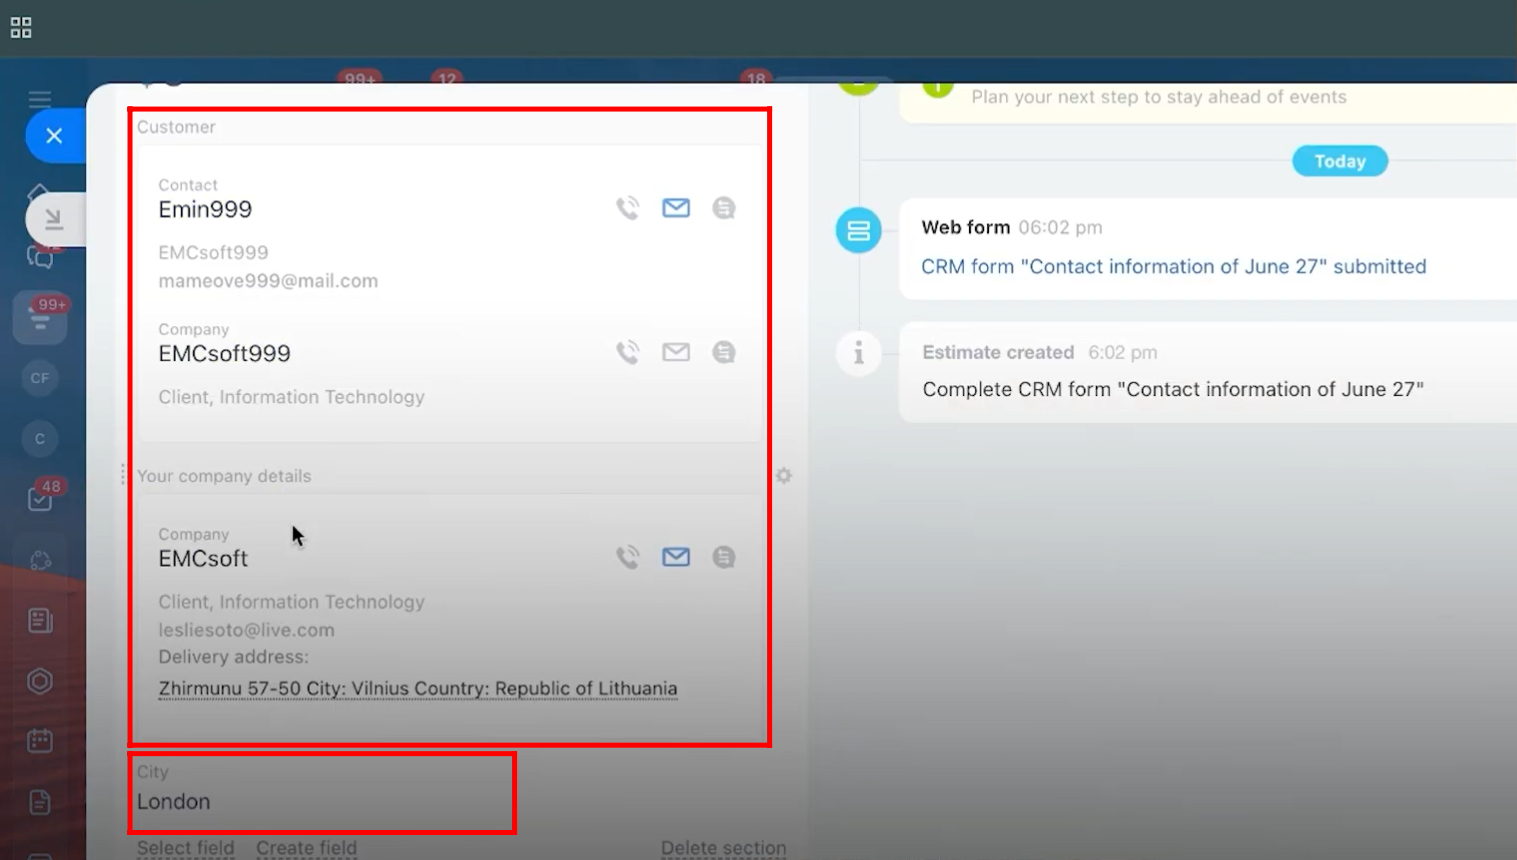
47. Open the newly created estimate, where you will find the customer and company details, along with the City field showing “London” in the estimate details.
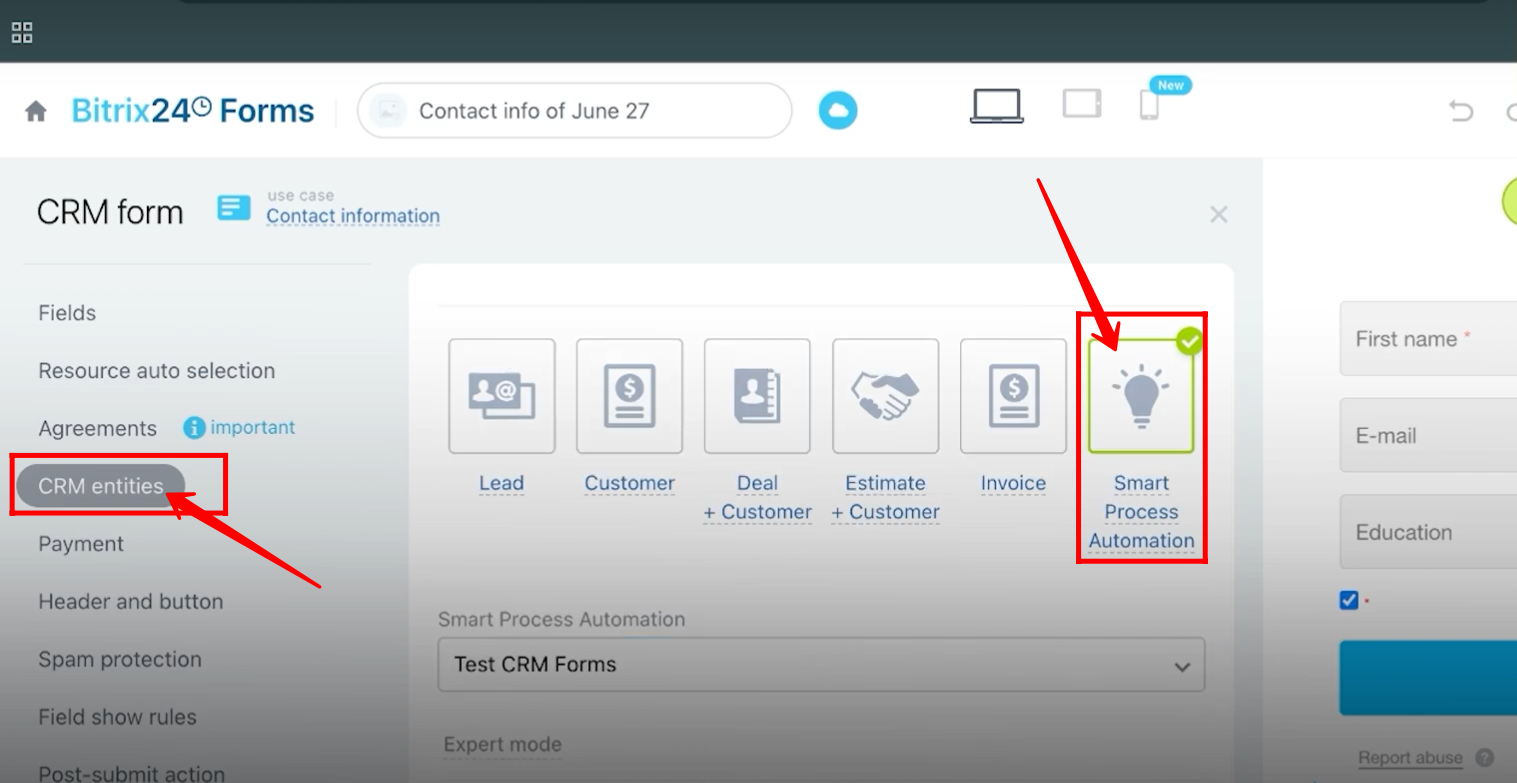
48. Go to the form configuration again and open the CRM Entities tab. Change the linked entity to Smart Process Automation (SPA).
Note: The Invoice and SPA entities are very similar. The Invoice entity will be covered in a separate guide later. For now, we will proceed with SPA.
Below that, choose which SPA to use — here, Candidates is selected.

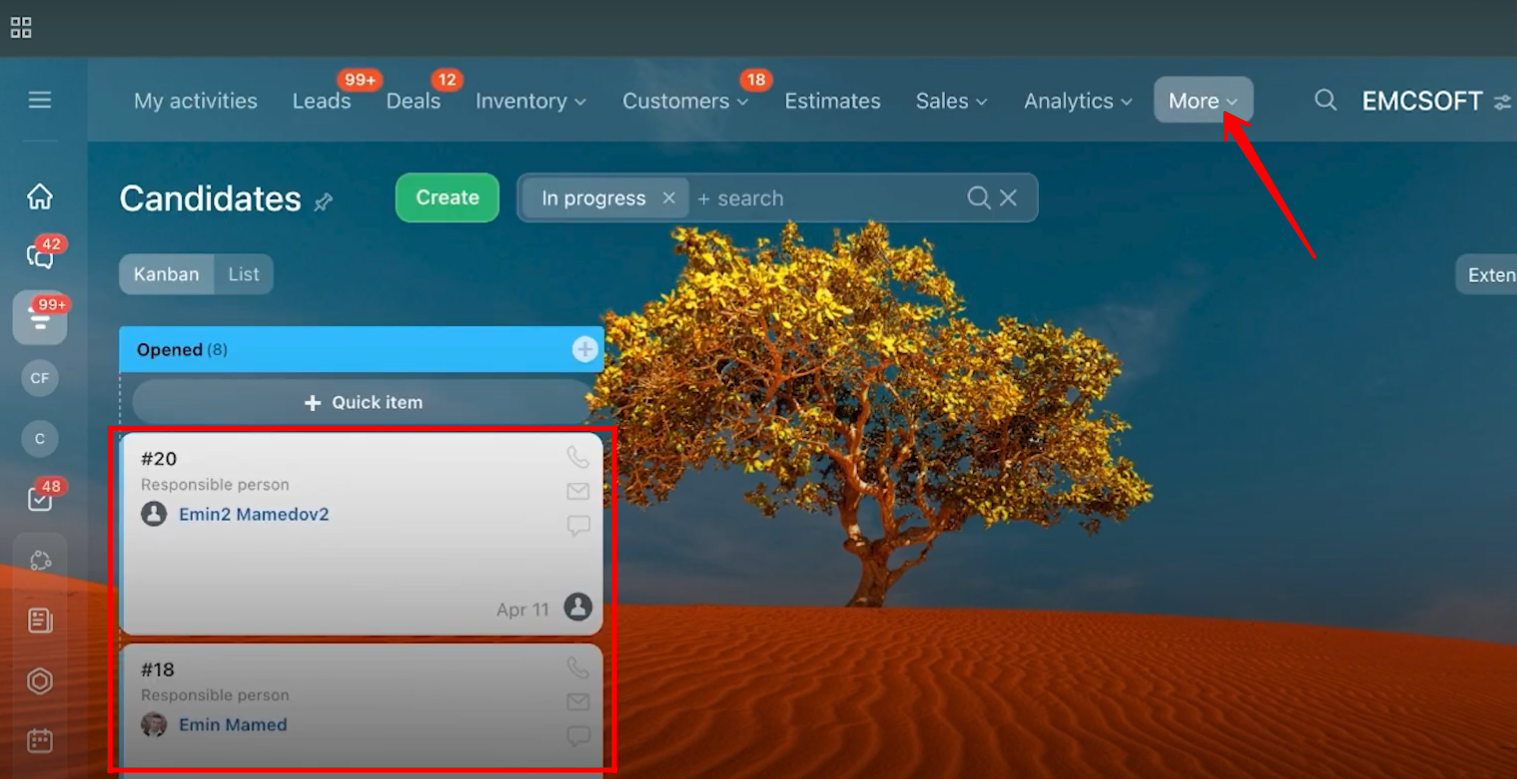
49. To view the Candidates SPA records, go to More > SPA, then select the desired SPA, in this case, Candidates. You will see all records created within this specific SPA.
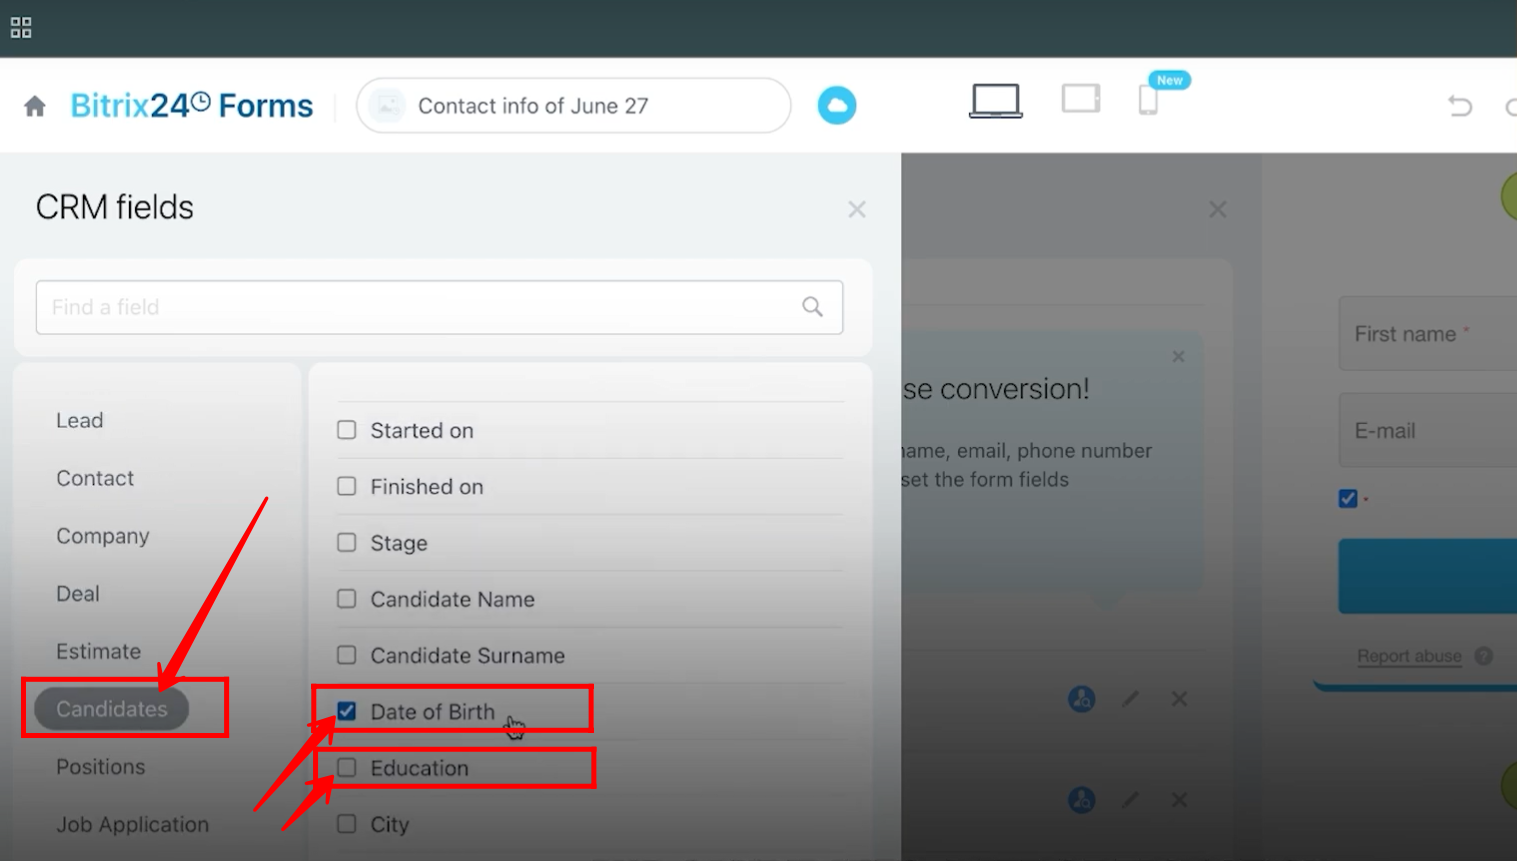
50. Go back to the form configuration and add fields to the form, this time selecting them from the Candidates SPA entity.
51. Fill in the form details and click Send to submit the form.
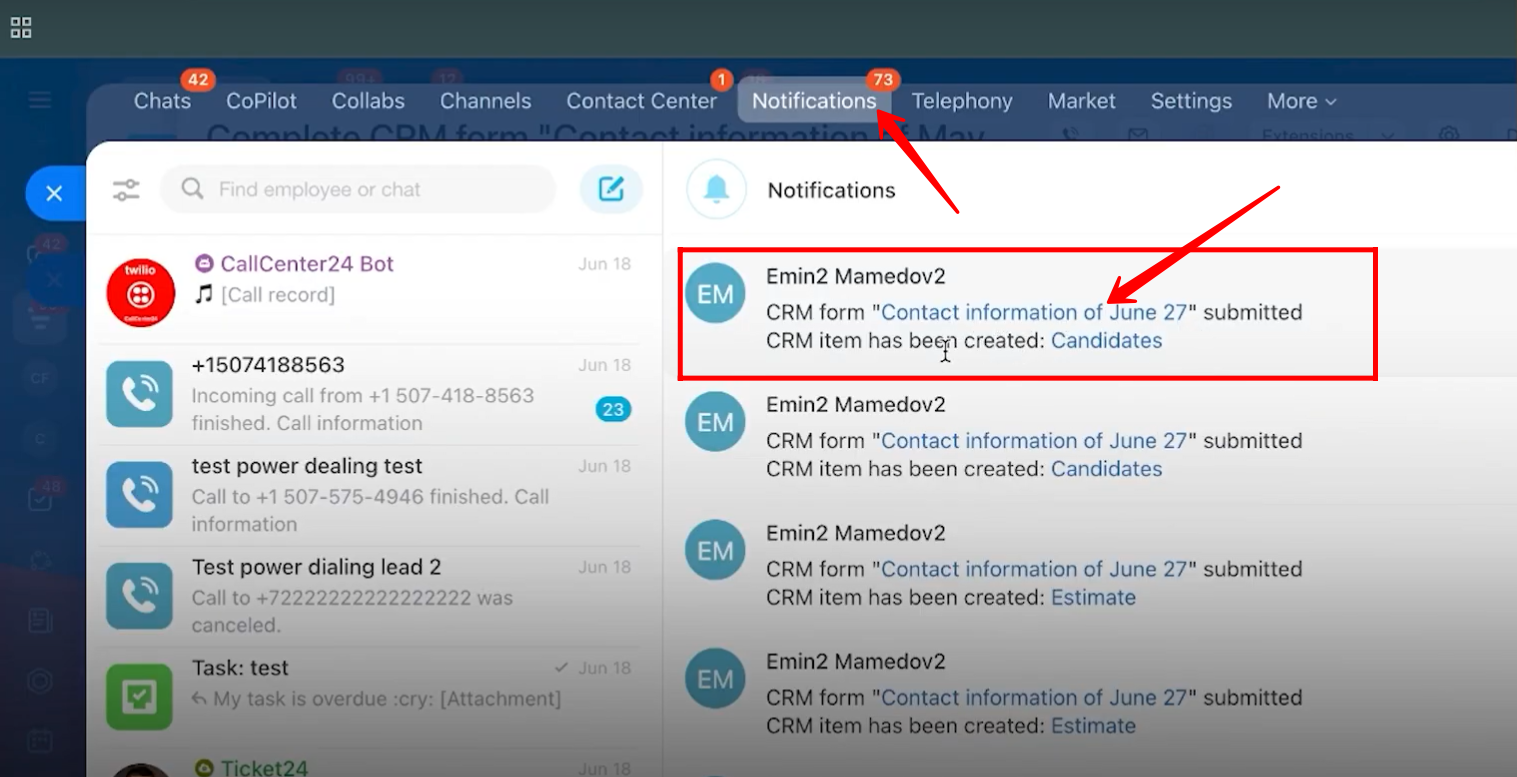
52. You will receive a notification confirming the form submission with the provided name, and a new CRM item will be created under Candidates.
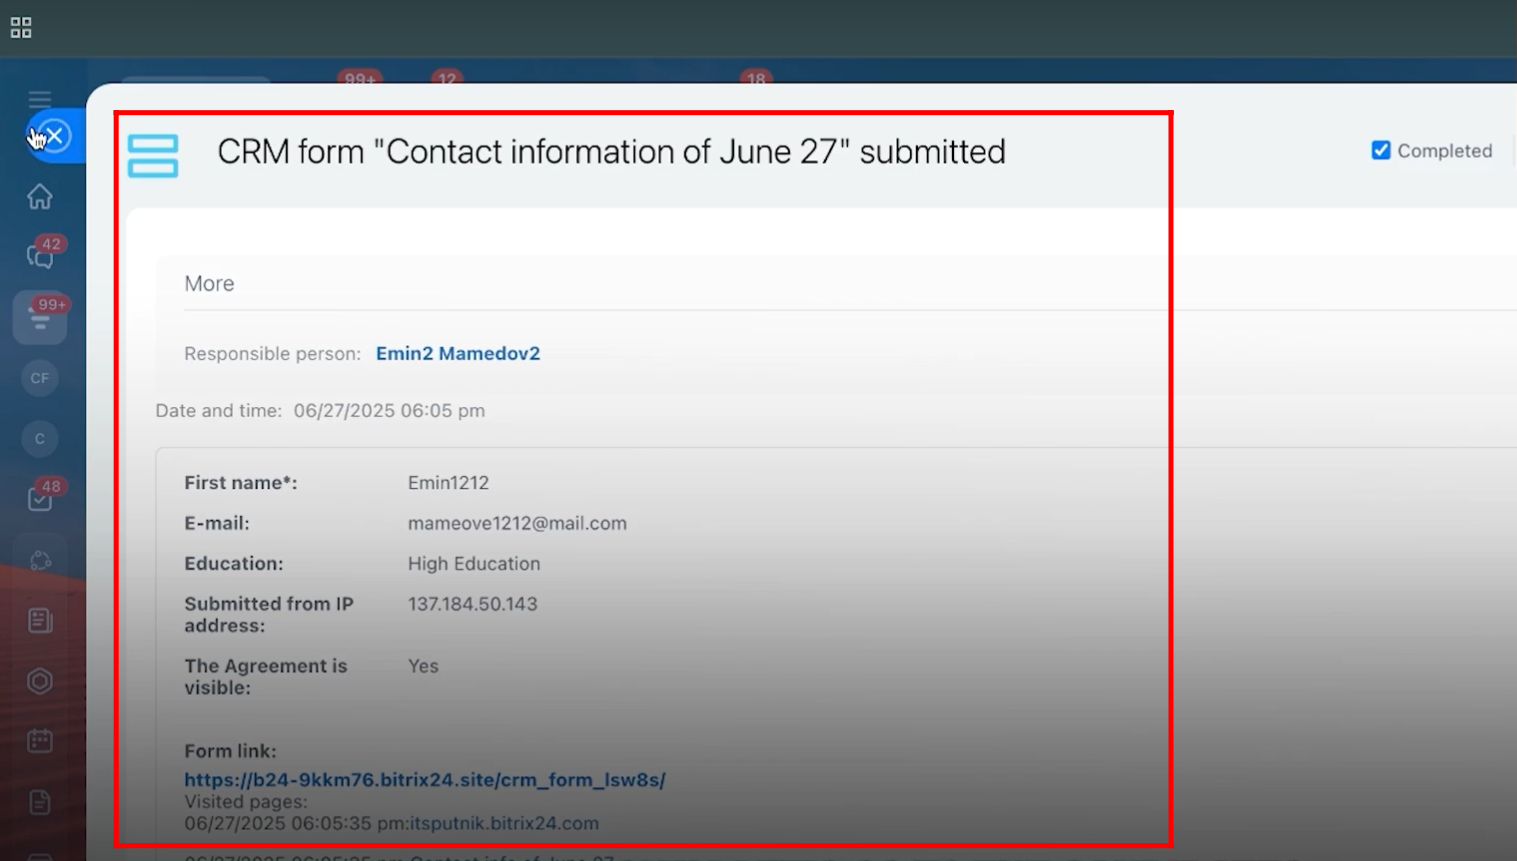
53. Open the submitted form from the notification, and you will see all the details you filled in the form.
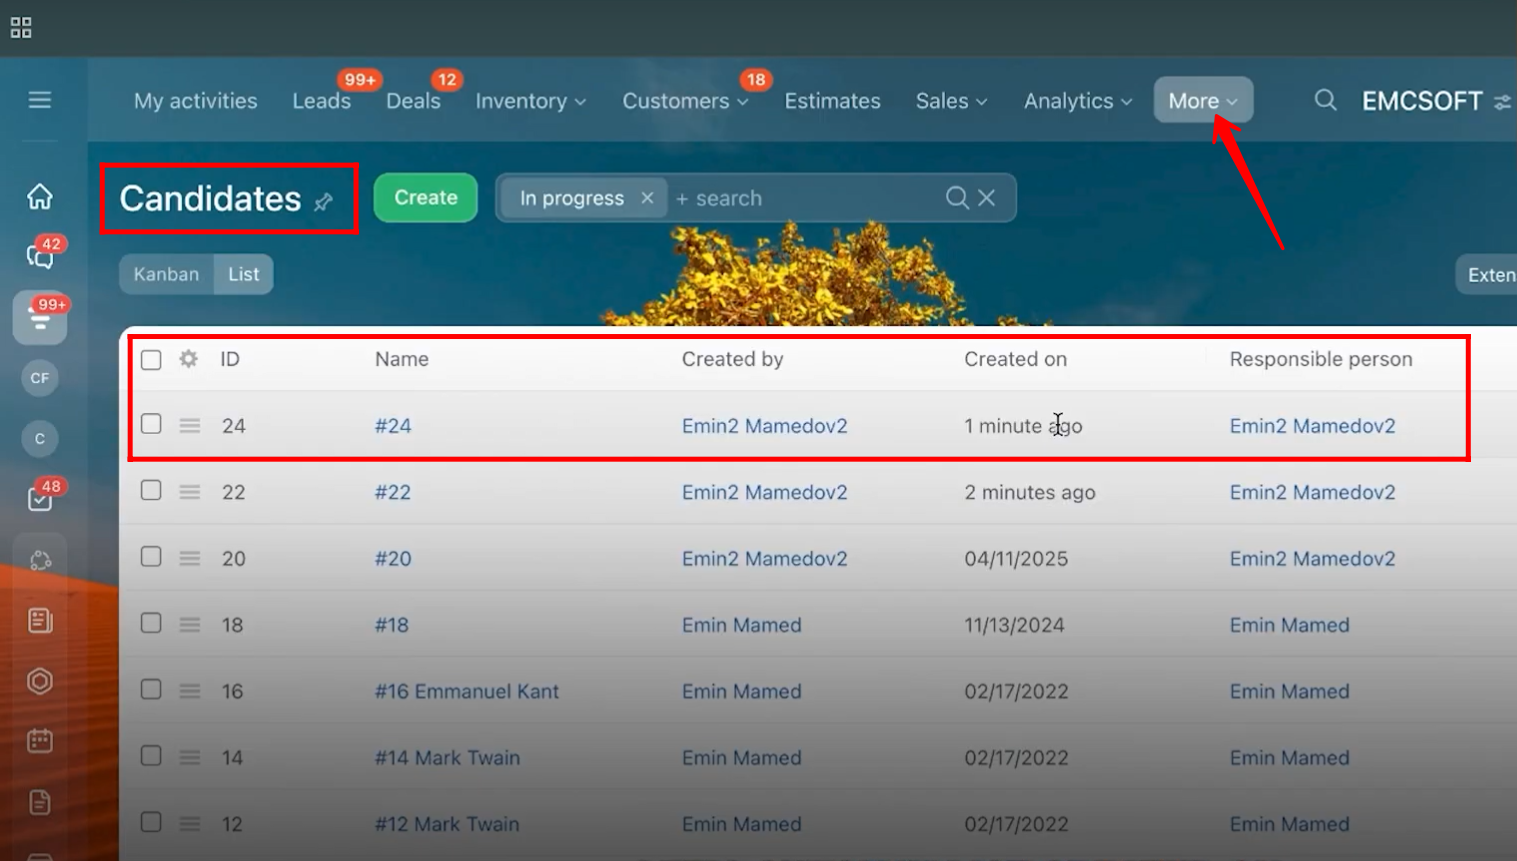
54. Go to More > SPA > Candidates (created through this workflow).
Here, you will see a new SPA record created with the name and details you submitted in the form.
(We will cover the process to create an SPA in the next steps, separately.)
55. Go to More > Smart Process Automation, then click Create to generate a new SPA.
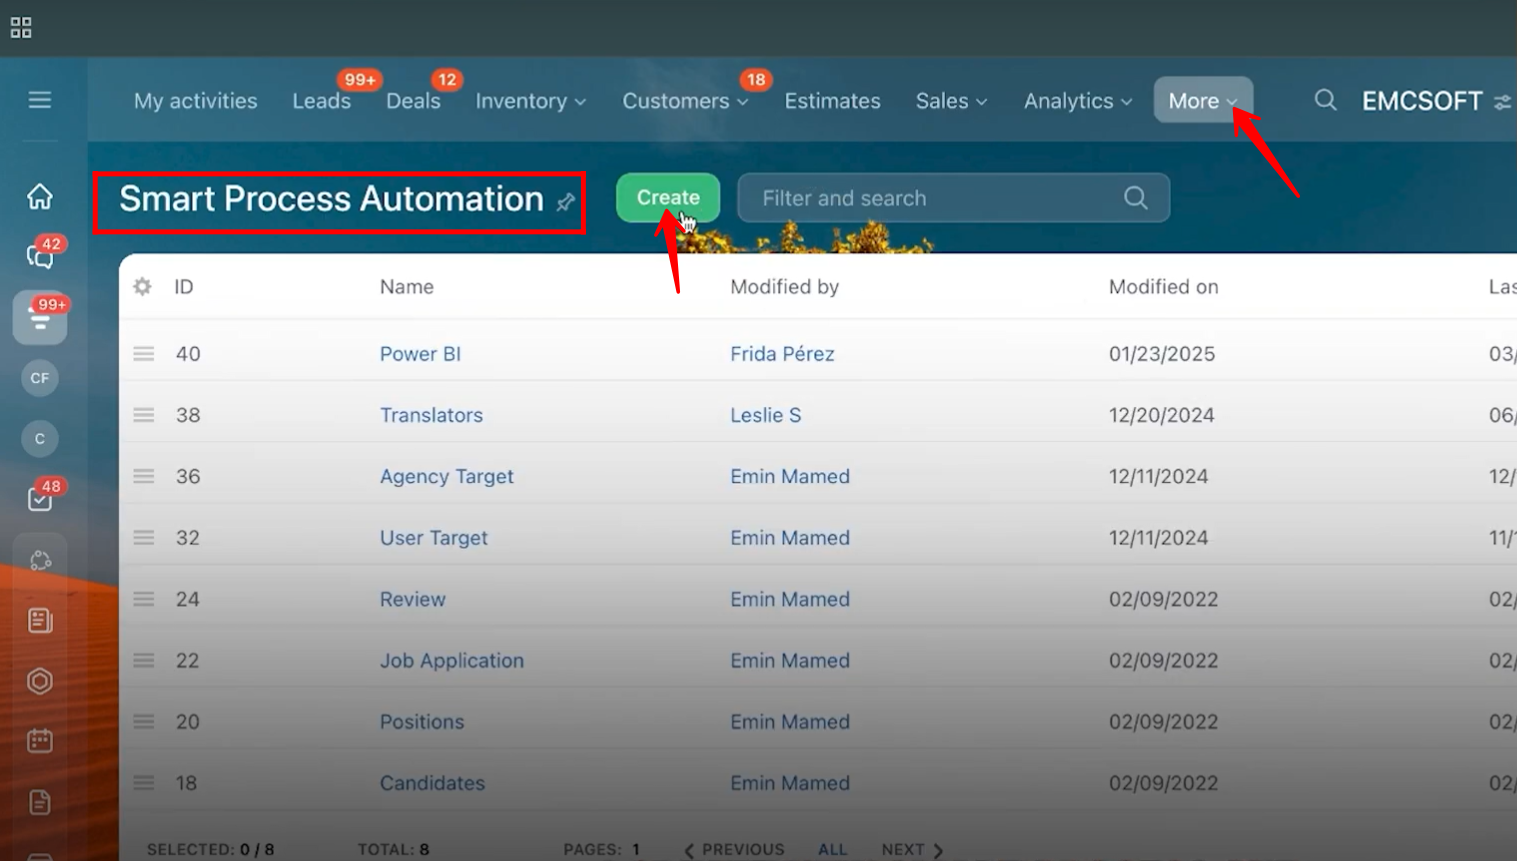
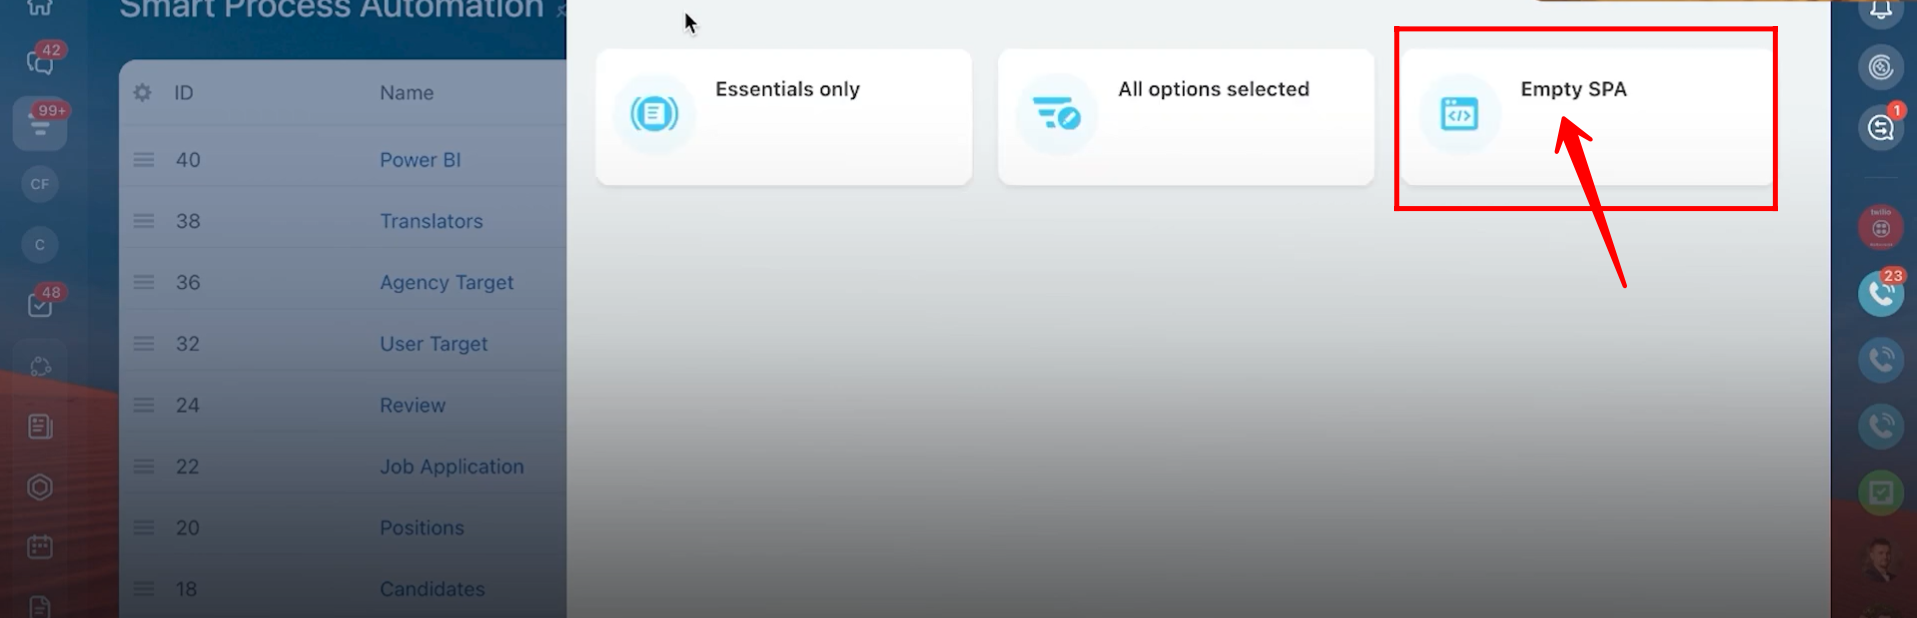
56. You can create an SPA using pre-built templates: “Essentials Only,” “All Options Selected,” or “Empty SPA.” For now, we will select “Empty SPA.”
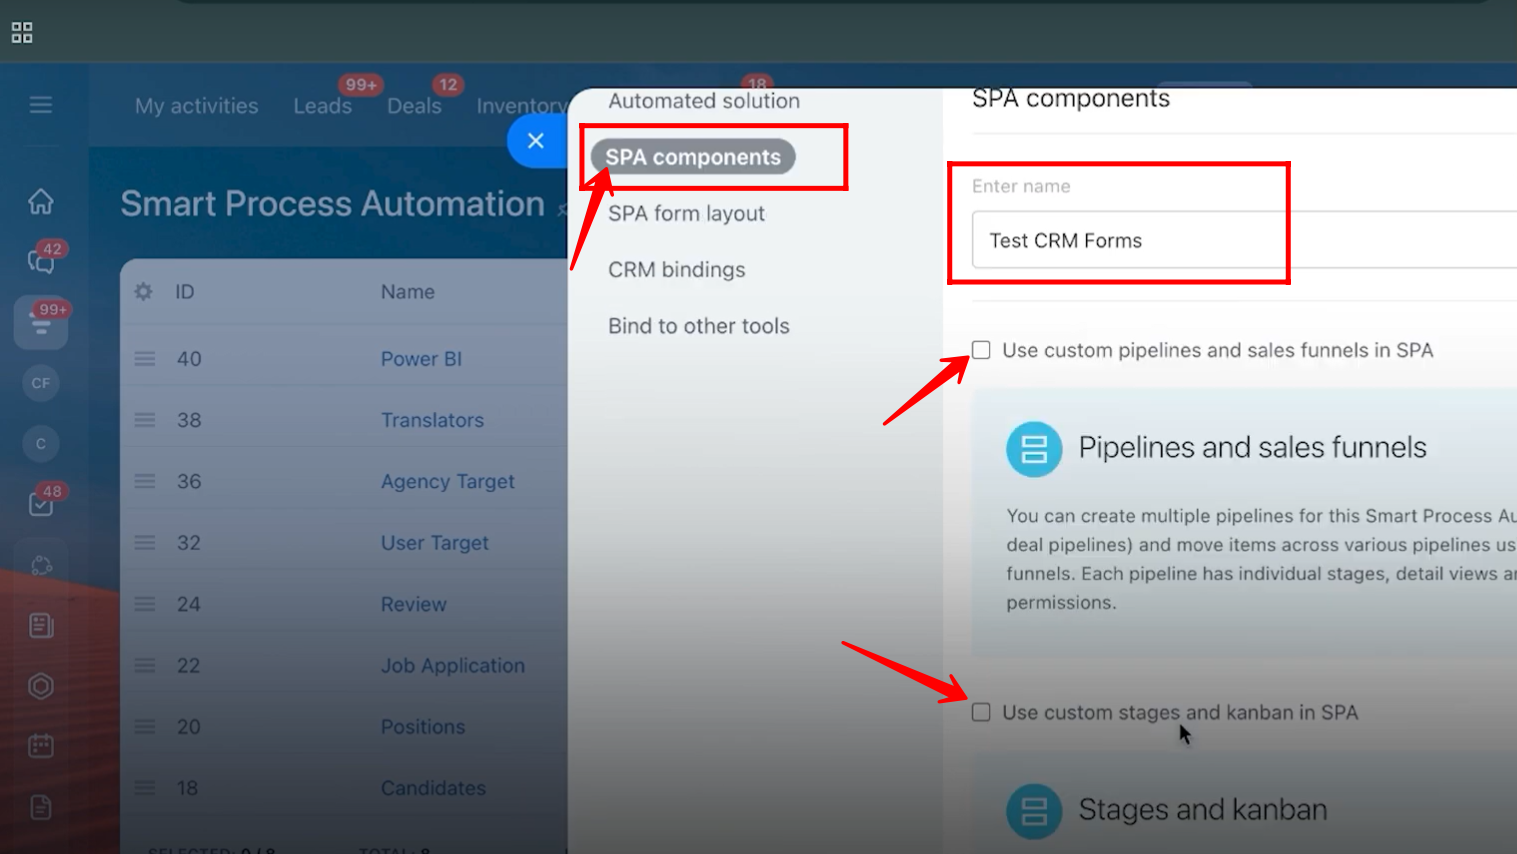
57. In SPA Components, enter the name of the SPA and select options according to your needs, such as “Use custom pipelines and sales funnel in SPA”, “Use custom stages and Kanban in SPA”, and others.
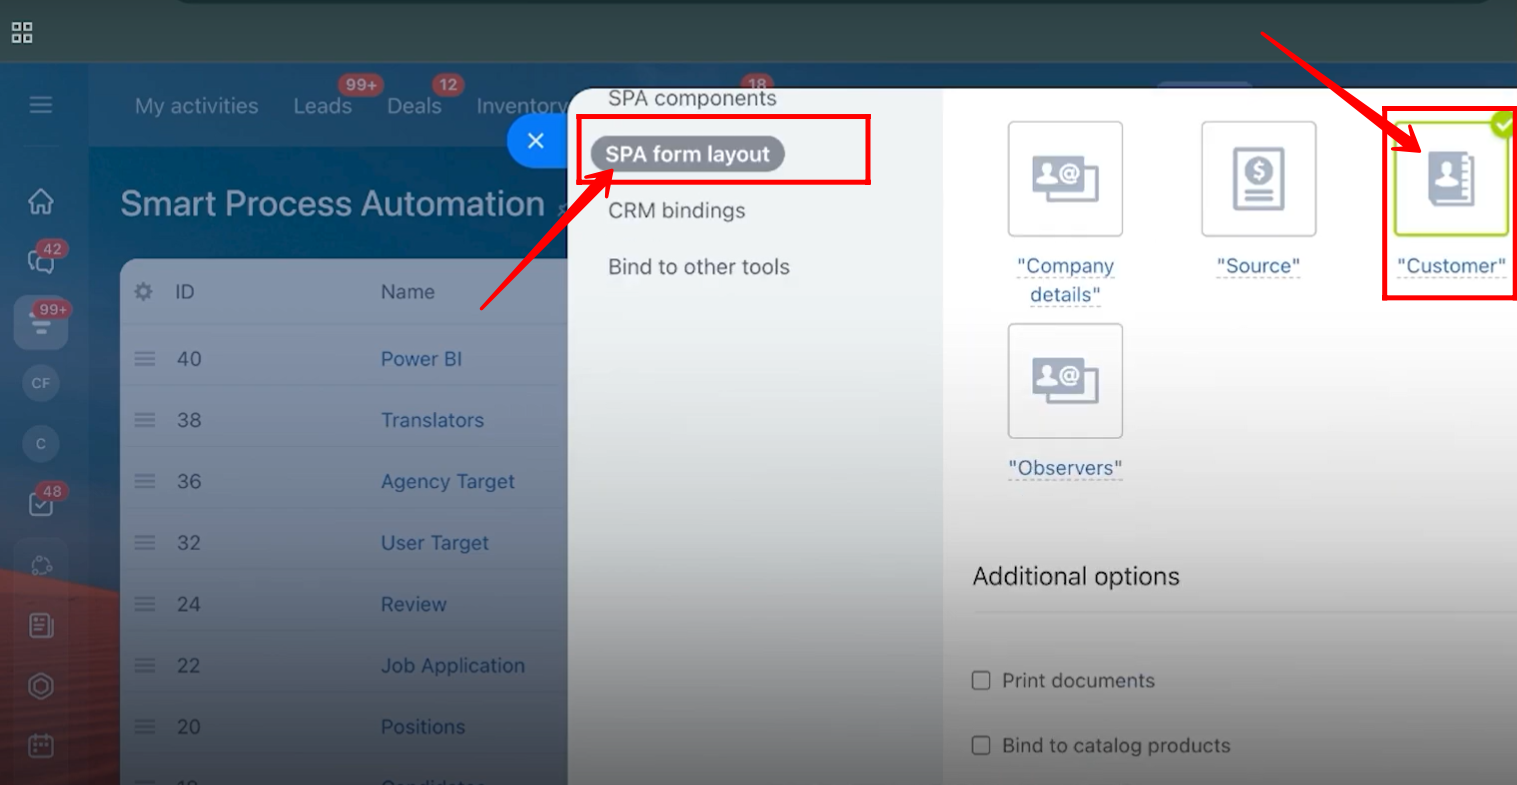
58. Go to SPA Form Layout and select the sections you want to include, such as Company Details, Sources, Customers, or Observers. For now, select Customers.
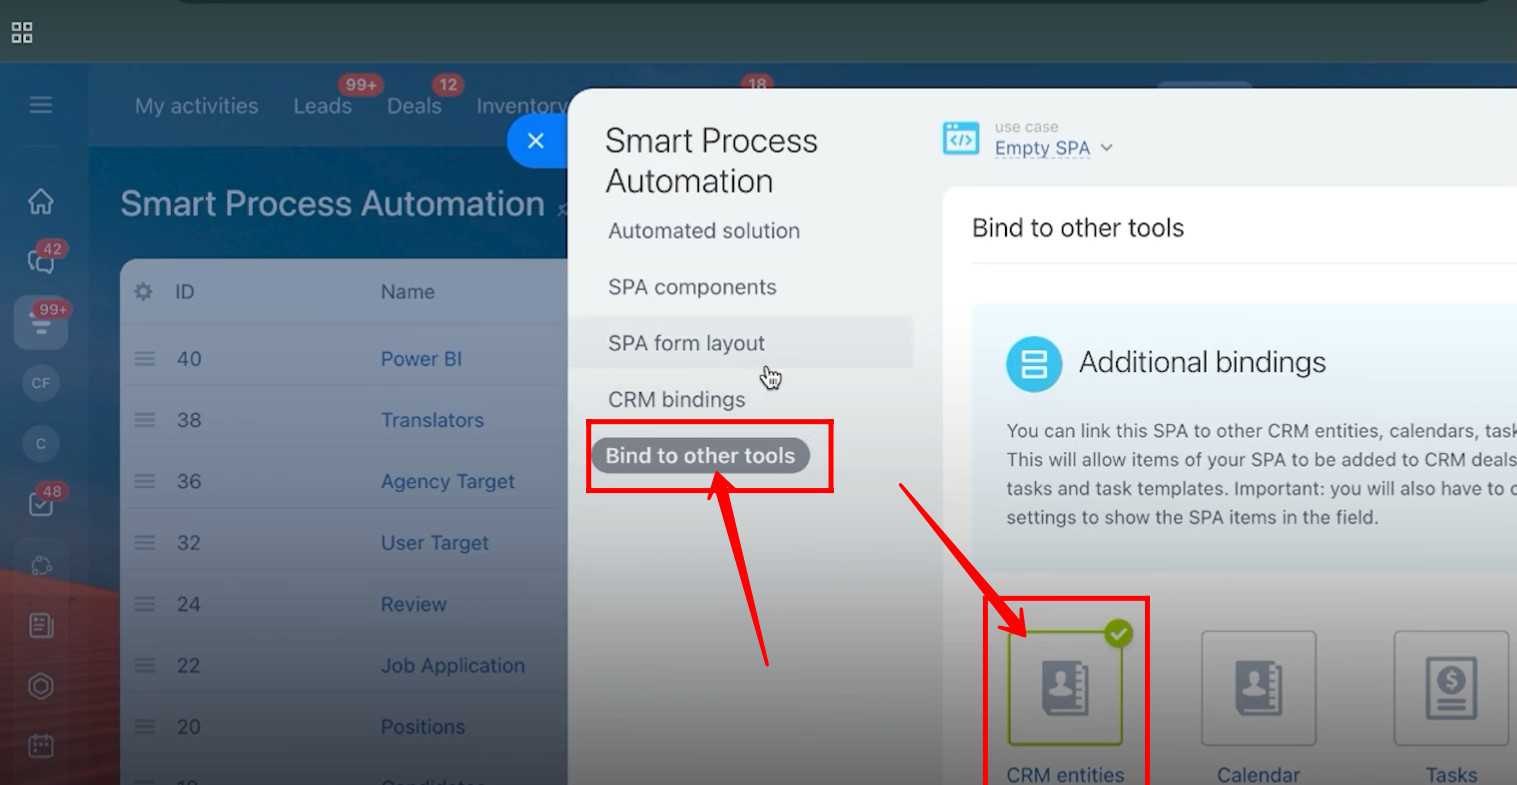
59. Go to the Bind to Other Tools tab and select the tools you want to integrate with, such as CRM Entities, Calendar, or Tasks. For now, select CRM Entities.
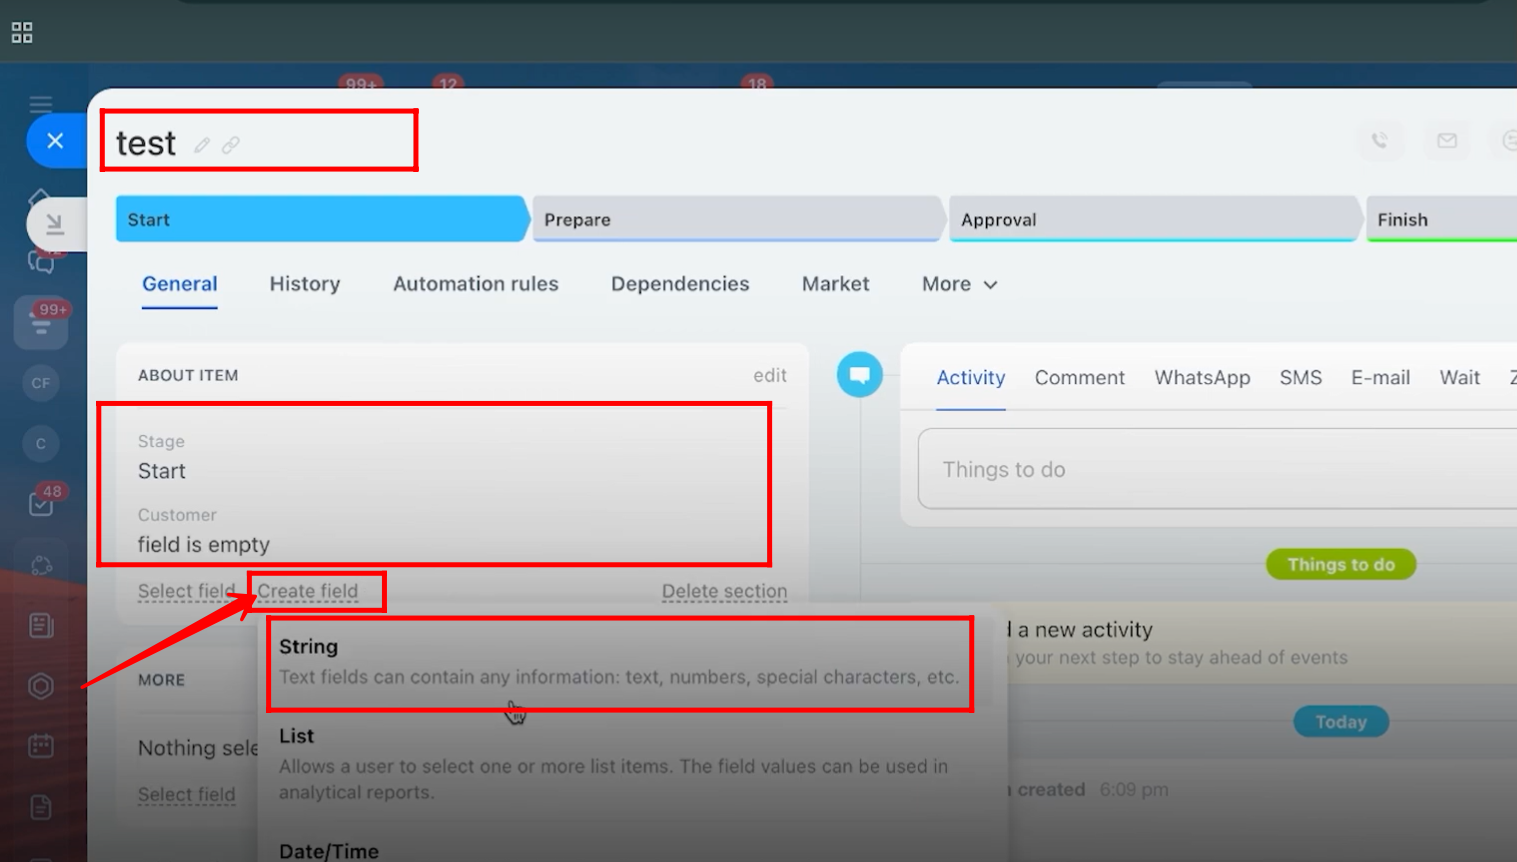
60. The new SPA named “Test CRM Form” has been created. Create a new record within this SPA—here, it is named “test.” Add a new field of type String to the SPA for testing purposes.
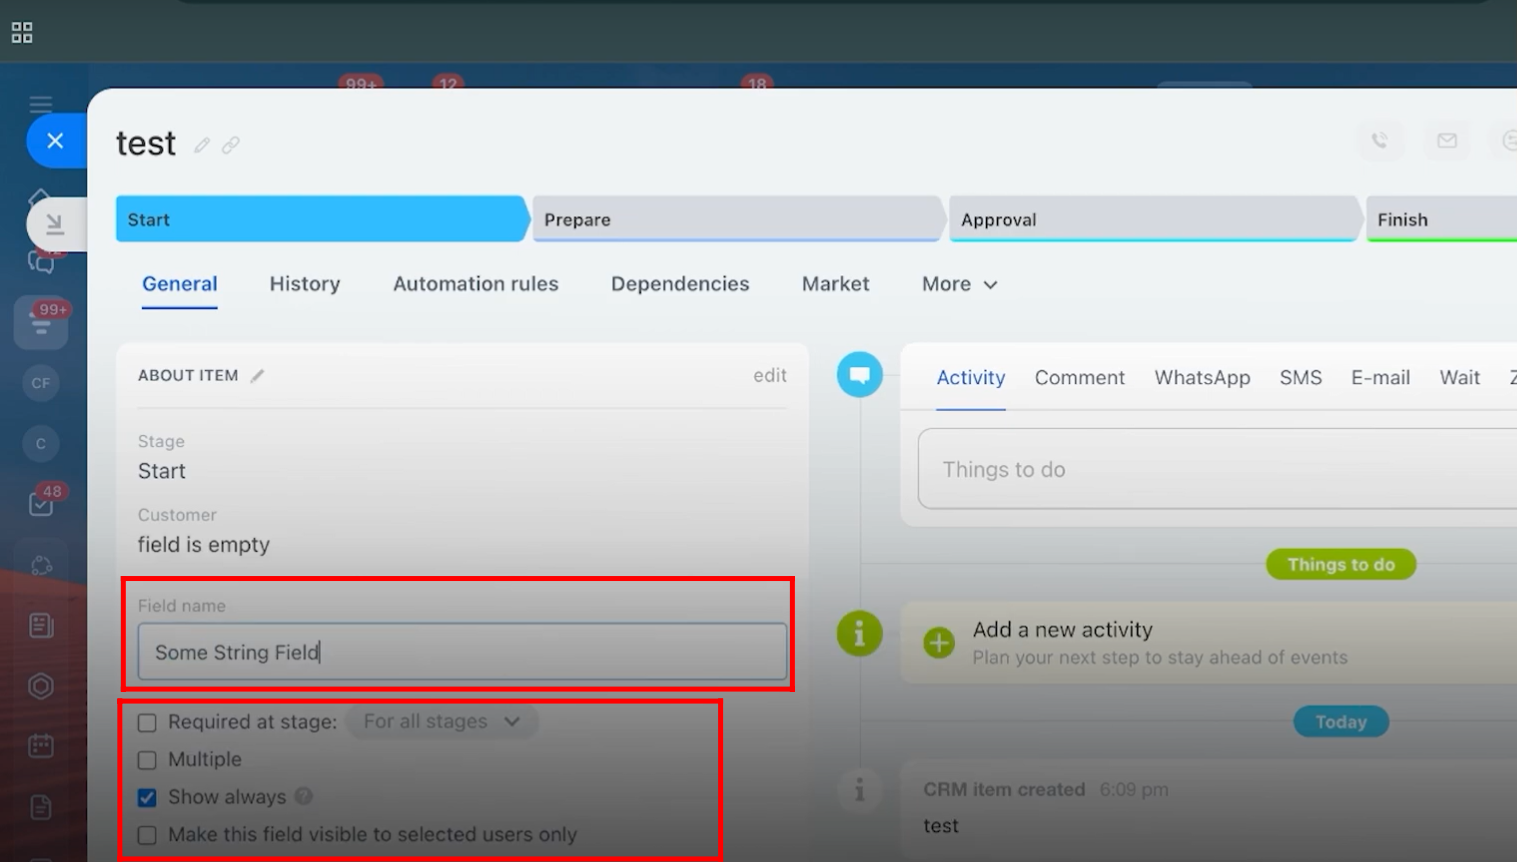
61. Here, the field is named “Some String Field” for testing. Save the SPA to apply the changes.
62. Go back to the form configuration, ensure that the linked entity is set to Smart Process Automation, and select the SPA named “Test CRM Forms.”
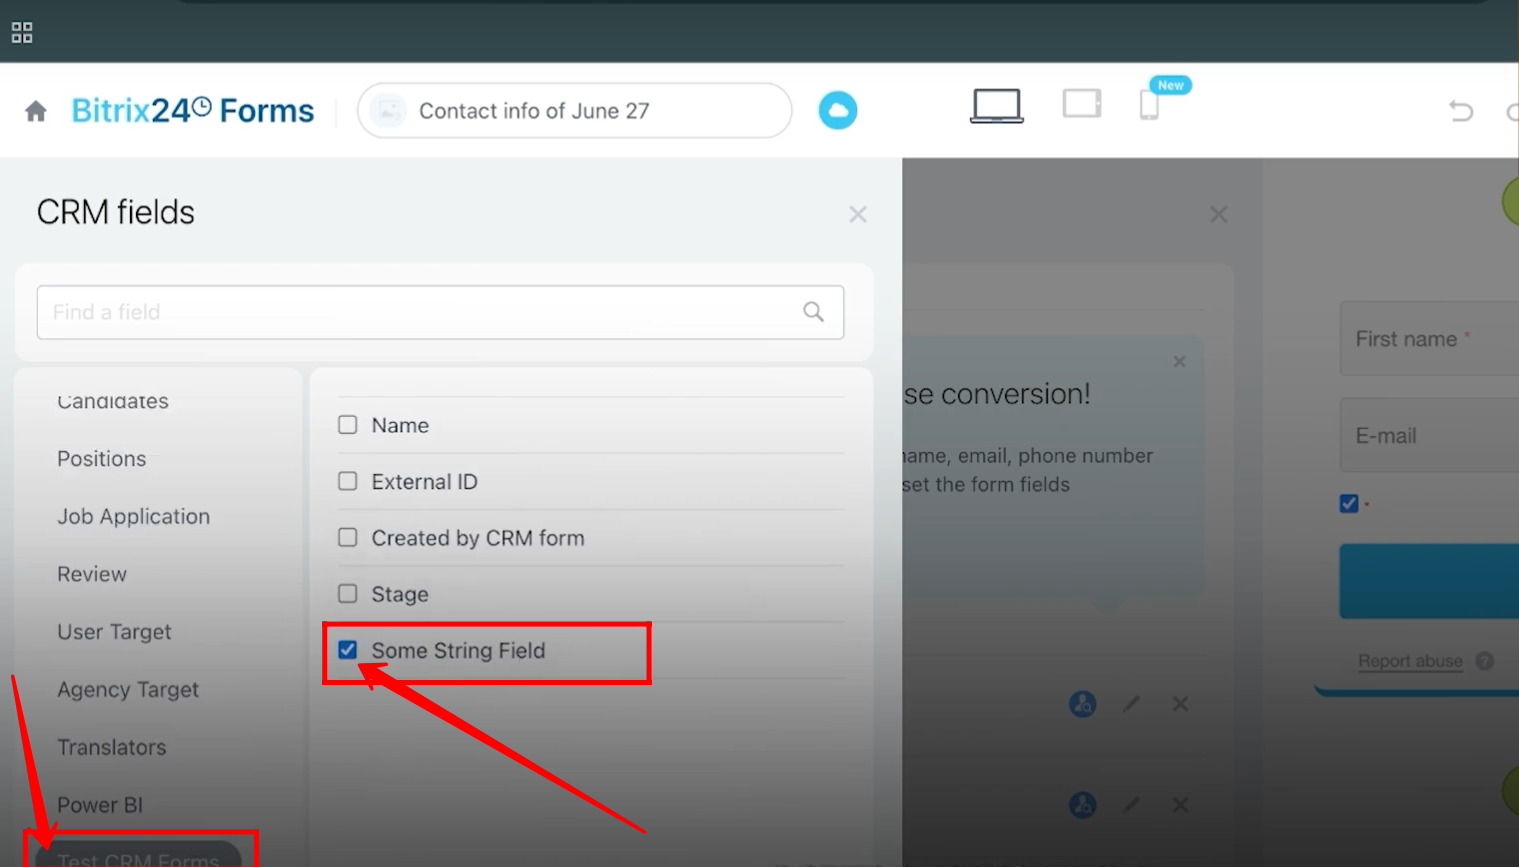
63. Go to the Fields tab and add a new field. Navigate to the “Test CRM Forms” SPA entity, find the field named “Some String Field,” and select it.
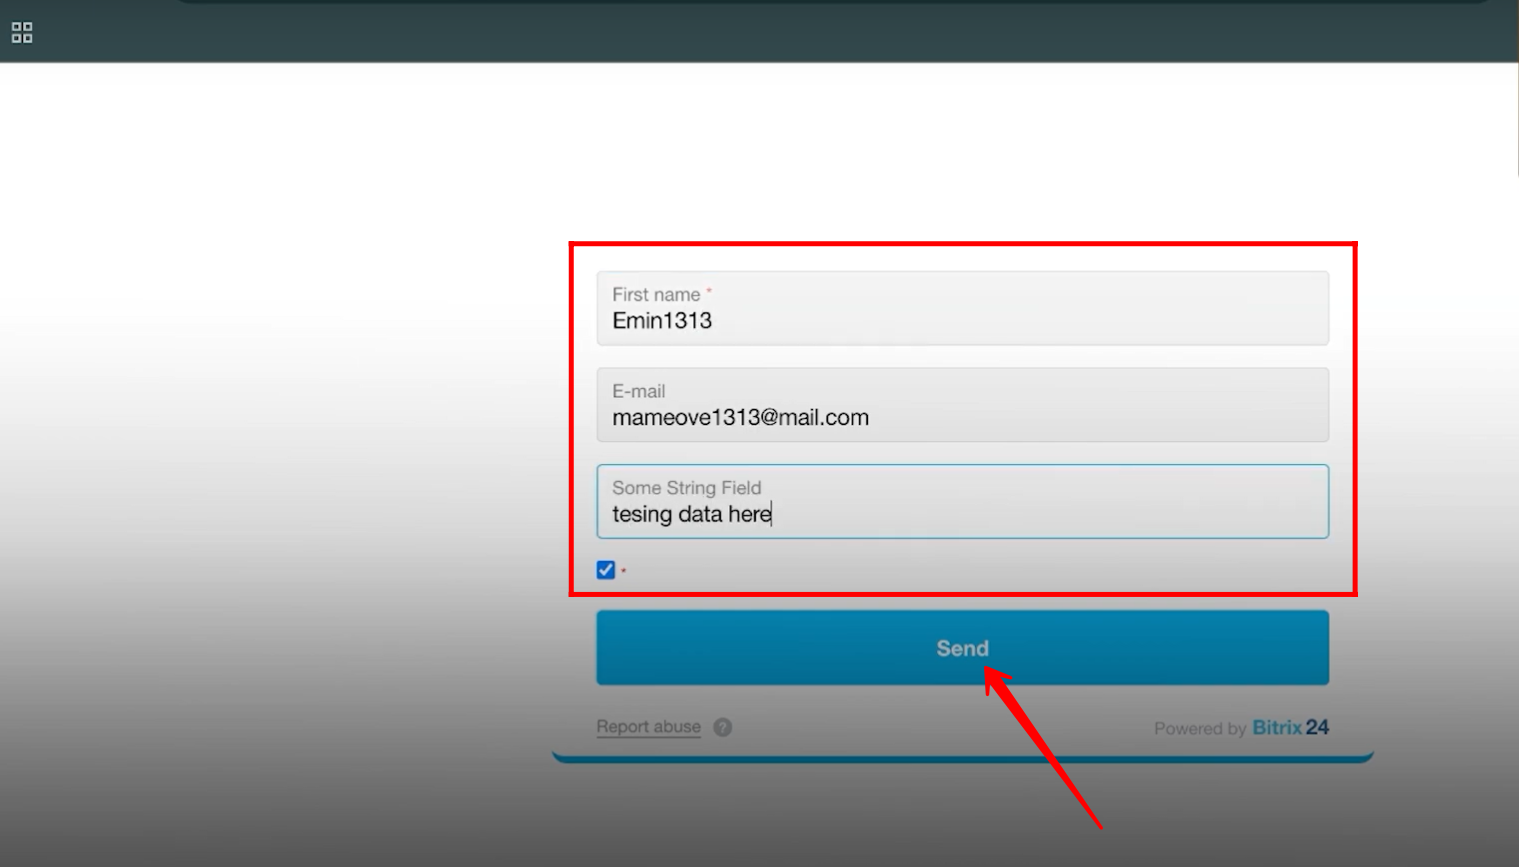
64. Save the form and open it. Fill in all the required details, then click Send to submit the form.
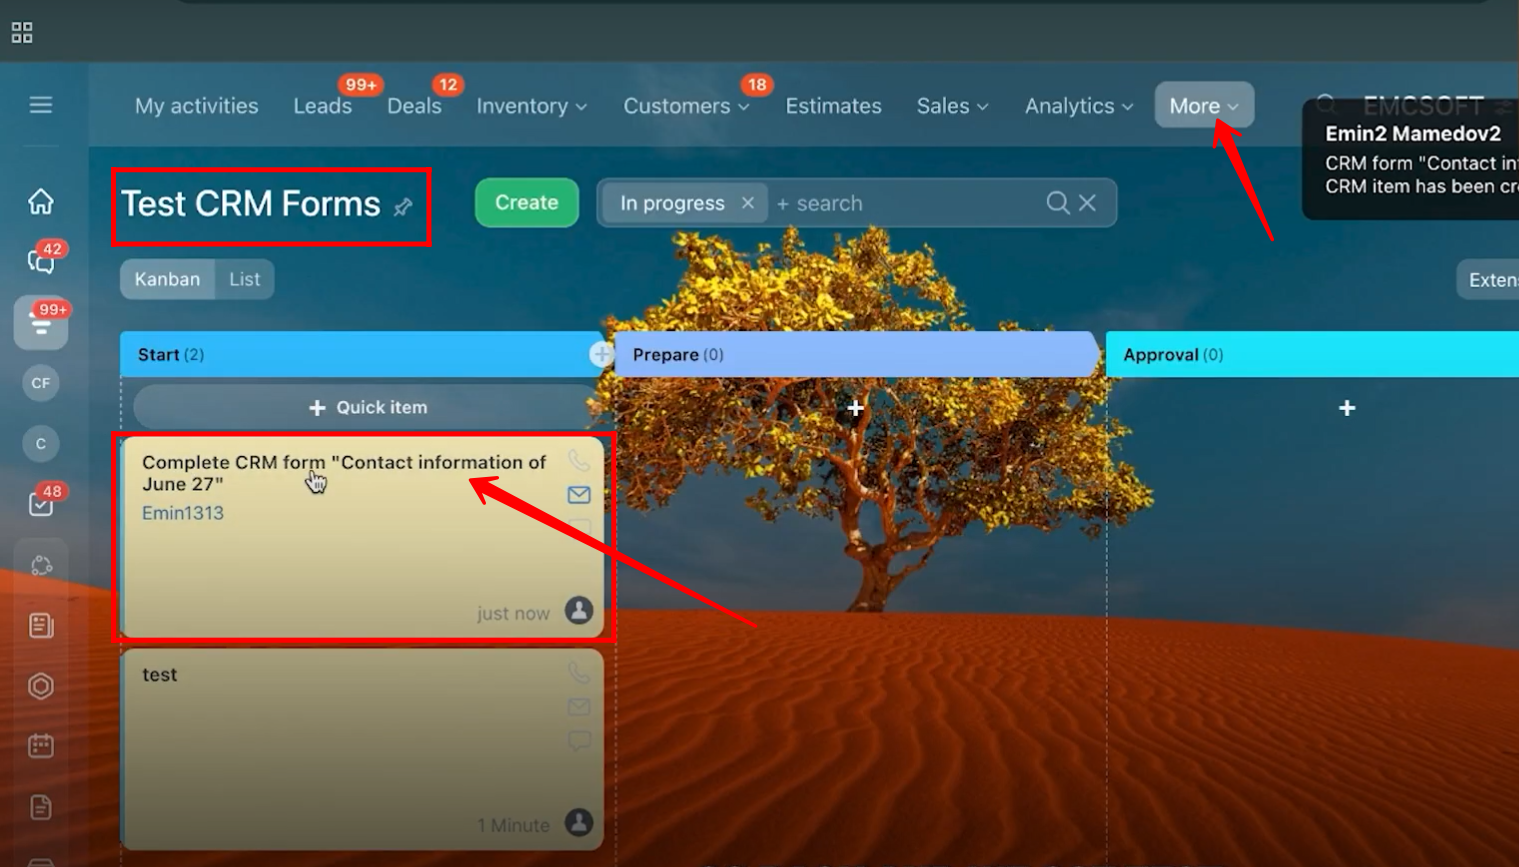
65. Go to More > Smart Process Automation > Test CRM Forms, where you will see a new SPA record created with the submitted form name.
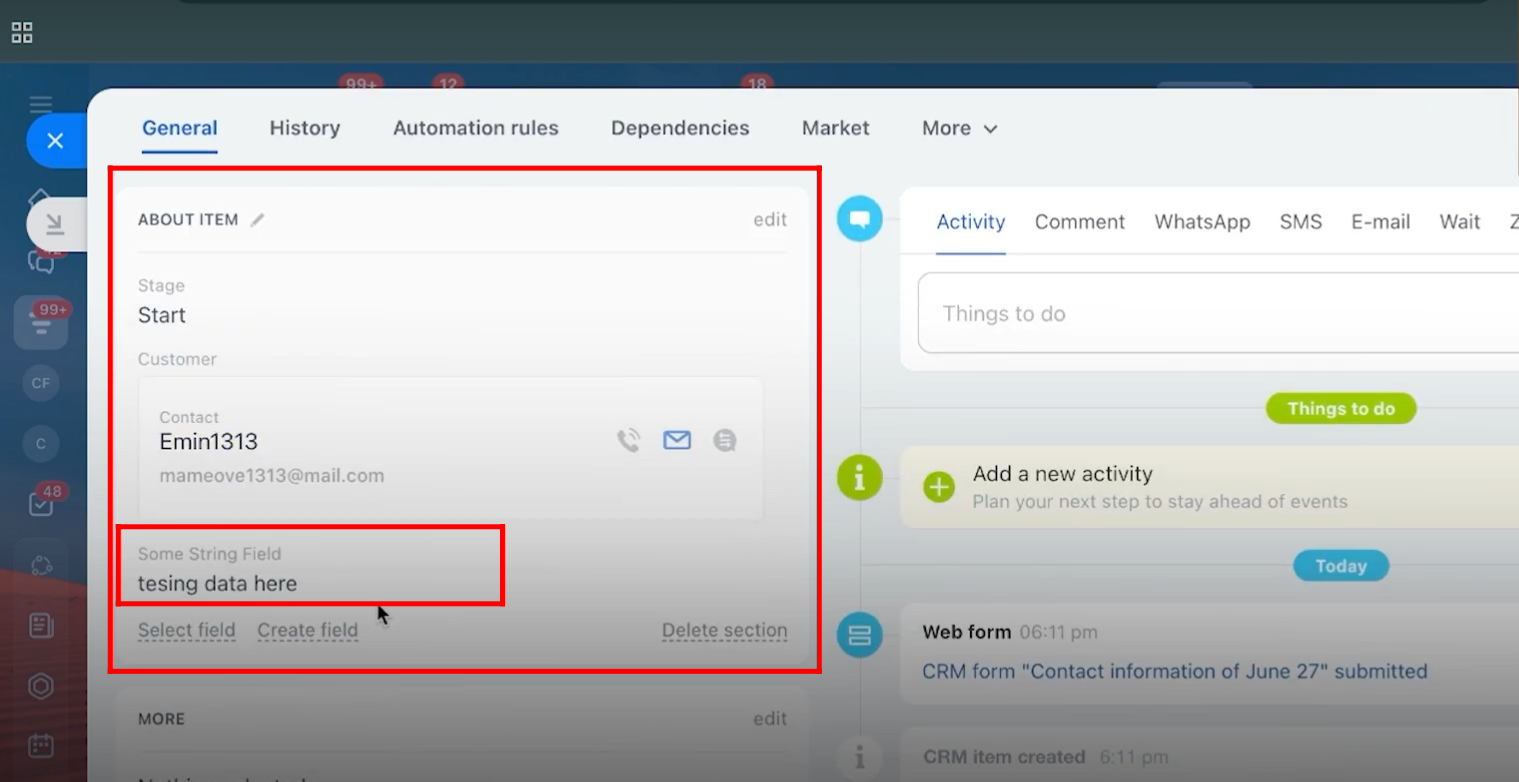
66. Open the record, and you will see the customer data along with the Some String Field populated with the submitted information.
“You can also watch this video on youtube”