| 1201 Views | admin

Managing orders is a central part of any business, and Bitrix24 provides the tools to handle this process directly within the CRM. Orders not only record customer requests and purchases but also connect with products, inventory, and client information, allowing you to keep everything in one place.
In this section, we will look at how orders are created through CRM forms, how the captured details are stored, and how they can be accessed for further processing. This foundation will set the stage for exploring more advanced features like inventory control, invoices, and customer management in later articles.
Detailed Instructions are given below
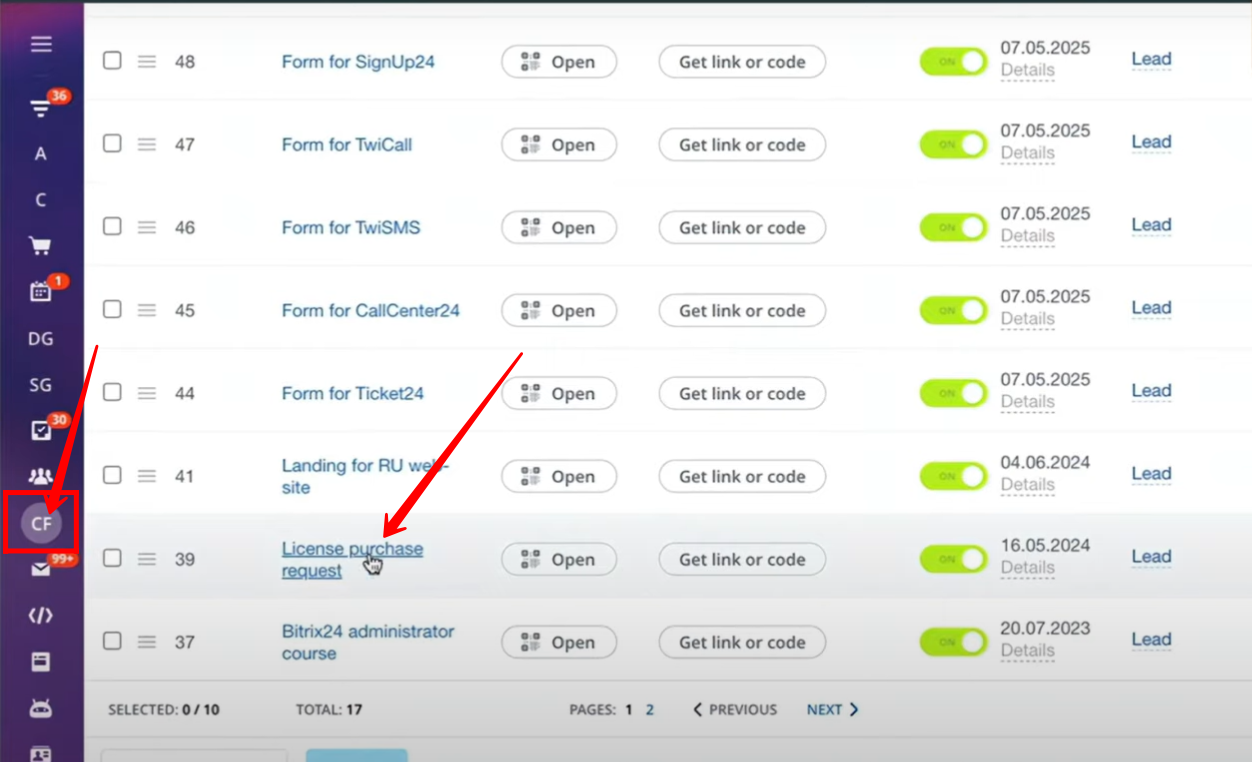
1. Navigate to CRM Forms in your Bitrix24 workspace. You can either create a new form or open an existing one for testing. In this example, we’ll be working with a previously configured form titled “License Purchase Request.”
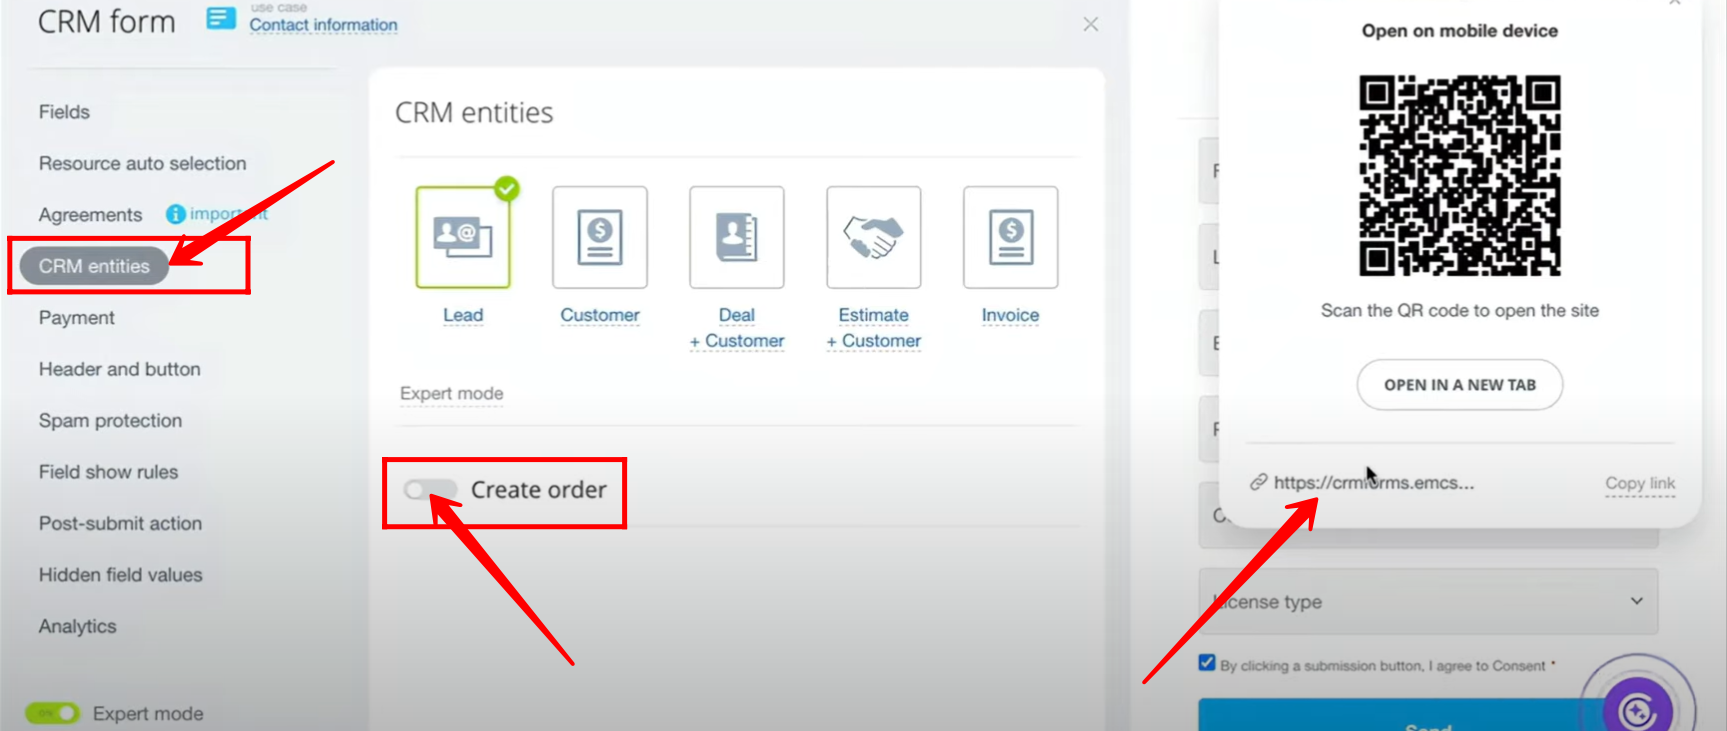
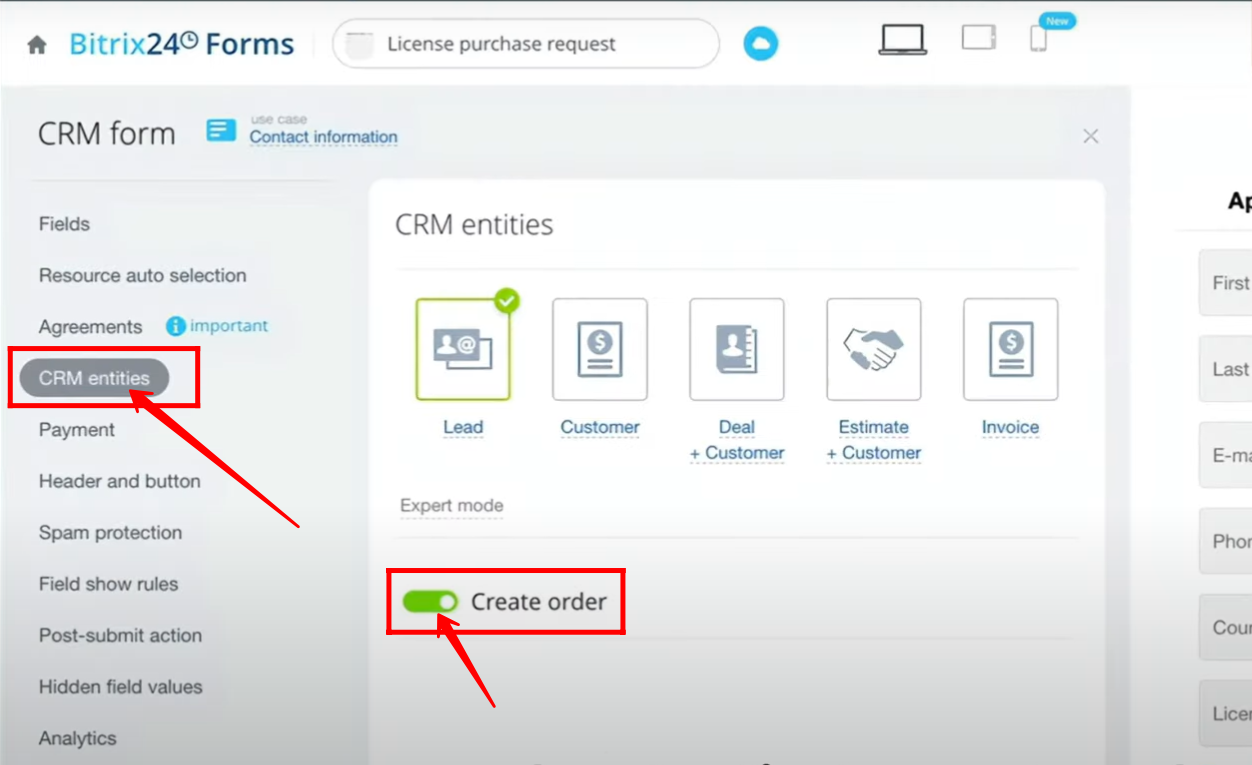
2. Go to the CRM Entities section within the form settings. Ensure that the “Create Order” option remains turned off. After saving these settings, open the form to proceed with testing.
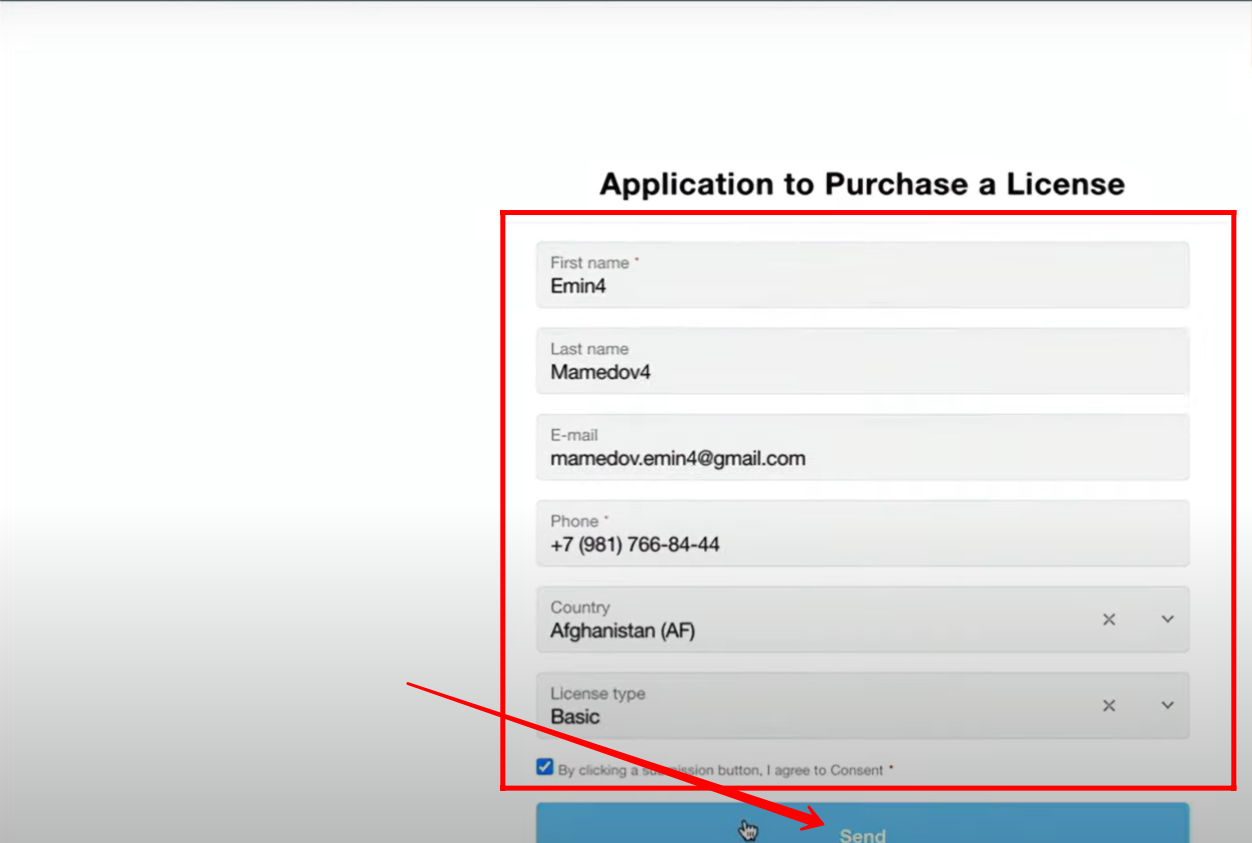
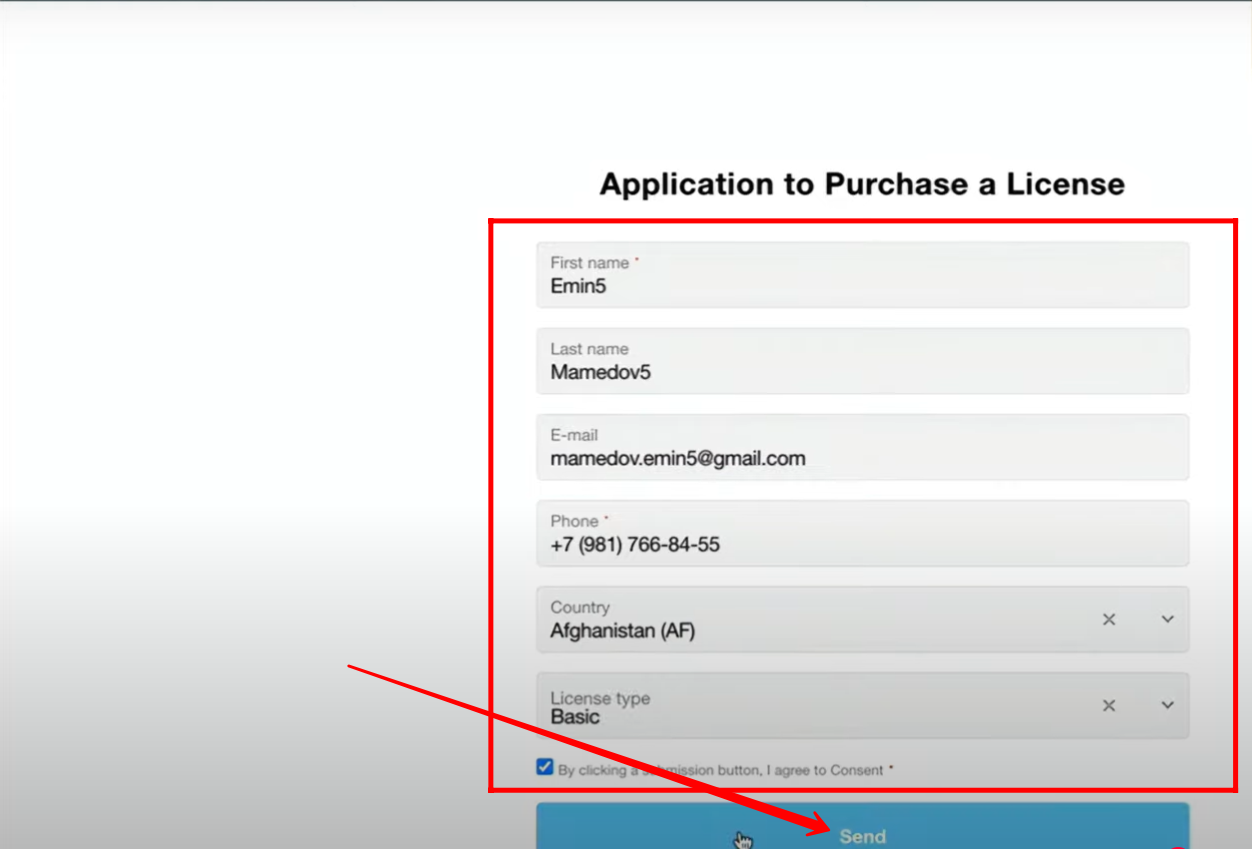
3. Fill in the required details in the form fields. Once all necessary information has been entered, click Send to submit the form.
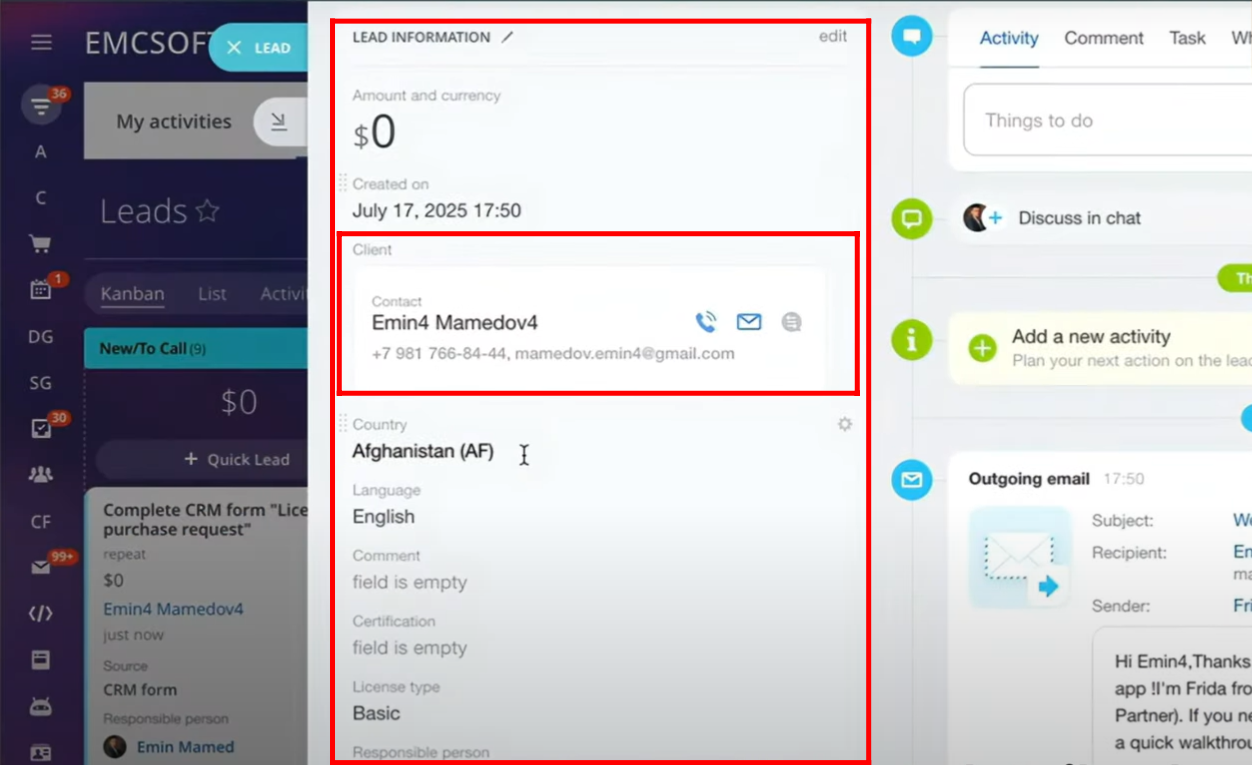
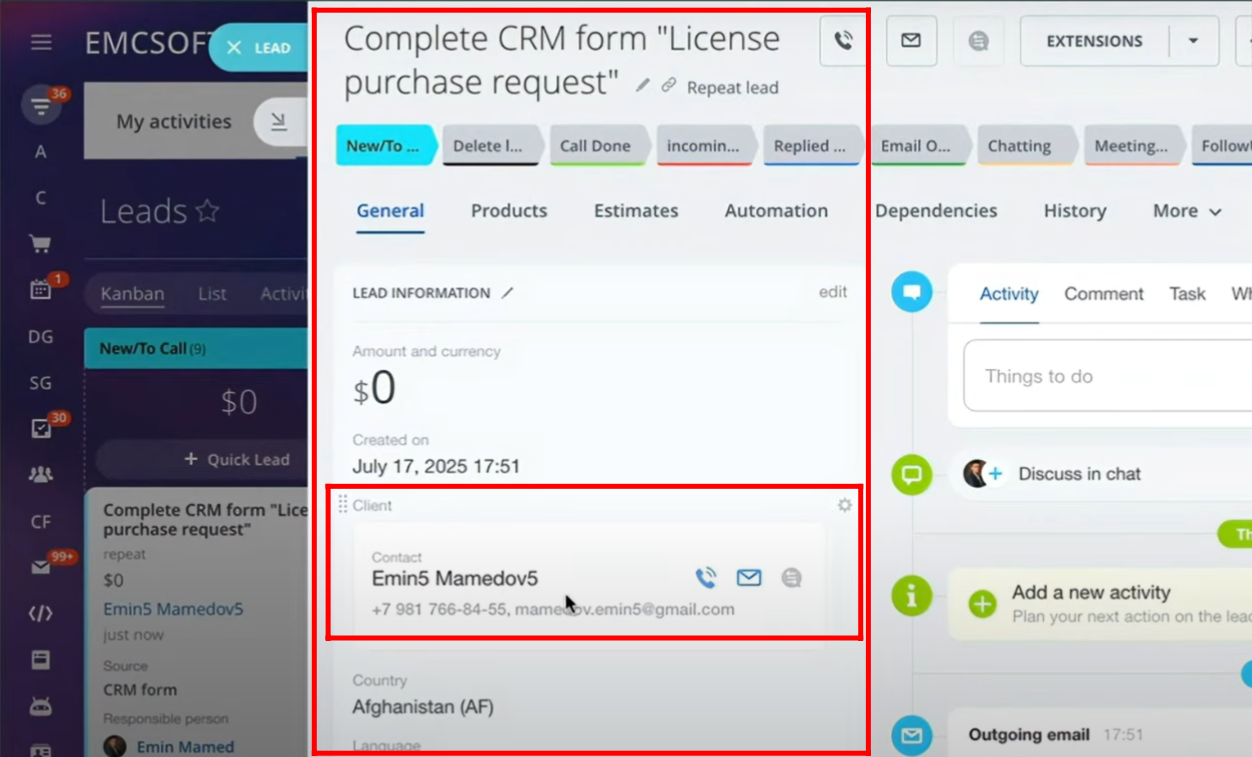
4. Navigate to the Leads section in CRM. Locate and open the newly created lead that was generated after submitting the form.
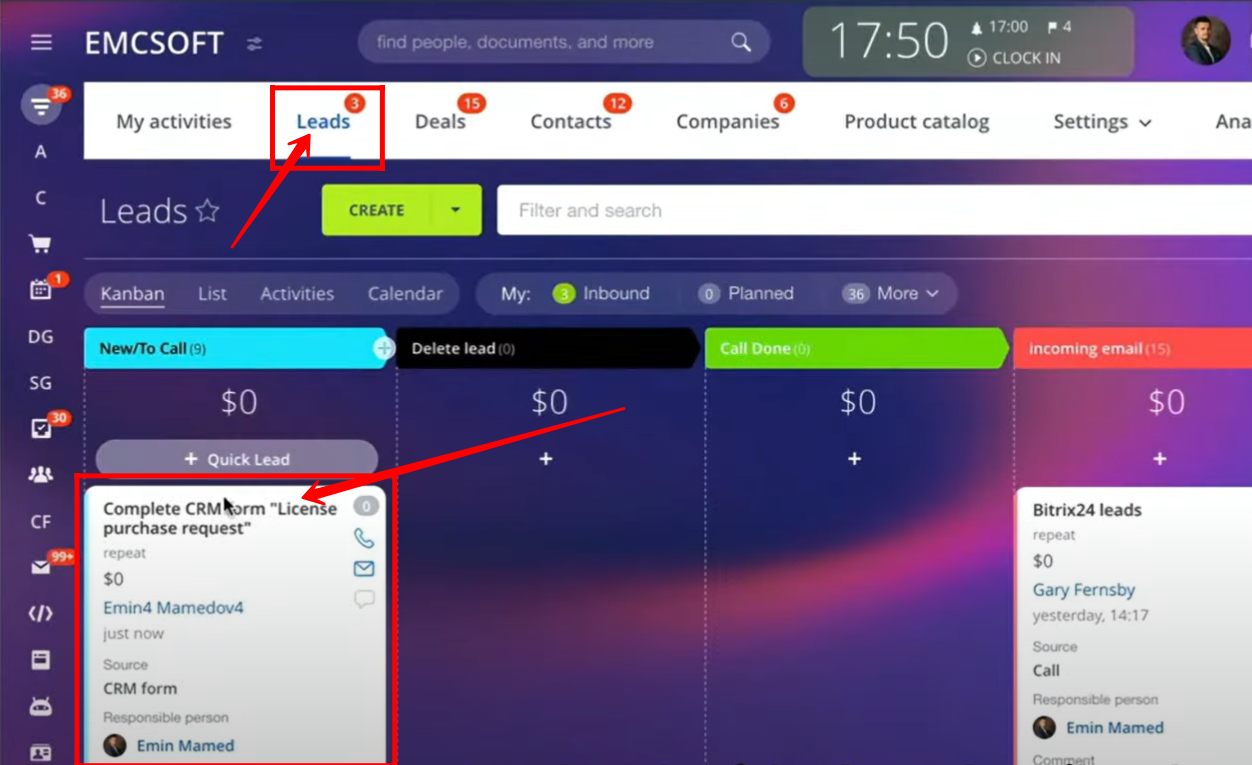
5. Inside the lead details, you will see that the client/contact information provided in the form has been automatically added to the lead. The lead itself is created under the name of the form that was used for submission, making it easy to identify its origin.
6. Return to the form configuration and navigate to the CRM entities section. This time, switch on the “Create Order” option. By enabling this setting, each form submission will not only create a lead but will also automatically generate an order linked to that lead.
7. Open the form once again and enter new client details to test the updated configuration. After filling out the required fields, click Send. Since the “Create Order” option is now enabled, the system will generate both a lead and an order from this submission.
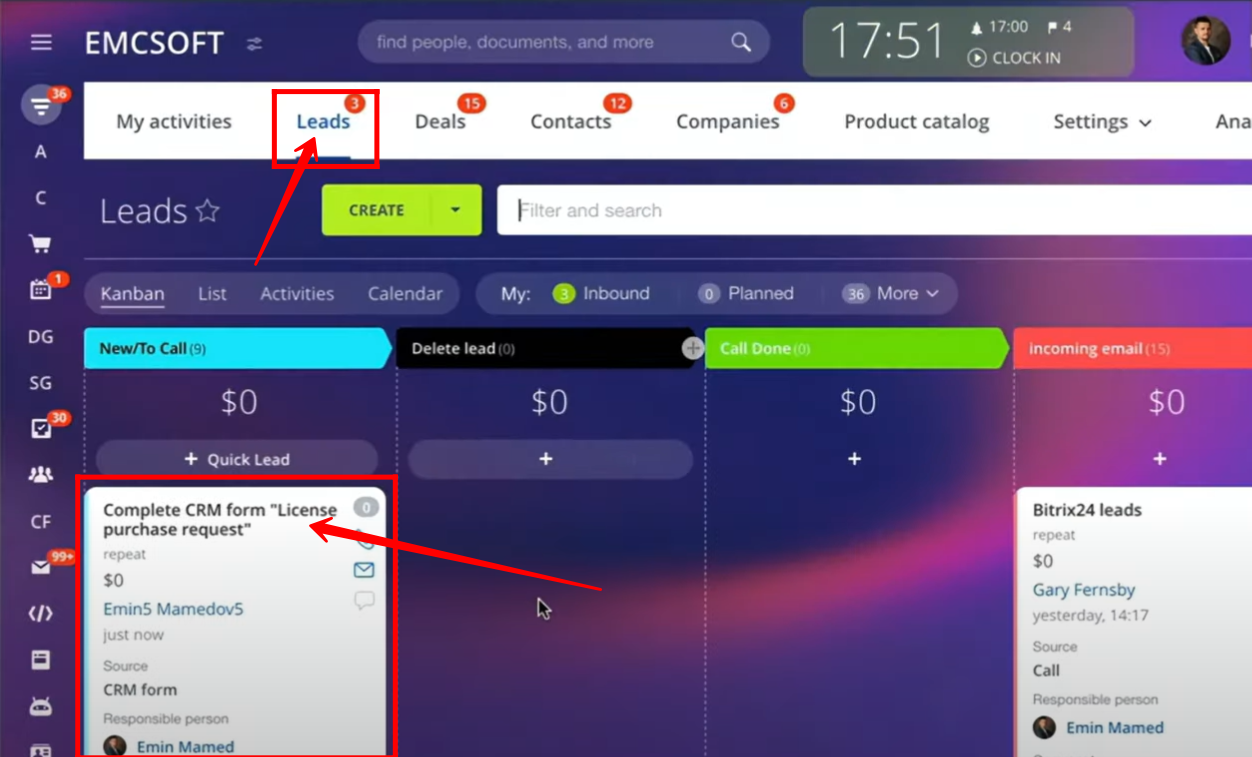
8. Navigate to Leads in the CRM and open the most recent lead. You will see that the lead name matches the form name (e.g., License Purchase Request).
9. All client information provided in the form is automatically captured within the lead details.
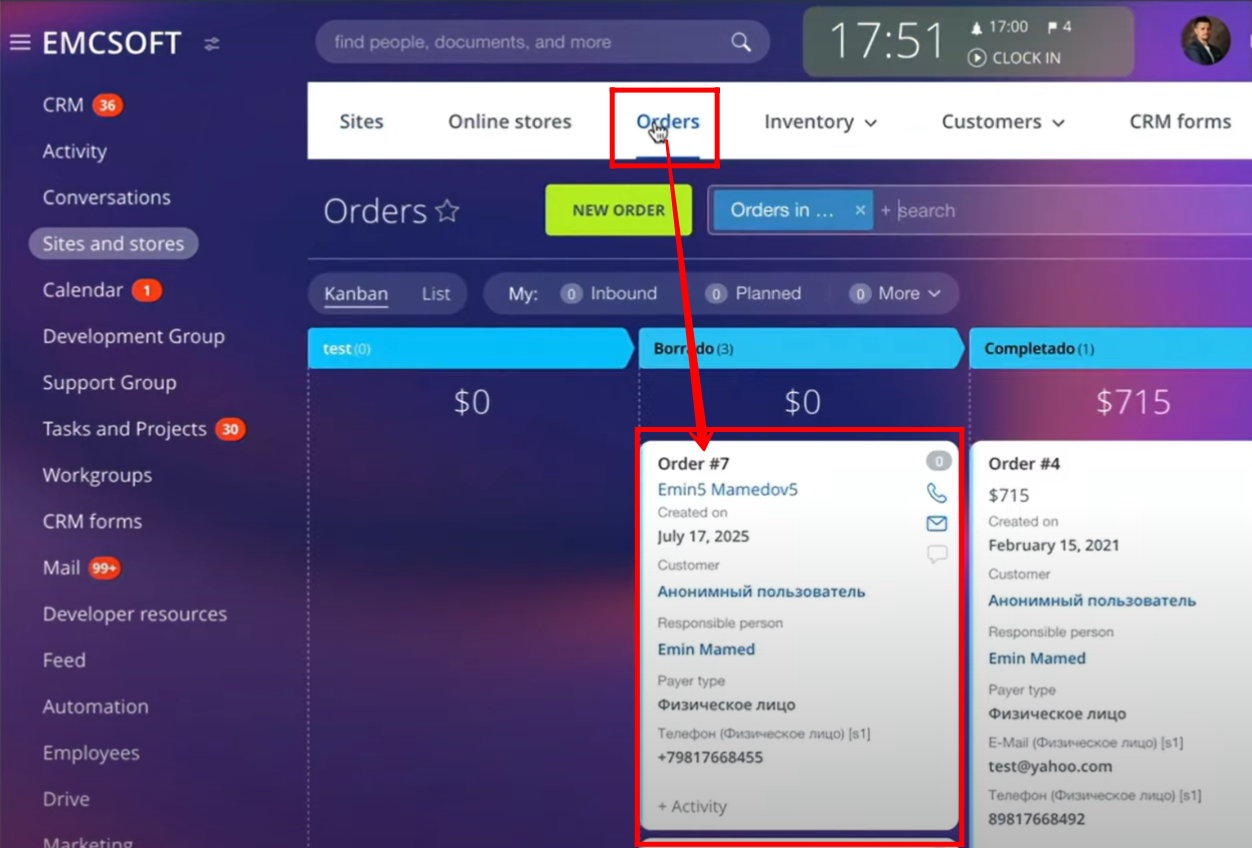
10. Next, go to Sites and Stores and open the Orders section. Here, you will find a newly created order. This order includes the client details you submitted through the form, showing that the system has successfully captured and processed the information into an order record.
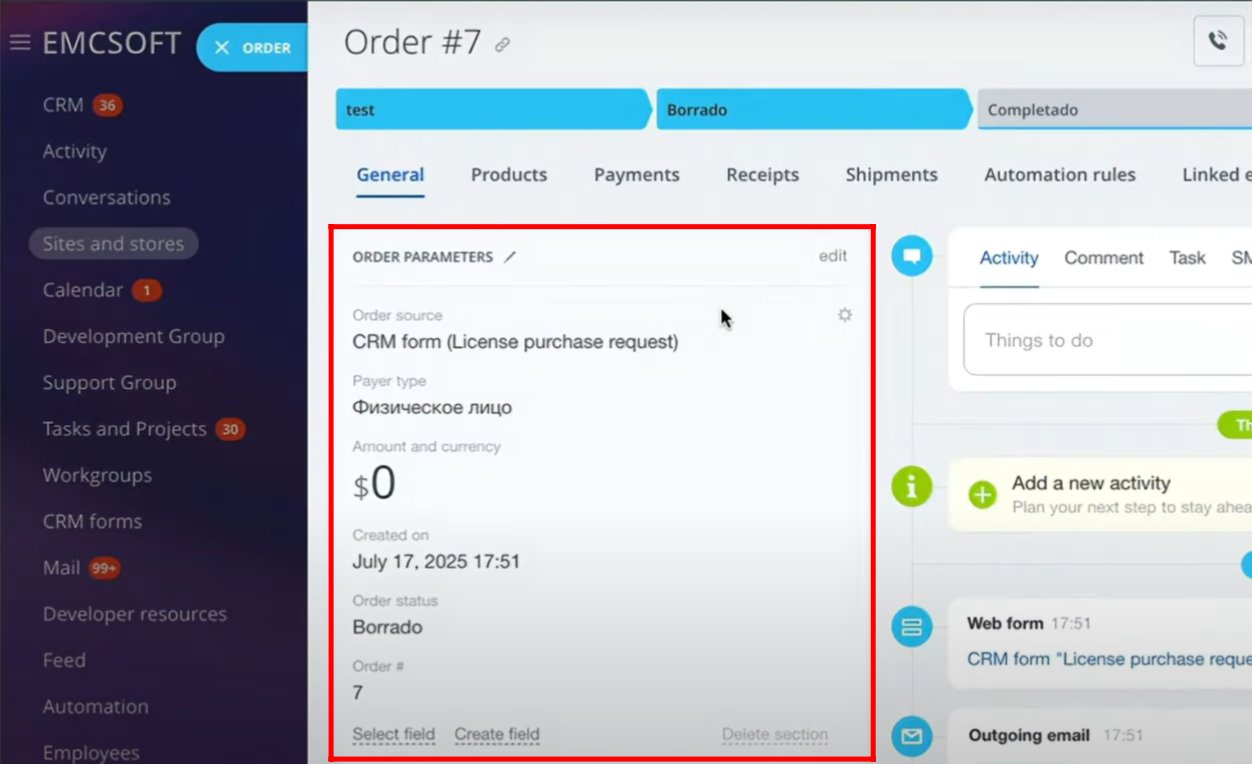
11. Open the newly created order from the Orders section. Review the details to ensure that the client information, along with the submitted form data, has been accurately captured. This confirms that the “Create Order” option in CRM Forms is functioning as intended.
In addition to creating and verifying orders, the CRM also provides extended functionalities. You can manage product inventory, maintain detailed customer information linked to orders, track product details, handle invoices, and much more. These advanced features ensure that your CRM not only captures client requests but also supports end-to-end order and customer management.
All of these aspects will be covered in detail in the upcoming articles of this training course.
You can also watch video on Youtube