| 1969 Views | admin

When working with CRM forms, it’s often important not only to capture the information users manually enter but also to store additional details automatically in the connected records. This is where hidden fields come into play. Hidden fields allow you to pass dynamic values in the background without requiring the user to input them directly.
By configuring hidden fields, you can enrich your CRM data with important context like form identifiers, result IDs, campaign parameters, or even contact details. These values ensure that every form submission is traceable, organized, and mapped correctly to your deals or contacts without extra effort from the user.
In addition, hidden fields can dynamically fetch values such as the contact’s name or campaign parameters from the URL and store them in your CRM. This makes your workflows more automated, ensures better data accuracy, and eliminates the need for manual updates after each form submission.
Detailed Instructions are given below
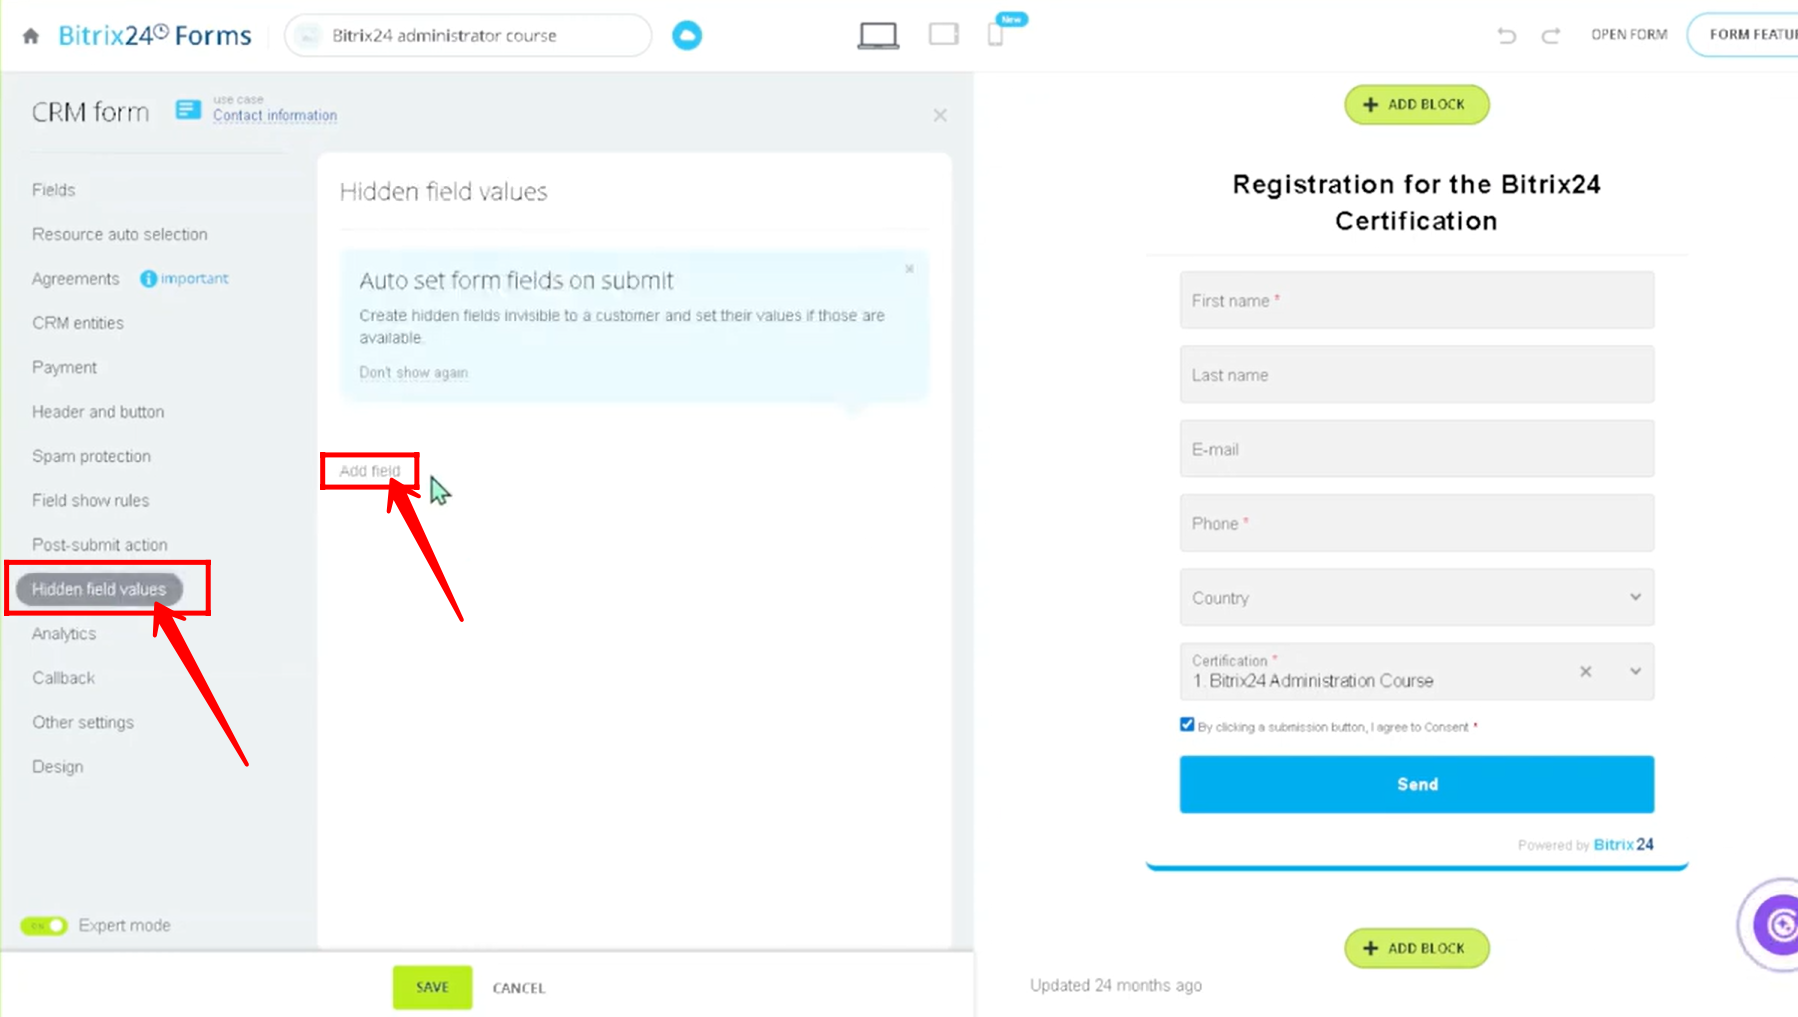
1. To begin, create a new form and open its configuration settings. From there, navigate to the “Hidden Field Values” tab and click on “Add Field” to proceed.
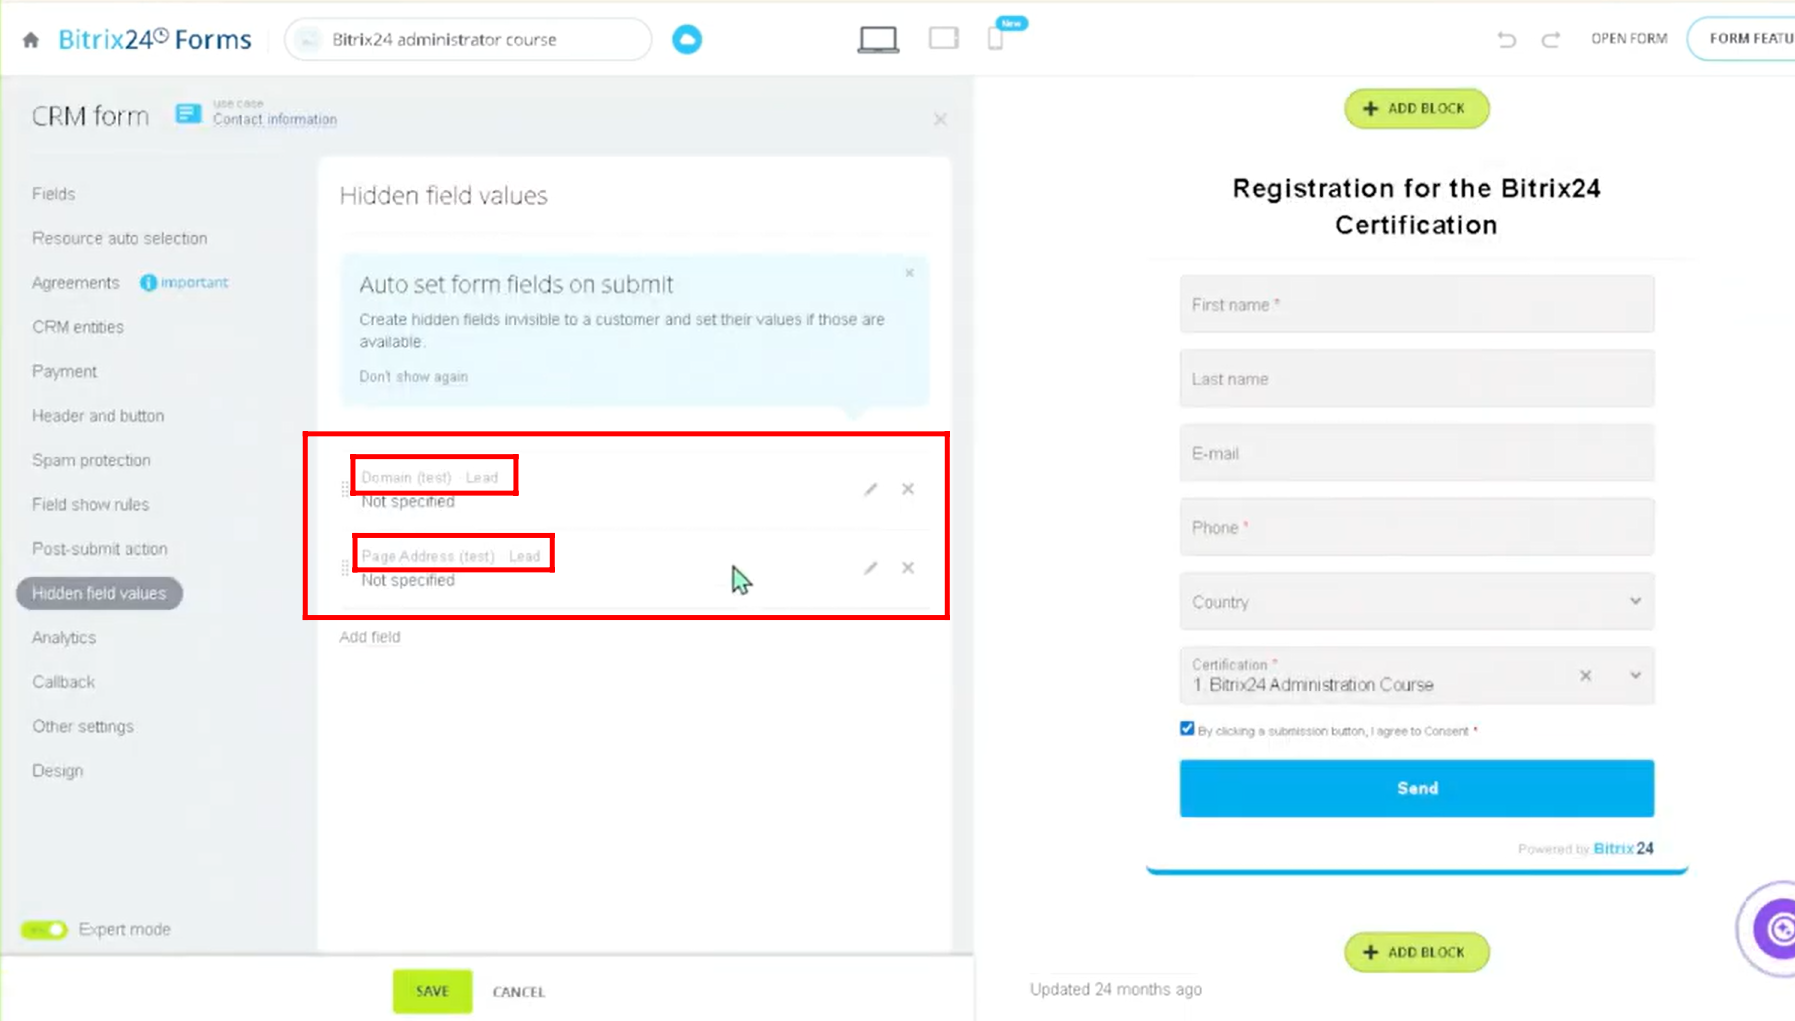
2. For testing purposes, a few fields have been configured in the portal to check how the Hidden Field Values feature works. In this case, two fields — “Domain (test)” and “Page address (test)” — have been added as hidden fields. It’s important to note that the fields visible to users for input are configured under the Fields tab, whereas these two fields remain hidden and are not directly filled by the customer.
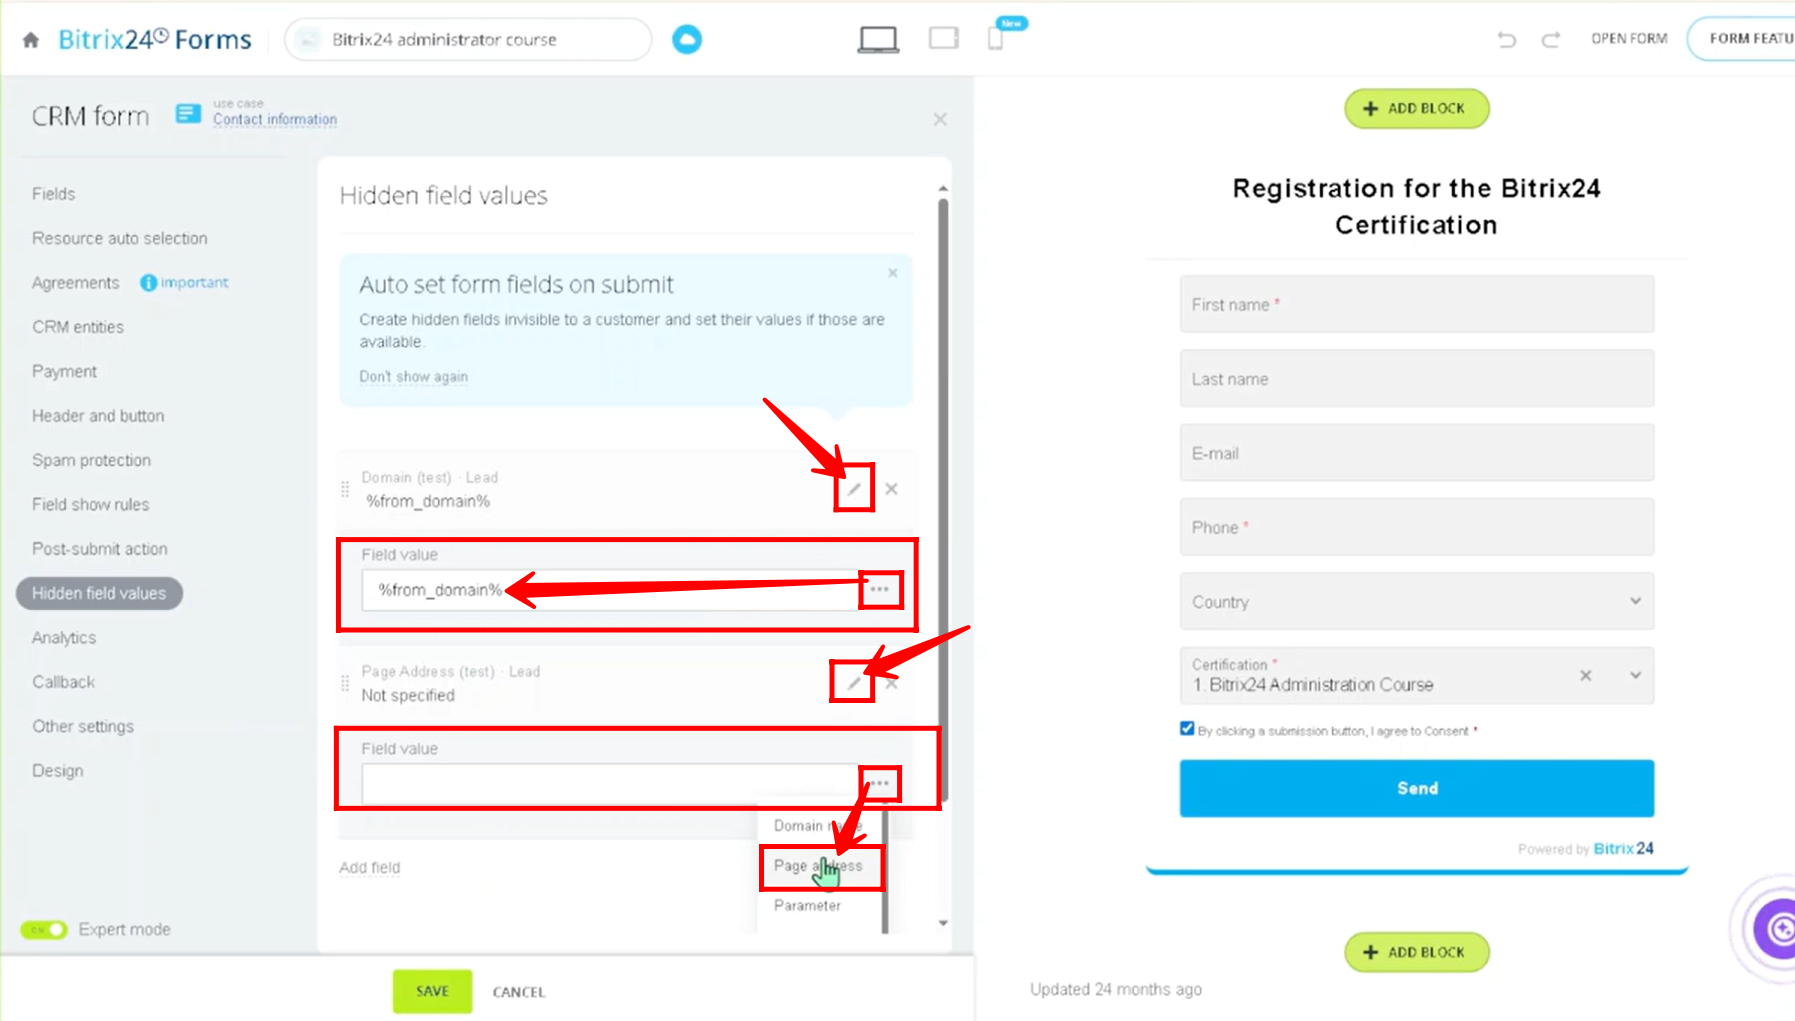
3. Now, click on the edit icon to assign either static or dynamic values to the hidden fields. If you wish to use dynamic values, simply click the three-dots option and select from the available values provided there.
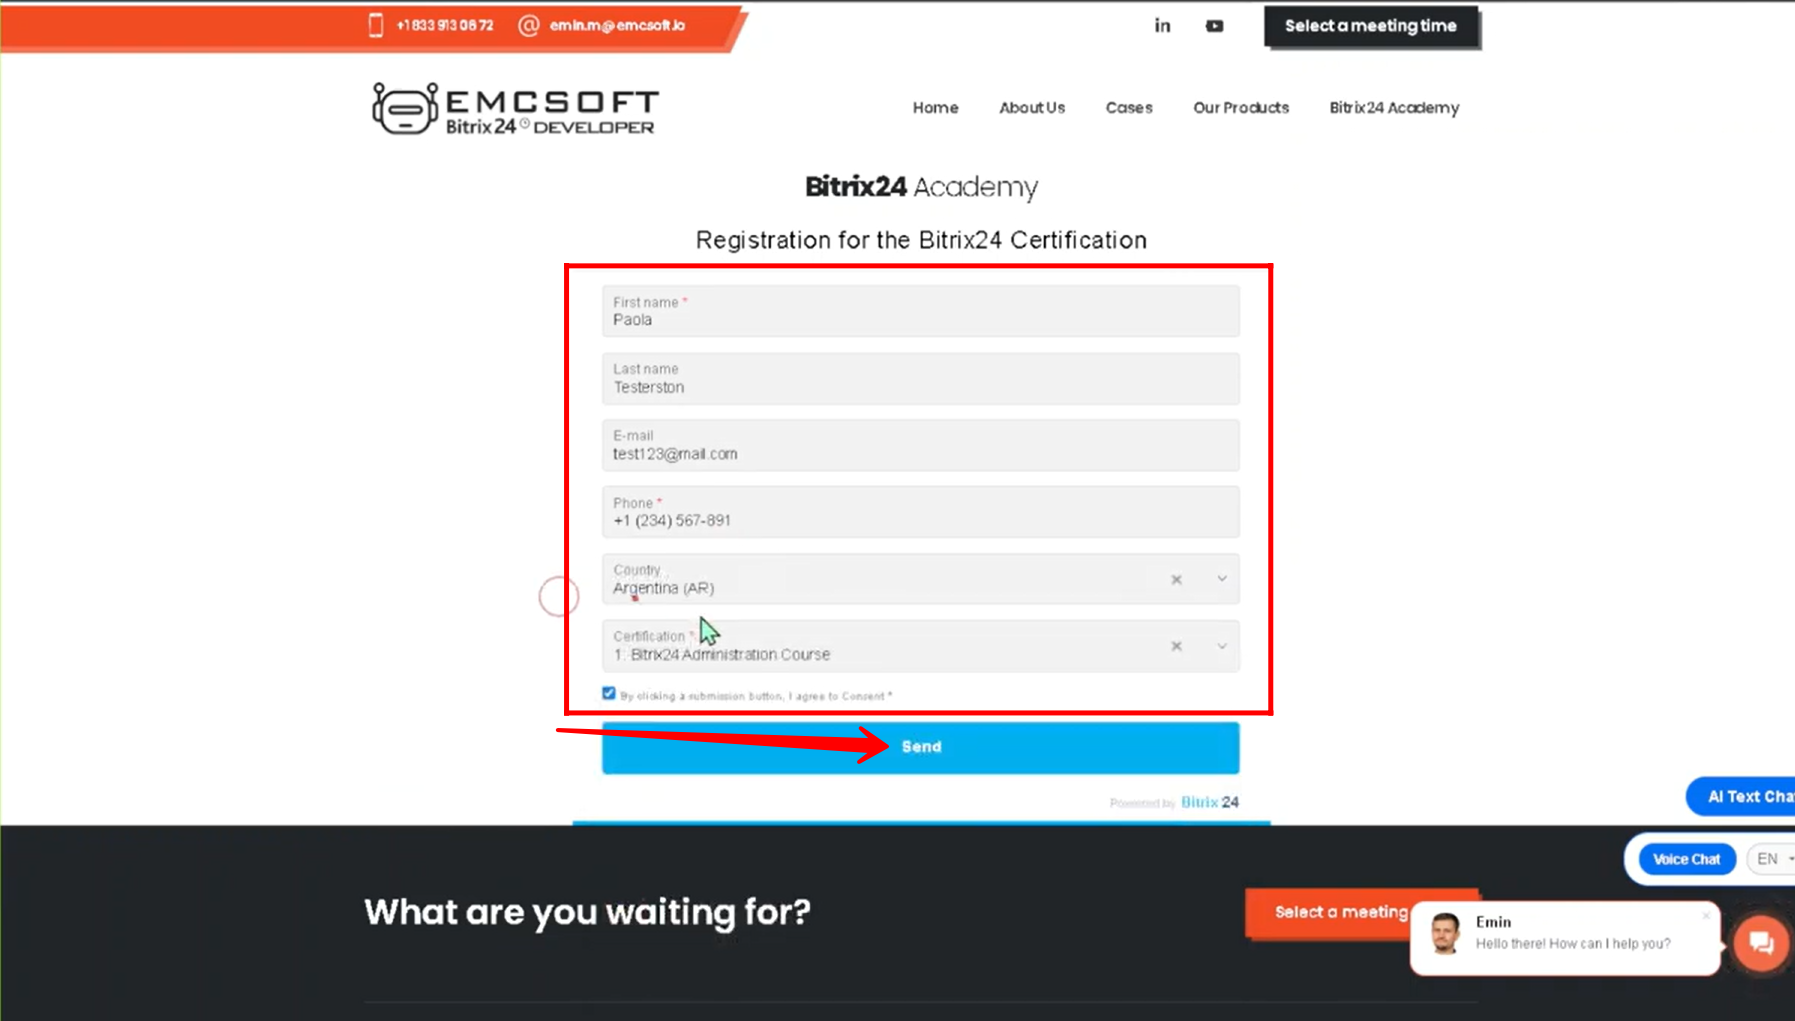
4. Open the form, fill in the required details, and submit it to observe how the process works in the background. Keep in mind that the hidden fields will not be visible to you on the form itself.
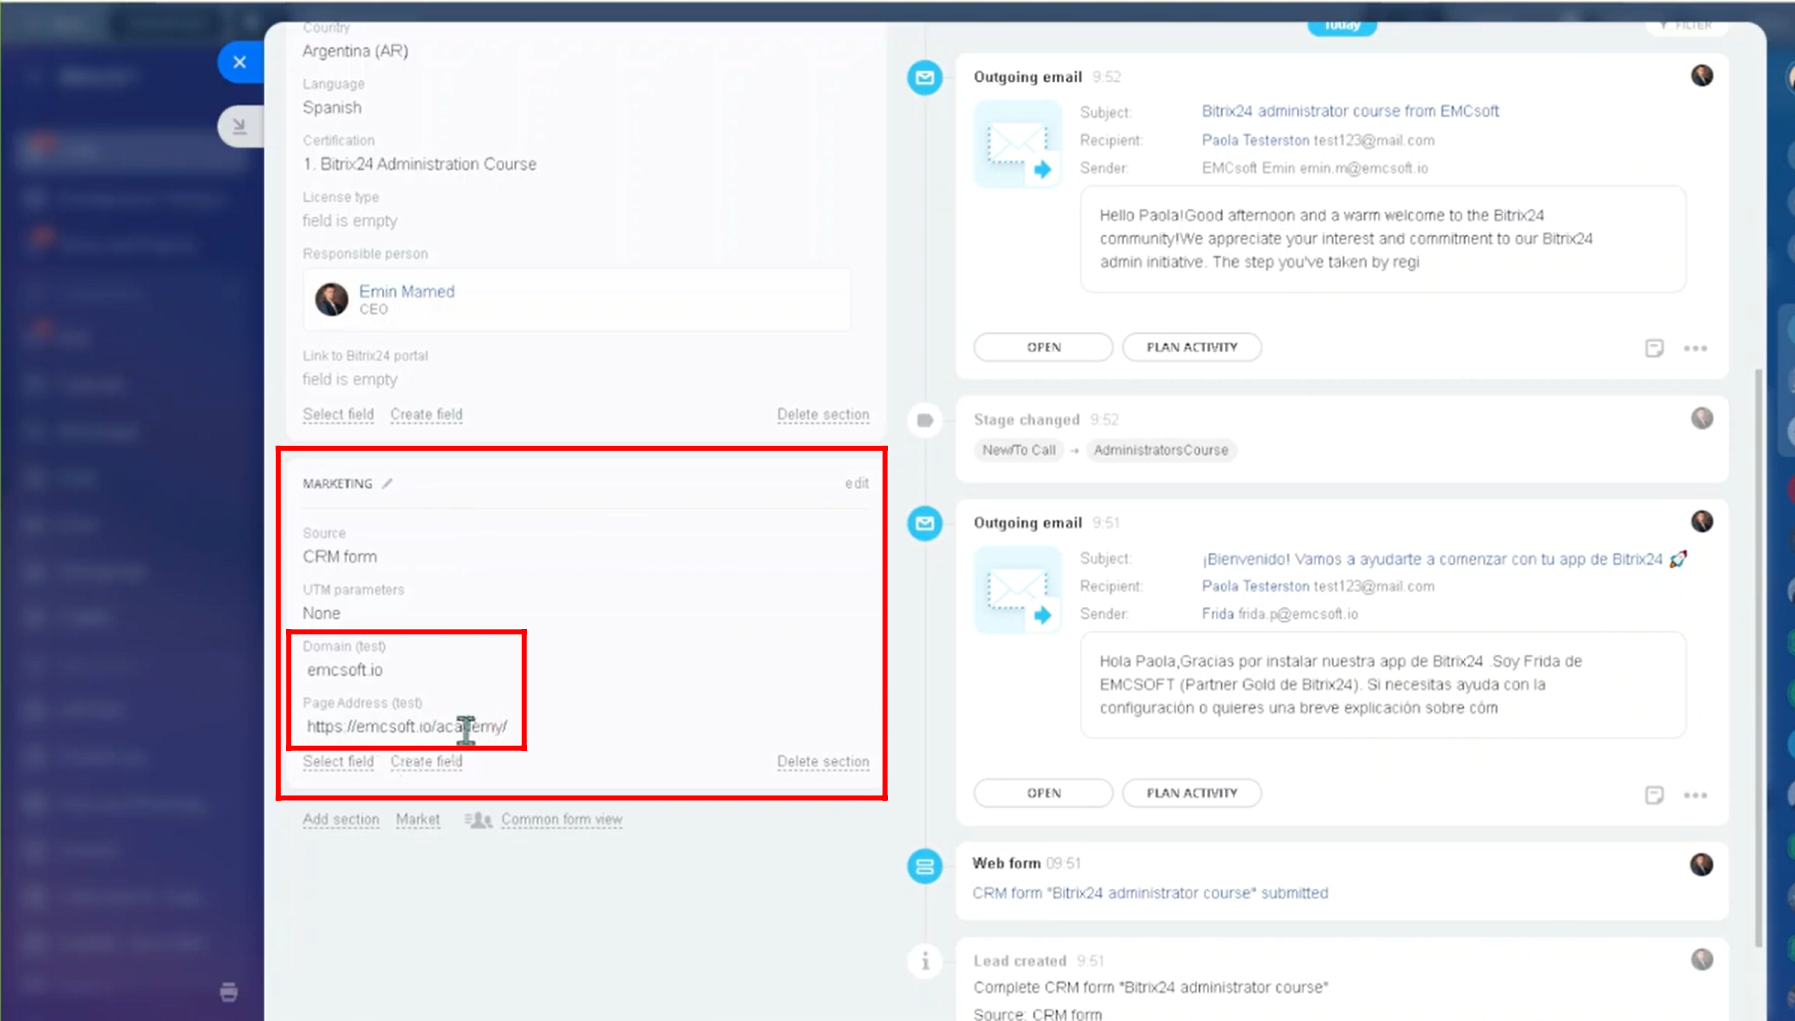
5. Since the form was linked to the lead entity, navigate to the Leads section, where you’ll see that a new lead has been generated. Go ahead and open it to review the details.

6. In the lead details, you will find all the information entered during the form submission, along with the hidden field values that were automatically captured. These include the domain name emcsoft.io and the page address https://emcsoft.io/academy/, since the form was hosted on the EMCSoft website.
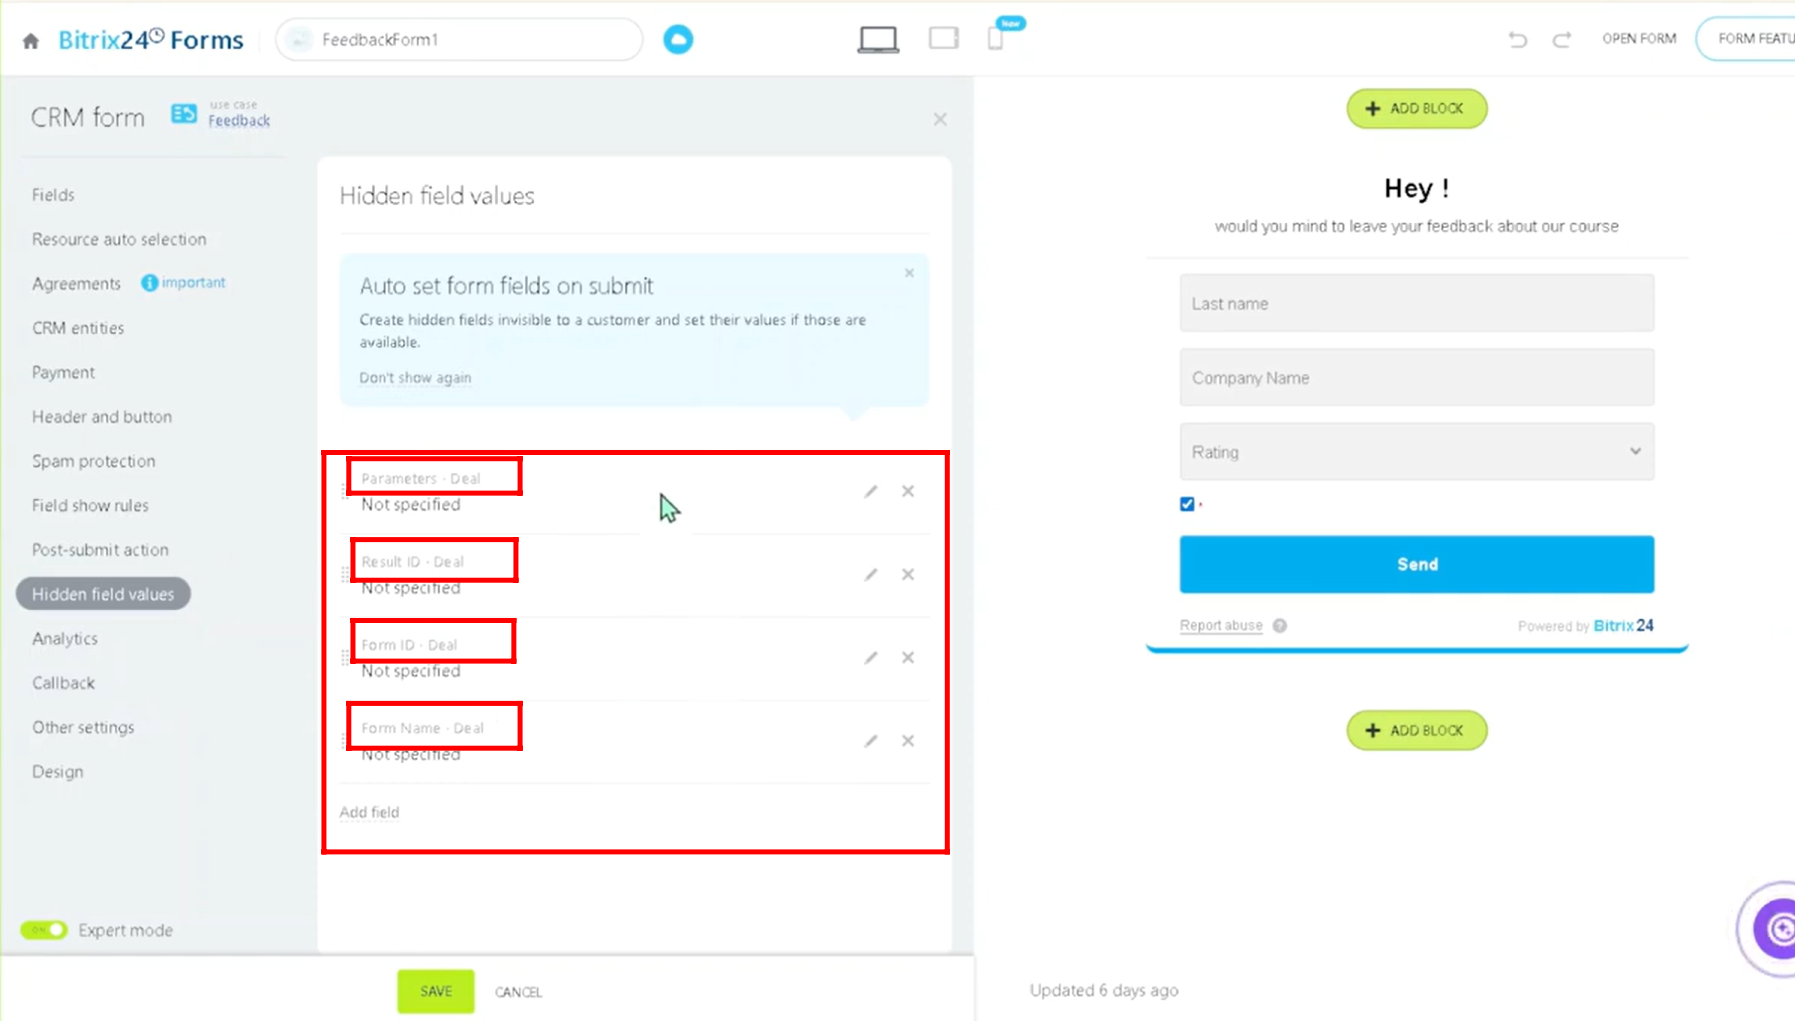
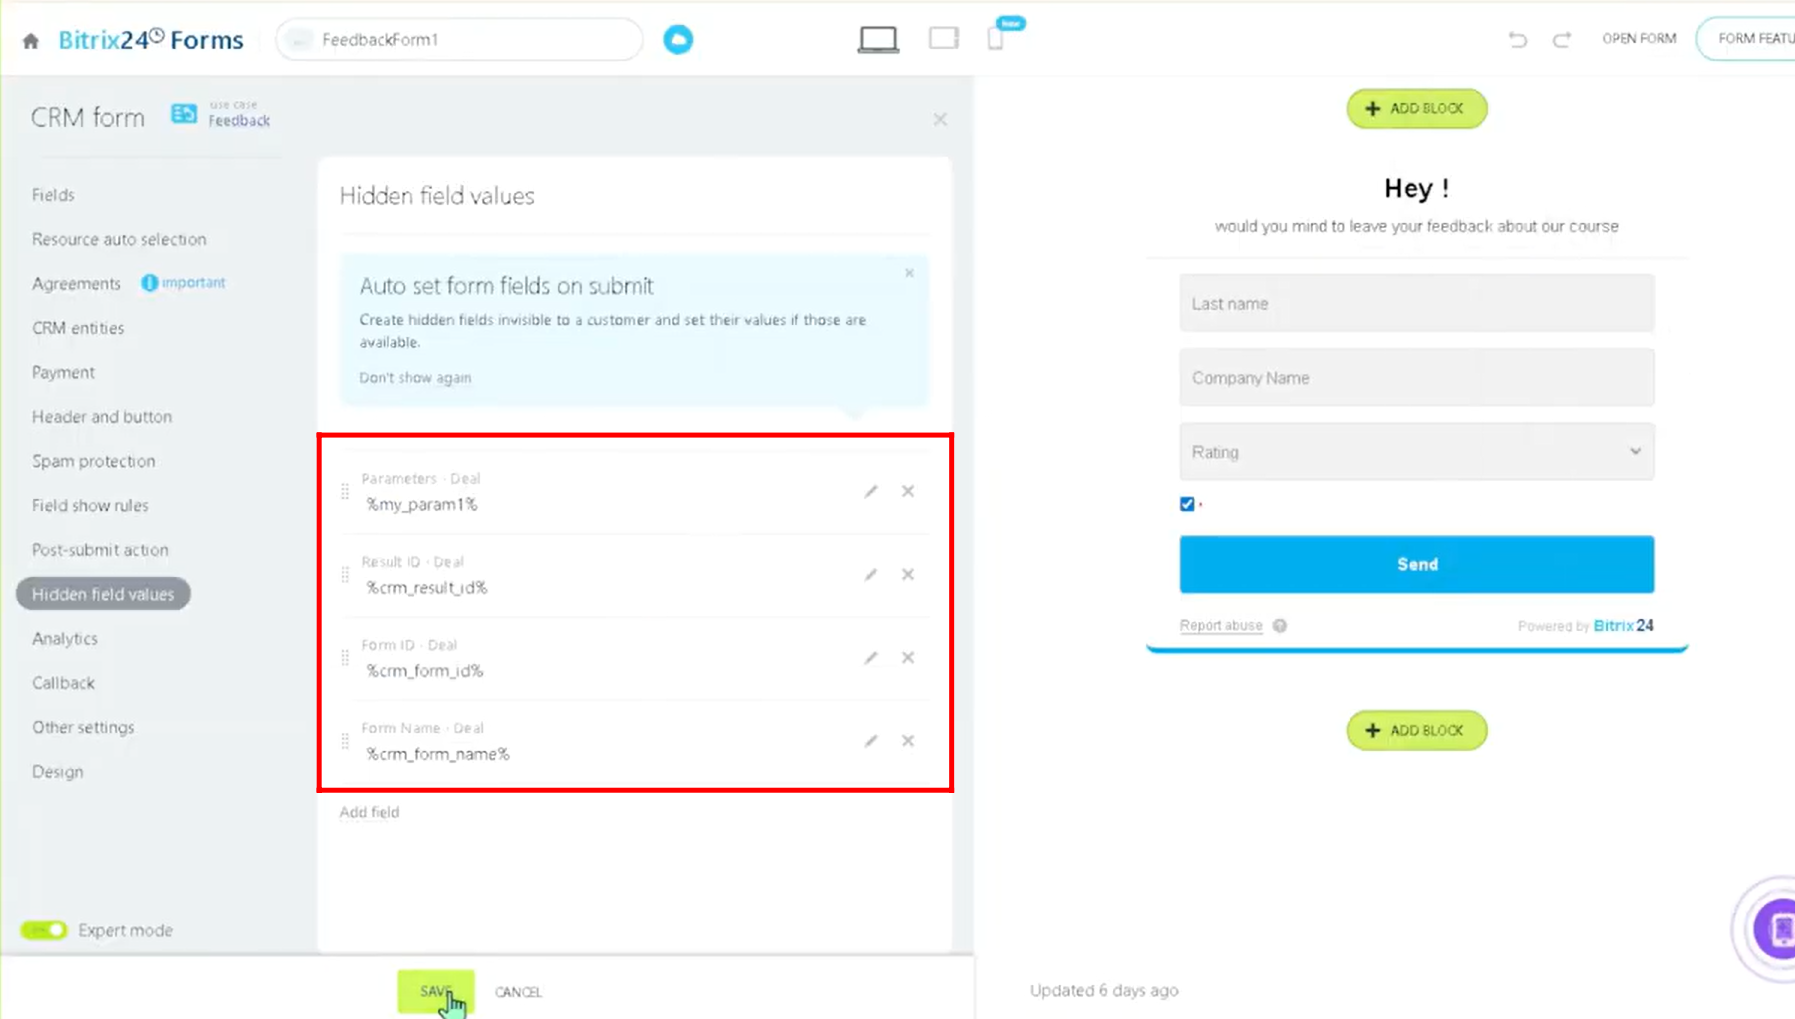
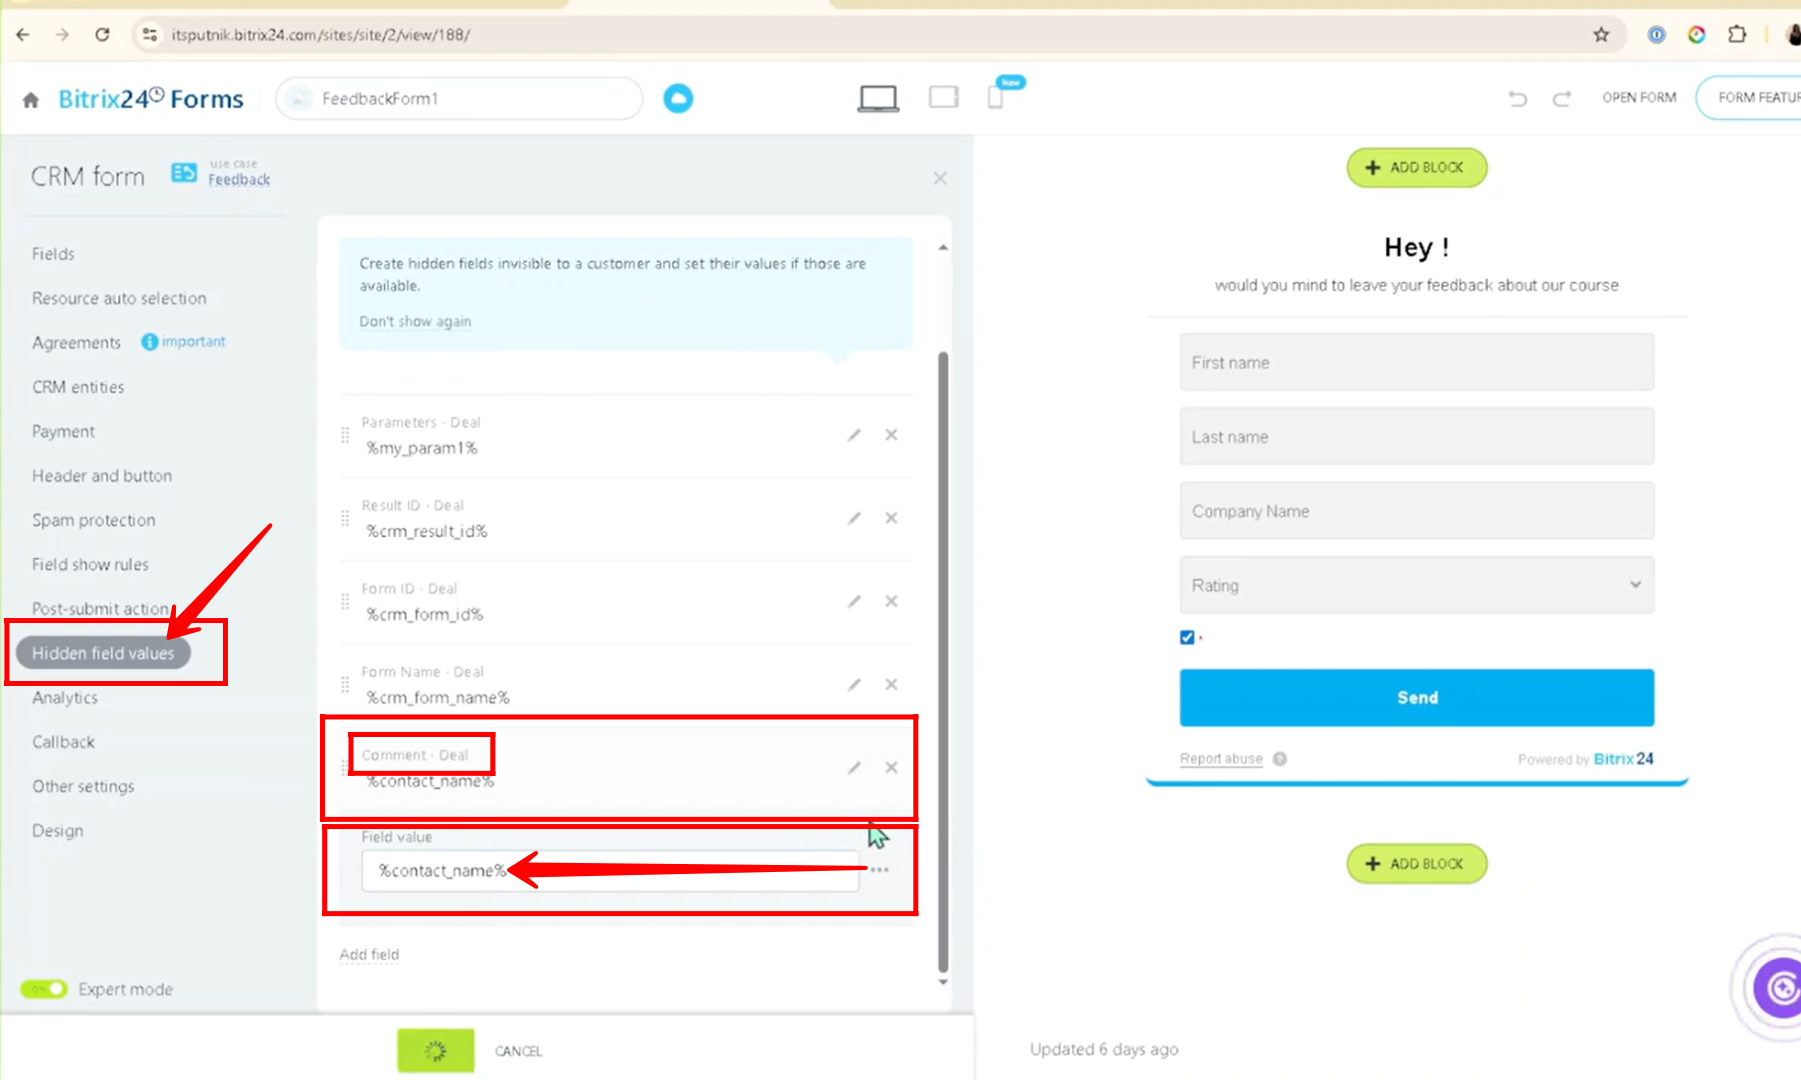
7. We will now return to the form configuration and open the Hidden Field Values tab, where the previously added fields will be removed and replaced with new ones. The newly configured fields are Parameters, Result ID, Form ID, and Form Name, all of which are linked to the Deal entity. For this use case, a new form has been created, although you can also work with an existing form in your portal.
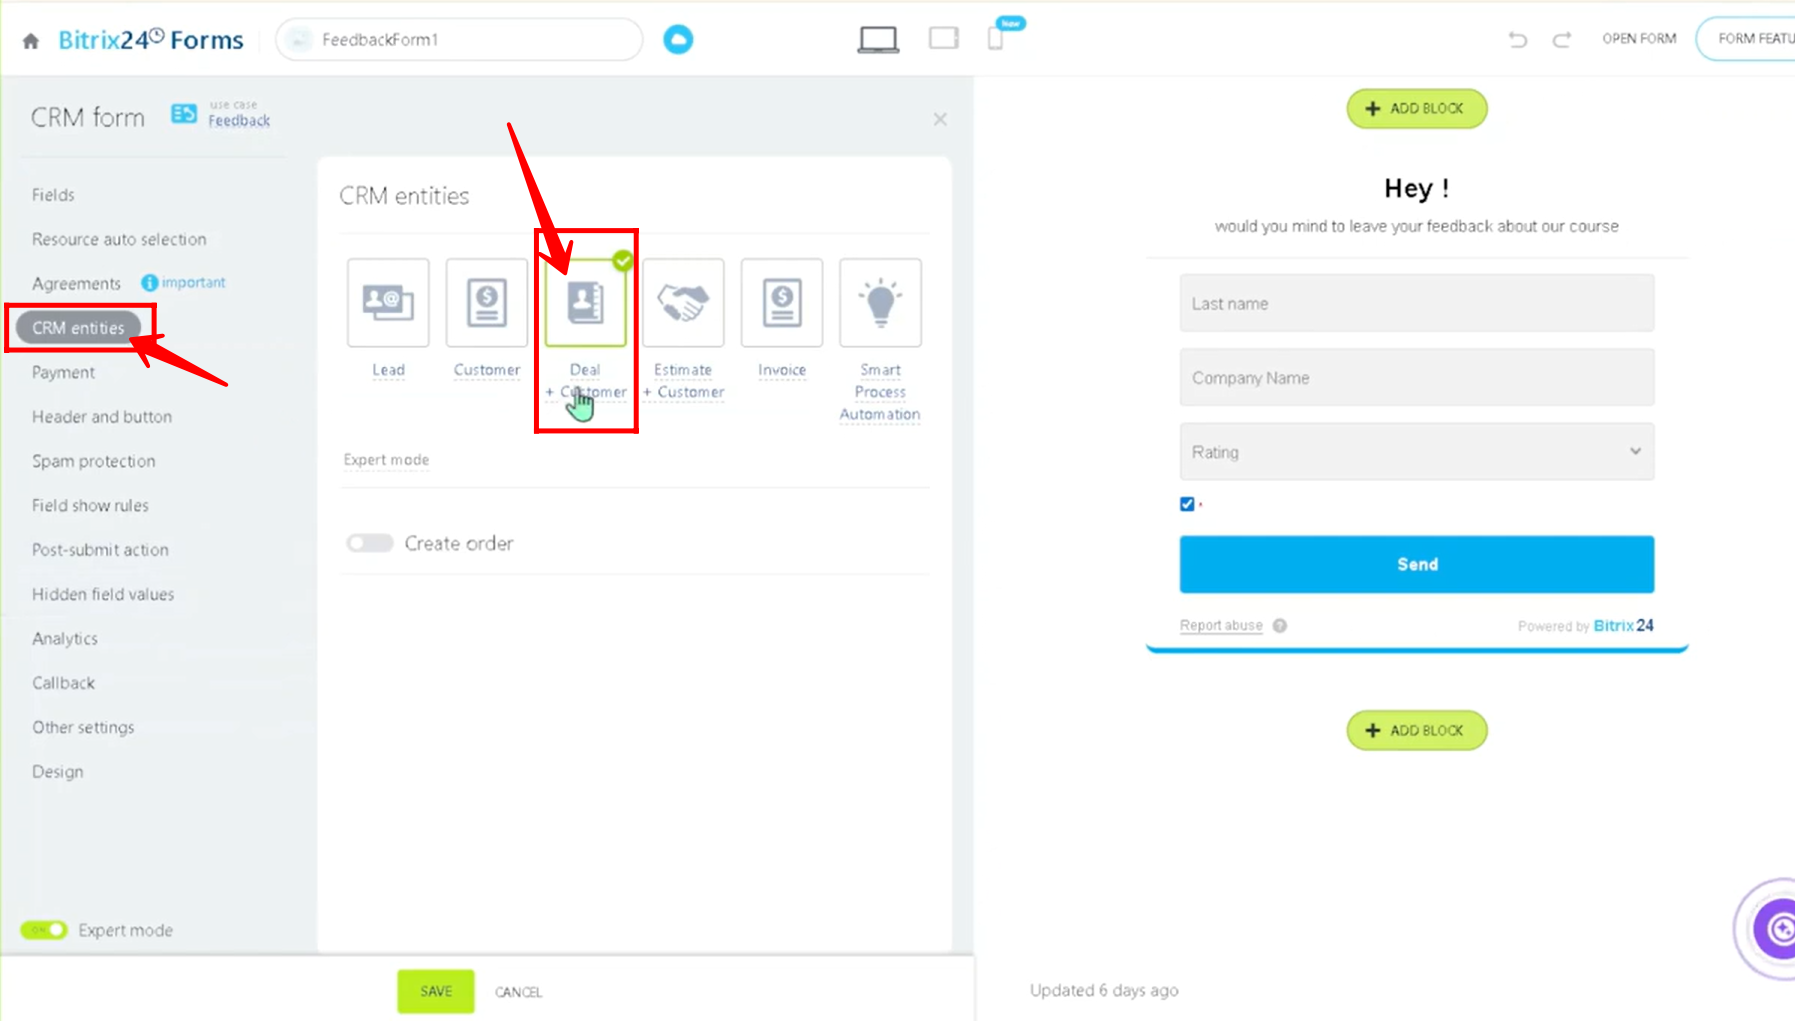
8. To ensure proper functioning, the form must be linked to the Deal entity. Since a deal on its own cannot be directly connected to a form, you need to go to the Entities tab and select the “Deal + Customer” option.
9. In the Hidden Field Values tab, add dynamic field values for all the previously selected fields using the three dots options. The values “%my_param1%”, “%crm_result_id%”, “%crm_form_id%”, and “%crm_form_name%” are added as dynamic field values. These values will be automatically populated—you only need to select them as standard text values from the three dots options.
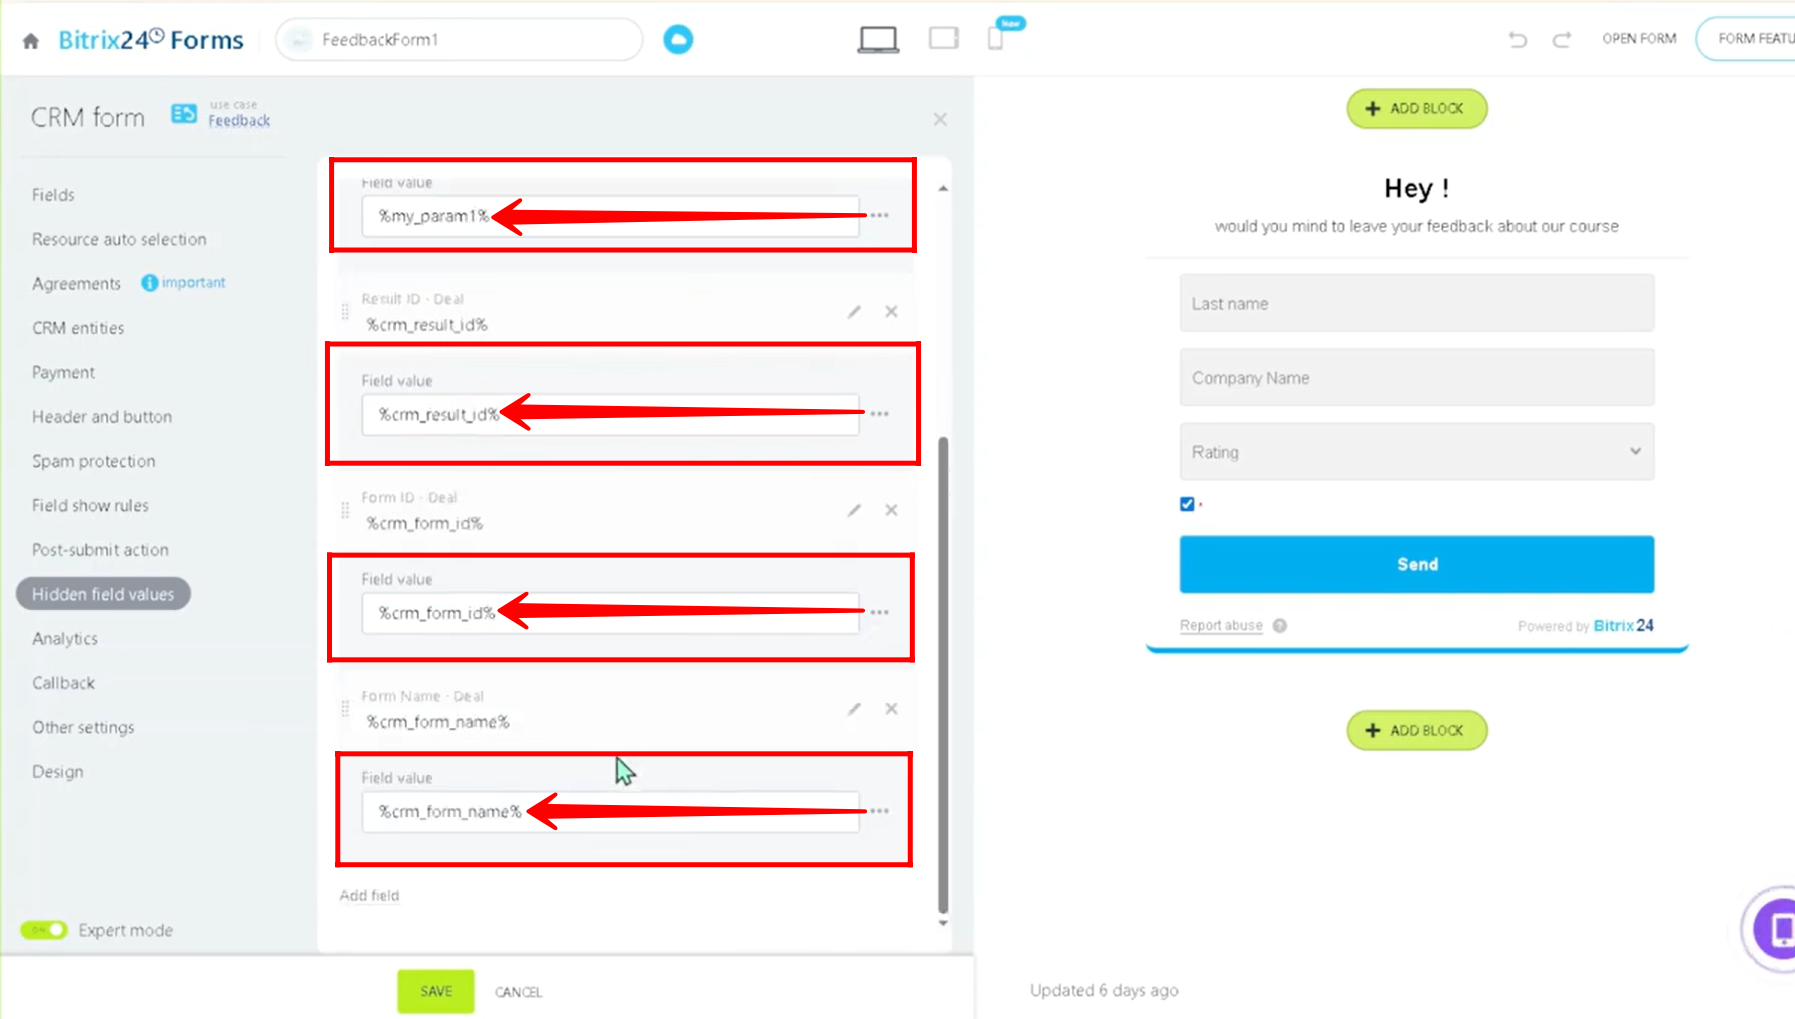
10. The hidden fields configured are Parameters, Form ID, Result ID, and Form Name. The Parameter is appended to the form link at the end of the last “/” (explained in later steps), the Form ID is a system-generated auto-sequenced ID created by the portal for CRM forms, the Form Name captures the name of the form you configured, and the Result ID is a randomly generated unique identifier that represents a specific user submission at a given time, changing each time the same user submits the form again.
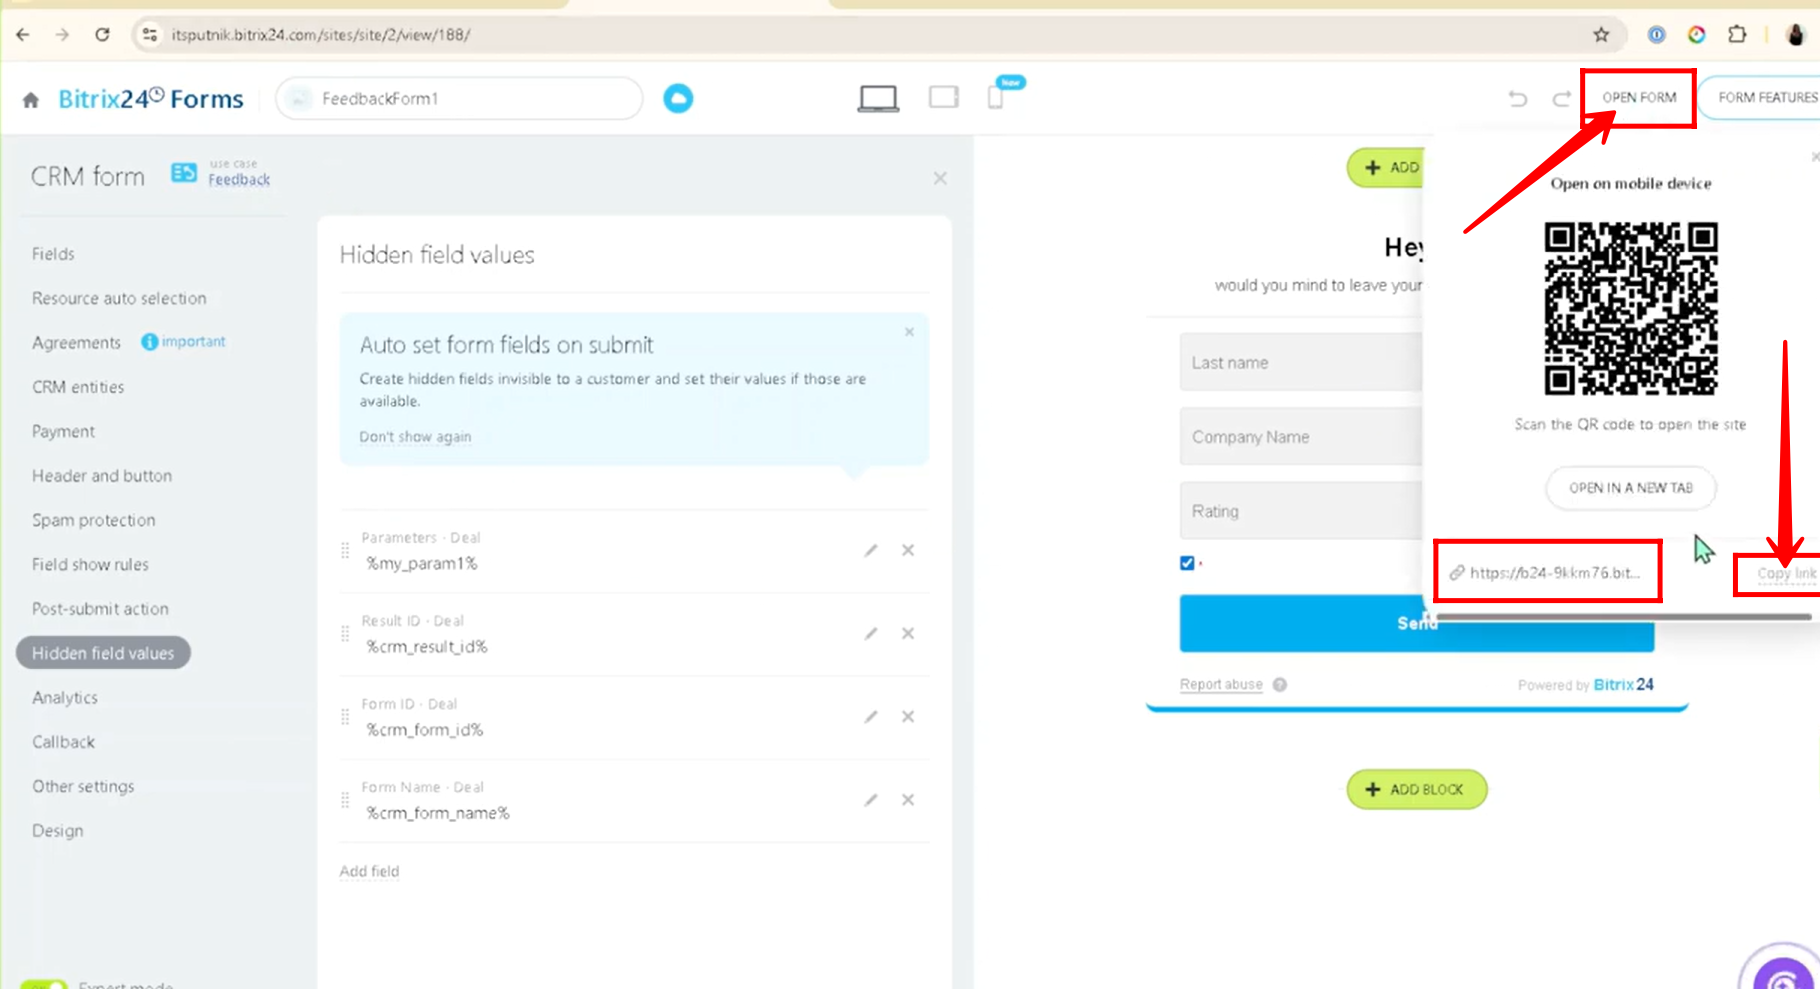
11. Click on the “Open Form” option, then select “Copy Link” to copy the form URL, and paste it into a new browser tab to open the form.
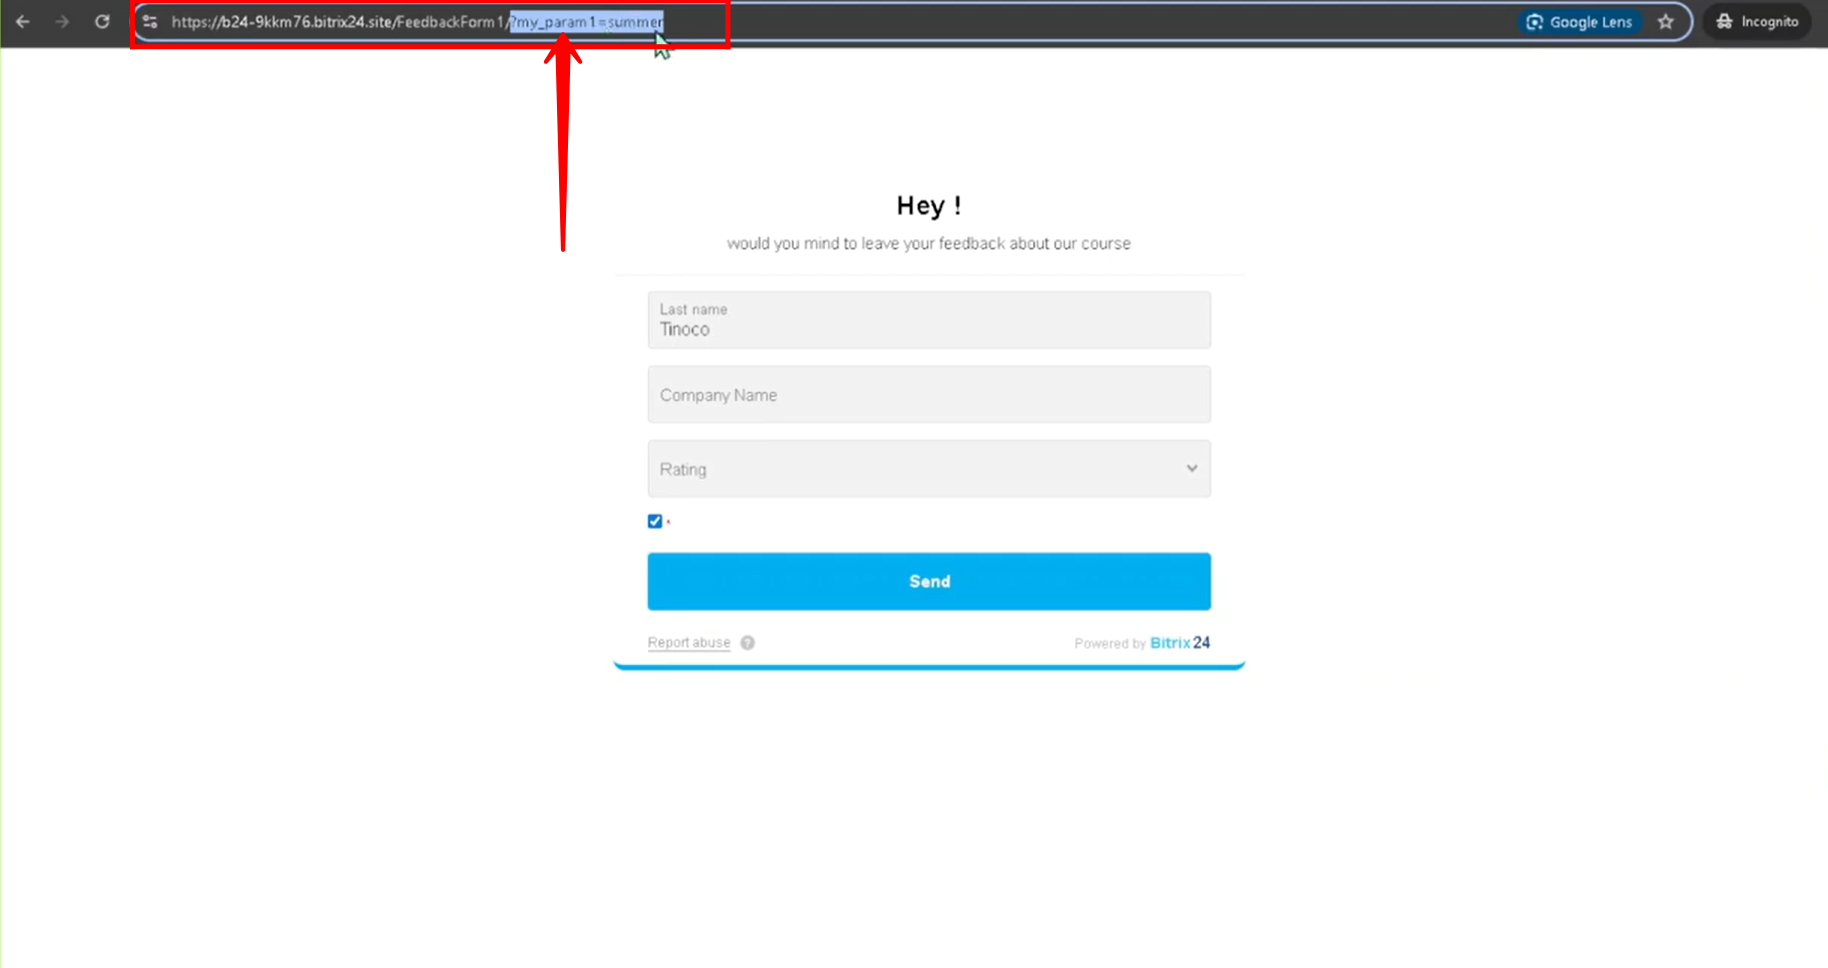
12. As you can see, after pasting the form link into the search bar, the form opens. Now, by adding a parameter after the last slash “/” (for example: ?my_param1=summer) and pressing enter again, the same form reloads but this time with the parameter included.
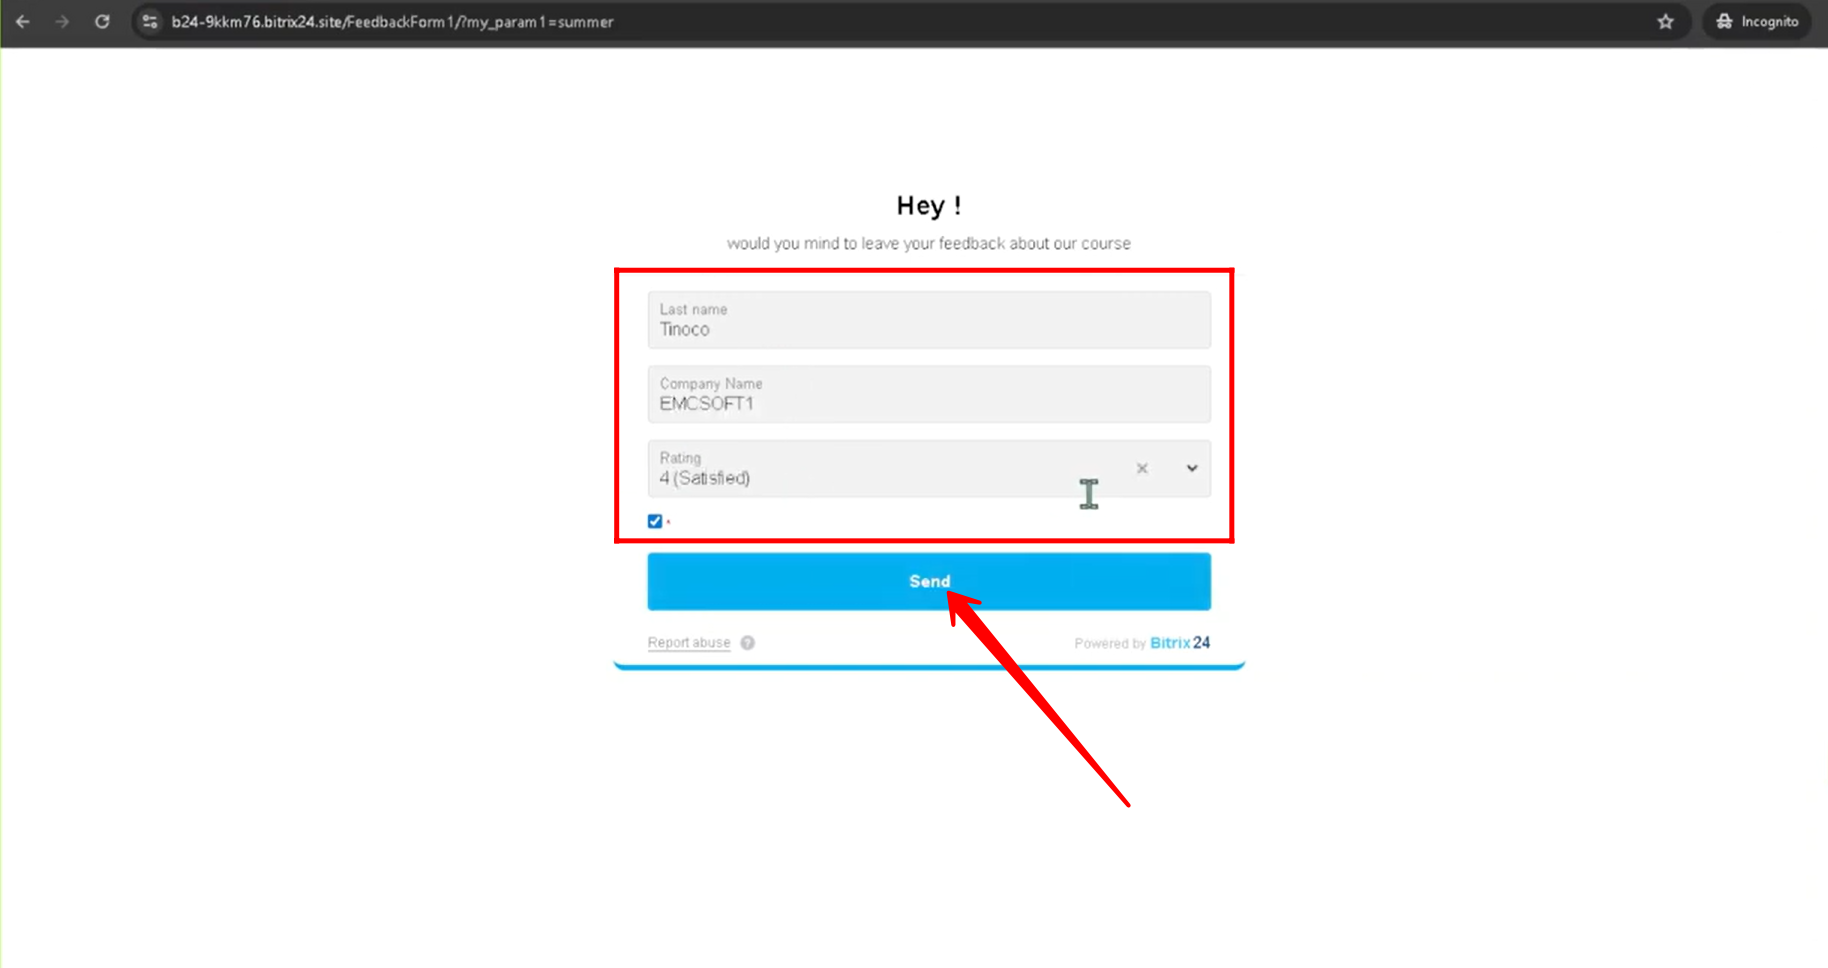
13. Fill out the form with the required details and click the Send button to submit it.
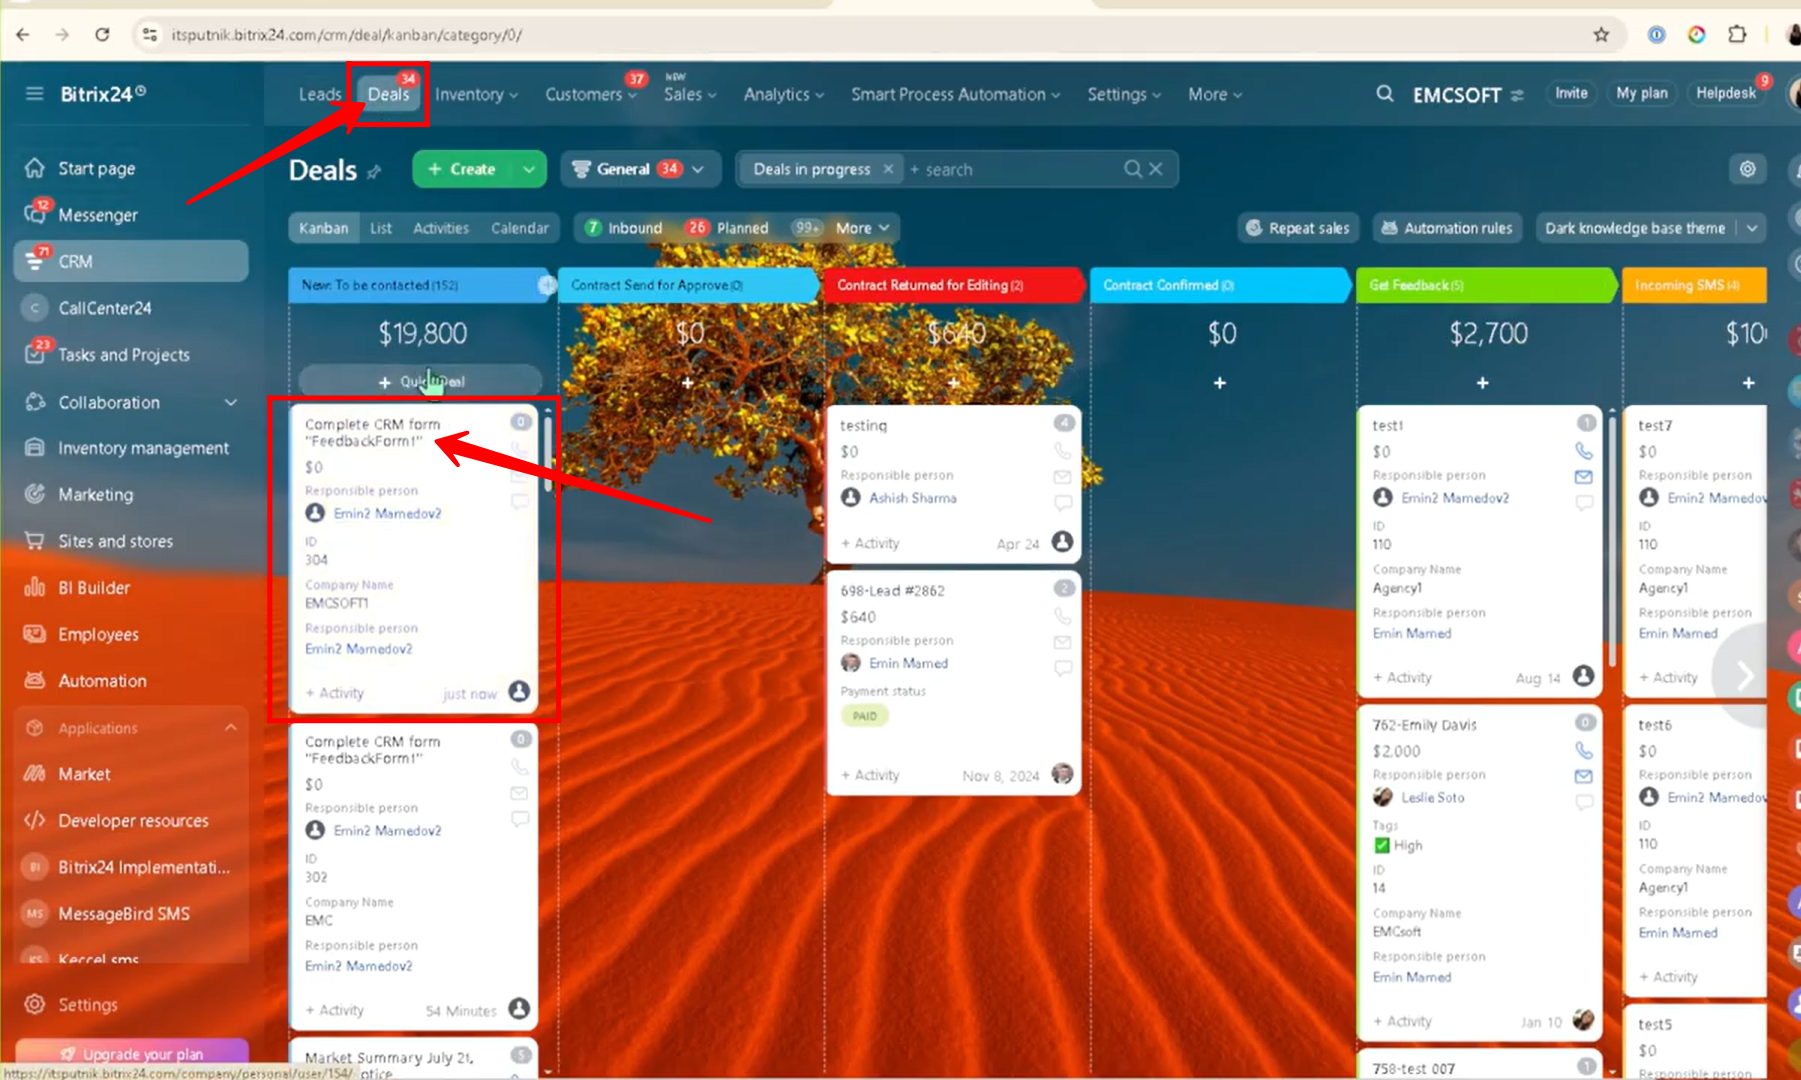
14. Navigate to the Deals section, where a new deal will be automatically generated after the form submission. Click on the newly created deal card to open and view its details.
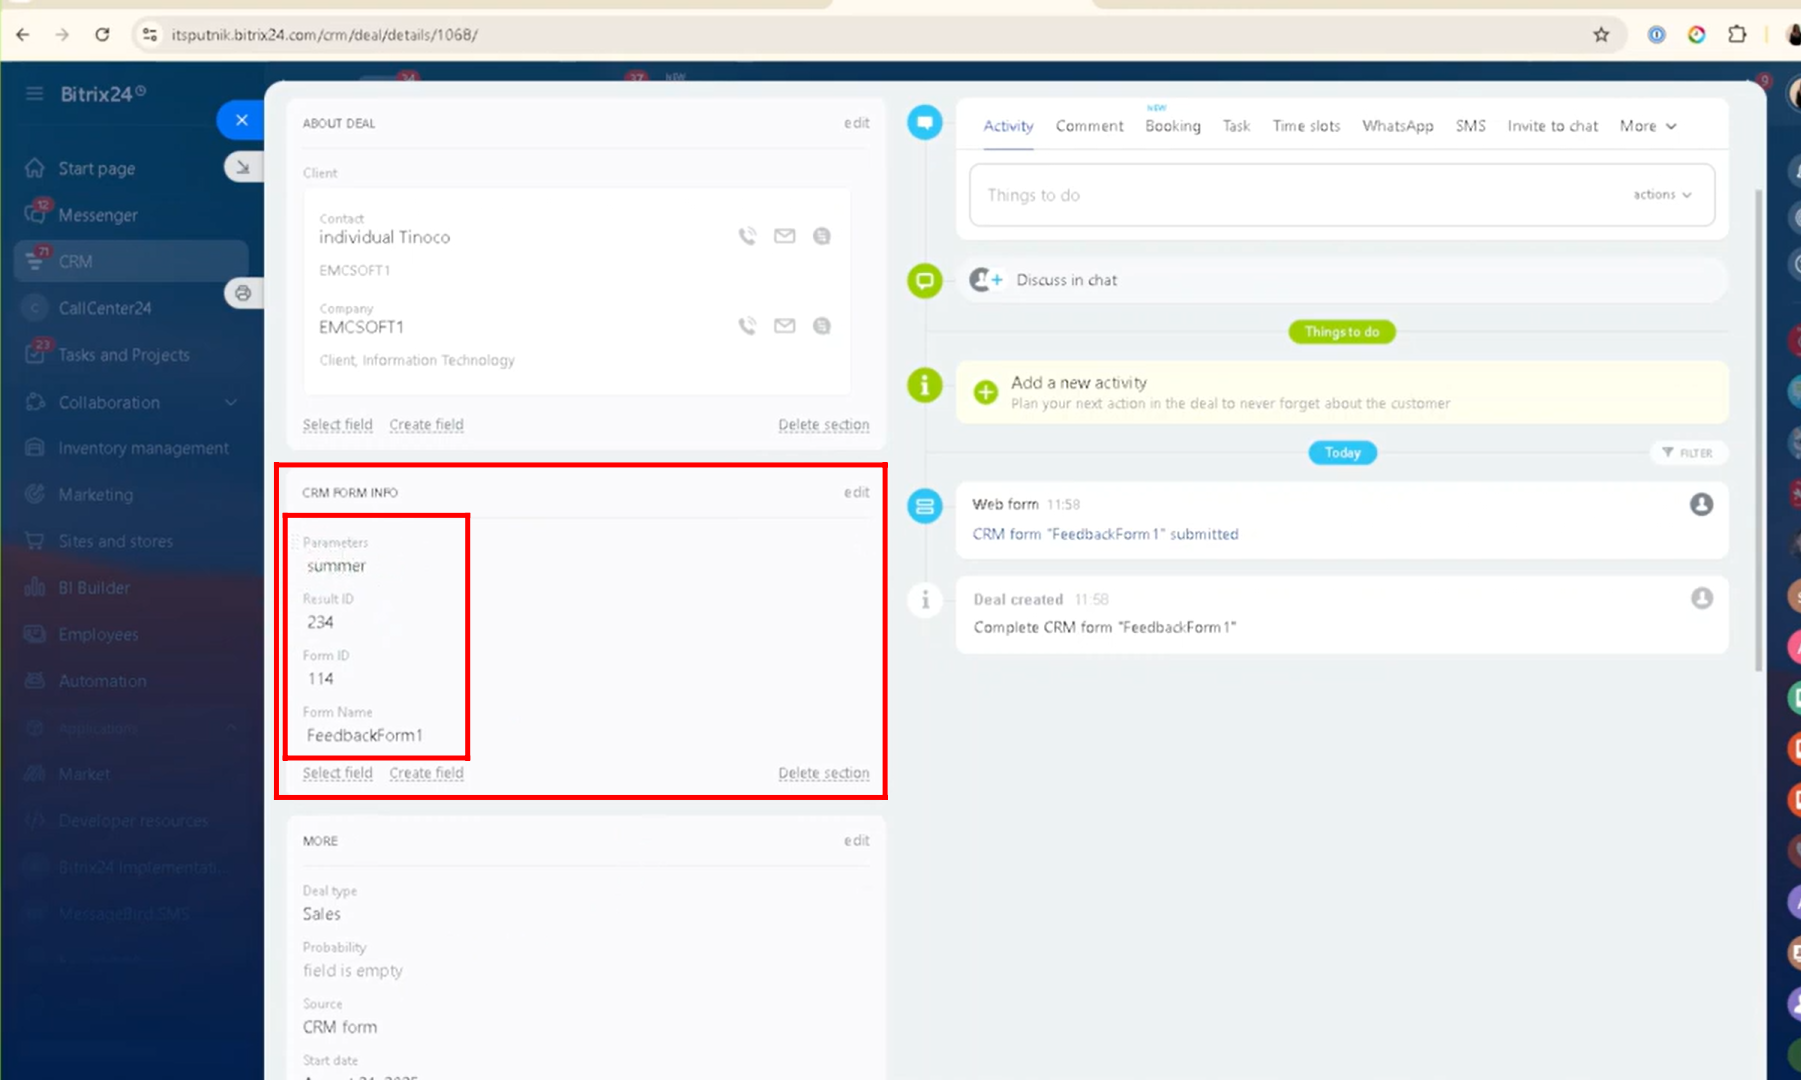
15. In the Deal details, you can view both the information submitted through the form and the hidden field values. These hidden fields are captured dynamically during submission, for example: Parameters: summer, Result ID: 234, Form ID: 114, and Form Name: FeedbackForm1.
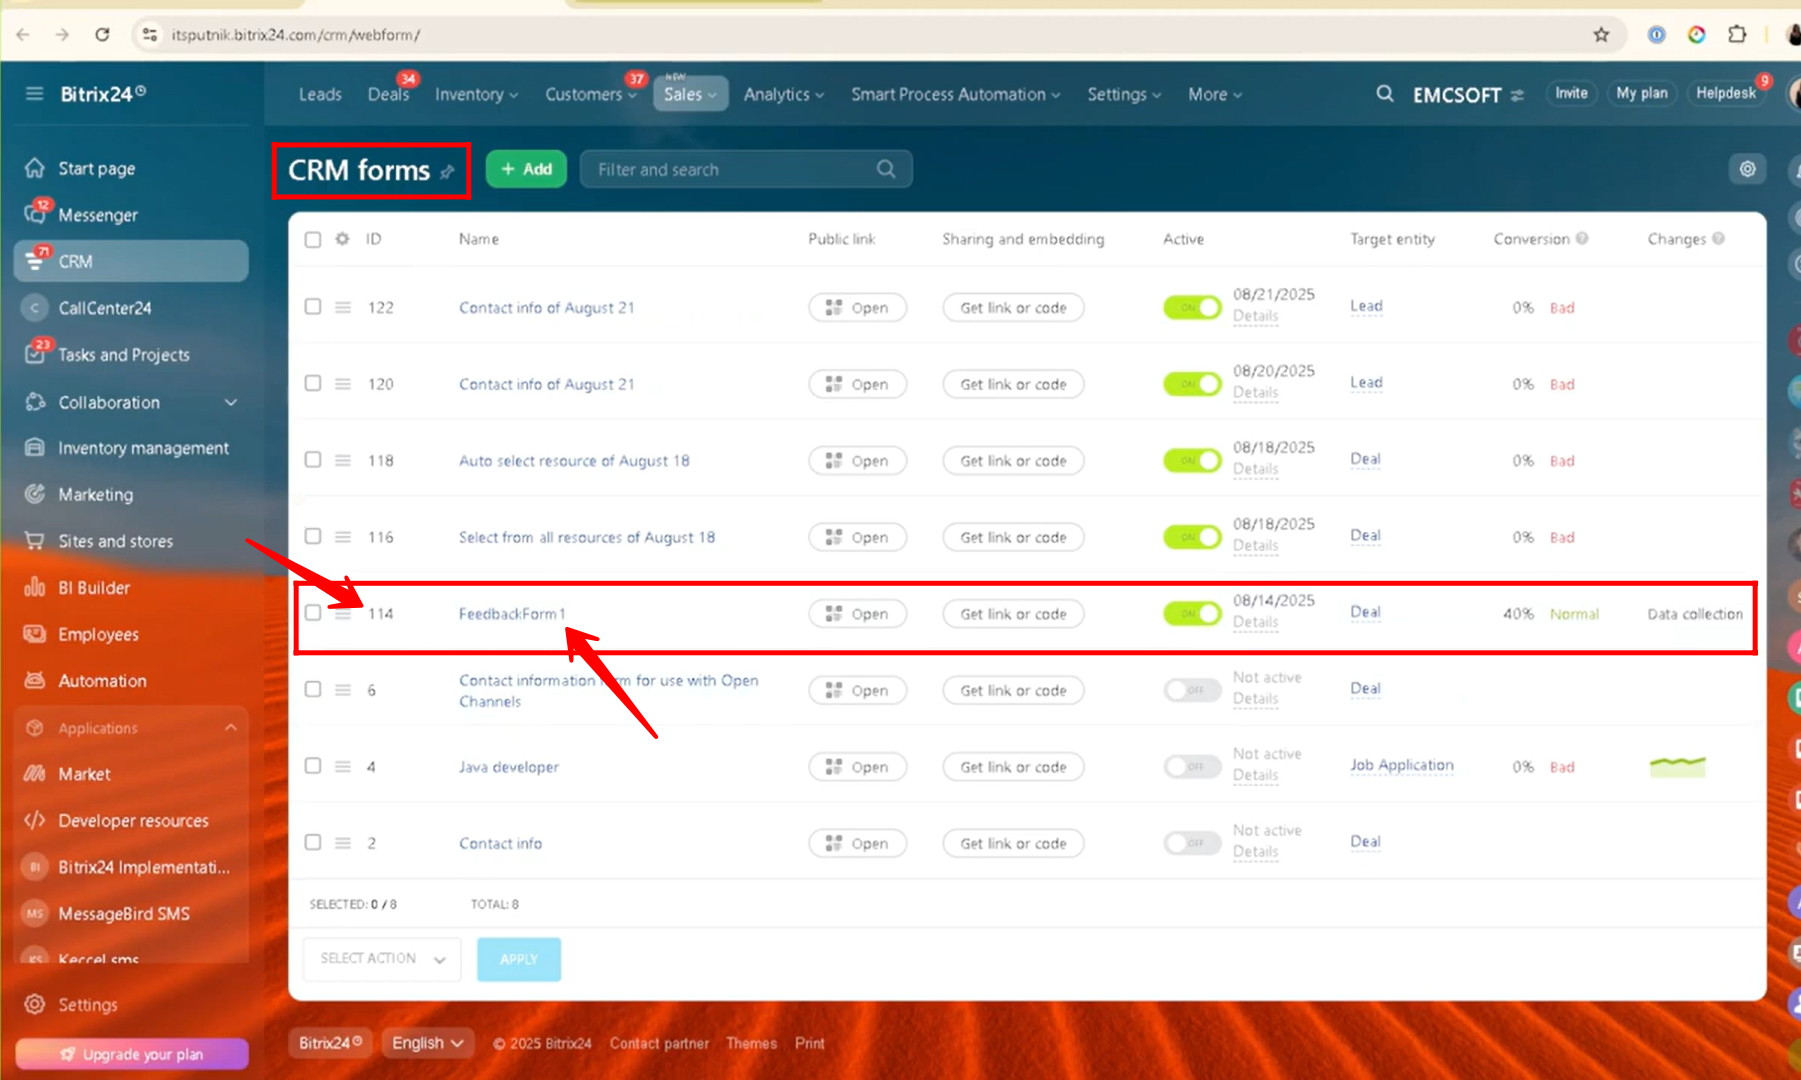
16. You can verify the Form Name and Form ID by navigating to the CRM Forms section, where both values are displayed within the list of available forms.
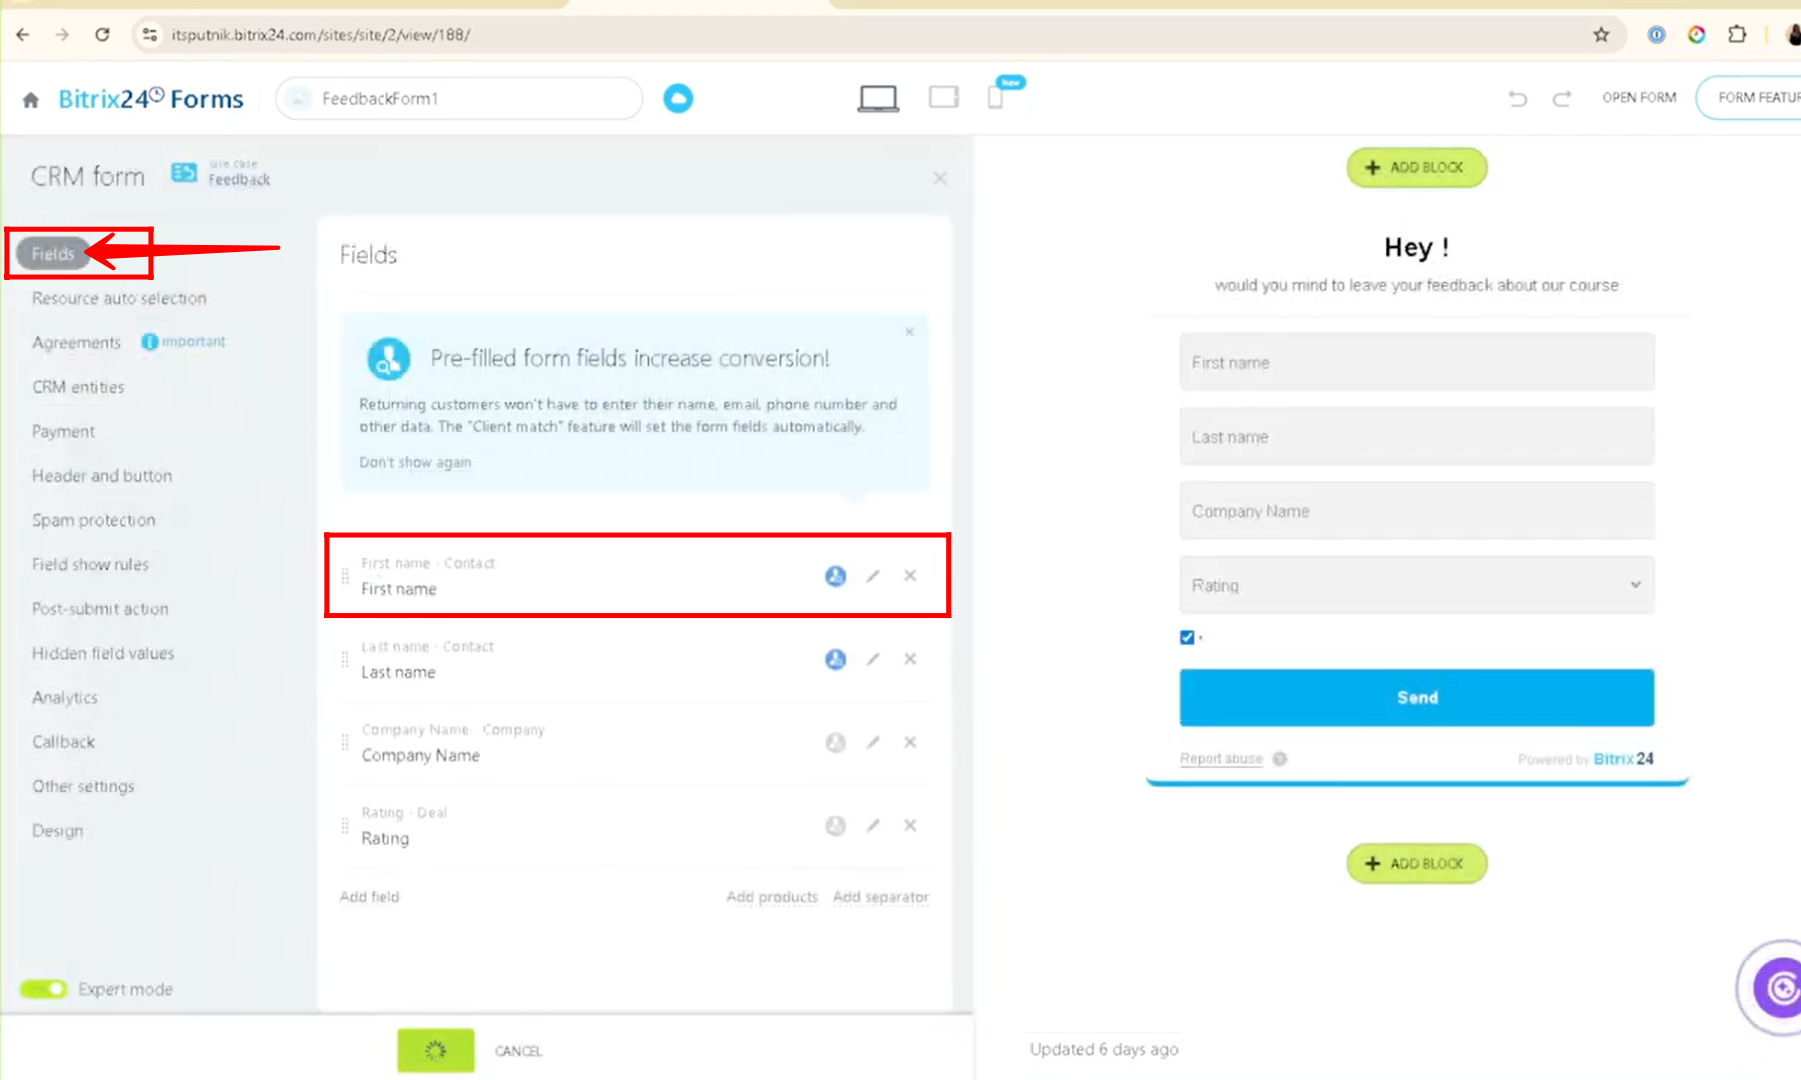
17. Here, we added First Name as a new field in the form, but if the use case requires saving this name in the Deal details (since the form is connected to Deals and the field is selected from the Contact entity), the solution is to use a Hidden Field Value.
18. Go to the Hidden Field Values tab, where a new field called “First Name” has been added. Here, you can see that the dynamic field value is set as “%contact_name%”, which means the contact’s name will be automatically captured and filled into the Deal details once the form is submitted with the name in the form fields.
You can also watch video on Youtube