| 4910 Views | Amin

Clients and deals database
While some of us may work with CRM from scratch, most of entrepreneurs and companies come to CRM as a result of growing operations. Therefore, by the moment we install a new CRM we should already have a list of our clients and deals.
Another situation is obtaining a ready business and using previously collected database. In that case you might be willing to add and merge databases.
Anyway, importing a database is a crucial step in the beginning of using CRM.
Importing process in Bitrix
There is no really convenient way in Bitrix to import clients database in several clicks. First thing to mention here is that deals are identified with contact only by Name and Surname.
That is inconvenient because clients can have same names or surnames and even both. In case you have namesake, a system will connect their deals with one person. So, confusion may arise and cause serious circumstances.
Importantly, in Bitrix deals must be imported after contacts, not vice versa. Unfortunately, deals in Bitrix are not identified by ID numbers. So, you need to correctly correlate names and surnames with no duplicating values.
Assuming that most of databases are in Excel table format, we will go through sample database and show hidden hazards. We will use standard Excel tools to avoid namesakes so this process is quite simple and do not require any advanced skills.
Let’s observe in detail how we should import contacts database in Bitrix CRM.
1. We will start from Contacts import. Only after Contacts we will be able to import Deals if there are any.

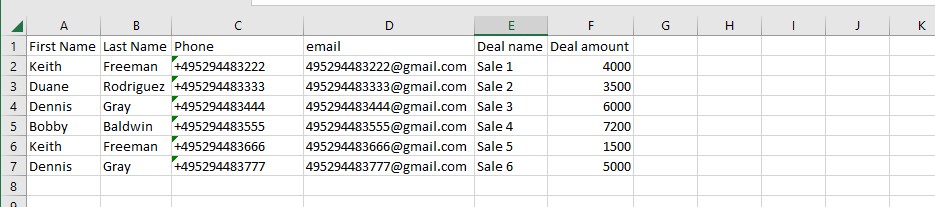
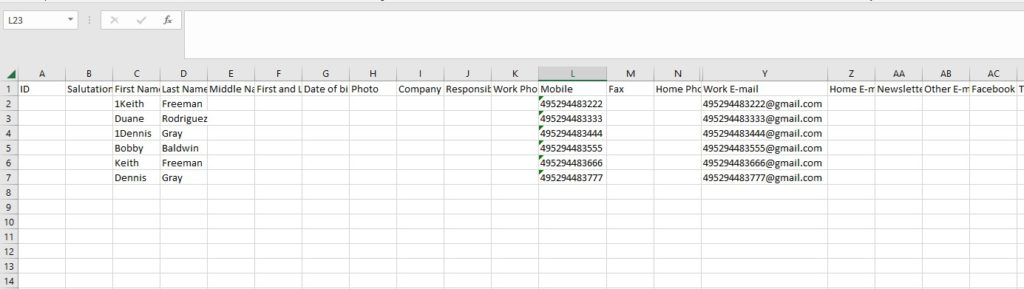
2. This is quite simple database of our clients and his deals in Excel.
3. Before we proceed, we need to create a new column with both Name and Surname. We do so in order to find namesakes. We created a column and typed the following formula: B2&” “&A2. A space between quotations mean that Name and Surname will be separated by space in new column.
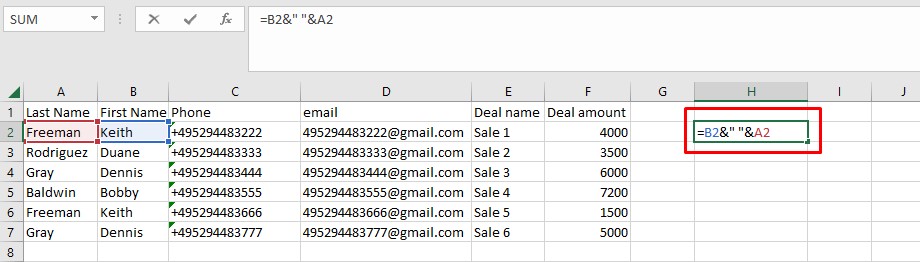
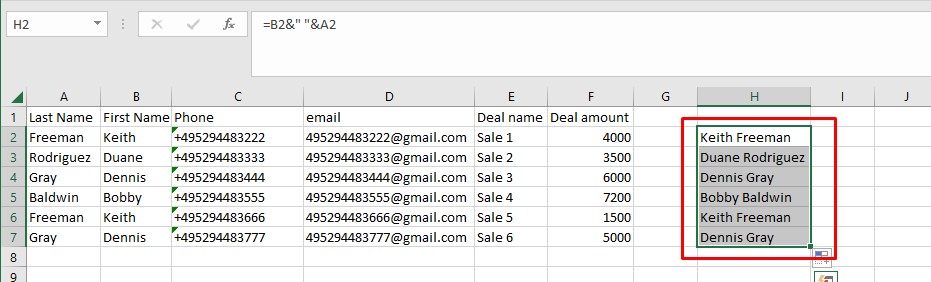
4. As a result, we have a new column with Name and Surname connected. We can identify several namesakes.
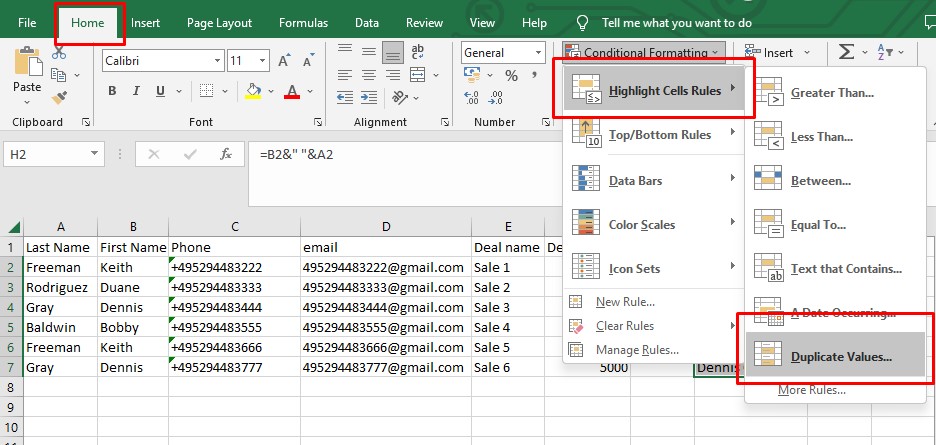
5. Our example database is very small, so assuming that you will have much bigger sheet, it’s better to use Excel tools. Click Home > Conditional Formatting > Highlight Cells Rules > Duplicate Values.
6. All namesakes will be highlighted.
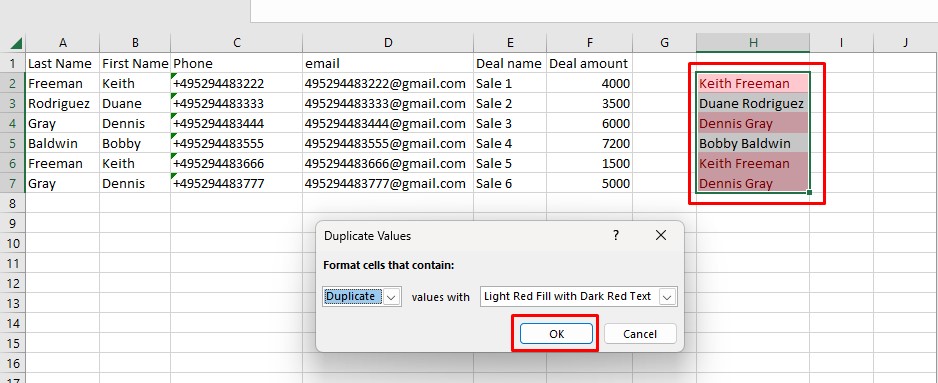
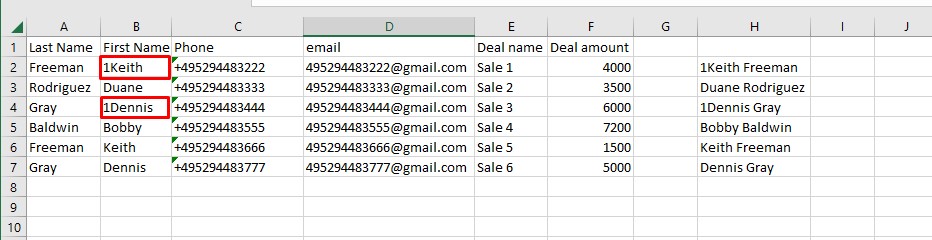
7. What we do next is adding 1 (or any other unusual symbol) before one of duplicate names. The idea is to separate namesakes as simply as possible.

8. Now we have no highlighted values, meaning that deals will not be merged between duplicated contacts.
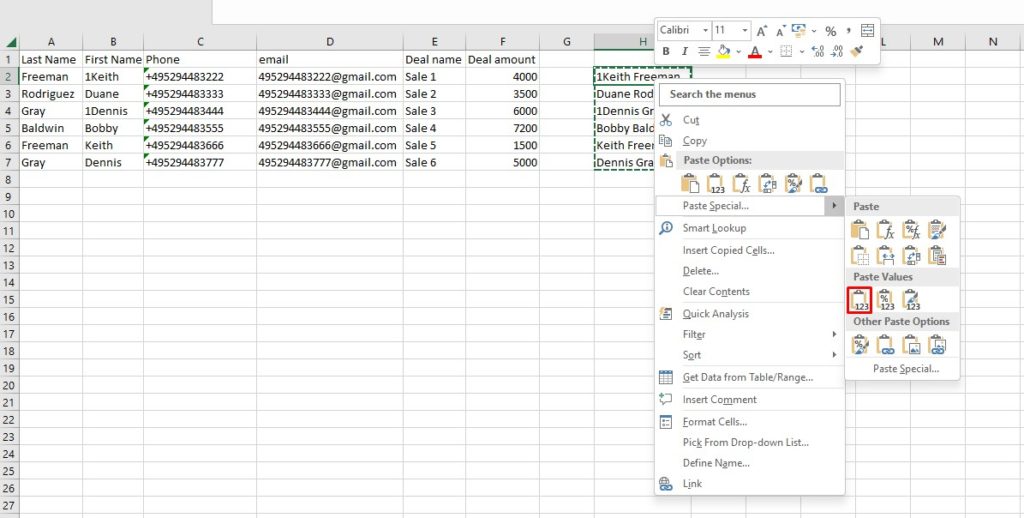
9. Last thing we need to do with our table is to copy new column and paste it as Values. So, we willhave only formula results, without formatting or comments.
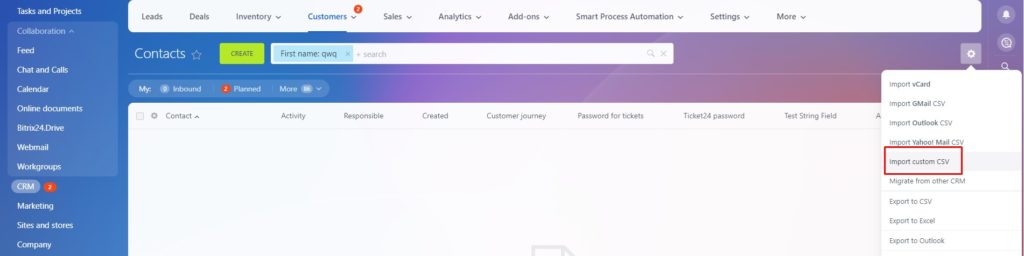
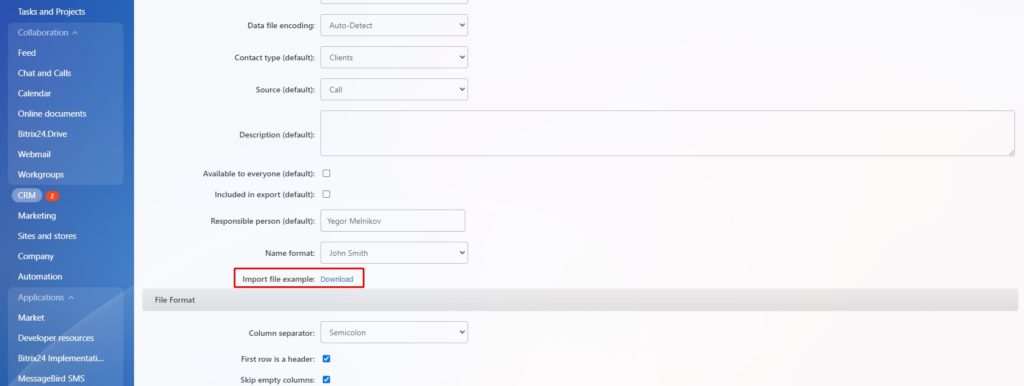
10. Let’s come back to Bitrix. Before we import our database, we need to prepare our document. To do so, go to CRM – Contacts – click gear and click Import as CSV file with your settings.
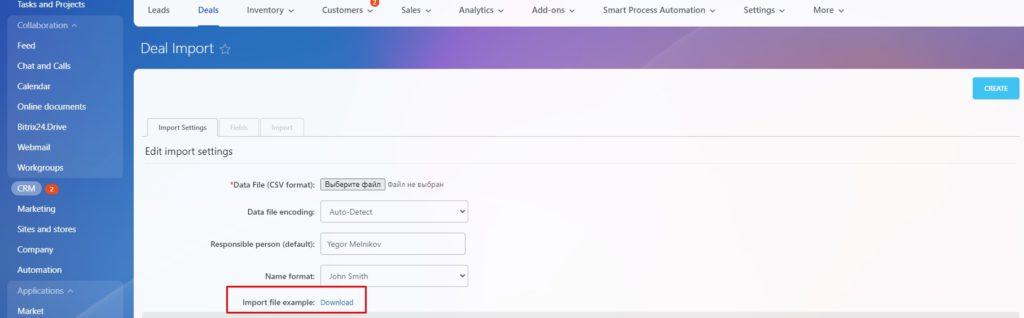
11. Go directly to “Import file template” and download the template.
12. In template downloaded we have Excel file with all parameters that Bitrix Contact cards have by default.

13. We need to copy our columns and paste in relevant columns of that template. In our example we copy Name, Surname, Phone number and email. Those parameters that we don’t have should be left as it is.
14. Go back to Bitrix and click Select Data file and Choose CSV file that we filled before

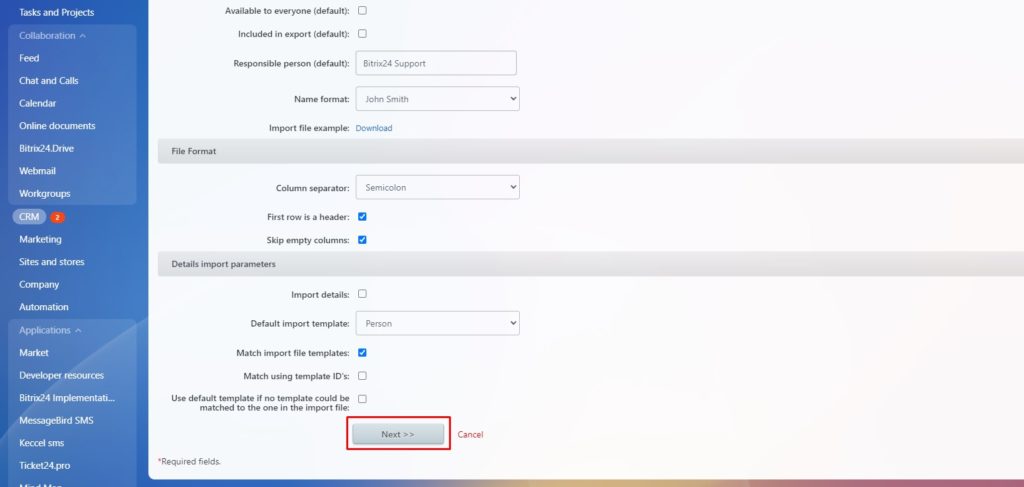
15. Leave all import parameters by default. If we didn’t have responsible name in database, then Bitrix will define responsible person for all rows by default.

16. Click Next.
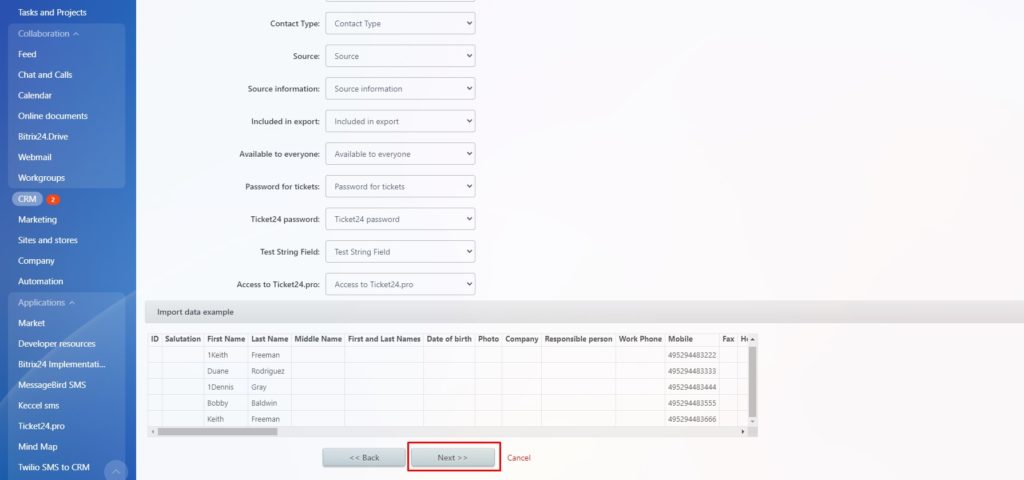
17. We see our data correlated with Bitrix Contact card parameters. Click Next.
18. Then we have duplicate control. In our case we are downloading totally new clients database, so we click Next.
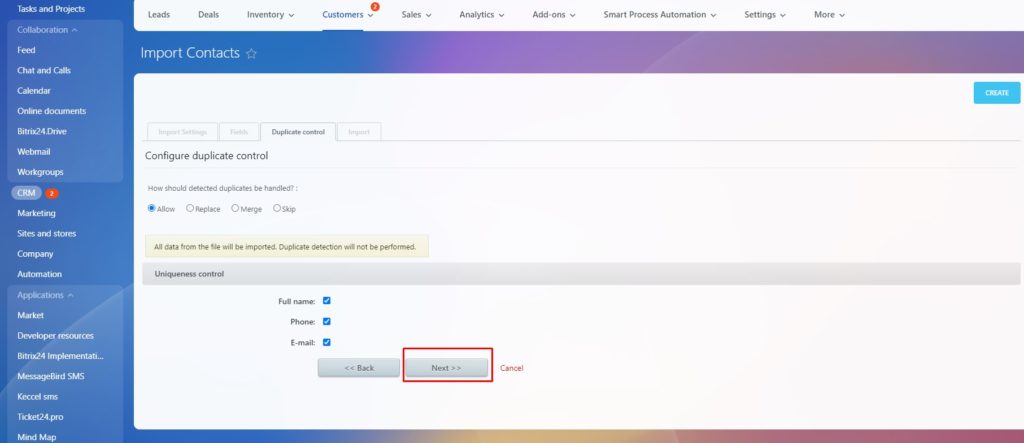
19. In result page we see a number of contacts that will be imported. Click Ready.
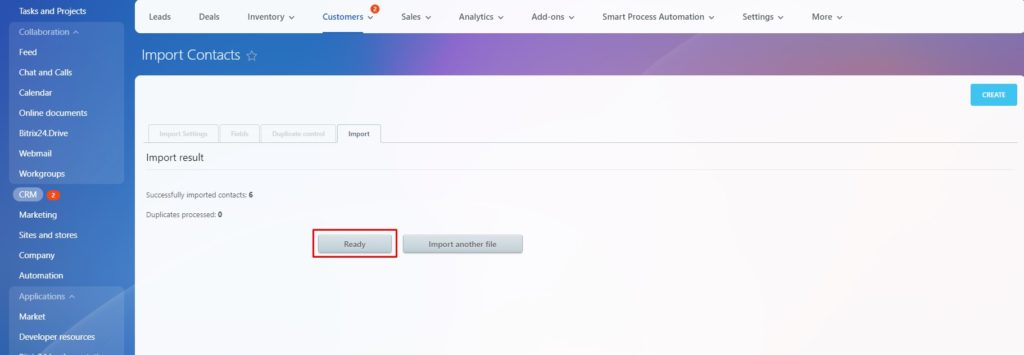
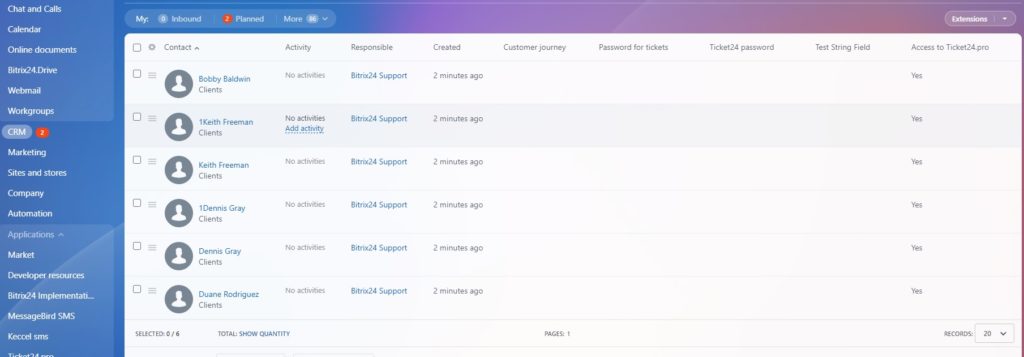
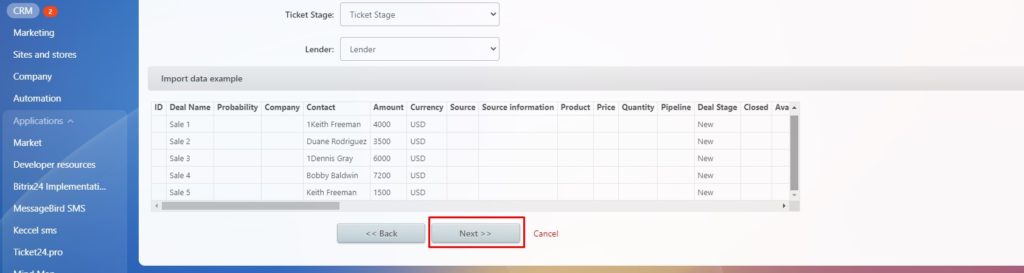
20. As a result, 6 contact cards were imported to Bitrix.
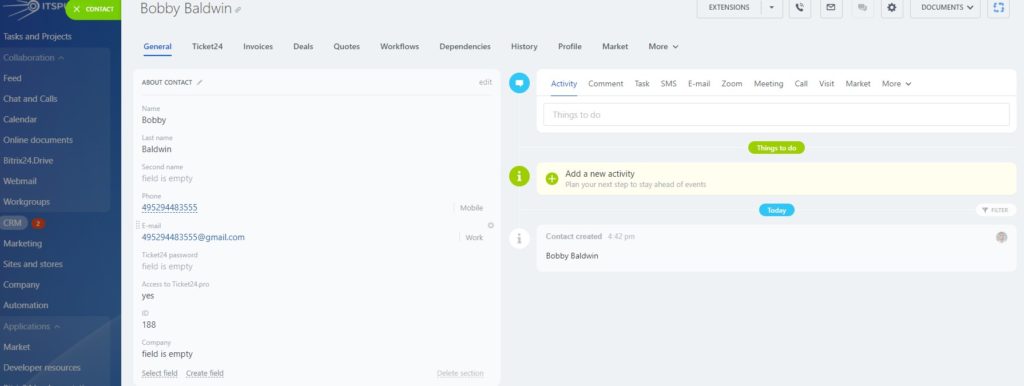
21. Inside of contact card we see details: phone number and email address.
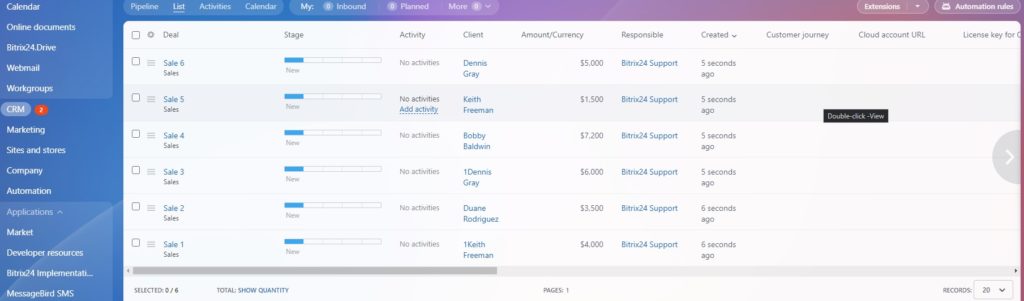
22. Next step is to import Deals. Go to CRM – Deals – gear icon – Deals import.
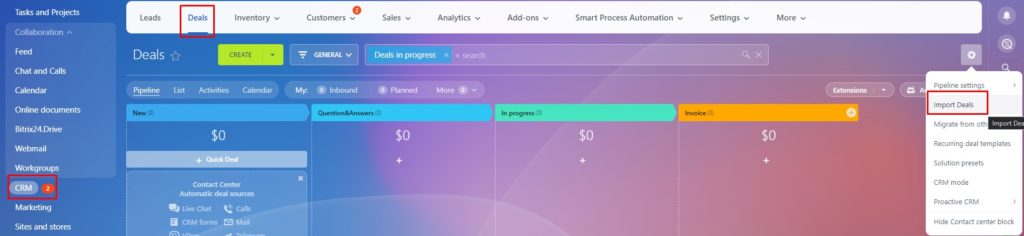
23. Similarly to contacts’ import, you need to download a template.
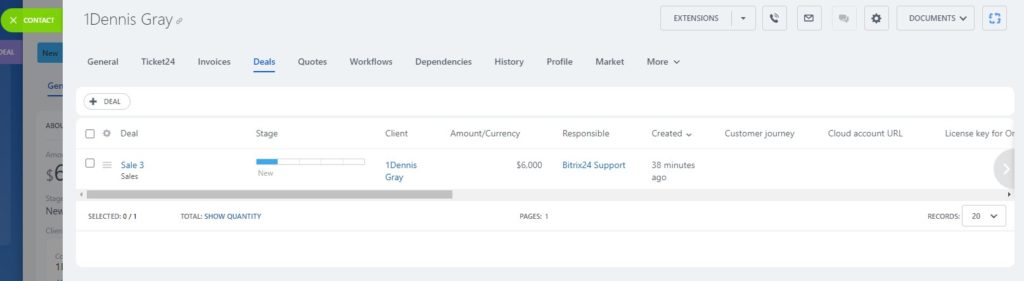
24. In a similar way we see a table with all Bitrix Deal card parameters. There is one necessary column that should be filled for all deals – Name of deal.
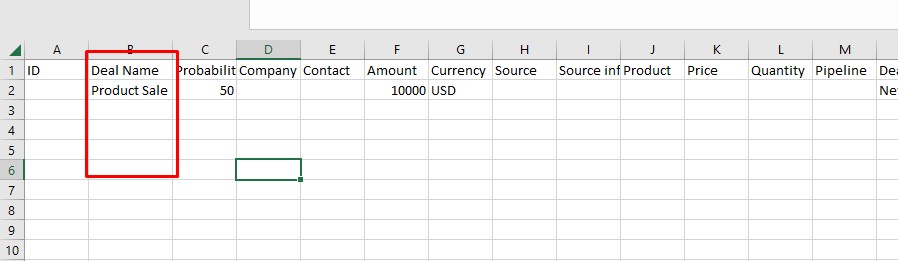
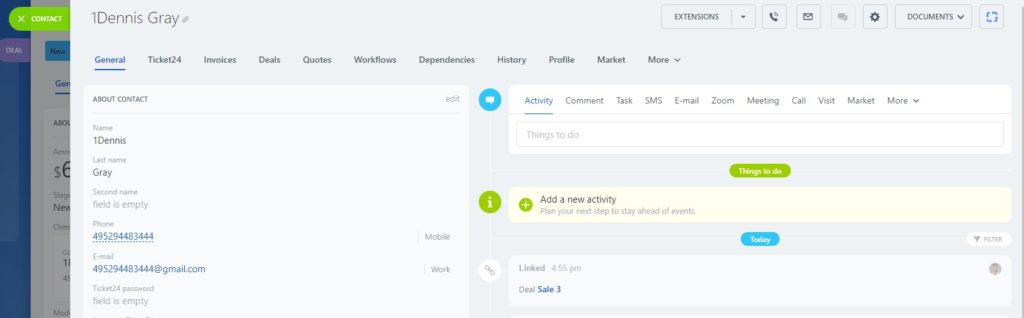
25. We copy deals from our database, starting from Deal name.

26. In Contact column we need to copy new column values that we created before using formula (remember to copy values, not formula itself).

27. Save CSV file.

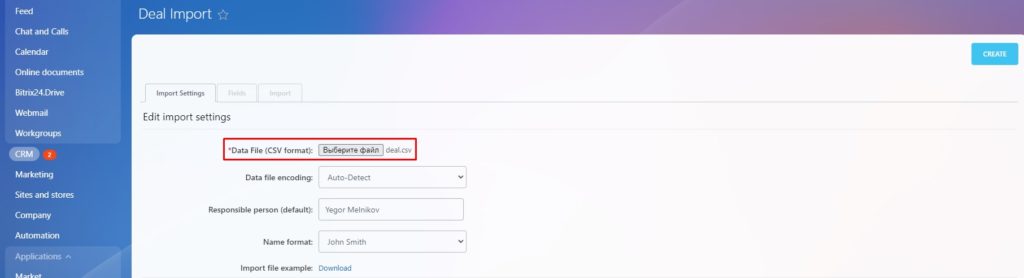
28. Go back to Bitrix and download that file to import Deals.
29. Click Next.

30. We see how Bitrix correlated values with Deal parameters. Click Next.
31. Finally, we see a number of deals imported. Click Ready.

32. This is how they look as a list.
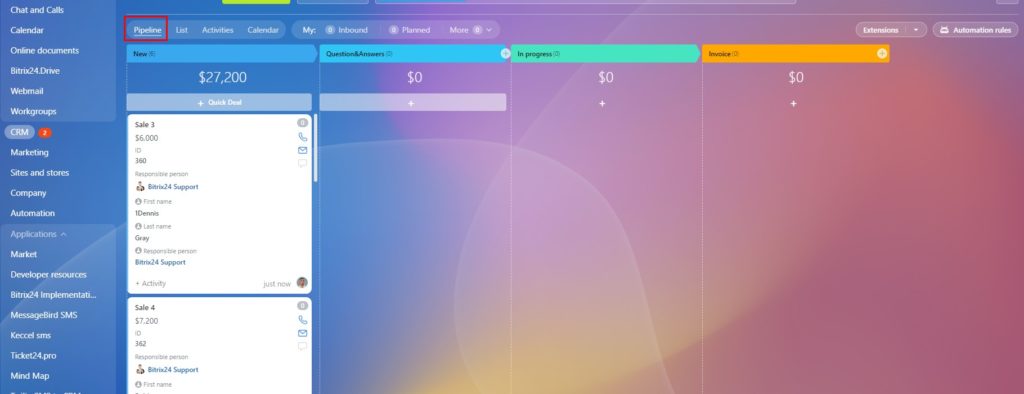
33. Let’s view them in Kanban view.
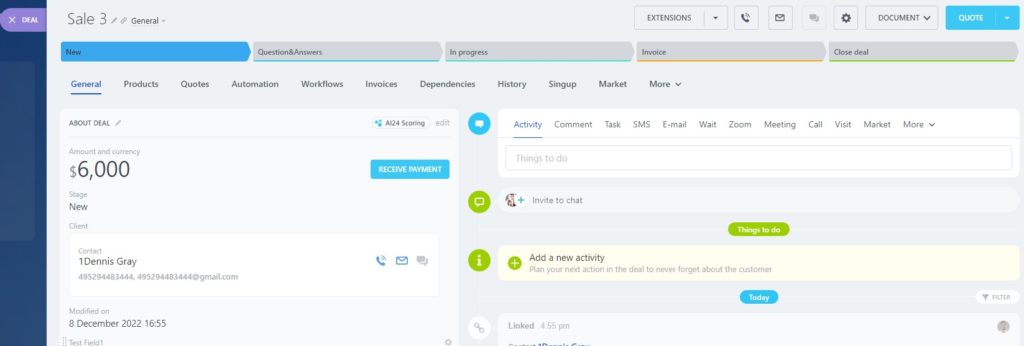
34. Going into a Deal we can see a Contact card attached correctly.
35. Vice versa, from Contact card we can view all relevant Deals.
36. In deals tab will be all deals connected to that particular contact.
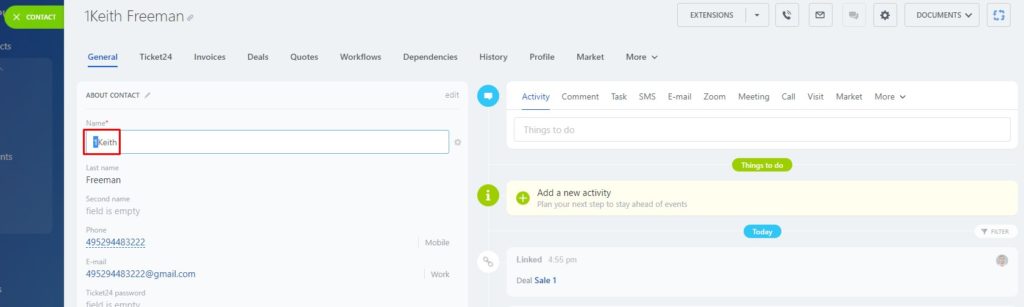
37. Last thing to do is deleting additional symbols. To do so, go to Contacts and in search box type that symbol. In our case its 1.

38. We see 2 contacts with duplicated Names with 1 at the beginning.
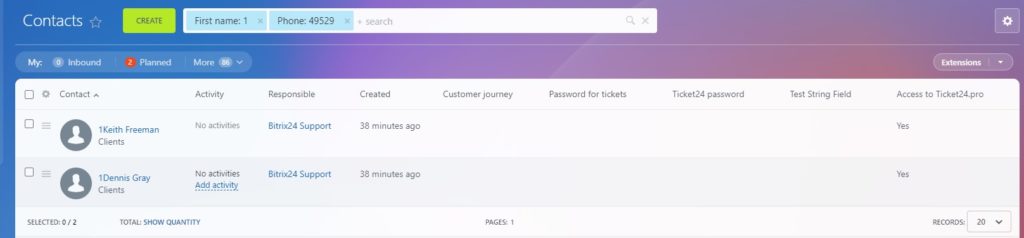
39. In our case we will go through these contacts and delete extra symbols in names manually.
We observed a process of clients database import to Bitrix. At first glance, this is quite simple process which is usually not observed in detail. However, there are peculiarities which may arise and lead to irrelevant import of contact or deal cards.
We hope that you find this video helpful. If you have already met similar problems and aware of how much time and effort can be spent, we suggest you to hire experts that will set up or improve your Bitrix CRM.
EMCsoft has wide experience of working with both small companies and corporations and propose suitable offers. Just contact us via this page and we will get back to you at the earliest.
“You can also watch this video on Youtube”