| 2116 Views | Amin

Introduction to Smart Process Automation
Smart Process Automation (SPA) stands for advanced tool developed by Bitrix24. With SPA any user can build its own system using data cards similar to standard Leads, Deals and Contacts and the way how they are related to each other.
Therefore, user can manage an independent workflow without messing it up with already established CRM system. Or create a truly unique CRM system that will be adjusted to specific parameters of your company. This can be vital when standard sales structure does not fit your requirements.
Flexible, but convenient + powerful, but not excessive
As you most likely know, Bitrix24 offers a nice user-friendly interface where we have Leads, Deals, Contacts and Companies connected between each other. Kanban view provides probably the best visual presentation of cards. User is able to see a broad picture: how many leads are just opened; how many is under work and so forth. Flexible settings allow to customize Kanban cards as you wish.
Inside each card user can specify a responsible person who is in charge of particular Lead or Deal. Also, you can configure a number of various parameters and fields. Thanks to the interconnected databases you can check on a specific Contact card and see how many Leads and Deals came it has generated. The same works the other way round.
Other business processes logic in details
There is no surprise that users enjoy CRM possibilities in Bitrix24 and want to adapt this system to other objects. For example, to manage claims and be able to connect them with deals or create a hr module via spa.
Let’s see an example. Imagine that you are a window manufacturer who is using CRM to manage Leads and Deals. In addition to this, you need to automatize measurement operations.
Usually, measurements might be done before potential client makes a final decision. However, sales manager has to confirm measurement date and time both with client and specialist from production department. If company has a corporate car, it should be available. After measurements technical specialist have to prepare a final quote. If client does not agree with price, then sales manager should contact supervisor and approve discount. And only after positive reaction this Lead can be converted into the Deal.
See how many iterations and communications goes between departments on the matter of measurements. And what if company has several technicians in charge of measuring windows? Or it has special supplier of super advanced windows which prices should be specified every time they have a new order? The more parameters you have, the more you will need to automatize all these operations.
Auto sales funnel example
Sales process has been discussed and broken up by marketers in deep details. There are a set of elements that can be automatized to reach auto sales funnel without human involvement.
Imagine you keep an eye to the sales and have implemented CRM system for sales department. You have a sales funnel starting with useful and free lead magnet. Interested people submit emails that are collected and automatically converted into Contacts in CRM system. Then you send tripwire offers on these emails using robot and triggers. Successful tripwire offers will move your Leads to Deals with core offers. All these iterations are shown as Kanban cards and can be connected with Calendars or Tasks.
Apparently, you will see how automatization make difference to the sales. Then you will want to break into detail other processes and automatize them in the same way.
Alternatives: pros and cons
What options might be available?
– Create new cards in Leads or Deals in Bitrix24. Obviously, it will be easy to get confused with sales and non-sales cards. Moreover, you cannot edit sales funnel or pipeline without destructing an already established system;
– Use Universal Lists in Bitrix24. Yes, it has flexible settings – for example, you can assign responsible persons. But this method is not visual and can be overwhelming to understand from the first sight;
– Use external applications. There are plenty apps for task and project management. The most popular include Trello, Jira, Asana and so on. There are many pros, however cons can outweigh them. It is a one more app that will add headache for team members. Aligning it with daily messengers barely will improve work efficiency. Also, you will need to pay for one more subscription;
– Use another top-rated CRM systems with extensive functions and pay for them the highest prices on a constant basis;
– Hire developers to create add-ons where every interface and option is programmed. Obviously, this is more expensive, time and labor consuming way, but still it used to be highly demanded.
Good price for value
Bitrix24 has introduced a very useful tool, making customization more affordable and easier. Experts refer to SPA as to the quite successful solution in the market.
Apparently, Smart process automation is available only at Professional cloud version of Bitrix24 with Unlimited business tool suite. Those who are aware of SPA possibilities will see that this value worth its pricing, especially comparing to rare alternatives available.
SPA configuration in Bitrix24
Let’s see briefly what settings exactly can be configured in Smart Process Applications.
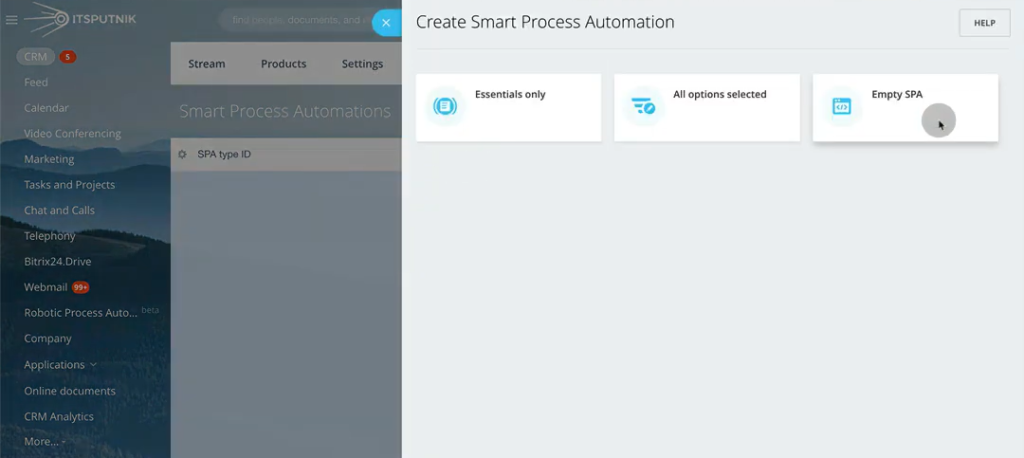
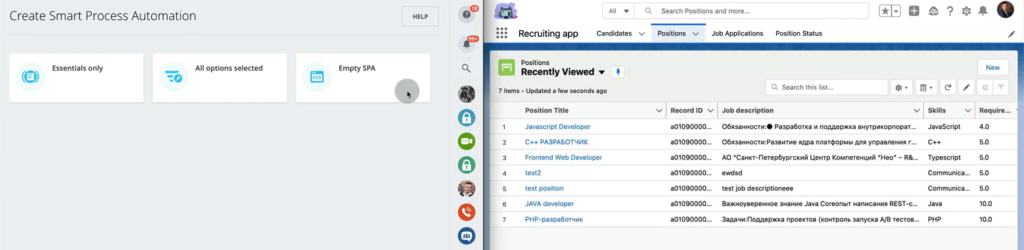
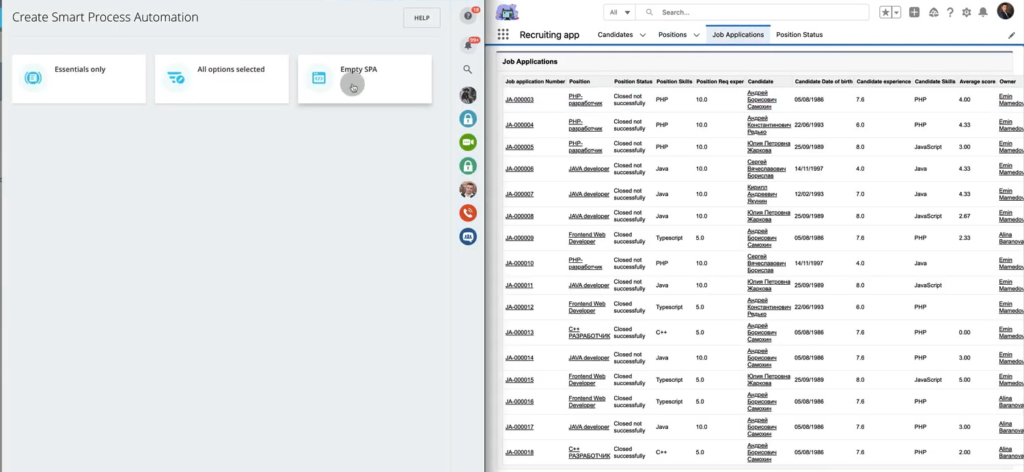
When we create a new SPA, system will show three types: Essentials only, All options selected and Empty SPA. First two options have pre-established settings so we would recommend to create SPA from scratch using third option.
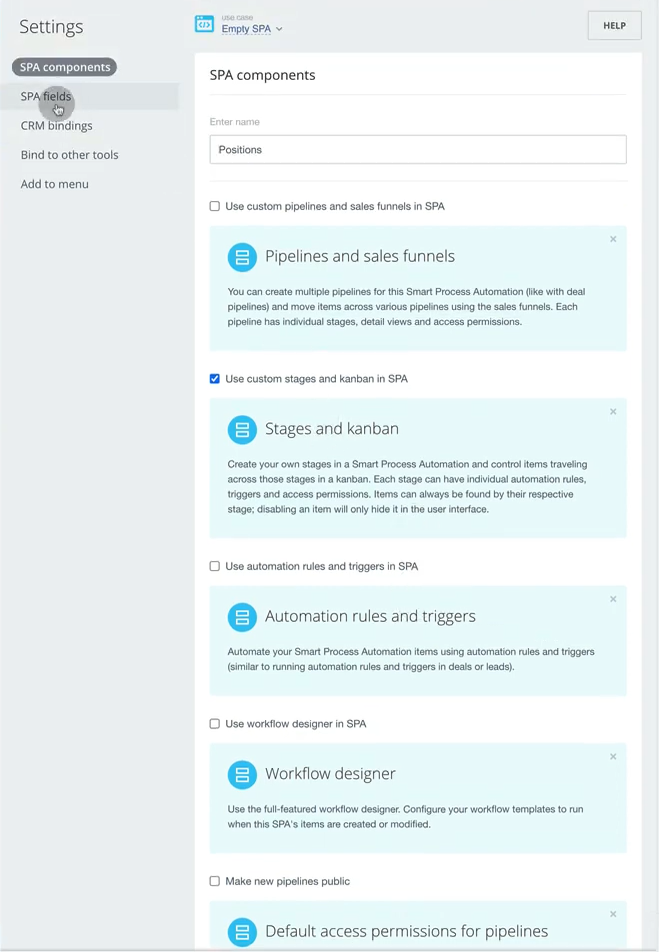
What components we can use and what they mean:
a. Pipelines and sales funnel – new objects can go through pipelines different from sales one. Each pipeline has individual stages, detail views and access permissions. We recommend to use this feature only if your objects have a complicated structure and work flow chart;
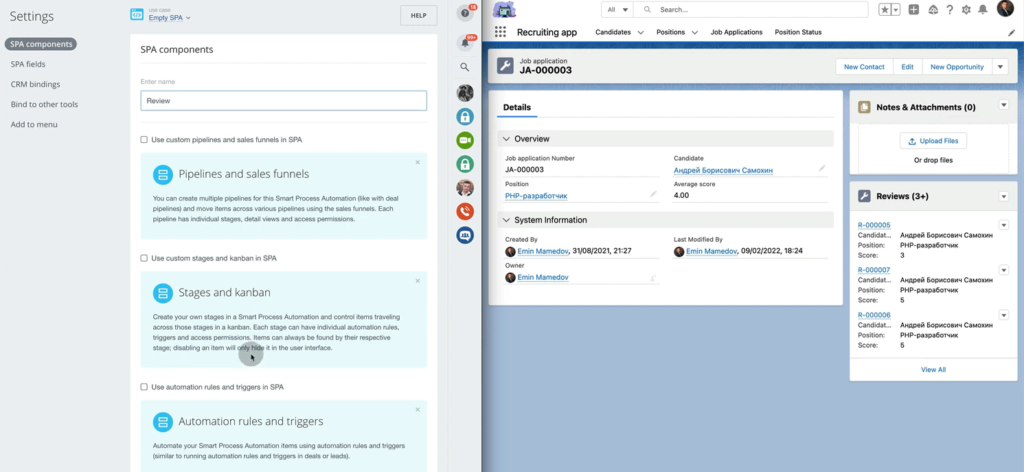
b. Stages and Kanban – enabling this component you can view objects as cards and move them between stages that you determine in advance. Also, you need to have this feature if you want to use robot and triggers. You probably should use this feature to build an intuitive system;
c. Automation rules and triggers – helps to automatically create a new notification or task or, for instance, send automated emails. For above mentioned example with windows, you can set up a robot that will send SMS offer with 10% discount for those who decide to place an order in 3 hours after measurements. Such details can actually improve your sales!
d. Workflow designer – visually compelling tool for building a business process which looks like a diagram;
e. Default access permissions for pipelines – needed when you have several pipelines and want to keep access to them for all users. If not selected, you will need to assign roles manually.
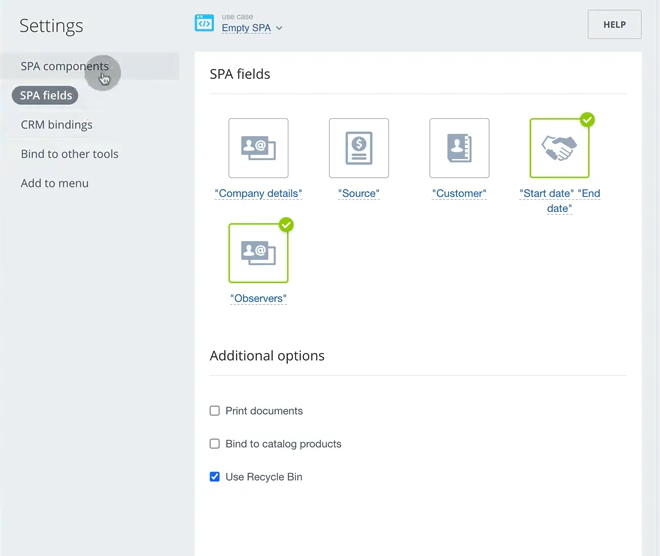
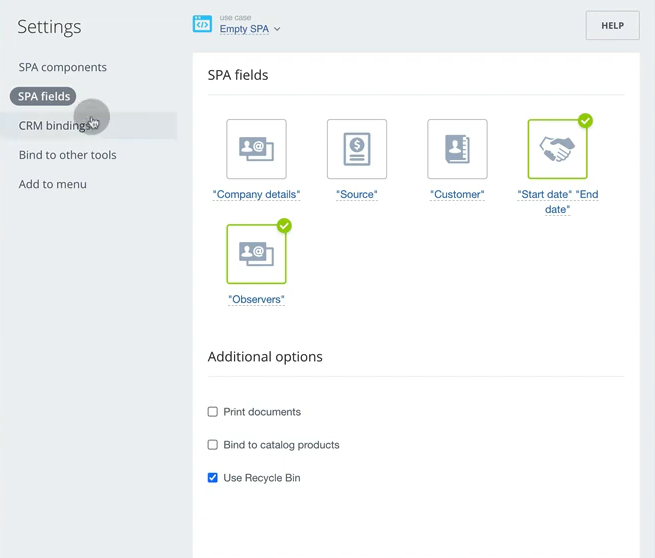
SPA fields
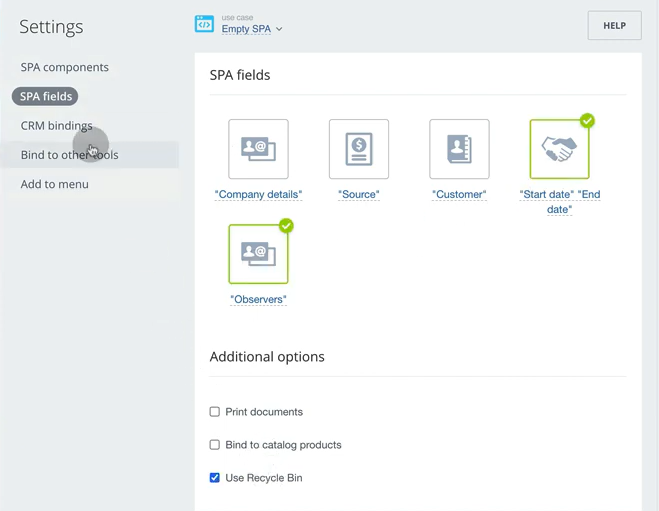
Here user can choose what fields shall be set as standard in new objects’ cards.
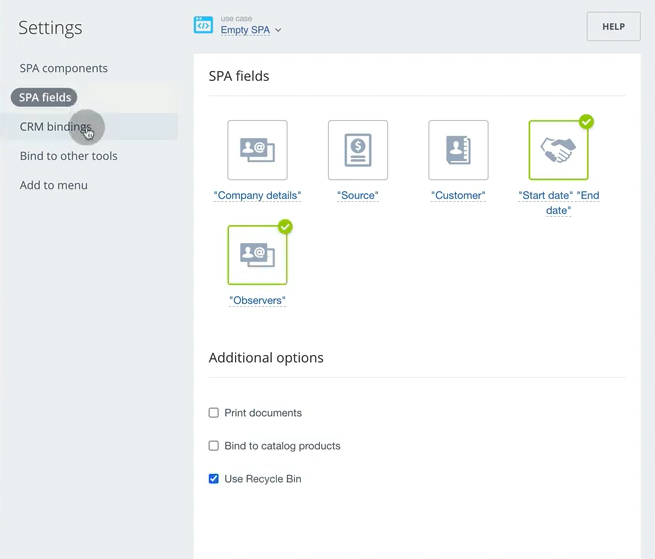
• Observers.
People who will be able to see this object. Additional options involve printing documents right from new object’s card. Also, you can bind SPA with products’ catalog if available. Thanks to ticking “Use recycle bin” we may move some objects there and keep the data in bin before we delete them finally.
It is important to understand what you exactly need and avoid excess fields. The more fields you have, the less comfortable and understandable card will be.
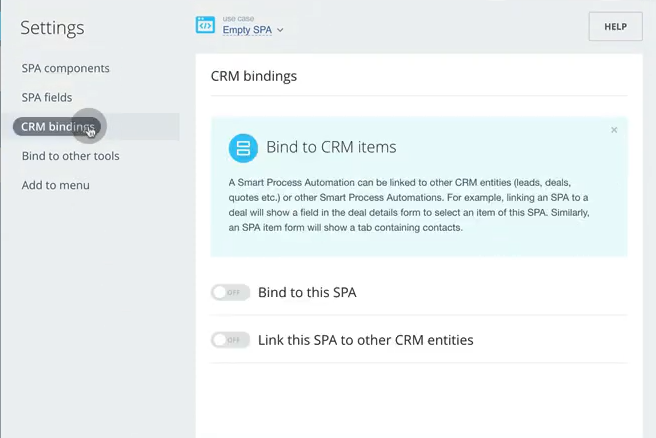
• CRM bindings
This actually is a cherry on the cake – user can bind new objects with standard CRM objects, i.e. Leads, Deals, Contacts and Companies. If we describe sales as a heart of the business, this feature will connect body parts though arteries. But to keep things simple, you should enable this feature only if connection is crucial.
• Binding to other tools
User can associate new objects not only with CRM, but also with Calendar, Tasks and Task templates. Enabling this feature, you will see these elements in drop-down lists.
• Add to menu
Users can create section in left panel and access SPA from there for better navigation.
Simplify procedures
There might be a big temptation to enable a lot of features in order to get an outstanding functionality. However, you should be clear-eyed and build as simple system as you can.
Nice to hear, you can change your mind at any time and edit above mentioned parameters and add or remove them.
Let’s see how we can create a HR module for recruiting using Bitrix24 tools.
As a reference, we will use the same app we created in Salesforce. There we have such objects as Candidates, Positions, Job applications and Position status.
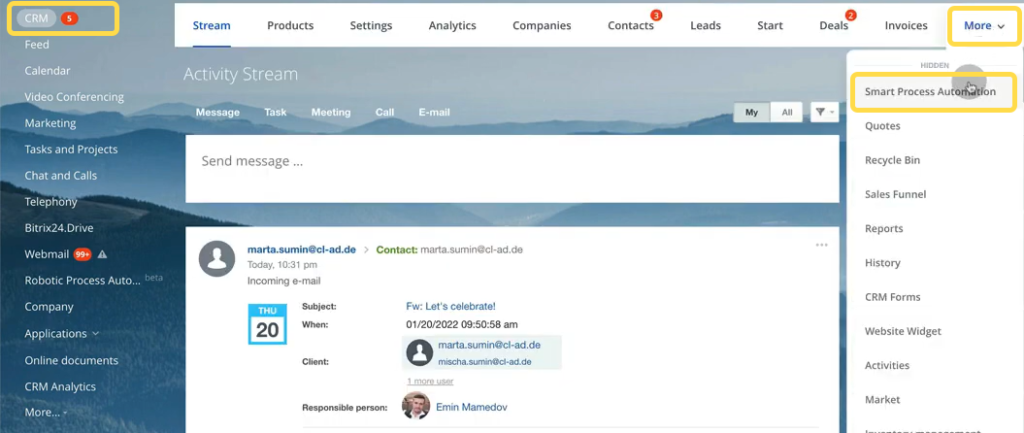
1. First, in side panel go to CRM, choose More and click Smart Process Automation.
2. Create Empty SPA.
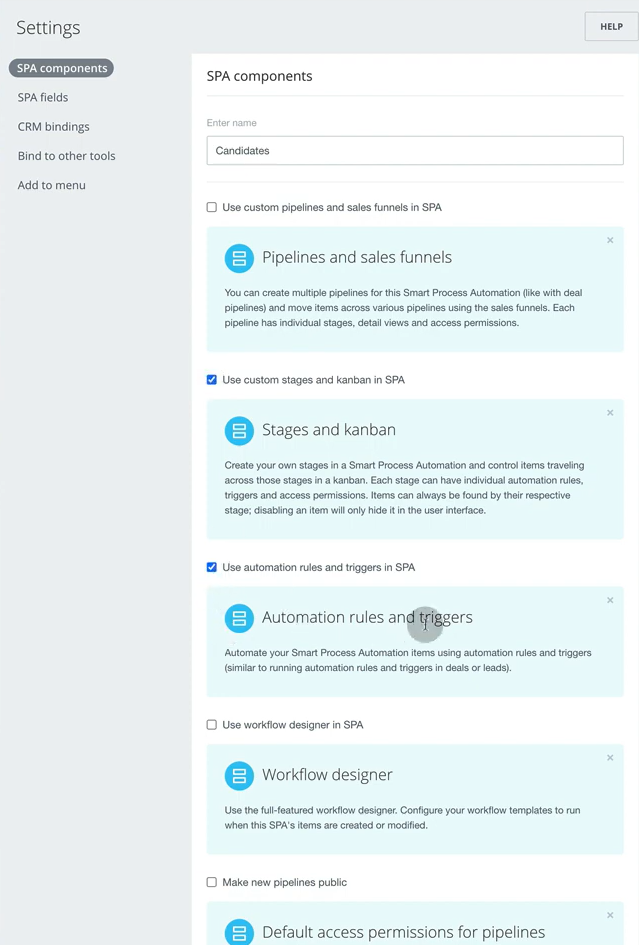
3. Name this SPA as Candidates. Tick “Use custom stages and Kanban in SPA”, because we will need to move our candidates as successful or not successful. P.S. later we will untick this feature but now we will leave it as stated.

4. In SPA fields choose “Start date, End date” and “Observers”.
5. In CRM bindings and other settings we don’t need anything else, so click Save.
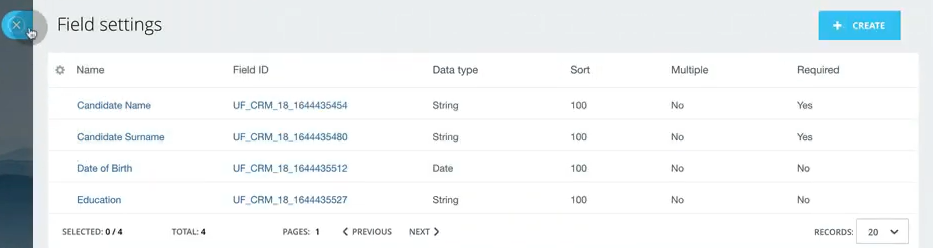
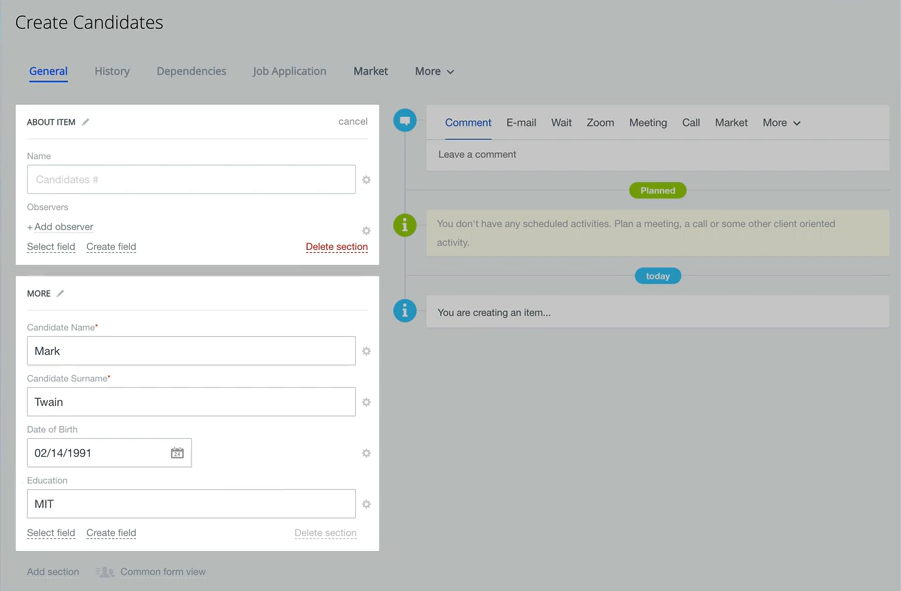
6. Now we have to make Candidates SPA and add the following fields: Candidate’s name, Date of birth and Education as shown in Salesforce example.
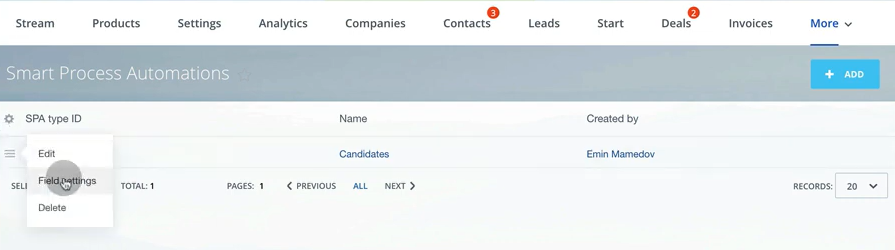
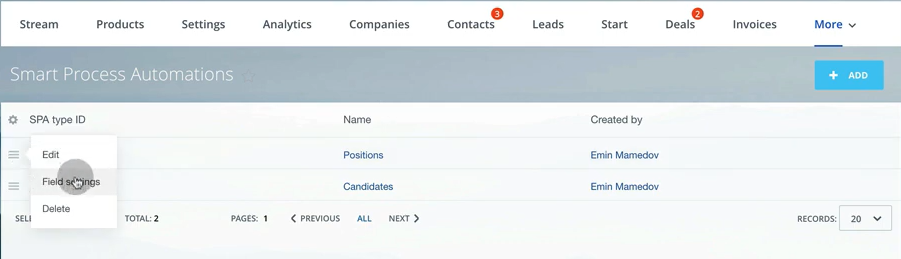
7. To do so, click on settings at the right side from Candidates SPA and choose Field settings.
8. Click +Create

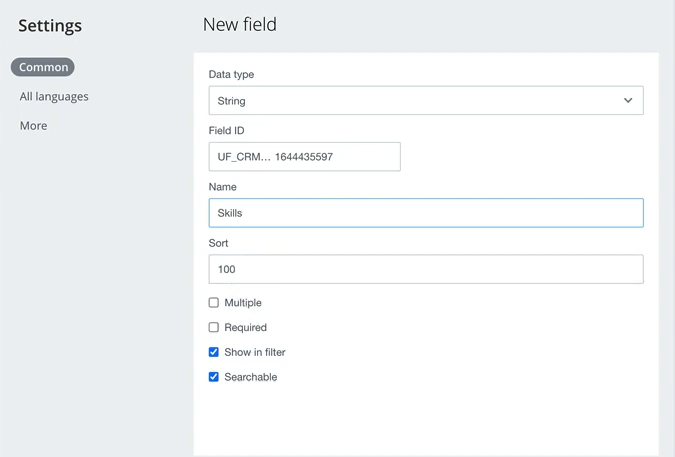
9. We will add new field. Data type is String, which is name.

10. Type Candidate Name as a field name. Choose Searchable and be sure that Multiple is unticked. Click Save.

11. Next do the same to create Candidate Surname field.

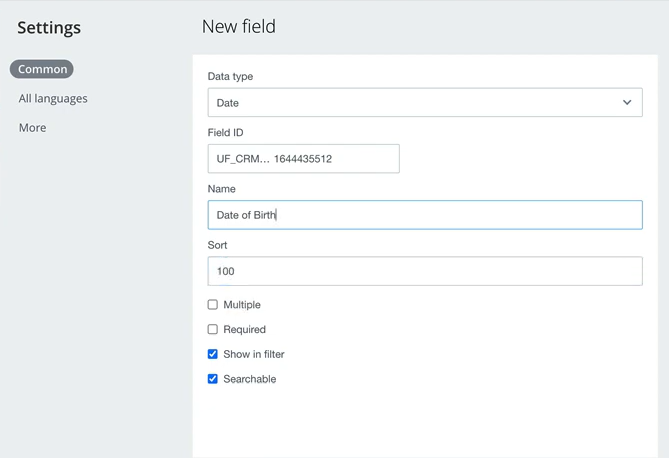
12. Next create Date of birth field. In Data type choose Date. You can untick Required if DOB is not necessary to state.
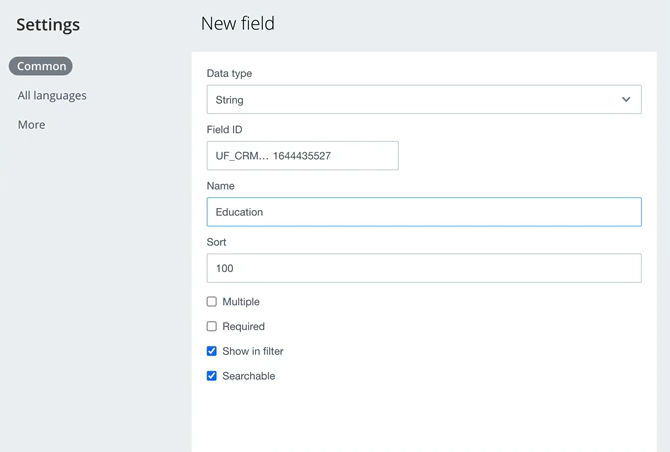
13. Next create Education field as shown below.
14. Now our Candidates SPA shall contain four fields.
15. Next step is to create second SPA called Positions. Click +Create and Empty SPA
16. Name it Positions. Tick “Custom stages and Kanban in this SPA”.
17. In SPA fields choose same fields as for previous SPA. Click Save as we don’t need to use anything else.
18. To add fields in Positions SPA, click Settings – Field settings
19. Add new field, call it Skills.
20. Next we will create Job Application SPA.
21. No SPA components are required, so choose SPA fields as shown below
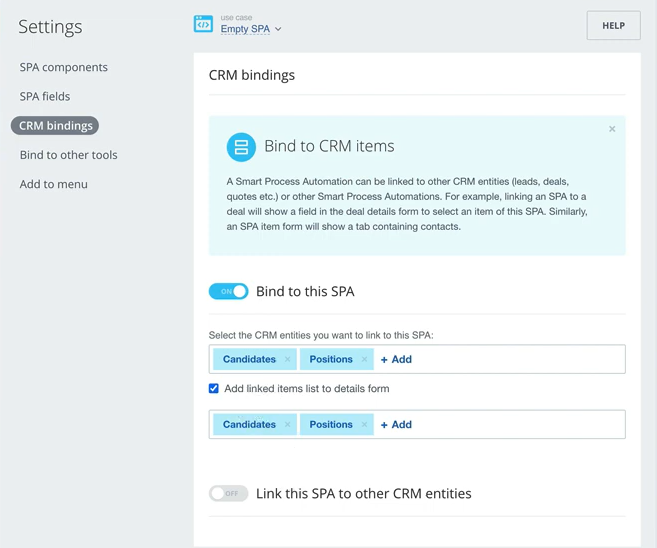
22. Here we will need to add CRM bindings. We will bind Job applications with two other SPAs: Candidates and Positions. Select them in both fields below: in first we will be able to connect entities to this SPA, in second – connect this SPA to entities instead. Click Save.
23. Last SPA that we need to create is Review
24. Choose same SPA fields
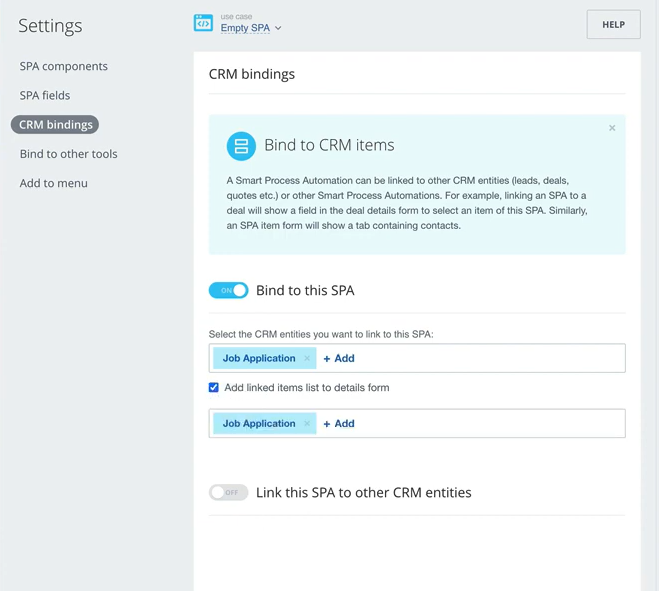
25. Bind Reviews with Job Application SPA. Click Save.
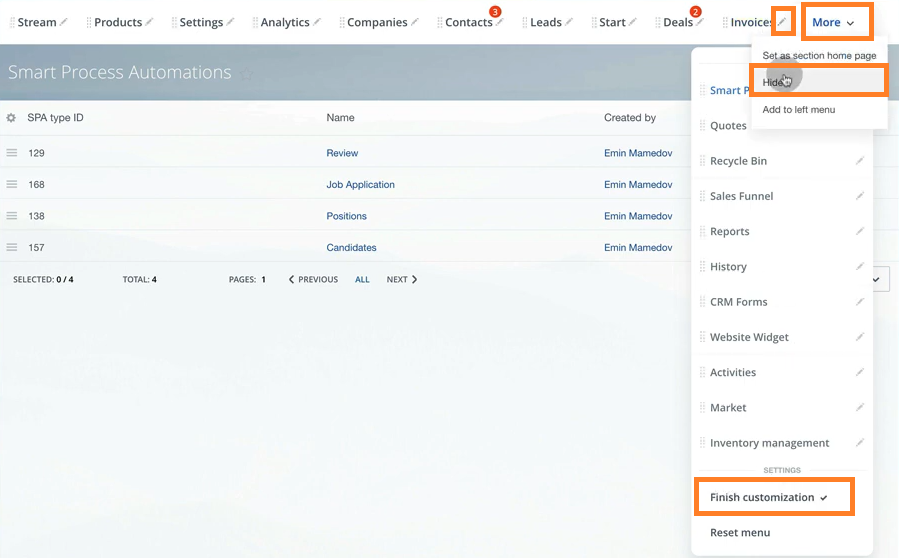
26. Hence, in Smart process automations we see our SPAs as a list. To organize upper menu columns click More – select Configure menu – then click pencil icon next to unwanted blocks – choose Hide.
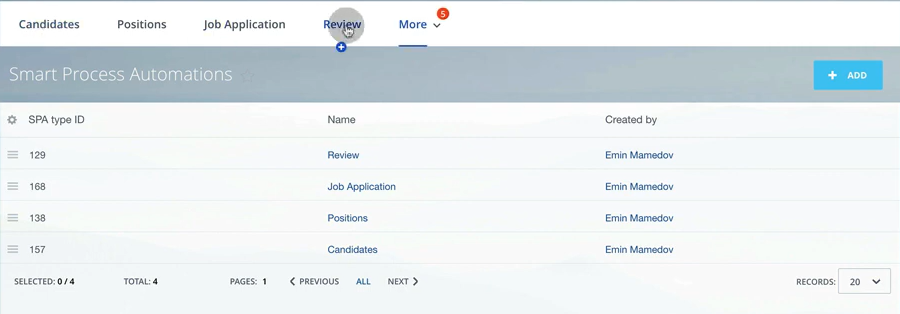
27. Finally, we have only four required blocks shown.
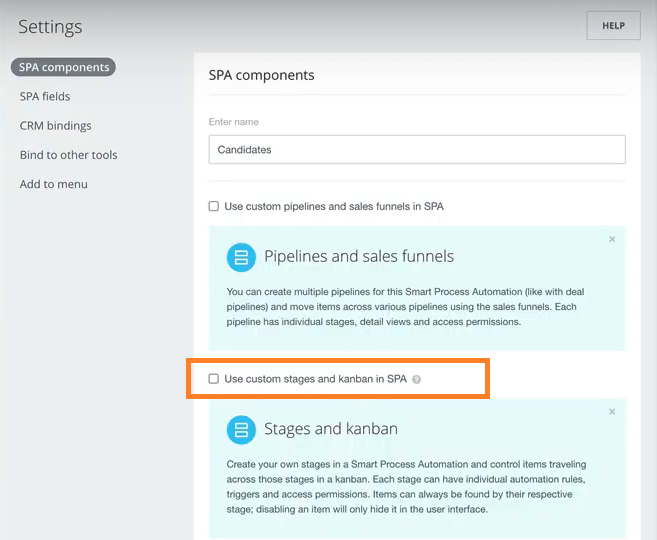
28. As we see in Salesforce example, we don’t actually need Kanban view for Candidates. Therefore, we need to go to Candidates SPA settings and click Edit

29. Here uncheck “Use custom stages and Kanban in SPA”. Doing the same steps, you can make changes in any settings of SPA.
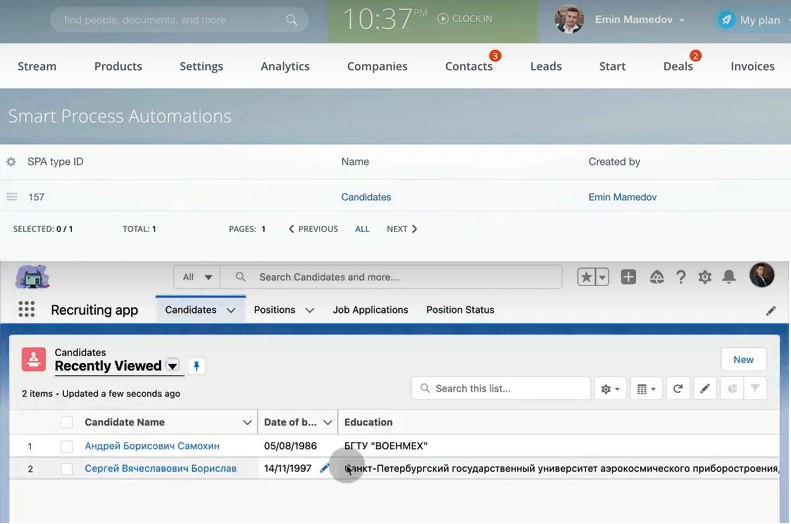
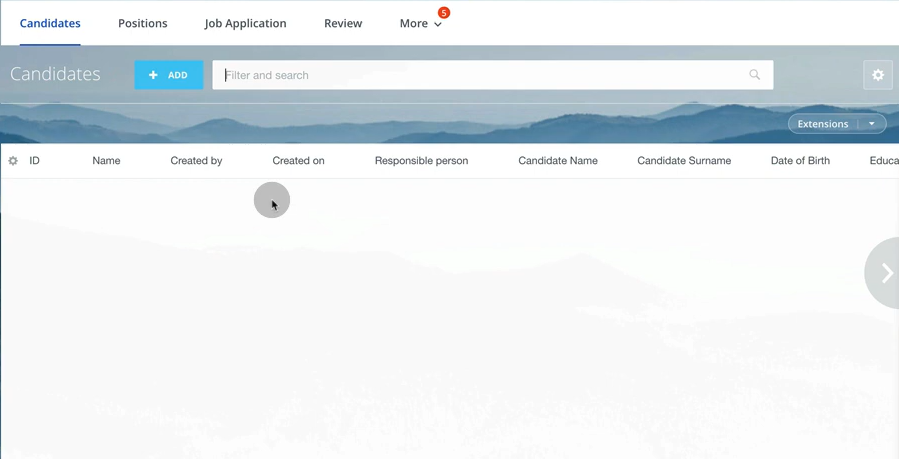
30. So now we will have our candidates only as a list.
31. In Positions we will adjust our stages to get the same as in Position Status in Salesforce. Change names of two stages to Pending and Opened and delete extra stages.
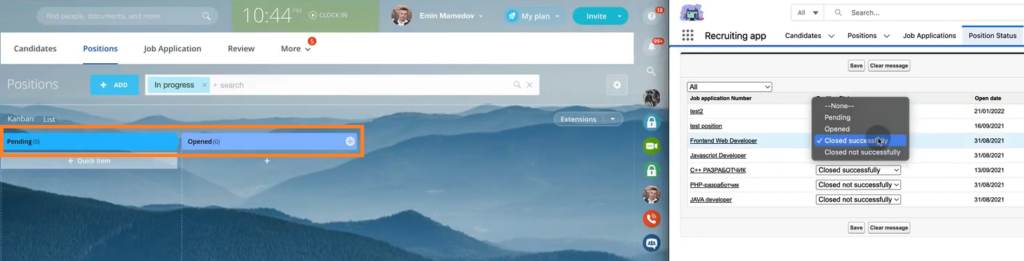
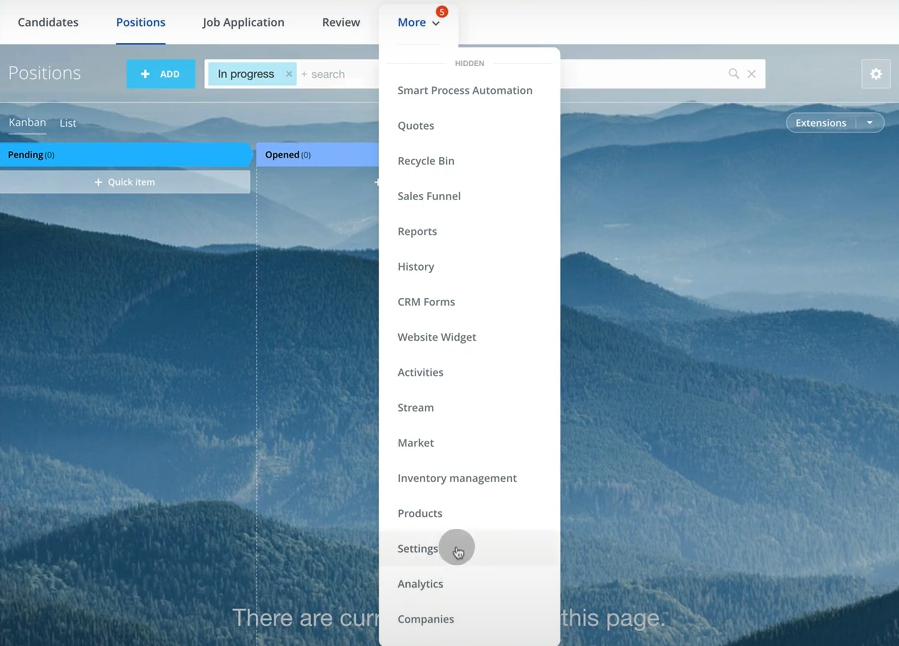
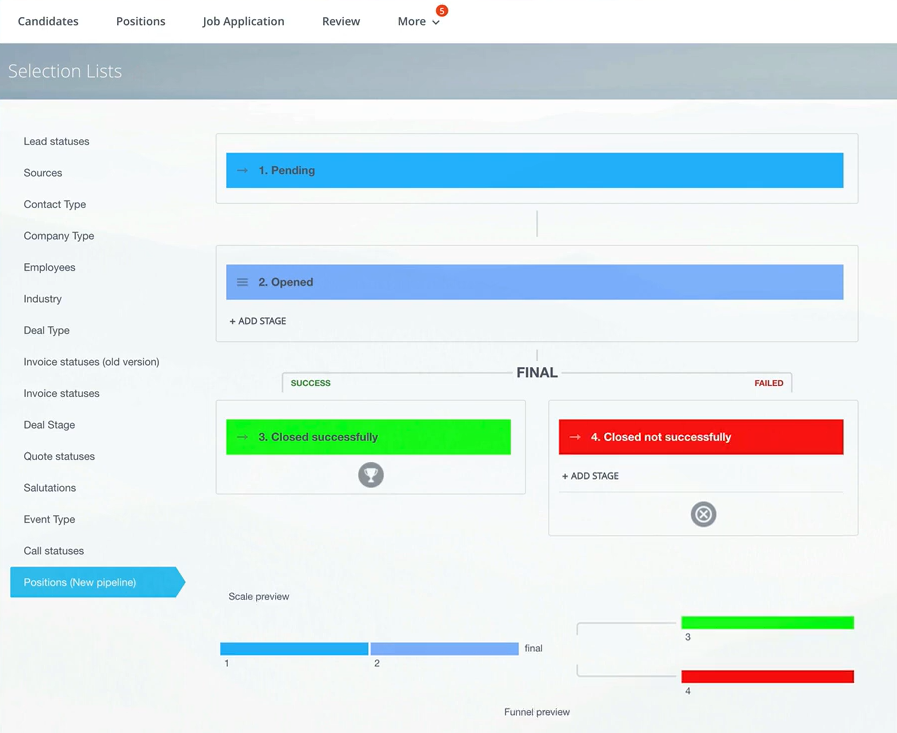
32. To have Closed successfully/not successfully stage we need to go to More – Settings.
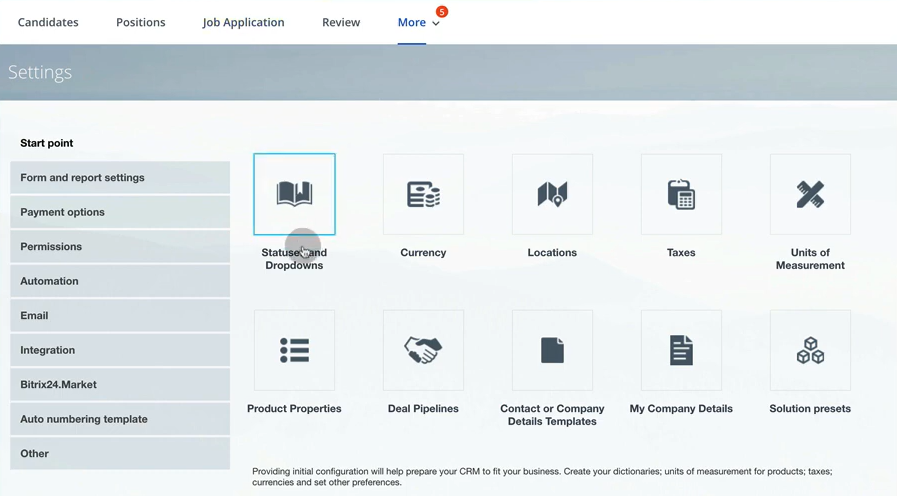
33. Choose Statuses and Dropdowns.
34. In window opened go to Positions (New pipeline).
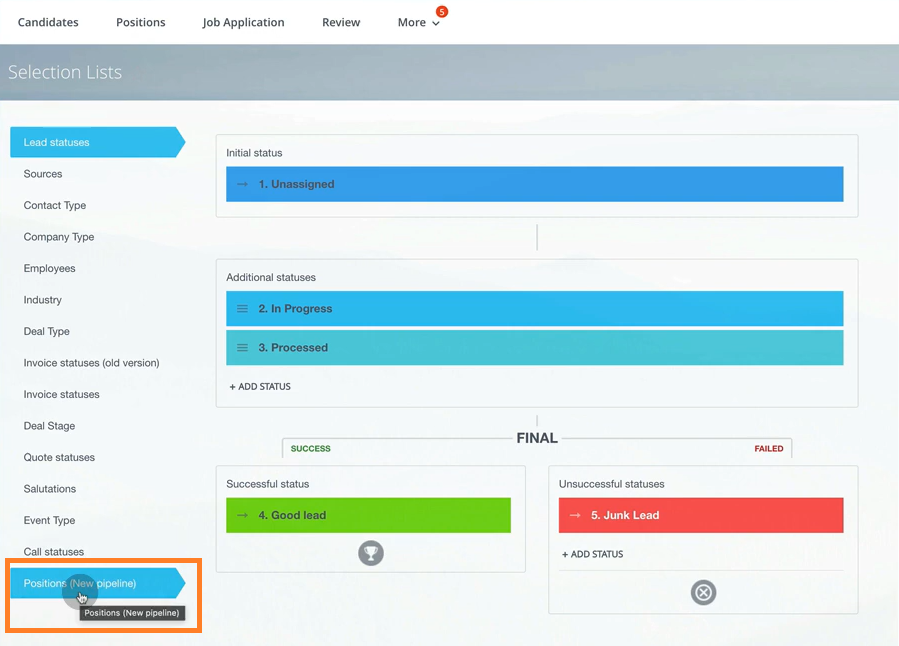
35. Here change final statuses from Success to Closed successfully and Failed to Closed not successfully. Click Save
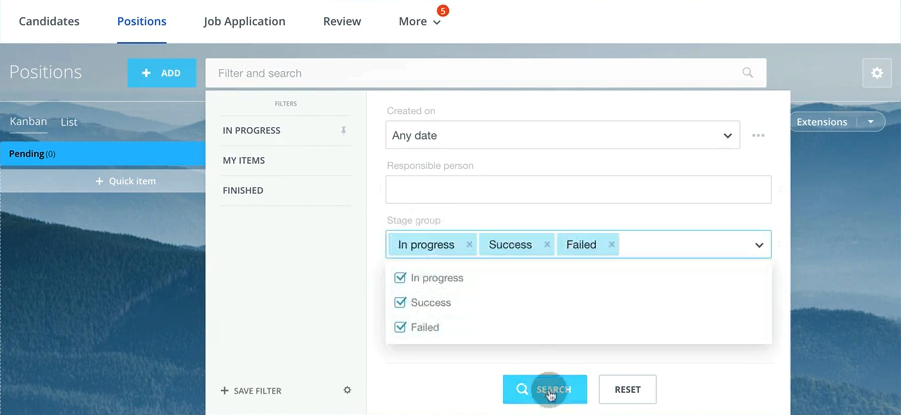
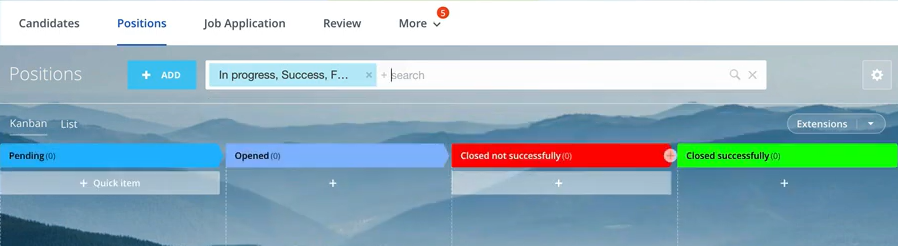
36. Go back to kanban view of Positions. Check filter and choose all stages in Stage group
37. Now we have all four stages and can move our Positions between them.
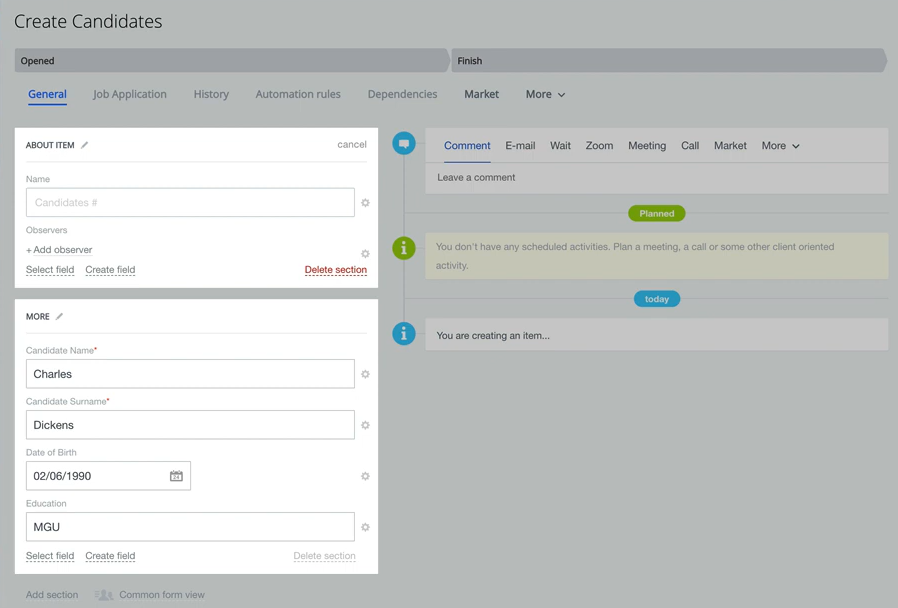
38. Let’s test our system. Go to Candidates and add a new one. Click ”Select field” under name and add additional field – Observers.
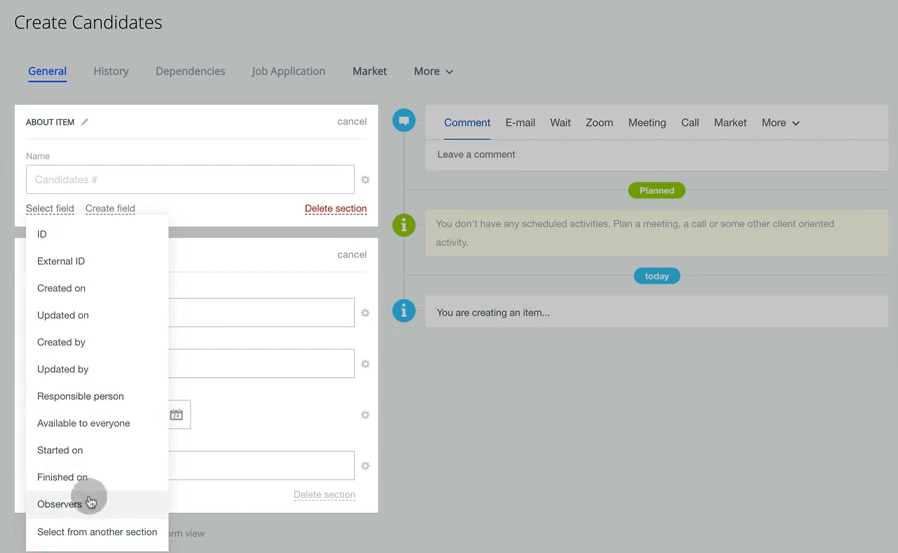
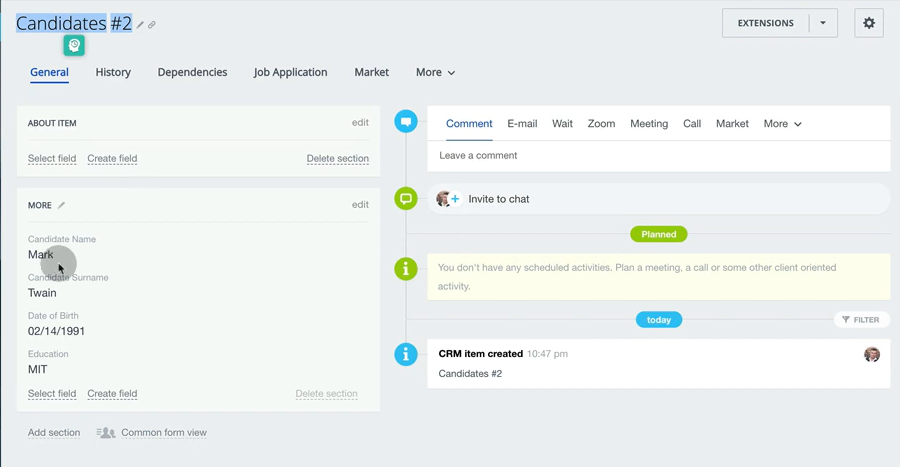
39. Type candidate’s name, DOB and Education. Click Save
40. We see that system automatically gave ID as Candidates #2. Let’s change it to have name and surname shown for easy navigation
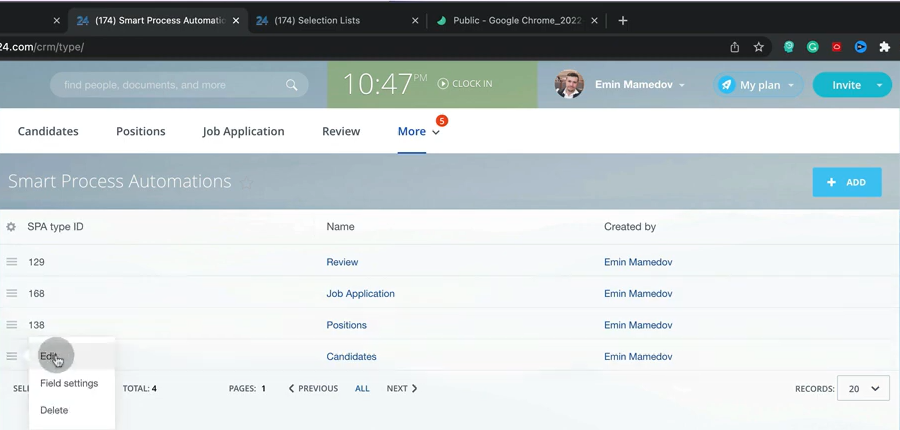
41. To do so, go to Smart process automations, find Candidates. Go to settings – Edit
42. Tick Stages and Kanban and Automation rules and triggers. Second component doesn’t work without the first one, so we need to choose both.
43. Then go to Candidates object and in Kanban view delete unnecessary columns.
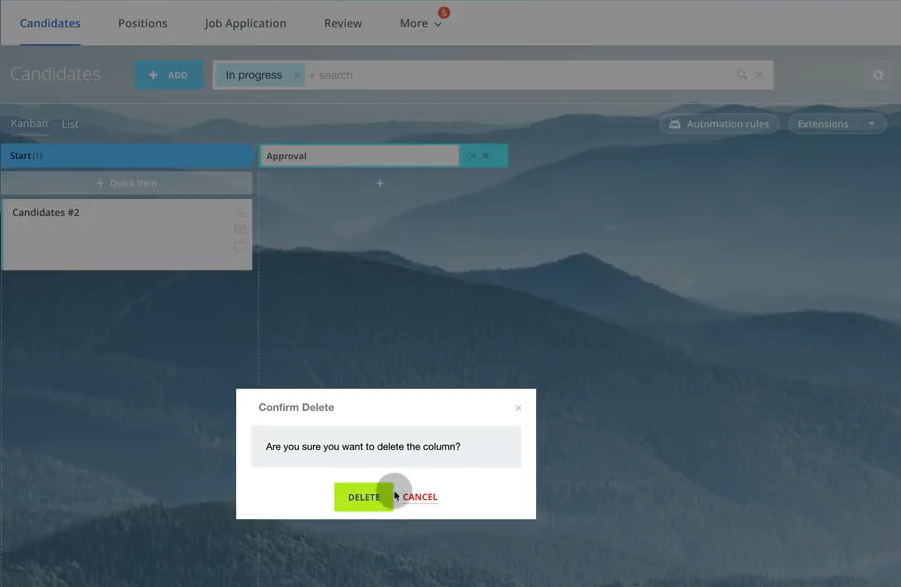
44. Finally only one column is left. Name it Opened.

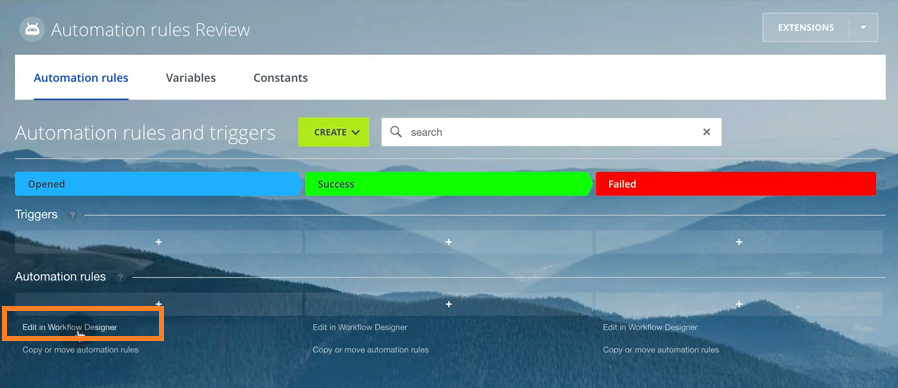
45. Then go to Automation rules

46. Add new Automation rules – For employee – Edit element

47. In name field insert ID, then Candidate name and Candidate Surname
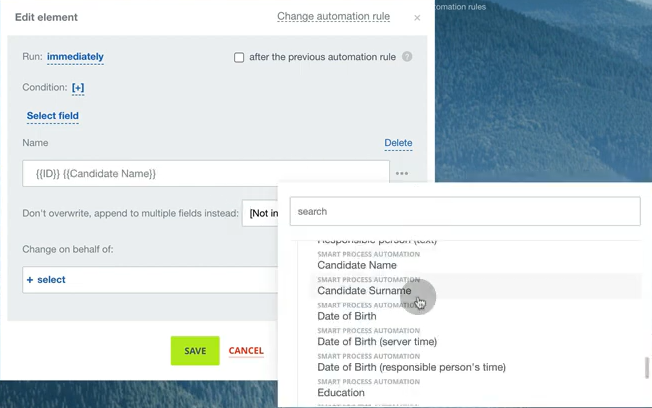
48. To make it more understandable, add # before ID. Click Save.
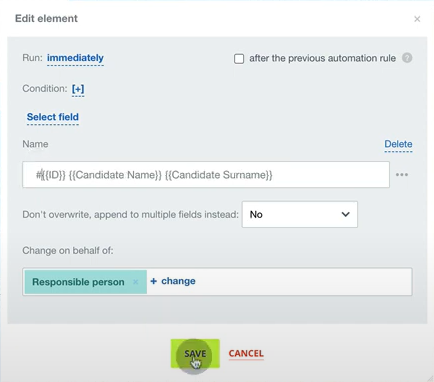
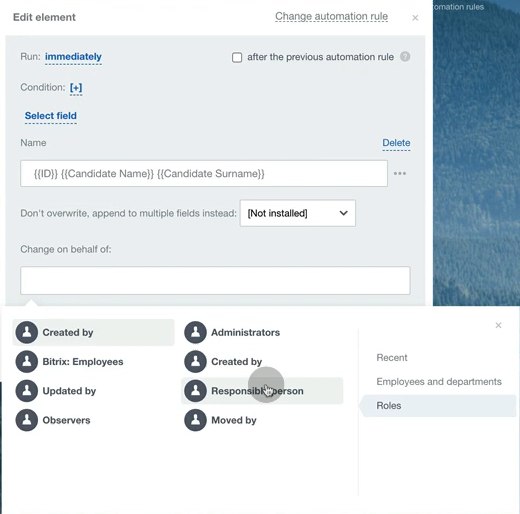
49. Also add responsible person for that particular candidate. Click save. As rule is run immediately, robot will work as soon as we create a new candidate in Opened stage.
50. Let’s create a candidate again.

51. We see how information about our candidate looks as a list. To change the view, click on settings gear icon.

52. Leave only highlighted blocks as shown below.
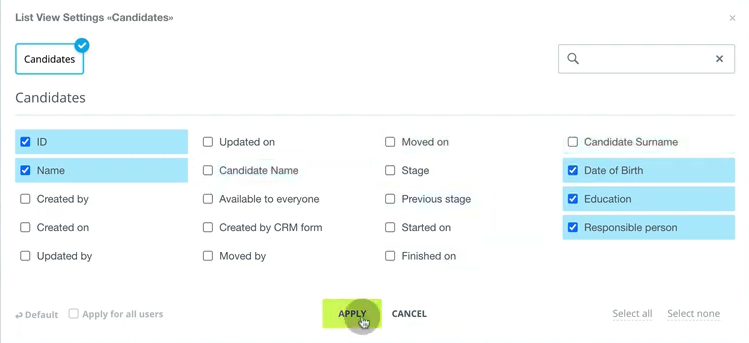
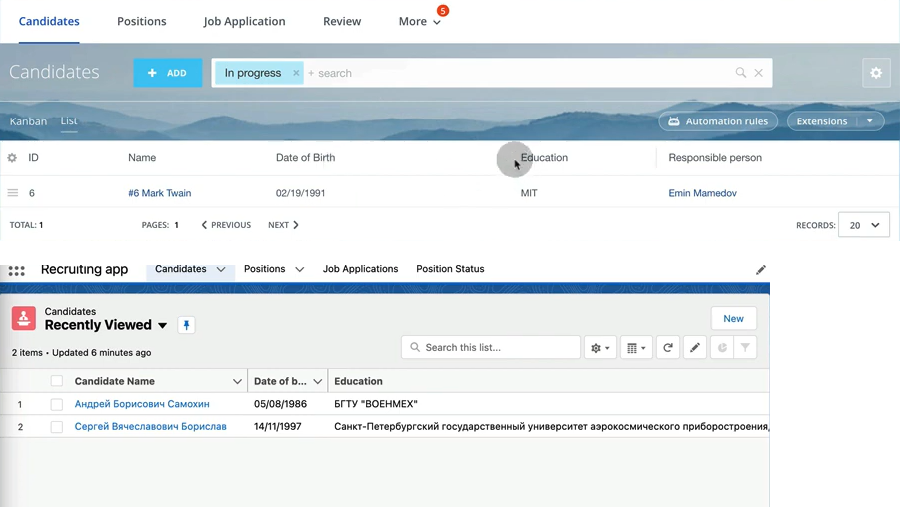
53. Now candidates list looks very similar to salesforce example
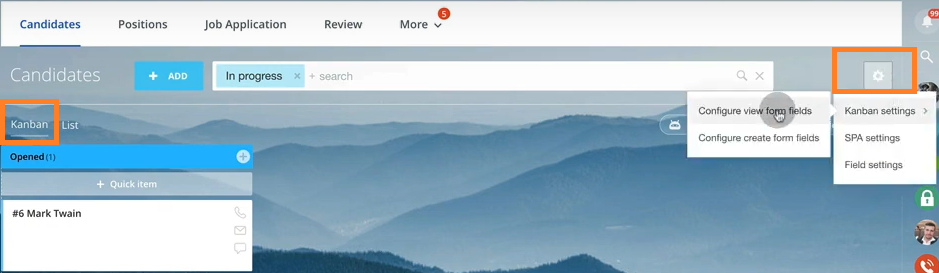
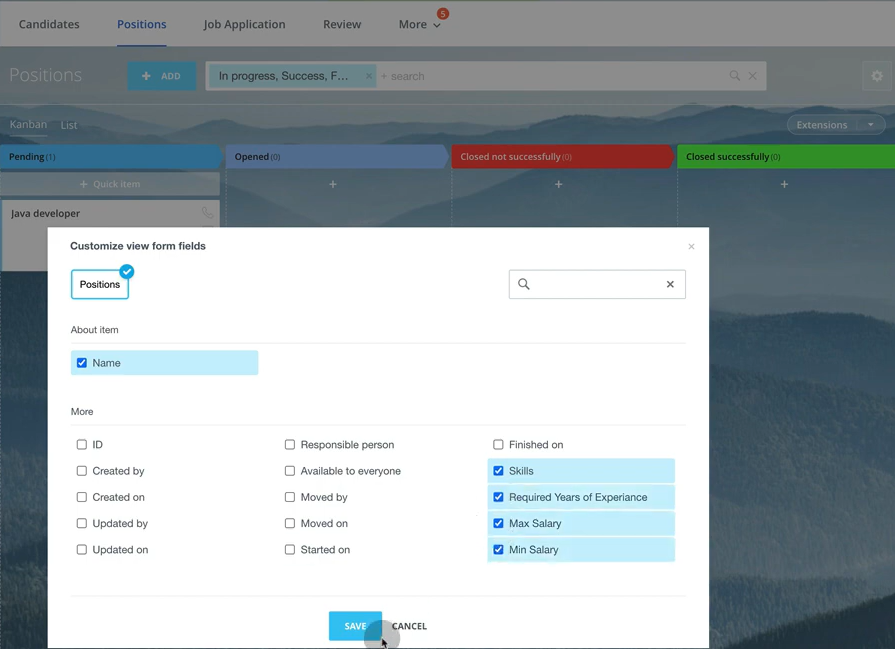
54. To make candidate card look more informative, go to Kanban – Settings – Kanban settings – Configure view from fields
55. Tick Responsible person, Date of Birth and Education
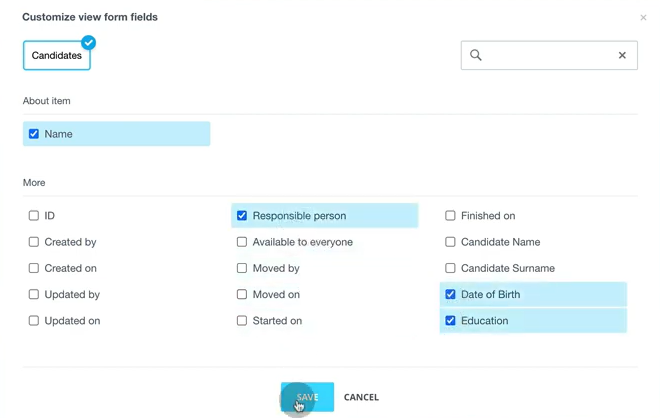
56. Now candidate card in Kanban view looks informative and we can identify him/her from glance.

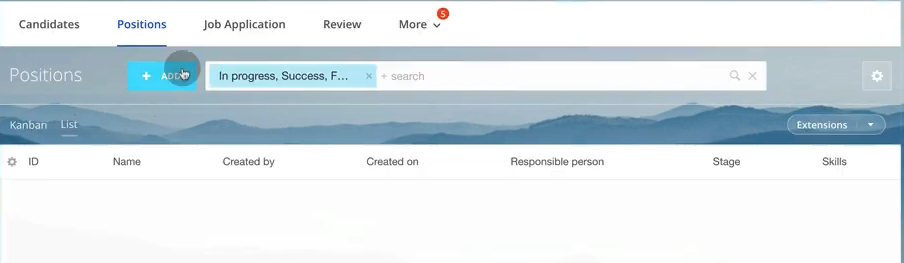
57. Next, go to Positions and click Add
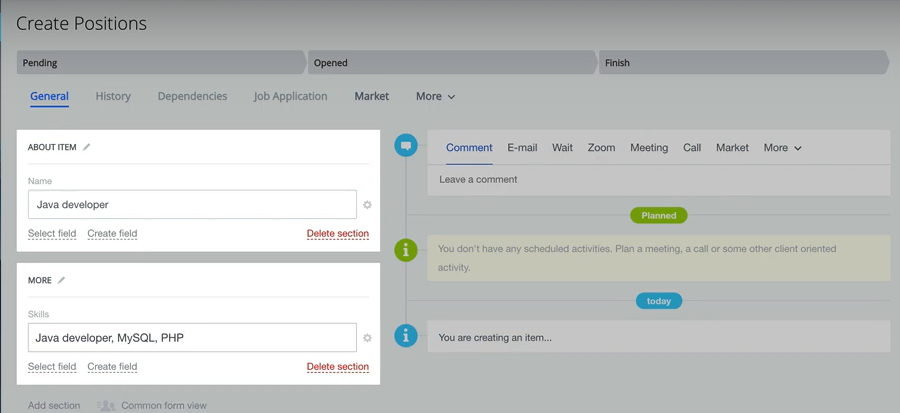
58. In this example we created Java developer position. In skills specify required parameters.
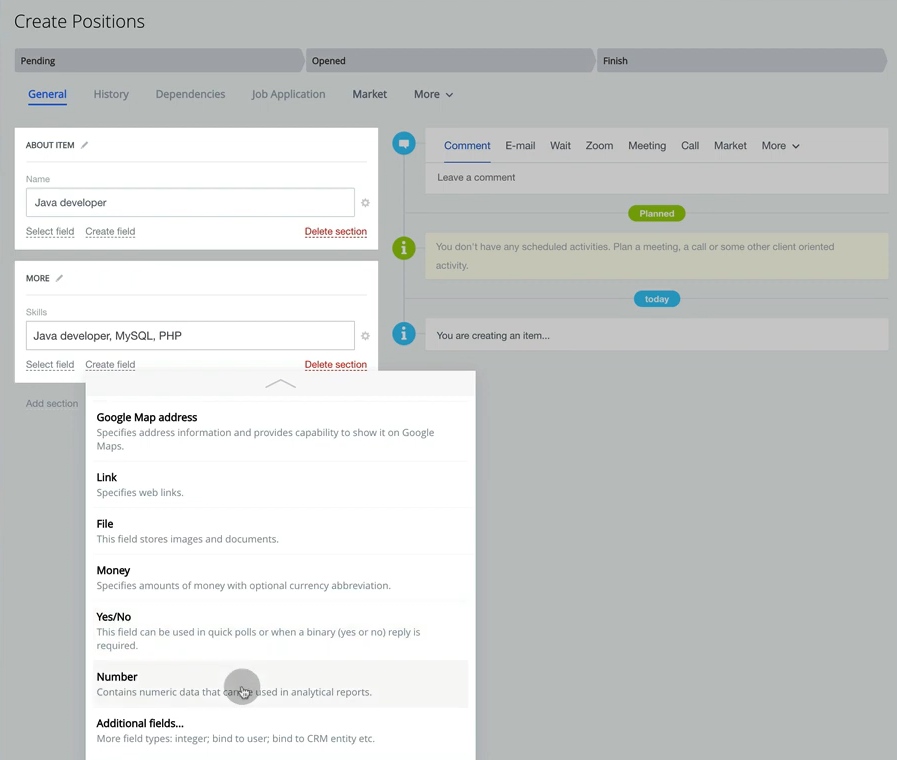
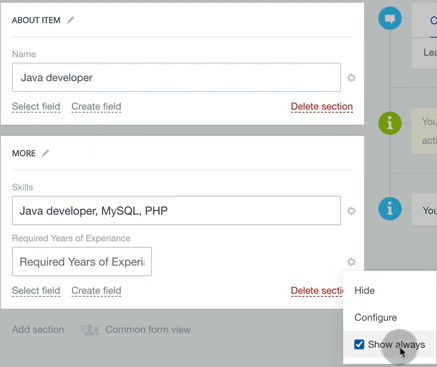
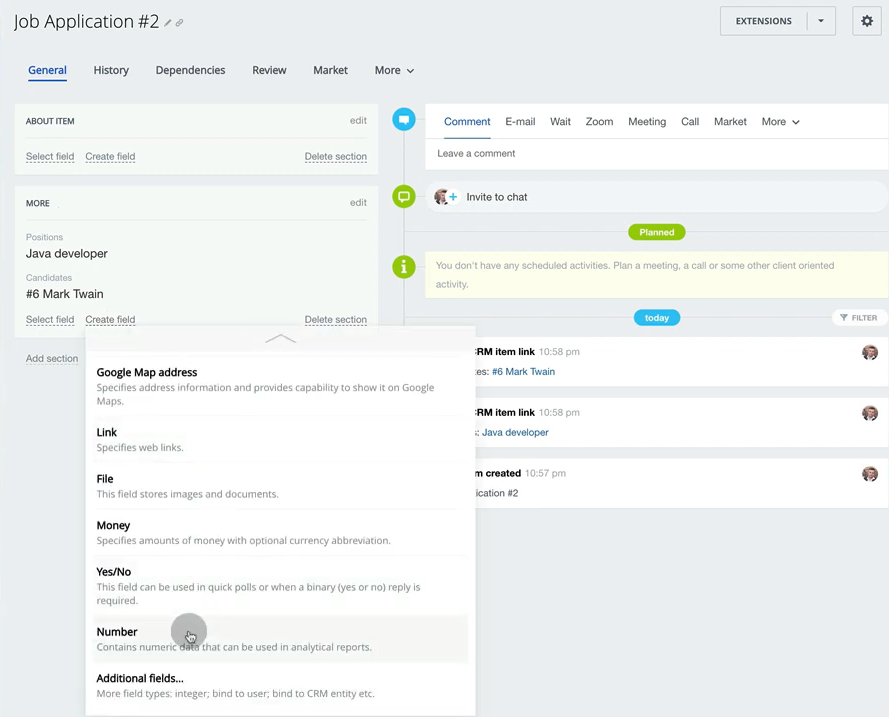
59. Let’s add one more field – Required years of experience. To do so, select Create field and choose type of the field, in this case it is Number.
60. Type the name of the field and tick Show always.
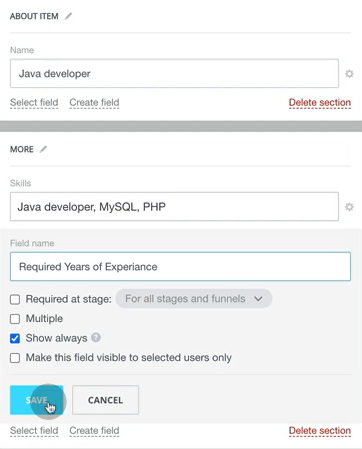
61. Double check that Show always mode is on, clicking on the gear icon.
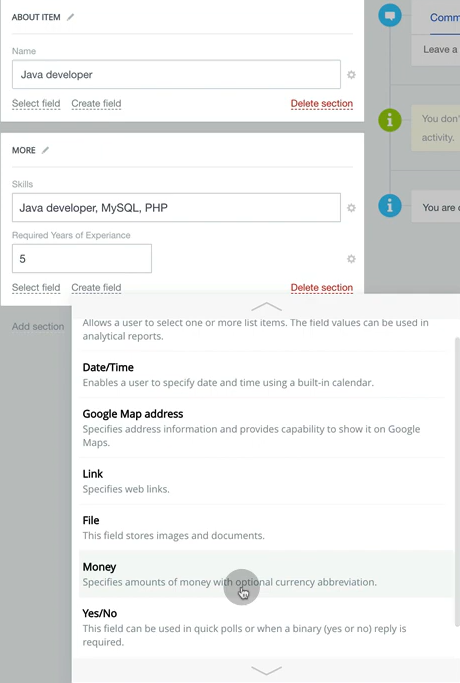
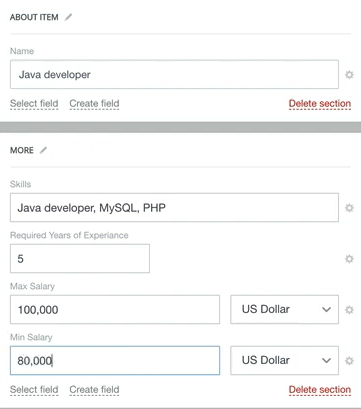
62. We will also add max and min salary. Repeat steps 59-61 but with data type as Money.
63. After creating fields, fill them as per requirements. Click Save.
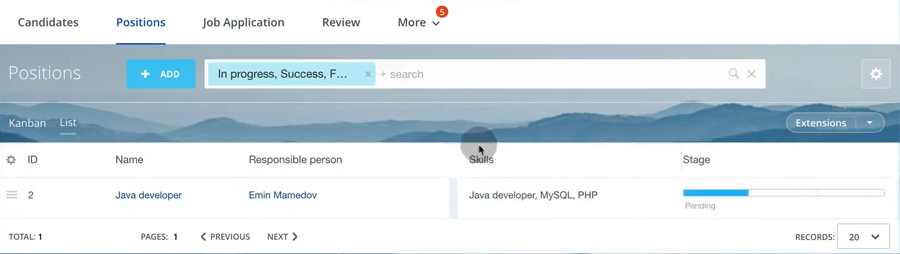
64. In list view of positions delete Created by and Created on columns
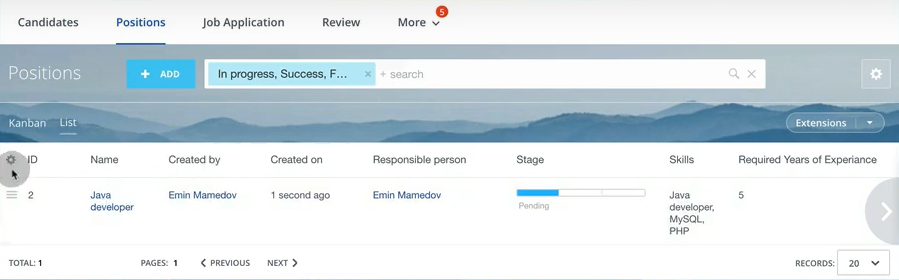
65. Moving columns, make the list view more understandable
66. In Kanban view we also edit Position card view, ticking highlighted blocks in settings as shown below
67. Now Positions cards will look like that

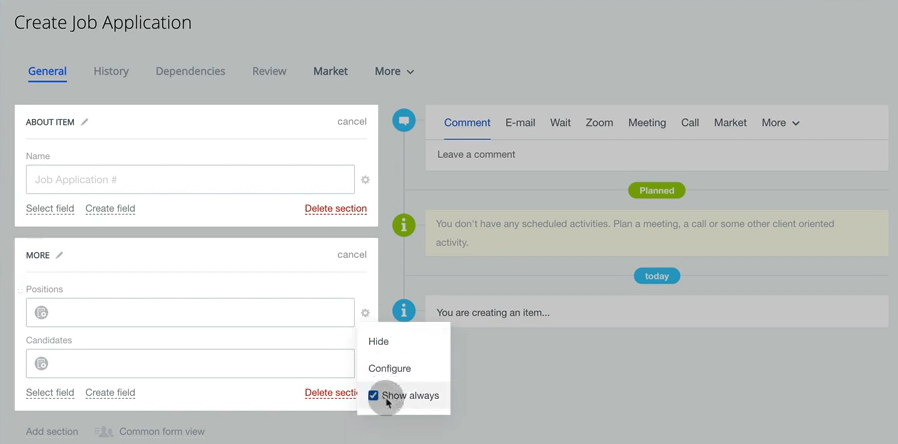
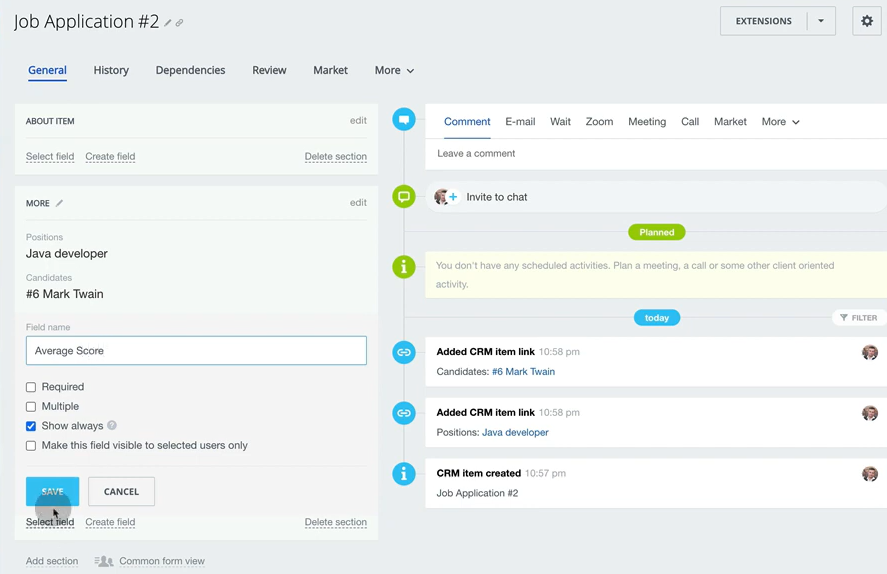
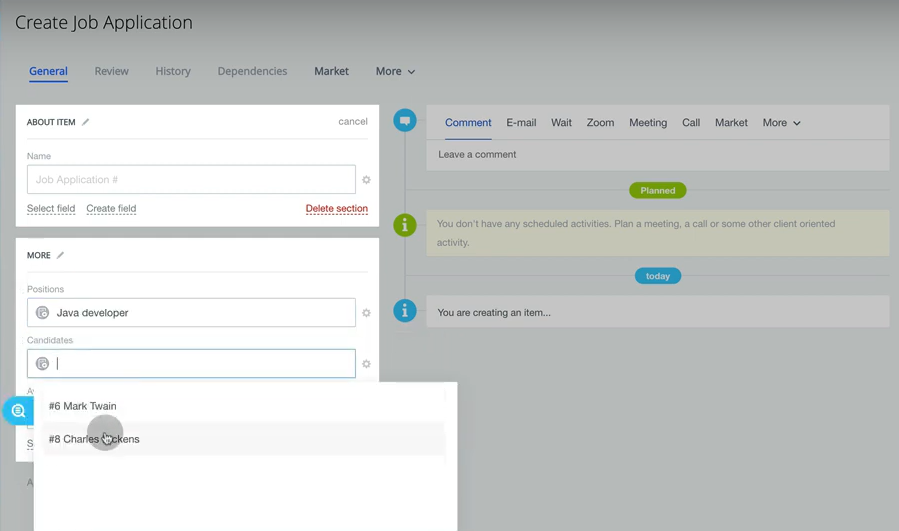
68. Next step is to create new Job application. In more section click Select field and find Candidates and Positions

69. Make sure that both fields have enabled Show always mode.
70. Then you can choose relevant Position and Candidate. In our example we have only one position and candidate.

71. We will add one more field called Average score. Choose Data type as Number.
72. That average score will be automatically connected with reviews. We will disclose this later.
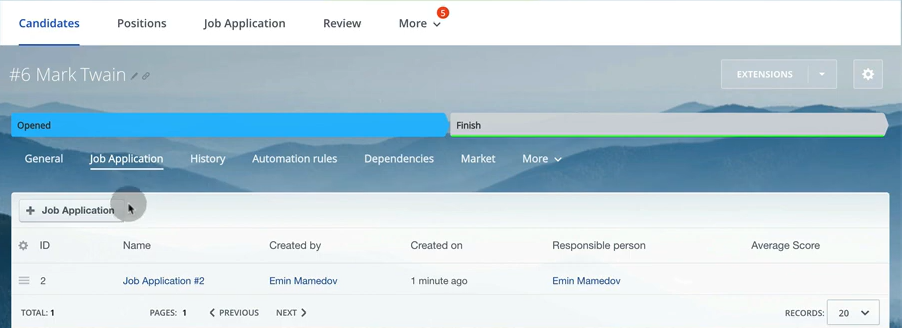
73. Therefore, if we go to Candidate, inside we can choose Job Application to see how many applications he has made to different positions
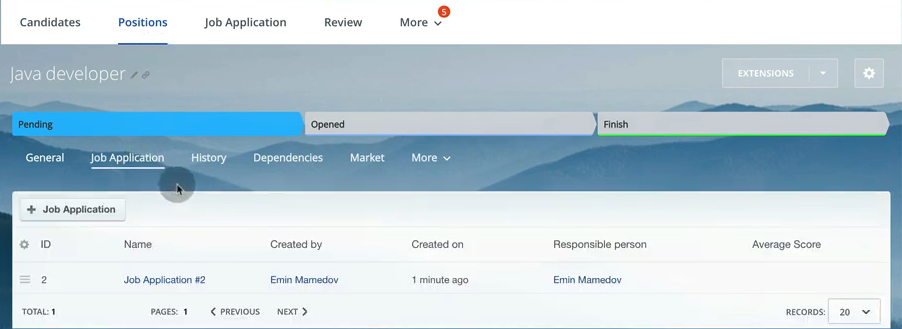
74. Same story for Positions. If we click on particular card and go to Job applications, we will how many applications came for certain Position
75. Let’s add one more Candidate
76. And create one more Job application

77. Here for Java developer position we will state our second candidate
78. And when we go inside Java developer position, we will see 2 job applications

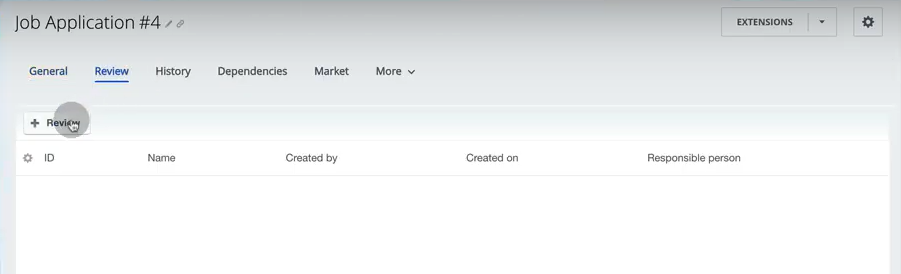
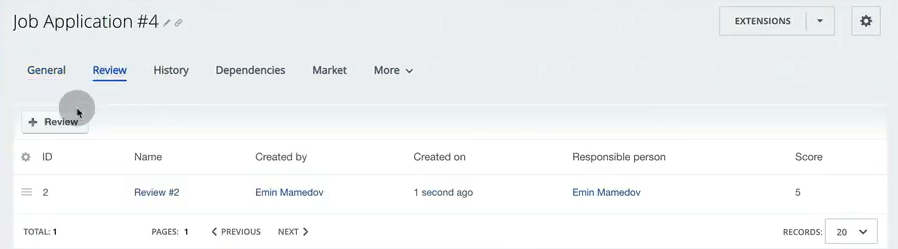
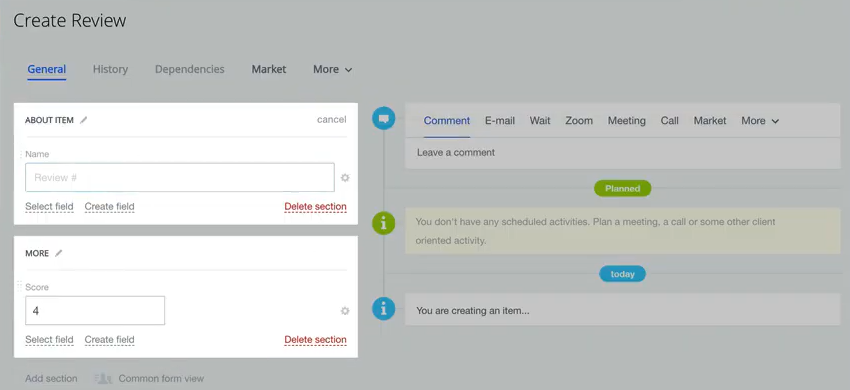
79. Let’s observe Reviews object. In real world each application can have several reviews from different departments and people. To add this feature, in Job application #4 go to Review and click +Review
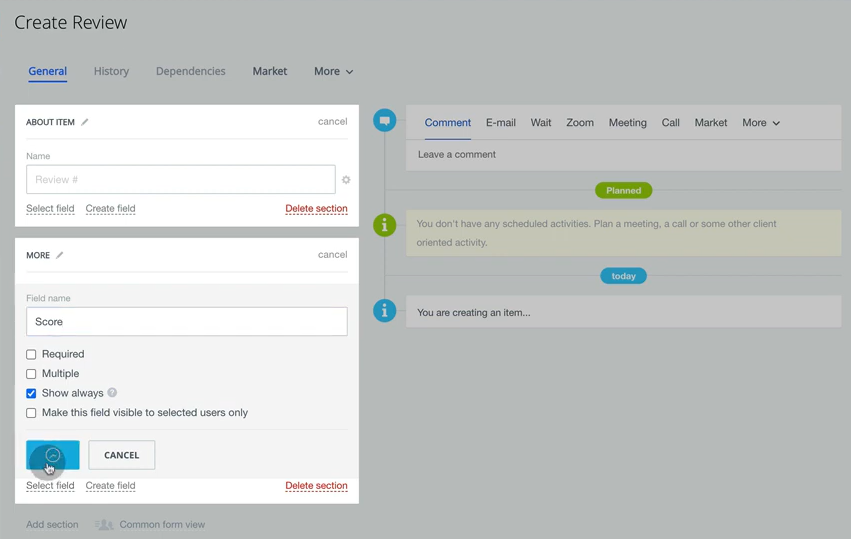
80. We can create this field right from Job application. Name will be given automatically. Add Score field so everybody could add specific score.
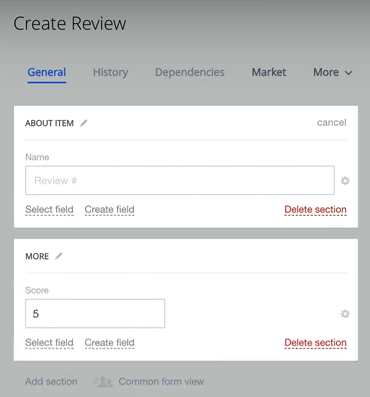
81. Let’s add score 5 in this particular application. Click Save.
82. We see that this application has 1 review. To add more, click on +
83. Add one more review with 4 score.
84. Now this application has 2 reviews.

85. Also you can go to Reviews to see all of them and sort it using filters.

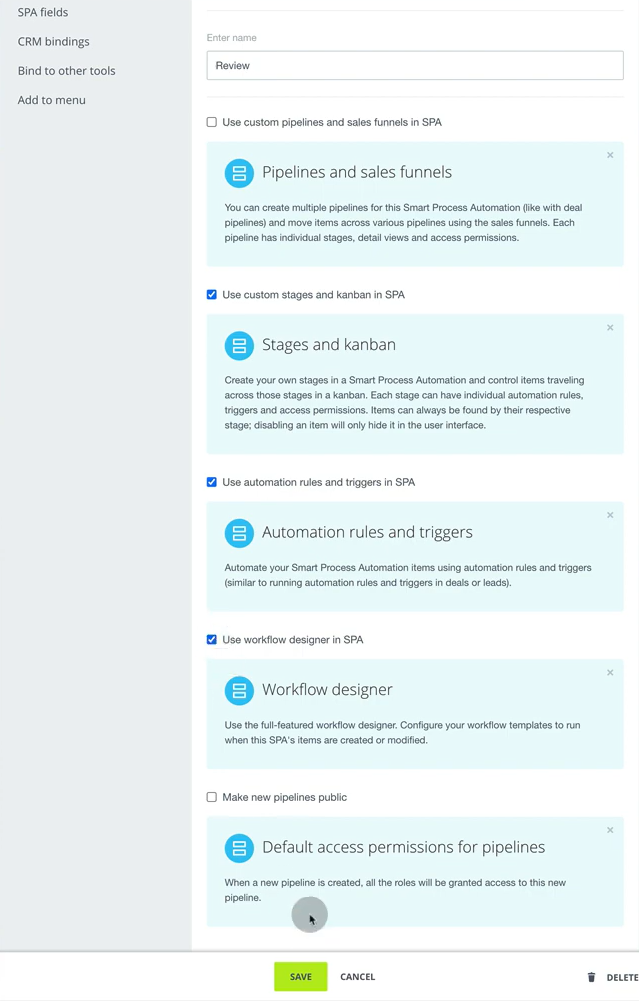
86. As for the Average score tool, there are some tips to do so. Go to SPA and click on reviews’ Settings.

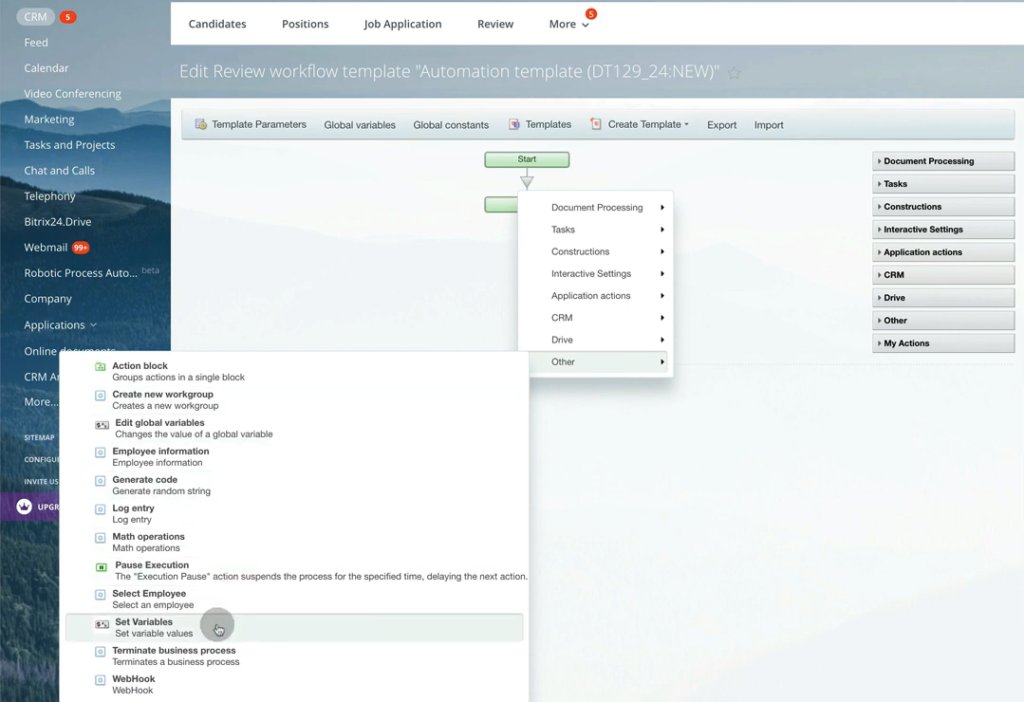
87. Here we have to tick Workflow designer block as we will build a new business process.
88. In Kanban view Review shall look like this
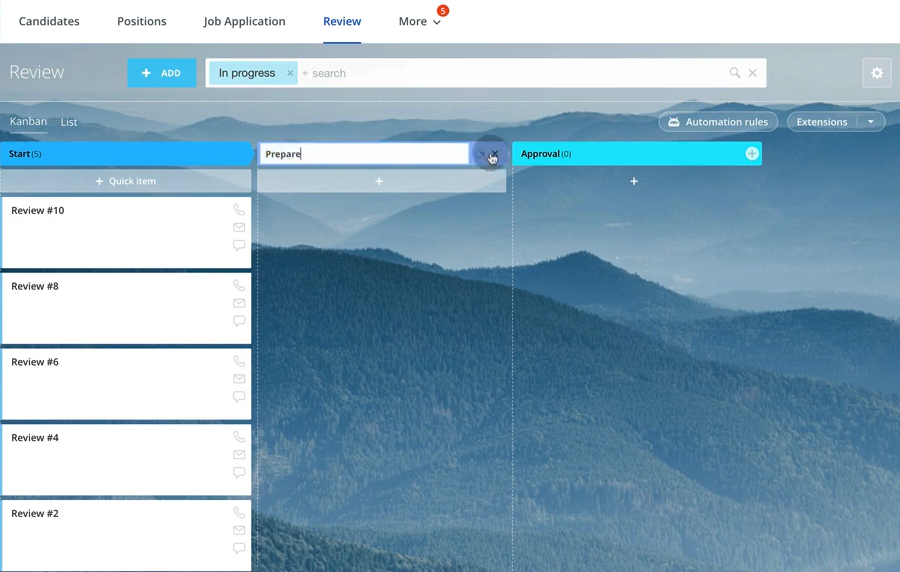
89. Delete extra columns and leave only one and call it Opened

90. To calculate Average Score from Review Score of each Review we shall use Bussiness Process. How to write in will be showing in next article.

91. The last but not least, we move our positions between stages and therefore visually see their status
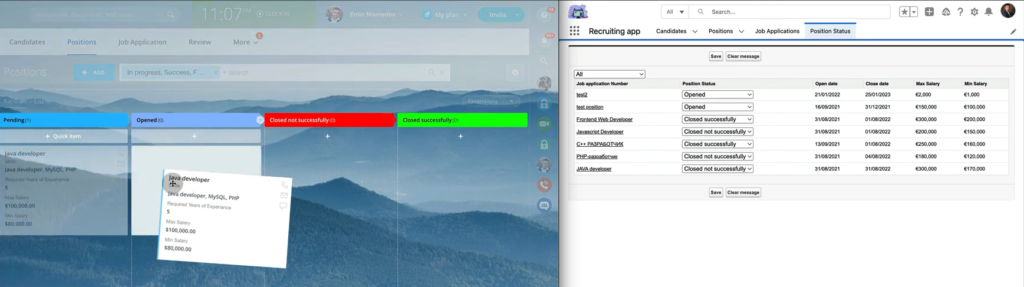
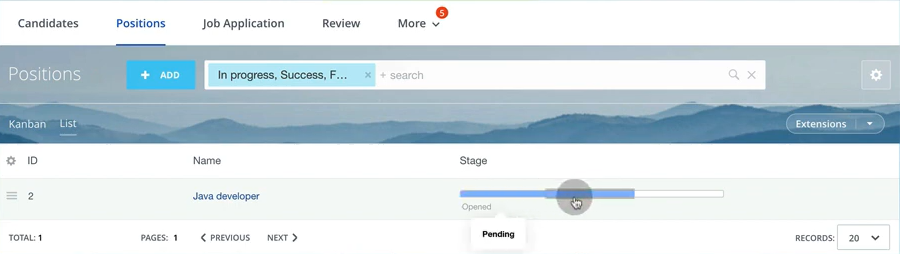
92. And we can also see positions stages in list view.
That was a detailed tutorial on how you may create a hr module for recruiting via spa. We reviewed Smart Process Applications in Bitrix24 and made a recruiting app from scratch. This is how you can create various objects and use Bitrix24 functionality not only to the sales, but also for business process automation. The main advantage here is not only possibility to create objects, but to connect them and set dependencies using friendly interface.
As you see, Bitrix24 has a powerful engine that can be adapted to processes other that sales. Having quite affordable pricing, it is a good value for the price. We are looking forward to advice on your cases – just fill in the contact us form here.
“You can also watch this tutorial on Youtube”