| 2224 Views | Amin

Bitrix24 CRM enhances your business’s relationship with your customers. It ensures that you are well-equipped to relate with them and their data effectively. Further integrations of the system also allow you to automate most processes for faster and more productive interactions.
However, to systematize customer data and make the most of them, you and your team members must use Bitrix24 efficiently. This efficiency includes harnessing the endless possibilities presented to you by this CRM. One of such possibilities is creating a task template for your business processes.
Why Task Templates?
It sounds a lot easier to open a new page for tasks based on demand. But then, there are several advantages to creating task templates and executing tasks from pre-arranged templates rather than a blank page on your CRM.
Faster Data Input
If it would take you twenty minutes to set up a task from scratch, then using a template will slash that time to about 5 to 10 minutes. This time difference may not seem significant if you have only a handful of tasks to create in Bitrix24. If you have scores of tasks to complete in a single day, a template will eventually spare you overtime in the long run.
Reduced Error
As you set up tasks, there are possible mistakes that could cost your business a whole lot. But these mistakes can be significantly reduced when you do not have to begin from scratch each time there is a need to create tasks. Hence, task templates save your business the consequences of manual input errors.
Increased Productivity
Every 5 minutes shaved off your task creation time can be channeled into other aspects of your business. You can also incorporate those extra minutes into strategic planning and development for the improvement of your business.
This case illustrates how EMCsoft creates easy-to-use task templates to enhance your business processes. You can take a look at how we do so for our clients in the steps below:
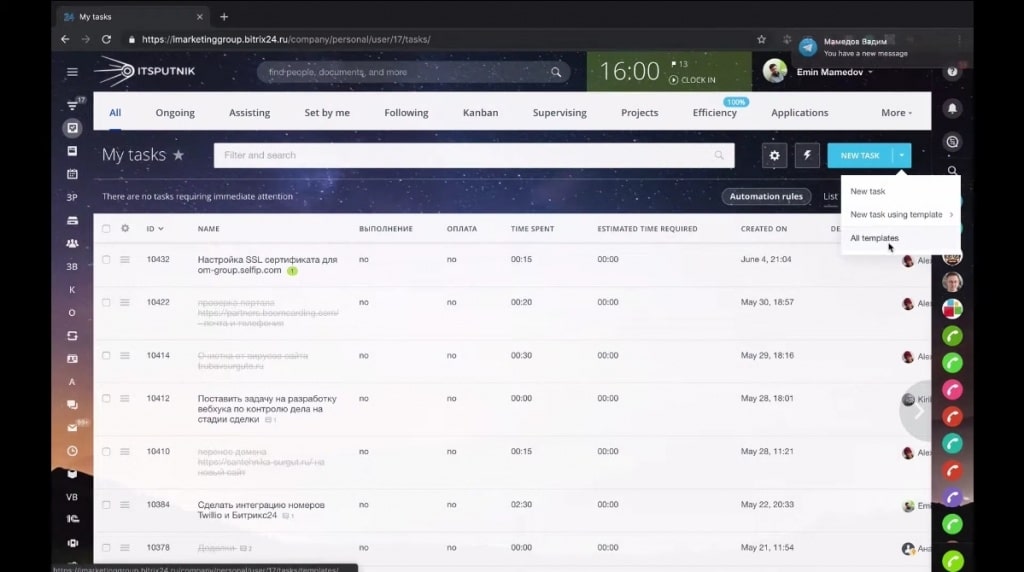
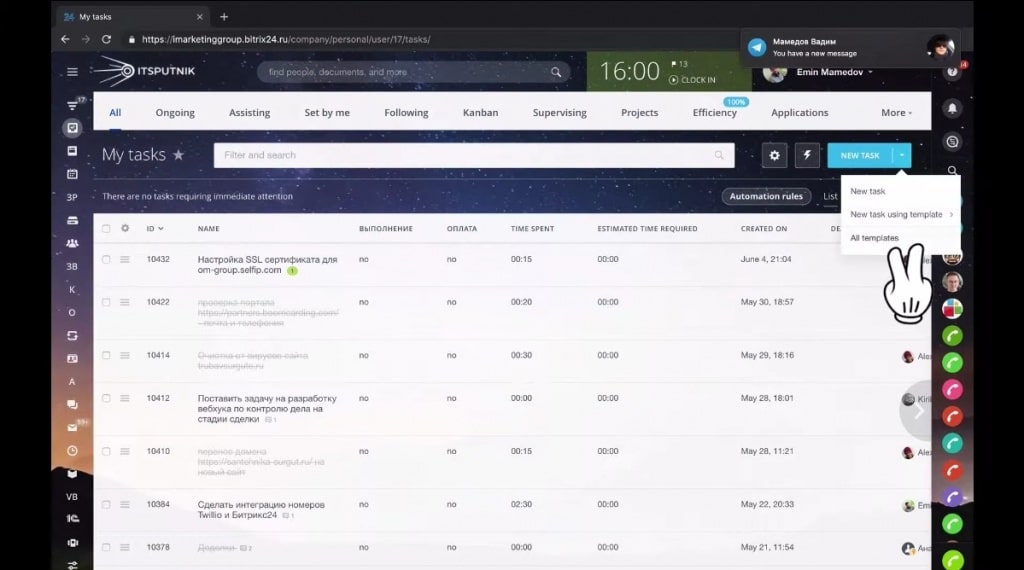
1. Under the ‘My task’ menu, click on ‘New Task’. Then, under the dropdown, select ‘All Templates’.
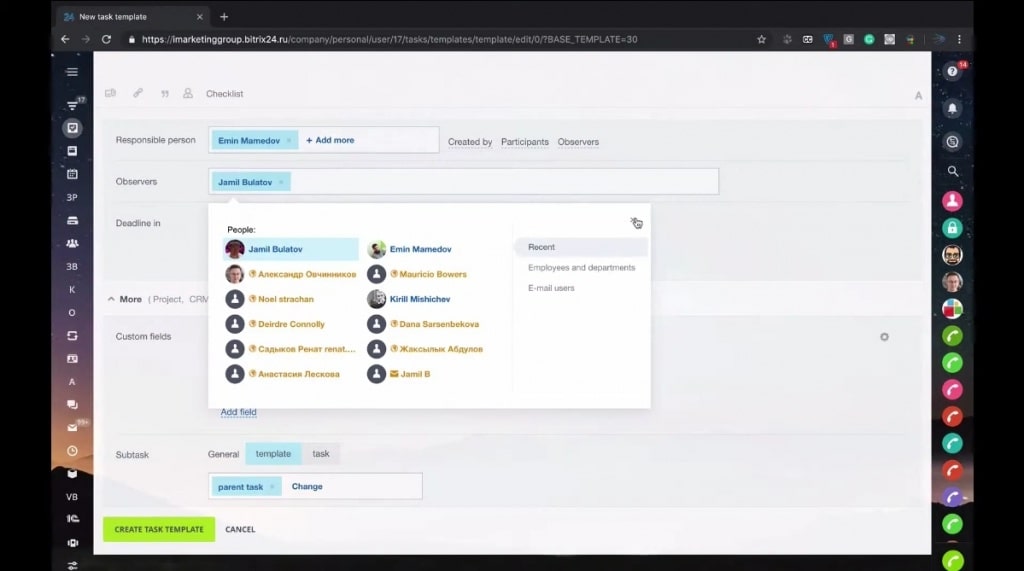
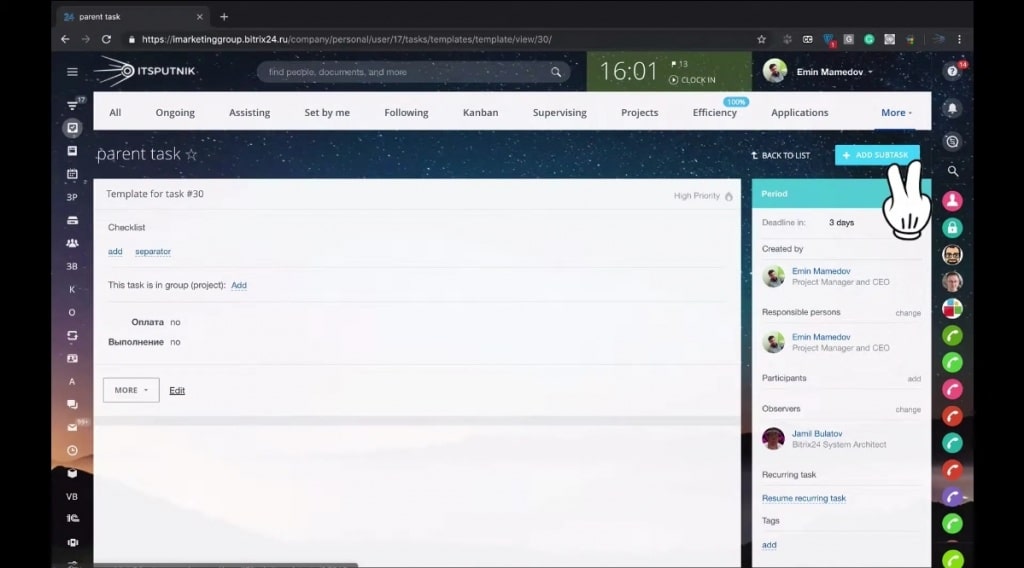
2. On the new page, click on ‘Add’, and input the details of the task. This task is a parent task template, and its details include observers, deadline, and a list of other requirements.
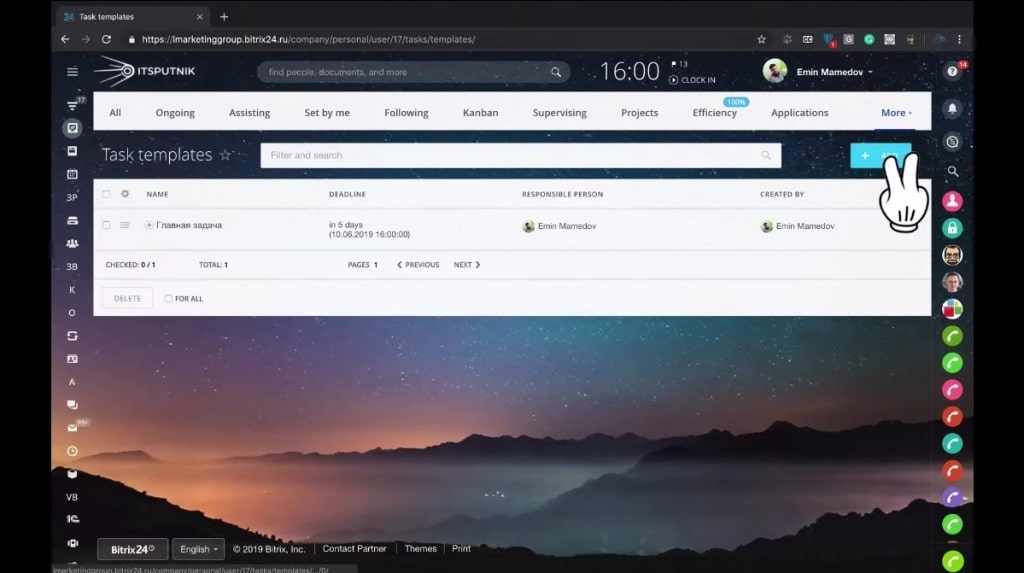
3. After filling in the necessary details, ‘Create Task Template’.
4. When the template is created, navigate to ‘Back to List’ on the upper right of the page.
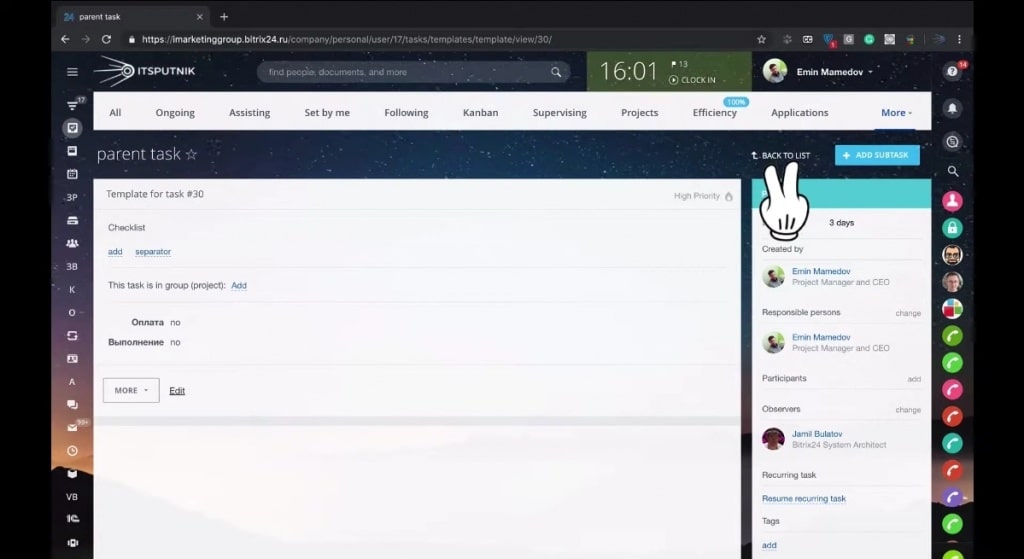
5. Under the list, open the ‘Parent Task’ and then ‘Create a Subtask’ within it.
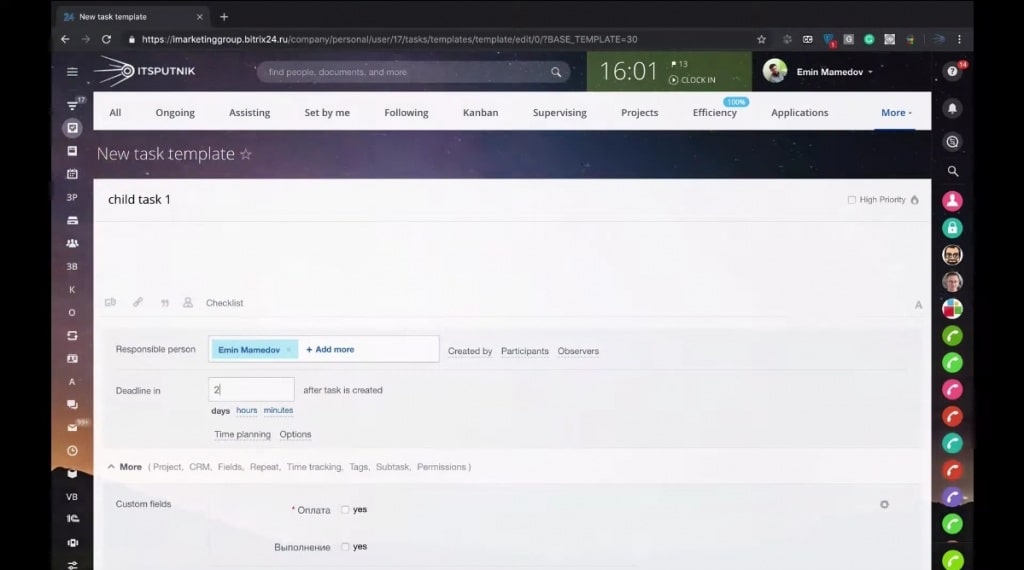
6. This subtask is titled ‘Child Task1’ and is filled and saved just as the ‘Parent Task’.
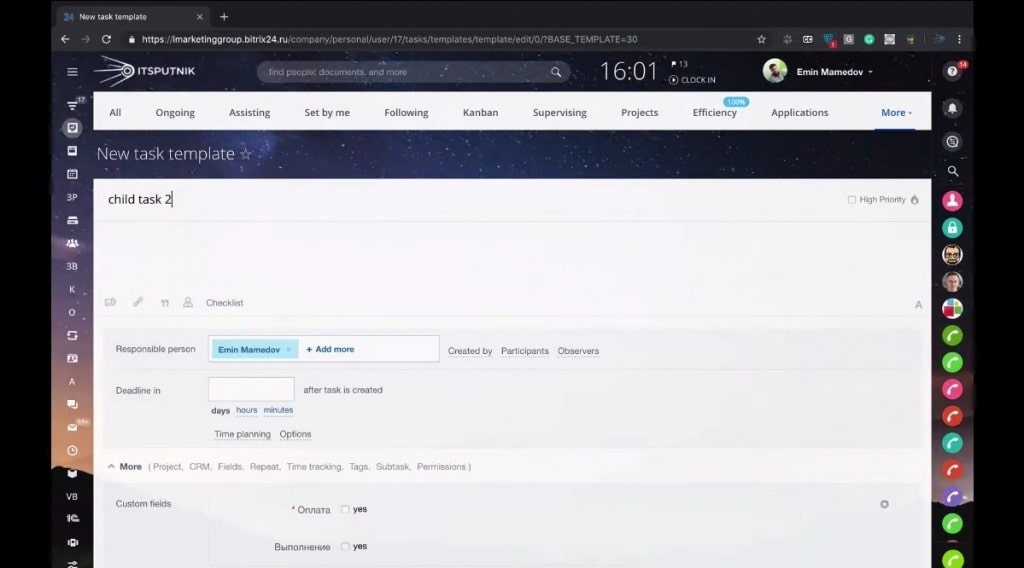
7. We repeat the same process as in 4, 5, and 6 to create a ‘Child Task 2’ under the parent task template.
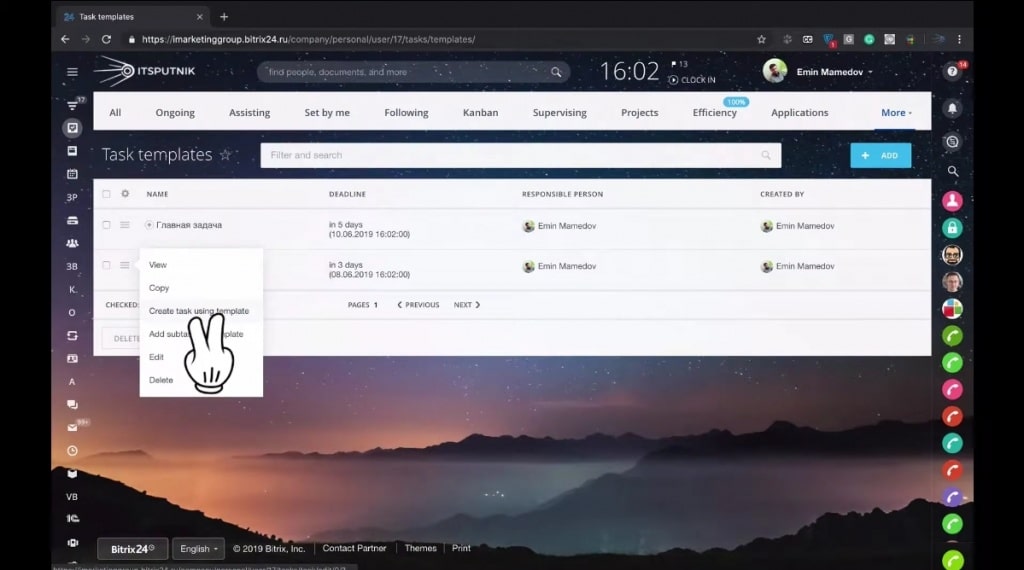
8. Now, to create an actual task with the template, navigate to ‘New Task’, and then click on ‘All Templates’ from the dropdown.
9. Next, click on the dropdown beside the ‘Parent Task’ on the list. Select ‘Create Task Using Template’.
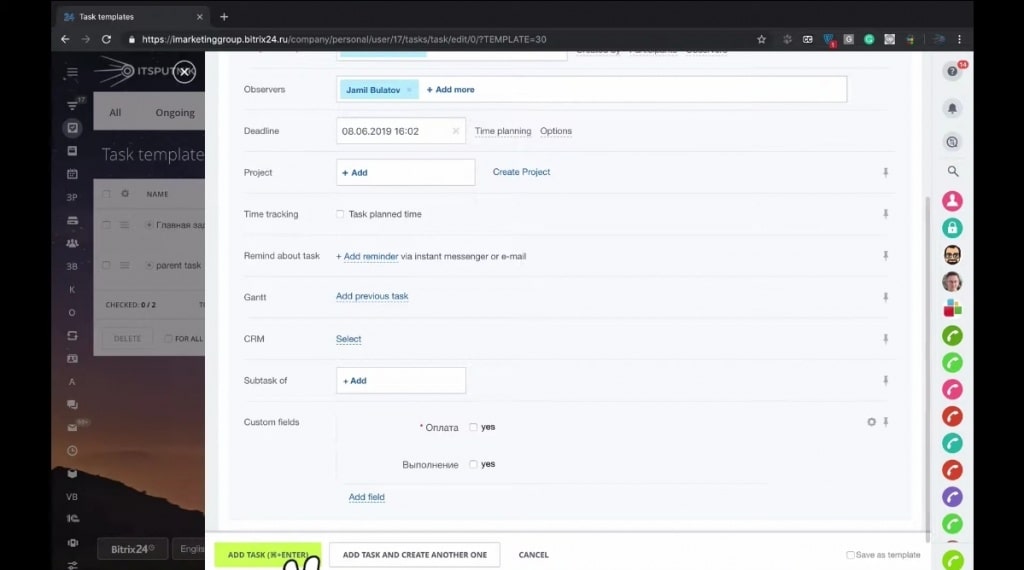
10. On the parent task page, you can edit as necessary, and then save by clicking on ” Add Task ‘. You can also create multiple tasks with the same template by selecting ‘Add Task and Create Another One.
Need this? We will be happy to receive a call or email from you! Meanwhile, you can check out the video of this illustration below.