| 939 Views | admin

Bitrix24 security tips you can’t afford to skip
Welcome to this essential guide on securing your Bitrix24 CRM system. As your CRM holds critical business data—like customer information, sales records, and internal communication—protecting it from breaches is more important than ever. In this video, we’ll walk you through proven steps to safeguard your CRM, reduce risks, and ensure your customer trust stays intact. Whether you’re a small business or a growing enterprise, these security practices can make a big difference.
CRM security is crucial because 43% of cyberattacks specifically target small businesses. A single data breach can result in serious consequences, including financial loss, reputational damage, and a loss of customer trust. Safeguarding your CRM data is essential for maintaining business integrity, and effective security measures go beyond preventing attacks—they play a vital role in upholding the trust your customers place in you.
Detailed instructions are described below
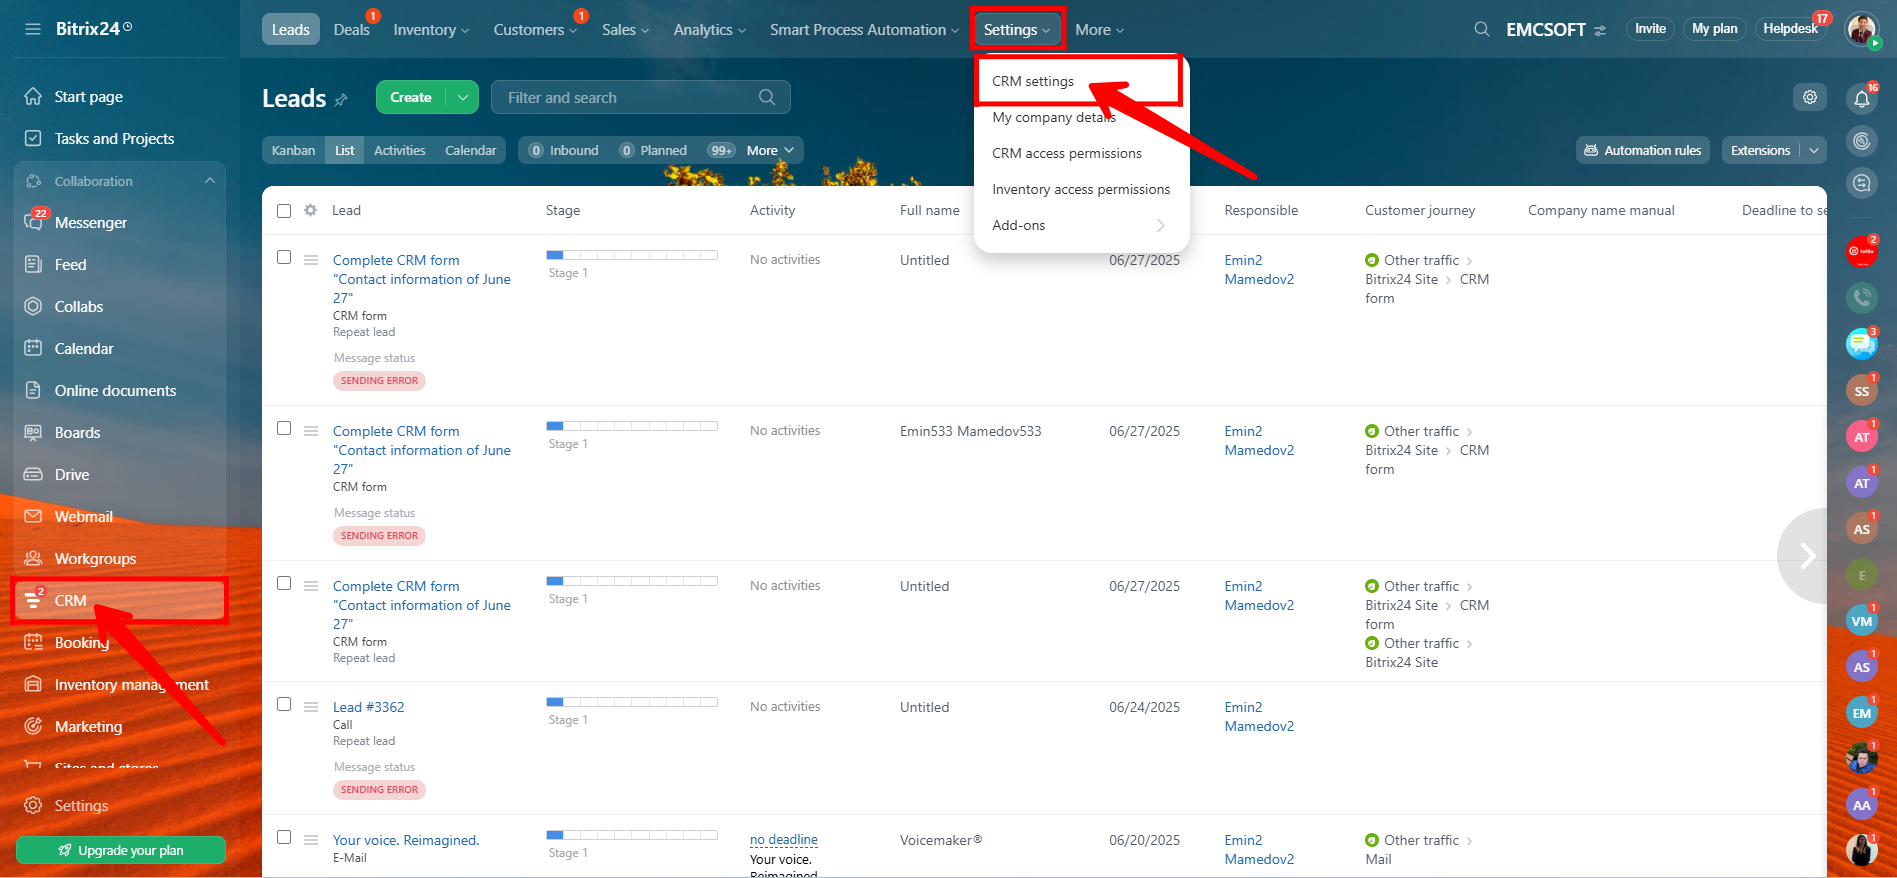
1. Go to Settings within your CRM, then navigate to CRM Settings to begin configuring your security options.
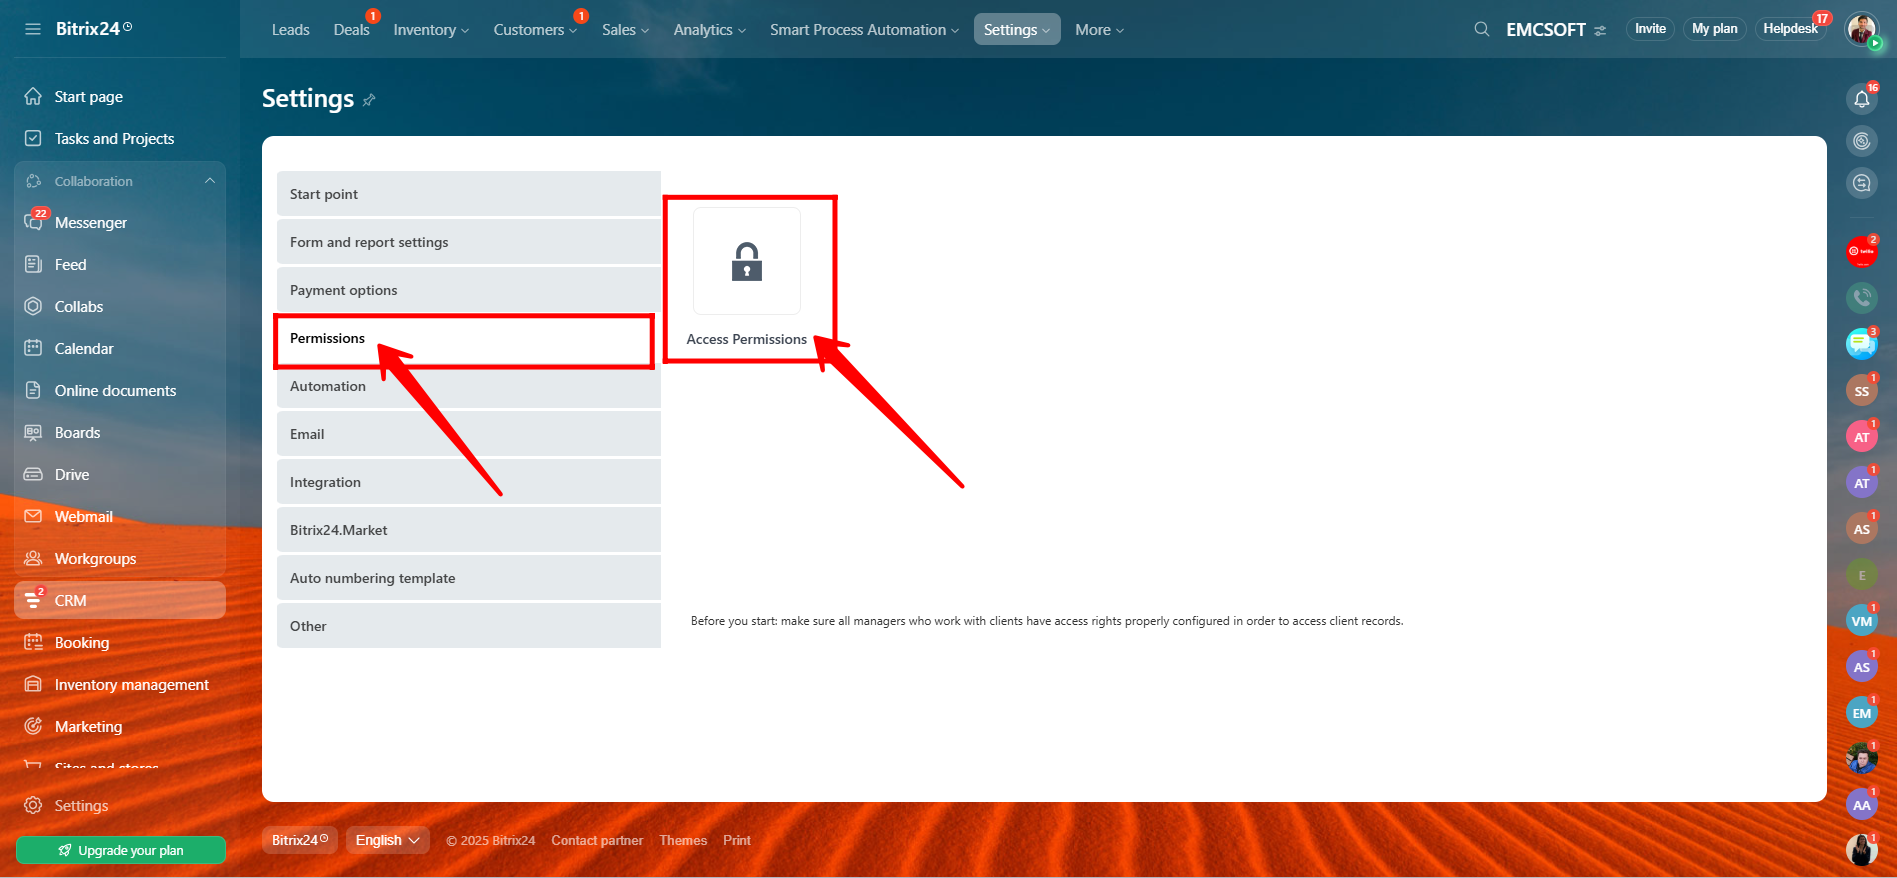
2. Click on Permissions, then select Access Permissions to manage user roles and control who can access what.
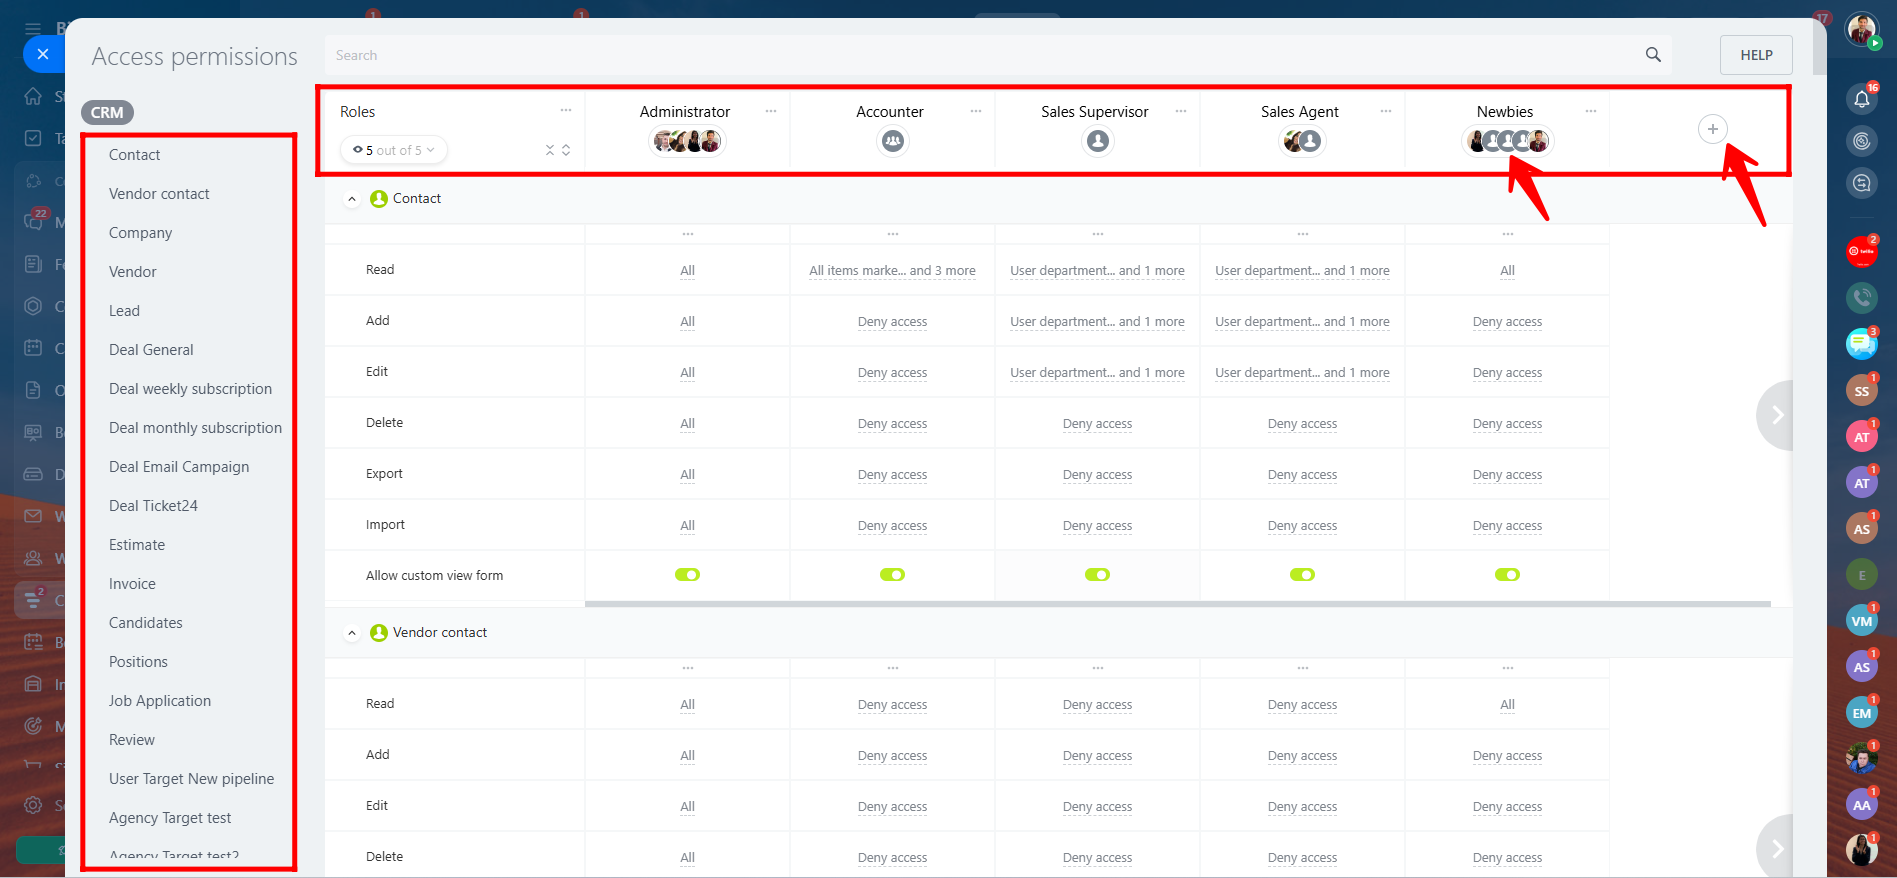
3. Here, you can add new roles by clicking the “+” icon and assign members to each role. You’ll see specific users or employees listed under each role, such as Administrator, Newbies, Sales Agent, Sales Supervisor, and Accounter (these roles are example-based and not predefined). From the left panel, you can navigate through each CRM entity—like Contact, Vendor Contact, Company, Lead, Deal, etc.—to define access permissions for each role. For every entity, you can allow or restrict actions such as Read, Add, or Edit, giving you full control over user access.
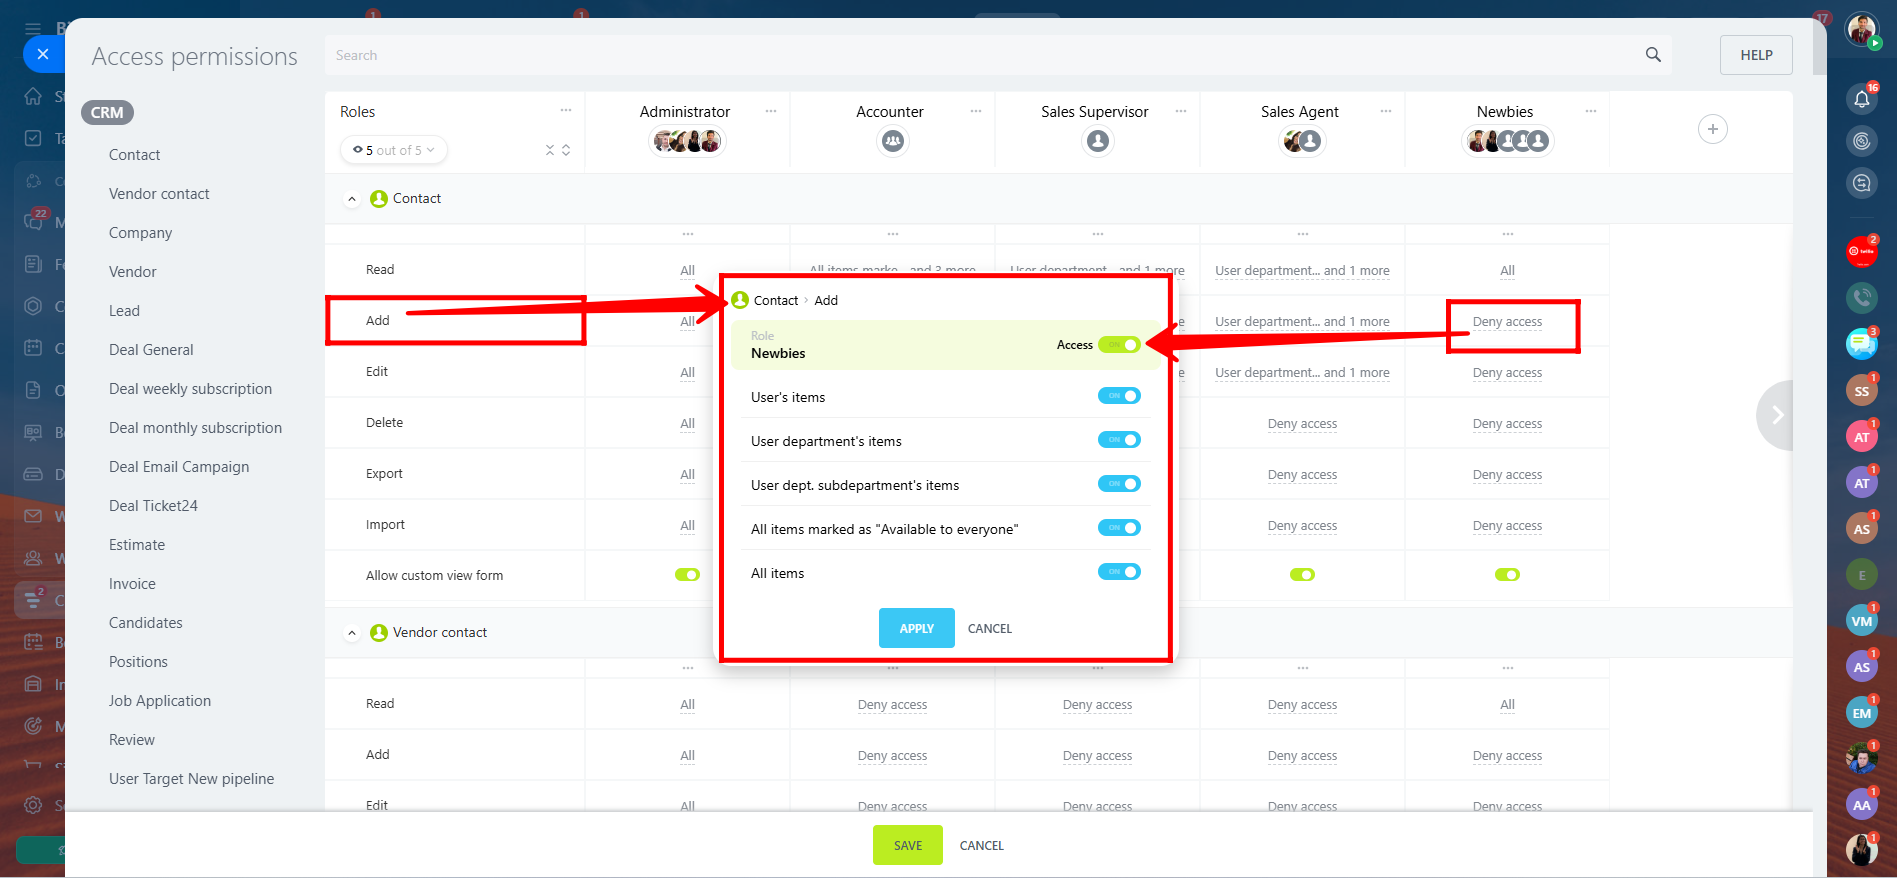
4. Here, in the “Contact” section, you can see that full access has been granted to the “Add” permission for the role of Newbies. Previously, this permission was set to “Deny Access”, but it has now been updated to allow them to add new contacts in the CRM.
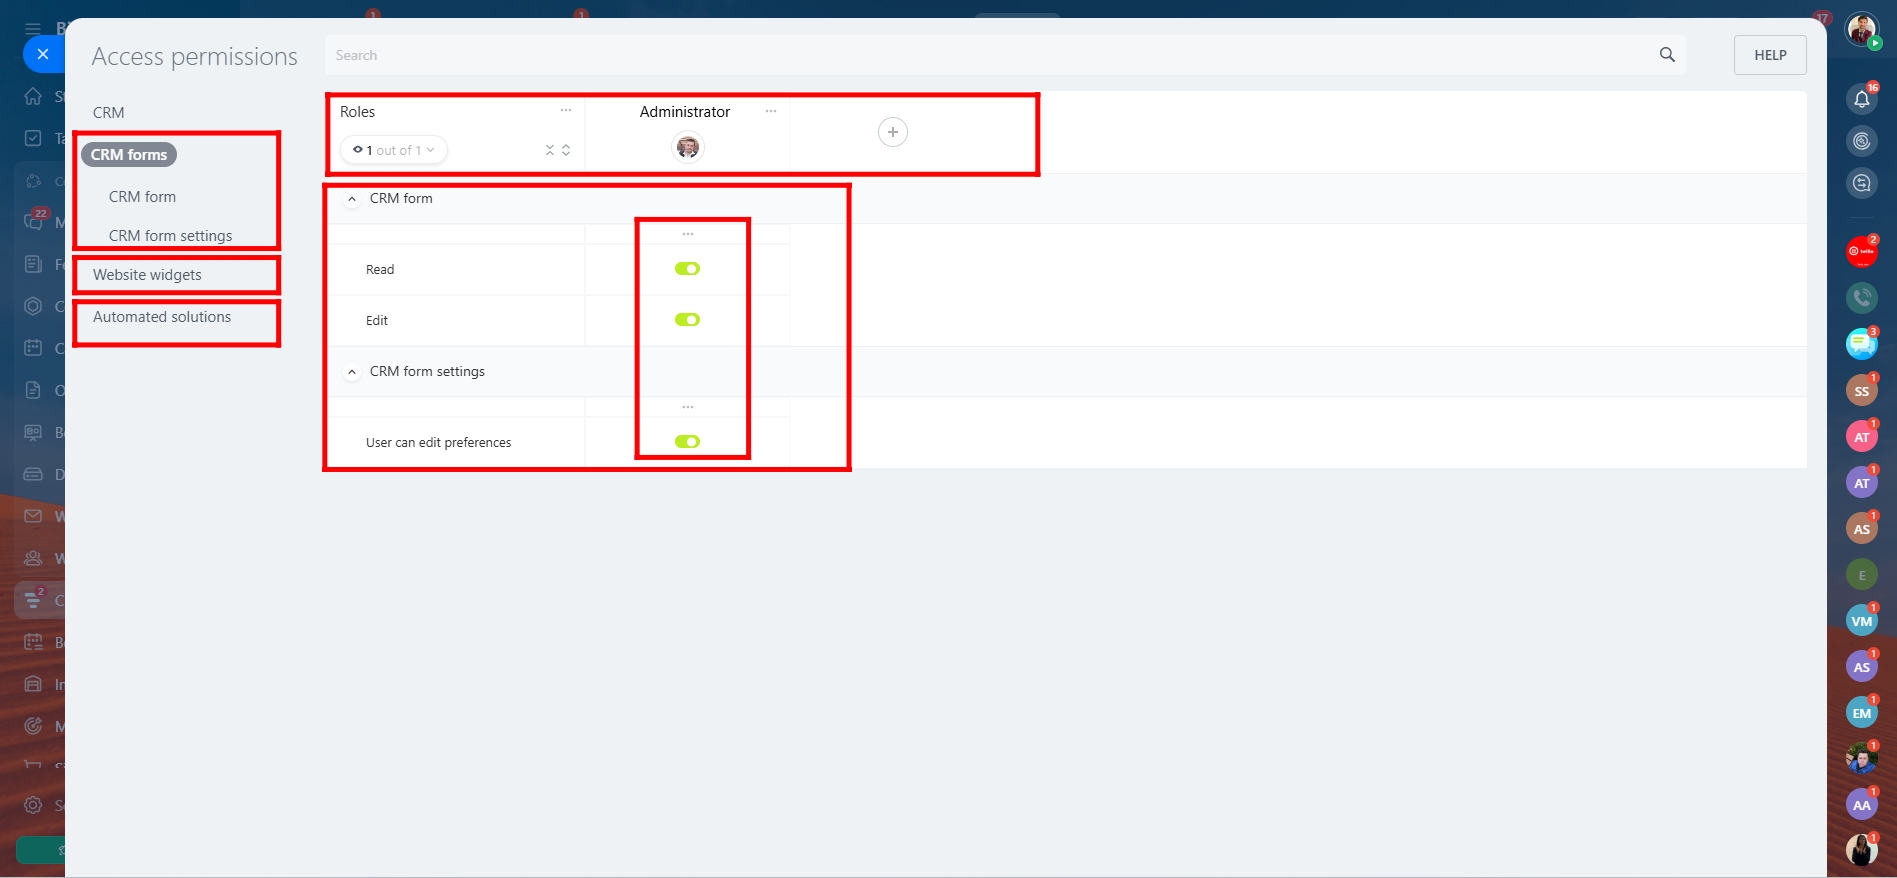
5. Similarly, all these entities—Contact, Vendor Contact, Company, Lead, Deal, etc.—are part of the CRM module. You can also navigate within Access Permissions to other areas like CRM Forms, Website Widgets, and Automated Solutions, where you can manage access rights in the same way—by assigning permissions (Add, Read, Edit, Delete) to specific roles for each section.
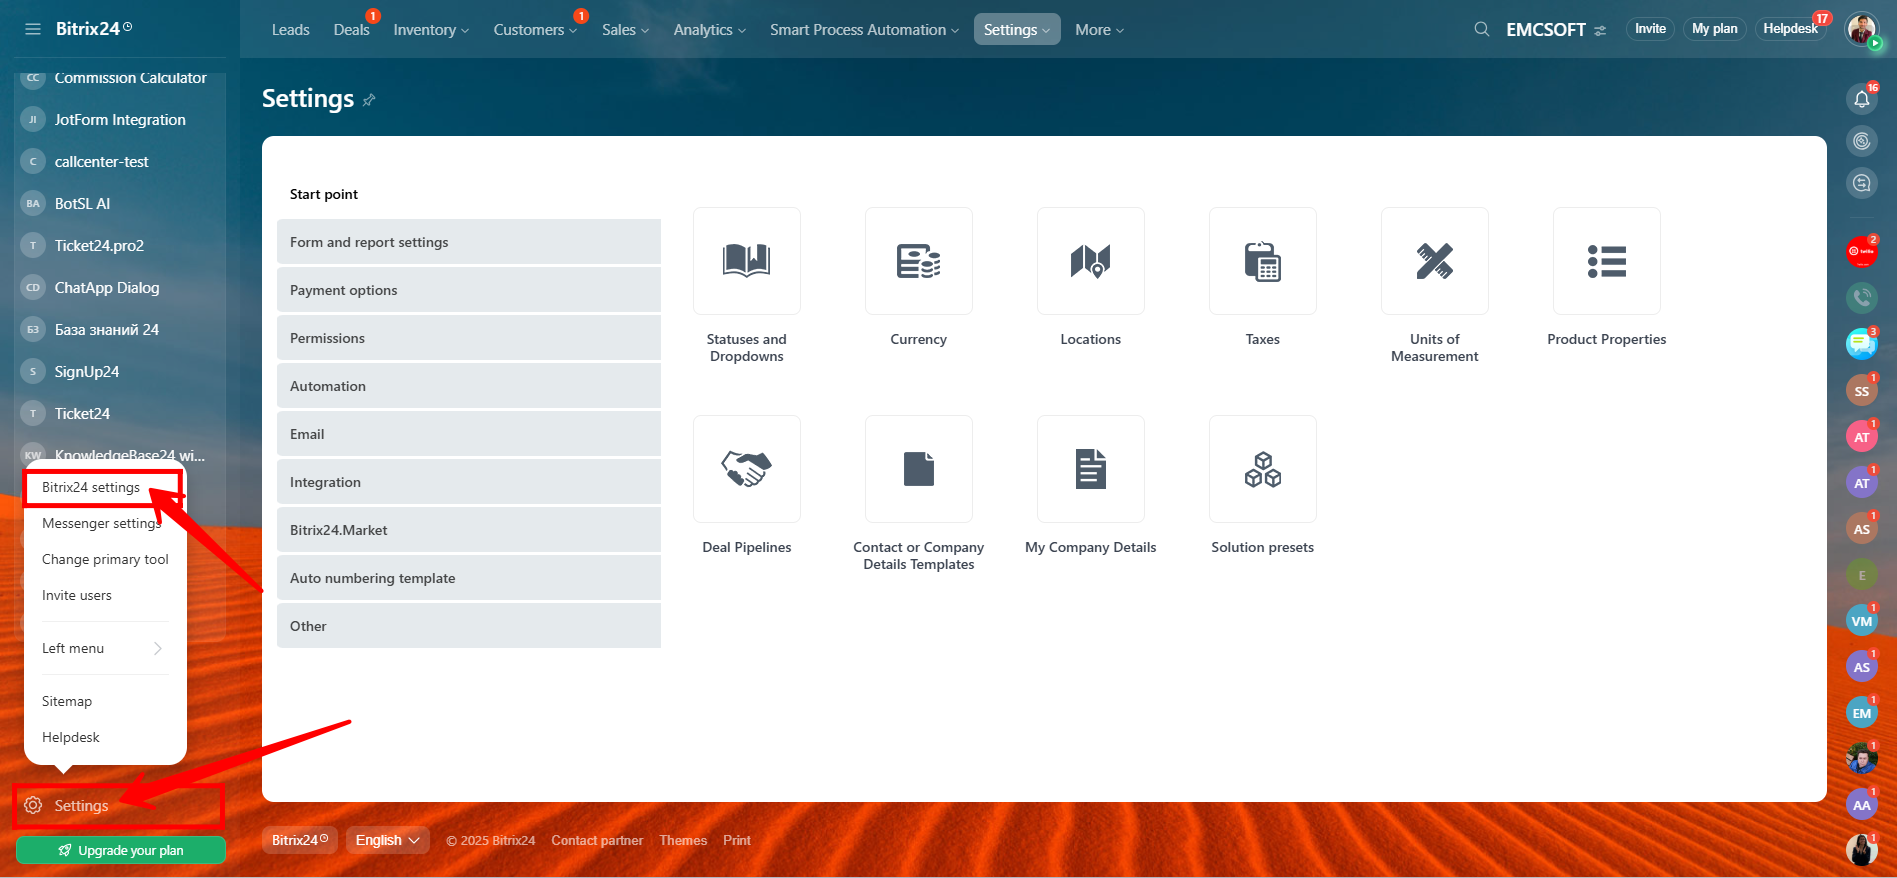
6. Now, go to the “Settings” option located at the bottom-left corner of your Bitrix24 interface, then navigate to “Bitrix24 Settings” from the menu. This section allows you to configure core system-wide preferences including regional settings, integrations, interface options, and other advanced platform controls.
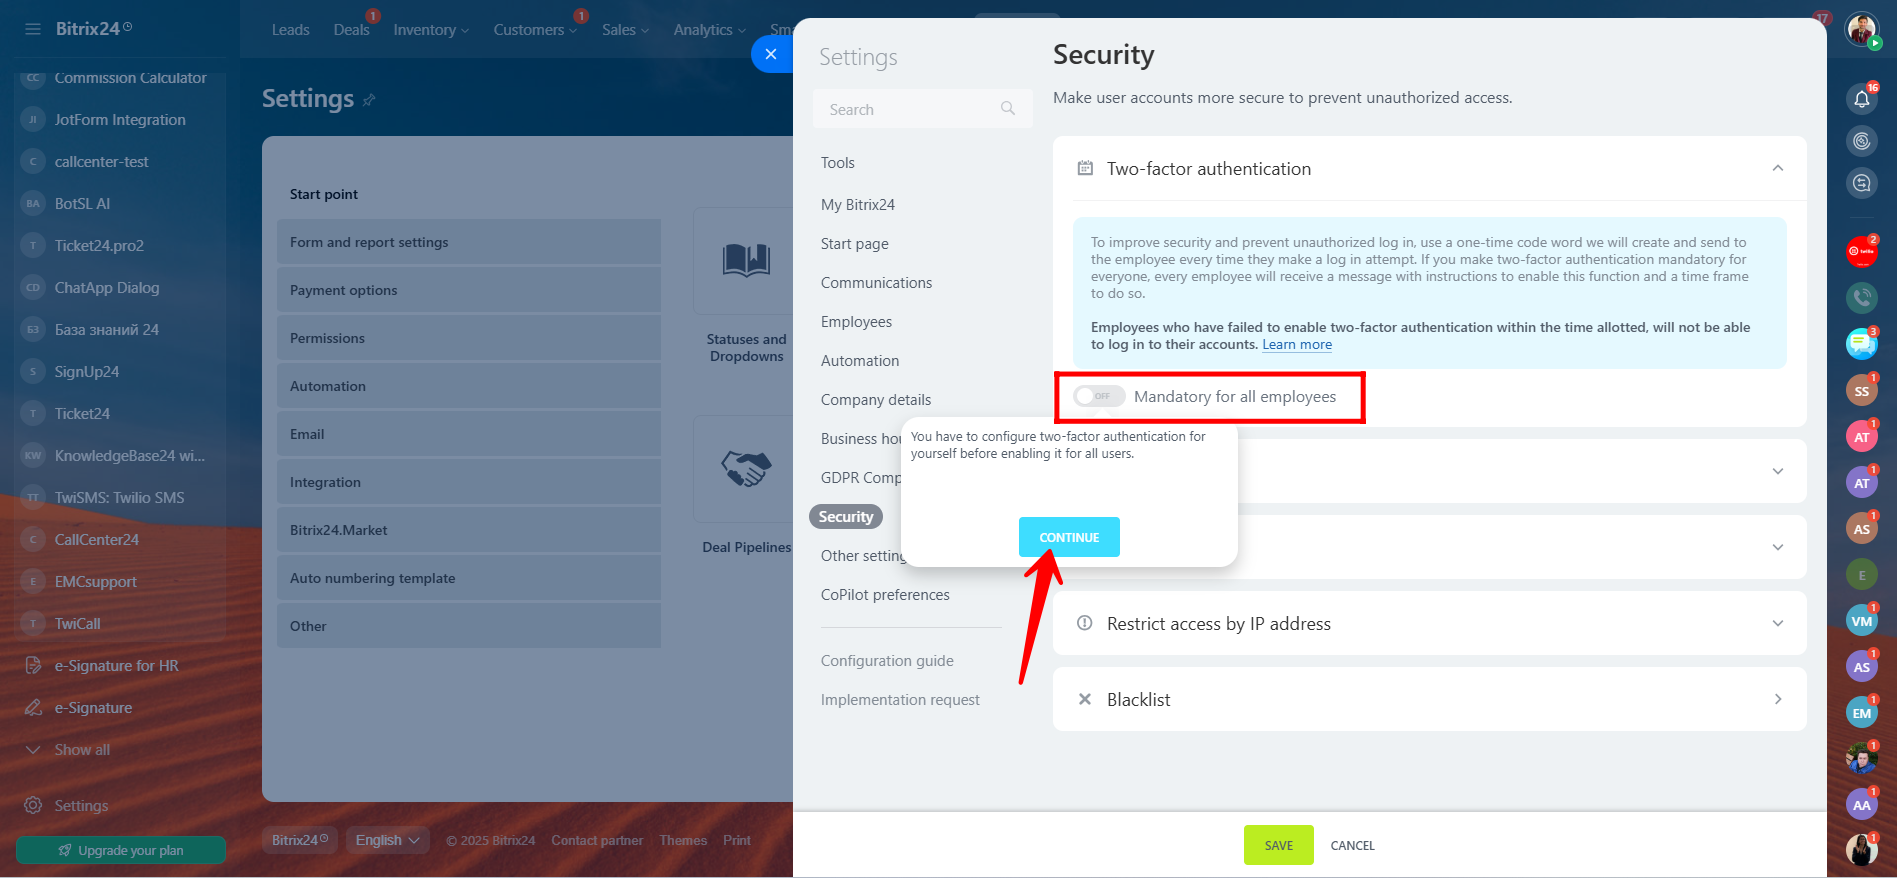
7. Go to the “Security” section within Bitrix24 Settings, then locate the option for “Two-step authentication”. Turn it ON, and click “Continue” to begin the configuration process.
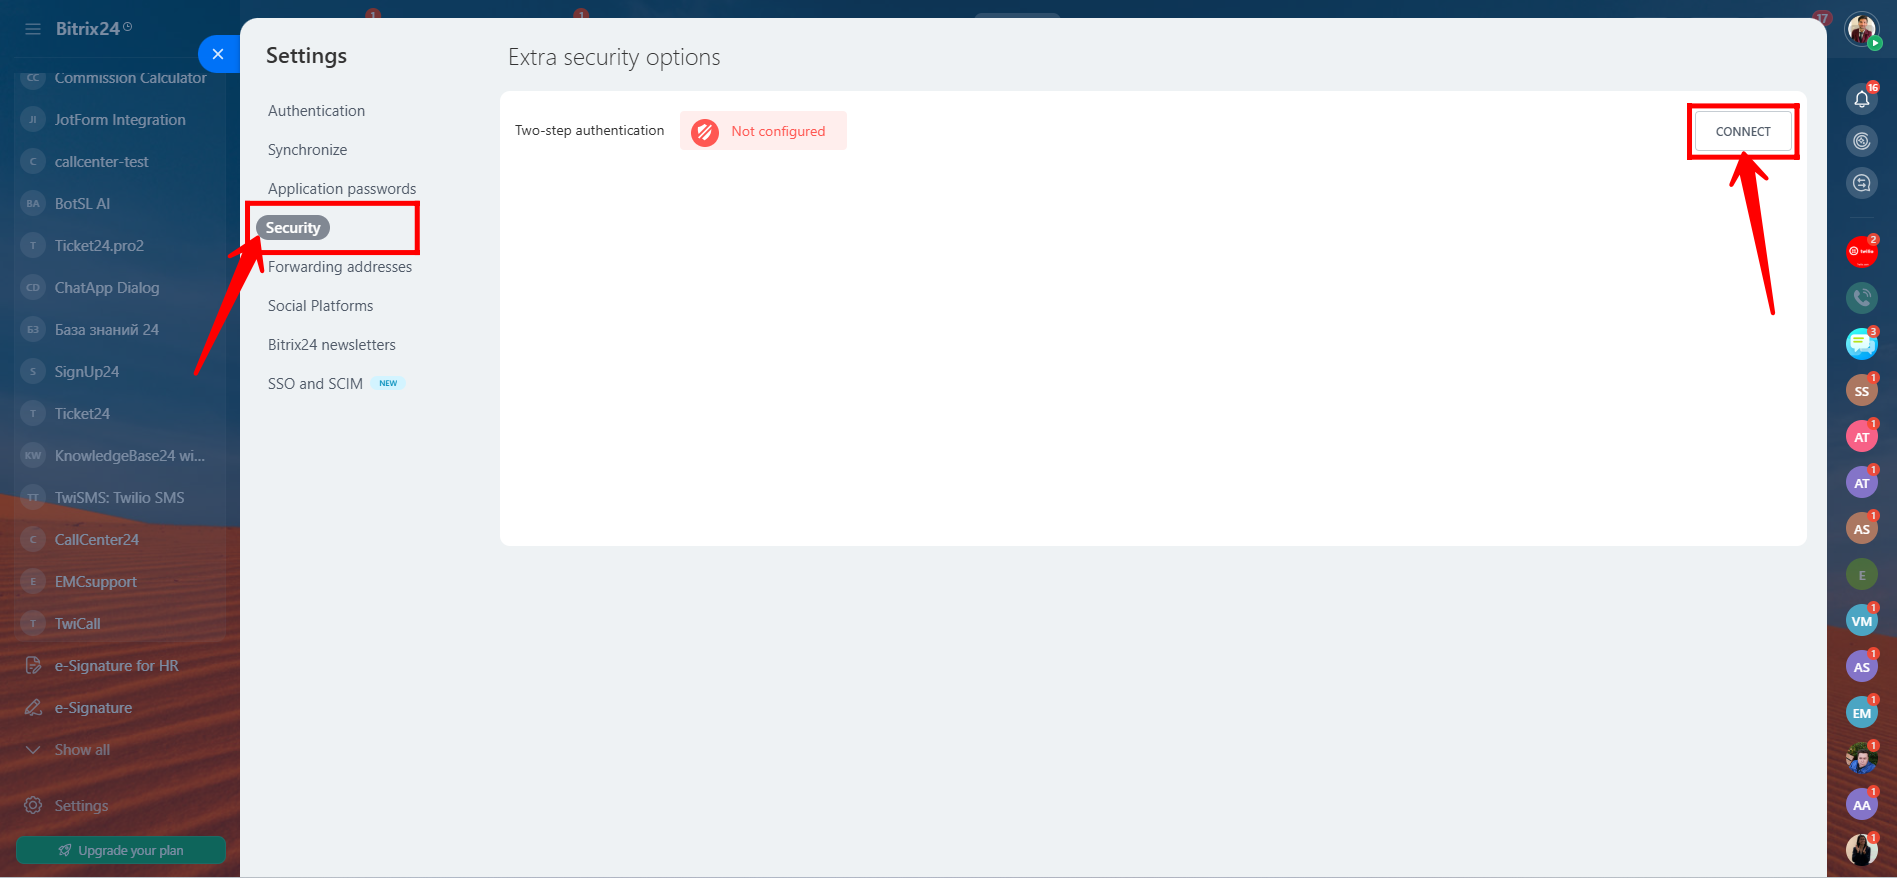
8. Click “Connect” to initiate the two-step authentication setup process.
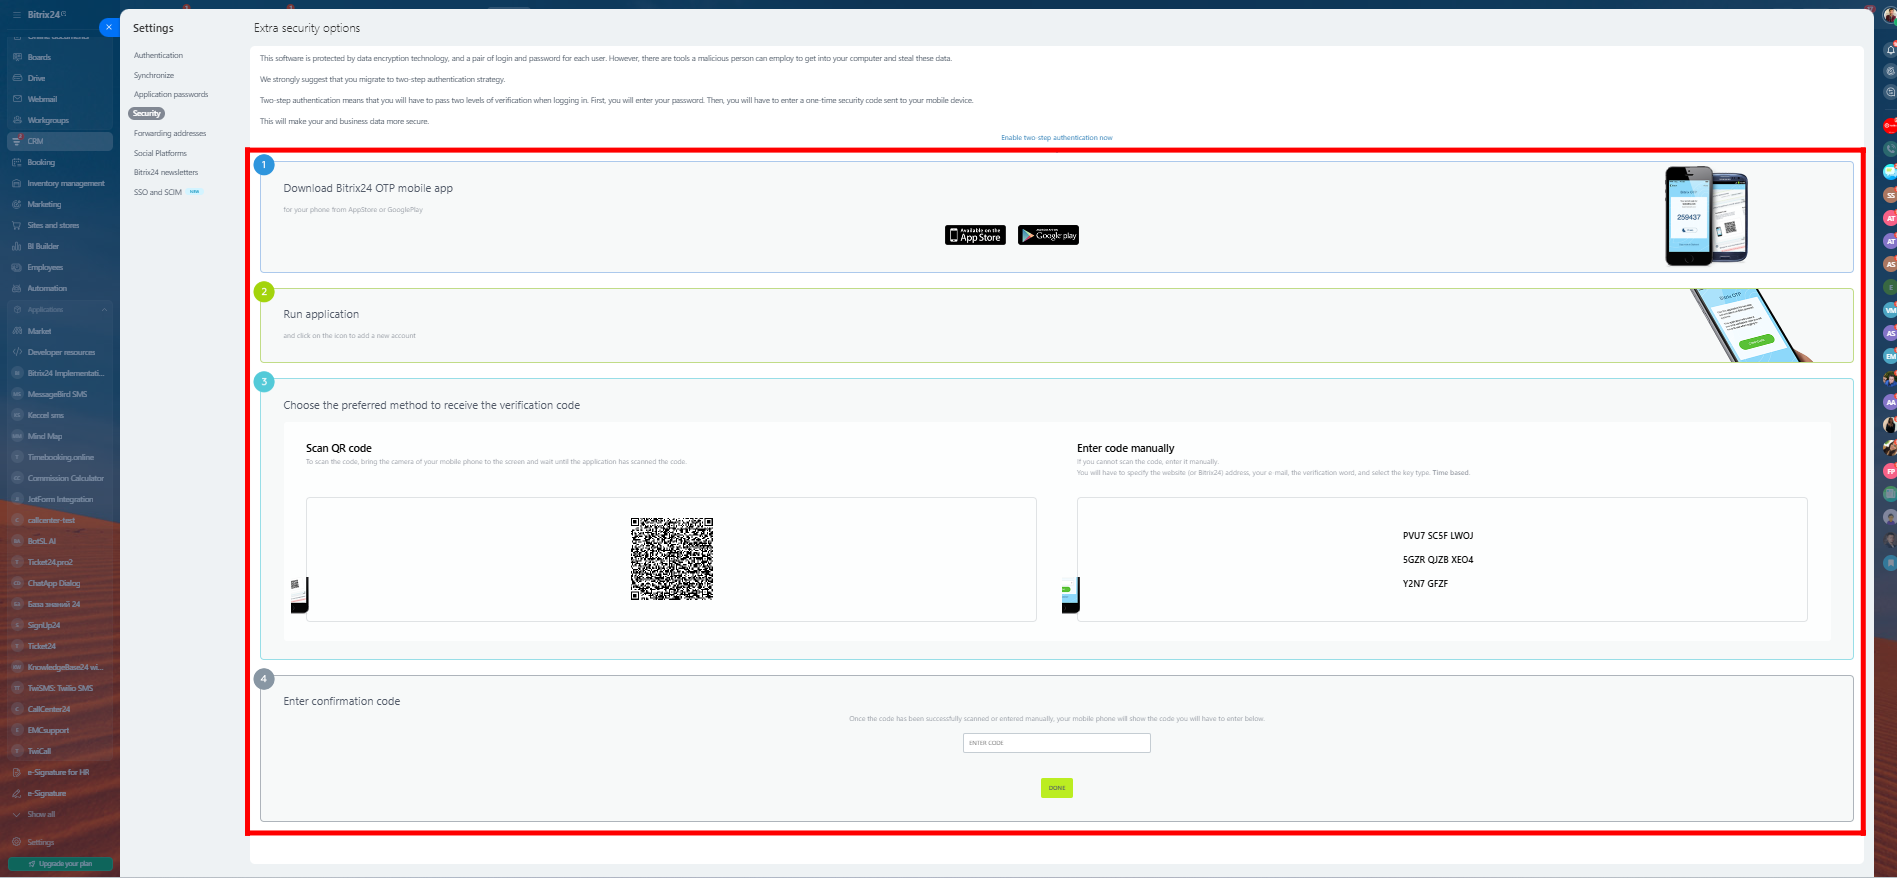
9. Follow the instructions displayed:
- Run the Bitrix24 OTP app on your mobile device.
- Scan the QR code shown on your screen or enter the key manually into the app.
- The app will generate a verificationcode.
- Enter that code into the designated field in Bitrix24 to confirm.
- Click “Save” to complete the two-step authentication setup.
Your account is now protected with an additional security layer.
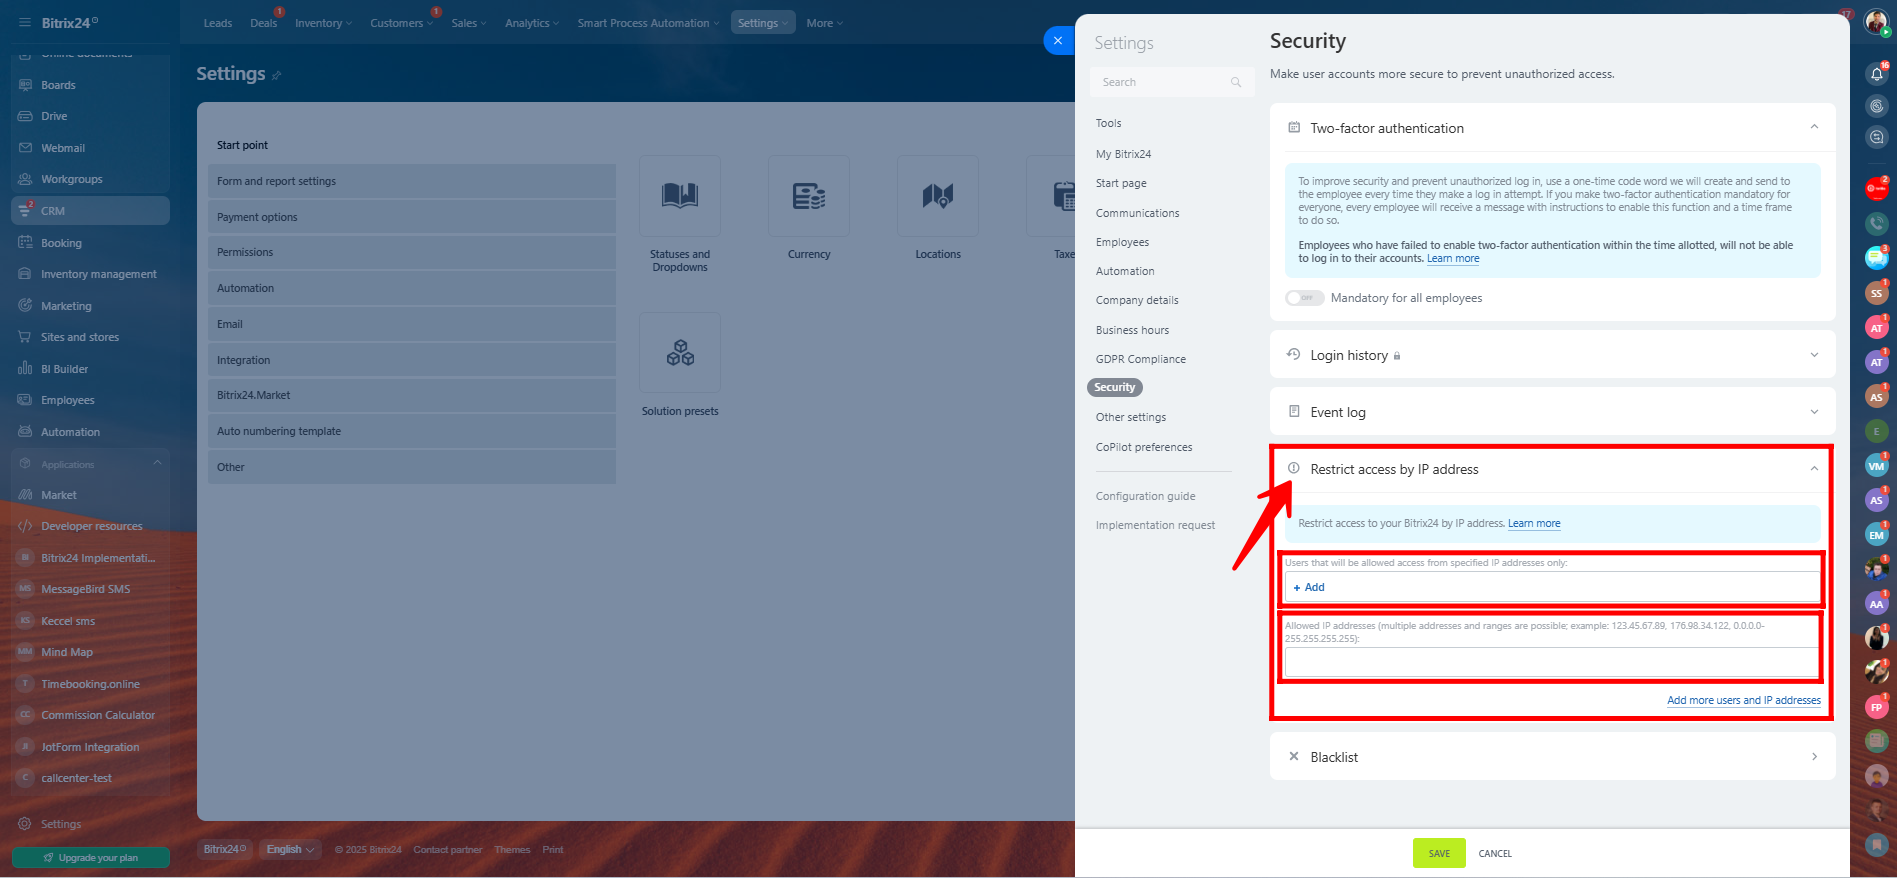
10. In Bitrix24 Settings > Security, you can restrict access by IP address to enhance security.
- Scroll to the IP access restriction section.
- Enable the option to restrict access.
- Enter the trusted IP addresses or IP ranges (e.g.,
192.168.0.1,203.0.113.0/24) from which users are allowed to access the system. - Click Save.
💡 Only users connecting from the listed IP addresses will be allowed to access your Bitrix24 portal. Be sure to include your own IP to avoid locking yourself out.
Let’s ensure your data is protected not just through settings but also with strong infrastructure. Bitrix24 secures your CRM data with enterprise-grade encryption and secure hosting. Whether you’re using the cloud or a self-hosted setup, all data is encrypted with 256-bit SSL, similar to what’s used in online banking.
Hosting is managed in certified data centers with built-in backups and fail-safes. Even if data is intercepted, it remains unreadable. For industries like finance or healthcare that need full control, Bitrix24’s self-hosted version allows your IT team to manage everything on your own infrastructure.
Best Practices for Ongoing CRM Security:
- Use unique passwords for every user
- Review and update access permissions regularly
- Remove inactive users from the system
- Regularly test your backup and recovery process
That’s how you secure your CRM with Bitrix24—protect your data, protect your business.
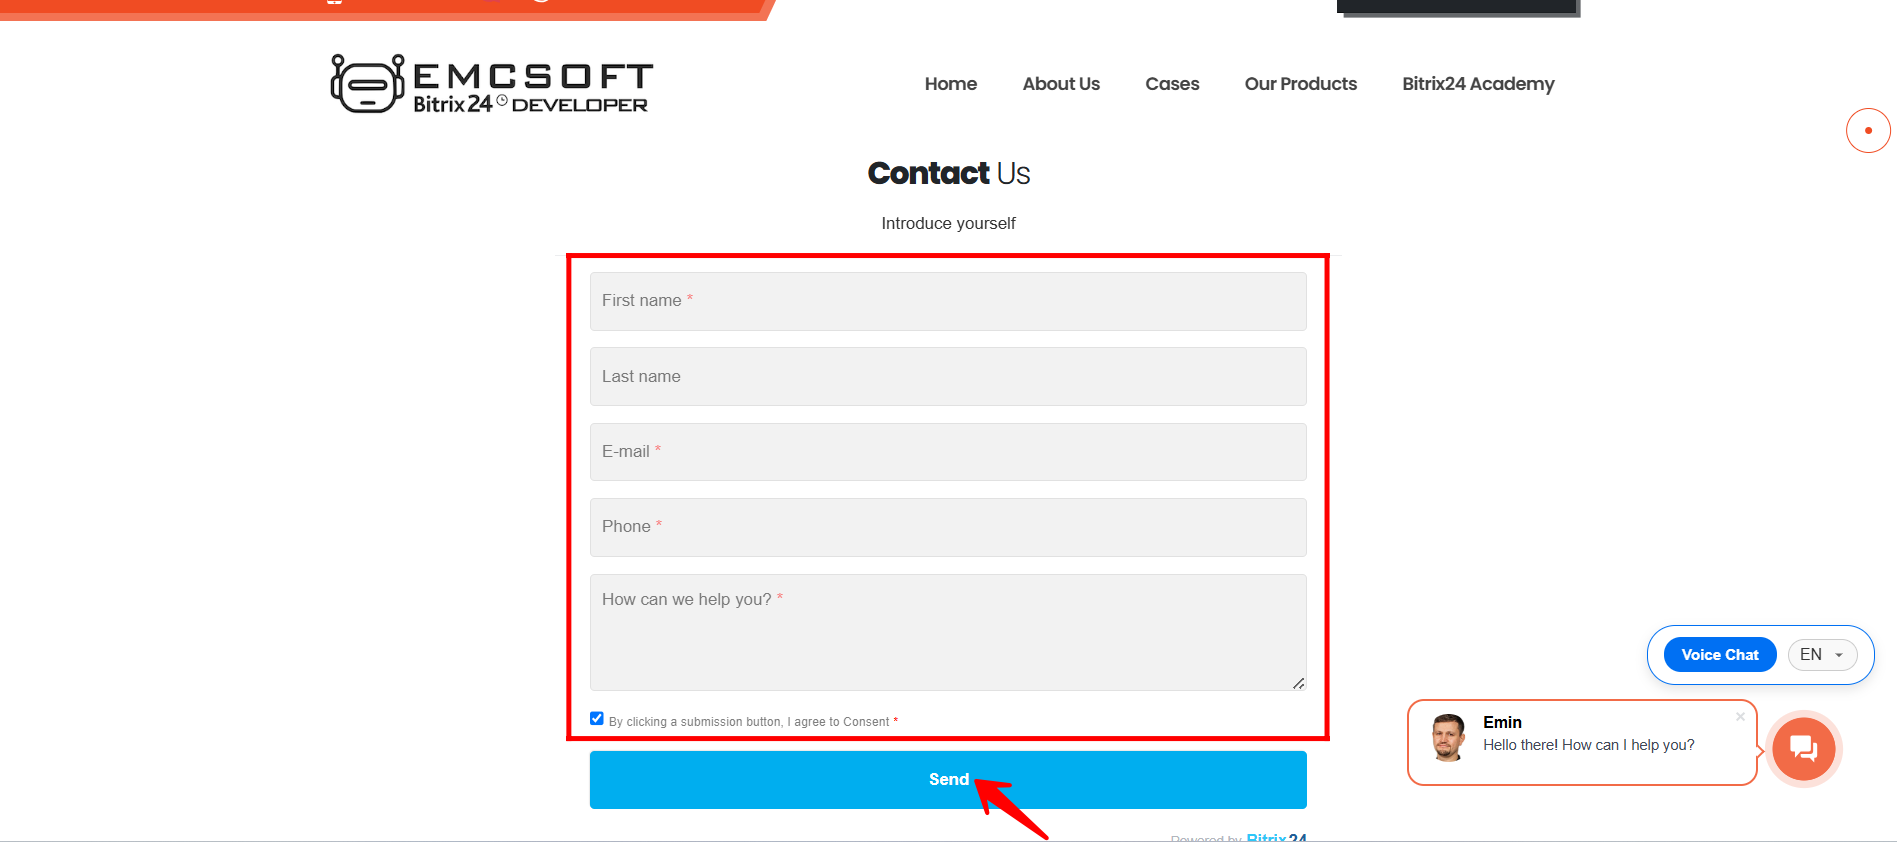
Need help with your Bitrix24 configurations?
👉 Visit https://emcsoft.io/contacts/
✅ Fill out the form
✍️ Leave a request — and our team will get in touch to assist you!
“You can also watch this video on Youtube”
Your CRM system is one of your company’s most valuable assets. With cyberattacks on the rise, securing your CRM isn’t just a good idea — it’s a necessity.
In our latest video, we walk you through simple, actionable steps to protect your Bitrix24 CRM from data breaches, unauthorized access, and costly mistakes.
🔶 Set up strong user access controls
🔶 Enable two-factor authentication
🔶Restrict access by IP
Whether you’re running a small team or managing sensitive client data at scale, these tips will help you keep your CRM secure — and your business protected.