| 3152 Views | Amin

CRM systems like Bitrix24 are tools created to ensure the smooth running of businesses and customer-related structures. These systems come with loads of features designed to attend to several facets of companies in multiple industries.
However, for most CRM systems to remain relevant and applicable across multiple industries, they often come with several complexities. If not simplified for specified purposes, these complexities can sometimes counter the advantages of utilizing such systems.
In essence, to make the most of a CRM system (or any digital solution), it must be aligned with your business needs, policies and requirements. And the one way to tailor CRM systems to your carved out niche and specialization, customization becomes necessary.
Benefits of Customizing Your CRM
The following are the advantages of customizing your CRM system to your unique business needs:
Fosters Customer Relationships
Your customers are the reason you set up and maintain your business. Without them, you’d have absolutely no reason to keep your business going or even need any CRM system. And if your customers are the pillars of your business, your CRM must be able to enhance your relationship with them.
Nevertheless, when CRM systems are built, it is quite beyond human ability to factor in the broad needs of every business that will likely use them. These systems are built with standard features that can cut across the general requirements of different companies at once. And frankly speaking, no two businesses share the exact needs or client base.
As a result, customizing your CRM and tailoring its features to your business needs will undoubtedly improve your relationship with your customers. You will be well armed to understand their engagement patterns and preferences and make necessary changes to your customer service delivery methods.
A customized CRM also translates to satisfied and loyal customers. The better you understand their needs, the better you’re positioned to meet those needs and have them return for more.
Improved Intuitiveness
When your CRM system is tailored according to your business requirements, it becomes easier to navigate. Your customers will not encounter difficulties locating various system features, especially if the traditional CRM is not industry-specific.
An intuitive CRM also makes work easier for your team members responsible for engaging customers. They will spend less time completing tasks, as a few clicks on the system will get them to use the functions they want at every point.
Improved Efficiency and Productivity
In addition to obtaining custom CRM software suitable for your industry and business type, you can also tweak different features of your CRM to meet each of your department’s needs. Your employees can also enjoy easy navigation around the system when you consider the needs of their different job descriptions.
Consequently, customizing your CRM functions according to the intricate needs of the different facets of your business will undoubtedly boost your overall efficiency. Each department (or employee) will be better equipped to complete tasks and complete deliverables.
Increases Managerial Control
For your business management processes to be effective, you need to have significant control over your business activities, indicators, and results. But then, most systems are built with more inclination to specific departments and specializations. Working with these kinds of systems dampens the control managers and leaders have over the day-to-day progression of their businesses. This is particularly the issue if the manager has little or no background in the area of the systems inclination.
By customizing your CRM system to suit the unique needs of your business, you eliminate the dampening effects of specialized system features on managerial control. Each department and employee’s progression sheets and result reports will be intuitive for relevant designations, irrespective of their background and specializations.
Competitive Advantage
When you make the most of your CRM and use tools and features best suited for your business, you get an edge over the competition. If you happen to use the same CRM system as a few of your competitors, the one thing that can single you out is your ability to tailor the system to your business’s needs.
Furthermore, upon gathering relevant data on your customers’ preferences, it may face challenges staying ahead of the competition if you only utilize the standard features of your customer relationship management platform. Customization will help you harness the most efficient business methods by identifying functions that produce tailored results. It also enables you to provide exceptional services to your customers. Customers will recognize and match your processes with your business in the long run. Consequently, you’ll find many of them returning for more and becoming unsolicited brand ambassadors for your business.
Assured Data Security
Every business’ data makes up a crucial part of its existence, and business owners must strive to firmly secure their data at all times.
Using your CRM in its standard form also means using the system’s preset security. Security may not seem much of a problem because CRM developers are ideally required to ensure the safety of their client’s data. However, customizing your CRM also allows you the flexibility of tweaking its security features to better protect your company’s data.
How to Customize the Card View for Lead, Deal, Contact, or Company.
Have you been using Bitrix24, but you still worry you’re not making the most of your lead and deal cards? Or does your business encounter some difficulties fine-tuning your deal cards to meet your unique needs? We’ll show you how you can begin to make the most of your CRM software for your deals.
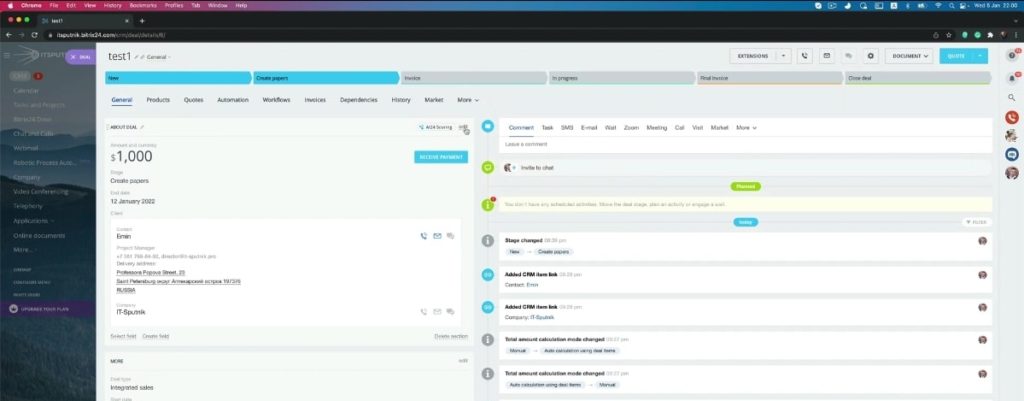
1. Begin by navigating to the deal. Inside the deal, there are some information and sections set by default.
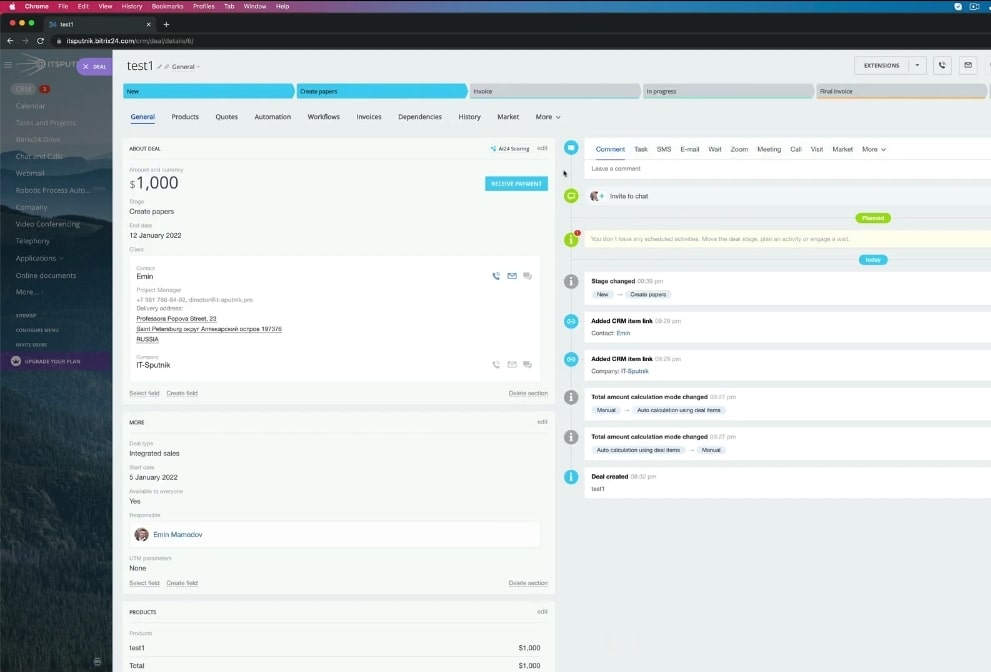
2. Depending on your preferences and business needs, those default sections could be deleted or added.
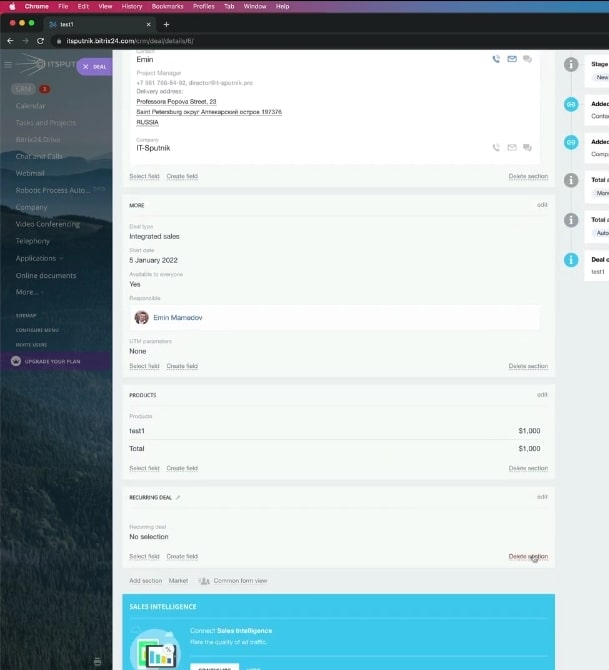
3. So, you can create new sections and also set their names. You can add some custom fields in each section according to your business requirements.
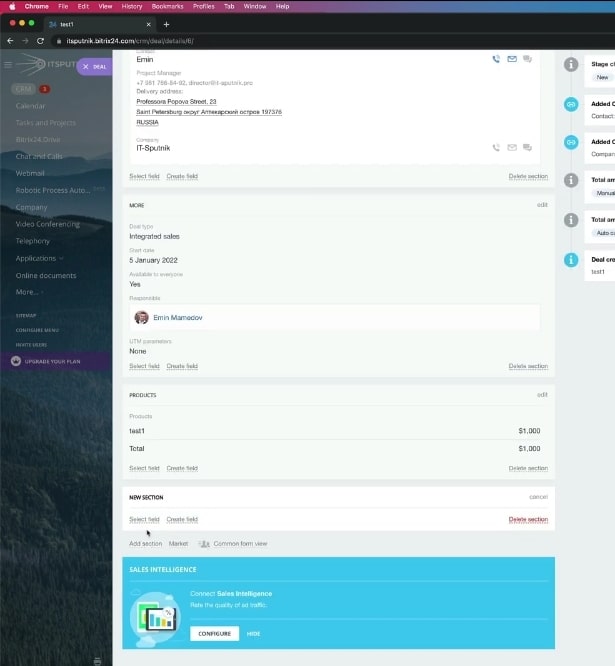
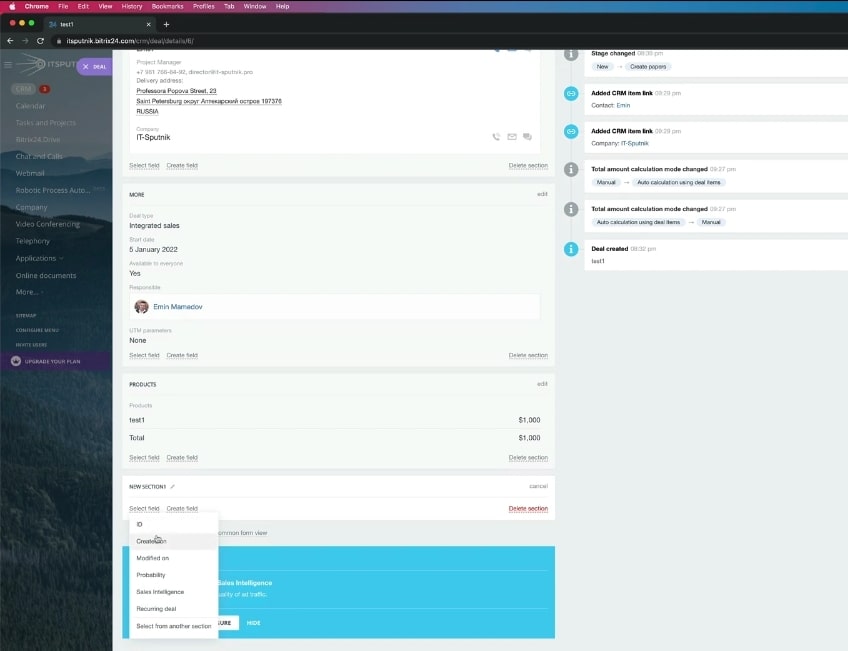
4. You can edit the different fields to suit your business in the default section.
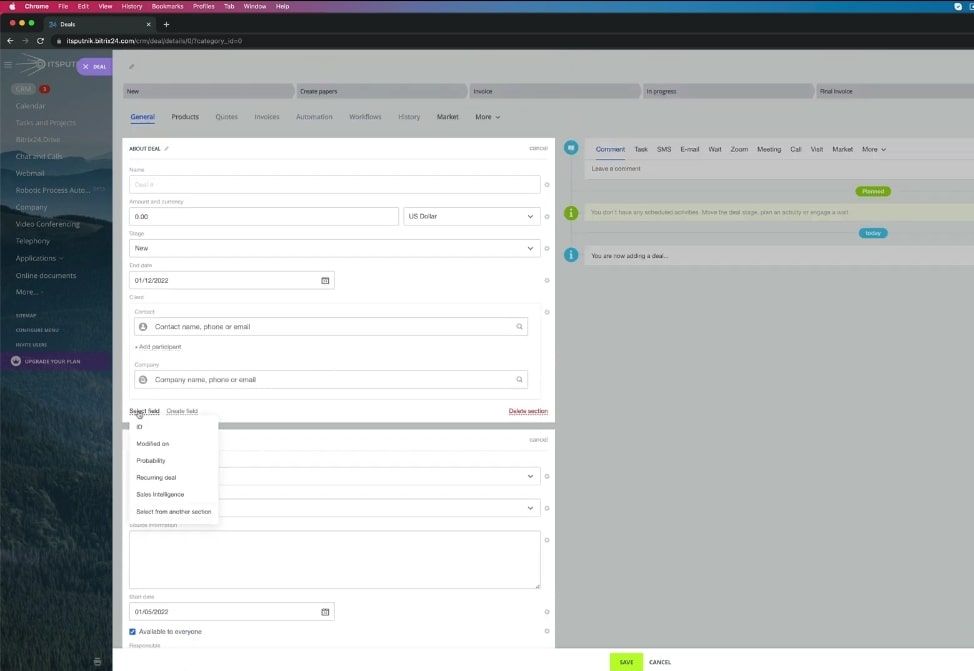
5. When you create a deal, you see all the sections in the same order. So, you can select and set the different fields you want to see whenever you create a new deal.
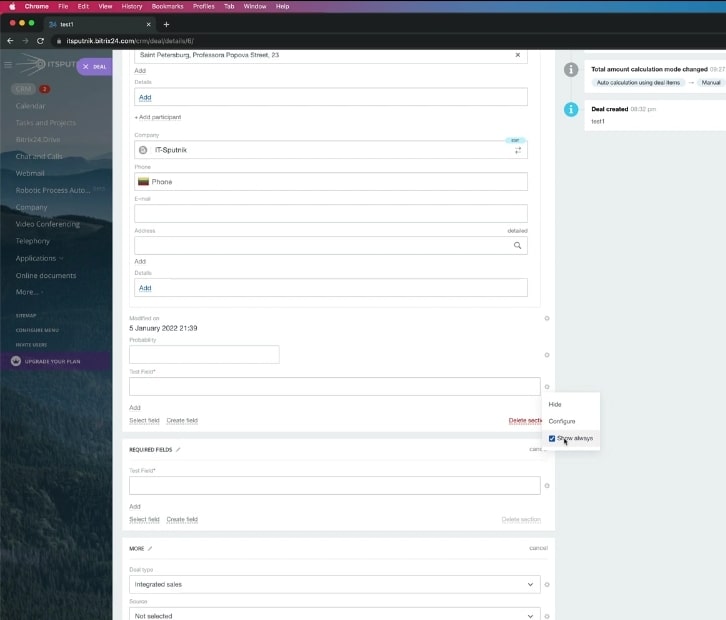
6. Also, when you edit your deals, some fields only show up when you have data stored in them. To have these fields visible even when it hasn’t any data, you need to click ‘edit,’ click on the setting icon by the side of that field, and then tick the ‘show always’ box.
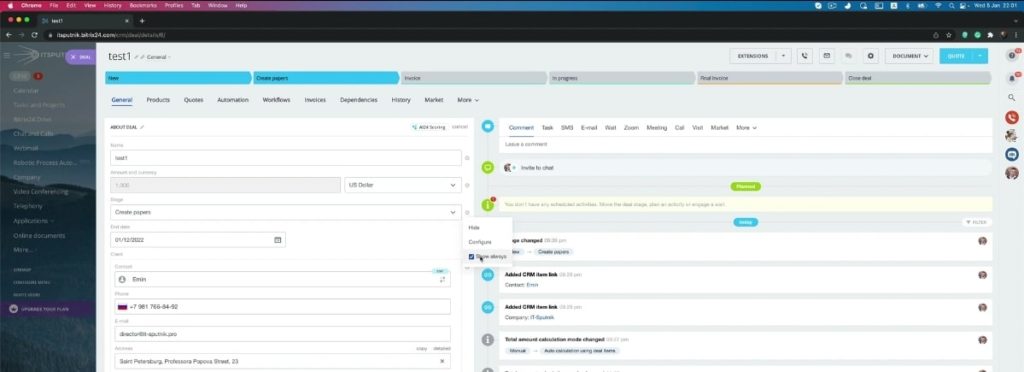
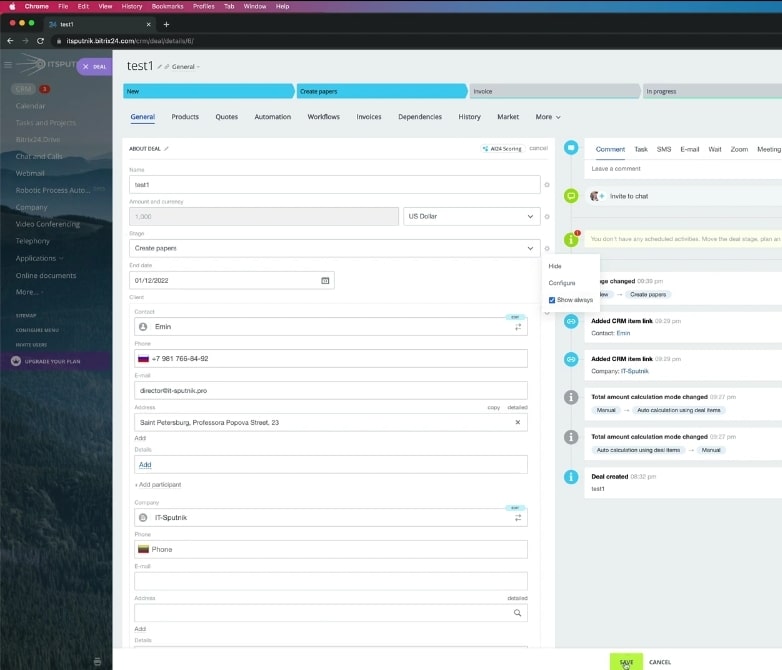
7. For example, a probability field is empty, as shown in the image. When you untick the ‘show always’ box, you stop seeing the probability field in the deal sections.
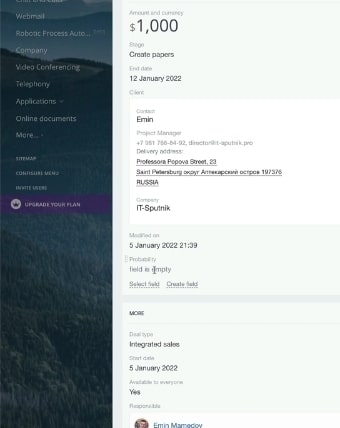
8. But if you happen to want always to see the probability field, scroll down to ‘edit fields’ and repeat the step in 6 above. The field will become available even when it doesn’t have any data.
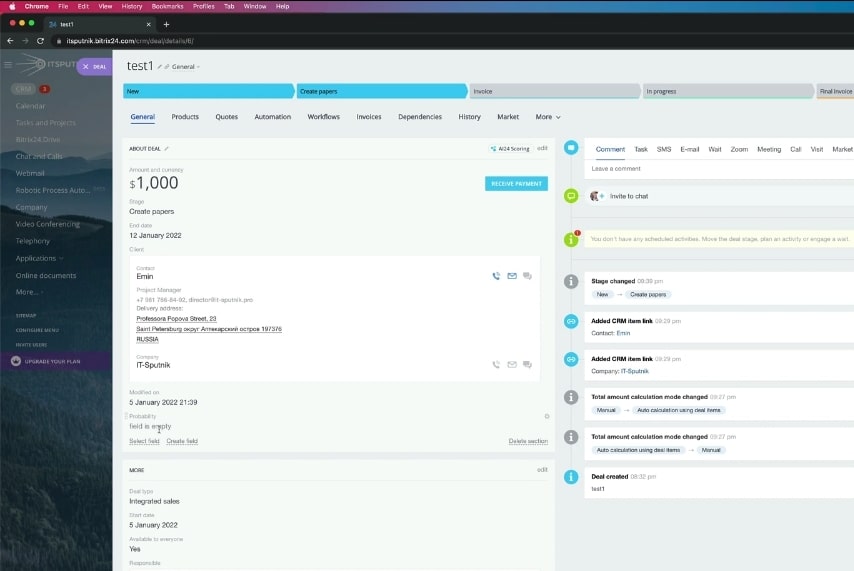
There are also limitations to the default fields available on the Bitrix24 deal card. However, you can create your personalized fields, but you need to have permission to do so.
9. To customize your deal card, click on the ‘create field’ just underneath the contact detail in the deal card.
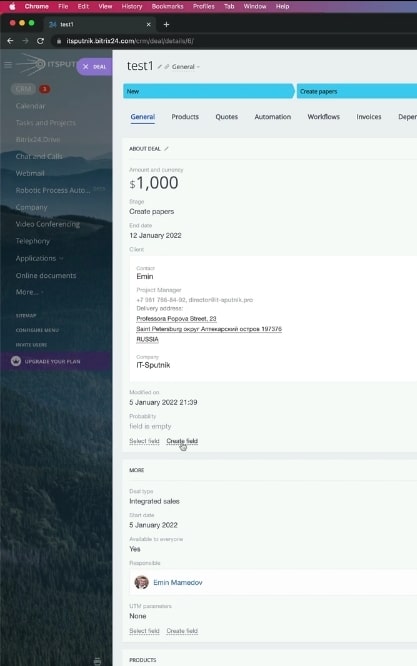
10. Next, click on the type of field you want to create inside the deal, and then create.
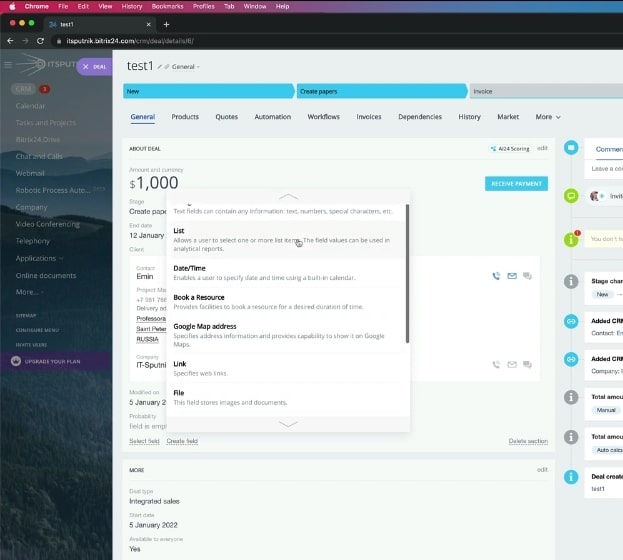
11. Another method of creating new fields in your deal card is to navigate to your settings. This settings method is more efficient than the method above because you can access the list of all custom fields and easily navigate between them.
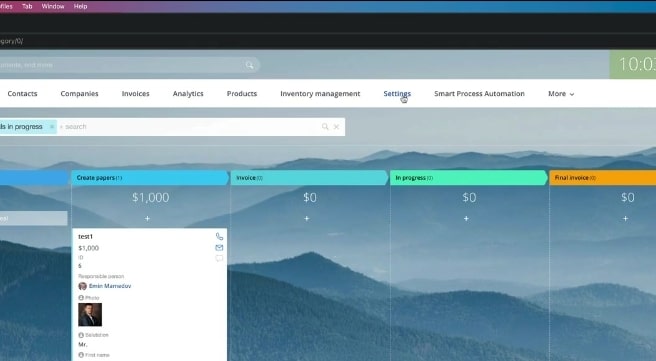
12. Next, locate your ‘form and reports settings’ and click on the ‘custom fields’ icon.
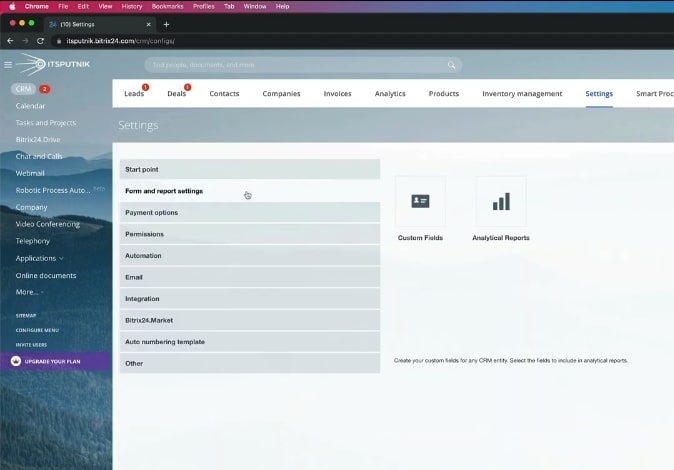
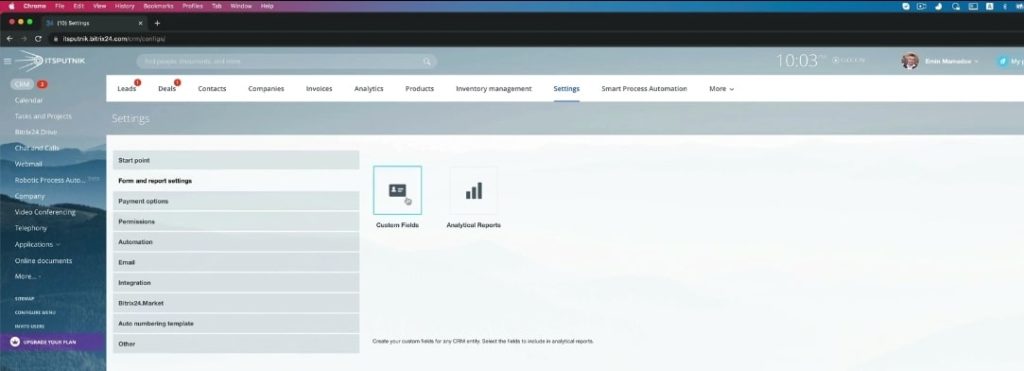
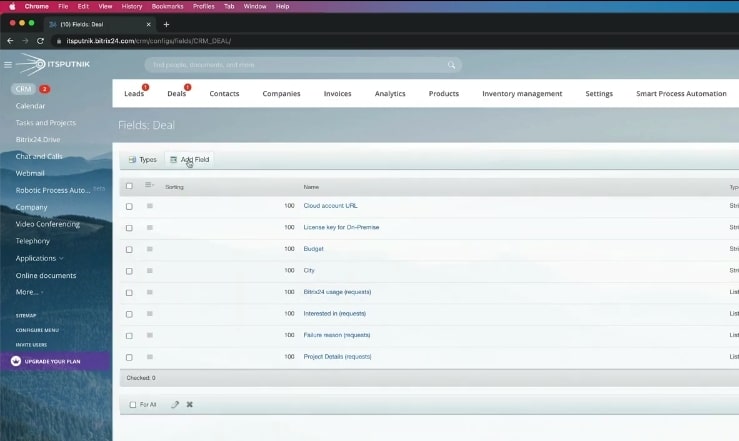
13. On the page that opens, select deal.
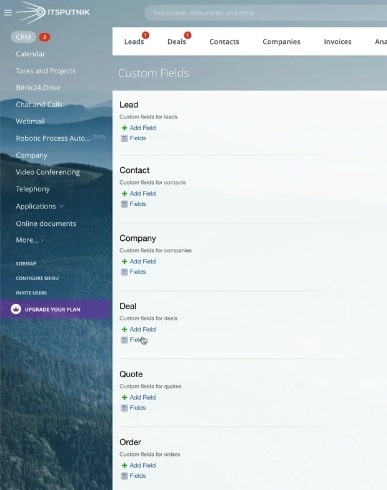
14. On the deal settings page, click on ‘add field’ from the top menu options of the page.
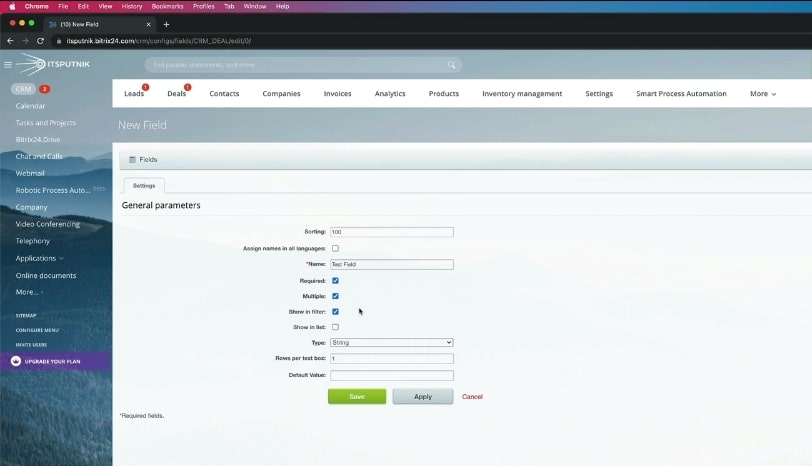
15. Now, fill in the deal’s name (in this case, we used ‘Test Field’), and select the features you want the deal to have. Note that ‘show in filter’ means that you can see that data when you apply filters.
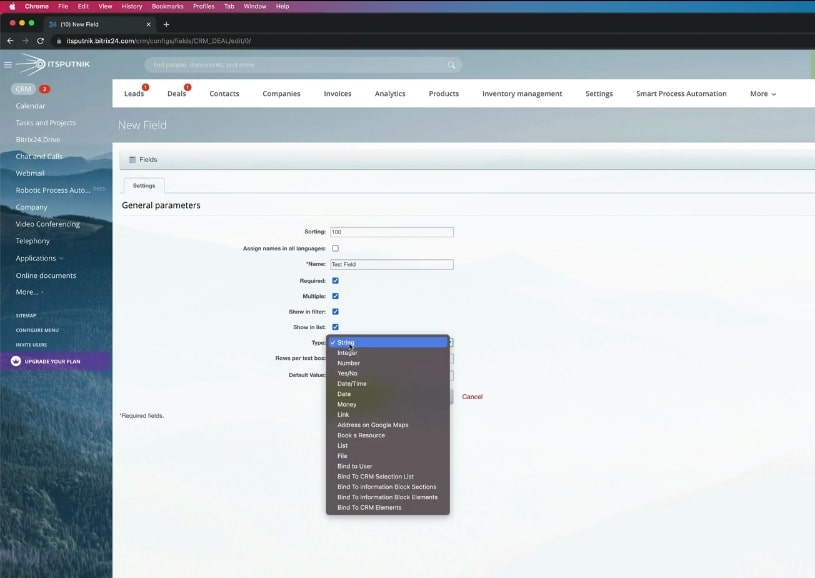
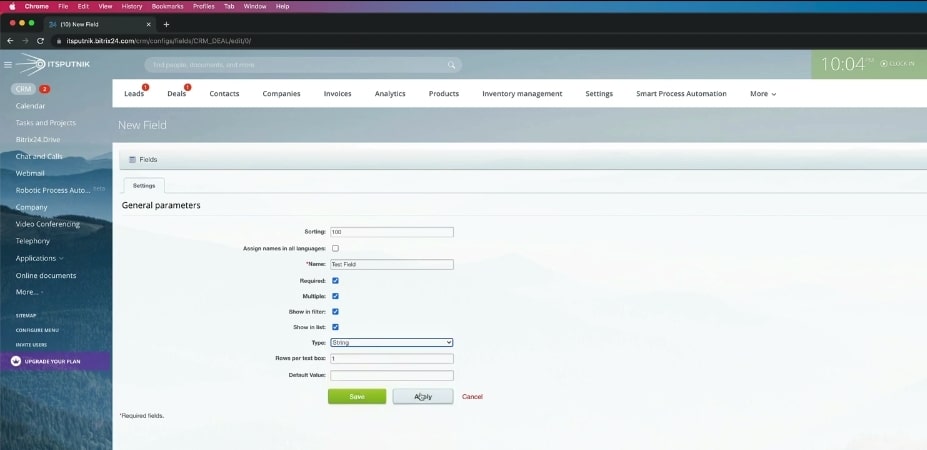
16. Now, select the deal type, the number of rows per text box, and click ‘apply.’ Afterwards, save the settings.
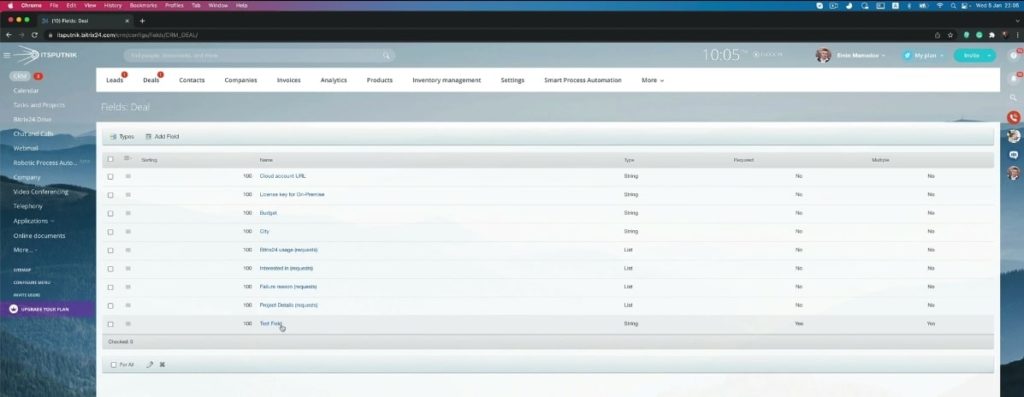
17. When you navigate back to the fields in your custom fields in deals, you’ll find ‘Test Field’ in the list of deals.
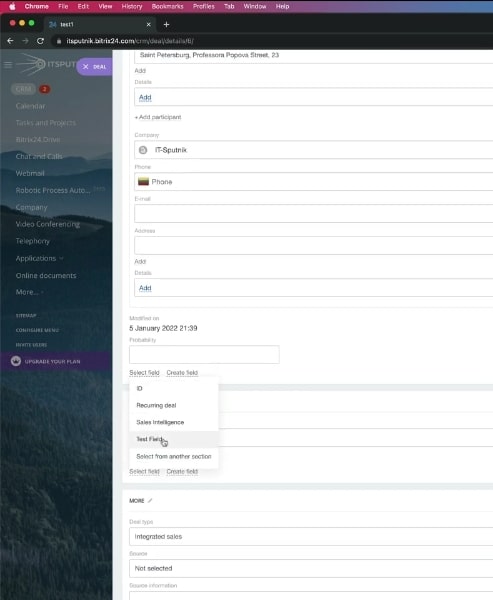
18. Now, return to deals in Kanban view, and open the Deal. Navigate to ‘select fields’ just next to ‘create field,’ and then select the ‘Test Field’ we just created.
19. Repeat step 6 to ensure that the ‘Test Field’ is always visible even with no data.
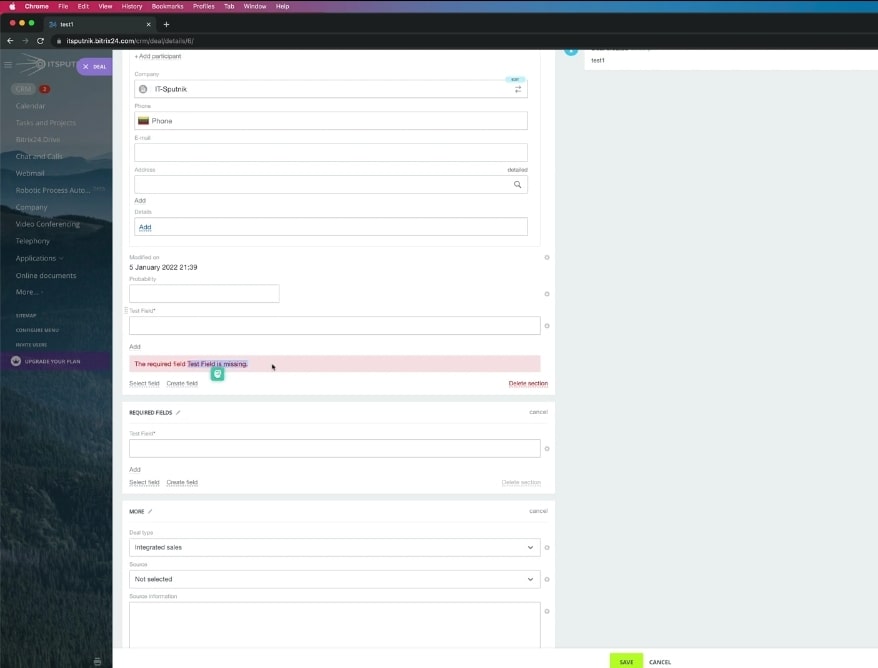
20. However, if you try to save this deal while the newly created field remains empty, you’ll get an error notification and will need to fill in data in that field.
21. Once you enter data in the ‘Test Field’ (test, in our case), you can then save the Deal.
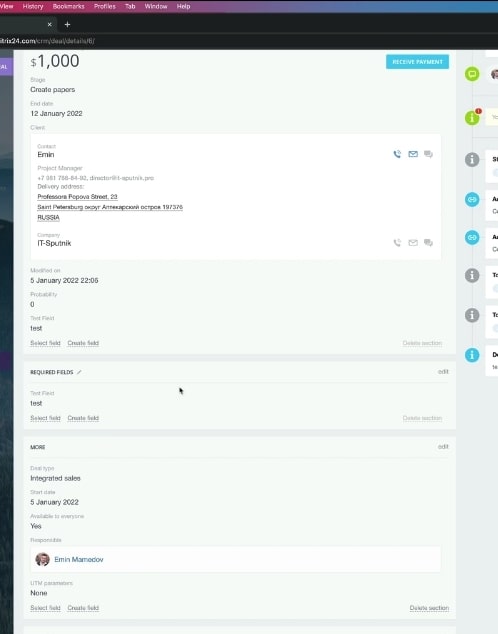
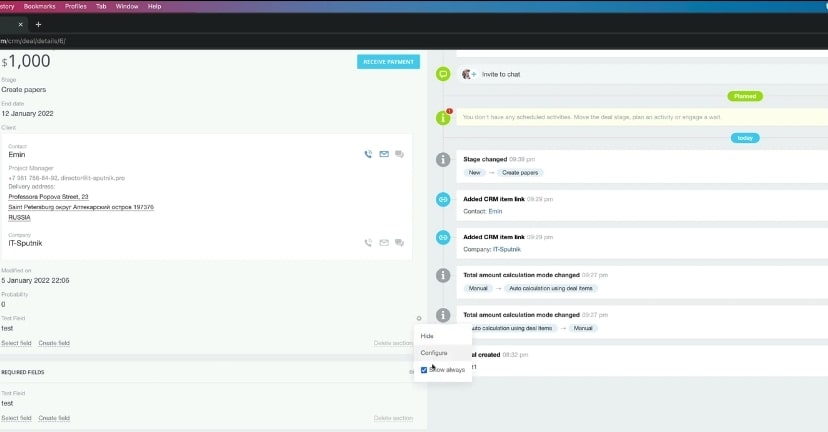
22. You can also configure the new field by clicking on the settings icon at the extreme right of the field and selecting ‘configure.’ This configuration allows you to change the field’s name whenever you deem it necessary.
23. You can also edit the stages where the deal will be required. The default is set to all stages and funnels, but you can set it to any stage of your choice.
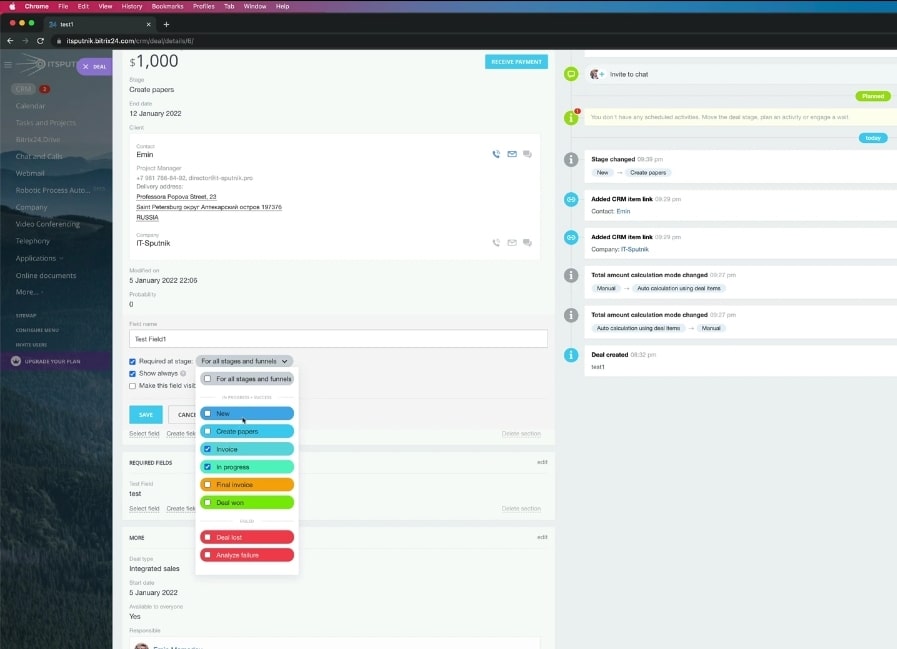
24. In our example, we set the ‘Test Field’ to be required for the invoice stage alone. This means that if invoice data is not available for that field when we get to the invoice stage, we will receive a notification. Also, select multiple fields, and save the new configurations. Delete the initial data entered in that field.
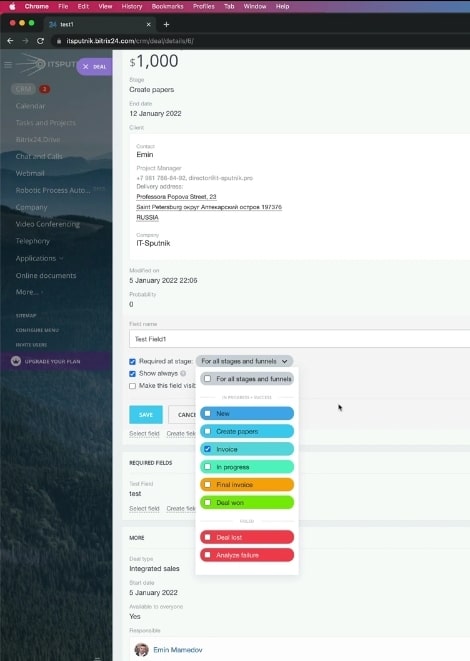
25. If we move the deal to invoice, we’ll receive a notification asking us to enter ‘Test Field’ data since it was configured (in step 28) for the invoice stage.
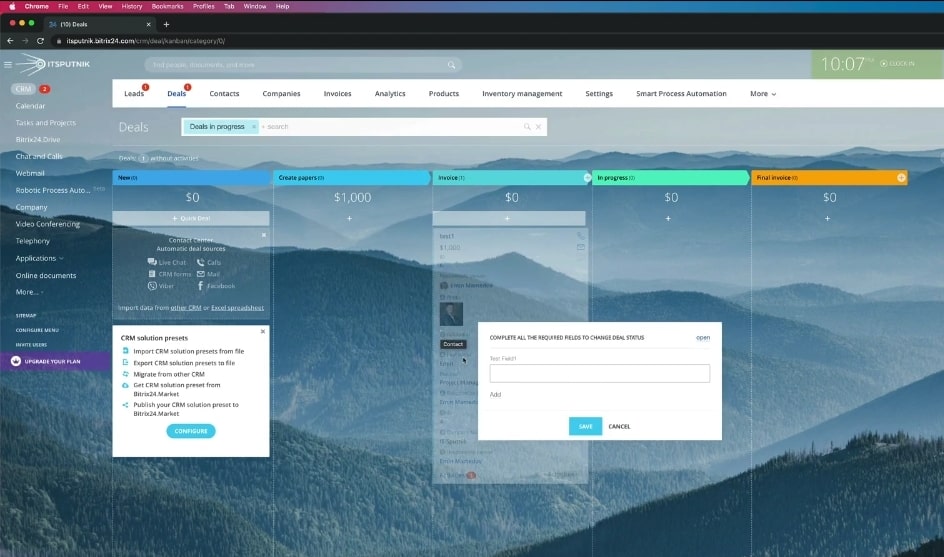
26. When you enter data in the field as requested by the notification, you can also enter multiple fields by clicking on ‘add.’ Now save the field.
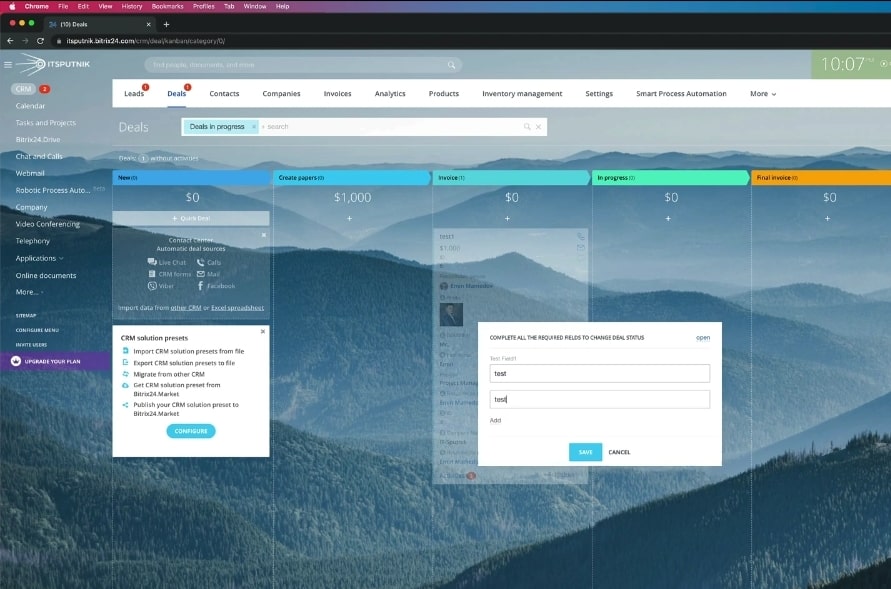
27. Also, on your Deal card, you can move different default items to other sections on the Deal to customize the card for your unique needs
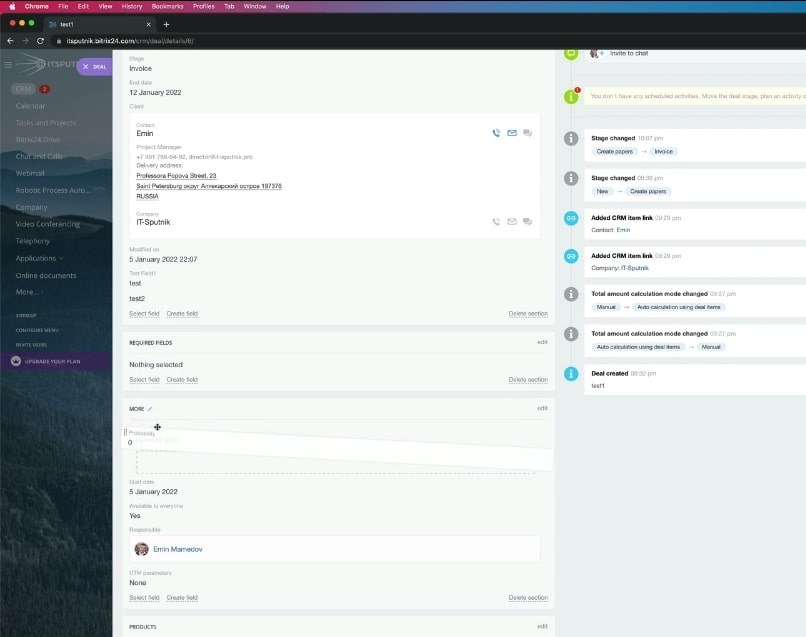
28. You can also create new sections and change the card view. To customize the card view, scroll to the bottom of the card and then select ‘common form view.’
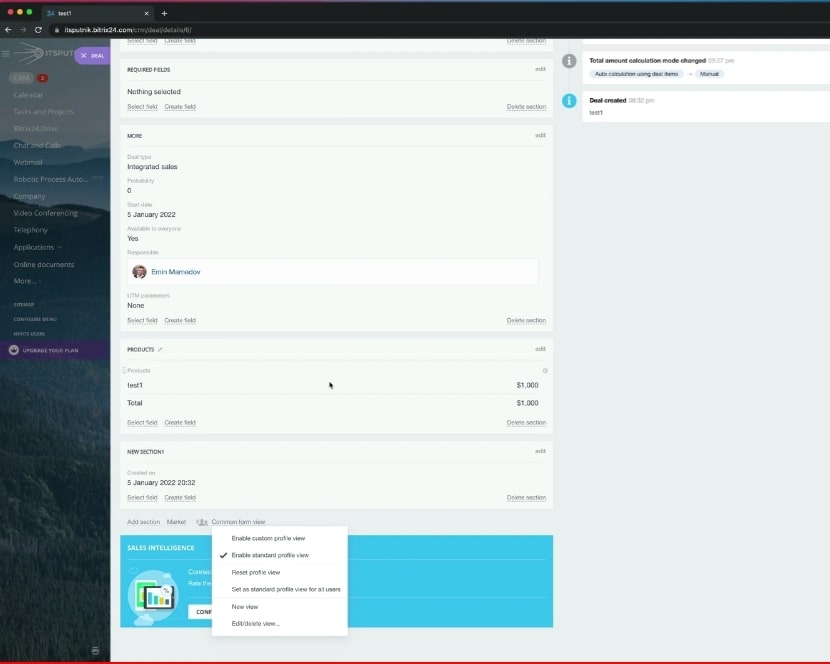
29. You can set the view as ‘set as standard profile for all users.
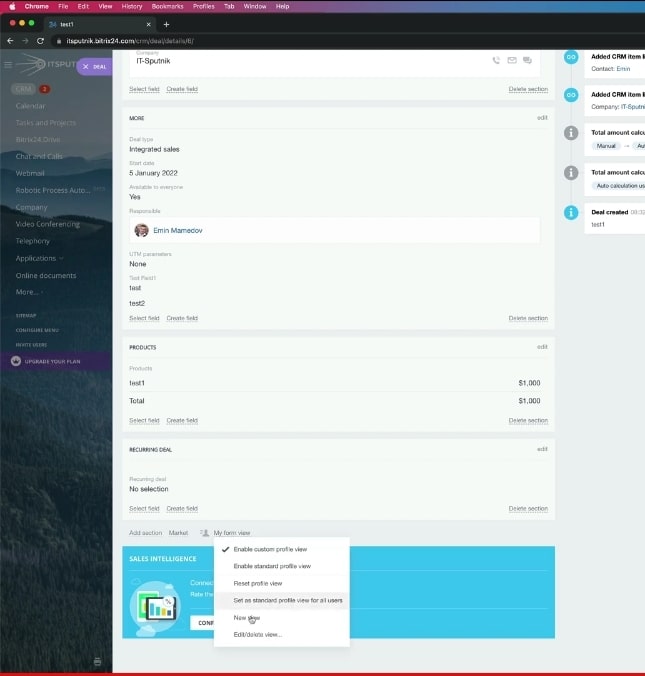
30. You can also create a customized Deal card view for a particular user. Select the view option, and select ‘new view.’
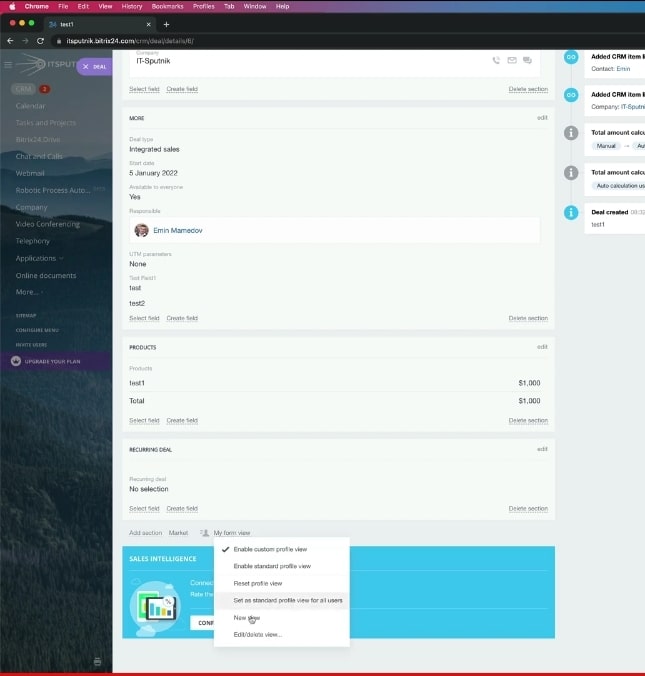
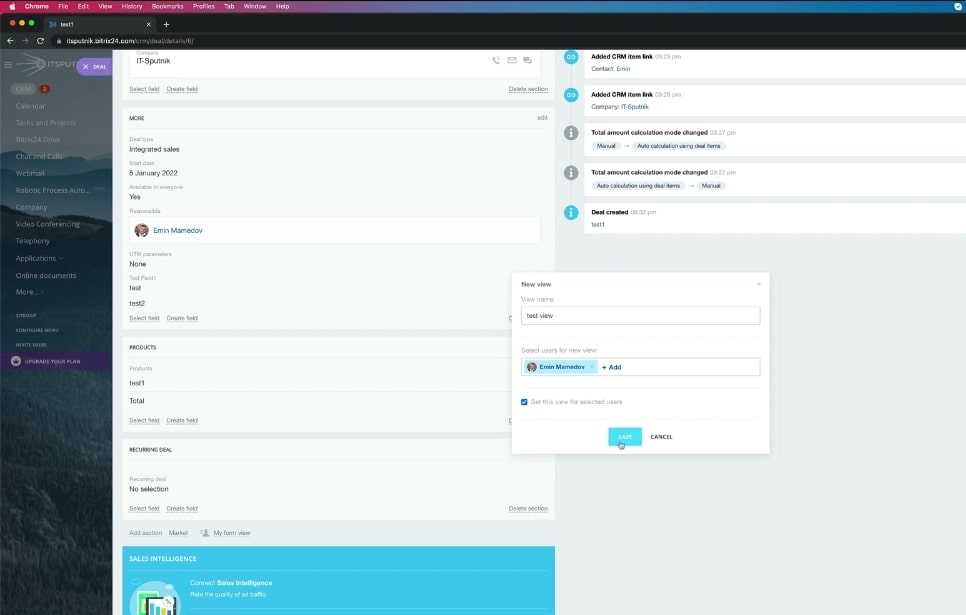
31. Now, set the name of the view, and then select the user for whom you’re creating the view, then save. That user will see the card view whenever you take any action on the card.
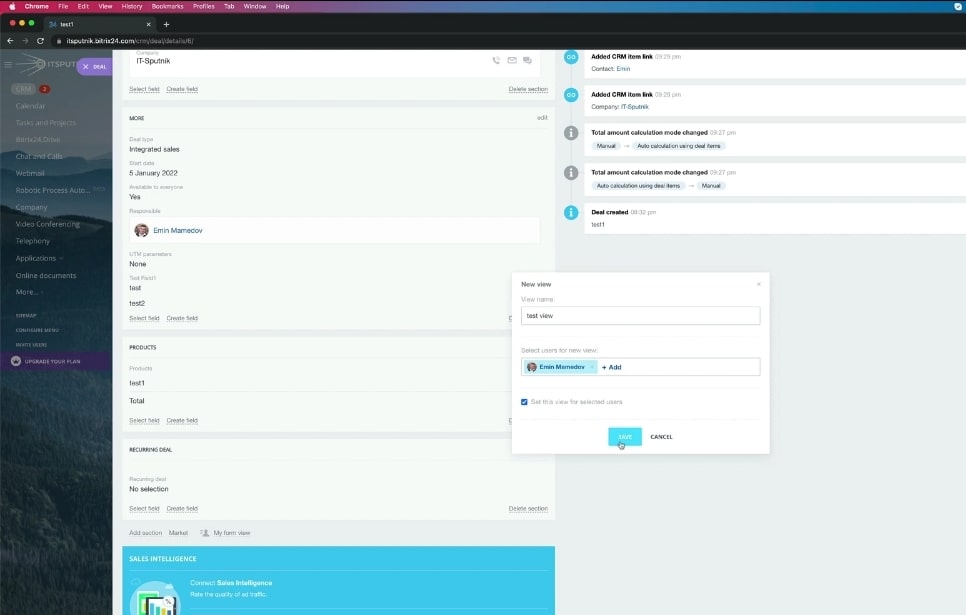
32. You can also create another view for another user by repeating step 38 above. Each of your users will see different views of the Deal card, depending on your actions when you added their specific views.
“Do you need to customize any feature of your Bitrix24 CRM to suit your business needs? Contact us today. We’ll make sure that choosing Bitrix24 becomes one of the best decisions you’ve made for your business“
