| 2292 Views | Amin

Visualization in marketing
Visualization plays a huge role when we are talking about marketing and sales.
Research studies show that one picture can tell much more than bunch of words or numbers. According to experts, the human brain processes visual information way faster than verbal information. It means that content that is created with visuals is naturally more engaging and interesting for users.
That’s why marketers dig into data visualization and learn how to create visual assets to represent data, making it easier to visualize and understand the information. Doing that, you can engage your audience deeper.
Branding importance
Branding images has a purpose of right communication between company and target audience. Branding helps to develop strong emotions for audience. Focusing on your branding is useful not only for big corporations, but also for small and medium enterprises. Using right logo, fonts, images and colors you can stand out from competitors and keep top-of-mind with your customers and potential customers.
Visualization in documentation
In invoices and quotations sellers usually use just text and numbers. However, even here it can be efficient to use visual elements.
Using branding elements, you can favorably differ from competitors. Moreover, your logo can be remembered by your clients for long-term perspective.
One more thing to consider, pictures of your products or services can speed up coordination process. For example, in b2b business you send an invoice to client company representative. In turn, he has to approve it by senior manager. And if you have an image of your product right there, senior manager can understand the subject from the first sight.
Ways of visualizing a document
So, what kind of images you can use in standard documents as invoices and agreements? As a minimum – company logo in header. More – pictures of your product. In case of service, you can prepare some infographic showing service efficiency or popularity.
If you are in sphere of custom work, drafts and layouts are essential. Visualization of a future work will inevitably increase your value.
Templates in Bitrix24
Bitrix CRM allows to integrate documents and edit them right inside of the system. You can create documents in standard text editors such as Microsoft Word and use and share them in Bitrix. Also, you can insert credentials which will get data from fields inside of the deal.
Let’s see a quick tutorial of how to: Insert a picture of your product into an invoice or any other document in Bitrix24.
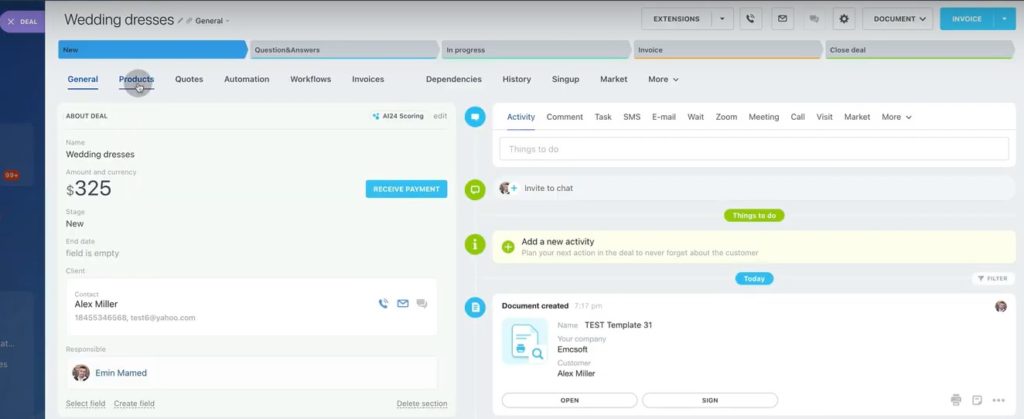
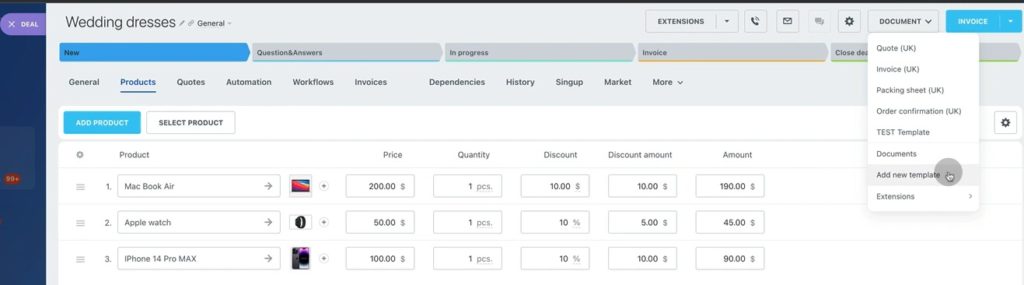
1. We have a sample Deal. Go to the Products tab.
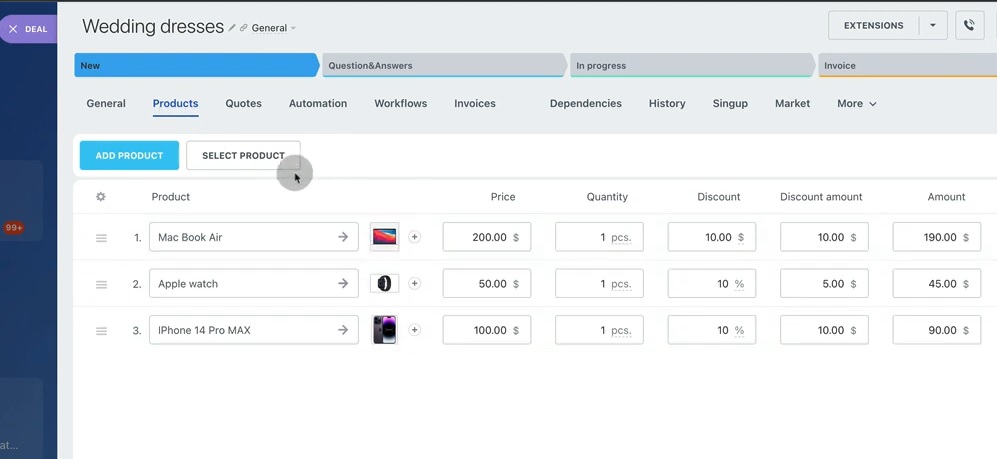
2. Here we see a list of our products with small images next to product name.
3. Go inside of the product card.
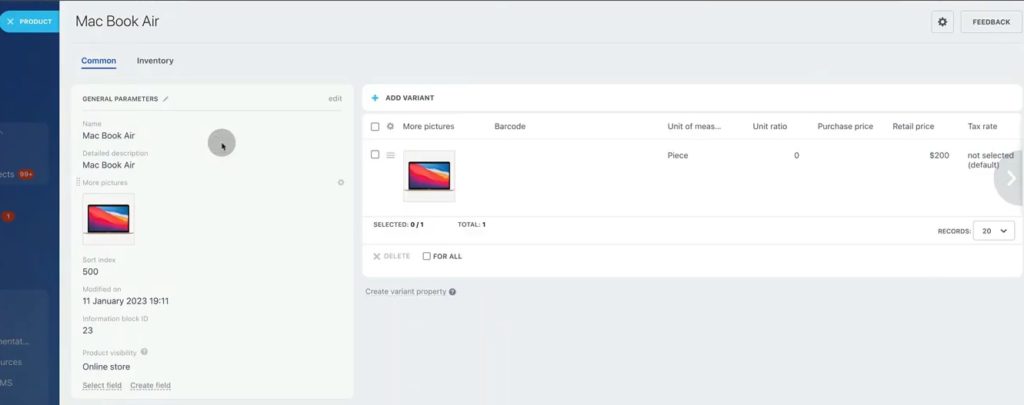
4. We will see that picture is located in field named More pictures.

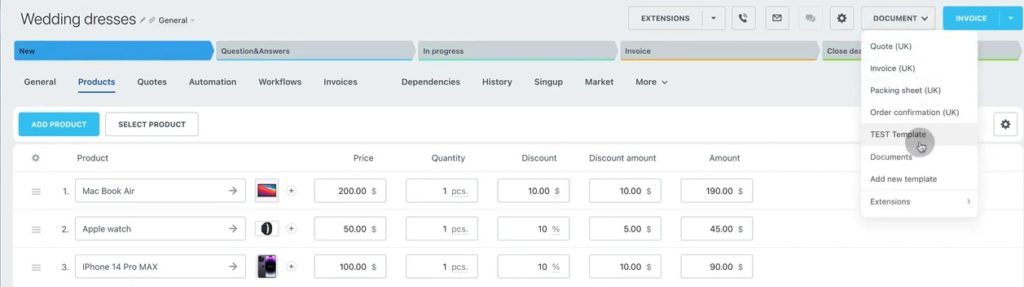
5. Go back to products and click Document – TEST Template.
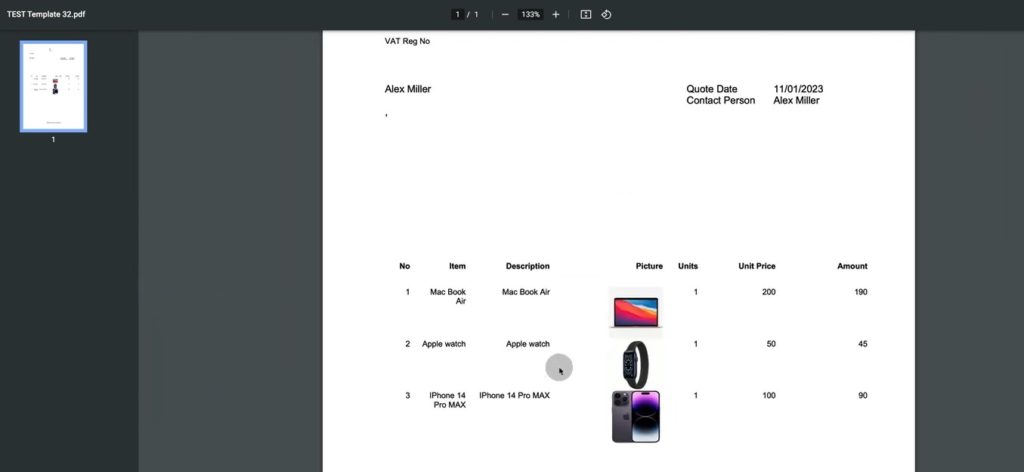
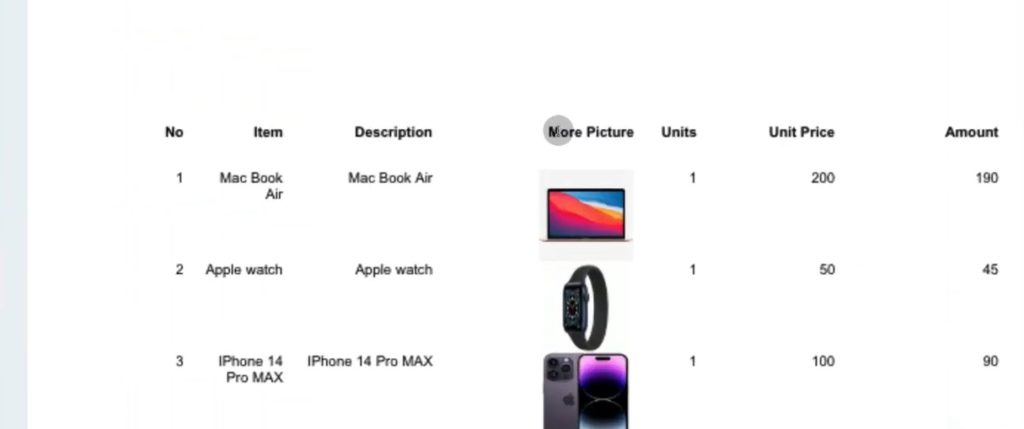
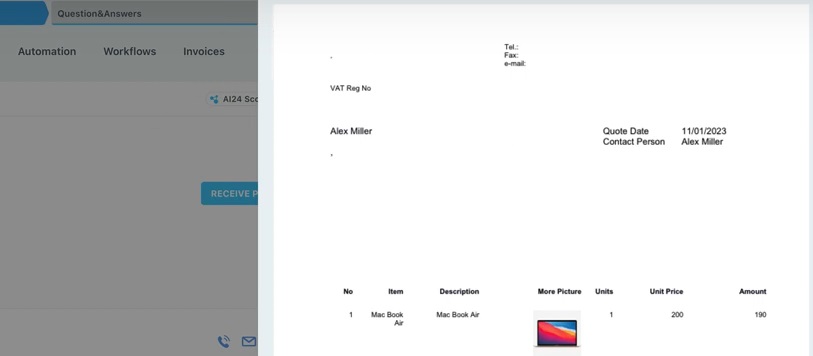
6. Here we see template that was created before. We will download it as a PDF document.
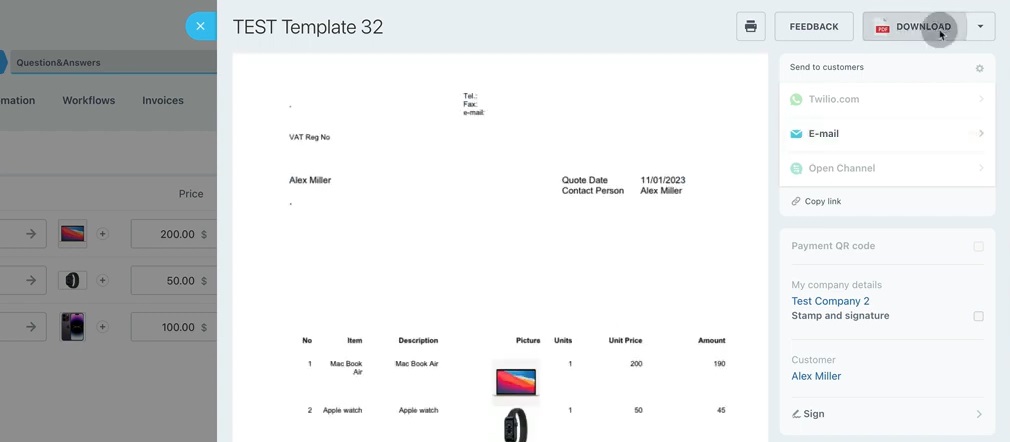
7. This is how our test document looks like.
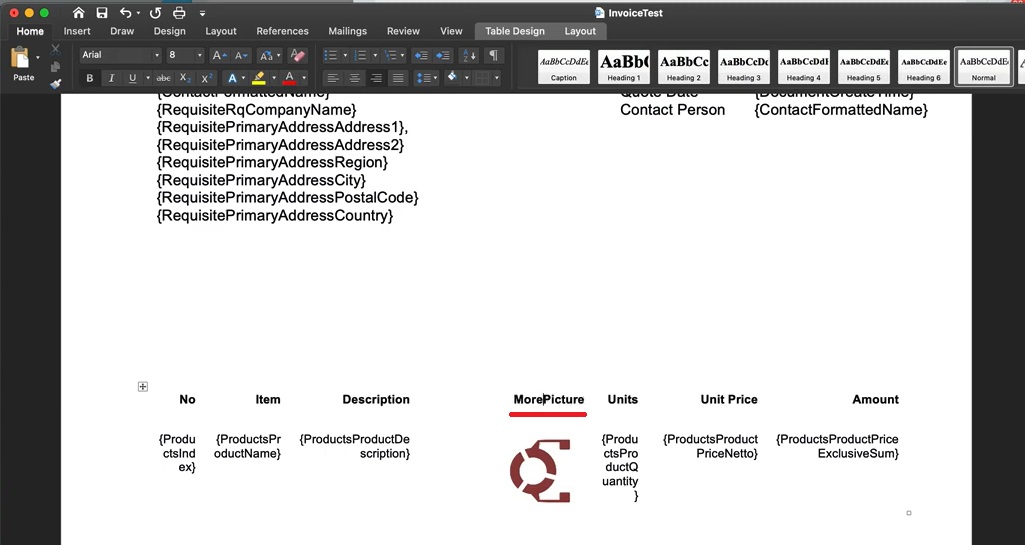
8. So, to achieve that, you will need to open your document template in text editor. Insert any required picture – in our case it’s company logo.
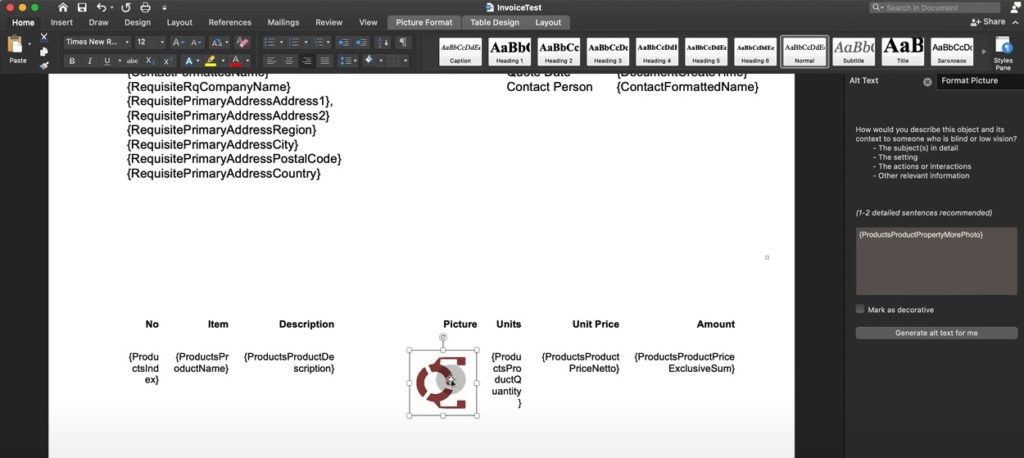
9. Then click on that image and go to Picture format settings – Alt text. In opened panel from the right, you will see a box.

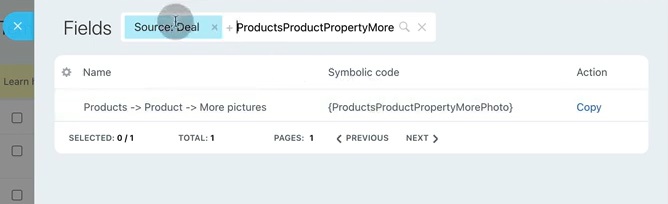
10. Inside of that box type the following: {ProductsProductPropertyMorePhoto}

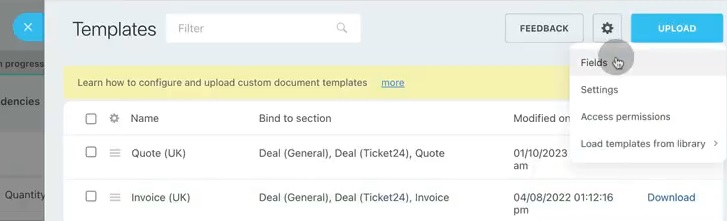
11. To understand what that text means, you can go back to the Deal – Document – Add new template.
12. In Templates go to settings wheel icon – Fields.
13. Here in fields, we see that sentence as a path which leads to Property, which is picture itself.
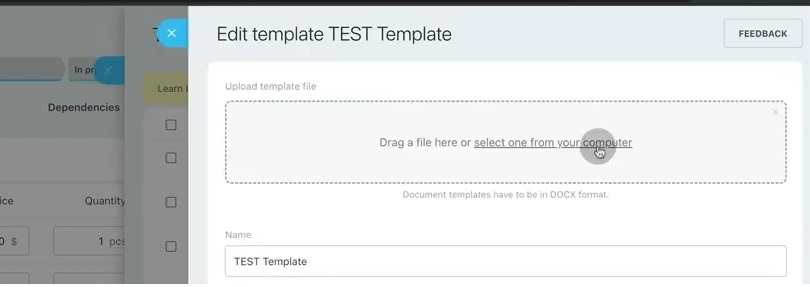
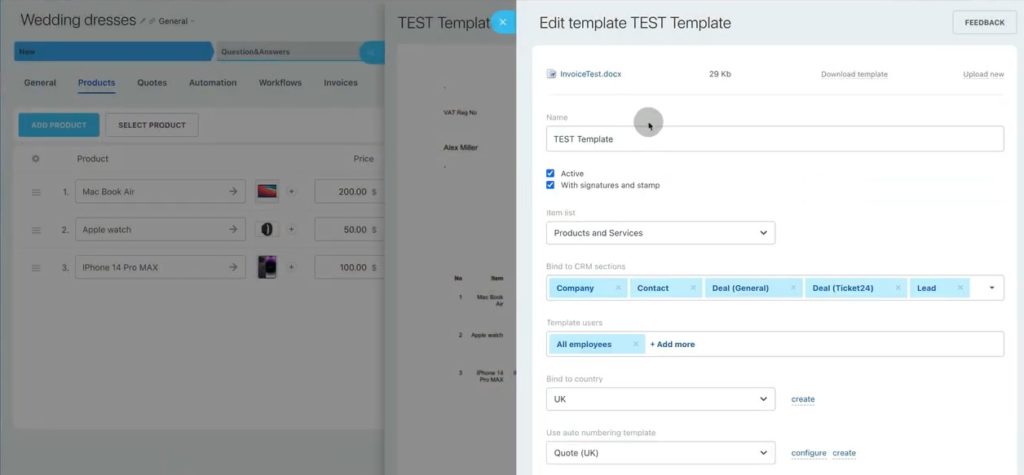
14. So, next step is uploading our template in .docx format.
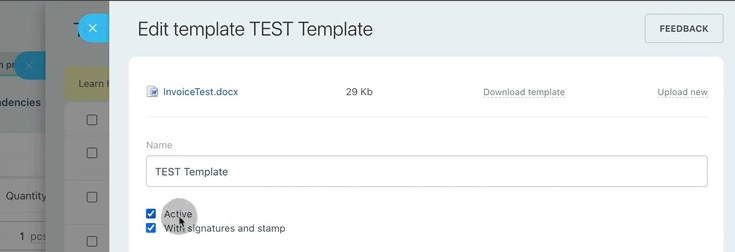
15. Be sure that you tick Active and With signatures and stamp fields. Active means that this template will be shown in a list.
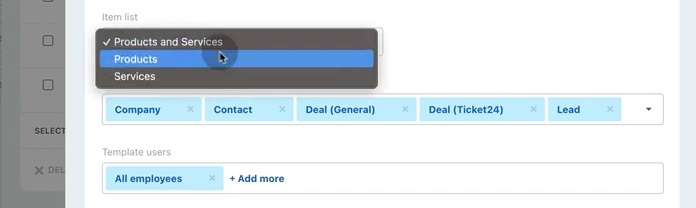
16. Then, choose Products instead of Products and Services, if applicable.
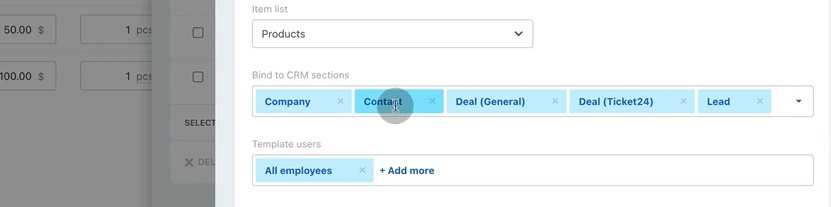
17. Next, check that this template is bound to all Bitrix cards, including deals in Ticket24. After that you can select who can use this template: all employees, several or just one.
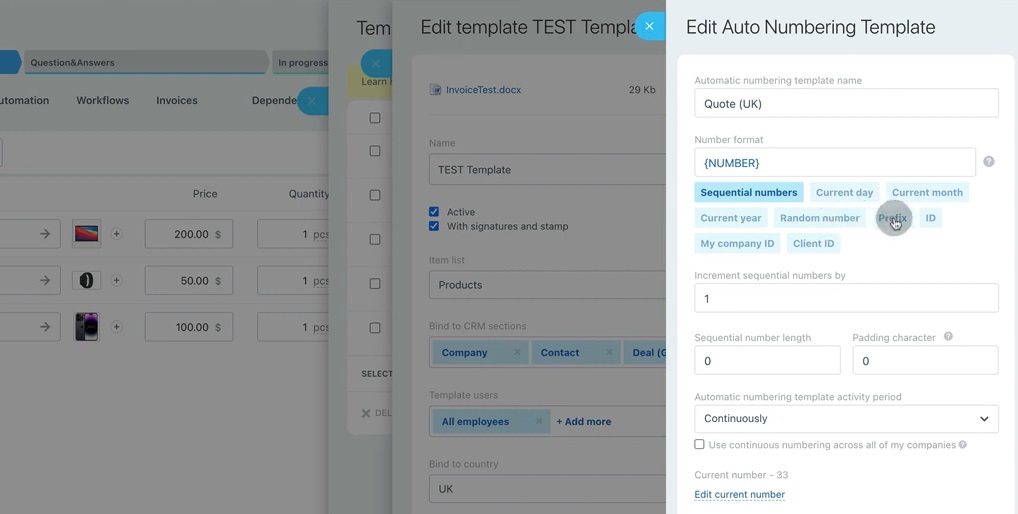
18. Then you need to connect template with some number or bind it to country.

19. For numbering, click Configure and set up these numbers which are generated automatically inside of the document. Then click Save.
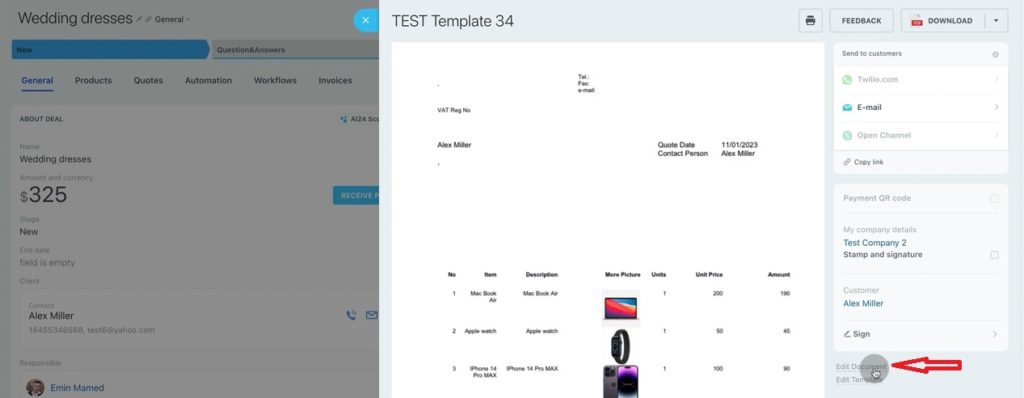
20. That’s it and we see our template in Bitrix with pictures that we inserted before. In addition to this, we will show how you can benefit from Edit template option.

21. Imagine that you need to edit your template – as n example we change column name from Picture to More Picture. Save it.
22. Then go to Edit template and upload the new template with edited elements.
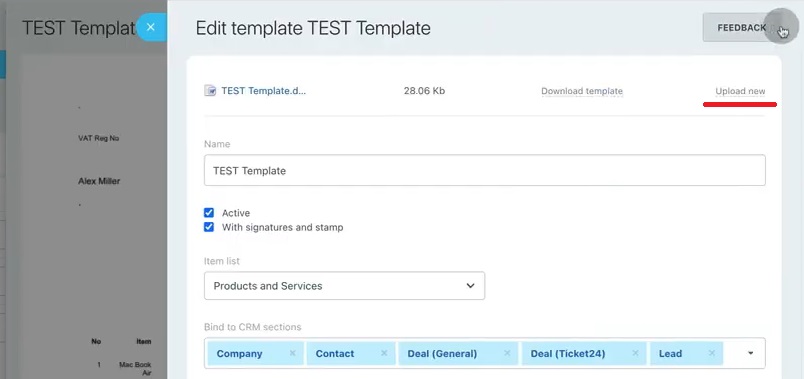
23. Make all previous settings and click Save.
24. Then refresh your page and go again to Document – TEST Template – Create new.
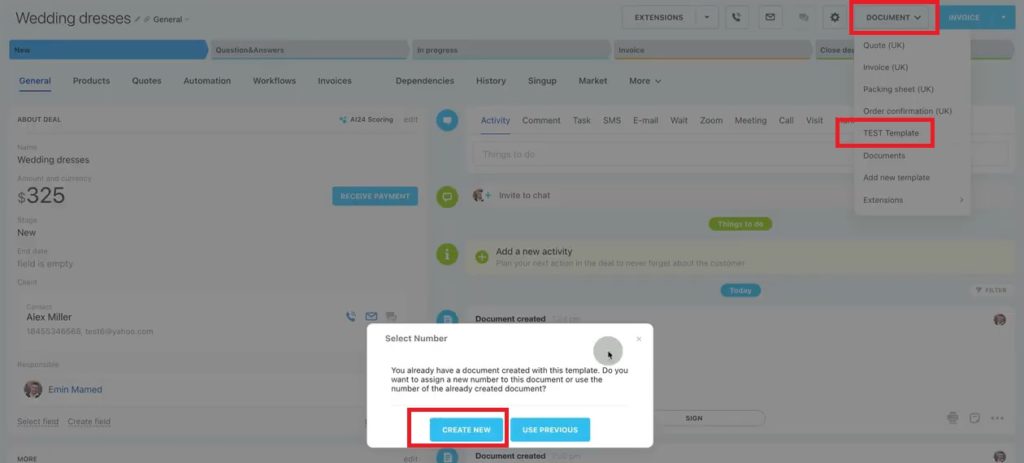
25. We see that template was updated.
26. Also, you can see that in our template we have a lot of data. These data is coming from deal card.

27. However, in our document these fields are empty for some reasons. Obviously, it will be too time consuming to go back to the Deal, insert data, then generate document again.
28. Instead of it, we will go to Edit Document field next to the template.
29. Here we just type missing data in relevant fields.
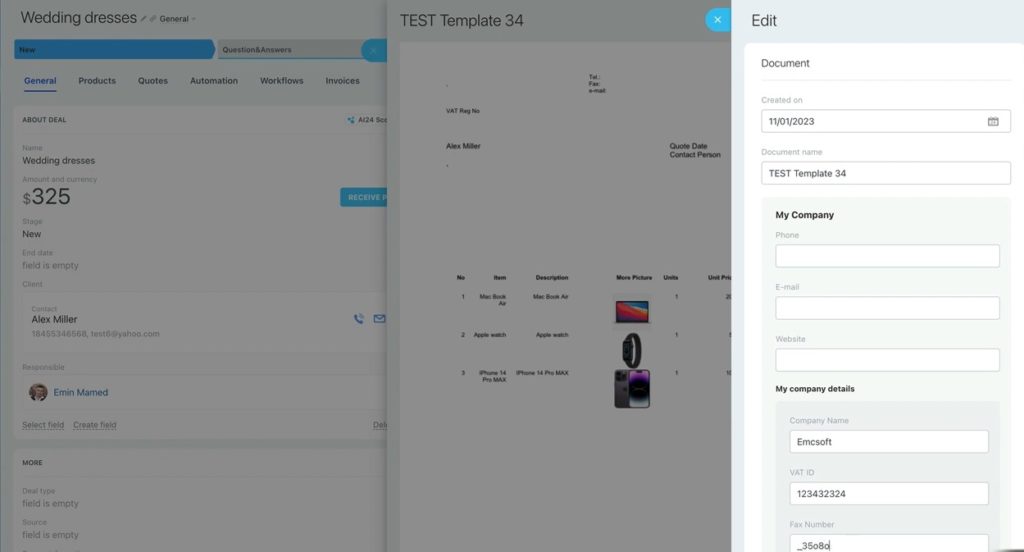
30. After saving you will see that template is changed and inserted data is visible.

That was a quick overview of inserting pictures in Bitrix documents. Using this instruction, you can add any picture in any document you use in business correspondence to increase visual appeal.
Also, we are going to launch education courses for Bitrix administrators. We feel ready to share that scope of experience with those who desire drive in Bitrix24 CRM deeper.
If you are interested in scaling up your skills in Bitrix administration, feel free to contact us via our contact page.
You can also watch this video on Youtube