| 1230 Views | admin

Your contacts are different, your emails should be too
In this guide, we’ll explore how to use audience segmentation in Bitrix24 to send more targeted and effective messages. Segmentation allows you to group your audience based on shared characteristics—like behavior, interests, or actions—so you can communicate with them in a more personalized way. This often leads to better results, including higher open and click-through rates, stronger engagement, and more conversions. The more relevant your message is to your audience, the better the response.
Detailed instructions are described below
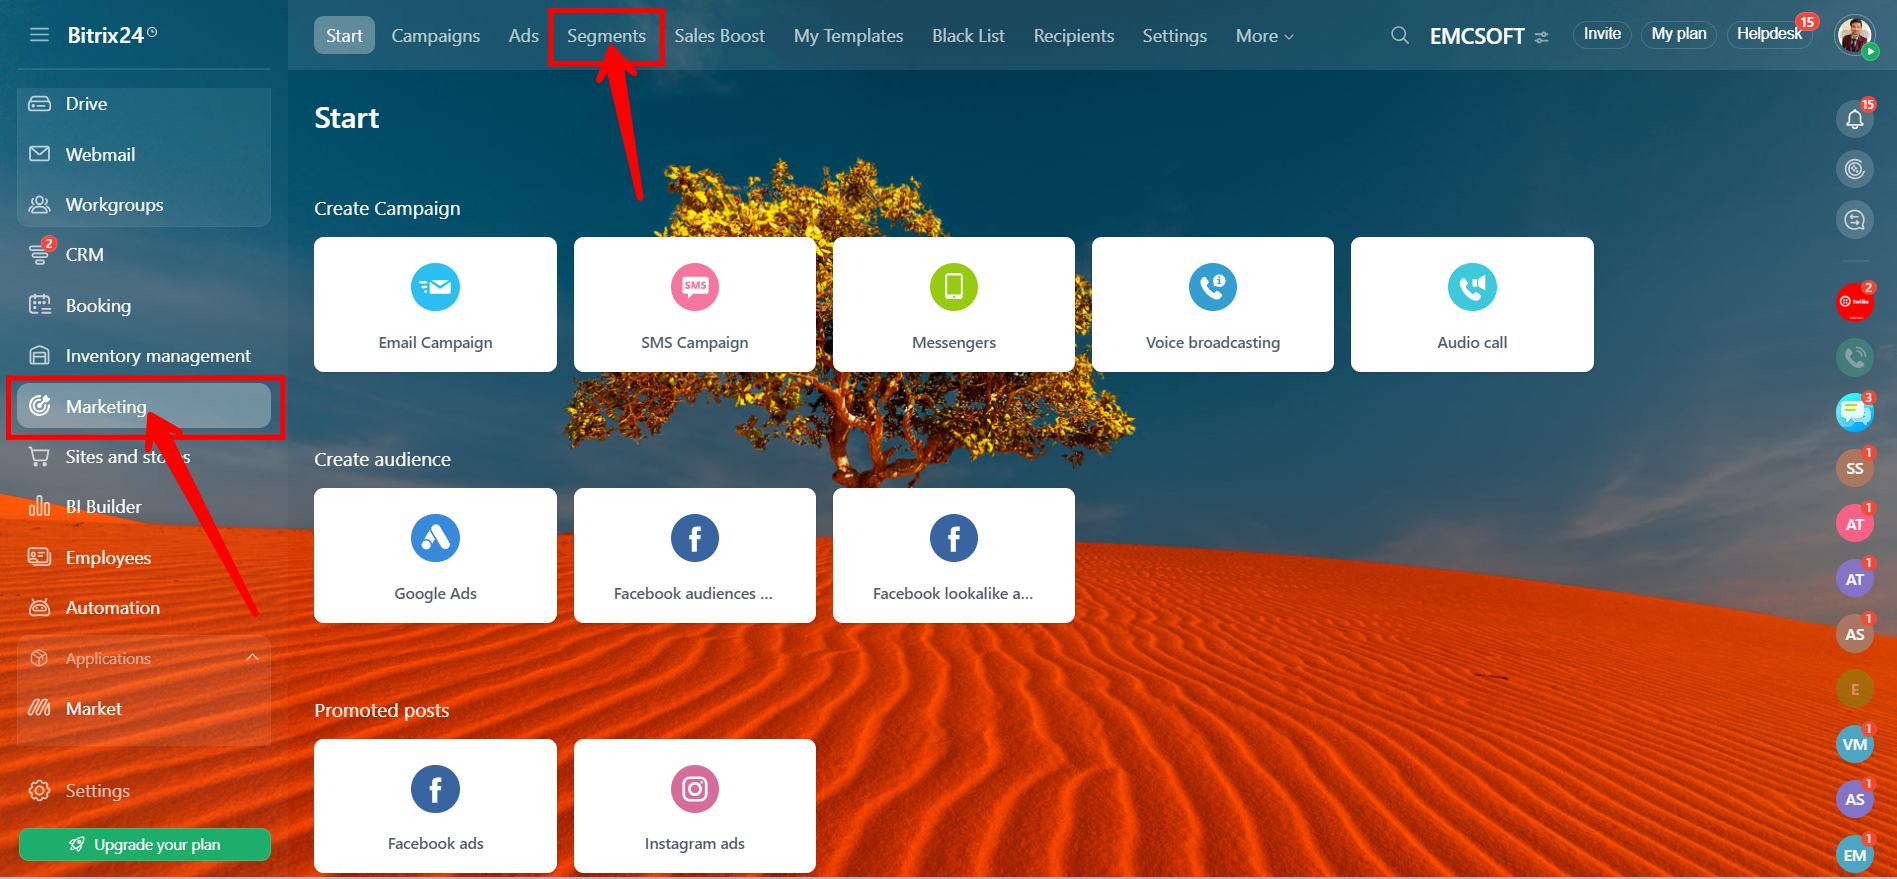
1. To get started, go to the Marketing section in your Bitrix24 dashboard, then click on Segments. This is where you can create a new audience segment based on specific criteria.
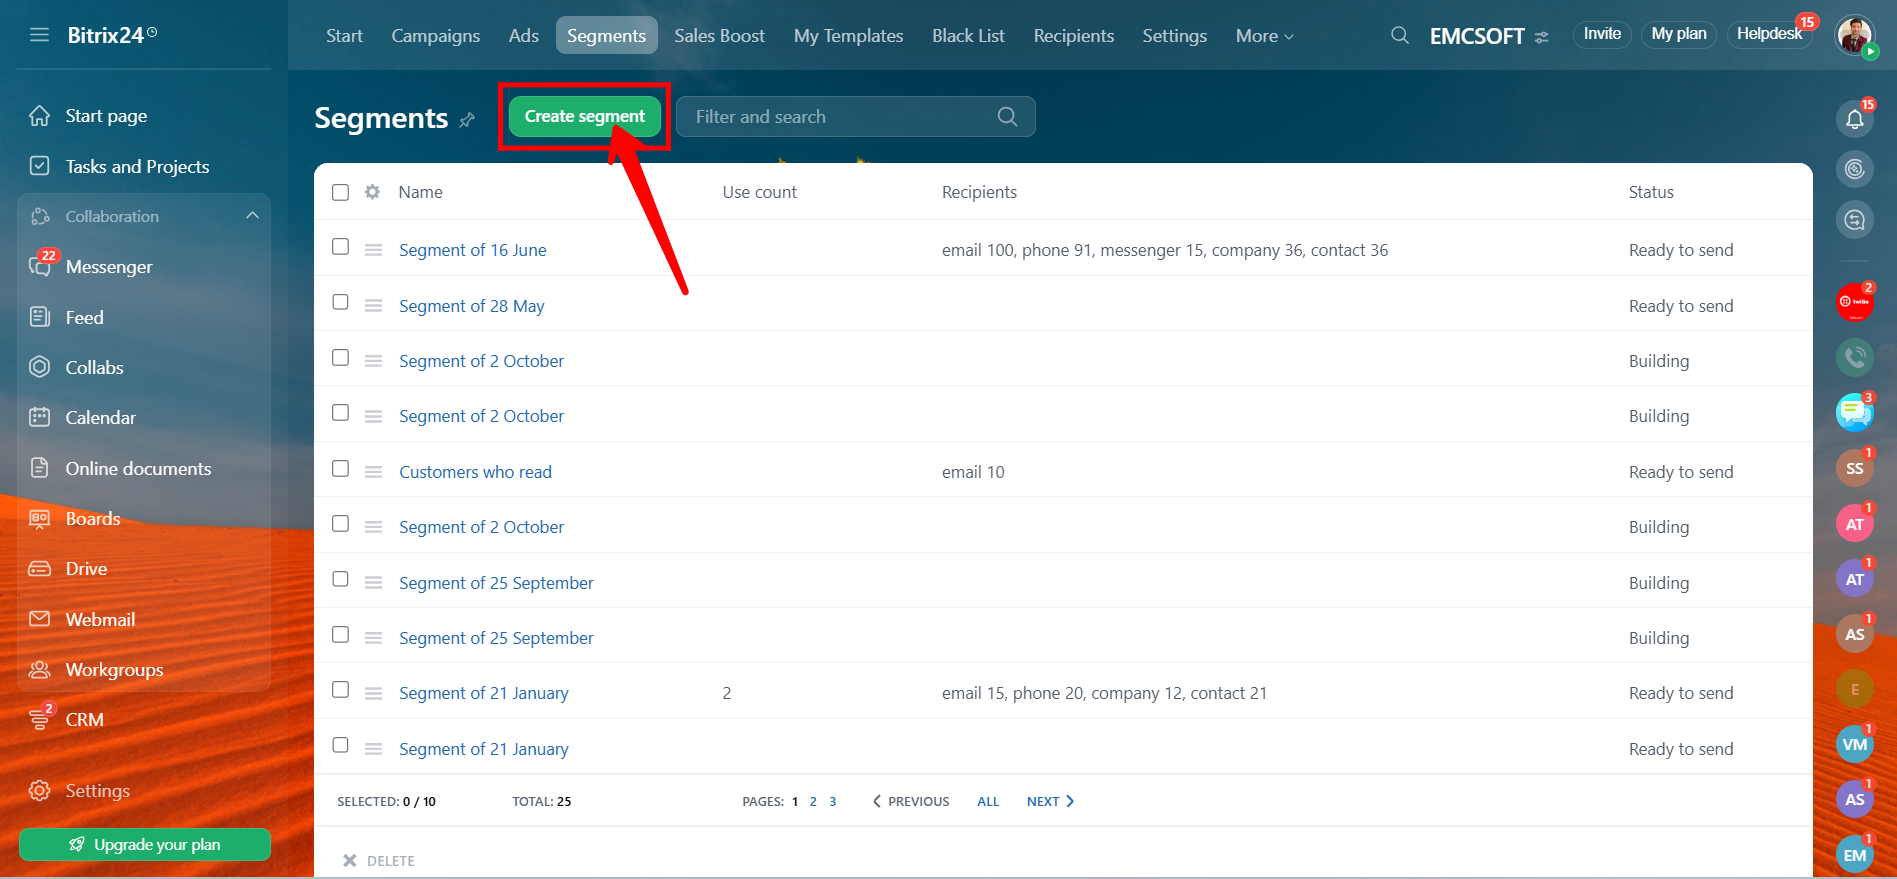
2. Click on the “Create Segment” button.
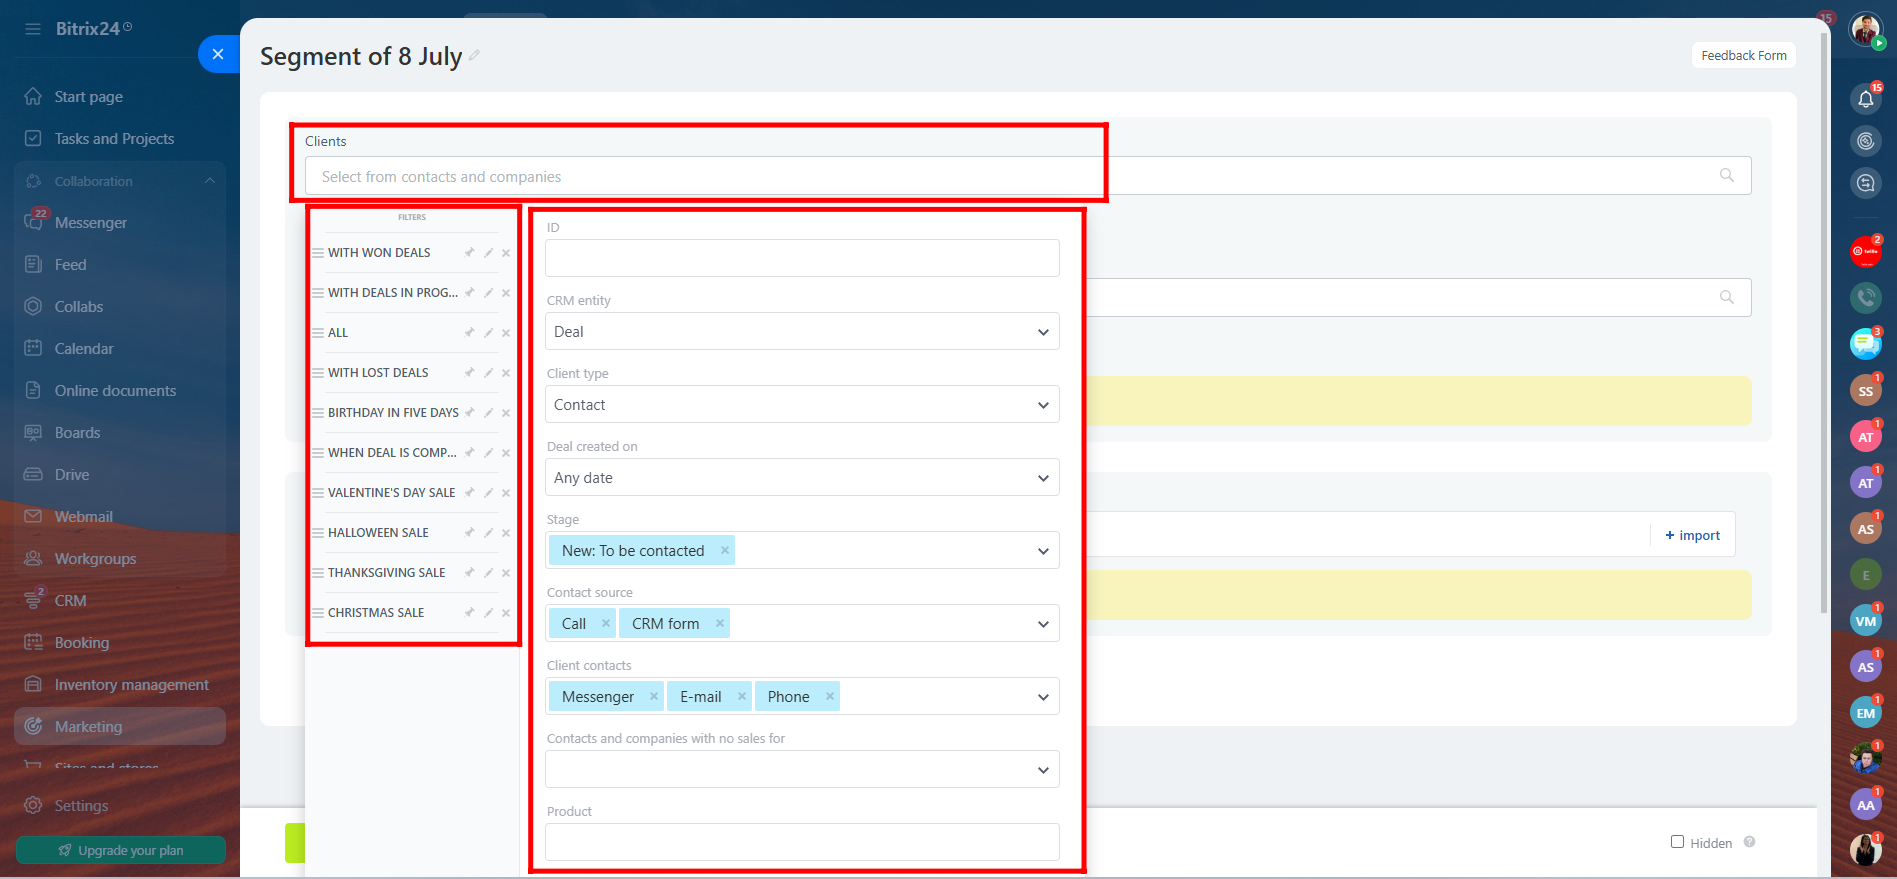
3. After creating the segment, give it a meaningful name of your choice to keep your segments organized. You can then filter your audience using predefined options such as “With Won Deals,” “With Deals in Progress,” “All,” “With Lost Deals,” or “Birthday in Five Days.”
For more advanced targeting, you can apply multiple custom filters based on factors like Client ID, CRM Entity, Client Type, Deal Creation Date, Deal Stage, Contact Source, and more. This helps you build a highly specific audience tailored to your campaign goals.
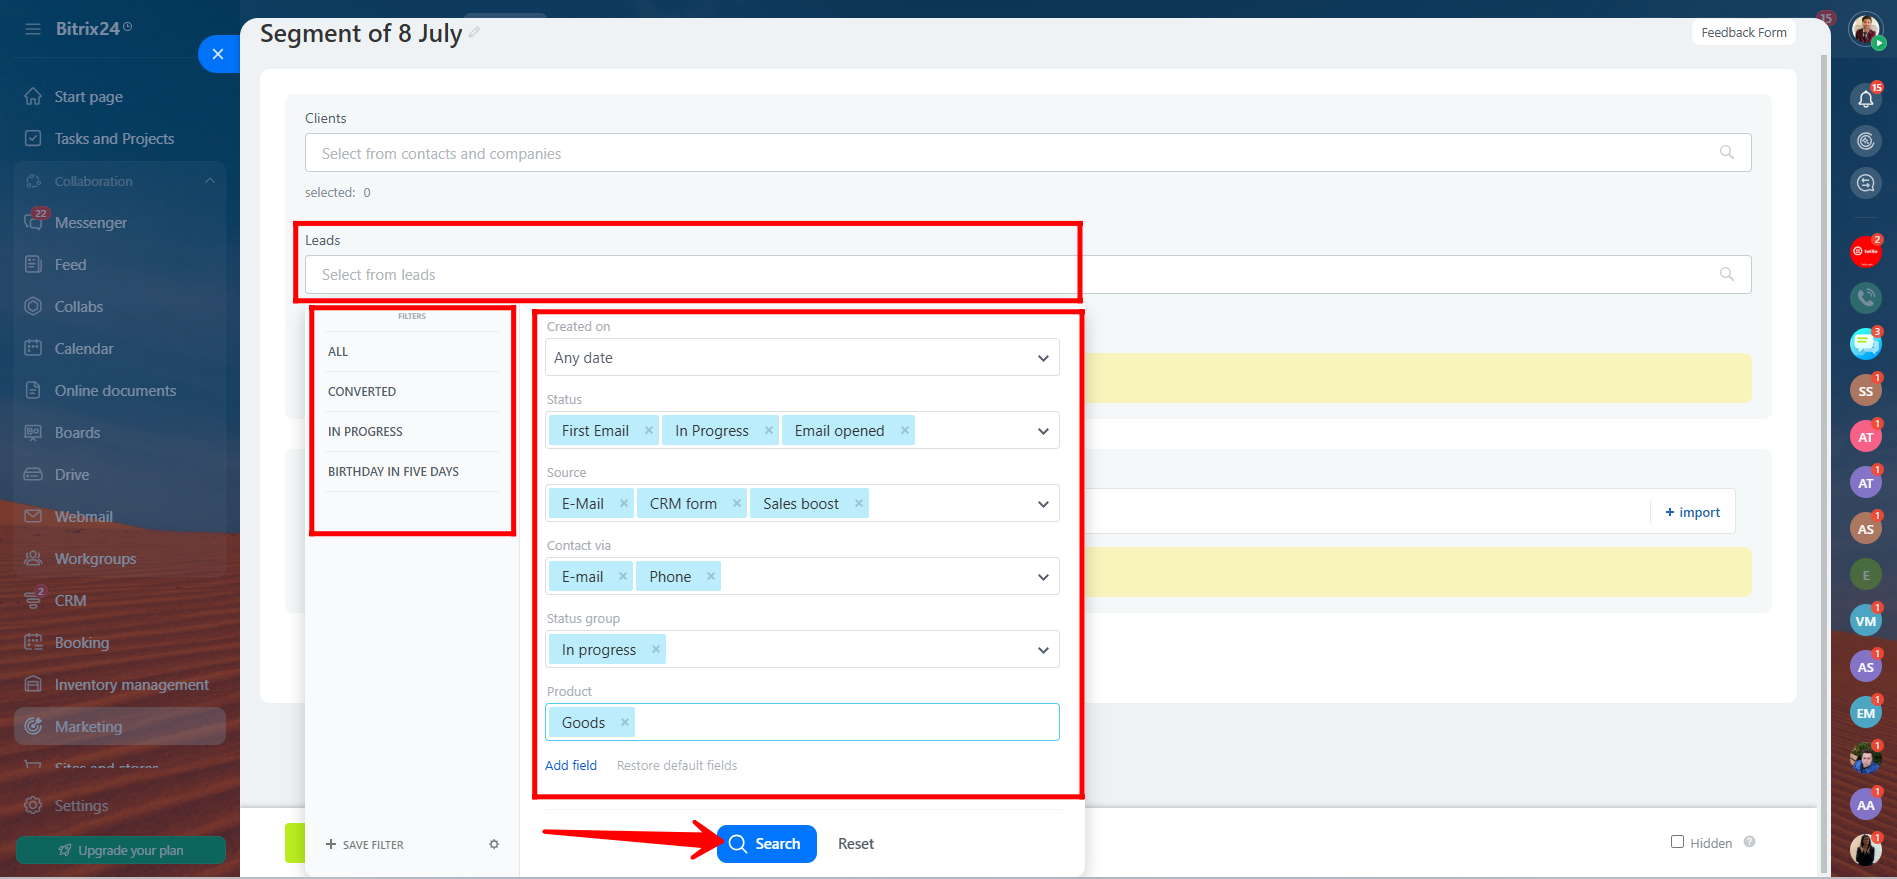
4. You can also segment your audience based on leads. Bitrix24 provides both predefined and custom filters to help you narrow down your target group. Use predefined filters such as “All,” “Converted,” “In Progress,” or “Birthday in Five Days.” For more detailed segmentation, apply custom filters like Created On, Status, Source, Contact Type, Status Group, or Product. You can also add additional filter fields to create a segment that perfectly matches your criteria.
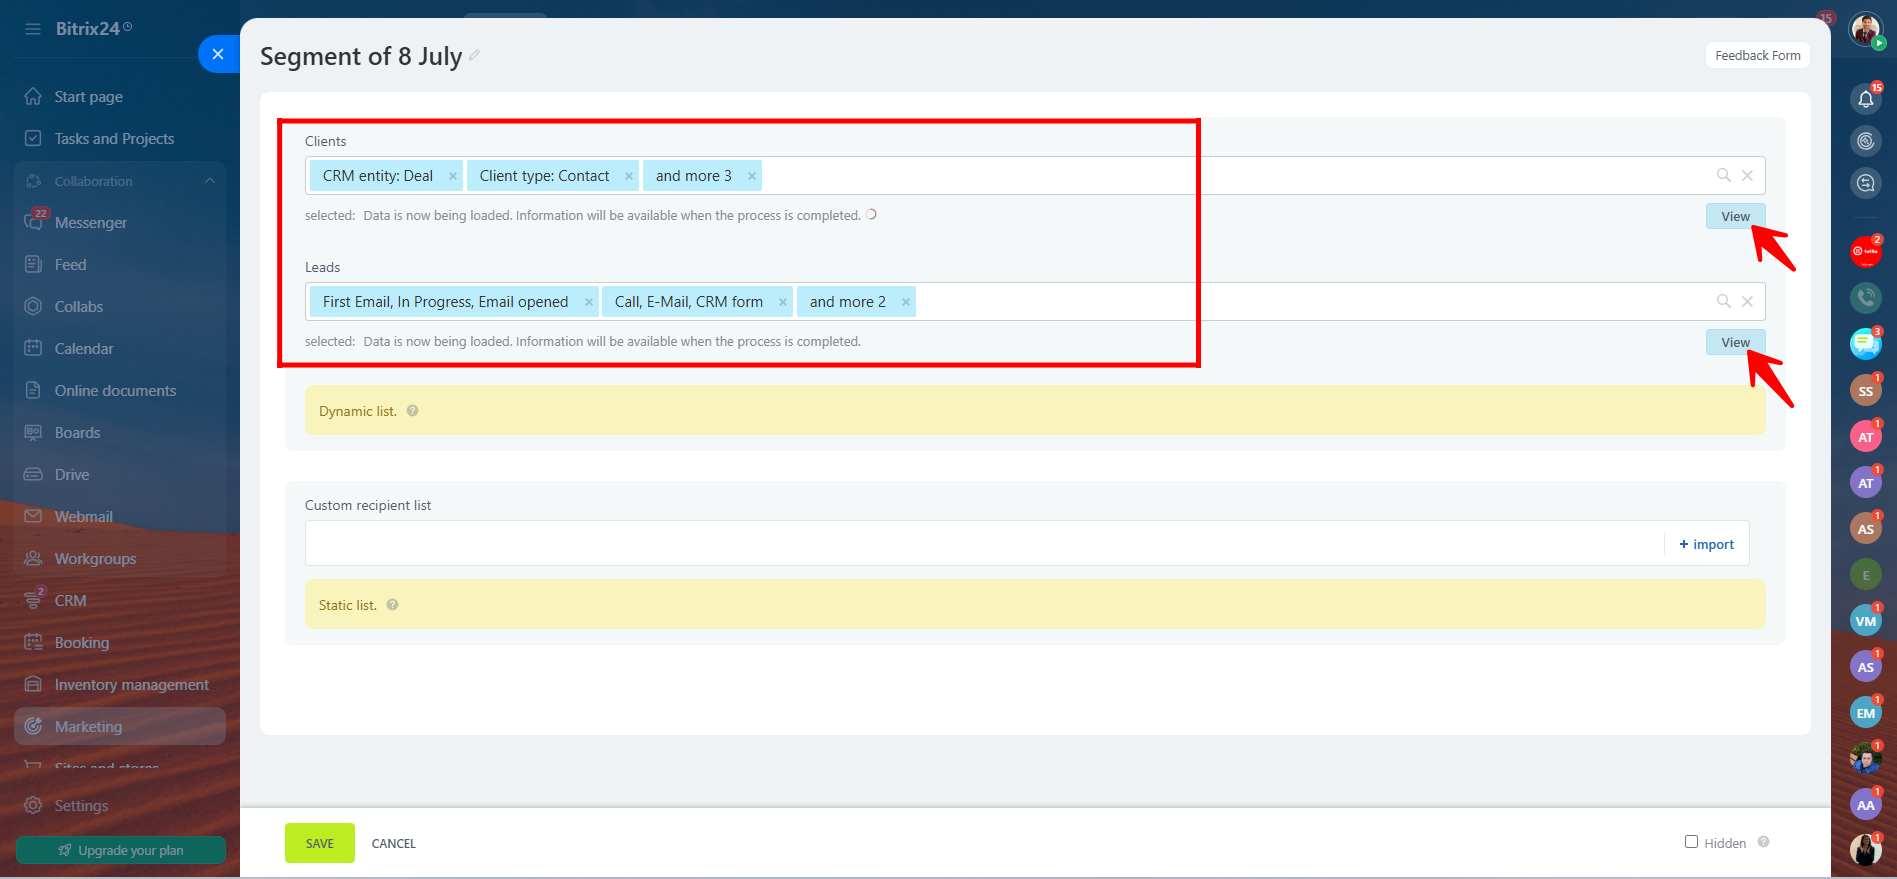
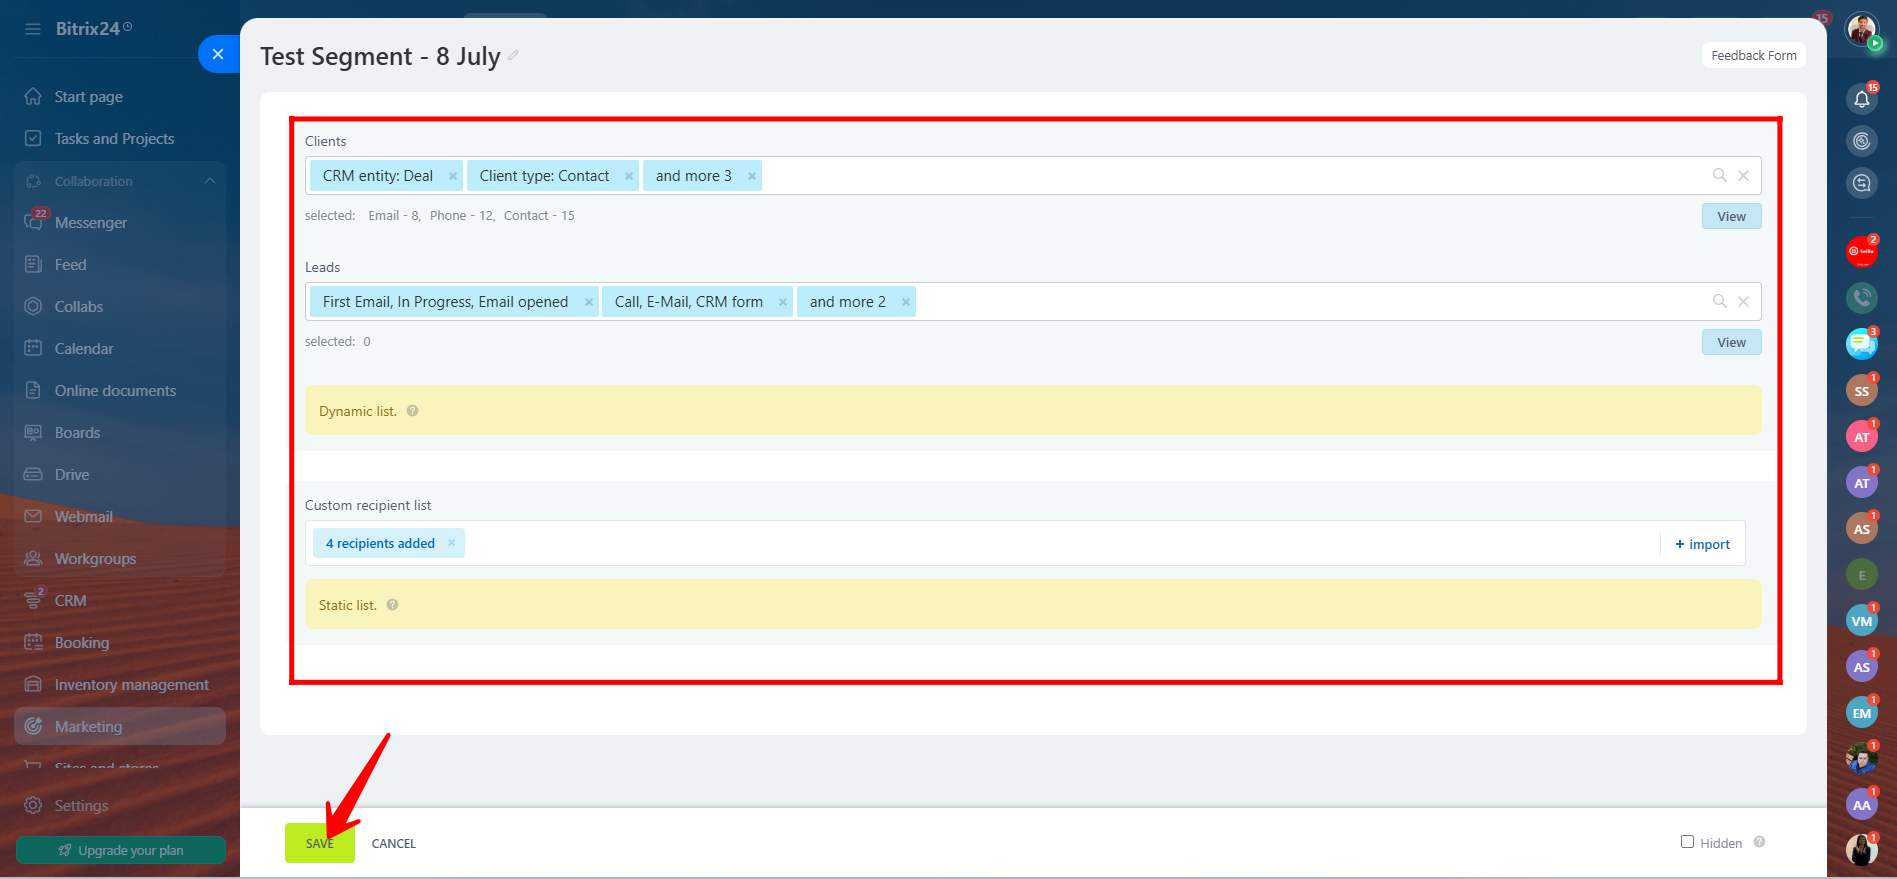
5. After applying filters to both Clients and Leads, click the “View” button to see the results. This allows you to check how many clients or leads have been narrowed down based on your selected criteria. You’ll be able to verify the effectiveness of your filters and confirm that your segment includes the right audience for your campaign.
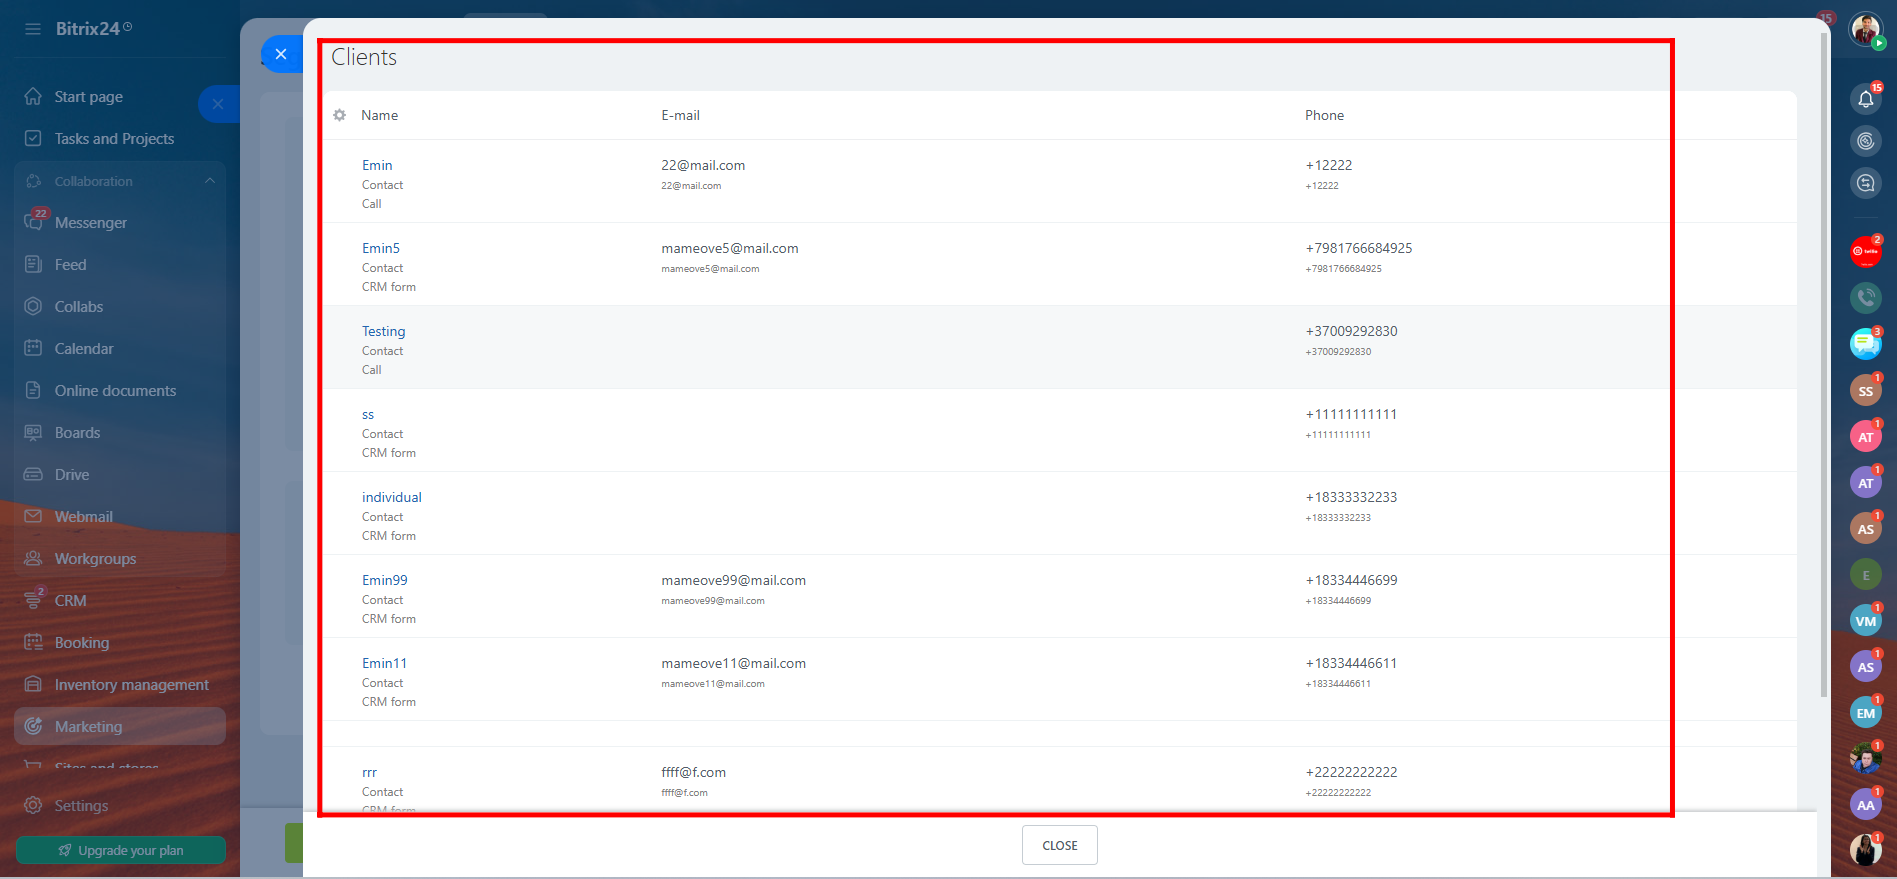
6. Once the filters are applied and you’ve clicked View, you’ll see a list of clients that match your selected criteria. This list displays only those contacts who meet the conditions you set during segmentation, giving you a clear view of your targeted audience before launching a campaign.
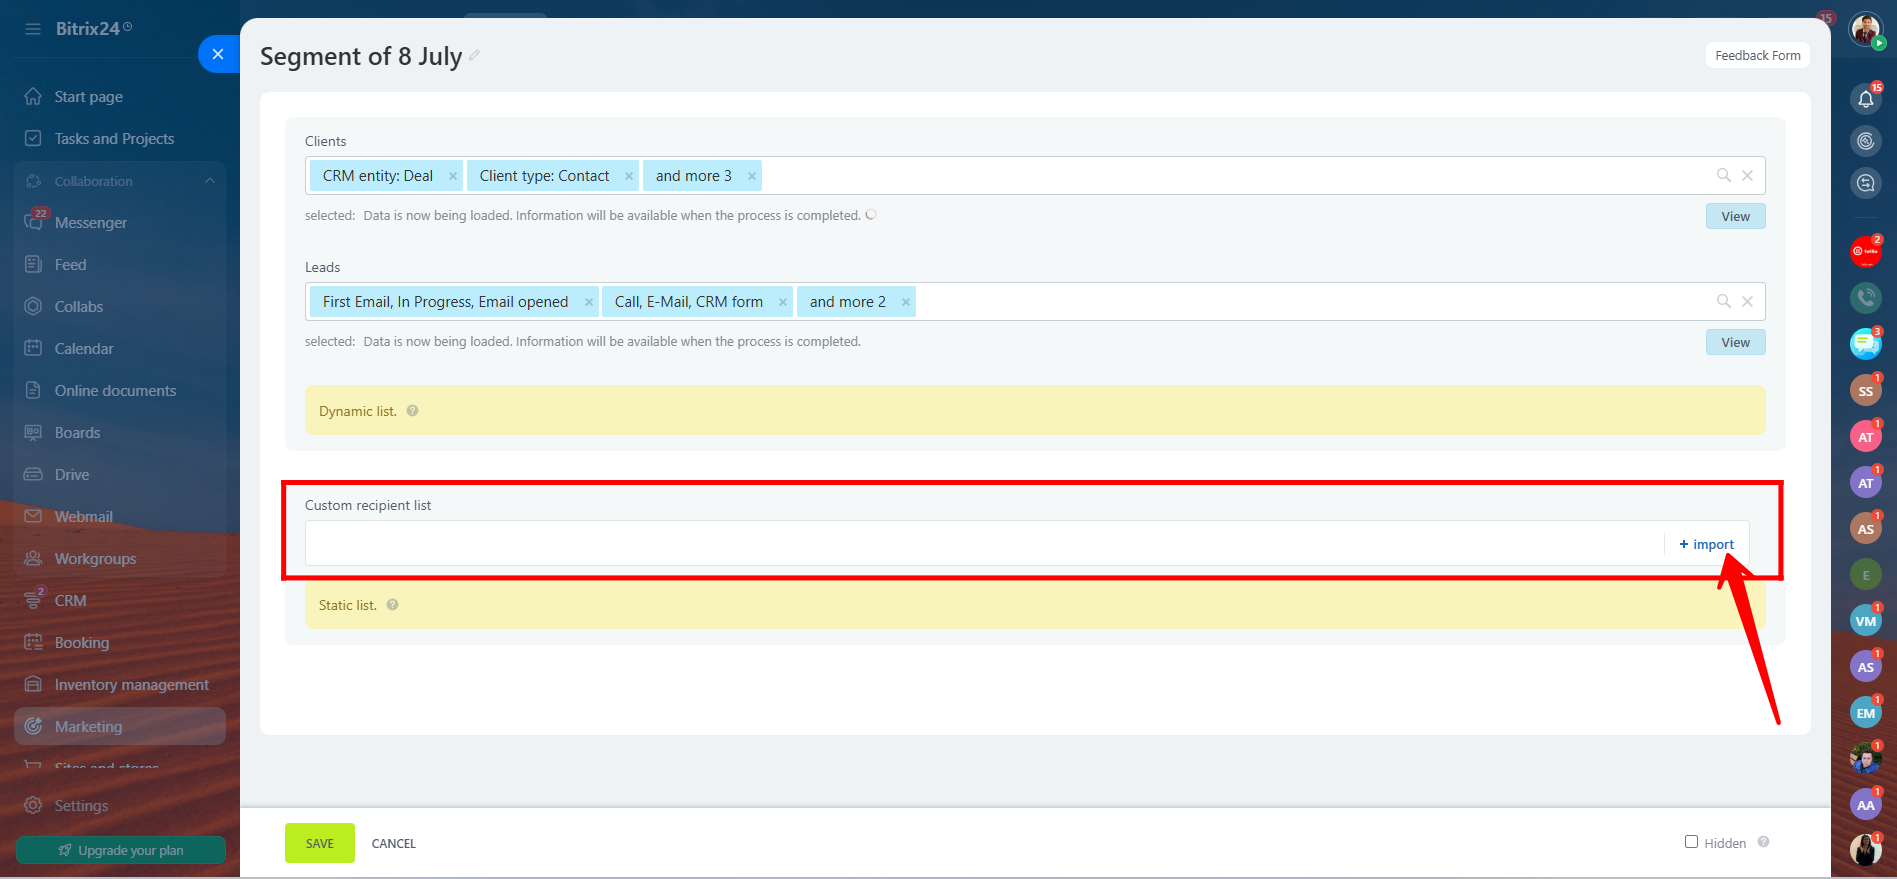
7. If you have your own contact list, you can import it by clicking on the “+ Import” button. This allows you to add external recipients to your segment, making it easier to include leads or clients who may not already exist in your Bitrix24 CRM.
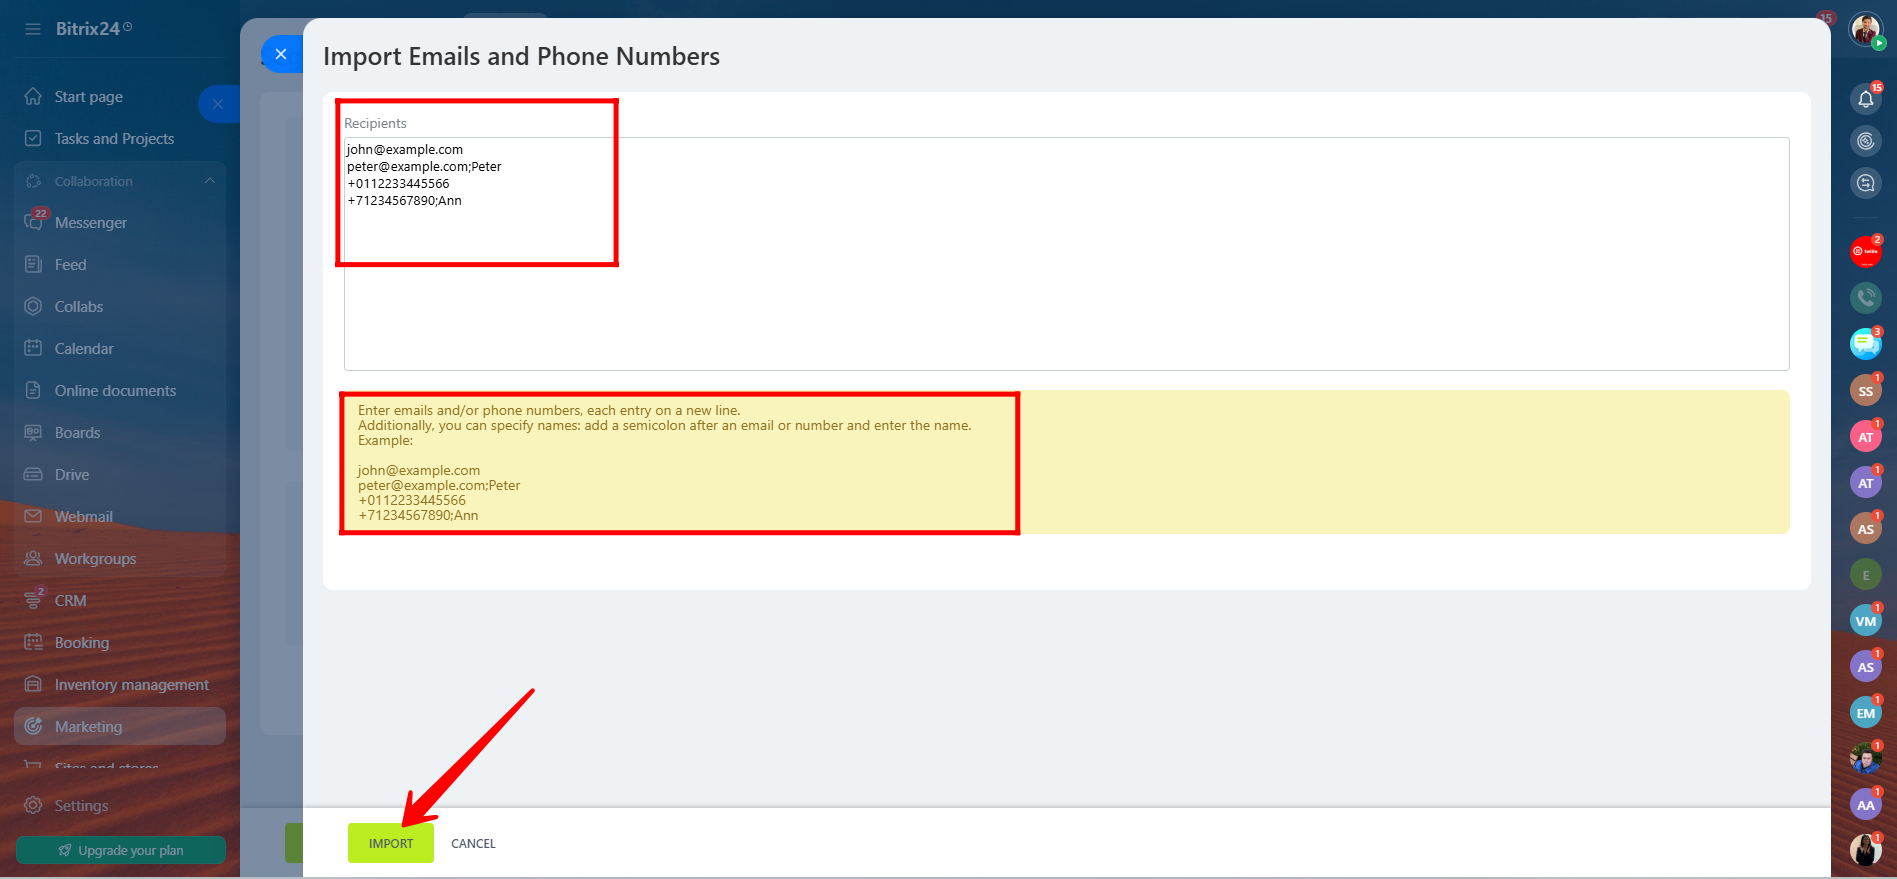
8. You can also manually enter email addresses or phone numbers of recipients to target a custom audience. Simply type each entry on a new line. If you’d like to include names, add a semicolon (;) after the email or number, followed by the recipient’s name (e.g., example@email.com;John Doe). This helps personalize your messaging for each contact.
9. At this stage, you can review your entire configuration — including the Clients and Leads filters (which create Dynamic Lists) and any manually added Custom Recipient List (a Static List). Once everything looks correct and your segment is ready, click “Save” to store your audience segment for future campaigns.
You can also enhance your segmentation by creating custom fields in the CRM—such as Industry Type, Subscription Status, or Customer Tier—to better reflect the unique attributes of your business. These fields give you more control and flexibility when grouping your contacts. You can choose to keep your segments manual or make them dynamic, so they update automatically whenever new contacts meet the criteria. Dynamic segments help keep your campaigns accurate and up to date without needing constant manual adjustments.
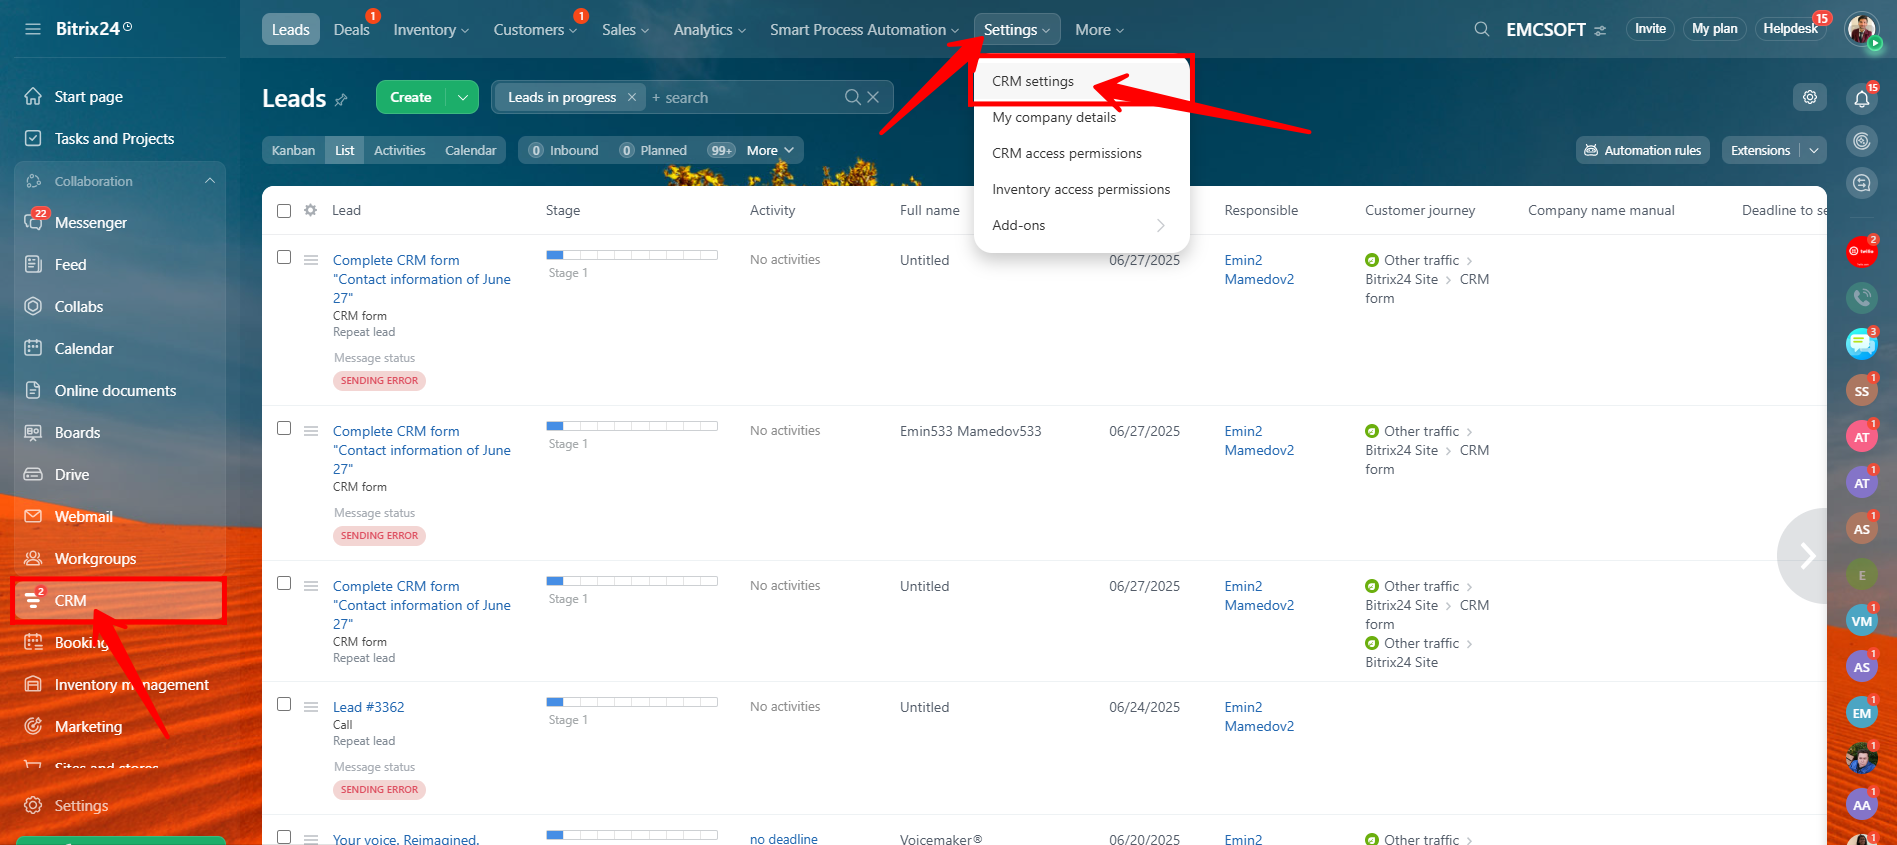
10. For example, to create custom fields, go to the CRM section, then click on Settings, and from there, select CRM Settings.
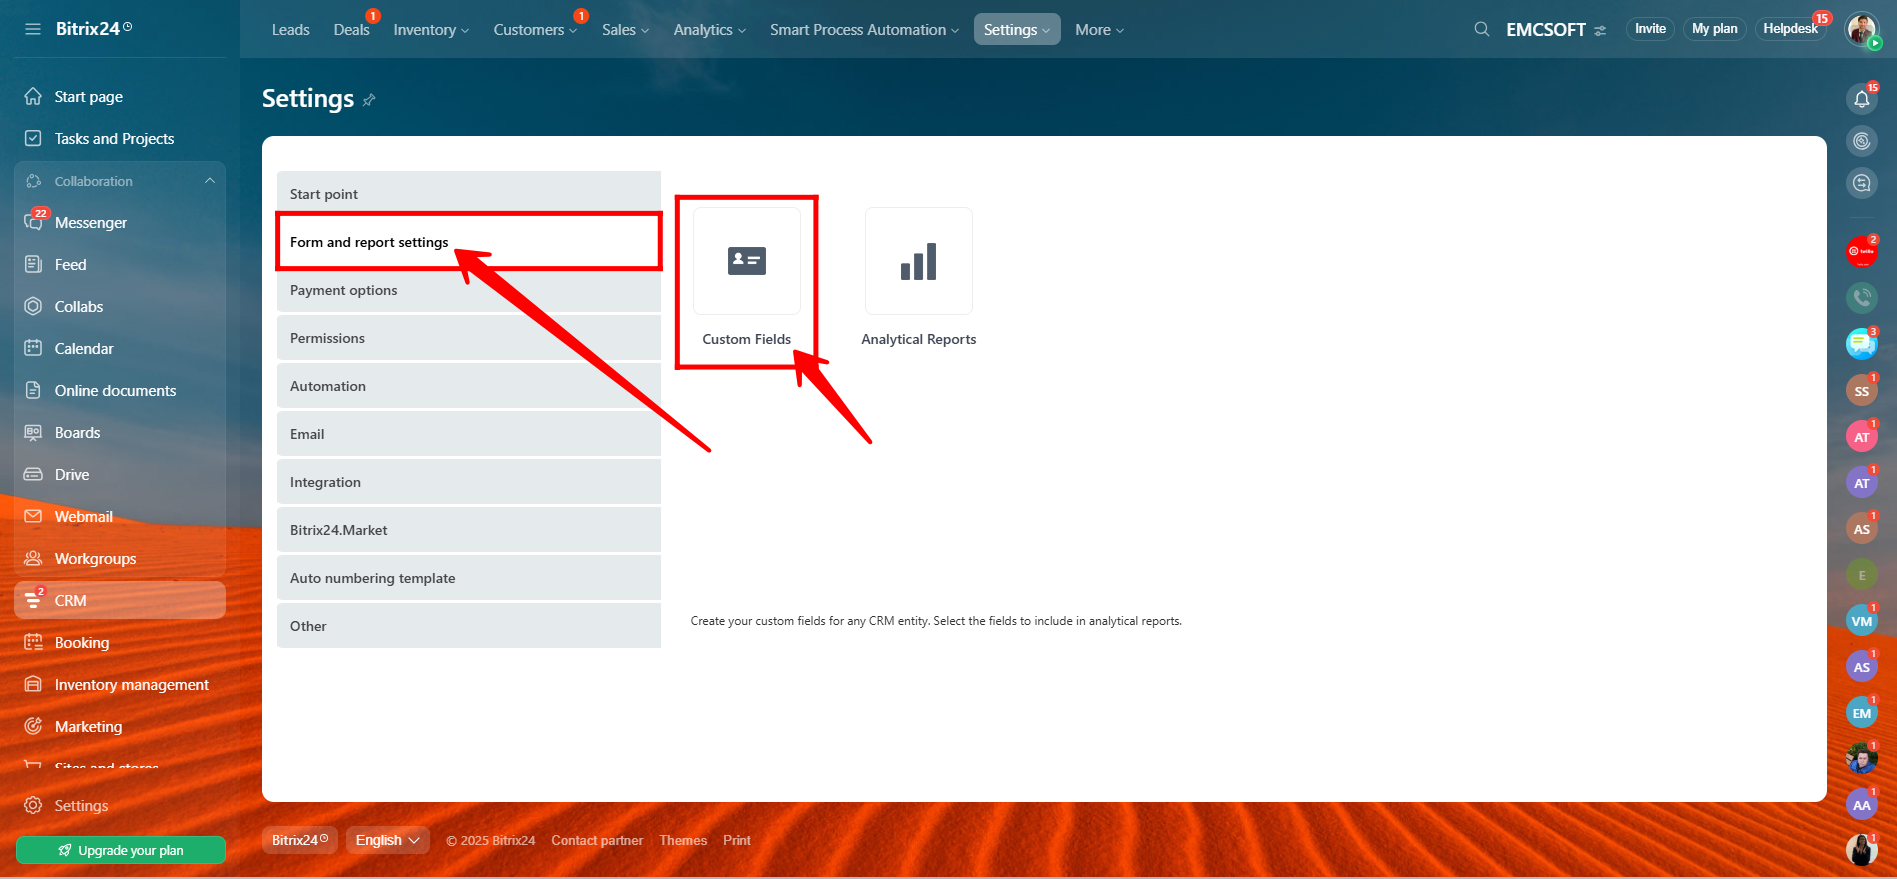
11. Next, go to “Form and Report Settings”, and then click on “Custom Fields.”
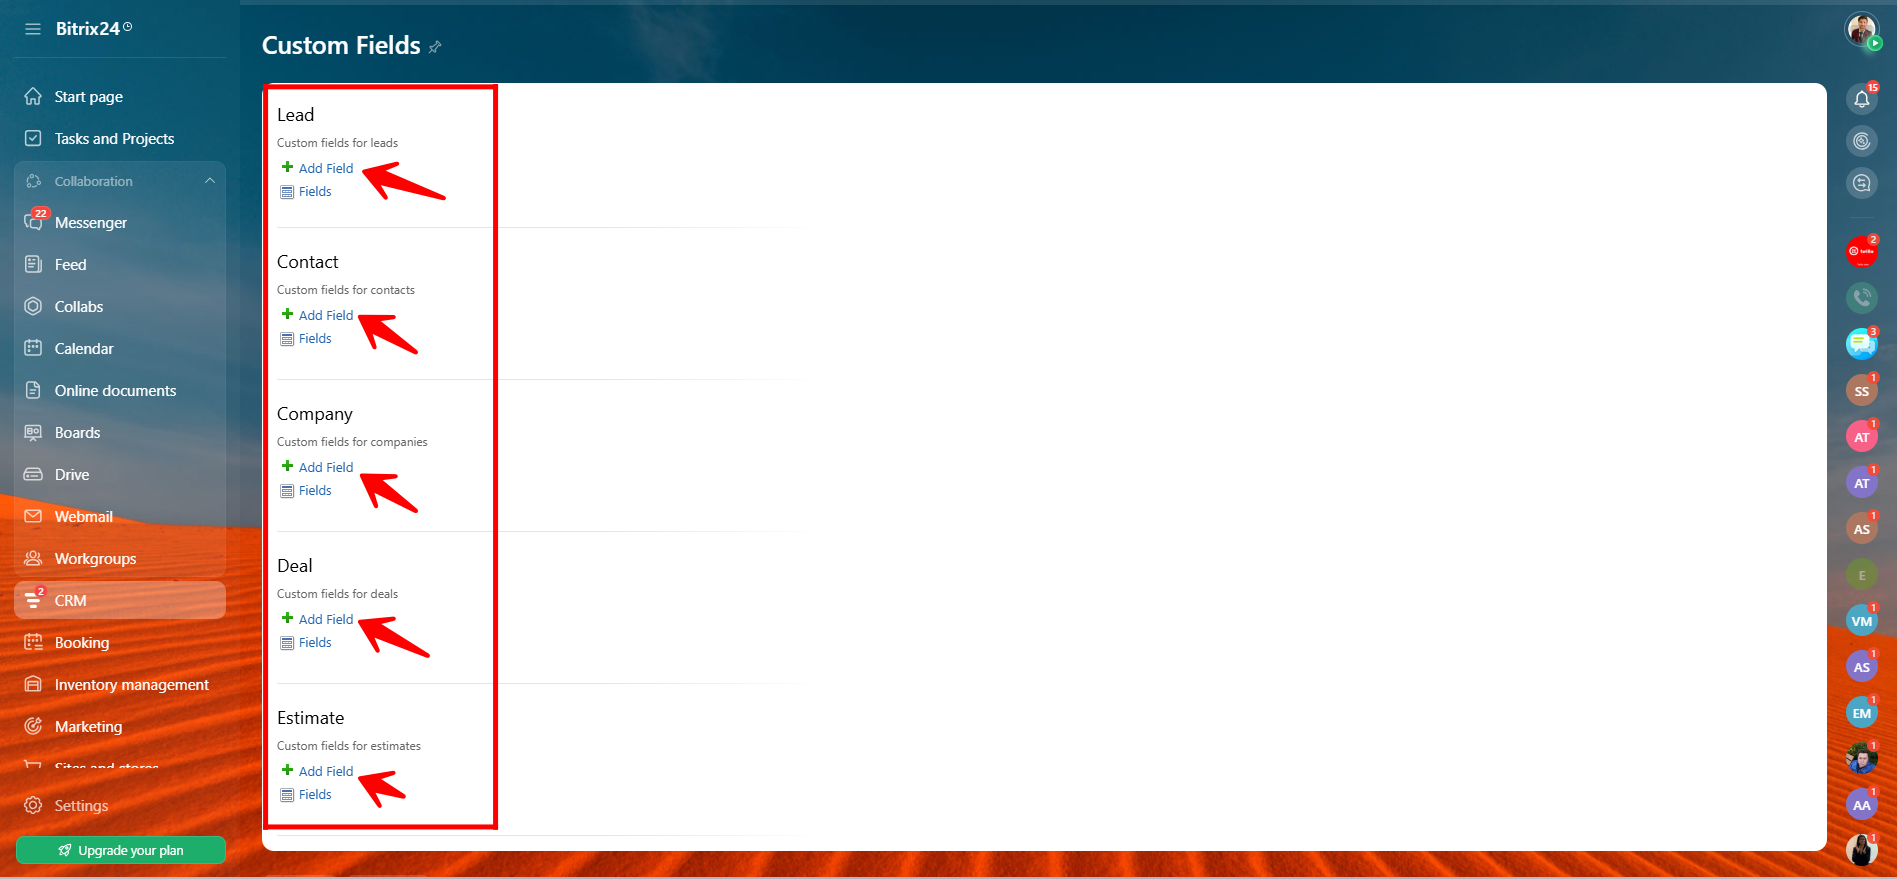
12. Here, you can add custom fields to various CRM entities, including Contacts, Companies, Deals, Leads, and Estimates. These fields help you capture specific information relevant to your business, allowing for more personalized communication and precise audience segmentation.
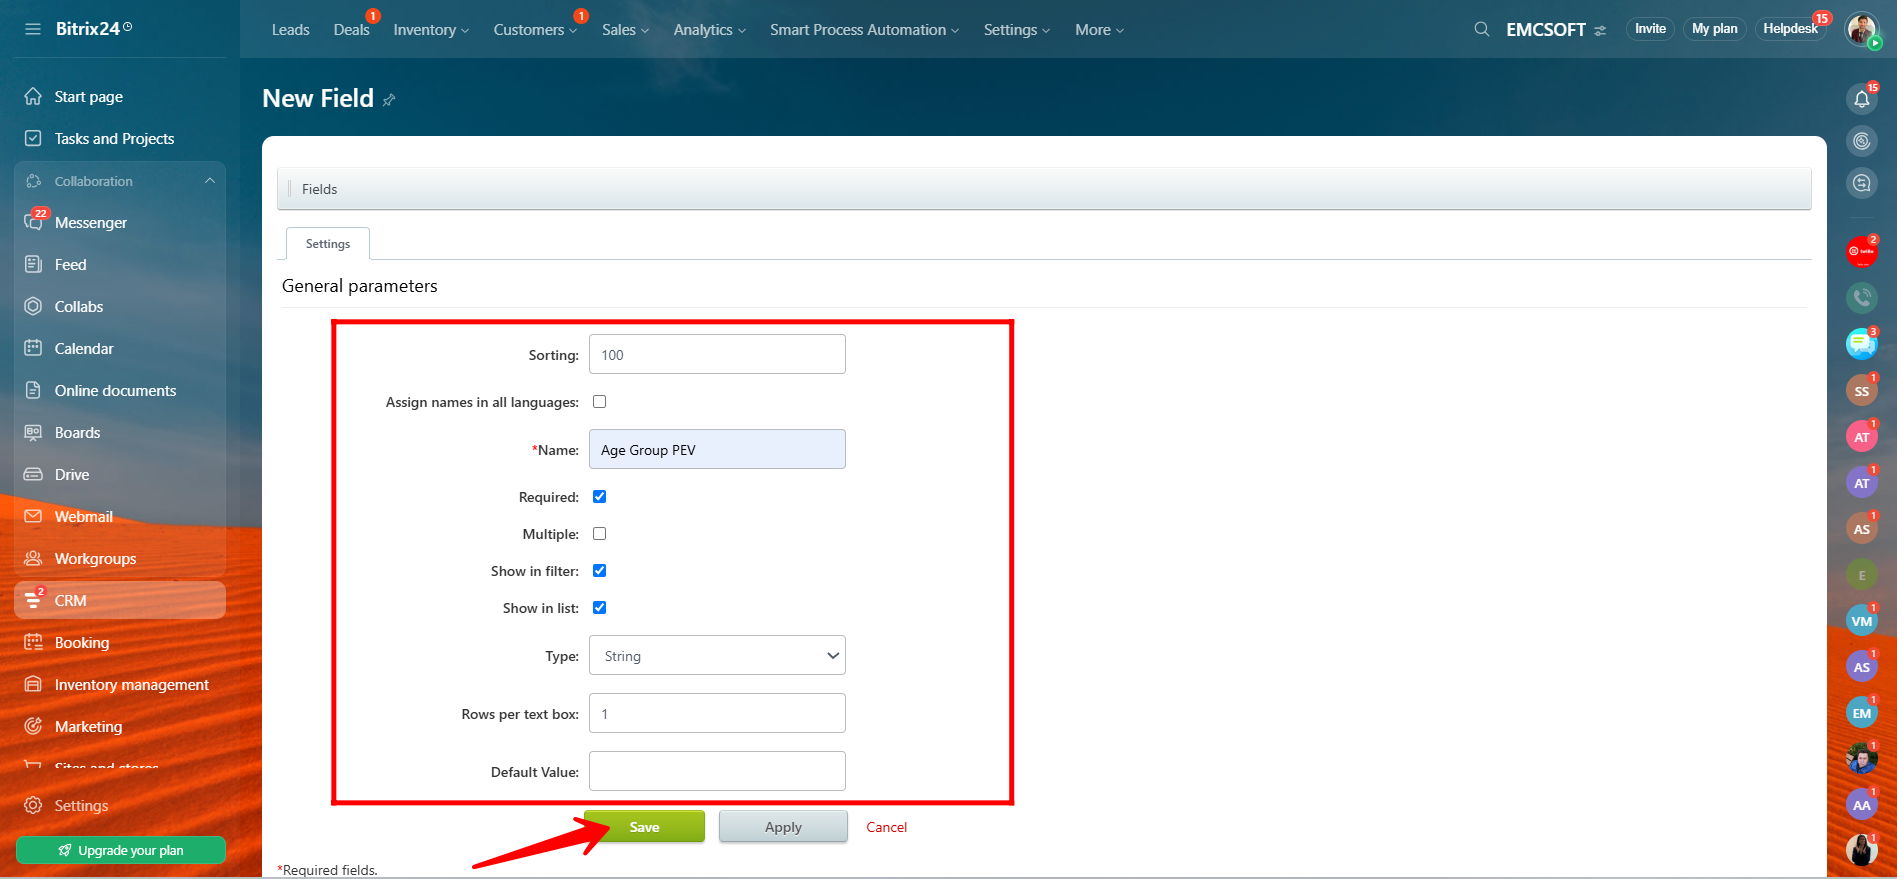
13. When configuring a new custom field, start by entering a name for the field. Then, choose the settings based on your needs—such as whether the field should be required, allow multiple values, be shown in filters, or appear in lists. Also, select the field type (e.g., String, Boolean, Date and Time, etc.). Once all options are set, click Save to create the field.
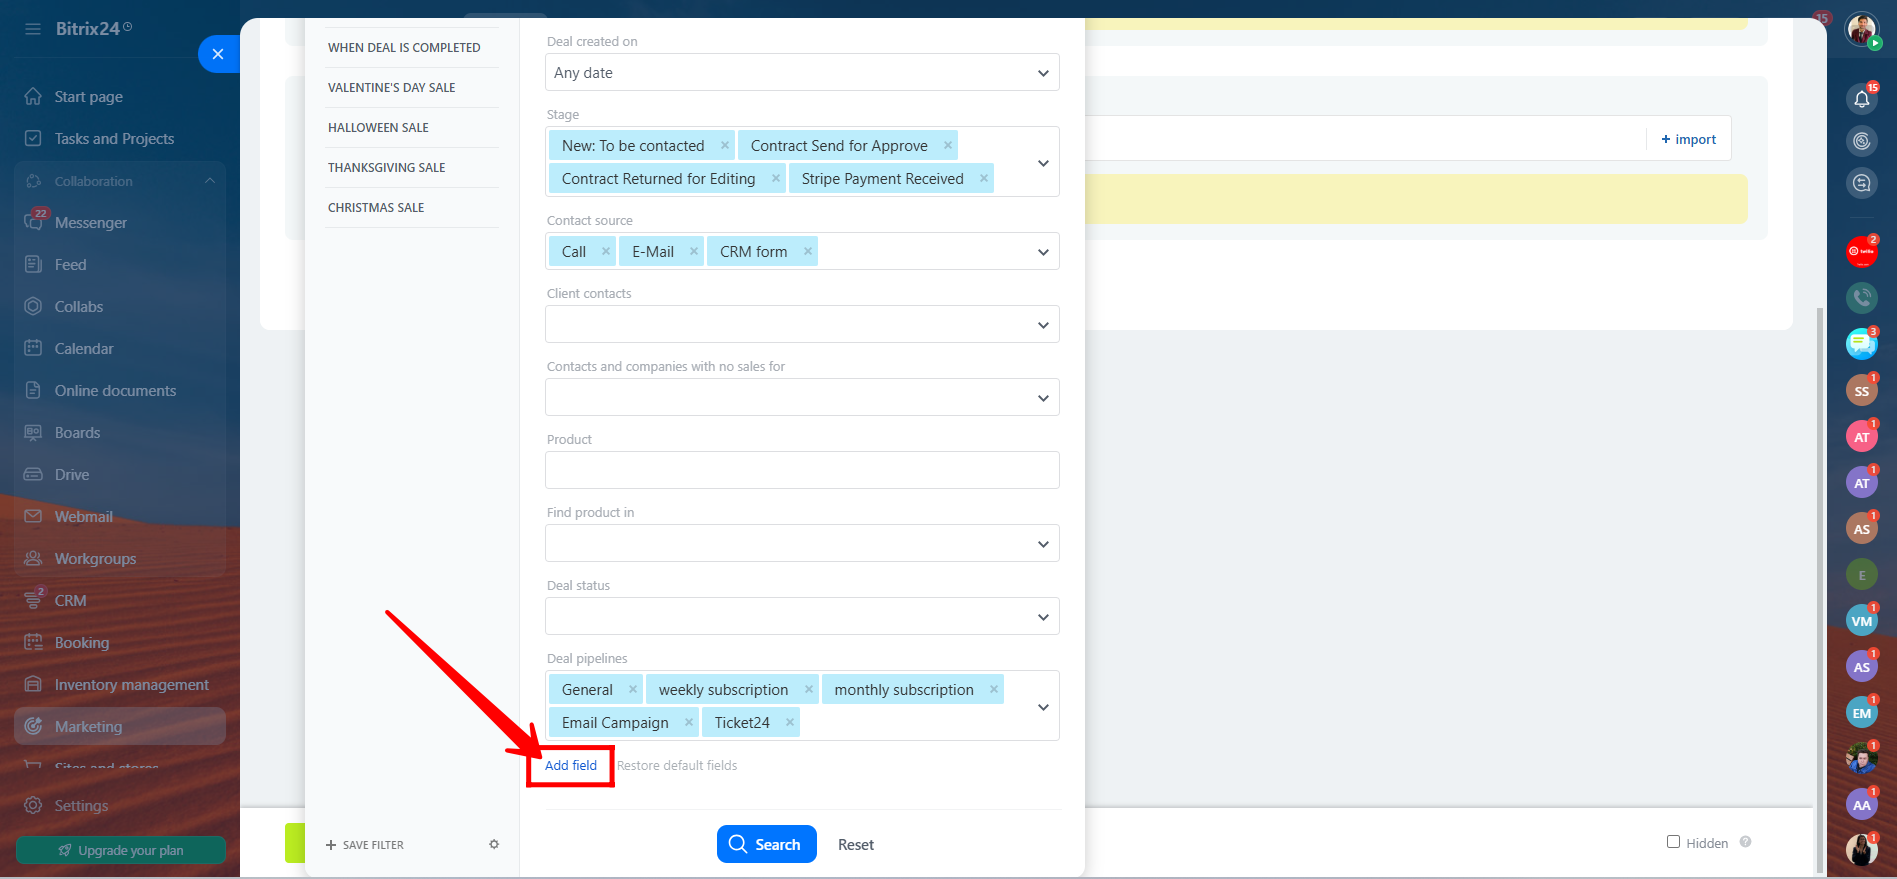
14. Go back to your configured segment, open the filter options, and click “Add Field” to see if the newly created custom field appears in the list. This allows you to confirm that the field is available for segmentation and can now be used to filter contacts based on the custom data you’ve added.
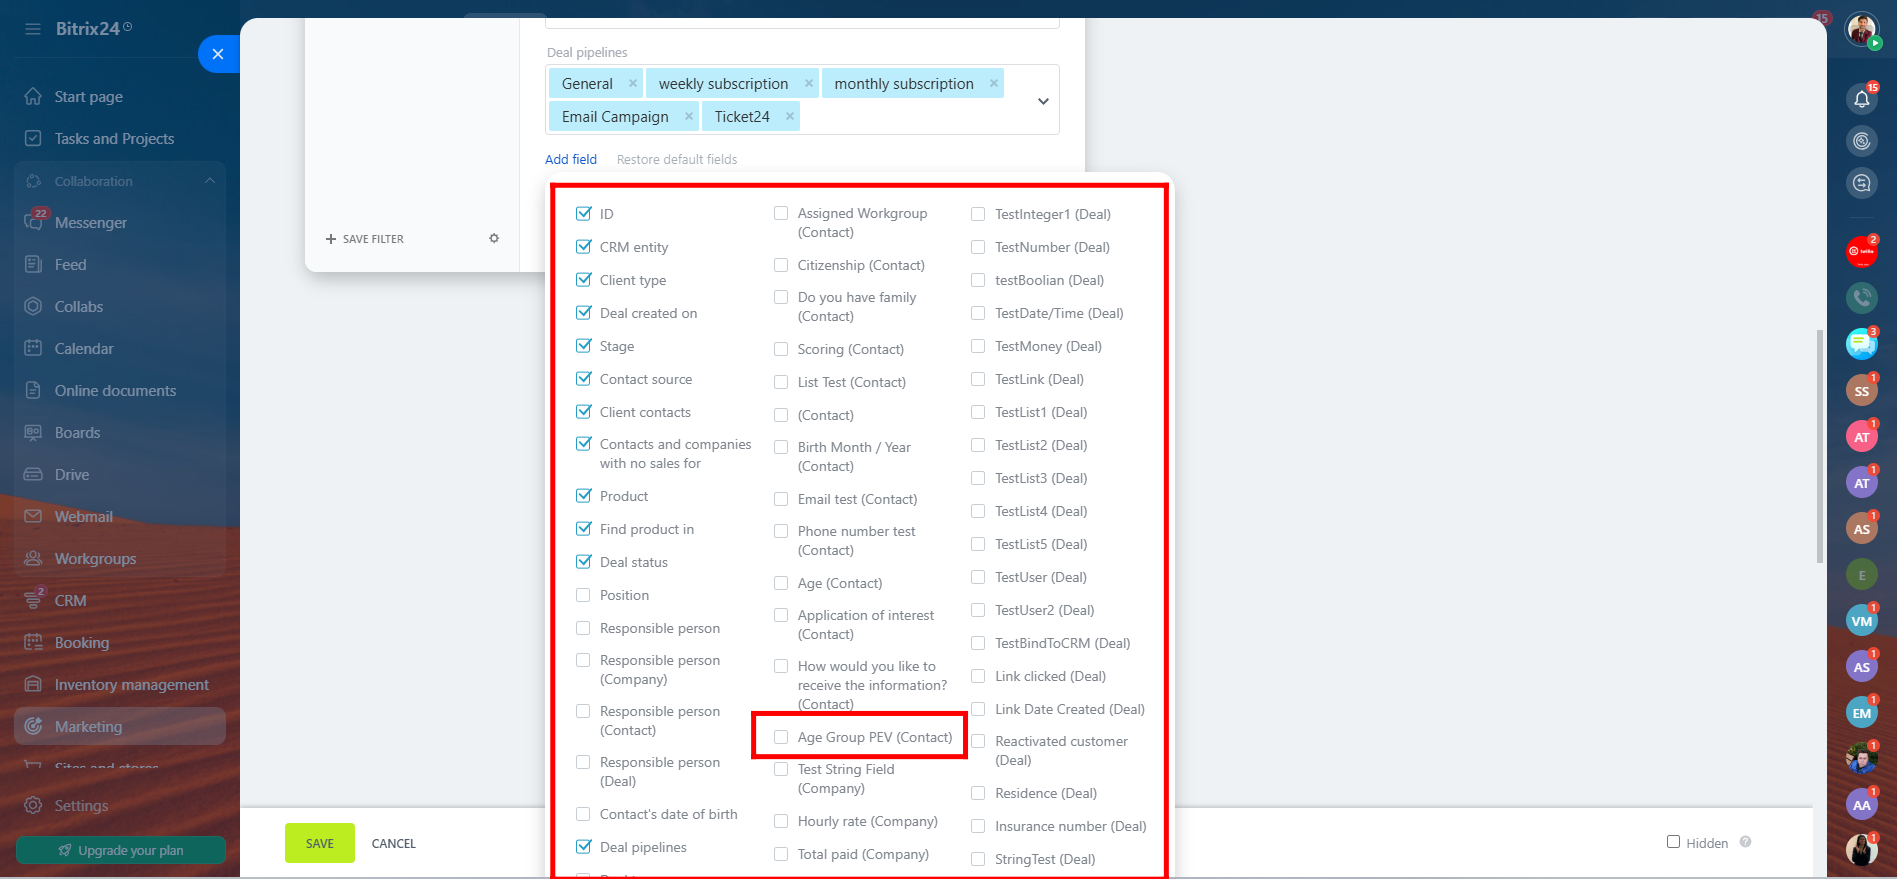
15. Here, you’ll see the newly created custom field—for example, “Age Group PEV (Contact)”—appearing in the filter options. Keep in mind that when you apply a filter using this field, it must have a value assigned in at least one contact’s details. If no contact has data for that field, the filter may return an empty list, even if your setup is correct.
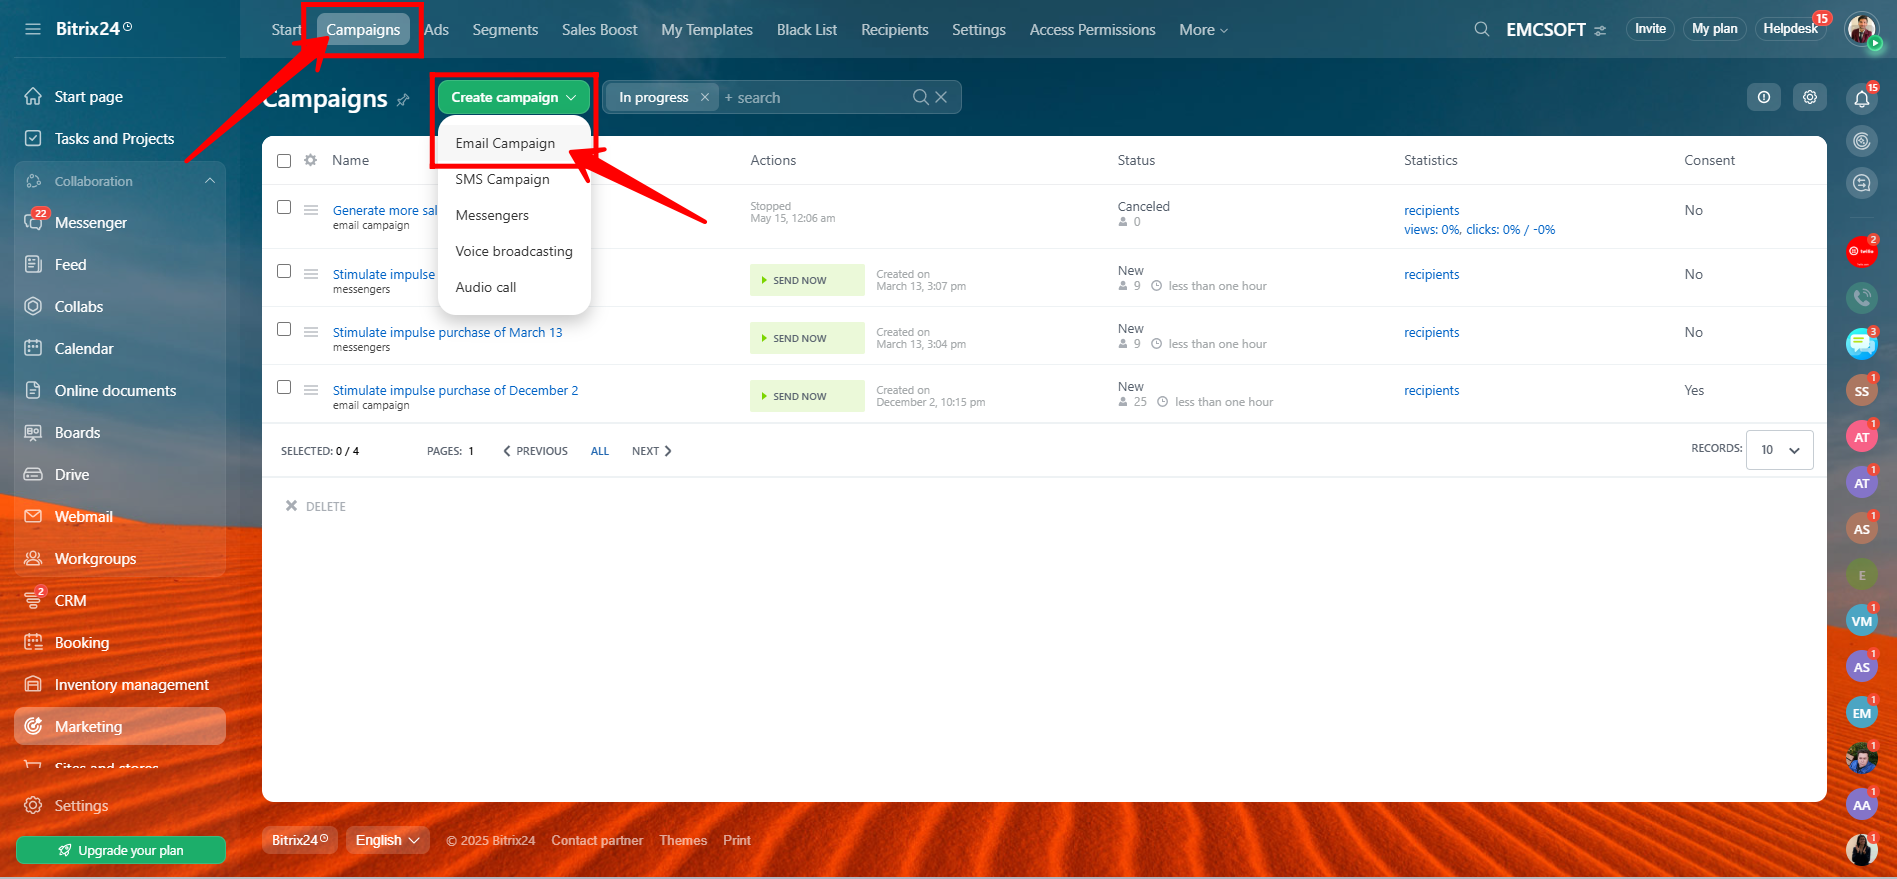
16. Now it’s time to use your segment in a real campaign. Go to the “Campaigns” section in Bitrix24, then click the “Create Campaign” button. From the available options, choose “Email Campaigns” to start setting up a campaign that will use the segment you created.
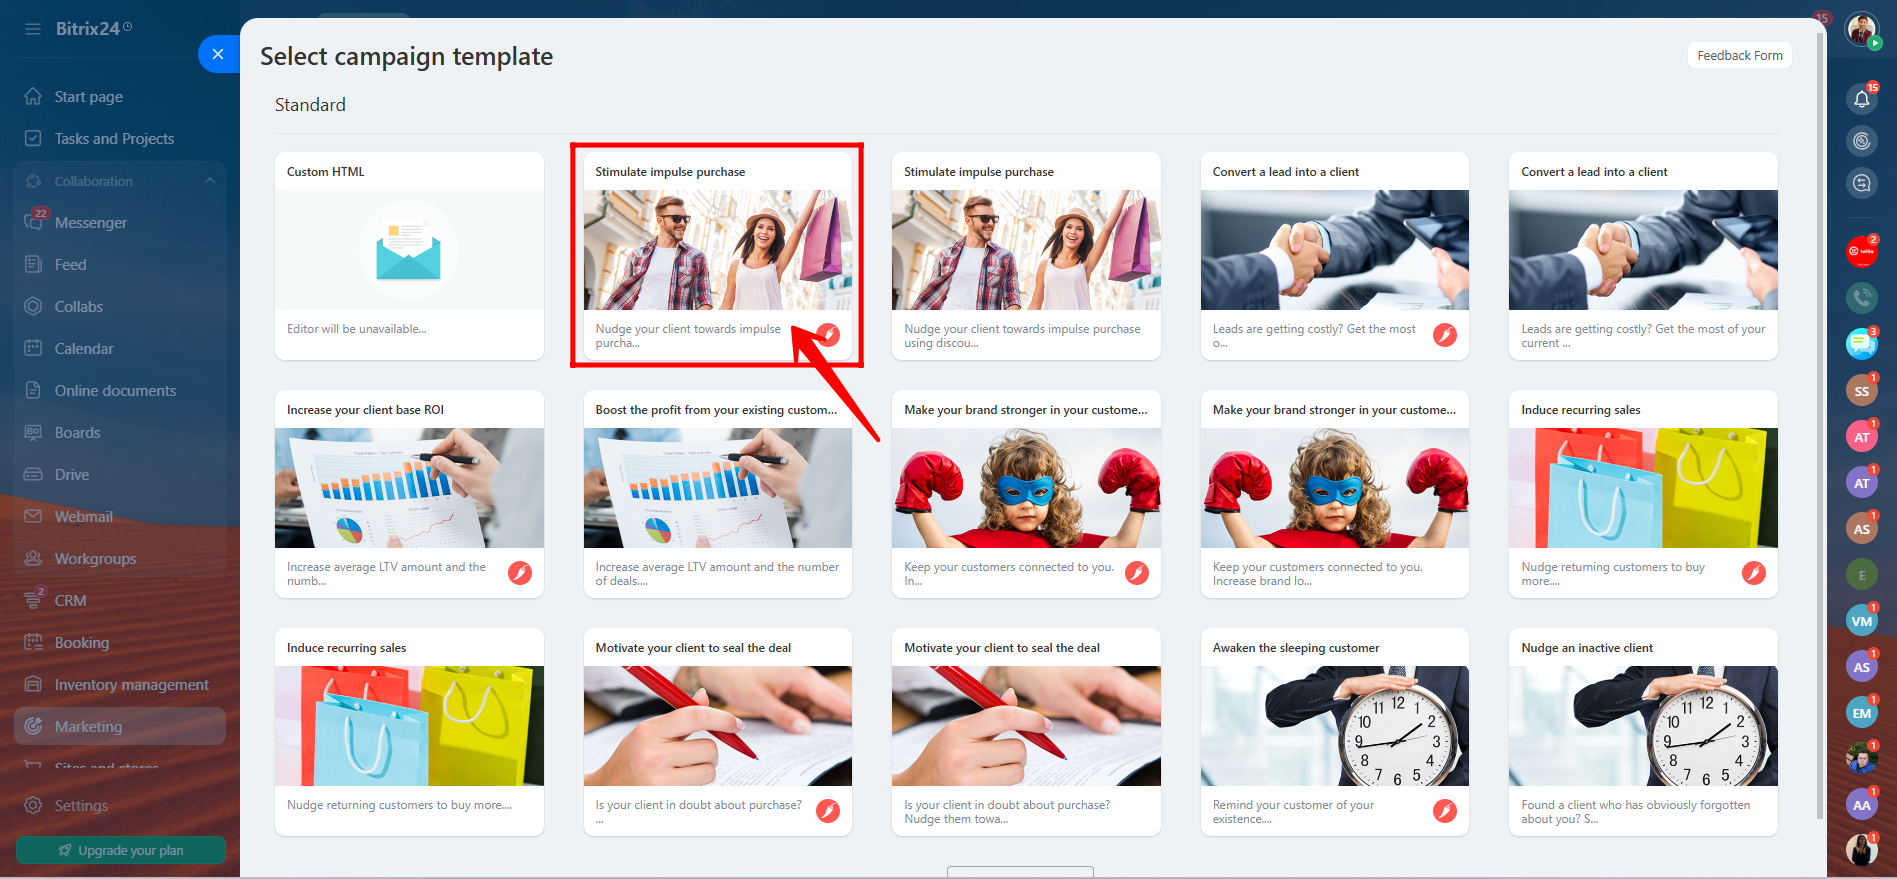
17. You can either add custom HTML for full design control or choose from the predefined email templates provided by Bitrix24. Select the option that best suits your campaign needs and design preferences.
18. In the campaign configuration settings, you can select the segments you previously created. Once selected, Bitrix24 will display how many contacts or clients are included in that segment, giving you a clear idea of how many recipients will be targeted in your campaign.
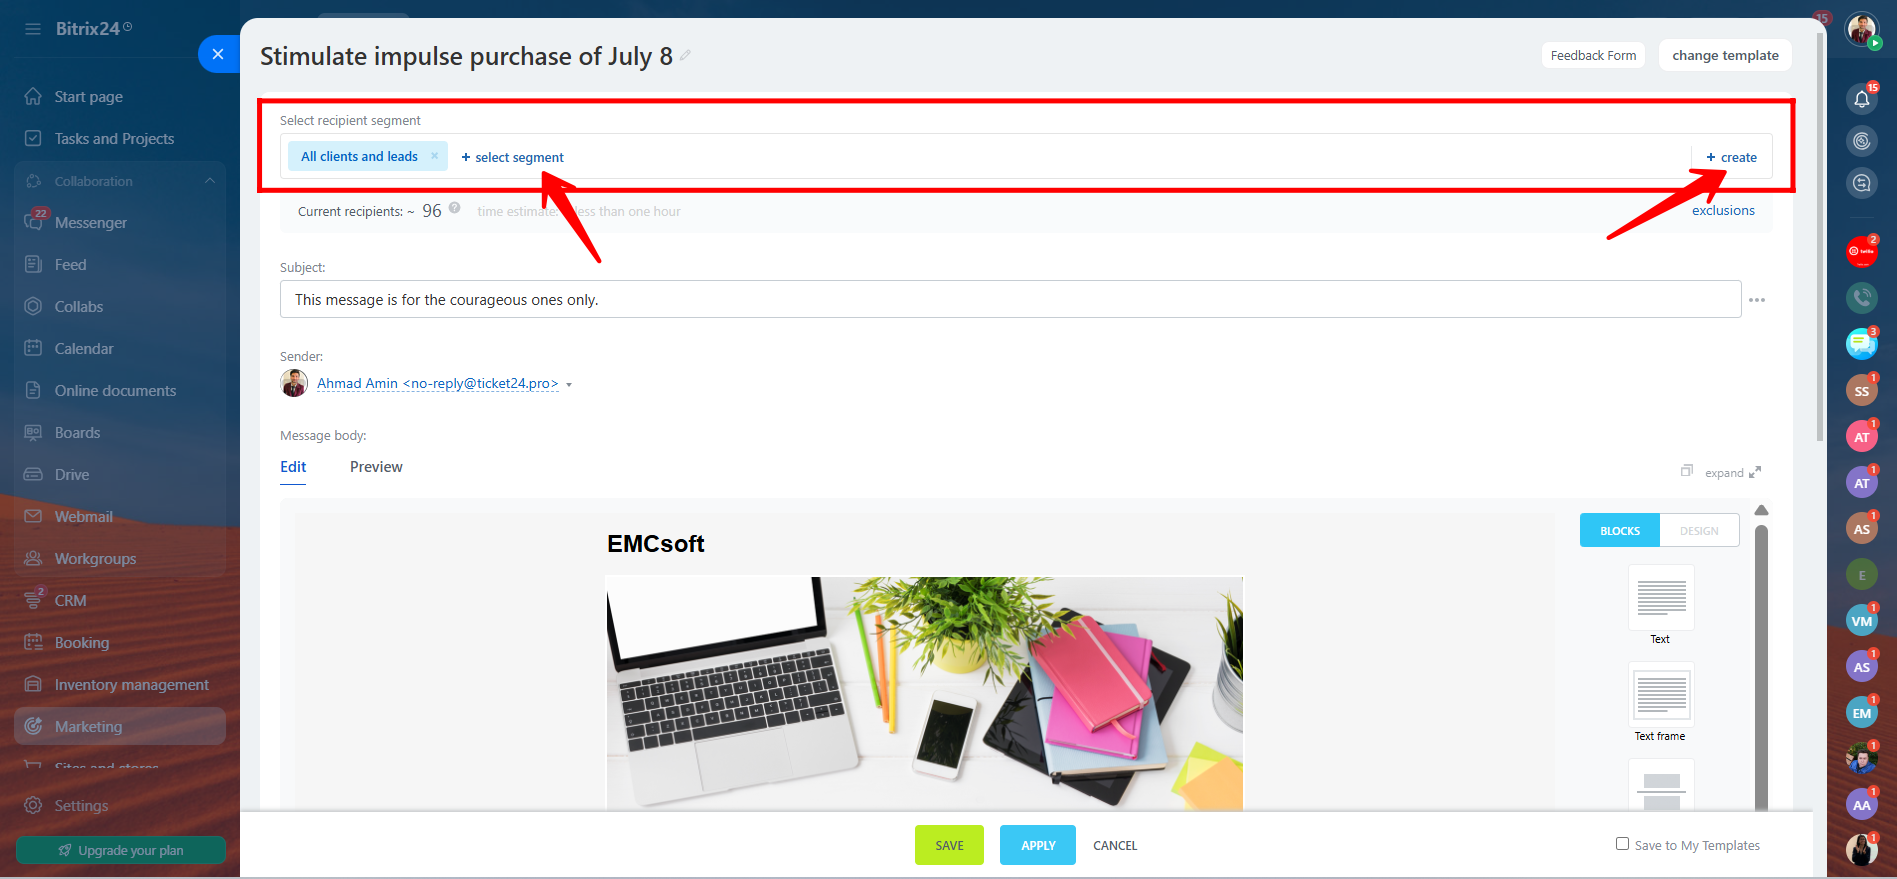
19. You can also exclude specific segments from the campaign if needed, allowing you to fine-tune your audience. Next, add a subject line for your email. For added flexibility and personalization, you can include a dynamic field (such as the recipient’s name or company) directly in the subject to make your message more engaging.

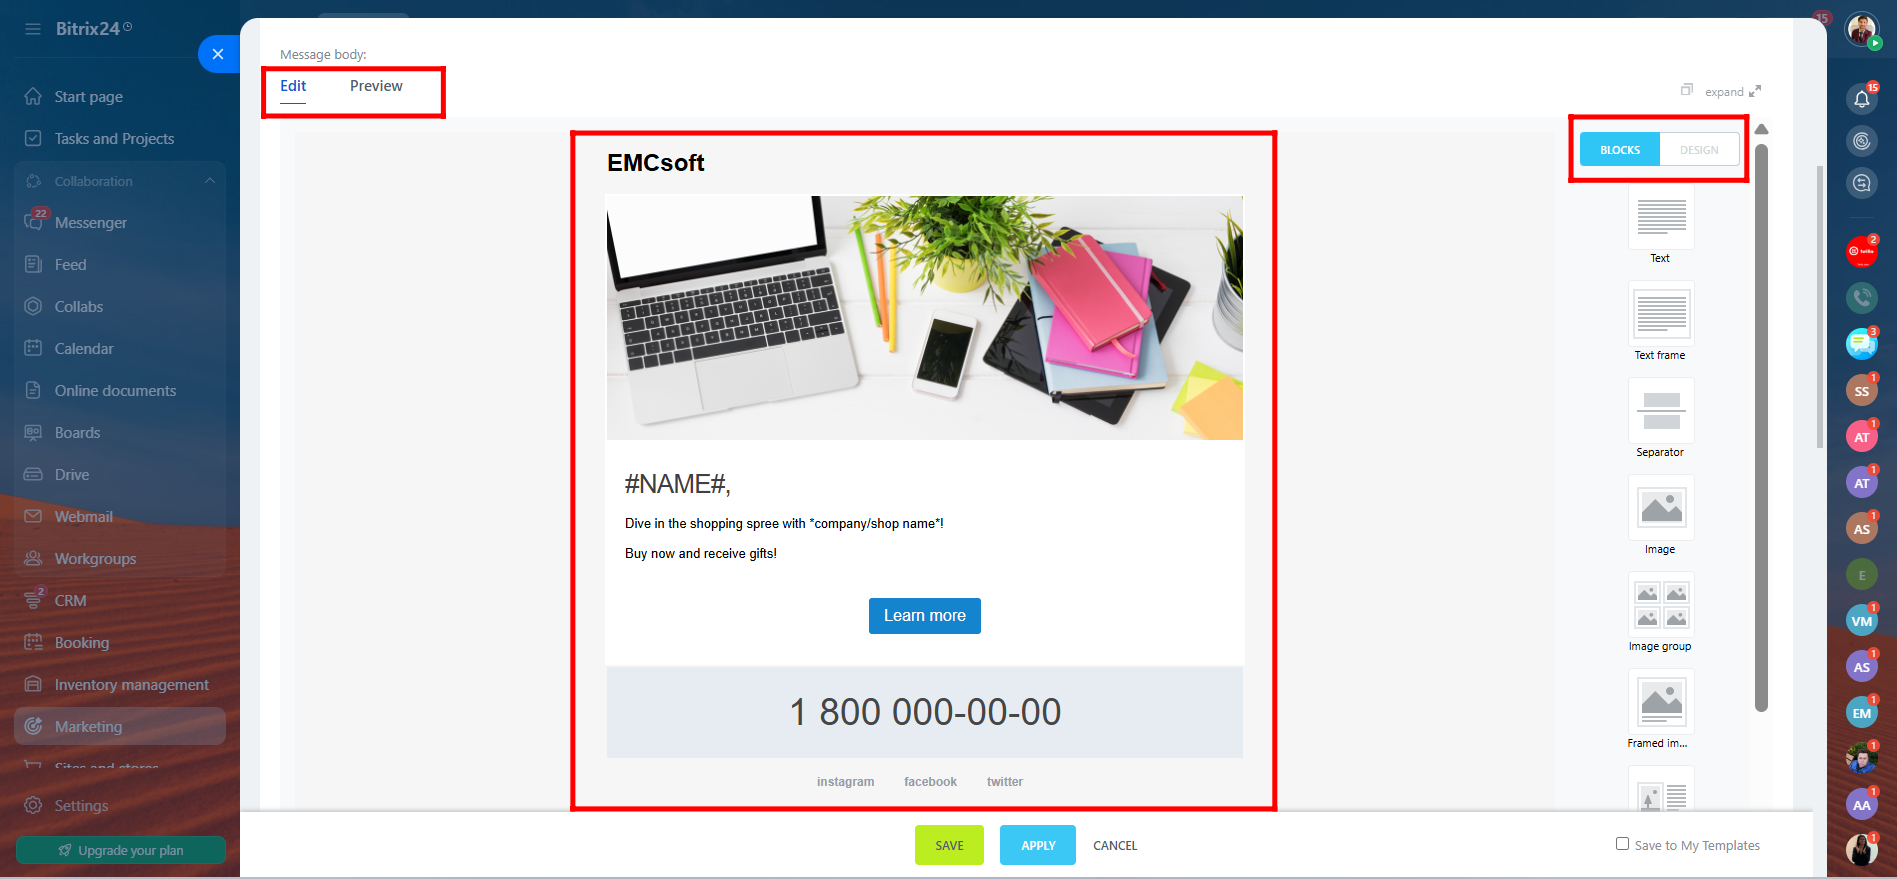
20. Here, you can add content blocks, customize or edit the default email design, or browse and select from additional design templates. You can also view a preview of your email to see how it will appear to recipients before sending.
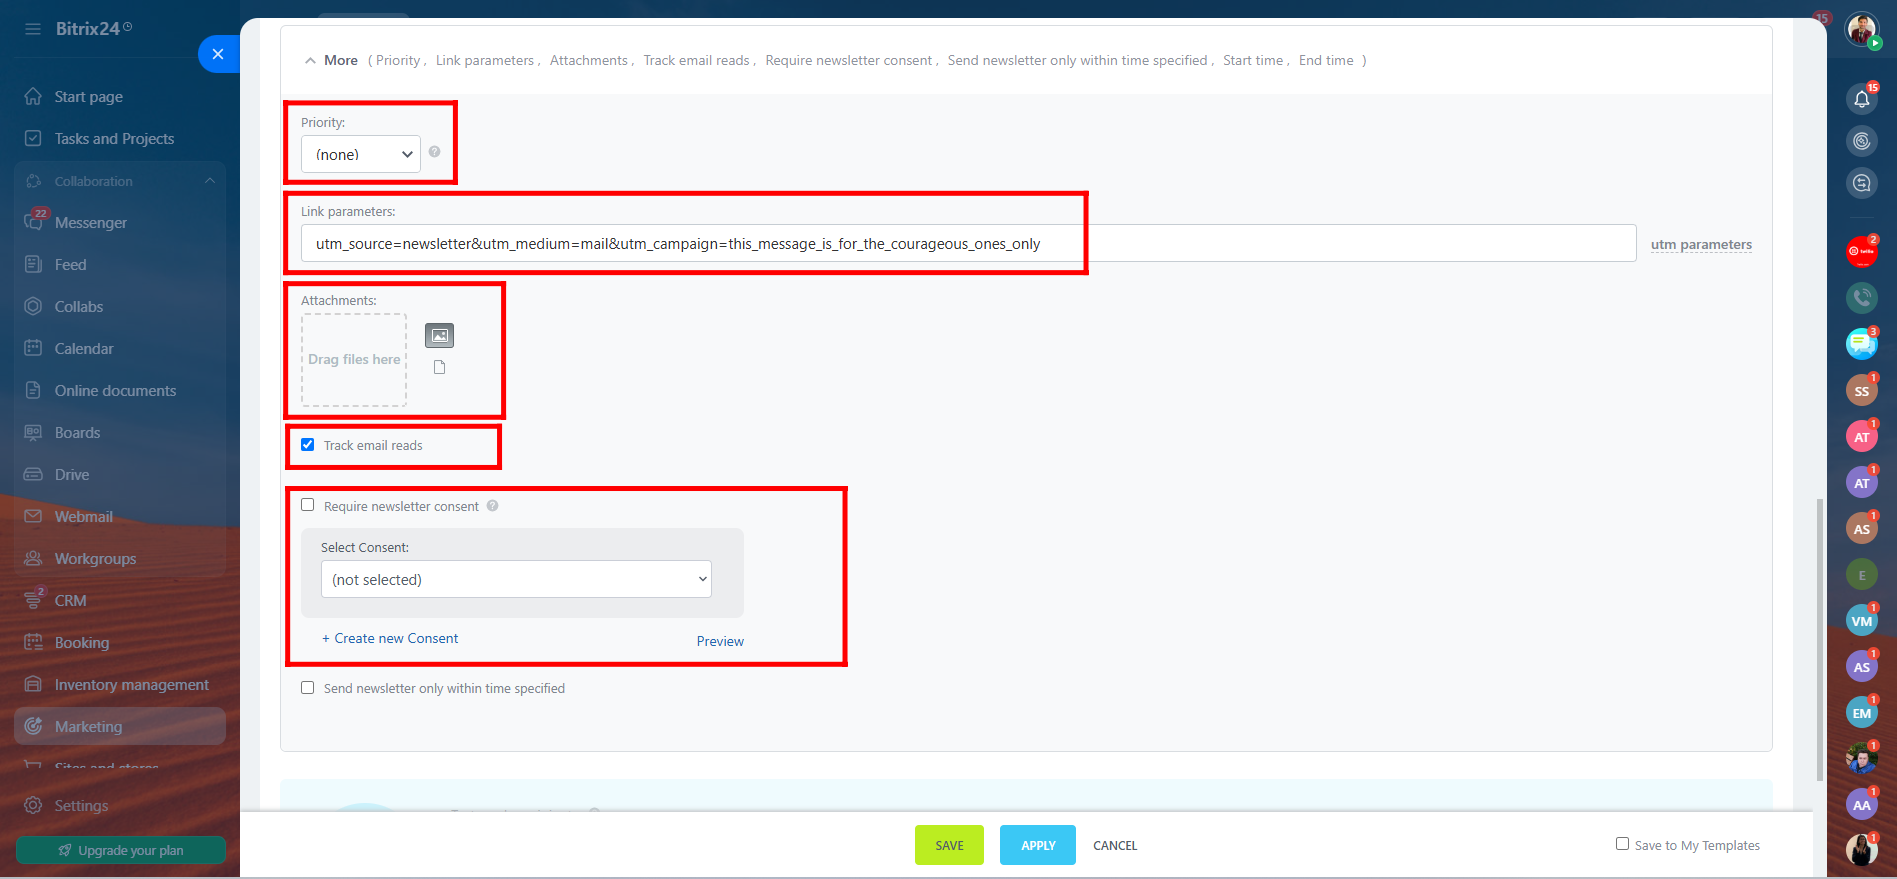
21. You can also set the priority of the email, add link parameters for tracking, attach files or documents, and check the box to track email reads. Additionally, you can include pre-made consent forms (which will be covered in a separate guide) to ensure compliance with data protection regulations.
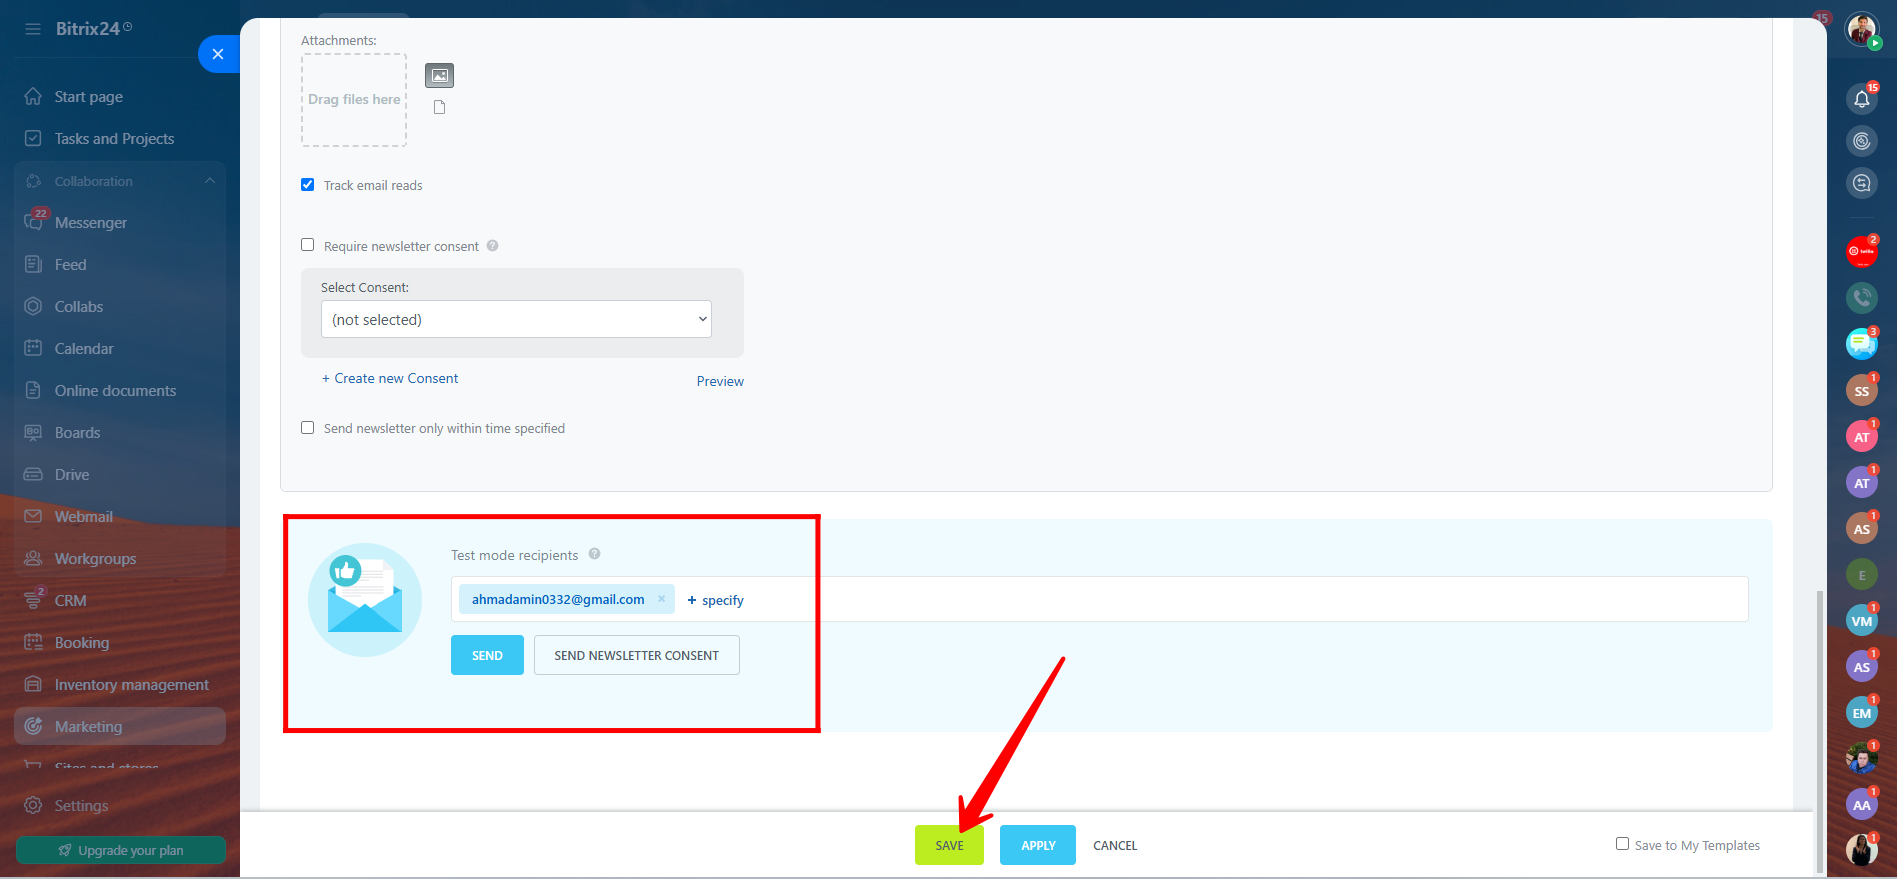
22. You can test the campaign by sending it to one or more recipients in test mode. Simply enter the test email addresses, review your content, and click Send to preview how the campaign will appear. Once you’re satisfied, save the campaign to finalize and prepare it for full launch.
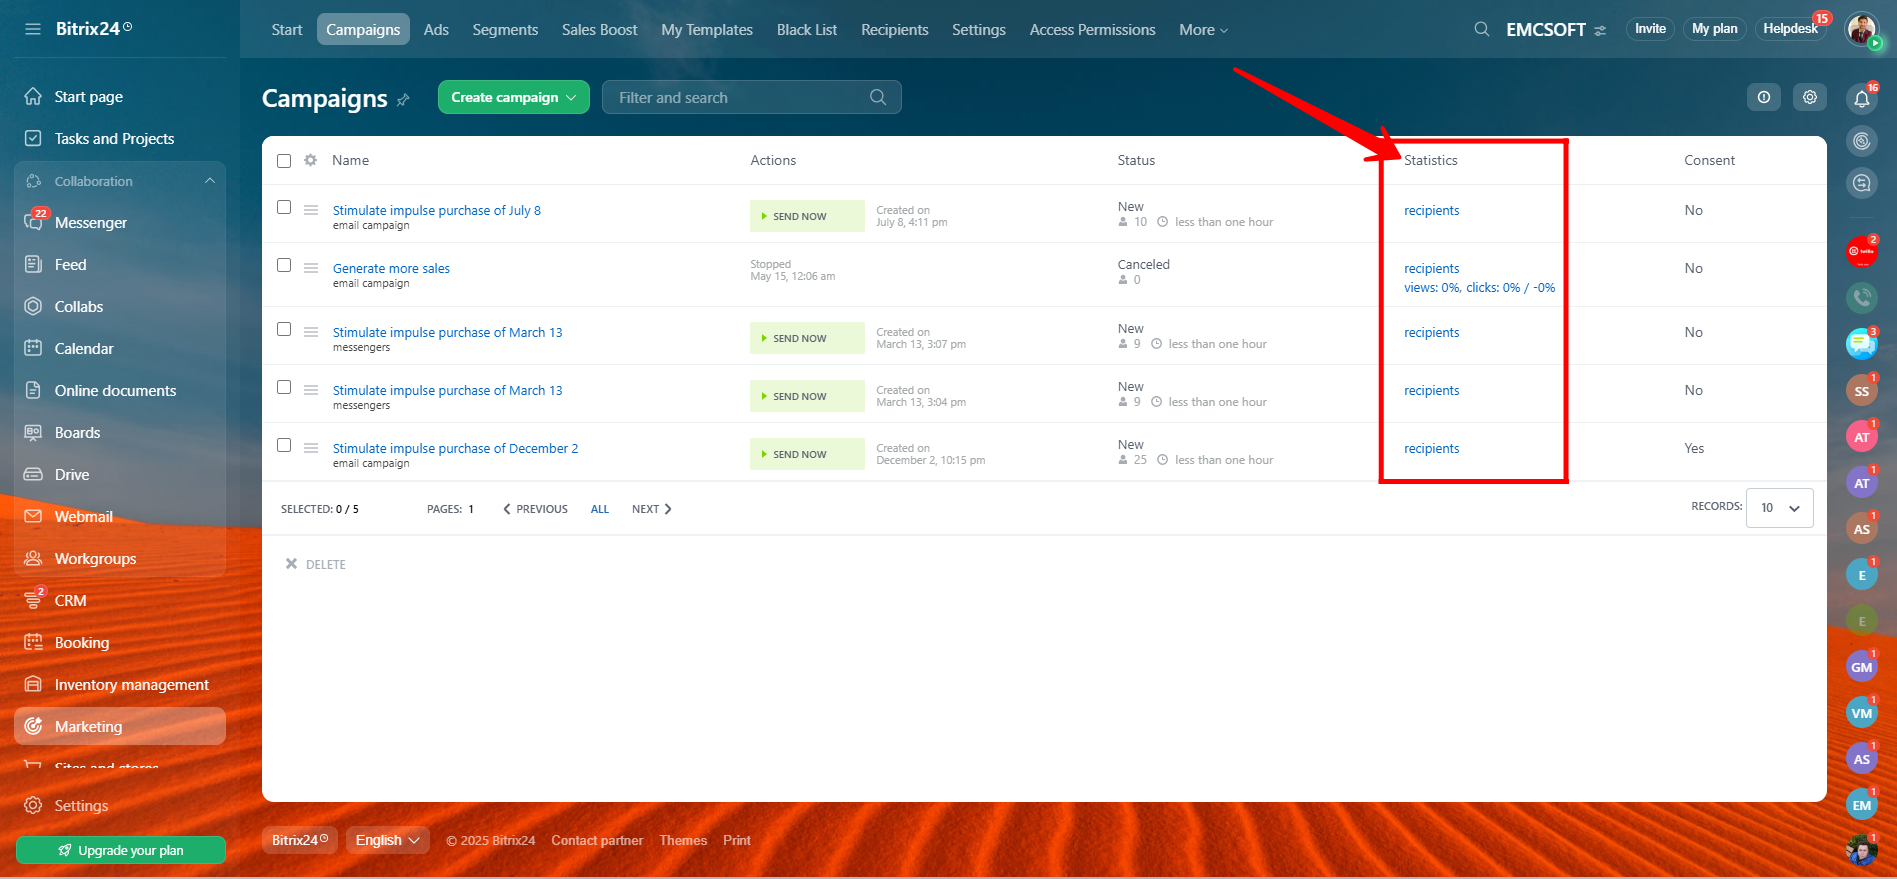
23. You can view the list of your active campaigns in the campaign dashboard. To launch a campaign, click “SEND NOW” under the Actions column. Once your campaign is sent, you can monitor its performance by going to the Statistics section, where you’ll find detailed insights on open rates, click-throughs, bounces, and other key metrics for each campaign.
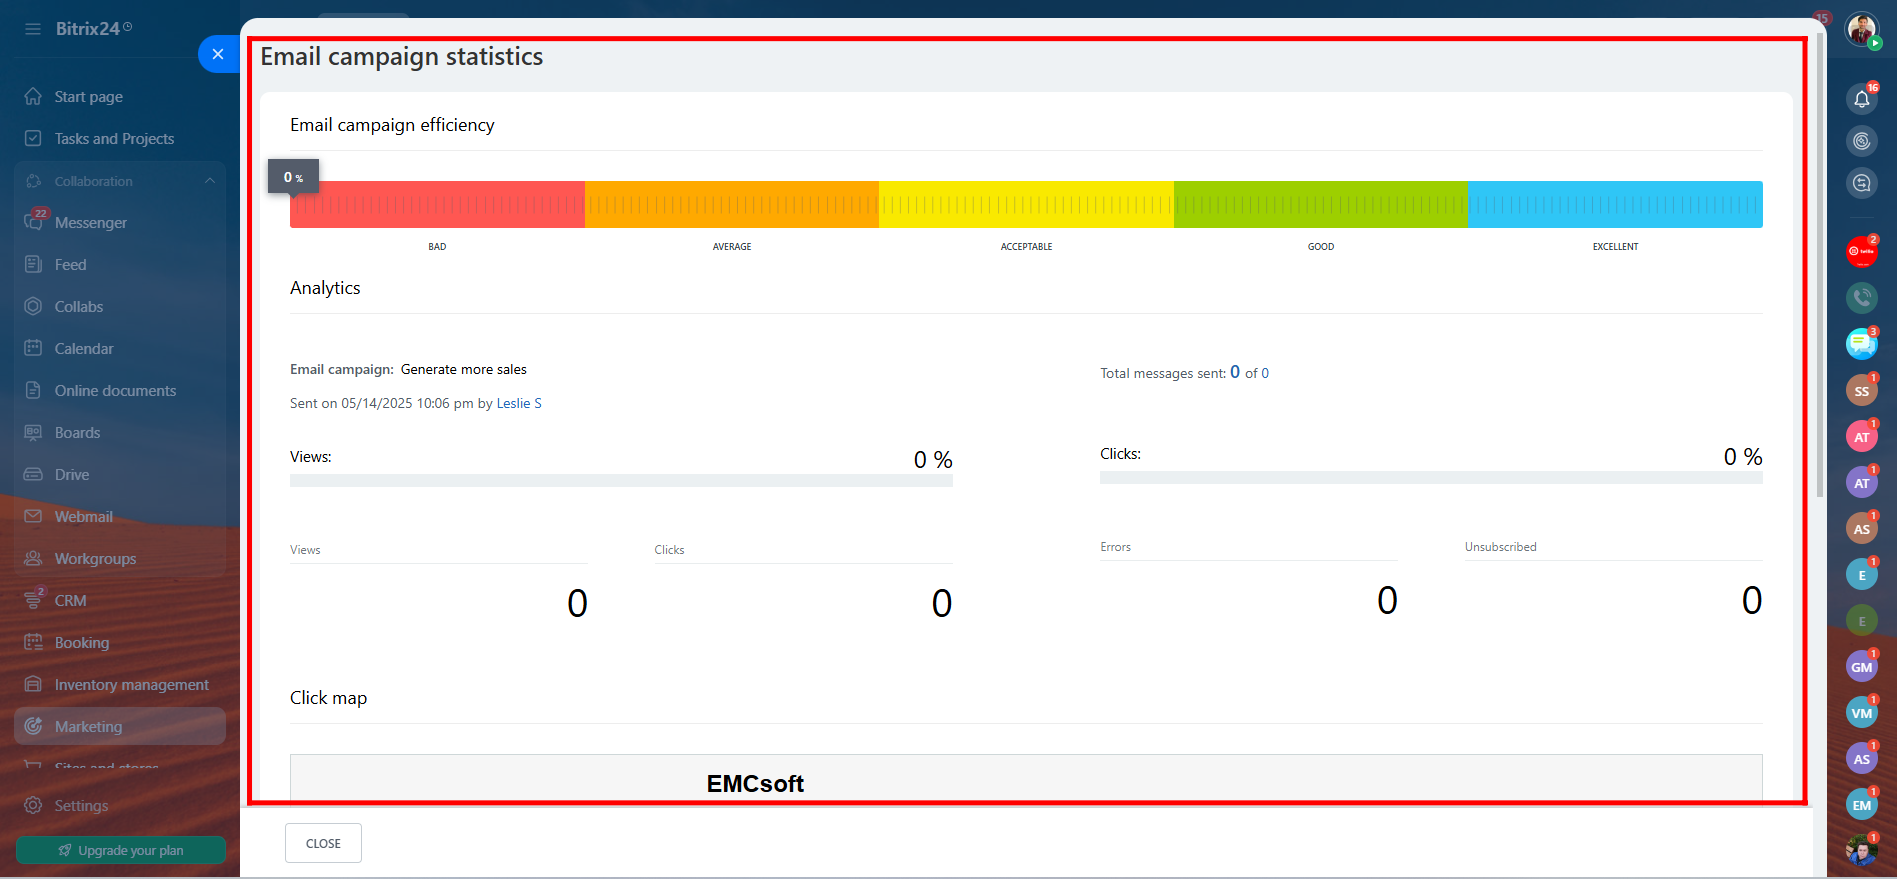
24. You can quickly gauge each campaign’s efficiency rating—shown as Bad, Average, Acceptable, Good, or Excellent. In the Analytics tab of the campaign’s statistics, you’ll also find detailed metrics, including Total Messages Sent, Views, Clicks, Unsubscriptions, Errors, and a Click Map that highlights where recipients interacted within your email.
Best Practices for Effective Segmentation
Before we wrap up, here are a few best practices to help you get the most out of your segmentation efforts in Bitrix24:
Keep Segments Meaningful
Avoid segments that are too broad or too specific—aim for groups that are clearly defined and actionable.
Test Different Strategies
Try segmenting by demographics, user behavior, or deal stage to see which approach delivers the best results for your campaigns.
Avoid Over-Segmenting
Too many small segments can lead to unnecessary complexity and more work, with little added value.
Maintain Clean CRM Data
Regularly review and clean your CRM data to ensure your segmentation remains accurate and effective.
Remember: Good segmentation leads to better targeting, and better targeting leads to more successful marketing. That’s how you segment your audience effectively in Bitrix24.
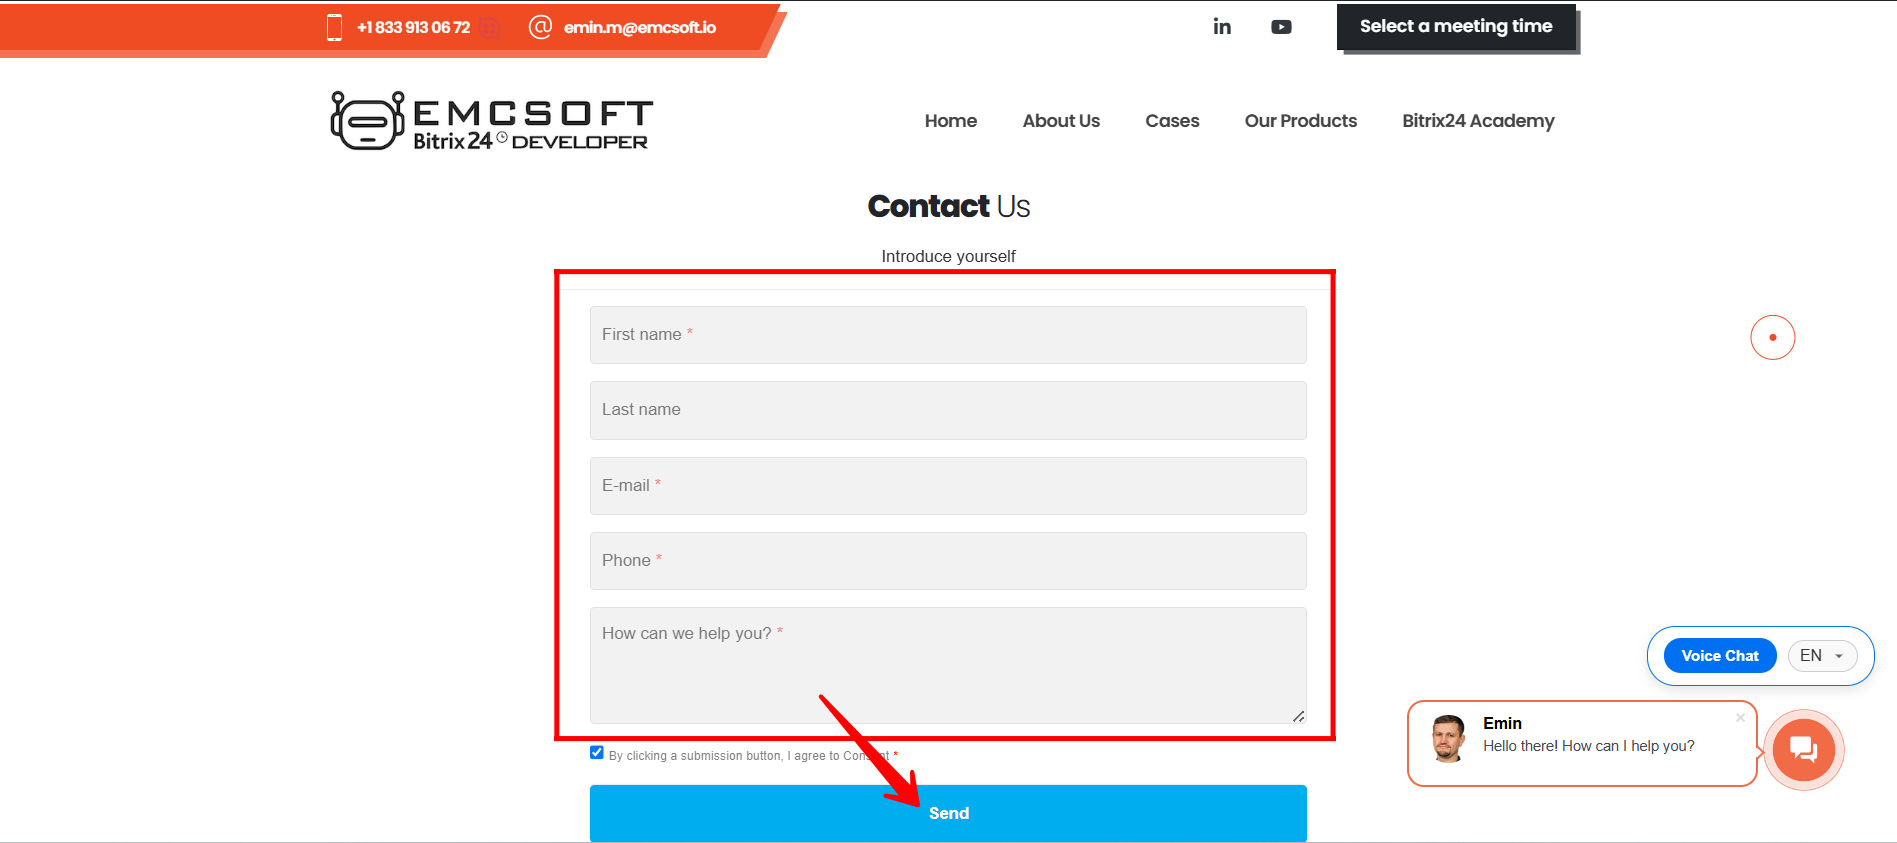
If you’d like us to help you create custom segments and targeted campaigns for your audience, simply visit https://emcsoft.io/contacts/ and fill out the contact form. Our team will get in touch with you shortly to discuss your needs and provide personalized support.
“You can also watch this video on Youtube”
Not all customers are created equal, and your emails shouldn’t treat them that way.
In our latest video, we walk you through how to segment your contacts in Bitrix24 CRM so you can send smarter, more relevant campaigns that drive real results.
🔶 Create dynamic segments based on behavior, demographics, or deal stage
🔶 Send personalized emails with tailored tone and timing
🔶 Track performance by segment to fine-tune your strategy
Whether you’re targeting loyal customers or warming up new leads, segmentation helps you boost open rates, increase engagement, and create real value for your audience.