| 913 Views | admin
Bitrix24 Contact Center allows businesses to connect with customers through social media platforms such as Facebook and Instagram. By integrating these channels, you can receive messages, comments, and enquiries directly inside Bitrix24, without switching between different platforms. This helps teams manage communication from one place and respond to customers more efficiently.
Facebook integration in Bitrix24 includes both Messenger messages and comments on posts, each handled through separate open lines. This makes it easier to track different types of customer interactions and ensure that no enquiry is missed. Agents can reply to messages and comments directly from Bitrix24, and the responses are delivered back to Facebook in real time.
Instagram integration works in a similar way, but both messages and comments are managed through a single open line. Once connected, agents can handle Instagram conversations from within Bitrix24, making it easier to manage multiple channels without confusion.
In this guide, we will walk through the complete setup process for Facebook and Instagram open lines. You will learn how to configure open channels, connect your Meta accounts, and test the integration to ensure that messages and comments are received and replied to correctly.
“Detailed Instructions are given below”
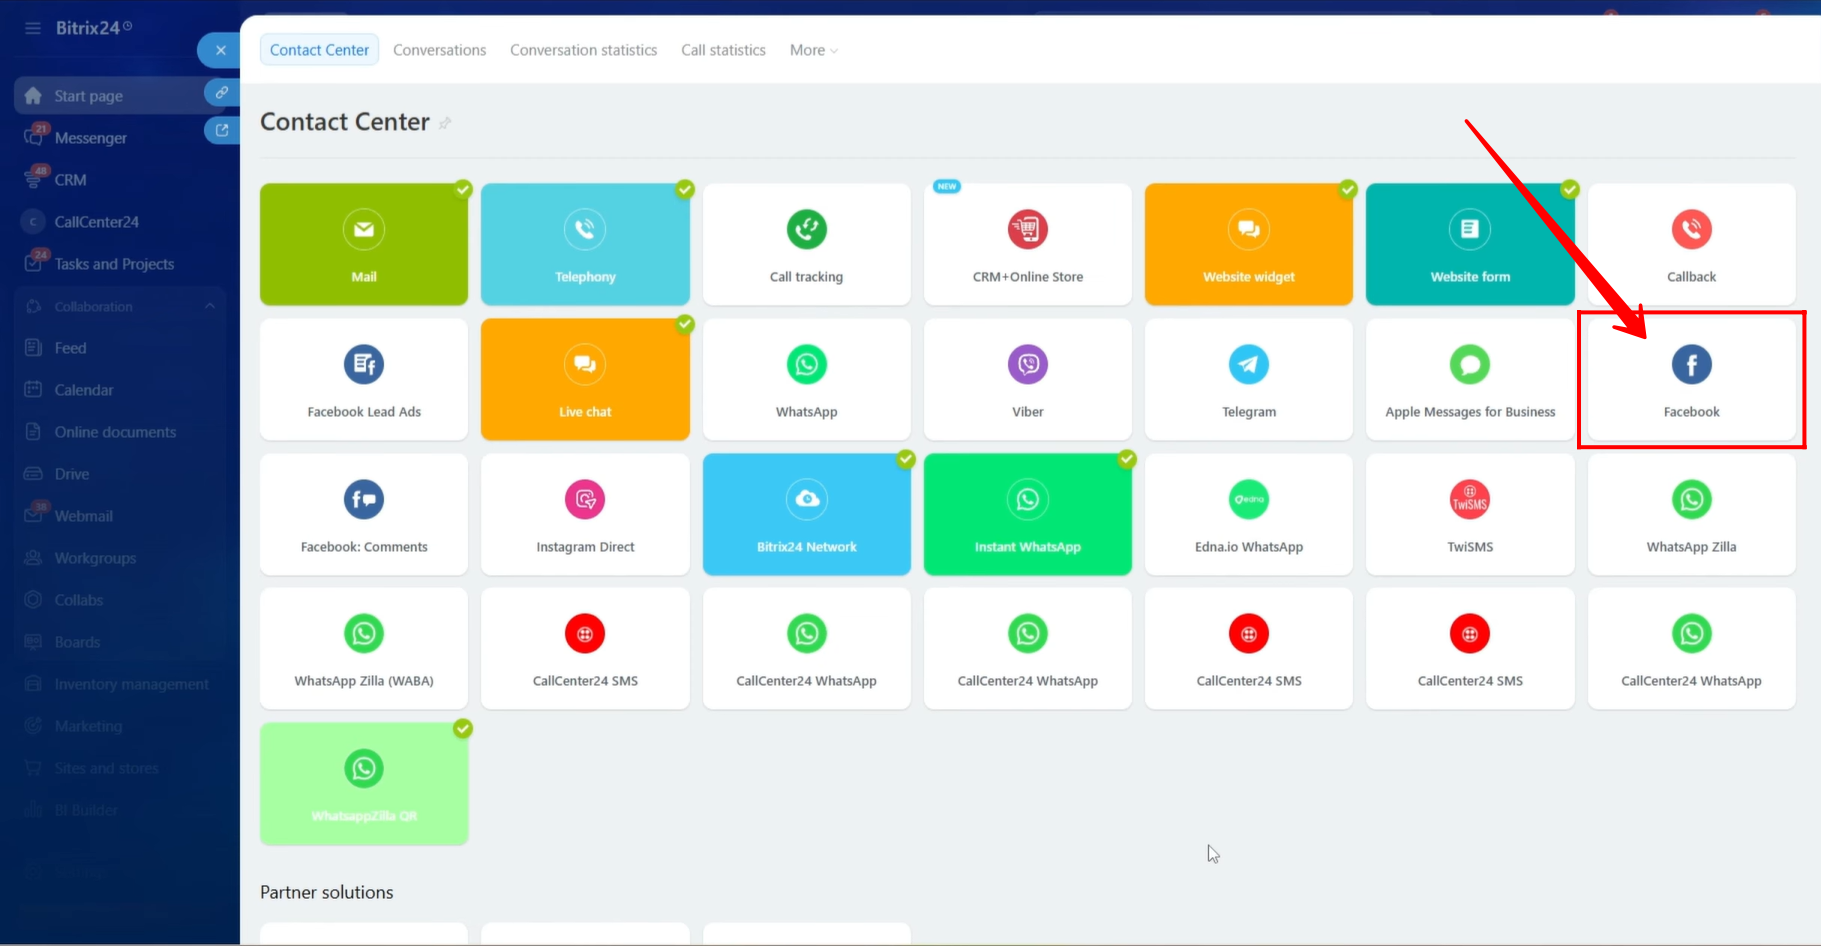
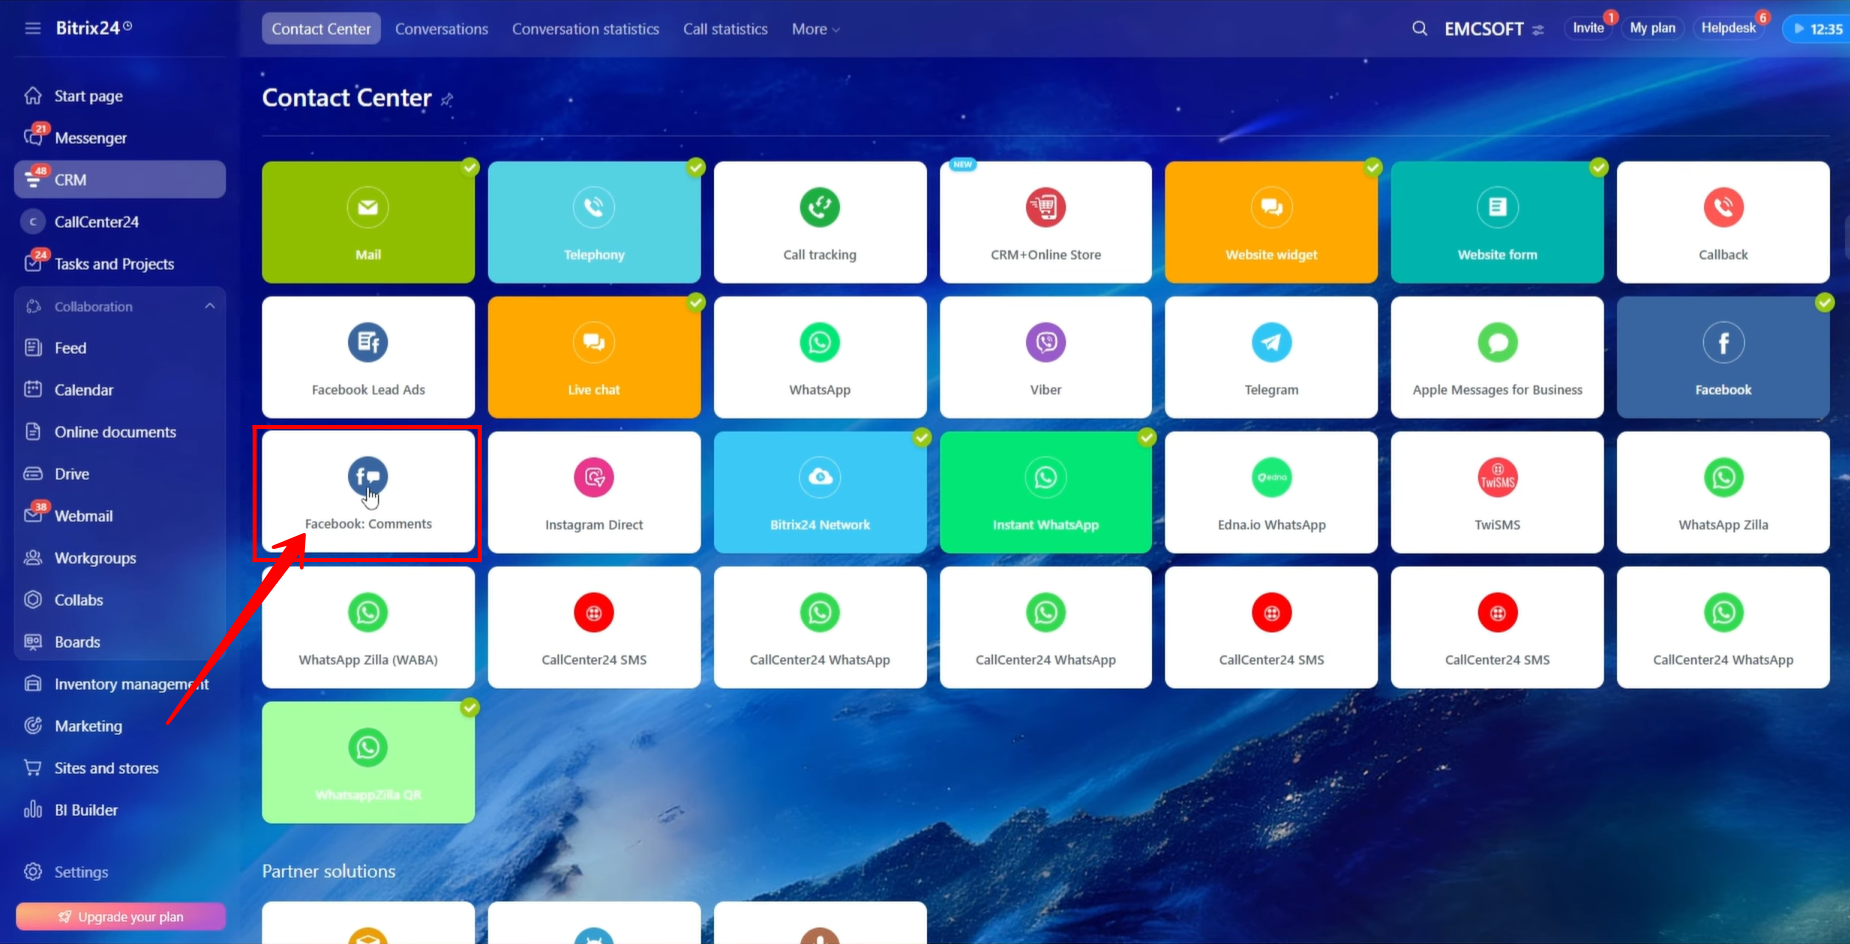
1. Navigate to Contact Center by searching for it in the search bar.

2. Select the Facebook open line option.
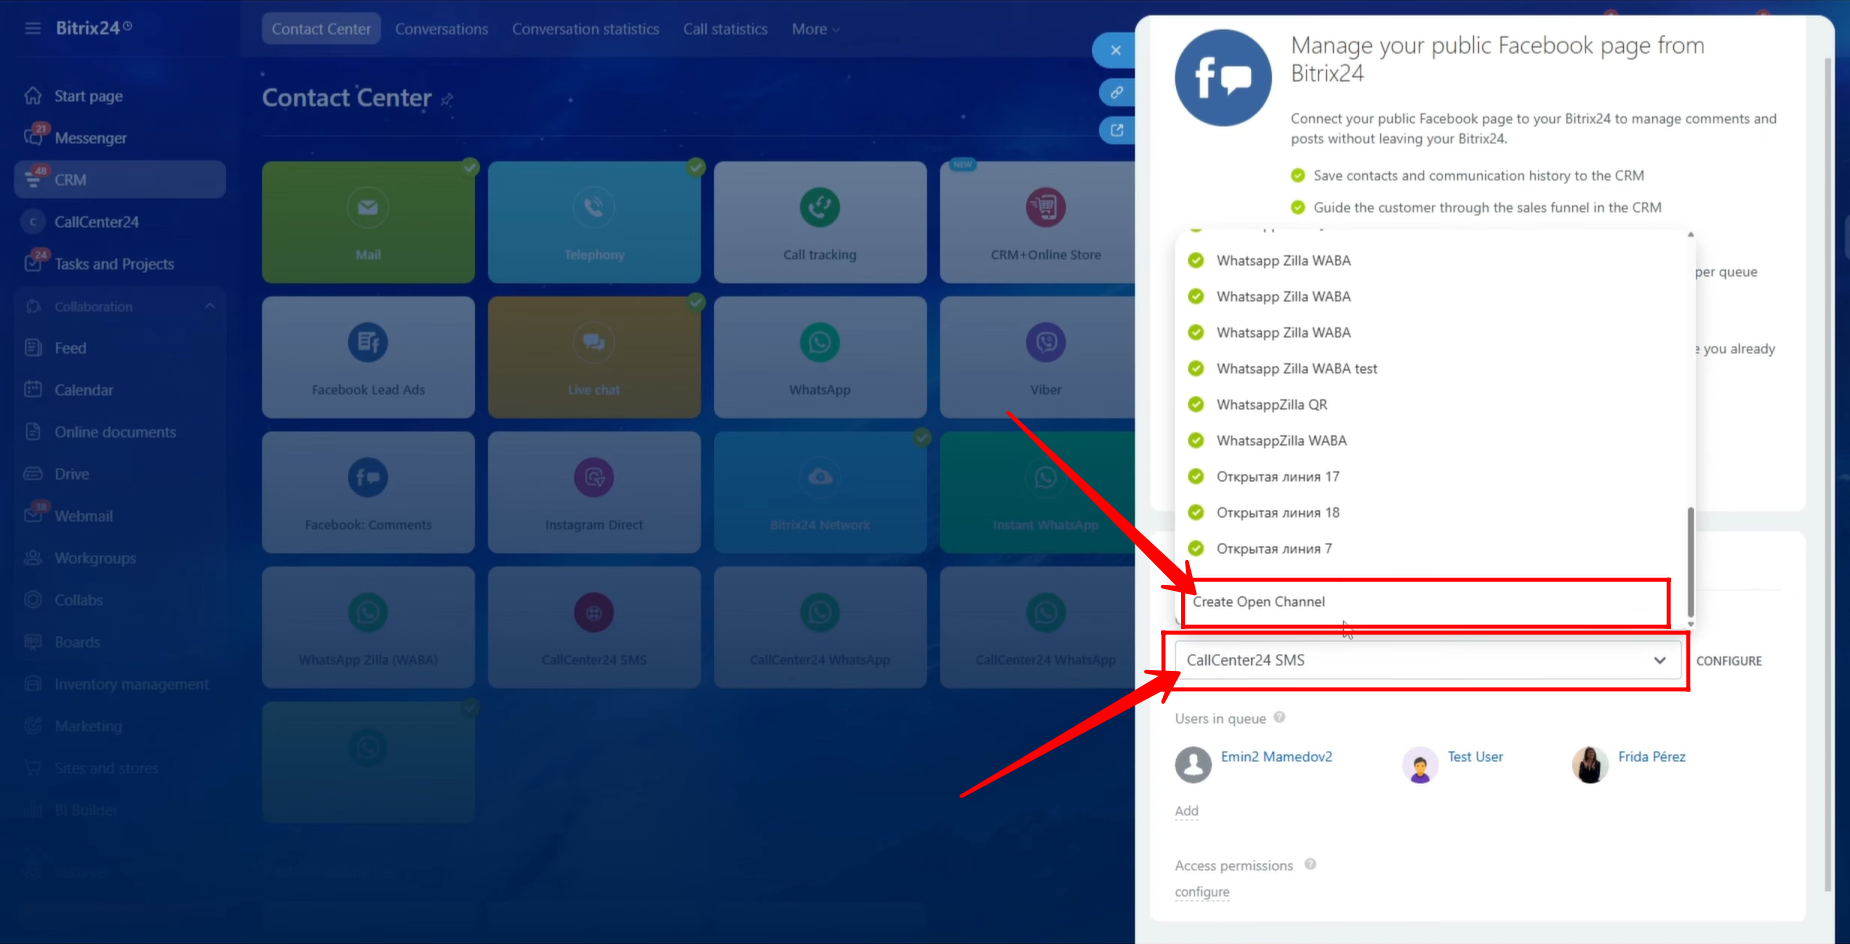
3. In the open channel configuration dropdown, click Create Open Channel. We will create a new channel configuration specifically for Facebook.

4. A new open channel will be created, as shown, with a default name such as “Open Channel 37.” Click Configure to proceed.

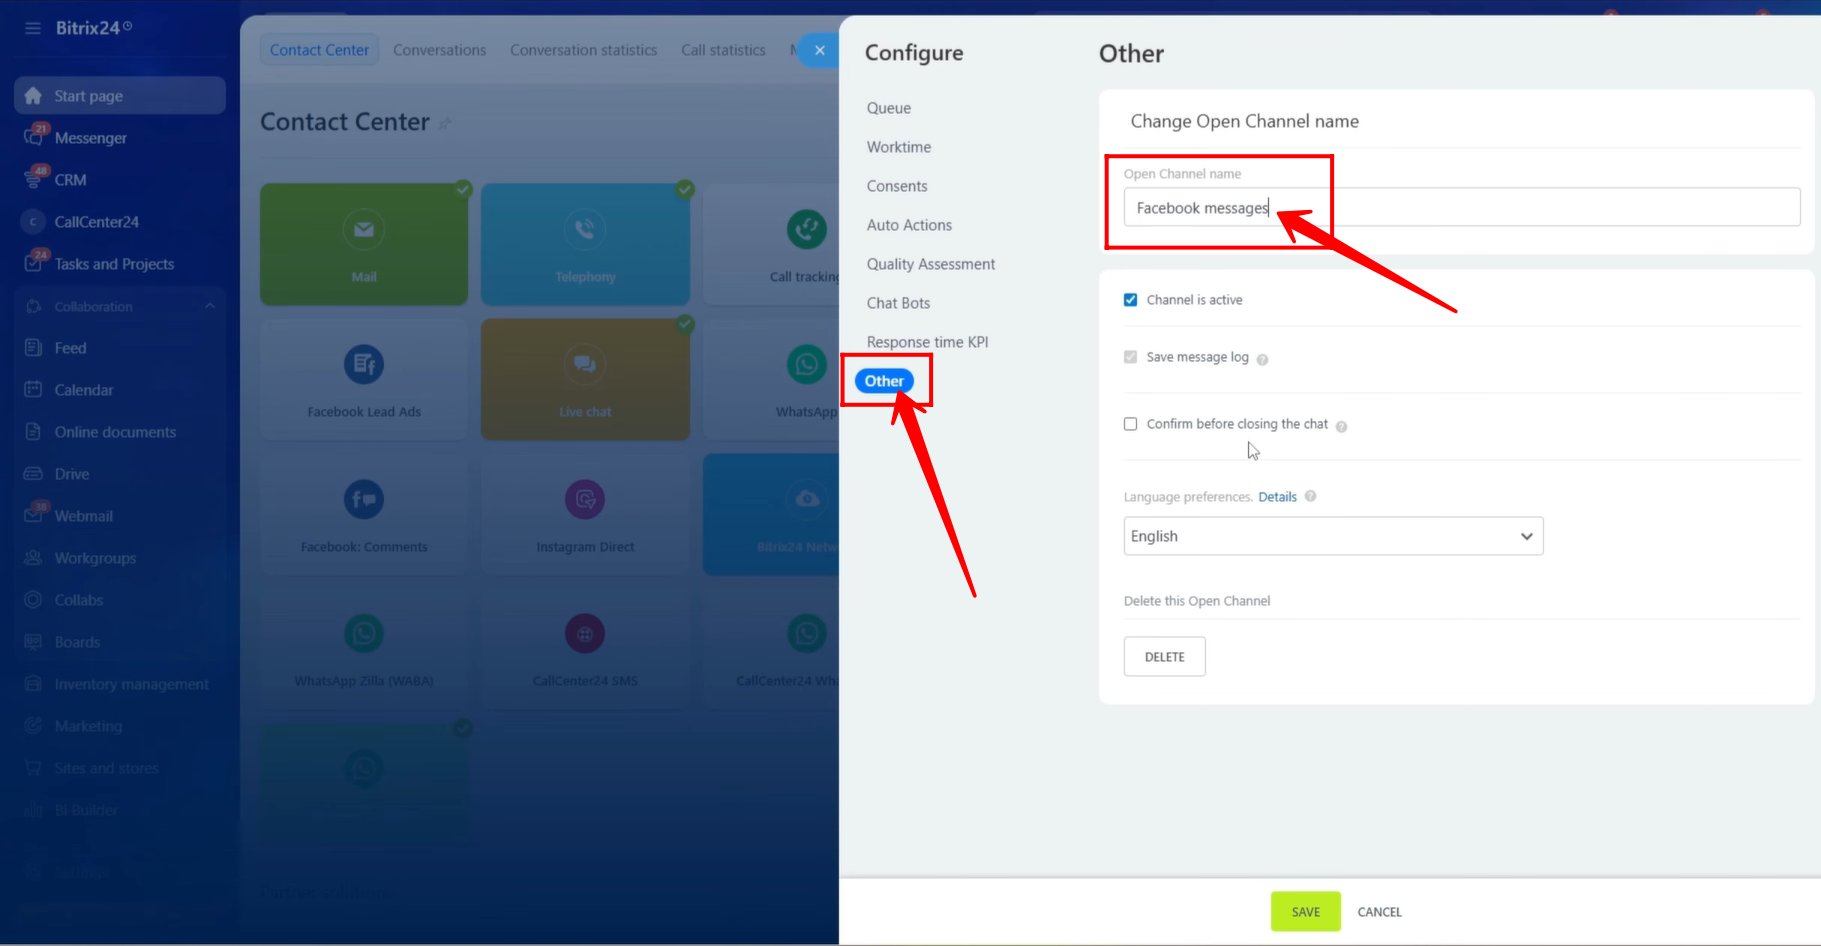
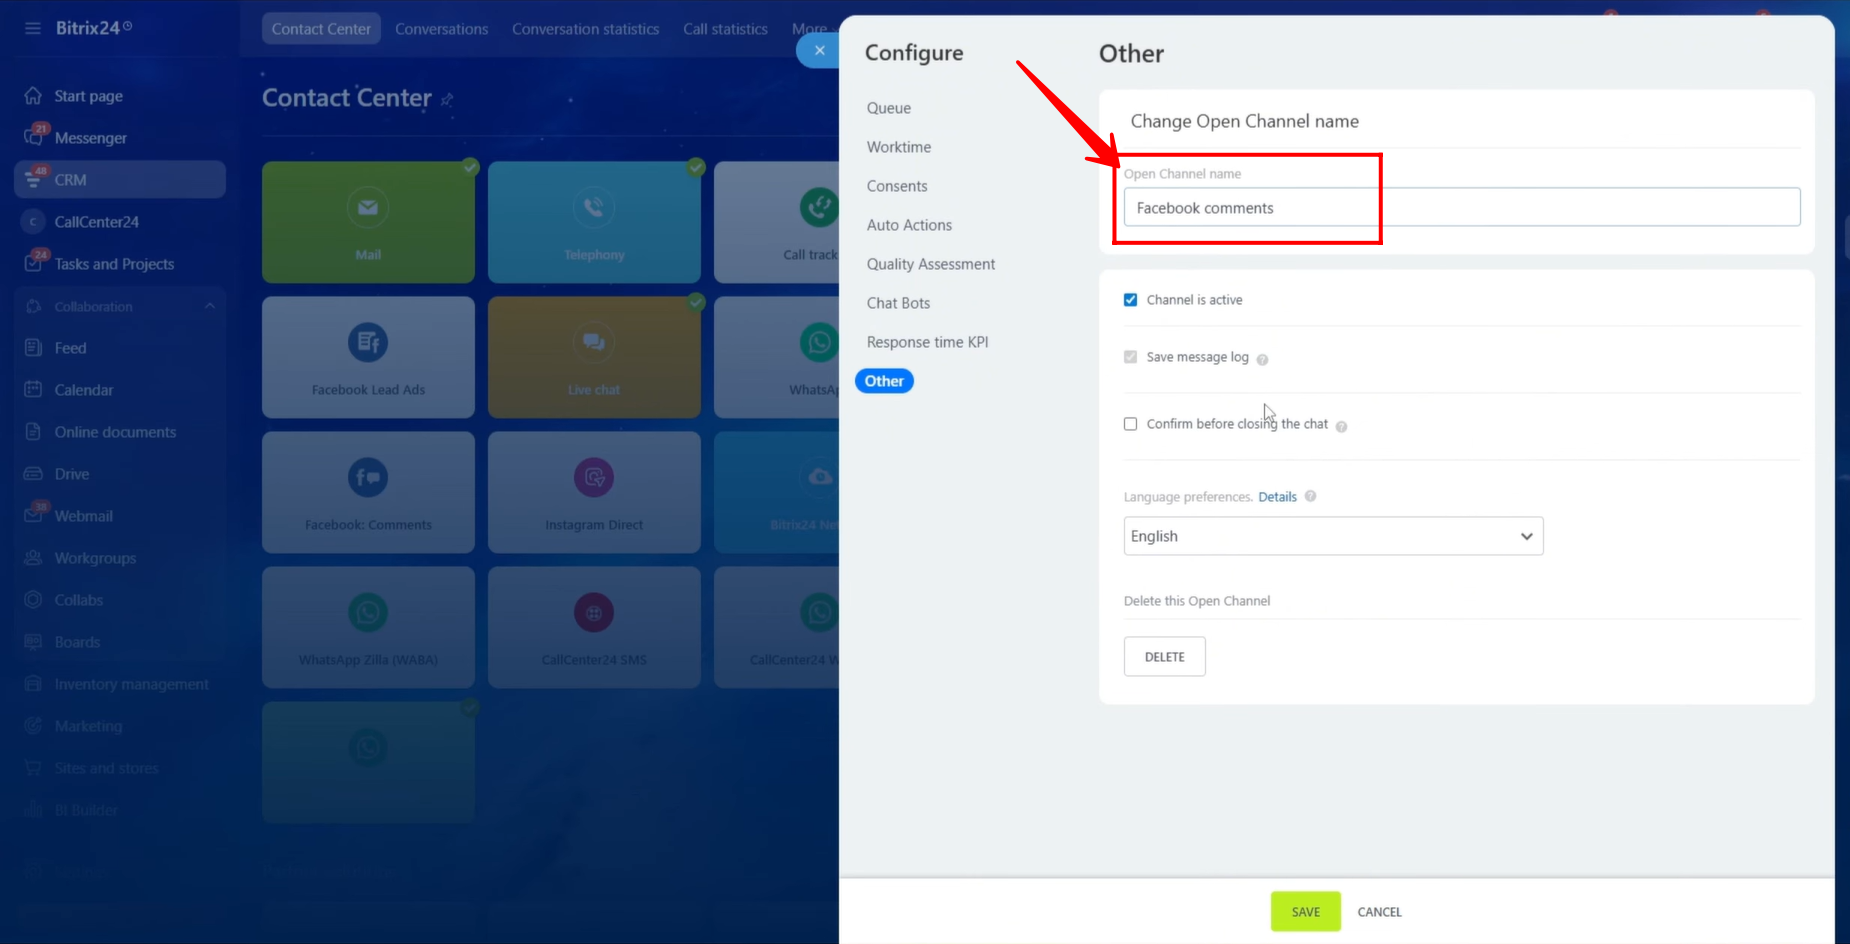
5. Go to the Other tab and rename the open channel. Since this open line will be linked with Facebook Messenger to send and receive messages, we are naming it “Facebook Messages.”
From this section, you can also make the channel active or inactive, set the language preference, or delete the channel if needed.
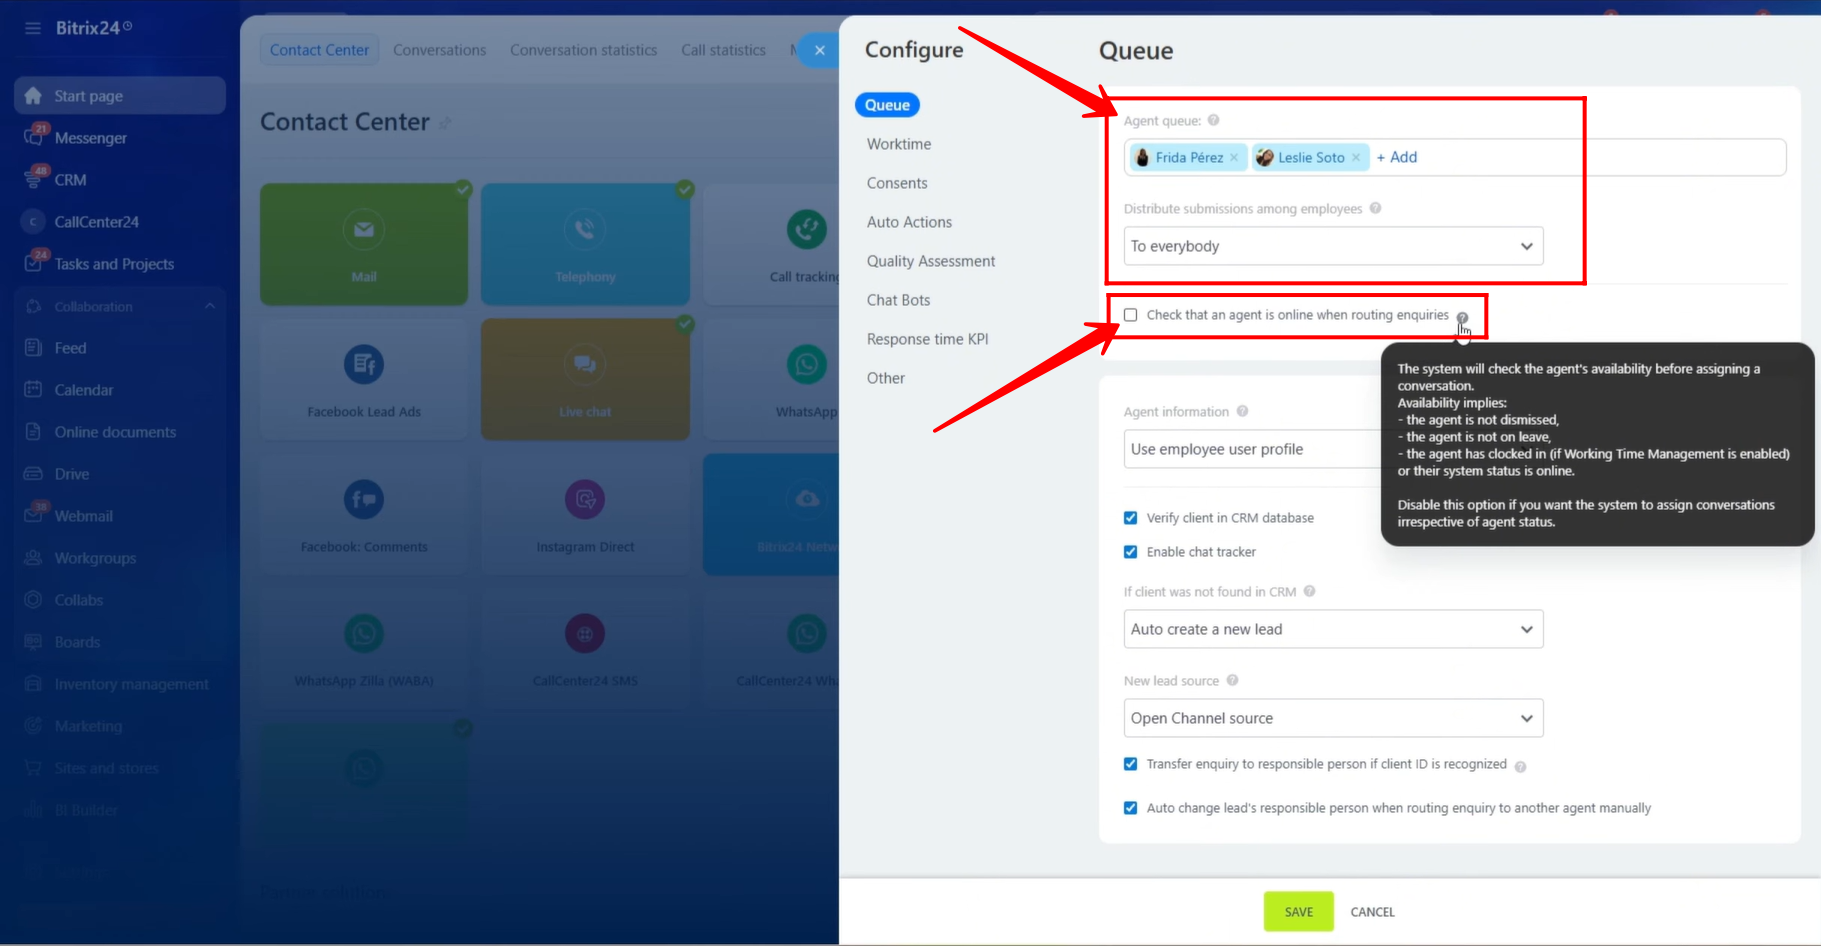
6. Navigate to the Queue tab. Add the agents who will handle Facebook messages and respond to customers.
You can define how messages are distributed among agents: Evenly, Exactly as enqueued, or To everybody.
In our case, we selected To everybody, meaning all agents will receive incoming messages, and the first available agent can pick up and respond to the chat.
You can also enable the option to assign chats only to agents who are currently available. If this option is disabled, chats will be shown to all agents regardless of their availability.
7. Choose how the agent’s information should be displayed to customers. You can either show or hide the user’s profile information.
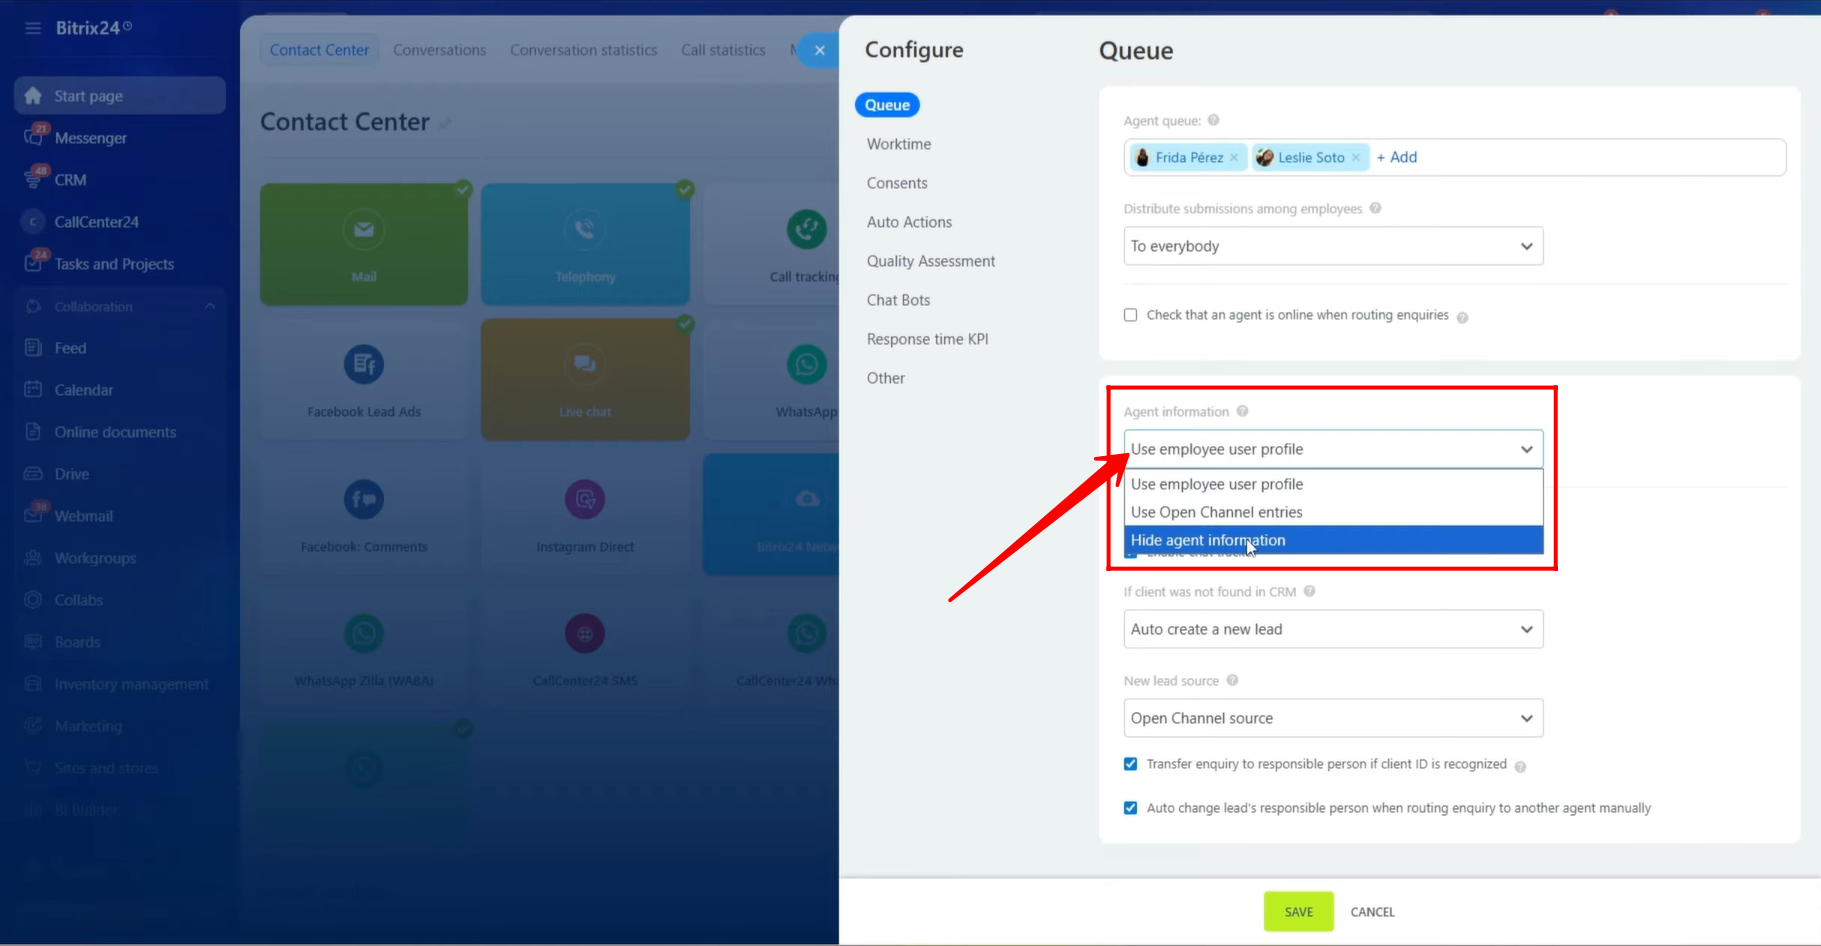
8. If you choose to hide agent information, you can define a custom display name (such as your company name) and select an avatar that will be shown to clients instead of individual agent details.
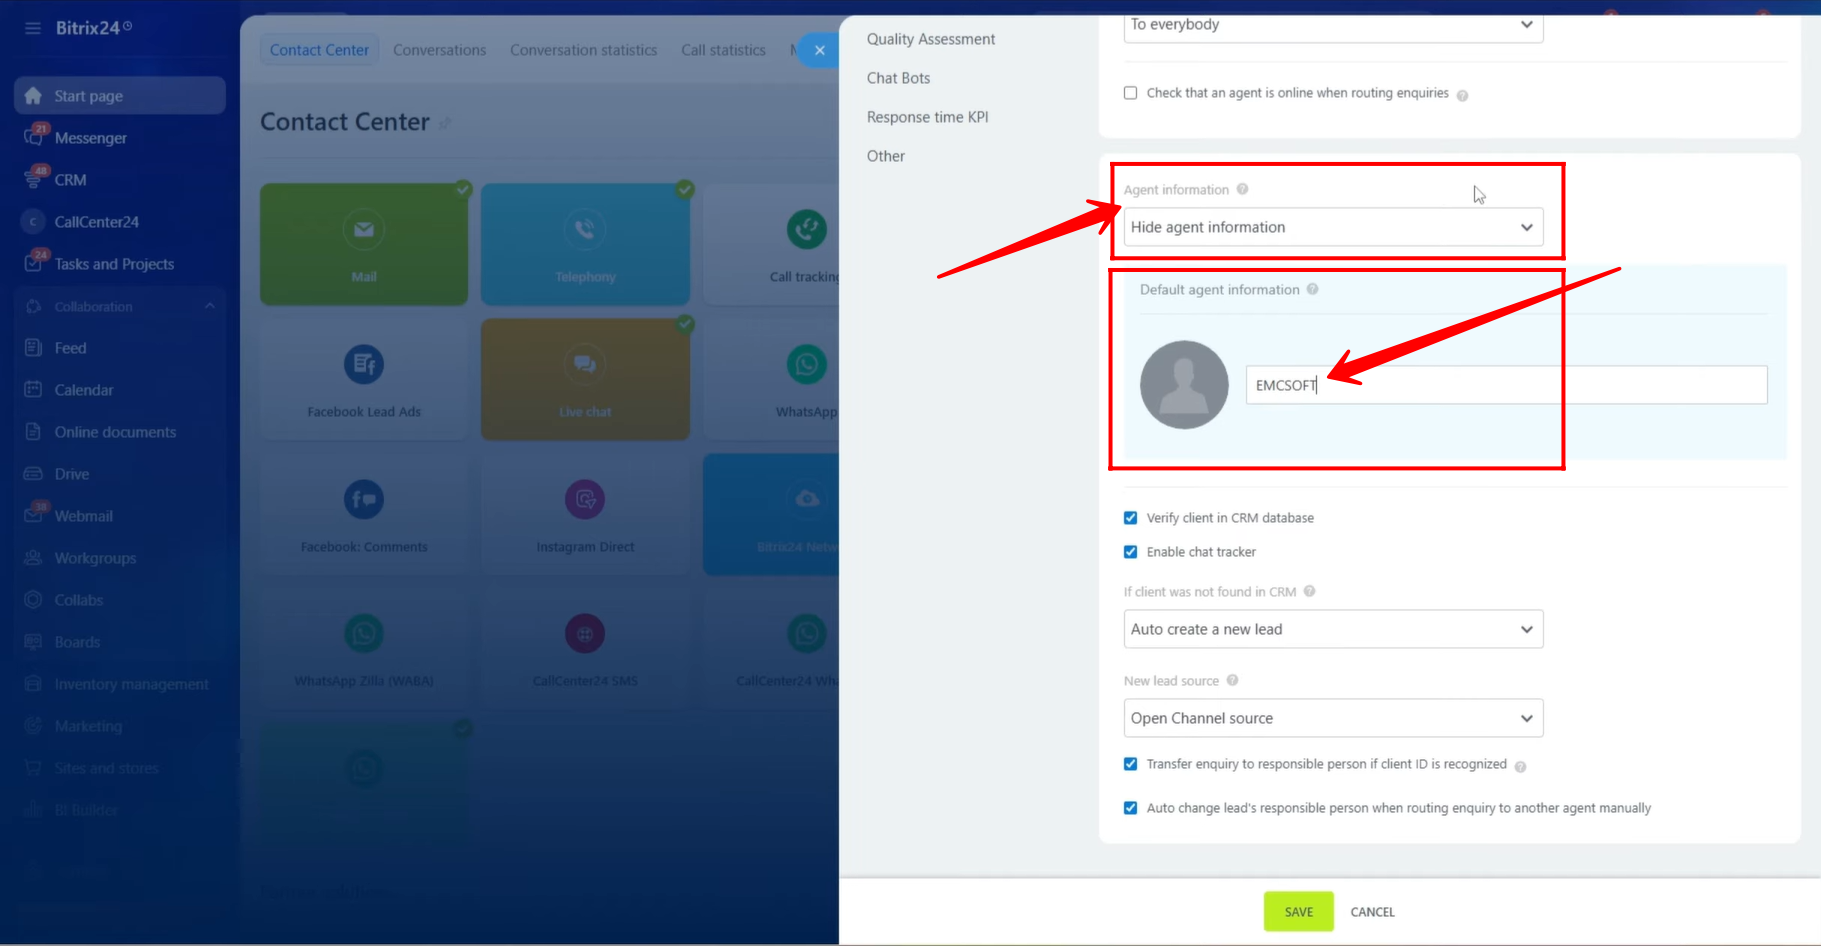
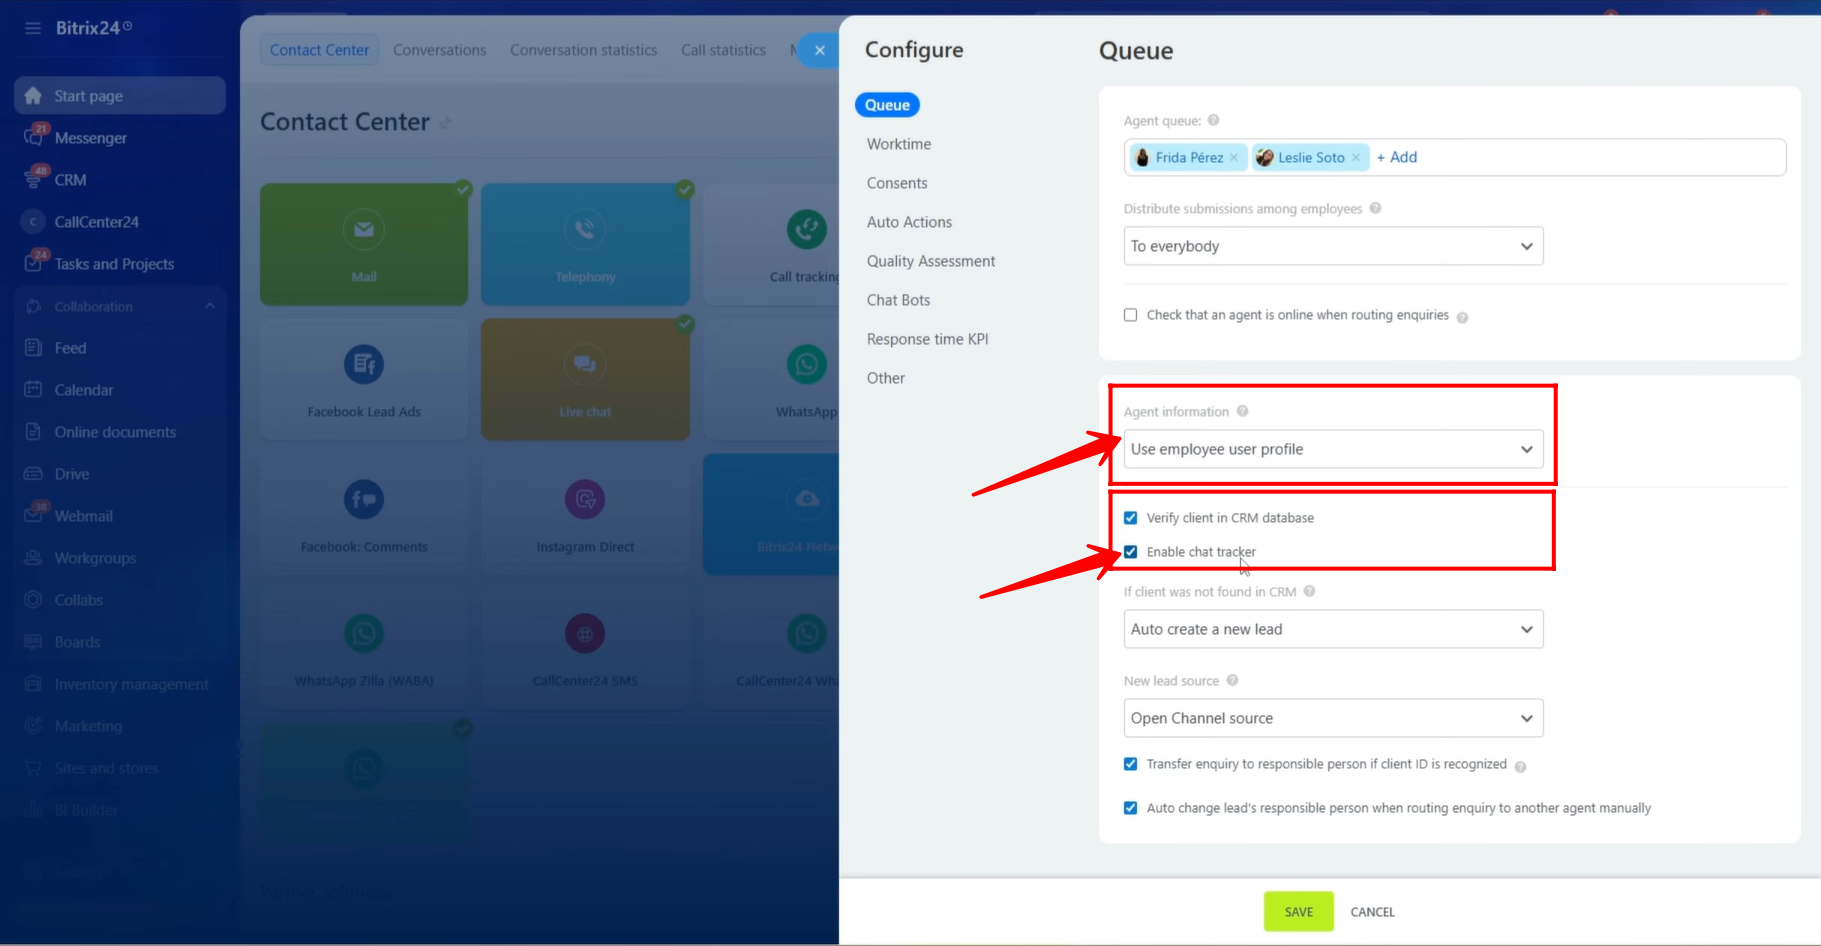
9. In our case, we selected to display the agent’s user profile.
You can enable the option Verify client in CRM database to avoid duplicate records. When enabled, the system checks if the client already exists in the CRM and links the chat to the existing record instead of creating a new one.
You can also enable the Chat Tracker, which ensures that if a client contacts you through multiple channels (such as Facebook, Instagram, or WhatsApp), all conversations are linked to the same CRM entity.
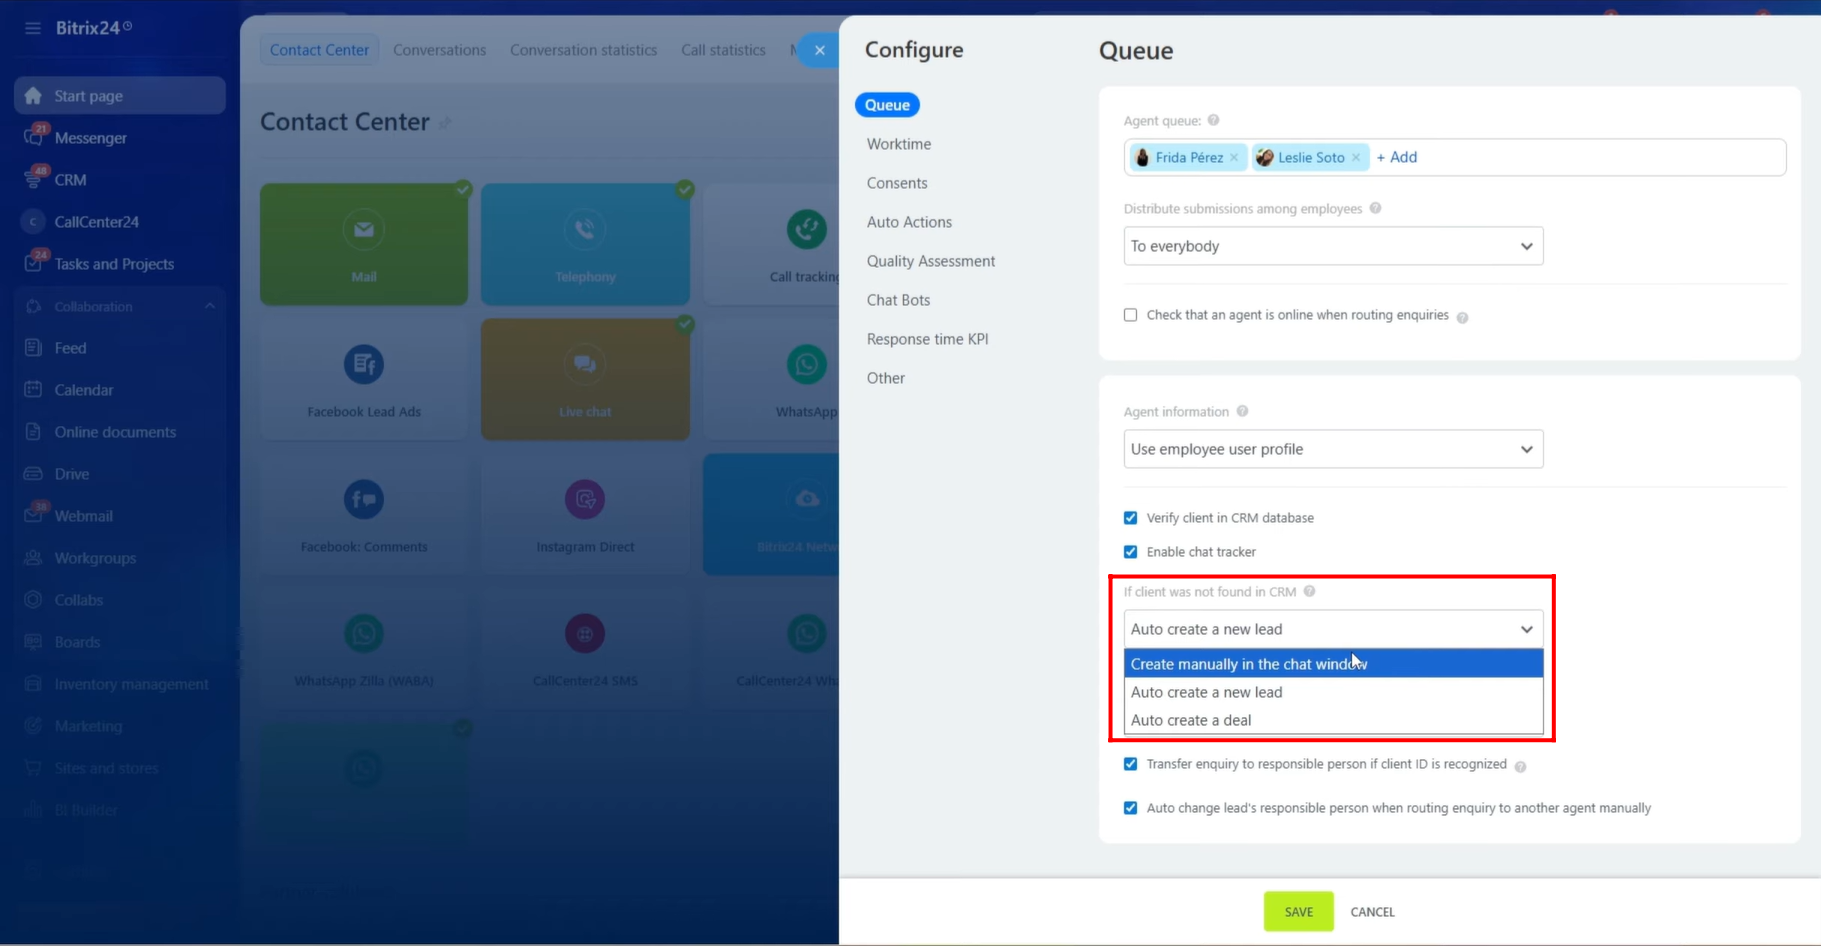
10. If the client is not found in the CRM, you can define the behavior for new contacts. You can choose to create a new lead, create a new deal, or create manually from the chat window.
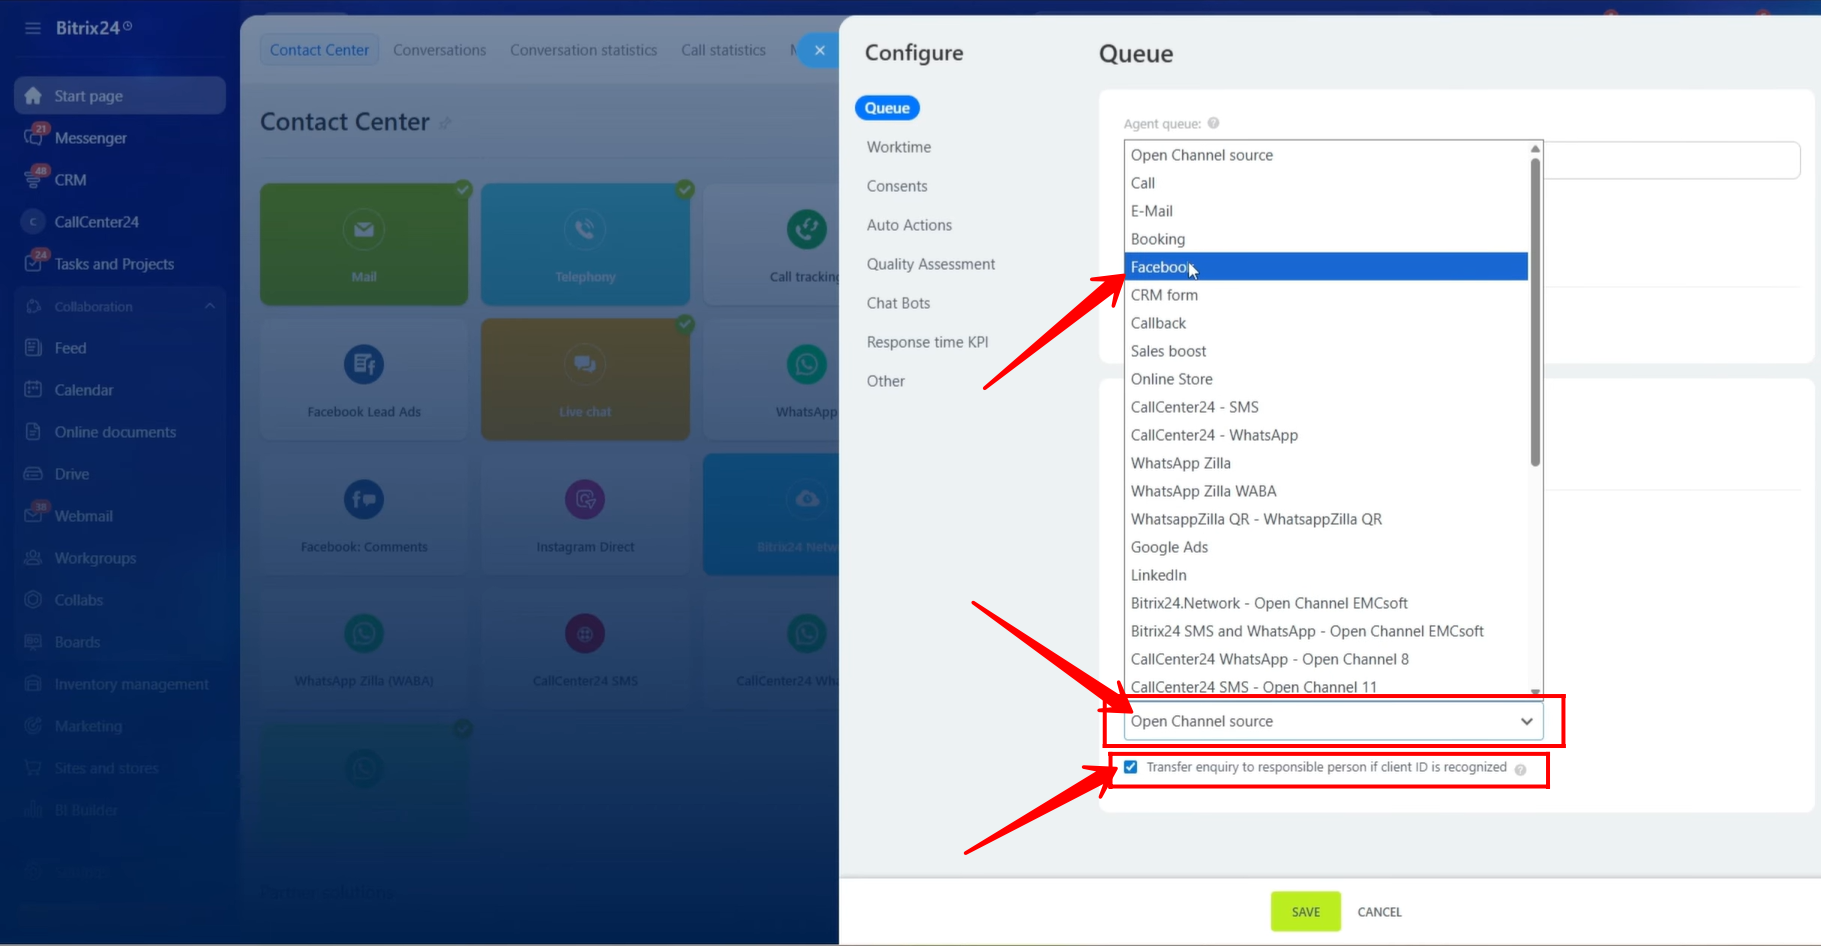
11. Select the open channel source, which in this case is Facebook.
You can also enable an option so that if a returning client previously communicated with a specific agent, the chat will be automatically assigned to that same agent instead of the entire queue.
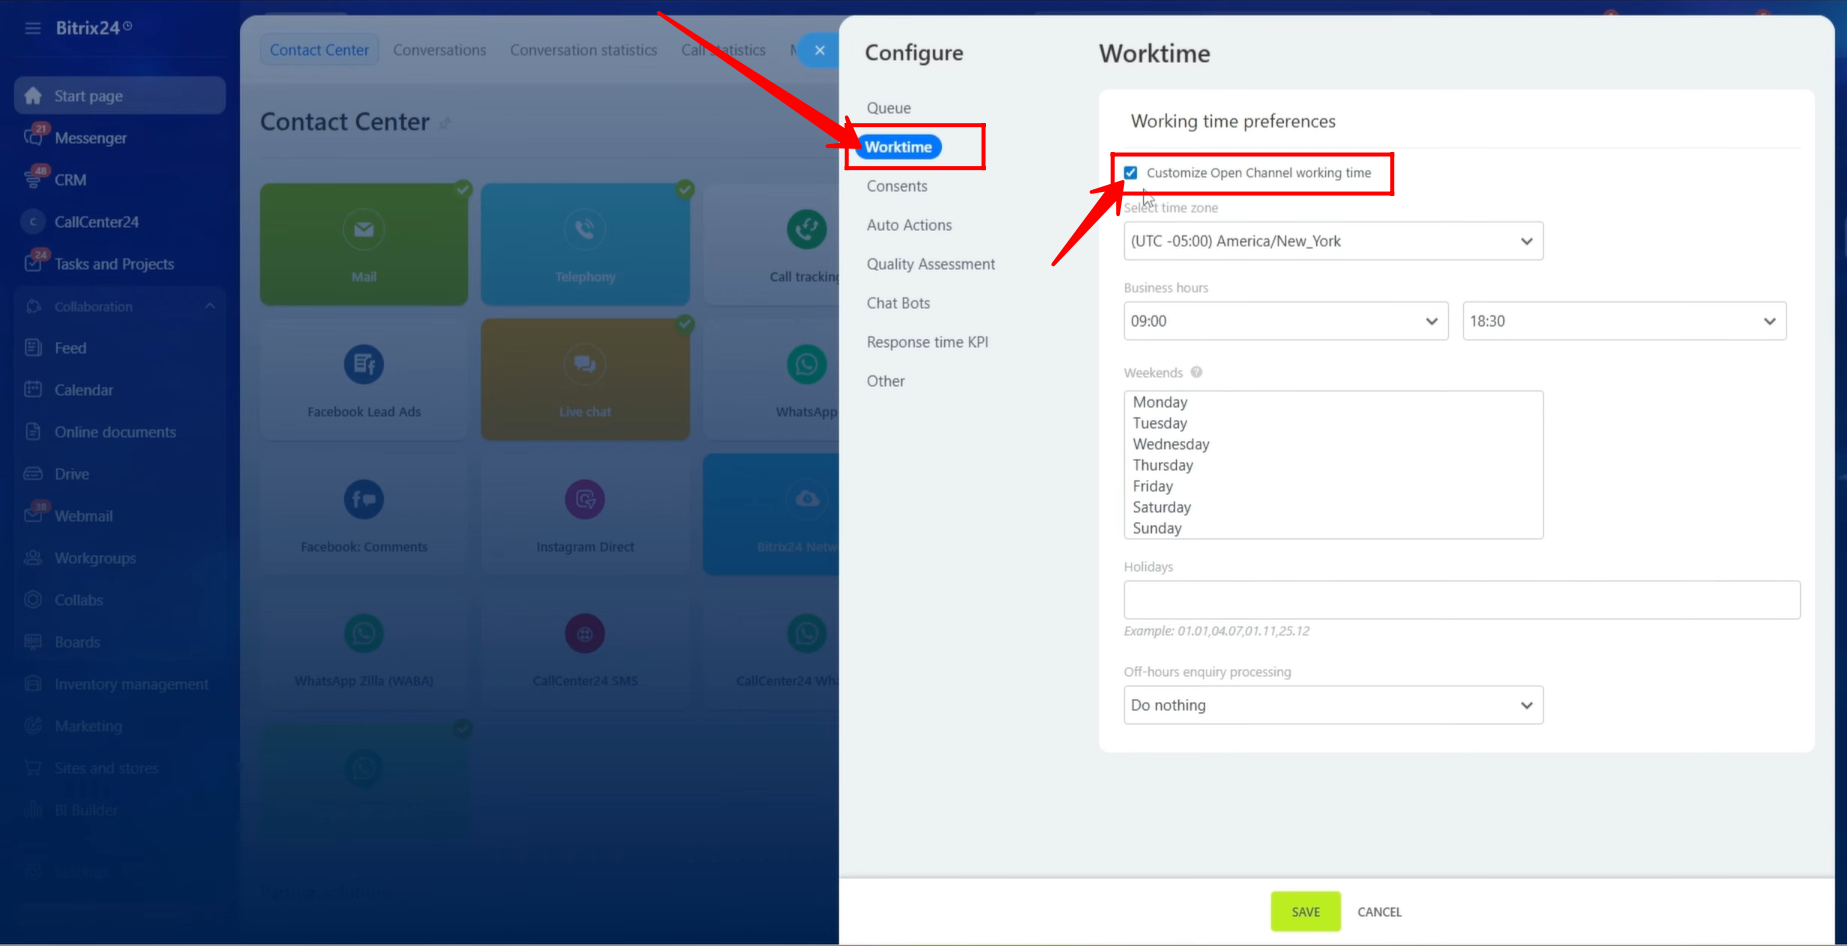
12. In the Worktime tab, you can configure working hours. Select the time zone, define business hours, add holiday dates, and choose whether to send an automatic message or do nothing when messages are received outside working hours.
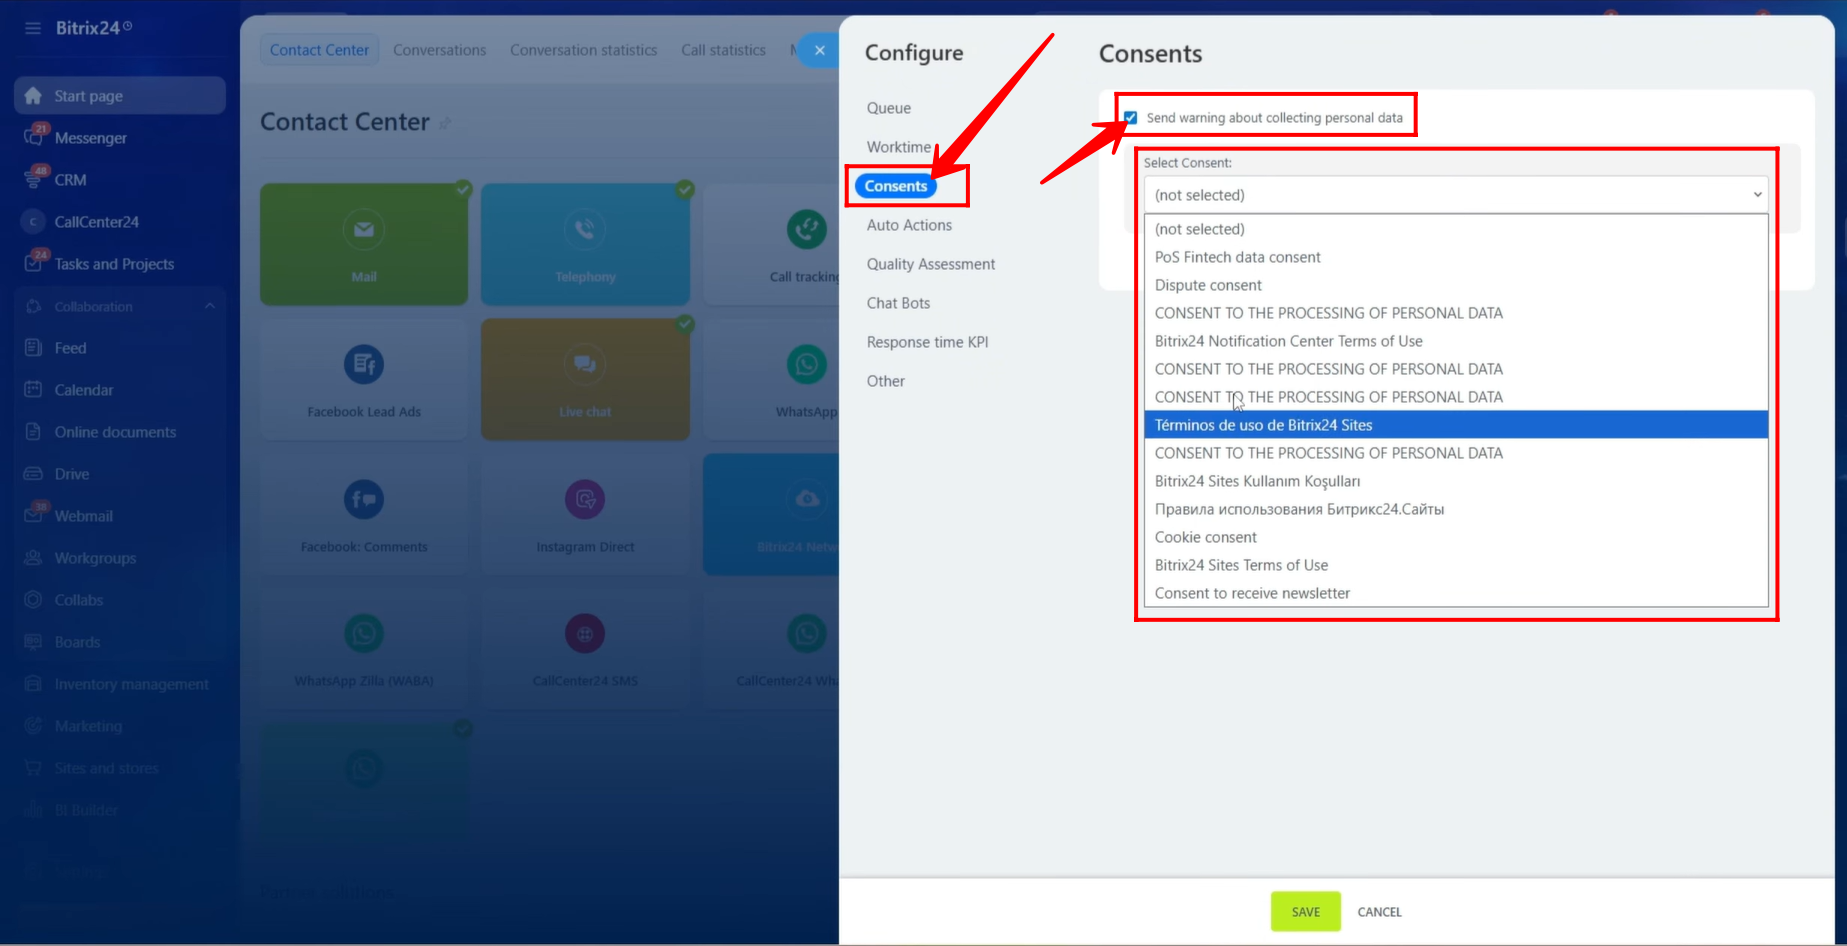
13. In the Consents tab, you can configure a consent message or select an existing one. This message will be sent to clients when they contact you, informing them about data collection or other policies.
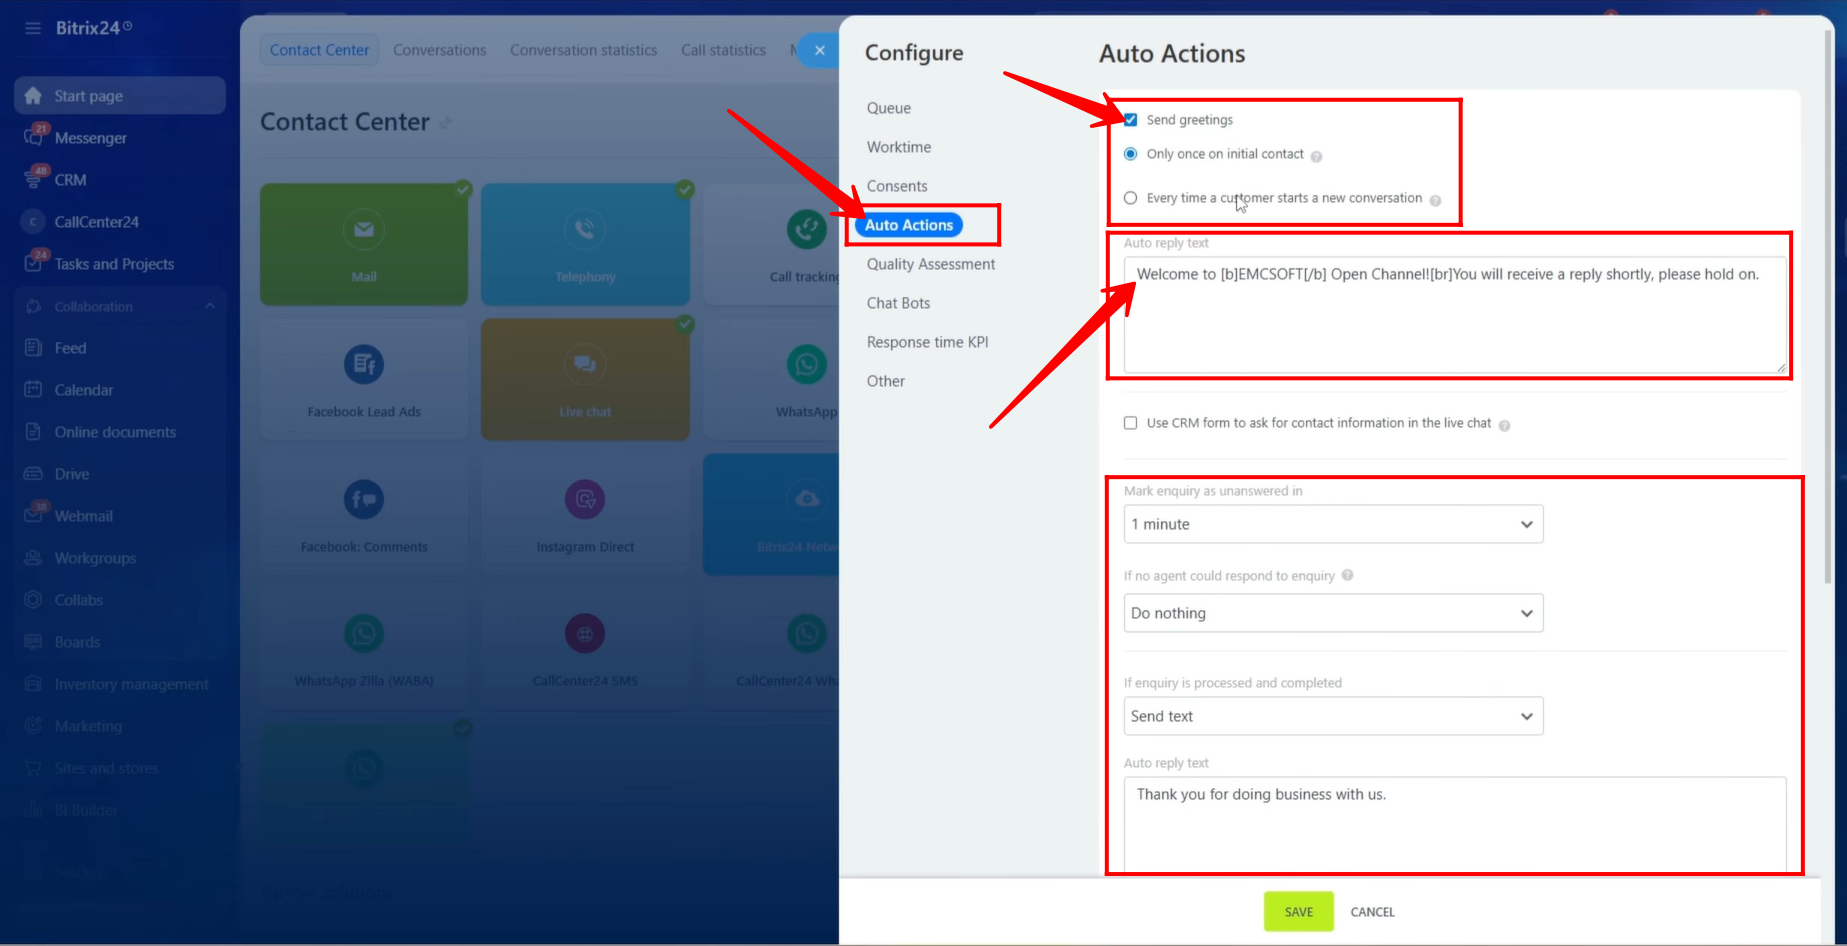
14. In the Auto Actions tab, you can configure greeting messages. You can define an auto-reply text and choose whether it should be sent only once on initial contact or every time a new conversation starts.
You can also enable sending a CRM Form in the chat to collect customer information.
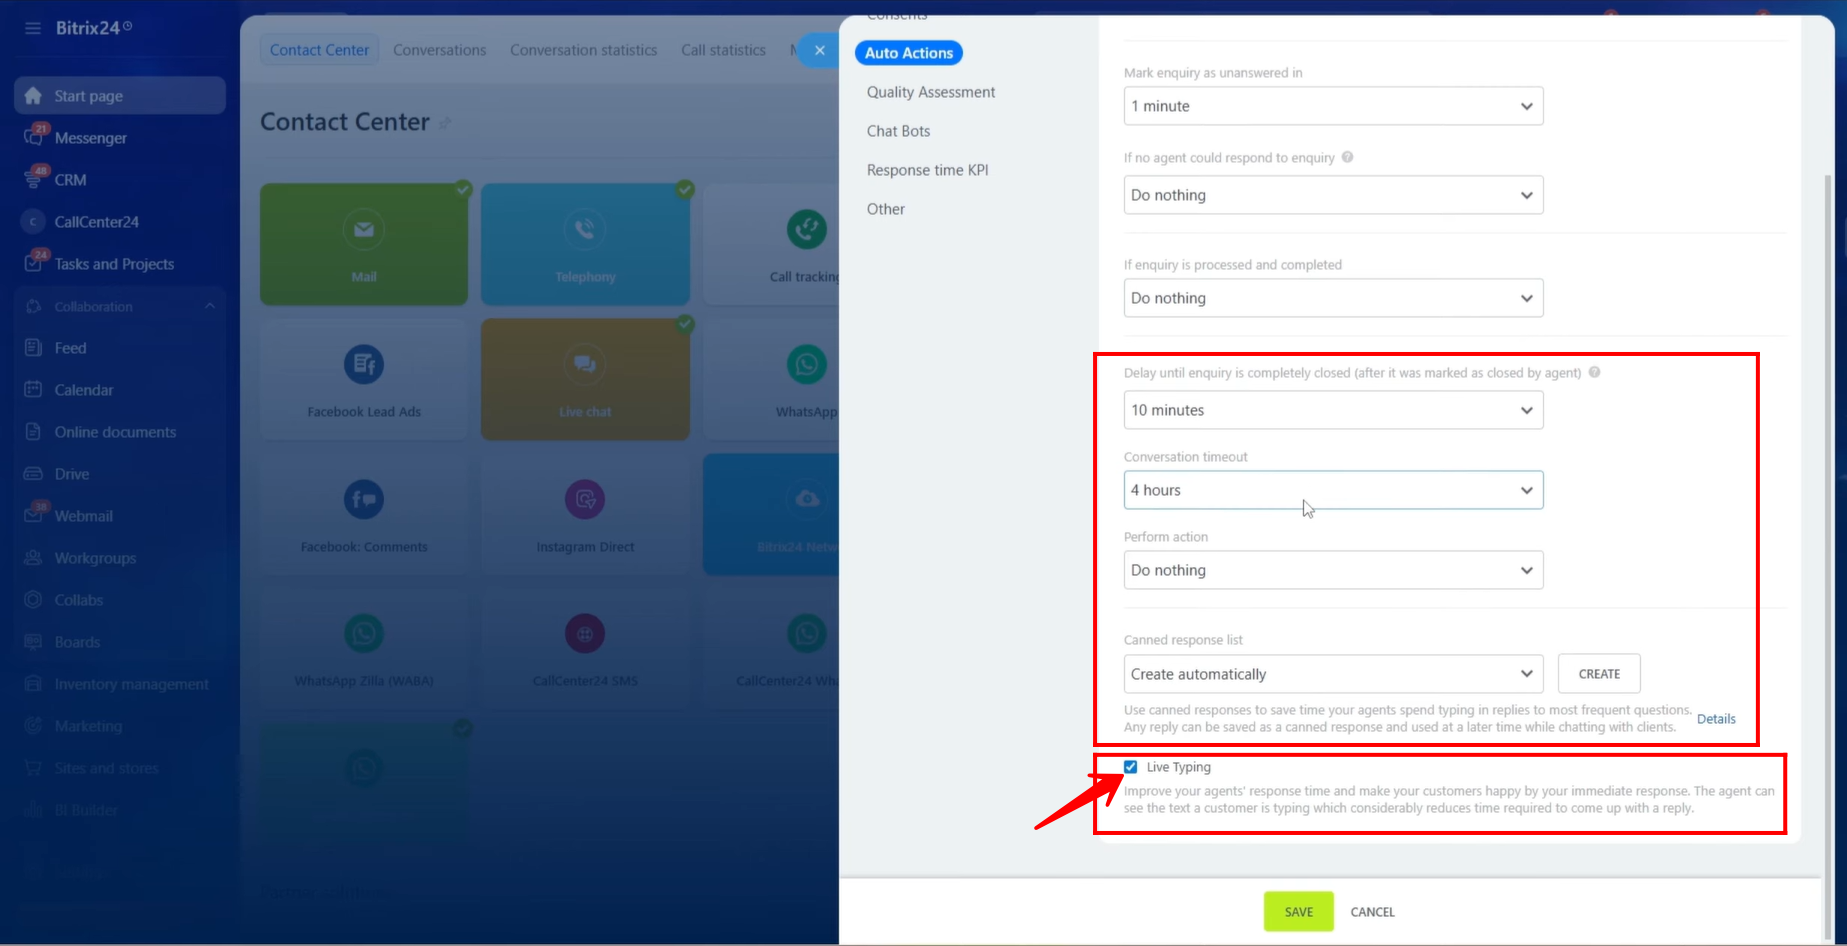
You can define when an enquiry should be marked as unanswered. In our case, we selected 1 minute. You can choose to send an automatic message or take no action if no agent responds within that time.
You can also define actions for when a chat is completed, such as sending a closing message.
15. You can configure the delay after a chat is closed, set a conversation timeout, and define actions such as sending a message or doing nothing.
You can also create and use canned responses to save time when replying to clients. Additionally, you can enable Live Typing to see what the client is typing in real time.
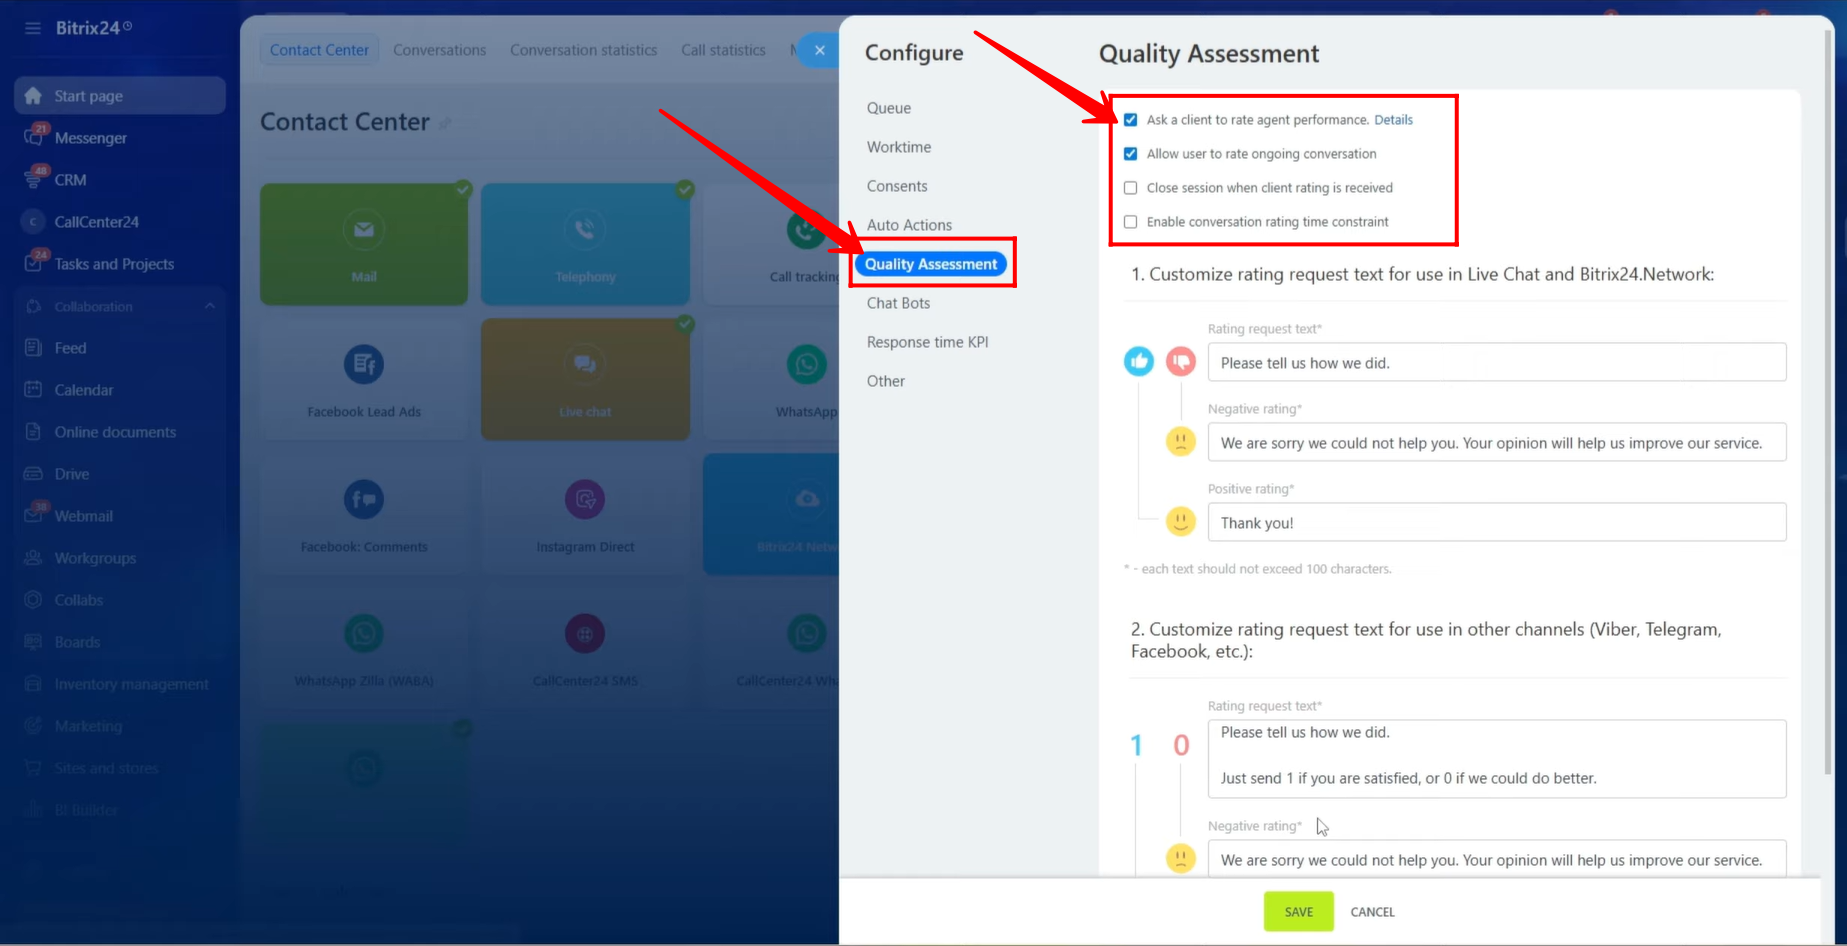
16. In the Quality Assessment tab, you can configure customer feedback options. You can ask clients to rate agent performance, response time, and overall experience.
You can also customize rating messages for different communication channels.
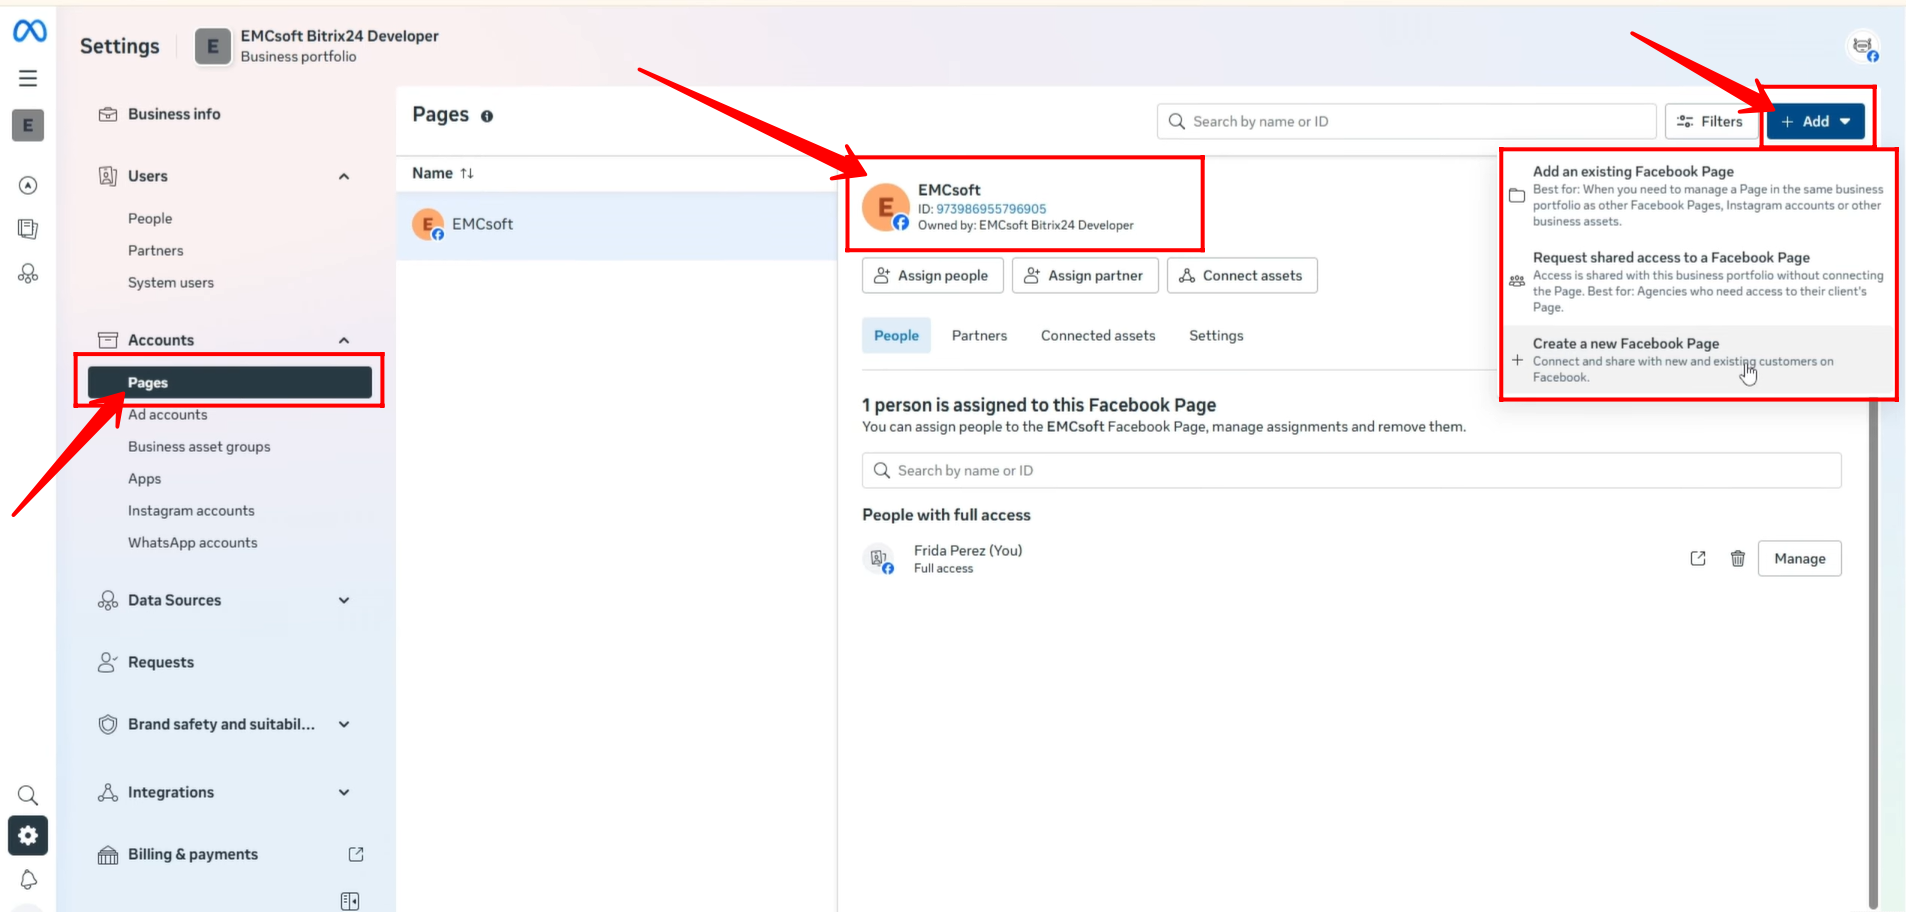
17. Now move to Meta Business Suite. Ensure that your Facebook page is properly connected under the Pages section.
If a page is not connected, click + Add to connect an existing page, request access, or create a new page.
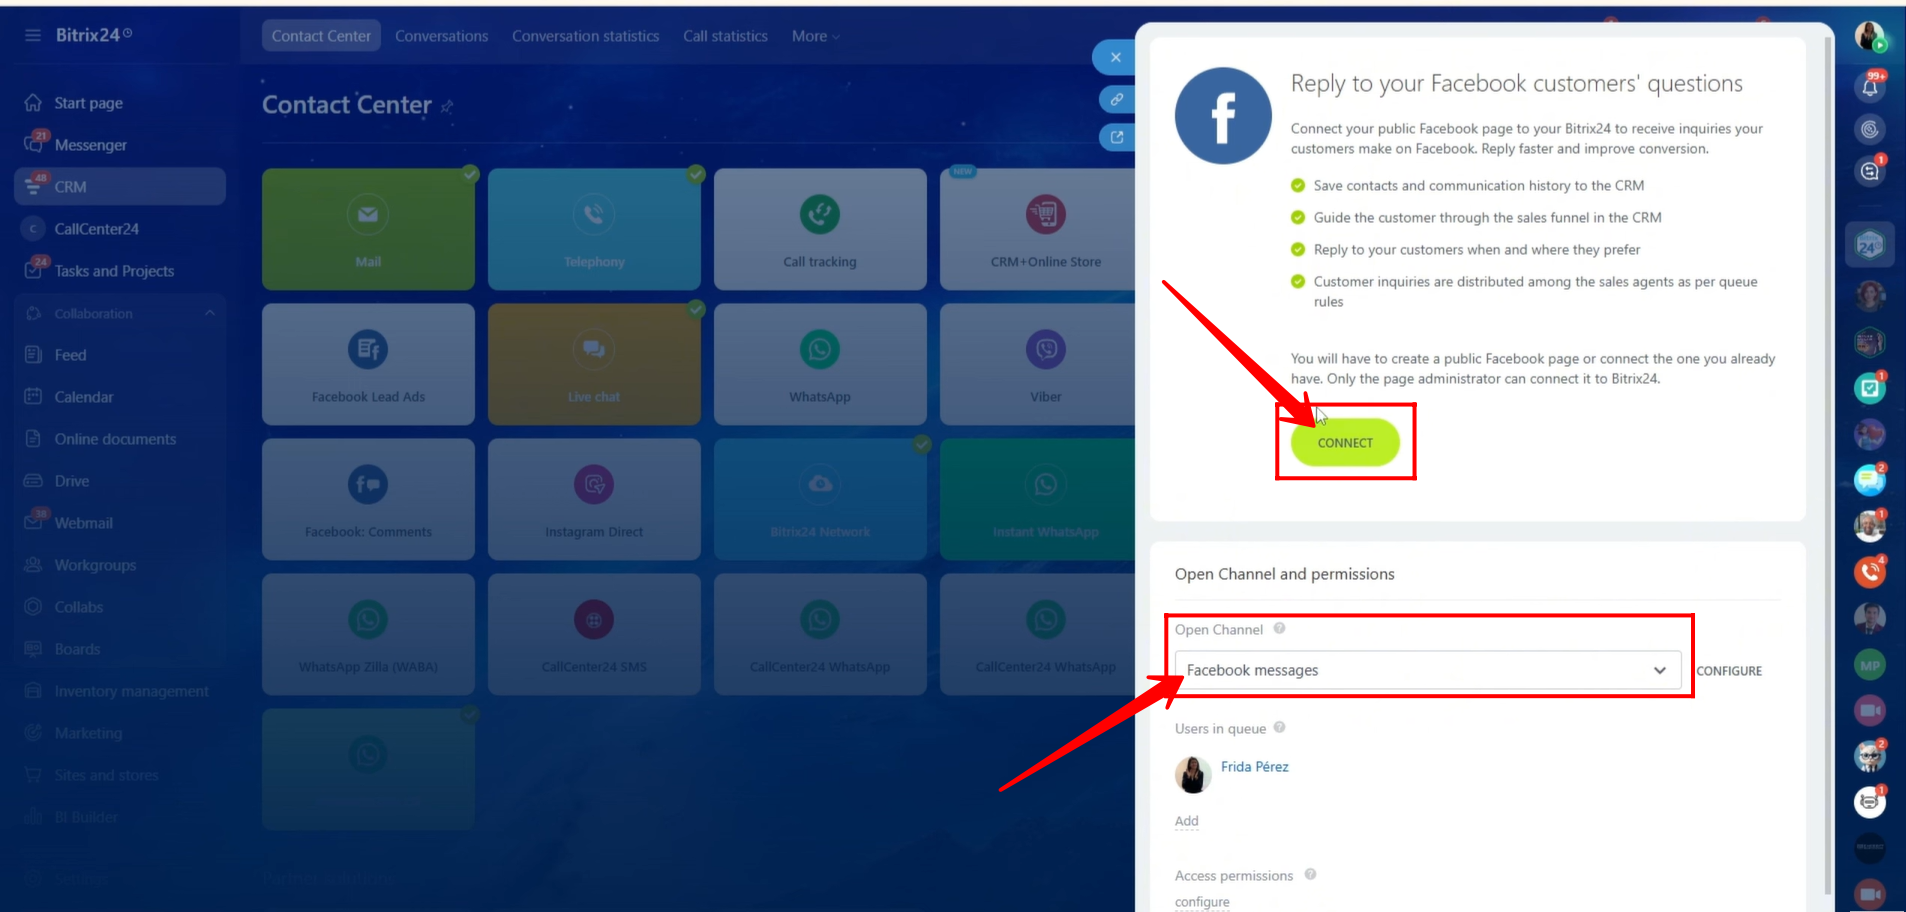
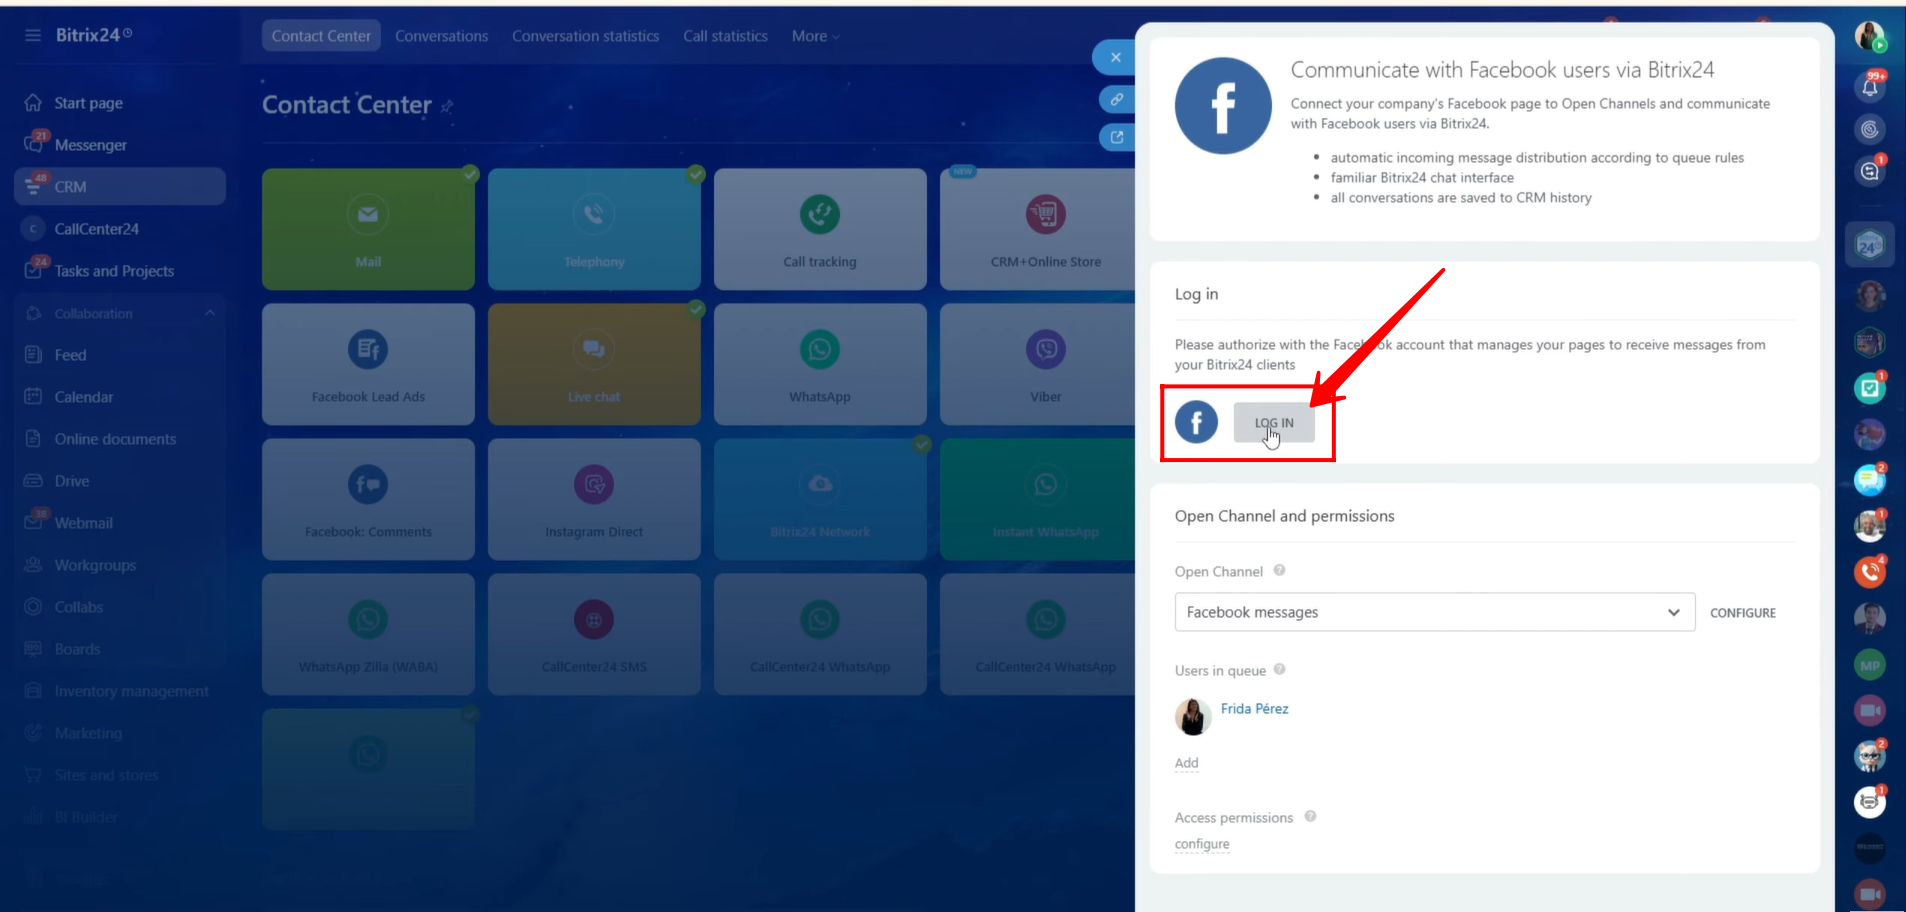
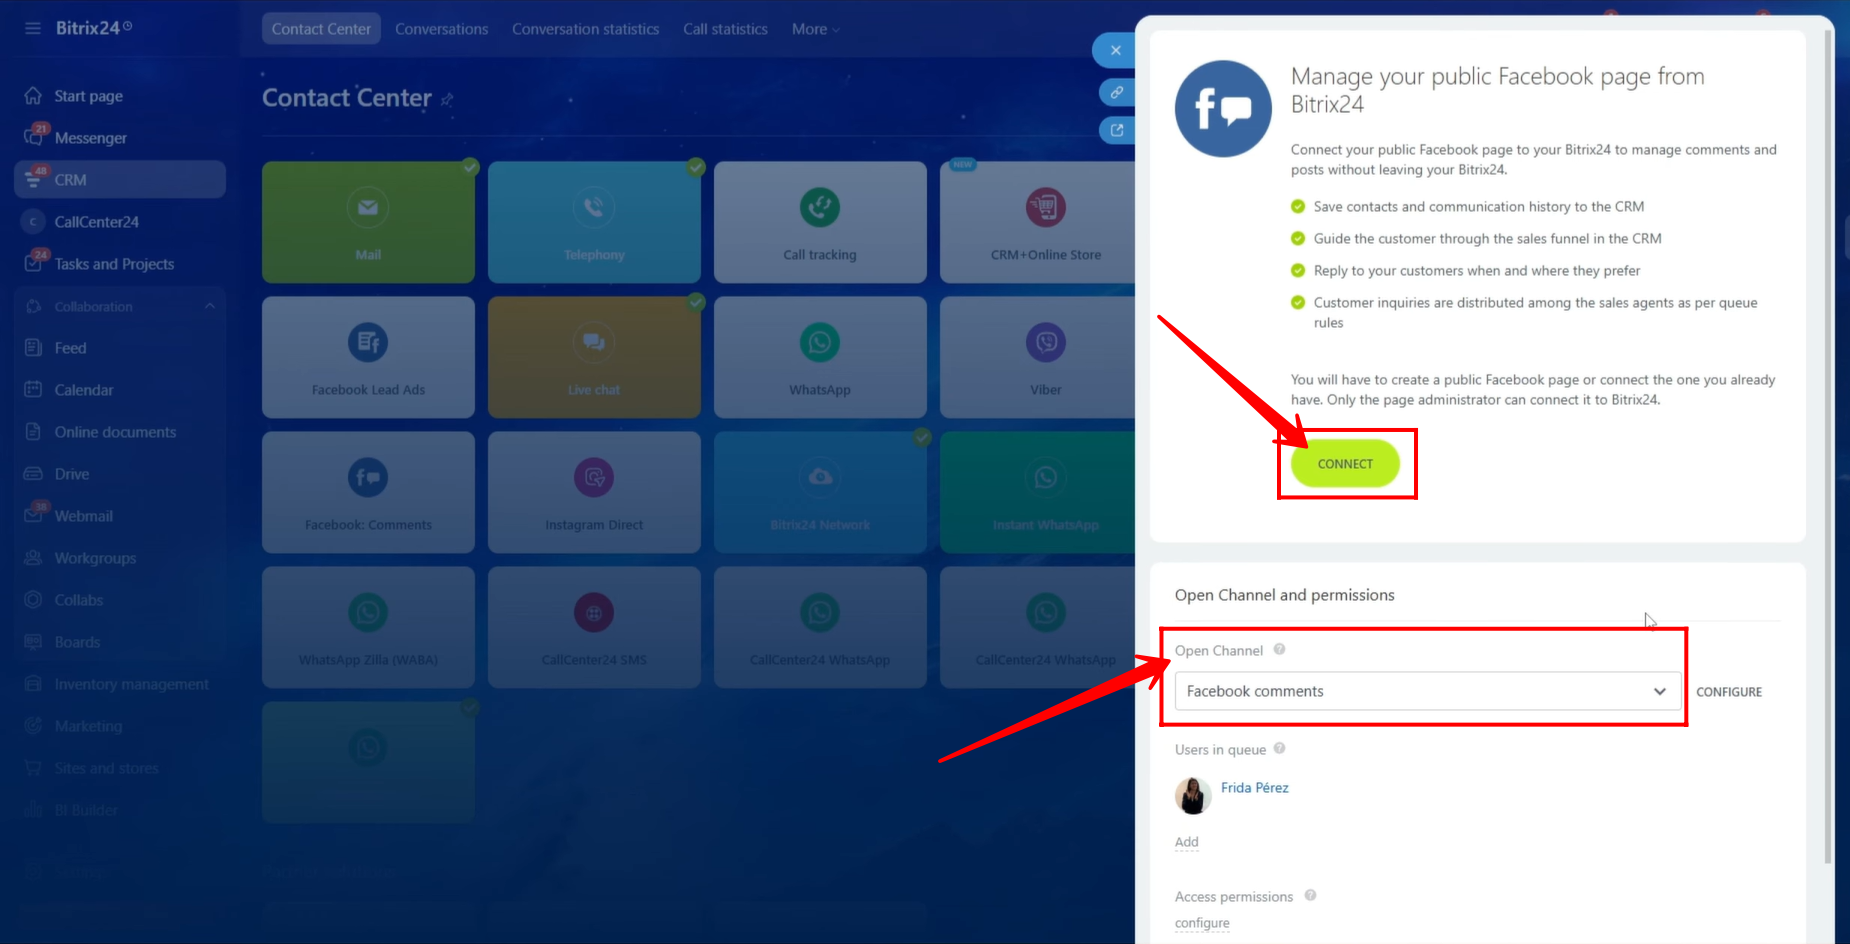
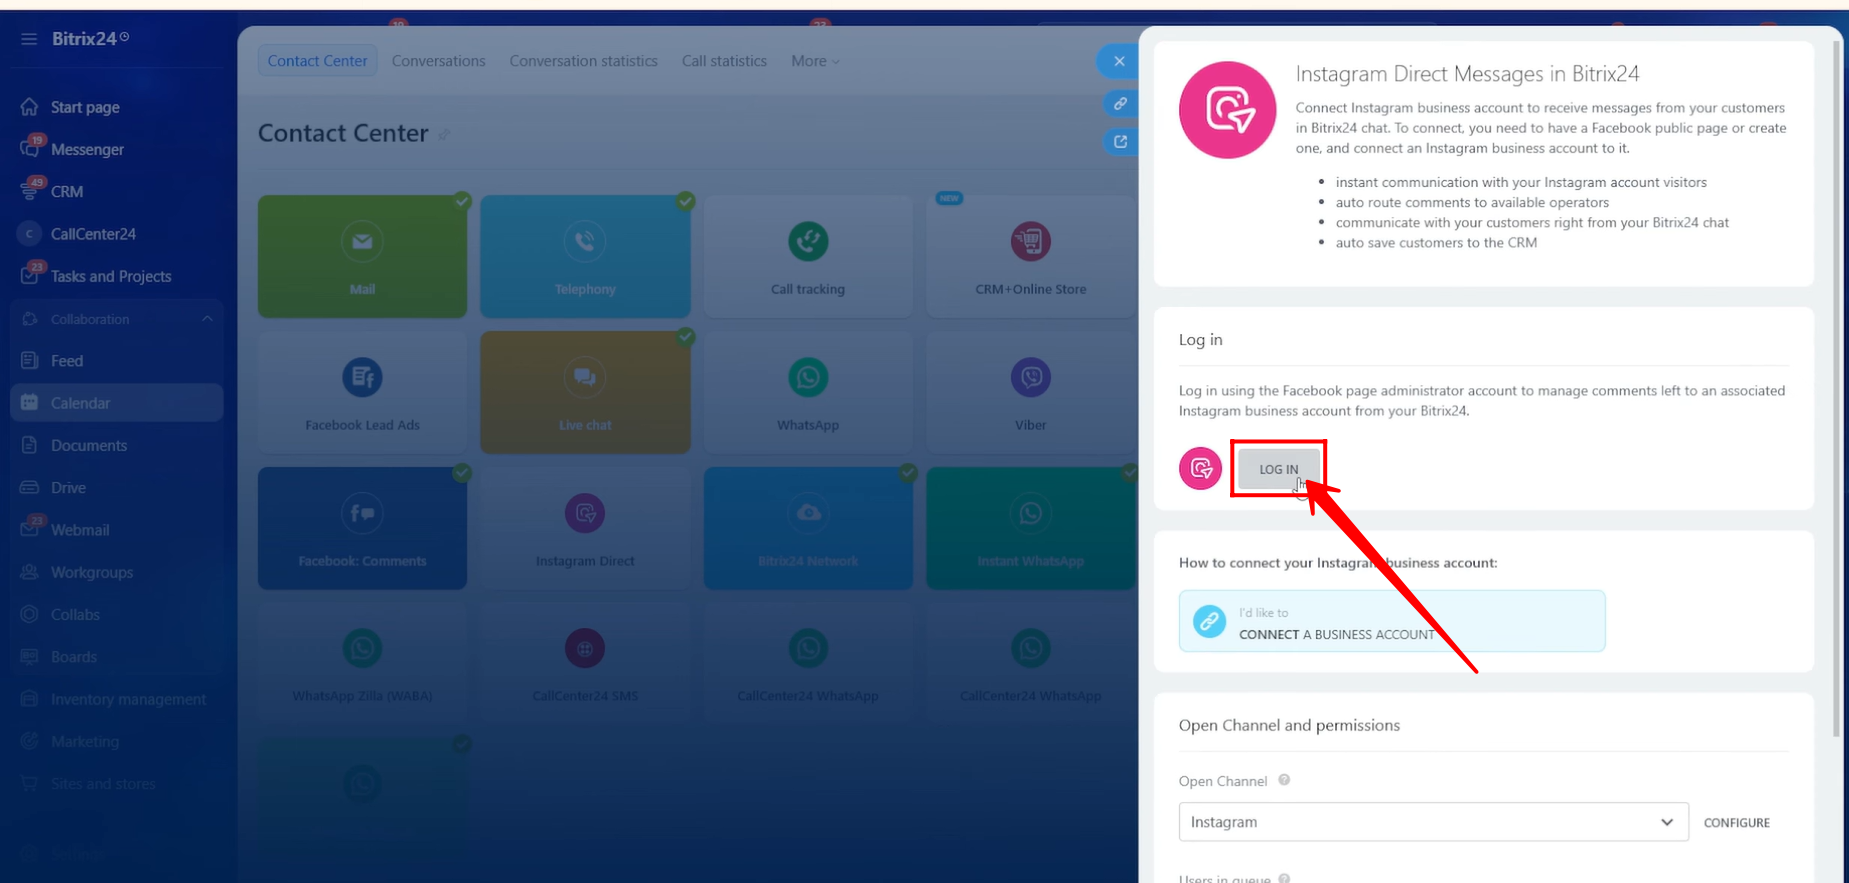
18. Return to Bitrix24. Your open channel is now configured for Facebook. Click Connect to proceed.
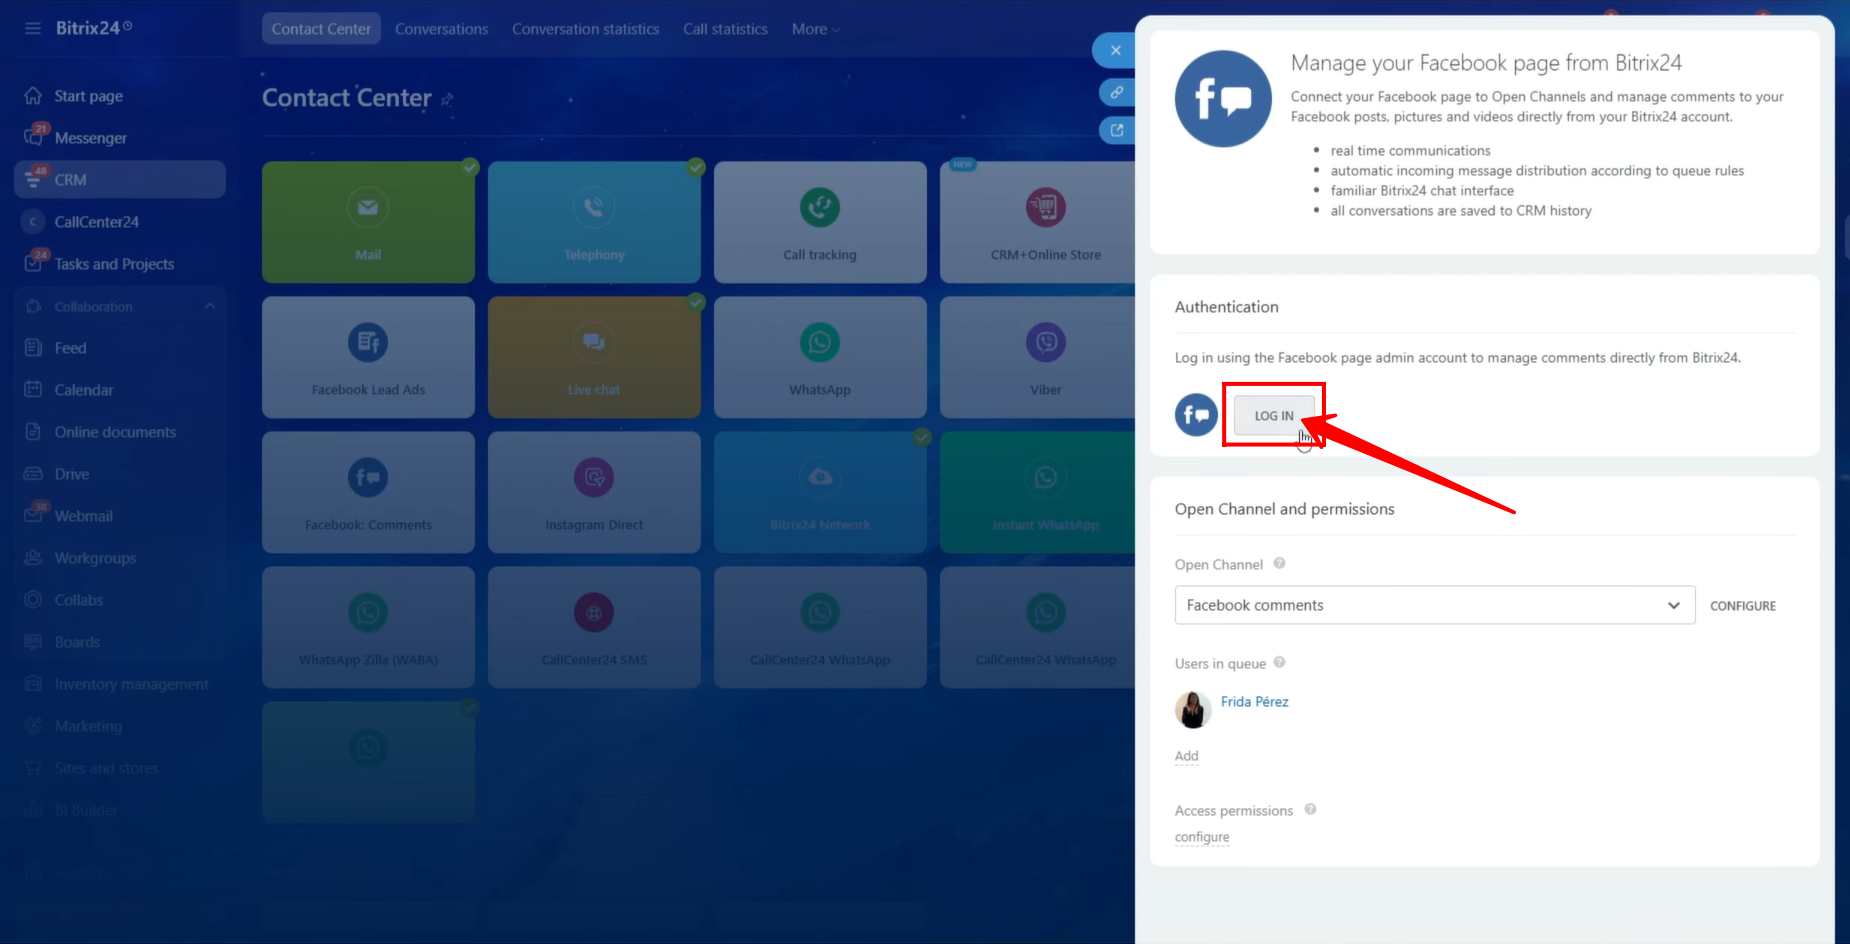
19. Click Log In and sign in to your Facebook account.
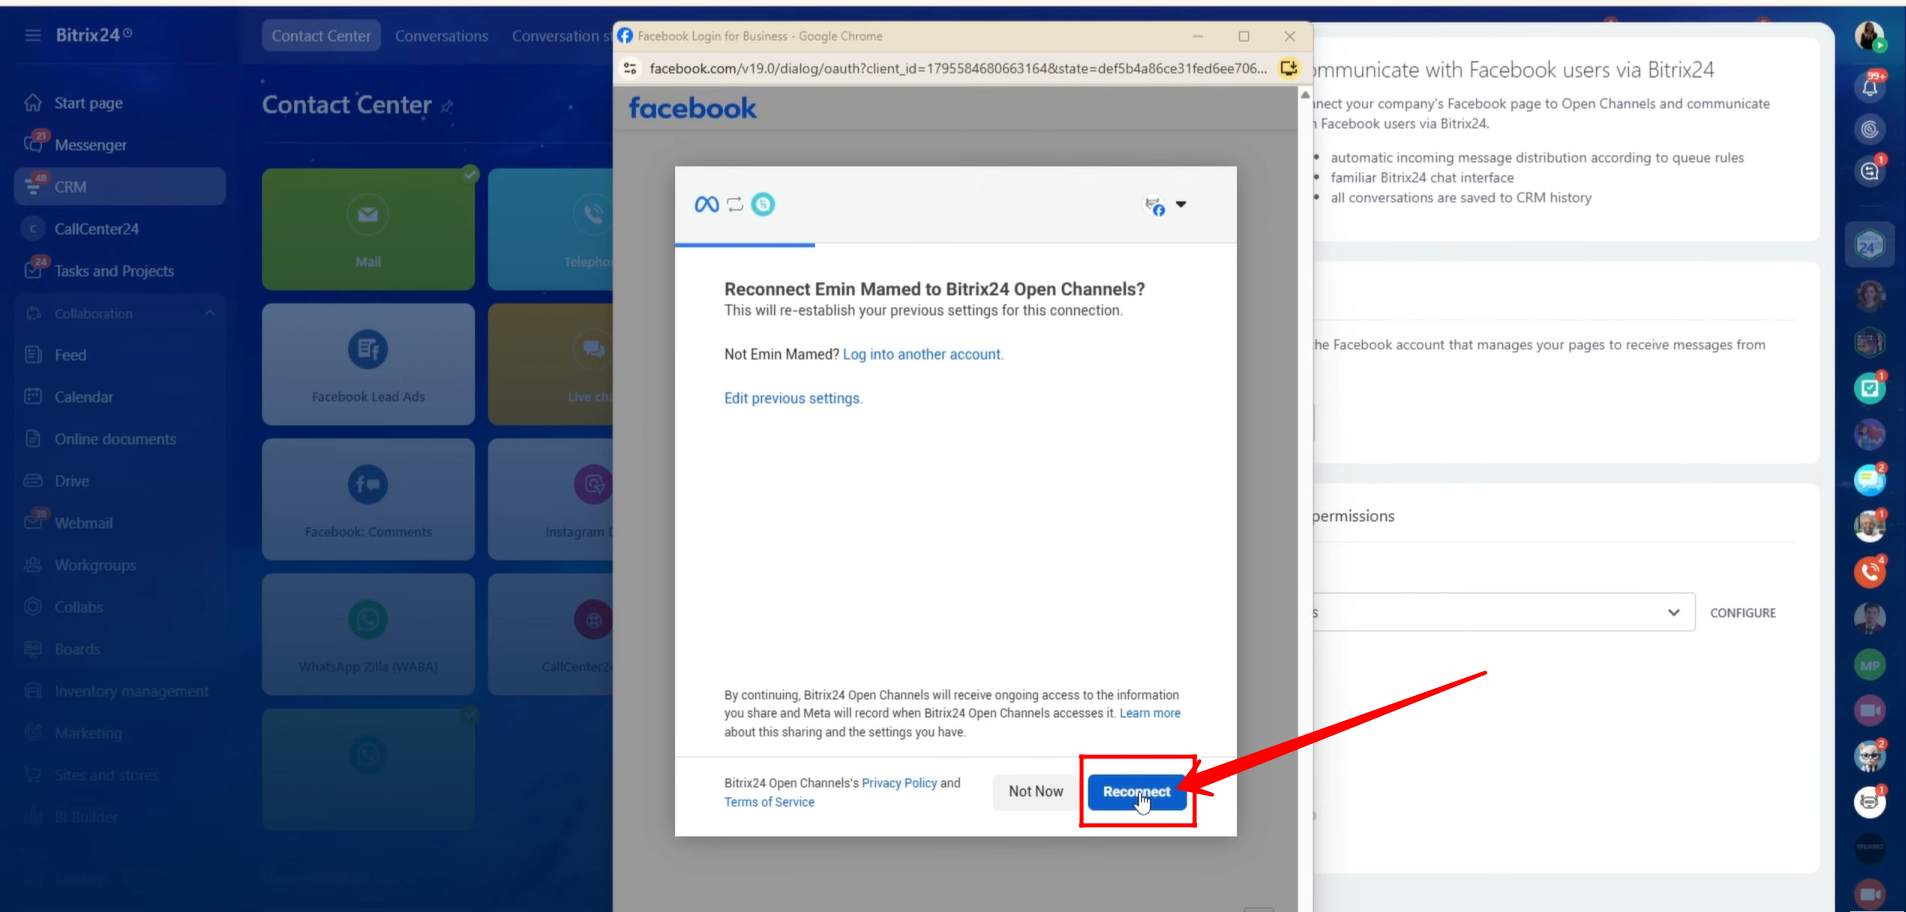
20. If you already had a connection, you may be asked to reconnect. Otherwise, you will be prompted to grant permissions to your Meta Business account and Facebook pages.
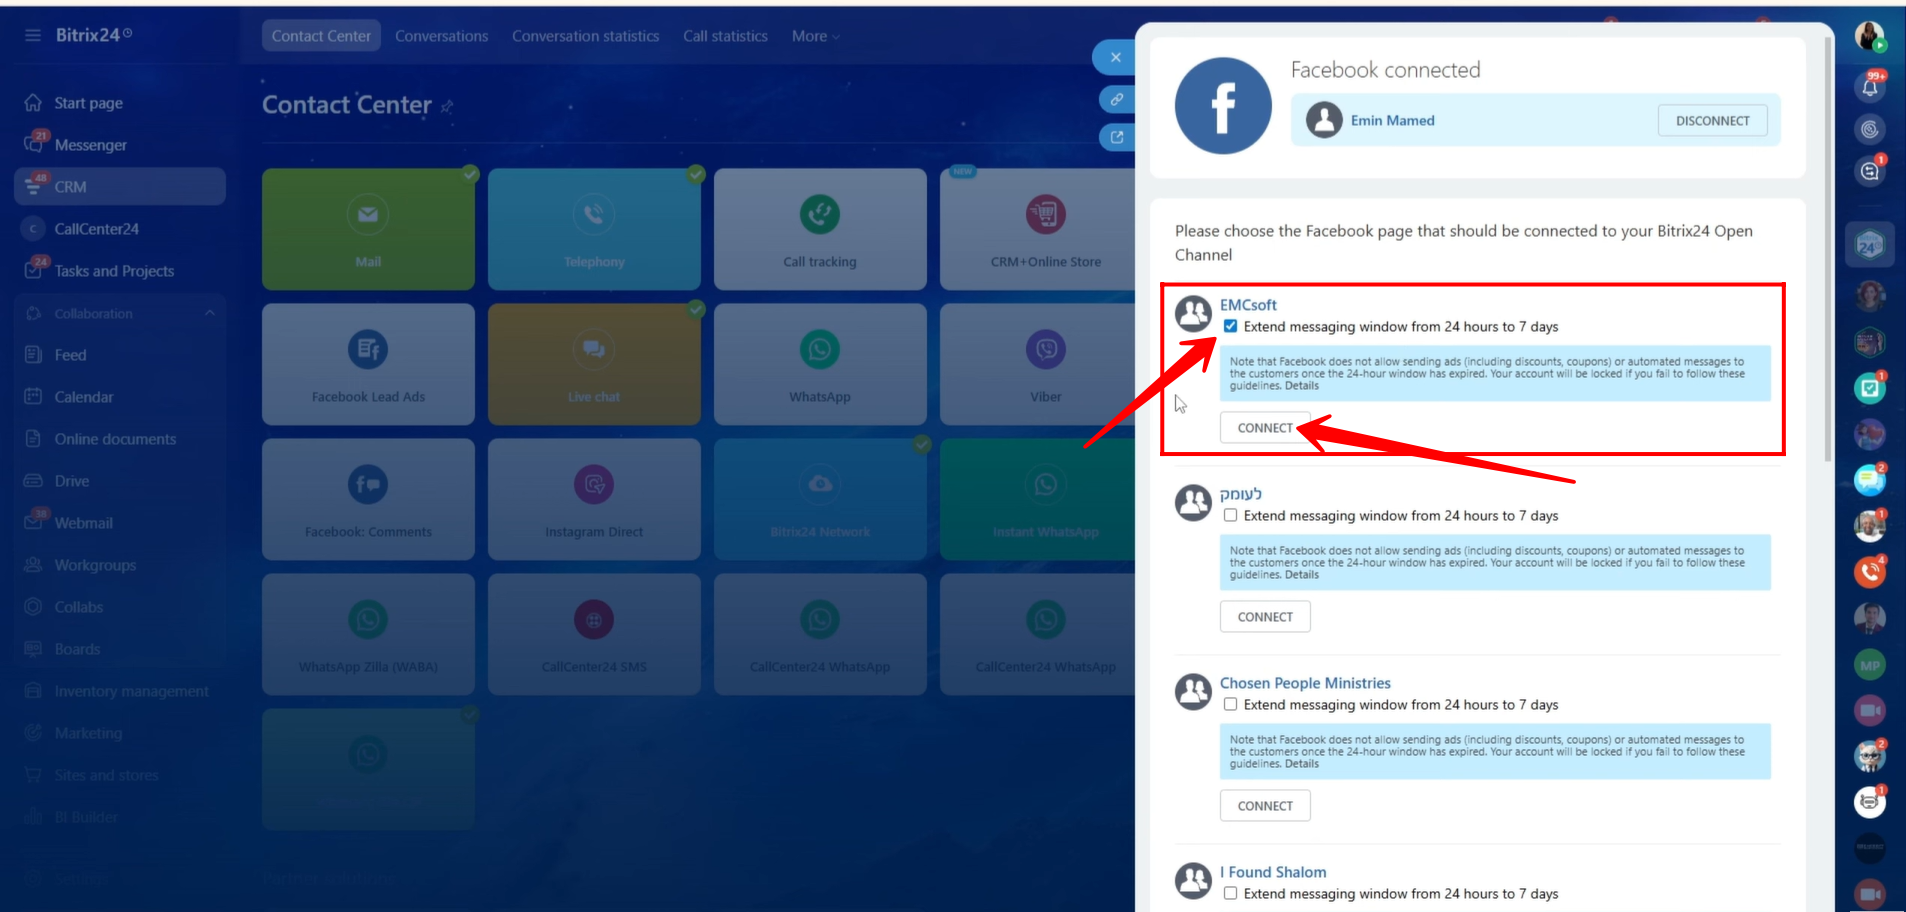
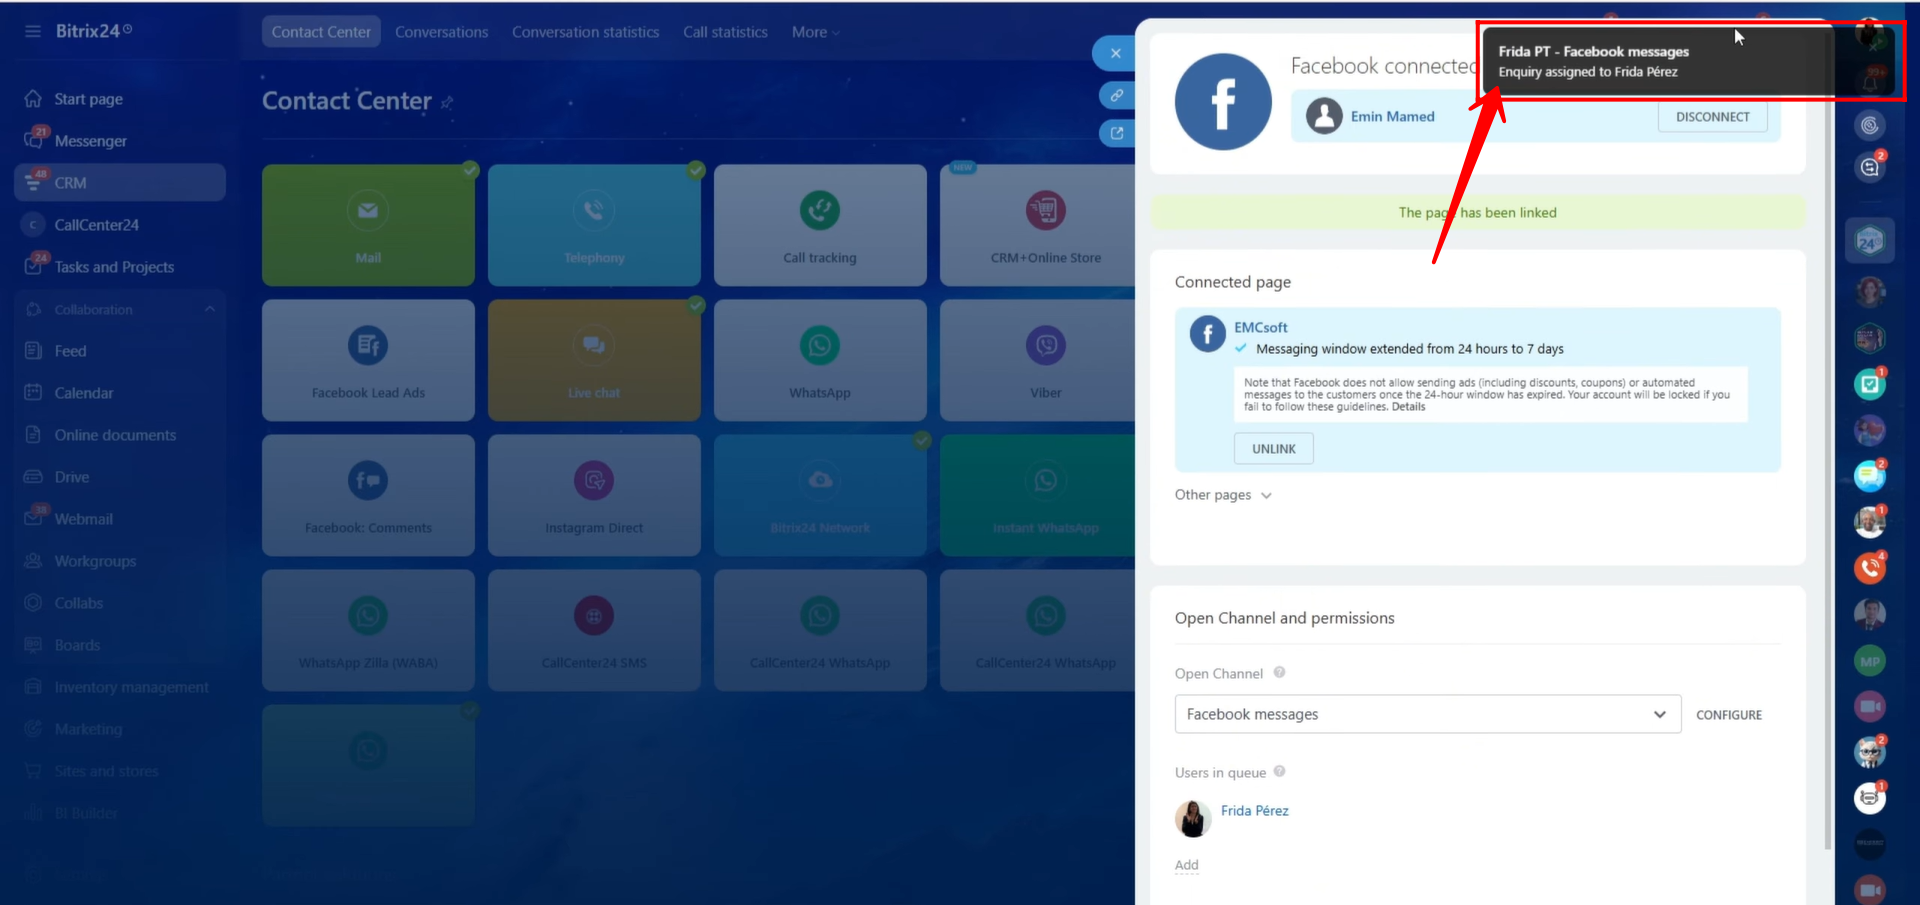
21. You will now see a list of pages connected to your Facebook account. Click Connect next to the page you want to use.
You can also enable the option to extend the messaging window from 24 hours to 7 days.
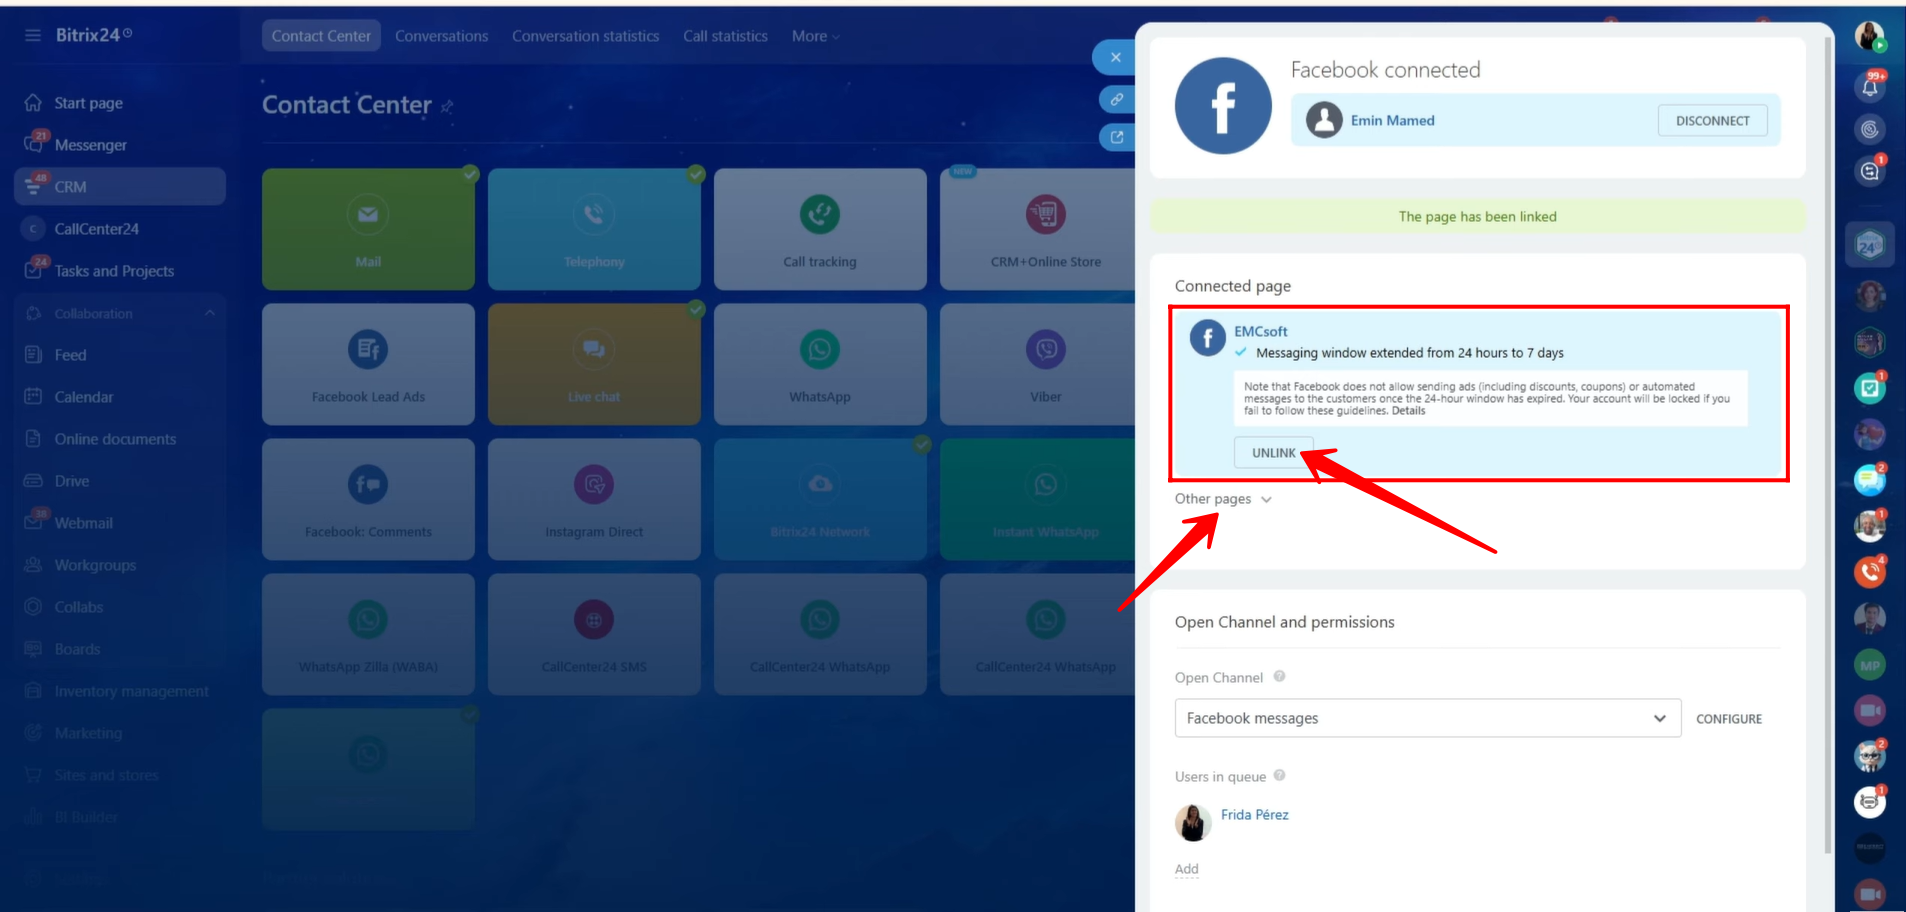
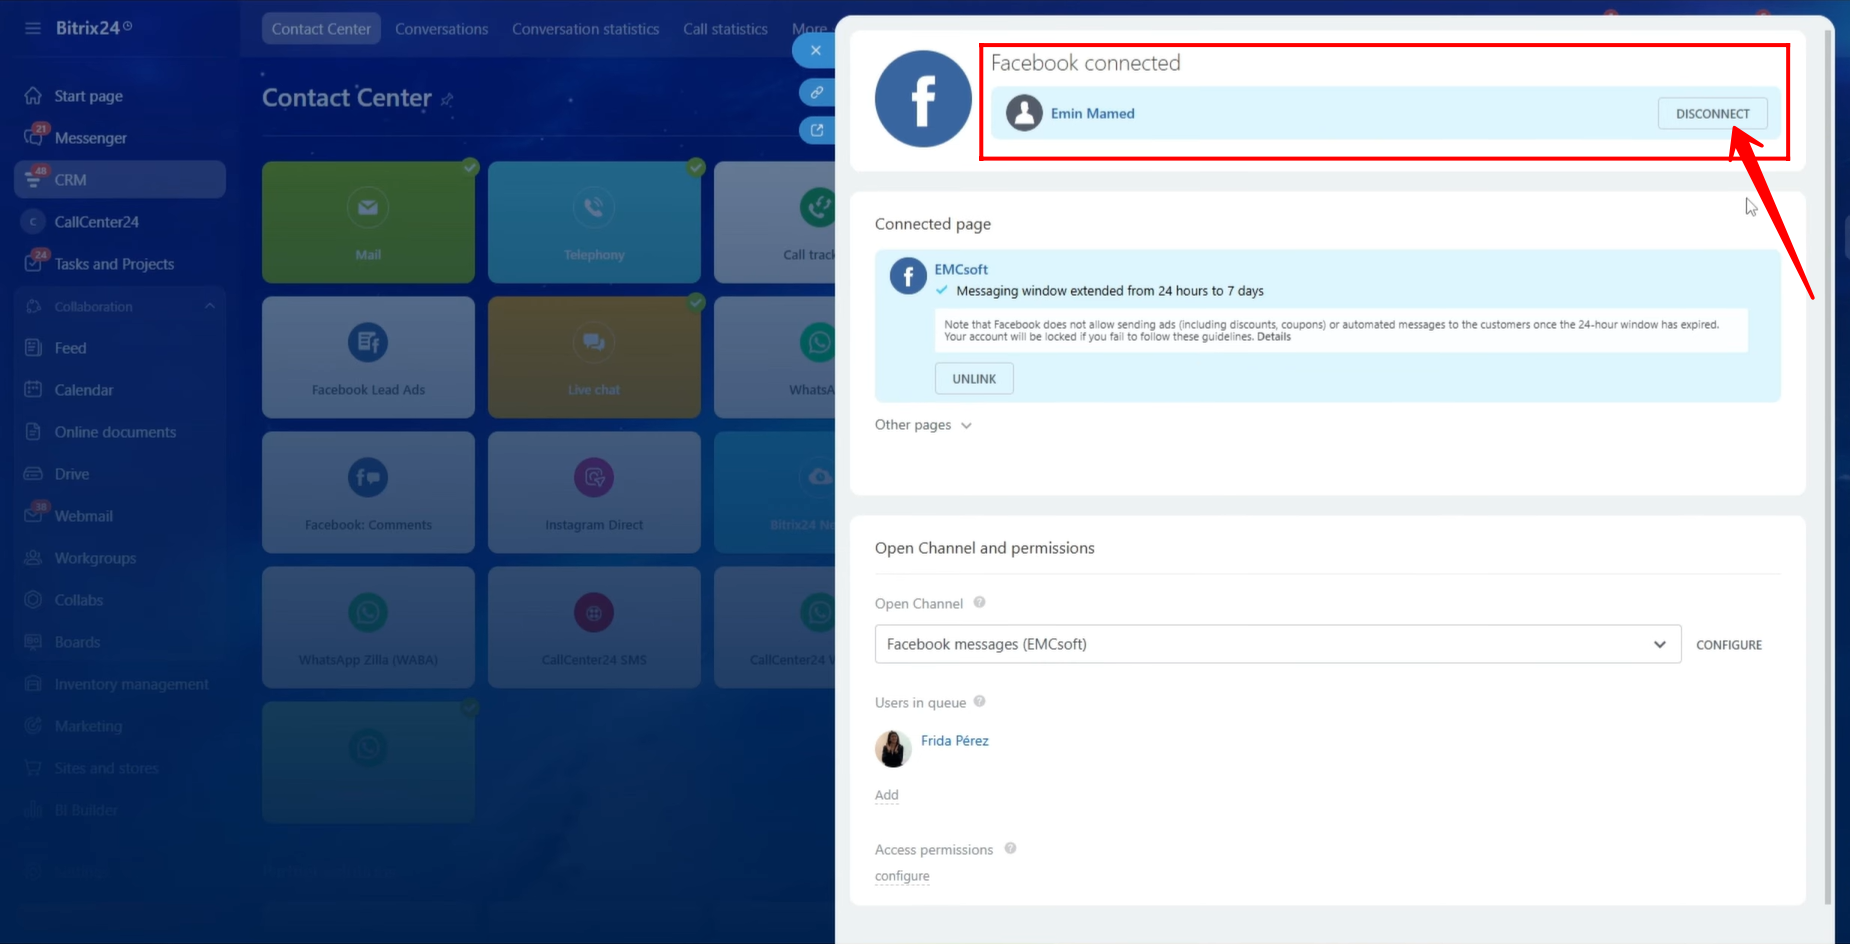
22. You now have the option to unlink the connected page or connect additional pages to the open line.
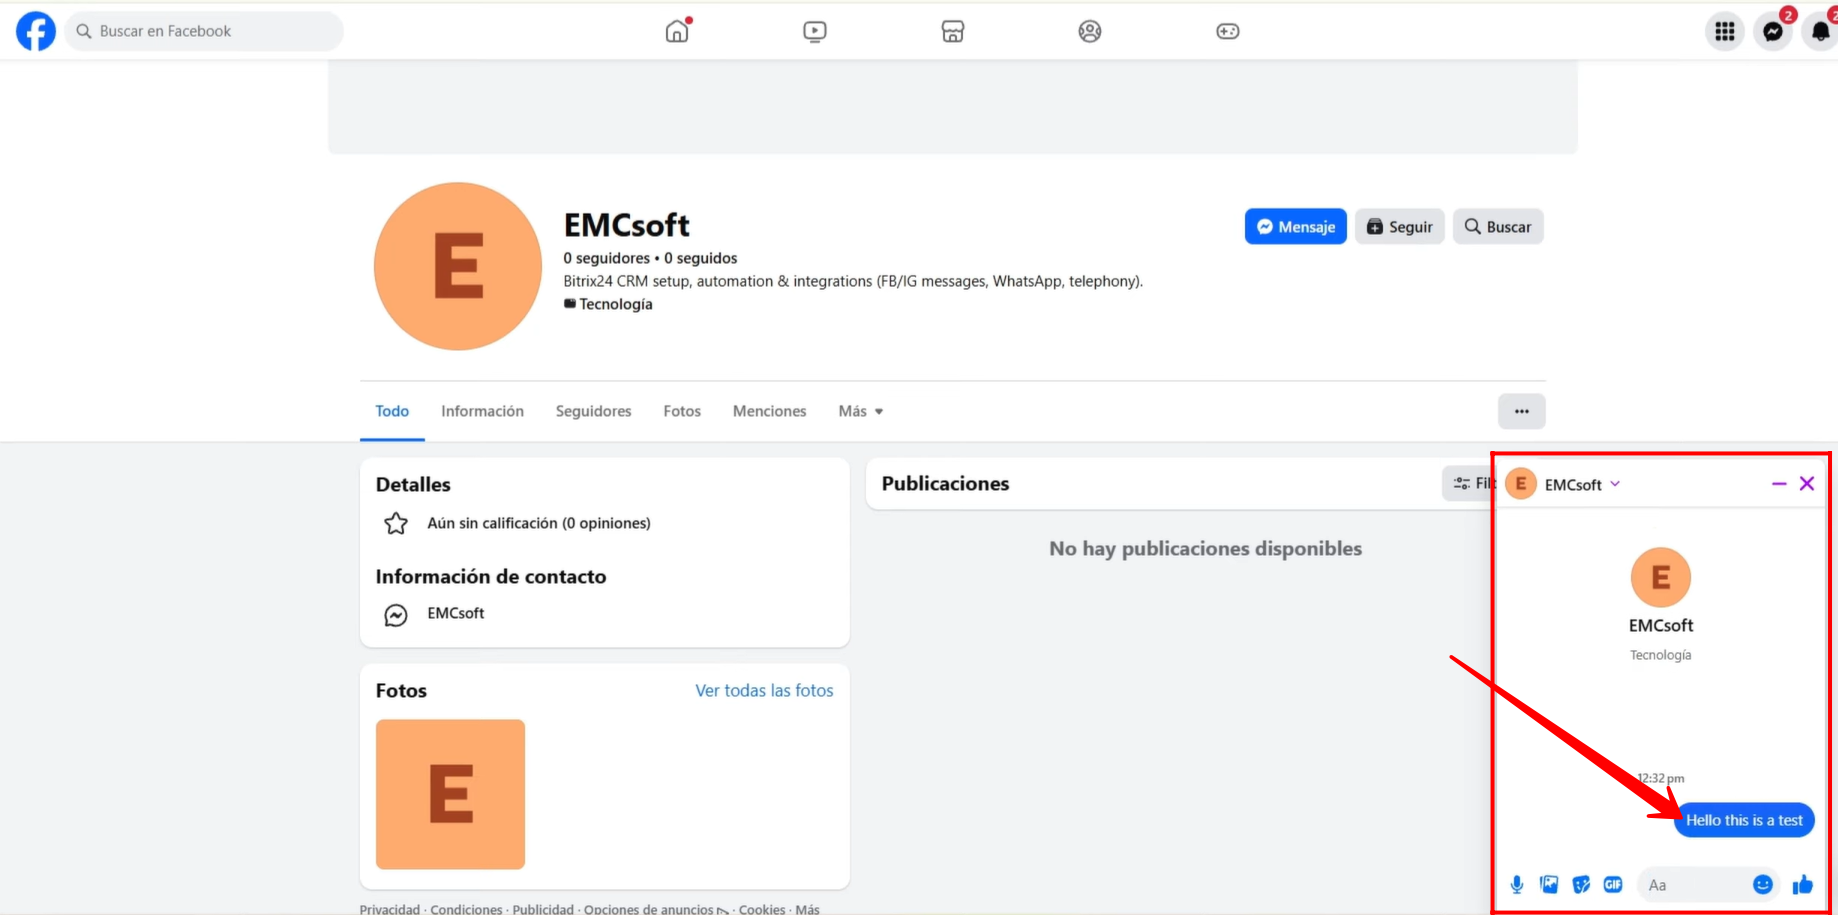
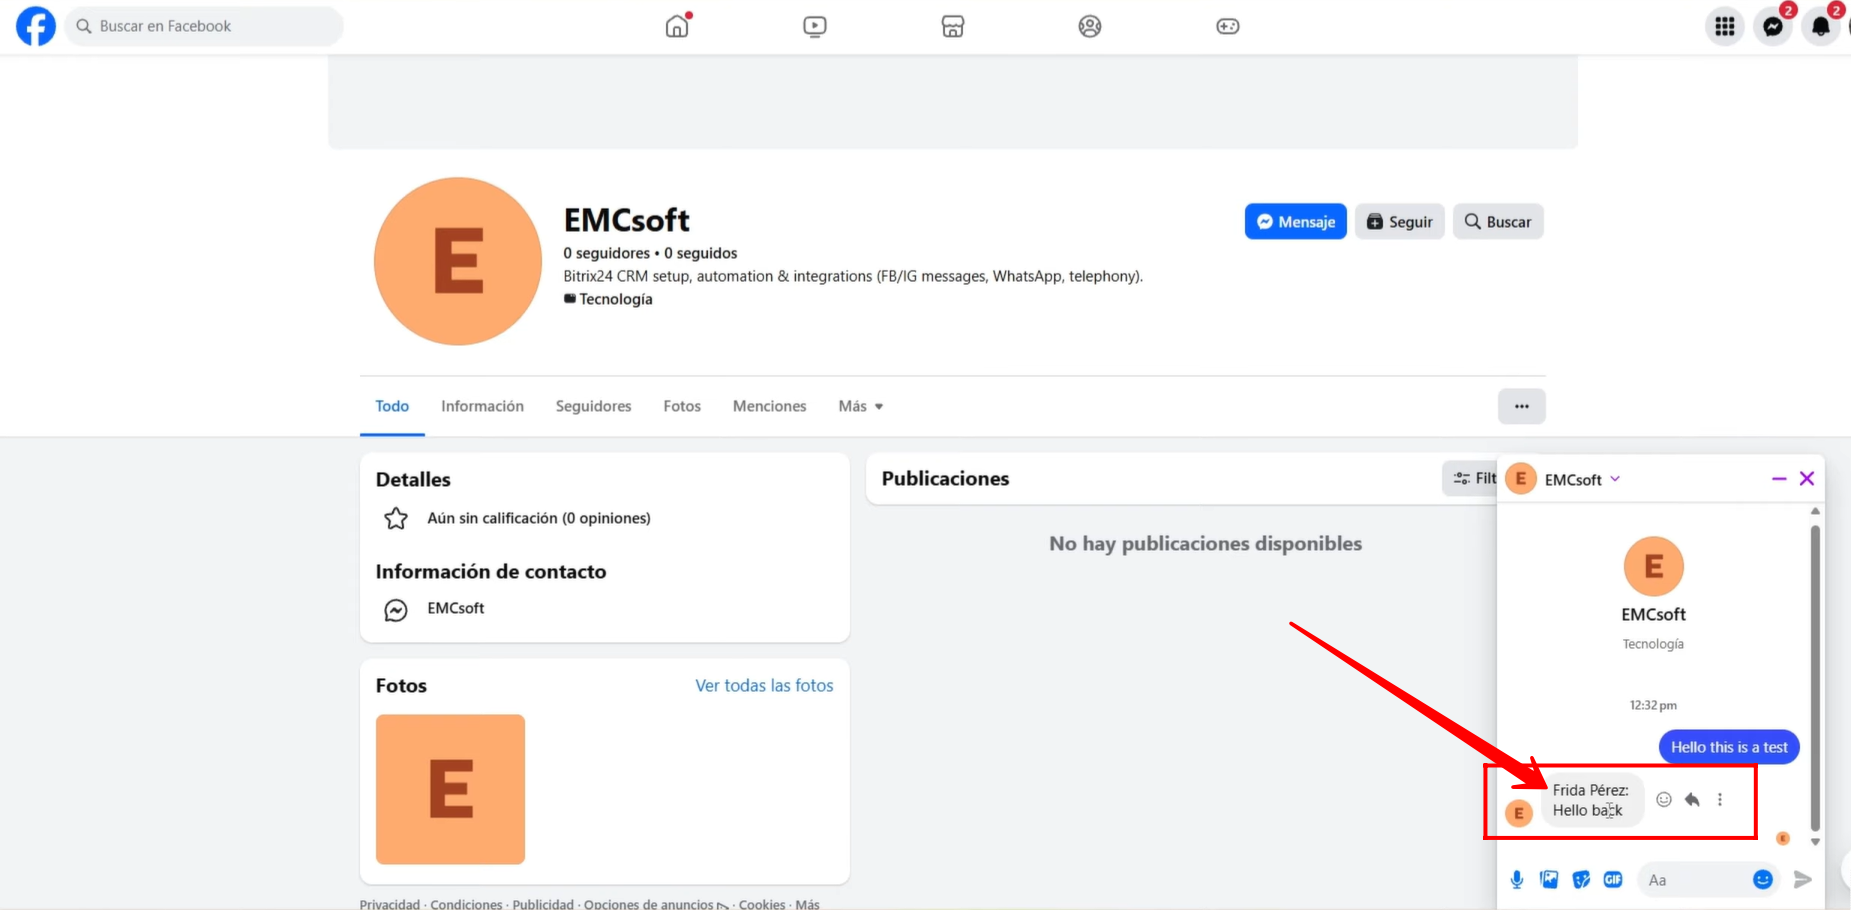
23. For testing, we sent a message from another Facebook profile to the connected page.
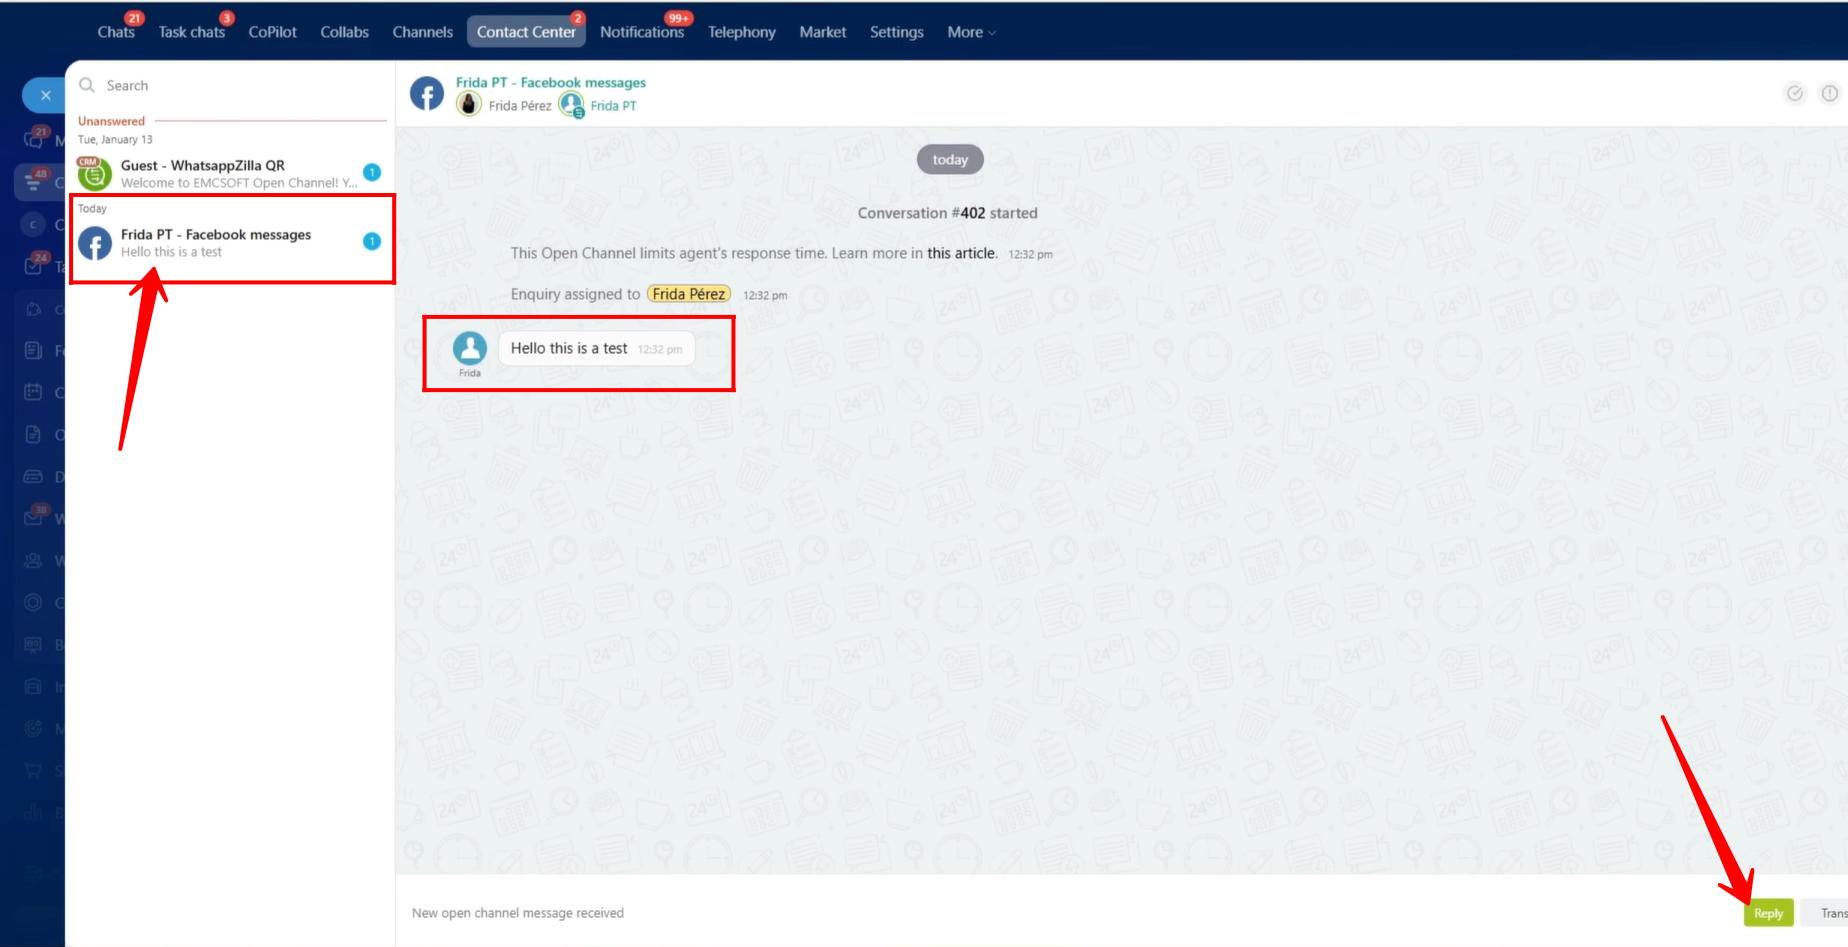
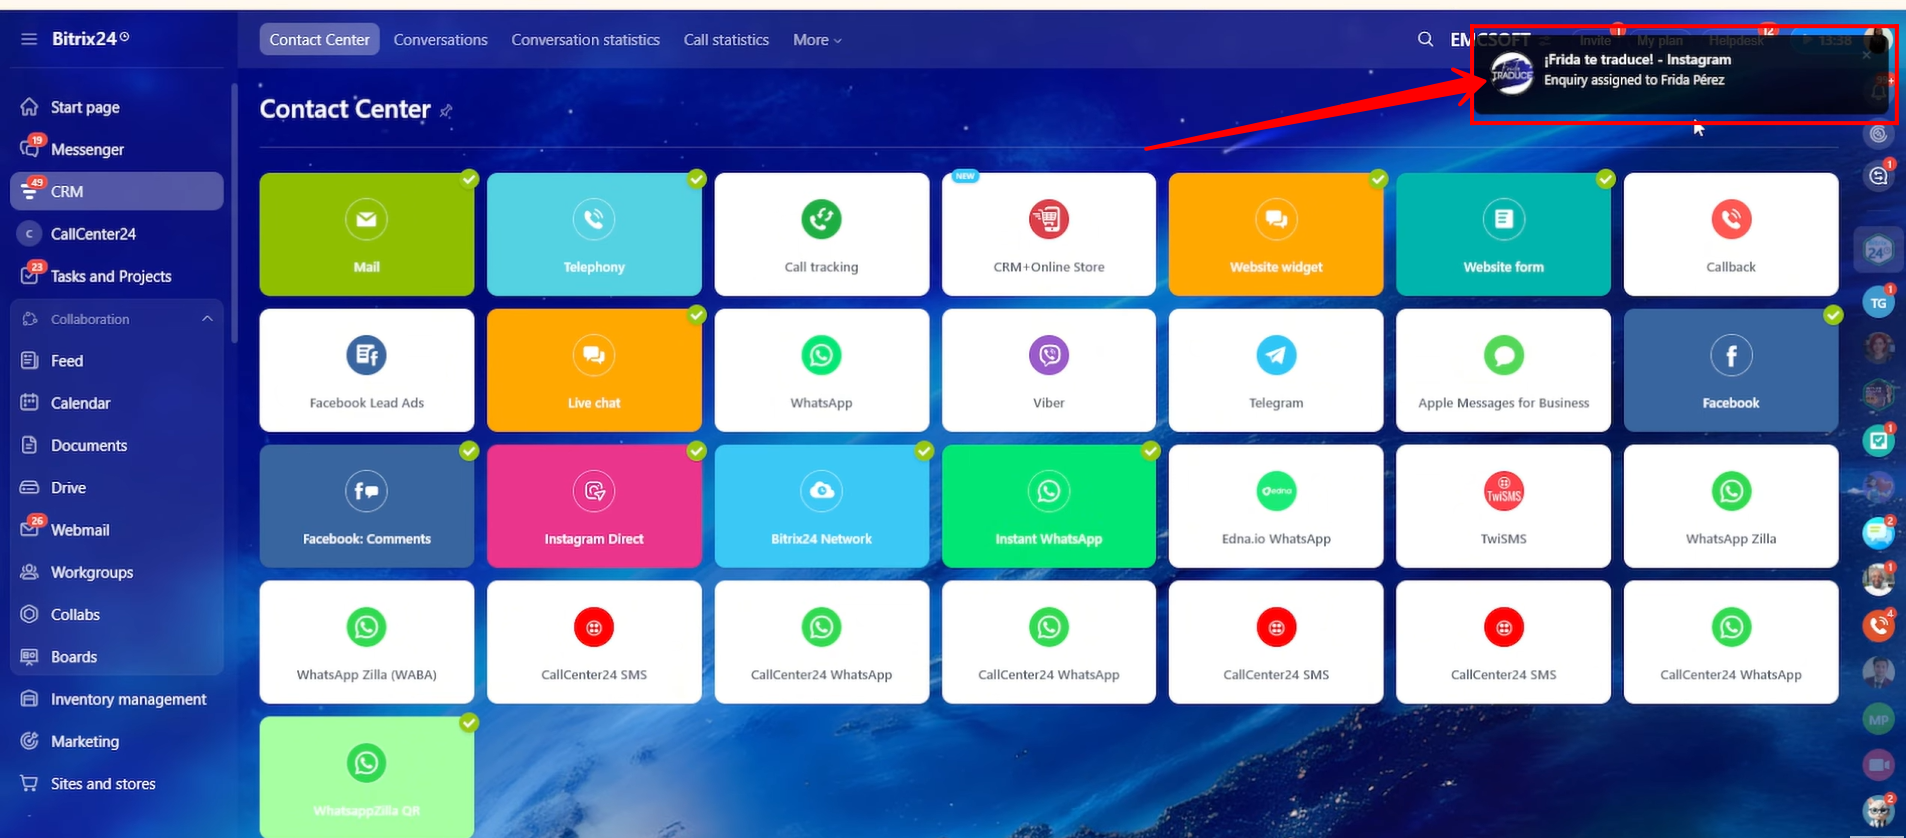
24. The message will appear in Bitrix24 as a Contact Center chat notification. Click the notification to open the chat.
25. If the notification is missed, go to Messenger → Contact Center. All open line chats will be displayed there.
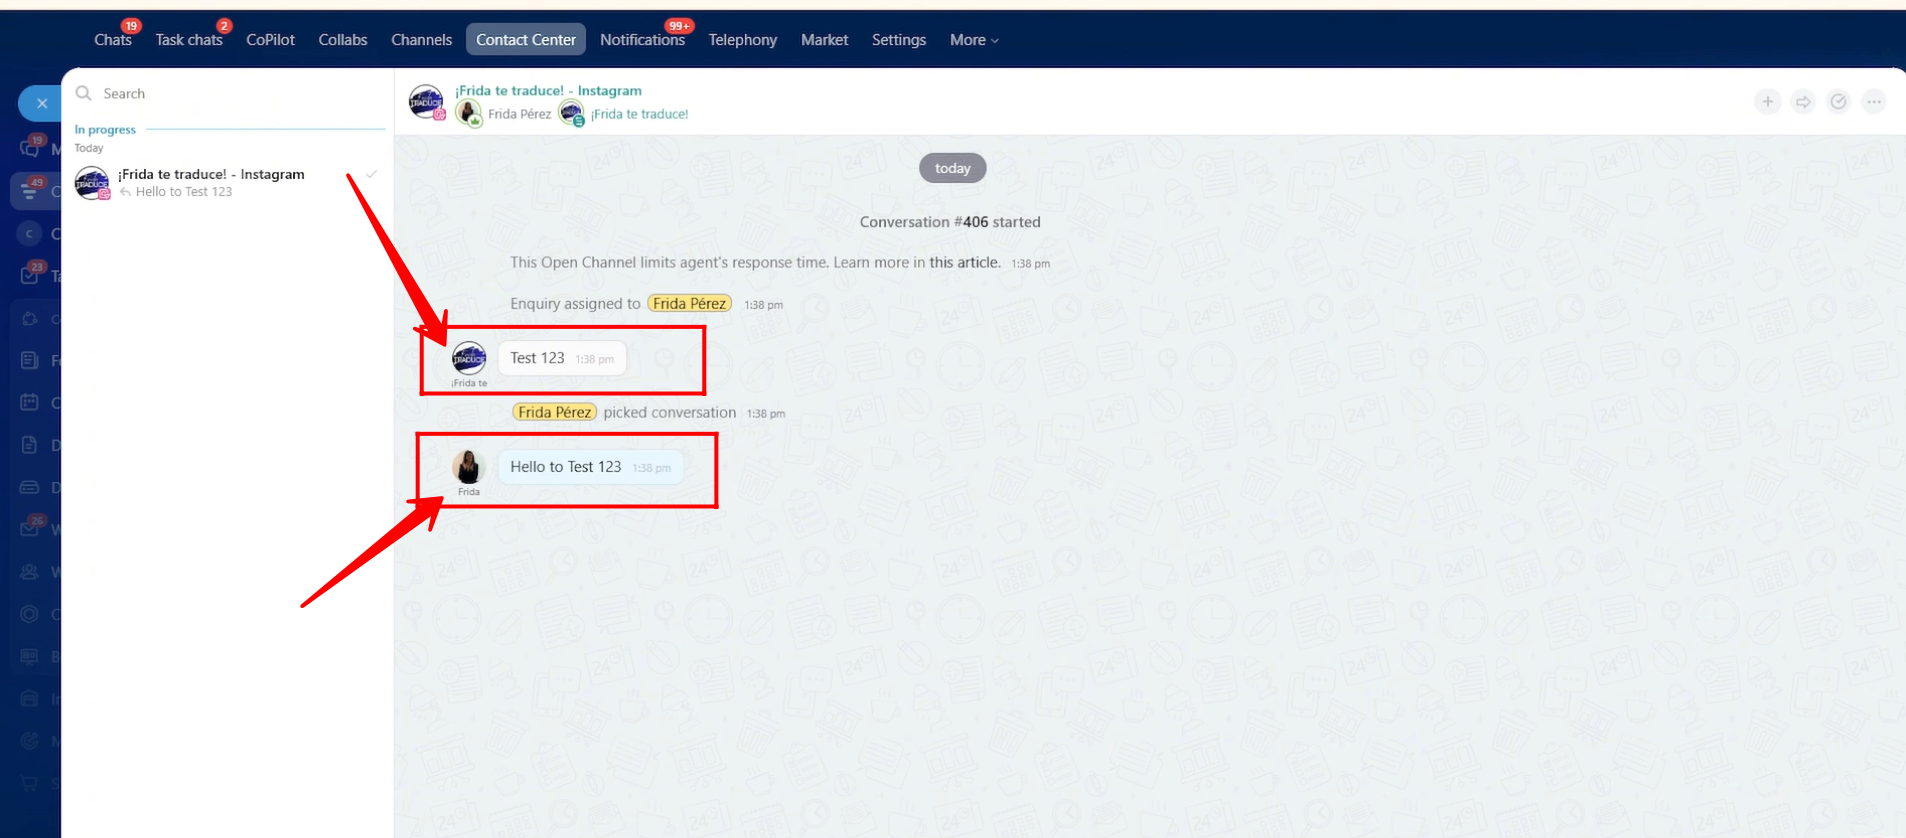
The agent must click Reply to accept and respond to the conversation.
The chat name will appear as “Client’s Facebook Name – Facebook Messages,” indicating the source of the chat.
26. The agent replies to the client’s message from Bitrix24.
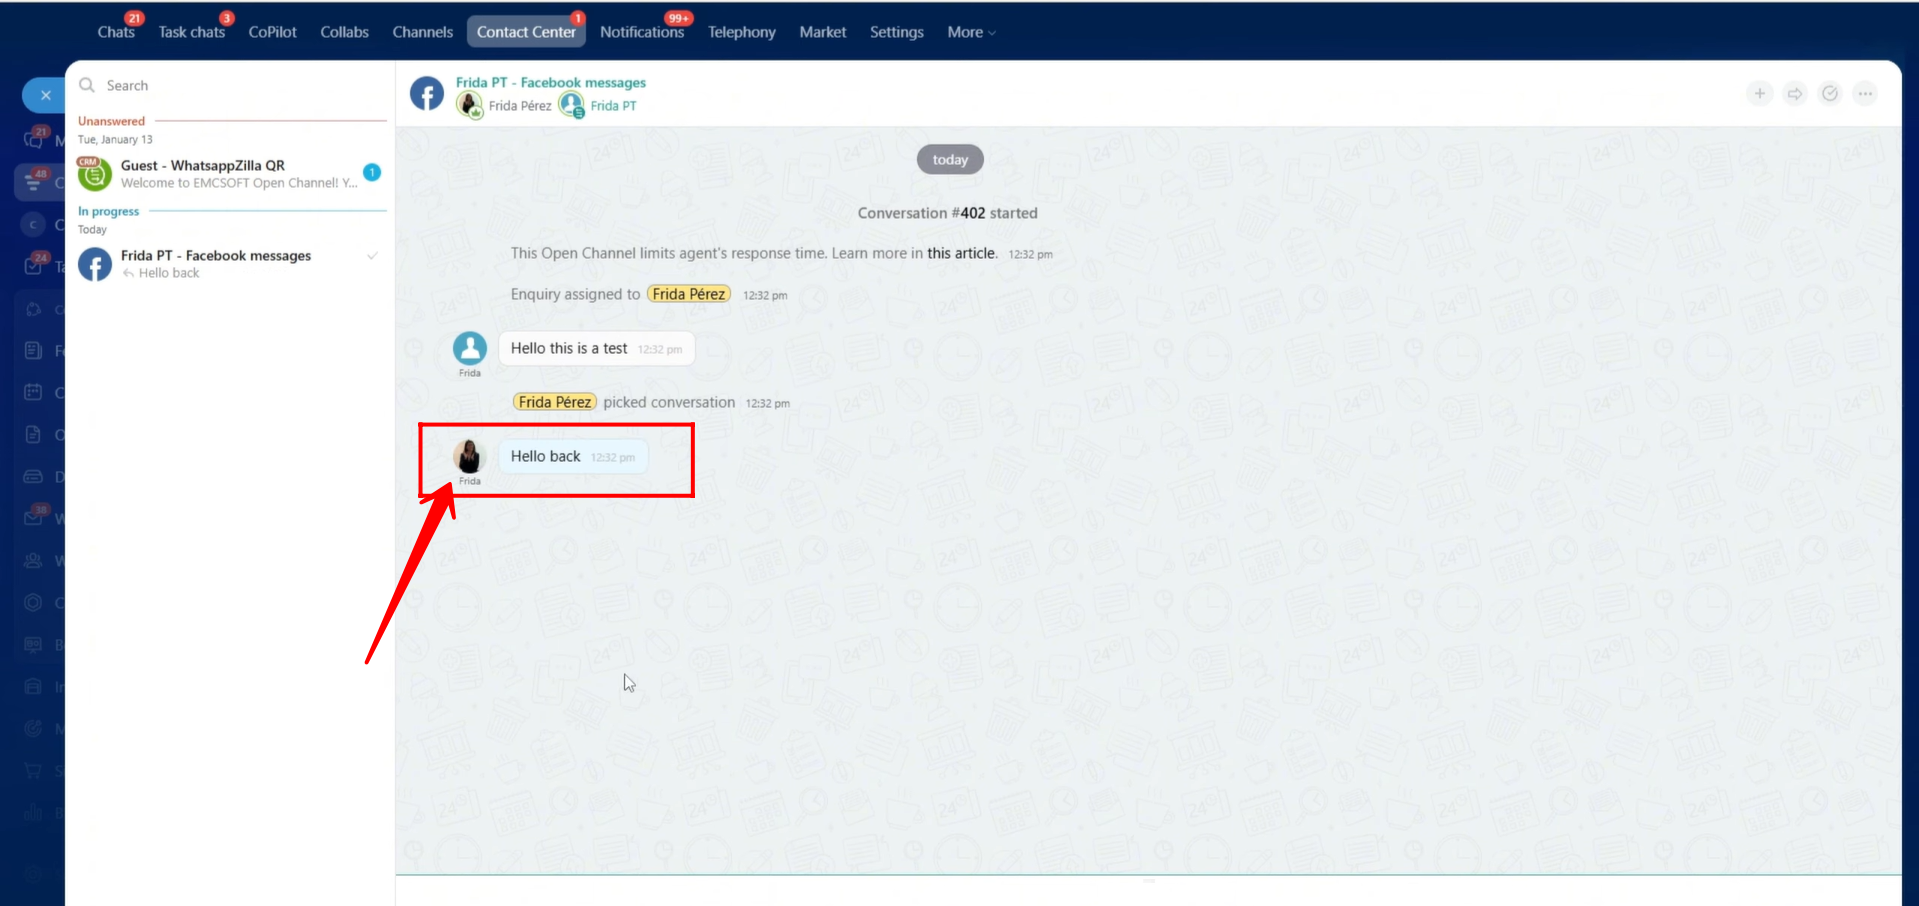
27. The client receives the reply directly in their Facebook Messenger. This confirms that the integration is working correctly.
28. If needed, you can click Disconnect in the open channel settings to unlink the Facebook page from the open line.
29. Now, we will connect the Facebook: Comments open line to collect customer comments from your page posts. Previously, we connected only Facebook Messenger messages.
30. We will follow the same process to create a new open channel for Facebook Comments. If you want to reuse the same configuration as the Facebook Messages open line, you can simply connect the previously configured open channel instead of creating a new one.
31. Go to the Other tab and rename the open channel to “Facebook Comments.” You can apply the same configurations as explained earlier in the previous steps. We will not go into detailed explanations again.
32. The configured open channel is now linked to the Facebook Comments open line. Click Connect to proceed with connecting your Facebook profile.
33. Click Log In to your Facebook account.
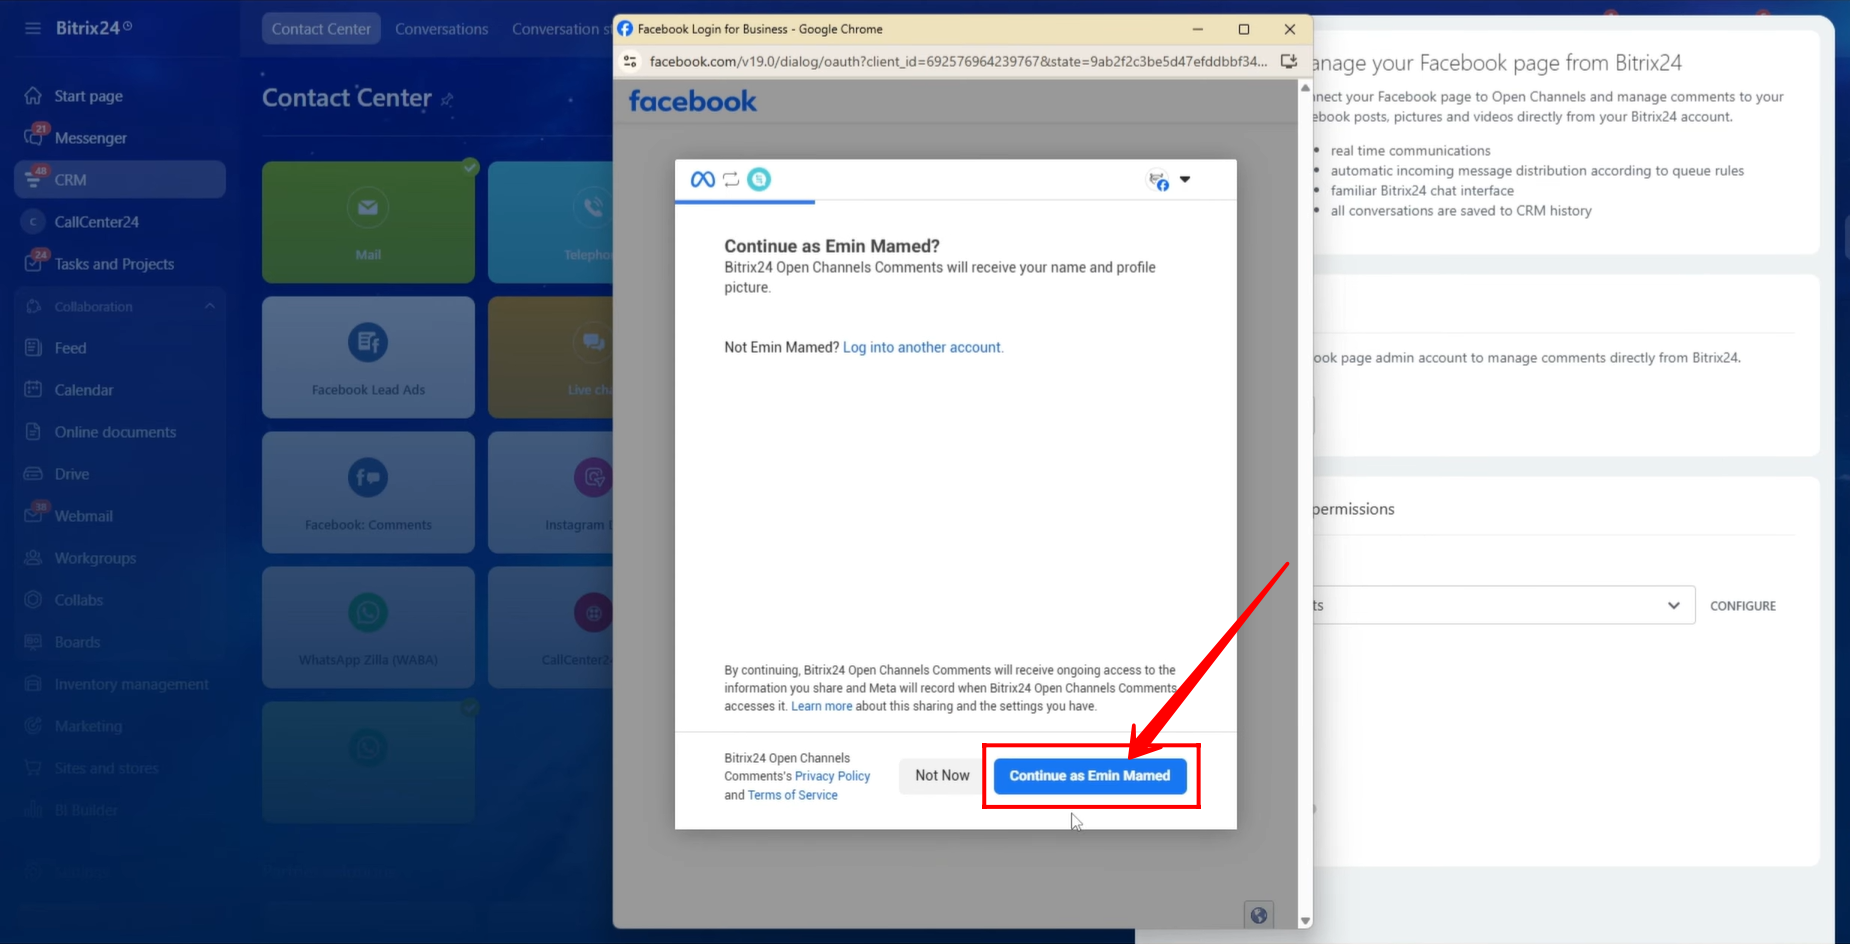
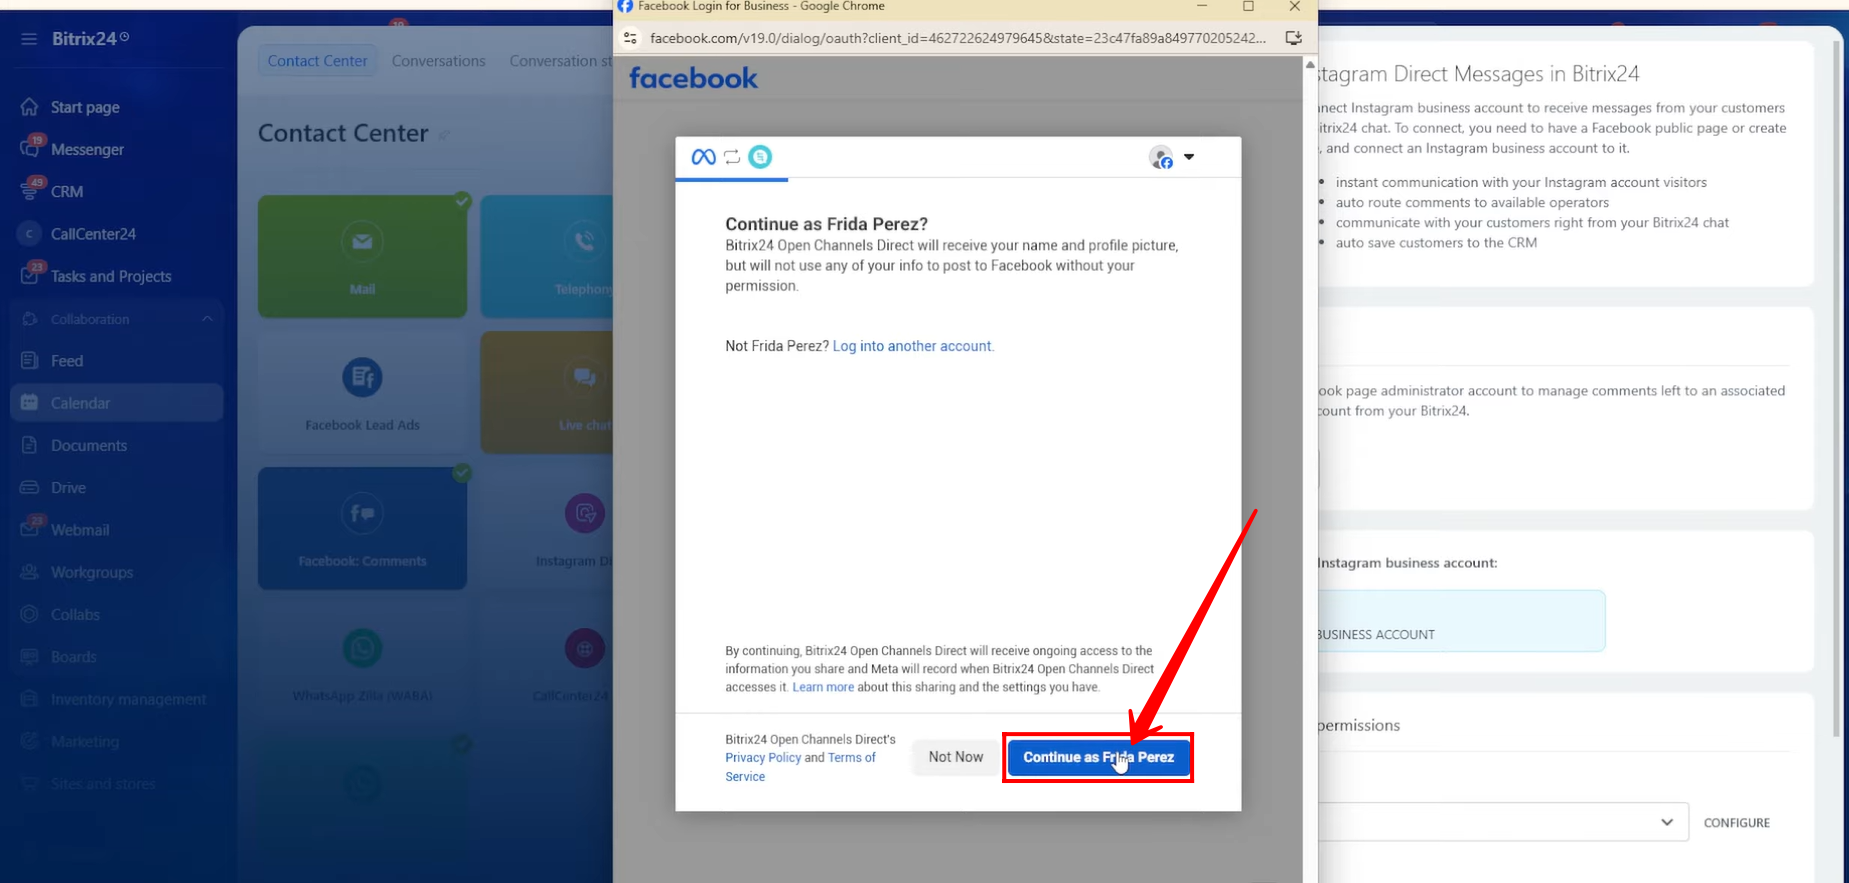
34. You will be prompted with an option to continue using your Facebook profile. Click Continue as your profile.
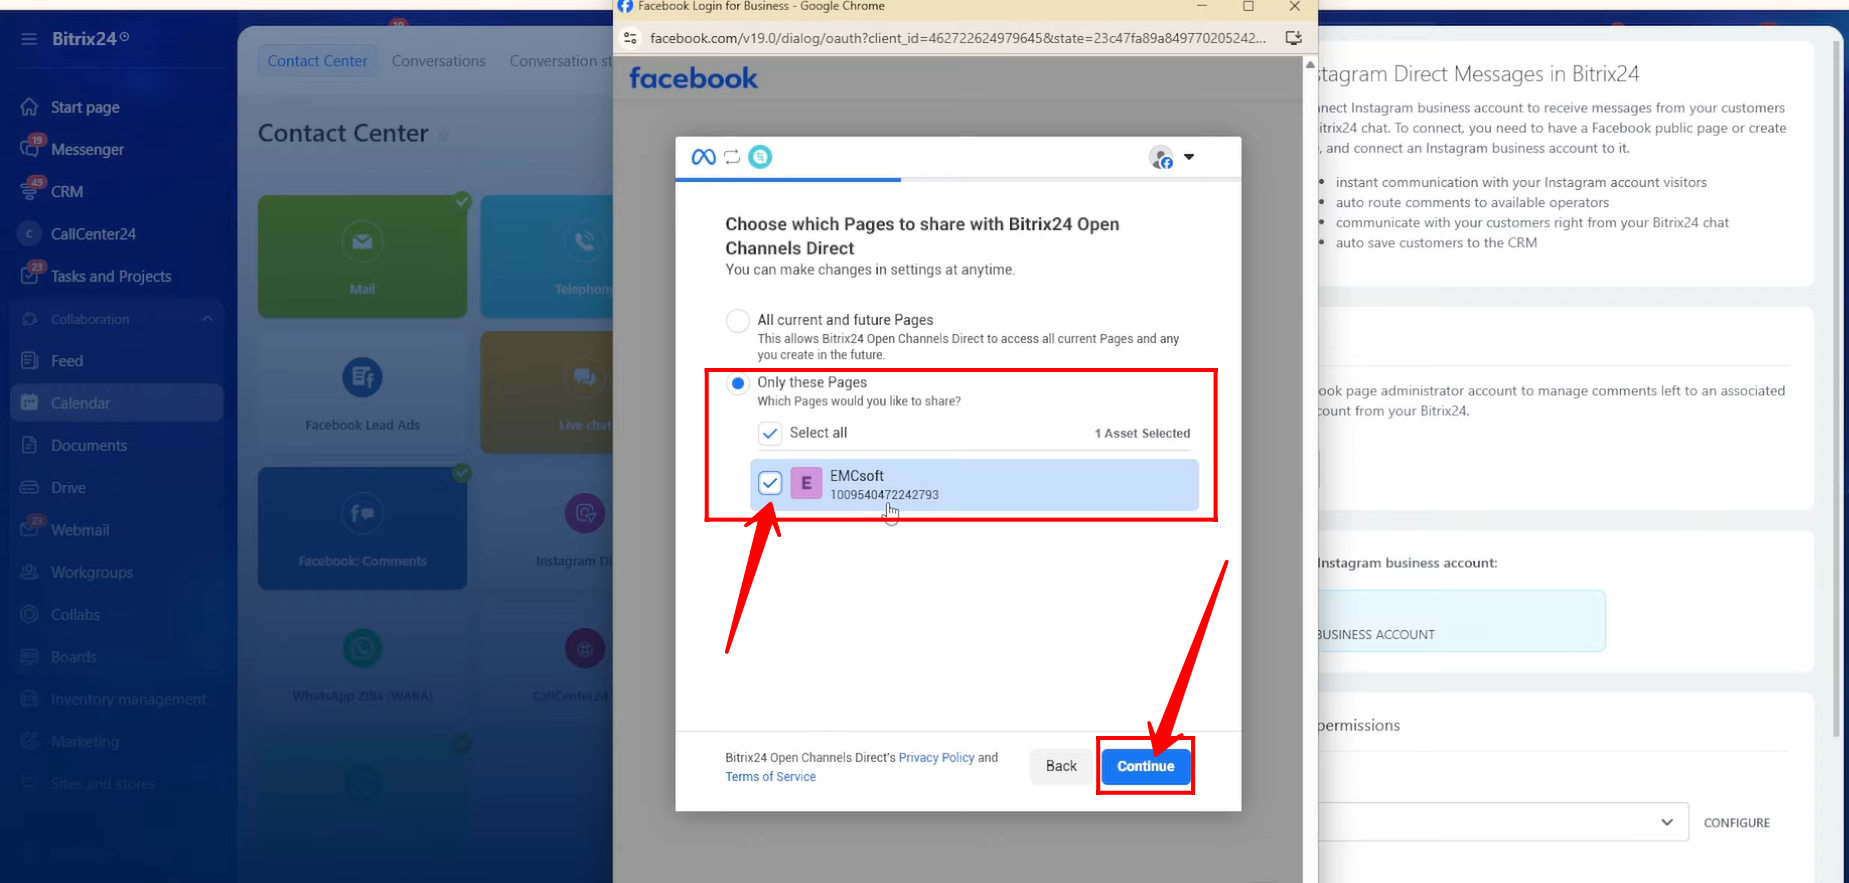
35. You will be asked whether you want to connect existing and future pages or current pages only. Select your preferred option and click Continue.

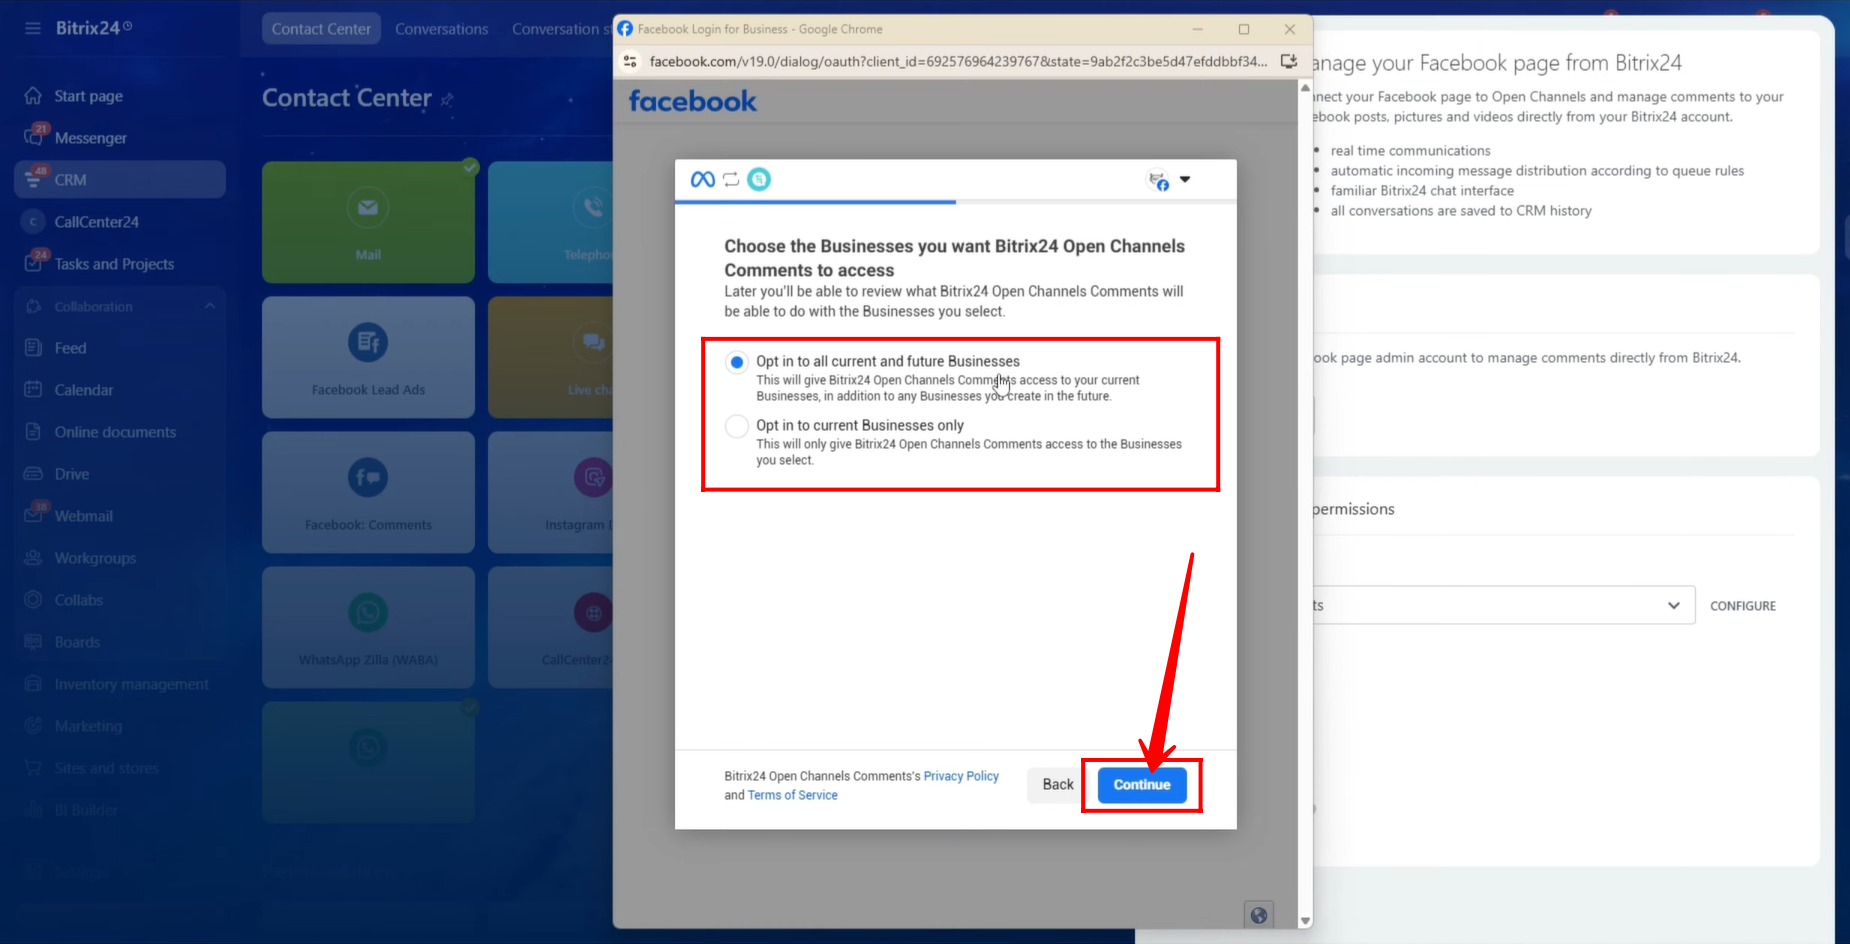
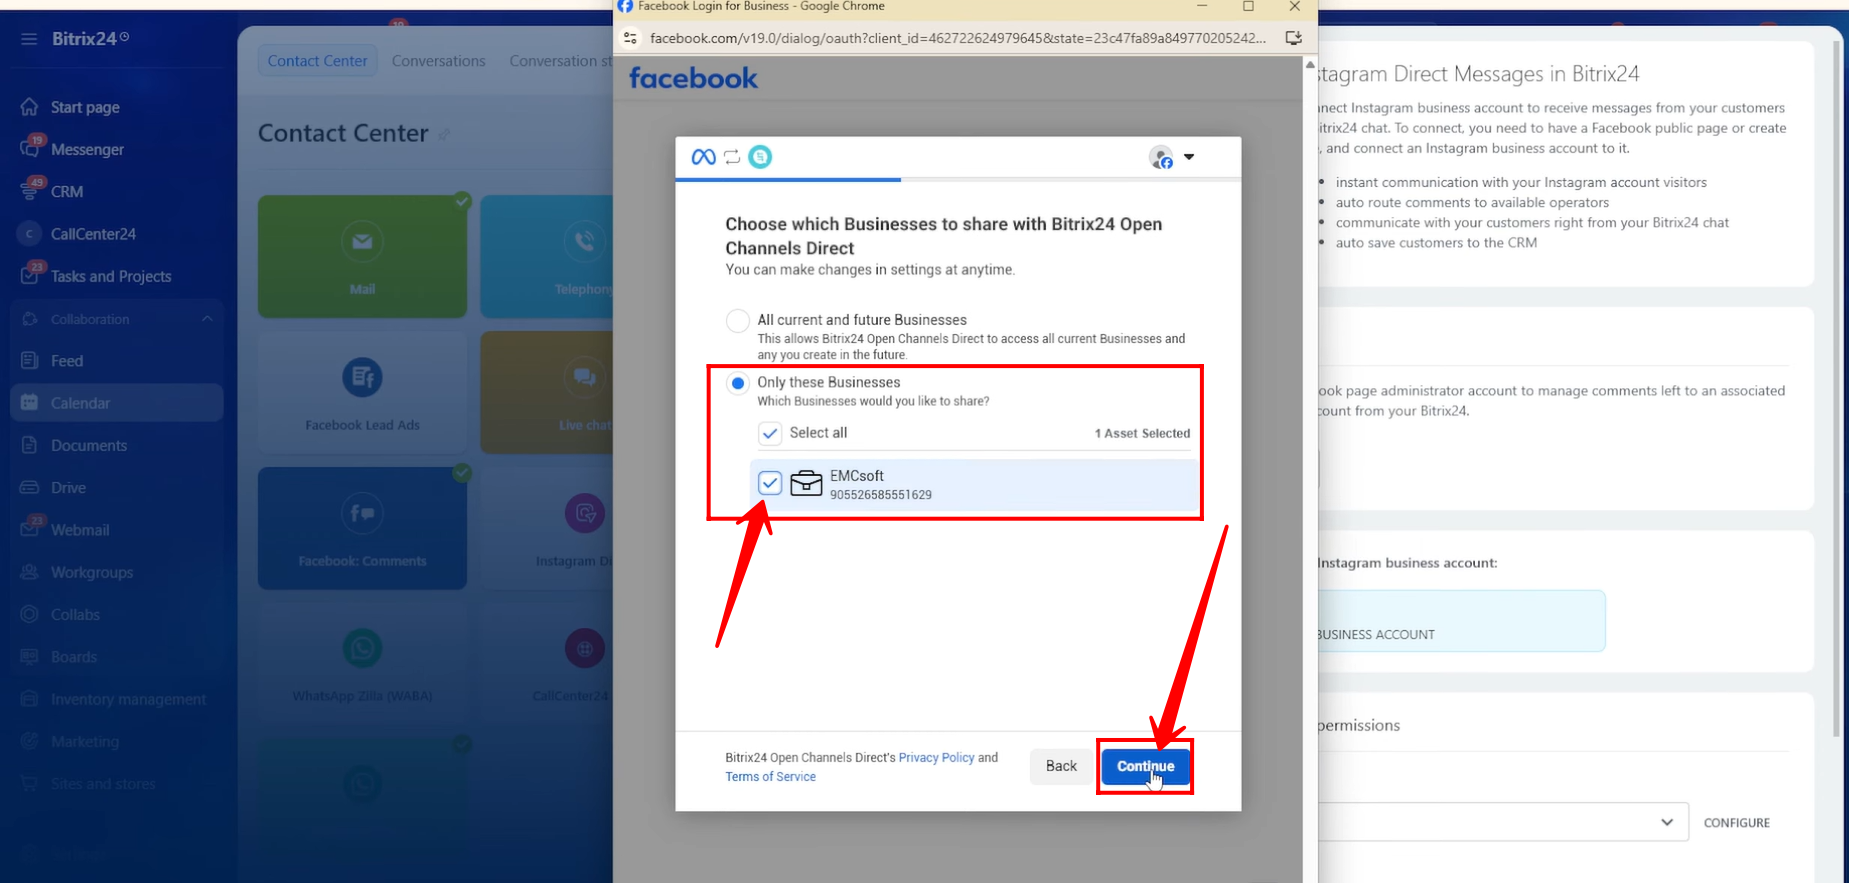
36. Next, you will be asked whether to connect all current and future businesses or current businesses only. Choose the appropriate option and click Continue.
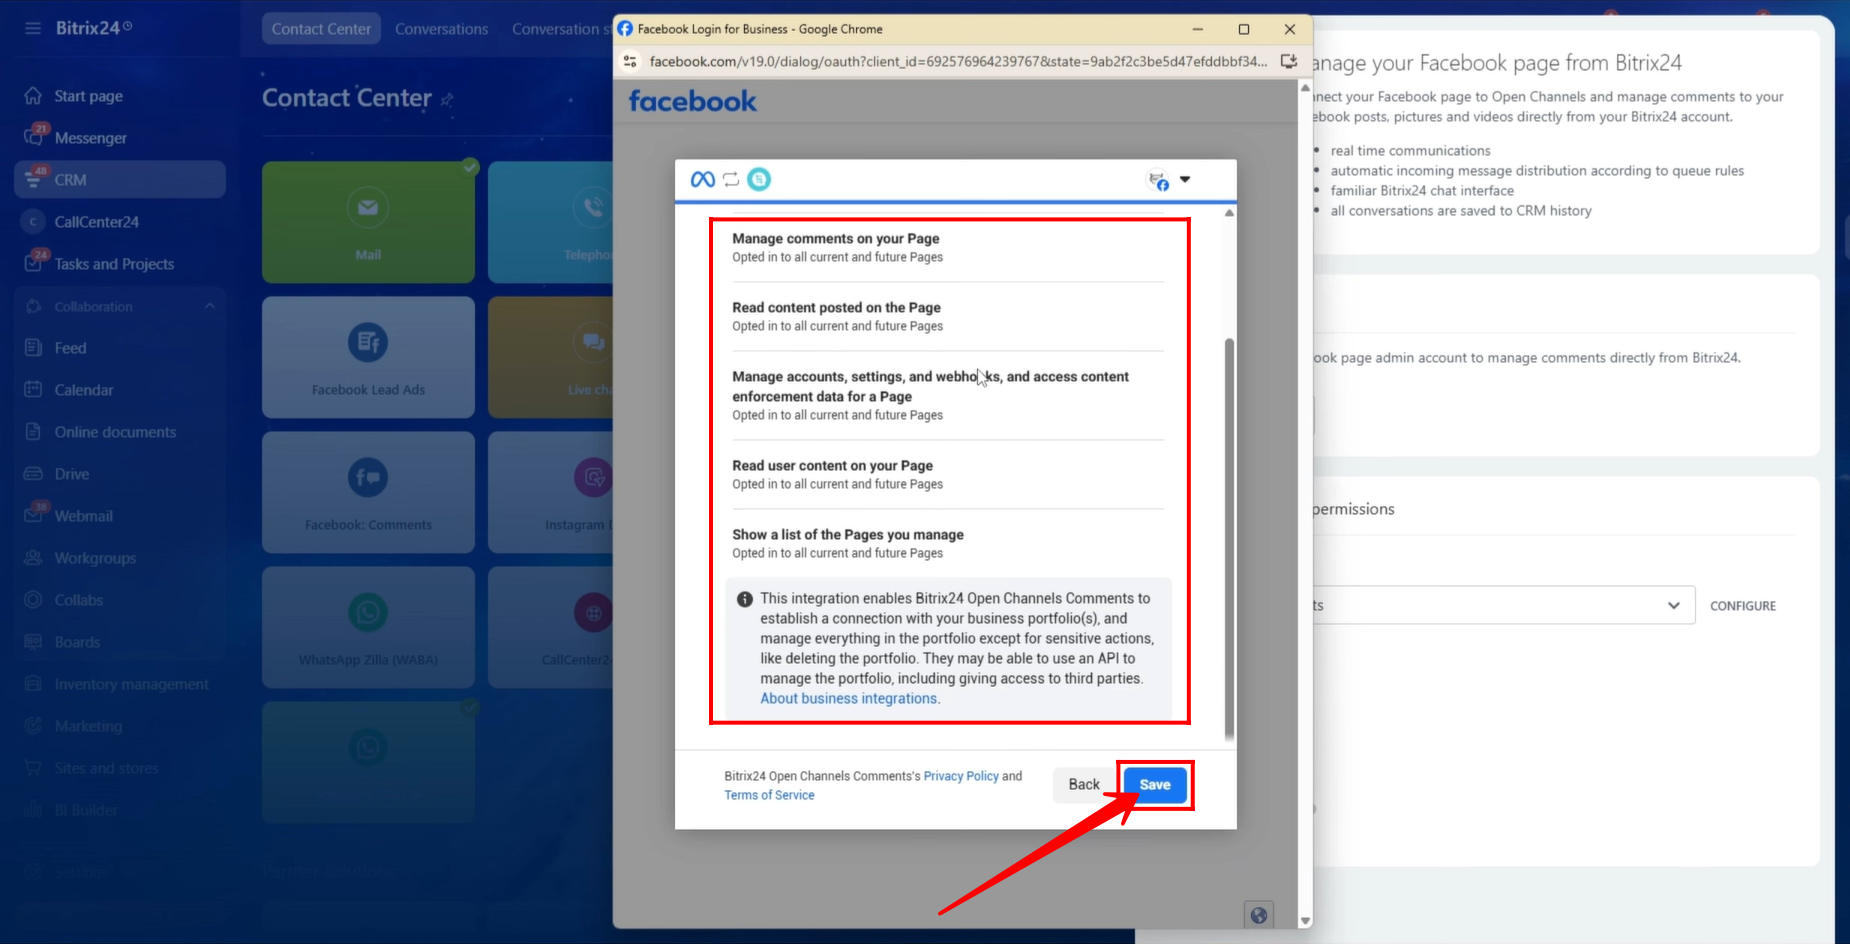
37. A popup window will display all the permissions that you are about to grant. Review them carefully and click Save to proceed.
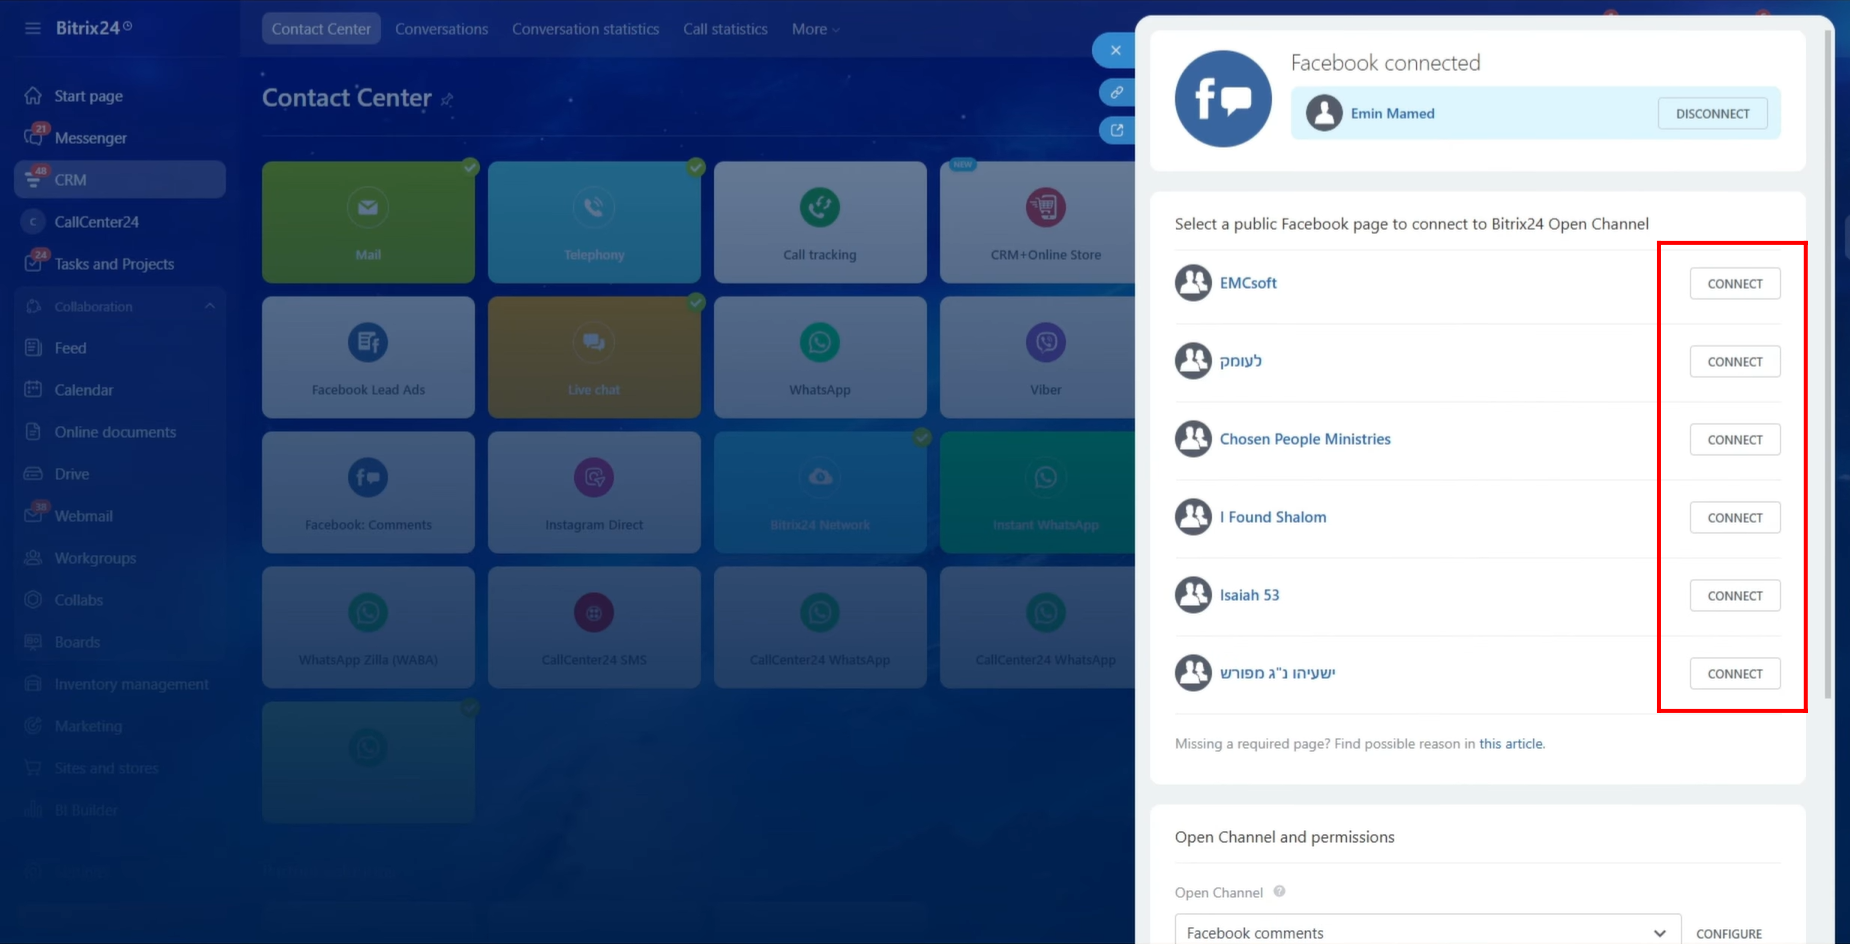
38. You will now see a list of Facebook pages. Click Connect next to the page from which you want to receive comments into Bitrix24 open channel chats.
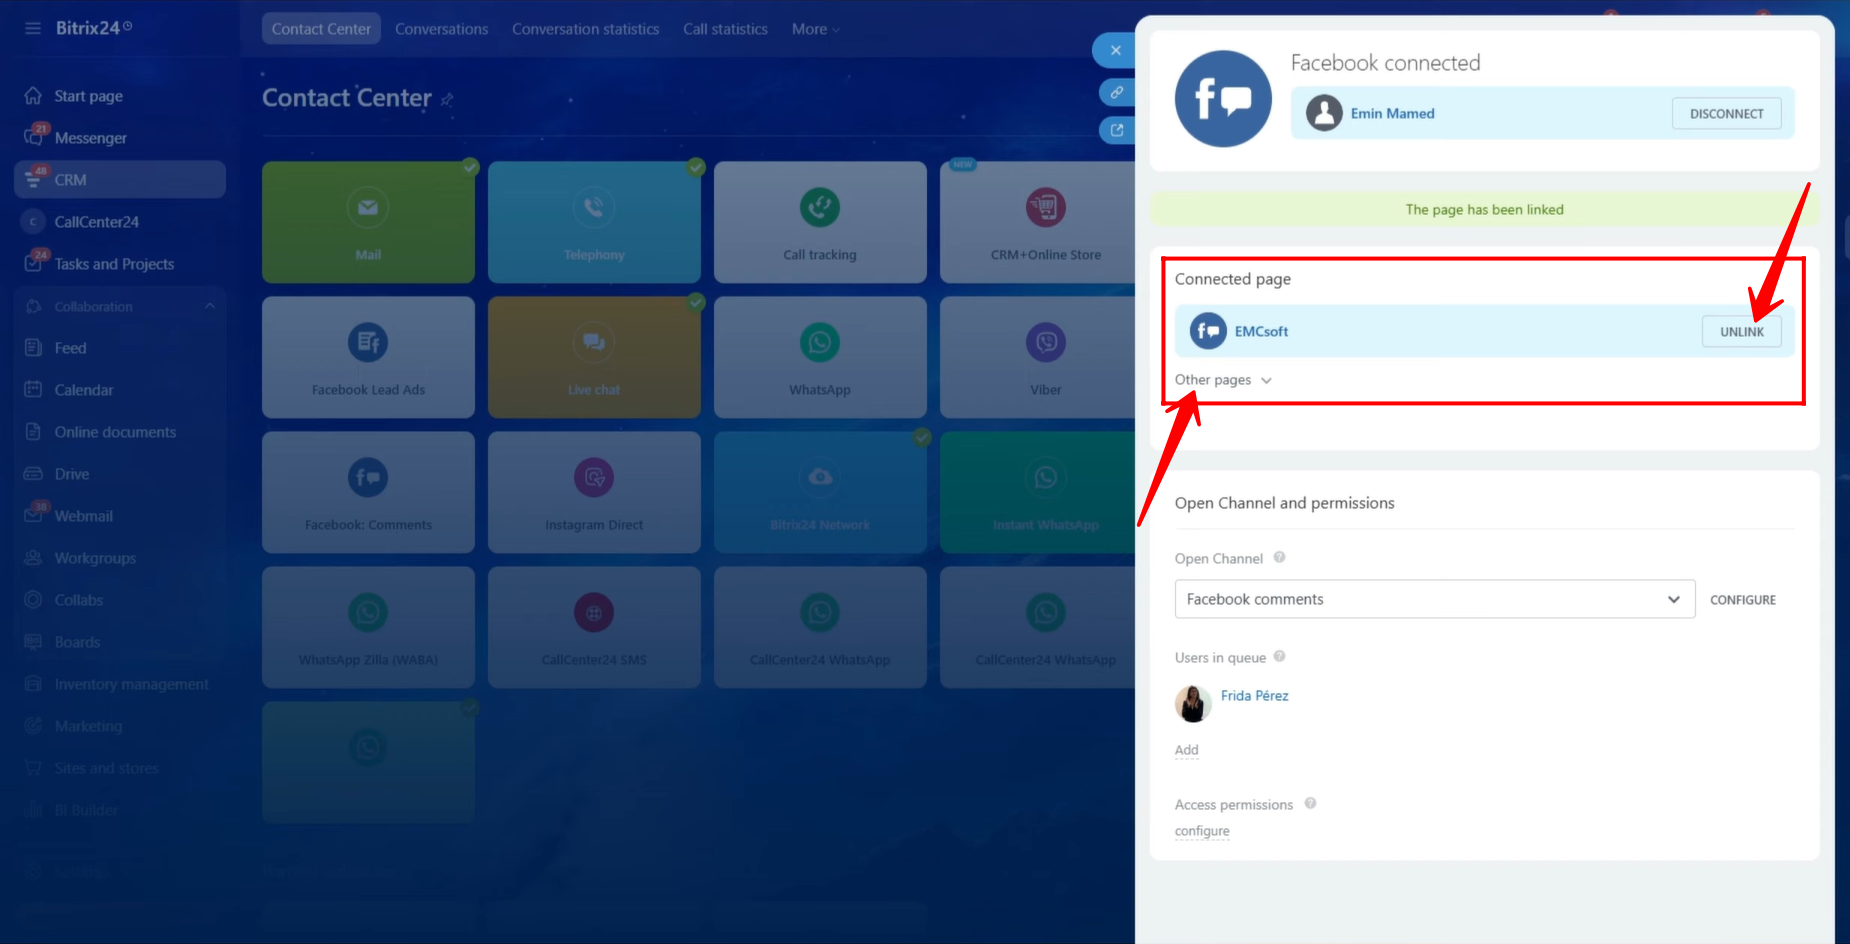
39. From this section, you can also unlink a connected page or explore and connect additional pages if needed.
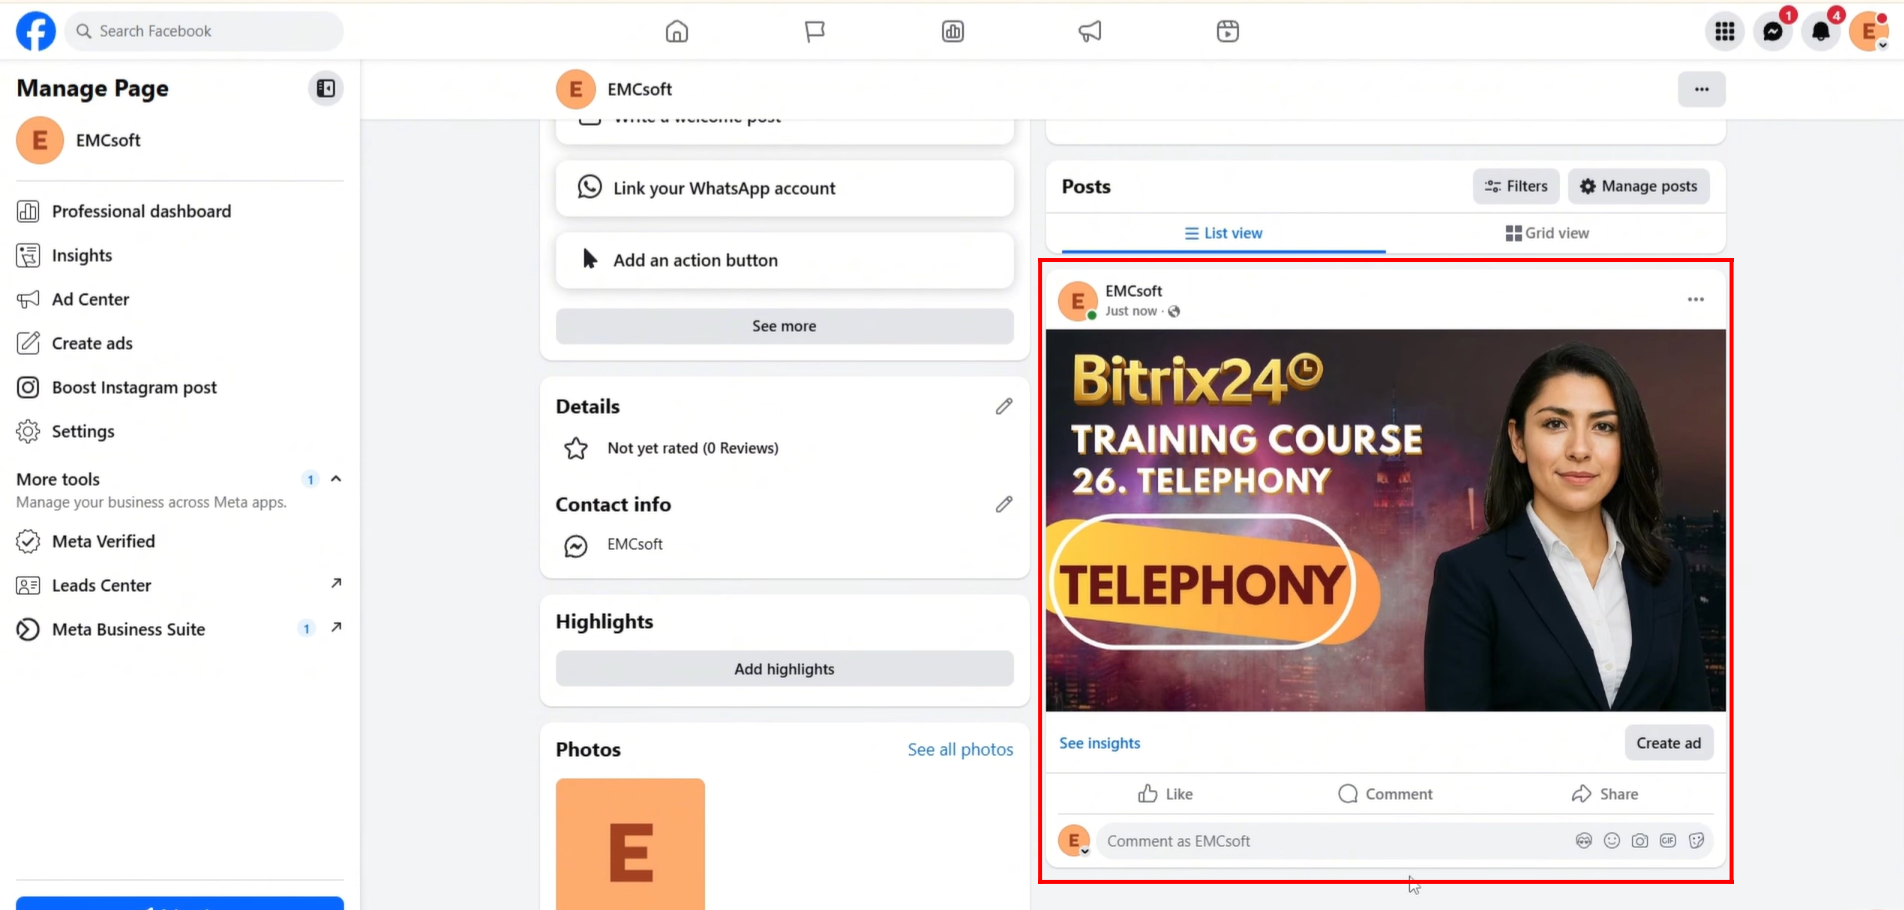
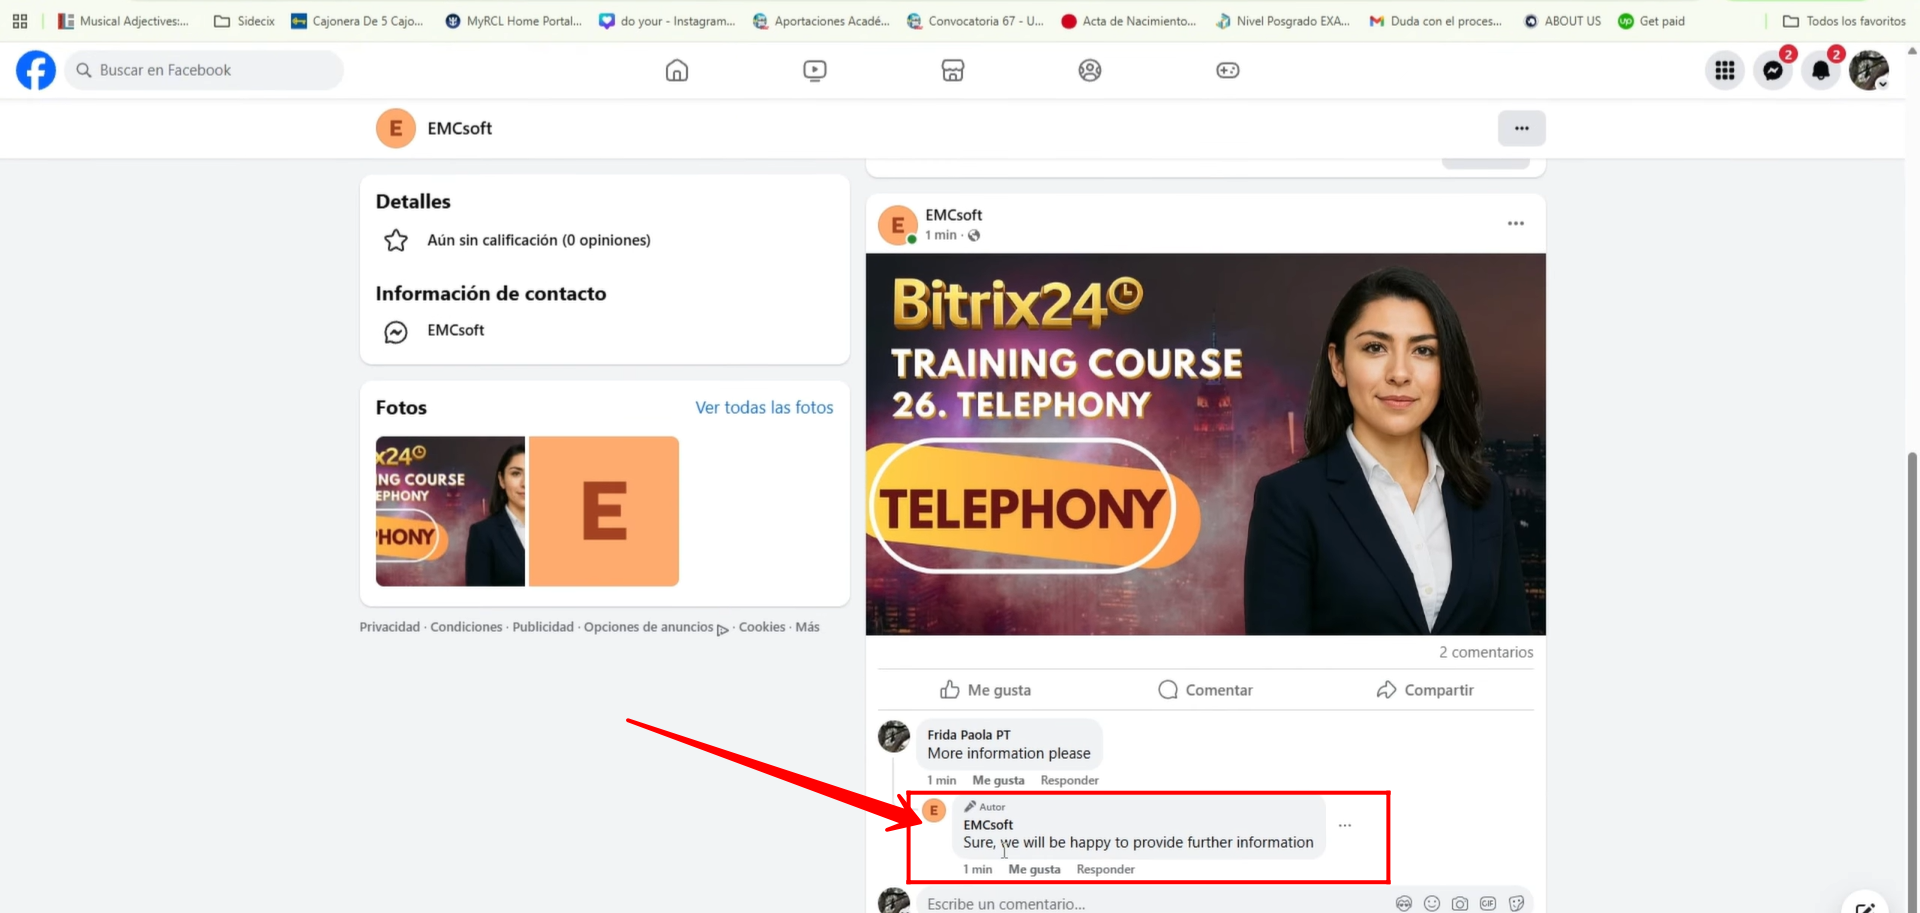
40. For testing purposes, we created a post on the Facebook page to receive a comment.
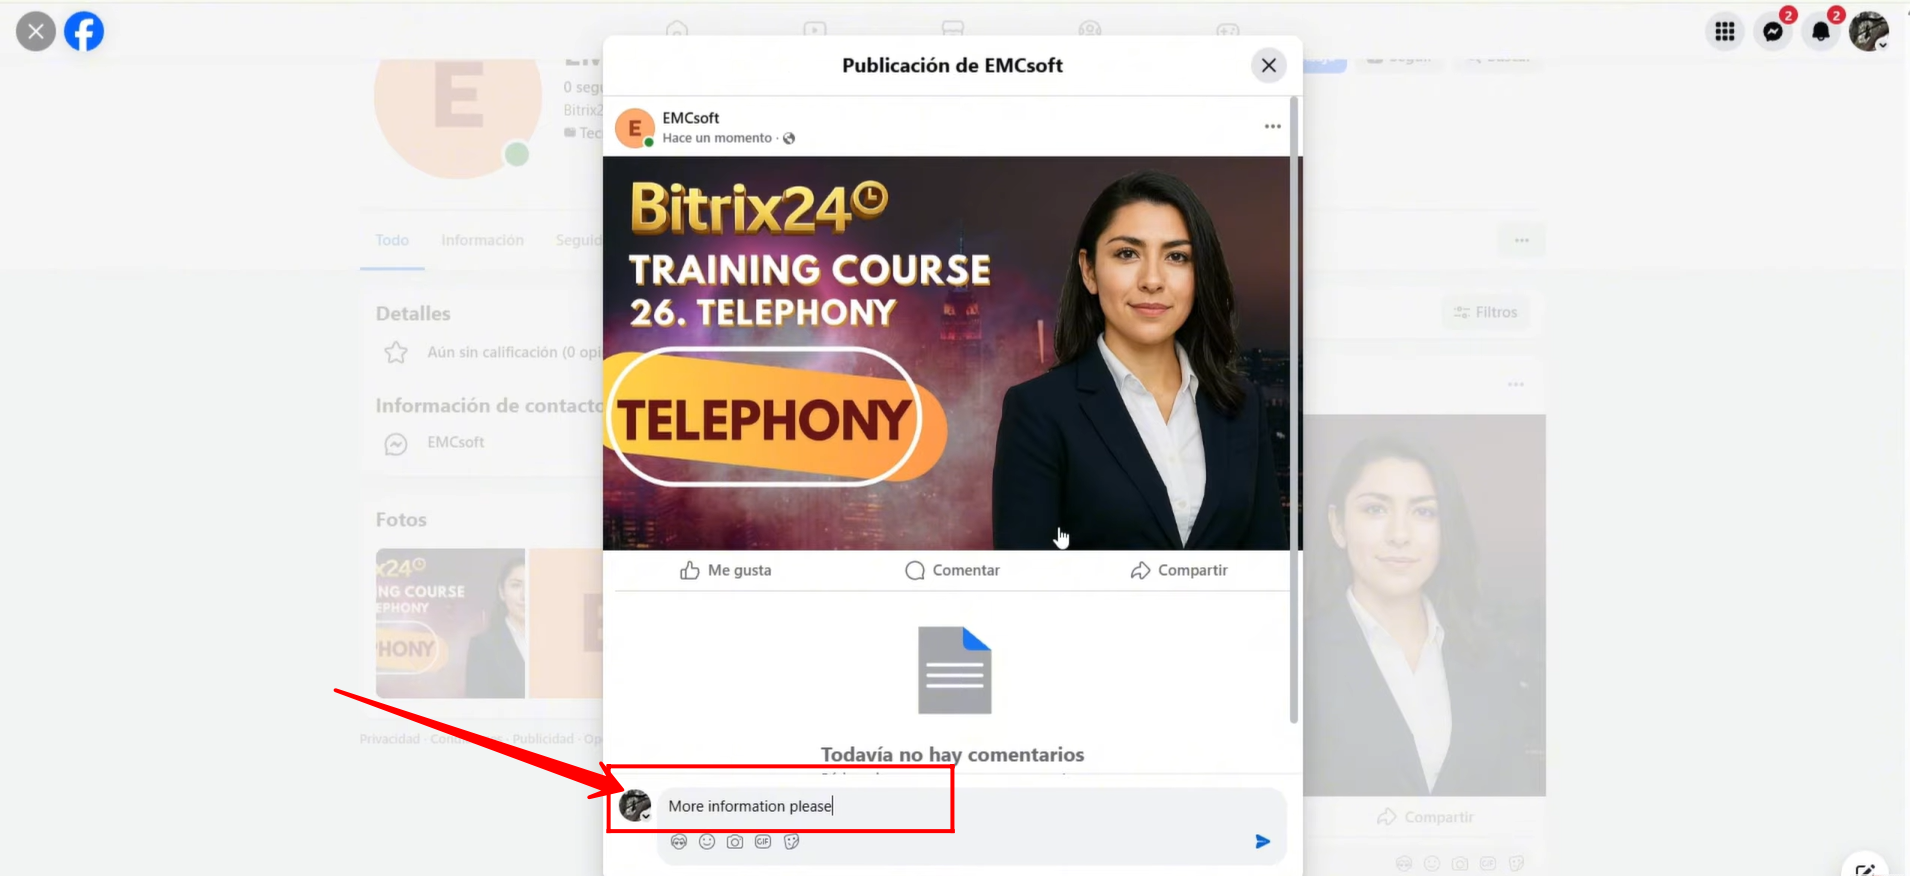
41. From another profile, acting as a customer, we added a comment on the post of the page that is connected to Bitrix24.
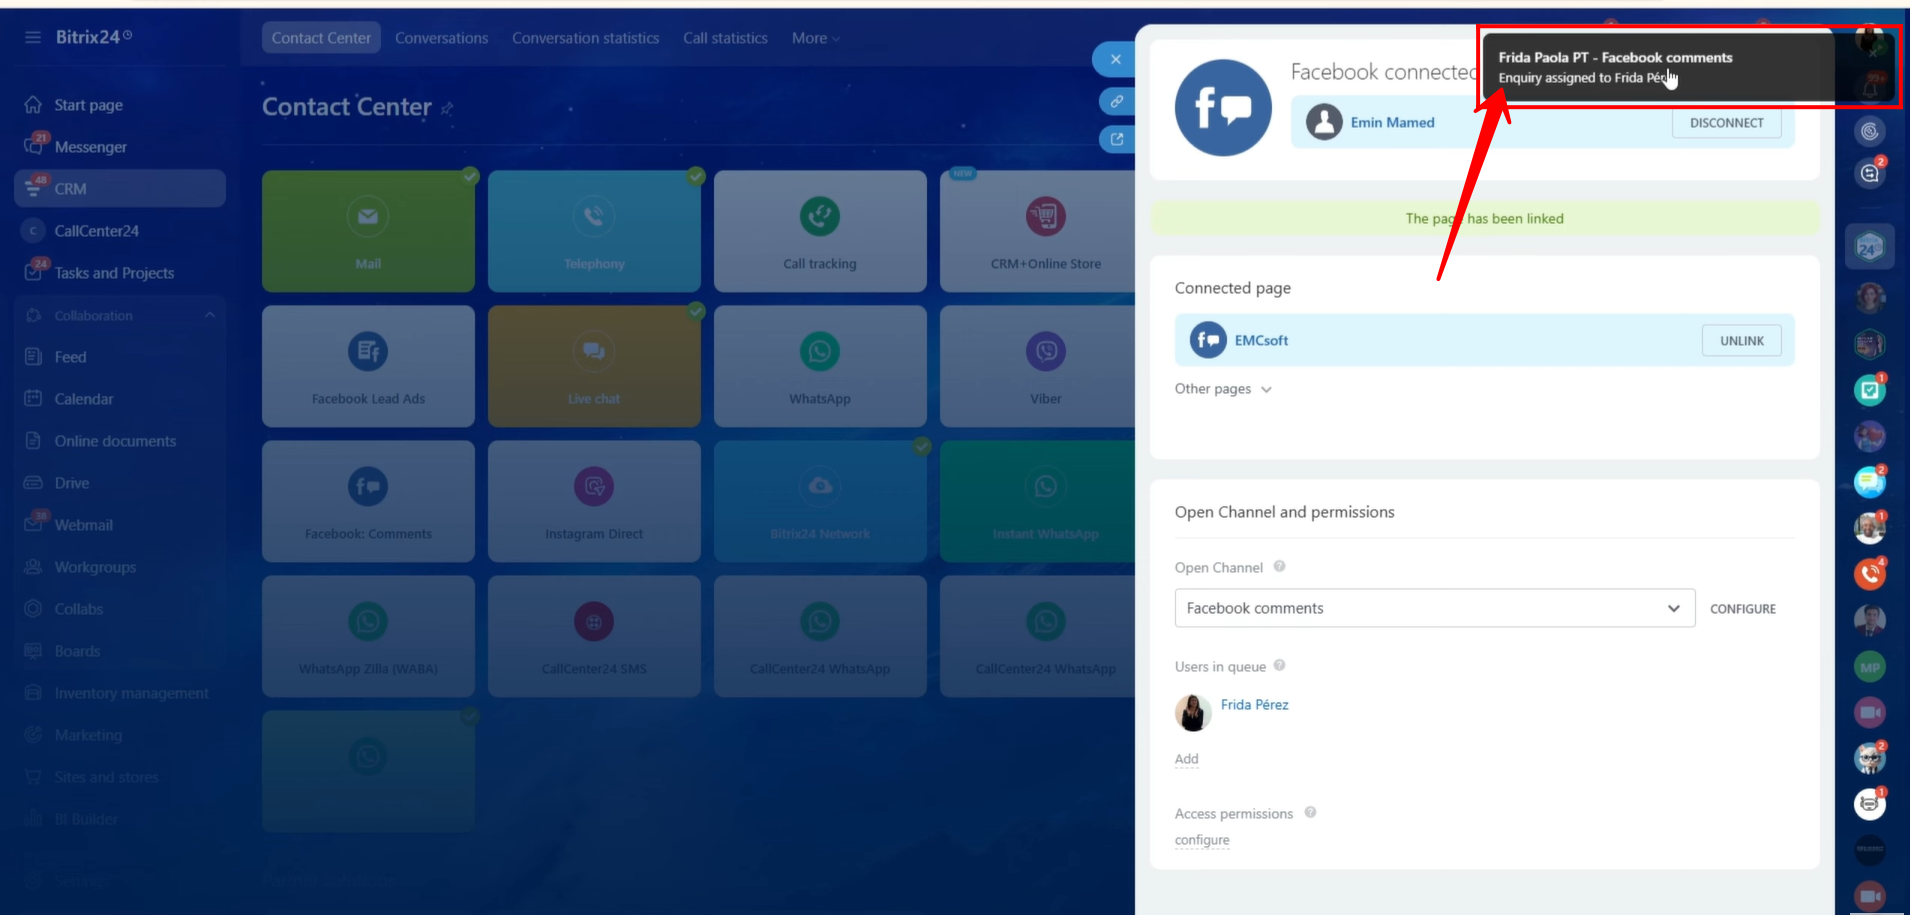
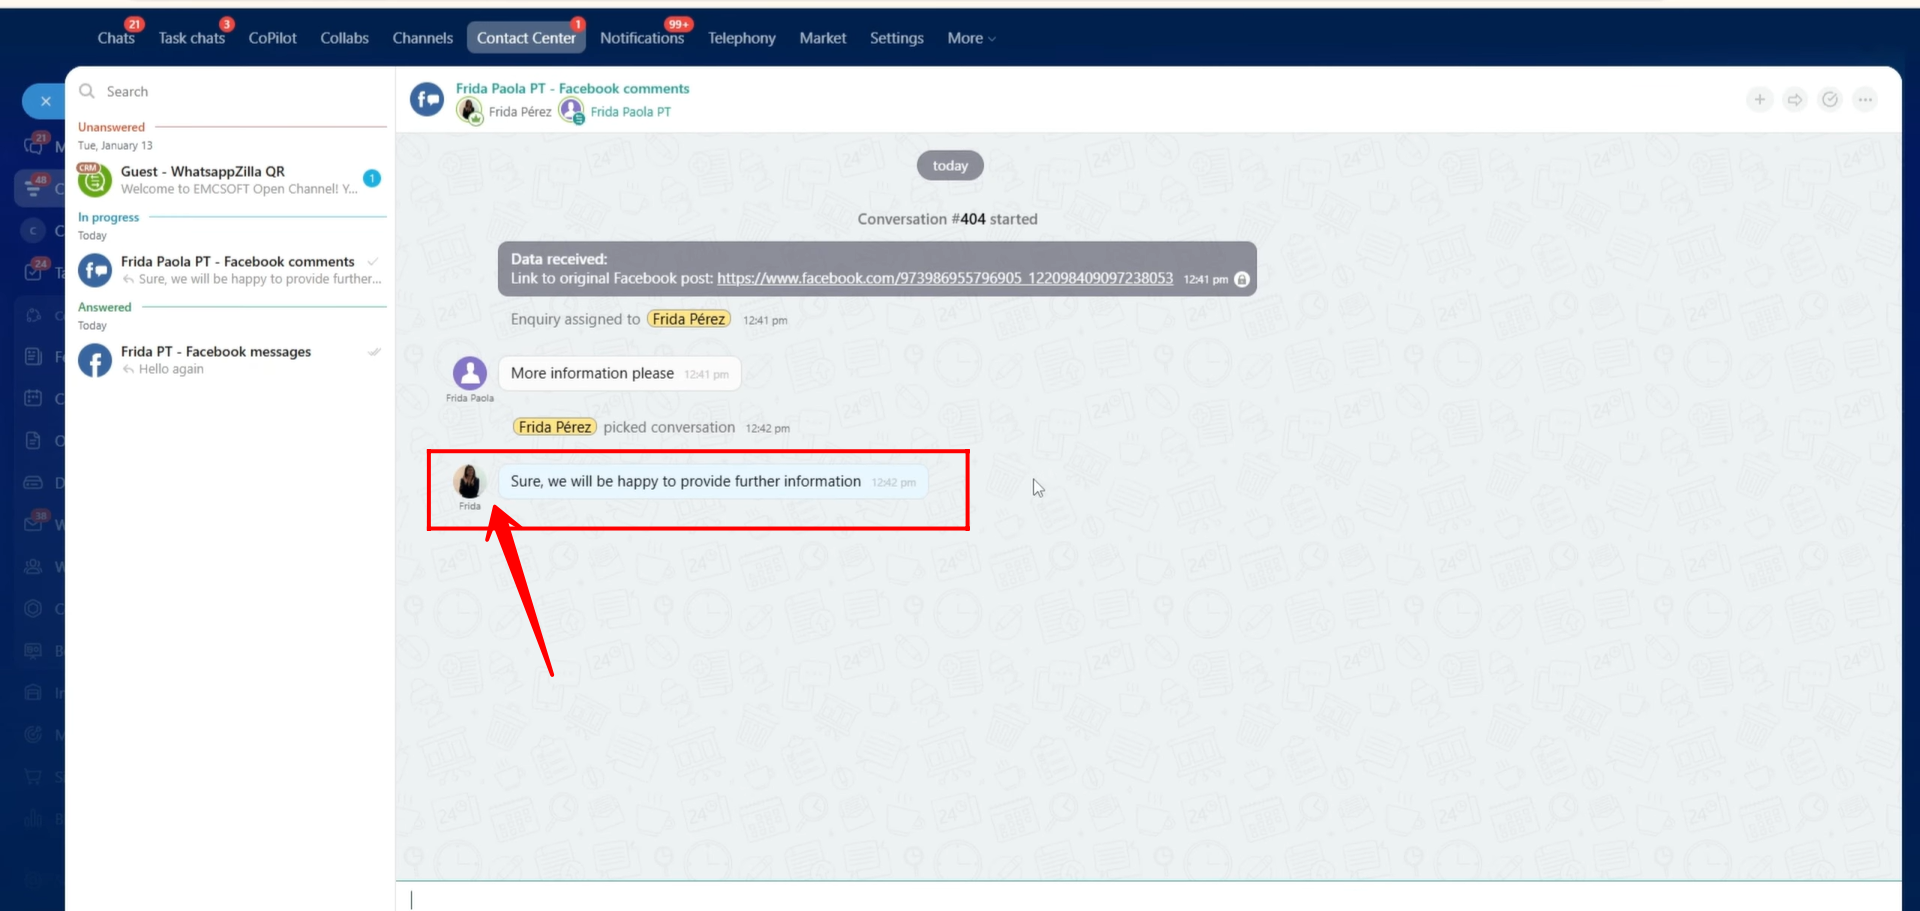
42. As you can see, the comment has been received in Bitrix24. Click on the notification to open the chat.
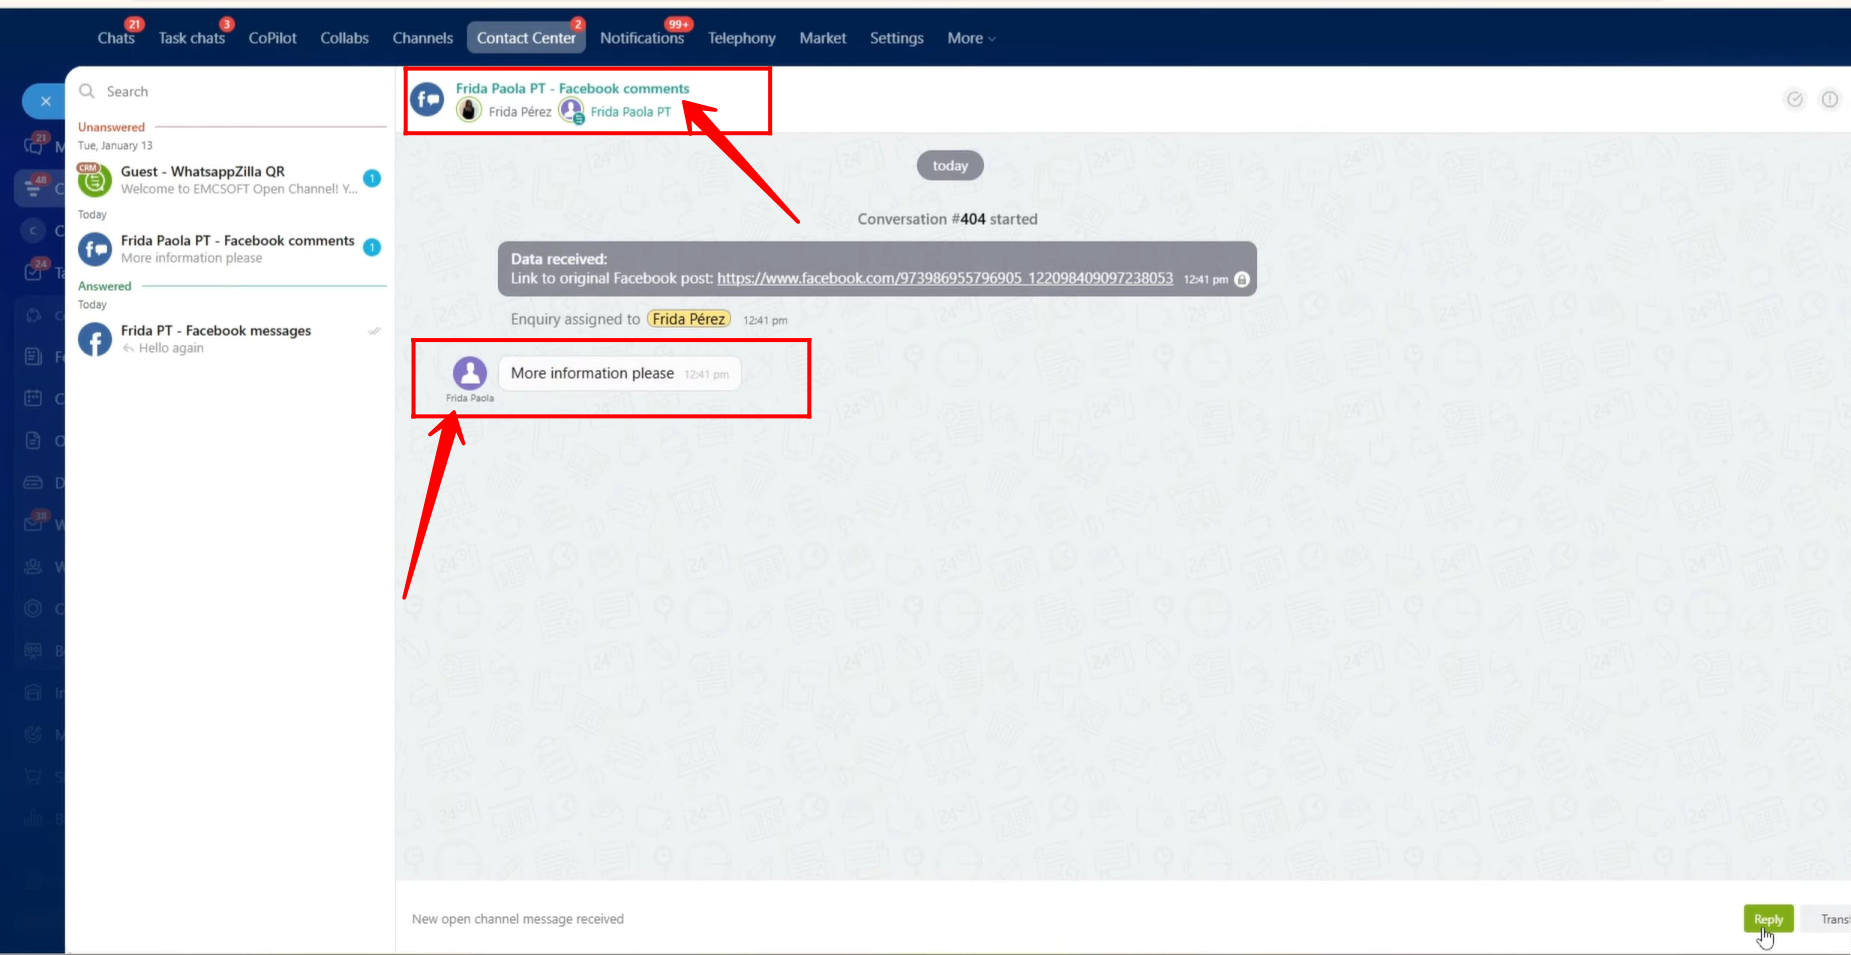
43. The chat name appears as “Customer’s Facebook Profile Name – Facebook Comments” to indicate the source of the message. The comment is displayed within the chat. Click Reply to respond to the customer.
44. The agent replies to the customer’s comment directly from the open line chat.
45. As a result, the reply is posted under the customer’s comment on the Facebook post.
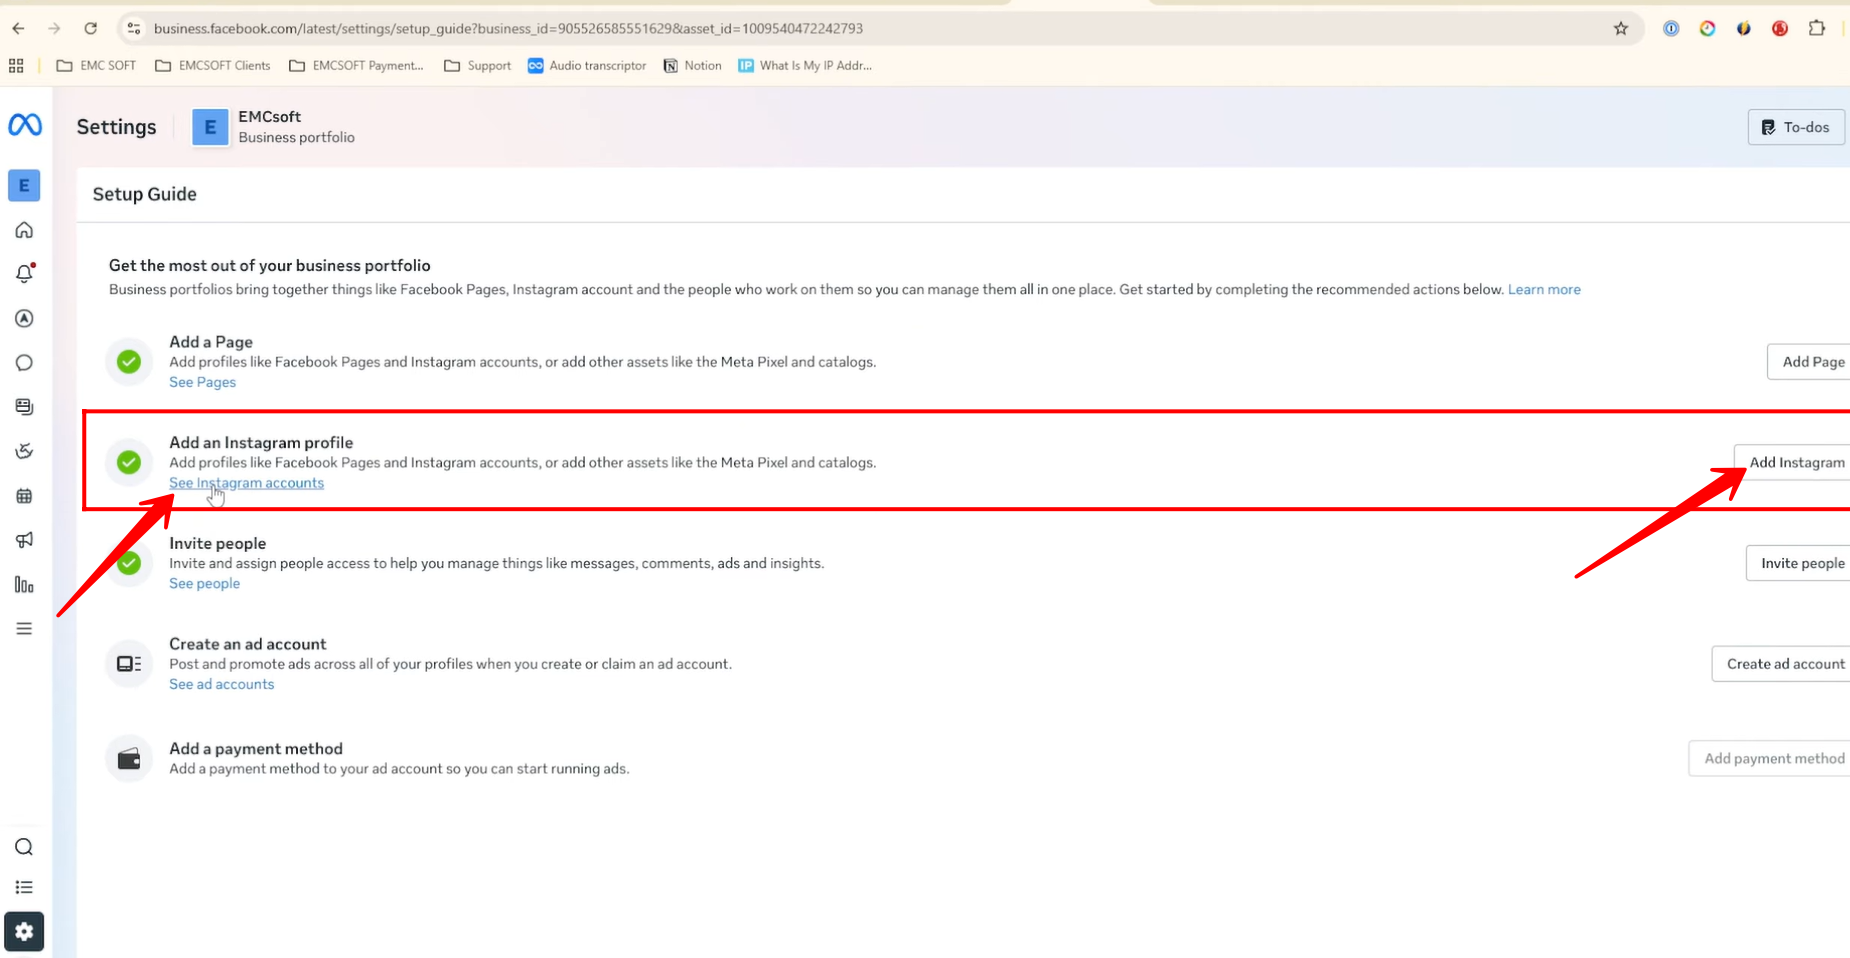
46. Now, go to Settings in Meta Business Suite. Click Add Instagram to connect your Instagram account. If an account is already connected, you can click See Instagram Accounts.
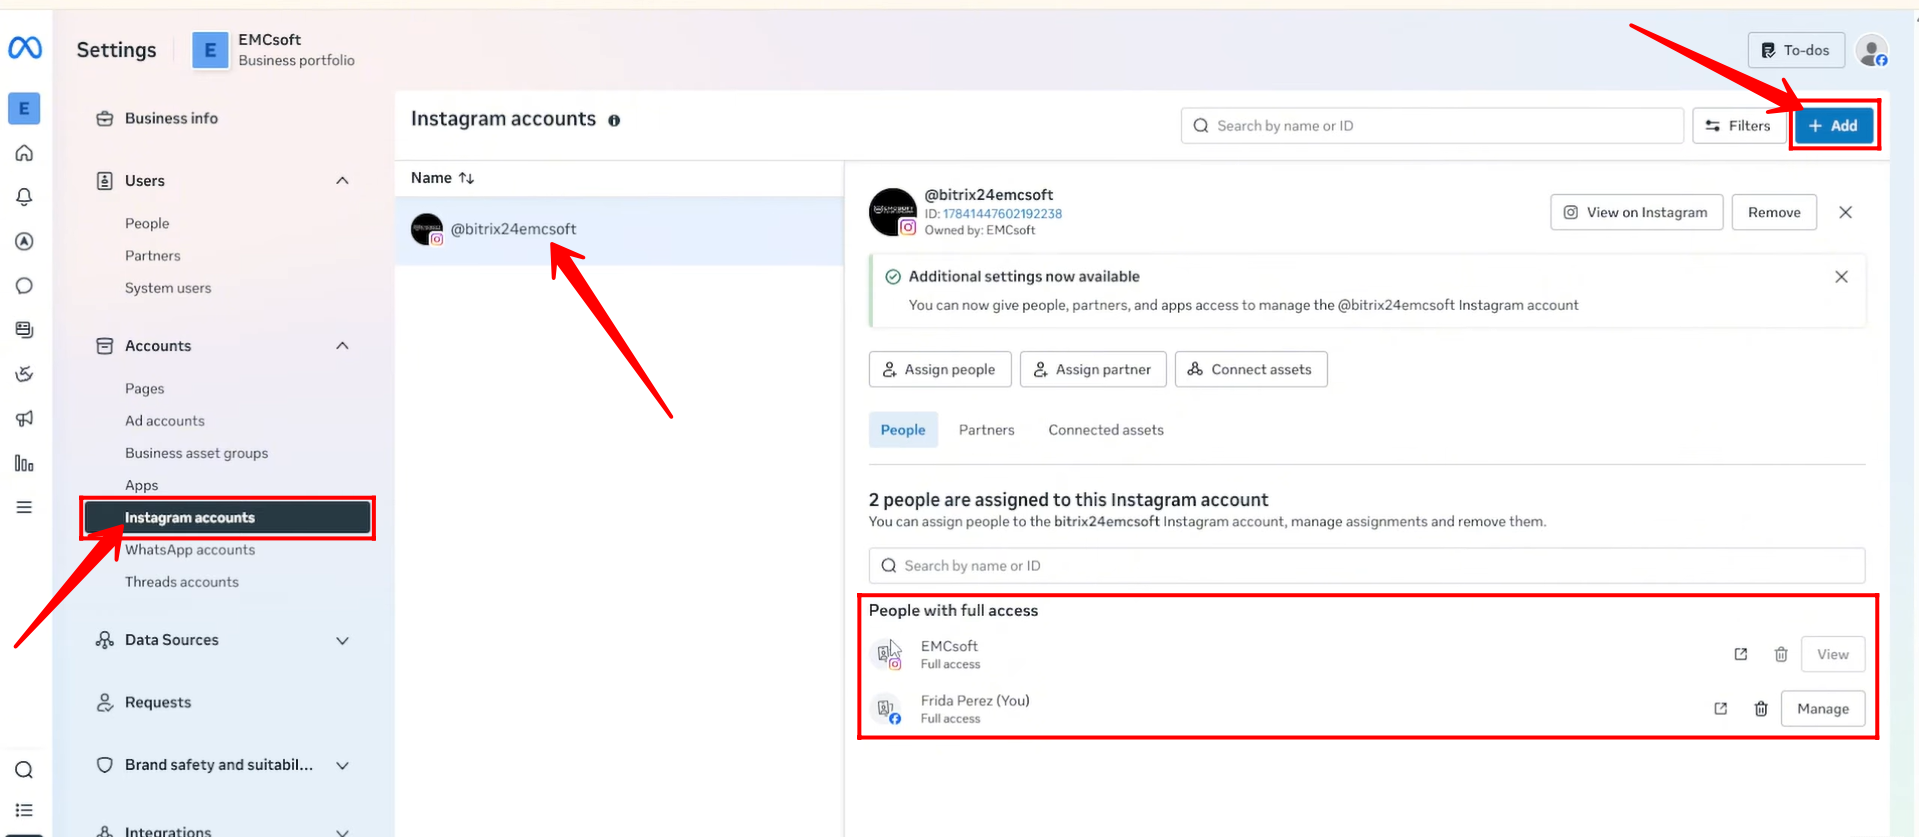
47. Under the Accounts section, navigate to Instagram Accounts. Here, you can view all connected Instagram accounts. If an account is not yet connected, click + Add to connect a new one.
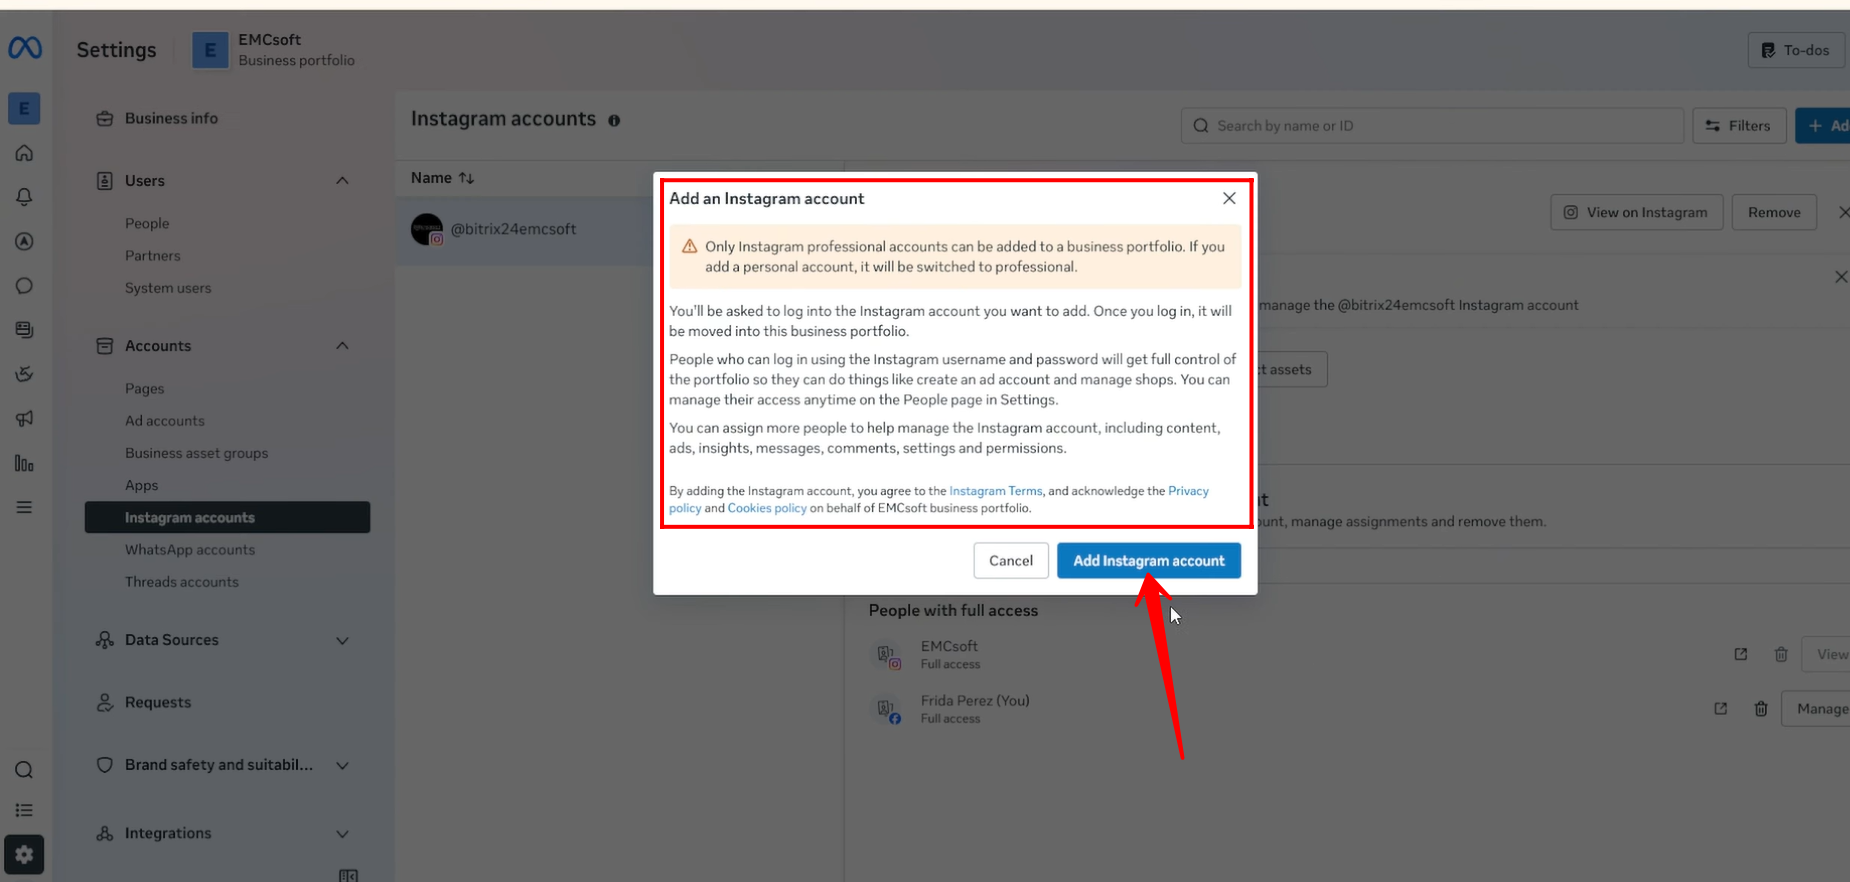
48. Click Add Instagram Account. Please note that only professional Instagram accounts can be added to a business portfolio. If you attempt to connect a personal account, it will need to be converted to a professional account.
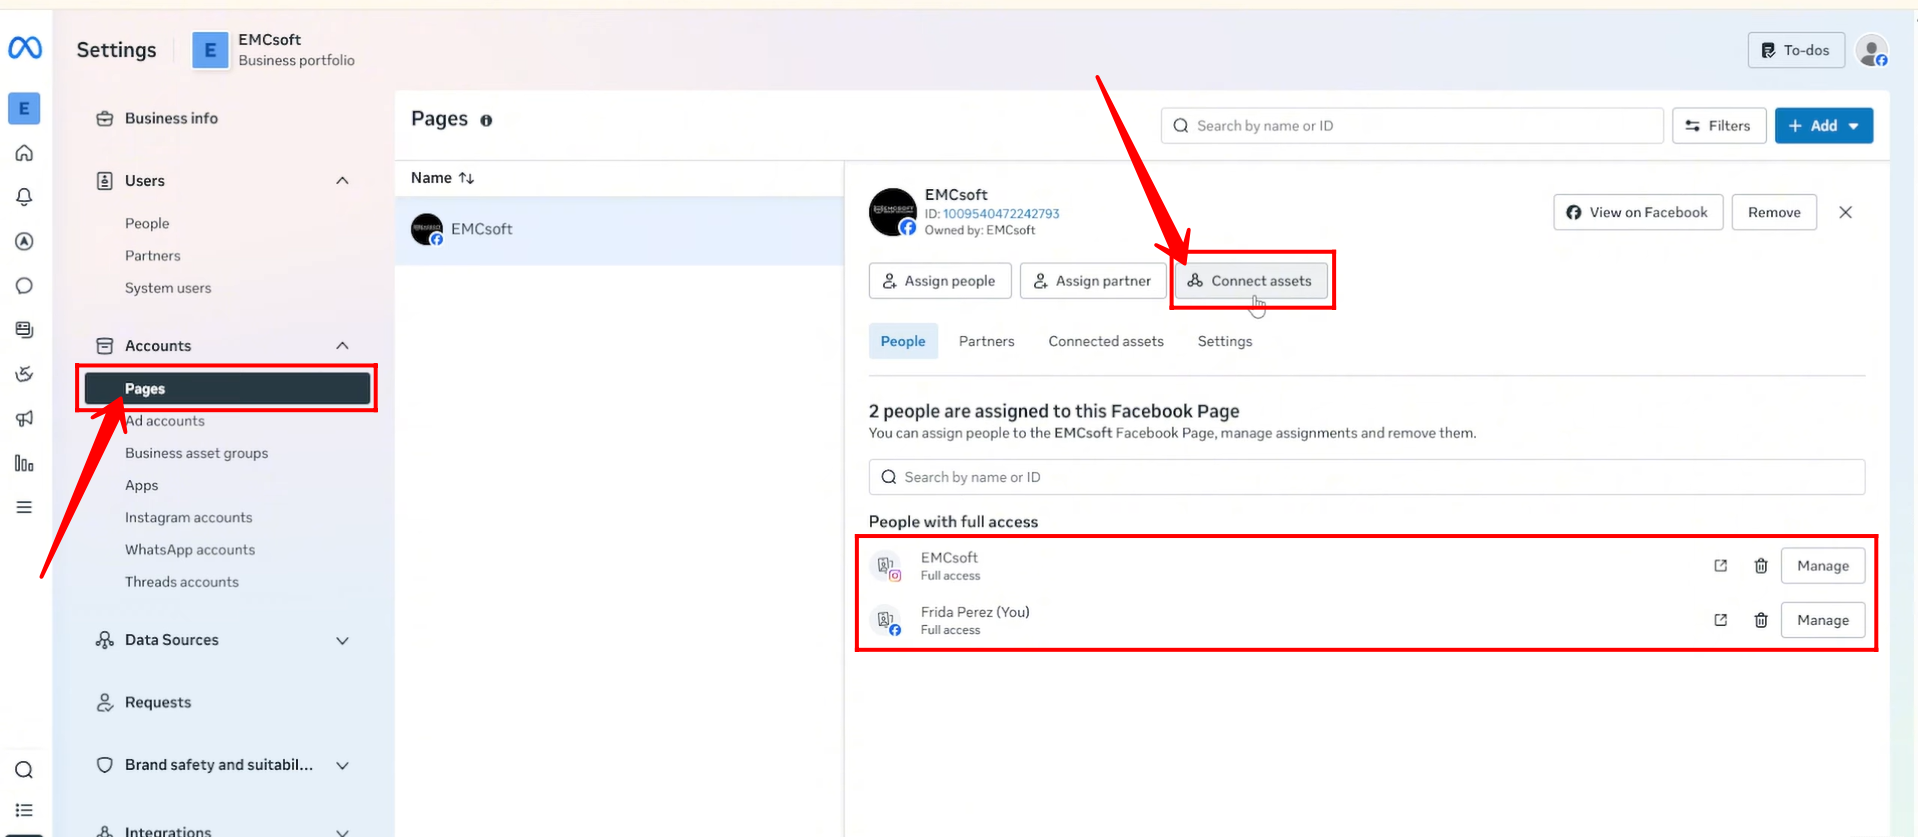
49. Go to the Pages section from the side panel. Ensure that both Facebook pages and Instagram accounts are connected under your business profile.
If any required account or page is missing, click Connect Assets and add the necessary page or account.
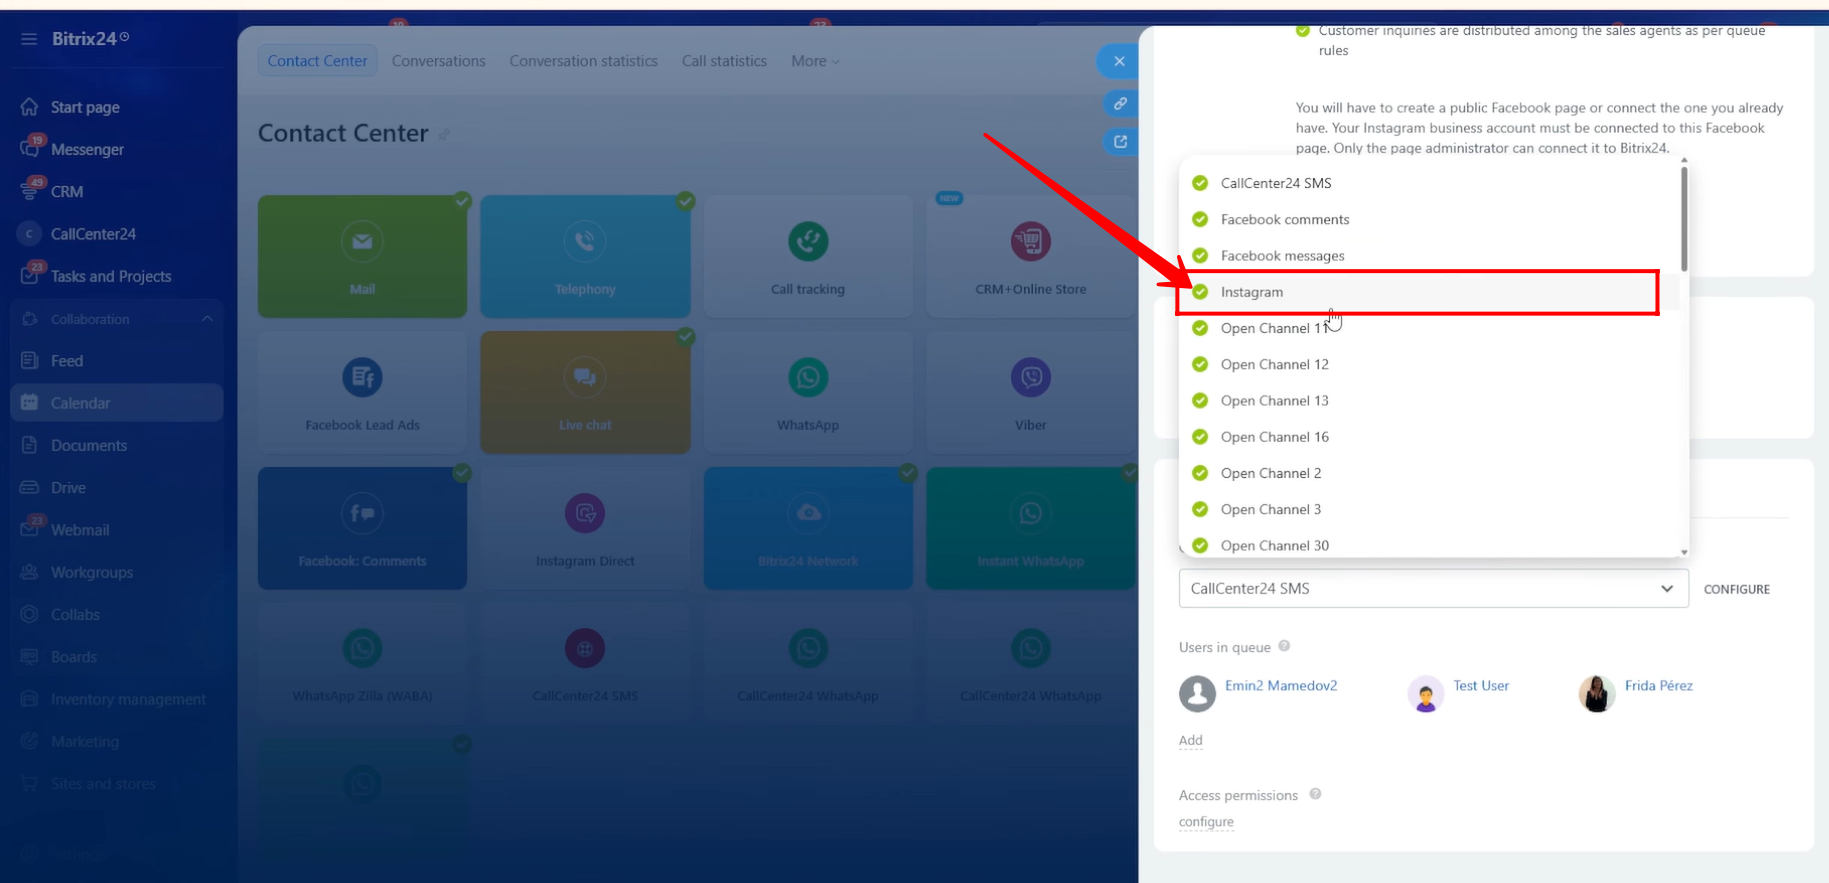
50. Return to Bitrix24 and select the Instagram Direct open line to receive messages from Instagram. Please note that for Facebook, messages and comments are handled through separate open lines, while for Instagram, both messages and comments are received through a single open line.

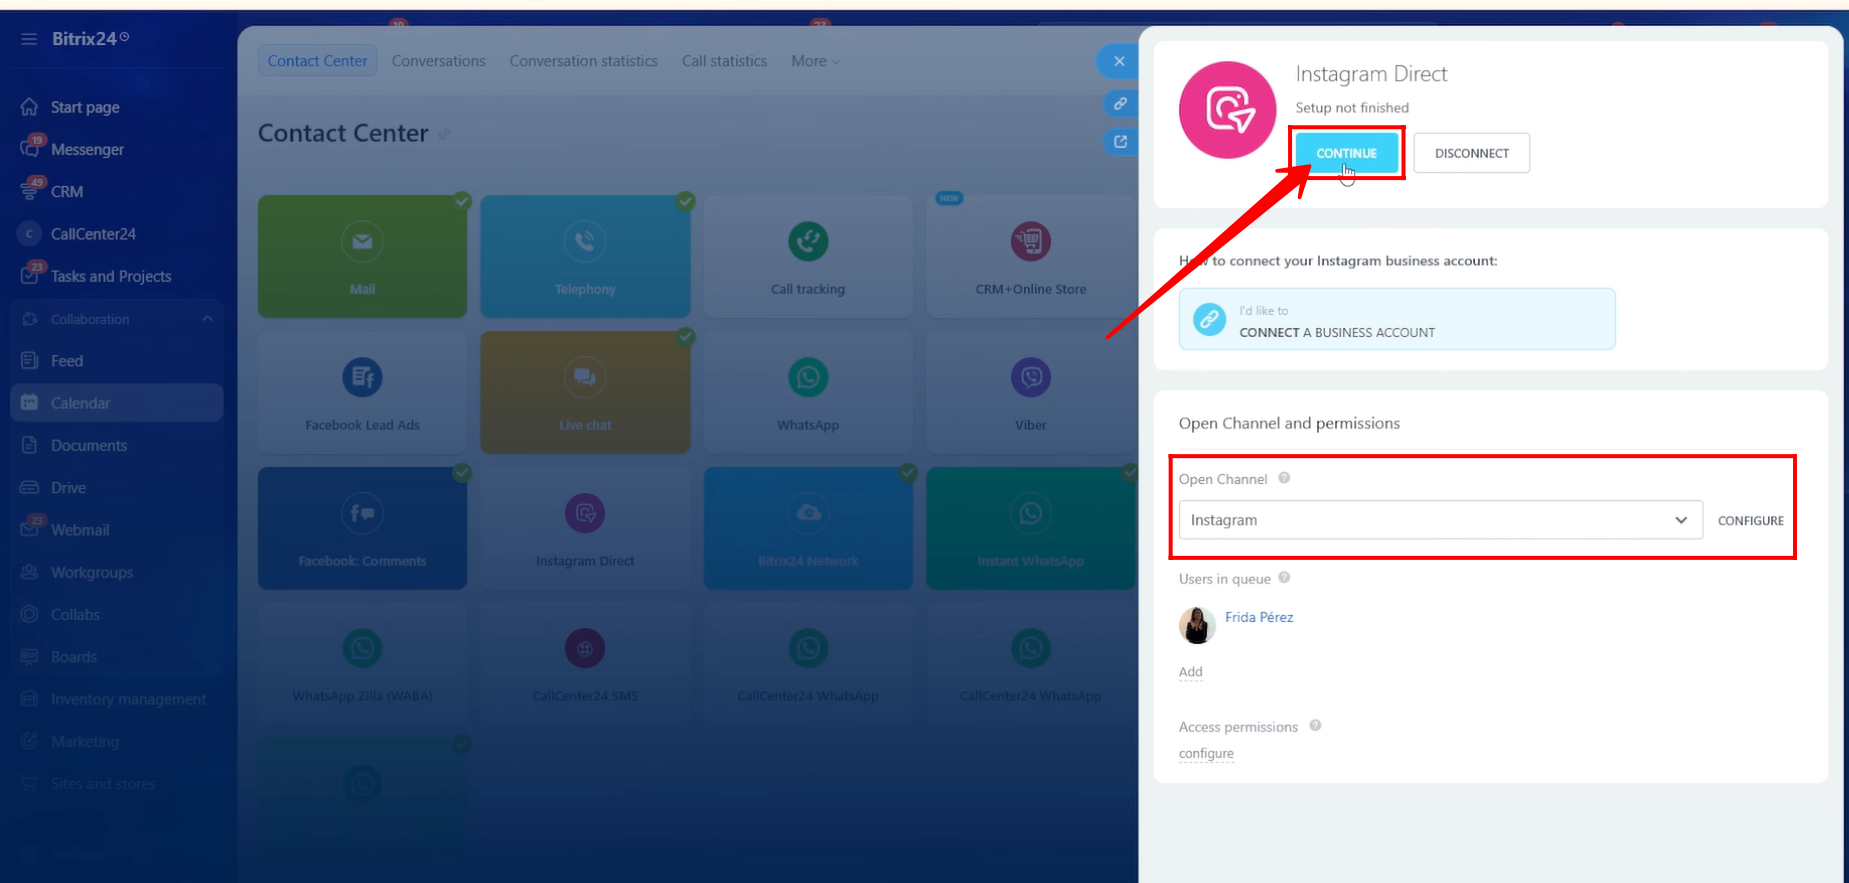
51. For this open line, we have already configured an open channel named “Instagram.”
52. Click Connect to proceed with linking your Instagram account.
53. Click “Log In” to sign in to your Instagram account.
54. Continue using your Instagram profile.
55. Select whether you want to connect All current and future Pages or Only selected Pages. In this case, we selected a specific page. Click Continue.
56. Next, choose whether to connect All current and future Businesses or Only selected Businesses. We selected a specific business and clicked Continue.
57. Then, choose whether to connect All current and future Instagram accounts or Only selected Instagram accounts. In this example, we selected a specific account. Click Continue.
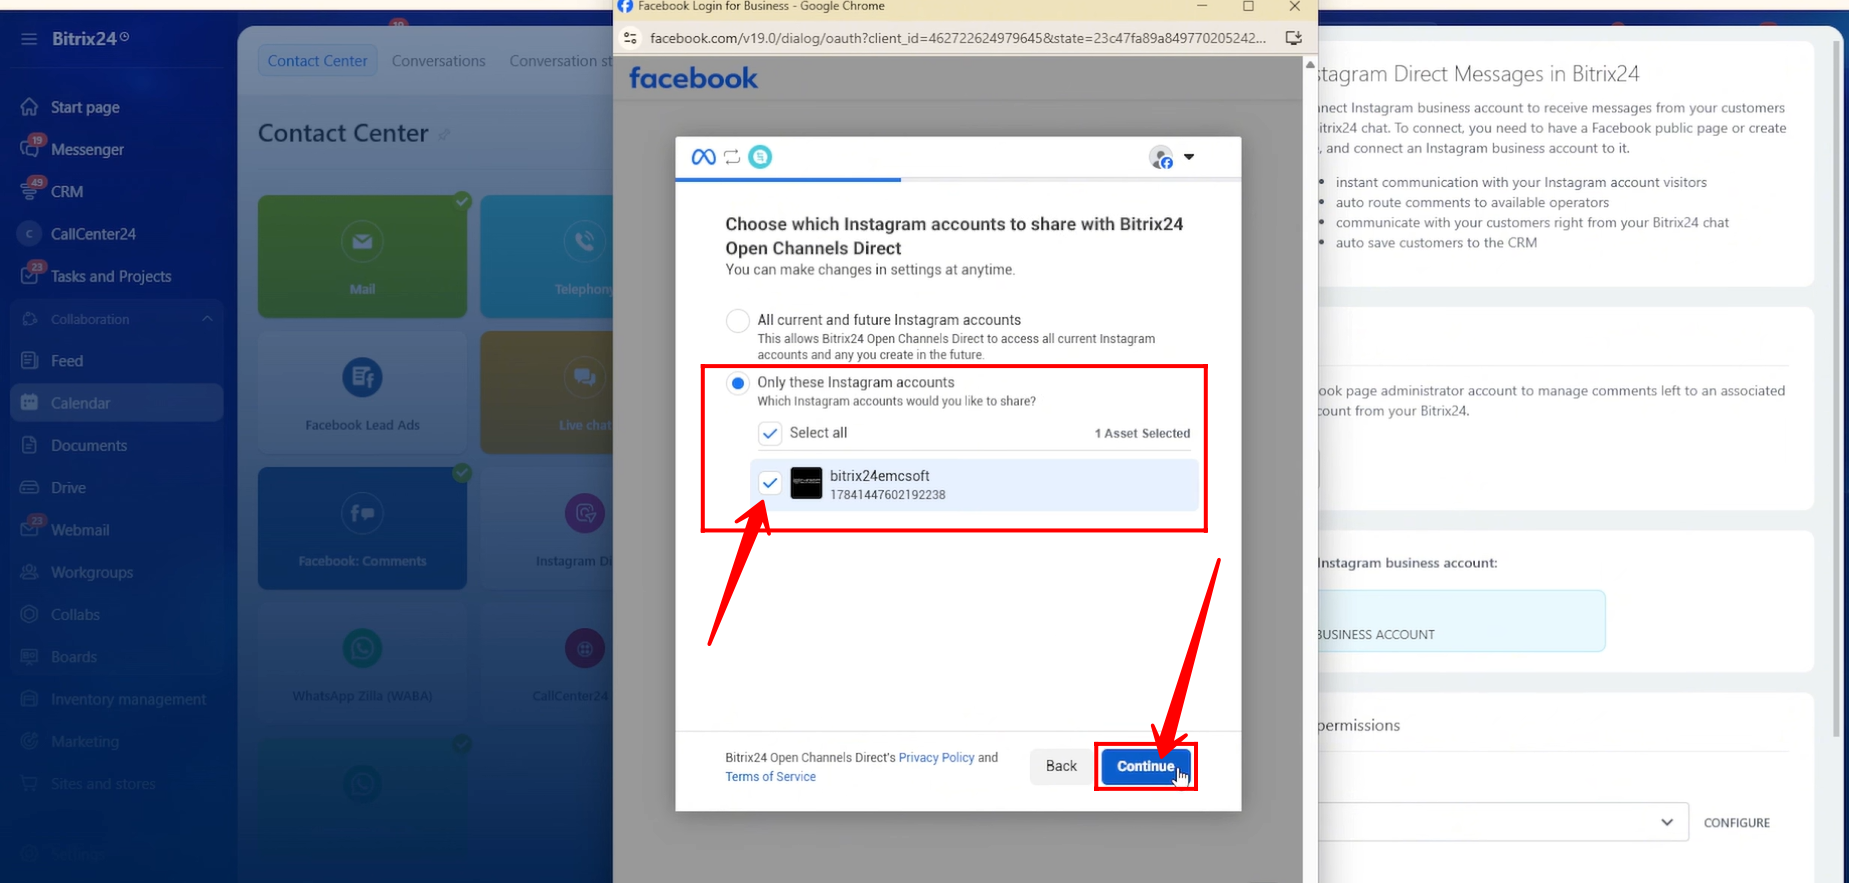
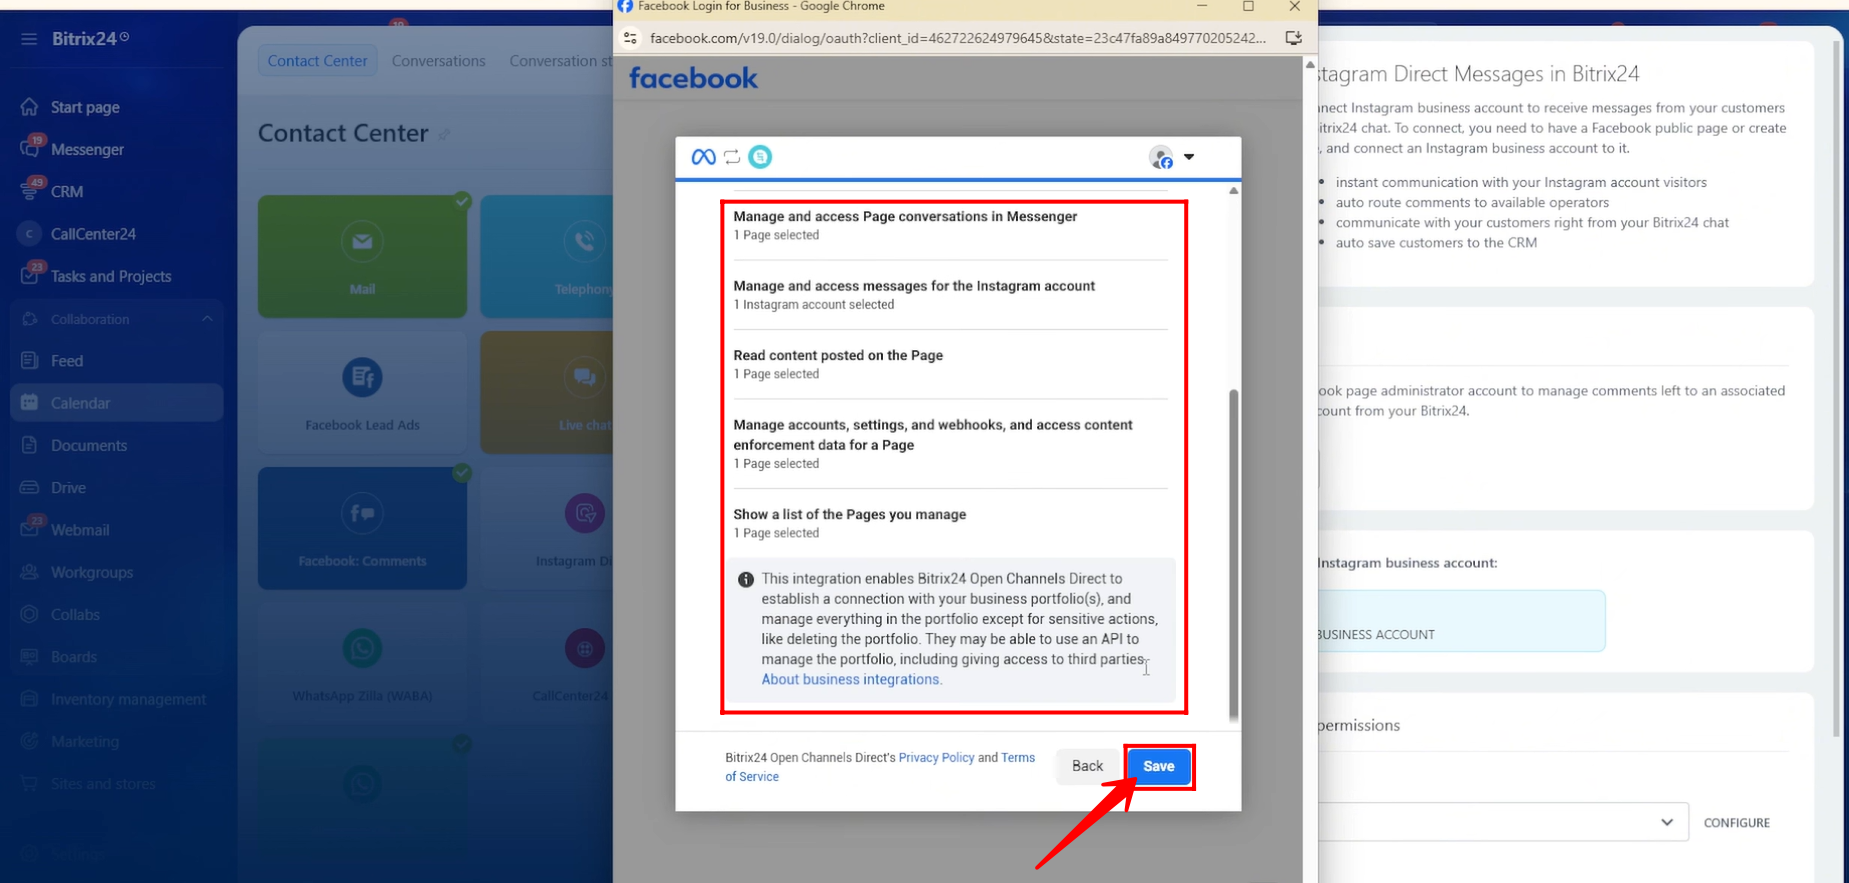
58. Review all the permissions that will be granted to the selected entities, and click Save.
59. For this setup, we are leaving the option unchecked for connecting comments from posts and broadcasts, as we only want to receive direct messages from Instagram.
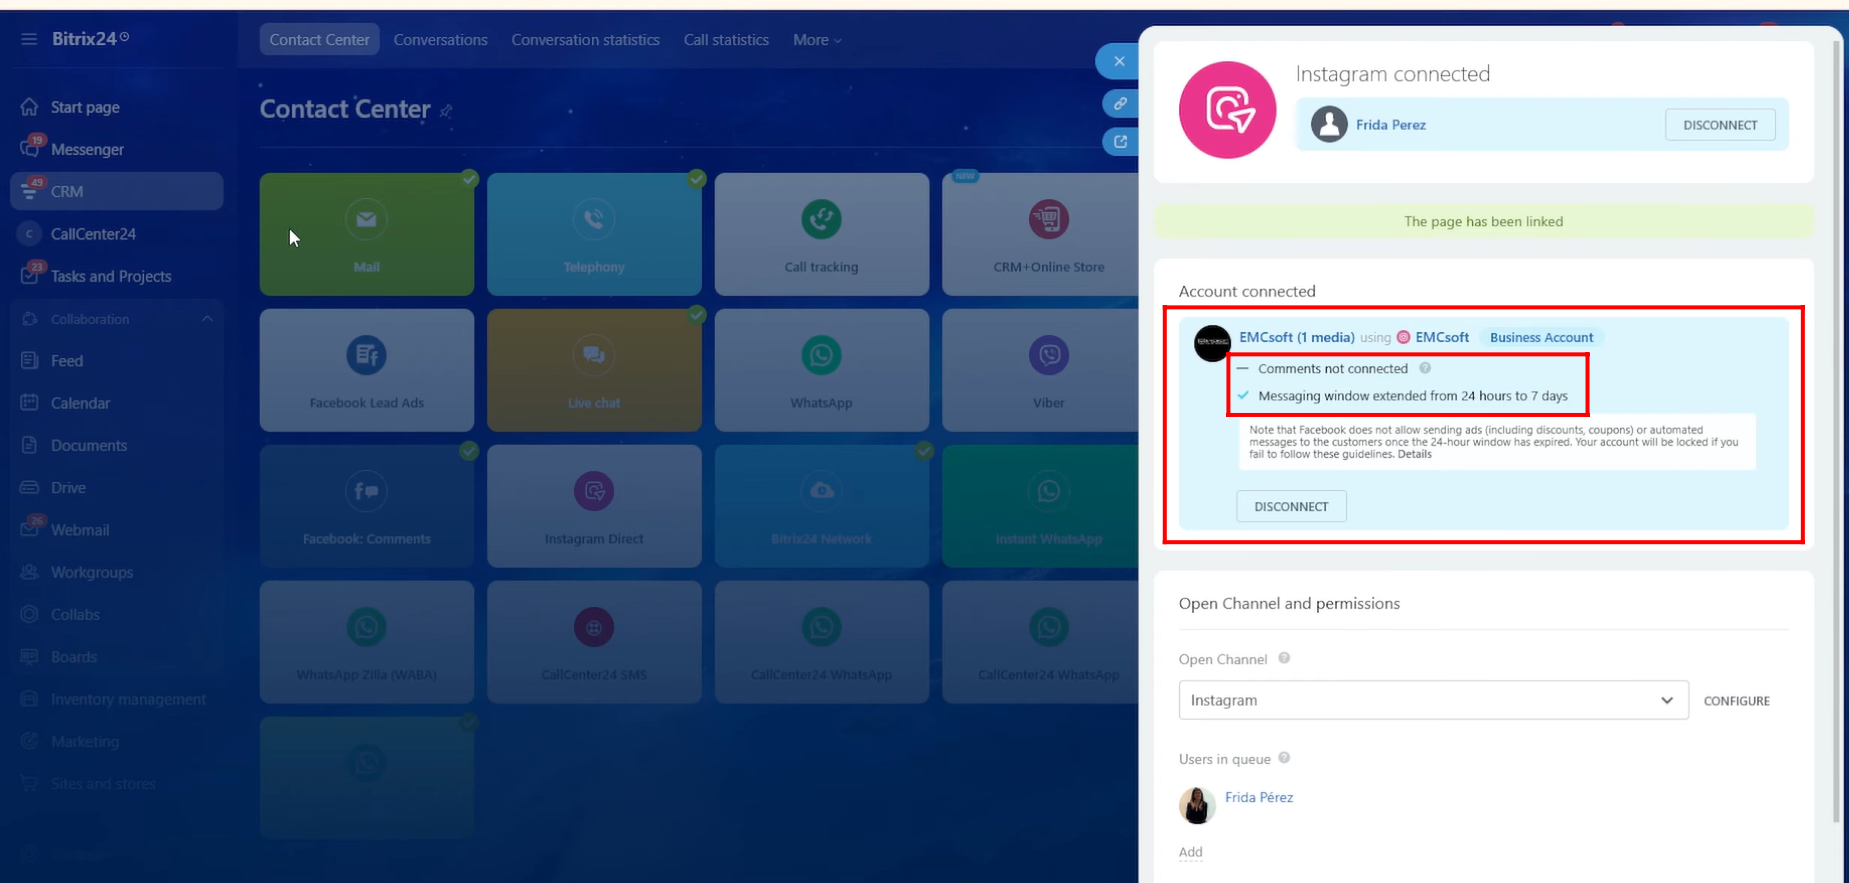
We have enabled the option to extend the messaging window from 24 hours to 7 days. This ensures that if the client messages after the standard time limit, the conversation continues instead of creating a new chat.
After configuring these options, click Connect.

60. As you can see, the Instagram account has now been successfully connected to the selected open line.
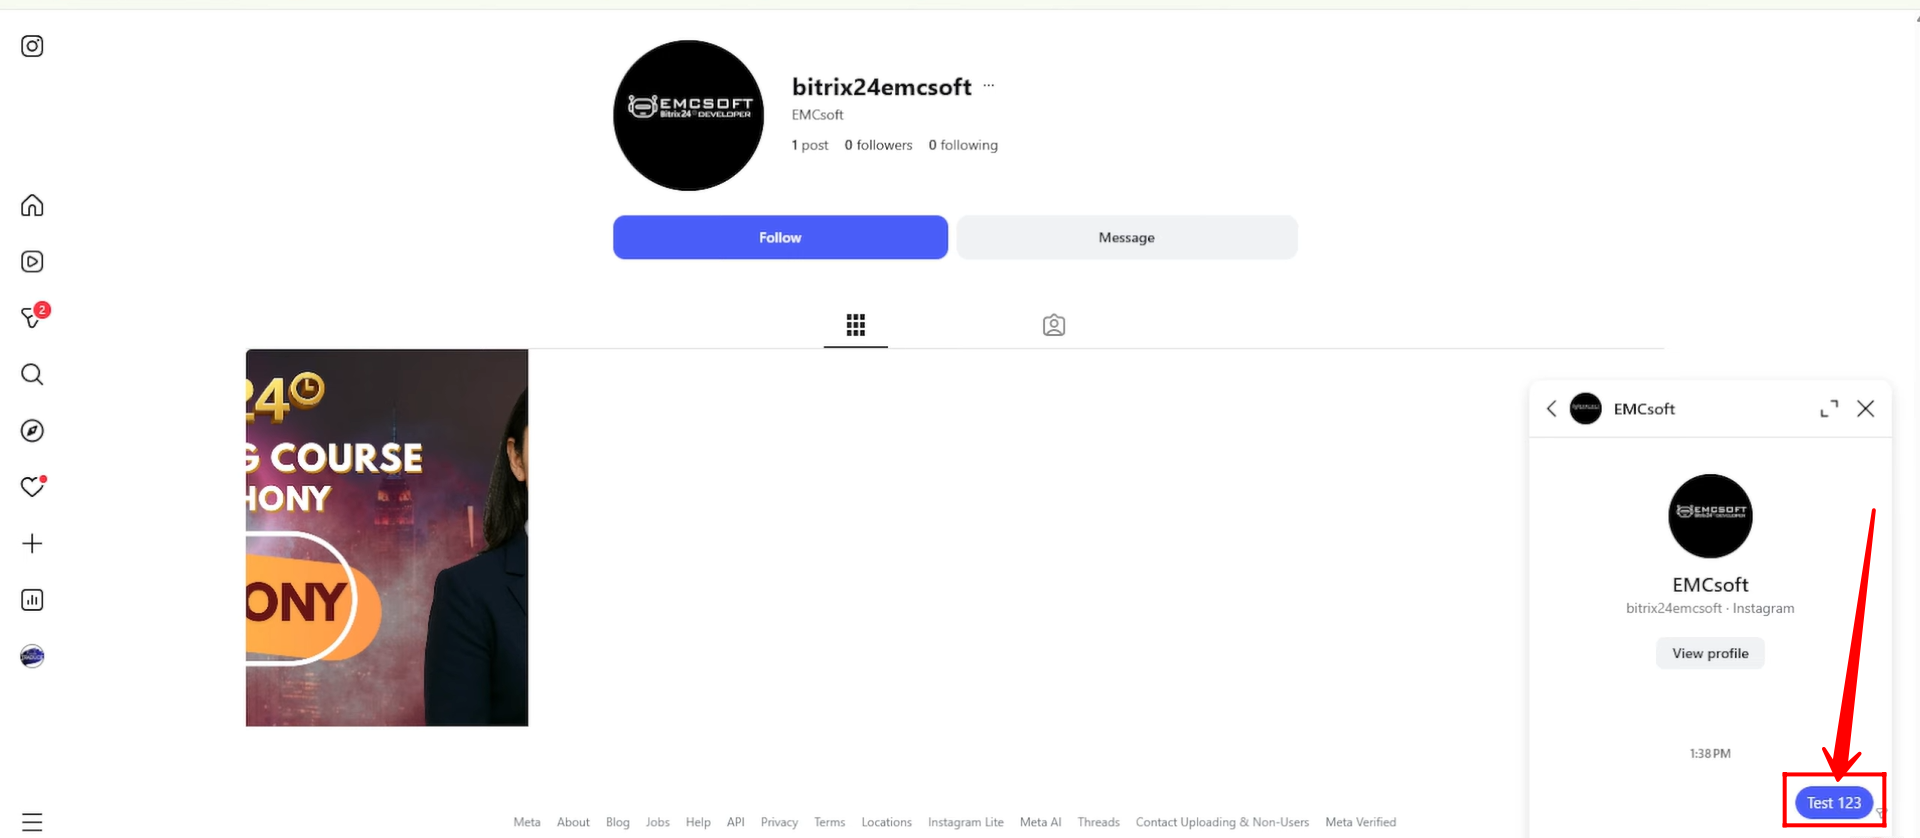
61. For testing purposes, we sent a message from another Instagram account to the connected page.
62. A Contact Center chat notification was received in Bitrix24 for the incoming Instagram message.
63. We replied to the message from Bitrix24. The chat is named “Customer’s Instagram Profile Name – Instagram” to indicate the source.
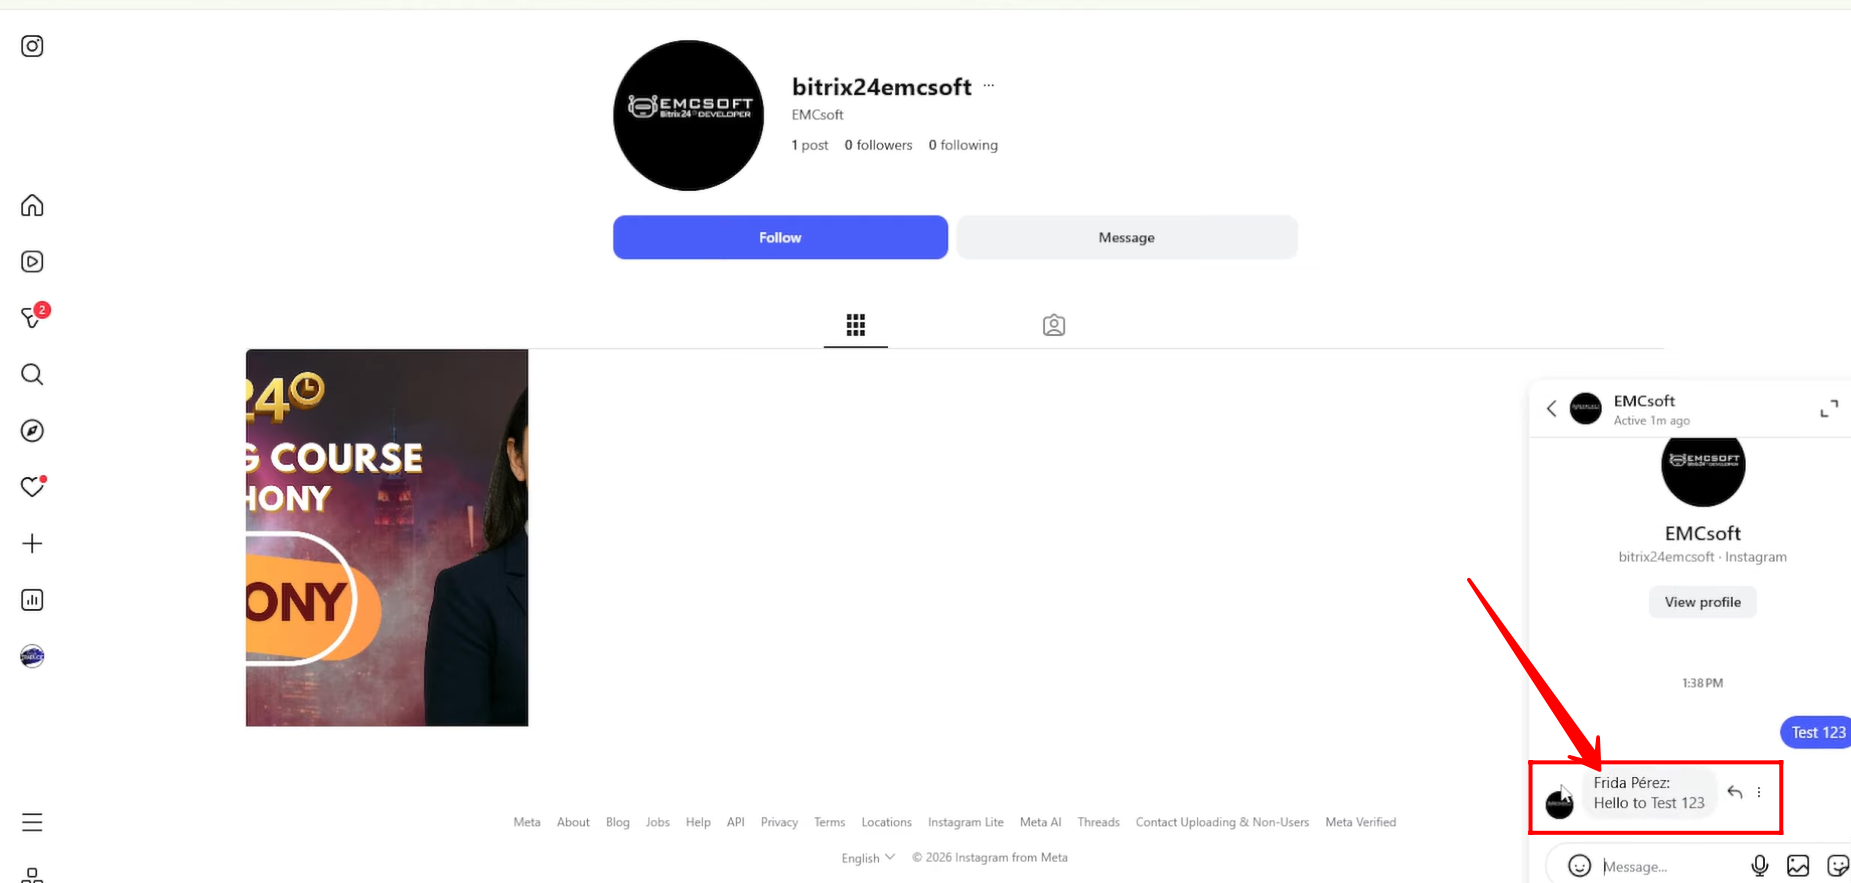
64. The reply sent from Bitrix24 was successfully received in the customer’s Instagram Messenger.
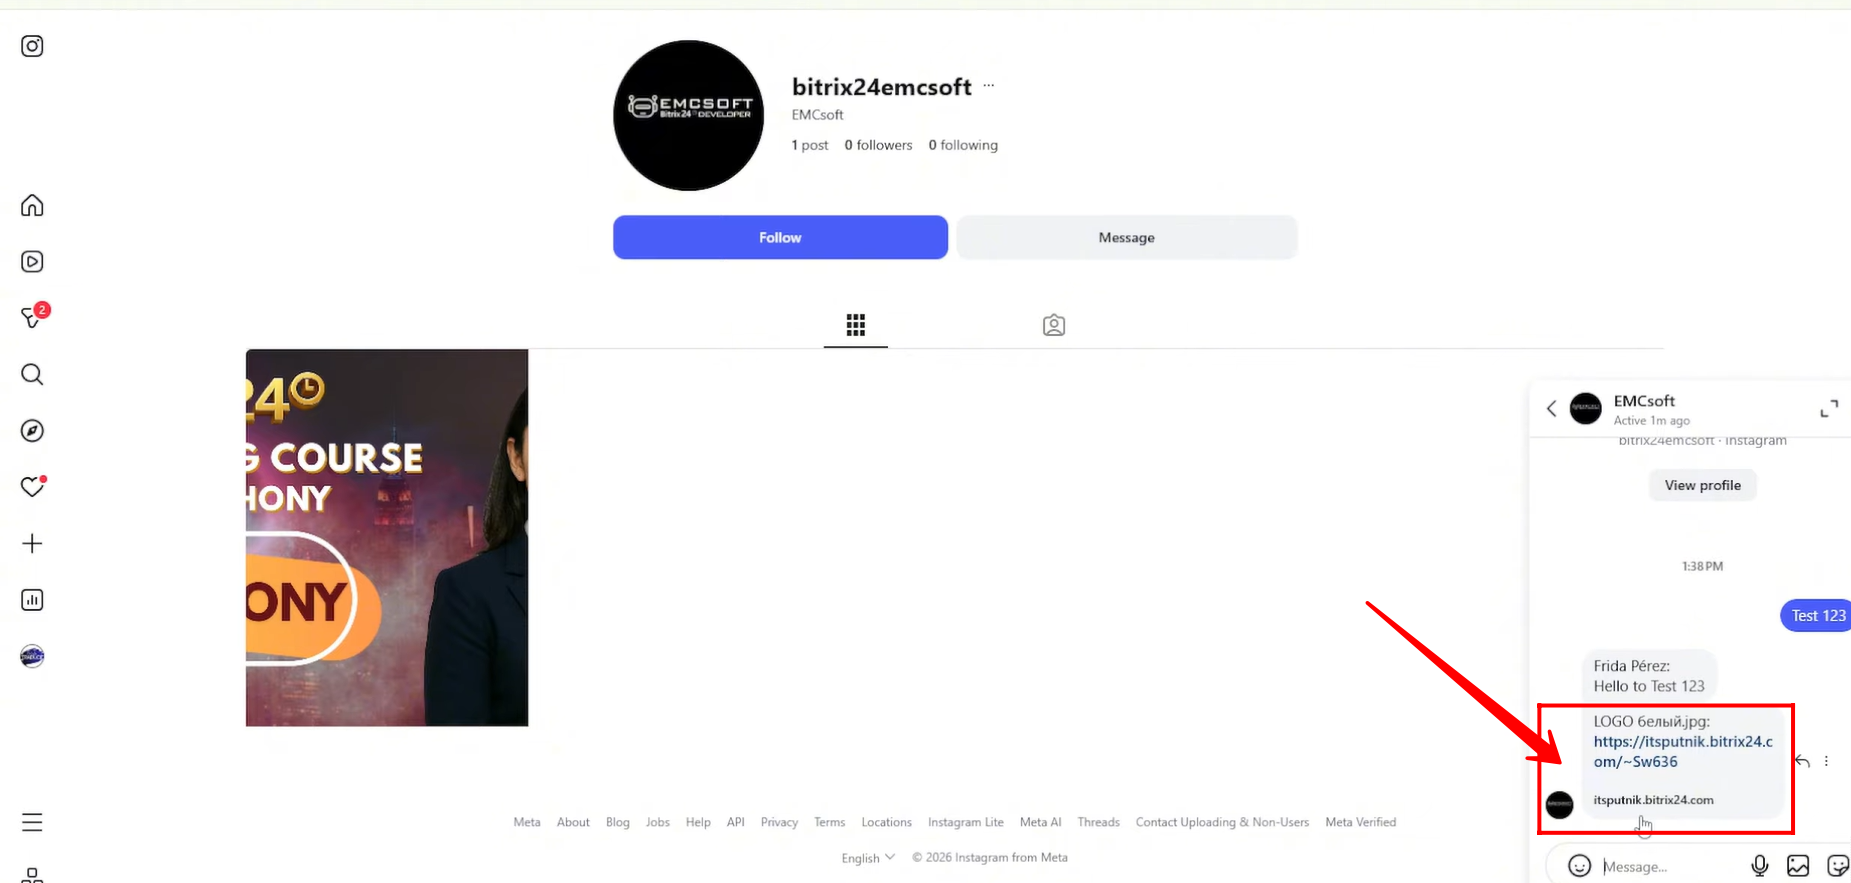
65. You can also send images through the Instagram open line chat to the customer.
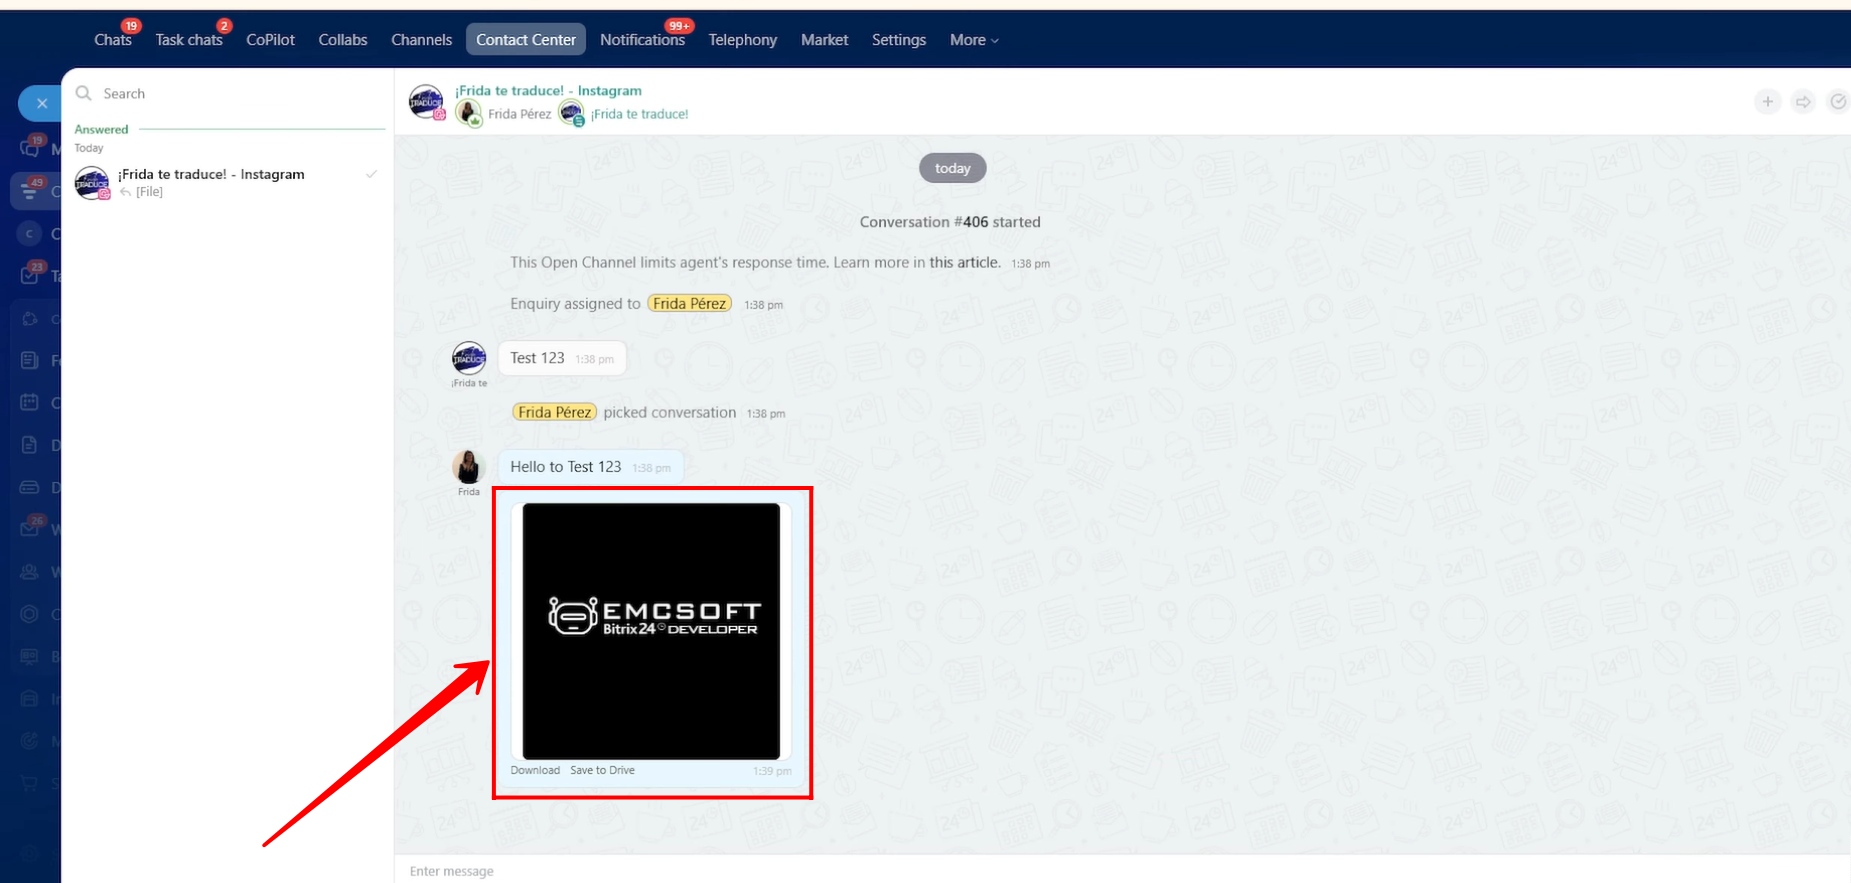
66. The customer will receive the image as a link, and by opening the link, they will be able to view the image.
“You can also watch video on Youtube”