| 7 Views | admin
Callback Forms in Bitrix24 allow website visitors or customers to request a phone call directly from your team. When a callback form is submitted, Bitrix24 can automatically notify the responsible employee and open a calling window, allowing the employee to contact the customer without manually searching for their information.
This feature helps ensure that callback requests are handled quickly and that all submitted information is automatically recorded in the CRM. Depending on the form configuration, Bitrix24 can also create a new Lead, Contact, or other CRM record when a callback request is received.
In this guide, we will walk through the complete process of creating and configuring a Callback Form in Bitrix24. You will learn how to enable callback functionality, select the outgoing phone number, configure form fields, test the form, and understand what happens when a customer submits a callback request.
By the end of this article, you will have a fully functional Callback Form that can automatically notify your team, initiate outgoing calls, and store customer information in your CRM for future follow-up.
“Detailed Instructions are given below”
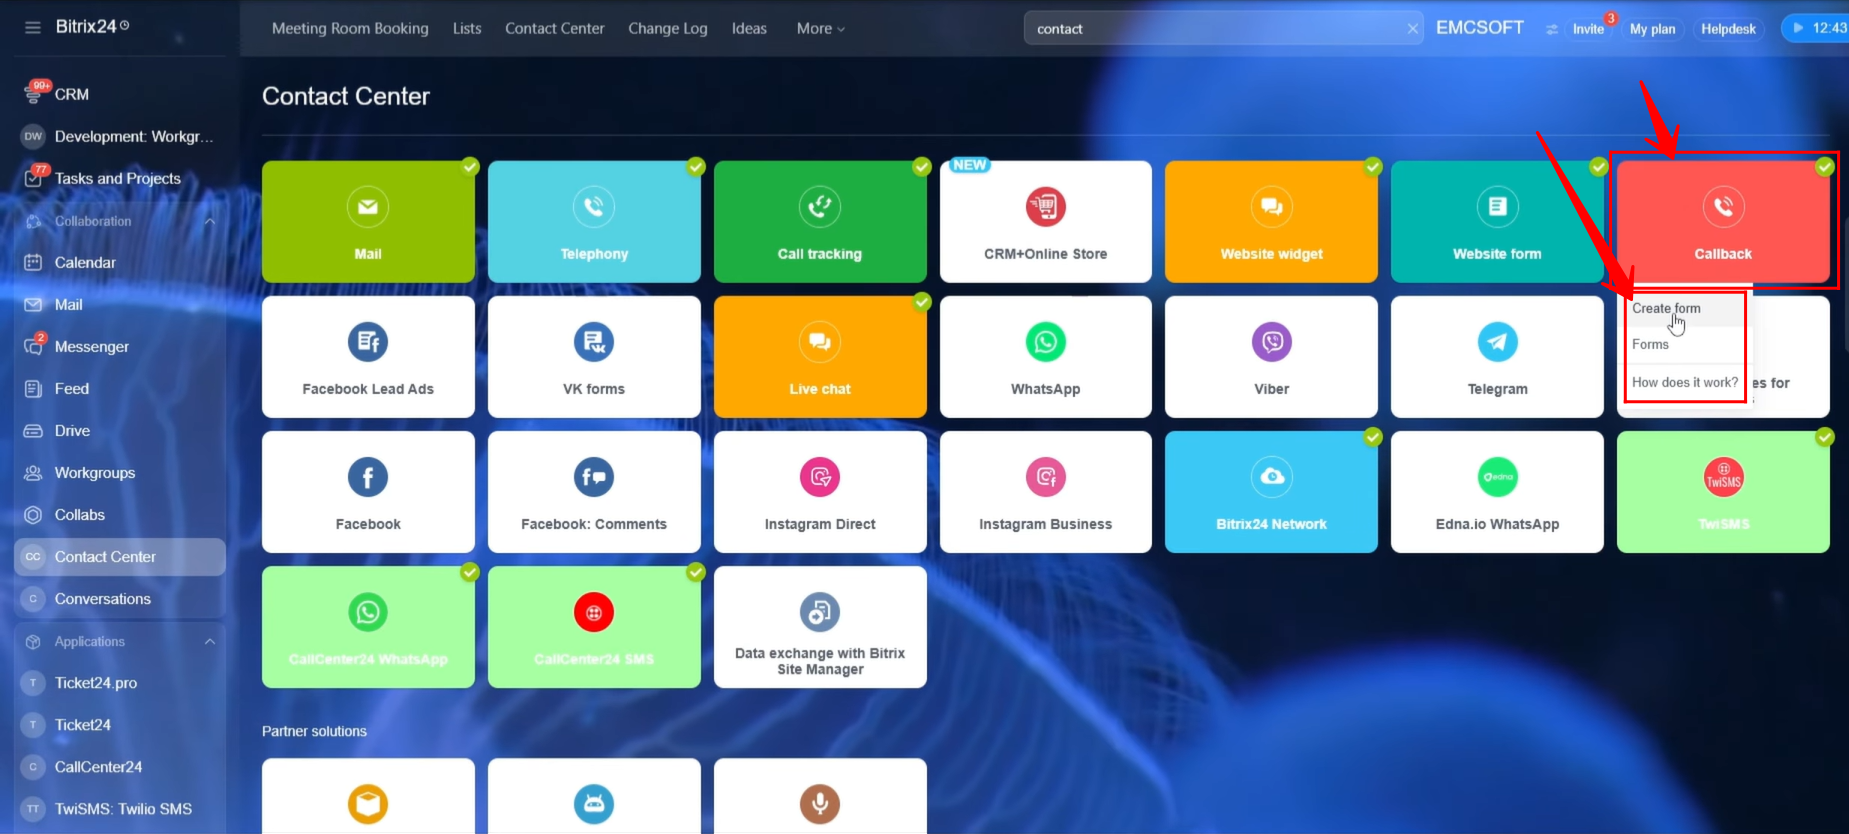
1. Navigate to Contact Center from the left-side menu in Bitrix24, or use the search bar to locate it. Open the Callback open channel, where you will have the option to either create a new callback form or manage existing callback forms.
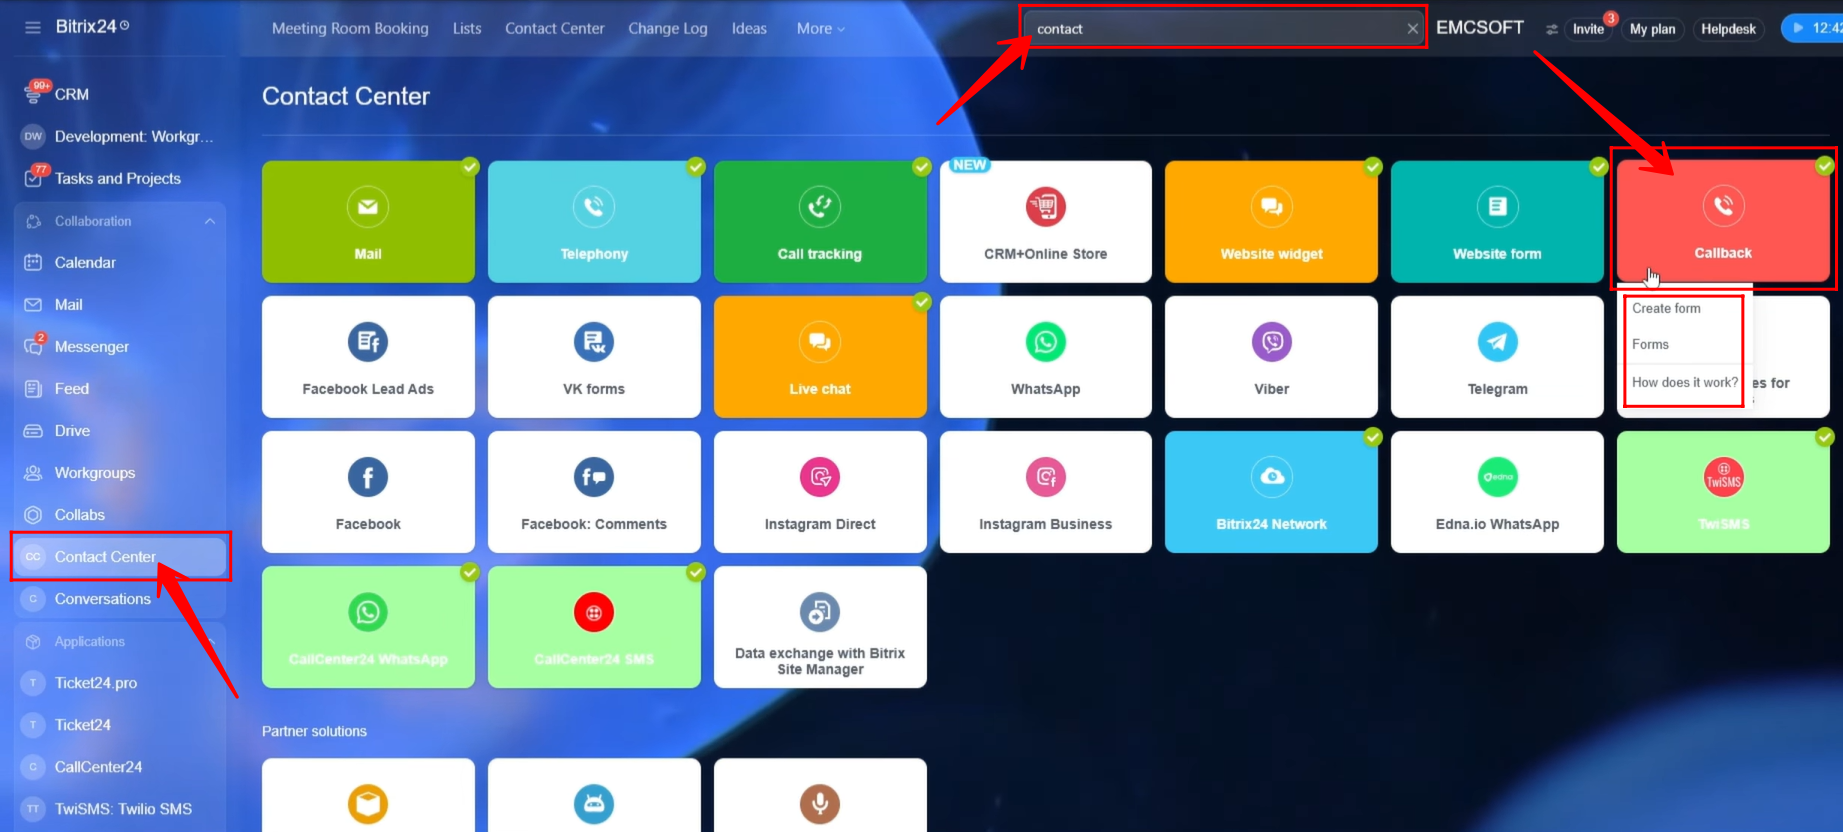
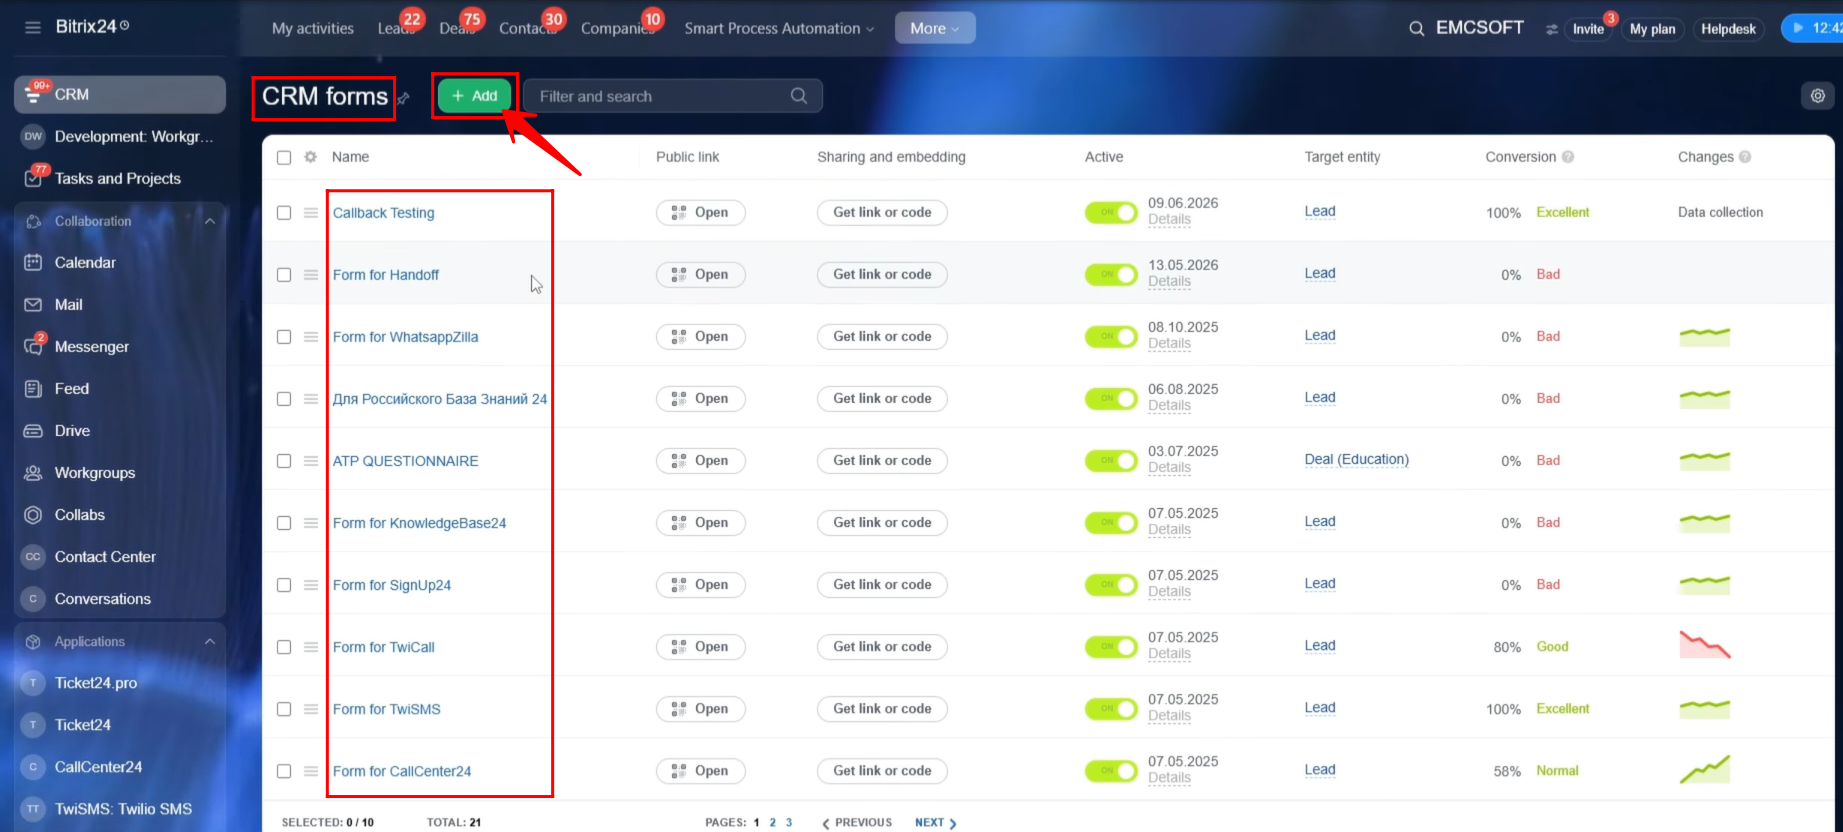
2. Alternatively, navigate to CRM Forms within Bitrix24 to view all existing forms. To create a new callback form from scratch, click “+ Create.”
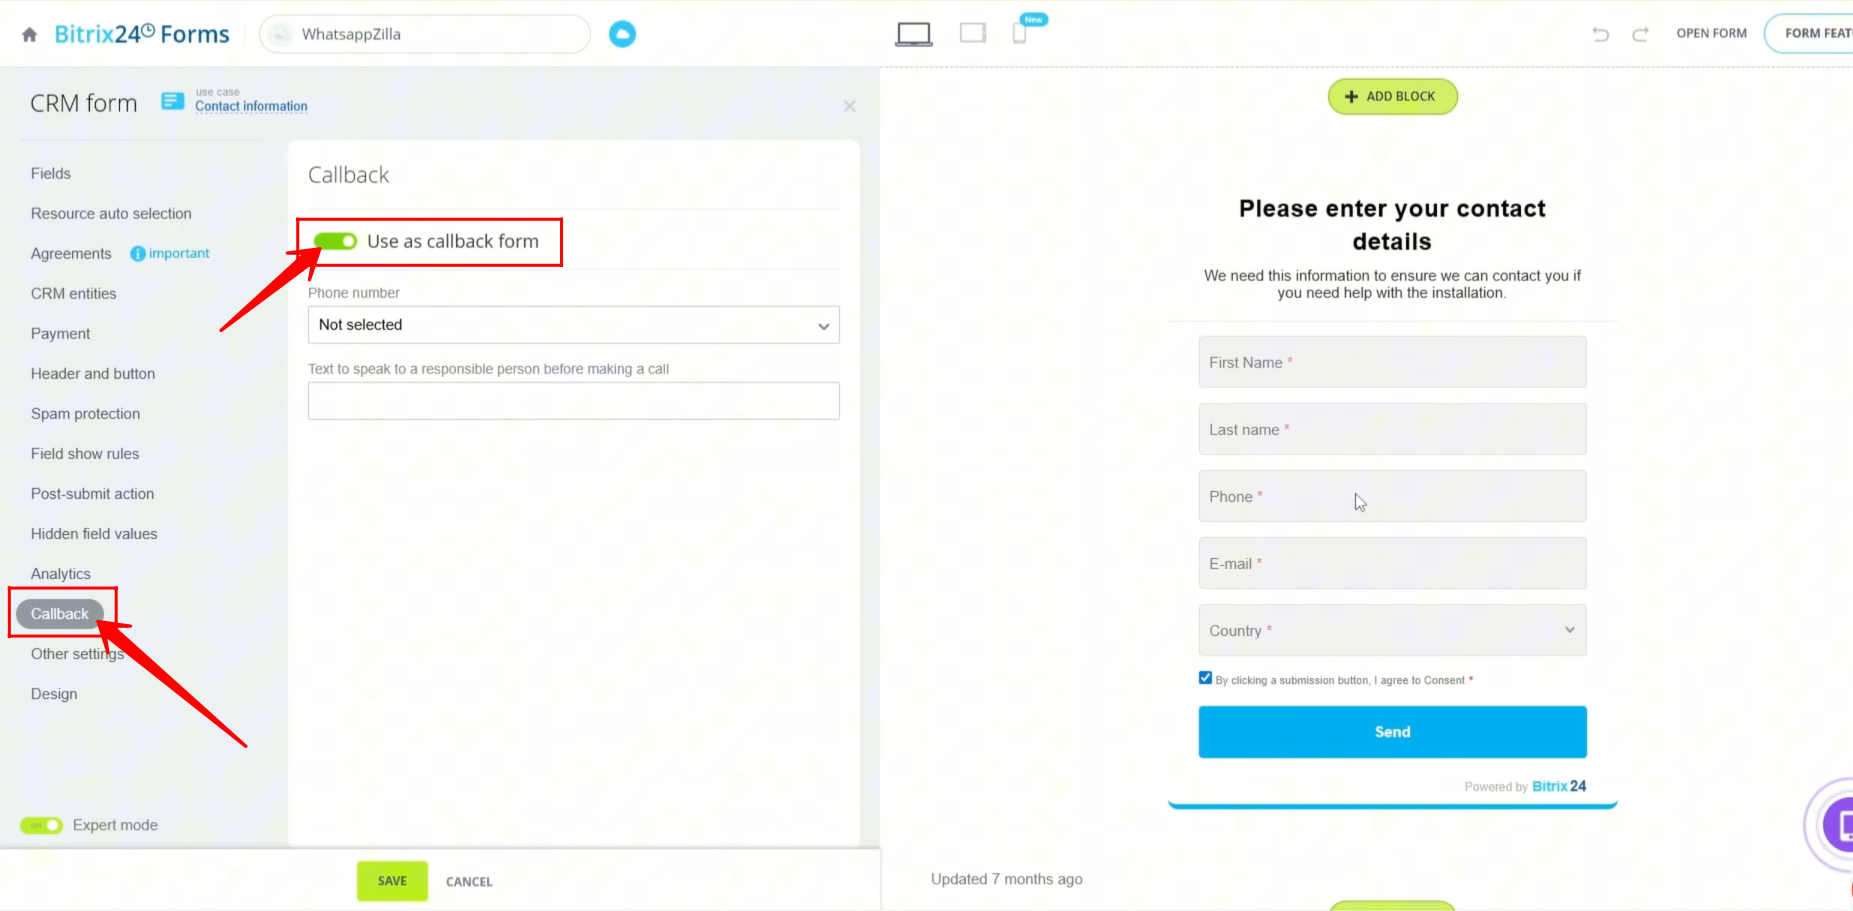
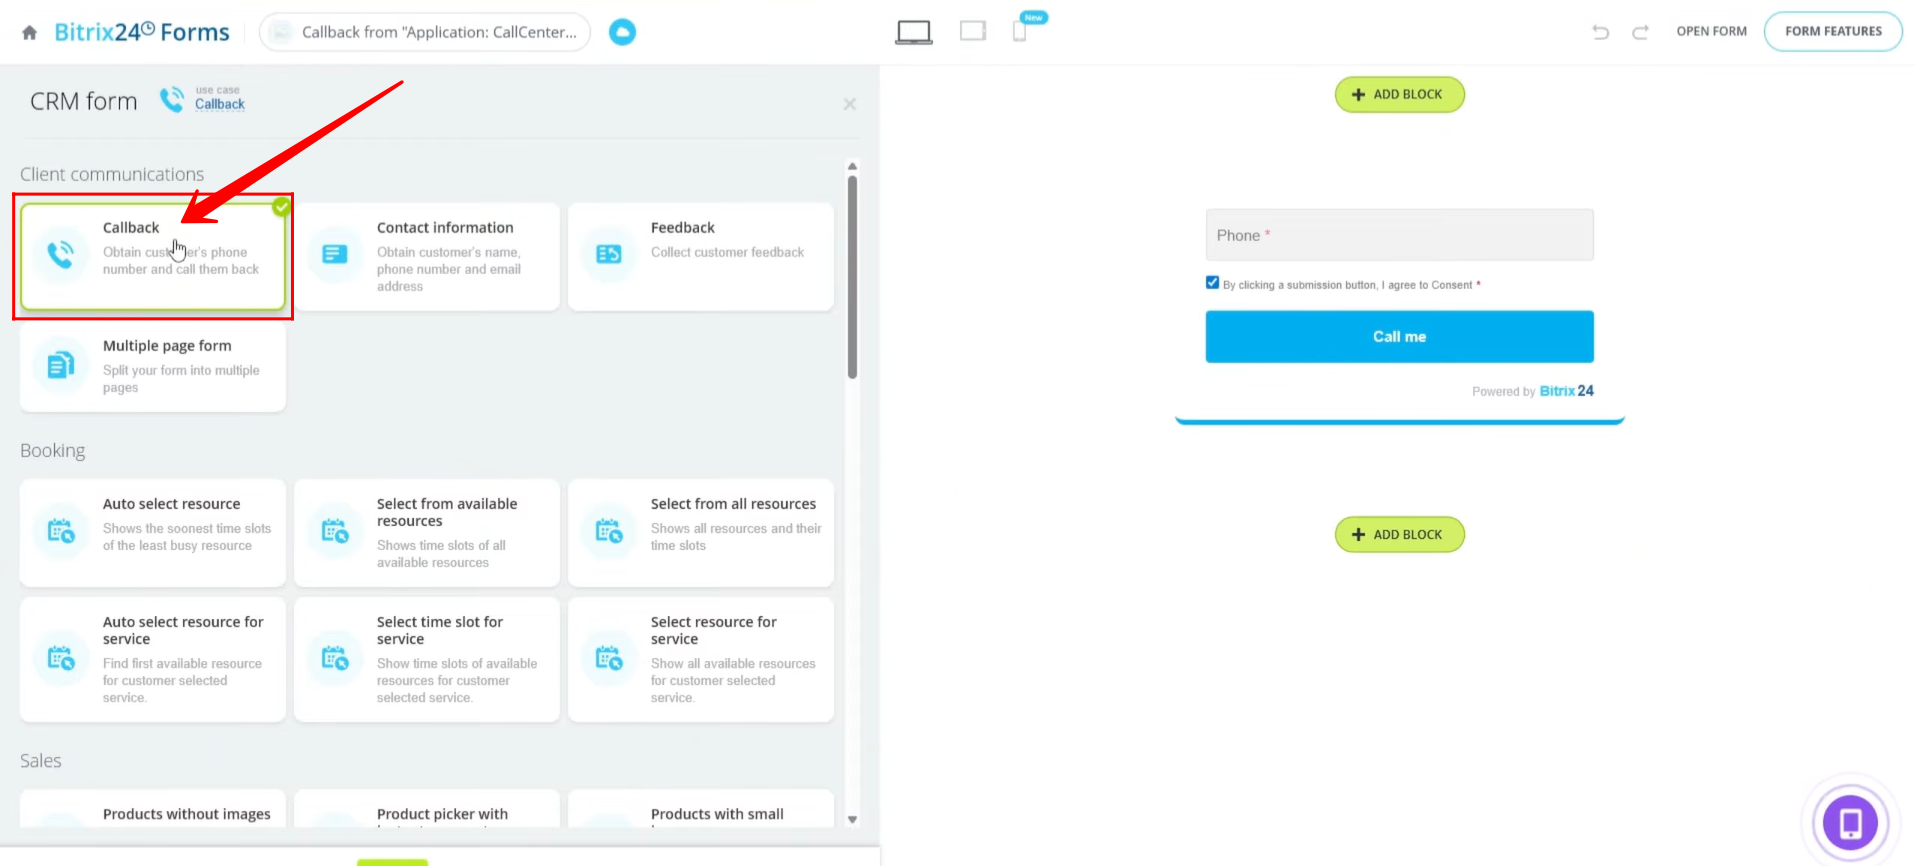
3. Within the form settings, enable Expert Mode. This option provides access to advanced form settings, including the ability to configure the form as a callback form.

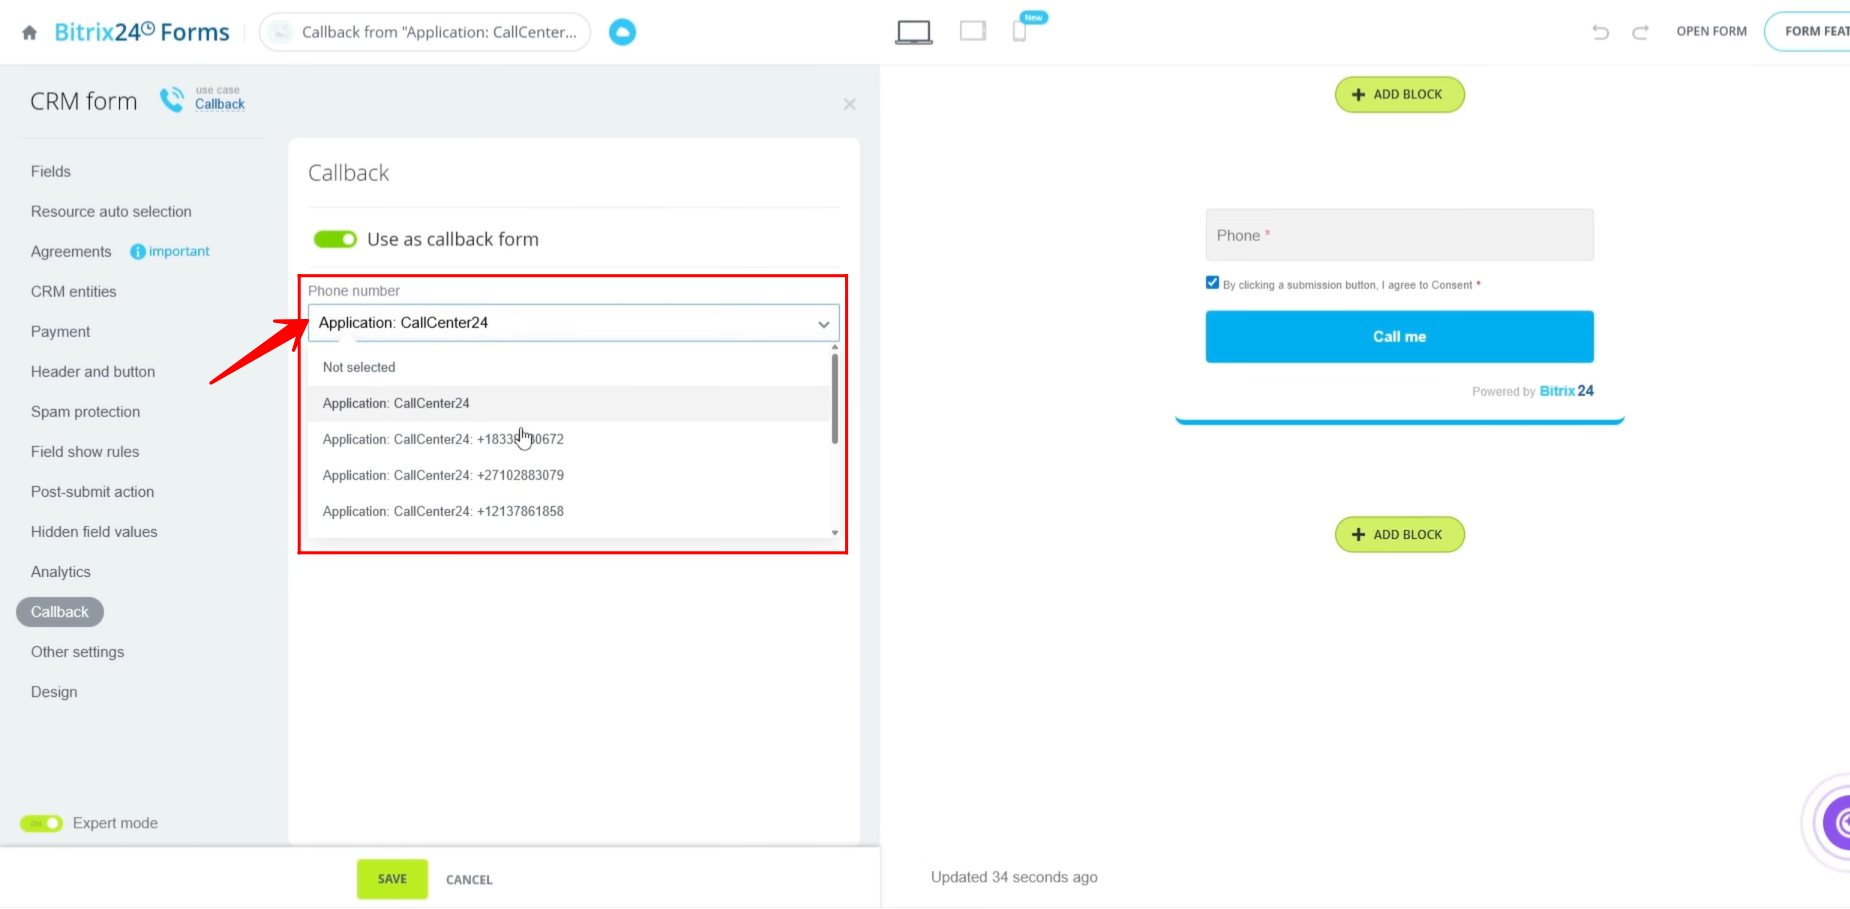
4. Navigate to the Callback tab and enable the “Use as Callback Form” toggle. This setting converts the CRM form into a callback request form.
5. If you are creating the form directly from the Contact Center’s Callback section, click “Create Form” to begin the setup process.
6. When prompted to choose a form type, select “Callback.”
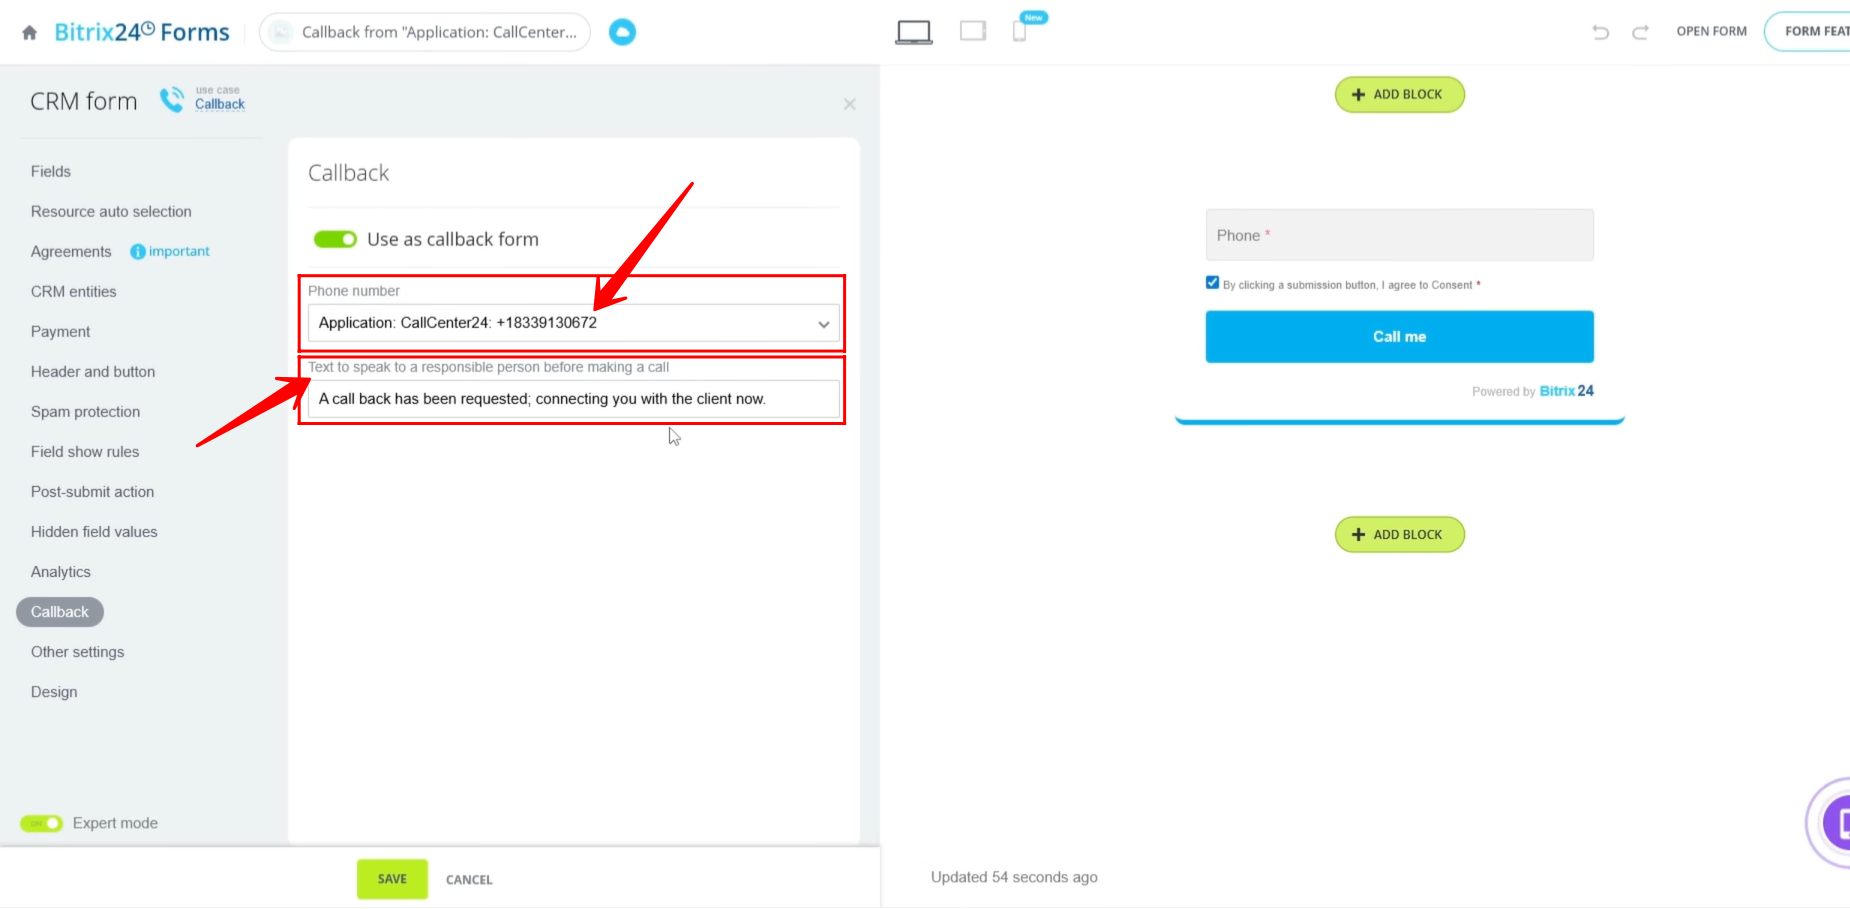
7. The “Use as Callback Form” option will already be enabled by default. Select the specific phone number or telephony application that should trigger an outgoing call notification when the form is submitted.
When a visitor submits the callback form, the selected phone number or application will automatically open a calling window for the responsible agent.
8. You can also enter a custom text message that will be converted into an audio message. This audio notification will be played to the responsible employee before the calling window appears, providing information about the incoming callback request.
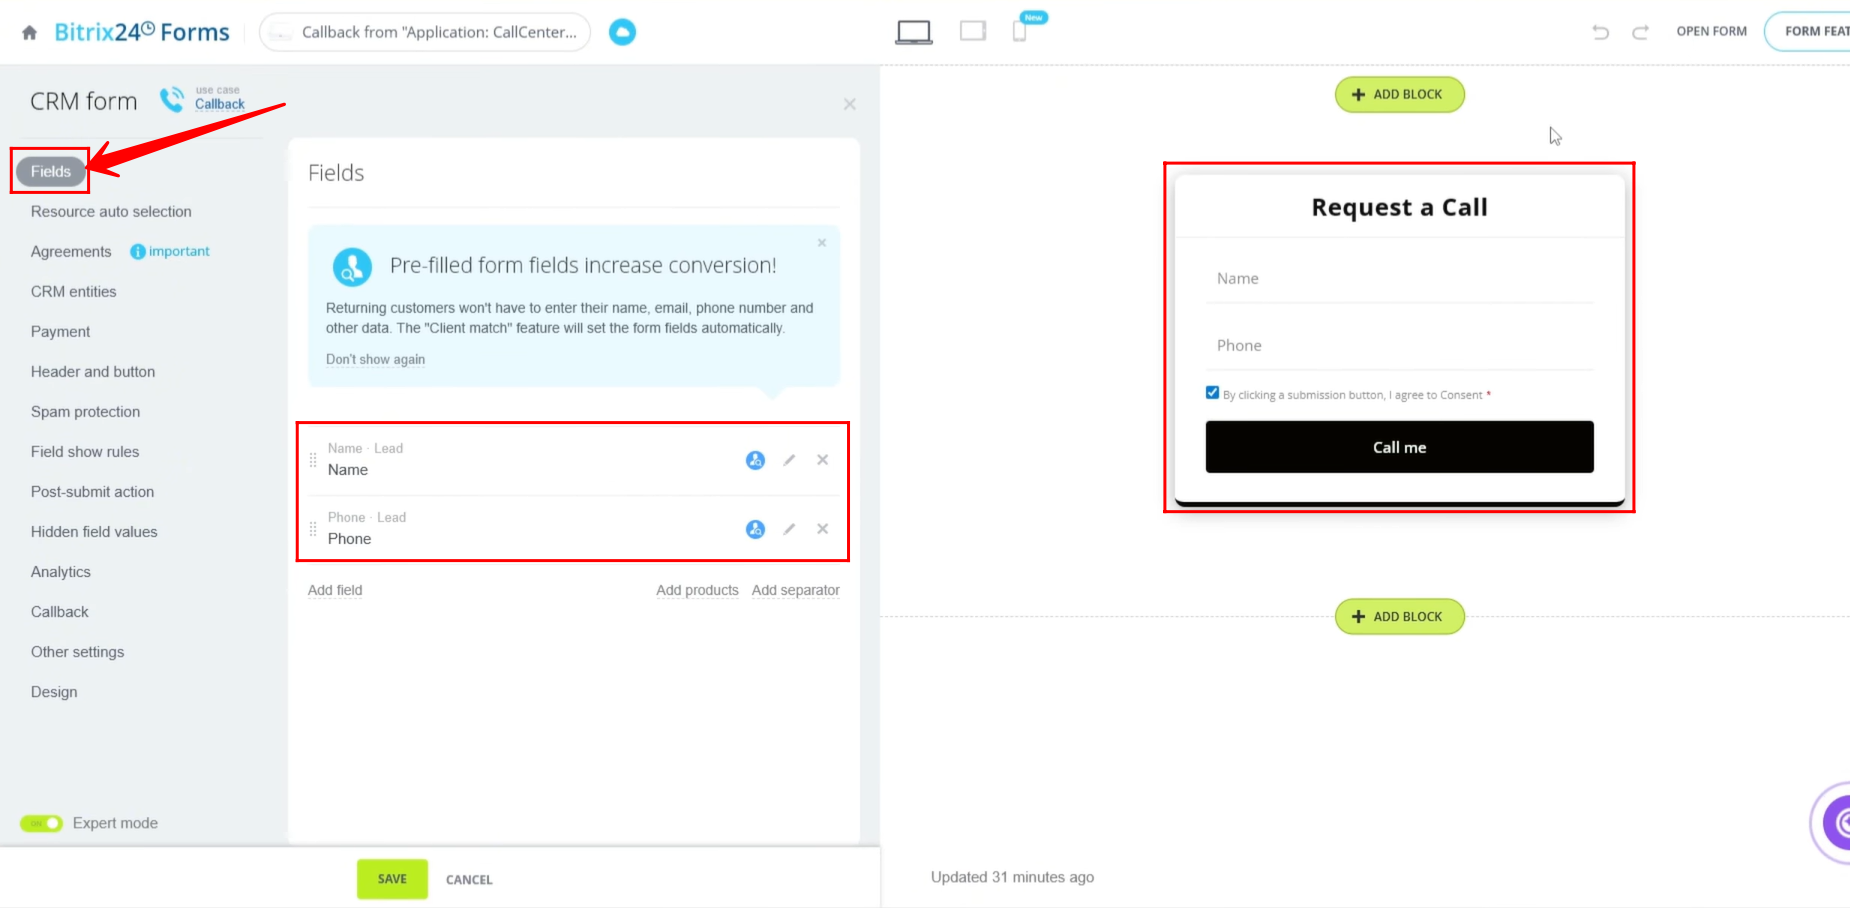
9. Navigate to the Fields tab to configure the information that should be collected during form submission.
We have already explained CRM Form configuration in detail here:
Bitrix24 Training Course 9. CRM Forms: Fields and CRM entities
For this example, we configured only the Name and Phone Number fields from the Lead entity to be submitted through the callback form.
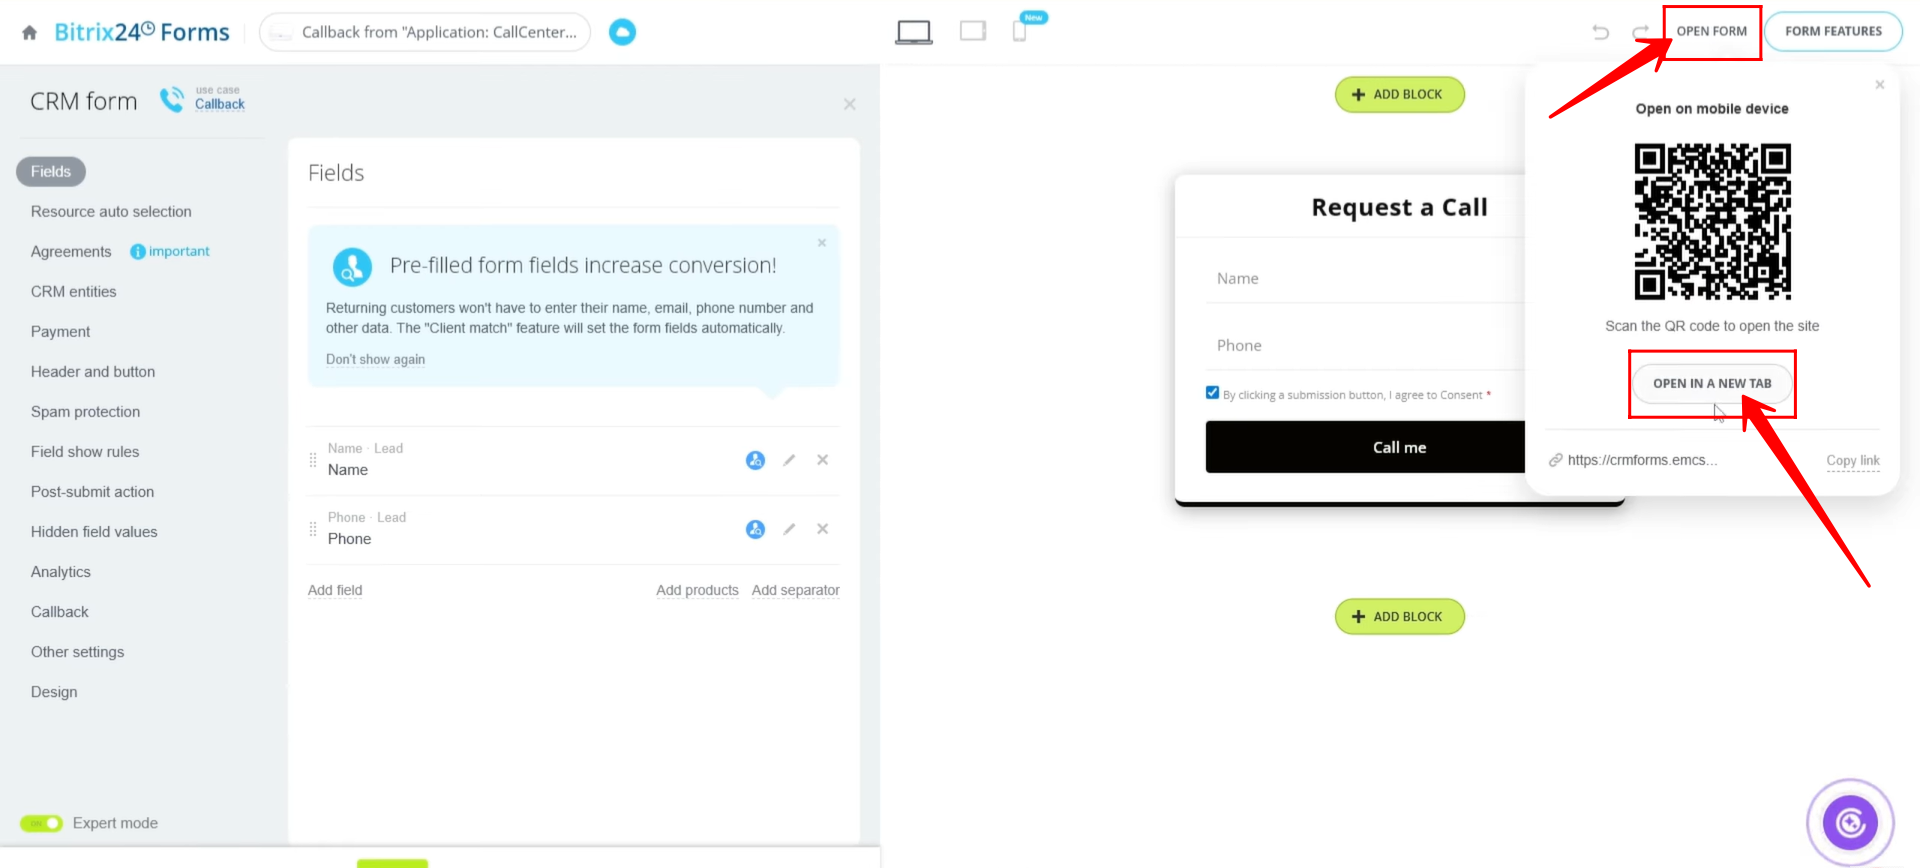
10. To test the callback form, click “Open Form” and then select “Open in New Tab.” This will open the form in a separate browser tab.
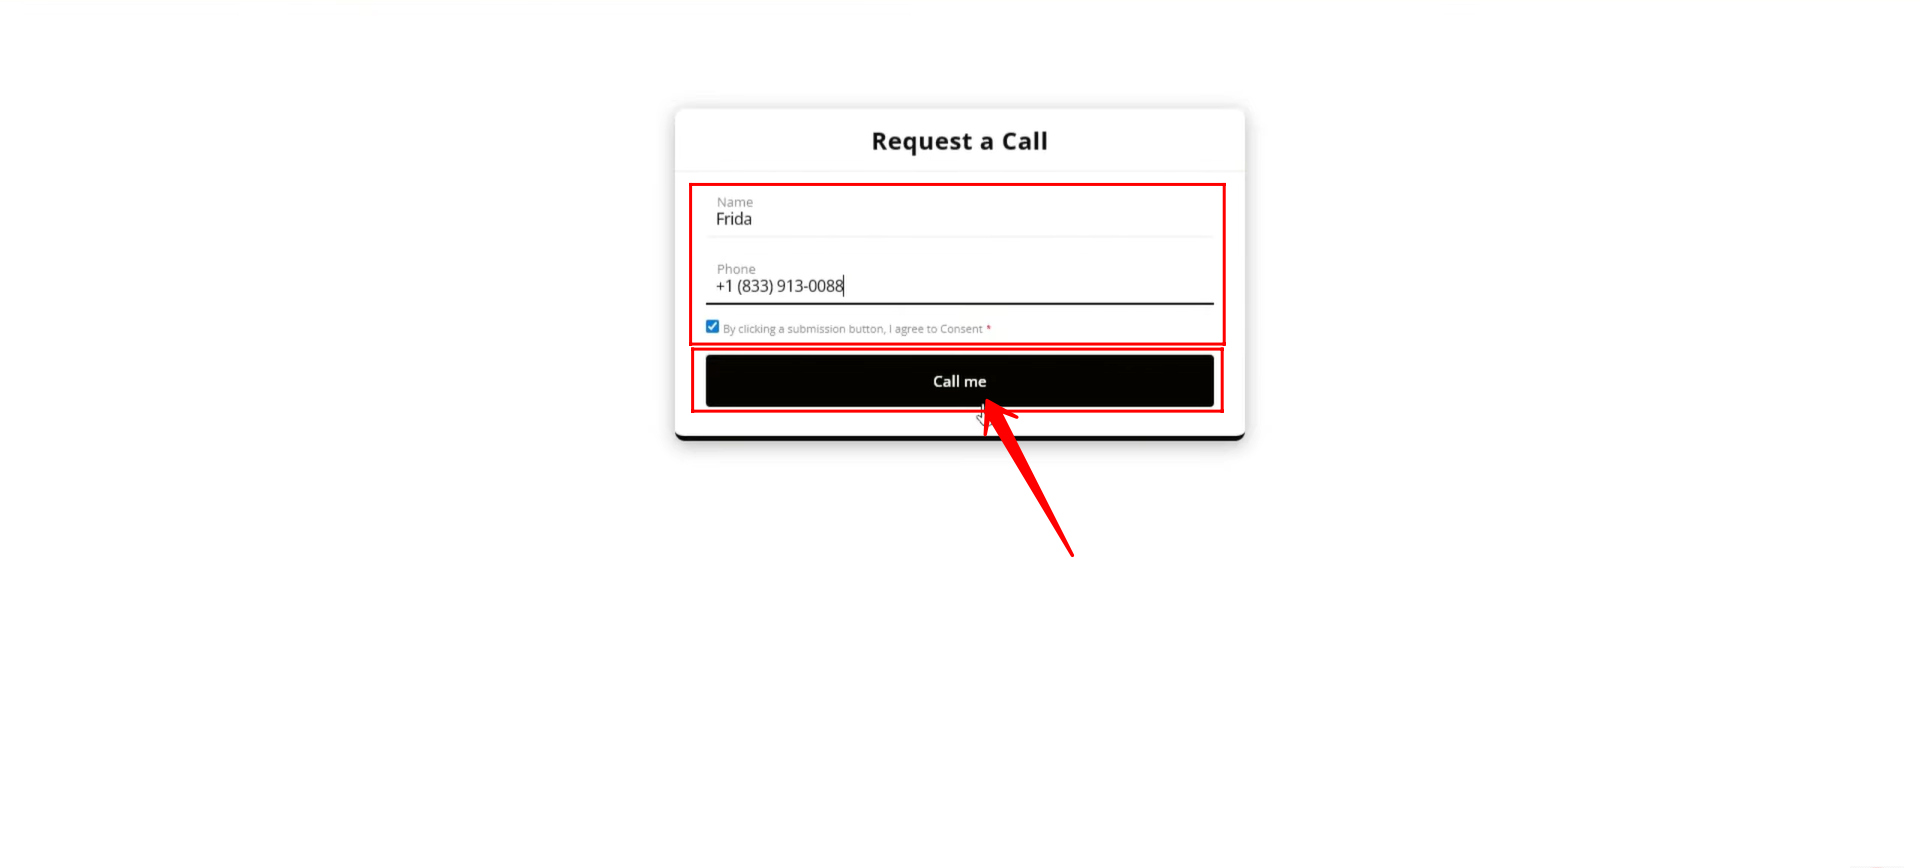
11. In the form, enter a Name and Phone Number where the callback should be received, and then submit the form.
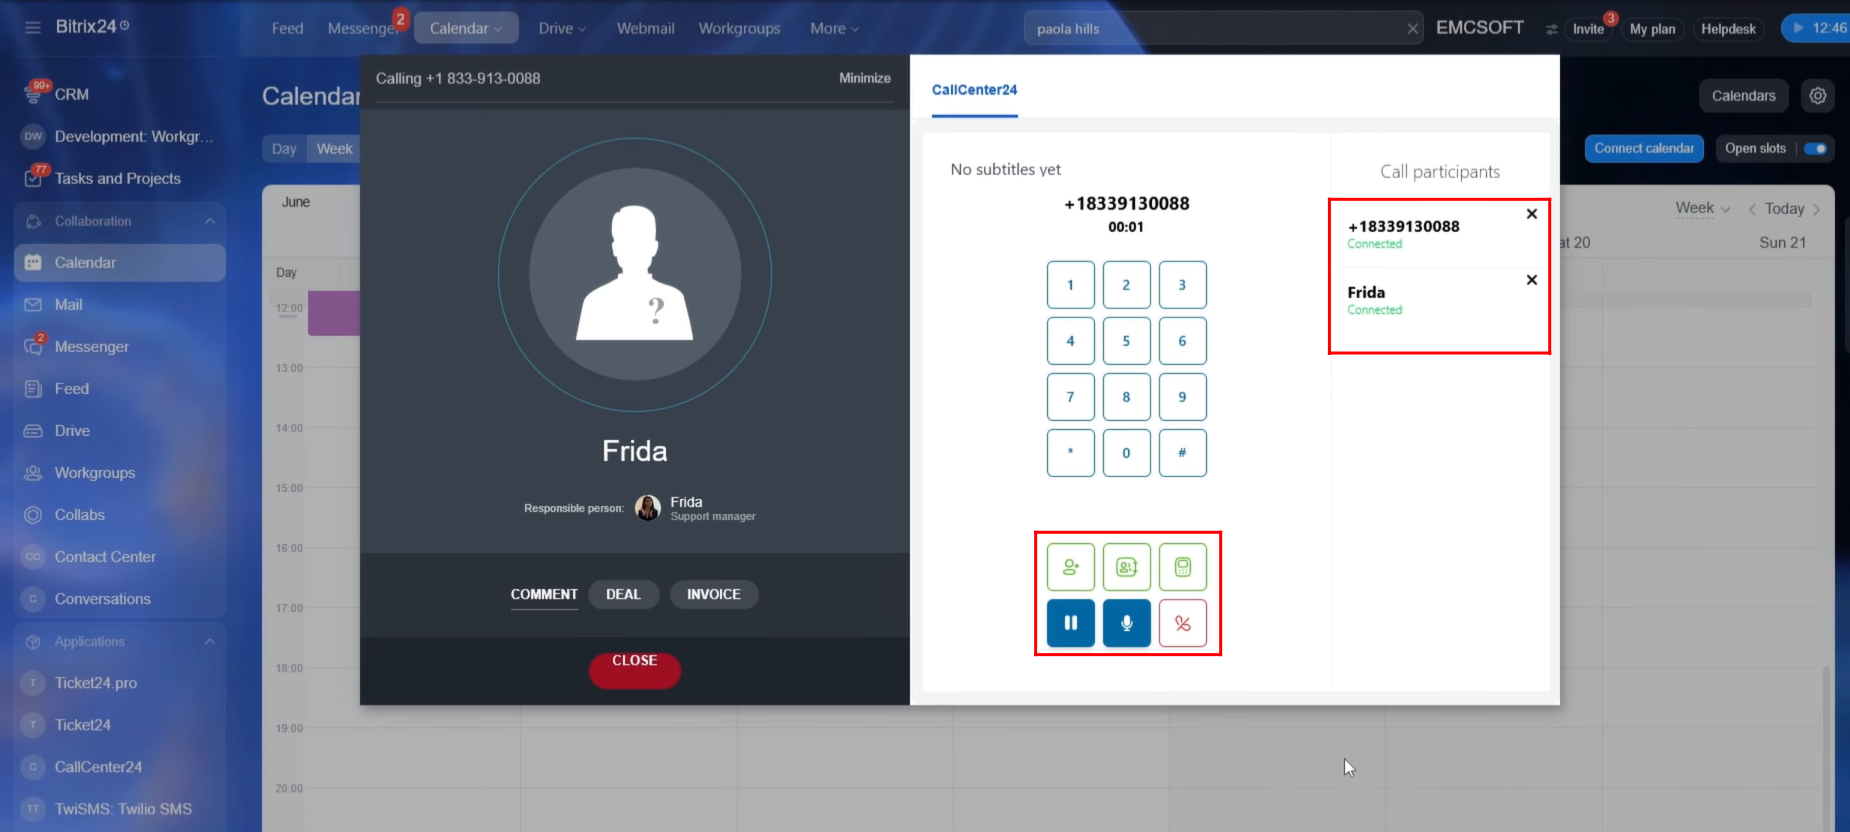
12. As soon as a visitor submits the callback form, the responsible employee assigned to handle callbacks will receive a notification.
At the same time, a calling dialer window will automatically appear, allowing the employee to initiate a call to the submitted phone number. The client’s phone number entered in the form will automatically be displayed in the dialer window.
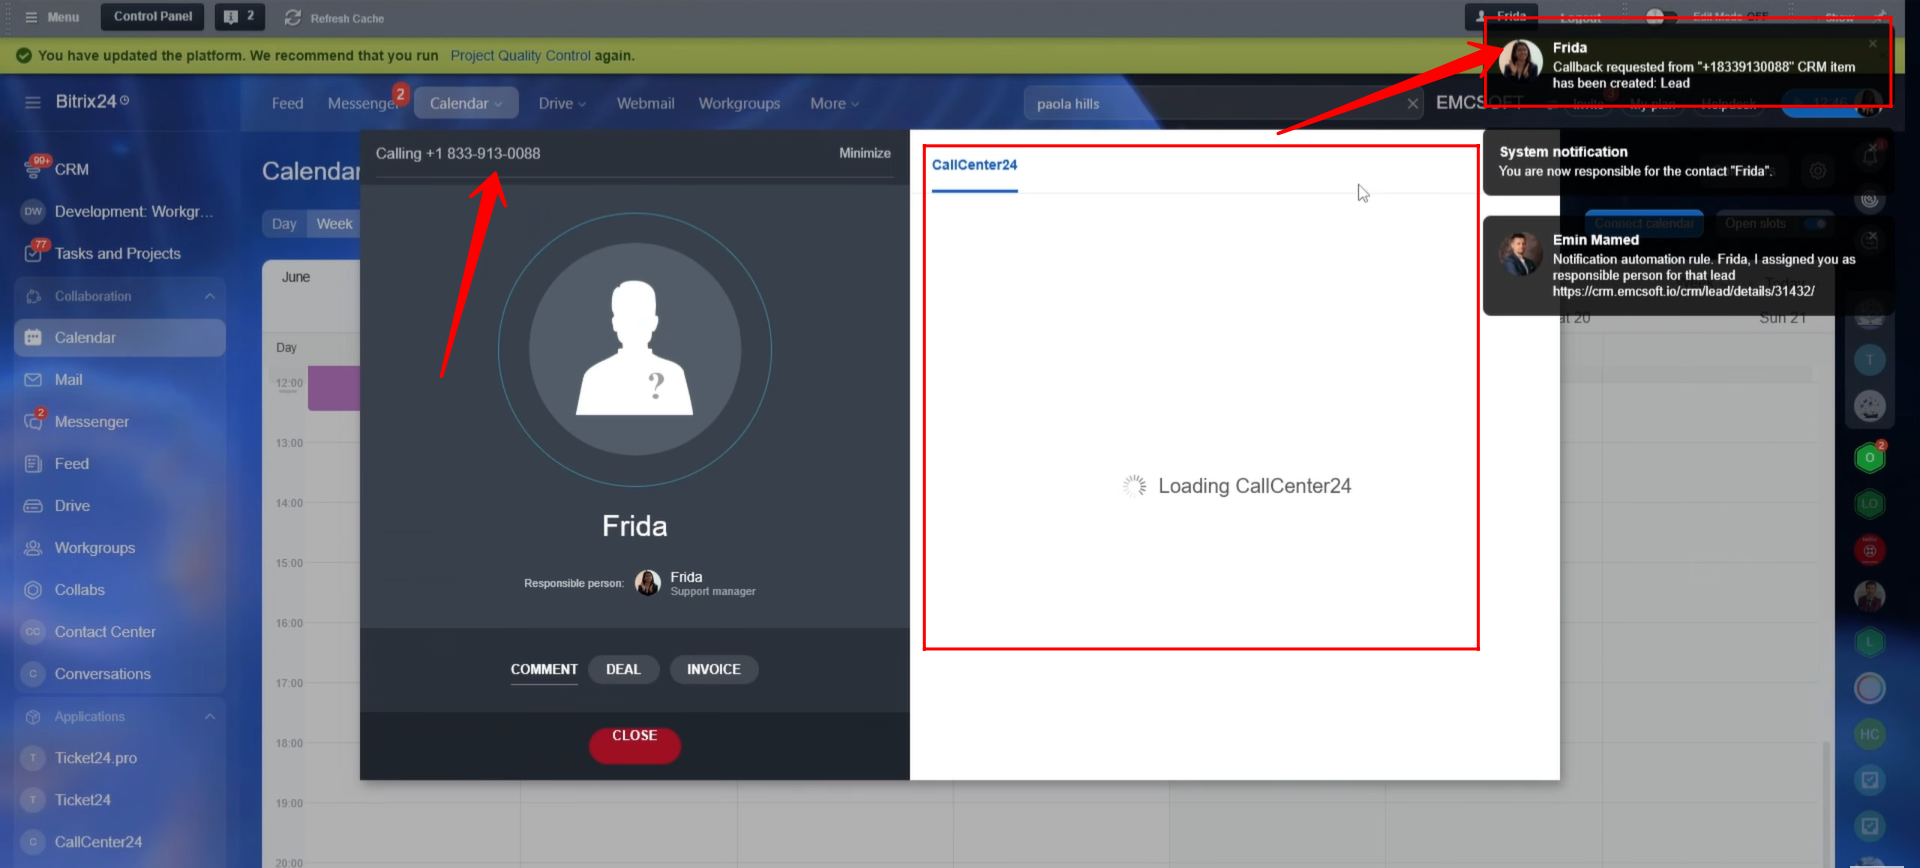
13. The calling dialer window will display the client’s phone number and automatically select one of your company’s outgoing phone numbers to place the call.
The outgoing number used for the call will be the same number that was selected during the callback form configuration.

14. Once the dialer window appears, click the green call button to initiate the call. The call will be placed to the client’s phone number, and the client can answer the call as normal.
During the call, the dialer window provides several additional options, including:
- Adding another agent to the call
- Transferring the call
- Opening the linked CRM record
- Putting the call on hold
- Muting the microphone
- Ending the call
To learn more about the calling features available in the CallCenter24 application, please refer to:
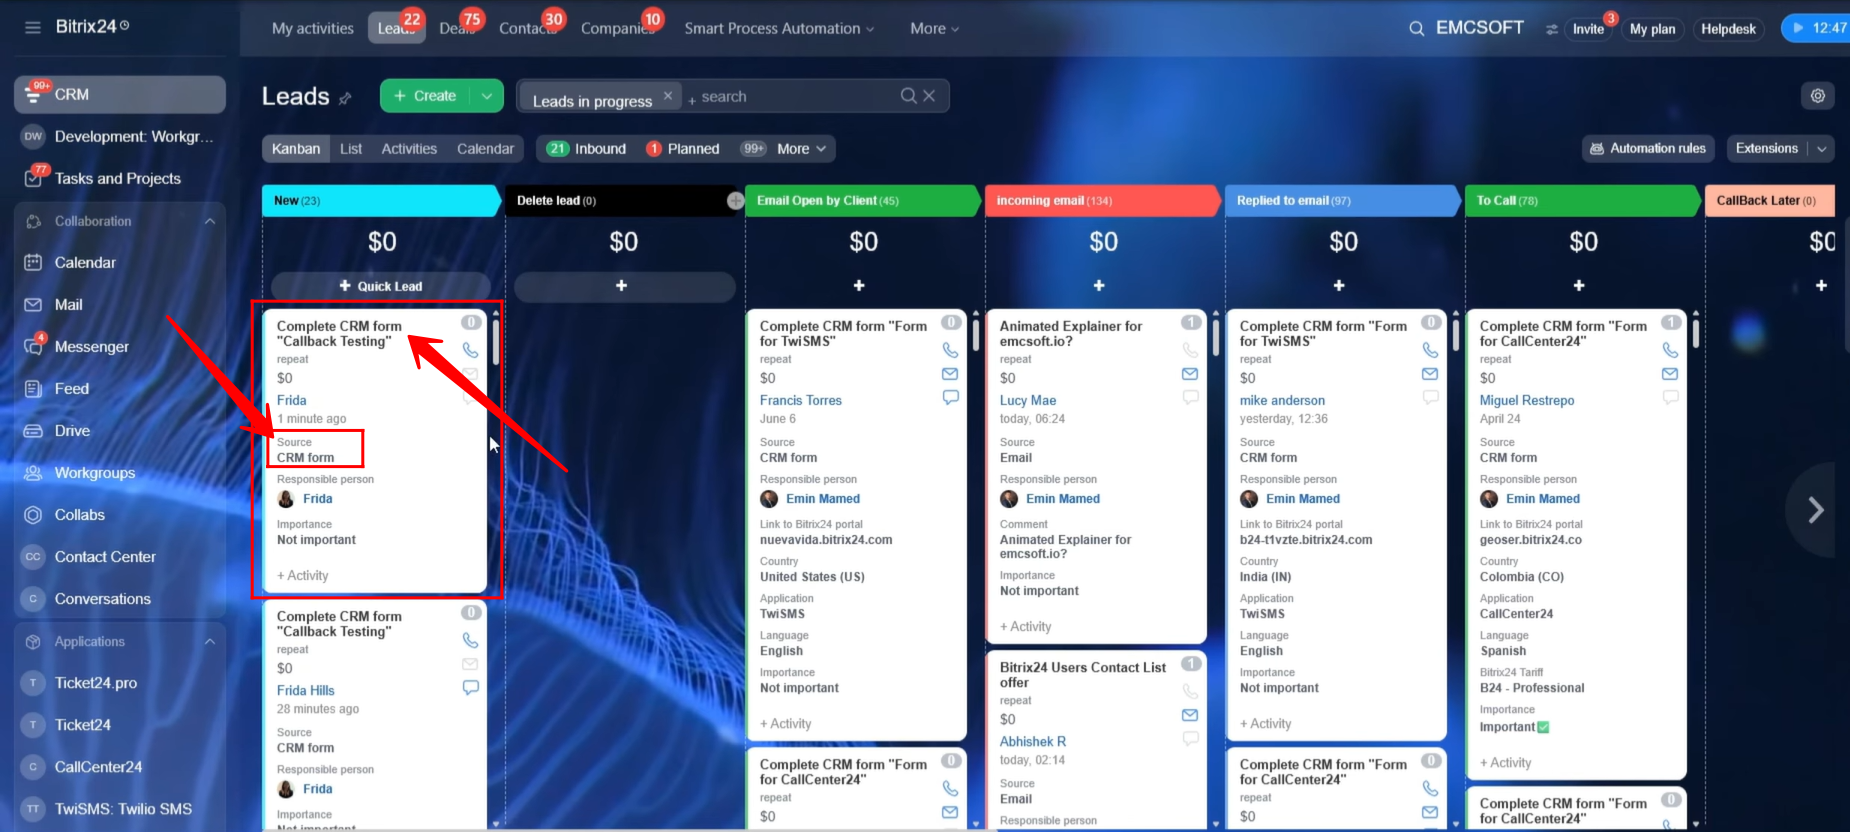
15. Since the form was configured to submit the Name and Phone Number fields into the Lead entity, a new Lead record is automatically created when the callback form is submitted.
The Lead Source for the newly created record will be displayed as “CRM Form.”
“You can also watch video on Youtube”