| 3272 Views | Amin

Creating a Payment Link:
Create Payment Link option. This feature allows you to generate a payment link automatically within Bitrix, as opposed to sourcing it externally.
Once set up, a deal gets created and you can attach relevant contacts and products to it.As the deal progresses, the payment link becomes active. This link can then be sent to the customer through various mediums, such as TwiSMS.
Automating Customer Communication:
Within Automation Rule, you can set up customer communication, as we’ve discussed in previous videos. There are several modes available for sending notifications: SMS, WhatsApp, Facebook, and Email. For this guide, we’re focusing on SMS.Ensure the TwiSMS is set to execute after the robot that creates the payment link. You can integrate with TwiSMS (available in the Bitrix market) for efficient SMS delivery.
Notifications for Deal Progression:
If you move a deal to a certain stage, such as Progress, an SMS can be sent automatically to the customer. It’s possible to create a trigger notifying managers once a payment is made. This saves time from having to check each deal individually. Methods of notification can vary from SMS, Email, Direct Chat, and more.
Handling Invoices:
Invoices are different from payment links. You can create stages like Invoice Paid to monitor invoice progression. Let’s say you have an accountant who only views invoices. With Bitrix, you can integrate with your bank, so payments are tracked and updated in real-time.Additionally, when a client makes a payment, both the invoice and deal stage get updated simultaneously. You can also set up notifications for this. The Get Payment Information robot can be useful for extracting relevant payment details.
Generating Invoices Based on Deals:
With automation rules, Bitrix24 allows the creation of invoices directly from existing deals. Once an invoice is created, similar automation can be applied. For instance, generating documents and sending them back to the deal or directly from the invoice.
Modifying Details and Retrieving Values:
Bitrix24 offers robots like Modify Details and Get Details Values, which function similarly to ones discussed in our paperwork video.
Detailed instructions on how these robots can be used are described below.
1. Go to “Automation Rules”.

2. Click “Create”. Go to “Payments” and add a robot “Create payment link”.

3. Drag “Create payment link” robot to “In Progress” stage and edit it.

4. Select “Auto create payment link” as “Yes” and click “Save”.

5. Go to “Deals” tab and click “Create”.

6. Type the name of deal and assign a contact person to deal. Save it.

7. Open the deal, go to “Products” tab and click “Select Product”.
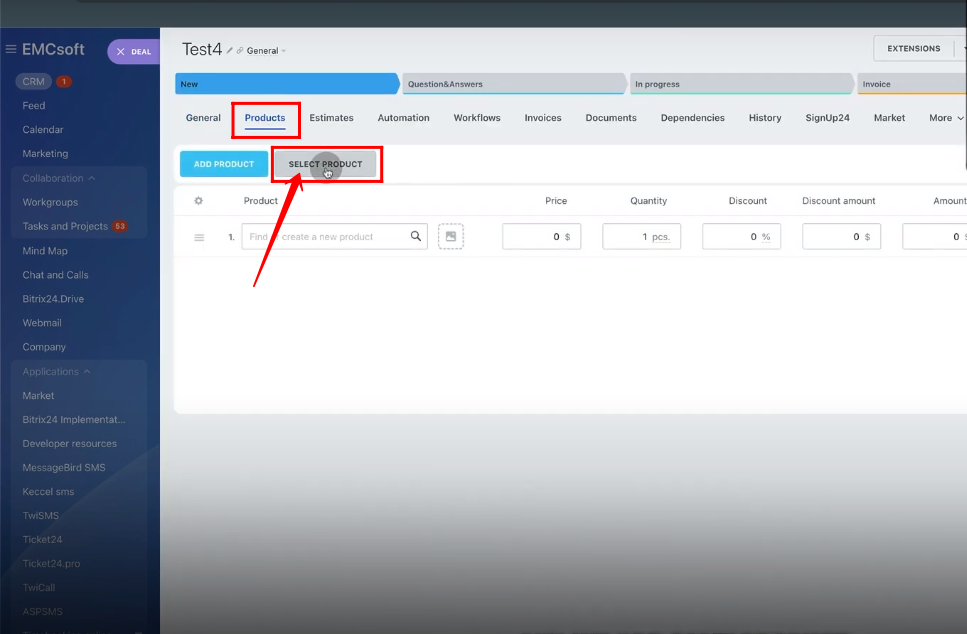
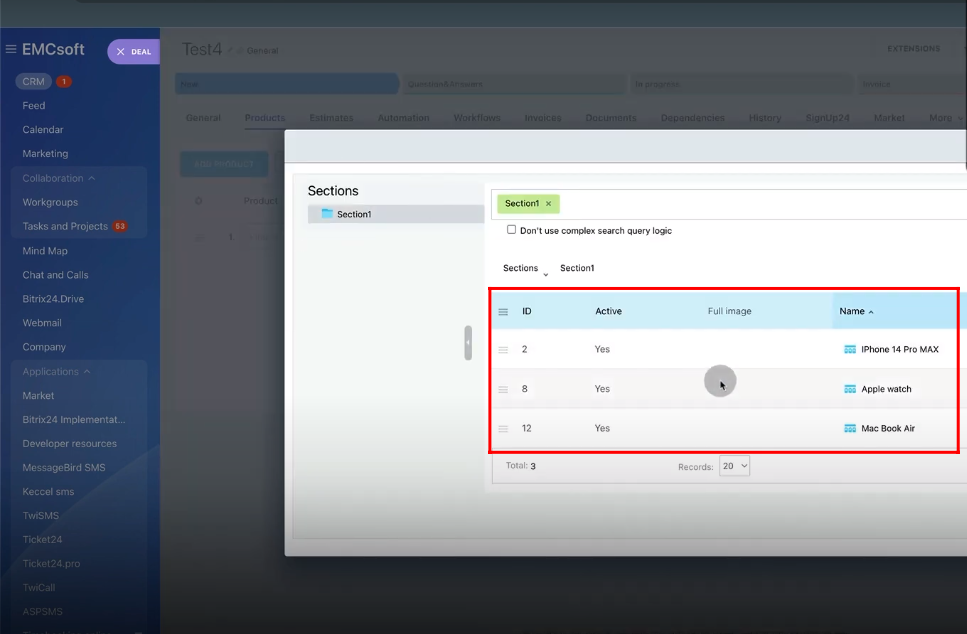
8. Select any product to add in the deal from the list of products.
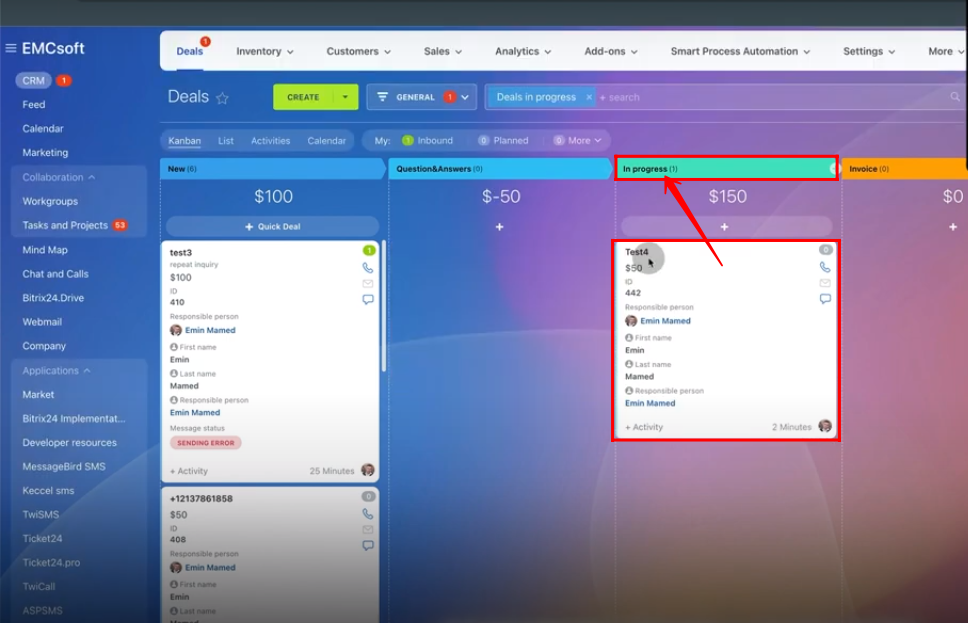
9. Click “In Progress” to change the stage of the deal. The payment link will be automatically generated. Click the link.

10. Select “Send via TwiSMS” to send the link to the customer. Click “Resend”.

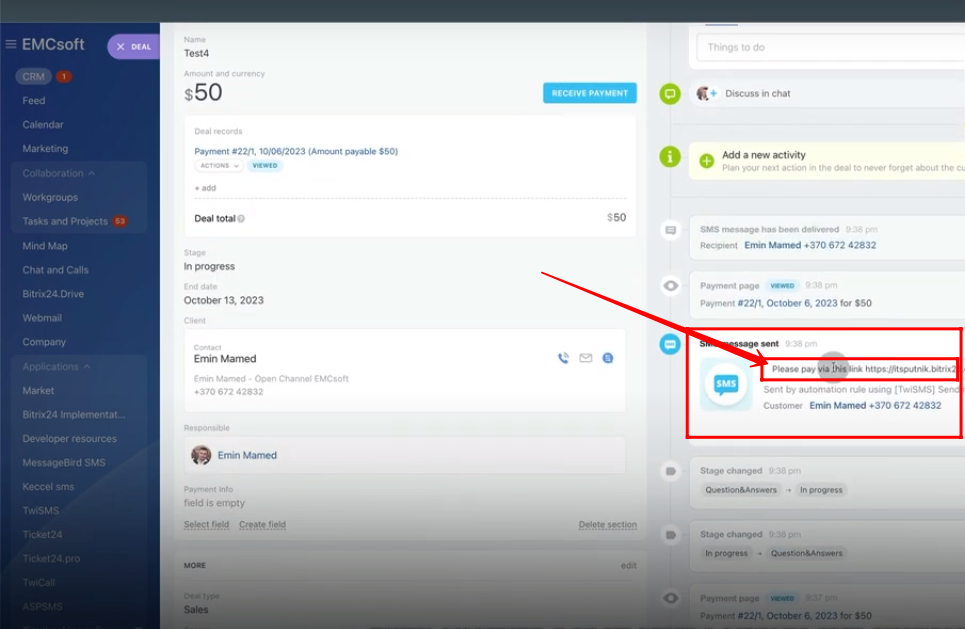
11. Here, the payment link has been sent to the customer via TwiSMS application.

12. Open the link in another tab, you will have an interface like this to pay for the product.

13. Go to “Automation Rules”. Click “Create”, go to “Customer Communication” and add a robot “Send SMS to customer”.

14. Drag the robot “Send SMS to customer” to “In Progress” stage. Edit it.

15. Fix Execution as “Wait” to run just after the previous robot’s success. Add the dynamic payment link code through the three dots selection option. Provider should be “TwiSMS”. Click “Save”.

16. Move the deal to “In Progress” stage. Open it.
17. Now the payment link has been sent to the customer through the robot.
18. Go to “Automation Rules”. Go to “Payment” and add the robot “Track order payment”.

19. Create a “Client Paid” stage and drag the robot “Track order payment” to this stage.

20. Open the deal, go to “Actions” and manually change the status of the payment as “Paid”.
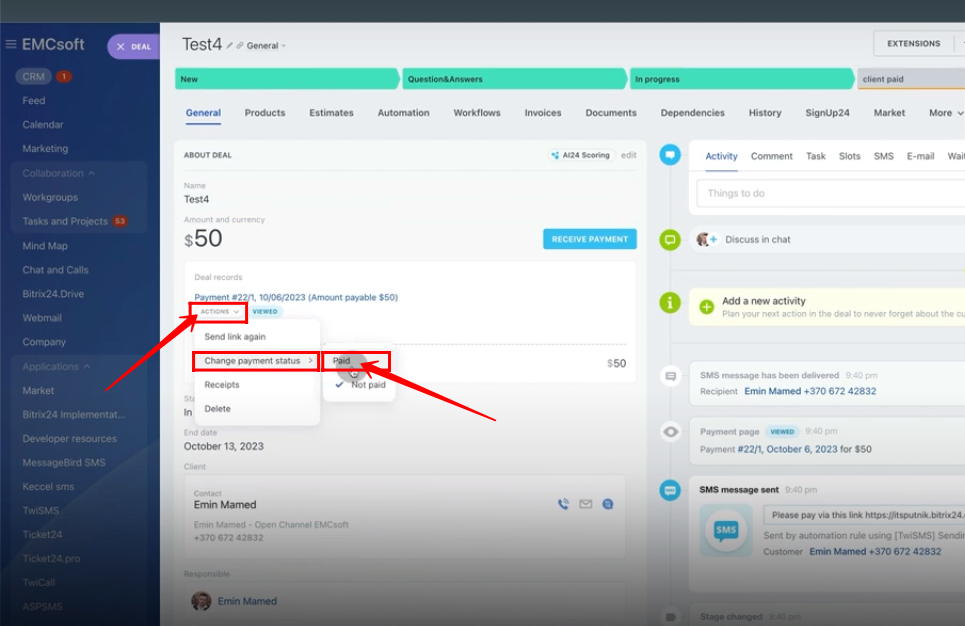
21. The stage of deal will be automatically changed to “Client Paid” and a payment receiving prompt will be there.
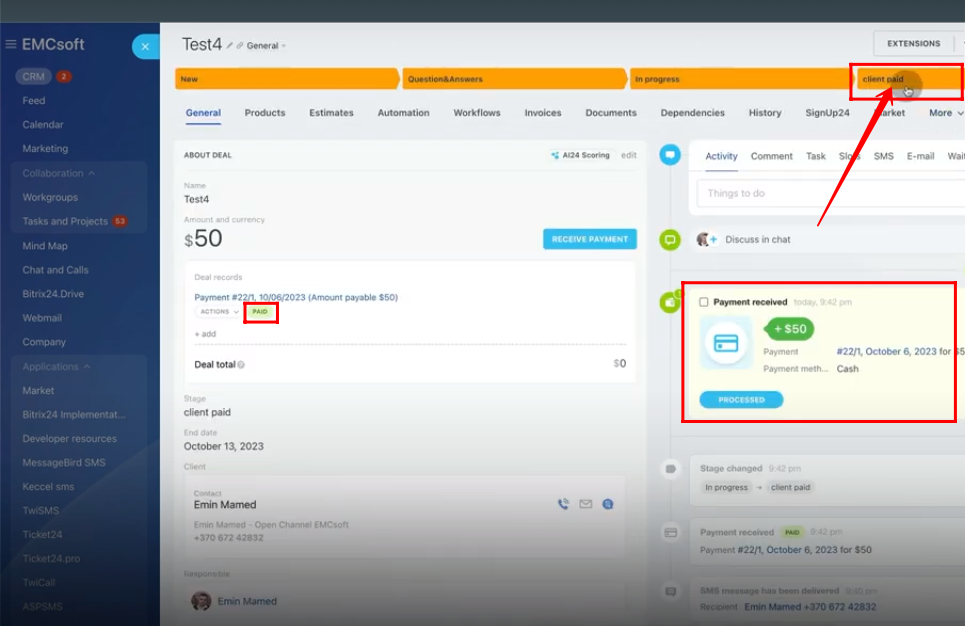
22. The stage of the deal changed in the “Deals” tab too.

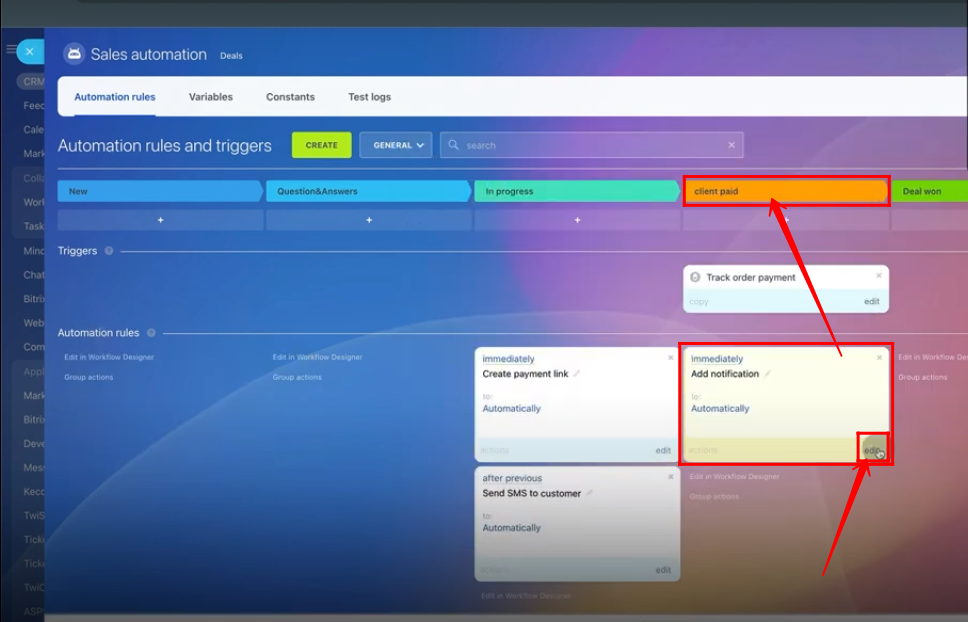
23. Go to “Automation Rules”. Click “Create”, go to “Employee alerts” and add a robot “Add notification”.

24. Drag the robot “Add notification” to “Client Paid” stage. Edit it.
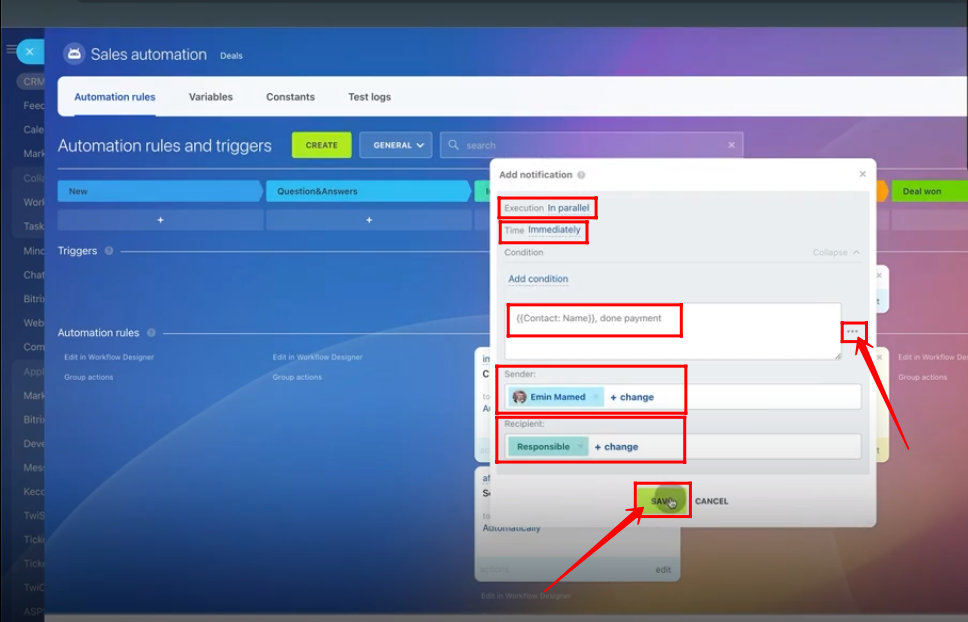
25. In description, add the dynamic contact name by three dots selection option. Fix “Sender” and “Receiver”. Click “Save”.
26. Roll back the stage of the deal to “Question&Answers”. Open the deal.

27. Go to “Actions” and manually change the status of the payment as “Not Paid”.

28. Again go to “Actions” and click “Delete”.
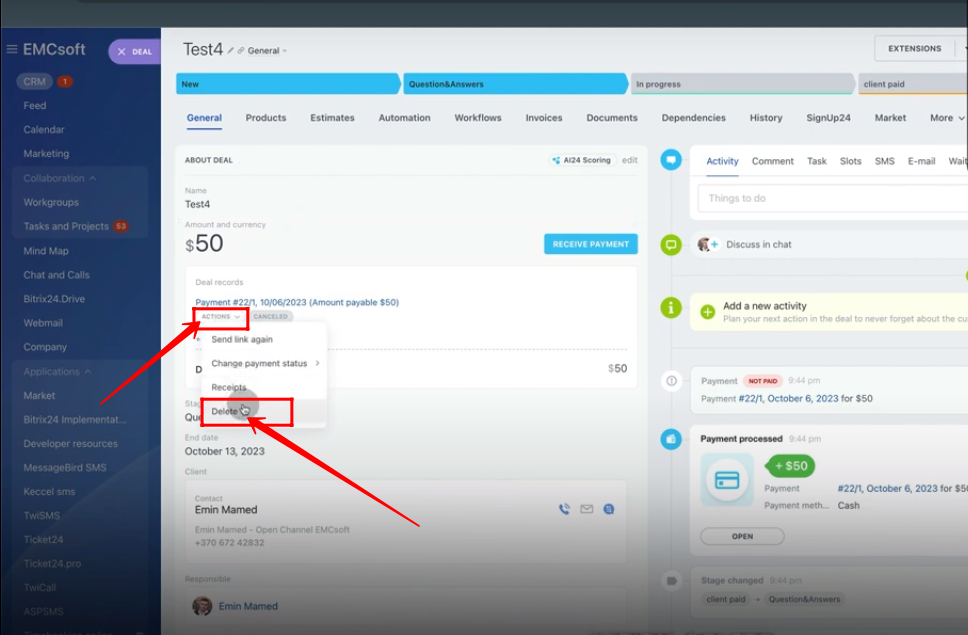
29. Click “OK” to delete the payment link.

30. Change the stage of the deal to “In Progress”. New “payment link” wil be generated and a message will be sent to the customer.

31. Go to “Actions” and manually change the status of the payment as “Paid”.

32. The stage of the deal will be changed to “Client Paid” and you will receive a notification regarding the info of the customer who paid.

33. Go to “Automation Rules”. Click “Create”, go to “Payment” and add a robot “Track invoice payment”.

34. Drag the robot “Track invoice payment” to “Invoice Paid” stage.

35. Open the deal, which is currently in “Client Paid” stage.

36. Go to “invoices” tab and click “Continue”.

37. Change the stage of the invoice to “Send to Customer”.

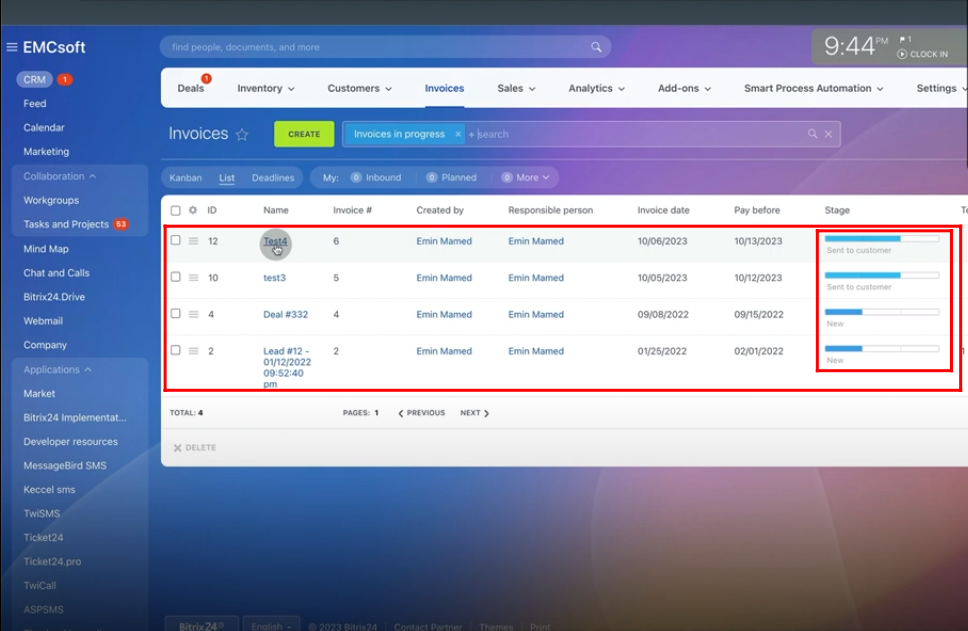
38. Now go to “Sales” and click “Invoices”.

39. Here’s the list of the invoices with the stages info.
40. Manually change the stage of the newly created invoice to “Paid”.

41. The stage of the deal will be automatically changes to “Invoice Paid”.

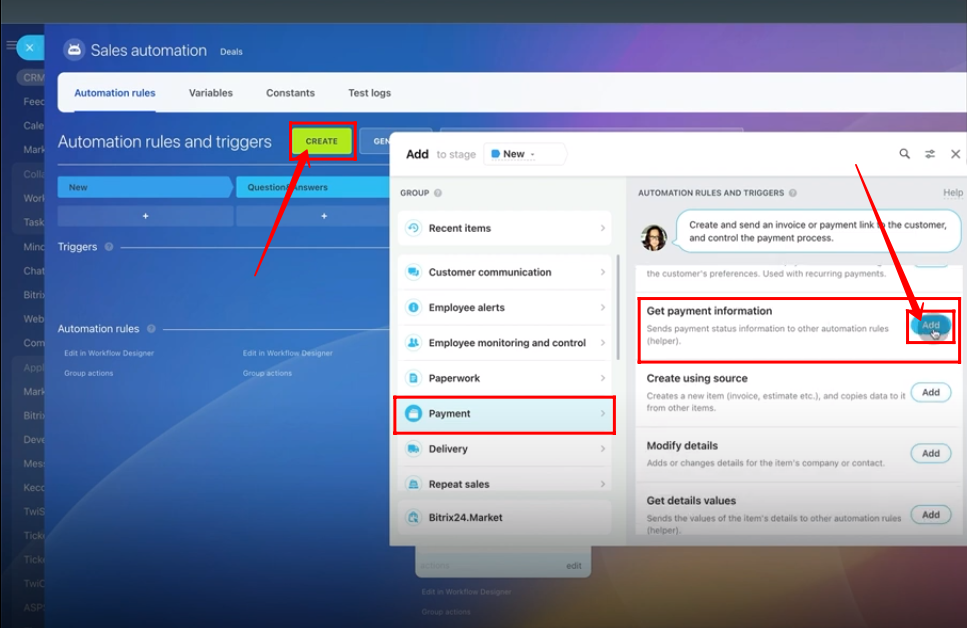
42. Go to “Automation Rules”. Click “Create”, go to “Payment” and add a robot “Get payment information”.
43. Drag the “Get payment information” robot to “In Progress” stage. Edit it.

44. Add a dynamc “Order ID” through the three dots selection option. Click “Save”.

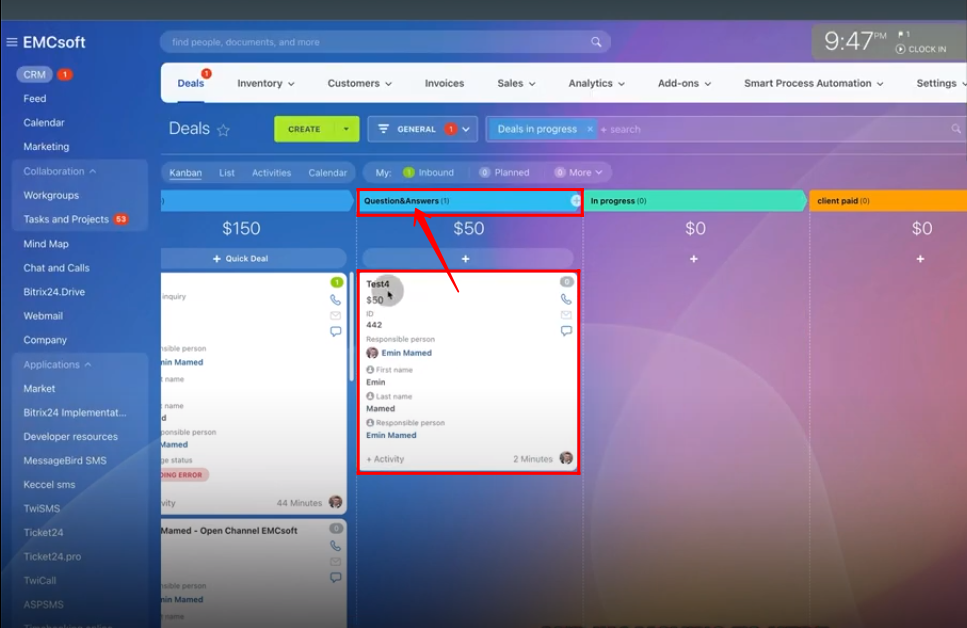
45. Change the stage of the deal to “Question&Answers” stage again.
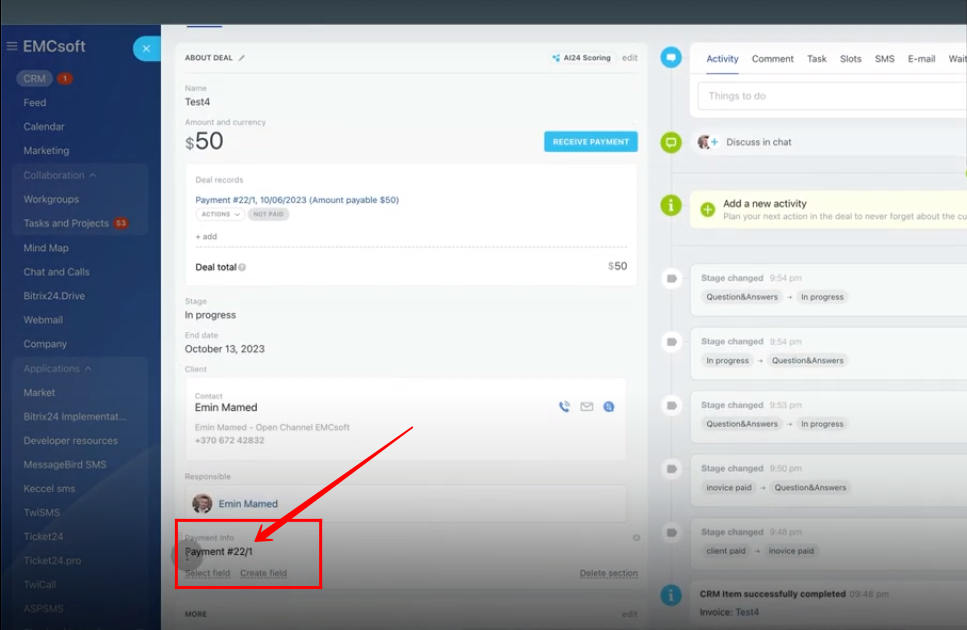
46. Click “Create field” and select “String” to create a new field named as “Payment Info”.

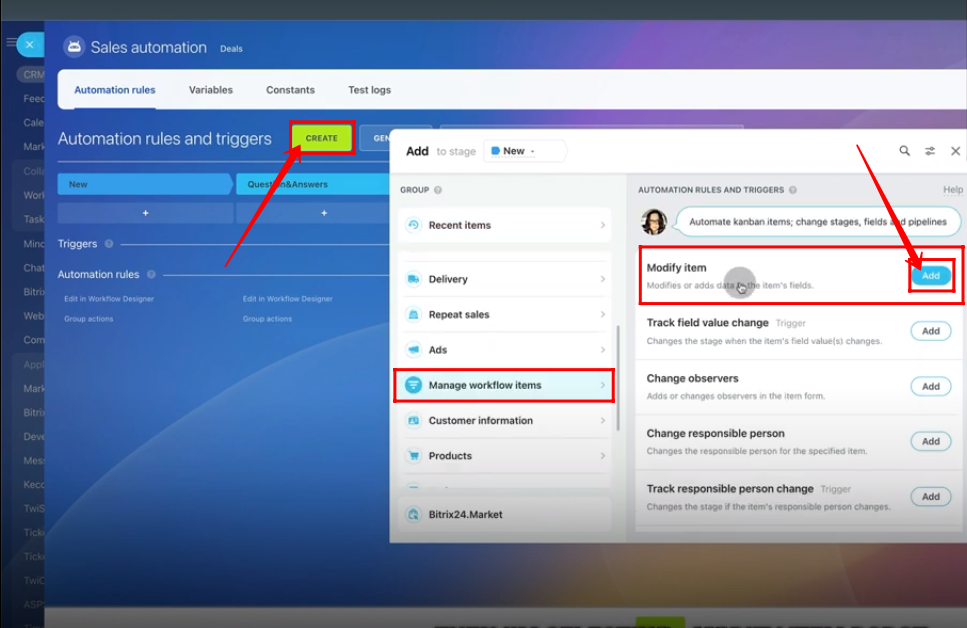
47. Go to “Automation Rules”. Click “Create”, go to “Manage workflow items” and add a robot “Modify item”.
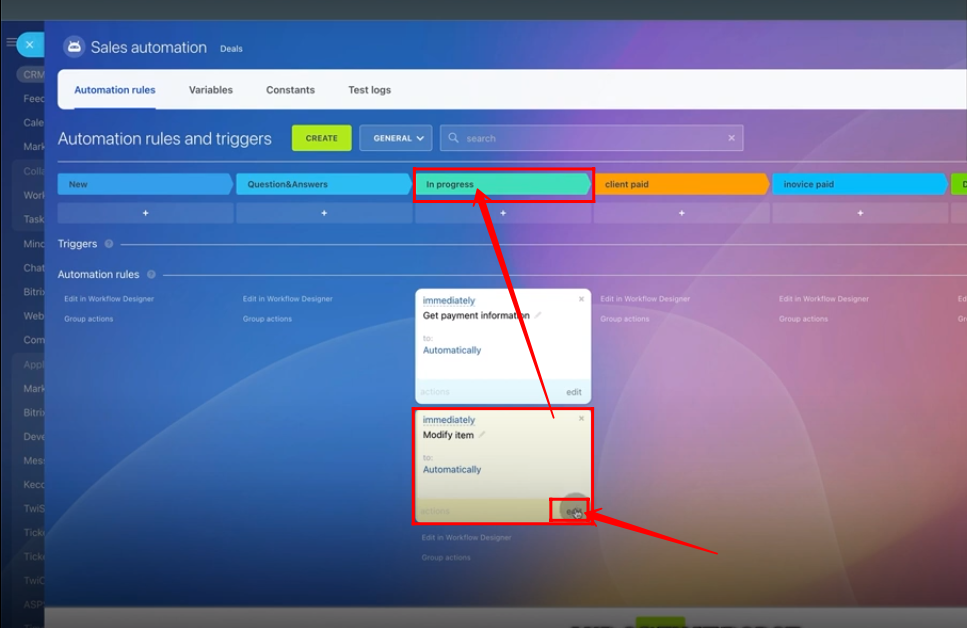
48. Drag the “Modify item” robot to “In Progress” stage. Edit it.
49. Fix Execution as “Wait” to run just after the previous robot’s success. Click “Select field” and select “Payment Info”.

50. Click three dots option, go to “Get payment information” and select “Payment #”.

51. Select a contact person in the attribute “Change on behalf of” and click “Save”.

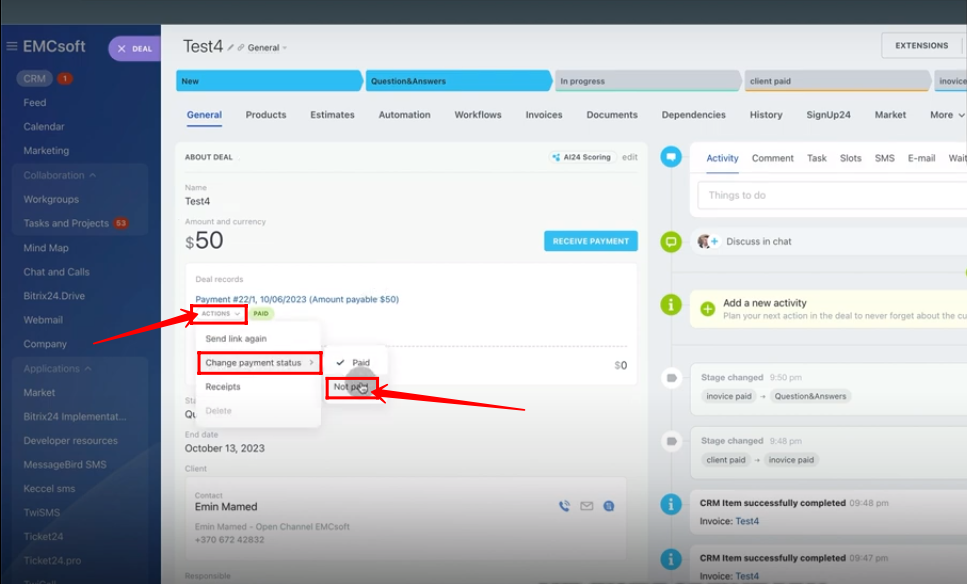
52. Open the deal. Go to “Actions” and manually change the status of the payment to “Not Paid”.
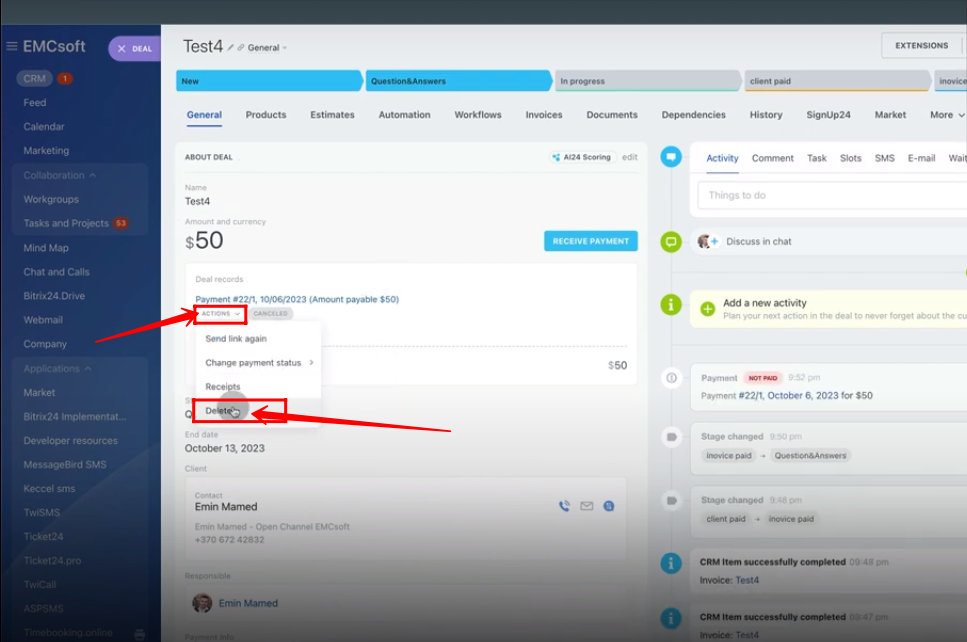
53. Go to “Actions” and click “Delete”.
54. Click “OK” to delete the payment link.

55. Change the stage of the deal to “In Progress” again. The payment link will be automatically generated again.

56. Payment Number will be written under “Payment Info” field.
57. Go to “Automations” tab within the deal.
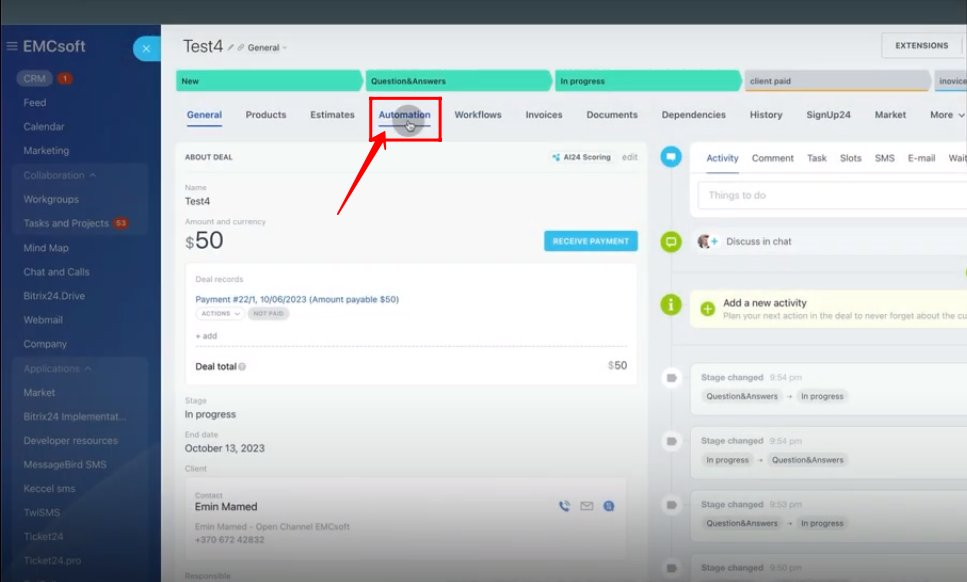
58. You will find a list of robots in a sequence that participated in the whole automation process.

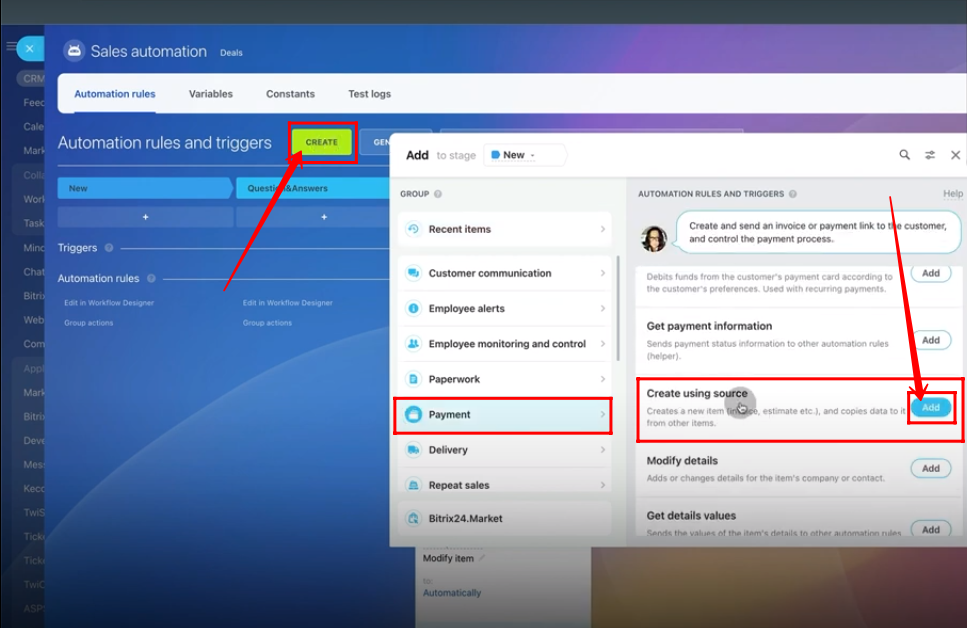
59. Go to “Automation Rules”. Click “Create”, go to “Payment” and add a robot “Create using source”.
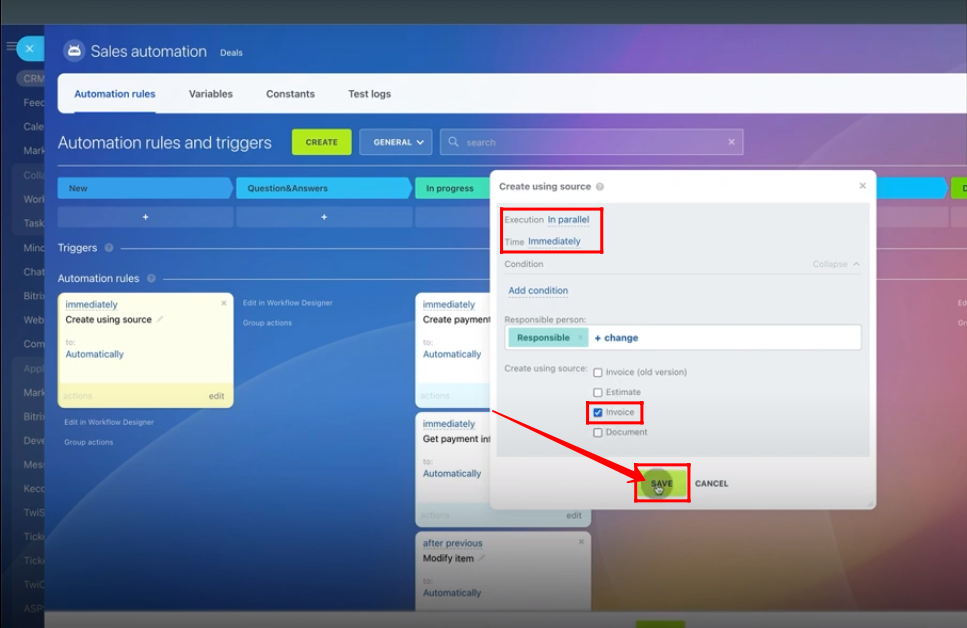
60. Fix Execution as “In Parallel”. Check the box of “invoice”. Click “Save”. Move the robot to a new stage “Create Invoice”.
61. Move the deal to “Create Invoice” stage. Open the deal.

62. Go to “Invoices” tab within the deal. A new invoice will be generated with “New” stage.

“You can also watch this video on Youtube”