| 2312 Views | Amin

Introduction:
This article delves into the application of these robots in conjunction with CRM forms, guiding you through the logic and demonstrating the methodology.
The Process:
Setting Up CRM Forms:
● Navigate to CRM forms.
● Click on ‘add-ons’ and proceed to create a form to collect client contact data including first name, last name, email, and phone number.
Data Lead Creation:
● Ensure that upon data entry by a client, a lead is generated.
Creating User Agreements:
● It’s essential to have user agreements in place. For text, one can navigate to the emcsoft.io website, copying the text available there and pasting it into your CRM.
Identifying Forms:
● It’s crucial to differentiate between various CRM forms. Add a field inside the lead that signifies which form the data originated from. Create a list inside a lead, giving examples like “form number one”, “form number two”, etc.
Default Values and Form Duplication:
● Each form can have default values that are hidden. It is important to correctly set these values, as they’ll determine which PDF file or document is sent to the client.
● Creating multiple forms is easy. For instance, once “form number one” is set up, it can simply be duplicated and edited to make “form number two”, and so on.
Automating Email Responses:
● Based on the CRM form filled out by a customer, an automatic email with an attached document can be sent. This ensures immediate responses, enhancing customer experience.
● For instance, if “form number one” is filled, a particular email with a unique attached document is sent. If “form number two” is filled, a different email and document are dispatched.
Testing:
● Input data into both forms to validate that the correct emails and documents were being sent out. This is a crucial step to ensure the system functions as desired.
Detailed instructions on how to do this can be found below:
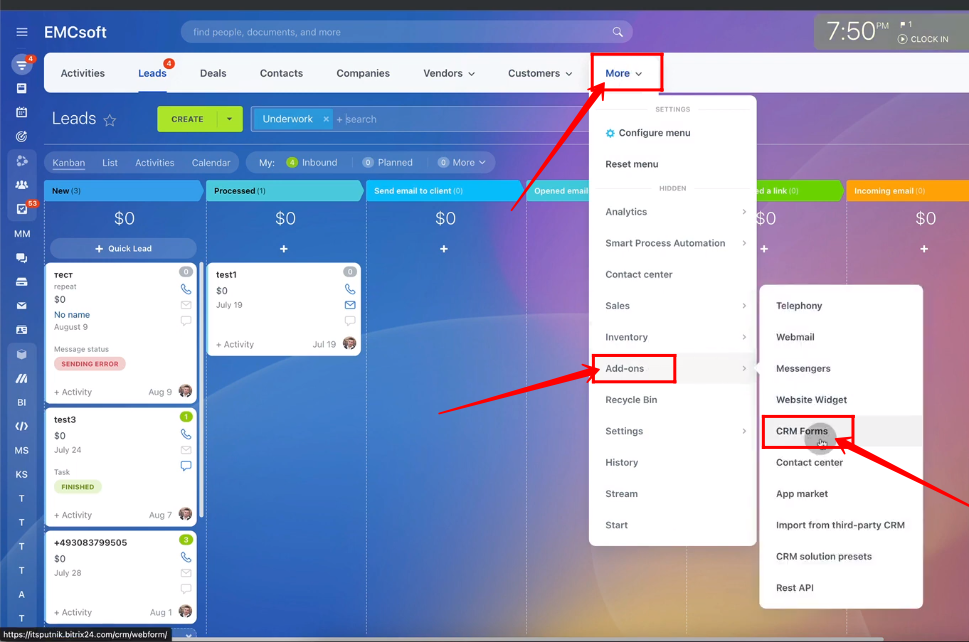
1. Go to “More”. Click “CRM Forms” by opening “Add-ons” section.
2. Click “Add”.

3. Go to “CRM Entities” and select entity as per your requirement. In this case, Lead is selected.

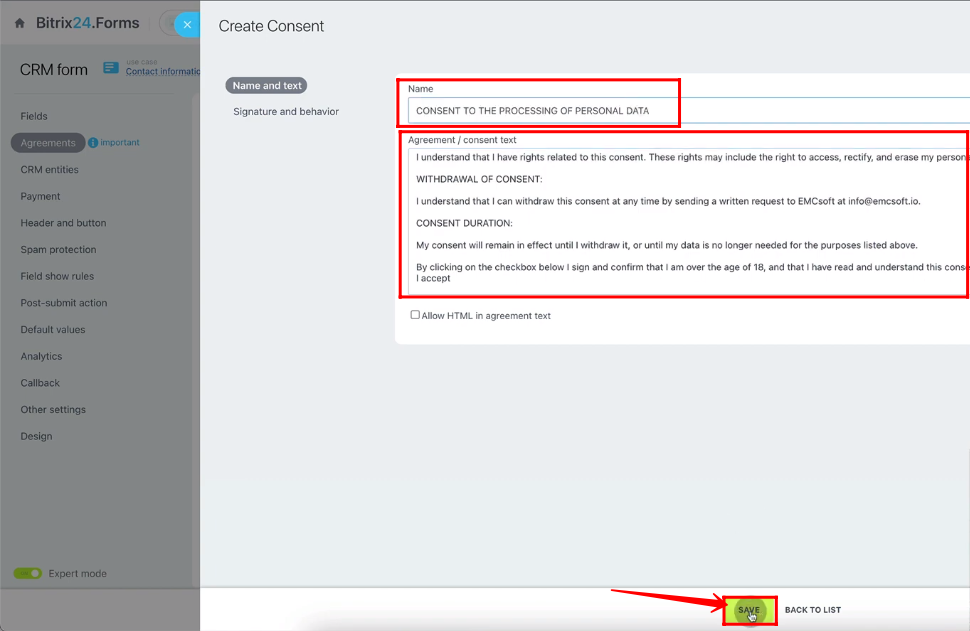
4. Go to “Agreements” and click “Create user agreement”.

5. Fill in the name and consent text of user agreement. Click “Save”.
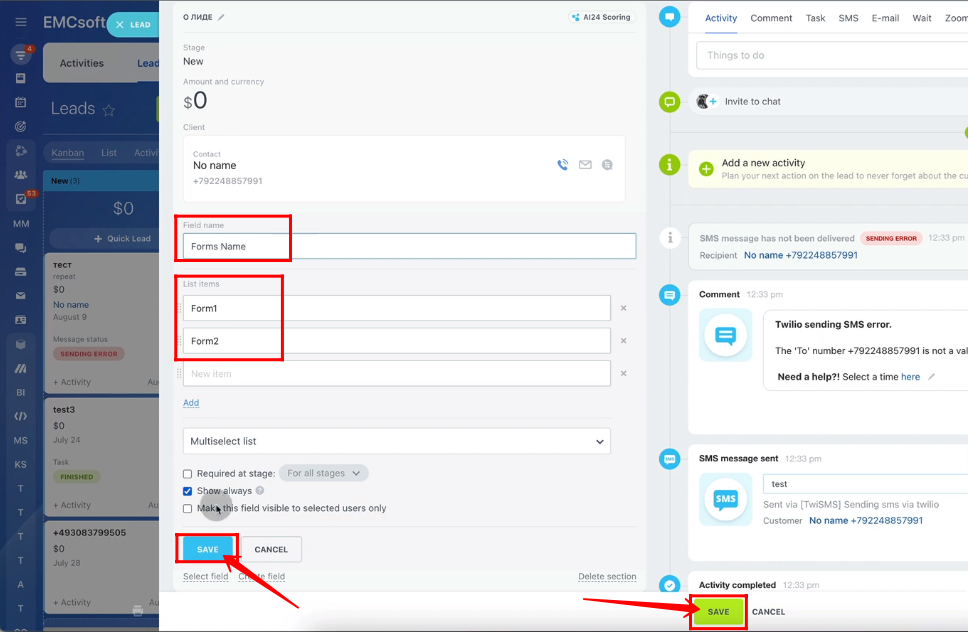
6. Open your lead, click “Create field” and select “List”.

7. Fill in the “Field Name”, “List Items” and click “Save”. In this scenario, list items are “Form 1” and “Form 2”.
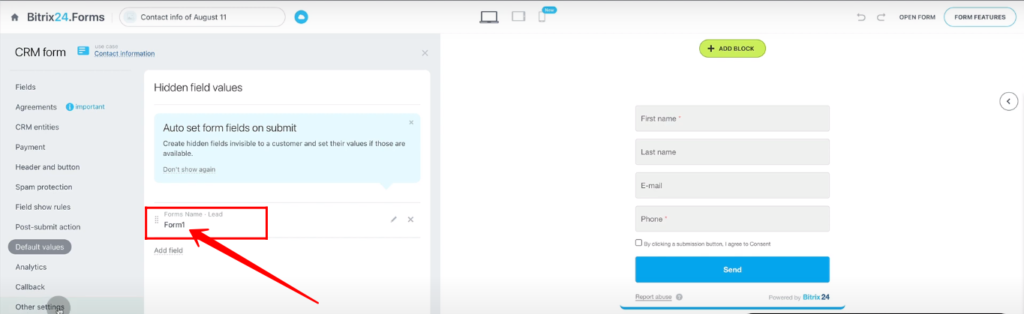
8. Go to “Default values” and click “Add field”.

9. Select “Form Names” and click “Add”.

10. By default, “Form 1” will be selected.
11. Go to “Other Settings”, edit “Form name” and click “Save”.
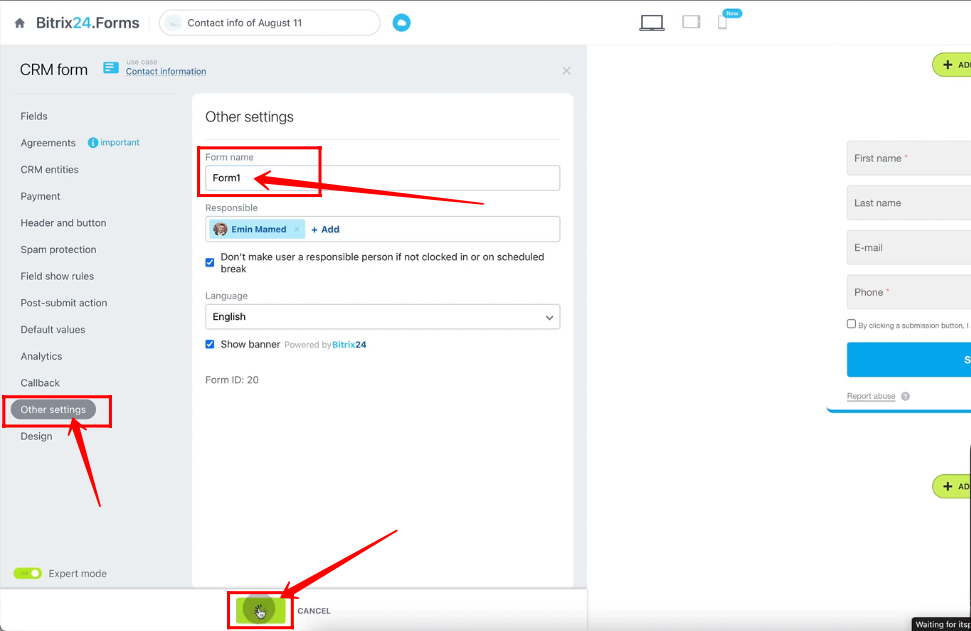
12. Here, you have created a form named “Form 1”. Right Click on Form 1 and click “Copy”.

13. The copy of Form1 has been generated. Open it.

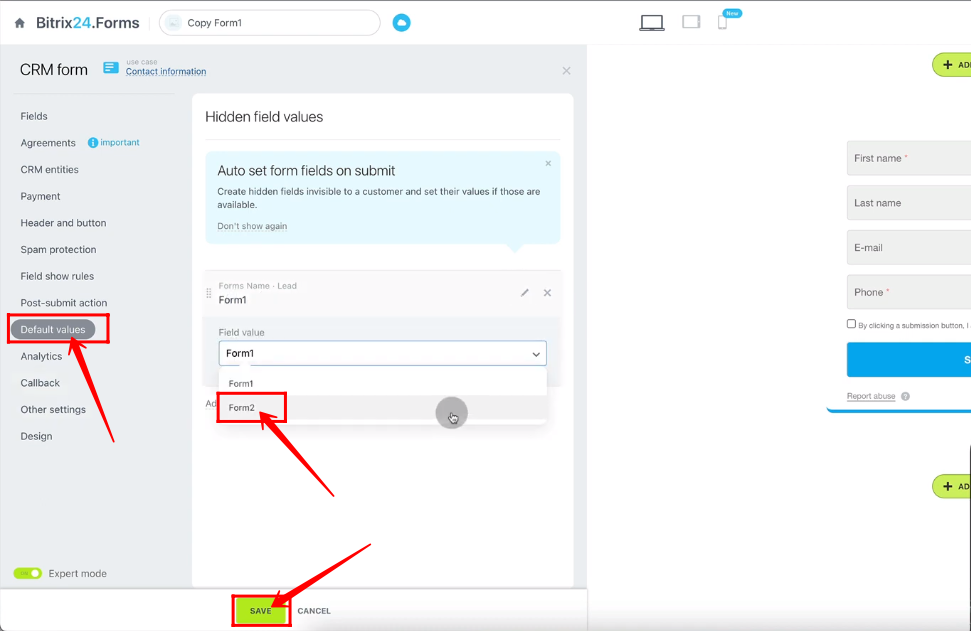
14. Go to “Other Settings”, edit “Form name” and click “Save”.

15. Go to “Default values” and select “Form 2” as a “Field value”. Click “Save”.
16. Click “Edit” to make changes in “Form 1”.

17. Go to “Form Features” and click “Settings icon”.

18. Edit title, page address, rich formatting text and click “Save”.

19. Edit “Form 2”. Open “Form Features” and edit all the details. Click “Save”.

20. Click “Open” and then “Open in New Tab”.
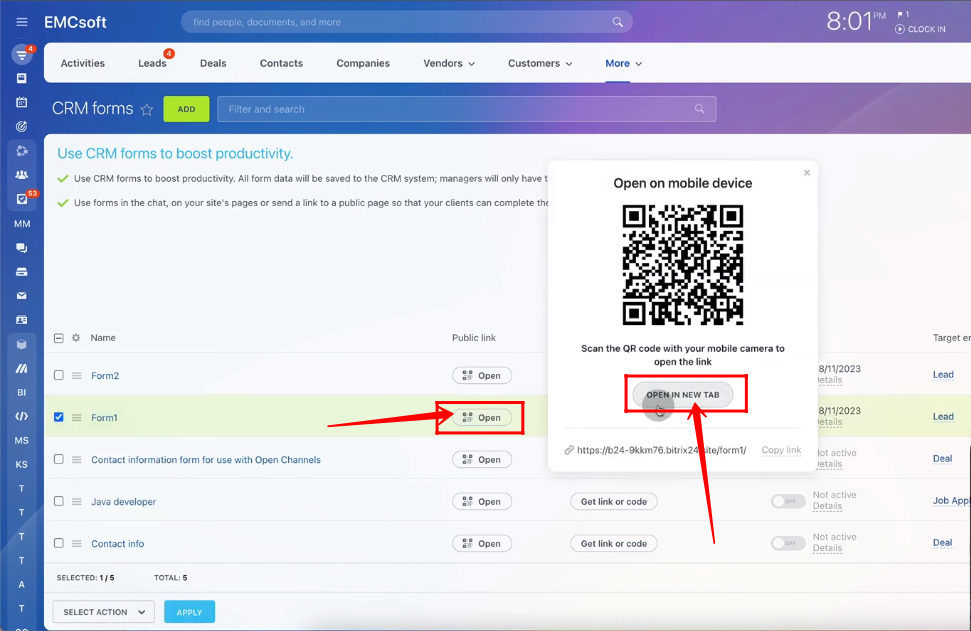
21. “Form 1” opened with the same page address which was edited in the form features section.

22. If you want to send an email to the client if he/she fills the form. Configure the robot “Send email to Customer”. In the condition, apply “Form Name equals to Form 1”, select the sender email, edit subject and body, attach a document, if you want. Click “Save”.

23. Configure the robot for “Form 2”. In the condition, apply “Form Name equals to Form 2”. Edit all the details and click “Save”.

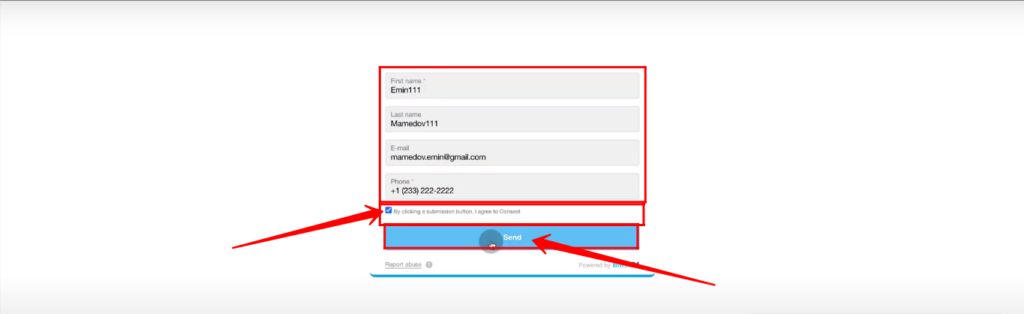
24. Open “Form 1”, fill all the details, accept the user agreement. Click “Send”.
25. Open your lead. You have got the details of client. Email has been sent to Client. Open it.
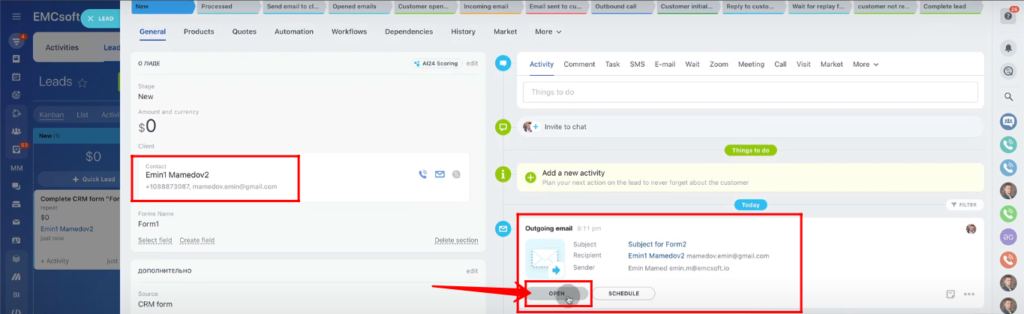
26. Here’s the configured email successfully delivered to client.

27. Now open “Form 2”, fill all the details, accept user agreement and click “Send”.

28. You’ve got the details of client. Email has been sent to client. Open it.

29. Here’s the configured email successfully sent to the client.

“You can also watch this video on Youtube”