| 4130 Views | Amin

Introduction:
Before delving into the details, it’s crucial to understand the benefits of setting up your own domain for CRM forms in Bitrix24. This feature allows you to customize the URL of your form, providing a more professional look and making it easier for your clients to recognize your brand. This step-by-step guide will walk you through this process.
Creating a Custom Domain
Start by purchasing a domain from a registrar of your choice. This is the URL your clients will see when they visit your CRM forms. Make sure the domain represents your business appropriately.
Setting Up Your Domain in Bitrix24
SAfter securing your domain:
1. Log into your Bitrix24 account.
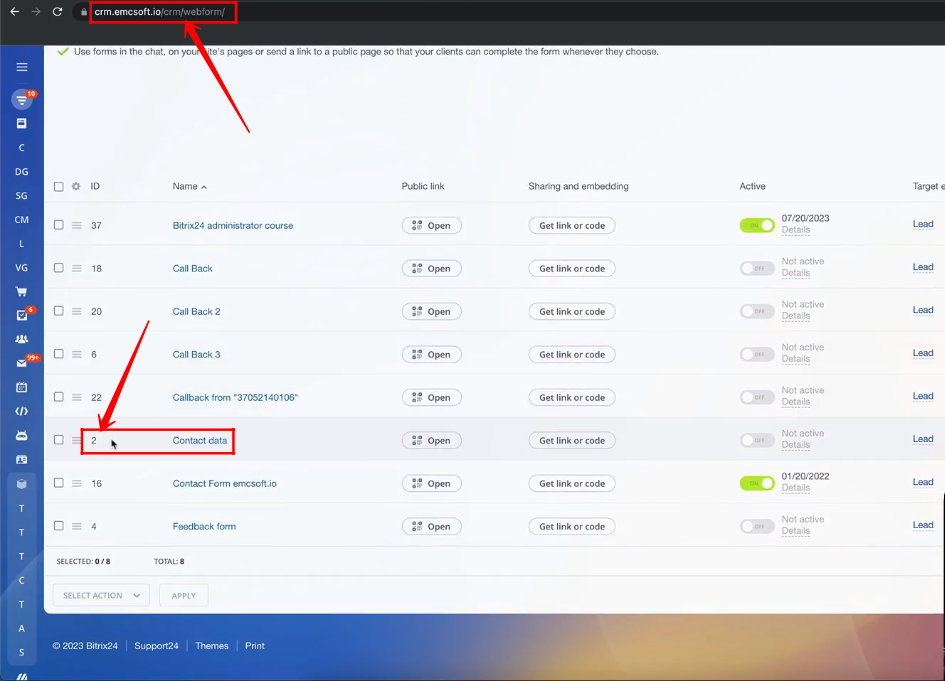
2. Go to [your bitrix24 domain]/crm/webform/
3. Find CRM Form with lowest ID
4. Click on “Edit” in that from
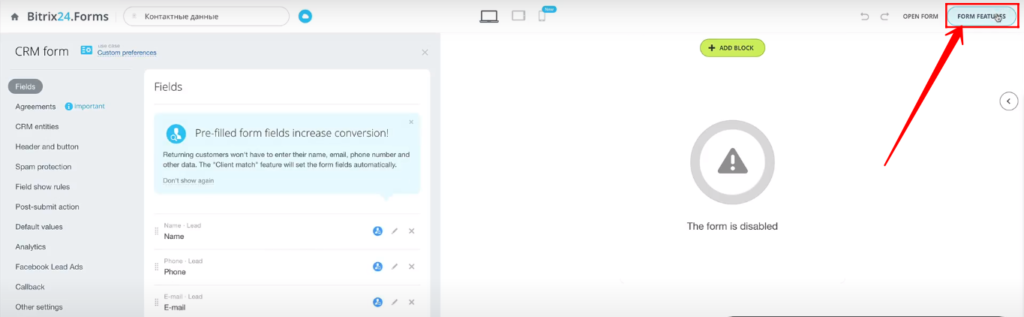
5. Then got to “Form Features”
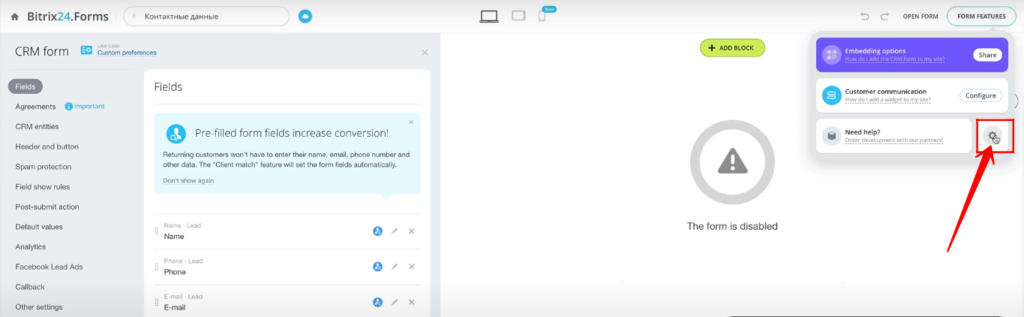
6. And then navigate to “Domain Settings”. Here, you’ll be able to add your new domain.
Verifying Your Domain
For security reasons, Bitrix24 requires you to verify ownership of your domain. Once you’ve added the new domain, Bitrix24 will provide you with a TXT record to add to your domain settings in your domain registrar’s dashboard. This process might take up to 48 hours to complete.
Testing Your Domain
After you’ve associated your domain with your desired form, it’s time to test it. Access the URL that you’ve configured in your domain settings. You should see your CRM form displayed on this webpage. If any issues arise, revisit the previous steps to ensure everything has been set up correctly.
Conclusion:
Setting up your own domain in Bitrix24 CRM forms enhances your brand’s visibility and makes it easier for your clients to interact with your business. With the steps provided in this guide, you should be well on your way to a more customized, professional CRM experience.
Remember, the EMCsoft support team is always ready to assist if you encounter any hurdles during the setup process.
Detailed instructions on how to do this integration can be found below:
1. Go to “[Your Actual Bitrix24 Domain]/crm/webform” and Click the CRM Form with lowest Id, as shown below.
2. Go to “Form Features”.
3. Click the “Settings” icon.
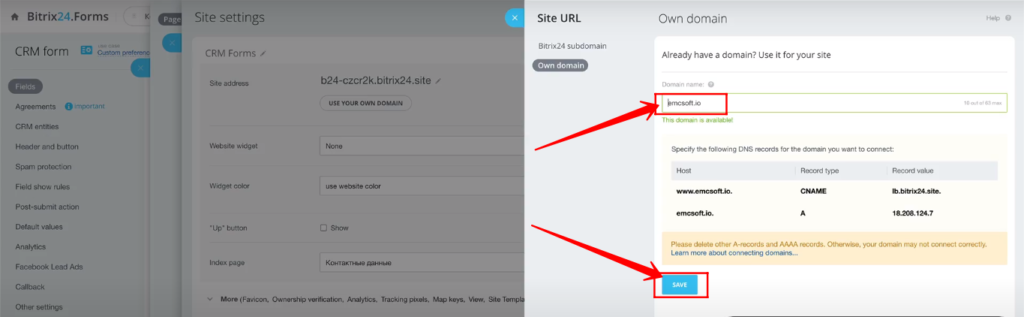
4. Go to “Site Settings”.

5. Click “Use Your Own Domain”.
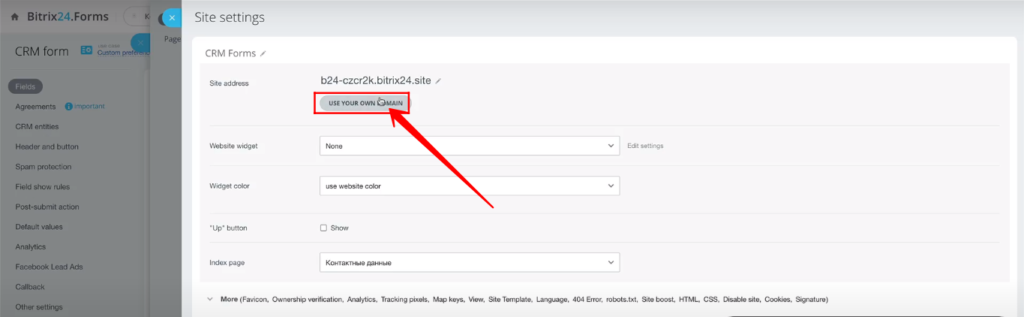
6. Add your own new domain and click “Save”.
7. Now take a screenshot of your TXT Record provided to you after new domain addition and send it your admin.

“You can also watch this video on Youtube”