| 753 Views | Amin

CRM is a priceless asset to every business / organization. In addition to enhancing customer relationships, CRM also makes business growth possible by fostering team productivity and improving business processes.
By improving business processes, CRM provides an avenue to centralize data, automate tasks, and also carry out projects systematically.
On the other hand, the productivity advantage of CRMs like Bitrix24 ensures that agents and managers can collectively make productive efforts towards organizational growth. In Bitrix24, workgroups ensure that teams can accomplish specific tasks within a given period.
However, workgroups may become chaotic when there is little or no organization within them. Creating group topics ensures that workgroups perform their functions in the following ways:
Task Specificity
When you set up group topics, you give your workgroup / team members something specific to brood on. This way, priority is given to the topic in question over other less-pressing tasks within the workgroup.
Workgroup Members Speak the Same Language
Group topics ensure that responsible people can harvest from effective collaboration. Every group member knows what the group focus is at the time, and no one unduly deviates from it.
Improved CRM Efficiency
Group topics leave you with improved CRM efficiency as everything is in its place. For reference purposes, group topics also ensure that users can effortlessly locate every item by simply searching for its unique topic.
Improved Productivity
When team members can actively recognize the specific tasks to focus on at any given period, their productivity improves. When users can navigate the CRM interface efficiently, business productivity is bound to increase alongside customer satisfaction.
Hence, in this case, we’ll show you easy-peasy steps to create group topics in your Bitrix24 workgroups.
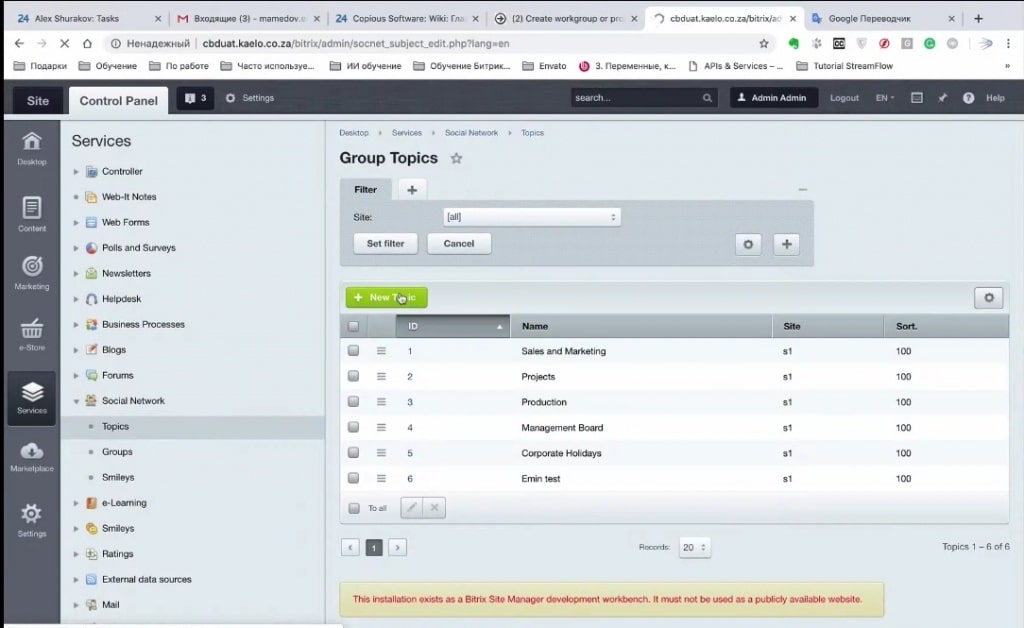
1. Within the Bitrix24 Control Panel, we navigate to services on the menu by the left side of the interface.

2. Under the ‘Services’ menu, we select ‘Social Networks’ and then ‘Topics’.

3. The available group topics will be displayed, and then we select ‘New Topic’.
4. Next, we input the title and site of the group topic and then save it.
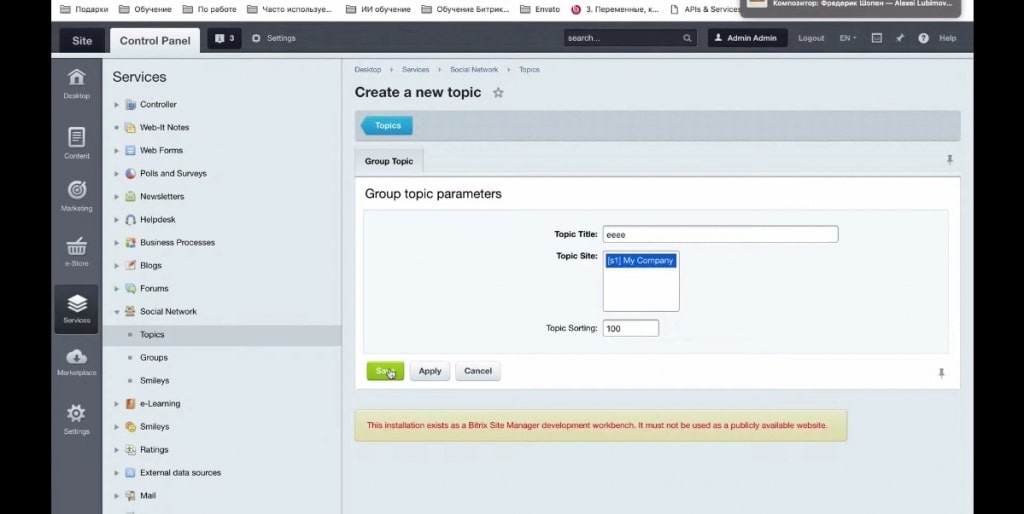
5. Under ‘Topics’, we can select the topic to edit and add specifics to it.

Kindly contact us to assist you with any troubles you may be having with your workgroups or group topics. We’ll be glad to hear from you! You can also watch a brief clip of this illustration below.