| 3389 Views | Amin

In today’s session, we’ll delve into the essential aspects of setting up the lead card within Bitrix24. The lead card is a crucial element for managing and tracking detailed information about your leads, providing a centralized place for all pertinent data. We’ll cover various customization options, including display types, field configurations, and tab settings, to help you optimize your lead management process.
Setting Up the Lead Card
We’ll guide you through the process of setting up the lead card in Bitrix24. This step is fundamental for ensuring that all relevant information about your leads is accurately recorded and easily accessible.
Display Type, Selection of Display Type, and Display Type Assignment
Learn how to choose and assign different display types for various fields in the lead card. This will help you organize your lead data more efficiently, allowing for better visualization and management.
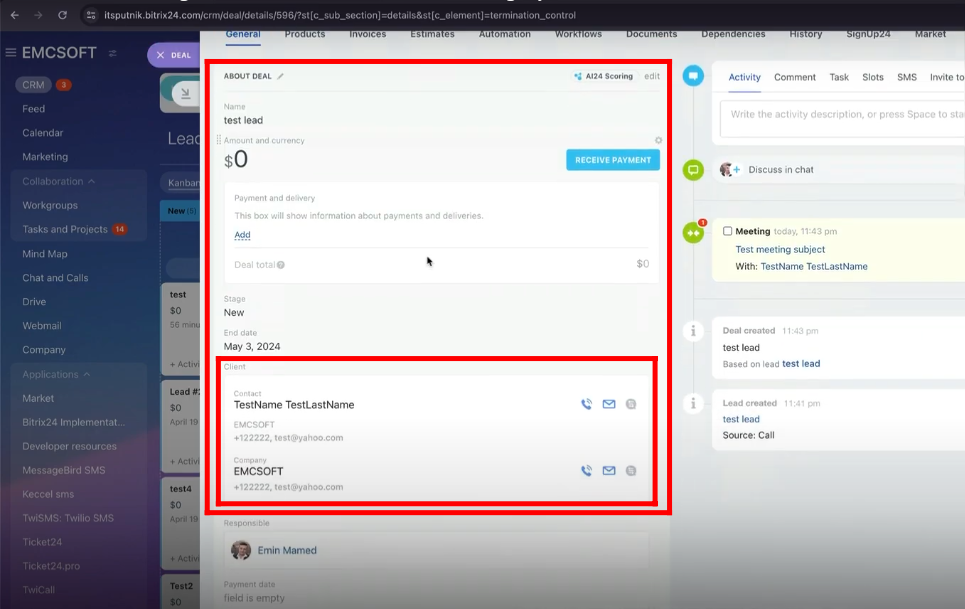
The Difference Between Client Field, Name, Phone, and Email Fields
Understanding the differences between the client field and the individual fields for name, phone, and email is essential. We’ll explain how each field functions and their importance in maintaining an organized CRM system.
Setting Up the Client Field
We’ll walk you through the steps to set up and configure the client field in the lead card. Properly associating leads with their respective clients ensures better tracking and management.
How to Set the Country in the Phone Field
Correctly setting the country in the phone field is crucial for ensuring accurate communication. We’ll show you how to format phone numbers with the appropriate country code.
Setting Up Tabs in Lead Card
Tabs help in organizing information within the lead card into manageable sections. We’ll guide you on how to set up and customize tabs such as details, activities, and custom tabs to streamline information access.
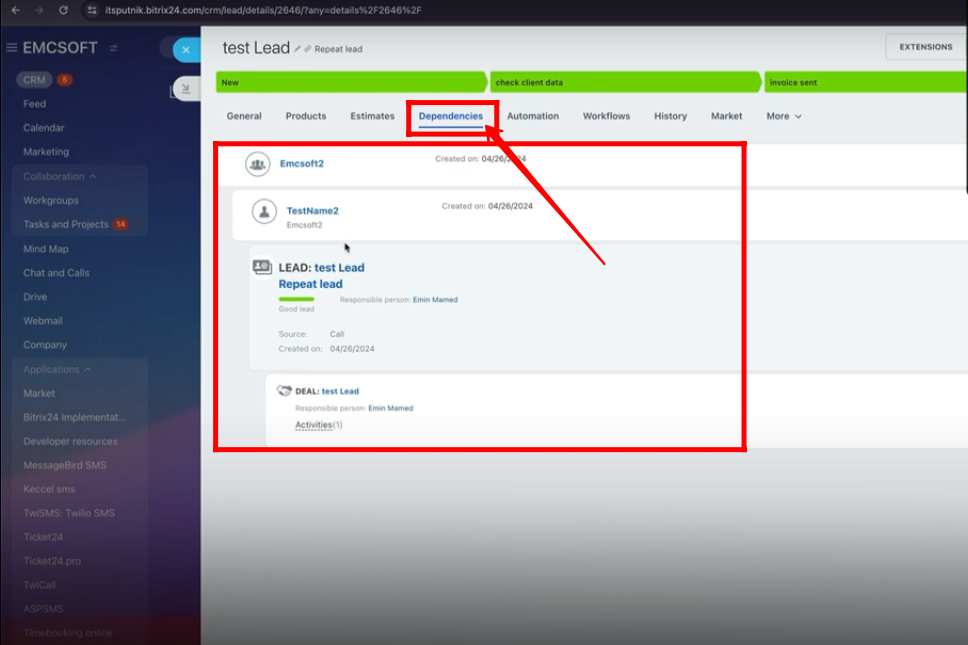
Dependencies Tab
The dependencies tab allows you to track the relationships between leads and other CRM elements. We’ll explain how to set up this tab to gain valuable insights into your sales pipeline.
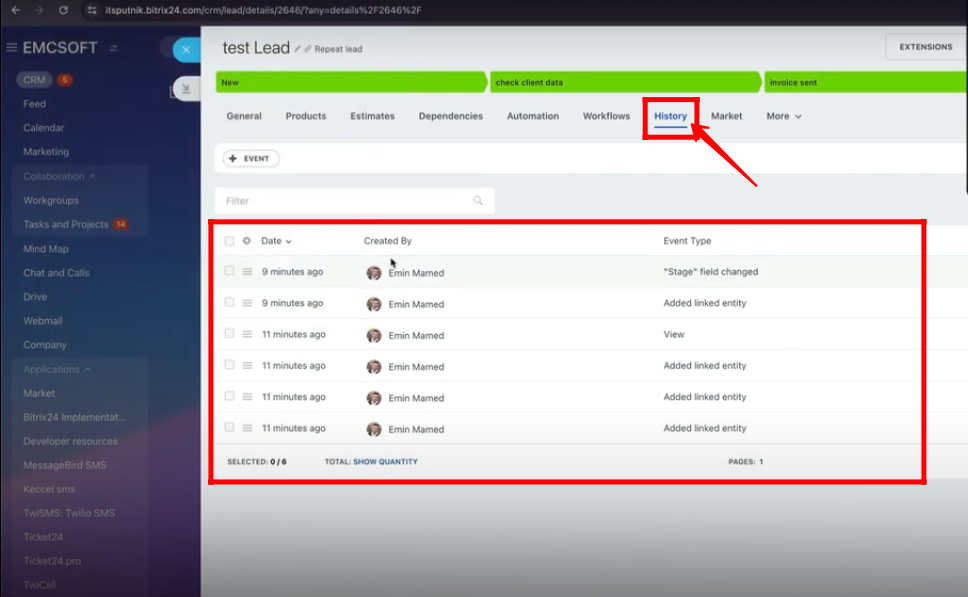
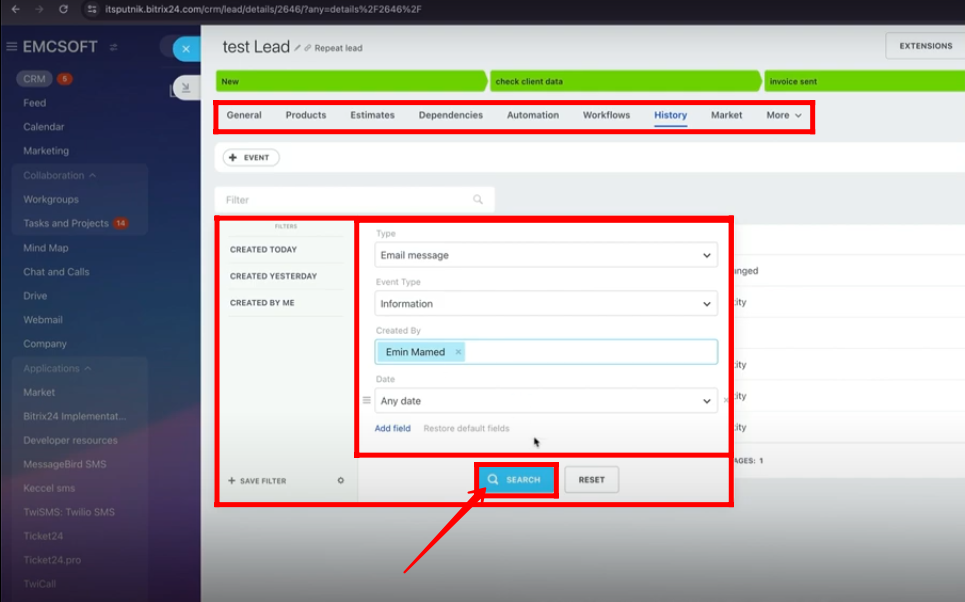
History Tab
The history tab provides a complete log of all interactions and changes related to a lead. We’ll show you how to configure this tab to ensure you have a detailed record of all activities.
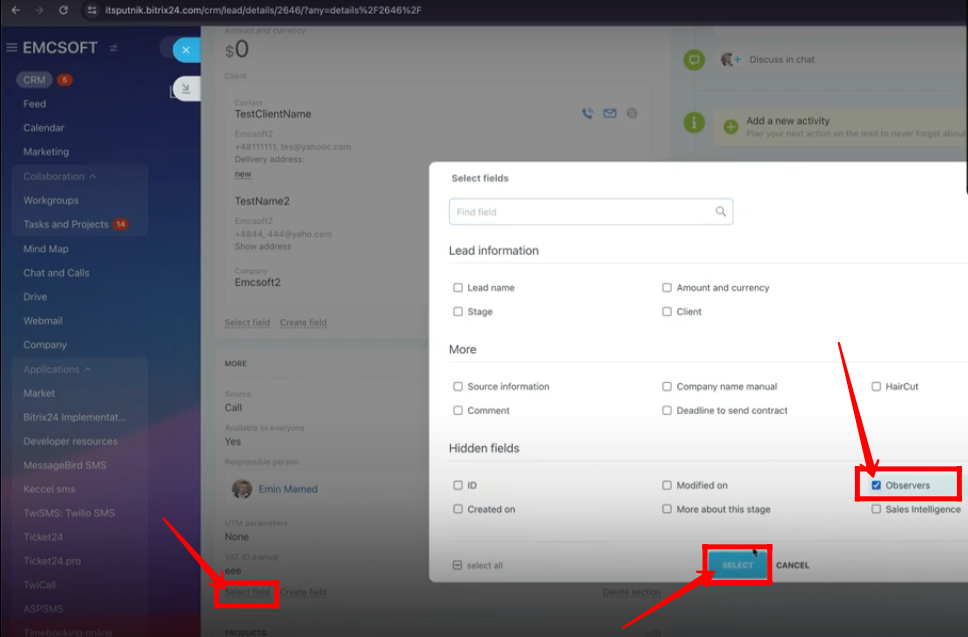
Observers and Chat on Lead
Effective collaboration is key to managing leads. We’ll demonstrate how to add observers and use the chat function within the lead card, facilitating better communication and teamwork within your CRM.
Detailed instructions are described below
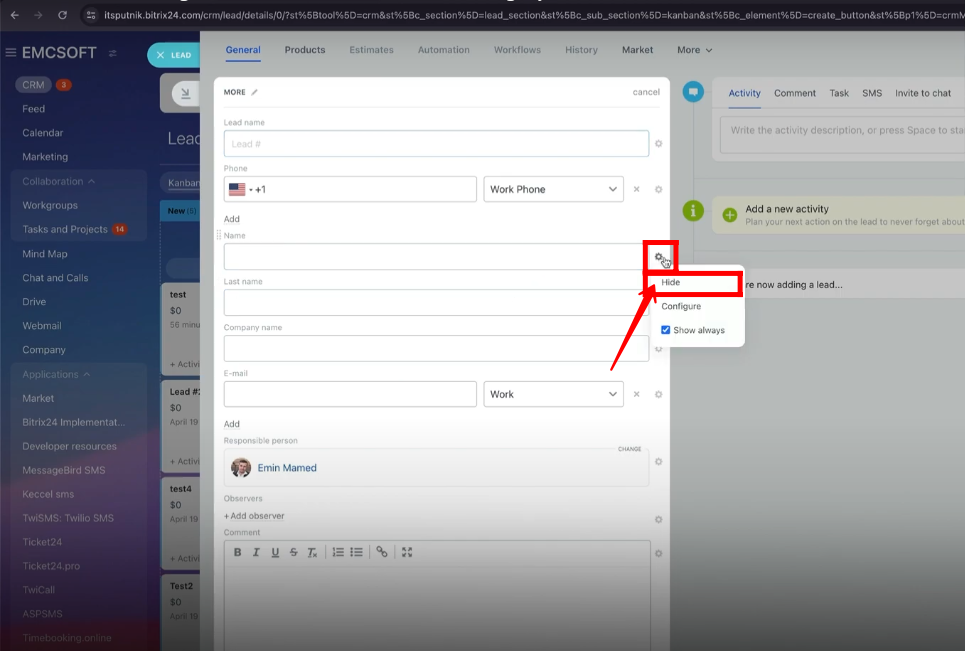
1. Within the lead, you can “edit” the lead details.
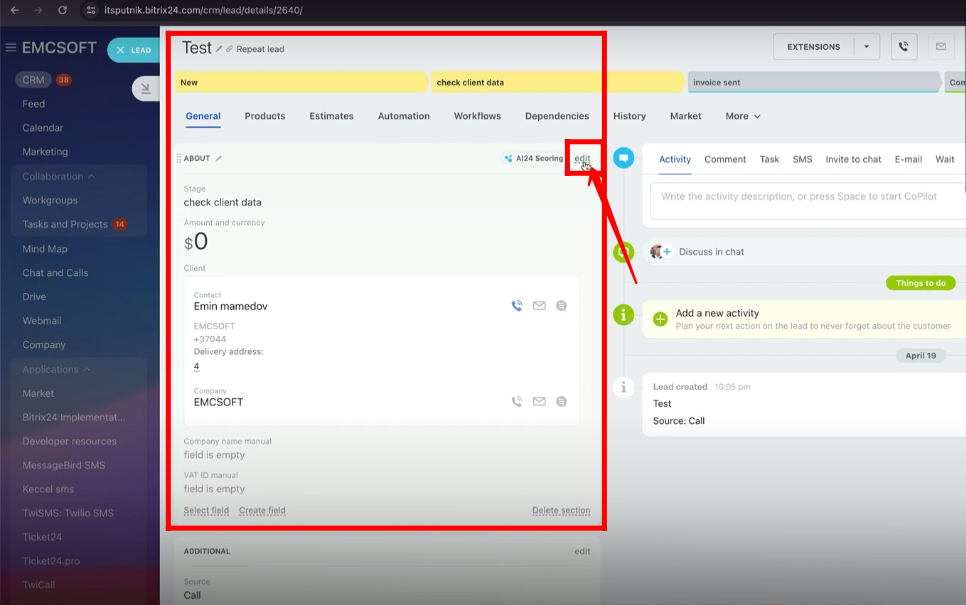
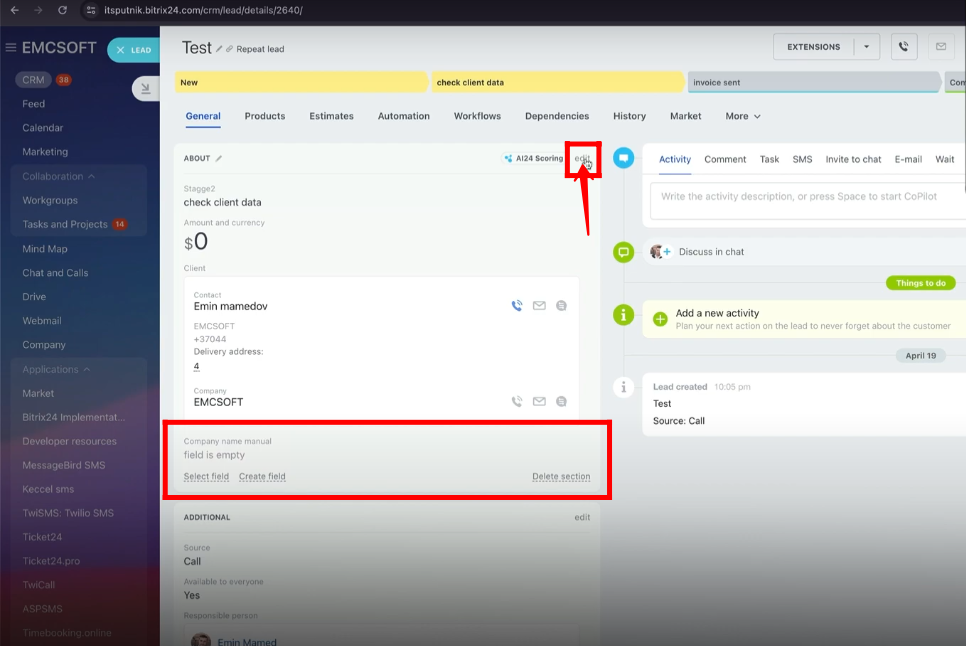
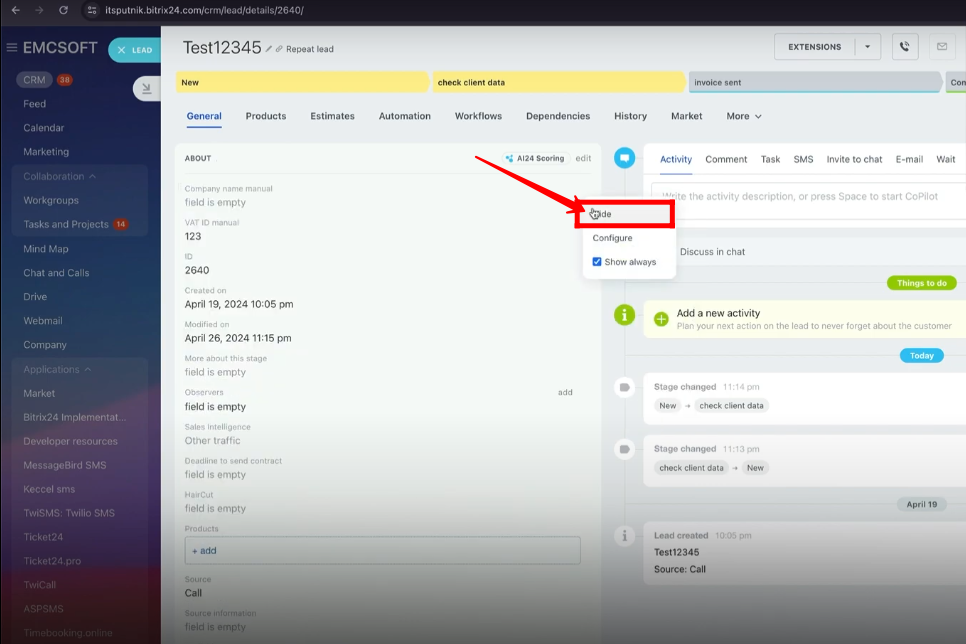
2. To hide any attribute, click the “settings” icon and then choose the “Hide” option.

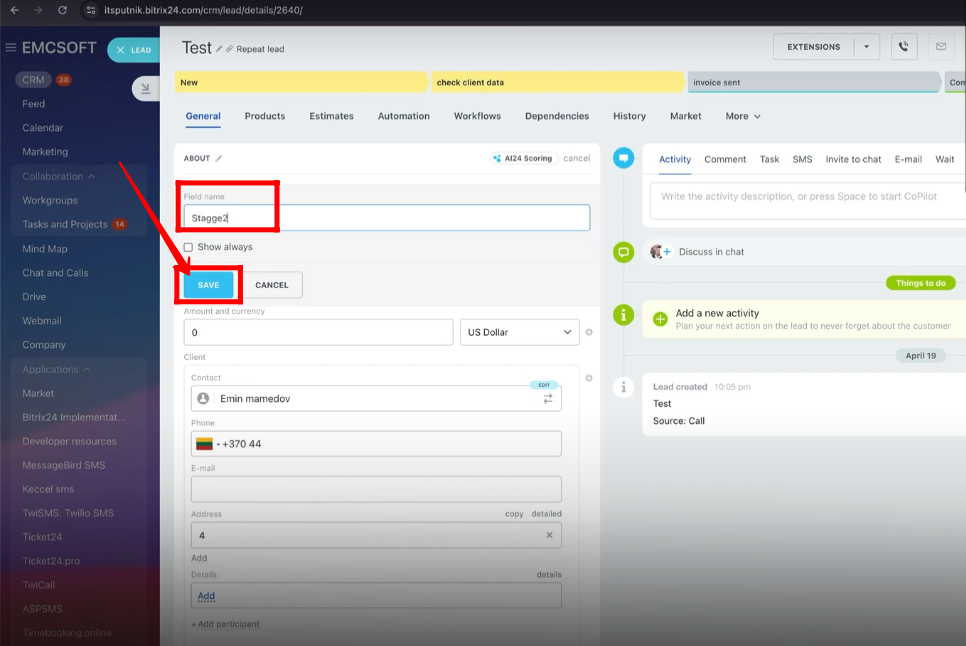
3. Also, choose “configure” instead of “hide” to make changes in the attribute. Here, the name of the attribute “Stage” has been changed to “Stage2”.
4. You can choose the option “Show always” to view a particular field or attribute even if that field doesn’t have any data.
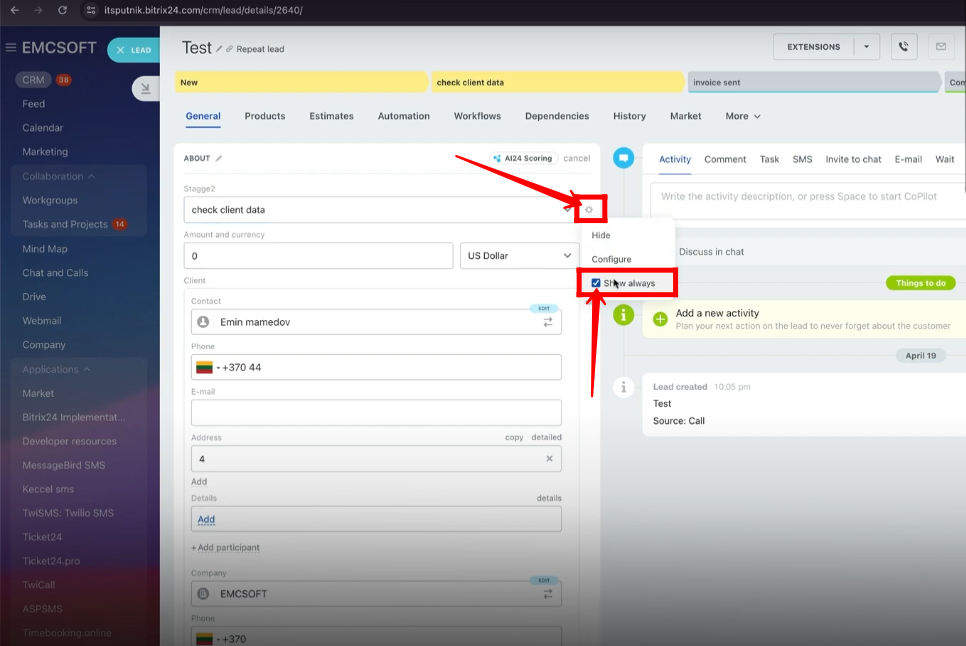
5. Let’s uncheck the option “Show always” for the field “VAT ID manual”.
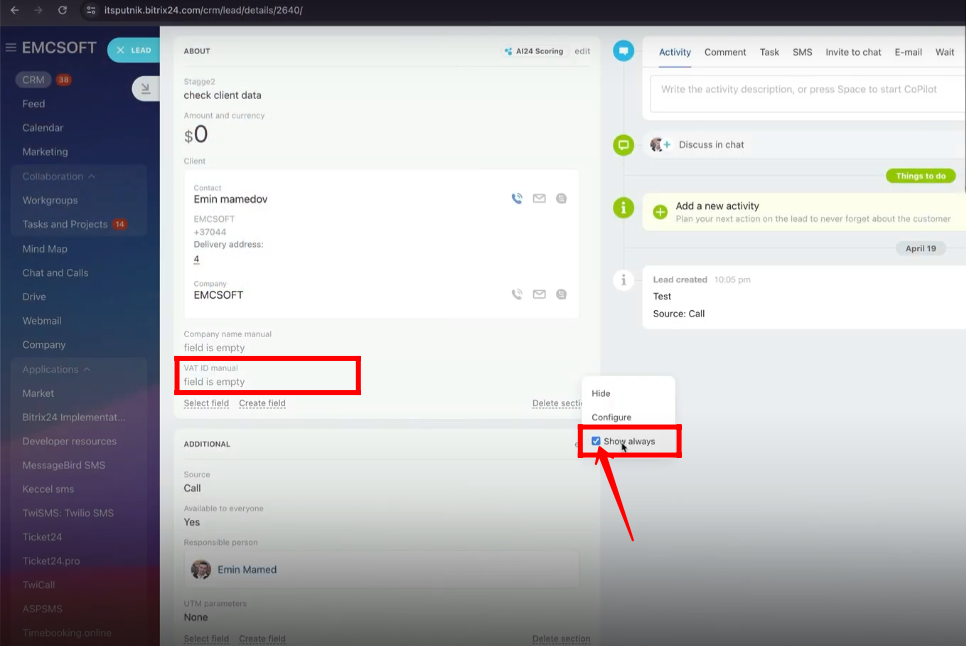
6. Now, the field “VAT ID manual” is not being shown because it was empty. Click “edit” to fill in the field “VAT ID manual”.
7. In edit mode, you can enter some data in the field “VAT ID manual”.
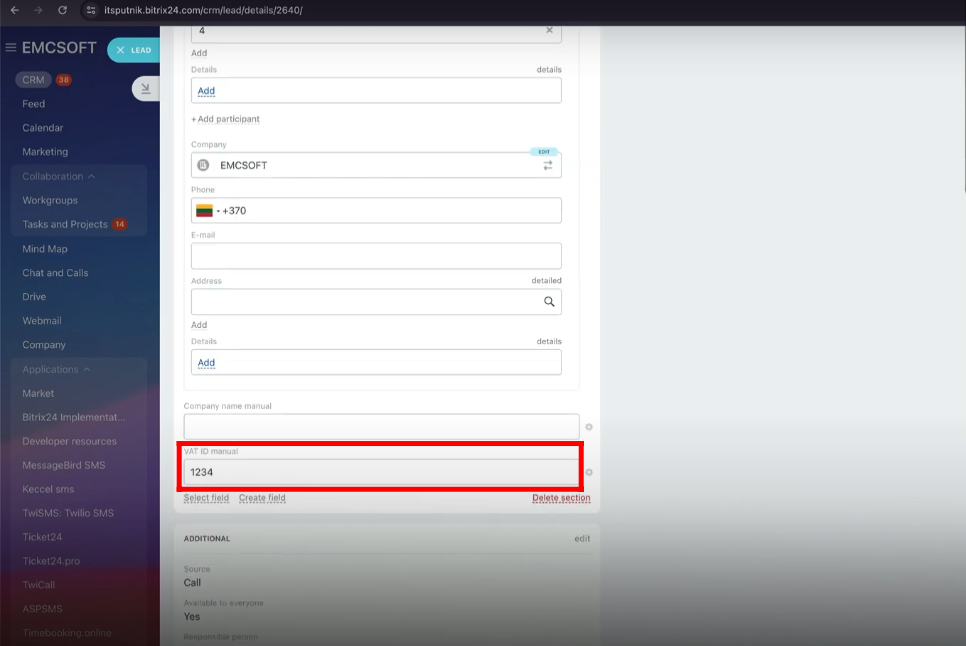
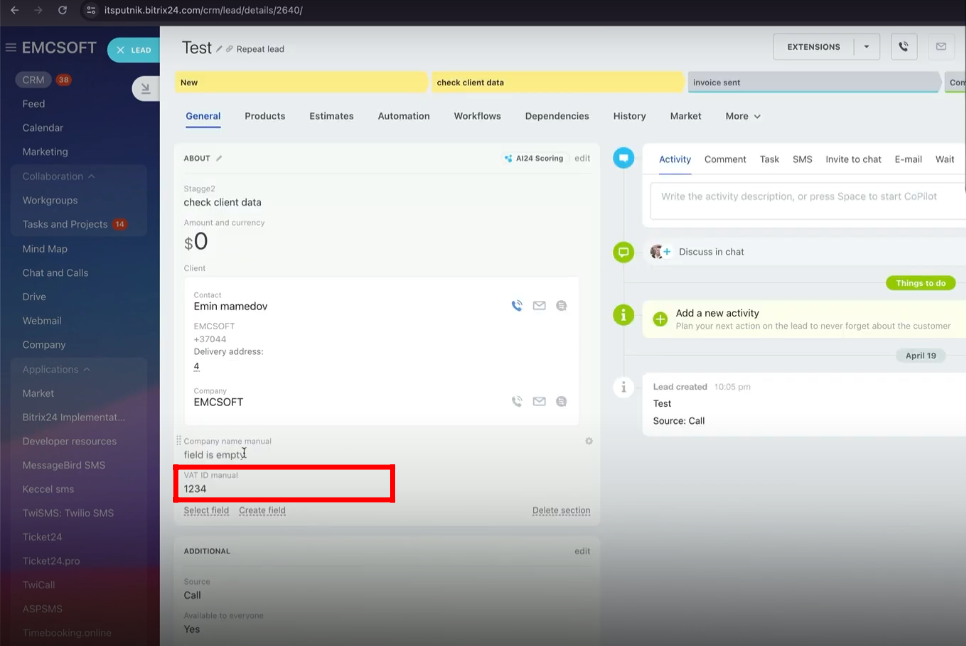
8. Now, the “VAT ID manual” with data “1234” is being shown.
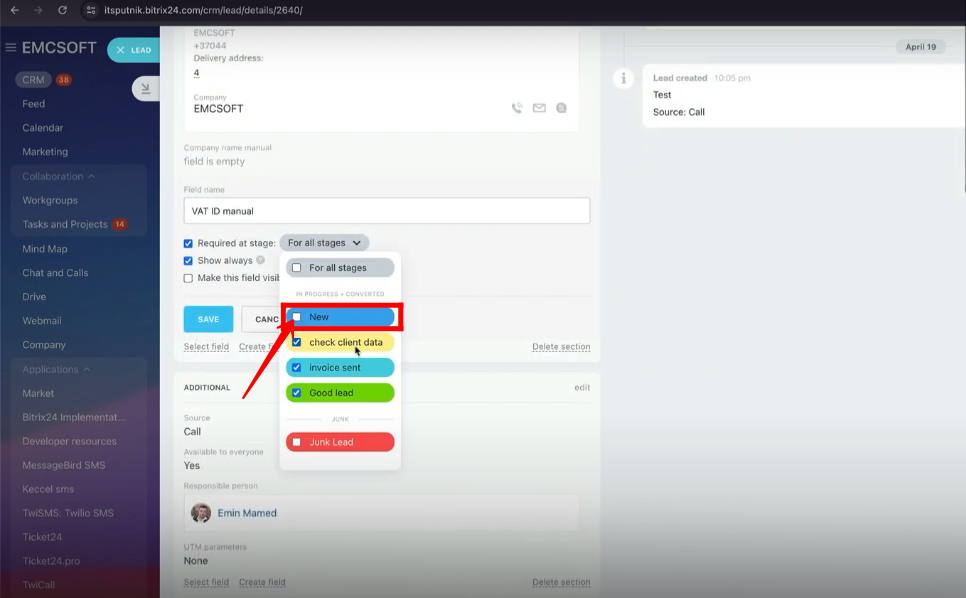
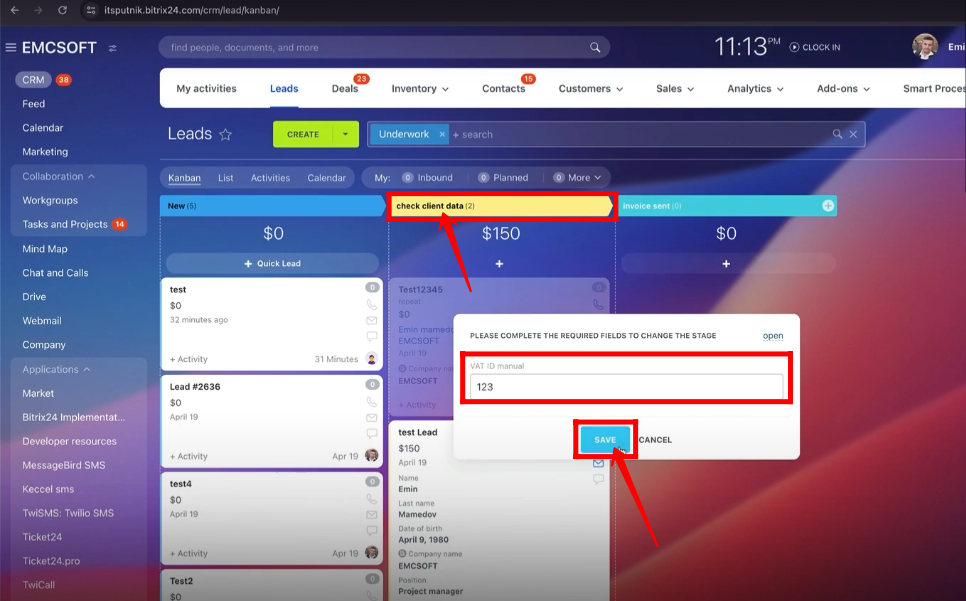
9. You can configure any field to be required at any particular stage or all stages.
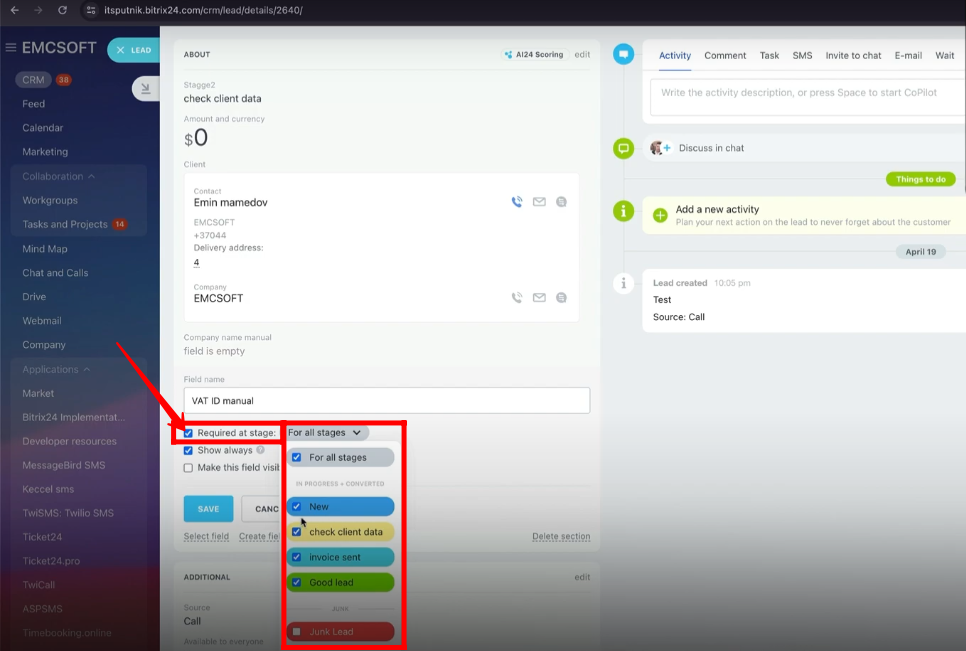
10. Change the stage of the lead to “New” for now.
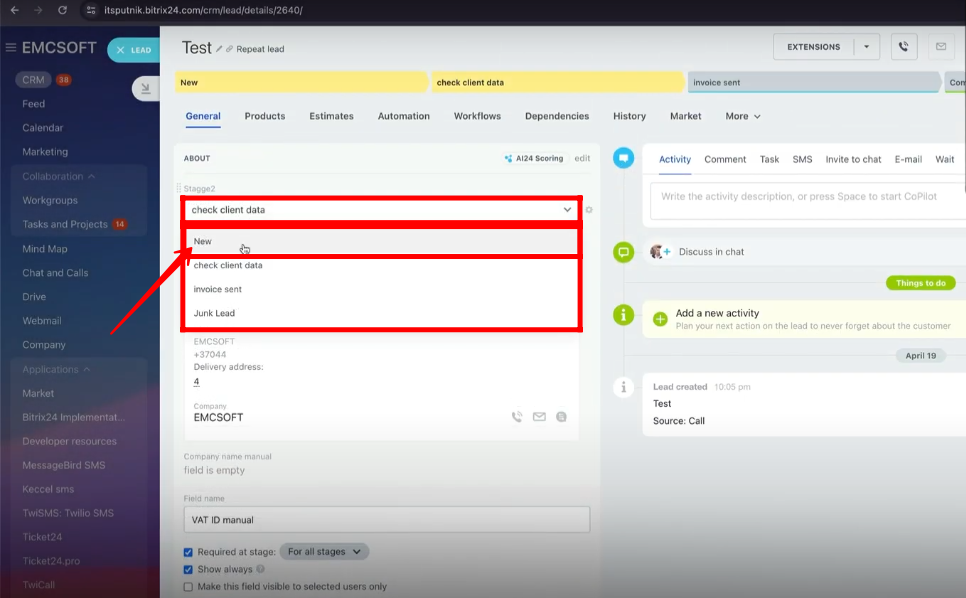
11. For the field “VAT ID manual”, make it not required for the “New” stage.
12. Remove the data from the “VAT ID manual” field.
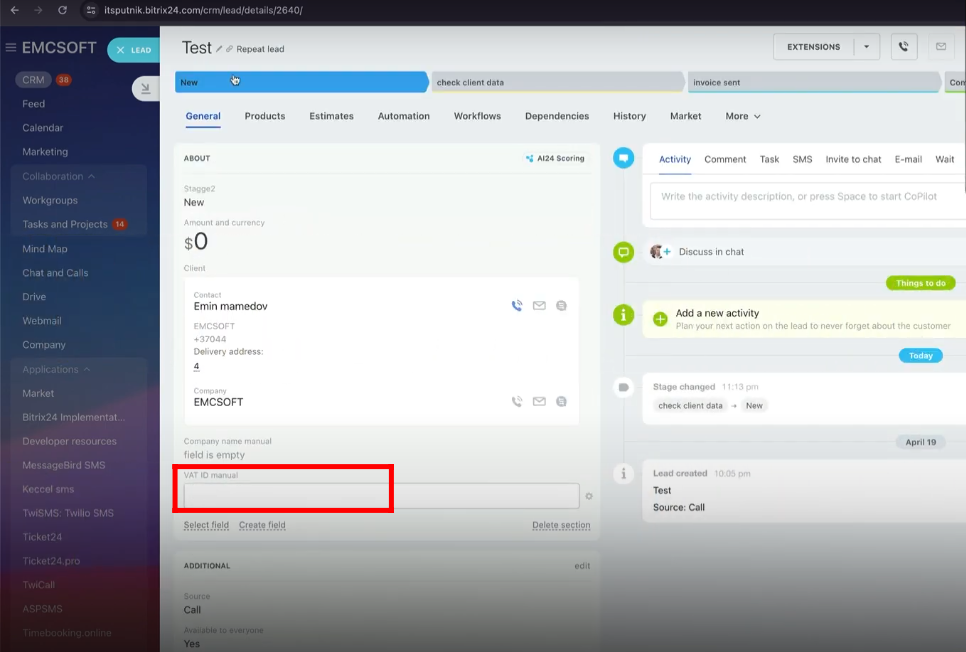
13. You can see the lead is in the “New” stage for now.
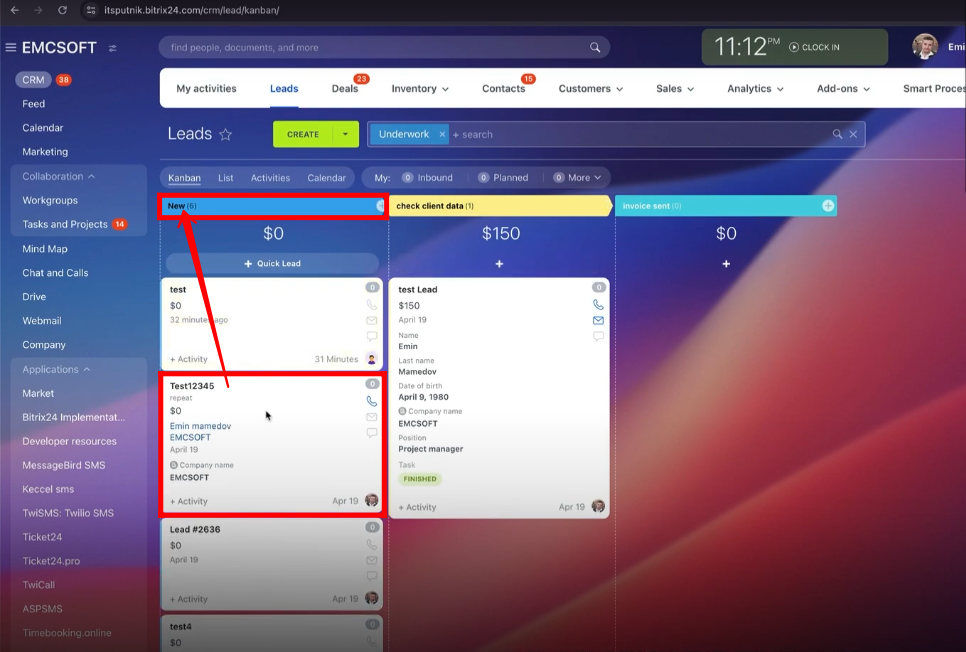
14. Move the lead to the “Client check data” stage. It will require you to first fill in the “VAT ID manual” field and then the lead will be moved to required stage.
15. In the “configuration mode” of any field, you can make it visible to the selected users only. Here, the field “VAT ID manual” has been made visible only to the user “Test user”.
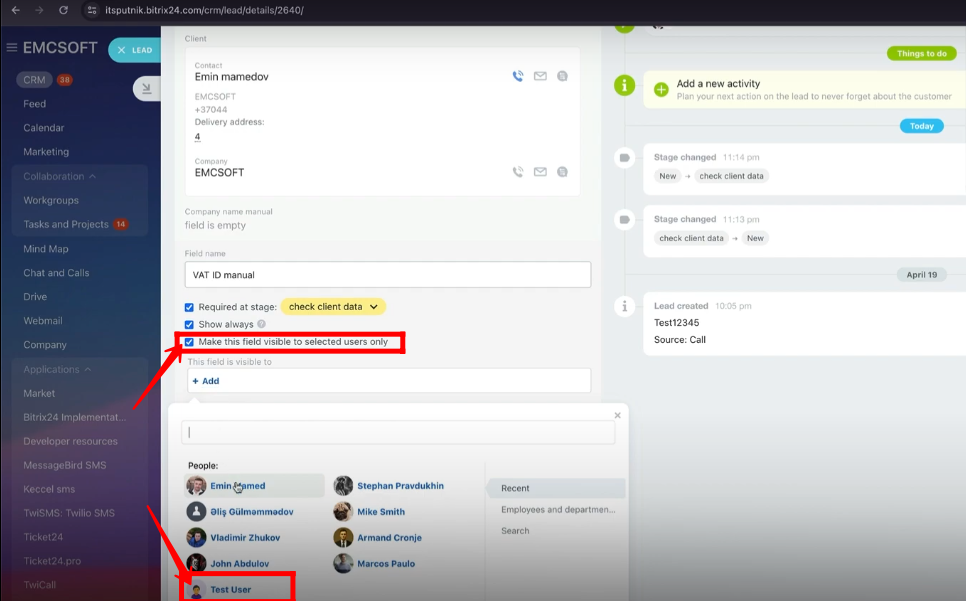
16. The lead is opened from another user’s panel instead of “Test user”. The field “VAT ID manual” is not present here because it was only visible to “Test user”.
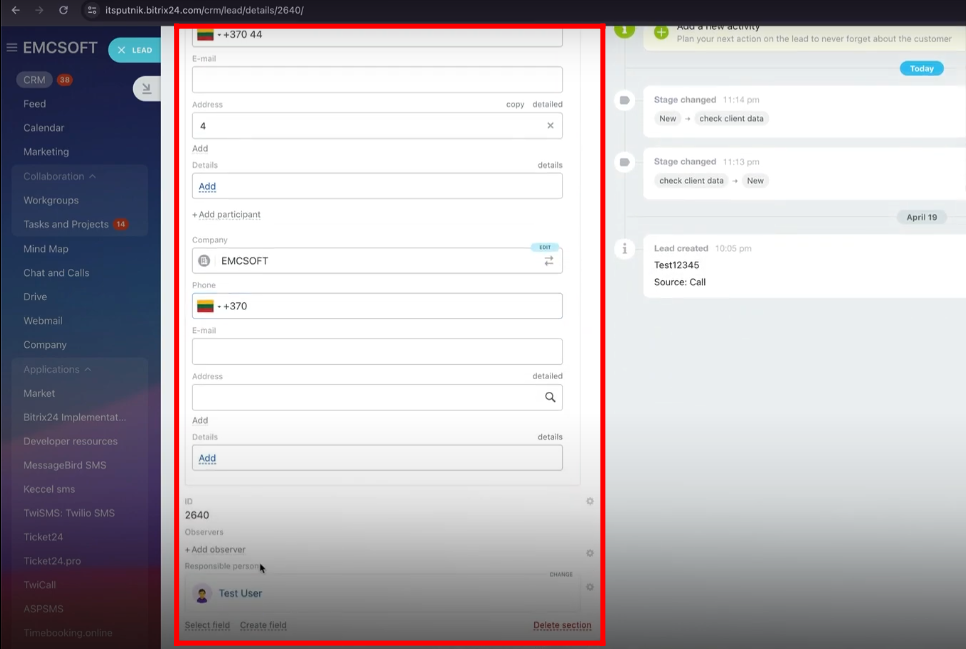
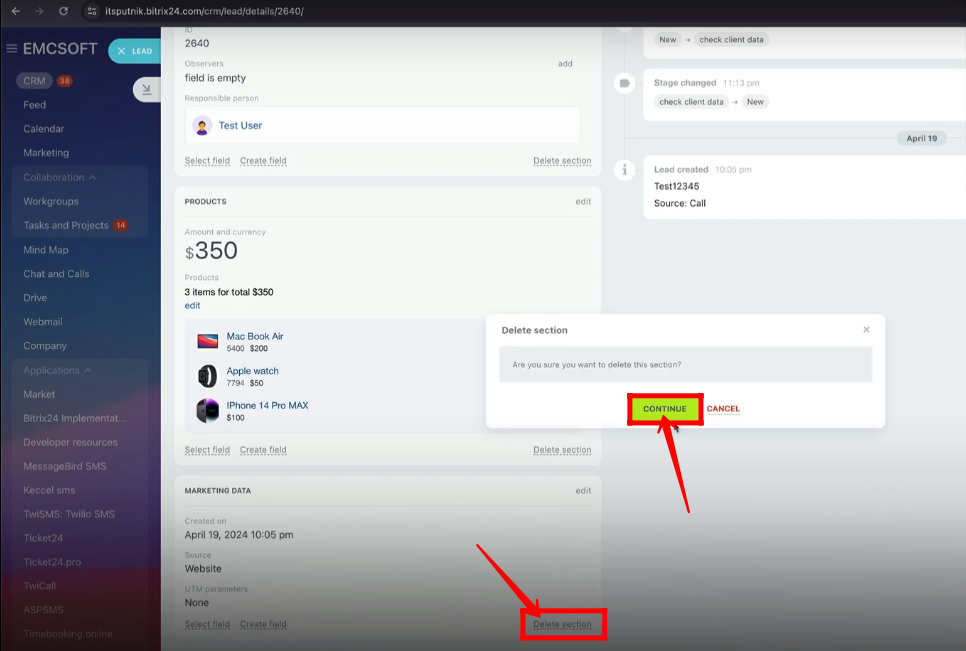
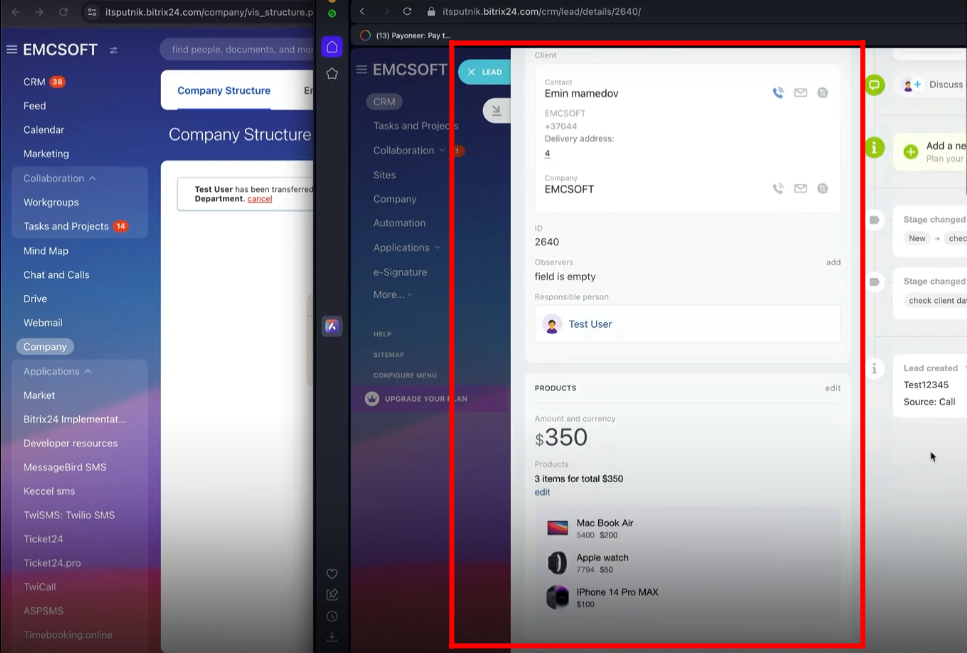
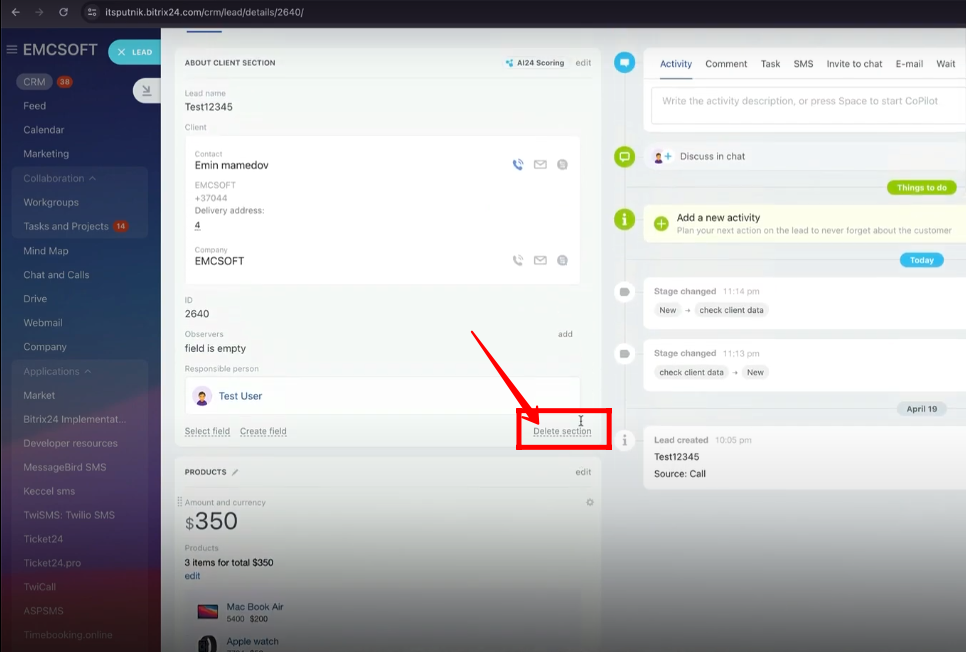
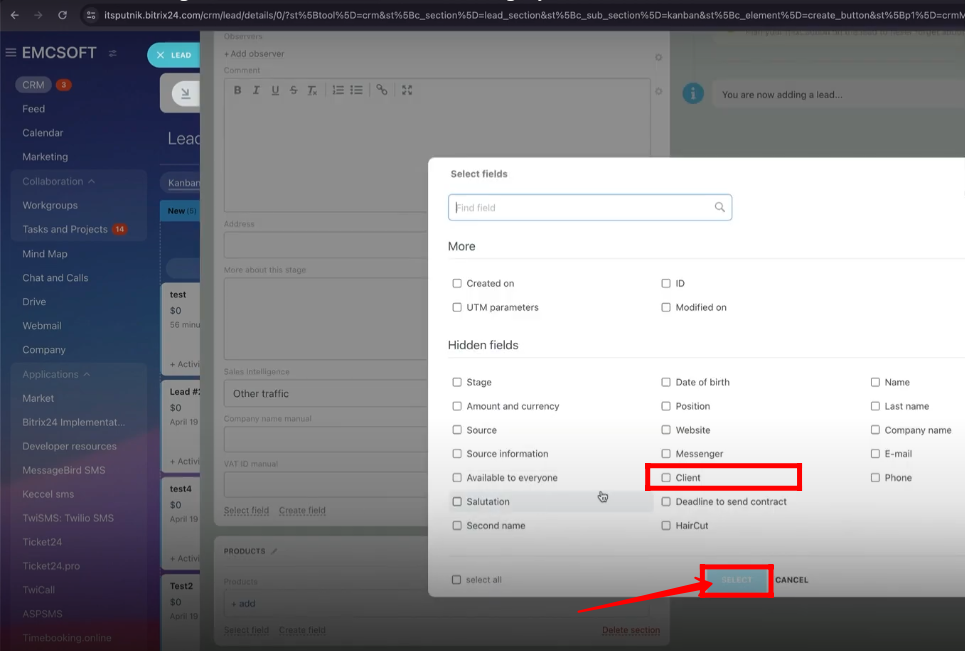
17. There can be multiple sections with selected fields in them that can be customized within the lead. You can also “delete” any section.
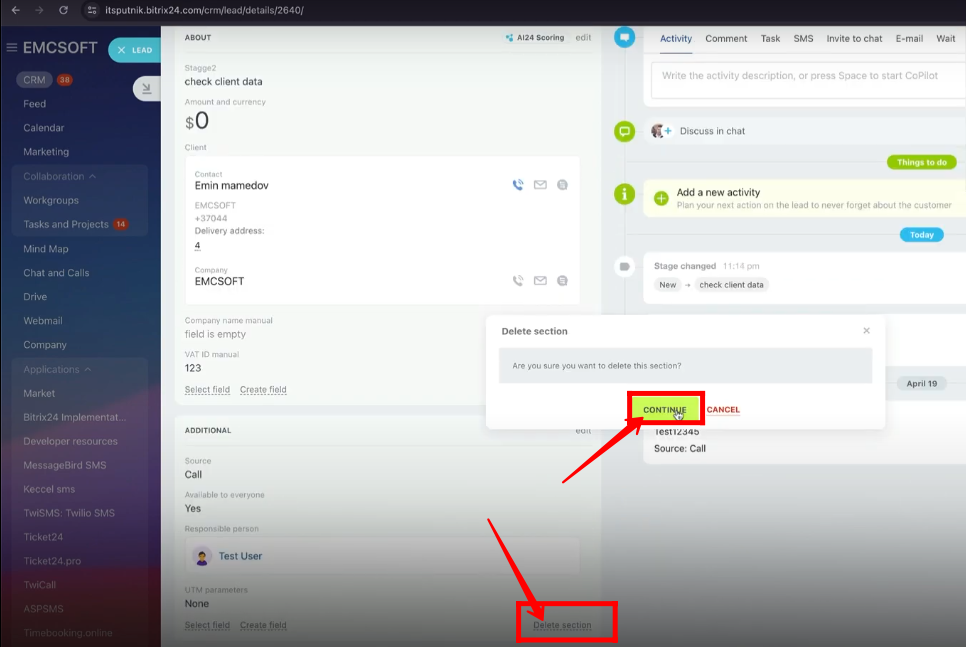
18. You can show all fields within one section only. But it is an inappropriate practice.
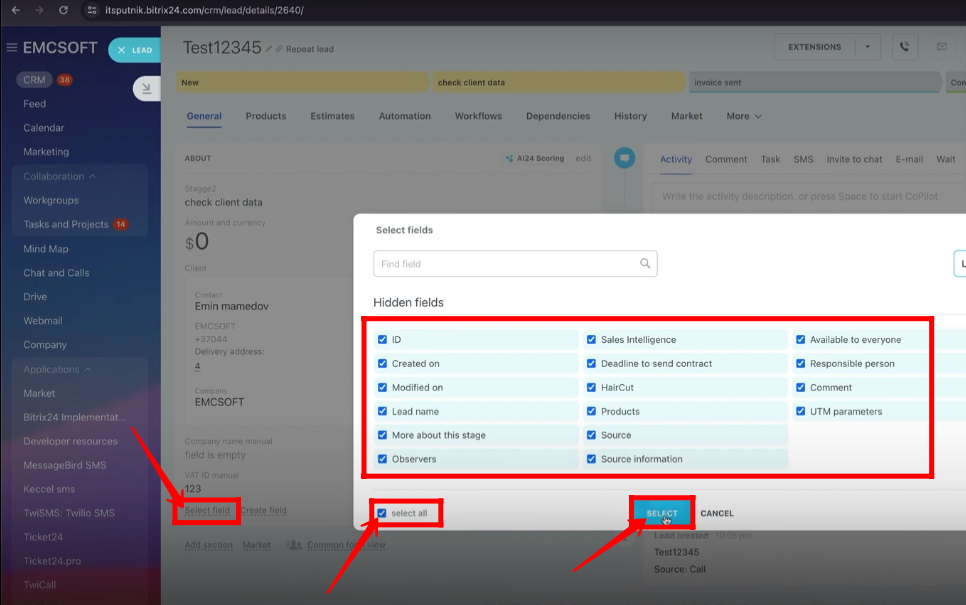
19. All fields are being shown only in one section. It will be difficult for user to find the required fields.
20. For now, “Hide” all the fields within the lead.
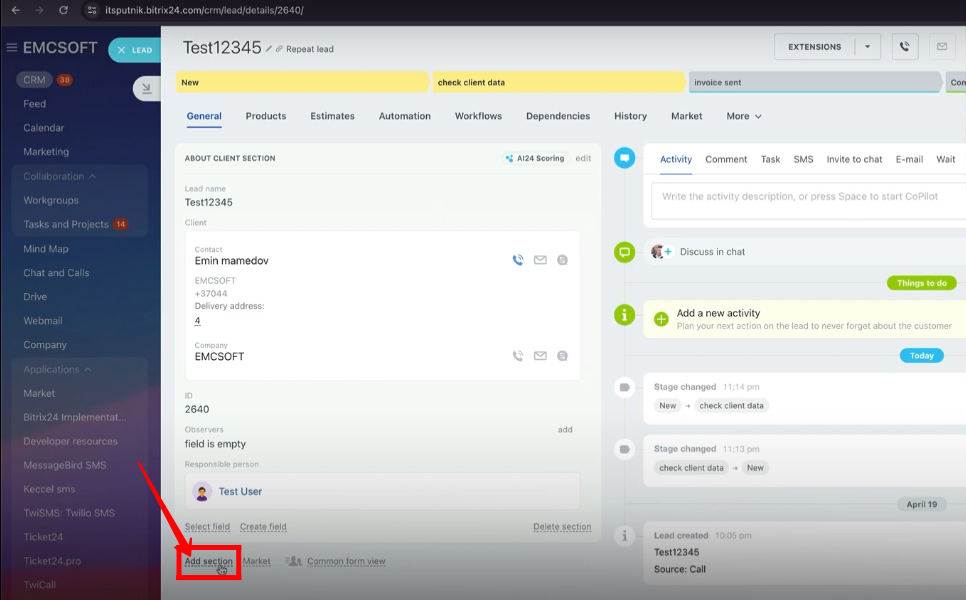
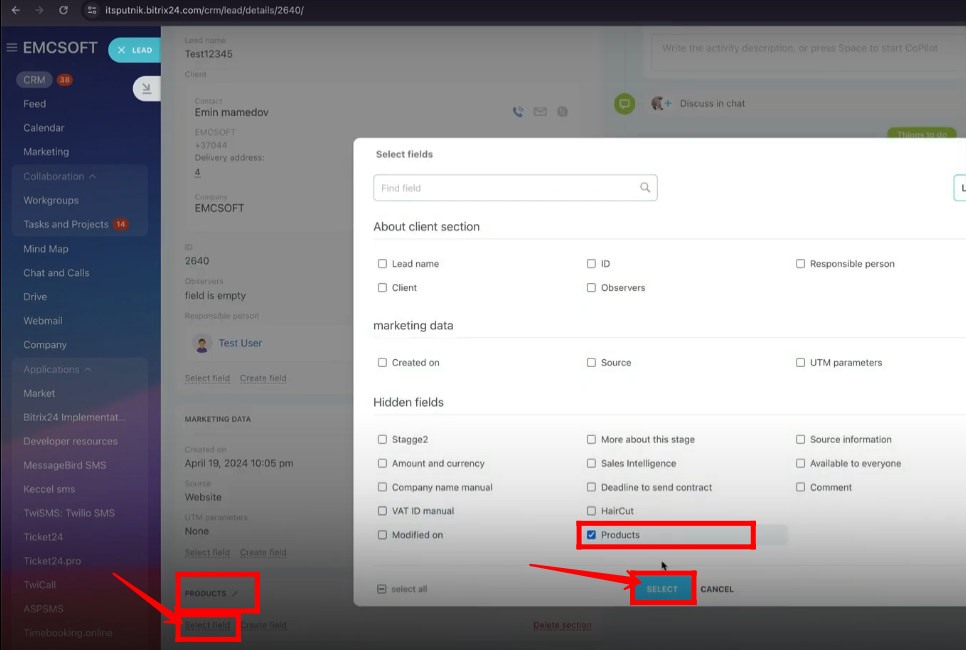
21. Here, the first section is named “About Client Section” and click “Select fields” to view within that section.
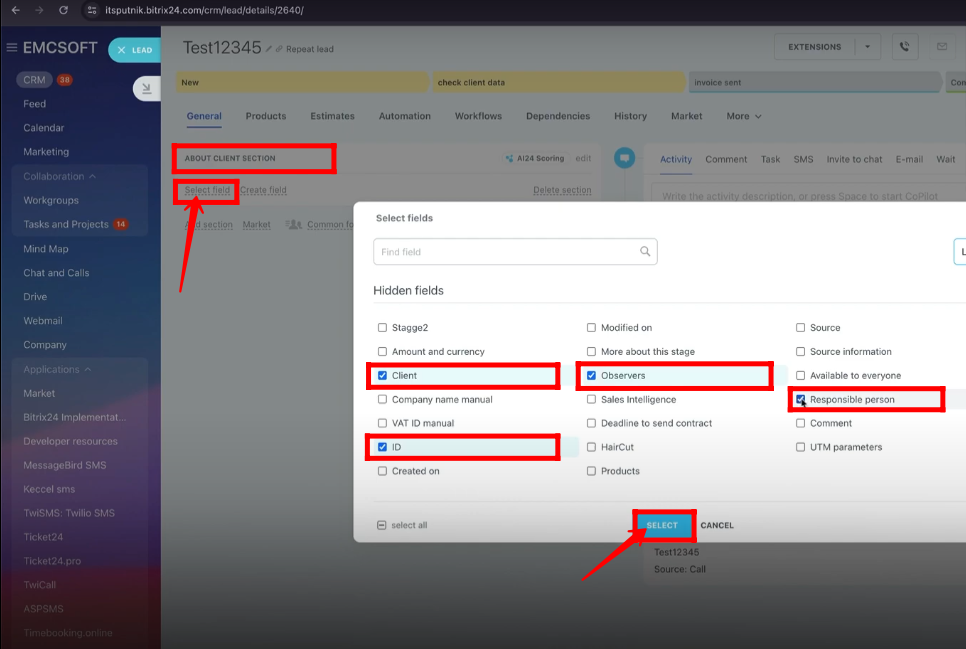
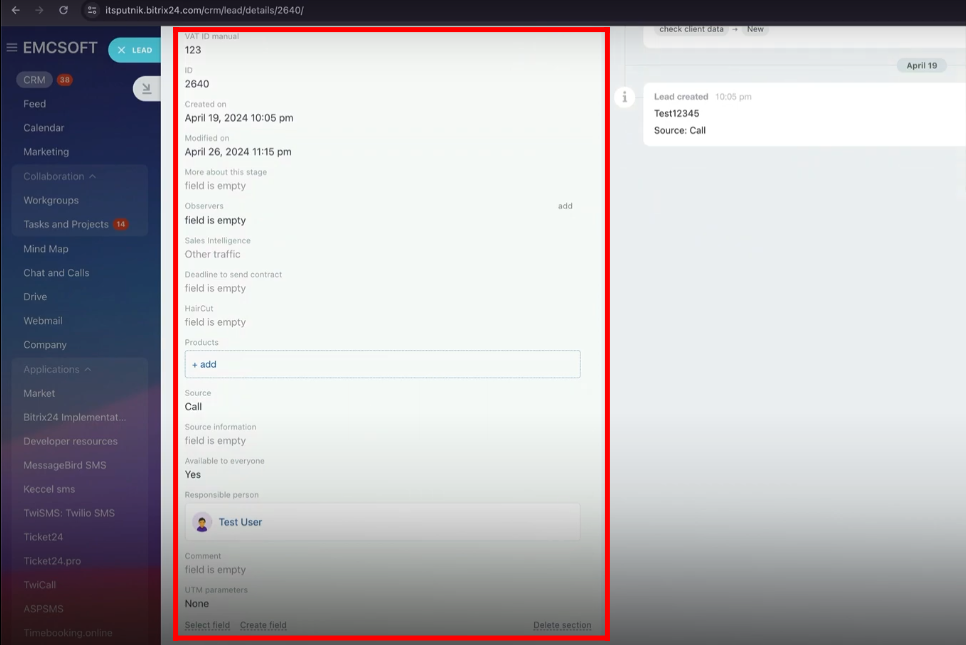
22. Now all the selected fields are being shown only in the section “About Client Section”.
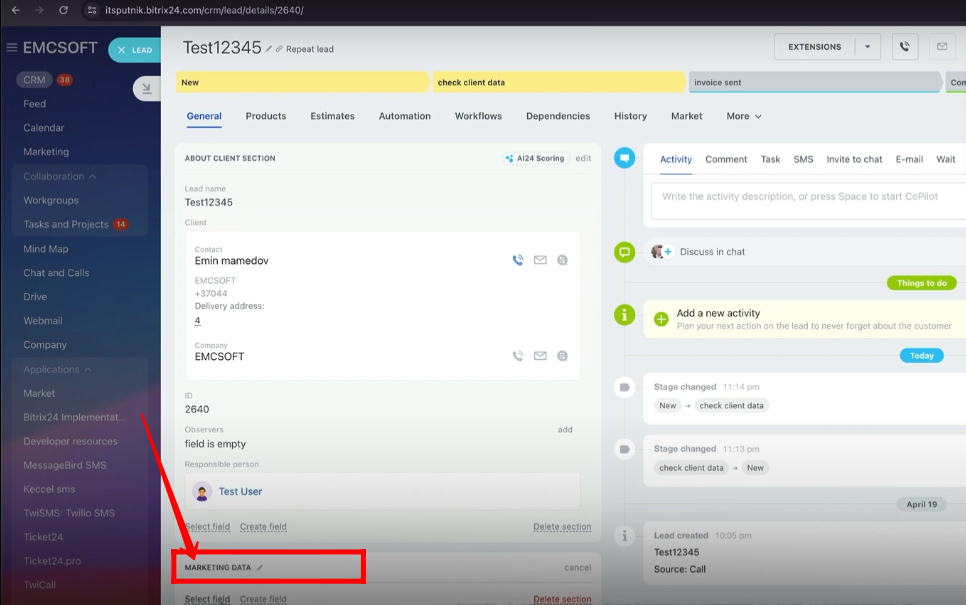
23. Click “Add Section” to create another section.
24. The second section is named “Marketing Data” here.
25. The fields “Created on”, “Source” and “UTM parameters” are selected to view in this section.
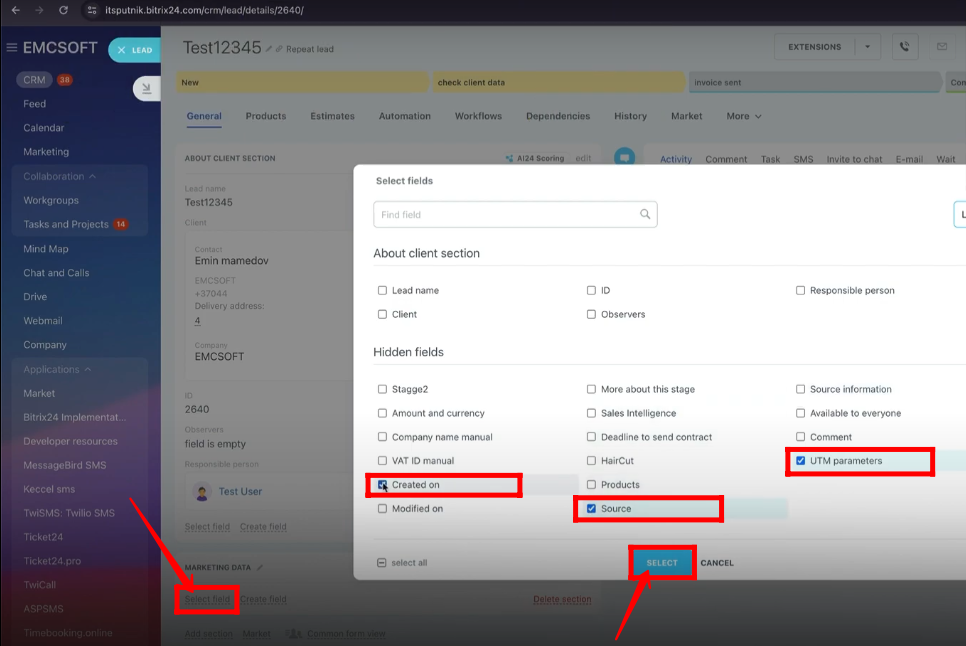
26. All selected fields are now being shown in the “Marketing Data” section.
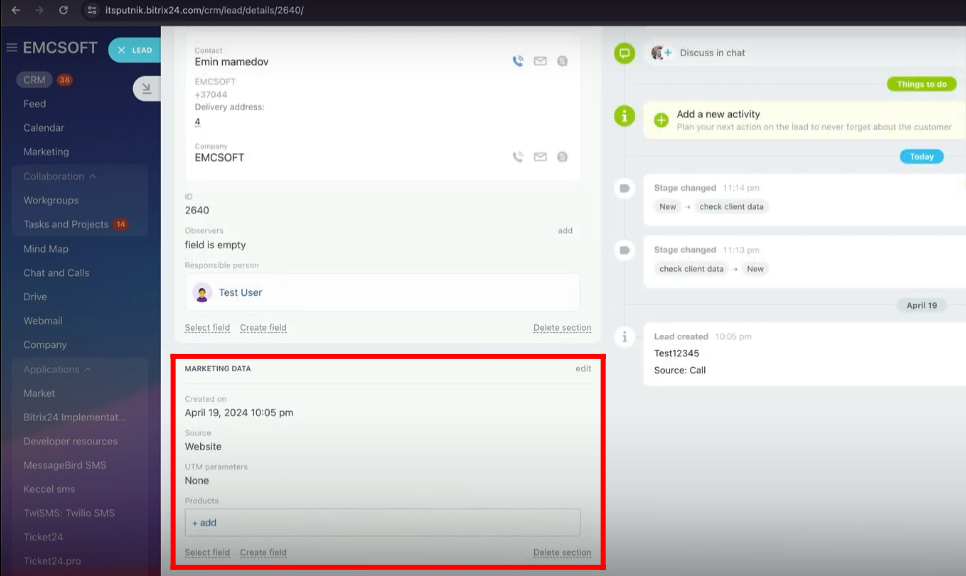
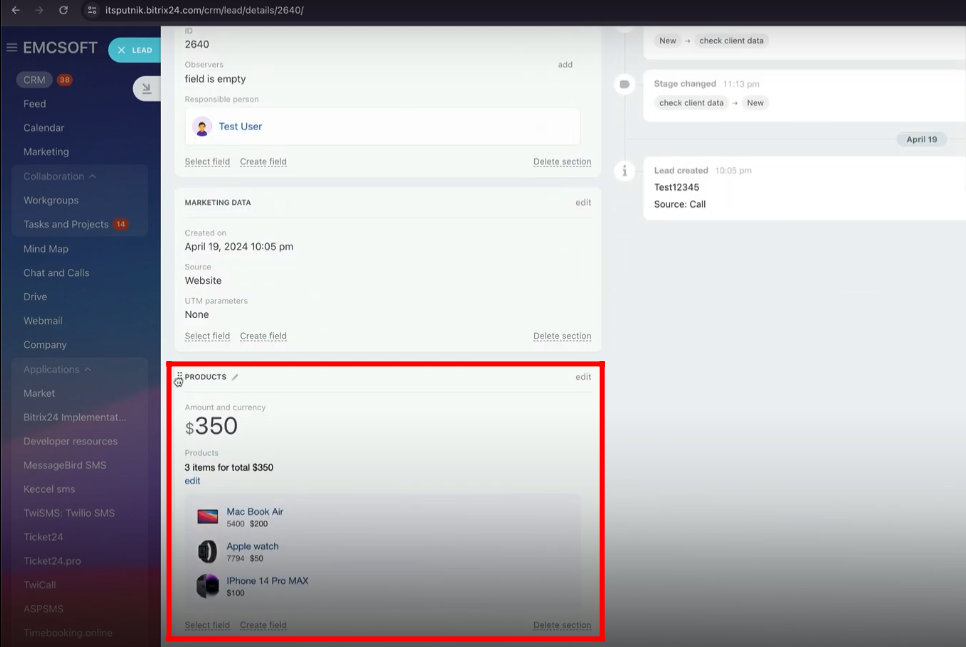
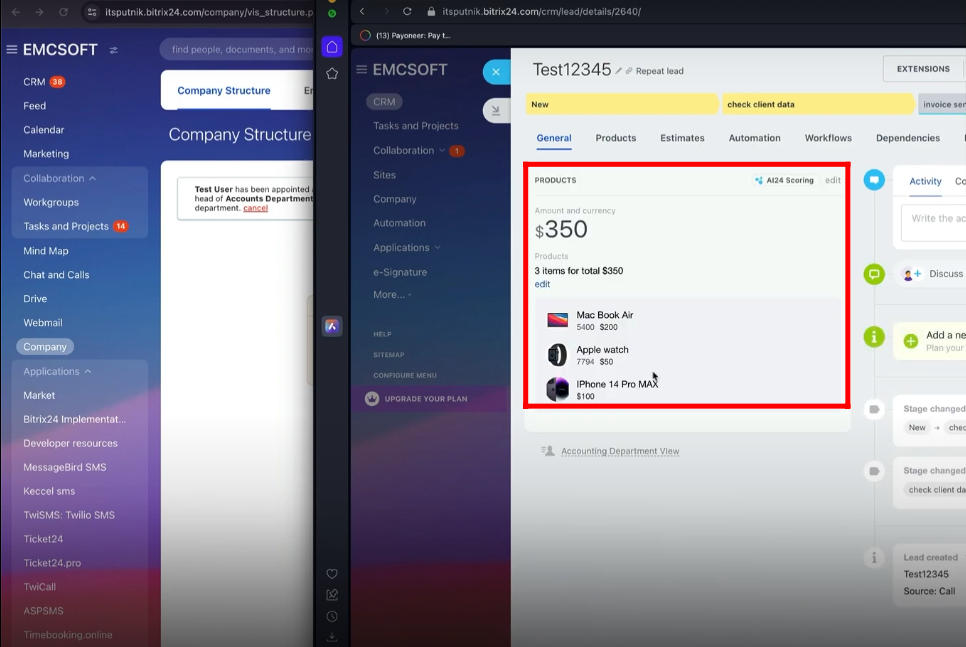
27. Now, the third section “Products” has been added and the field “Products” is selected to be viewed in the “Products” section.
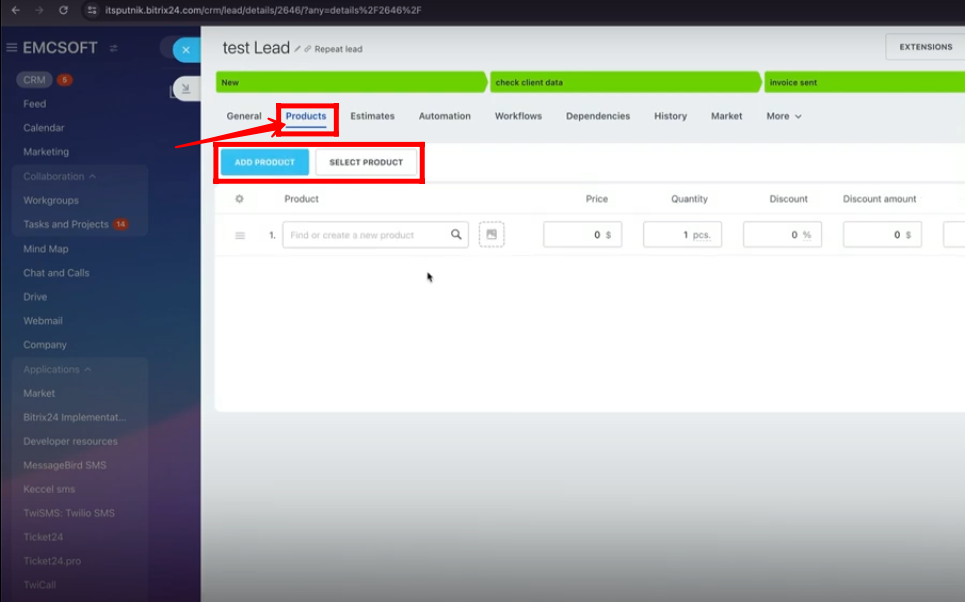
28. Go to the “Products” tab within the lead and select Products.
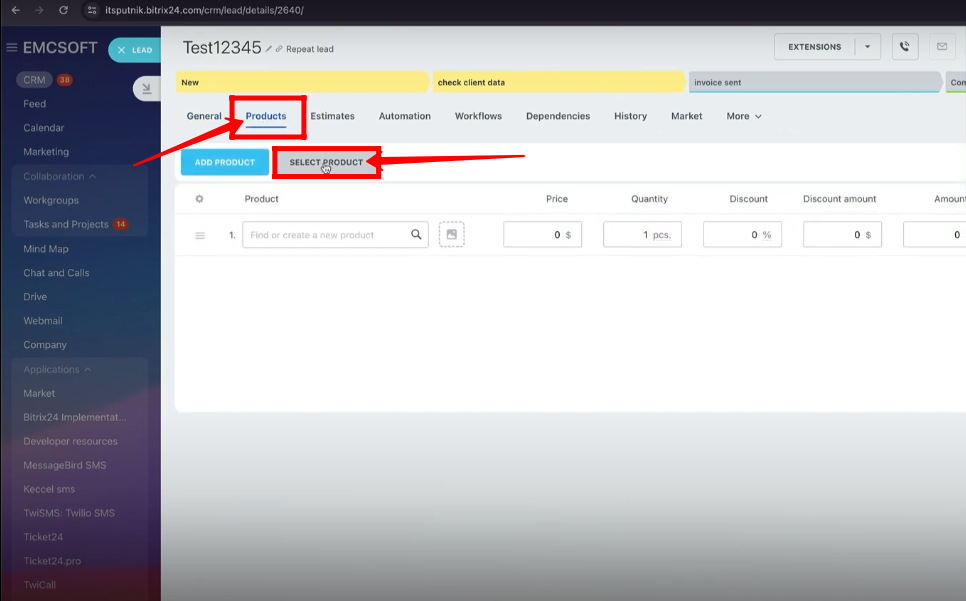
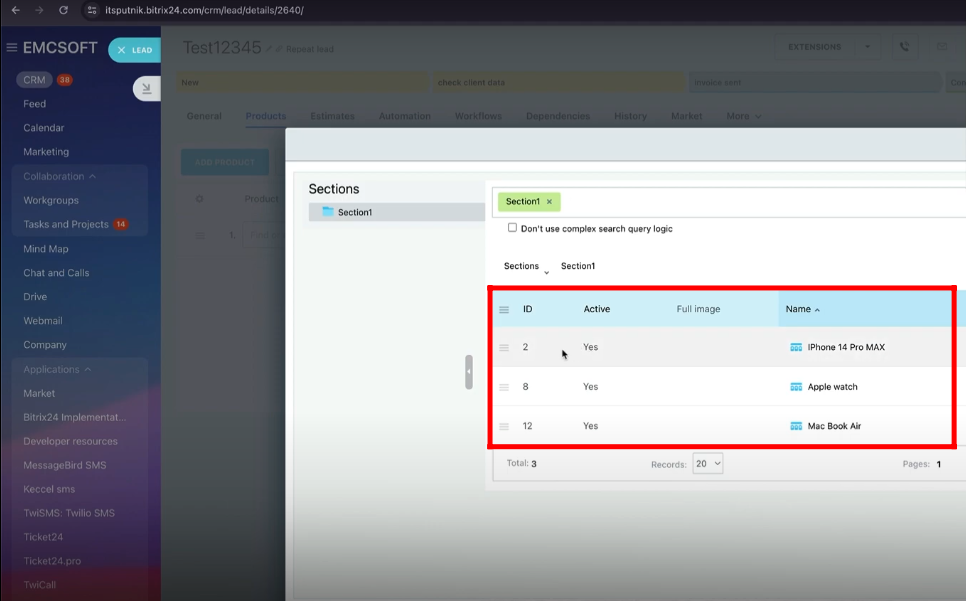
29. Select the products to be viewed in the “Products” section. In this case, all products have been selected.
30. All products are being shown in the “Products” section and the field “Amount and Currency” is selected now to be viewed in this section.
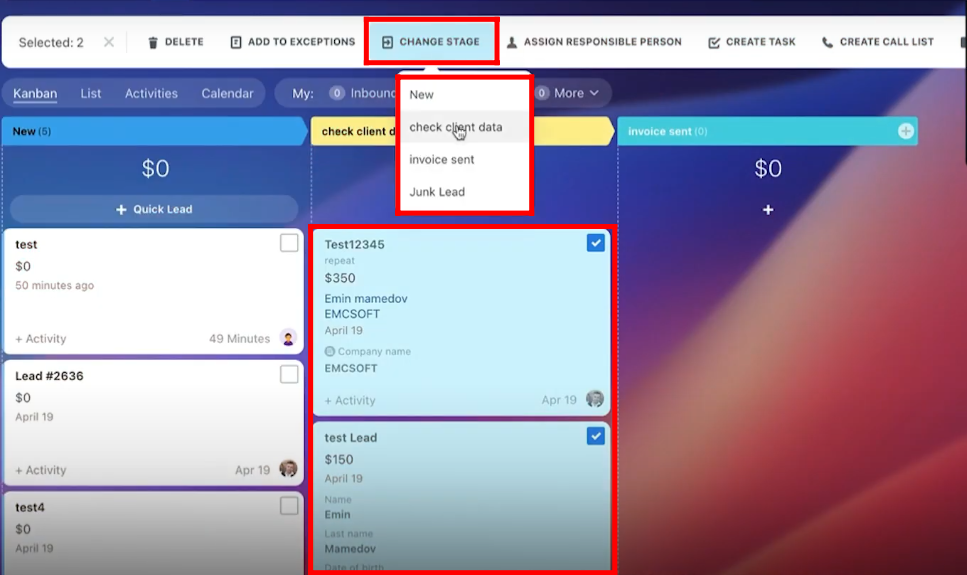
31. You can create your own custom fields of provided multiple types within the lead.

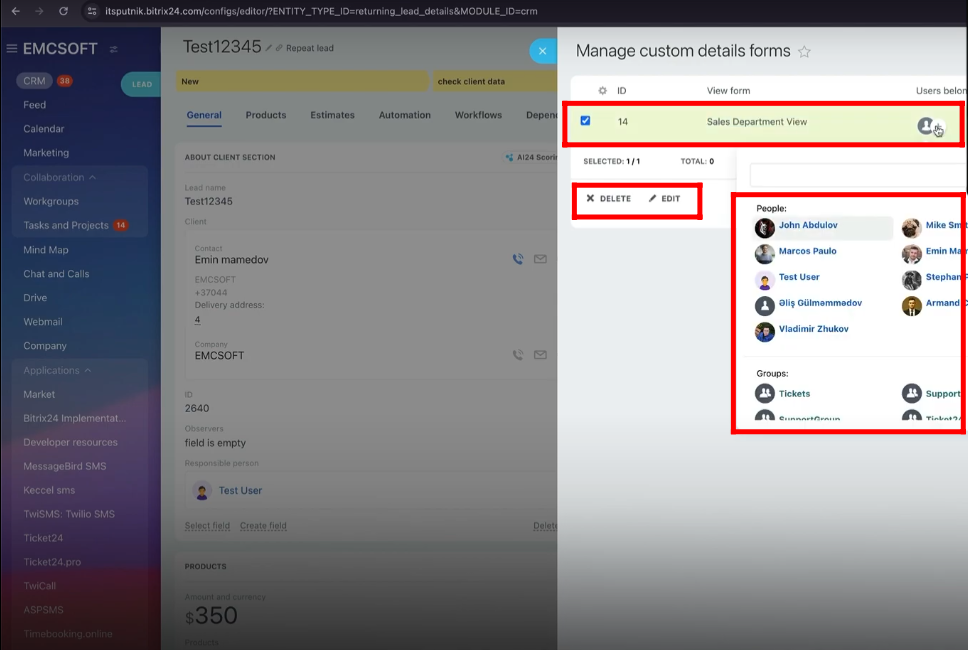
32. You can create a “New View” of leads for multiple departments and users.
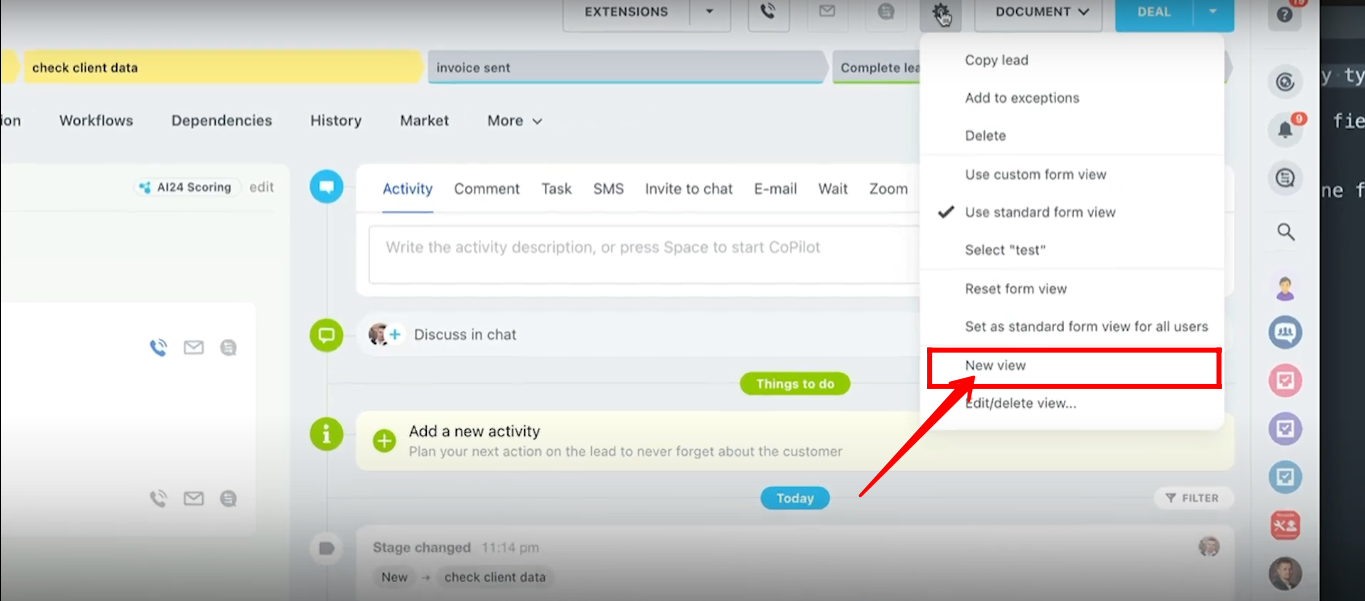
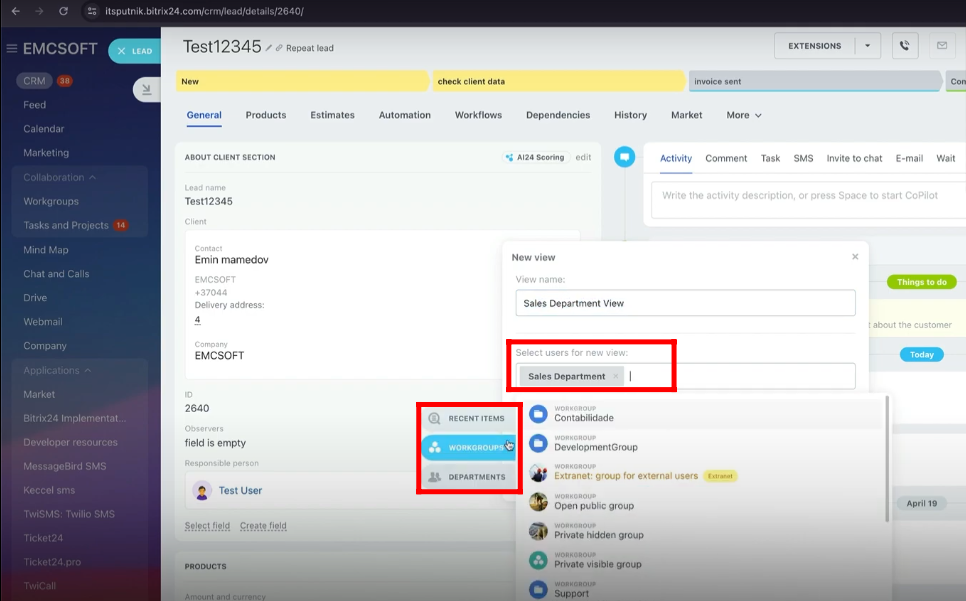
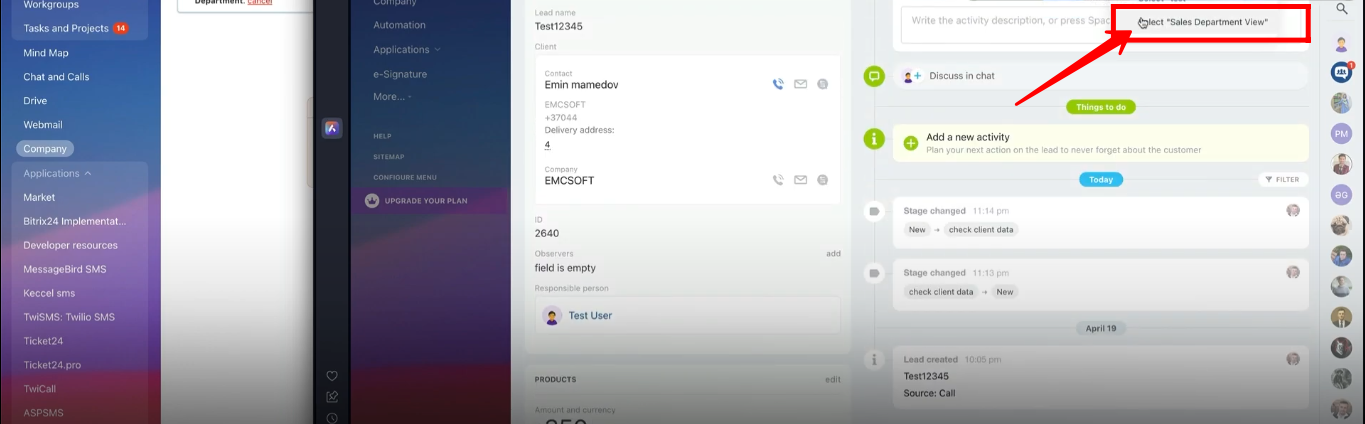
33. For testing purposes, this new view is named “Sales Department View” and users are being selected to show that view within the “Sales Department”.

34. The users can be selected by “Departments” or “Workgroups”.
35. Check the box “Set this view for selected users” and click “Save”.
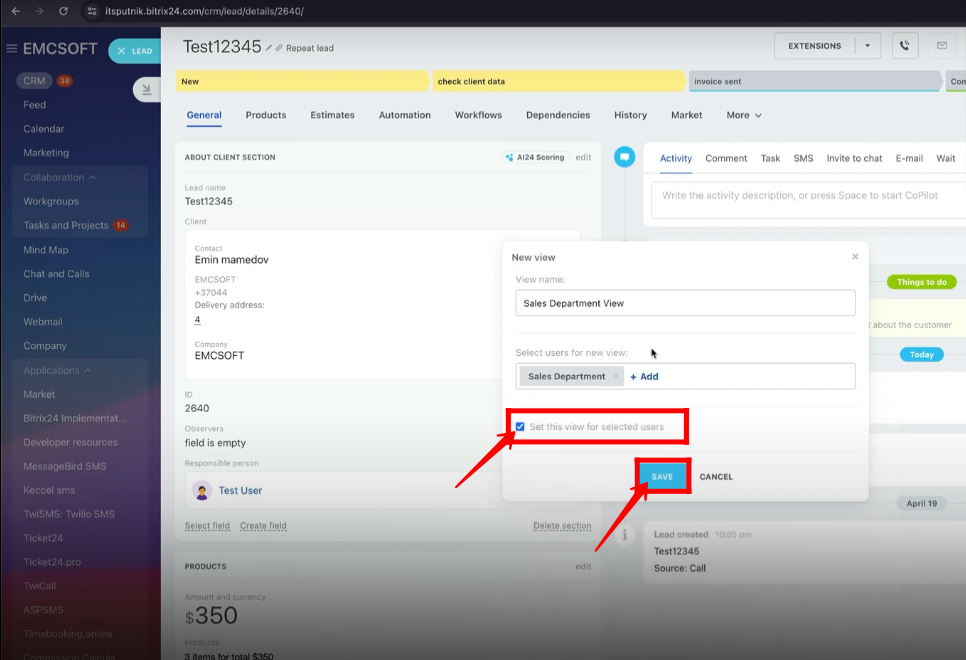
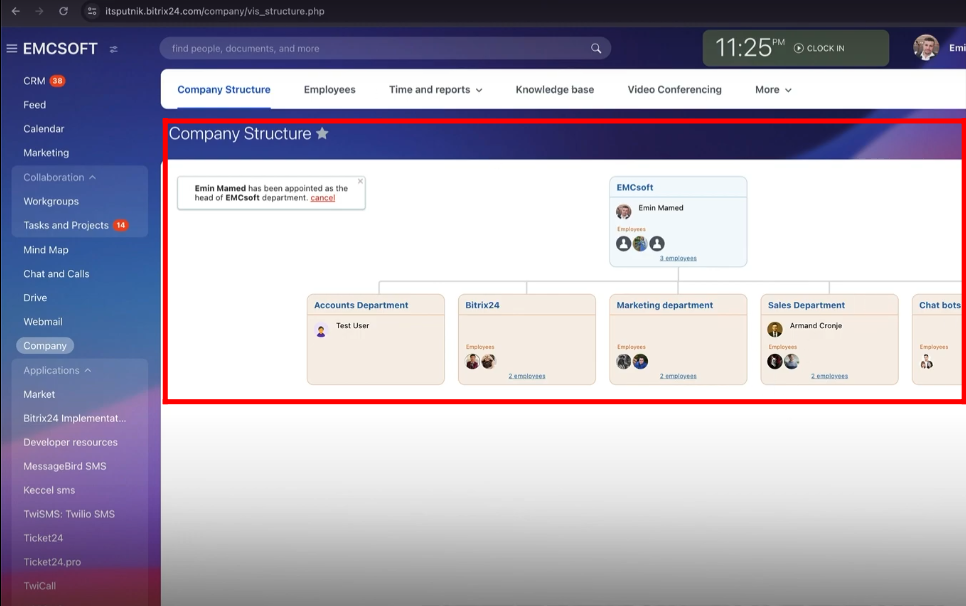
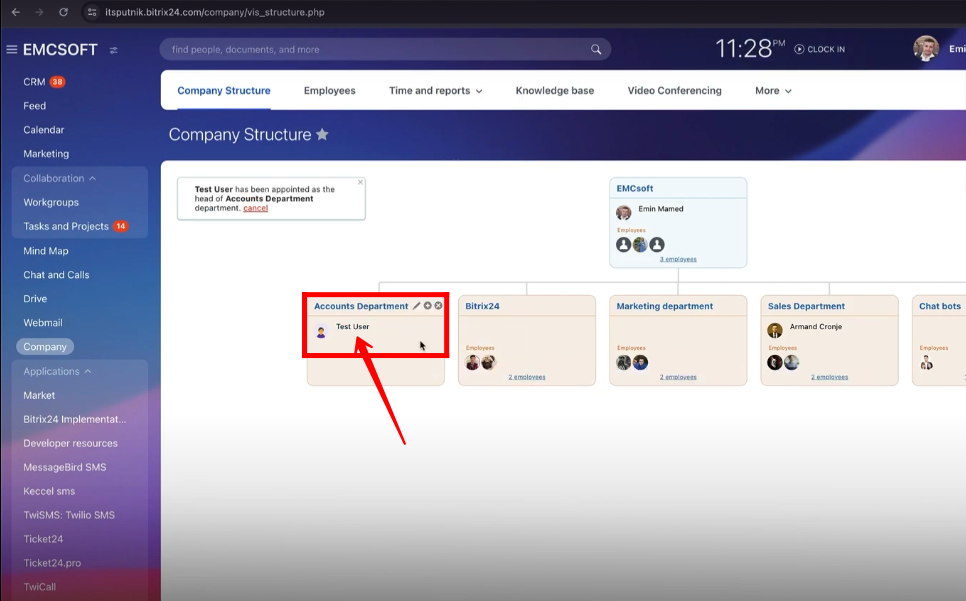
36. The company structure must be configured already to view users within the departments at the time of lead view setup.
37. To create a new view of lead, let’s delete one section. The “Marketing Data” section has been deleted by the head of the company to set up a view for the “Sales Department”.
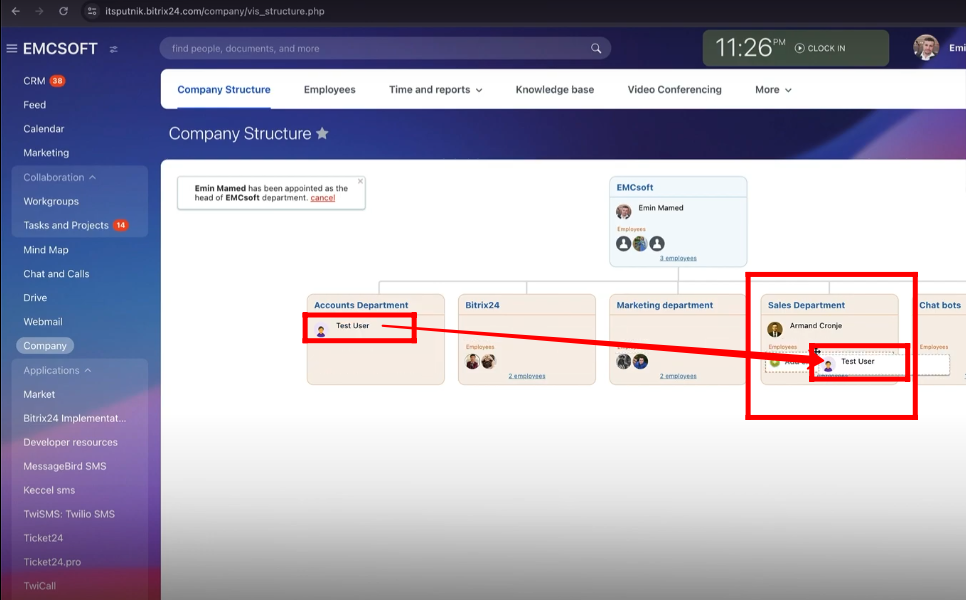
38. We will be viewing the “Test User” panel. In this case, that user is being moved to the “Sales Department” for testing purposes.
39. Select “Sales Department View”.
40. The lead is opened in the “Test User” panel. Only the “Client” and “Products” sections are shown there.
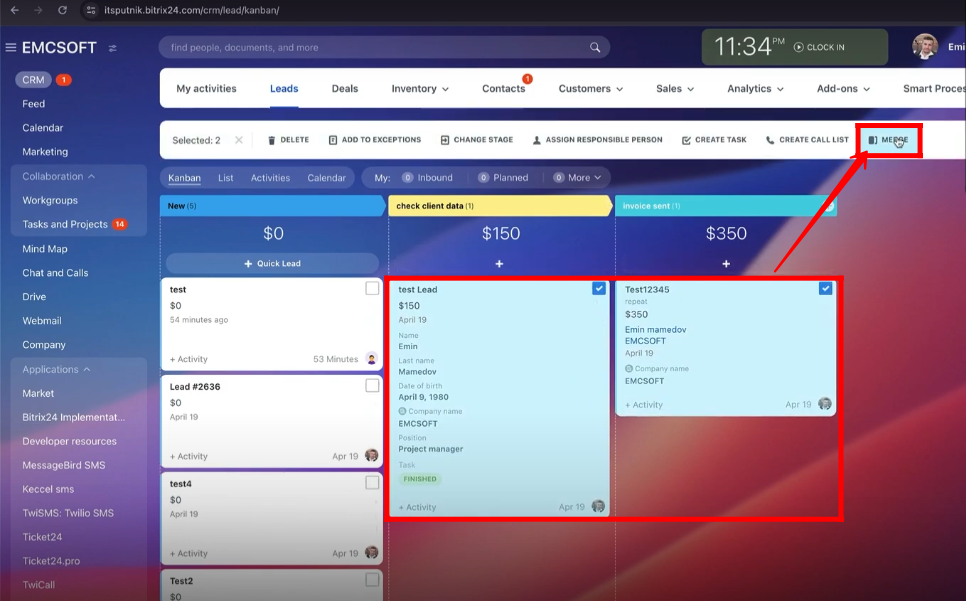
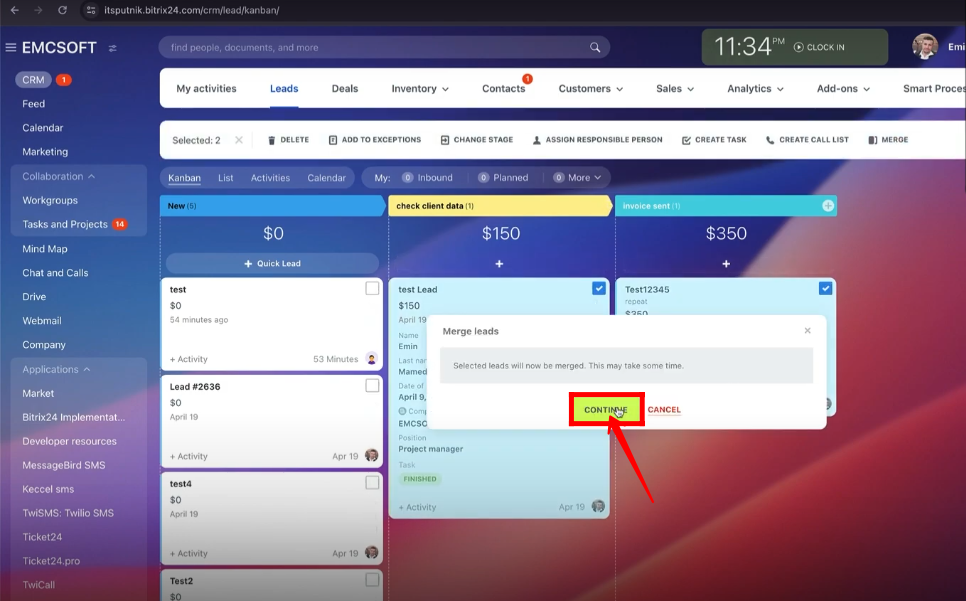
41. Go to “Edit/Delete View”.

42. You can add more users in the targeted department to show a selected view or delete that view.
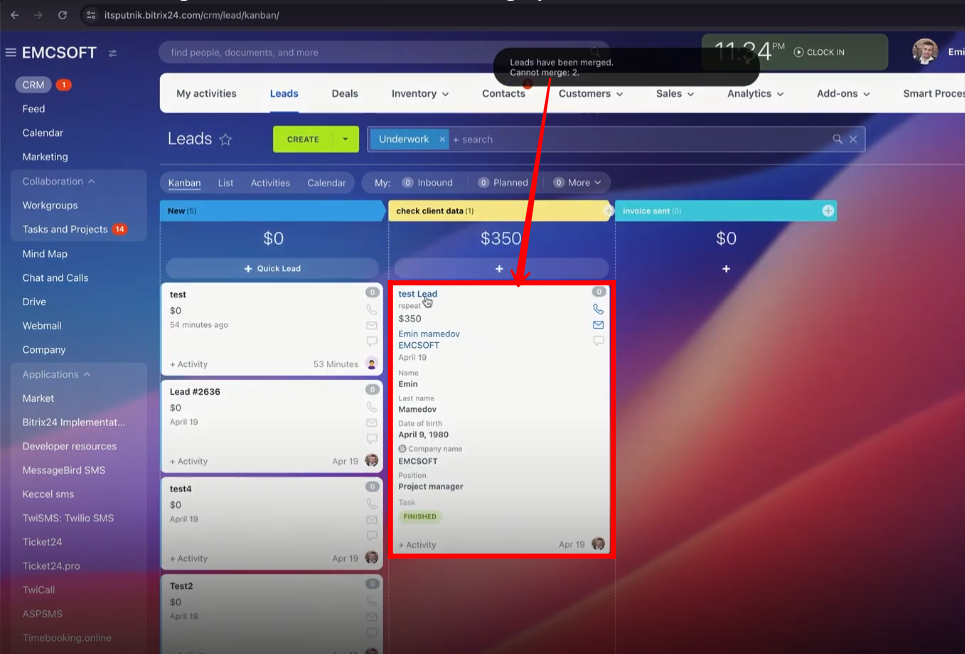
43. Click again “New View” to create another view.

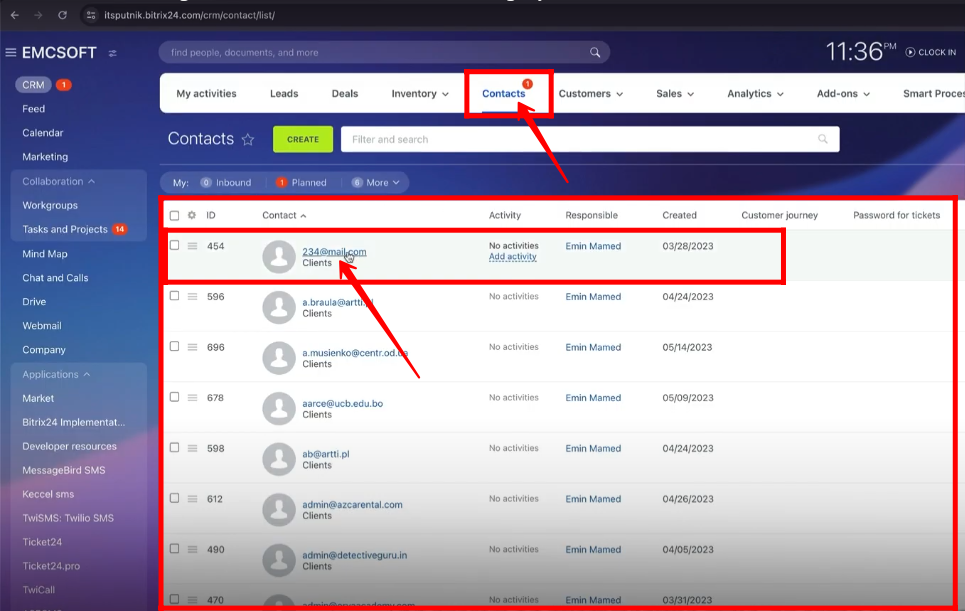
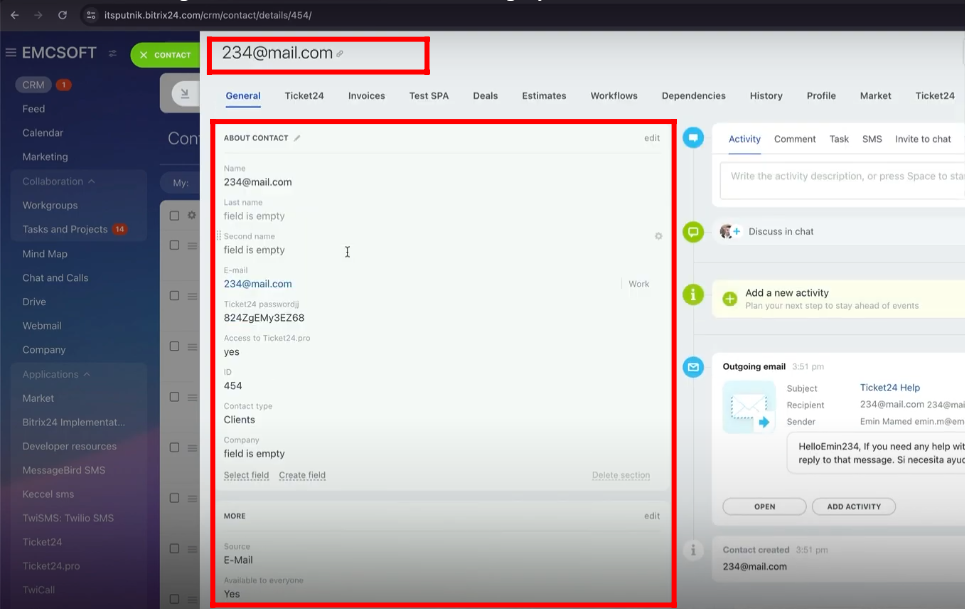
44. This view is named “Accounting Department View” and the “Accounts Department” is allowed to see that lead view.
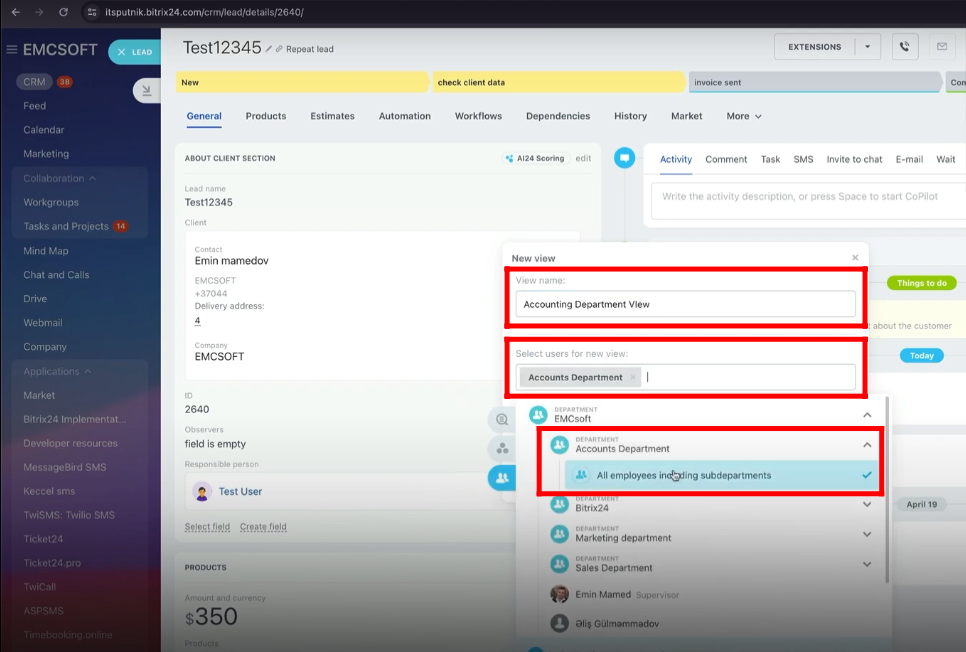
45. Now, delete the “Client” section to generate a new view.
46. Drag the “Test User” to “Accounts Department” in the company structure.
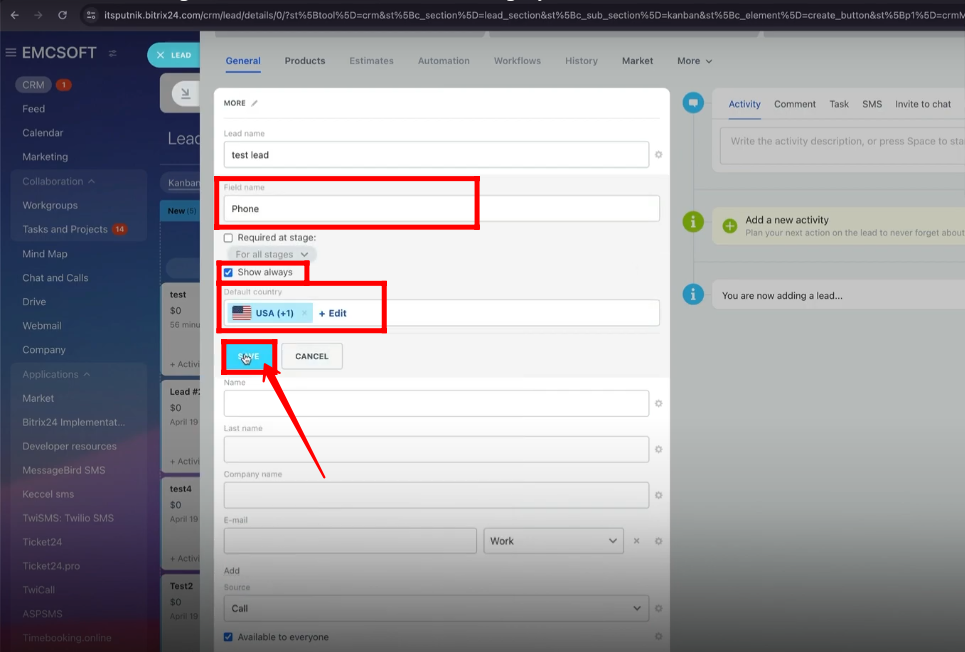
47. The lead is viewed from the “Test User” panel and only the “Products” section is present there.
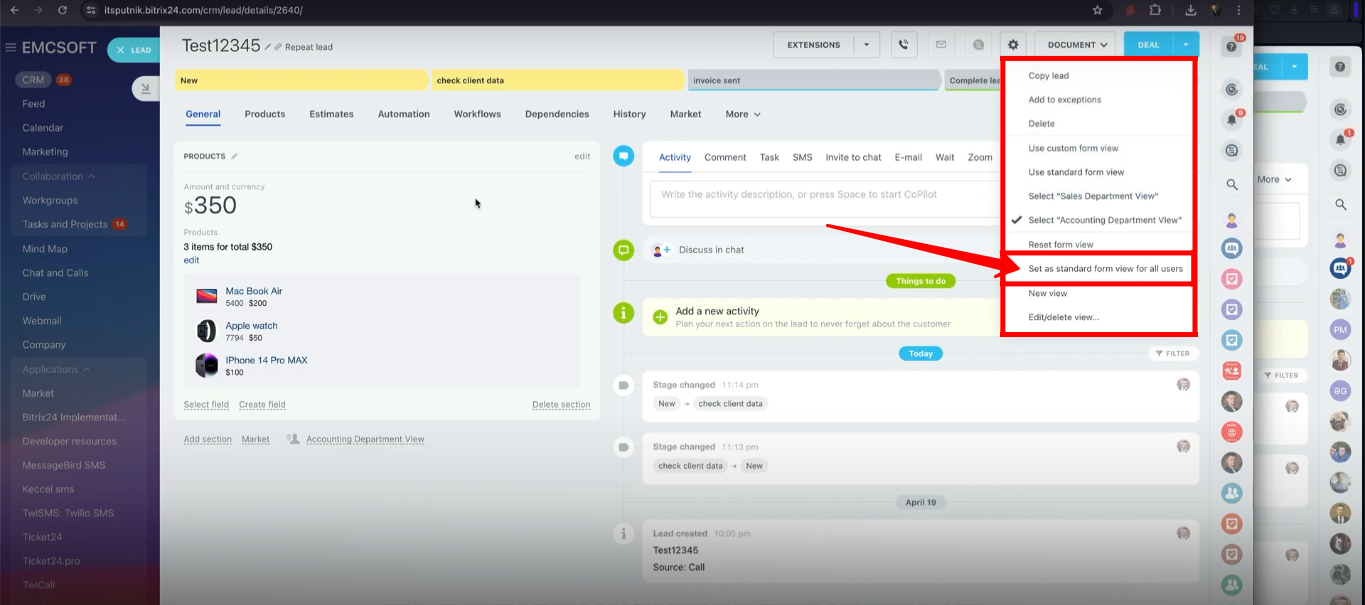
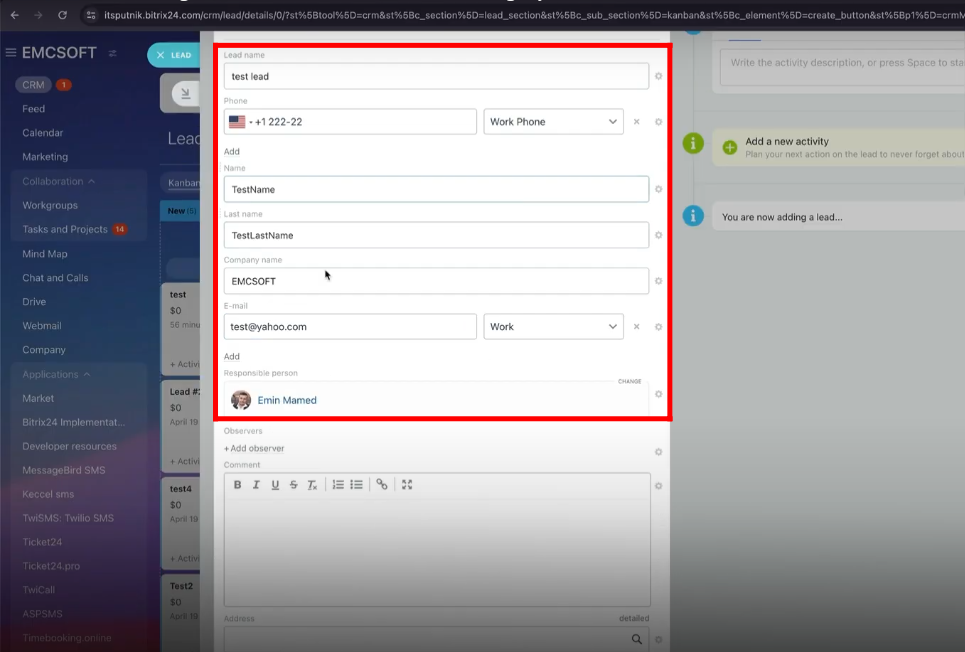
48. You can select “Set as Standard form view for all users” to make the default view for all users within multiple departments.
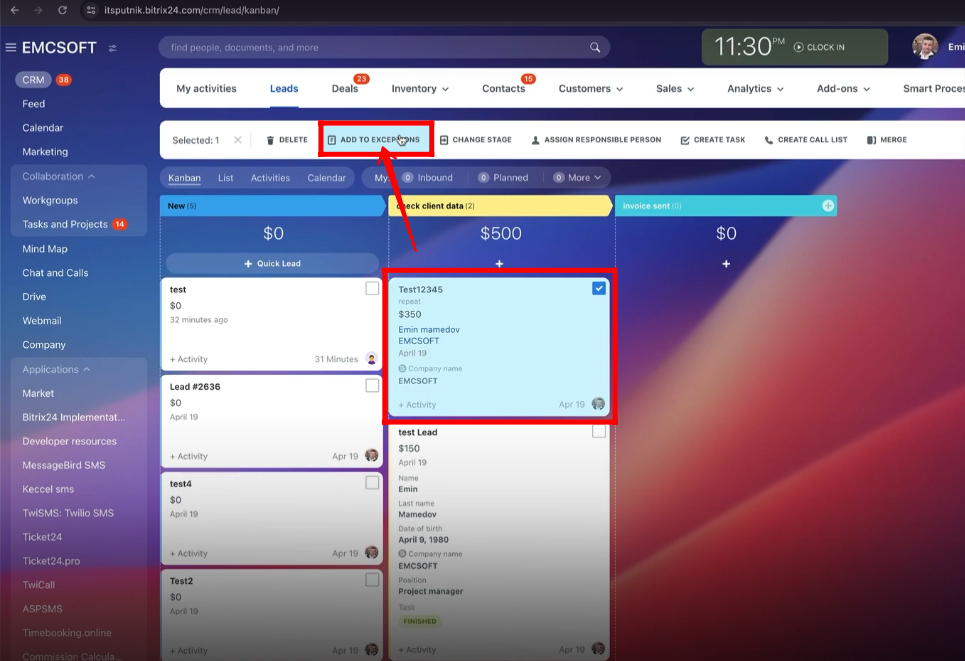
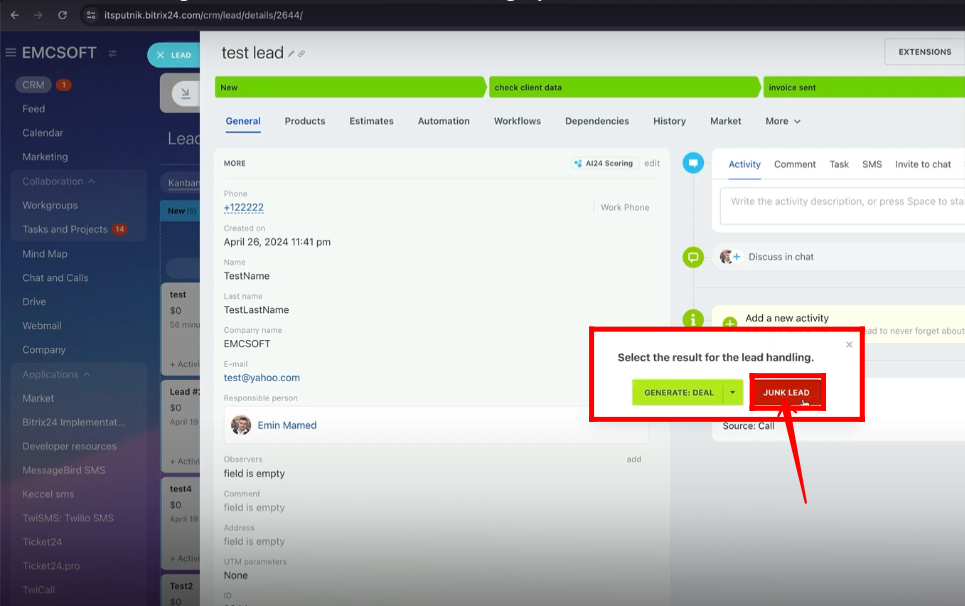
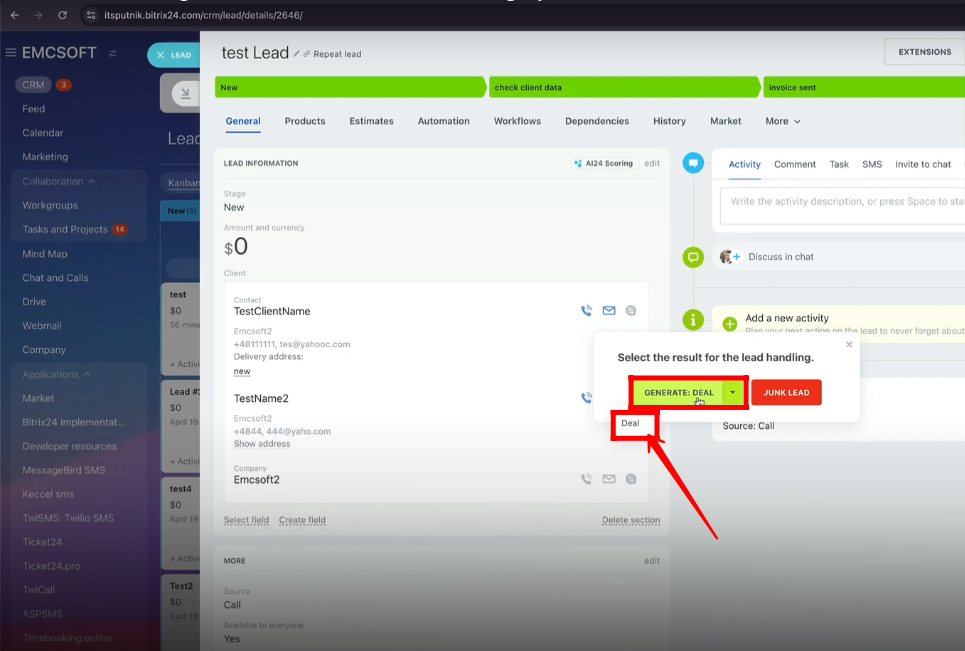
49. For example, if you configured the automation that if you receive an email from anyone, then a lead should be created against that sender’s email. But later, if you think, that email is spam then you select that particular lead and click “Add to Exception”. Next time, the lead will not be created if you receive any email from that sender.
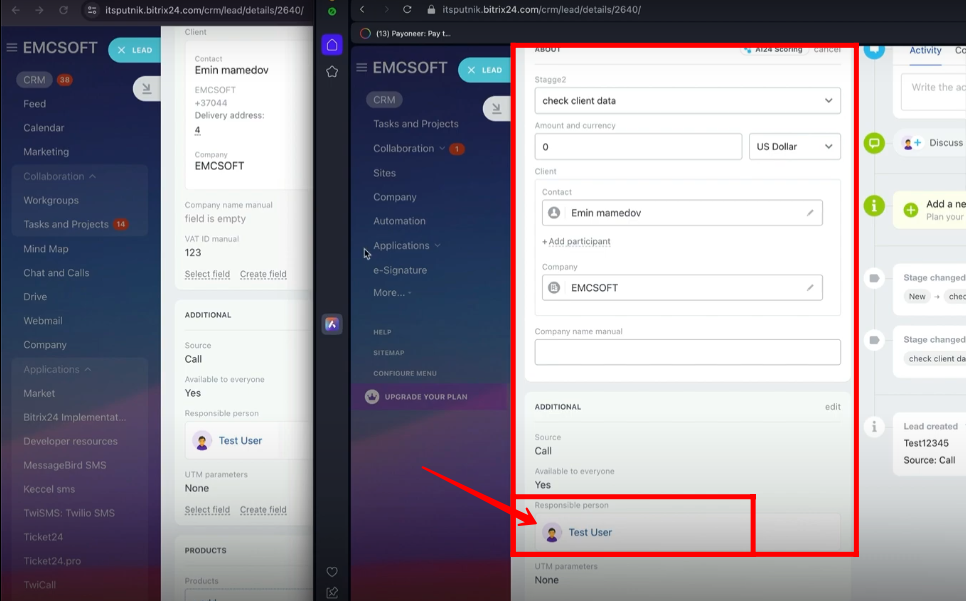
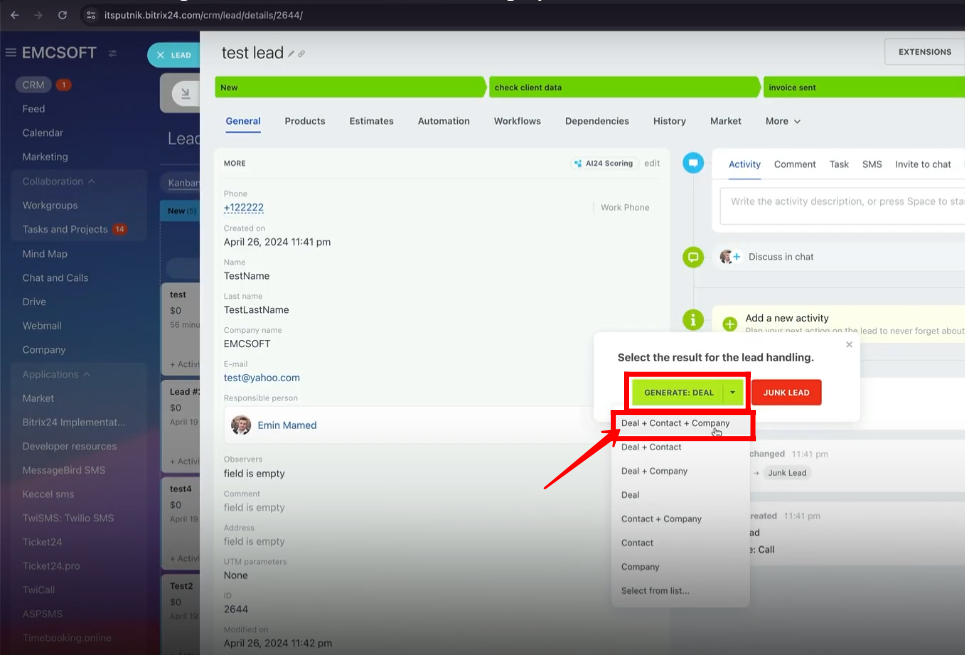
50. You can select multiple leads and assign a “Responsible Person” to all selected leads at once.
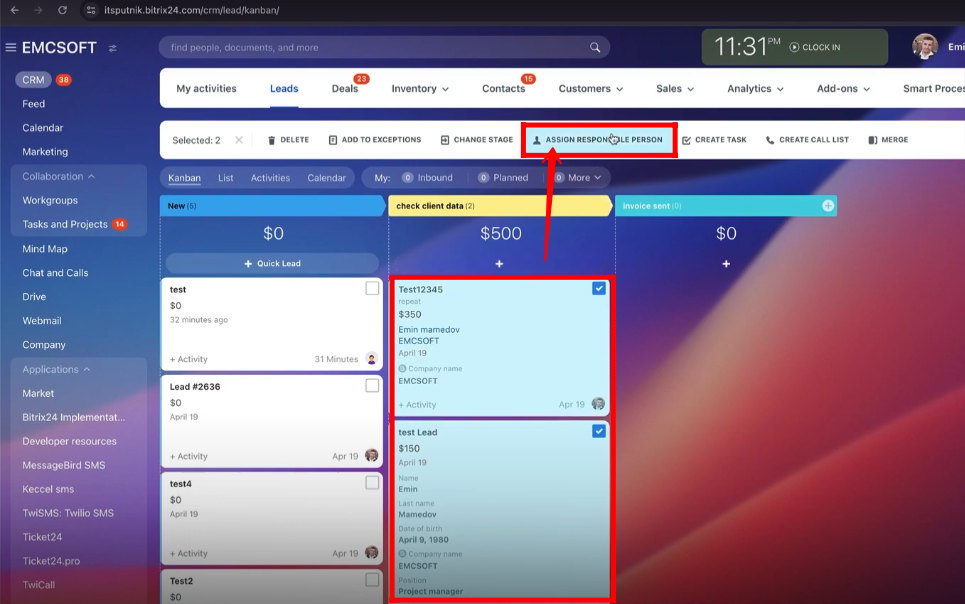
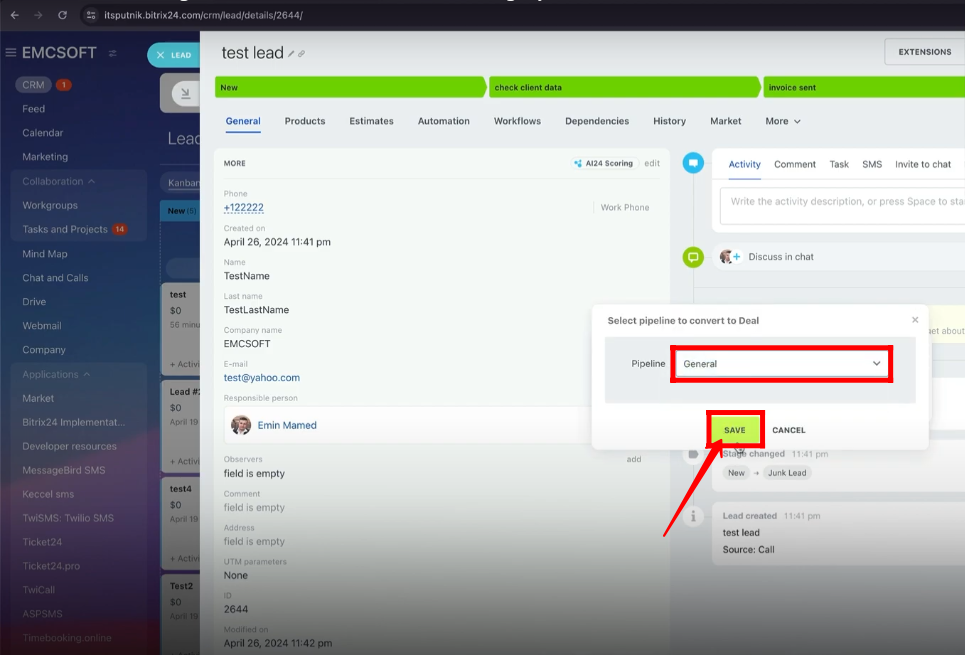
51. Also, you can change the stage of all the selected leads at once.
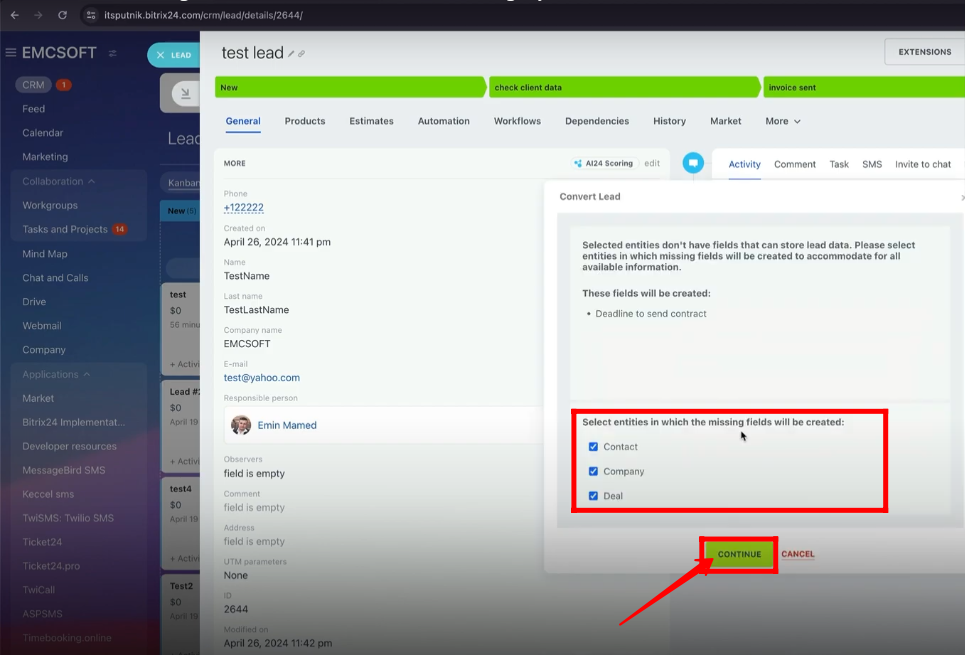
52. You can select multiple leads and create tasks within selected leads.
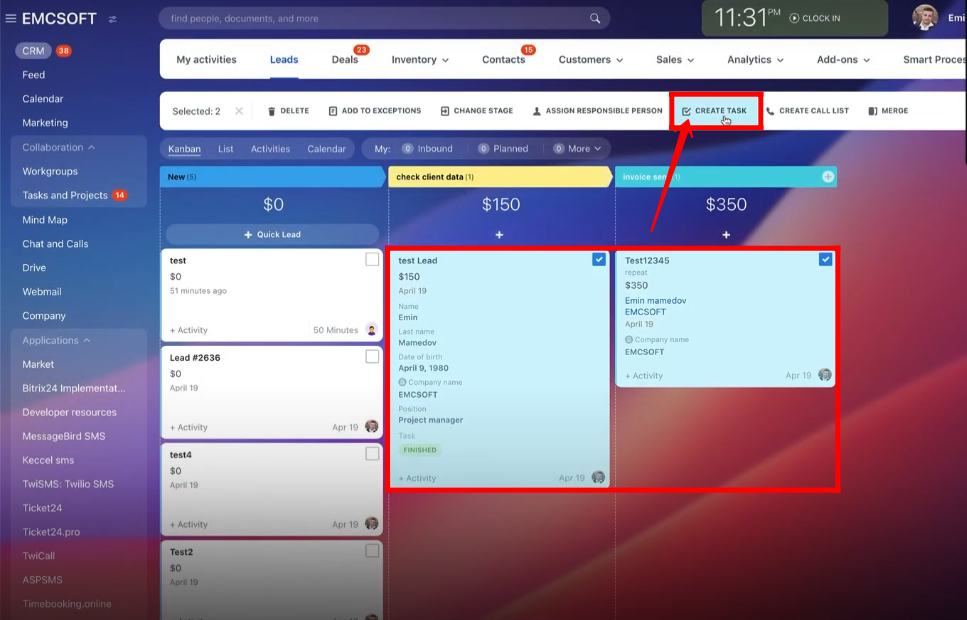
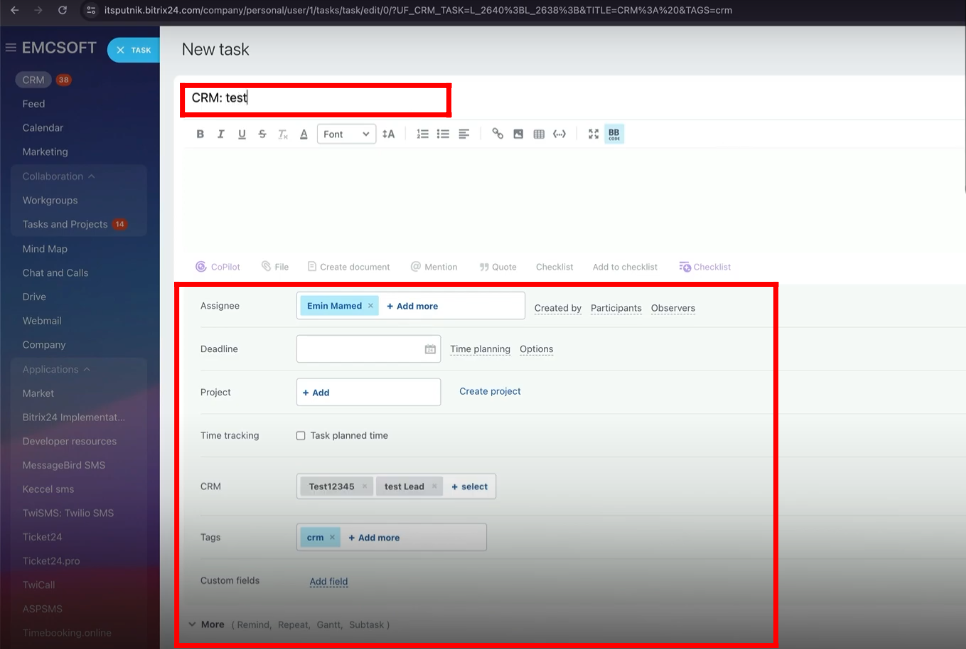
53. Name the task and configure all the fields within the task.
54. A new task will be generated within all the selected leads.

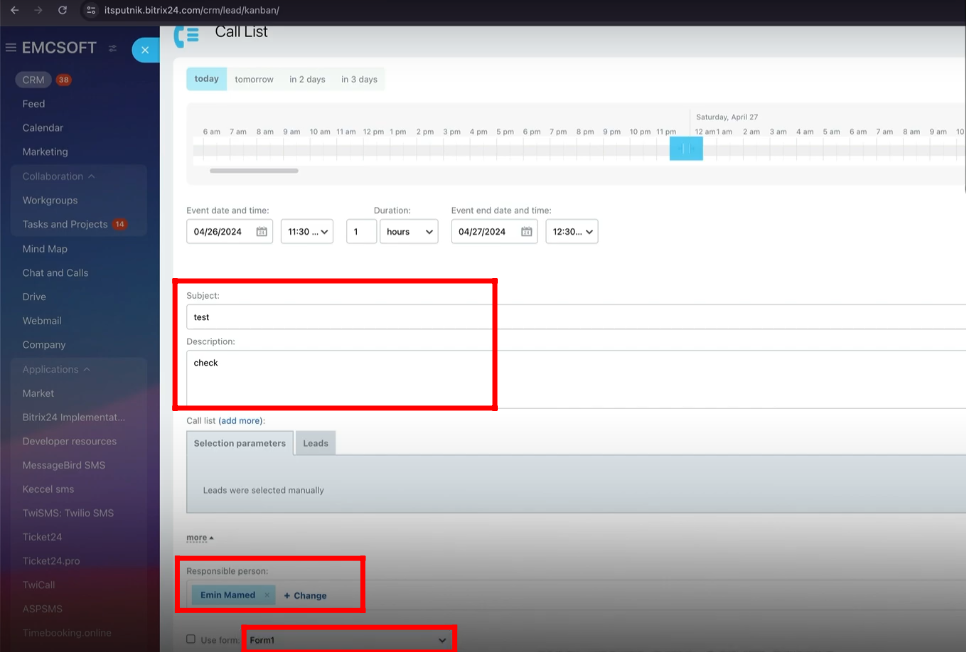
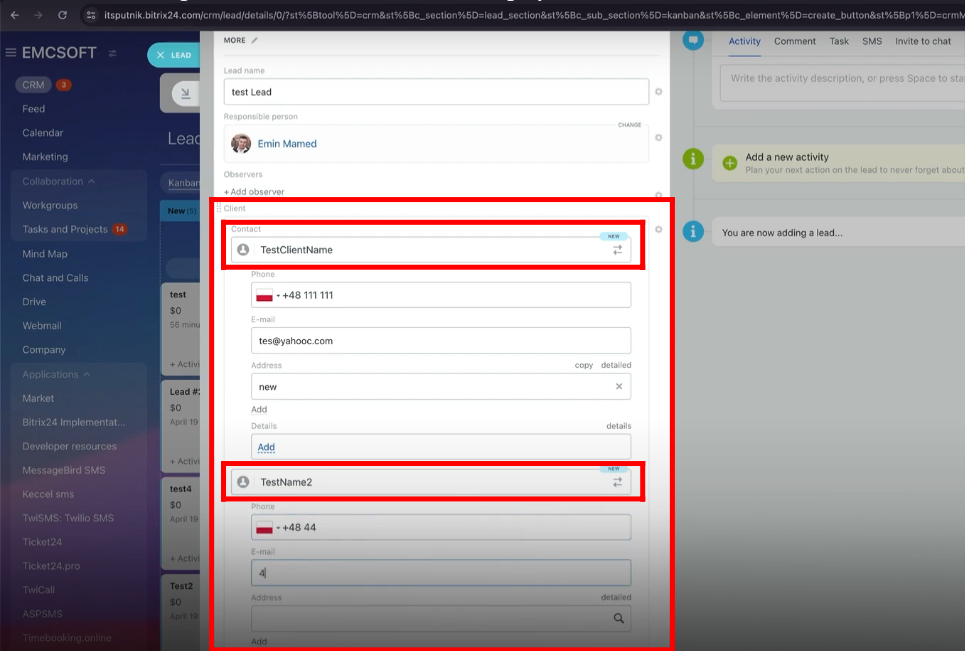
55. A new “Call list” can be generated for selected leads.

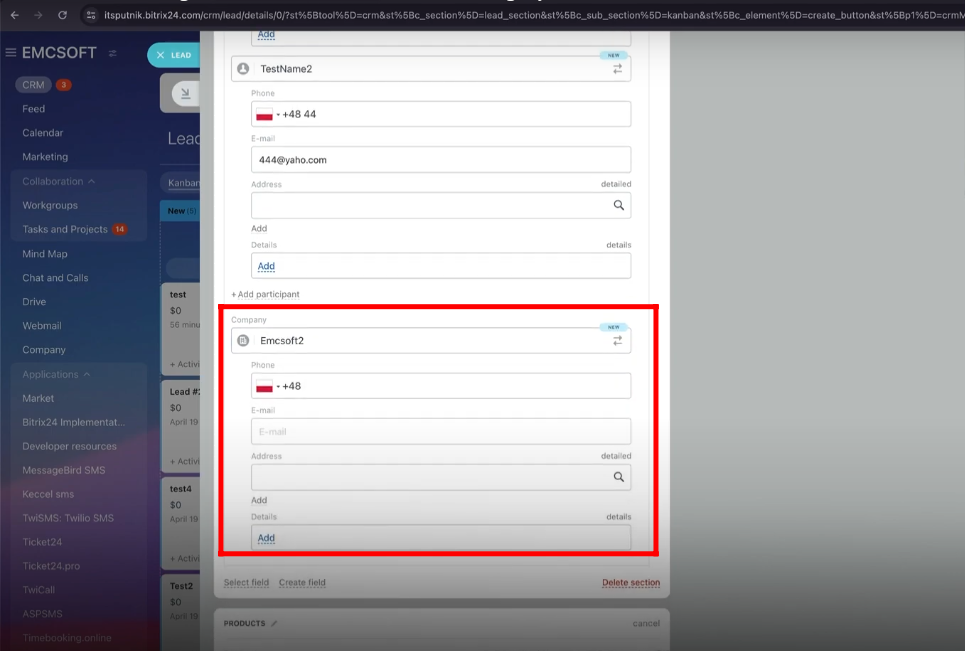
56. Write “Subject” and “Description” there. Assign a “Responsible person” to the call list. Save it.
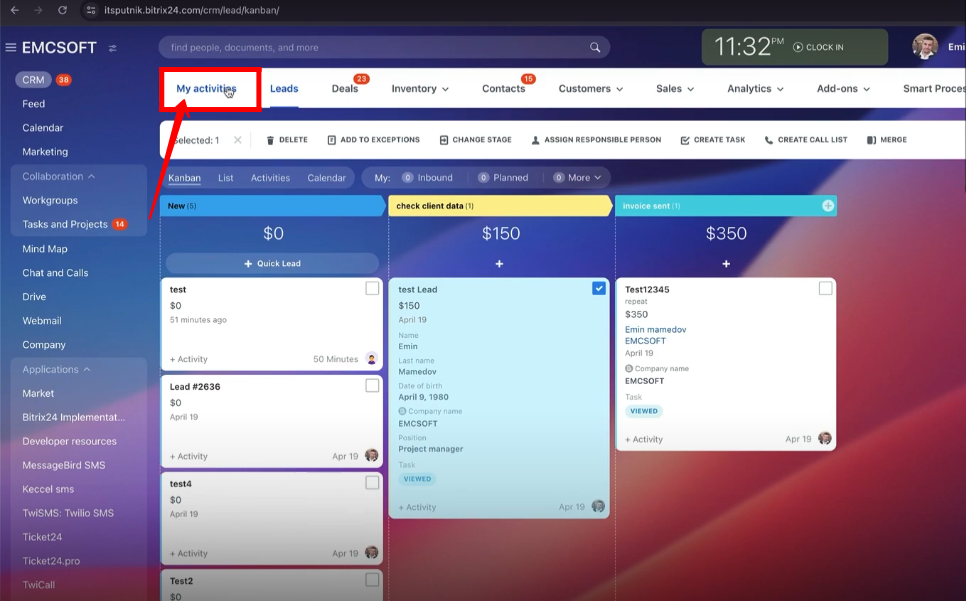
57. Go to “My activities”.
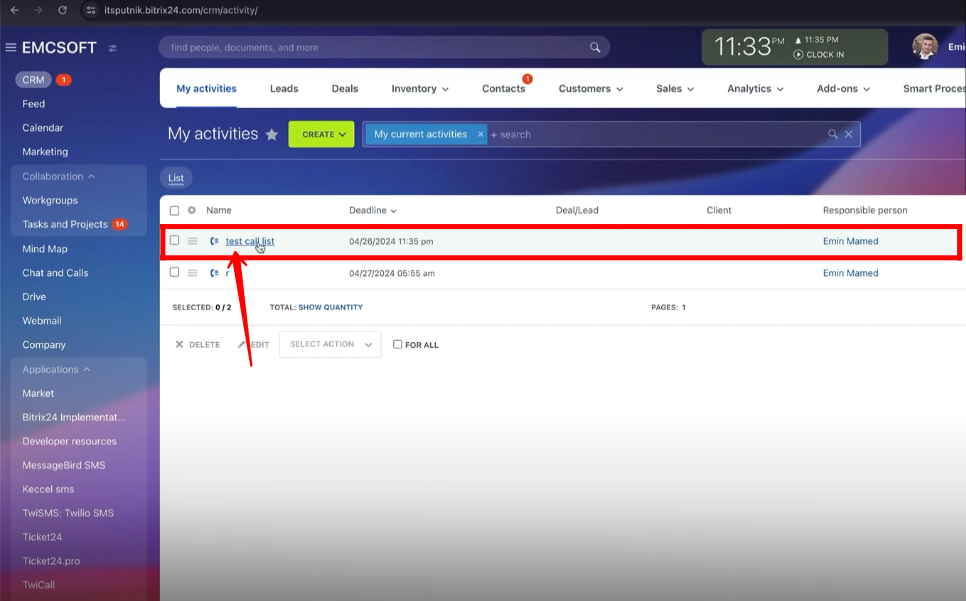
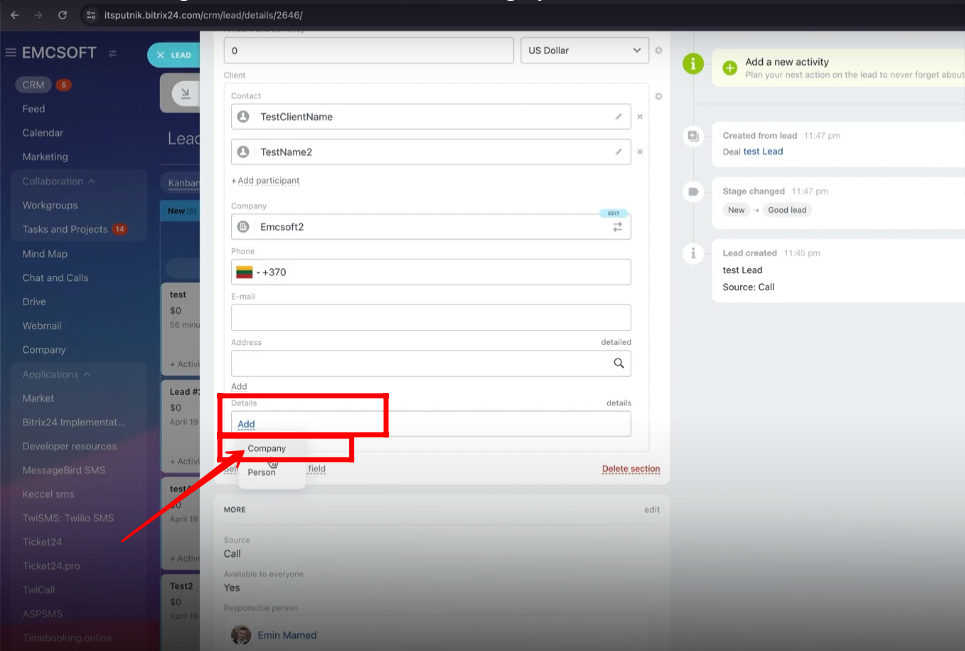
58. Select a newly configured call list.
59. Click “Start Calling”.
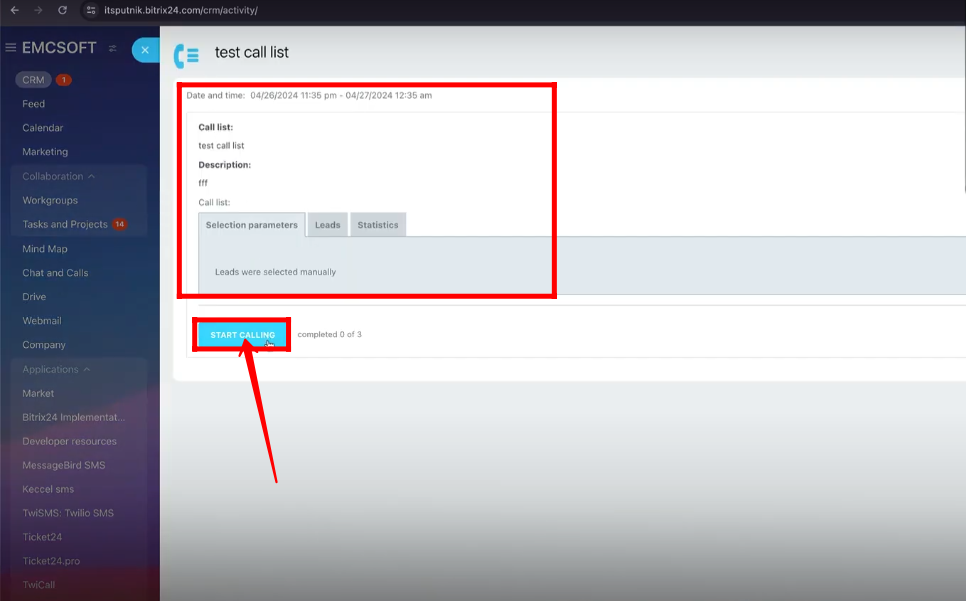
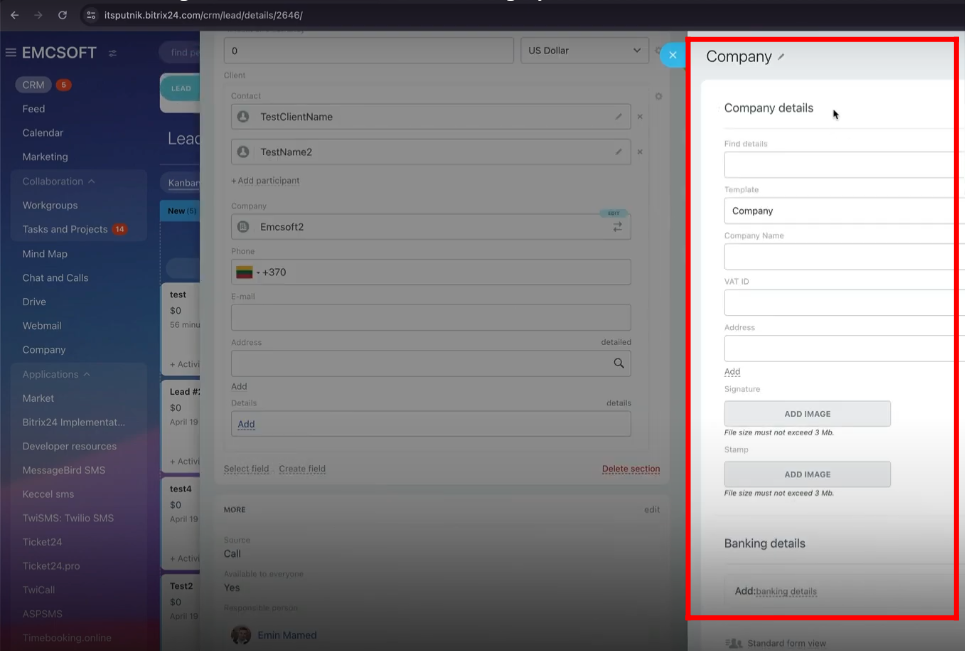
60. A call list will be there and you can call a list of users in the queue.

61. The email, phone number or some other information can be the same for multiple leads if you got leads from the same customer. You can select those leads and click “Merge”.
62. Click “Continue”.
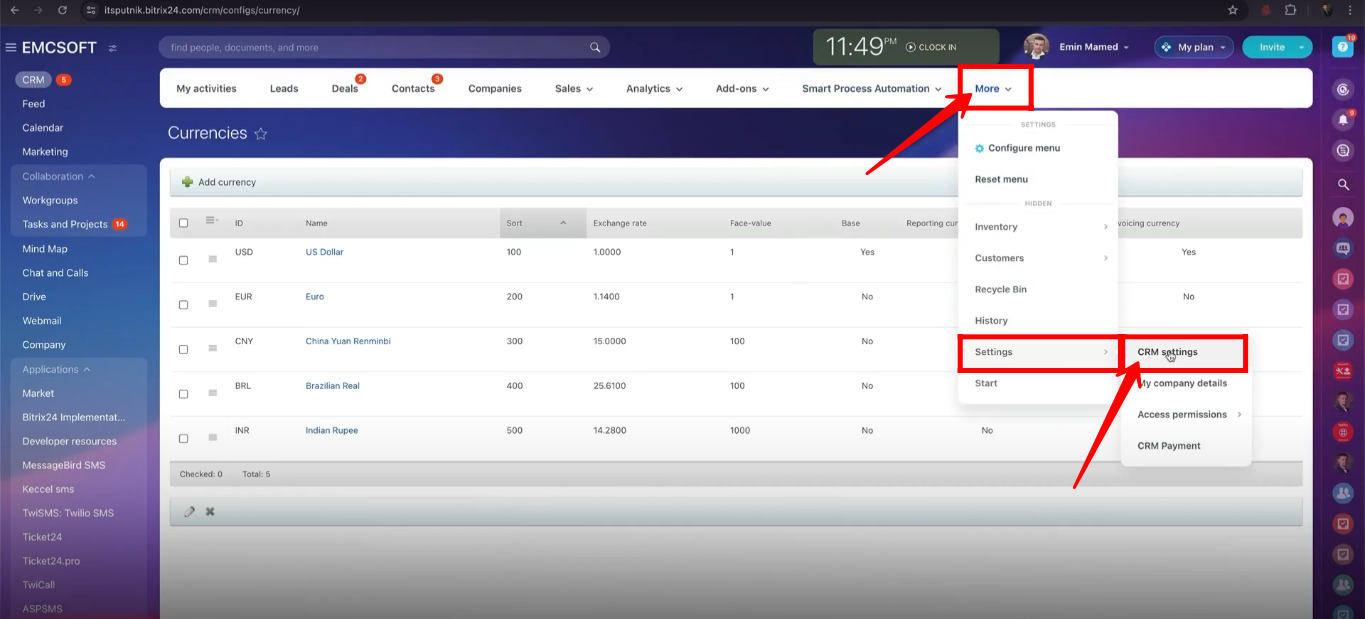
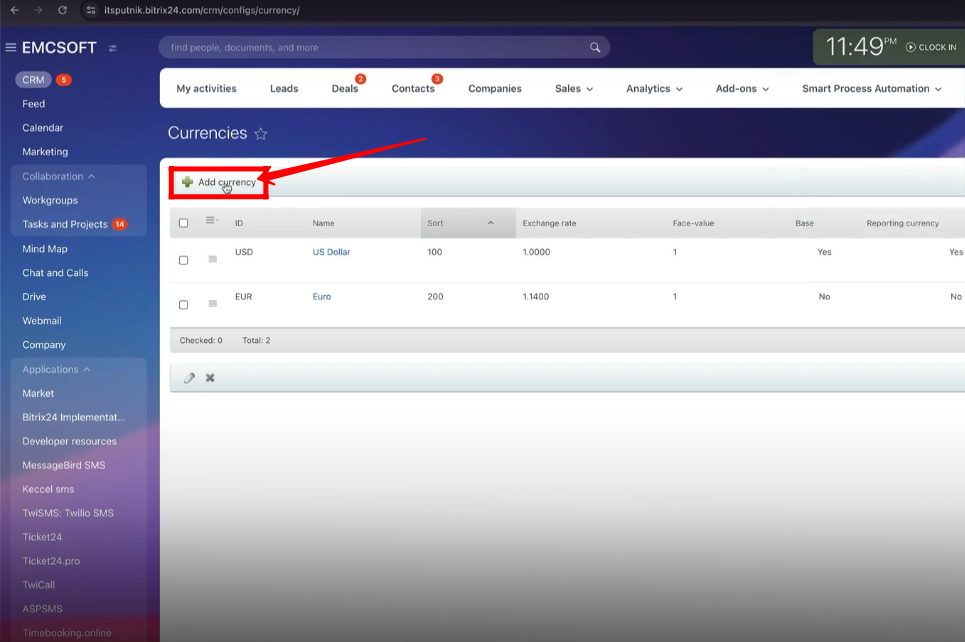
63. Two leads with same information have been merged as one lead.
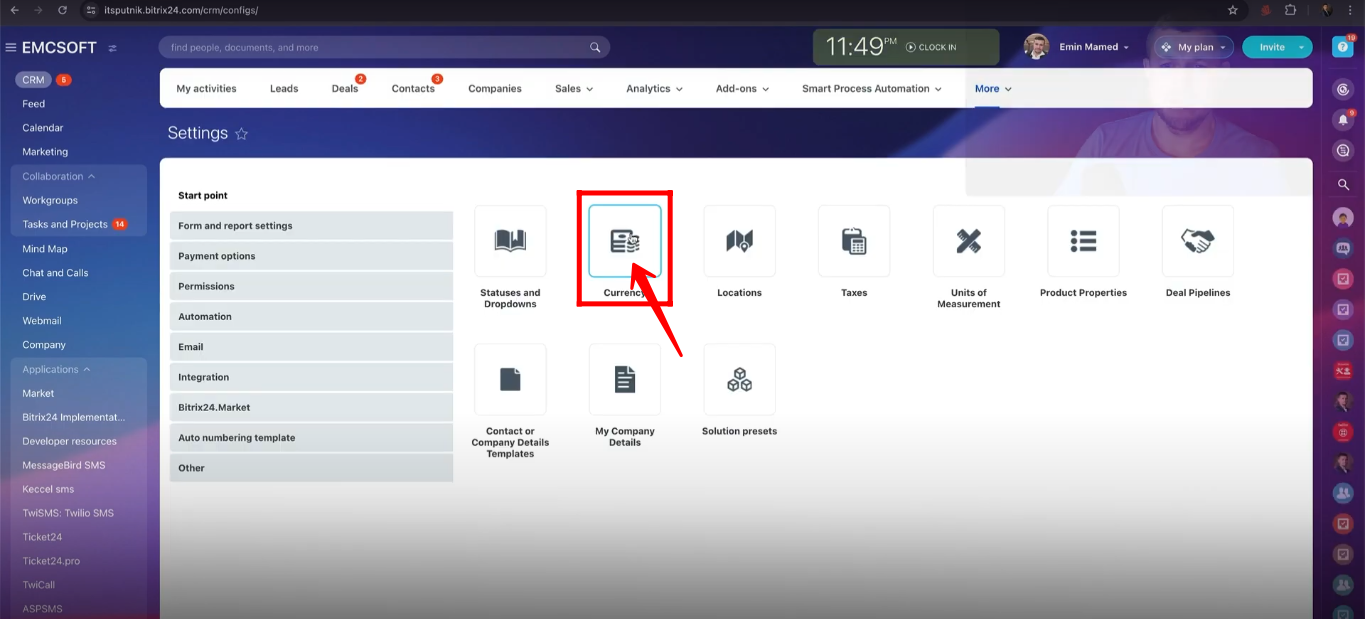
64. Go to “Contact”. You will find a list of static contact objects that can be used to simply import in leads. Open a contact.
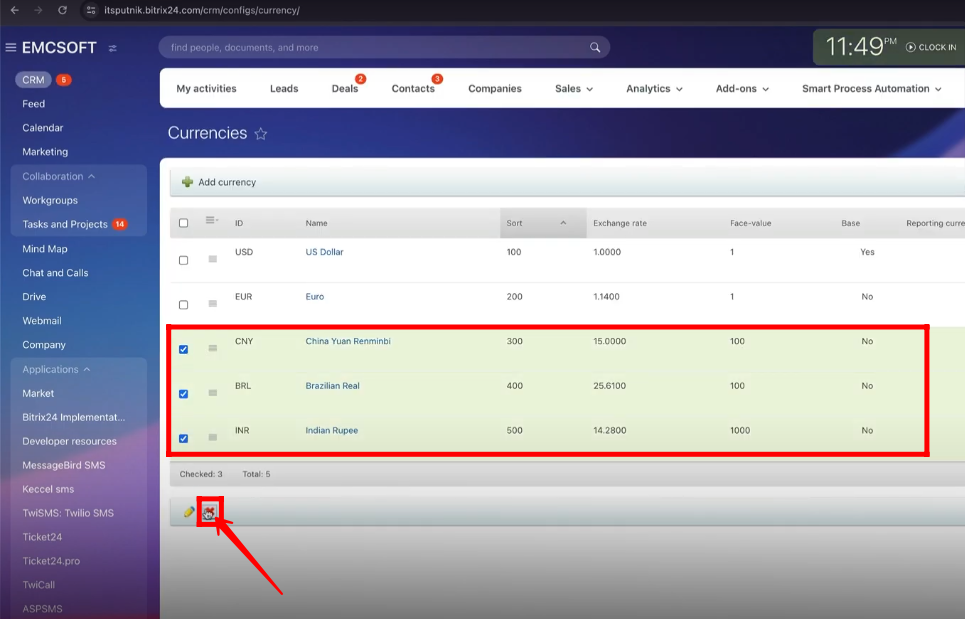
65. You will find all information about that contact here.
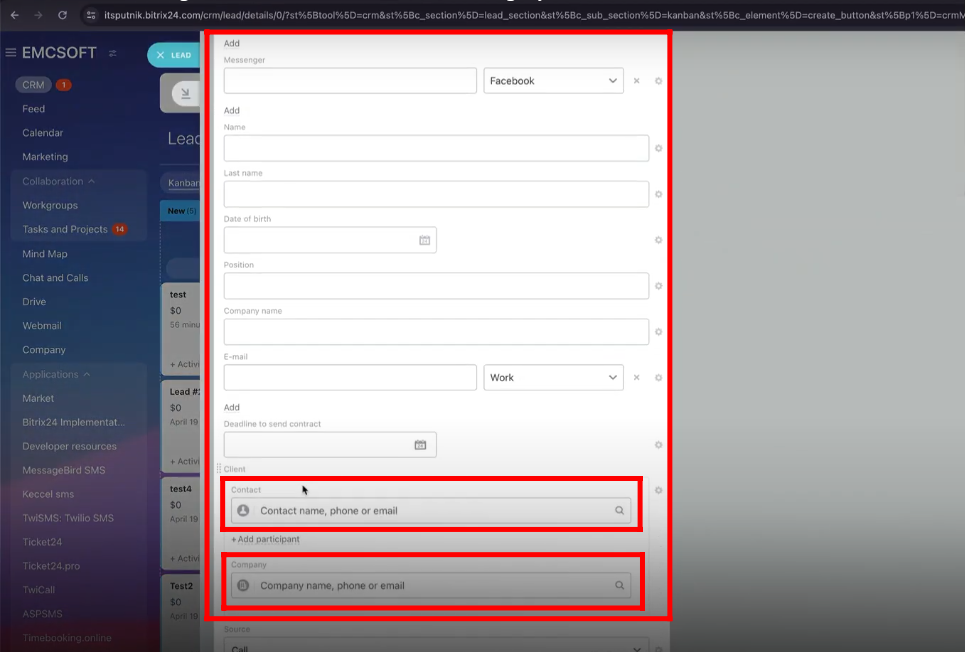
66. Once you create a lead, you store data inside the lead by filling in the attributes. But in “Client” field, you can import contact and company info from already stored objects.
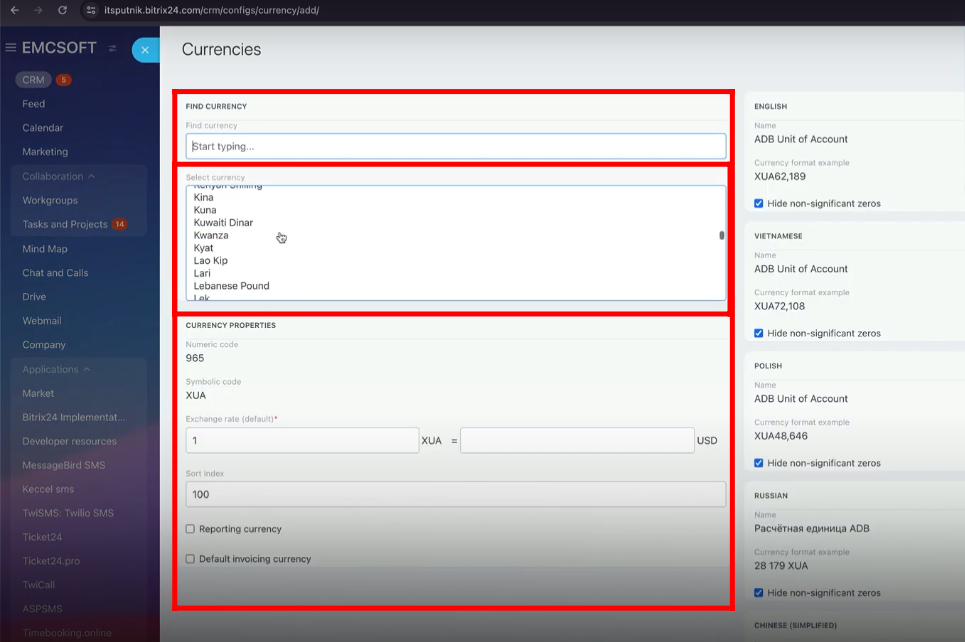
67. You can configure “Phone” field of type contact and fix the default country there.
68. Now, the default country is “US (+1)” in “Phone” field. You can fill in all the fields here that will be filled only within this lead.
69. If you convert the lead as “Junk Lead”. All the information within this lead will also be moved in junk.
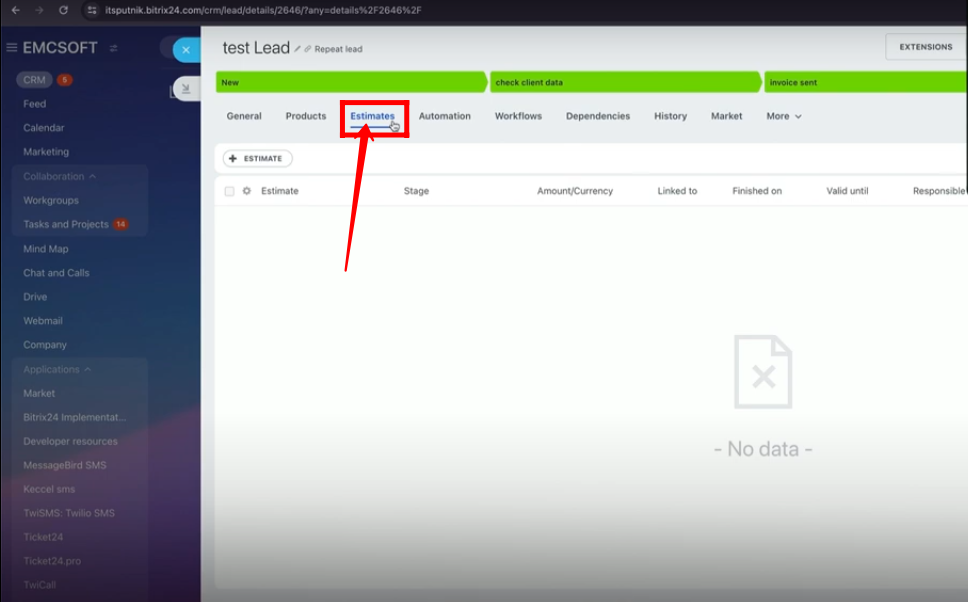
70. If you click “Generate: Deal”. You will find multiple options of conversion because you have filled information of lead manually(we will elaborate more in detail in upcoming article). Click “Deal+Contact+Comapny”.
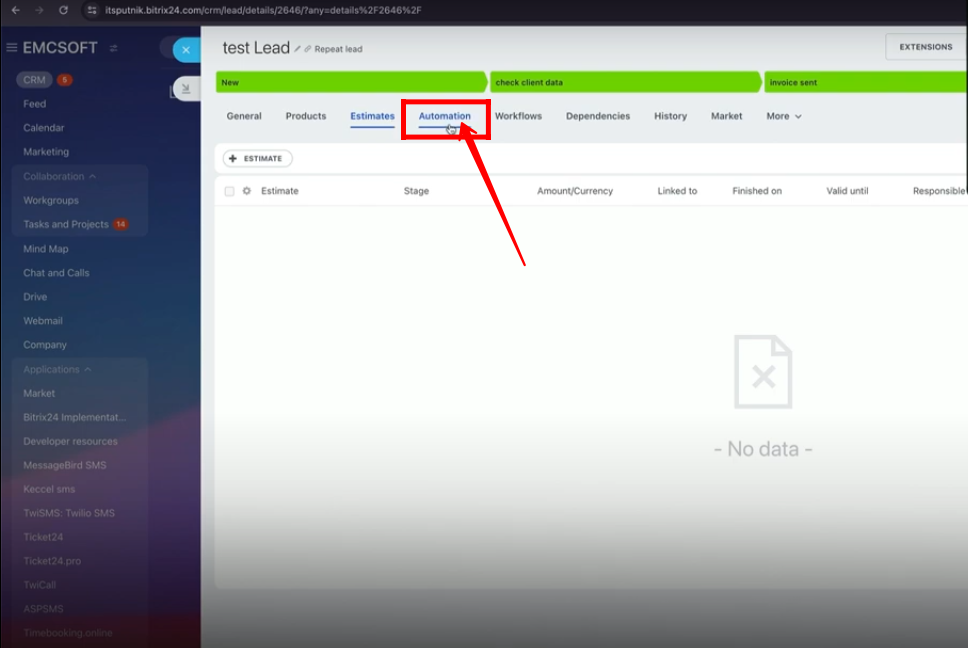
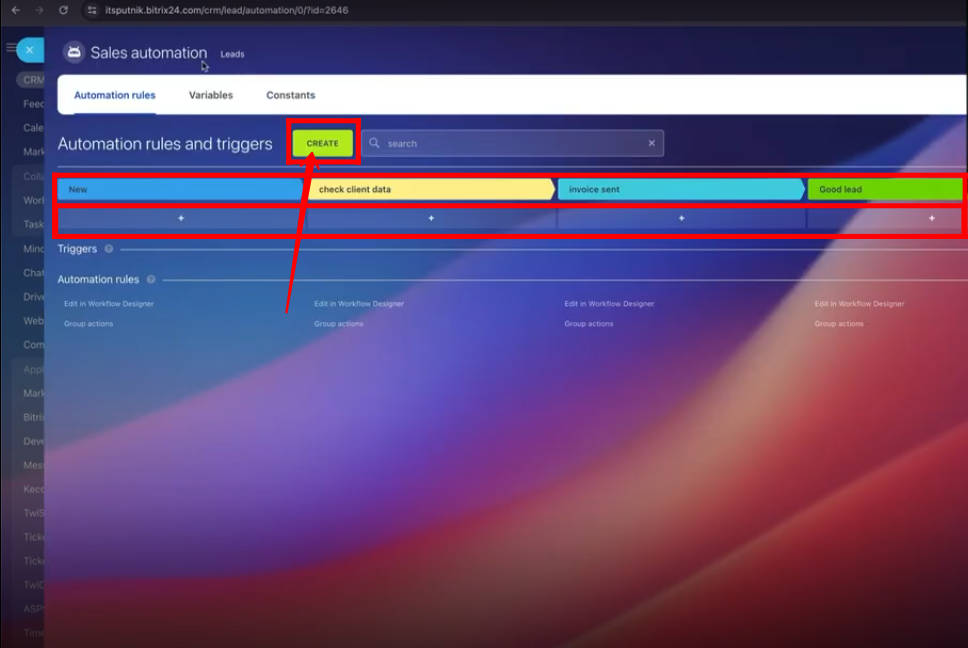
71. Select the pipeline (“General”) and click “Save”.
72. Check the boxes according to requirements and click “Continue”.
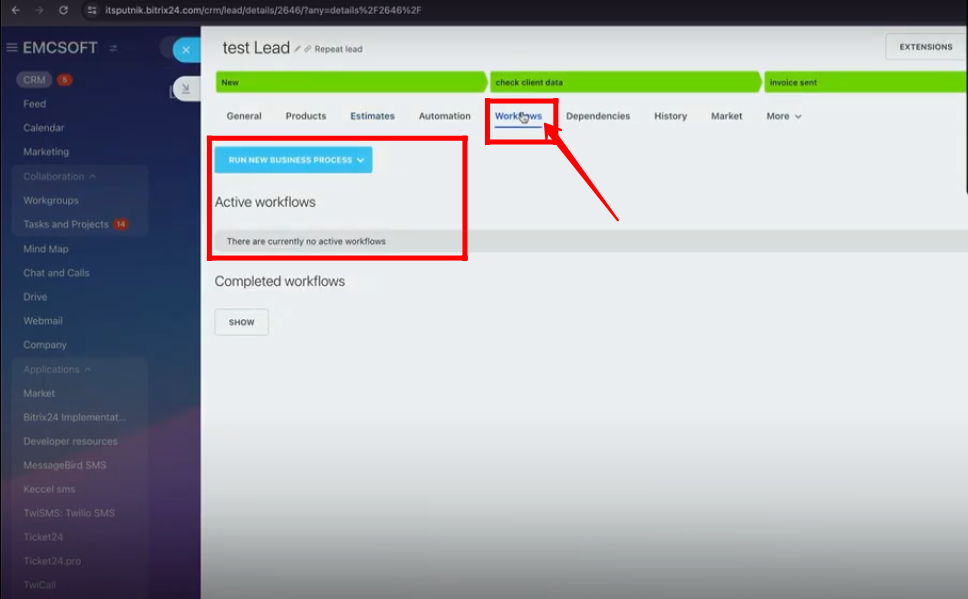
73. Lead will be converted into “Deal” with Client’s contact and company information as separate objects.
74. Hide extra fields within the lead for now.
75. Select the “Client” field to add in the lead to import or filling in manually multiple contacts of client.
76. Here, you can see, two contacts of only one client have been added.
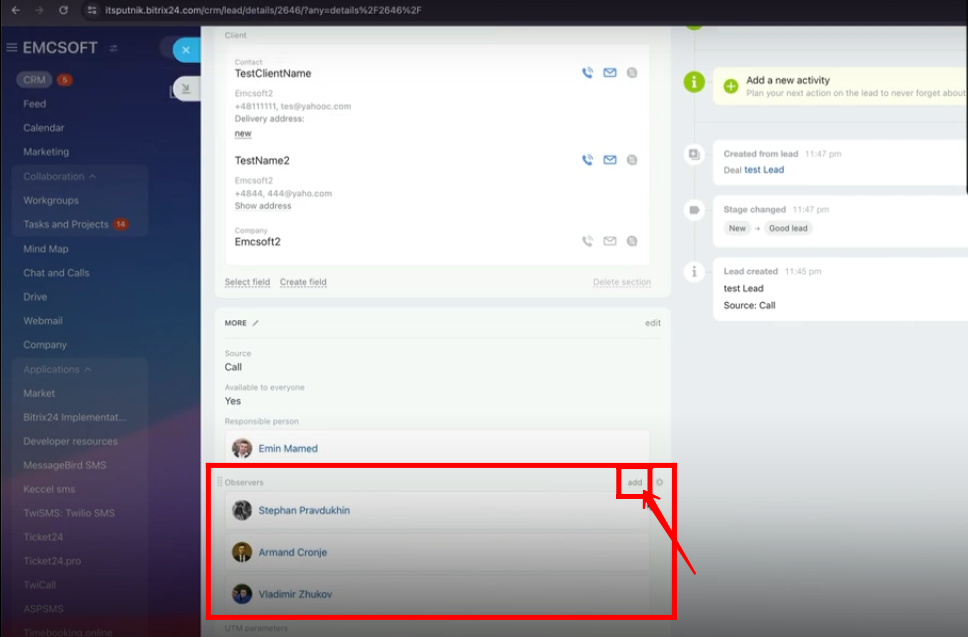
77. Company information of that client has been added.
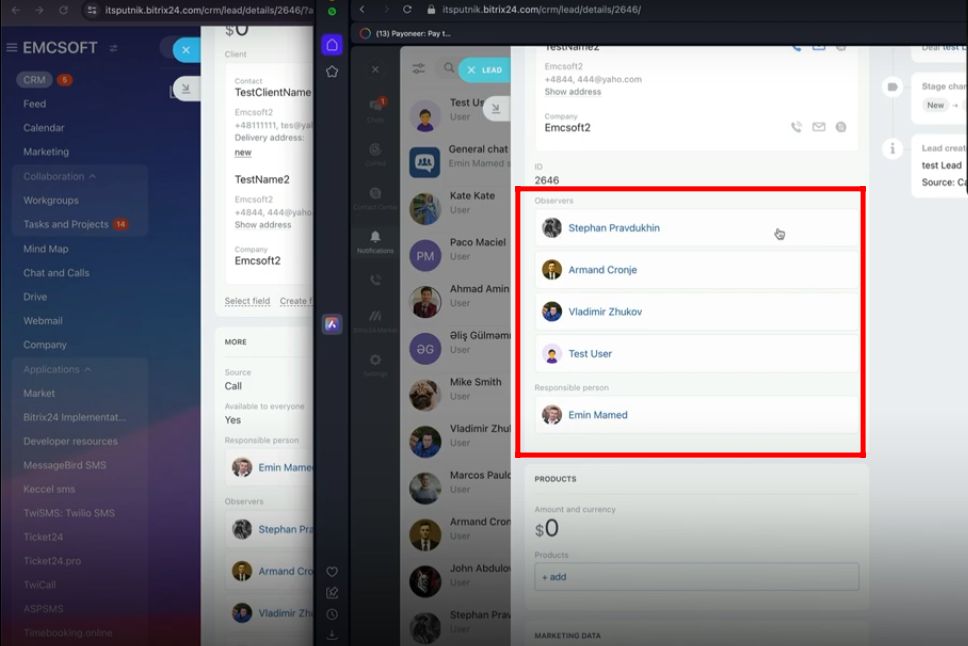
78. As you filled in contact and company information in “Client” field. You will get only the option to convert the lead to “Deal”, not to “Deal+Contact+Company”.
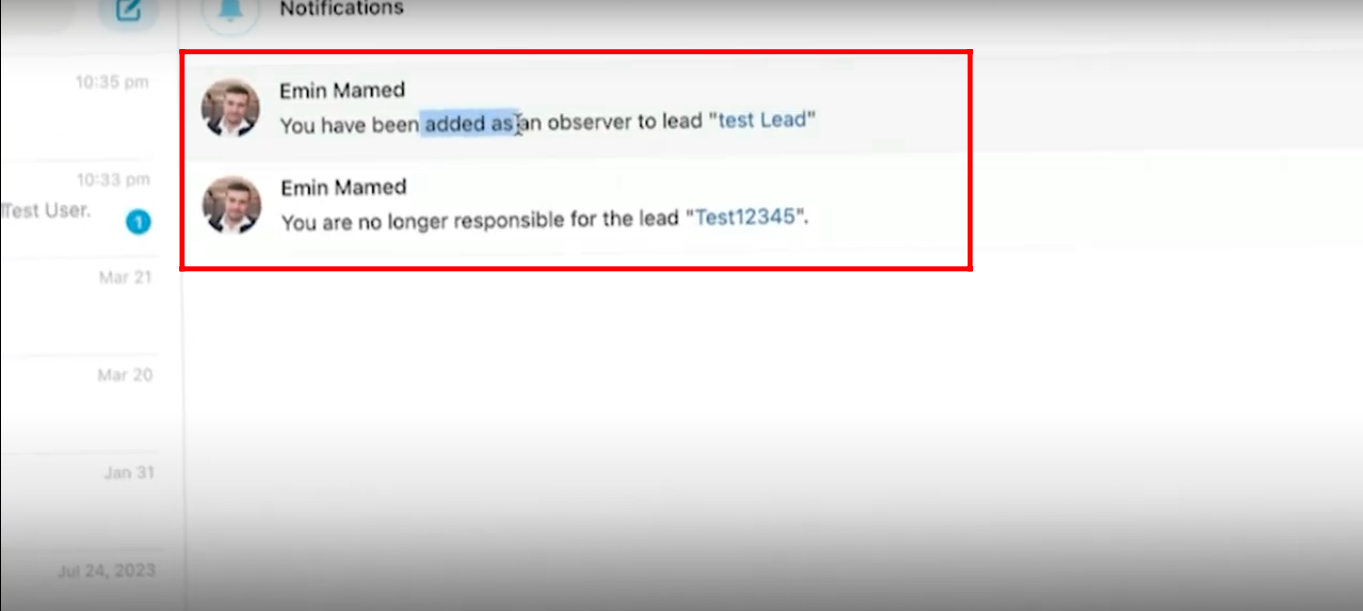
79. You can add in details more about “Company” or “Person(Solo businessman)”. Select “Company”.
80. You can add more details here about your client’s company like “VAT ID”, “Bank details” etc.
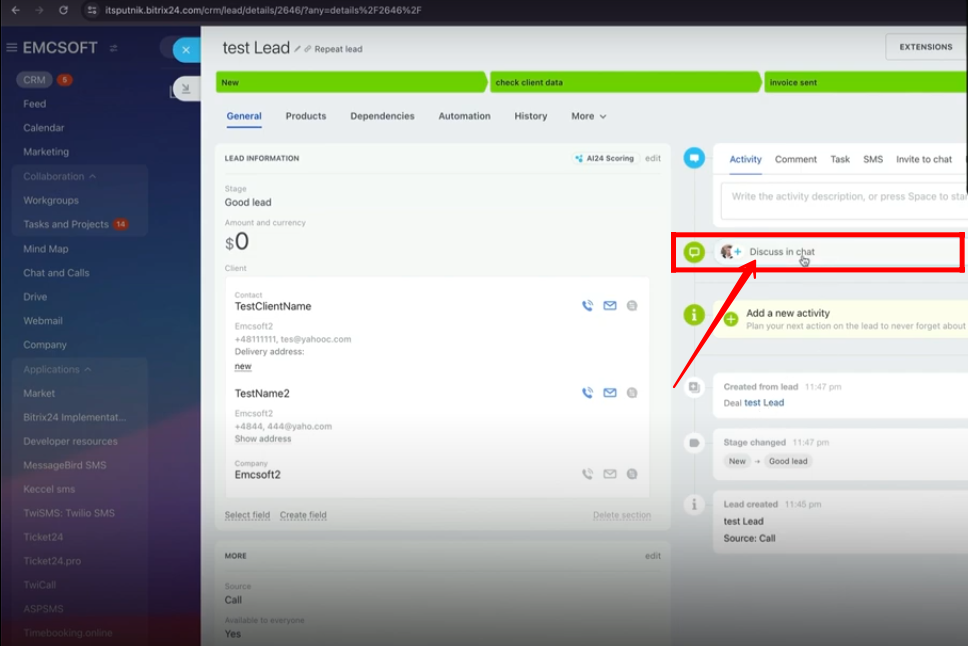
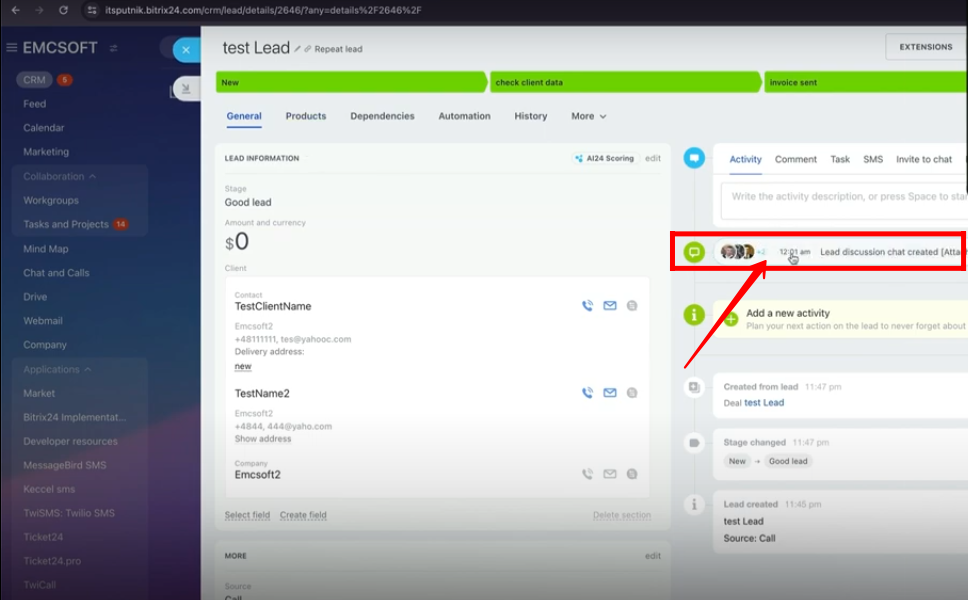
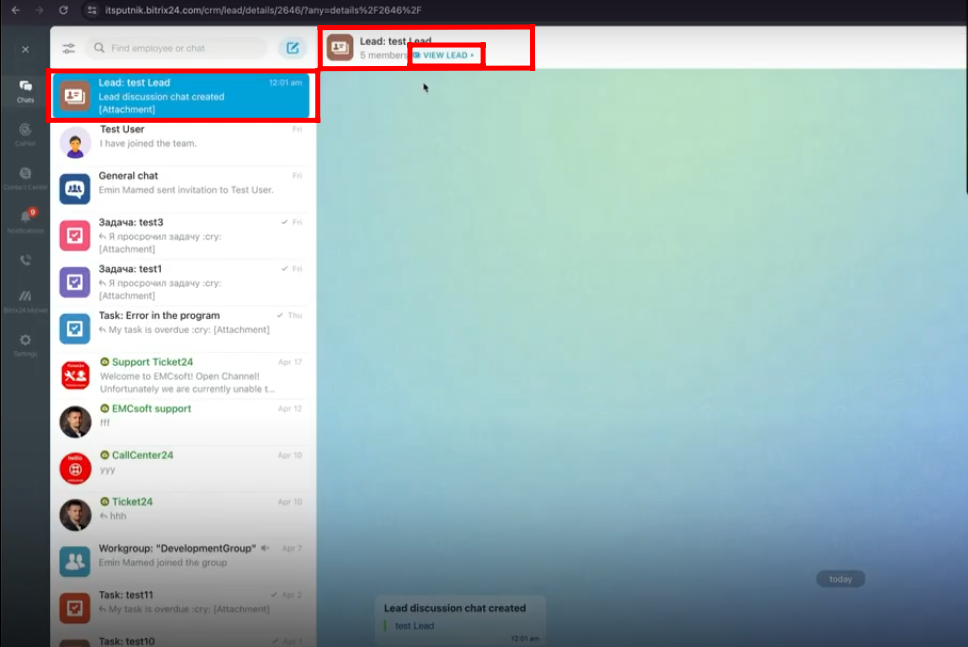
81. For “Person”, same goes here like company.

82. You can select currencies within the lead to add amounts.
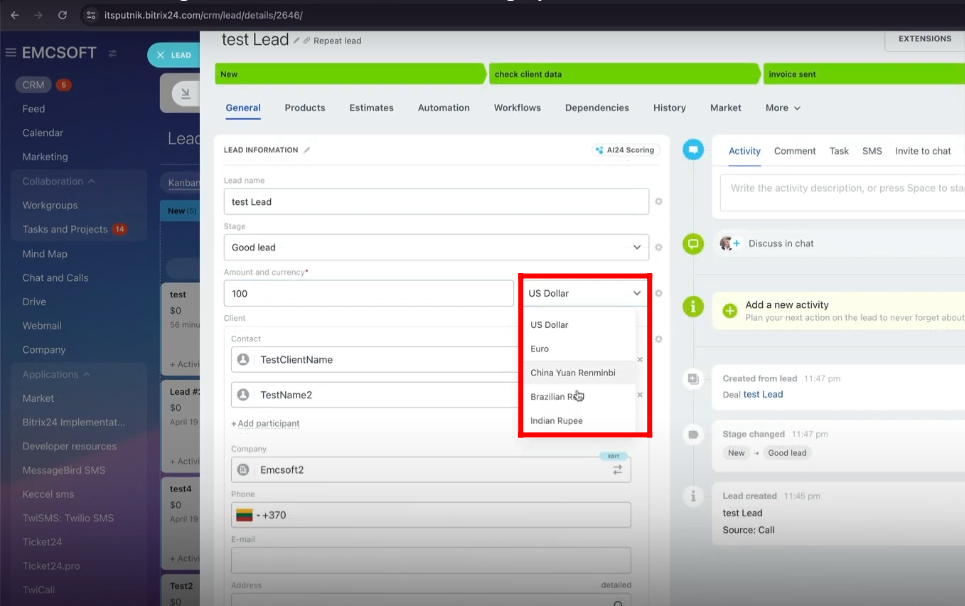
83. For adding new currency, go to “More”. Select “CRM Settings”.
84. Click “Currency”.
85. You can select multiple currencies and “delete/edit” by clicking “cross/edit” signs respectively.
86. Click “Add Currency”.
87. You can select any currency and fill in all the required fields to add. Save it.
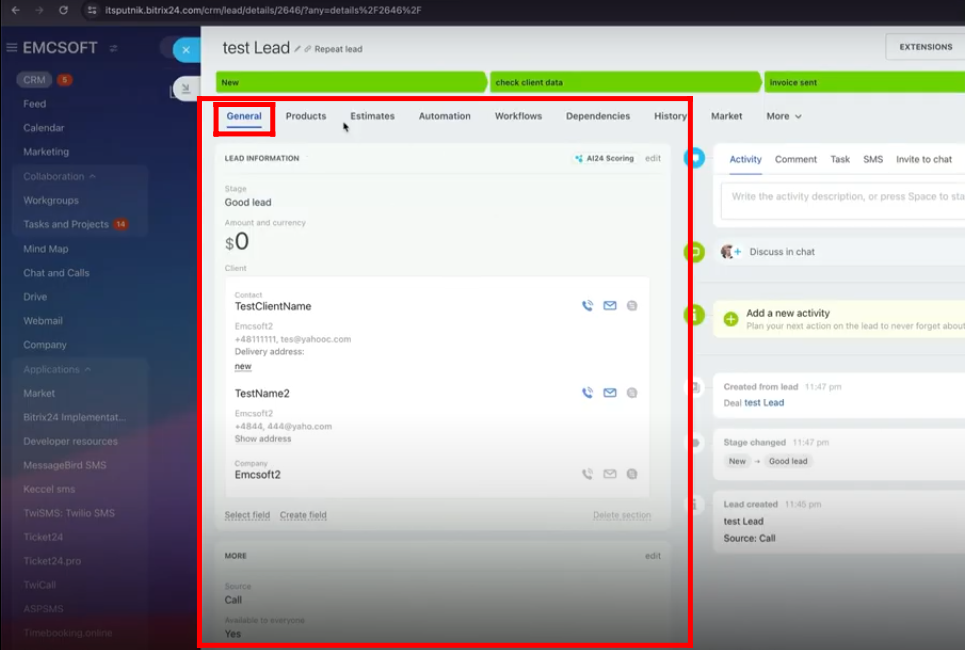
88. In “General” tab within the lead, there is always general information about lead that you fill in the fields.
89. In “Products” tab, there is information about the products connected to the lead as objects.
90. Estimates can be created separately and connected to Lead, Deal, Contact and Company object(We will discuss about estimates later).
91. You can add automations within the lead in “Automation” tab.
92. A proper guidance is provided in previous articles that how automations are customized to run in certain stages for leads.
93. Workflows are very similar to automations but with some differences. For example, if you create some business processes, those processes will run here.
94. In “Dependencies” tab, you can view what (contacts, companies, estimates, deals) are connected to that particular lead.
95. In “History” tab, you will all the actions performed within or to that lead.
96. You can apply filters within the “history” tab to view a particular change performed to that lead.
97. Also, you can select a field “Observers” in the lead.
98. Multiple observers can be added within the lead.
99. The observer assigned to a particular lead will get a notification like this.
100. The lead is being viewed from “Test User(Observer)” panel. An observer can view activities of the lead but can’t edit.
101. “Responsible person” can create a chat with all observers as members to discuss lead in that chat.
102. Click on discussions to create a chat group.
103. You can chat with all observers and responsible persons of that lead and view that particular lead details from chat.
“You can also watch this video on Youtube”