| 2884 Views | Amin
In this tutorial, we will explore the different methods available in Bitrix24 for assigning a responsible person to a lead. This assignment is crucial for ensuring accountability and proper follow-up on potential clients. We will cover manual assignments, automated processes, and handling duplicates, providing a comprehensive guide to managing lead responsibilities within your CRM system.
Setup Responsible Person for Lead Manually, by Robots, by Conditions, from the CRM Form and Open Lines
Assigning a responsible person to a lead can be done in various ways in Bitrix24. We’ll start by demonstrating how to manually set the responsible person for a lead. Then, we’ll delve into more advanced methods, such as using automation robots to assign leads based on predefined rules and conditions. We’ll also cover how assignments can be made directly from CRM forms and open lines, ensuring that leads are efficiently routed to the appropriate team member right from the point of capture.
Mass Change of the Responsible Person
There are times when you might need to reassign multiple leads to a different team member, such as during team restructuring or when managing workload distribution. We’ll show you how to perform mass changes of the responsible person in Bitrix24, allowing you to update assignments for multiple leads quickly and efficiently.
Repeated Leads
Managing repeated leads is essential to avoid redundancy and ensure efficient lead processing. We’ll discuss strategies for identifying and handling repeated leads, including how to configure your CRM to automatically recognize and categorize them. This ensures that each lead is managed appropriately and that your sales team can focus on genuine new opportunities.
Processing Duplicates
Duplicate leads can clutter your CRM and lead to inefficient workflow. We’ll guide you through the process of identifying and merging duplicate leads within Bitrix24. By consolidating duplicates, you can maintain a clean and organized CRM database, ensuring that all lead information is up-to-date and accurately reflects your sales pipeline.
Lead Conversion
Converting leads into deals or contacts is a critical step in the sales process. We’ll explain how to convert leads in Bitrix24, including the various options available during the conversion process. This ensures that all relevant lead data is transferred accurately and that the lead seamlessly progresses through your sales funnel.
By mastering these topics, you’ll be able to efficiently assign responsibilities, manage duplicates, and streamline your lead management processes in Bitrix24, ultimately enhancing your CRM’s effectiveness and your team’s productivity.
Detailed instructions are described below
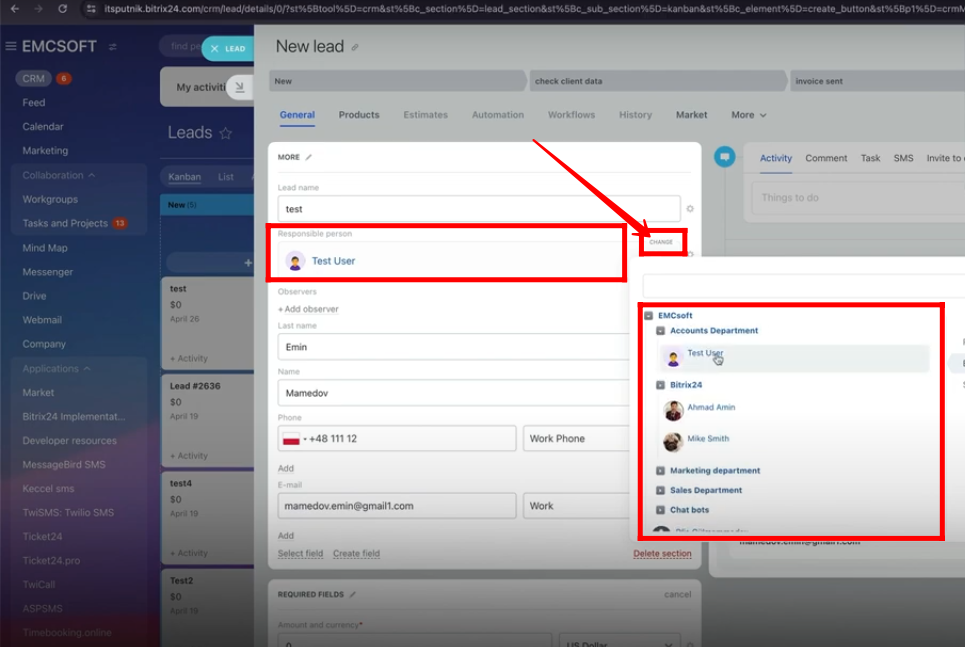
1. Click “Change” against the “Responsible person” field and select any user manually to assign a responsible person for that particular lead.
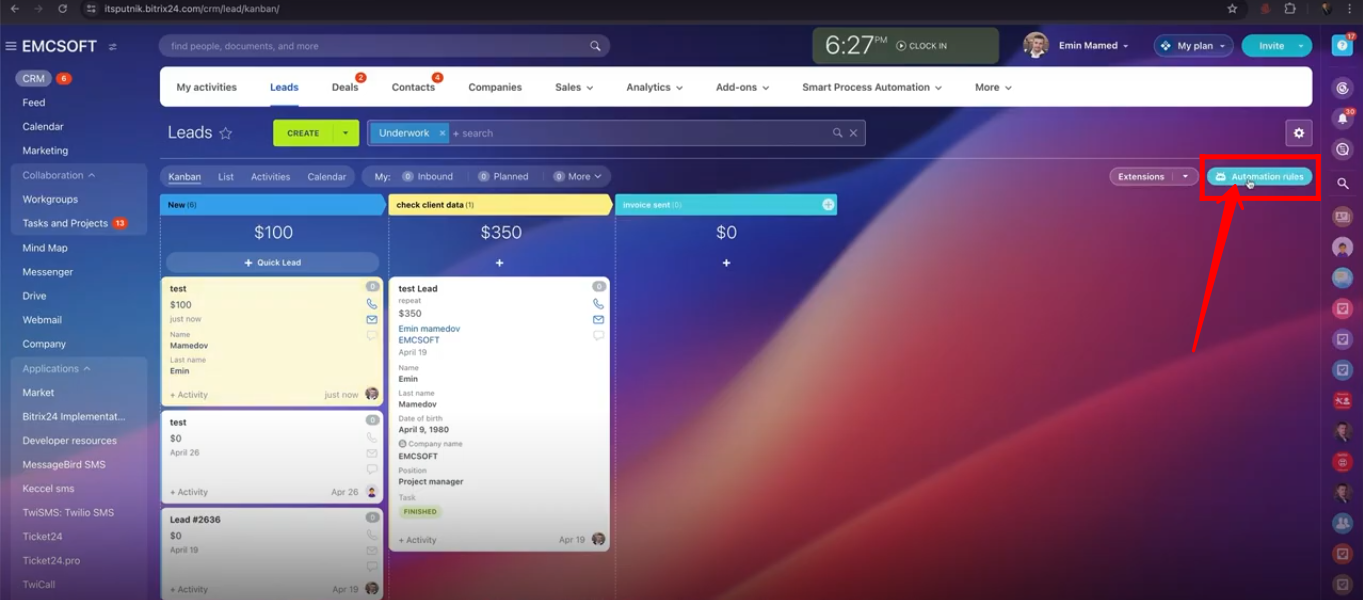
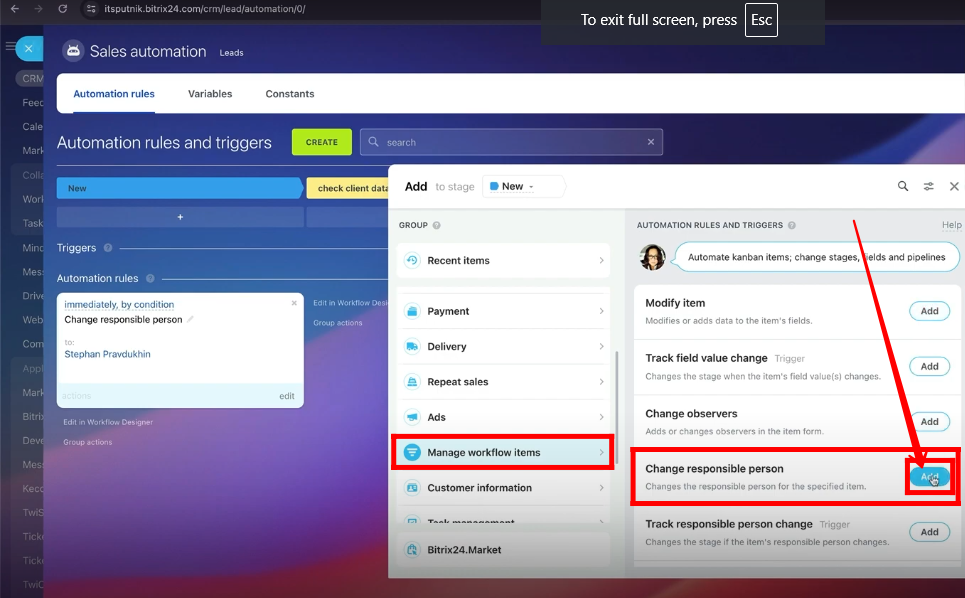
2. Responsible person for a lead can be assigned by a robot. Click “Automation Rules”.
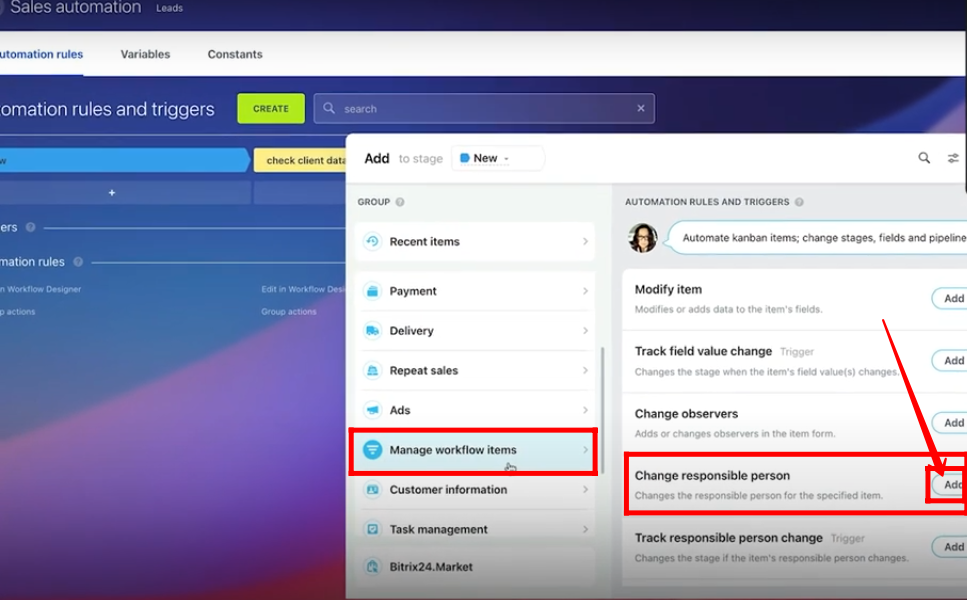
3. Go to “Manage Workflow Items” and add the “Change responsible person” robot.
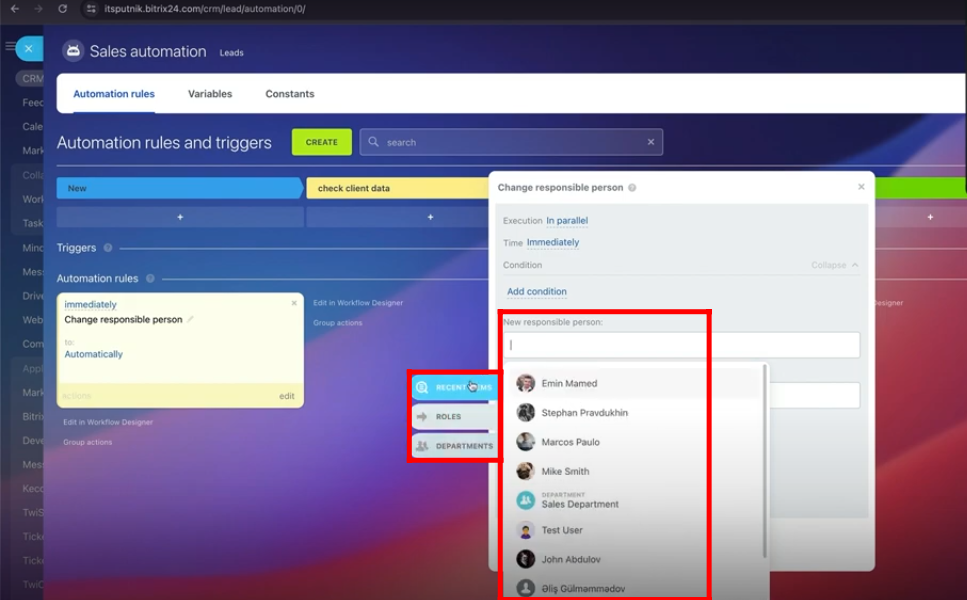
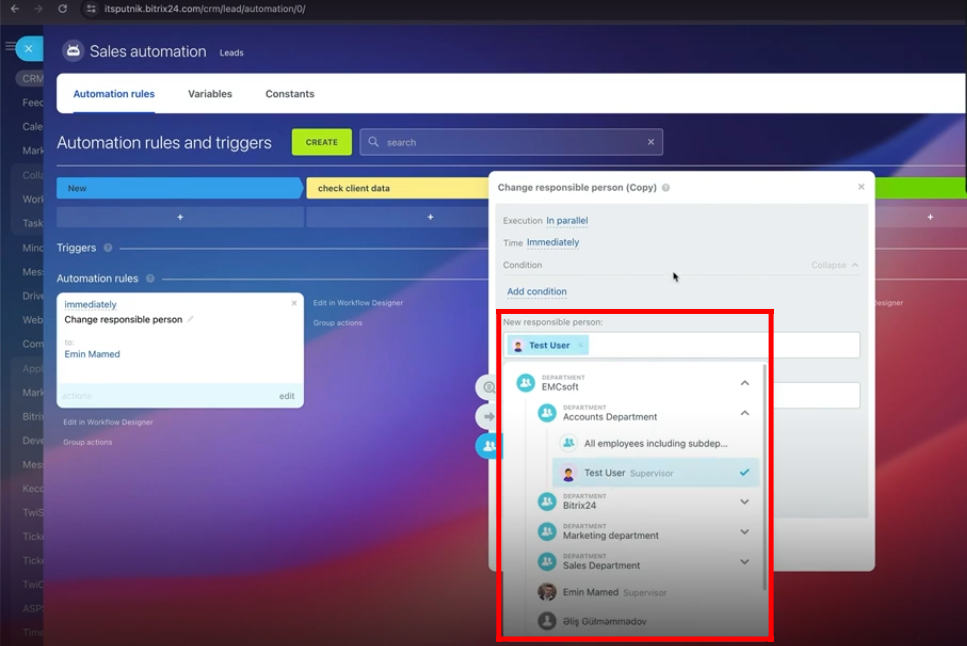
4. Select the responsible person from roles or departments.
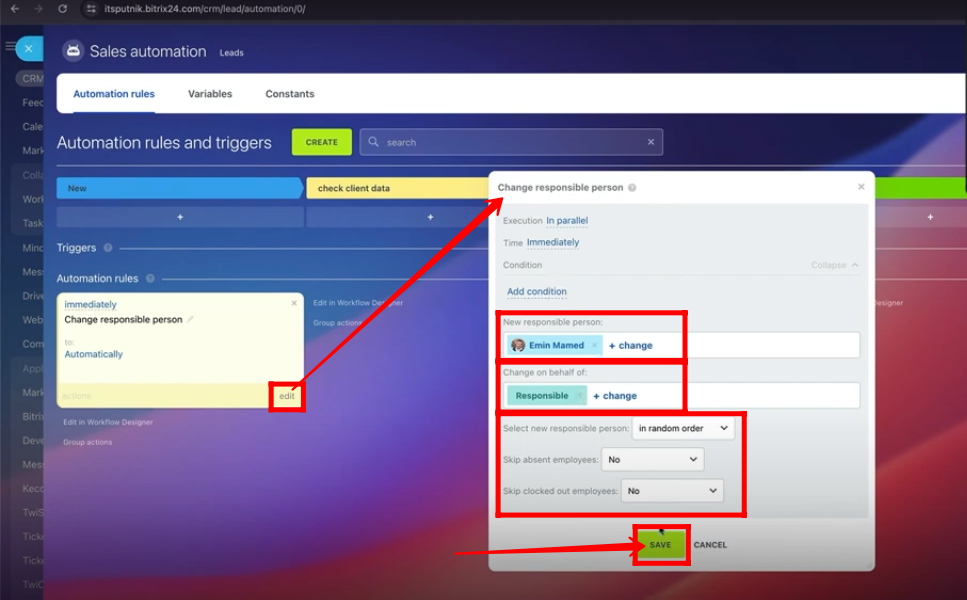
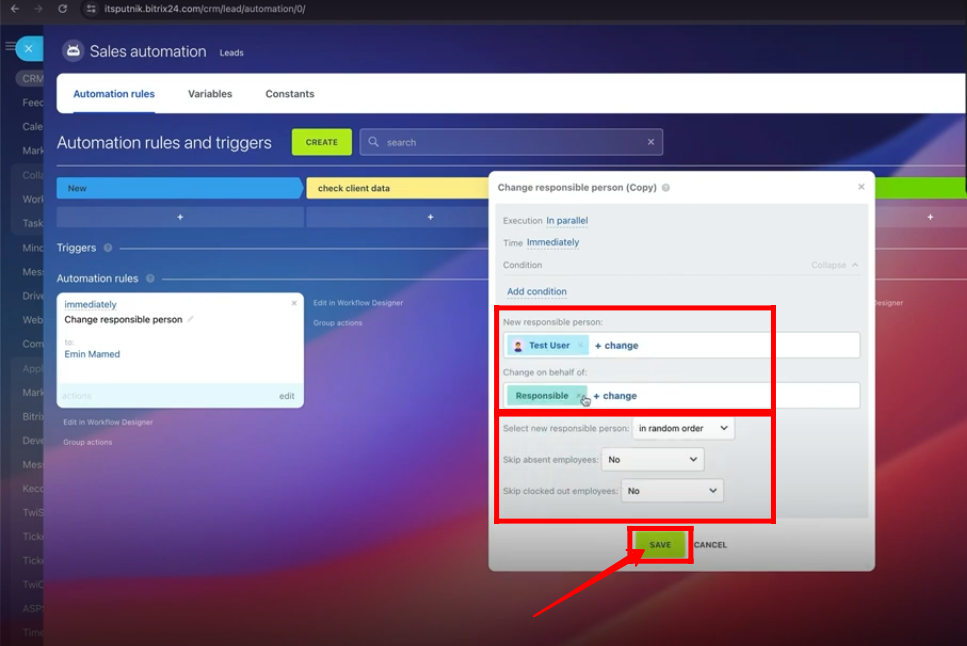
5. Add a role in the “Change on behalf of” field, add further details and click “Save”.
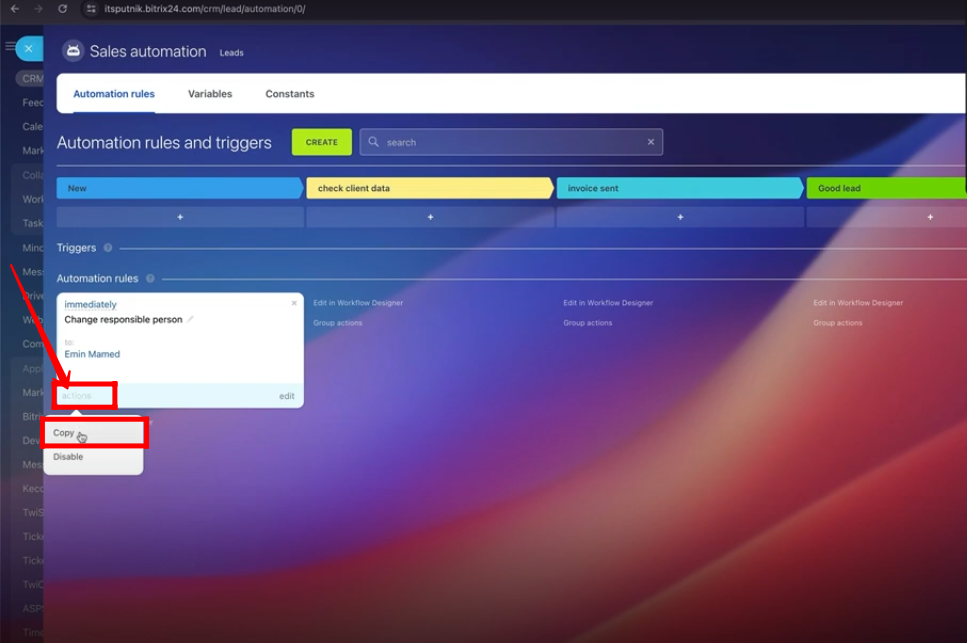
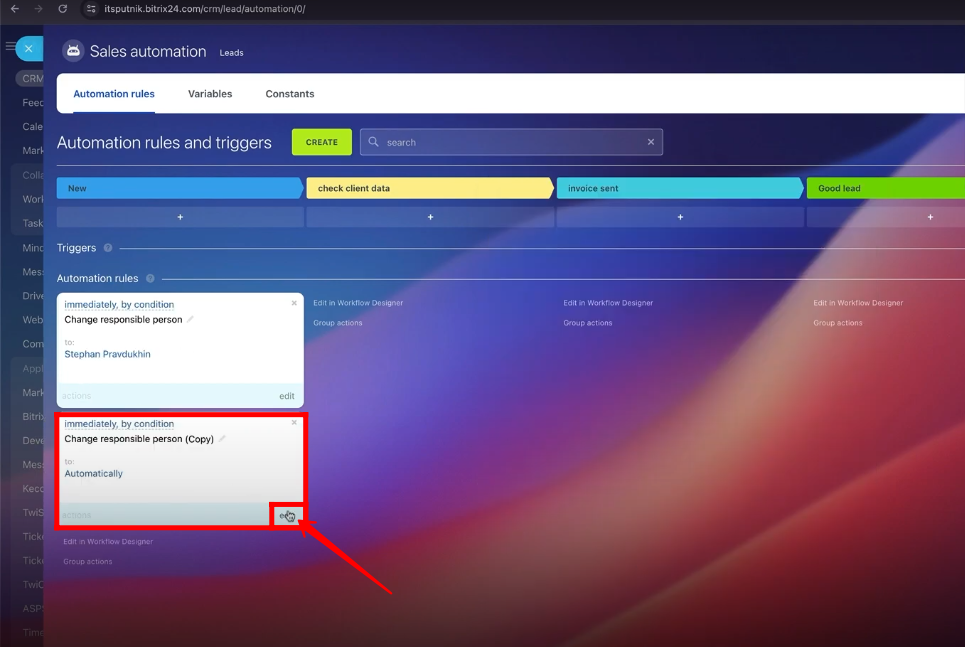
6. Make a copy of the “Change responsible person” robot by clicking “actions”.
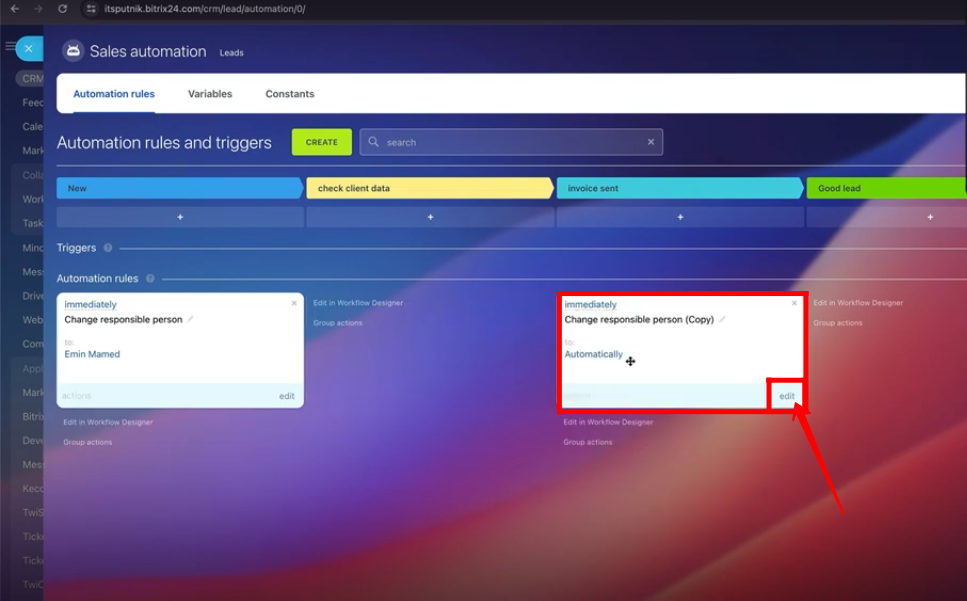
7. Edit a new robot “Change responsible person (Copy)” now. Make sure, the stages of both robots must be different.
8. Select the responsible person other than that of the previous robot for testing purposes.
9. Add a role in the “Change on behalf of” field, fill in other details and click “Save”.
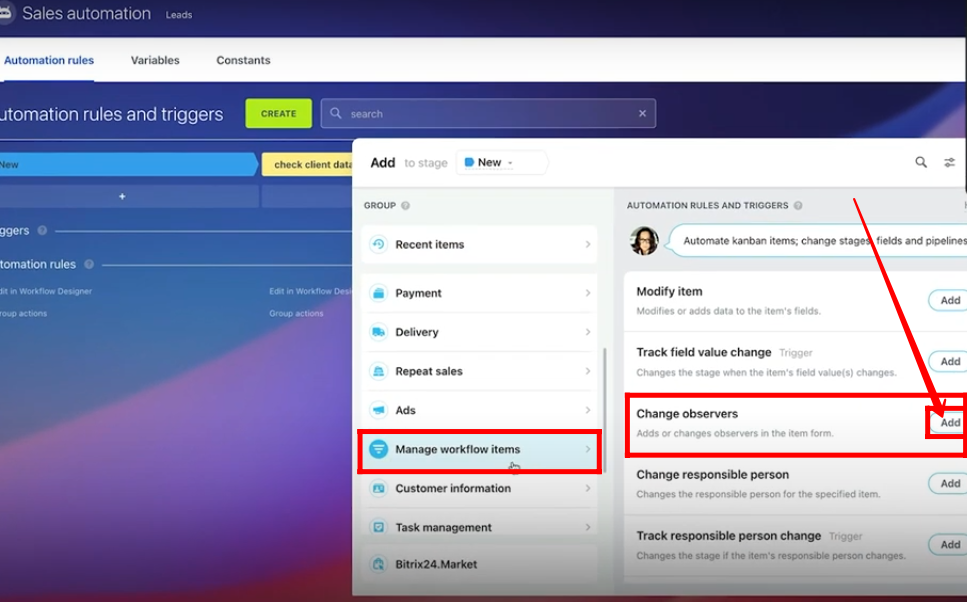
10. Go to “Manage Workflow Items” and add the “Change observers” robot.
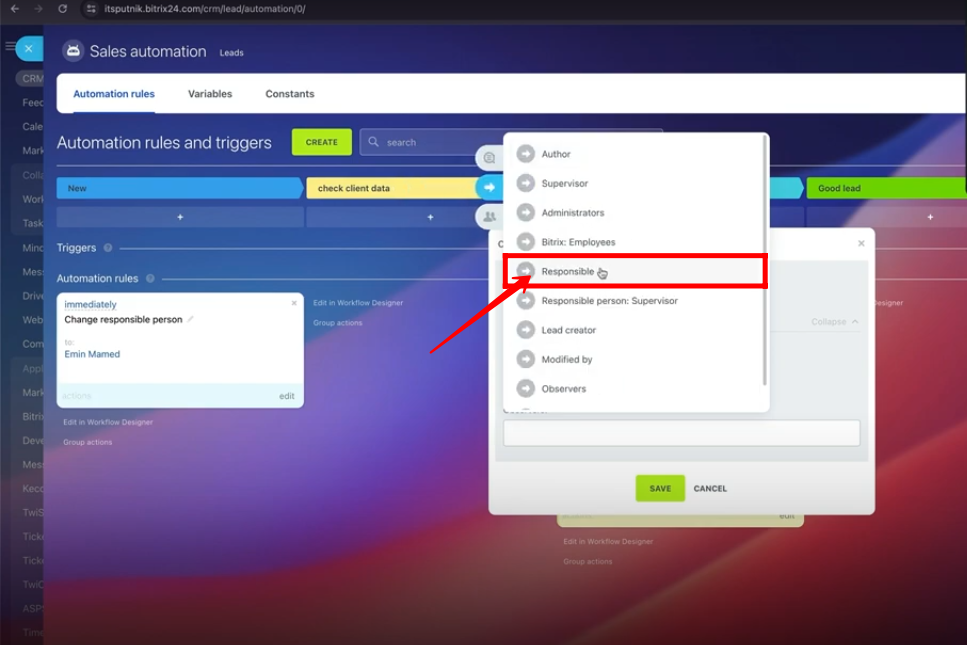
11. In this case, the observer is being selected by the role “Responsible”.
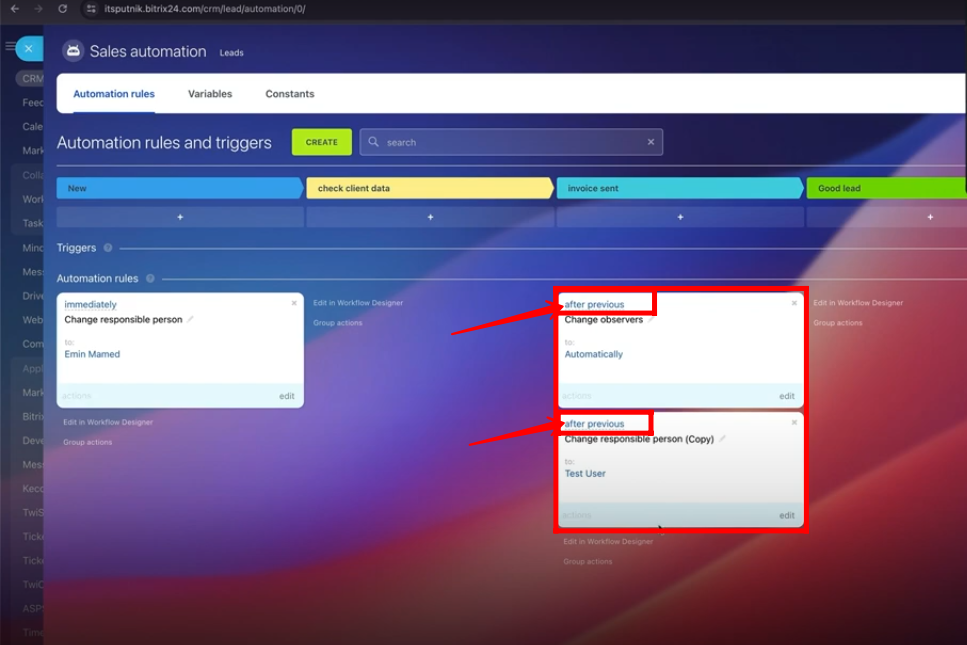
12. The Execution of both robots “Change Observers” and “Change Responsible Person (Copy)” must be “Wait” because these robots are being executed one after another under one stage.

13. You can see that both robots have “after previous” execution and the stage is “Invoice sent”.
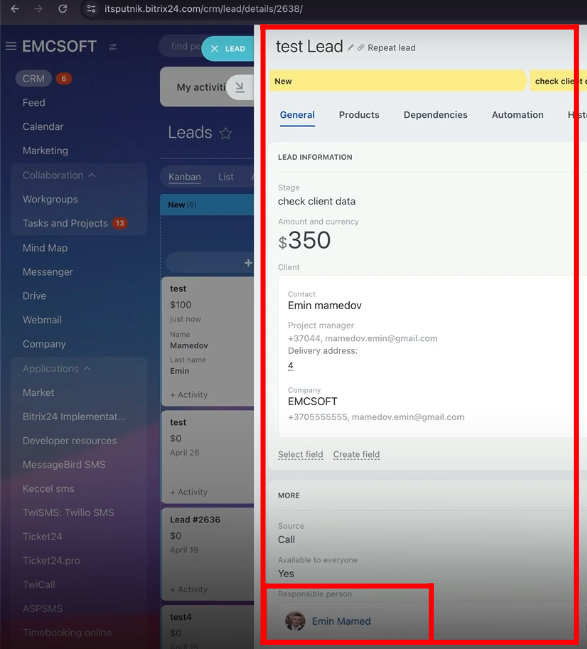
14. The “test Lead” is in the “check client data” stage and the responsible person is “Emin Mamed”.
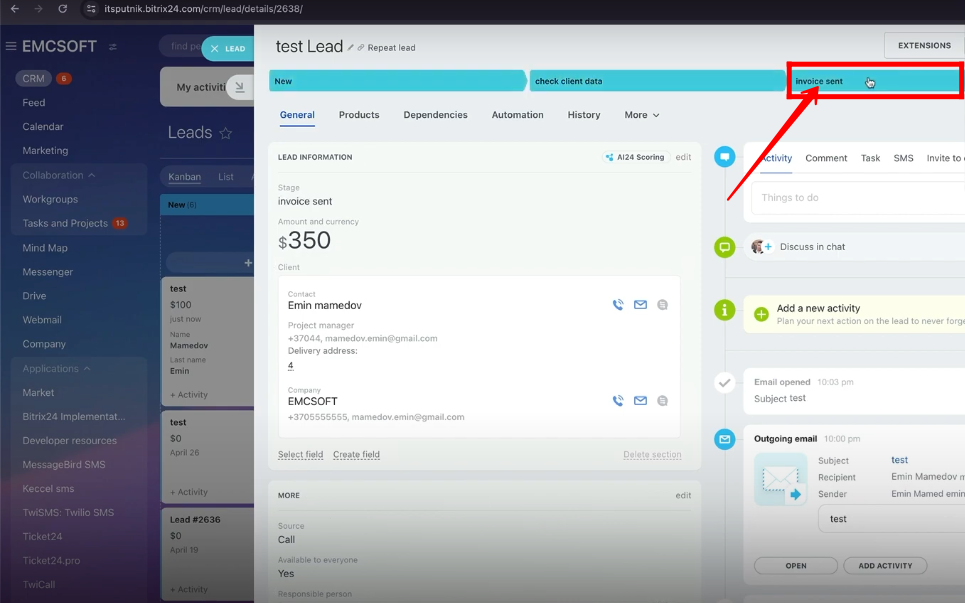
15. Change the stage of lead to “Invoice Sent”.
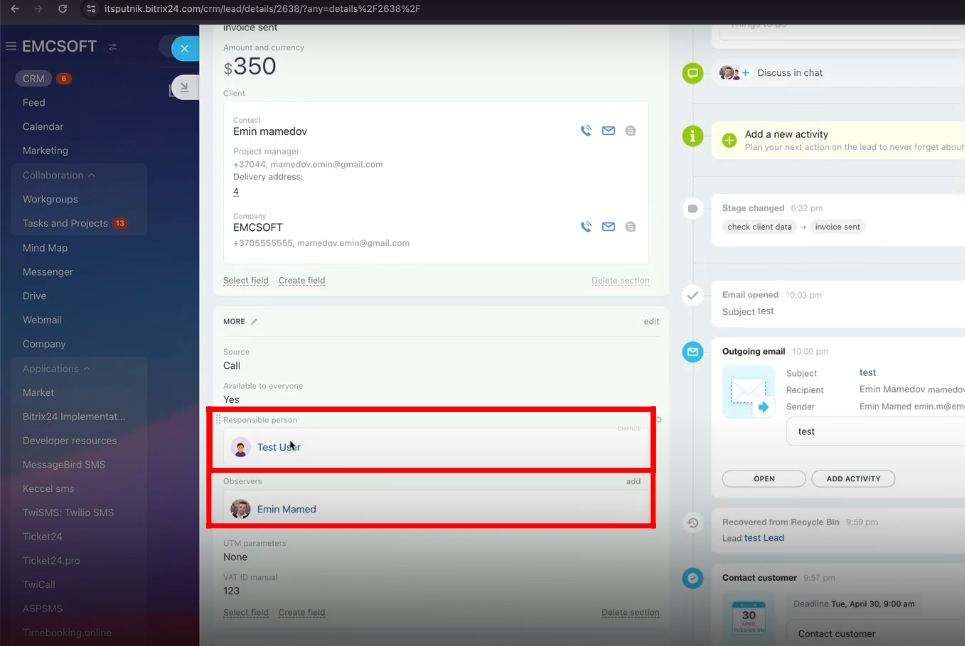
16. The observer and Responsible Person changed due to automation rules that we configured.
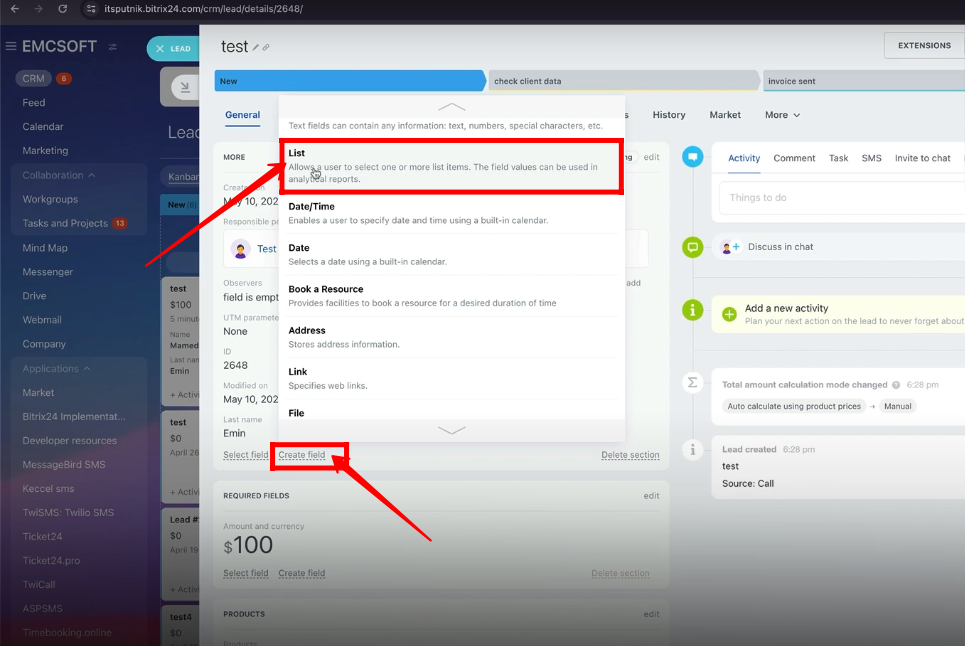
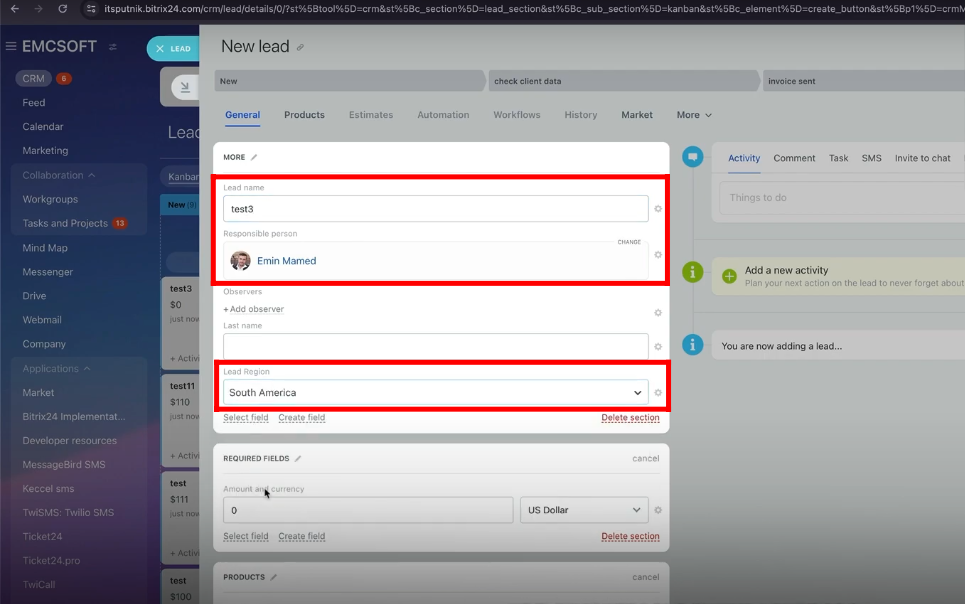
17. Now, we are going to see a new way to change the “Responsible person” for the lead. Click “Create field” to generate a new field of type “List”.
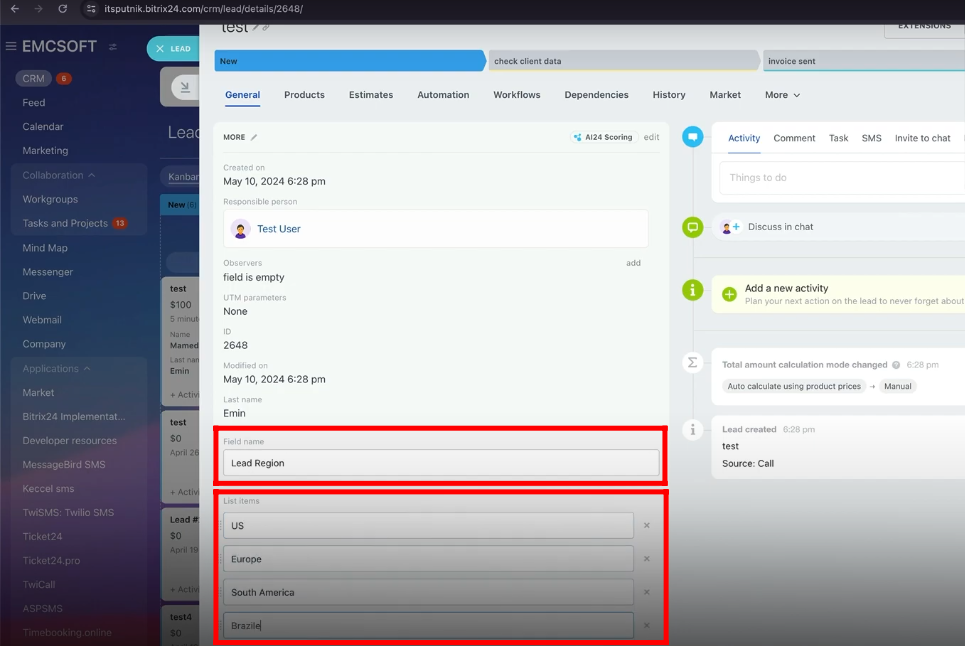
18. The field name is “Lead Region” and the list items are “US”, “Europe”, “South America” and “Brazil”.
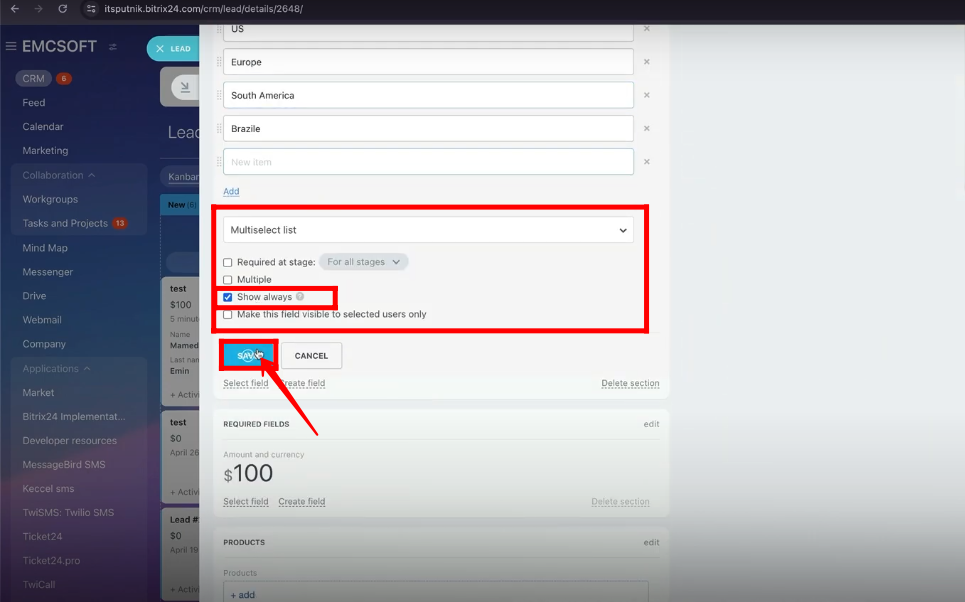
19. Make this list “Show always” and click “Save”.
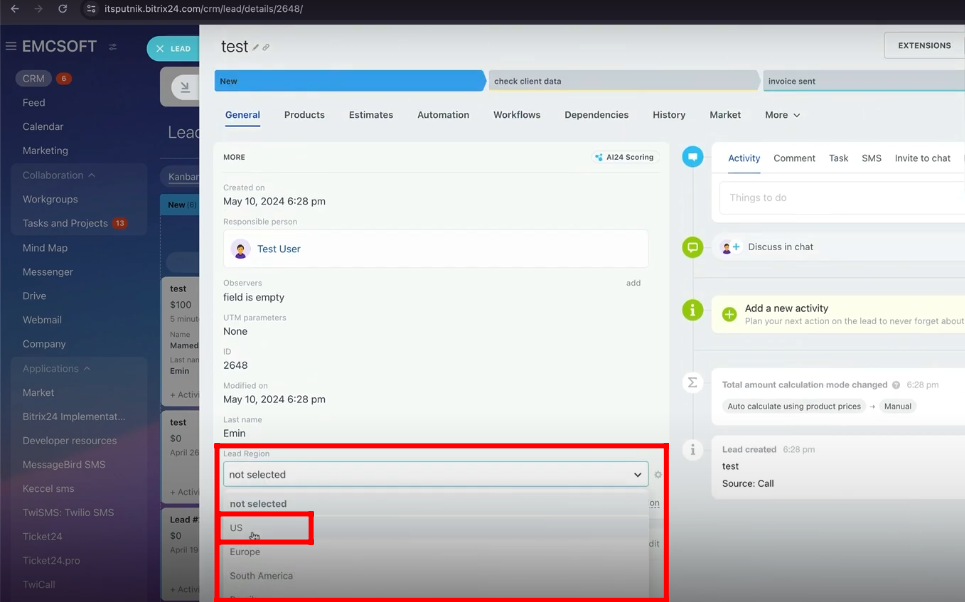
20. Now you can select the region of lead from a list of 4 countries. We will be changing responsible persons of lead on the basis of these regions.
21. Remove all previous robots and edit only one robot “Change Responsible person”. Apply the Condition “Lead Region equal to US” and change the Responsible person. Click “Save”.
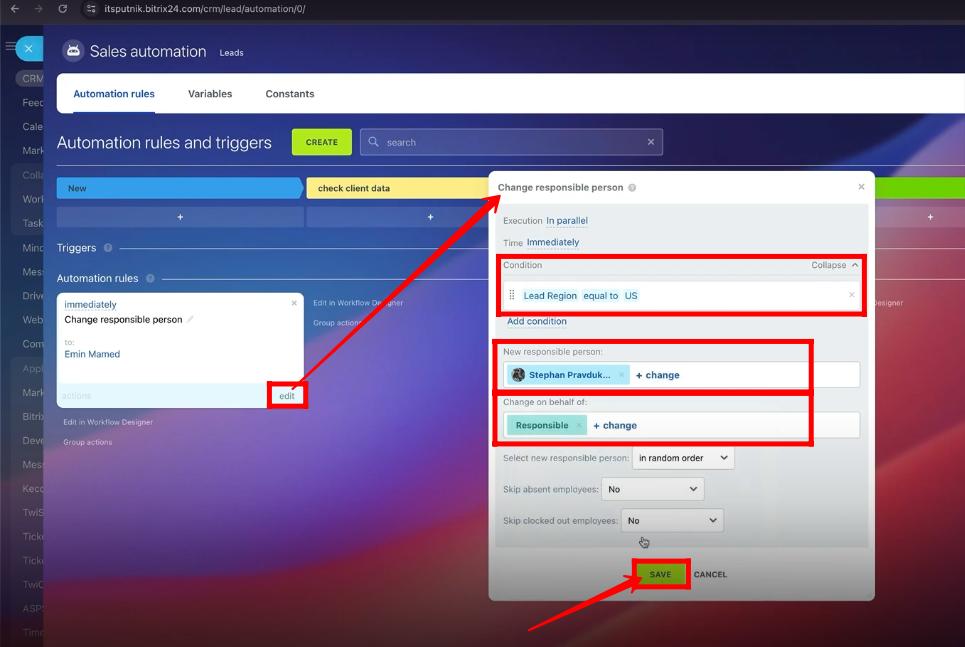
22. Create a new copy of the robot “Change Responsible person”. Edit it.
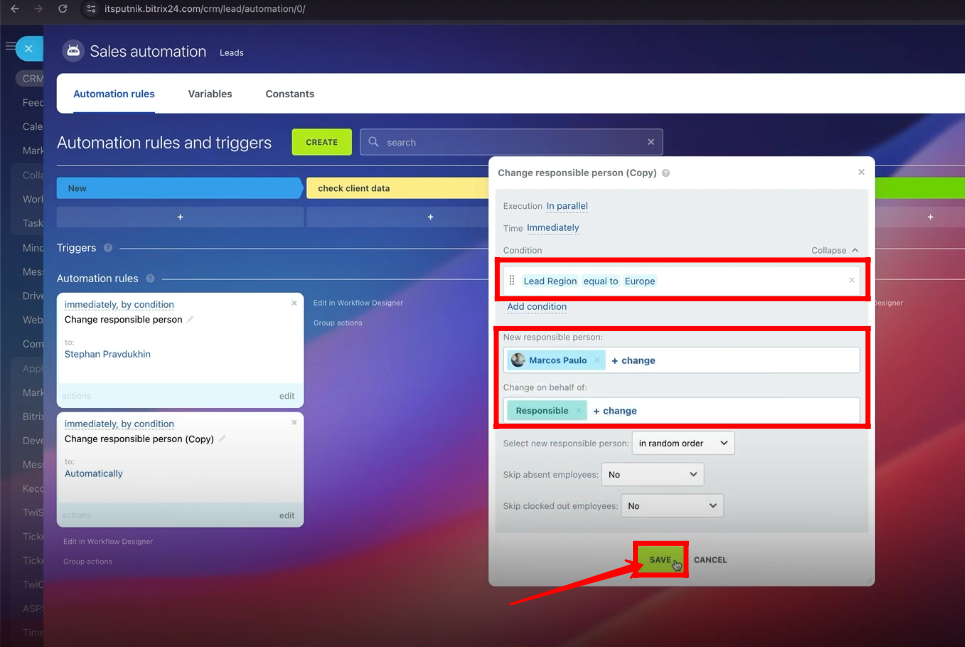
23. Now, the condition will be “Lead Region equal to Europe” and the Responsible person is “Marcos Paulo”. Save it.
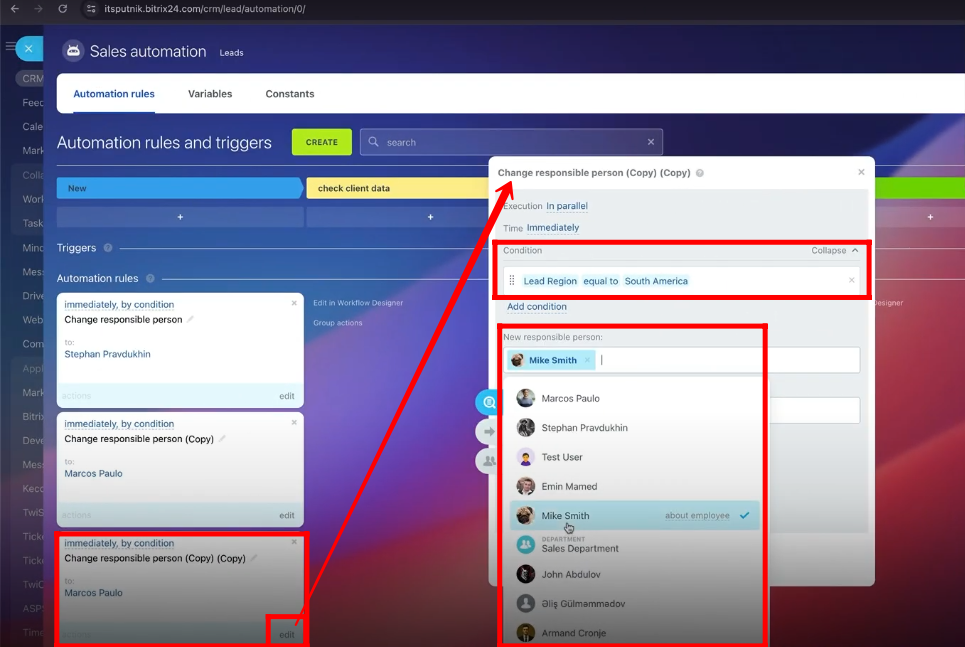
24. Generate again a new copy of the robot “Responsible person”. Edit it. Condition will be “Lead Region equal to South America” and the Responsible person is “Mike Smith”.
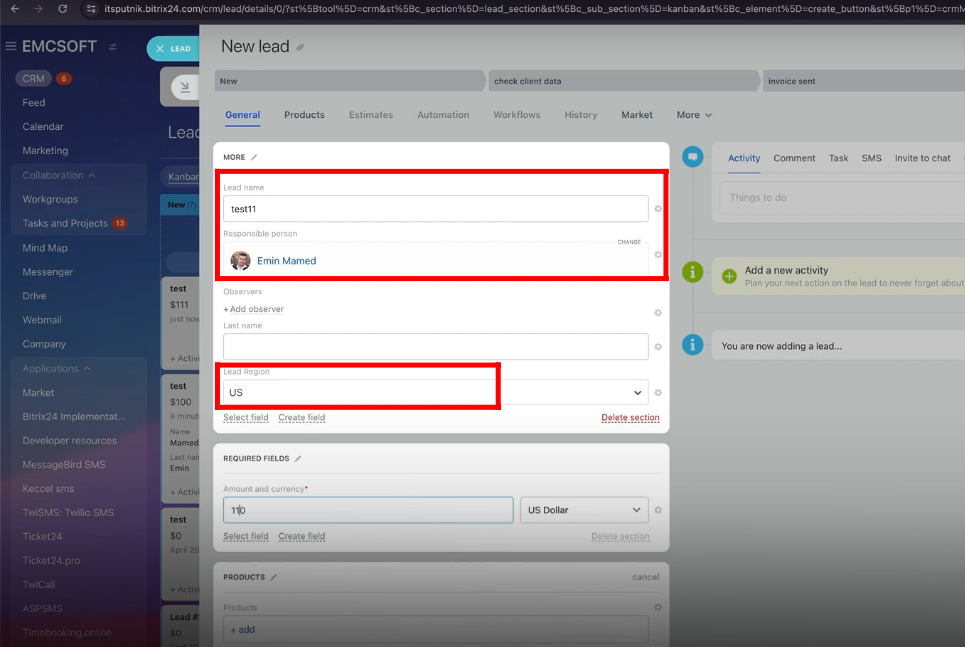
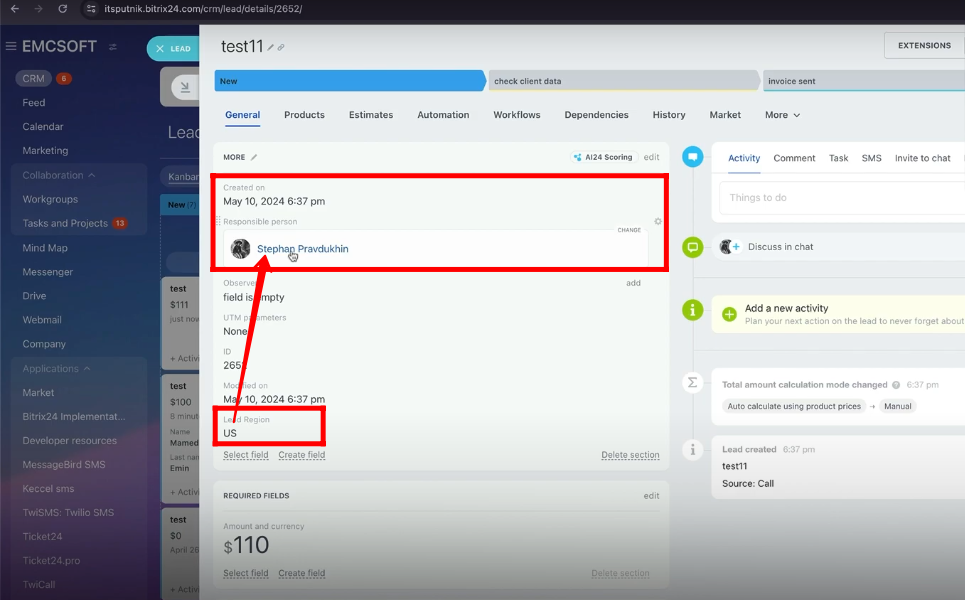
25. Create a new lead and select “Lead Region” as “US”.
26. The responsible person will be “Stephan Pravdukhin” due to the automation rule.
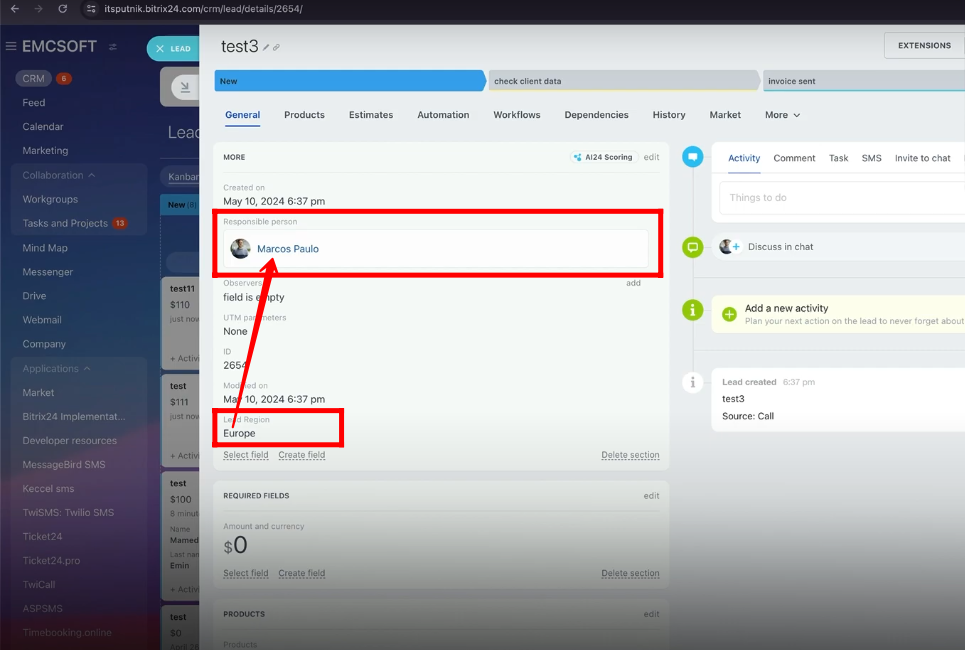
27. Change the lead region to “Europe”.
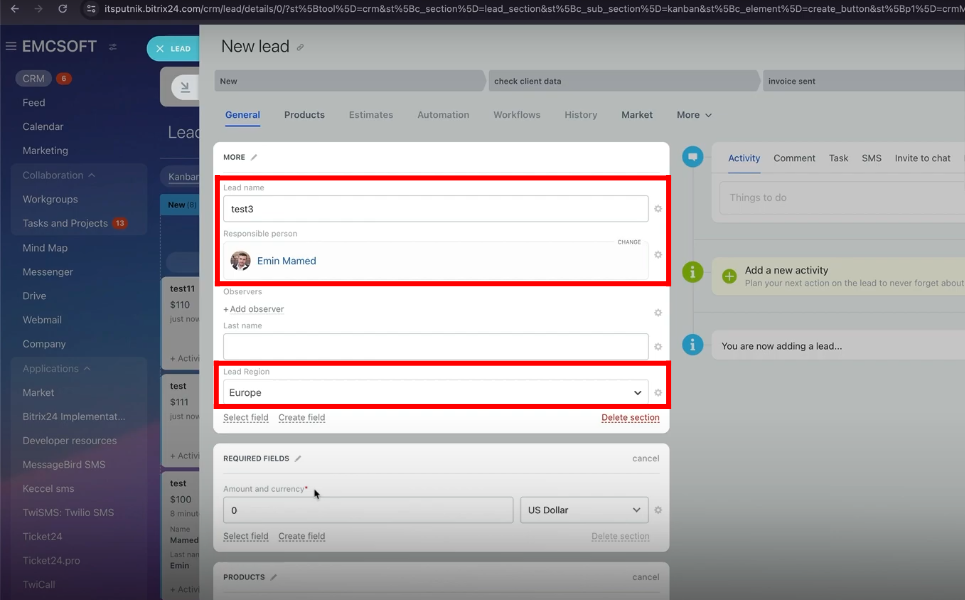
28. Now, the responsible person will be “Marcos Paulo”.
29. Change lead region to “South America”.
30. The responsible person will be “Mike Smith” for the lead.

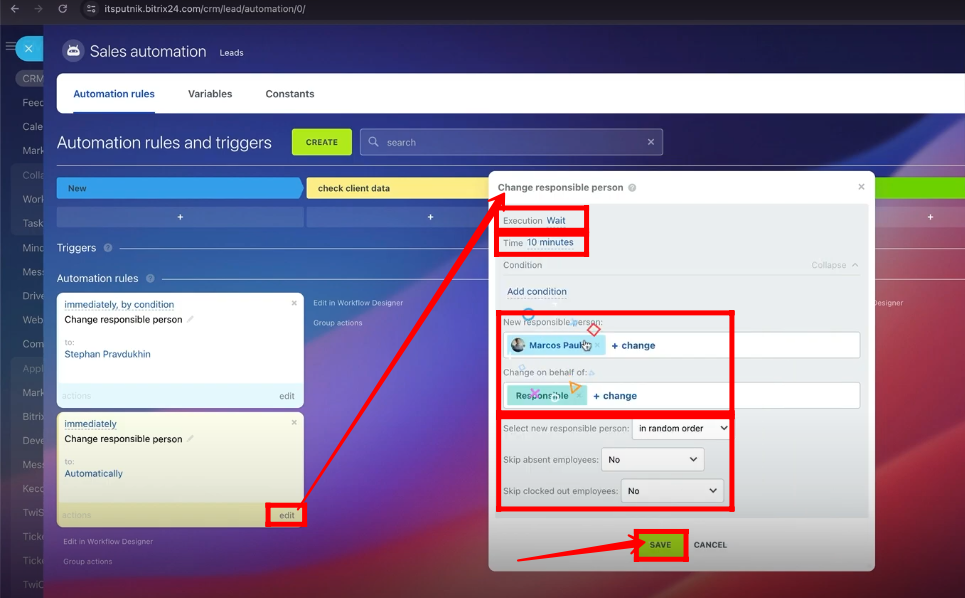
31. Go to “Manage Workflow Items” and add again a new robot “Change Responsible Person”.
32. The execution of this robot will be “Wait” and “Time” of execution will be “10 minutes”. This means that after the creation of a new lead if “Stephan Pravdukhin(the responsible person in the previous robot)” doesn’t take that lead then after 10 minutes, “Marcos Paulo” will be assigned as the new responsible person to that lead.
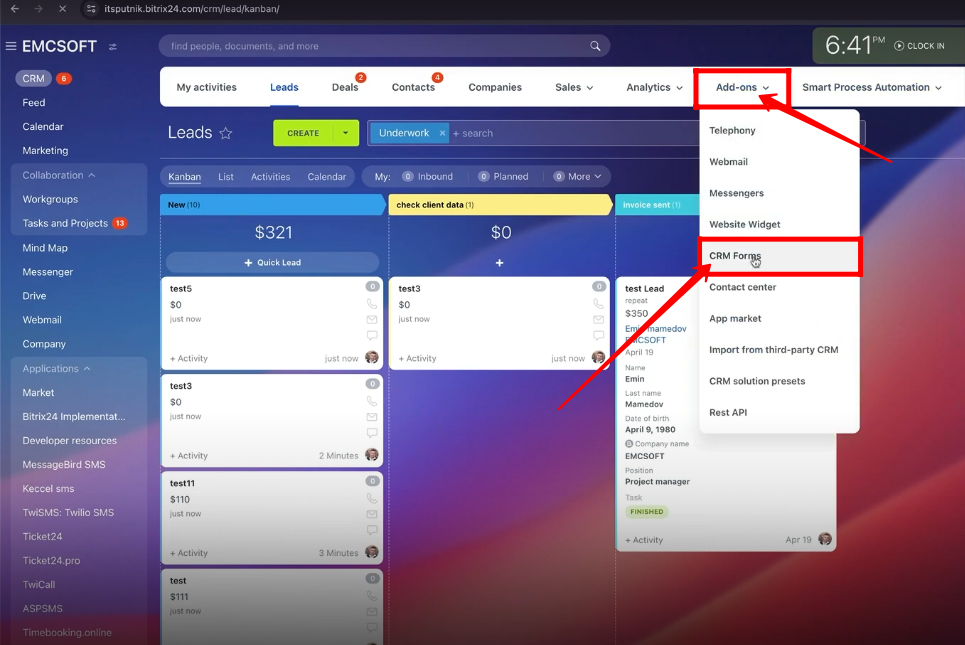
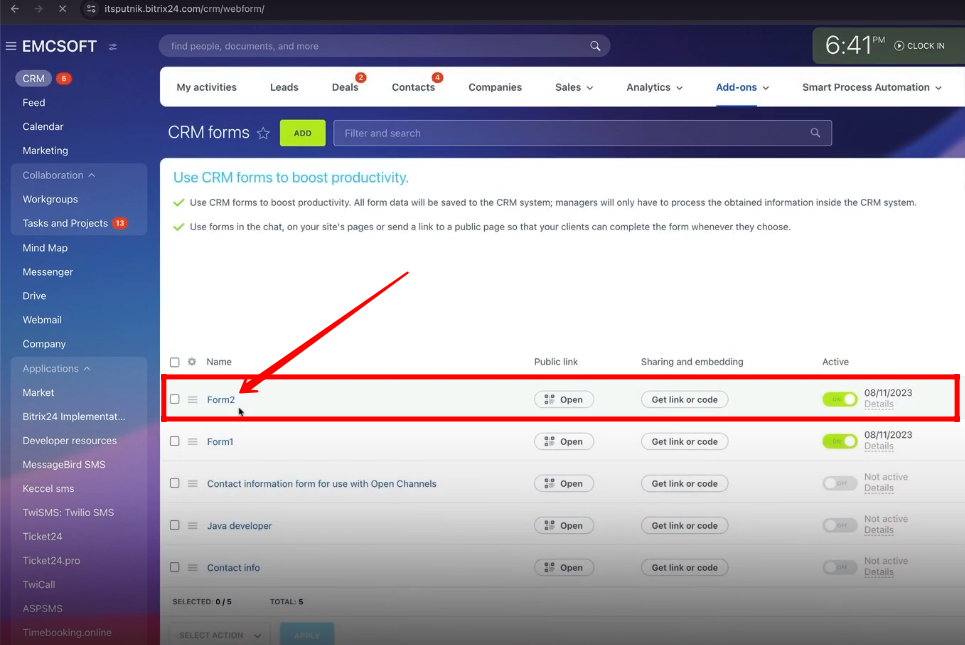
33. Go to “Add-ons” and click “CRM Forms”.
34. Open any previously configured form or add a new one.
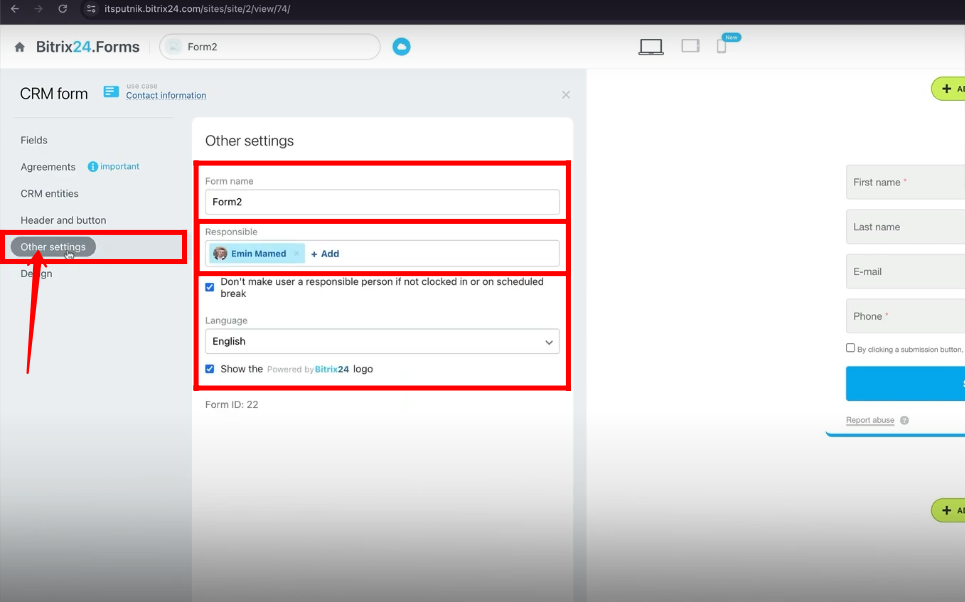
35. Go to “Other Settings” and you can assign a responsible person here also if a lead is being generated after filling this form by client.
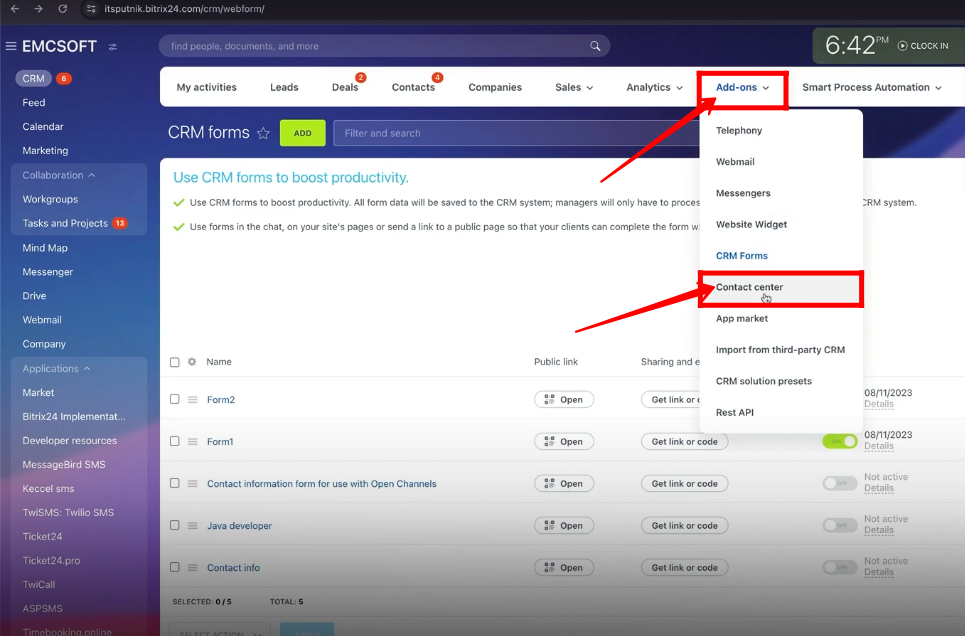
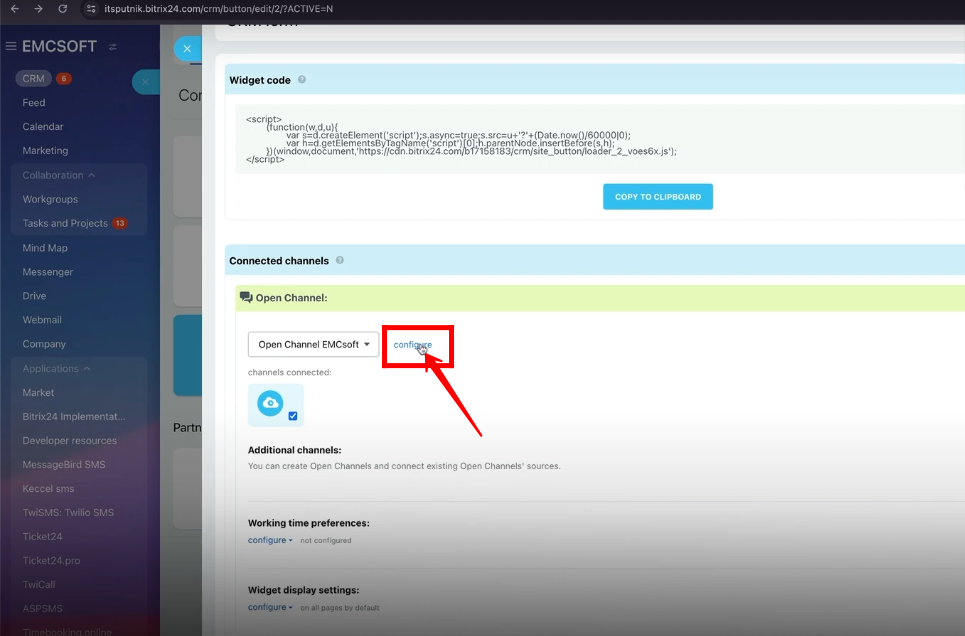
36. Similarly, go to “Add-ons” and click “Contact Center”.
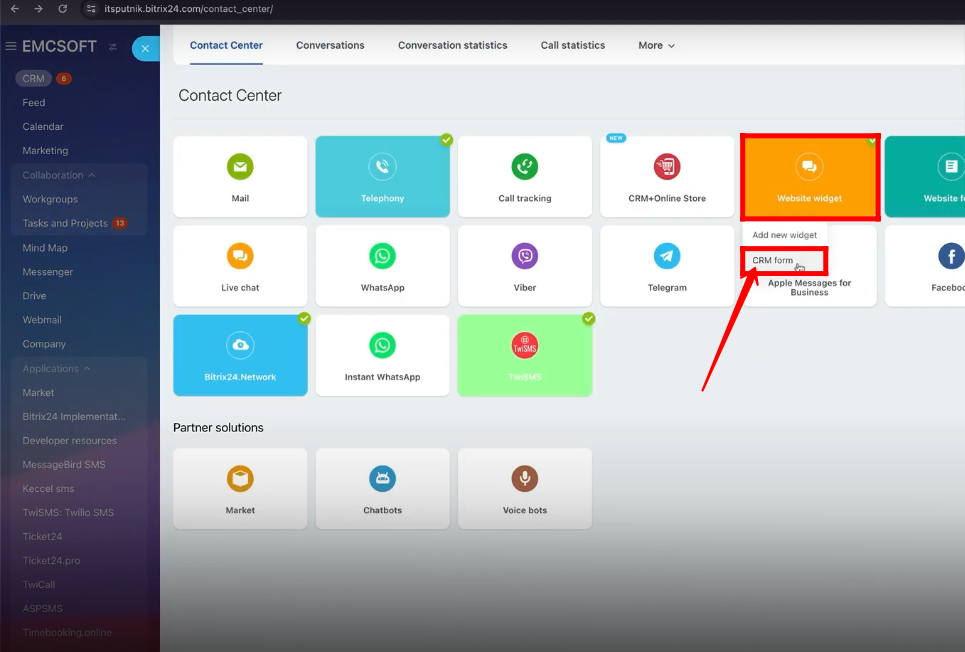
37. Go to “CRM Form” of “Website Widget”.
38. Click “Configure”.
39. Here, you can assign multiple Responsible persons in a queue.
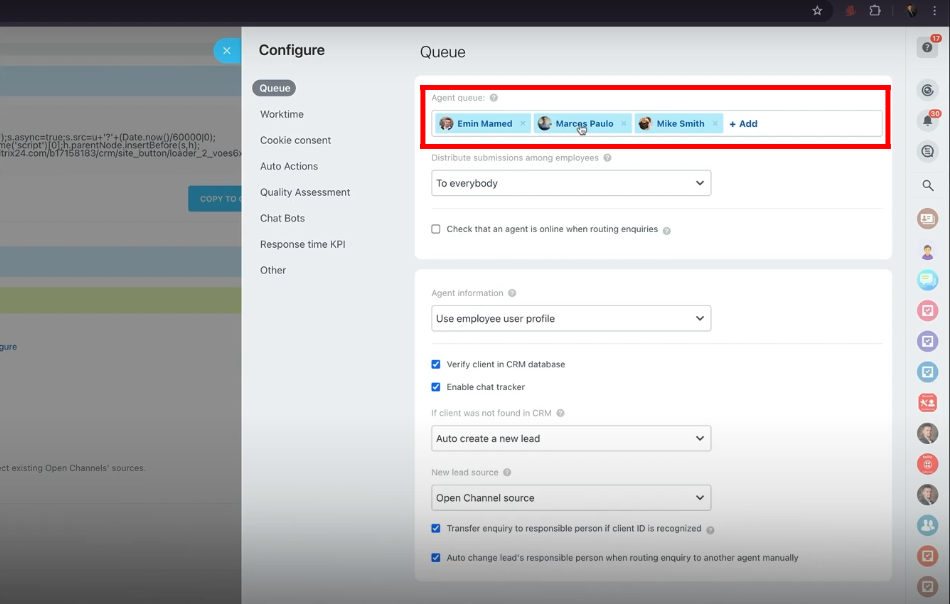
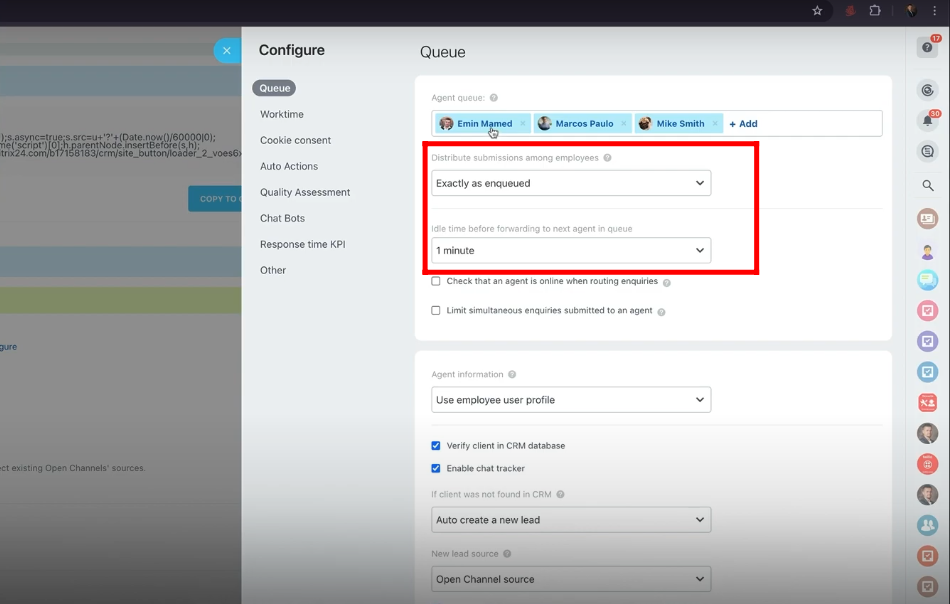
40. You can distribute submissions among employees as “To everybody”, “Exactly as Enqueued” and “Evenly”.
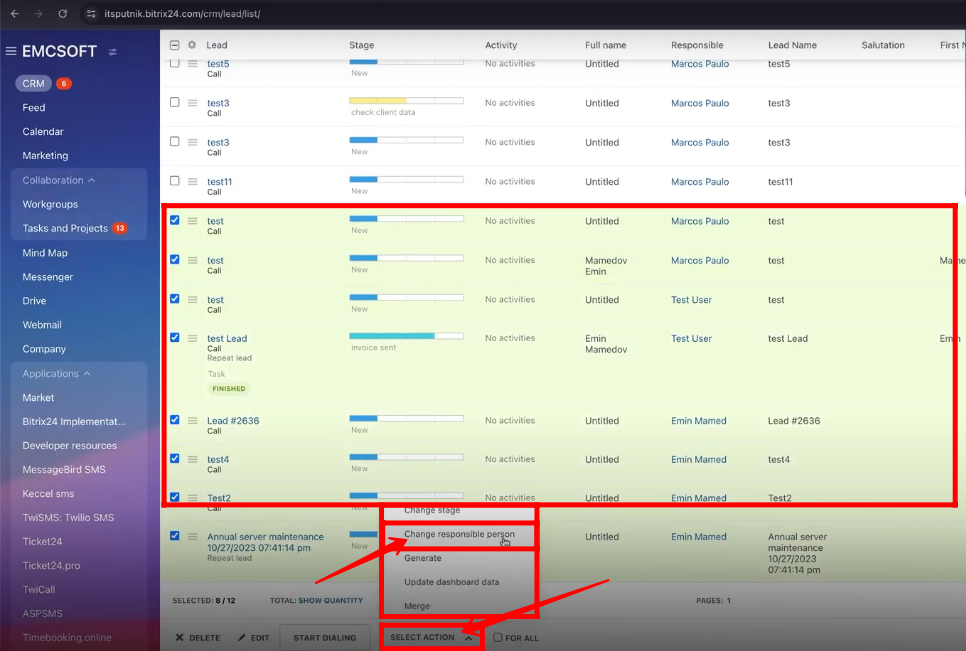
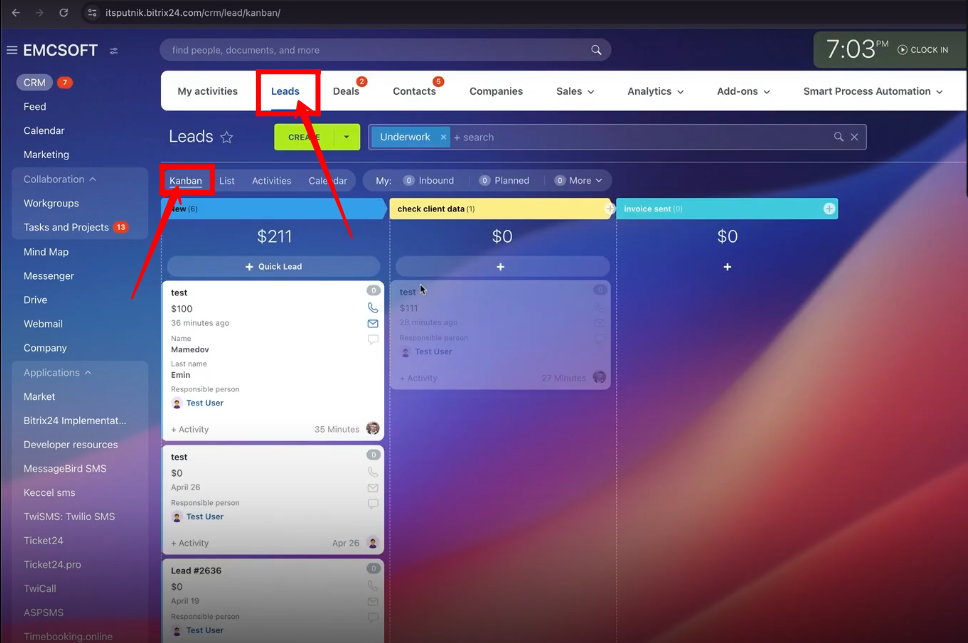
41. Go to “Leads” and click “List”.
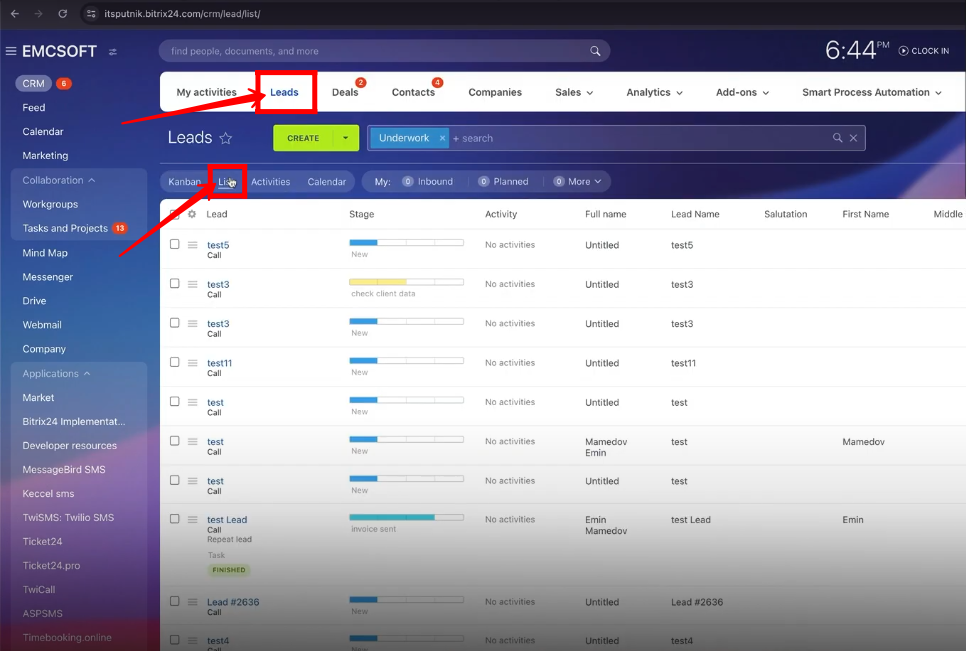
42. Select multiple leads at once and select action to change the responsible person.
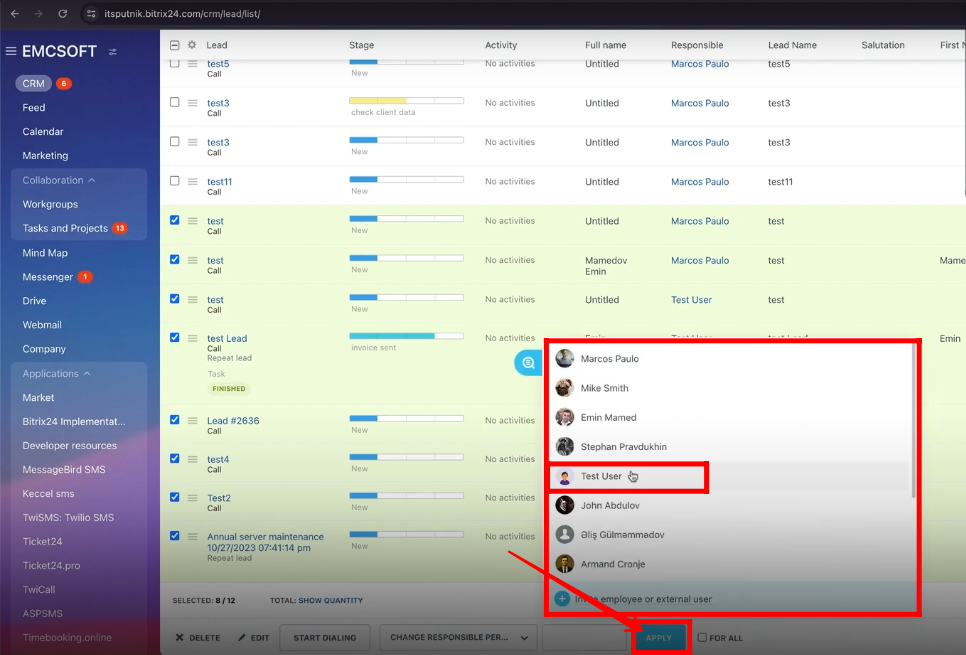
43. Choose the responsible person and click “Apply”. The responsible person of all selected leads will be “Test User”.
44. In the “Kanban” View, you can select multiple leads also and assign a responsible person at once.
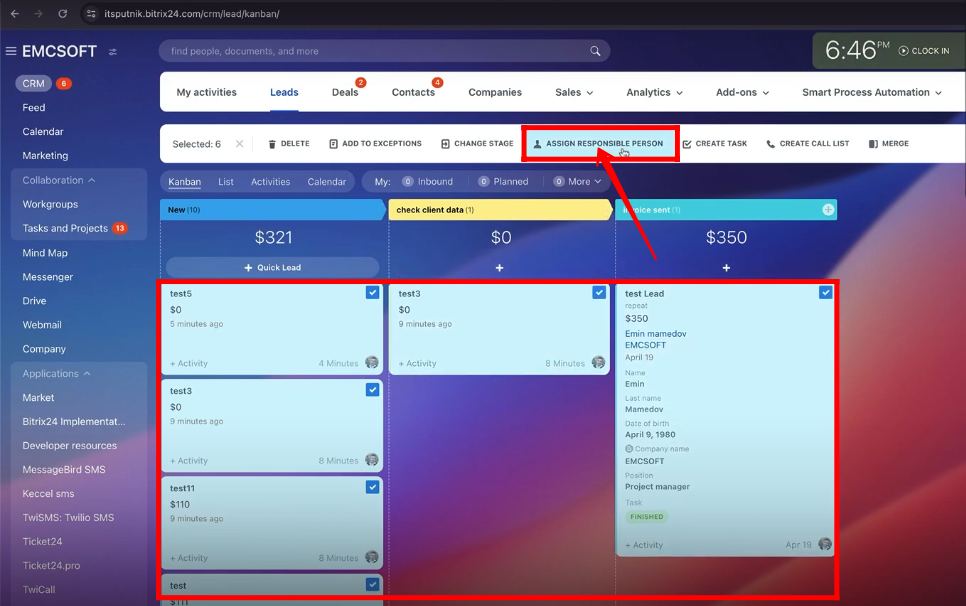
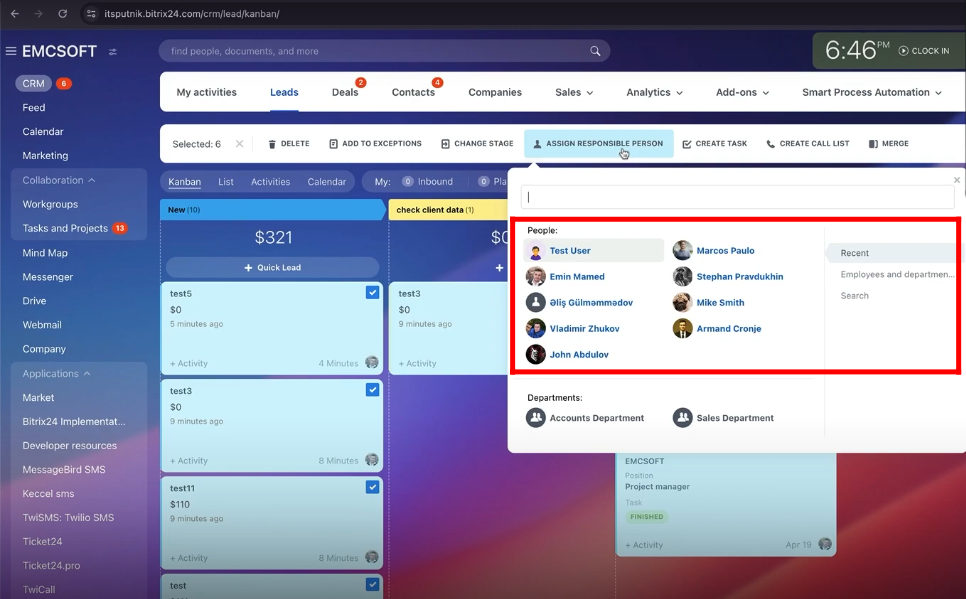
45. Select a responsible person and assign him/her to multiple leads.
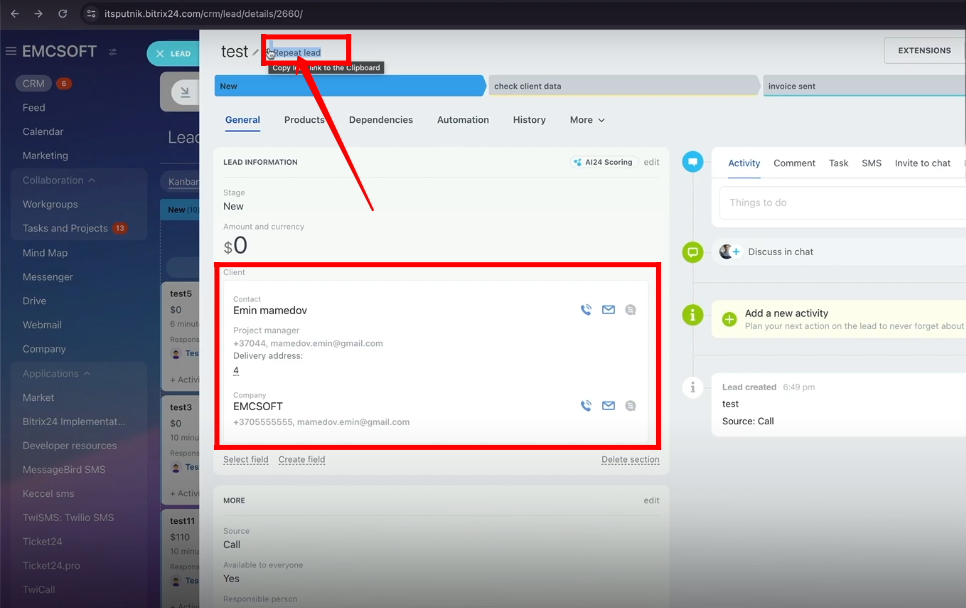
46. If you create a new lead and connect the already stored client’s contact or company details to that lead. Then that lead will be a “Repeated Lead”.
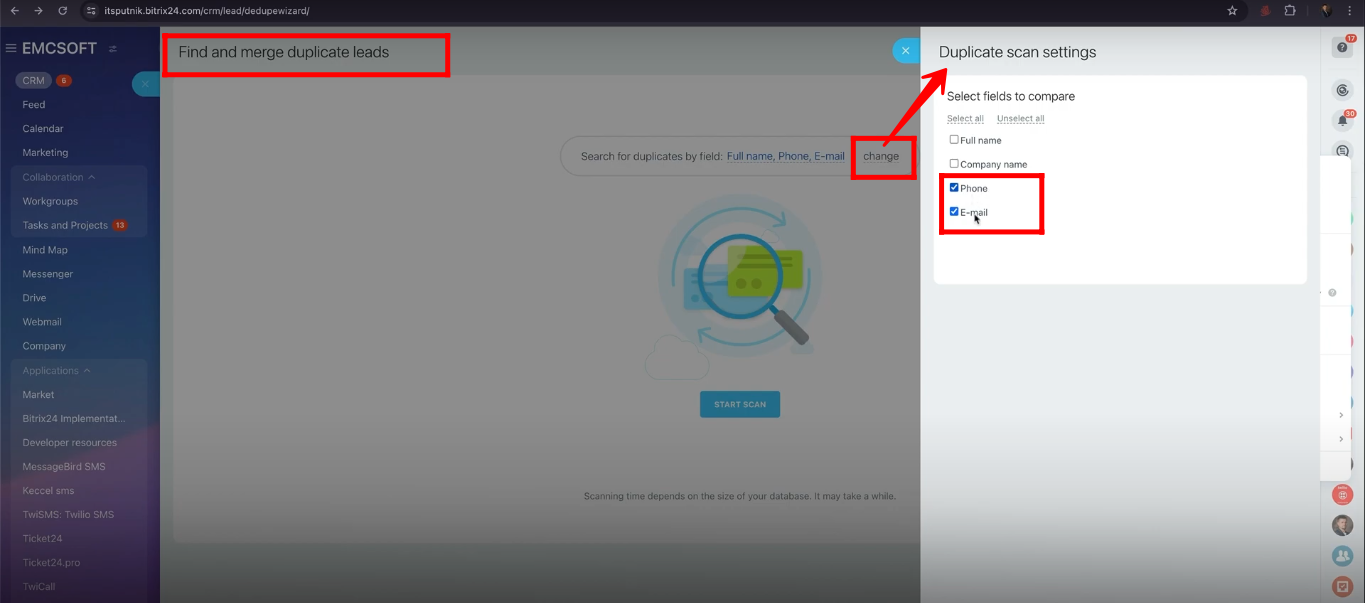
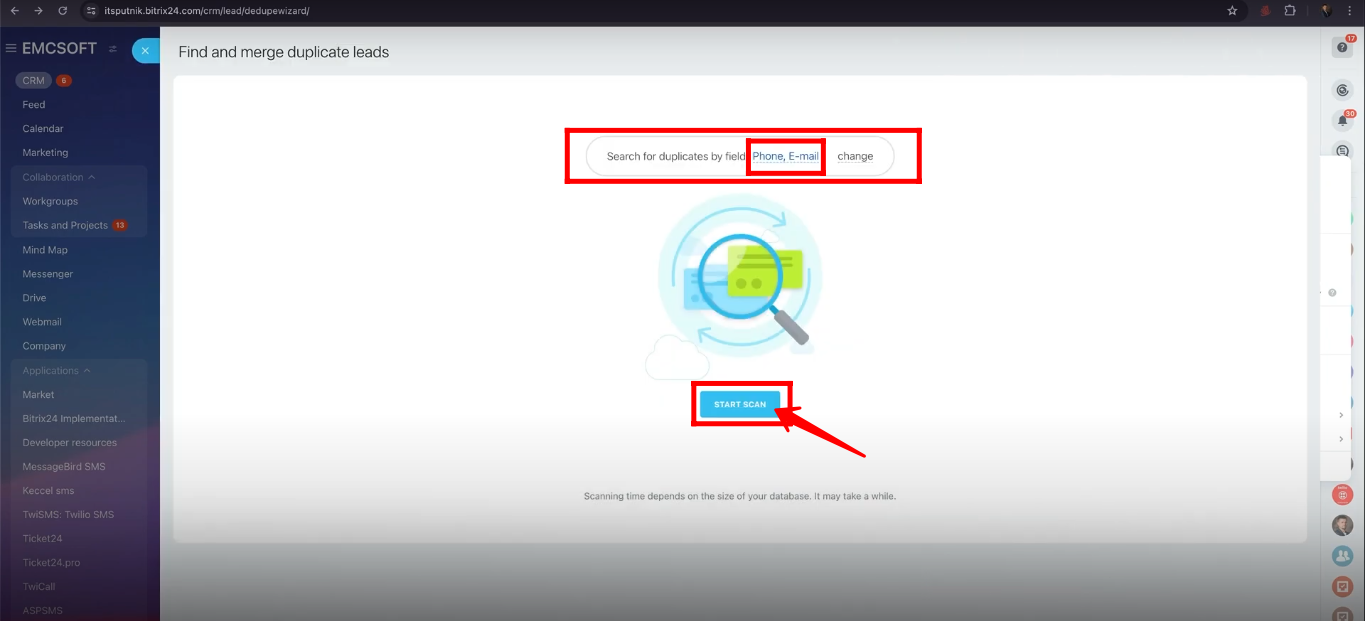
47. You can “Find and merge duplicate leads” from settings. You can setup settings to find duplicate leads on the basis of some fields. In this case, the fields are “Phone” and “Email”.
48. Click “Start Scan”.
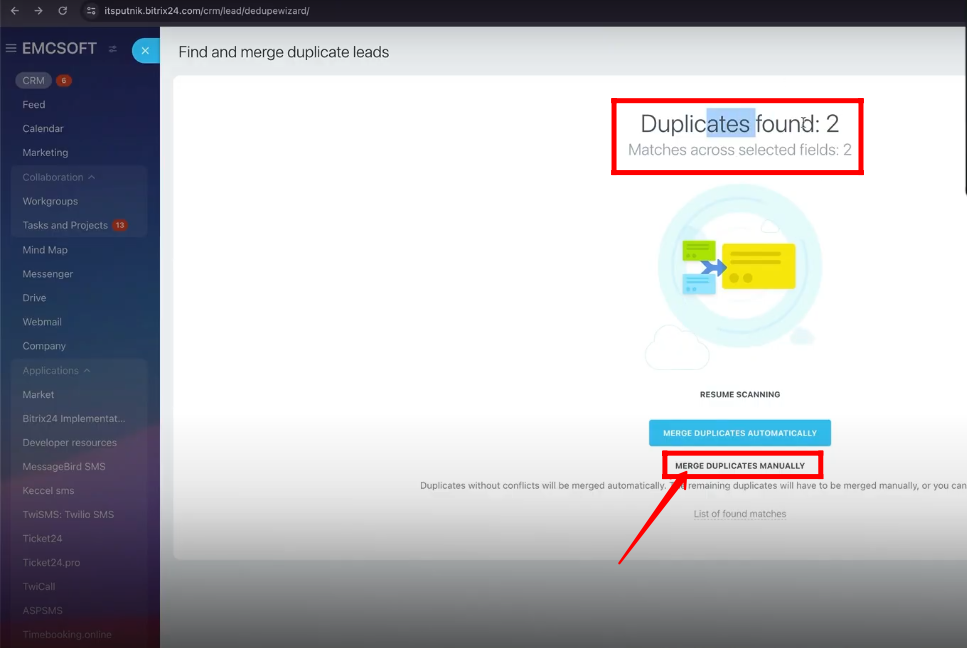
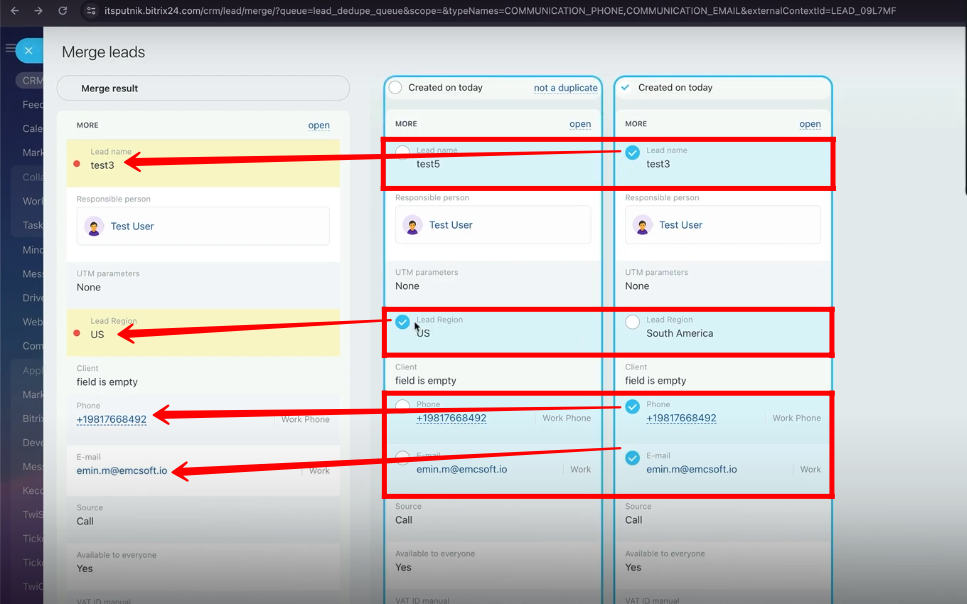
49. You can merge leads “Automatically” or “Manually”. Let’s merge the leads manually.
50. You can select the lead name, lead region, or other mandatory fields to show in merged lead. Obviously, phone and email are same in all leads.
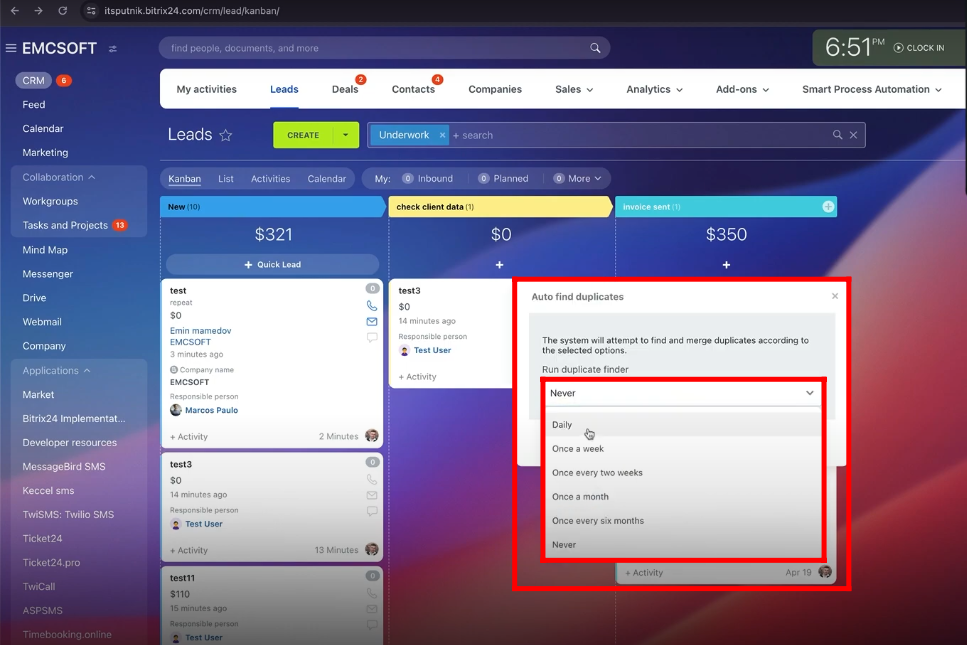
51. You can set up a duration and the system will find duplicate leads automatically after that time duration.
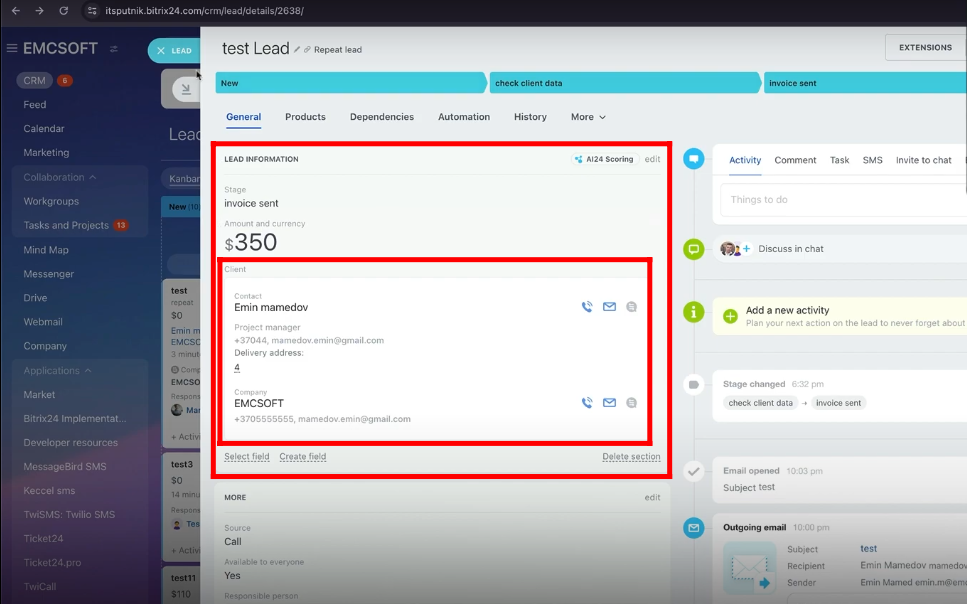
52. As you can see, this lead is connected with the already stored client’s contact and company information in the database.
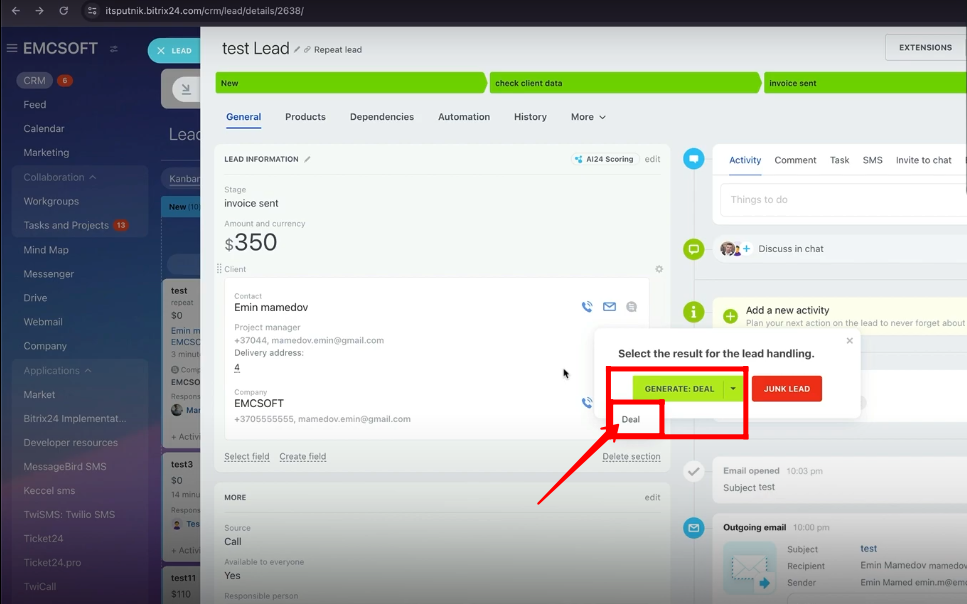
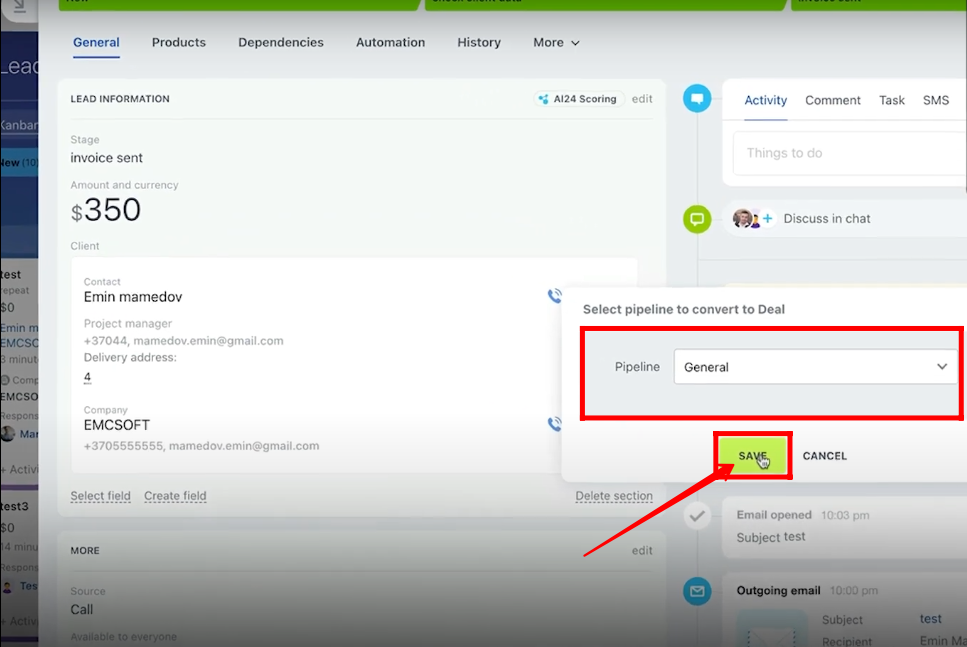
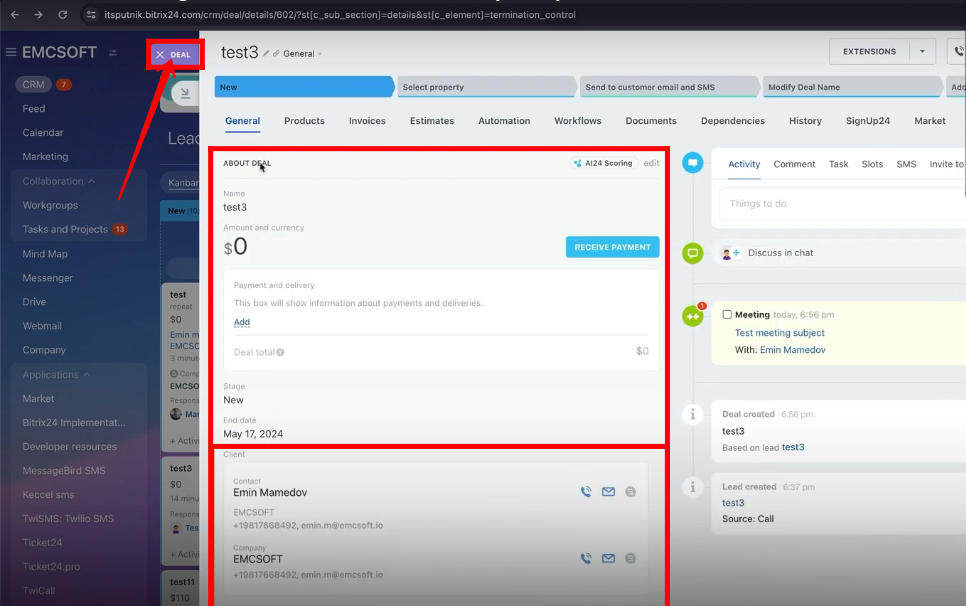
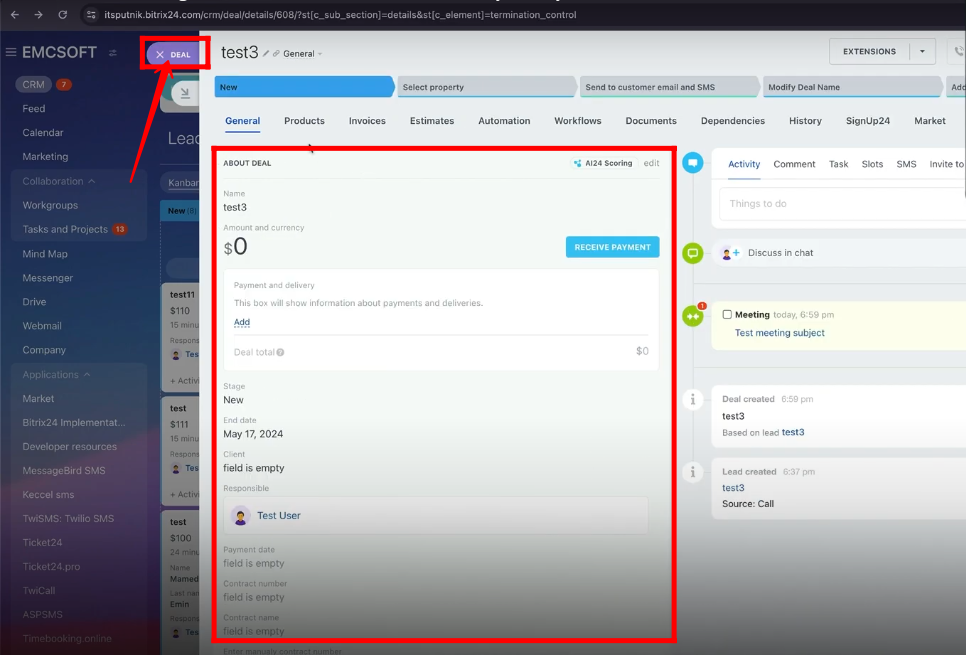
53. At the time of completion of the lead, you will get only the option to convert into “Deal” and not to “Deal+Contact+Company” because we already have contact and company details. Click “Deal”.
54. Select the pipeline and click “Save”.
55. Click “Continue”.

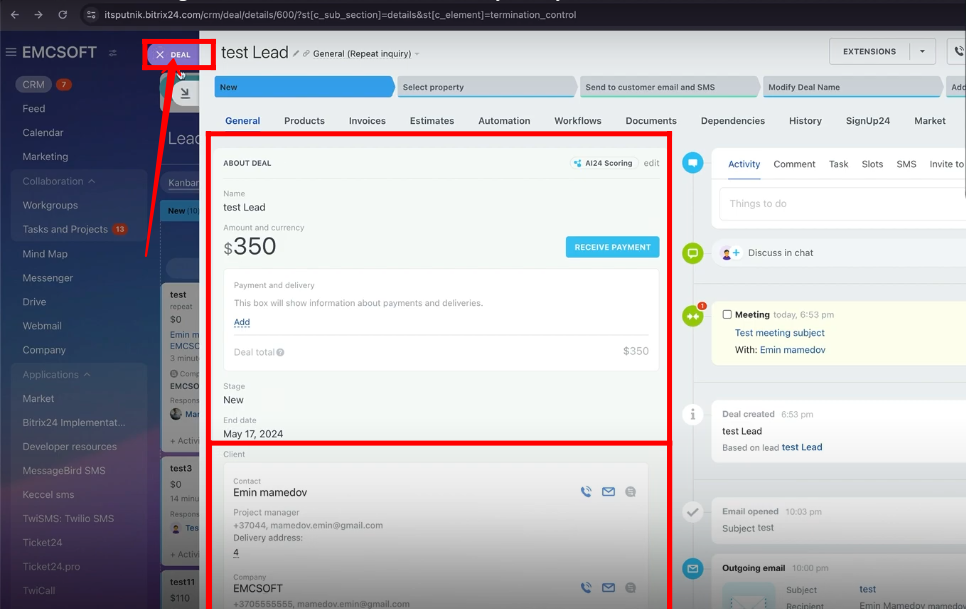
56. Lead will be converted into the Deal with client contact and company details attached.
57. When you fill a all information in the lead manually then that information will be only stored in lead only and you will get multiple options at the time of lead completion.
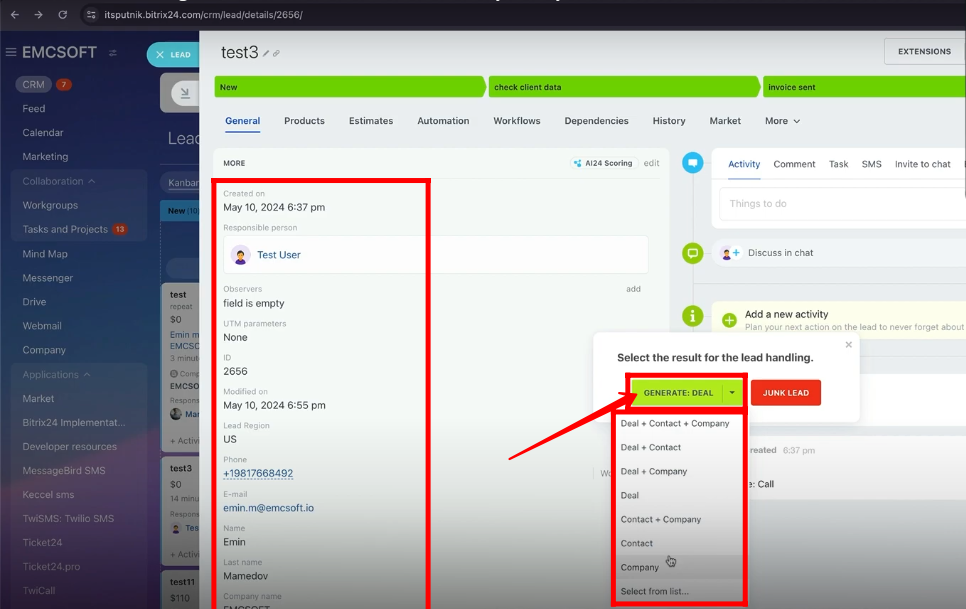
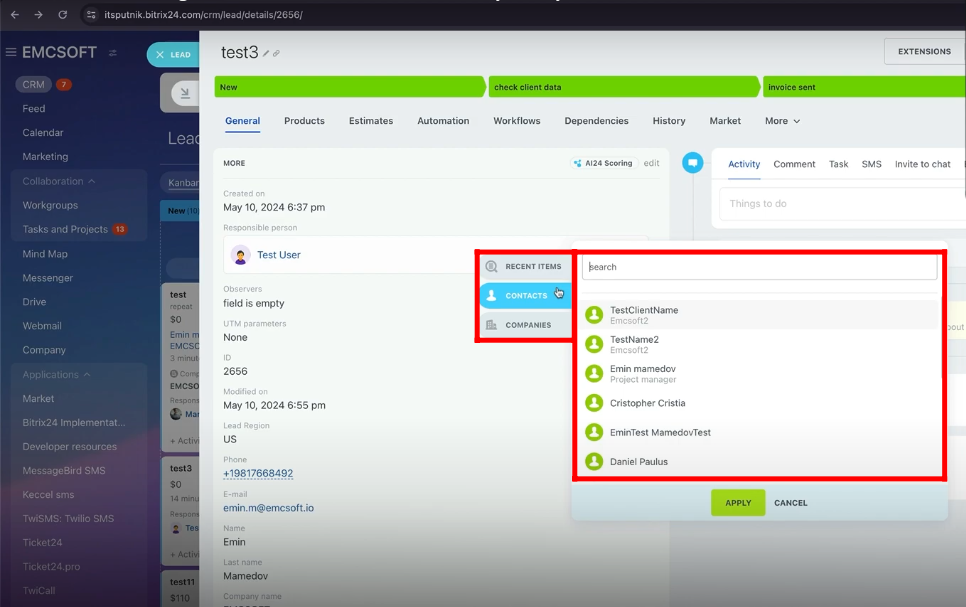
58. Further, you can select from a list of contacts and companies to attach with the lead.
59. Here’s the list of contacts and companies. You can select and attach the lead to these contacts and companies.
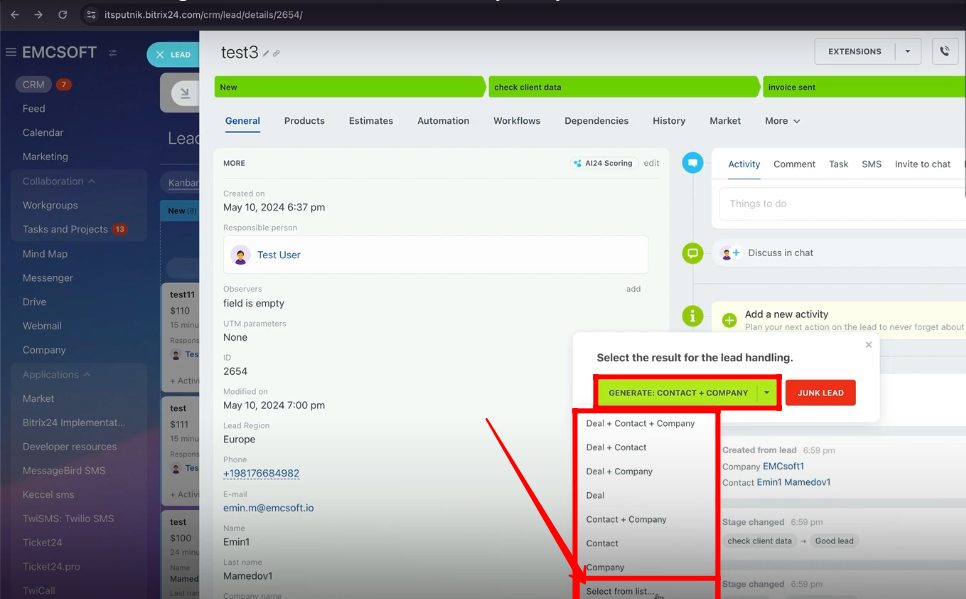
60. Let’s select the first option “Deal+Contact+Company”.
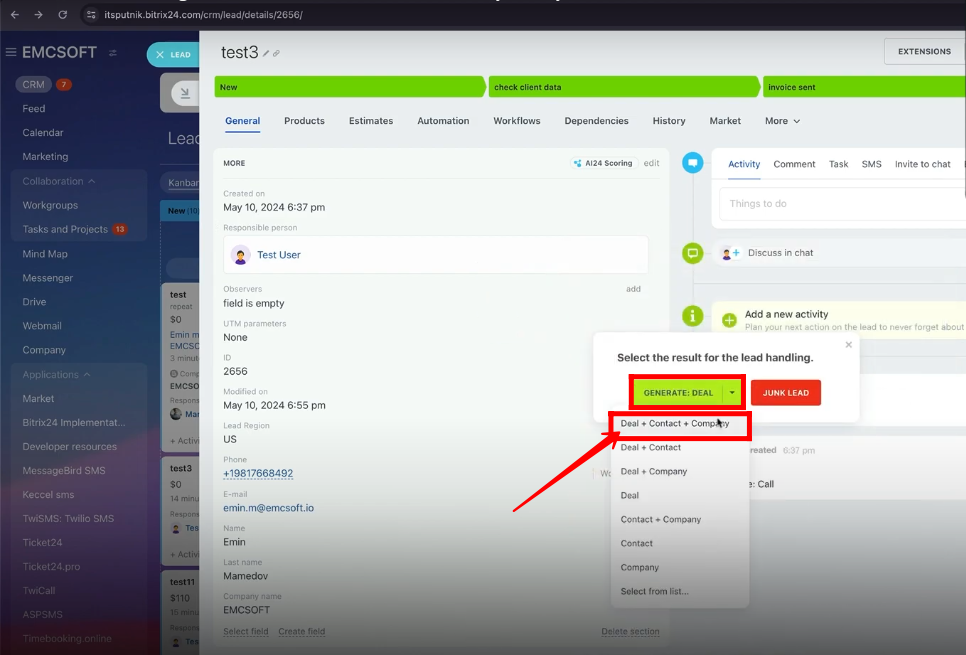
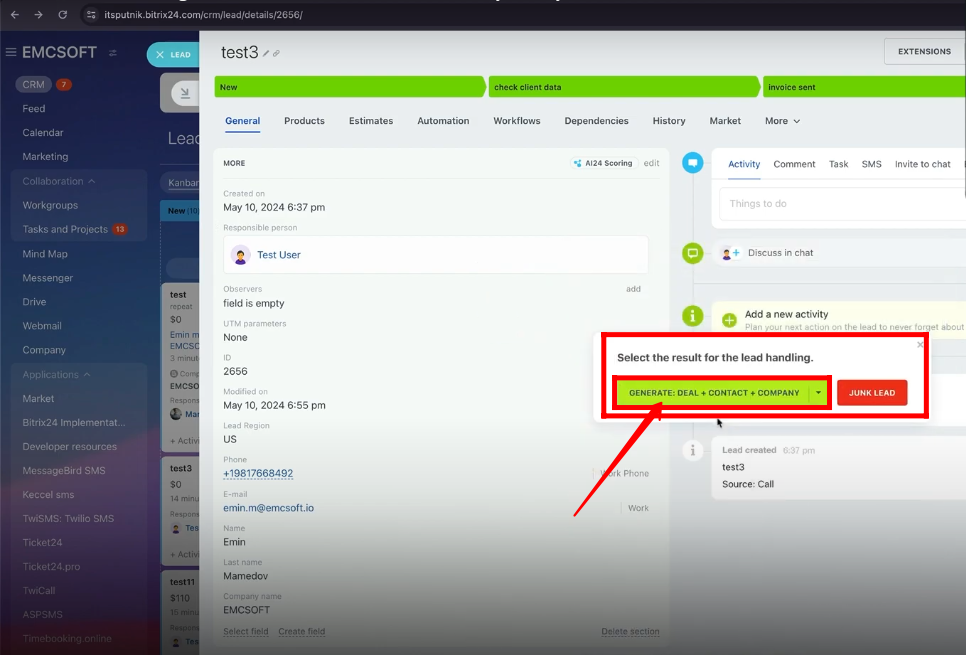
61. Click “Generate: Deal+Contact+Company”.
62. Select the pipeline and click “Save”.
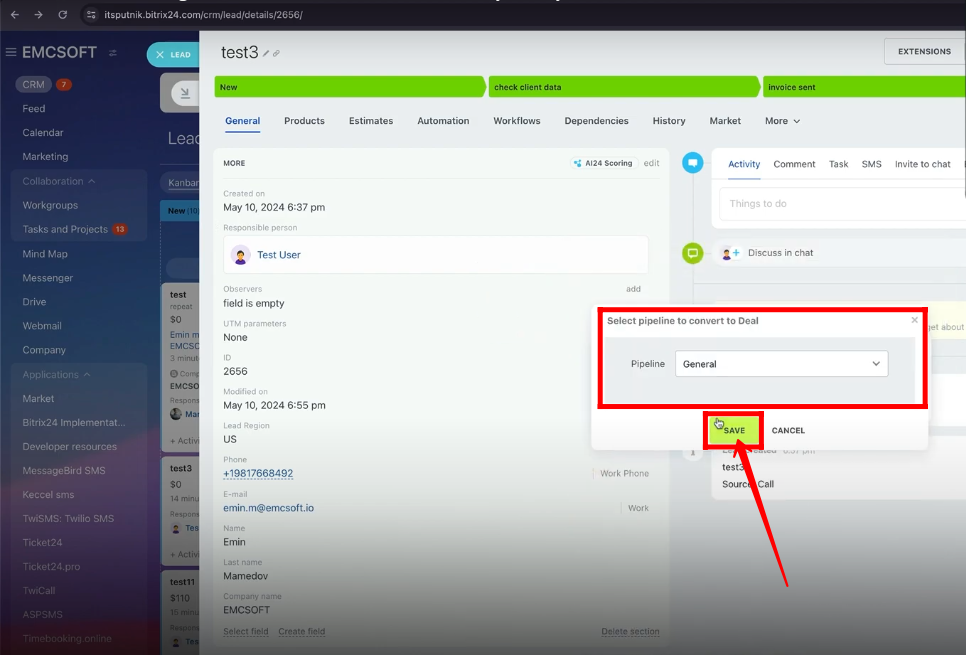
63. The lead will be converted into the Deal.
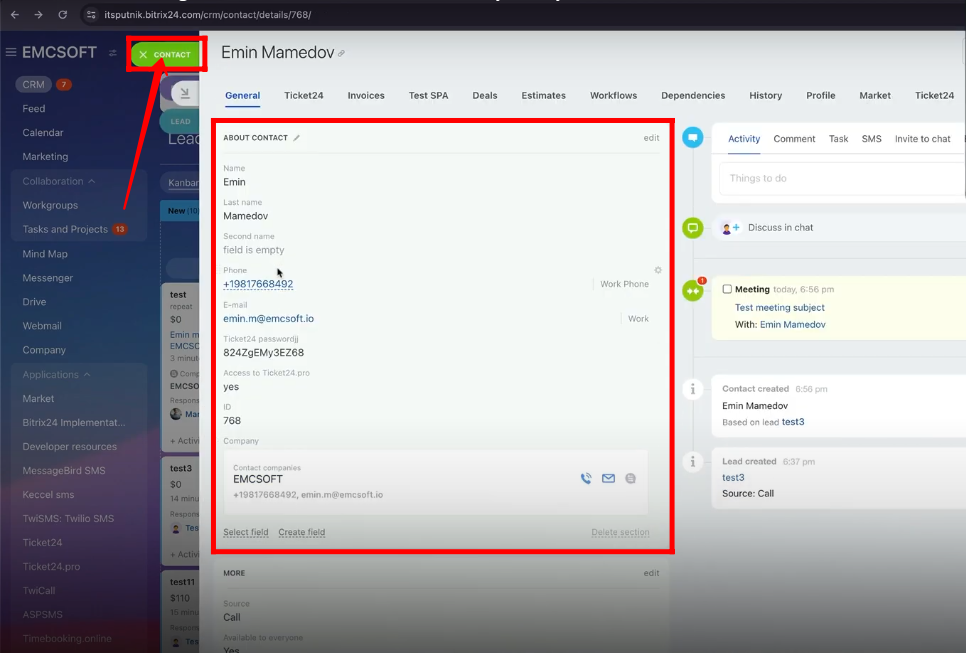
64. A new contact will be generated from the information extracted within the lead.
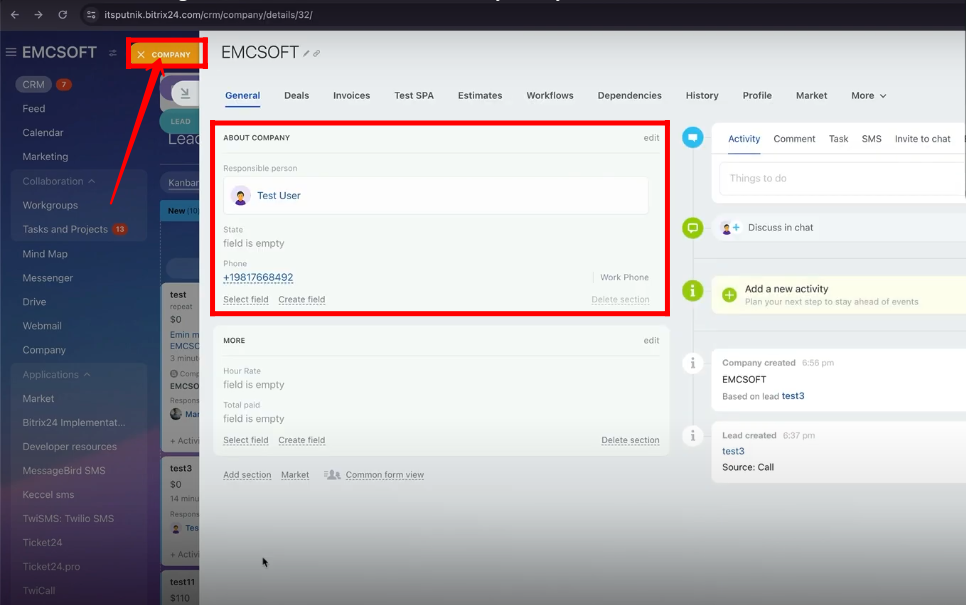
65. A new company will be generated from the information extracted within the lead.
66. Now, select another option “Deal+Contact” for lead completion.
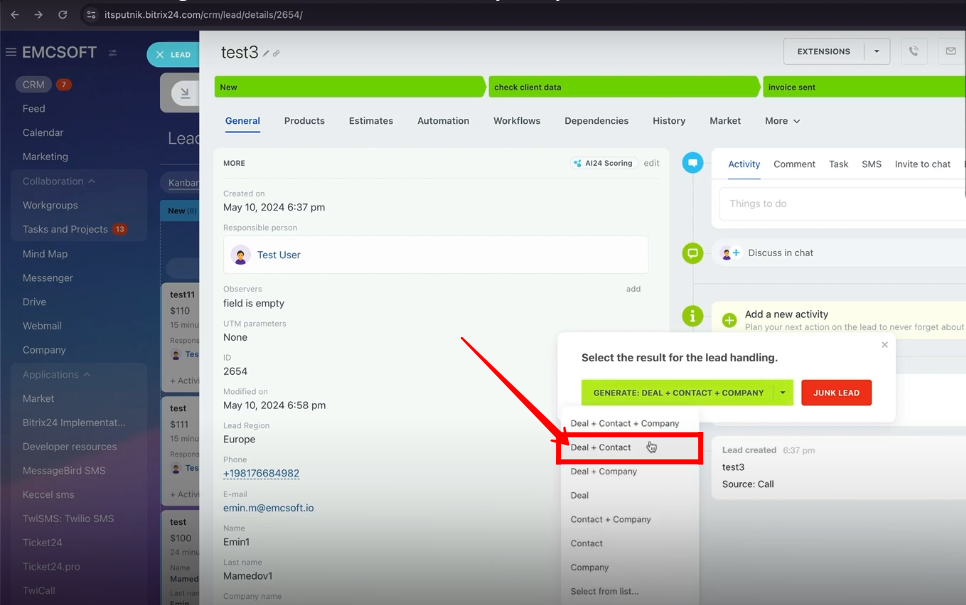
67. The lead will be converted into the “Deal” with the new contact information of the client stored in the database.
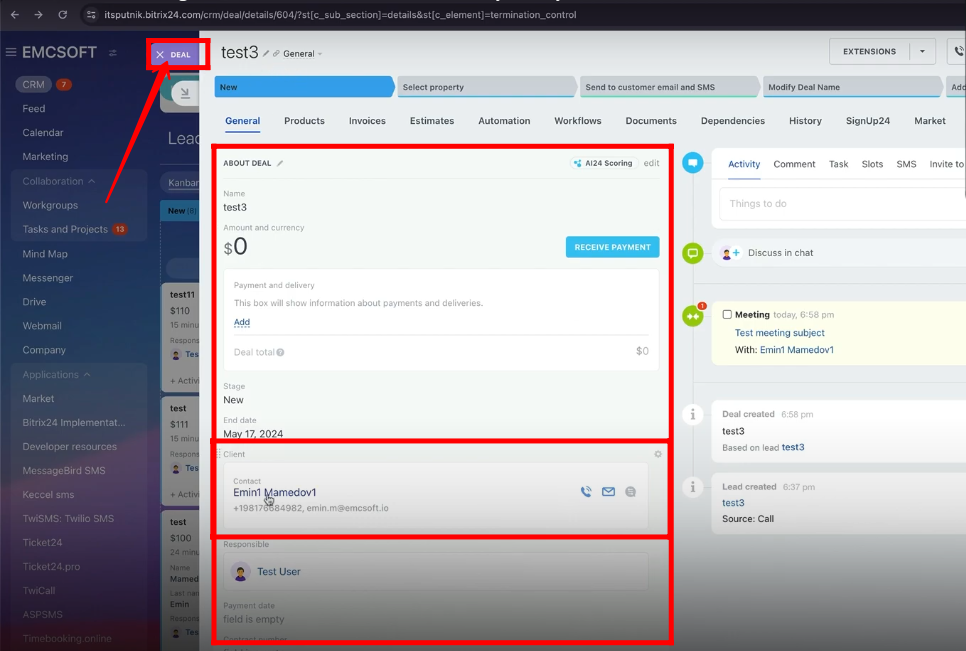
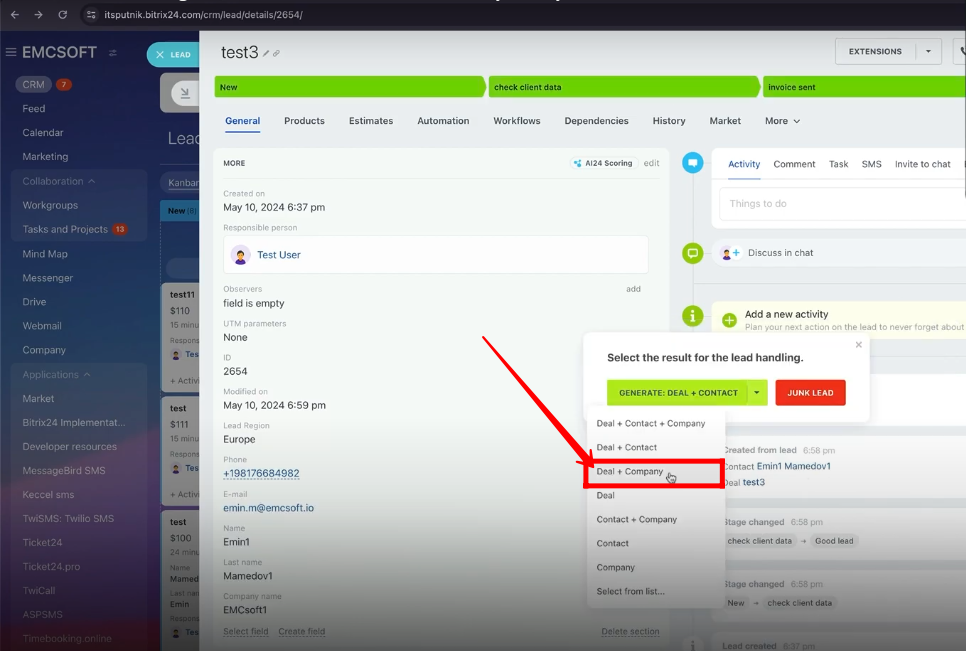
68. Roll back the lead to the previous stage and select the option “Deal+Company” for lead completion.
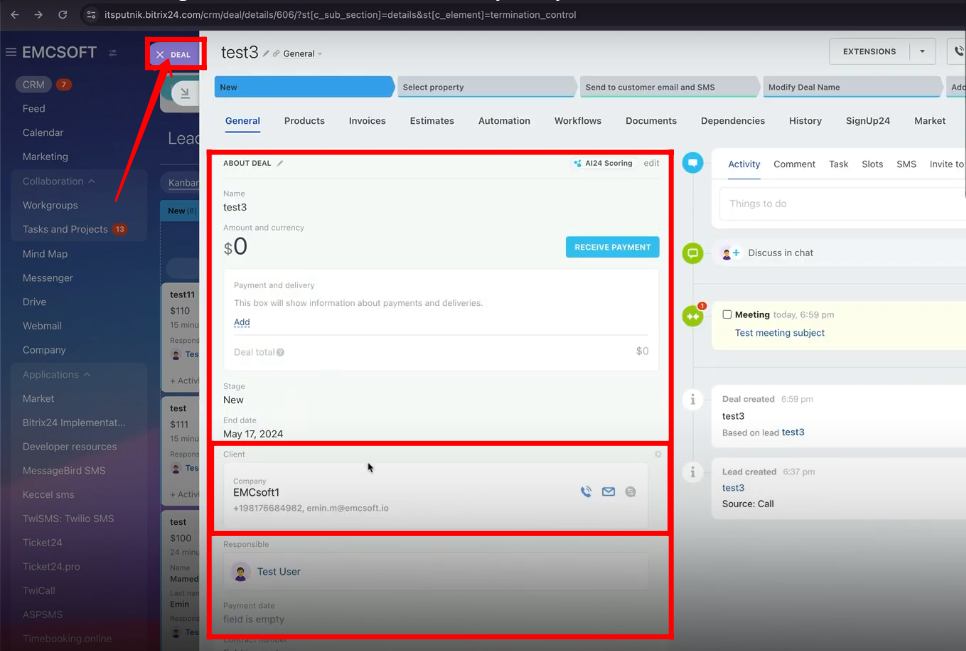
69. The lead will be converted into the “Deal” with the new company information of the client stored in the database.
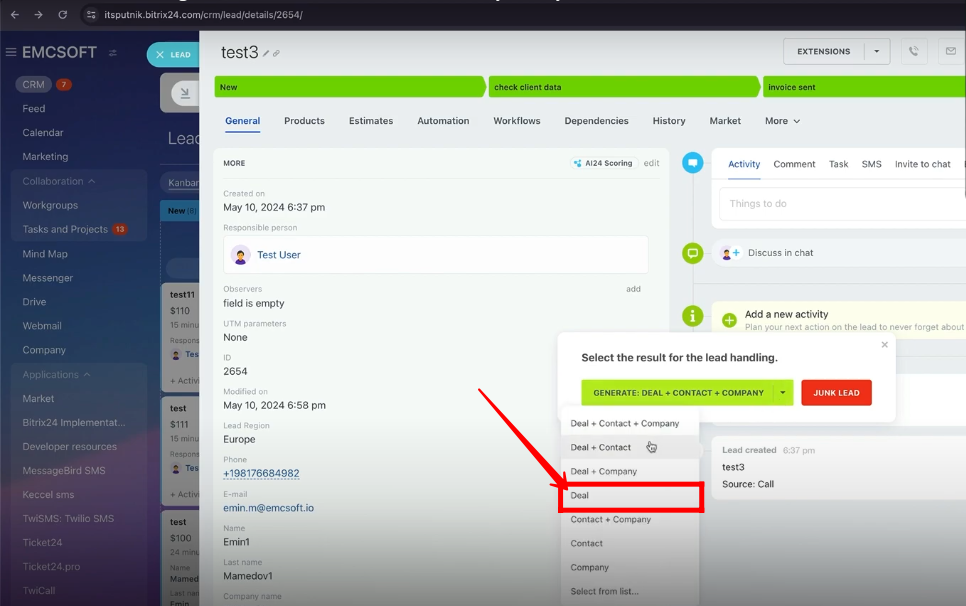
70. Roll back the lead to the previous stage and select the option “Deal” for lead completion.
71. The lead will be converted into the “Deal” only.
72. Roll back the lead to the previous stage and select the option “Contact+Company” for lead completion.
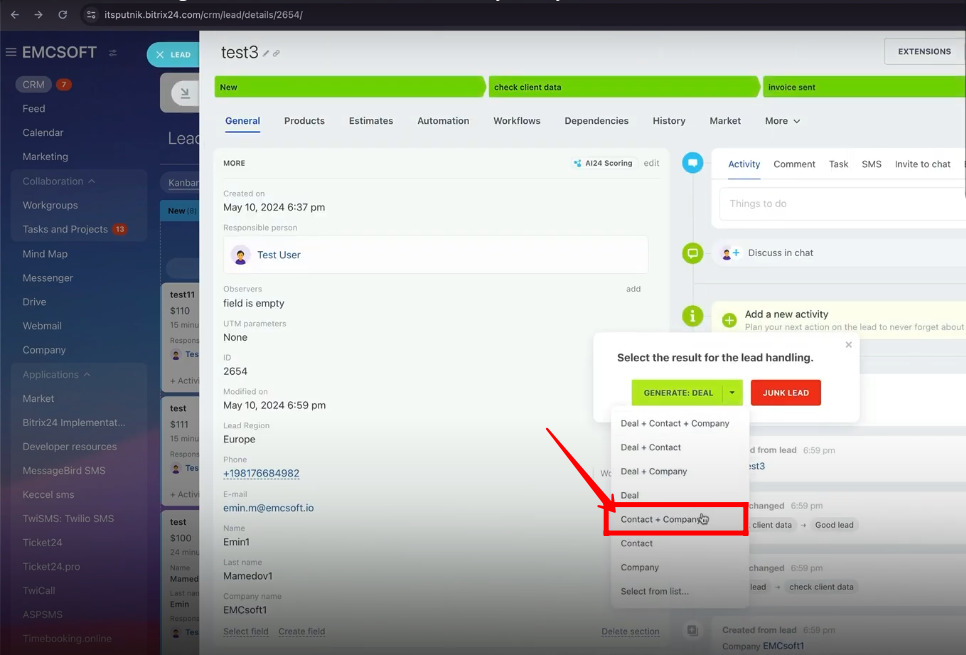
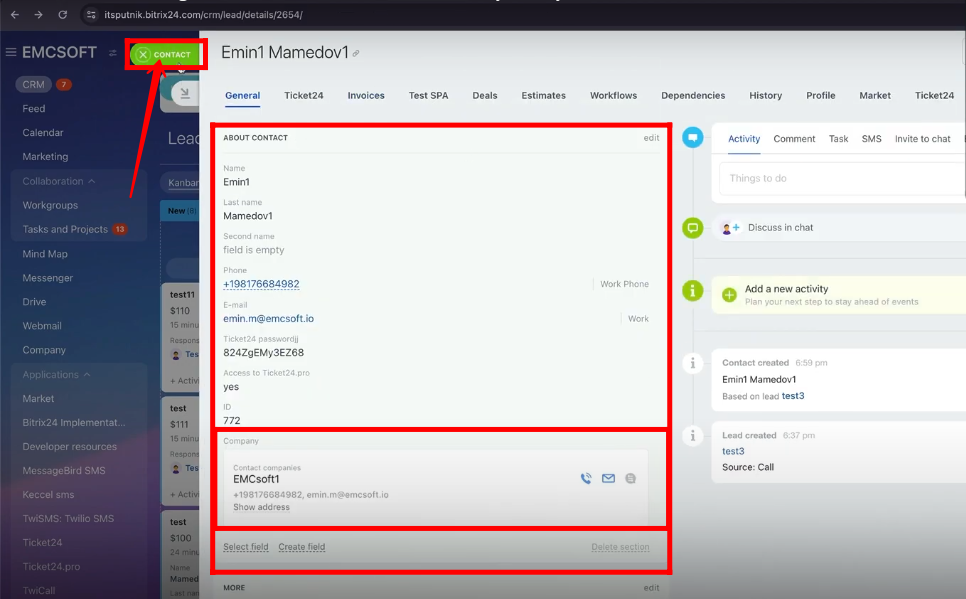
73. A new “Contact” and “Company” will be generated from the information extracted within the lead.
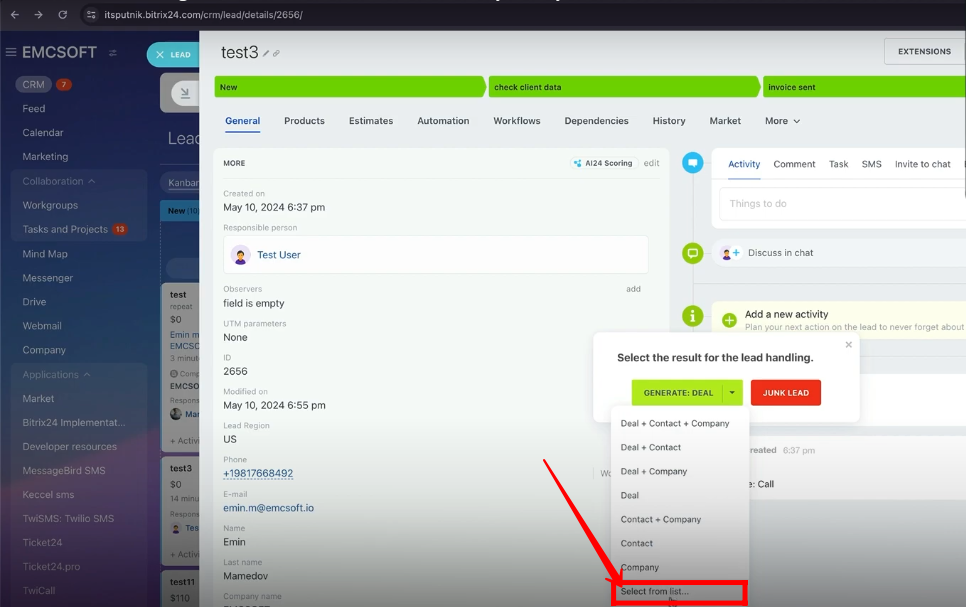
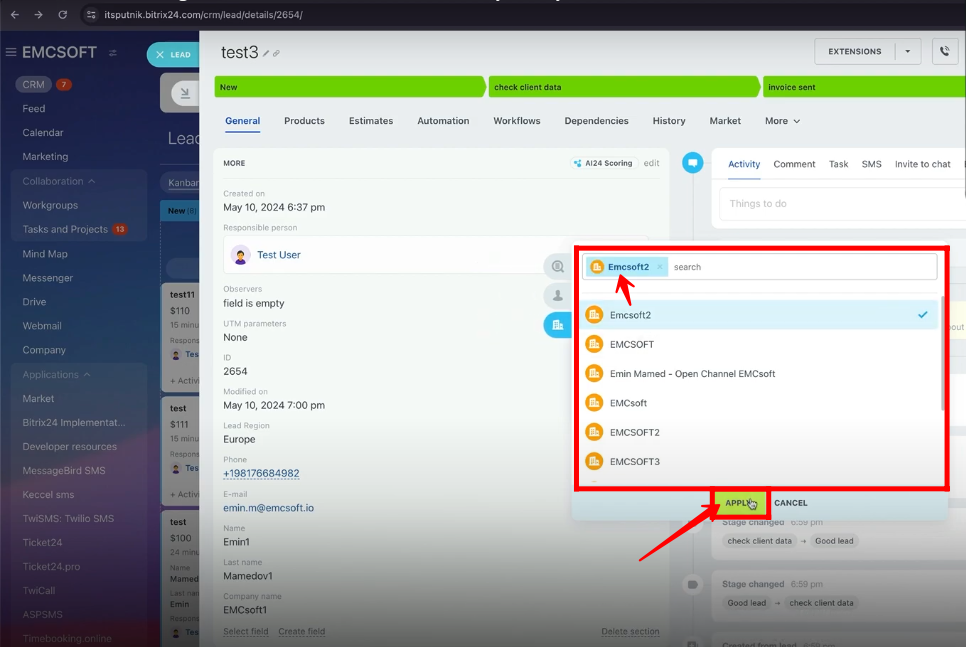
74. Roll back the lead to the previous stage and select the option “Select from list” for lead completion.
75. Here, the company “EMCSoft2” is selected.
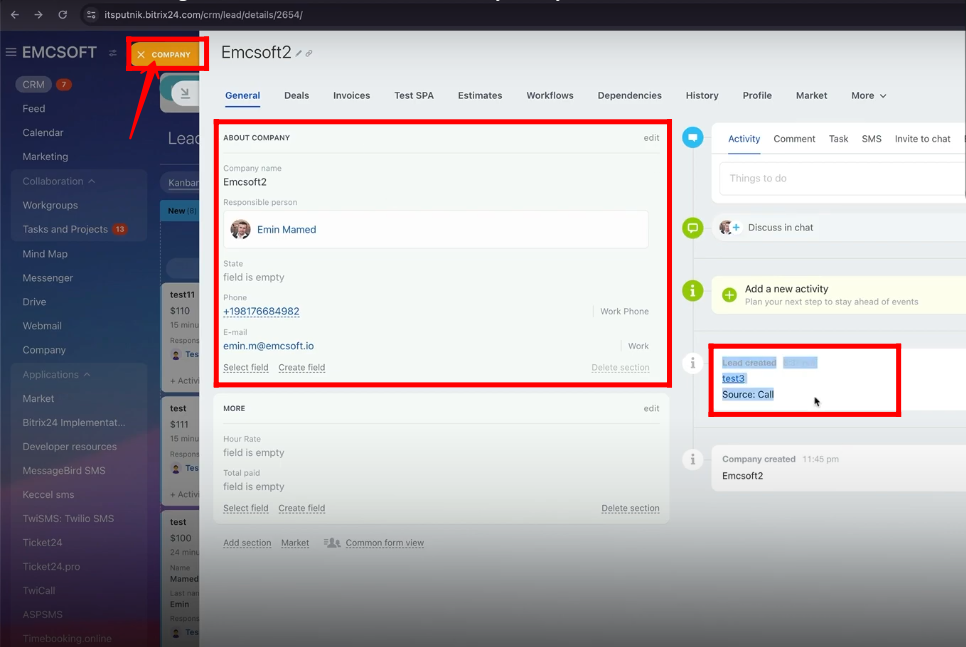
76. A company will be generated with the attached lead name.
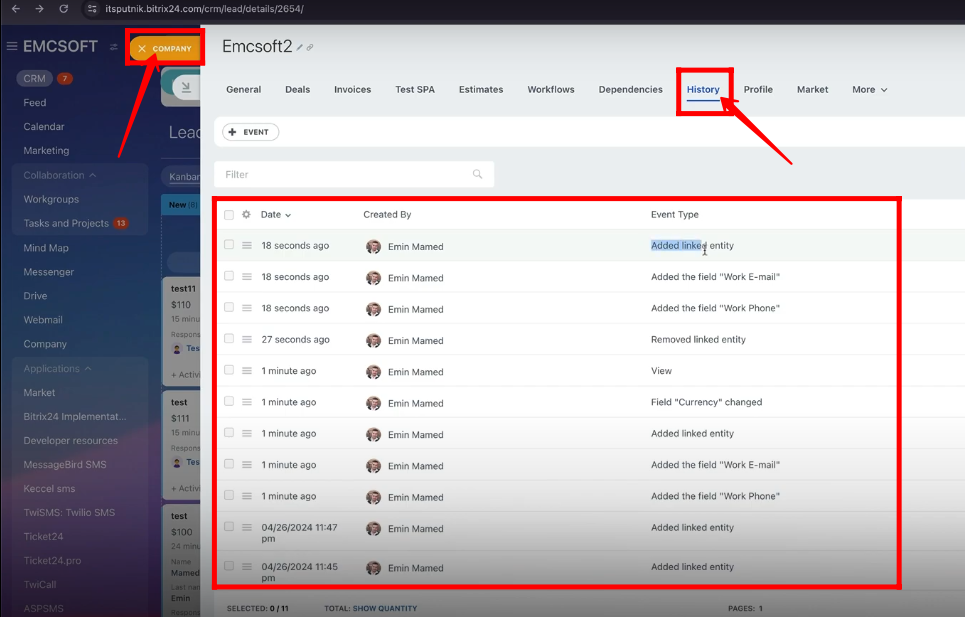
77. Go to the “History” tab within the lead and you can see all activities performed to that lead.
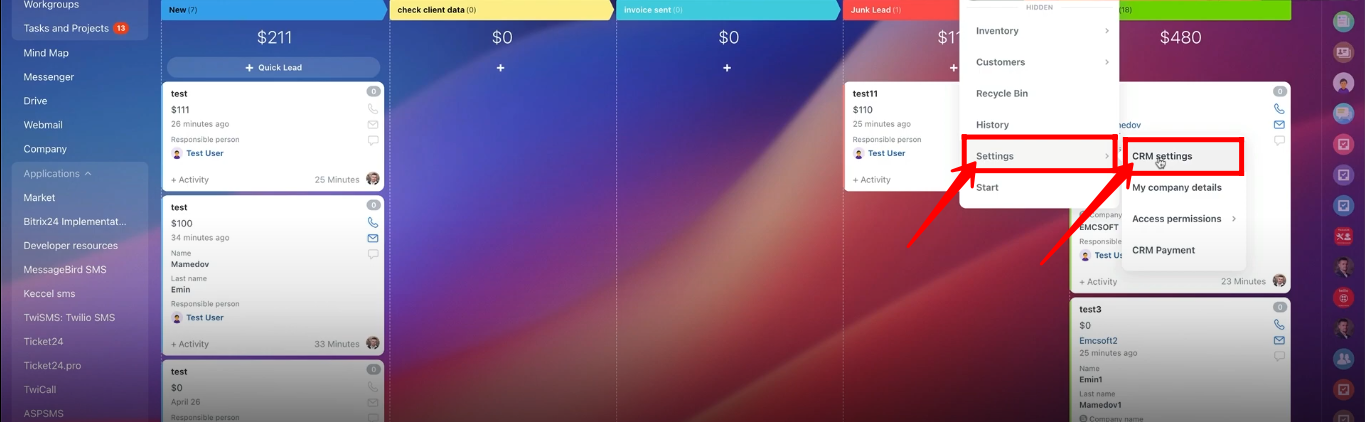
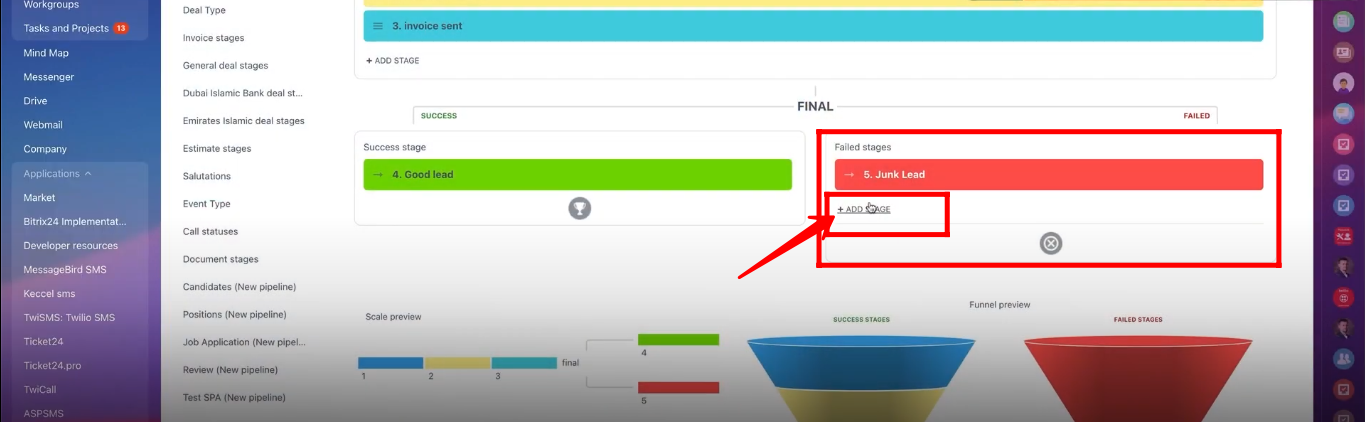
78. Go to “Settings” and select “CRM Settings”.
79. You can create a new stage with the “Junk Lead” stage of the final process of the lead.
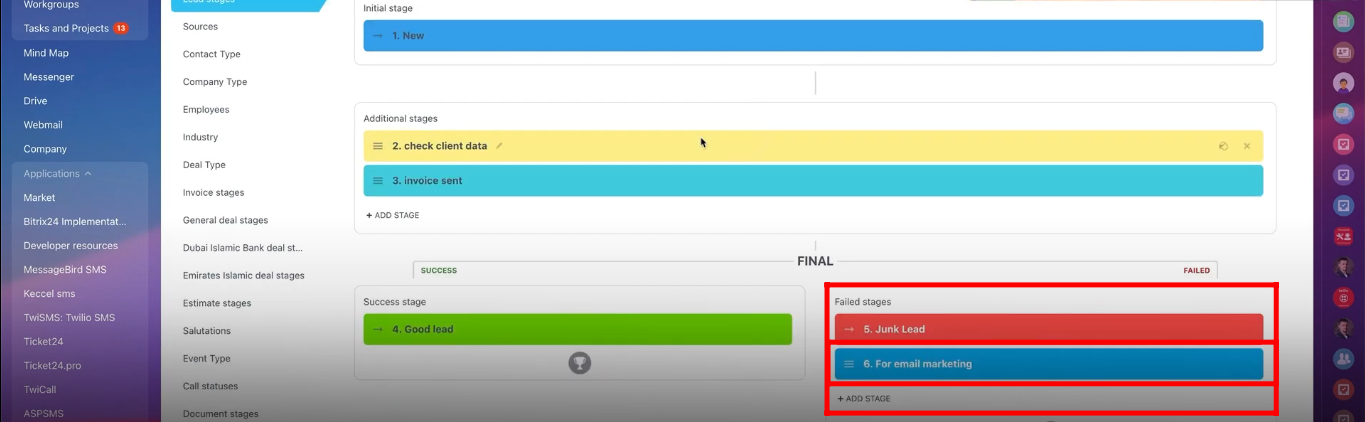
80. Here, a new stage “For email marketing” has been created.
81. Go to “Leads” and click “Kanban” view.
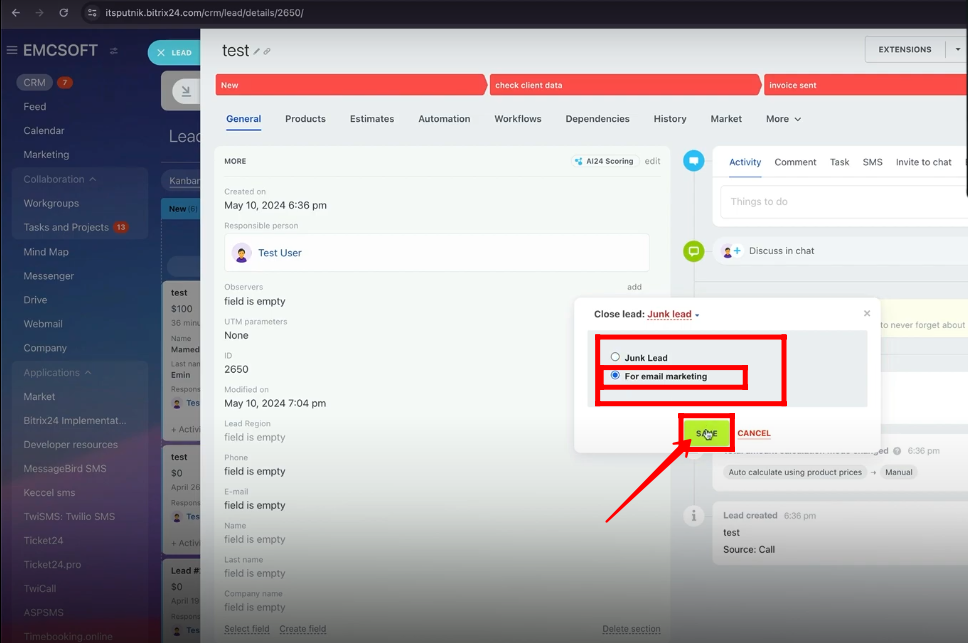
82. Now, complete that lead and click “Junk Lead”.
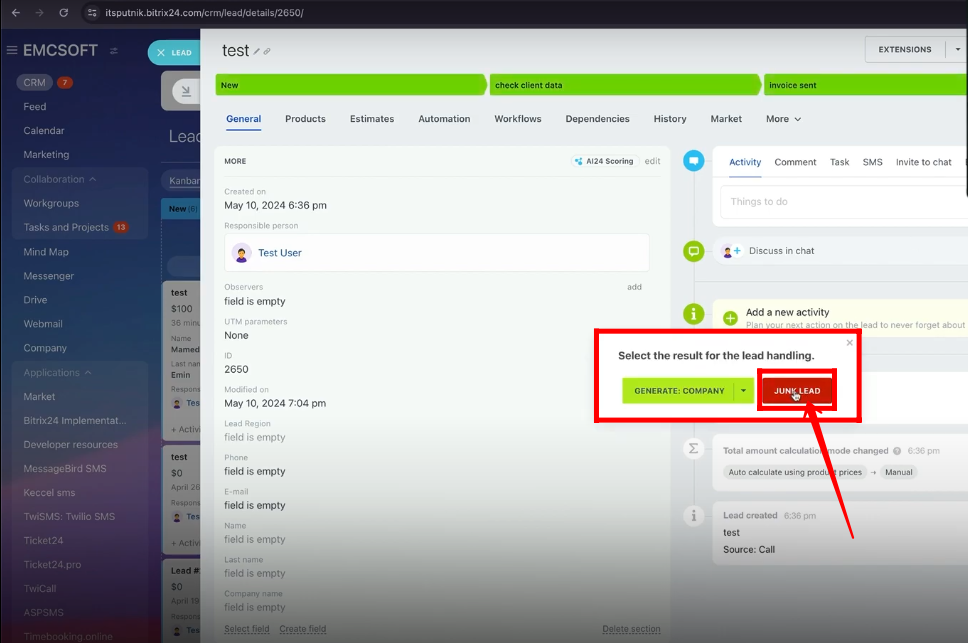
83. Now, you get the option to close that lead as a “Junk Lead” or “For Email Marketing”. Select “For Email Marketing” and click “Save”.
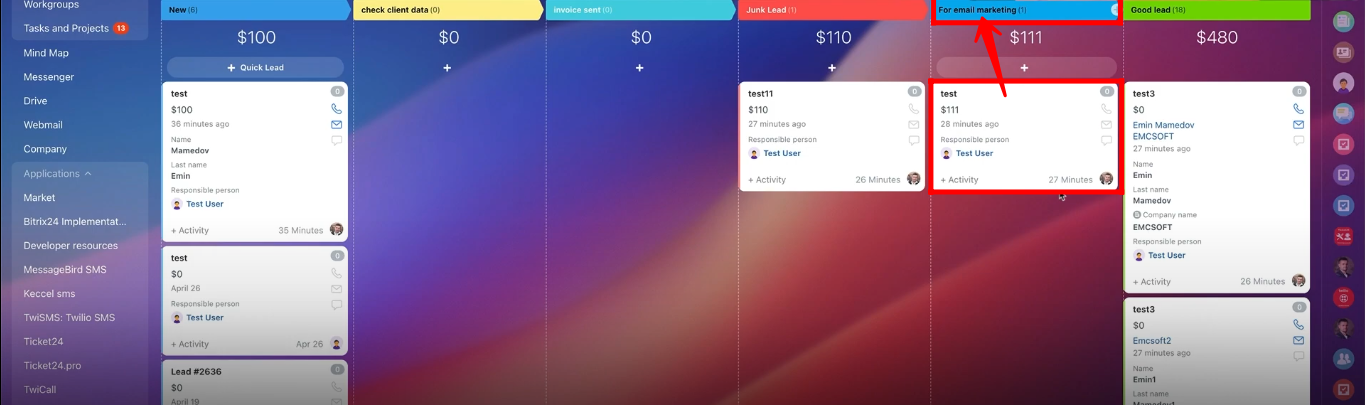
84. The lead will be moved to the “For Email Marketing” stage.
“You can also watch this video on Youtube”